

Page 1

ENGLISH
OWNER’S MANUAL
SXS
REFRIGERATOR
Please read this owner's manual thoroughly before
operating and keep it handy for reference at all times.
LSC22991ST
www.lg.com
Page 2
Table of contents
ENGLISH
Introduction
Installation
Operation
Entry
Basic safety precautions
Identification of parts
Where to install
Door removal
Door replacement
Water supply installation
Height adjustment
Starting
Adjusting the temperatures and functions
Adjusting the temperatures and display
Setting the functions
Fresh air filter
Operating the dispenser
Refrigerator Door-in-Door
Shelf
Dairy corner
Deodorizer
Freezer/Fridge basket
fresh zone
3
3
13
14
15
16
16
17
18
18
19
20
21
27
31
32
32
33
33
34
Suggestion on
food storage
Care and
maintenance
Location of foods
Storing foods
General information
Cleaning
Smart Diagnosis
Trouble shooting
Disposal of the old appliance
It is normal…
This product is exclusive use at 115V/60Hz.
You should purchase transformer of more than 2.0KVA when you
want to use it at the 220V area.
2
35
36
37
37
38
39
42
43
Page 3
Introduction
Entry
The model and serial numbers are found on the inner case or Right side of
refrigerator compartment of this unit. These numbers are unique to this unit and
not available to others. You should record requested information here and retain
this guide as a permanent record of your purchase. Staple your receipt here.
Date of purchase :
Dealer purchased from :
Dealer address :
Dealer phone no. :
Model no. :
Serial no. :
Basic safety precautions
This guide contains many important safety messages.
Always read and obey all safety messages.
This is the safety alert symbol. It alerts you to important safety messages that
inform you of hazards than can cause injury, lead to fatal accidents or cause damage to
the product. All safety messages will be proceeded by the safety alert symbol and the
hazard signal word, "DANGER, WARNING, or CAUTION. These words mean:
DANGER
WARNING
CAUTION
All safety messages will identify the hazard, tell you how to reduce the chance of injury,
and tell you what can happen if the instructions are not followed.
3
You may be fatally or seriously injured if you do not follow the
specified instructions.
You may be fatally or seriously injured if you do not follow the
specified instructions.
Indicates an imminently hazardous situation which, if not
avoided, may result in minor or moderate injury, or product
damage only.
Page 4
Introduction
WARNING
To reduce the risk of fire, electric shock, or injury to persons when using your
product, basic safety precautions should be followed, including the following.
Read all instructions before using this appliance.
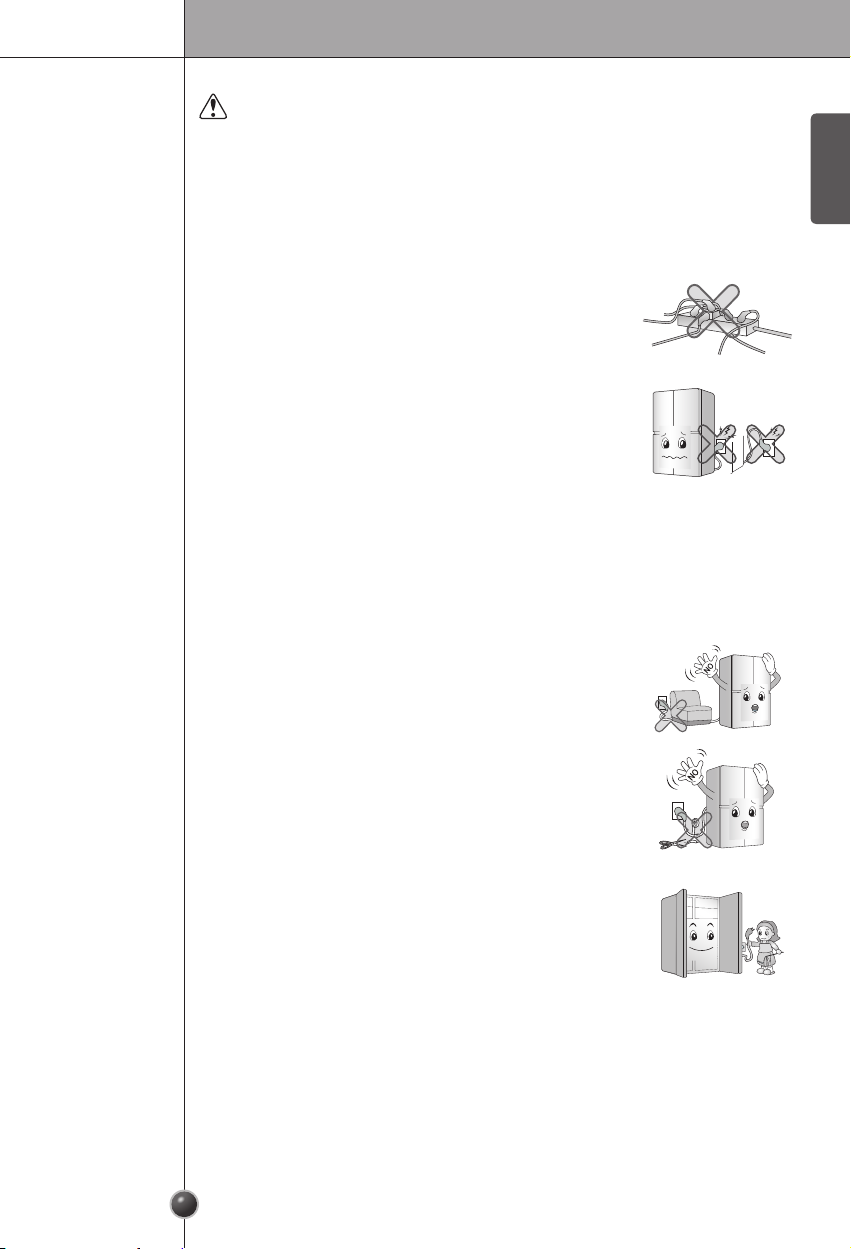
1. When connecting the power
The dedicated outlet should be used.
• Using several devices at one outlet may cause fire.
• The electric leakage breaker may damage food and the
dispenser may be leaked.
Do not allow the power plug to face upward or to be squeezed at
the back of the refrigerator.
Water may be flown into or the plug may be damaged, which
causes fire or electric shock.
Prevent the power cord from being squeezed or imprinted if the refrigerator is pushed
in after the power plug is extracted during the installation.
When moving your appliance away from the wall, be careful not to roll over the power
cord or to damage it in any way.
It becomes the cause of fire or electric shock.
Do not allow the power cord bent or pressed by the heavy
object to be damaged.
It may damage the power cord to cause fire or electric shock.
ENGLISH
Do not extend or modify the length of the power plug.
It causes electric shock or fire by the electric damage of the
power cord or others.
Unplug the power plug when cleaning, handling or replacing the
interior lamp of the refrigerator.
• It may cause electric shock or injury.
• When replacing the interior lamp of the refrigerator, make sure
that the rubber ring for preventing the electric spark within the
socket is not taken off.
4
Page 5
Introduction
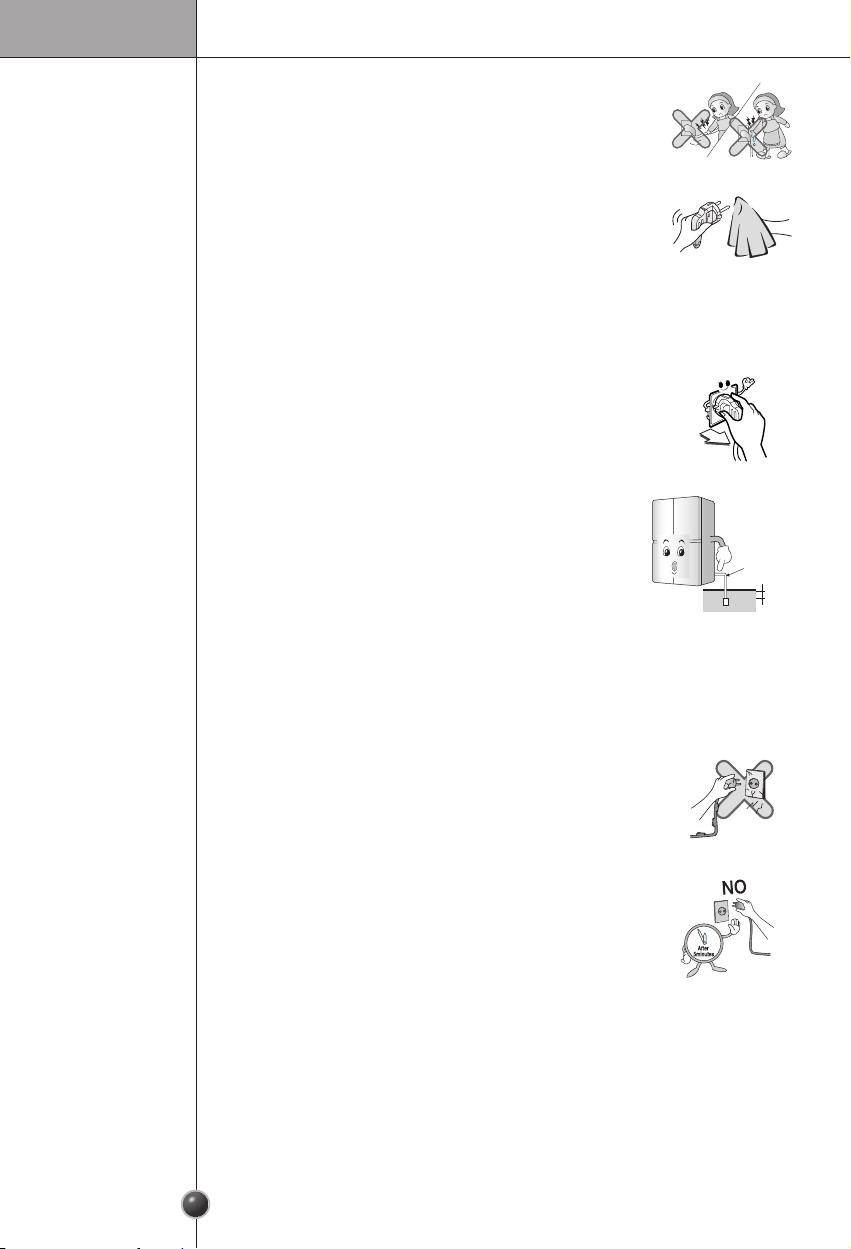
Do not pull out the cord or touch the power plug with wet hands.
It may cause electric shock or injury.
Remove water or dust from the power plug and insert it with the
ends of the pins securely connected.
Dust, water or unstable connection may fire or electric shock.
Unplug the power cord from the power outlet for cleaning or other requirements.
It may cause electric shock or injury.
Pull out the power plug not by grasping the cord but the plug of
its end.
It may cause electric shock or short circuit to fire.
Make sure of grounding.
Consult a qualified electrician or service person if the
grounding instructions are not completely understood,
or if you have doubts on whether the appliance is properly
grounded.
The incorrect grounding may cause breakdown and electric
Ground
Copper
Flat
Wire
More than
30 inches
shock.
Be sure to use grounded exclusive proper voltage consent for the power plug.
Be sure to use grounded extension consents when extension consents are used.
It becomes the cause of fire.
When the power cord or the power plug is damaged or the holes
of the outlet are loosed, do not use them and have it replaced
immediately by the manufacturer or its service agent.
It may cause electric shock or short circuit to make fire.
Wait for 5 minutes or longer when reconnecting the plug.
It may cause the operation of the freezer to fail.
If the supply cord is damaged, it must be replaced by the manufacturer or its service
agent or a similarly qualified person in order to avoid a hazard.
5
Page 6
Introduction
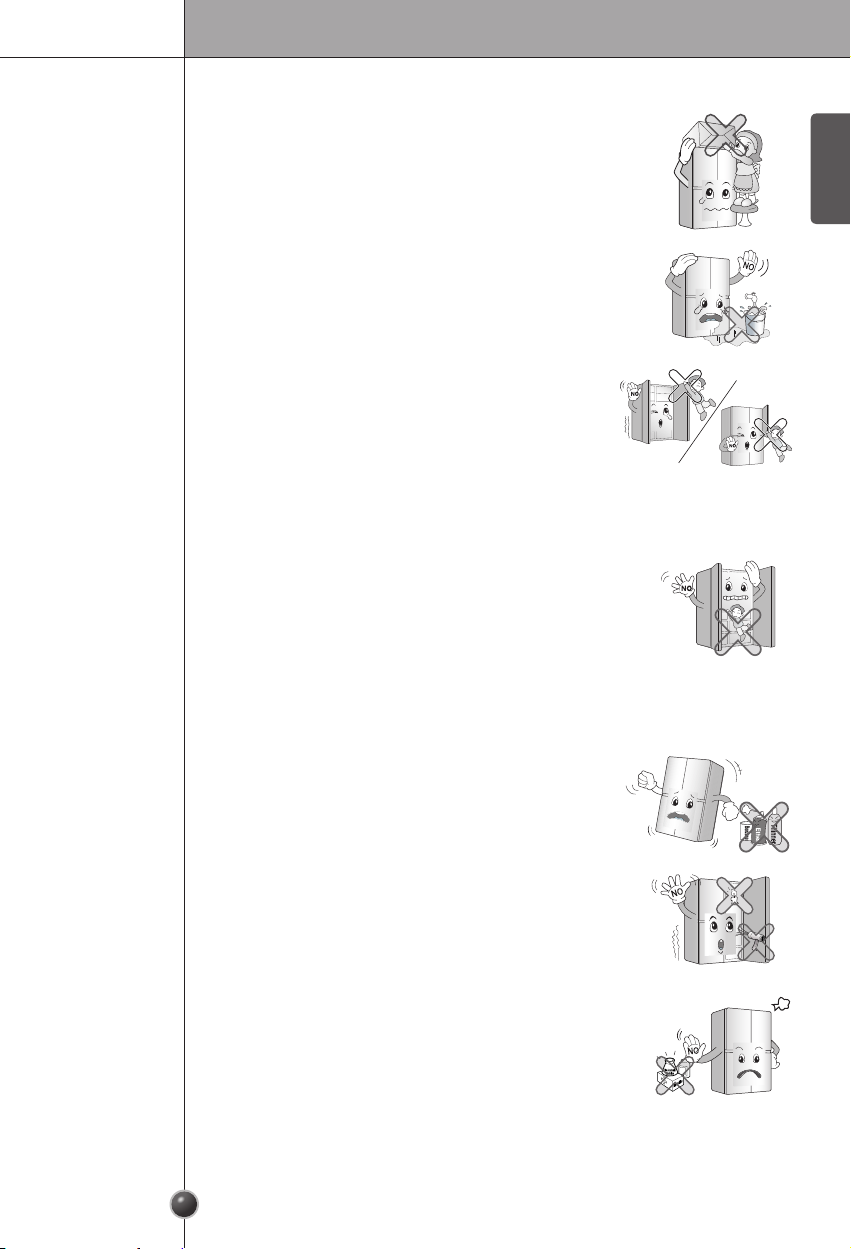
2. When using the refrigerator
Do not place heavy objects or containers filled with liquid on top
of the refrigerator.
It may drop, causing injury, fire or eletrick shock when operating
the refrigerator.
Do not install your refrigerator in a wet place or in a place
vulnerable to water or rain.
Deterioration of insulation of electric parts may cause electric
leakage.
Do not hang onto any part of the refrigerator, especially the
doors and door bins.
It may make the refrigerator fallen down or damage the
hands. Especially, do not allow the children to do the above.
When water entered to electric parts inside the product, pull out the power plug, and
contact the service center.
It may cause electric shock or fire.
Prevent children from entering the product.
It may endanger the life of a child if the child enters the
refrigerator.
ENGLISH
Opening and closing the door of the refrigerator vigorously may cause the stored food
in the refrigerator basket to fall by shock and hurt the foot, so take precautions.
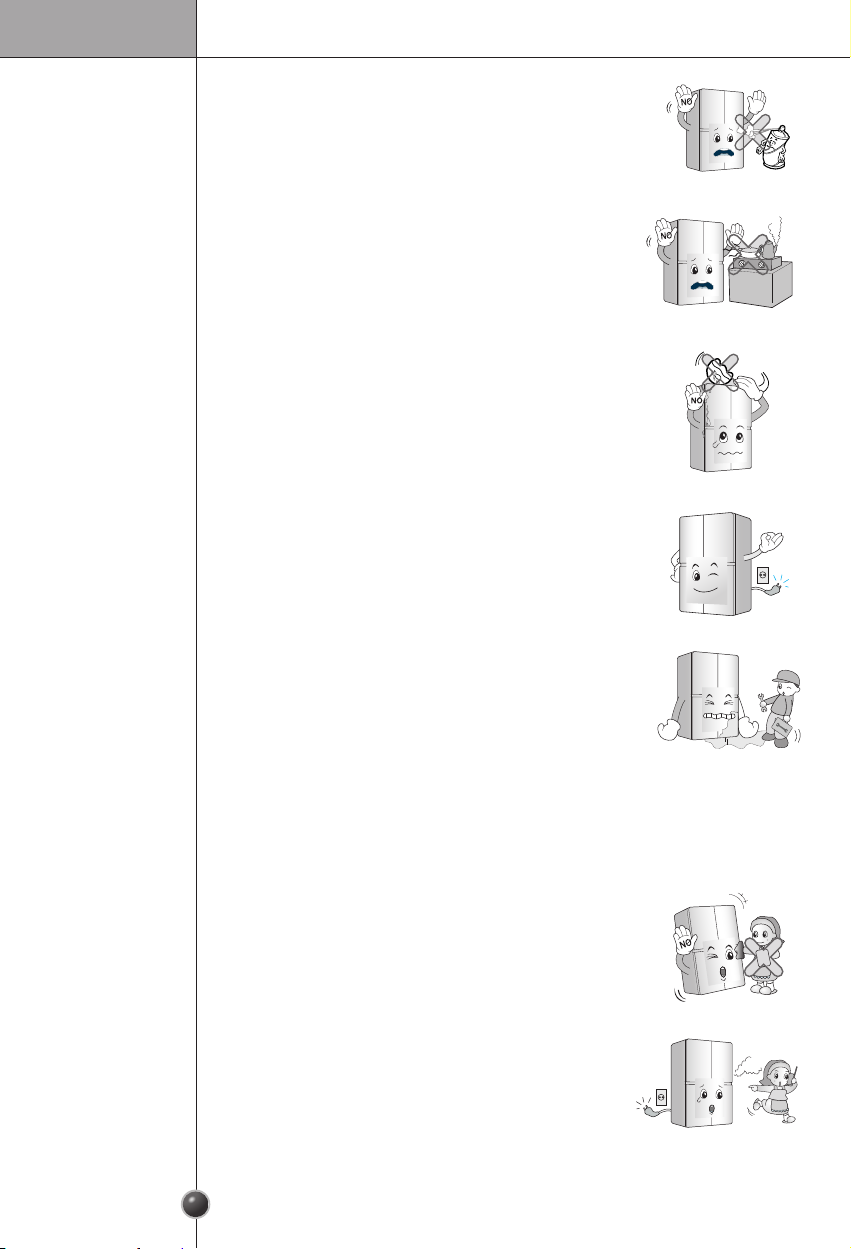
Do not use or store inflammable materials ether, benzene,
alcohol, medicine, liquefied petroleum gas, spray or
cosmetics near or in the refrigerator.
It may cause explosion or fire.
Do not use any sort of dryer or any other source of heat to dry
the inside of the refrigerator.
It may cause explosion or fire.
Do not store the medicine or academic materials at the
refrigerator.
When the material with the strict temperature control is stored,
it may be deteriorated or it may make an unexpected reaction to
cause any risk.
6
Page 7
Introduction
Do not use the combustible spray near the refrigerator.
It may cause fire.
Install in places away from the fire such as the place where
flammable gas is leaked.
It may cause fire.
Do not place flower vase, cup, cosmetics, medicine or any
container with water on the refrigerator.
It may cause fire, electric shock or injury by dropping down.
In case of thunder and lightning, or not in use for a long period of
time, detach the power plug.
There is a danger of electric shock or fire.
Use the submerged refrigerator after checking it.
It may cause electric shock or fire.
Do not move refrigerator while the refrigerator is operating.
Compressor may occur a temporary rattling noise.
(This is normal and will not impact on the performance or the life of the compressor.
The rattling will stop after the refrigerator comes to a rest.)
Do not spray water at the outside or the inside of the
refrigerator or do not clean it with benzene or thinner.
Deterioration of insulation of electric parts may cause electric
shock or fire.
When any strange smell or smoke is detected from the
refrigerator, disconnect the power plug immediately and
contact to the service center.
It may cause fire.
7
Thinner
Service
center
Page 8
Introduction
Do not allow anyone except for a qualified person to
disassemble, repair or alter the refrigerator.
It may cause injury, electric shock or fire.
Do not use the refrigerator for non-domestic purpose
(storing medicine or testing material, using at the ship, etc.).
It may cause an unexpected risk such as fire, electric shock,
deterioration of stored material or chemical reaction.
Be careful of the door falling down during disassembly and assembly of the door.
Do not insert refrigerator shelf upside down.
The shelf may fall down and cause injury.
When disposing the refrigerator, remove the packing materials from
the door or take off the doors but leave the shelves in place so that
children may not easily climb inside.
This appliance is not intended for use by persons (including children) with reduced
physical, sensory or mental capabilities, or lack of experience and knowledge, unless
they have been given supervision or instruction concerning use of the appliance by a
person responsible for their safety.
ENGLISH
Children should be supervised to ensure that they do not play with the appliance.
Install the refrigerator on the solid and level floor.
Installing it on the unstable place may cause death by falling down
the refrigerator when opening or closing the door.
Do not insert the hands or the metal stick into the exit of
cool air, the cover, the bottom of the refrigerator, the
heatproof grill (exhaust hole) at the backside.
It may cause electric shock or injury.
The appliance must be positioned so that the plug accessible after installation.
Do not touch food or containers in the freezer with wet hands.
8
Page 9

Introduction
Electric Shock Hazard. Disconnect electrical supply to refrigerator before installing.
Failure to do so could result in death or serious injury.
If your access door is too narrow for the refrigerator to pass through, remove the
refrigerator door and pass the refrigerator laterally.
Do not insert your hands into the ice maker during operation. This may cause injury.
Always disassemble the fresh compartment using two hands.
You can be injured from the weight of the compartment when filled with food.
When disassembling/reassembling the fresh compartment of the fridge, open the
refrigerator door fully.
You can disassemble/reassemble the freezer drawer in the same method.
Always disassemble the fresh compartment using two hands. (You can be injured from
the weight of the compartment when filled with food.)
When disassembling/reassembling the fresh compartment or V Fresh compartment of
the fridge, open the refrigerator door fully.
Keep ventilation openings, in the appliance enclosure or in the built-in structure, clear
of obstruction.
Do not use mechanical devices or other means to accelerate the defrosting process,
other than those recommended by the manufacturer.
Do not damage the refrigerant circuit.
Do not use electrical appliances inside the food storage compartments of the
appliance, unless they are of the type recommended by the manufacturer.
The refrigerant and insulation blowing gas used in the appliance require special
disposal procedures. When disposal, please consult with service agent or a similarly
qualified person.
9
Page 10
Introduction
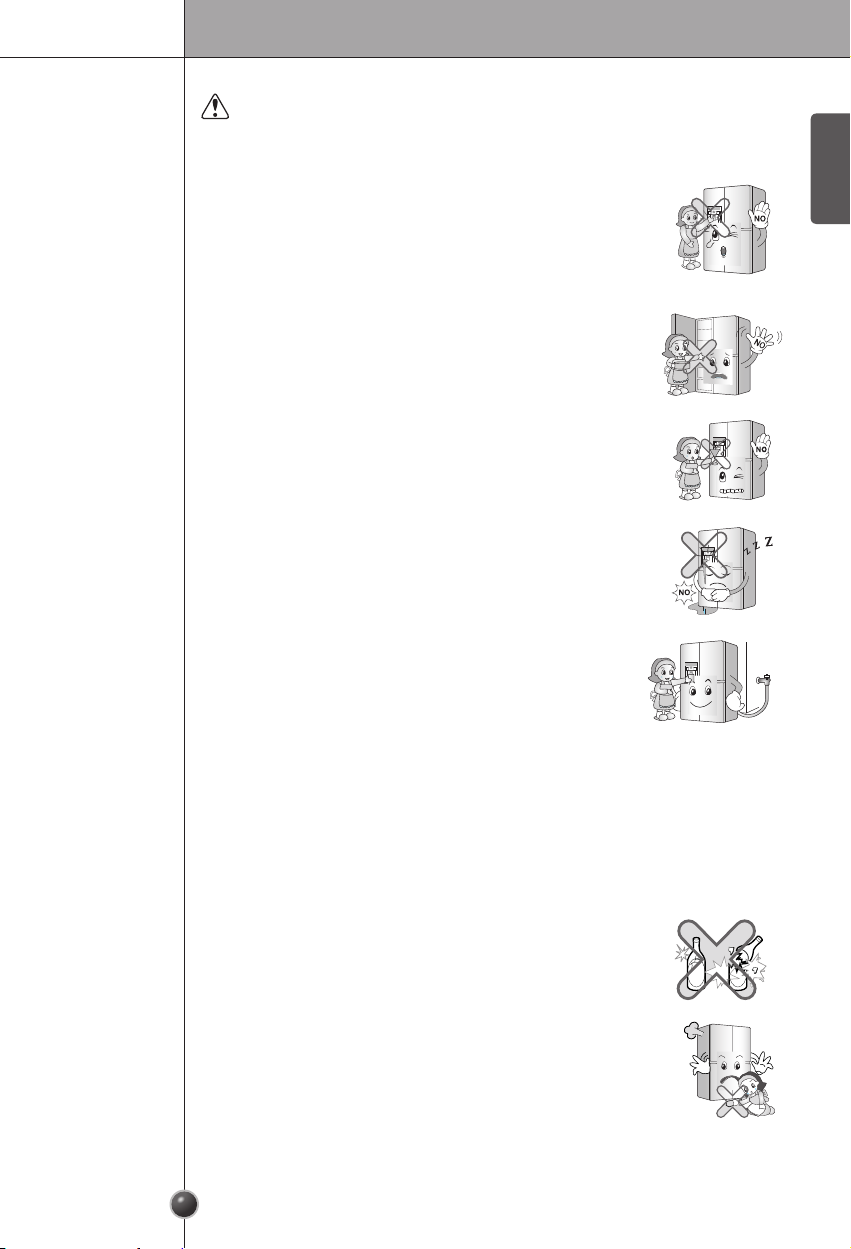
CAUTION
Violating this direction may cause injury or damage house or furniture.
Always be careful, please.
Do not insert the hands into the ice bucket or the ice dispenser.
(only for the model with the dispenser).
Operating the ice maker may cause injury.
Do not touch food or containers at the freezer with wet hands.
It may cause frostbite.
Do not put ice in thin crystal cup or ceramic ware.
It may break cup or ceramic ware to cause injury.
When the electricity is off, remove ice from the ice bucket
(only for the model with the dispenser).
The long-time power failure may thaw ice to damage the floor.
When the long-time power failure is expected, remove ice from
the ice bucket.
Supply the automatic ice maker with drinkable water only
(only for the model with the dispenser).
Otherwise, it may cause any risk.
Drinkable
water
ENGLISH
Do not remove the cover of the automatic ice maker.
(Only for the models with automatic ice maker)
The operation mechanic parts of the ice maker may hurt people.
Do not place the food in disorder inside the refrigerator.
The food may fall during opening and closing the door of the refrigerator and hurt
people.
Do not put any type of bottle in the freezer section.
It may freeze the contents to break the bottle to cause injury.
Do not insert hands into the bottom of the refrigerator.
The iron plate of the bottom may cause injury.
10
Page 11
Introduction
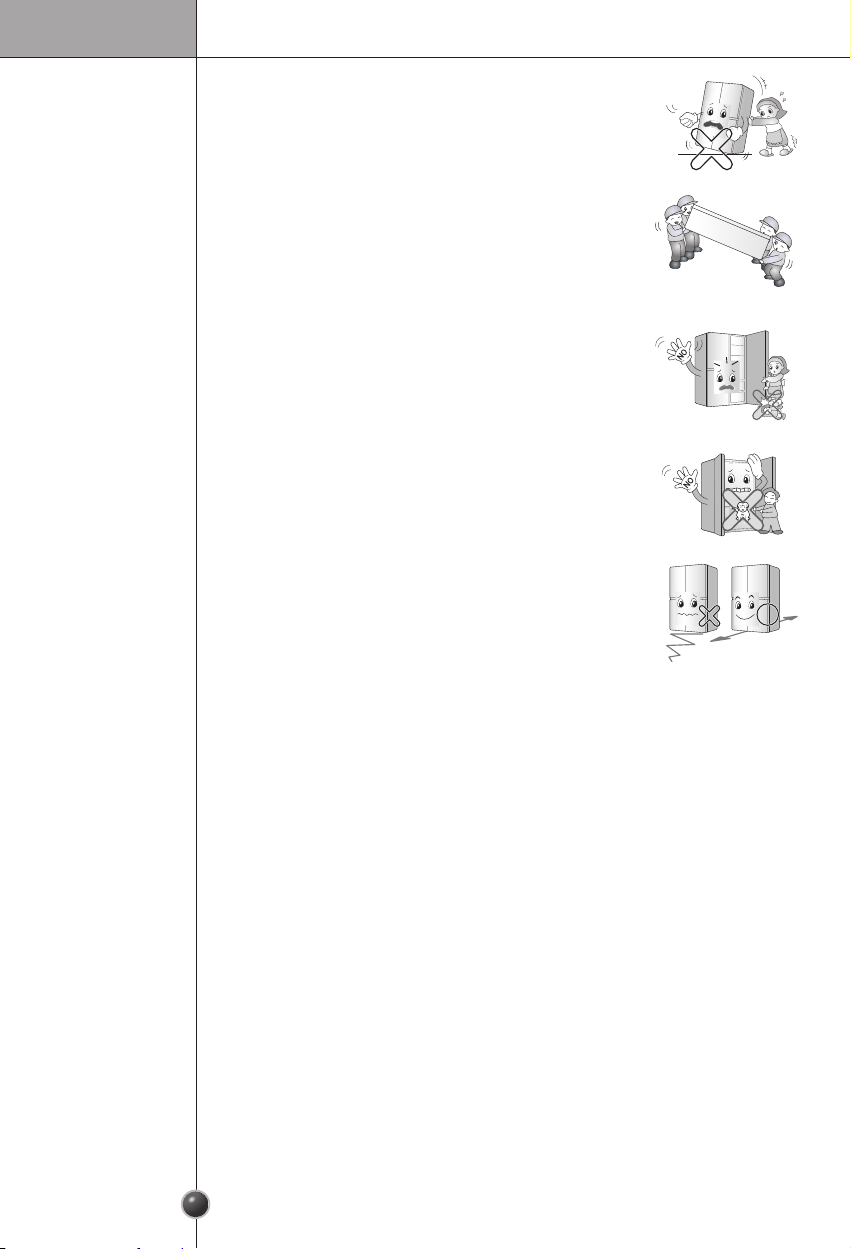
Do not tilt the product while moving the product.
Carry the refrigerator with the handle bar at the bottom of the
front and the top of the rear.
Your hands may slip causing injury. Because the product is
heavy, carrying it alone may hurt people or accidents may occur.
Please use caution when opening or closing the doors and doorin-door as it may cause injury to people around the refrigerator.
Opening or closing the doors may cause feet, hands or small
children to be hit by the doors, causing injury.
Do not put any living animal in the refrigerator.
If refrigerator is moved in zigzag direction, it may damage the
floor. Please move it only in a straight line direction.
When the user switches to AUTO or POWER mode, the LED near the filter will be
turned on. Open the refrigerator door to check whether the LED near the filter is
turned on. Do not insert the finger or any other alien object inside the fan. It can cause
an injury or malfunction.
Do not wash the Fresh Air Filter as it can deteriorate the performance.
If the user continues to use the Fresh Air Filter past the time to replace, the
antibacterial and deodorizing performance can be deteriorated.
This filter may not be effective for all bacteria or virus types.
This is effective for the bacteria growing on inside the refrigerator and not on the food.
Throw away the ice (about 20 pieces) and water (about 7 glasses) first made after
refrigerator installation.
The first ice and water may include particles or odor from the feed water pipe or feed
water box. This is necessary in case that the refrigerator has not been used for a long
time.
11
Page 12

Introduction
Be careful that food is not block the ice passage.
If foods are placed at the entrance of ice passage, ice may not be dispensed. The ice
passage may also be covered with ice powder if splinter ice is used only. This time,
remove the ice powder accumulated.
Never store beverage cans or other foods in ice storage bin for the purpose of rapid
cooling.
Such actions may damage the automatic ice maker.
Never use thin crystal glass or other thin containers to collect ice.
Such glasses or containers may be broken.
Put ice first into a glass before filling water or other beverages.
Water may be splashed if ice is added to existing liquid in a glass.
Never touch a hand or other tools on ice outlet.
Touch may cause a part breakage or hand injury.
Never remove the ice maker cover.
Sometimes level the surface so that the ice storage bin is fully filled with ice.
Ice is piled up just near the ice maker. So, such status may be considered, by the ice
maker, that the ice storage bin is fully filled and ice making operation may stop.
If discolored ice is dispensed, immediately contact service center, stopping use.
ENGLISH
Never use too narrow or deep glass.
Ice may be jammed in ice passage and, thus, the refrigerator may be failed.
Keep the glass at a proper distance from ice outlet.
A glass too close to the outlet may hinder ice from coming out.
That’s why you may have chilblains and they may be broken when their inner matters
are frozen, causing personal injury.
You must check the O-RING, which is made by rubber and prevent electric spark.
Don't touch lamp, in case of light on the long time. Because it can be very hot.
To get best performance from the product.
Do not place foods too closely in front of the vents at the rear of the appliance as it can
obstruct free air circulationg in the refrigerator compartment.
Do not place carbonated or fizzy drinks in the freezer compartment.
When installing, servicing or cleaning behind the refrigerator, be sure to pull the unit
straight out and push back straight in after finishing.
Do not store explosive substances such as aerosol cans with a flammable propellant in
this appliance.
12
Page 13
Introduction
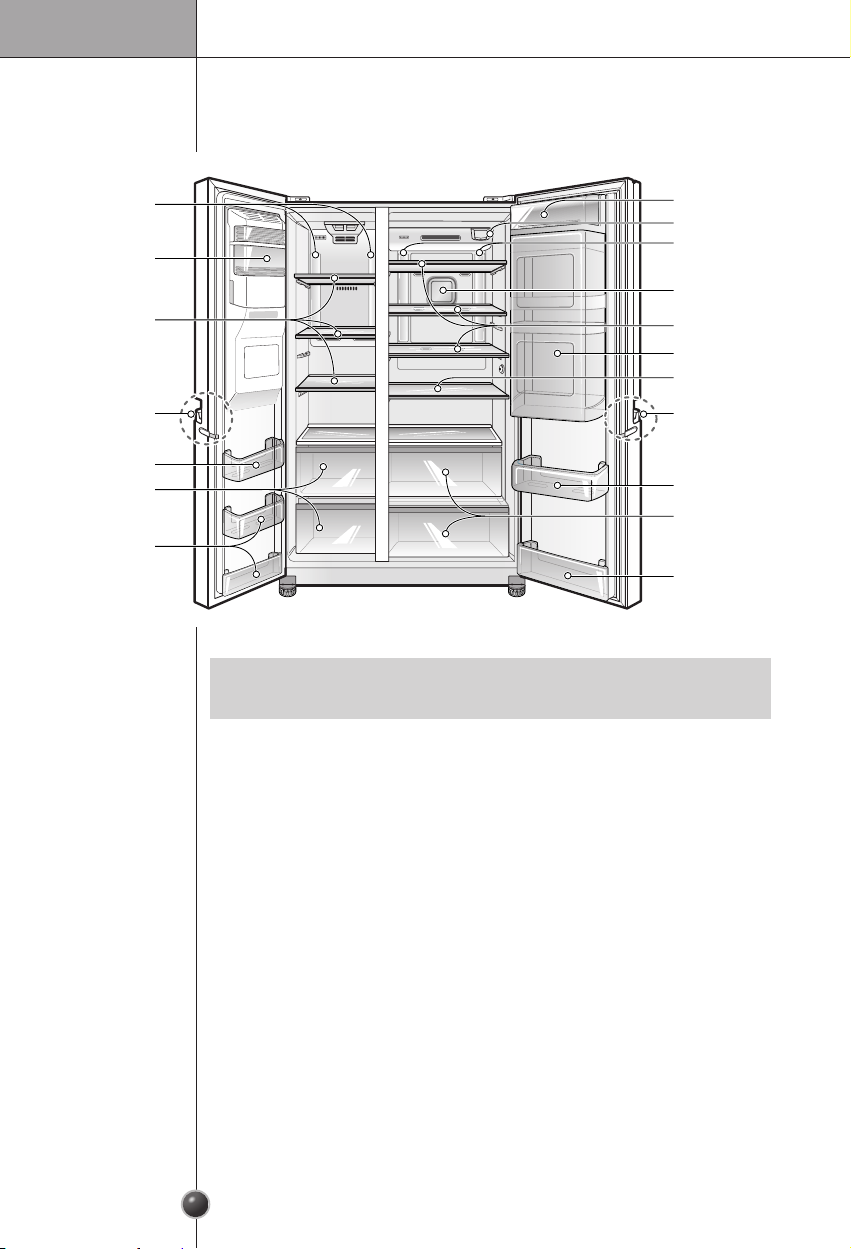
Identification of parts
LED Lamp
Automatic
Icemaker
Shelf
SmartPull™Handle
Door Bin
Freezing Zone
Door Bin
Freezer
Compartment
Refrigerator
Compartment
Dairy Corner
Filter
LED Lamp
Fresh Air Filter
Shelf
Refreshment center
Shelf
SmartPull™Handle
Door Bin
Fresh zone
Door Bin
NOTE
•
Parts, features, and options vary by model. Your model may not include every option.
13
Page 14
Installation
Select a good
location
Appliance
usage range
Where to Install
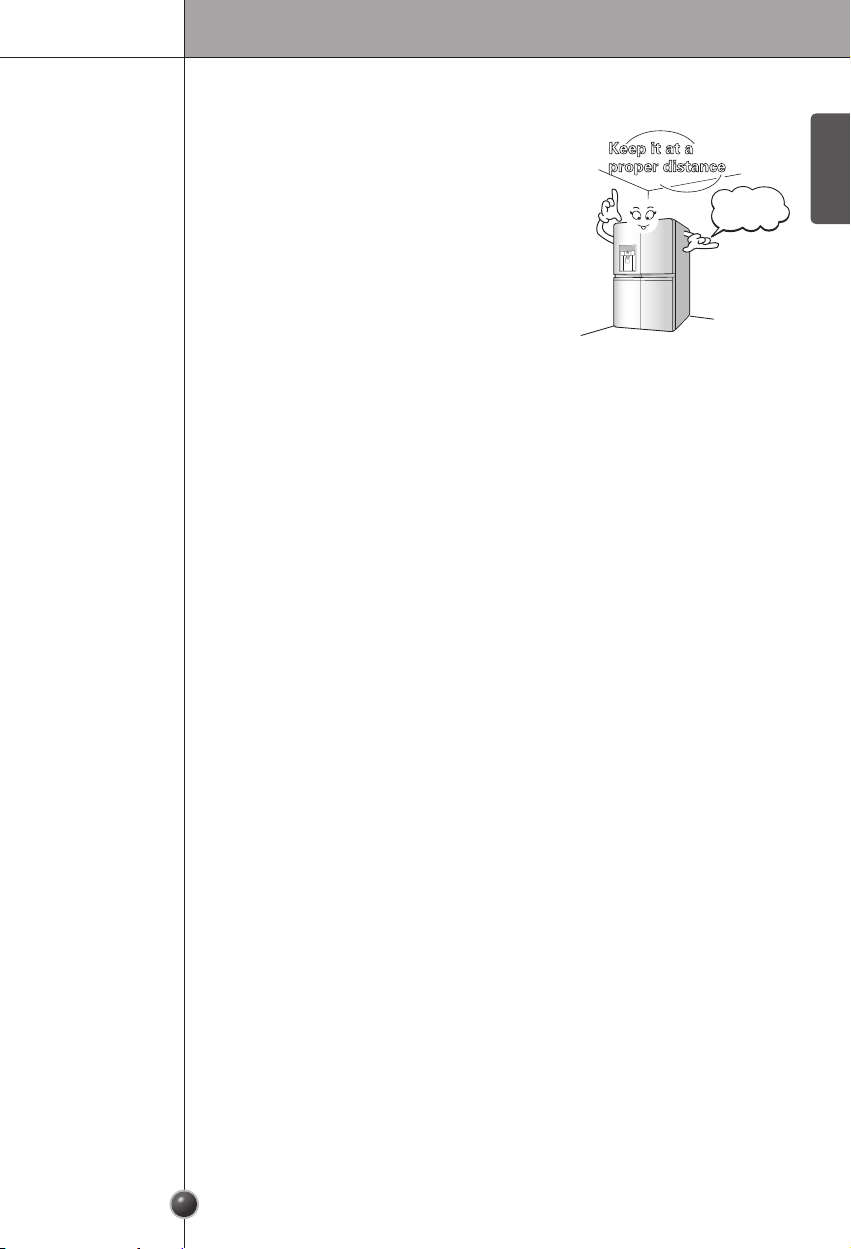
1. Place your appliance where it is easy to use.
2. Avoid placing the unit near heat sources, direct
sunlight or moisture.
3. To ensure proper air circulation around the fridge
-freezer, please maintain sufficient space on both the
sides as well as top and maintain at least 2 inches
(5 cm) from the rear wall.
4. To avoid vibrations, the appliance must be leveled.
5. Do not install the refrigerator below 41°F as it may
affect the performance.
This appliance is intended to be used in household and similar applications such as
– staff kitchen areas in shops, offices and other working environments;
– farm houses and by clients in hotels, motels and other residential type environments;
– bed and breakfast type environments;
– catering and similar non-retail applications.
Keep it at a
proper distance
More than
2 inches to back
ENGLISH
14
Page 15

Installation
WARNING
Remove the
freezer
compartment
door
Door removal
Electric Shock Hazard
Disconnect electrical supply to refrigerator
before installing. Failure to do so could
result in death or serious injury.
If your access door is too narrow for the
refrigerator to pass through, remove the
refrigerator door and pass the
refrigerator laterally.
1) Removing the hinge cover by loosening the
screws. Separate all connection wires.
2) Remove the keeper by rotating it counter
clockwise (c) and then lifting the upper hinge
up (d).
NOTE
•
When removing the upper hinge, be careful that
the door does not fall forwards.
Feed water tube
Hinge
cover
Upper
hinge
Keeper
Connection
wires
Upper hinge
3) Remove the freezer compartment door by lifting it
upward. This time, the door should be lifted
enough for the feed water pipe tube to be
completely pulled out.
Lower hinge
Engough for
water feed pipe tube
to be completely
pulled out
NOTE
•
Move the refrigerator compartment door passing through the access door and lay it
down, but be careful not to damage the feed water pipe tube.
Open the door and turn
the hose to inner side
Guide line is completely
inserted when only one
guide line is showing out
of two.
Must be cut vertically
when cutting the tube.
(Leak otherwise.)
Non-vertical Damaged Increased
Water hoses are should
be behind the leg to
prevent the damage.
15
Page 16

Installation
1
2
3
4
5
Ma
x
FR
Z
TEMP
REF
TEMP
M
i
n
5
4
3
2
1
Ma
x
Remove the
refrigerator
door
Move the
refrigerator
1) Loosen the hinge cover screws and
remove the cover. Remove connection
wire.
2) Remove keeper by rotating it clockwise (c)
Upper
hinge
Keeper
Connection
wires
and then remove the upper hinge by lifting
it up (d ).
3) Remove the refrigerator compartment door
by lifting it up.
NOTE
•
Do not remove the grease on the surface of
Lower hinge
gasket or hinge.
Move the refrigerator laterally through the
access door as shown in the right figure.
Door replacement
Mount them in the reverse sequence of removal after they pass through the
access door.
ENGLISH
Before
installation
WARNING
Water supply installation
Automatic icemaker operation needs water pressure of 21~121 psi
(1.5~8.5 kgf/cm2) (That is, a paper cup (6 oz. or 180 cc) will be fully filled within
3 seconds.)
If water pressure does not reach the rating 21 psi (1.5 kgf/cm2) or below, it is
necessary to purchase a separate pressure pump for normal automatic icemaking
and cool water feed.
Keep the total length of the feed water pipe tube within 26 ft (8 m). Be careful for
the tube to avoid being kinked. If the tube is 26 ft (8 m) or longer it may cause
trouble in water feed.
Install the water supply line where it will not be affected by heat.
Connect to potable water supply only.
Refer to instructions with water filter kit for installation.
IMPORTANT : Use only new hose-sets supplied whit the appliance and do not
16
reuse old hose-sets.
Page 17

Installation
When the floor
is not leveled
When the fridge
door is lower
than the freezer
door
Height adjustment
Height difference
- When the height of the door may not be leveled
when the floor is not leveled.
When the freezer door is lower –
Use the spanner to turn the nut of the height
adjustment screw on the left to the counterclockwise
direction to level the door.
Adjust the height of the door, insert the E ring.
A maximum of three rings (Only Freezer).
2 E rings are enveloped with owners manual.
When using the spanner
When the fridge door is lower –
Use the spanner to turn the nut of the height
adjustment screw on the right to the clockwise
direction to level the door.
When the fridge door is lower than the freezer door while using the refrigerator,
level the doors.
Height difference
1. Use the 햴 tool for adjustment on
the wide side to turn nut 햲 (
in the clockwise direction to loosen
)
keeper nut
1
the keeper nut.
Adjustment
2. Use the 햴 tool for adjustment on
the narrow side to turn the
adjustment hinge pin 햳 in
) clockwise direction or
(
Down
Up
2
hinge pin
3
Tool for
adjustment
( ) counterclockwise direction
to adjust the height of the fridge
and freezer doors.
3. After aligning the height of the door,
turn the keeper nut in counterclockwise direction tightly.
CAUTION
After leveling
the door height
Next
Do not force too hard to level the height. The hinge pin can be pulled out.
(Adjustable range of height is a maximum of 2" (5 cm))
The refrigerator doors will close smoothly by heightening the front side by adjusting the
height adjusting screw. If the doors do not close correctly, performance may be
affected.
1. Wipe off all dust accumulated during shipping and clean your appliance thoroughly.
2. Install accessories such as the ice cube box, cover evaporating tray, etc., in their
proper places. They are packed together to prevent possible damage during shipping.
3. Connect the power supply cord (or plug) to the outlet. Don't double up with other
appliances on the same outlet.
17
Page 18

Operation
Starting
When your refrigerator is first installed, allow it to stabilize at normal operating
temperatures for 2-3 hours prior to filling it with fresh or frozen foods.
If operation is interrupted, wait 5 minutes before restarting.
Adjusting the temperatures and functions
Function display board
Door-in-Door
1
LOCK STATUS
This indicator shows the current status for
the control panel functions is set to LOCK.
2
ICE PLUS
When the ICE PLUS button is pressed, the
display will indicate the selected function
has been activated.
3
DISPENSER SELECTION INDICATOR
Shows Cubed ice or Crushed Ice selection
that will be dispensed when the push switch
is pressed.
4
ICE ON/OFF INDICATOR
Shows Icemaker's "ON" or "off" selection
that will be operated when "Ice on" is
lighted.
5
FREEZER TEMPERATURE
Indicates the set temperature of the freezer
compartment in Celsius or Fahrenheit.
6
REFRIGERATOR TEMPERATURE
Indicates the set temperature of the
refrigerator compartment in Celsius or
Fahrenheit.
7
FRESH AIR FILTER INDICATOR
This indicator shows the current status for
the FRESH AIR FILTER. See “How to
remove the old filter.”
8
DISPENSER LIGHT INDICATOR
When the LIGHT button is pressed, the
display will indicate the selected function:
The dispenser light is on, this indicator will
appear on the display panel.
9
WATER FILTER STATUS
This indicator shows the current status for
the water filter. See Resetting the Filter
Indicator.
SmartPull™Handle
Easily opens the door.
Pulling too strongly
can cause damage. Do
not remove the rubber.
ENGLISH
18
Page 19

Operation
Adjust Freezer
Temperature
Adjusting the temperatures and display
To adjust the temperature in the freezer compartment, press the FREEZER button to
cycle through the the range of available settings.
Adjust
Refrigerator
Temperature
How to change
the temperature
mode
To adjust the temperature in the refrigerator compartment, press the REFRIGERATOR
button to cycle through the range of available settings.
To change the temperature mode from °F to °C (or vice versa) press and hold the
Refrigerator and Freezer temperature buttons simultaneously for approximately five
seconds. The temperature indication on the display window switches between Celsius
and Fahrenheit.
NOTE
•
The actual inner temperature varies depending on the food status, since the
indicated temperature setting is the target temperature and not the actual
temperature within the refrigerator.
Initially set the REFRIGERATOR CONTROL at 37 degrees F and the FREEZER
CONTROL at 0 degrees F.
Leave them at these setting for 24 hours (one day) to stabilize.
Then adjust the compartment temperature as illustrated above.
•
Temperature range of the
Temperature range of the Freezer
Refrigerator Control
Control
: -6°F ~ 8°F
: 33°F ~ 46°F
19
Page 20

Operation
Setting The
Dispenser Lock
Activating
ICE PLUS
Resetting The
Filter Indicator
Setting the functions
Press the button for the desired function to view and select other settings.
Press and hold the ALARM/LOCK button for three seconds to lock
the dispenser and all of the other control panel functions.
Press and hold again for 3 seconds to unlock.
This function increases both ice making and freezing capabilities.
• When you touch the ICE PLUS button, the graphic will illuminate
in the display and will continue for 24 hours. The function will
automatically shut off after 24 hours.
NOTE
•
Press the button again to cancel the ICE PLUS function.
Press and hold the Light/Water Filter button for more than
3 seconds to reset the filter indicator after the water filter has been
replaced.
ENGLISH
NOTE
•
t is recommended that you replace the filter when the water filter indicator light
I
reaches 0 or whenever the water or ice cube taste deteriorates noticeably.
20
Page 21

Operation
Fresh Air Filter
Fresh air filter
Fresh Air Filter provides the antibacterial function of removing virus or bacteria as well as
the deodorizer function of removing the odor within the refrigerator.
The performance test of the Fresh Air Filter has been done and proved through a public
certification organization ( ).
• The filter can be used for 6 months. (This may vary based on the environment of the
filter the consumer uses in.)
CAUTION
CAUTION
How to remove
the old filter
- When the user switches to AUTO or POWER mode, the LED near the filter will be
turned on. Open the refrigerator door to check whether the LED near the filter is turned
on. Do not insert fingers or any other alien object inside the fan. It can cause an injury
or malfunction.
- Do not wash the Fresh Air Filter as it can deteriorate the performance.
- If the user continues to use the Fresh Air Filter past the time to replace, the
antibacterial and deodorizing performance can be deteriorated.
- This filter may not be effective for all bacteria or virus types.
- This is effective for the bacteria growing on inside the refrigerator and not on the food.
When the Replace lamp is on,
replace the filter.
- When the “Replace” lamp is turned on, replace the
filter to maintain the performance of the Fresh Air
Filter function.
- To replace the filter, press the
on the display panel on the front side of the door
and switch to OFF mode.
- Hold the filter cover and rotate
counterclockwise to separate the filter
cover. Disassemble the Fresh Air Filter
inserted inside the filter cover.
button
Notification to
replace the filter
during use
When switching to
OFF mode
21
Page 22

Operation
1. Remove the old water filter.
• Lower or remove the top left shelf to allow the water filter to
rotate all the way down.
• Press the push button to open the water filter cover.
NOTE
•
Replacing the water filter causes a small amount of water (around 1 oz. or 25 cc) to
drain. Place a cup under the front end of the water filter cover to collect any leaking
water. Hold the water filter upright, once it is removed, to prevent any remaining
water from spilling out of the water filter.
• Make sure to rotate the filter down
completely before pulling it out of the
manifold hole.
• Pull the water filter downward and turn to
counter-clockwise.
2.
Replace with a new water filter.
•
Take the new water filter out of its packing
and remove the protective cover from the
o-rings. With water filter tabs in the
horizontal position.
ENGLISH
CAUTION
•
Push the new water filter into the manifold
hold and turn to clockwise.
• Rotate the water filter up into position and
close the cover. The cover will click when
closed correctly.
3. After the water filter is replaced, dispense 2.5 gallons of water (flush for
approximately 5 minutes) to remove trapped air and contaminates from the system.
Do not dispense the entire 2.5 gallon amount continuously. Depress and release
the dispenser pad for cycles of 30 seconds ON and 60 seconds OFF.
Do not operate refrigerator without water filter or water filter plug installed.
NOTE
•
To purchase a replacement water filter:
- Visit your local dealer or distributor
- Web: Find Parts & Accessories from Support section of lg.com
- Call : 1-800-243-0000 (USA) 1-888-542-2623 (Canada)
•
Part number of the replacement water filter: ADQ73613401(LT800P)
22
Page 23

Operation
Performance Data Sheet
Model: LG ADQ73613401-S Replacement cartridge : ADQ73613401
The concentration of the indicated substances in water entering the system was reduced to a
concentration less than or equal to the permissible limit for water leaving the system as specified in
NSF/ANSI Standard 42 and Standard 53.
System tested and certified by NSF International against NSF/ANSI Standard 42
and Standard 53 for the reduction of substances listed below.
Contaminant
Reduction
Chlorine Taste and
Odor
Nominal Particulate
Class I, , ≥ 0.5 to <
1.0 µm
Asbestos 170 MFL
Atrazine 0.0087 mg/L 0.009 mg/L →10% 94.2% 0.0005 mg/L 0.003 mg/L N/A
Benzene 0.017 mg/L 0.015 mg/L
Carbofuran 0.073 mg/L 0.08 mg/L
Lindane 0.002 mg/L 0.002 mg/L
P-Dichlorobenzene 0.263 mg/L 0.225 mg/L
Toxaphene 0.015 mg/L 0.015 mg/L
2,4-D 0.25 mg/L 0.210 mg/L
Lead pH @6.5 0.150 mg/L 0.15 mg/L
Lead pH @8.5 0.150 mg/L 0.15 mg/L
Mercury @ pH 6.5 0.006 mg/L 0.006 mg/L
Mercury @ pH 8.5 0.0062 mg/L 0.006 mg/L
Cyst*
Average
Influent
2.0 mg/L 2.0 mg/L ± 10% 97.5% 0.05 mg/L N/A 50%
5,600,000
pts/mL
120,000
cysts/L
NSF specified Challenge
Concentration
At least 10,000 particles/mL 99.3% 73,000 pts/ml N/A
7
10
to 108 MFL; fibers
greater than 10 µm in length
→
10% 97.0% < 0.0005 mg/L 0.005 mg/L N/A
→
10% 98.8% 0.001 mg/L 0.04 mg/L N/A
→
10% 98.8% 0.00002 mg/L 0.0002 mg/L N/A
→
10% 99.6% 0.001 mg/L 0.075 mg/L N/A
→
10% 93.5% 0.001 mg/L 0.003 mg/L N/A
→
10% 99.5% 0.0012 mg/L 0.07 mg/L N/A
→
10% >99.3% 0.001 mg/L 0.010 mg/L N/A
→
10% >99.3% 0.001 mg/L 0.010 mg/L N/A
→
10% 96.5 0.0002 mg/L 0.002 mg/L N/A
→
10% 86.9 0.0081 mg/L 0.002 mg/L N/A
Minimum 50,000 cysts/L >99.99% <1 cyst/L N/A
Avg %
Reduction
>99% < 1MLF N/A 99%
Average Product
Water Concentration
Max Permissible
Product Water
Concentration
Reduction
equirements
* Based on the use of Cryptosporidium parvum oocysts.
NSF
85%
99.95%
23
Page 24

Operation
WARNING
CAUTION
Service Flow
Water Supply
Water Pressure
Water Temperature
Capacity
Community or private well - Potable Water
0.5 gpm (1.9 lpm)
20 -120 psi (138 - 827 kPa)
33 - 100°F (0.6 - 37.8°C)
200 gallons (757 liters)
It is essential that the manufacturer’s recommended installation, maintenance and filter
replacement requirements be carried out for the product to perform as advertised.
NOTE
•
While the testing was performed under standard laboratory conditions, actual
performance may vary.
Replacement Cartridge: ADQ73613401
For estimated costs of replacement elements please call 1-877-714-7486 or visit our
website at www.lge.com
To reduce the risk associated with choking:
•
Do not allow children under 3 years of age to have access to small parts during the
installation of this product.
To reduce the risk associated with the ingestion of contaminants:
•
Do not use with water that is microbiologically unsafe or of unknown quality without
adequate disinfection before or after the system. Systems certified for cyst reduction
may be used on disinfected water that may contain filterable cysts. EPA Establishment
# 070595-MEX-001
To reduce the risk associated with property damage due to water leakage:
•
Read and follow. Use Instructions before installation and use of this system.
•
Installation and use MUST comply with all state and local plumbing codes.
•
Do not install if water pressure exceeds 120 psi (827 kPa). If your water pressure
exceeds 80 psi, you must install a pressure limiting valve. Contact a plumbing
professional if you are uncertain how to check your water pressure.
•
Do not install where water hammer conditions may occur. If water hammer conditions
exist you must install a water hammer arrester. Contact a plumbing professional if you
uncertain how to check for this condition.
•
Do not install on hot water supply lines.
The maximum operating water temperature of this filter system is 100°F (37.8°C).
•
Protect filter from freezing. Drain filter when temperatures drop below 40°F (4.4°C).
•
The disposable filter cartridge MUST be replaced every 6 months, at the rated capacity
or if a noticeable reduction in flow rate occurs.
•
Protect from freezing, remove filter cartridge when temperatures are expected to drop
below 33° F.
•
Do not install systems in areas where ambient temperatures may go above
110° F (43.3° C).
•
Where a backflow prevention device is installed on a water system, a device for
controlling pressure due to thermal expansion must be installed.
•
Ensure all tubing and fittings are secure and free of leaks.
ENGLISH
Manufactured for LG Electronics by MCM Co.,Ltd. 45-10. Nowon-Ri, Yiwol-Myun,
Jinchun-Kun, Chung-Buk, Korea
24
Page 25

Operation
25
Page 26

Operation
How to install
the new filter
CAUTION
Setting the time
to replace
(Reset)
Switch to use
mode
Install the new filter.
- Insert the new Fresh Air Filter in the
filter cover so that the white part of the
filter and the BACK label is visible.
Be careful not to switch the direction of the Fresh Air
Filter inserted on the filter cover.
- Align the filter cover where it was
originally located and then turn
clockwise about 30 degrees to
install the filter cover.
Close the refrigerator door and press
the button On the display panel
for more than 3 seconds to check that the
Replace lamp is turned off.
To use the Fresh Air Filter, press the button on the display panel to switch
to AUTO or POWER mode.
(Every time the user presses the button, the function of Fresh Air Filter will switch in the
order of OFF → AUTO → POWER → OFF.)
Notification to
replace the filter
Reset time to
replace
ENGLISH
26
OFF AUTO POWER OFF
Page 27

Operation
Setting The Ice
ON/OFF
Indicator.
Operating the dispenser
Press and hold ICE ON/OFF button for the more than 3 seconds to
reset the ON/OFF indicaotor.
NOTE
•
If you don't want to use the automatic icemaker, turn the icemaker
switch to OFF. If you want to use automatic icemaker again, change
the switch to ON.
Dispensing
Crushed Ice
Dispensing
Cubed Ice
Controlling The
Dispenser Light
CAUTION
Press the ICE TYPE button to illuminate the Crushed Ice icon.
Press the push ice switch with a glass or other container and
crushed ice will be dispensed.
Press the ICE TYPE button to illuminate the Cubed Ice icon.
Press the push switch with a glass or other container and cubed
ice will be dispensed.
NOTE
•
Hold the glass or other container in place for a couple of seconds
after dispensing ice or water to catch the last few cubes or
drops. The dispenser is designed to not operate while either
refrigerator door is open.
Press the LIGHT/FILTER button to turn the
dispenser light on and off.
- When filling the container with a
small opening, use it near the
opening of the water or ice
dispenser as close as possible.
- Do not dispense ice into crystal
Water
glasses or glass with low quality
as crystal and glass with low
quality might break.
Water Switch
Ice Switch
Incorrect Way Correct Way
27
Ice
Page 28

After dispenser
is used
Operation
ENGLISH
The water collector has no self-drainage
function, so it should be cleaned regularly.
Remove the cover by pulling the front of the
water collector cover and dry it with a cloth.
Automatic
icemaker
lcemaker
* This Button only
Must control by Service man.
Automatic Shutoff Arm
• The automatic icemaker can automatically make 7 cubes at a time, 70~120 pieces per
day. This quantity may vary by circumstance, including ambient temperature, door
opening, freezer load. etc.
• Icemaking stops when the ice storage bin is full.
NOTE
•
It is normal that a noise is produced when ice drops into the ice storage bin.
WARNING
•
Do not insert your hands in to the Icemaker in operation.
It may cause to injure you.
28
Page 29

Operation
When ice maker
does not
operate
smoothly
The other
functions
Ice is lumped together
• When ice is lumped together, take the ice lumps out of the ice storage bin, break them
into small pieces, and then place them into the ice storage bin again.
• When the ice maker produces too small or lumped together ice, the amount of water
supplied to the ice maker need to adjusted. Contact the service center.
• If ice is not used frequently, it may lump together.
Power failure
• Ice may drop into the freezer compartment. Take the ice storage bin out and discard all
the ice then dry it and place it back. After the machine is powered again, crushed ice
will be automatically selected.
The unit is newly installed
• It takes about 12 hours for a newly installed refrigerator to make ice in the freezer
compartment.
Door open warning
• 3 times of warning sounds at the interval of 30 seconds if a minute passes with the
door of refrigerator and the hombar door opened or completely closed.
• Please contact with the local service center if warning continue to sound even after
closing the door.
Diagnosis (failure detection) function
• Diagnosis function automatically detects failure when failure is found in product during
the use of refrigerator.
• If failure occurs at product, it does not operate though pressing any button and normal
indication is not done. In this case, do not turn power off but immediately contact with
the local service center. A lot of time are need for service engineer to detect the failed
part if turning it off.
29
Page 30

Operation
How ice/cold
water is
supplied
CAUTION
Water is cooled while stored in the water tank, and then sent to the dispenser.
Ice is made in the automatic ice maker and sent to the dispenser divided into
crushed or cubed form ice.
NOTE
•
It is normal that the water is not very cold at first. If you want colder water, add ice
into the glass.
Throw away the ice (about 20 pieces) and water (about 7 glasses) first made
after refrigerator installation.
The first ice and water may include particles or odor from the feed water pipe or
feed water box. This is necessary in case that the refrigerator has not been used
for a long time.
Keep children away from the dispenser.
Children may push switch incorrectly bad or damage lamps.
Be careful that food is not block the ice passage.
If foods are placed at the entrance of ice passage, ice may not be dispensed. The
ice passage may also be covered with ice powder if splinter ice is used only. This
time, remove the ice powder accumulated.
Never store beverage cans or other foods in ice storage bin for the purpose of
rapid cooling.
Such actions may damage the automatic ice maker.
Never use thin crystal glass or thin containers to collect ice.
Such glasses or containers may be broken.
Put ice first into a glass before filling water or other beverages.
Water may be splashed if ice is added to existing liquid in a glass.
Never touch a hand or other tools on ice outlet.
Touch may cause a part breakage or hand injury.
Never remove the ice maker cover.
Sometimes level the surface so that the ice storage bin is fully filled with ice.
Ice is piled up just near the ice maker. So, such status may be considered, by the
ice maker, that the ice storage bin is fully filled and ice making operation may stop.
If discolored ice is dispensed, immediately contact a service center and stop
use.
Never use too narrow or deep glass.
Ice may be jammed in ice passage and, thus, the refrigerator may be failed.
Keep the glass at a proper distance from ice outlet.
A glass too close to the outlet may hinder ice from coming out.
ENGLISH
30
Page 31

Operation
Using the
Family Door-in-
Door
How to take out
magic space
cover
How to
disassemble
Family Door-in-
Door Basket
How to use
moving basket
Refrigerator Door-in-Door
Press the mid left part of the Door-in-Door
until you hear a click sound.
• You can store more food in the larger Home
Bar.
• With the larger storage room, you can
organize your foods better.
First take out dairy product corner, and then pull up the
home bar cover to separate and take it out.
✽
Before the disassembly, please take out the food to empty
the refrigerator.
Hold both ends of the basket and lift up the front part
of the basket.
• Assemble in the same method as disassembly.
It can be moved up and down as necessary, and it can be used conveniently.
Press until
you hear
the "Click"
sound
CAUTION
<When moving it up> <When moving it down>
• Moving basket moves with upper and lower section together.
• To move the basket up, hold the center lightly and move it up.
• To move the basket down, hold the bottom of the basket with palm, Press the levers
on both sides at the bottom of the lower section upward, and then move it down.
• The bottom section of moving basket can be conveniently opened directly by opening
home bar.
After placing the basket at desired location, if basket is not leveled, it will sound
“click”, then move the basket upward lightly until it is fixed.
31
Page 32

Operation
How to use
How to
disassemble
Shelf
You can store side dish or refrigerated food on the shelf
with sufficient space in between the containers.
1. Hold the front part of the shelf and pull it out
until it gets blocked by the hooking part.
2. When you cannot pull out the shelf any more,
lift it up slightly.
3. While holding the shelf slightly, tilt the shelf to
pull it out.
Dairy corner
ENGLISH
How to use
How to
disassemble
You can store dairy goods such as butter, cheese etc.
Hold the basket with both hands and pull it out by pulling
it up (1).
If you close the refrigerator door with the dairy corner
left open on the door side, the refrigerator door may
not be closed properly. Therefore you must be careful.
32
Page 33

Operation
How to use
Deodorizer
With the deodorizer system, you can deodorize the refrigerator
and the deodorizer can be reused.
How to
disassemble
How to use
How to
disassemble
How to
reassemble
Unscrew the deodorizer cover using (+) driver, and then
separate it while pulling the deodorizer cover.
How to reuse the deodorizer
You can reuse the deodorizer continuously by drying it well with
the hair dryer.
Freezer/Fridge basket
You can store small packaged frozen food (Freezer basket), small packaged refrigerated
food or beverages (Fridge basket) such as milk, beer etc.
But, do not store ice cream or food to store for a long period of time (Freezer basket)
etc.
Hold the basket with both hands and slightly lift up the
front part to pull it out.
Hold the basket with both hands and
reassemble one side at a time by
pushing it in.
33
Page 34

Operation
How to use
How to
disassemble
the upper fresh
zone
How to
disassemble
the lower fresh
zone
Fresh zone
You can store fruits or vegetables.
1. Hold the front handle of the fresh zone and pull it out until it
gets blocked by the hooking part.
2. When you cannot pull out the fresh zone any more, lift it up
slightly to pull it out completely to the front side (outer side).
* The fresh zone can be reassembled in the reverse order.
When pulling out the lower fresh zone
1. Hold the front handle of the fresh zone and pull it forward.
2. When you cannot pull out the fresh zone any more, lift it up slightly to pull it out to the
front side.
When inserting the lower fresh zone
ENGLISH
WARNING
How to
disassemble
upper/lower
fresh zone
cover
* When inserting the fresh zone, always lift the cover up to push it in.
- Always disassemble the fresh zone using two hands.
You can be injured from the weight of the compartment when filled with food.
- When disassembling/reassembling the fresh zone of the fridge, open the refrigerator
door fully.
Hold the cover with both hands and pull it out.
* When disassembling the cover, always disassemble
the fresh zone first.
34
Page 35

Suggestion on food storage
Location of foods
(Refer to identification of parts)
Freezer
compartment
shelf
Freezer
compartment
door rack
Freezer
compartment
drawer
Dairy corner
Refreshment
center
Refrigerator
compartment
shelf
Refrigerator
compartment
door rack
Vegetable drawer
Store various frozen foods such as meat, fish,
ice cream, frozen snacks, etc..
Store small packed frozen food.
Temperature is likely to increase as door
So, do not store long-term food such
opens.
ice cream, etc..
Store meat, fish, chicken, etc.. after wrapping
them with thin foil.
Store dry.
Store milk products such as butter, cheese,
etc..
Store foods of frequent use such as beverage,
etc..
Store side dishes or other foods at a proper
distance.
Store small packed food or beverages such as
milk, juice, beer, etc..
Store vegetables or fruits.
35
Page 36

Suggestion on food storage
Freezer
compartment
CAUTION
Storing foods
Store fresh food in the refrigerator compartment. How food is frozen and thawed is
an important factor in maintaining its freshness and flavor.
Do not store food which goes bad easily at low temperatures, such as bananas, and
melons.
Allow hot food to cool prior to storing, placing hot food in the refrigerator could spoil
other food, and lead to higher energy consumption.
When storing the food, cover it with vinyl wrap or store in a container with a lid. This
prevents moisture from evaporating, and helps food to keep its taste and nutrients.
Do not block air vents with food. Smooth circulation of chilled air keeps refrigerator
temperatures even.
Do not open the door frequently. Opening the door lets warm air enter the
refrigerator, and cause temperatures to rise.
Never keep too much food in door rack because they may push against by inner racks
so that the door cannot be fully closed.
Do not store bottles in the freezer compartment - they may break when frozen.
Do not refreeze food that has been thawed. This causes loss of taste and nutrient.
When storing frozen food like ice cream for a long period, place it on the freezer
shelf, not in the door rack.
Do not touch the cold foods or containers- especially made of metallic -, with wet
hands and place glass products in the freezer compartment.
•
That’s why you may have chilblains and they may be broken when their inner
matters are frozen, causing personal injury.
ENGLISH
Refrigerator
compartment
Do not put wet food on the top shelf of the cooling room. It may be frozen by getting
the cool air directly.
Always clean food prior to refrigeration. Vegetables and fruits should be washed and
wiped, and packed food should be wiped, to prevent adjacent food from spoiling.
When storing eggs in their storage rack or box, ensure that they are fresh, and
always store them in an upright position, which keeps them fresh longer.
NOTE
•
If you keep the refrigerator in a hot and humid place, frequent openning of the door
or storing a lot of vegetables in it may cause dew to form which has no effect on its
performance. Remove the dew with dust cloth free from care.
36
Page 37

Care and maintenance
General information
Vacation time
During average length vacations, you will probably find it best to leave the refrigerator
in operation. Place freezable items in freezer for longer life.
When you plan not to operate, remove all food, disconnect the power cord, clean the
interior thoroughly, and leave each door OPEN to prevent odor formation.
Power failure
If you move
Anti
condensation
pipe
Exterior
Most power failures that are corrected in an hour or two will not affect your refrigerator
temperatures.
However, you should minimize the number of door openings while the power is off.
Remove or securely fasten down all loose items inside the refrigerator.
To avoid damaging the height adjusting screws, turn them all the way into the base.
The outside wall of the refrigerator cabinet may sometimes get warm, especially just
after installation.
Don’t be alarmed. This is due to the anti-condensation pipe, which pumps hot
refrigerator to prevent “sweating” on the outer cabinet wall.
CAUTION
• You must check the O-RING, which is made by rubber and prevent electric spark.
• Don't touch lamp, in case of light on the long time. Because it can be very hot.
Cleaning
It is important that your refrigerator be kept clean to prevent undesirable odors. Spilled
food should be wiped up immediately, since it may acidify and stain plastic surfaces if
allowed to settle.
Use a lukewarm solution of mild soap or detergent to clean the durable finish of your
refrigerator.
Wipe with a clean damp cloth and then dry.
Interior
After cleaning
WARNING
Regular cleaning is recommended. Wash all compartments a baking soda solution or a
mild detergent and warm water. Rinse and dry.
Please verify that the power cord is not damaged, power plug is not overheated, or
power plug is well inserted into the power consent.
Always remove power cord from the wall outlet prior to cleaning in the vicinity of
electrical parts (lamps, switches, controls, etc.).
Wipe up excess moisture with a sponge or cloth to prevent water or liquid from getting
into any electrical part and causing an electric shock.
Never use metallic scouring pads, brushes, coarse abrasive cleaners, strong alkaline
solutions, flammable or toxic cleaning liquids on any surface.
Do not touch frozen surfaces with wet or damp hands, because damp object will stick or
adhere to extremely cold surfaces.
37
Page 38

Care and maintenance
Using Smart
Diagnosis
Smart Diagnosis
Should you experience any problems with your refrigerator, it has the capability of
transmitting data via your telephone to the LG service center. This gives you the
capability of speaking directly to our trained specialists. The specialist records the data
transmitted from your machine and uses it to analyze the issue, providing a fast and
effective diagnosis.
If you experience problems with your refrigerator, call to the LG service center.
Only use the Smart Diagnosis feature when instructed to do so by the LG call center
agent. The transmission sounds that you will hear are normal and sound similar to a fax
machine.
Smart Diagnosis cannot be activated unless your refrigerator is connected to power.
If your refrigerator is unable to turn on, then troubleshooting must be done without
using Smart Diagnosis.
First, call to the LG service center. Only use the Smart Diagnosis feature when
instructed to do so by the LG call center agent.
1. Lock the display. To lock the display, press and hold the Lock button
for three seconds. (If the display has been locked for over five
minutes, you must deactivate the lock and then reactivate it.)
2. Open the right refrigerator door.
3. Hold the mouthpiece of your phone in front of the speaker
that is located on the right hinge of the refrigerator door,
when instructed to do so by the call center.
ENGLISH
4. Press and hold the Freezer Temperature button for three seconds
while continuing to hold your phone to the speaker.
5. After you hear three beeps, release the Freezer Temperature button.
6. Keep the phone in place until the tone transmission has finished.
This takes about 3 seconds, and the display will count down the time. Once the
countdown is over and the tones have stopped, resume your conversation with the
specialist, who will then be able to assist you in using the information transmitted for
analysis.
NOTE
•
For best results, do not move the phone while the tones are being transmitted.
•
If the call center agent is not able to get an accurate recording of the data, you may
be asked to try again.
•
Call quality differences by region may affect the function.
•
Use the home telephone for better communication performance, resulting in better
service.
•
Bad call quality may result in poor data transmission from your phone to the
machine, which could cause Smart Diagnosis to not work properly.
38
Page 39

Care and maintenance
Trouble shooting
Before calling for service, review this list. It may save you both time and expense.
This list includes common occurrences that are not the result of defective workmanship
or materials in this appliance.
Occurrence Possible cause Solution
Runing of
refrigerator
Refrigerator
compressor
does not run
Refrigerator
runs too much
or too long
Refrigerator control is off. Set refrigerator control. See setting the
Refrigerator is in defrost cycle. This is normal for a fully automatic defrosting
Plug at wall outlet is disconnected. Make sure plug is tightly pushed into outlet.
Power outage. Check house lights. Call local electric company.
Refrigerator is larger than the
previous one you owned.
Room or outside weather is hot. It is normal for the refrigerator to work longer
Refrigerator has recently been
disconnected for a period of time.
Large amounts of warm or hot food
may have been stored recently.
Doors are opened too frequently or
too long.
Refrigerator or freezer door may be
slightly open.
Refrigerator control is set too cold. Set the refrigerator control to a warmer
Refrigerator or freezer gasket is dirty,
worn, cracked, or poorly fitted.
Thermostat is keeping the refrigerator
at a constant temperature.
controls.
refrigerator. The defrost cycle occurs
periodically.
This is normal. Larger, more efficient units
run longer in these conditions.
under these conditions.
It takes some hours for the refrigerator to cool
down completely.
Warm food will cause the refrigerator to run
longer until the desired temperature is
reached.
Warm air entering the refrigerator causes it
to run longer. Open the door less often.
Make sure the refrigerator is level.
Keep food and containers from blocking door.
See problem section.
OPENING/CLOSING of doors.
setting until the refrigerator temperature is
satisfactory.
Clean or change gasket. Leaks in the door
seal will cause refrigerator to run longer in
order to maintain desired temperatures.
This is normal. Refrigerator goes on and off to
keep the temperature constant.
39
Page 40

Care and maintenance
Occurrence Possible cause Solution
Refrigerator
compressor
does not run.
Thermostat is keeping the
refrigerator at a constant
temperature.
This is normal. The refrigerator goes on and
off to keep the temperature constant.
Temperatures
are too cold
Temperature in
the freezer is too
cold but the
refrigerator
temperature is
satisfactory.
Temperature in
the refrigerator
is too cold and
the freezer
temperature
is satisfactory.
Food stored in
drawers freezes.
Meat stored in
fresh meat
drawer freezes.
Freezer control is set too cold Set the freezer control to a warmer setting
Refrigerator control is set too cold. Set the refrigerator control to a warmer
Refrigerator control is set too cold. See above solution.
Meat should be stored at a
temperature just below the freezing
point of water (32˚F, 0˚C) for
maximum fresh storage time.
until the freezer temperature is satisfactory.
setting
It is normal for ice crystals to form due to the
moisture content of meat.
Temperatures
are too warm
Temperatures in
the refrigerator
or freezer are
too warm.
Temperature in
the refrigerator
is too warm but
the freezer
temperature is
satisfactory.
Freezer control is set too warm. Set the freezer or refrigerator control to a
Refrigerator control is set too warm.
Refrigerator control has some effect
on freezer temperature.
Doors are opened too frequently or
too long.
Door is slightly open. Close the door completely.
Large amounts of warm or hot food
may have been stored recently.
Refrigerator has recently been
disconnected for a period of time.
Refrigerator control is set too warm. Set the refrigerator control to a colder setting.
colder setting until the freezer or refrigerator
temperature is satisfactory.
Set the freezer or refrigerator control to a
colder setting until the freezer or refrigerator
temperature is satisfactory.
Warm air enters the refrigerator/ freezer
whenever the door is opened.
Open the door less often.
Wait until the refrigerator or freezer has a
chance to reach its selected
temperature.
A refrigerator requires some hours to cool
down completely.
ENGLISH
40
Page 41

Care and maintenance
Occurrence Possible cause Solution
Sound and noise
Louder sound
levels when
refrigerator is
Louder sound
levels when
compressor
comes on.
Vibrating or
rattling noise.
Water/Moisture/
Ice inside
refrigerator
Moisture
collects on the
inside walls of
the refrigerator.
Moisture forms
on the outside
of the
refrigerator
or between
doors.
Today’s refrigerators have increased
storage capacity and maintain more
even temperatures.
on.
Refrigerator operates at higher
pressures during the start of the ON
cycle.
Floor is uneven or weak.
Refrigerator rocks on the floor when
it is moved slightly.
Items placed on the top of the
refrigerator are vibrating.
Dishes are vibrating on the shelves in
the refrigerator.
Refrigerator is touching wall or
cabinets.
The weather is hot and humid which
increases the rate of frost buildup and
internal sweating.
Door is slightly open. See problem section opening/closing of
Door is opened too often or too long. Open the door less often.
Weather is humid. This is normal in humid weather.
Door is slightly open,causing cold air
from the inside the refrigerator to
meet warm air from the outside.
It is normal for sound levels to be higher.
This is normal. The sound will level off as the
refrigerator continues to run.
Be sure floor is level and solid and can
adequately support refrigerator.
Remove items.
It is normal for dishes to vibrate slightly.
Move dishes slightly.
Make sure refrigerator is level and firmly set
on floor.
Move refrigerator so that it does not touch
the wall or refrigerator.
This is normal.
doors.
When humidity is lower, the moisture should
disappear.
This time, close the door completely.
41
Page 42

Care and maintenance
Occurrence Possible cause Solution
Odors in
refrigerator
Interior needs to be cleaned. Clean interior with sponge,warm water and
Food with strong odor is in the
refrigerator.
Some containers and wrapping
materials produce odors.
baking soda.
Cover food completely.
Use a different container or brand of
wrapping materials.
Opening/
Closing of
doors/Drawers
Door(s) will not
close.
Door(s) will not
close.
Drawers are
difficult to move.
Food package is keeping door open. Move packages that keep door from closing.
Door was closed too hard, causing
other door to open slightly.
Refrigerator is not level. It rocks on
the floor when it is moved slightly.
Floor is uneven or weak.
Refrigerator rocks on the floor when
it is moved slightly.
Refrigerator is touching wall or
cabinets.
Food is touching shelf on top of the
drawer
Track that drawer slides on is dirty. Clean drawer and track.
Close both doors gently.
Adjust the height adjusting screw.
Be sure floor is level and can adequately
support refrigerator.
Contact carpenter to correct sagging or
sloping floor.
Move refrigerator..
Keep less food in drawer.
ENGLISH
Disposal of the old appliance
This appliance contains fluid (refrigerant, lubricant)and is made of parts and materials
which are reusable and/or recyclable.
All the important materials should be sent to the collection center of waste material and
can be reused after rework (recycling). For take back, please contact with the local
agency.
42
Page 43

Care and maintenance
It is Normal...
The following occurrences are normal.
Noise
Door open
Icing/
Dew drops
Temperature
When you hear Ticking
Sound or Strange
mechanical noises
When you hear strange
mechanical noises sound
When you hear Sound of
water flowing
When you hear the
sound of wind such as
breeze-like sound right
after you close the door
When you hear the
vibrating sound
When you hear a loud
sound after installing the
product for the first time
When the door is slightly
opened after closing the
door.
When closing refrigerator
door, freezer door open
and close.
When there is icing or
dew drops formed on
the inner or outer side of
the refrigerator
When the front side of
the refrigerator is warm
Occurrence Solution
This is the sound of various parts expanding/contracting or
various control devices operating depending on the
temperature change within the refrigerator.
This is the count of compressor or fan operating when the
operation of the refrigerator is starting or ending. This is
the same phenomenon of the sound generated when
starting or turning off the engine of a car.
This is the sound of refrigerant changing the condition in
the freezer/fridge. When the liquid changes to gas, you
will hear the sound of water fl owing and when gas
changes to liquid, you will hear the Sound of water
fl owing sound.
This is the sound generated when the internal pressure is
temporarily lowered when the warm air entered through
the fridge or freezer is cooled fast.
If the refrigerator is installed on wooden floor or wooden
wall, or if the refrigerator is not leveled properly, the
sound can be loud from the vibration.
When you operate the refrigerator for the first time, the
refrigerator will operate at high speed to cool fast and the
sound can seem louder. When the internal temperature
falls below a certain level, the noise will subside.
Depending on the fore or speed of closing the fridge or
freezer door, the door can open slightly and then get
closed. Be careful not to close the door to hard.
It is linked between the refrigerator and freezer in order to
make cold air circulation. So, When close the refrigerator
door, air in the refrigerator go into freezer. It makes freezer
door open. Please relax as is not breakdown.
When external air flows into the cool inner surface of the
refrigerator, icing/dew drops can be formed.
Especially, this will happen more easily when you open
and close the refrigerator door more frequently.
Also if the humidity of the installed location is high or
during the rainy season or on a rainy day, dew drops can
form on the outer side of the refrigerator. This is a natural
phenomenon that occurs during the humid weather. Wipe
the water drops with a dry cloth.
Heat pipes are installed around the front part of the
refrigerator and on the divider of the freezer and fridge to
prevent the dew drops from forming.
The refrigerator may feel warmer after the installation or
during the hot summer, but this is not a problem and you
can be rest assured.
43
Page 44

LG ELECTRONICS U.S.A., INC.
LG REFRIGERATOR LIMITED WARRANTY - U.S.A.
Should your LG Refrigerator ("Product") fail due to a defect in materials or workmanship under normal home use, during the
warranty period set forth below, LG will at its option repair or replace the product. This limited warranty is valid only to the original
retail purchaser of the product and applies only when purchased and used within the United States including U.S. Territories.
Proof of original retail purchase is required to obtain warranty service under this limited warranty.
WARRANTY PERIOD
Refrigerator
One (1) year from the date
of original retail purchase
Parts and Labor
(internal/functional parts only)
Noises associated with normal operation and failure to follow instructions found in the use and care and installation guides or
operating the unit in an unsuitable environment will not be covered under this warranty.
Replacement products and parts are warranted for the remaining portion of the original warranty period or ninety (90) days,
whichever is greater.
Replacement products and parts may be new or remanufactured.
THIS WARRANTY IS IN LIEU OF ANY OTHER WARRANTY, EXPRESS OR IMPLIED, INCLUDING WITHOUT LIMITATION, ANY
WARRANTY OF MERCHANTABILITY OR FITNESS FOR A PARTICULAR PURPOSE. TO THE EXTENT ANY IMPLIED WARRANTY IS
REQUIRED BY LAW, IT IS LIMITED IN DURATION TO THE EXPRESS WARRANTY PERIOD ABOVE. NEITHER THE
MANUFACTURER NOR ITS U.S. DISTRIBUTOR SHALL BE LIABLE FOR ANY INCIDENTAL, CONSEQUENTIAL, INDIRECT,
SPECIAL, OR PUNITIVE DAMAGES OF ANY NATURE, INCLUDING WITHOUT LIMITATION, LOST REVENUES OR PROFITS, OR
ANY OTHER DAMAGE WHETHER BASED IN CONTRACT, TORT, OR OTHERWISE. Some states do not allow the exclusion or
limitation of incidental or consequential damages or limitations on how long an implied warranty lasts, so the above exclusion or limitation
may not apply to you. This warranty gives you specific legal rights and you may also have other rights that vary from state to state.
(Condenser, Dryer, Connecting Tube, Refrigerant and Evaporator)
One (1) year from the date of
original retail purchase
Parts and Labor
Sealed System
Seven (7) years from the date of
original retail purchase
Parts only
(Consumer will be charged for labor)
THIS LIMITED WARRANTY DOES NOT COVER:
1. Service trips to deliver, pick up, install, or repair the product;
instruct the customer on operation of the product; repair or
replace fuses or correct wiring or plumbing, or correction of
unauthorized repairs/installation.
2. Failure of product to perform during power failures and
interruptions or inadequate electrical service.
3. Damage caused by leaky or broken water pipes, frozen water
pipes, restricted drain lines, inadequate or interrupted water
supply or inadequate supply of air.
4. Damage resulting from operating the product in a corrosive
atmosphere or contrary to the instructions outlined in the product
owner’s manual.
5. Damage to the product caused by accidents, pests and vermin,
lightning, wind, fire, floods, or acts of God.
6. Damage resulting from misuse, abuse, improper installation,
repair, or maintenance. Improper repair includes use of parts not
approved or specified by LG.
7. Damage or failure caused by unauthorized modification or
alteration, or if it is used for other than the intended purpose, or
any water leakage where the unit was not properly installed.
8. Damage or failure caused by incorrect electrical current, voltage,
or plumbing codes, commercial or industrial use, or use of
accessories, components, or consumable cleaning products that
are not approved by LG.
9. Damage caused by transportation and handling, including
scratches, dents, chips, and/or other damage to the finish of
your product, unless such damage results from defects in
materials or workmanship and is reported within one (1) week of
delivery (Call: 1-800-243-0000).
10. Damage or missing items to any display, open box, discounted,
or refurbished product.
11. Products with original serial numbers that have been removed,
altered, or can not be readily determined. Model and Serial
numbers, along with original retail sales receipt, are required
for warranty validation.
12. Increases in utility costs and additional utility expenses.
13. Replacement of light bulbs, filters, or any consumable parts.
14. Repairs when your product is used in other than normal and
usual household use (e.g. commercial use, offices, and
recreational facilities) or contrary to the instructions outlined in
the product owner’s manual.
15. Costs associated with removal of your product from your home
for repairs.
16. The removal and reinstallation of the product if it is installed in
an inaccessible location or is not installed in accordance with
published installation instructions, including LG’s owner’s and
installation manuals.
17. Shelves, door bins, drawers, handles, accessories, and other
parts besides those that were originally included with this
particular model.
Linear Compressor
Ten (10) years from the date of
original retail purchase
Part only
(Consumer will be charged for labor)
The cost of repair or replacement under these excluded circumstances shall be borne by the consumer.
For complete warranty details and customer assistance,
please call or visit our website:
Call 1-800-243-0000 (24 hours a day, 365 days a year) and select the appropriate
option from the menu, or visit our website at www.lg.com
Or by mail: LG Customer Information Center:
P. O. Box 240007, 201 James Record Road Huntsville, Alabama 35813
ATTN: CIC
Write your warranty information below:
Product Registration Information:
Model:
Serial Number:
Date of Purchase:
Page 45

LG ELECTRONICS CANADA, INC.
LG REFRIGERATOR LIMITED WARRANTY - Canada
WARRANTY: Should your LG Refrigerator ("Product") fail due to a defect in material or workmanship under normal home use during the
warranty period set forth below, LG Canada will at its option repair or replace the Product upon receipt of proof of original retail purchase.
This warranty is valid only to the original retail purchaser of the product and applies only to a Product distributed in Canada by LG
Canada or an authorized Canadian distributor thereof. The warranty only applies to Products located and used within Canada.
(Note: If the original date of purchase can not be verified, the warranty will begin sixty (60) days from the date of manufacture)
Refrigerator
One (1) year from the date
of original retail purchase
Parts and Labor
(internal/functional parts only)
Noises associated with normal operation and failure to follow instructions found in the use and care and installation guides or operating
the unit in an unsuitable environment will not be covered under this warranty.
Replacement products and parts are warranted for the remaining portion of the original warranty period or ninety (90) days, whichever is
greater.
Replacement products and parts may be new or remanufactured.
LG Authorized Service Center warranties their repair work for thirty (30) days.
LG CANADA’S SOLE LIABILITY IS LIMITED TO THE WARRANTY SET OUT ABOVE. EXCEPT AS EXPRESSLY PROVIDED
ABOVE, LG CANADA MAKES NO AND HEREBY DISCLAIMS ALL OTHER WARRANTIES AND CONDITIONS RESPECTING THE
PRODUCT, WHETHER EXPRESS OR IMPLIED, INCLUDING, BUT NOT LIMITED TO, ANY IMPLIED WARRANTY OR CONDITION
OF MERCHANTABILITY OR FITNESS FOR A PARTICULAR PURPOSE, AND NO REPRESENTATIONS SHALL BE BINDING ON LG
CANADA. LG CANADA DOES NOT AUTHORIZE ANY PERSON TO CREATE OR ASSUME FOR IT ANY OTHER WARRANTY
OBLIGATION OR LIABILITY IN CONNECTION WITH THE PRODUCT. TO THE EXTENT THAT ANY WARRANTY OR CONDITION
IS IMPLIED BY LAW, IT IS LIMITED TO THE EXPRESS WARRANTY PERIOD ABOVE. LG CANADA, THE MANUFACTURER OR
DISTRIBUTOR SHALL NOT BE LIABLE FOR ANY INCIDENTAL, CONSEQUENTIAL, SPECIAL, DIRECT OR INDIRECT DAMAGES,
LOSS OF GOODWILL, LOST PROFITS, PUNITIVE OR EXEMPLARY DAMAGES OR ANY OTHER DAMAGE, WHETHER ARISING
DIRECTLY OR INDIRECTLY FROM ANY CONTRACTUAL BREACH, FUNDAMENTAL OR OTHERWISE, OR FROM ANY ACTS OR
OMISSIONS, TORT, OR OTHERWISE. This warranty gives you specific legal rights. You may have other rights which may vary from
province to province depending on applicable provincial laws. Any term of this warranty that negates or varies any implied condition or
warranty under provincial law is severable where it conflicts with provincial law without affecting the remainder of this warranty’s terms.
(Condenser, Dryer, Connecting Tube, Refrigerant and Evaporator)
One (1) year from the date of
original retail purchase
Parts and Labor
THIS LIMITED WARRANTY DOES NOT COVER:
1. Service trips to deliver, pick up, or install the product; instructing a
customer on operation of the product; repair or replacement of fuses
or correction of wiring or plumbing, or correction of unauthorized
repairs/installation.
2. Failure of the product to perform during power failures and
interruptions or inadequate electrical service.
3. Damage caused by leaky or broken water pipes, frozen water pipes,
restricted drain lines, inadequate or interrupted water supply or
inadequate supply of air.
4. Damage resulting from operating the Product in a corrosive
atmosphere or contrary to the instructions outlined in the Product
owner’s manual.
5. Damage to the Product caused by accidents, pests and vermin,
lightning, wind, fire, floods, or acts of God.
6. Damage resulting from the misuse, abuse, improper installation,
repair, or maintenance of the Product. Improper repair includes use
of parts not approved or specified by LG Canada.
7. Damage or product failure caused by unauthorized modification or
alteration, or use for other than its intended purpose, or resulting
from any water leakage due to improper installation.
8. Damage or Product failure caused by incorrect electrical current,
voltage, or plumbing codes, commercial or industrial use, or use of
accessories, components, or cleaning products that are not approved
by LG Canada.
All costs associated with the above excluded circumstances shall be borne by the consumer.
For complete warranty details and customer
assistance, please call or visit our website:
Call 1-888-542-2623 (24 hours a day, 365 days
a year) and select the appropriate option from
the menu, or visit our website at www.lg.com
WARRANTY PERIOD:
Sealed System
Seven (7) years from the date of
original retail purchase
Parts only
(Consumer will be charged for labor)
9. Damage caused by transportation and handling, including scratches,
dents, chips, and/or other damage to the finish of your product,
unless such damage results from defects in materials or
workmanship and is reported within one (1) week of delivery.
10. Damage or missing items to any display, open box, discounted, or
refurbished Product.
11. Products with original serial numbers that have been removed,
altered, or cannot be readily determined. Model and Serial
numbers, along with original retail sales receipt, are required for
warranty validation.
12. Increases in utility costs and additional utility expenses.
13. Replacement of light bulbs, filters, or any consumable parts.
14. Repairs when your Product is used in other than normal and usual
household use (including, without limitation, commercial use, in
offices or recreational facilities) or contrary to the instructions
outlined in the Product owner’s manual.
15. Costs associated with removal of the Product from your home for
repairs.
16. The removal and reinstallation of the Product if it is installed in an
inaccessible location or is not installed in accordance with published
installation instructions, including the Product owner’s and
installation manuals.
17. Shelves, door bins, drawers, handles, and accessories to the
Product. Also excluded are parts besides those that were originally
included with the Product.
Write your warranty information below:
Product Registration Information:
Model: Serial Number:
Date of Purchase:
Ten (10) years from the date of
original retail purchase
Part only
(Consumer will be charged for labor)
Linear Compressor
Page 46

LG Twin Tower, 20, Yoido-Dong,
Youngdungpo-Gu, Seoul, 150-721, Korea.
Printed in Korea
 Loading...