

LG LNP3021R Owner's Manual

Network IR PTZ Camera Owner’s Manual
Owner’s Manual
Network
IR PTZ
Camera
Please read this manual carefully before operating your
set and retain it for future reference.
Model:
LNP3021R
LG P/N: COV33509901 1512 (V1.0)
Network IR PTZ Camera Owner’s Manual
I
Safety Information
CAUTION: TO REDUCE THE RISK OF ELECTRIC SHOCK
DO NOT REMOVE COVER (OR BACK)
NO USER-SERVICEABLE PARTS INSIDE
REFER SERVICING TO QUALIFIED SERVICE PERSONNEL.
This lightning flash with arrowhead symbol
within an equilateral triangle is intended to
alert the user to the presence of uninsulated dangerous
voltage within the product's enclosure that may be o f
sufficient magnitude to con sti tu te a r is k o f ele ctri c sho ck
to person.
The exclamation point within an equilate ral
triangle is intended to alert the user to the
presence of important operating and maintenance
(servicing) instructions in the literature a ccompanying
the product.
FCC WARNING: This equipment may generate or use
radio frequency energy . Chan ges or modifica tions to this
equipment may cause harmful interference unle ss the
modifications are expressly approved in the in struction
manual. The user could lose the au thority to opera te this
equipment if an unauthorized change or modification is
made.
REGULATORY INFORMATION: FCC Part 15
This equipment has been tested and found to comply
with the limits for a Class A digital de vice , pursuan t to
Part 15 of the FCC Rules. These limi t s a re designed to
provide reasonable protection against harmful
interference when the equipment is opera ted in a
commercial environment.
This equipment generates, uses, and can radiate ra dio
frequency energy and, if not installed and u sed in
accordance with the instruction manual, may cau se
harmful interference to radio co mmun ica tions.
Operation of this equipment in a residential area i s like ly
to cause harmful interference in which ca se the user will
be required to correct the interference at his ow n
expense.
A suitab le conduit entries, knock-out s or glands shall be
provided in the cable entries of this produ ct in the end
user.
Holes in metal, through which insulated w ires pa ss, shall
have smooth well rounded surfaces or shall be provided
with brushing.
Warning: Do not install this equipmen t in a con fined
space such as a bookca se or simila r uni t.
Warning: Wiring methods shall be in acco rdance w ith
the National Electric Code, AN SI/NFPA 70.
Warning: This is a class A product. In a dome stic
environment this product may cause radio interference
in which case the user may be required to take
adequate measures.
Warning: To reduce a risk of fire or electric shock, do
not expose this product to rain or moi sture .
Warning: Please adopt the power adapter w hich can
meet the safety extra low voltage (SELV) standard. And
source with DC 12 V or AC 24 V (depending on models)
according to the IEC60950-1 and Li mi ted Pow er Sou rce
standard.
Warning: Install the came ra on a ceiling or w all w here
can withstand the weight of 5 times of the camera
including mounting bracket.
Caution: This installation shall be made by a qual ified
service person and shall conform to al l local codes.
Caution: To avoid electrical shock, do not open the
cabinet. Refer servicing to qualified personnel only.
Caution: The apparatus shall not be exposed to w ater
(dripping or splashing) and no objects fil led with liquids,
such as vases, shall be placed on the app ara tus.
Caution: Make sure the power supply voltage is corre ct
before using the camera .
Caution: Do not drop the camera or subject it to
physical shock.
Caution: The sensor may be burned out by a la ser
beam, so when any laser equipment is being used,
make sure that the surface of the sensor not be
exposed to the laser beam.

Network IR PTZ Camera Owner’s Manual
II
NOTICE: For safety marking information including
product identification and supply ra tings, p lease refer to
the main label on the bottom or rear of the app aratus.
NOTICE: Please make sure the product is installed
appropriate places where secured from flood, such a s
under the eaves, to operate properly. This product is
certified as IP66 standard.
However, if there is any flood concerns, it is highly
recommended to use an outdoor Housing. When y ou
install the camera inside an out door Housing , plea se
use one of the following methods:
1. Remove the front gl ass of H ou sing be fore i nst all ing
the camera.
2. To keep the front glass of Housing, remove the front
cover, and then put the camera close to the front glass.
Contact office for compliance of this product:
LG Electronics European Shared Service Center B.V.
Krijgsman 1, 1 186 D M Amstelveen, The Netherlands
Disposal of your old appliance
1. This crossed-out wheeled bin symbol indicates that
waste electrical and electronic products (WEEE)
should be disposed of separately from the municipal
waste stream.
2. Old electrical products can contain hazardous
substances so correct disposal of your old appliance
will help prevent potential negative consequences for
the environment and human health. Your old
appliance may contain reusable parts that could be
used to repair other products, and other valuable
materials that can be recycled to conserve limited
resources.
3. You can take your appliance either to the shop
where you purchased the product, or contact your
local government waste office for details of your
nearest authorized WEEE collection point. For the
most up to date information for your country please
see www.lg.com/global/recycling.
Handling of the unit
Be careful not to spill water or other liquids on the unit.
Be cautious not to get combustible or metallic material
inside the body. If used with foreign matter inside, the
camera is liable to fail or to get cause of fire or electric
shock.
Remove dust or dirt on the surface of the lens with a
blower.
Use a soft and lint-free, dry cloth (such as glass
cleaner) to clean the body. If it is very dirty, use a
cloth dampened with a small quantity of neutral
detergent then wipe dry.
Avoid the use of volatile solvents such as thinners,
alcohol, benzene and insecticides. They may
damage the surface finish and/ or impair the
operation of the camera.
This camera is designed for mounting on the ceiling
or wall. If you install this camera upside down, it
may cause malfunction.
Operating and storage location
Avoid viewing a very bright object (such as light
fittings) during an extended period. Avoid operating or
storing the unit in the following locations.
Extremely hot or cold places (operating temperature
-20 °C to 50 °C, however, we recommend that the
unit be used within a temperature range of -10 °C to
40 °C)
Damp or dust place
Places exposed to rain
Places subject to strong vibration
Close to generators of powerful electromagnetic
radiation such as radio or TV transmitters.
Do not use the camera in such place where rapid
temperature fluctuation by switching an air
conditioner on and off.

Network IR PTZ Camera Owner’s Manual
III
OPEN SOURCE SOFTWARE NOTICE
To obtain the source code under GPL, LGPL, MPL
and other open source licenses, that is contained in
this product, please visit http://opensource.lge.com.
In addition to the source code, all referred license
terms, warranty disclaimers and copyright notices are
available for download.
LG Electronics will also provide open source code to
you on CD-ROM for a charge covering the cost of
performing such distribution (such as the cost of
media, shipping and handling) upon email request to
opensource@lge.com. This offer is valid for three (3)
years from the date on which you purchased the
product.

Network IR PTZ Camera Owner’s Manual
Contents
1. Product Brief 1
2. Start Up 2
2.1 Client Installation Conditions ...................................................................................................................................2
2.2 Initial Configuration .................................................................................................................................................2
2.2.1 Modify Parameter ..............................................................................................................................................2
2.2.2 Login Web Client ...............................................................................................................................................2
2.2.3 Focus ................................................................................................................................................................3
3. Product Functions 4
3.1 Live View .................................................................................................................................................................4
3.1.1 Toolbar Buttons .................................................................................................................................................4
3.1.2 Image Adjustment .............................................................................................................................................4
3.1.3 Auxiliary Function ..............................................................................................................................................6
3.2 Motion Detection .....................................................................................................................................................6
3.3 PTZ Control .............................................................................................................................................................6
3.3.1 Preset Position ..................................................................................................................................................7
3.3.2 Patrol .................................................................................................................................................................7
3.3.3 Restricted Patrol ................................................................................................................................................8
3.3.4 Path Mode .........................................................................................................................................................8
3.3.5 Mixed Mode .......................................................................................................................................................8
3.3.6 Scheduled Task .................................................................................................................................................9
3.3.7 Positioning .........................................................................................................................................................9
3.4 Tempering Alarm .....................................................................................................................................................9
3.5 Alarm Linkage .......................................................................................................................................................10
3.5.1 Motion Detection Linkage ................................................................................................................................10
3.5.2 Tempering Alarm Linkage ................................................................................................................................10
3.5.3 Alarm Input Linkage ........................................................................................................................................10
3.5.4 Abnormality Linkage ........................................................................................................................................10
3.6 Privacy Mask ......................................................................................................................................................... 11
3.7 ROI ....................................................................................................................................................................... 1 1
3.8 Snapshot ............................................................................................................................................................... 11
3.9 Playback ...............................................................................................................................................................12
3.10 Upgrade ...............................................................................................................................................................12
4. Settings
14
4.1 Network Access ....................................................................................................................................................14
4.1.1 Ethernet ...........................................................................................................................................................14
4.1.2 PPPoE.............................................................................................................................................................14
4.1.3 DDNS ..............................................................................................................................................................14
4.2 BNC Output ...........................................................................................................................................................15
4.3 User Security ........................................................................................................................................................15
4.3.1 User Management ...........................................................................................................................................15
4.3.2 IP Filter ............................................................................................................................................................15
4.4 Text Overlay ..........................................................................................................................................................15
4.5 Multi-stream ..........................................................................................................................................................16
5. References 17
5.1 Troubleshooting ....................................................................................................................................................17
5.2 Specification ..........................................................................................................................................................19
6. Appendix: Glossary of Terms 21
Network IR PTZ Camera Owner’s Manual
1
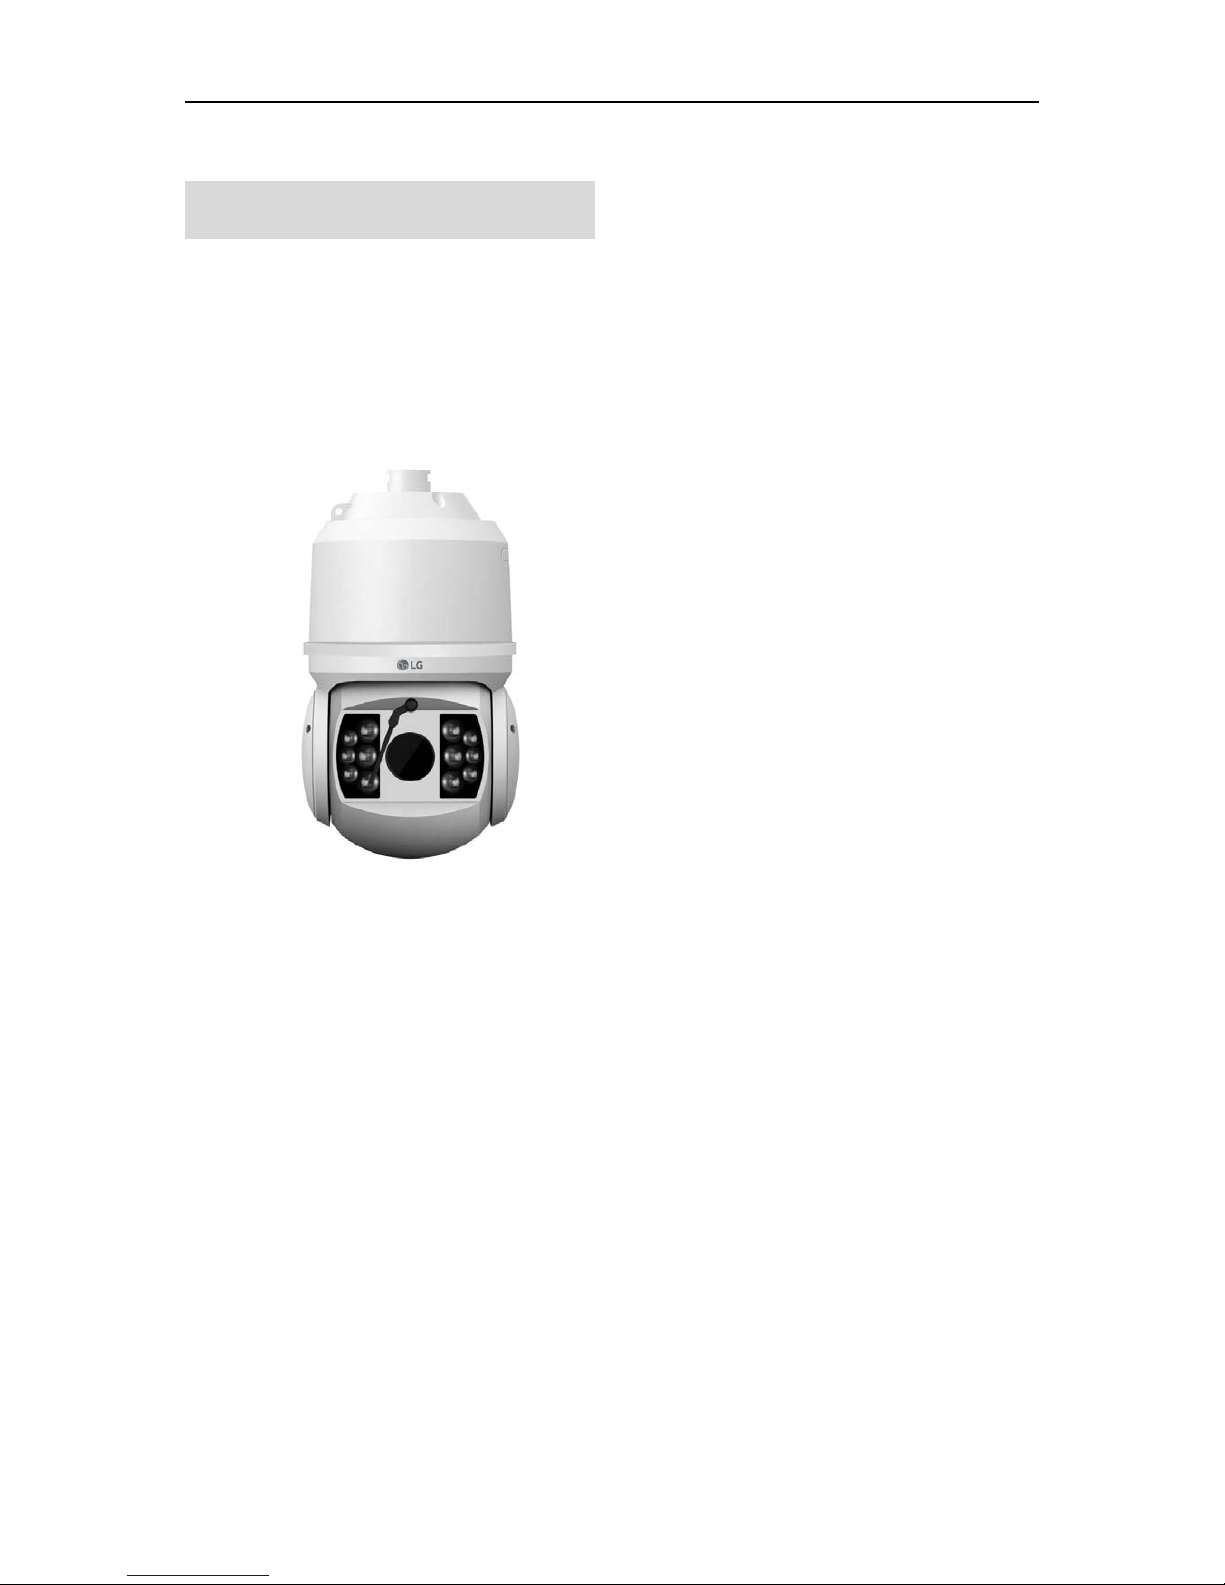
1. Product Brief
The high speed dome camera is remote HD IP
Camera based on IP network technology. It can
be deployed at any point of a surveillance
network and transmit HD video via public or
private IP network.
Picture 1-1 IR PTZ Camera
Network IR PTZ Camera Owner’s Manual
2
2. Start Up
2.1 Client Installation Conditions
Operating System: Windows XP, Win7 or Win8
Browser: IE8, IE9 or IE11 (standard version)
Processor: 2.0 GHz CORE®2 series or other
equivalent processors
RAM Memory: 2GB or above
DirectX:9.0c
NOTE:
Using IE8, IE9 or IE11 (standard version) is
recommended. If not standard, there are
compatibility issues.
2.2 Initial Configuration
After installation, electrify camera.
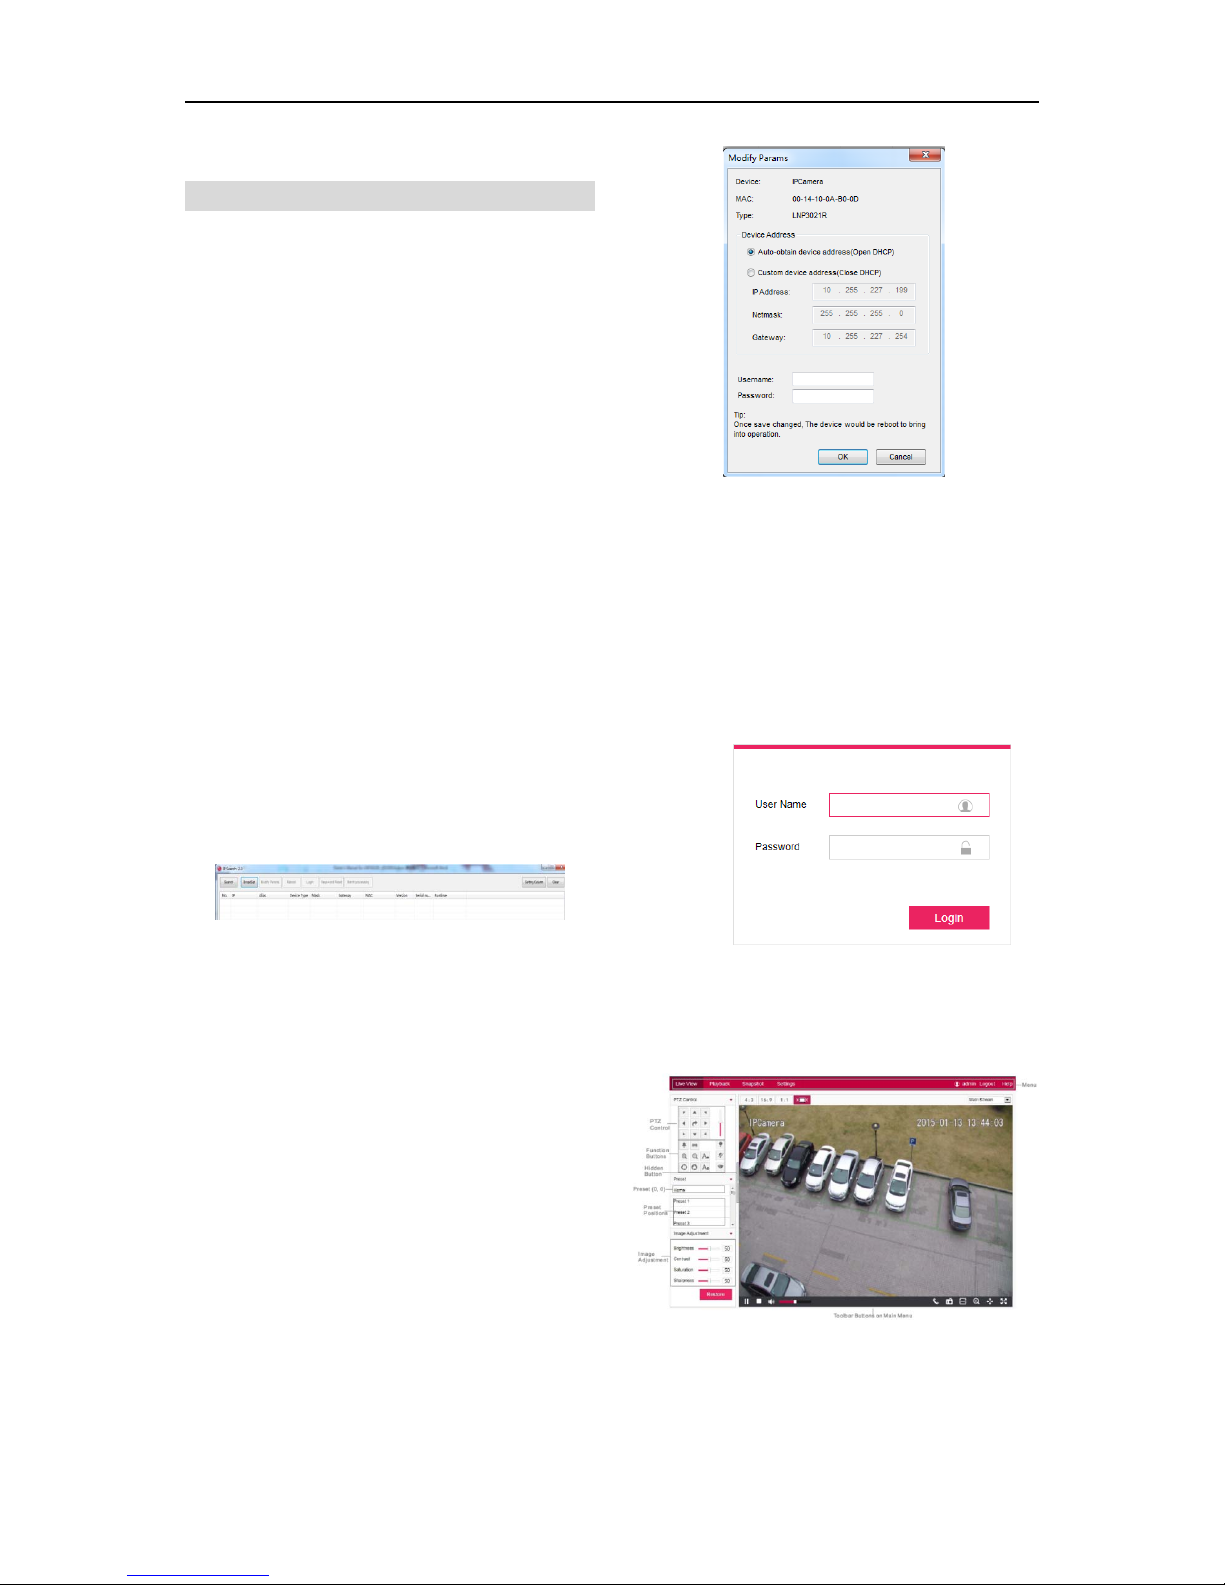
2.2.1 Modify Parameter
When camera detects DHCP server in the network,
camera will enable DHCP function by default, and
obtain an IP address assigned by the DHCP server.
Otherwise, camera applies static IP address:
198.168.0.16.
Operation Steps:
1) Get LG IP Search from the attached CD.
Picture 2-1 LG IP Search
NOTE:
Camera name is subject to the search result. LG
IP Search is green software free from
installation.
2) Run LG IP Search: it will search devices in LAN
automatically and display the list as shown in
Picture 2-1.
3) Select a camera to be configured, click “Modify
Params” or right click the mouse. Interface is
shown in Picture 2-2.
Picture 2-2 Modify Parameter
2.2.2 Login Web Client
1) After modification, the device will reboot
automatically. Please wait for 1 minute before the
camera can be searched again. Then select this
device again and click “Login” or double click
device name to enter Web Client. Interface is
shown in Picture 2-3.
Picture 2-3 Web Client Login
2) Enter user name and password: both are “admin”
as default.
3) Interface after login is shown in Picture 2-4.
Picture 2-4 Web Client
Network IR PTZ Camera Owner’s Manual
3
NOTE:
If more than 2 Clients connect to 1 camera at the
same time, Live stream may not be shown and
“Beyond Capacity” message is alerted. In this
case, Select the UDP at Settings>Local
Setting>Protocol or reduce the resolution and Bit
Rate Upper Limit at Settings>Camera>Video.
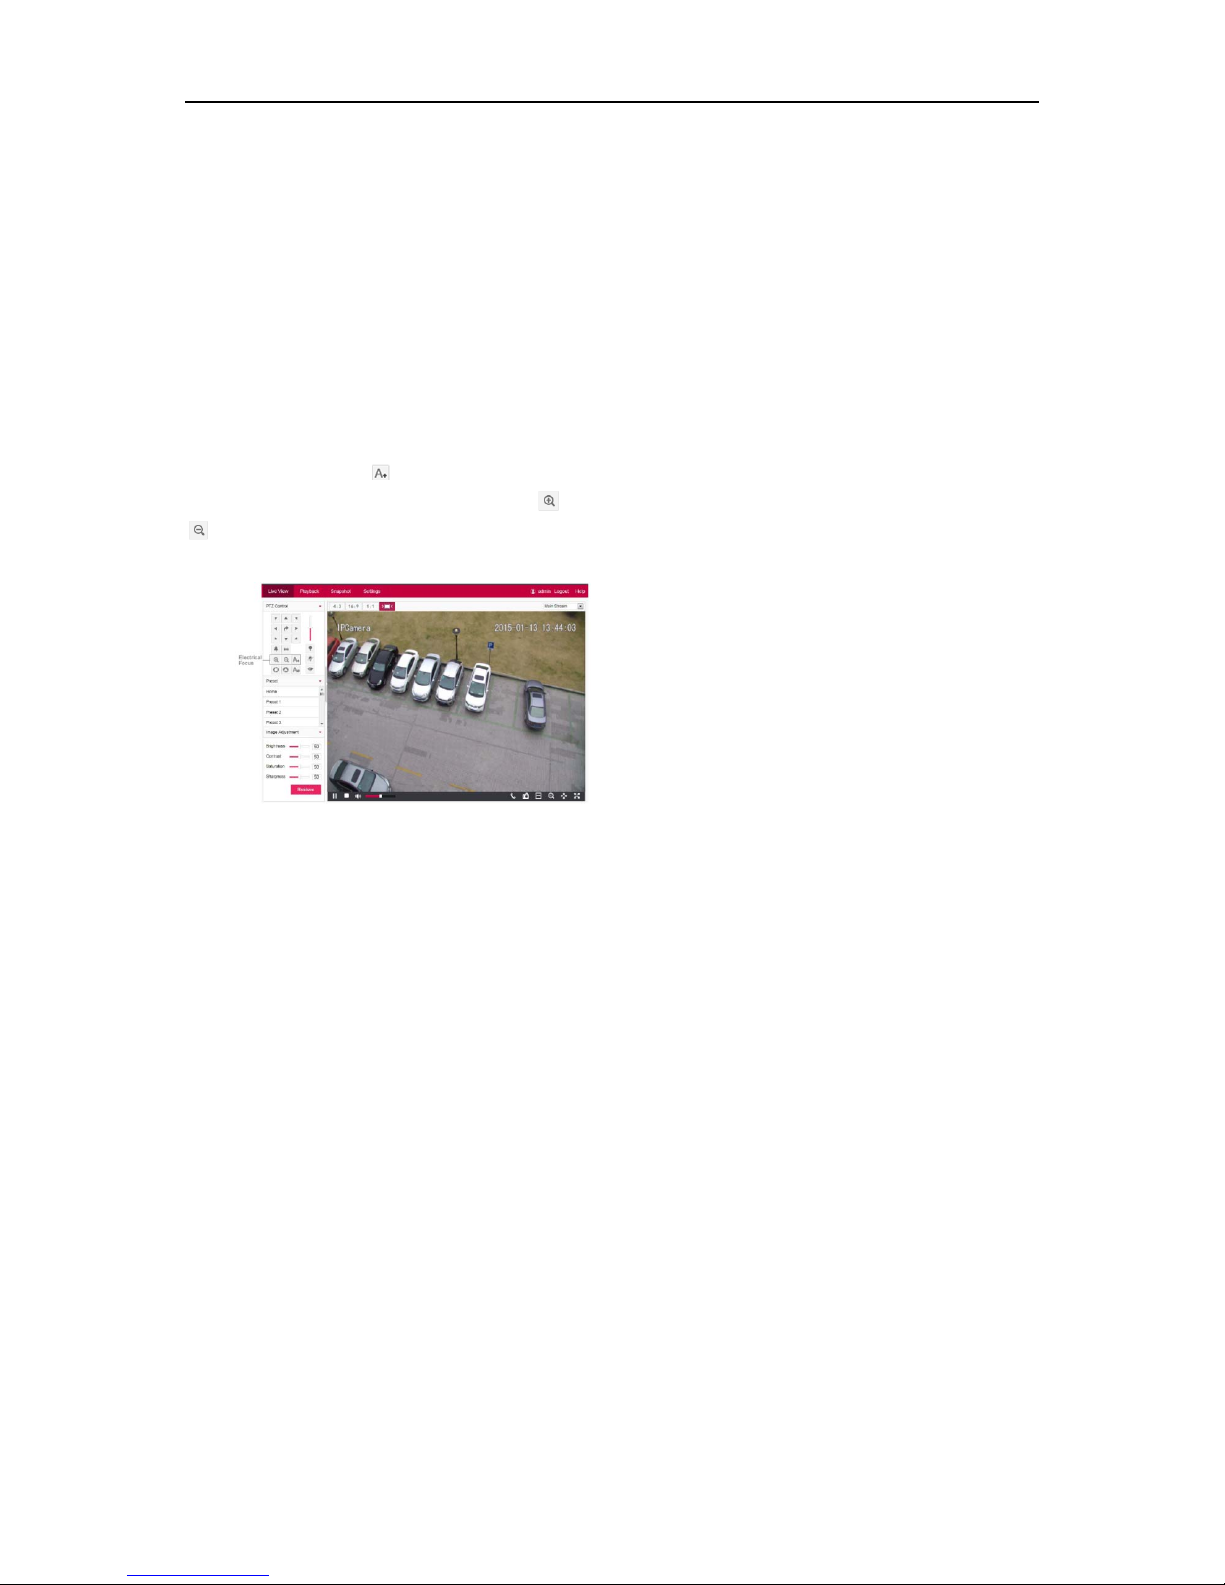
2.2.3 Focus
It is the process of imaging the target object clearly.
Please focus according to the lens type of camera:
Electrical Focus: Click
in function buttons area of
the Web Client, as the picture shows. Or click
or
for near or far focus. View live video on Web
Client and adjust focus till the image is clear.
Picture 2-5 Electrical Focus
Network IR PTZ Camera Owner’s Manual
4
3. Product Functions
By Web Client, user can not only view live video, but
also perform local snapshot and recording, and set
alarm linkage.
NOTE:
Some functions not supported by this model at
Web Client program are disabled. Functions
marked with “*” are supported by some models.
3.1 Live View
The default interface after user login is live video view,
or user can click Live View to enter the interface.
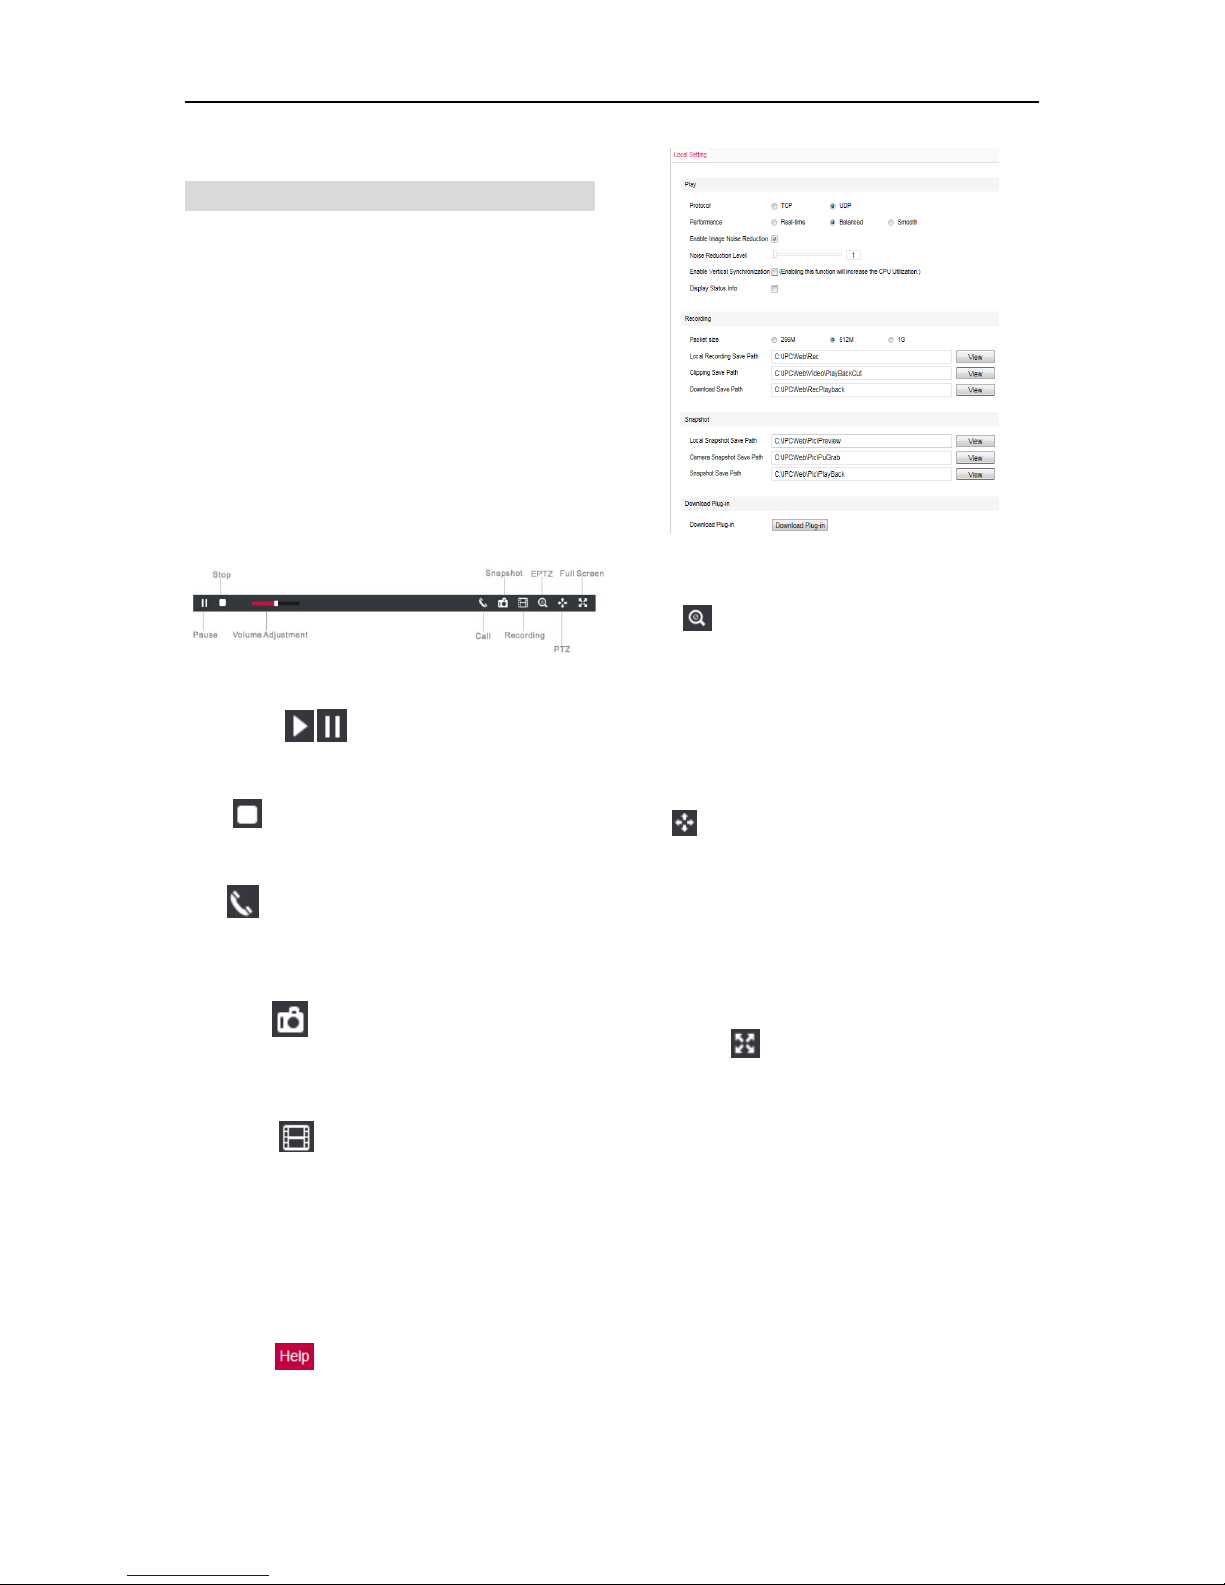
3.1.1 Toolbar Buttons
Picture 3-1 Toolbar Buttons
Play/Pause
/
Click this button to play or pause.
Stop
Click this button to stop live view.
Call
Click this button to call camera, and click again to stop
calling.
Snapshot
Click this button and client will capture an image and
save it in local PC.
Recording
Click this button to start recording and click again to
stop recording. Recording is saved on local PC.
NOTE:
User can set or modify save path of recording
and snapshot in Settings>Local Setting. For
other save path setting, please refer to the help
file in
.
Picture 3-2 Snapshot and Recording
EPTZ
Click this button to enable the EPTZ function. Left
click and drag toward lower right to draw an area.
Image of the selected area will be zoomed in and
cover the whole screen. Left click and drag toward
upper left to draw an area, then image will be zoomed
out.
PTZ
Click the button to zoom. Left click and drag toward
lower right to draw an area. Image of the selected
area will be zoomed in and cover the whole screen.
Left click and drag toward upper left to draw an area,
then the image will be zoomed out. Double click a
point in the image and the point will be centered.
Full Screen
Click this button to display full screen. Double click or
press Esc to exit.
3.1.2 Image Adjustment
3.1.2.1 Brightness
Due to low light situation, the image will look
completely or partially dark and hard to recognize.
Web Client provides the following functions to
increase image brightness and ensure surveillance
quality.
 Loading...