

Page 1

OWNER’S MANUAL
MODEL: LND71ISSD
LND71PESD
LND71PECD
LND71WESD
LND71WECD
LND71ISCD
LND71SWCD
Please read this instruction booklet carefully and completely
before connecting, operating or adjusting
this product.
CAUTION : This Map CD is only for map
upgrade, so Please don’t use this CD to
install Navi software by using “Install
Software” in console menu.
LND71 series_ENG
Page 2
2
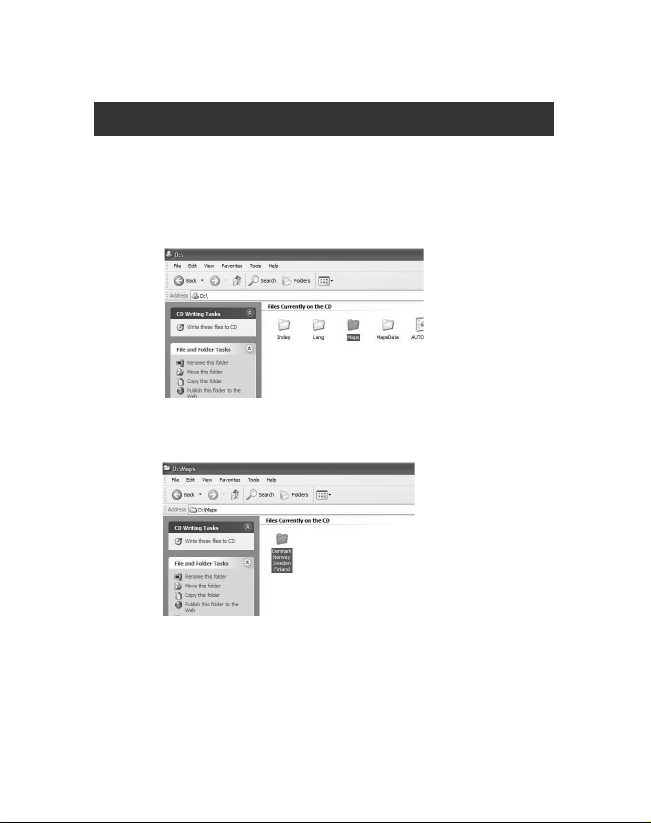
1. Insert a Map CD to a CD-ROM Drive.
2. Select a “Maps” folder in a CD file.
3. Select the map folder in the “Map” folder.
(Ex. : Demark Norway Sweden Finland)
This is available for LN700 Series and LN500 Series.
Page 3
3
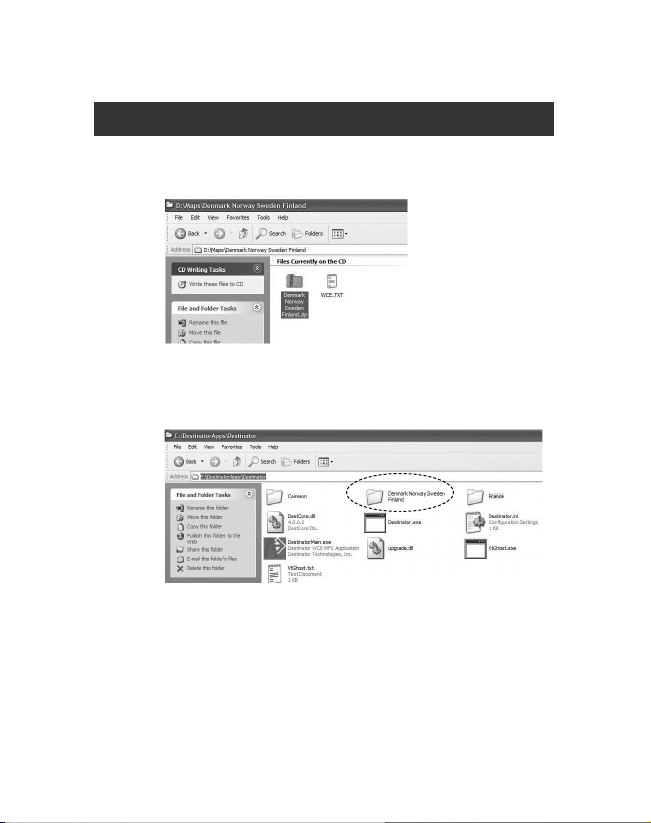
4. Copy the same name of Zip file in the map folder at
PC.
5. Unzip the folder first.
6. Copy the unzipped folder at the following location of
SD card.
SD : DestinatorApps\Destinator
Page 4

Note :
In order to change the same map that is currently using,
delete the map you are using first.
Copy the Map from the CD at the SD card if you want to
add the new map.
“Maps” folder is at the number 1, 2 and 3 CD if the CD
is consisted in 3 CDs.
For your reference, contents of folder is as following.
4
Page 5

5
Installing the Console
1.
Insert the Navigation Disc into the PC's CD-ROM
drive. The Navigation Console Installation Wizard
prompts you to select the language used for the
installation process. When you have selected a language, click OK.
2.
Please read the Welcome message and click Next.
3.
From the Select Directory screen, either accept the
recommended default directory or browse to a
different directory to install the Navigation Console.
Click Next.
4.
From the Language screen, select the default
anguage. Click Next.
5.
The Installation Confirmation screen displays your
installation choices. If you are ready to install, click
Next. The Installation Status box displays the
progress of the installation process.
by clicking LGE>Destinator Console from the
Windows Programs menu.
This is available for LN700 Series and LN500 Series.
Page 6

6
6.
If you want to change the language selection or the
directory location before installing, click Back, make
your changes, and return to the Installation
Confirmation screen, and click Next.
7.
When the installation is complete, click the Finish
button to close the wizard. You can open the console by clicking LGE>Destinator Console from the
Windows Programs menu.
Transferring a Map onto the SD Memory Card
1.
Connect the Card Reader to your PC using a USB
cable.
2.
Insert your SD card into the Card Reader.
3.
Select the required maps (be aware of the size of
your memory card). Click Change (bottom right) and
select Removable Disk.
Page 7

4.
Click Install/Remove Maps on the toolbar.
5.
Remove the SD card from the Card Reader and
insert the SD card into the navigation device.
Note :
Although you can transfer a map directly to the SD card
by connecting the navigation device to the PC via a
USB cord, it is much faster to copy the map to the SD
card by using the Card Reader. Transferring a map
directly to the device should only be considered for
extremely small map files.
7
Page 8

P/NO : MFL37340852
 Loading...