How it Works
Log In / Sign Up
Buy Points
How it Works
FAQ
Contact Us
Questions and Suggestions
Users
LG
Loading...
L
LG-K350TR
LG-K371
2
LG-K410
LG-K420ds
LG-K428
2
LG-K430TR
2
LG-K450
LG-K500TR
LG-K520TR
lg-k540
LG-K550
LG-K8V
LG-KE820
LG-KG920
LG-KM570
LG-KS365
LG-KU9500
LG-L18VC
LG-L80
LG-LW690
LG-M150
LG-M153
LG-M200n
10
LG-M210
LG-M250
4
LG-M320G
2
LG-M322
LG-M700
2
LG-M700AN
LG-MD120
LG-MG230d
LG-MN240
2
LG-MN510
2
LG-MS210
2
LG-MS550
LG-MS690
4
LG-P505
4
LG-P509
5
LG-P520
6
LG-P655h
3
LG-P659
LG-P690f
3
LG-P698
14
LG-P713GO
LG-P715
15
LG-P720
9
LG-P768f
4
LG-P768n
2
LG-P769
3
LG-P880g
3
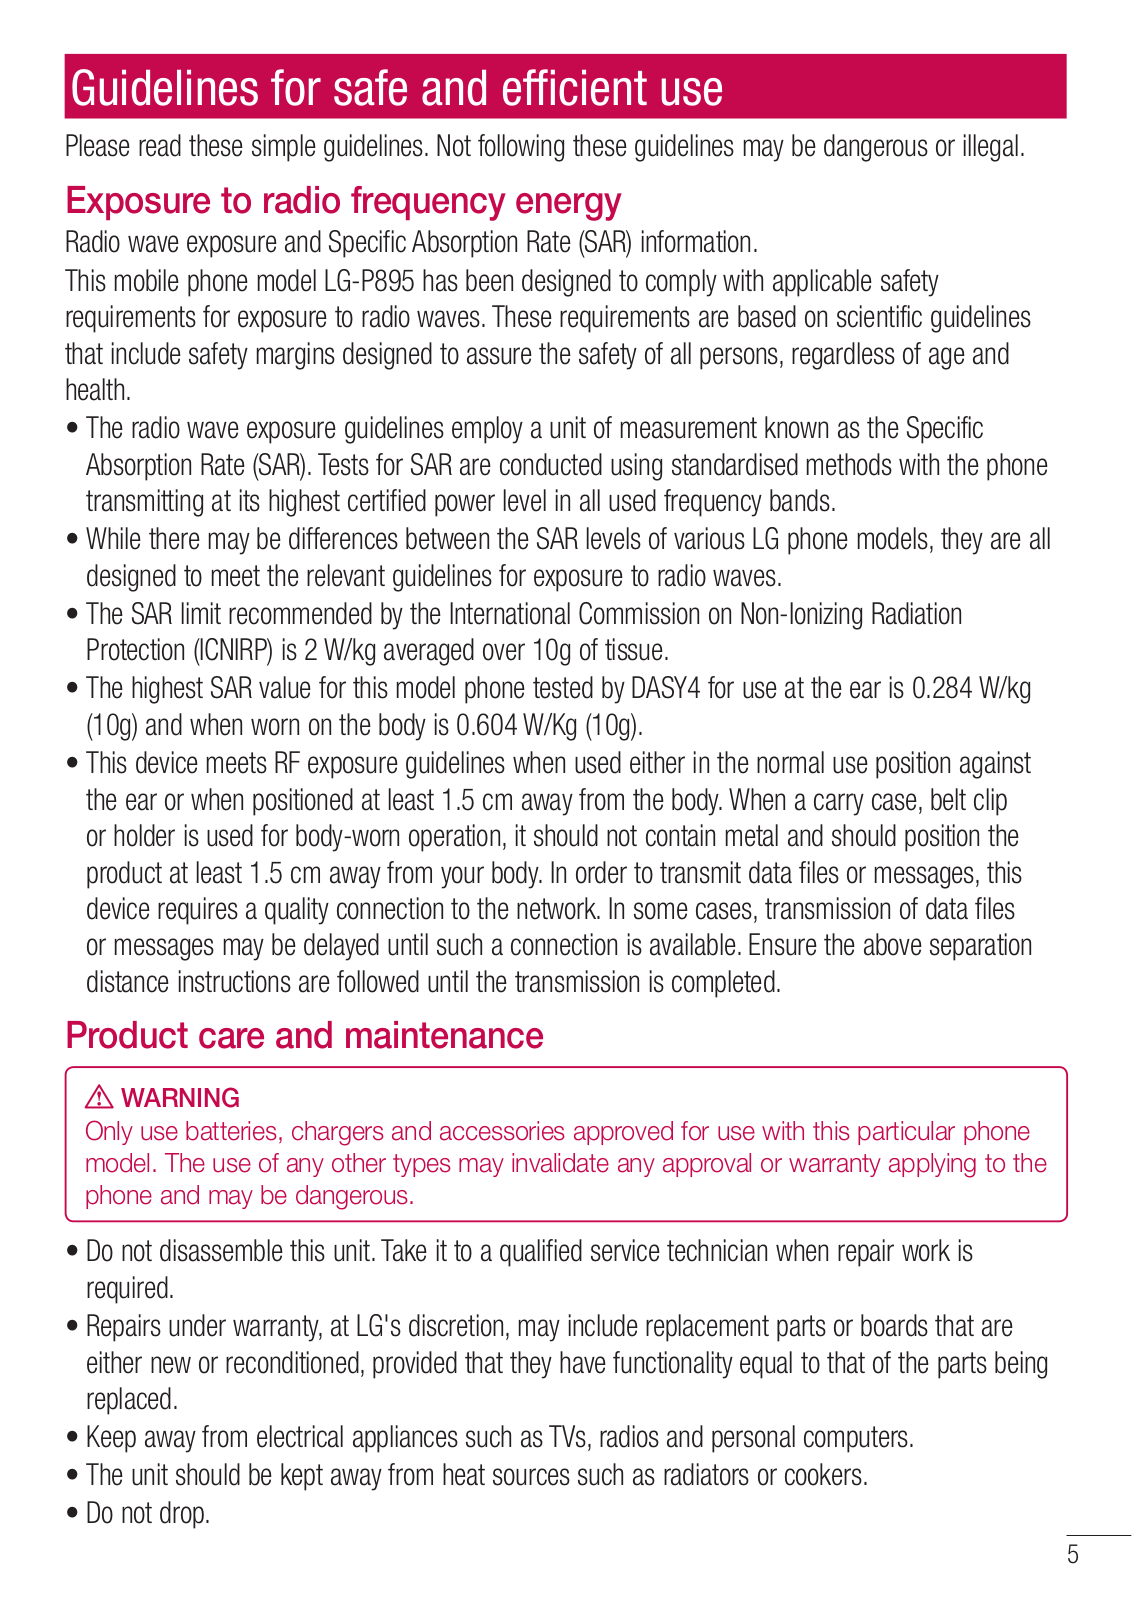
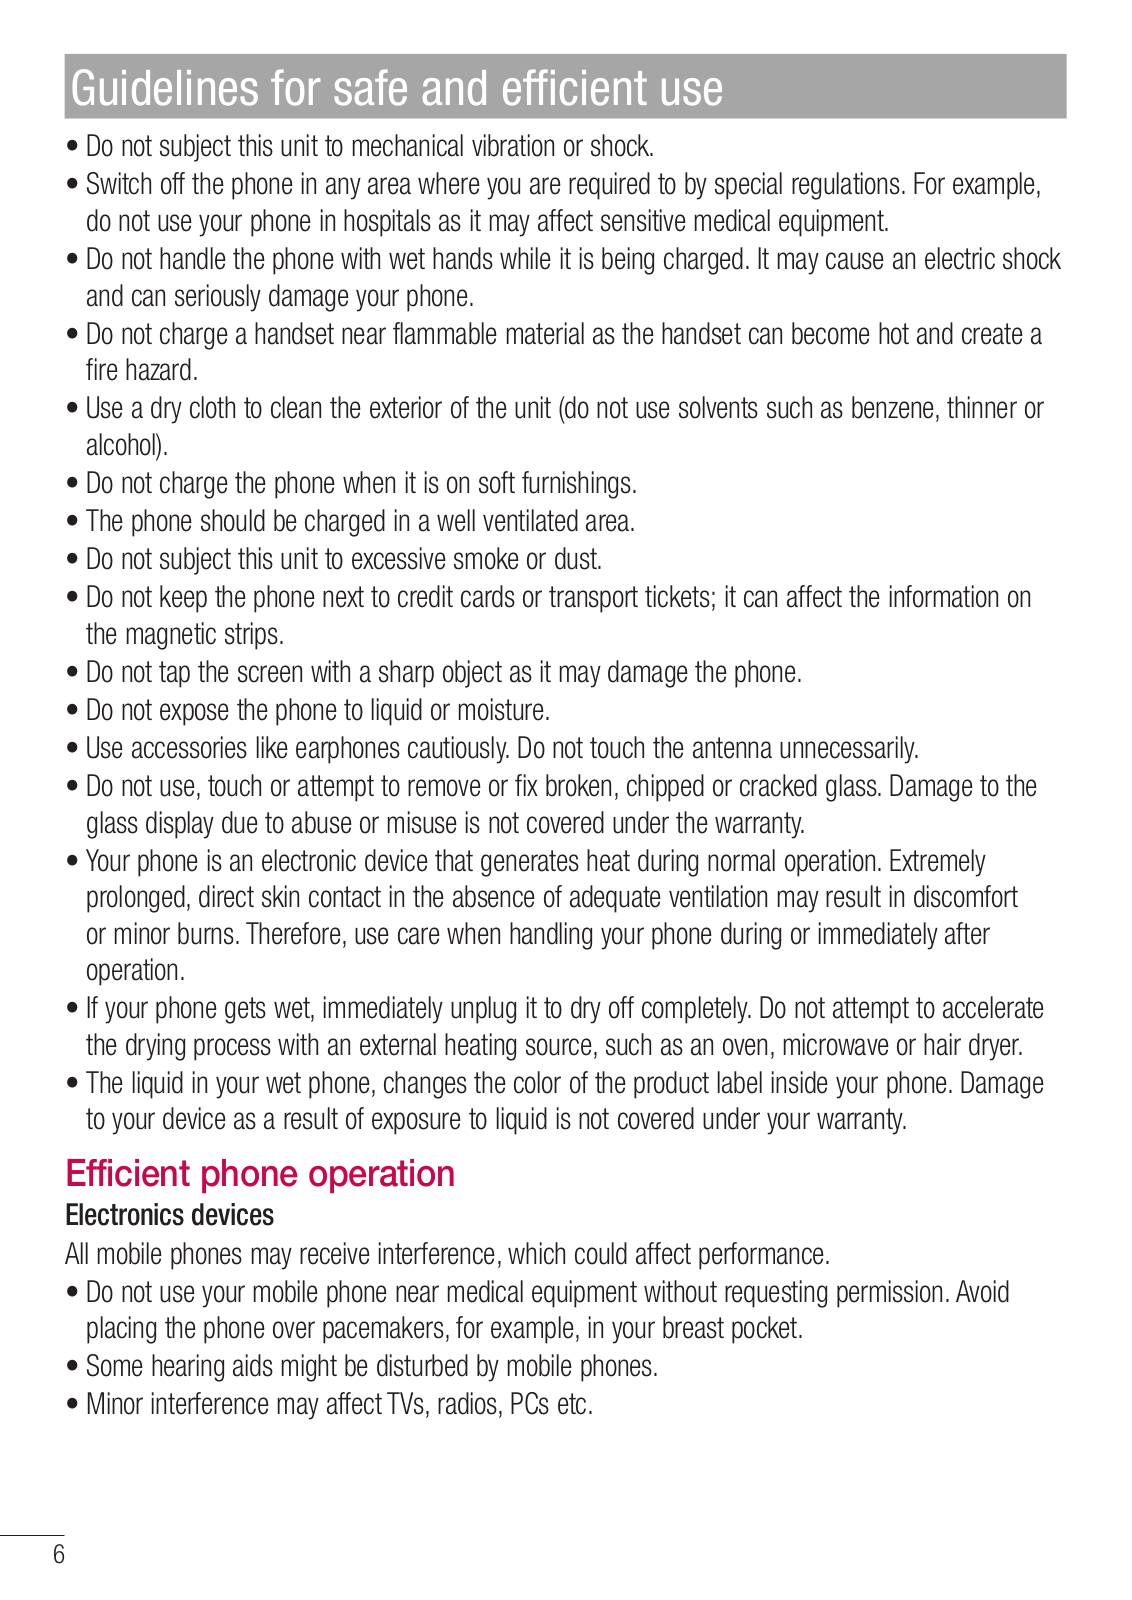
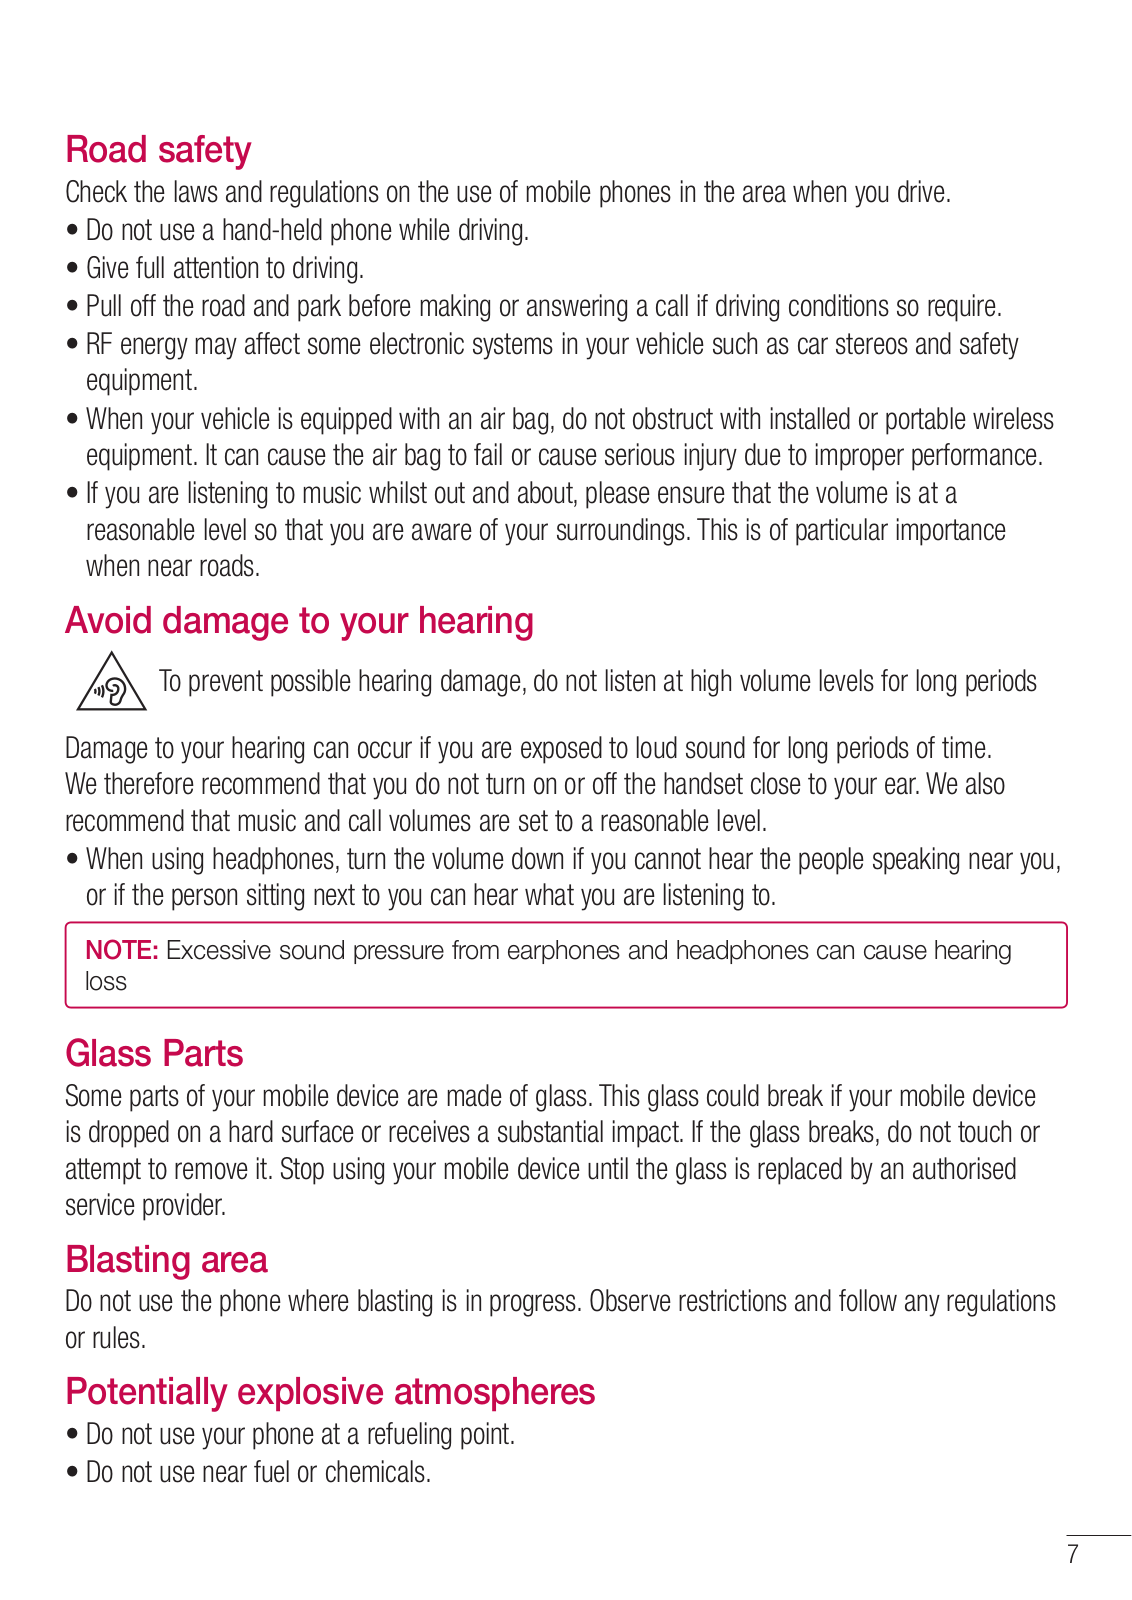
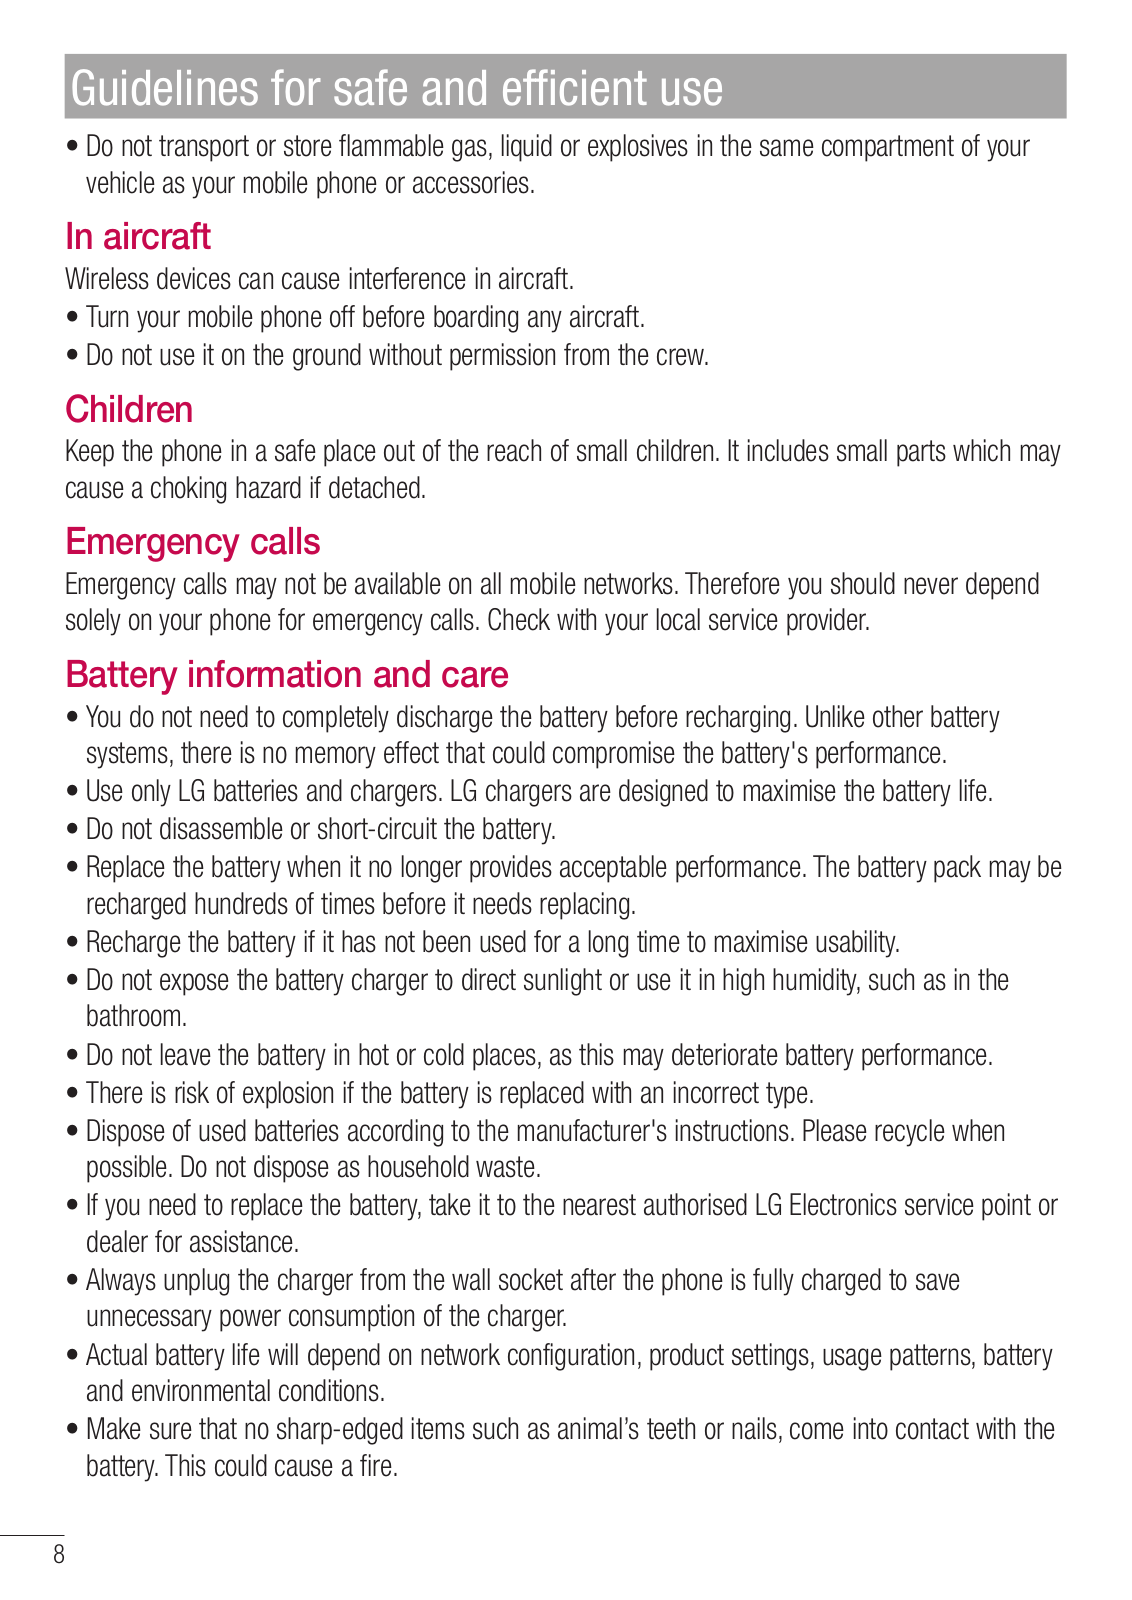
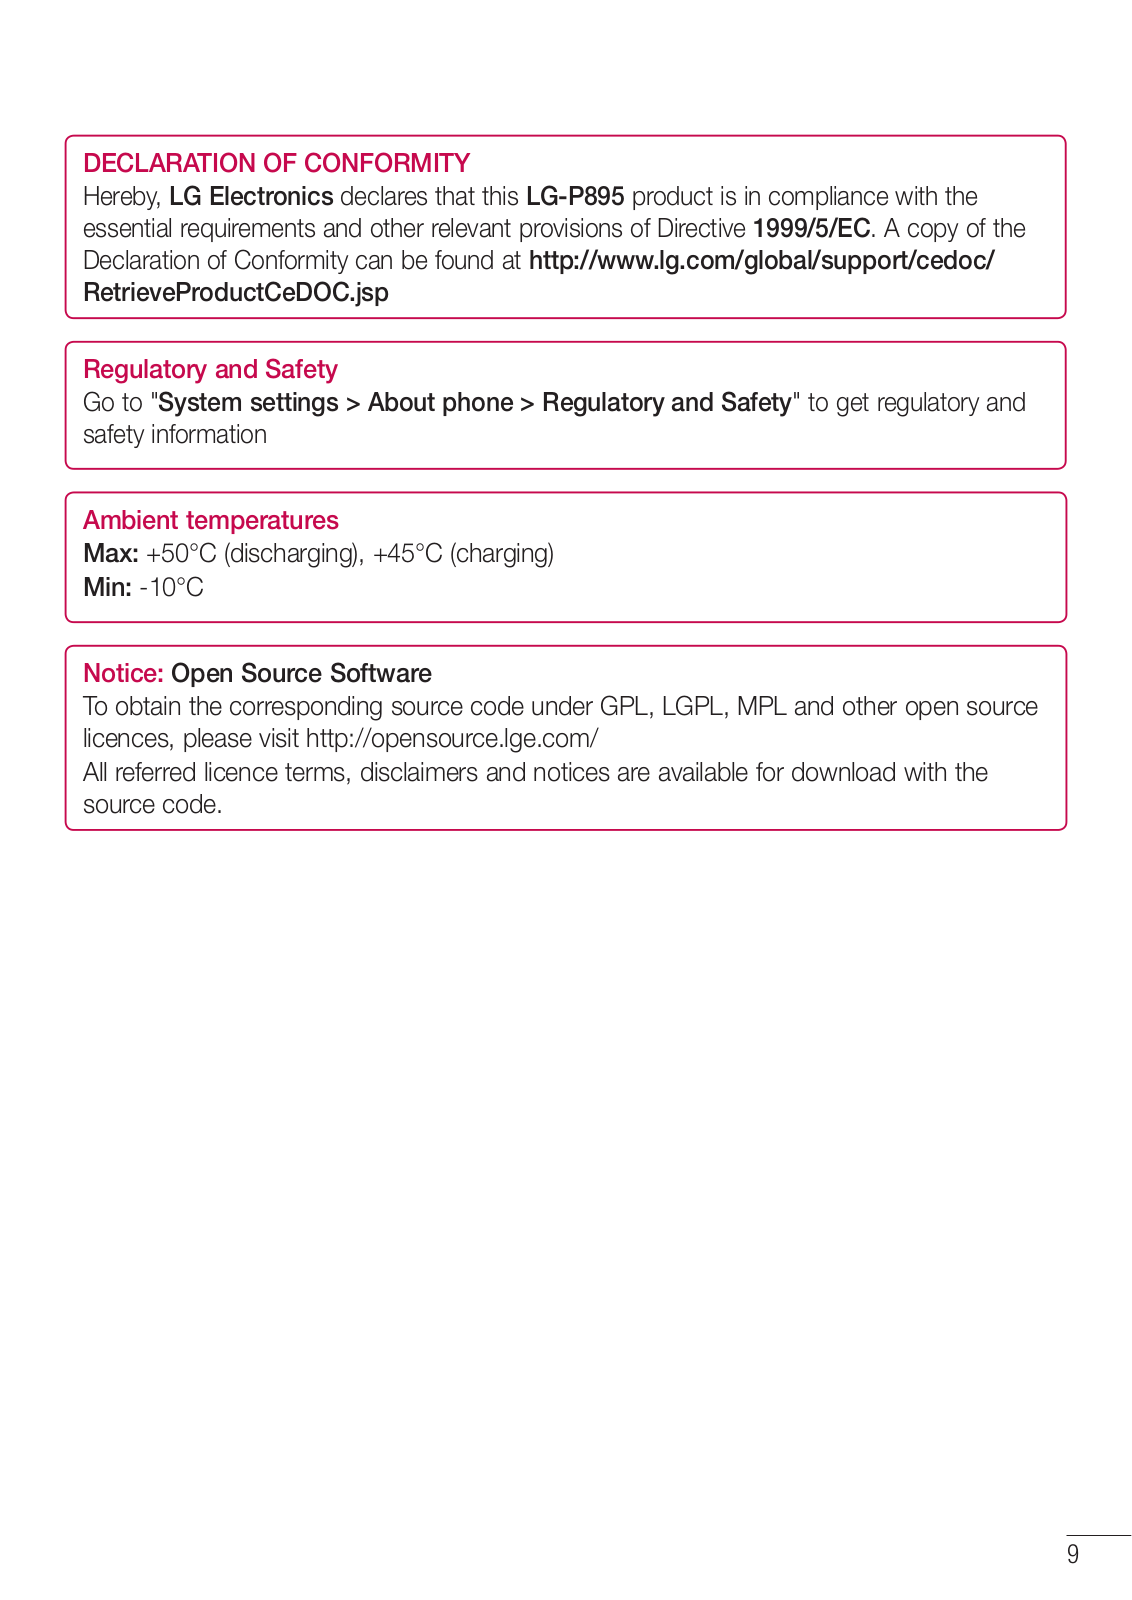
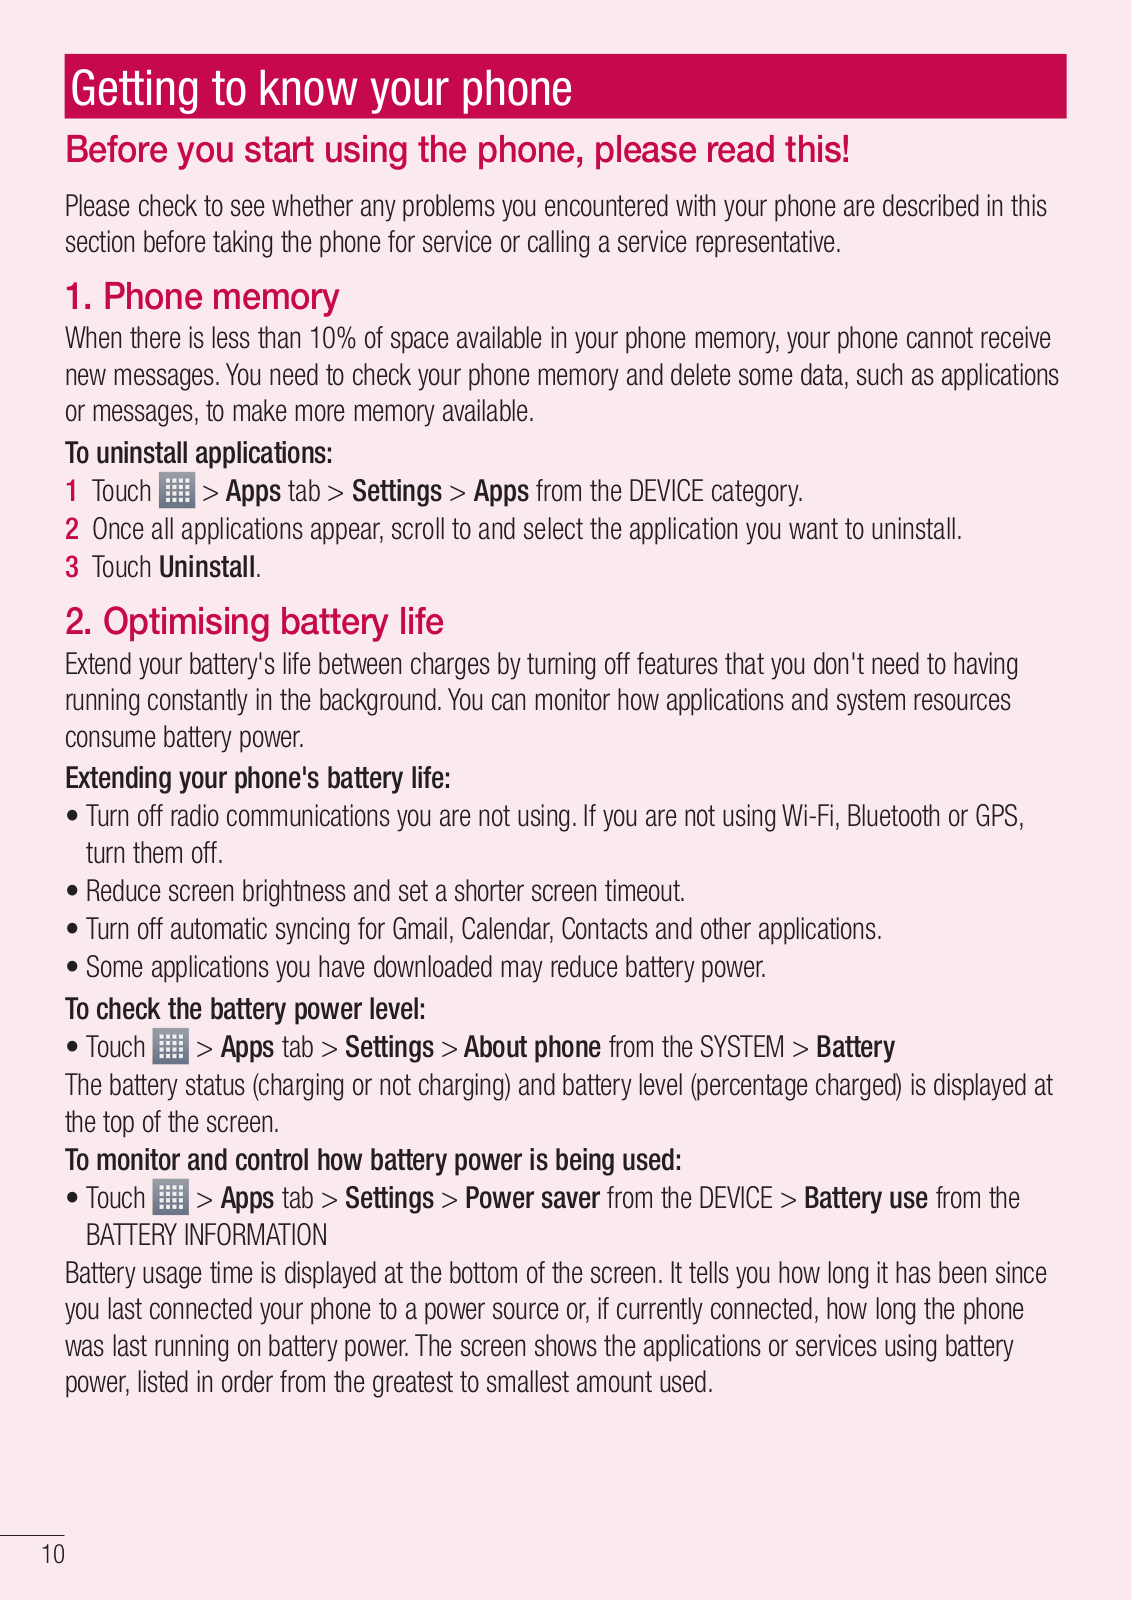
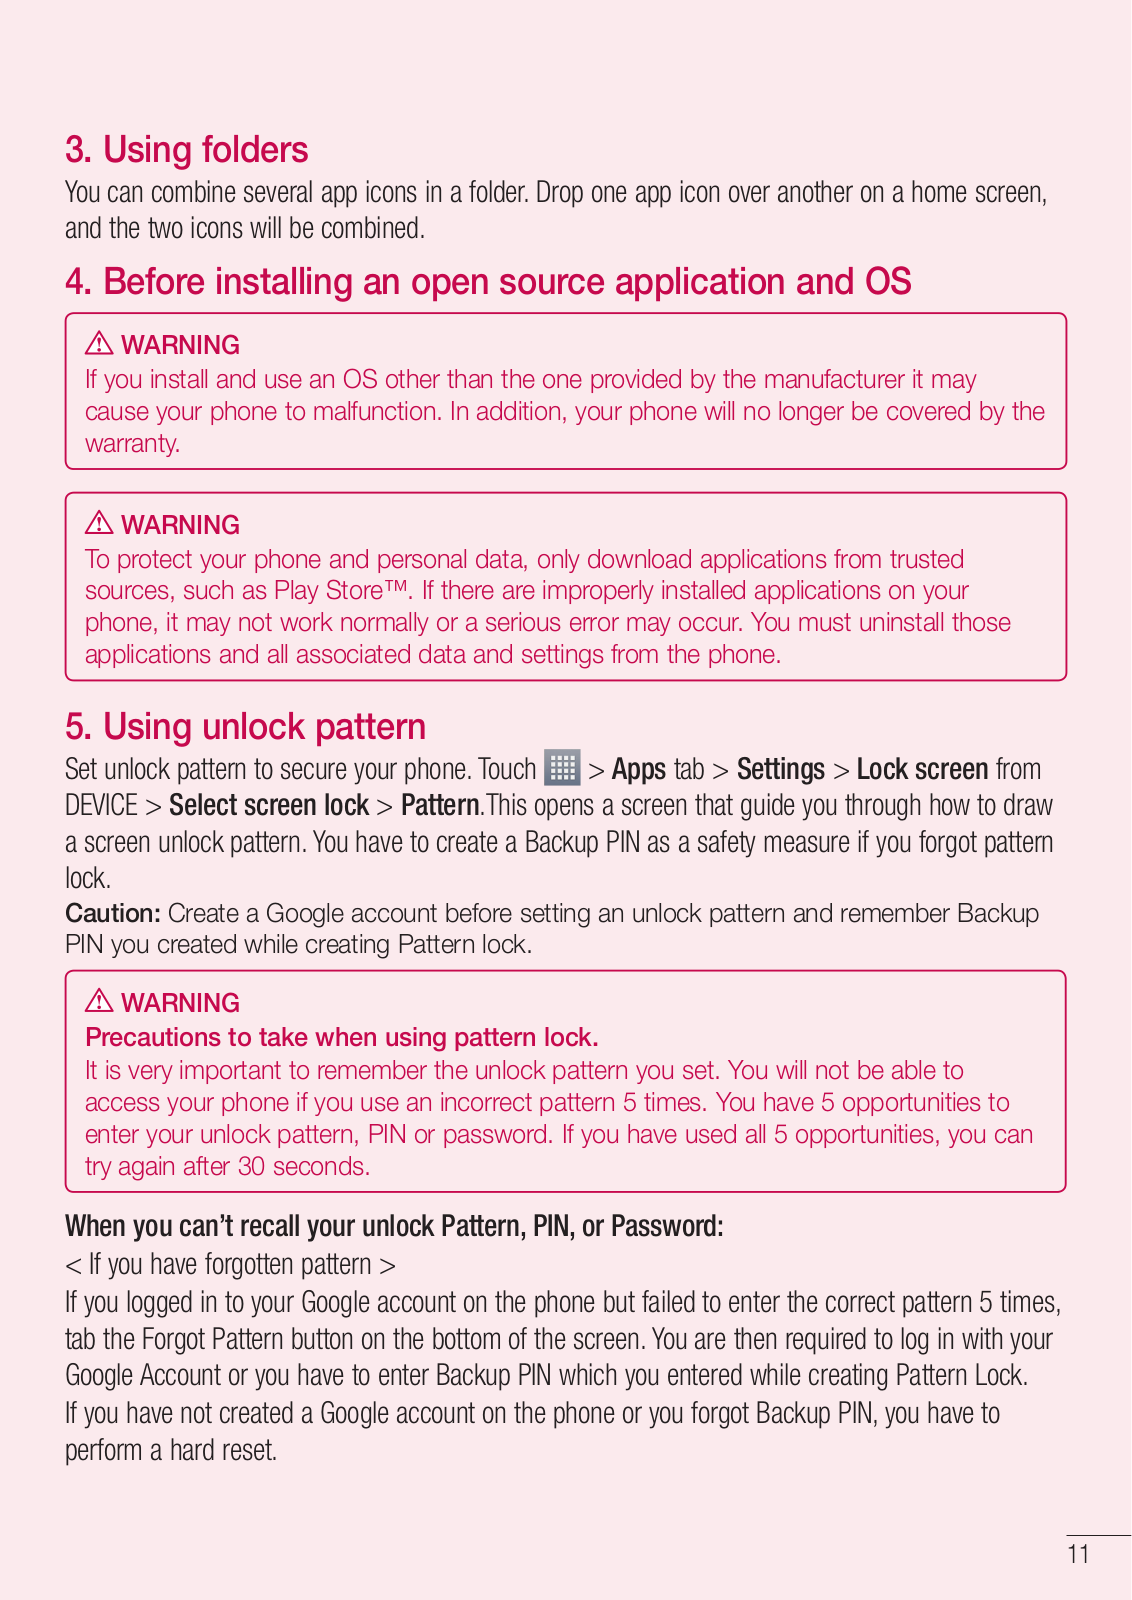
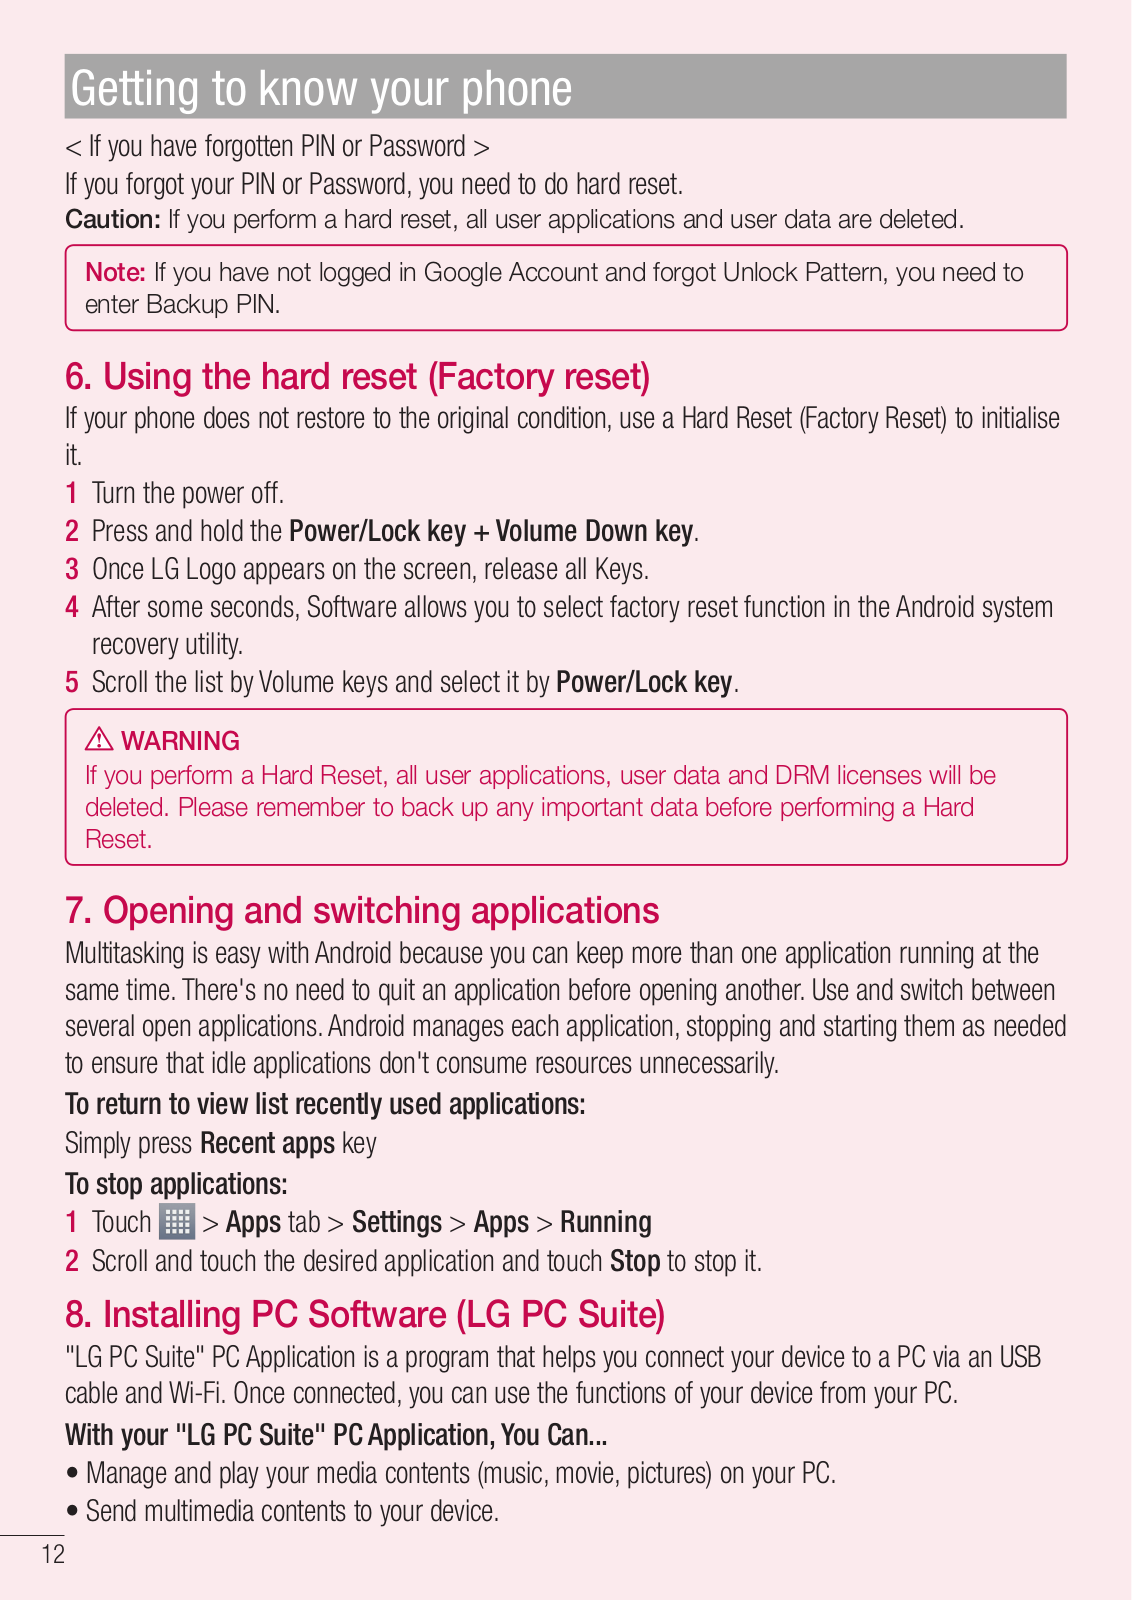
LG-P895
21
LG-P935
3
LG-P999
11
LG-P999DW
LG-R105
10
LG-R43
LG-R432
LG-R48
LG-R482
LG-R82DH
LG-RD2130
LG-RD2330
LG-RD2530
LG-RD2630
LG-RD7230
2
LG-RD8000
LG-RIBAILAGUA
LG-S300
LG-S310
20
LG-S367
4
LG-SD7130
LG-SP110
LG-SP110C
LG-SP200
LG-SU660
LG-SU950
LG-T300
41
LG-T300s
LG-T320
8
LG-T320e
2
LG-T320g
6
LG-T370
3
LG-T5100
LG-T515
9
LG-T580
10
LG-TD5130
LG-TM220
LG-TP260
LG-TP450
LG-UD90c
LG-UK495
LG-UK750
LG-UN220
LG-UN540
2
LG-UN610
LG-US110
2
LG-US215
LG-US375
LG-US550
LG-US610
Loading...
Loading...
Nothing found
LG-P895
Operating Instructions
134 pgs
13.89 Mb
0
Owner’s Manual
144 pgs
2.87 Mb
0
Owner’s Manual [ar]
428 pgs
7.62 Mb
0
Owner’s Manual [ar,en]
137 pgs
35.38 Mb
0
Owner’s Manual [el]
140 pgs
18.92 Mb
0
Owner’s Manual [en,fr]
206 pgs
36.46 Mb
0
Owner’s Manual [id]
197 pgs
38.13 Mb
0
Owner’s Manual [in]
162 pgs
3.12 Mb
0
Owner’s Manual [it]
72 pgs
9.85 Mb
0
Owner’s Manual [pl]
86 pgs
12.11 Mb
0
Owner’s Manual [th]
134 pgs
30.93 Mb
0
Owner’s Manual [tr]
140 pgs
32.48 Mb
0
Owner’s Manual [vi]
154 pgs
3.14 Mb
0
Owner’s Manual [zh]
64 pgs
16.74 Mb
0
Owner’s Manual [zh]
65 pgs
21.86 Mb
0
Service Manual
292 pgs
57.89 Mb
0
User Guide
196 pgs
37.46 Mb
0
User Guide
190 pgs
44.07 Mb
0
User Manual
176 pgs
33.44 Mb
0
User Manual
53 pgs
1.21 Mb
0
User Manual
162 pgs
3.51 Mb
0
Table of contents
Loading...
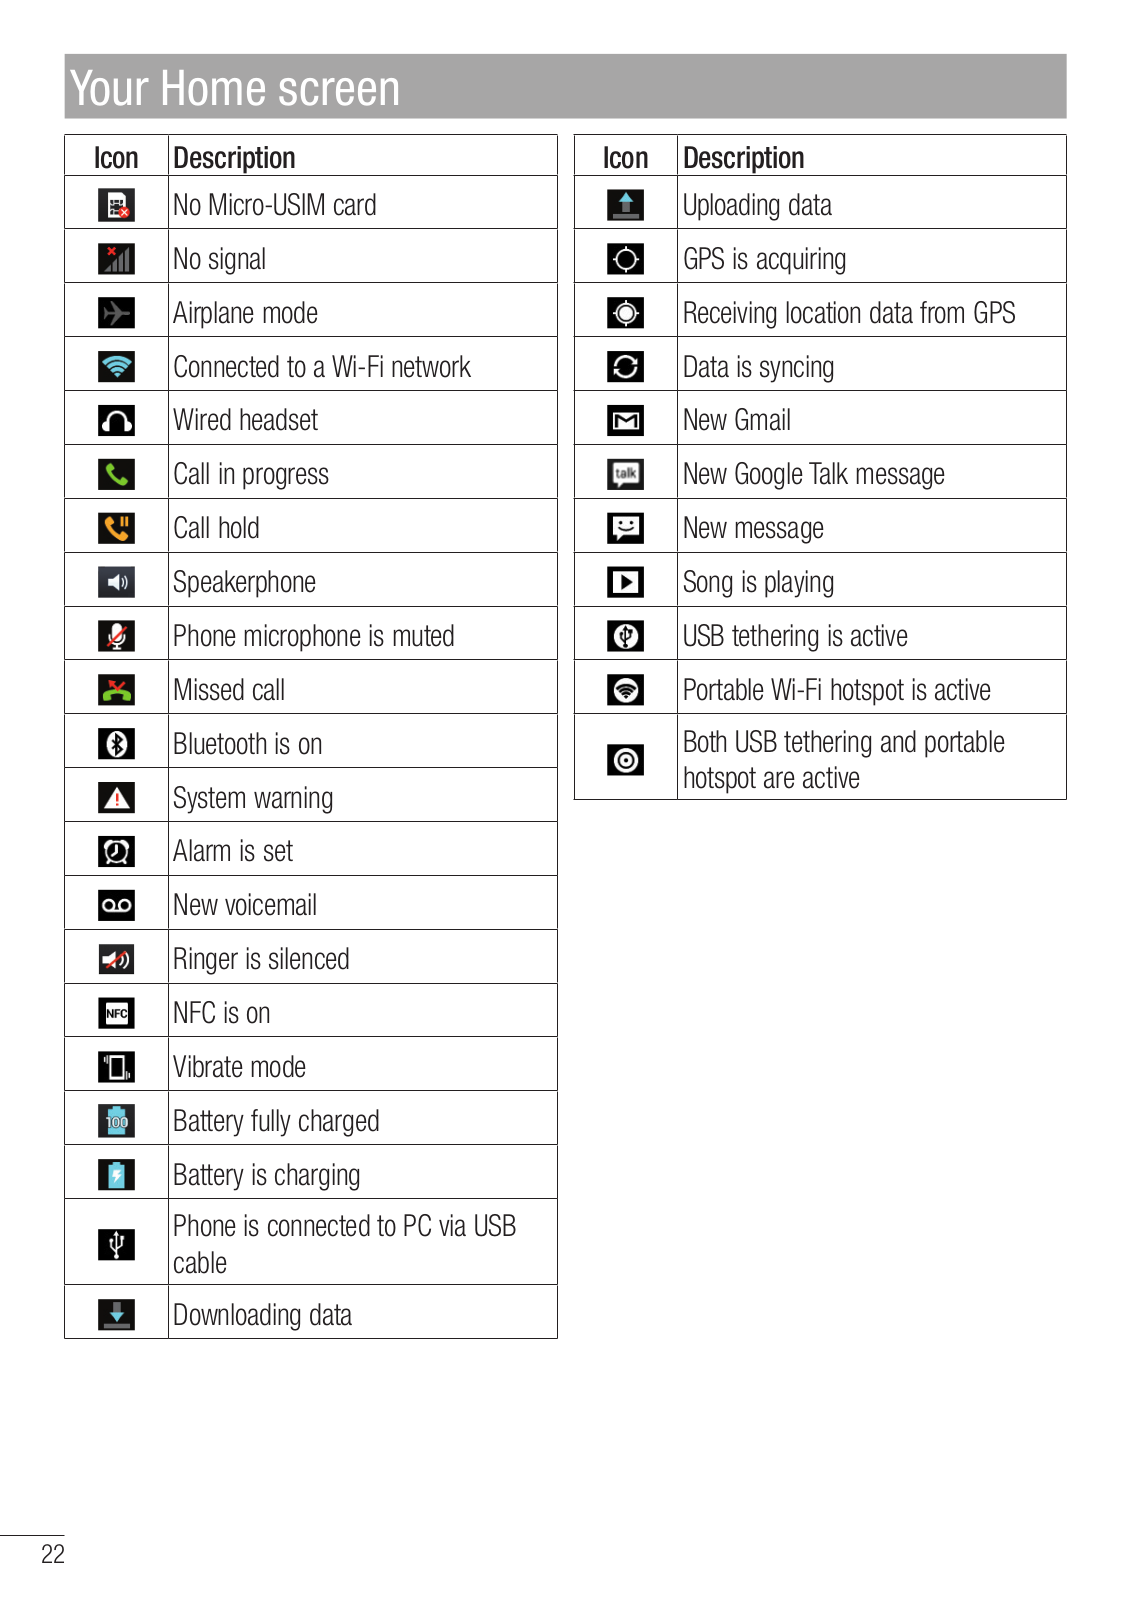
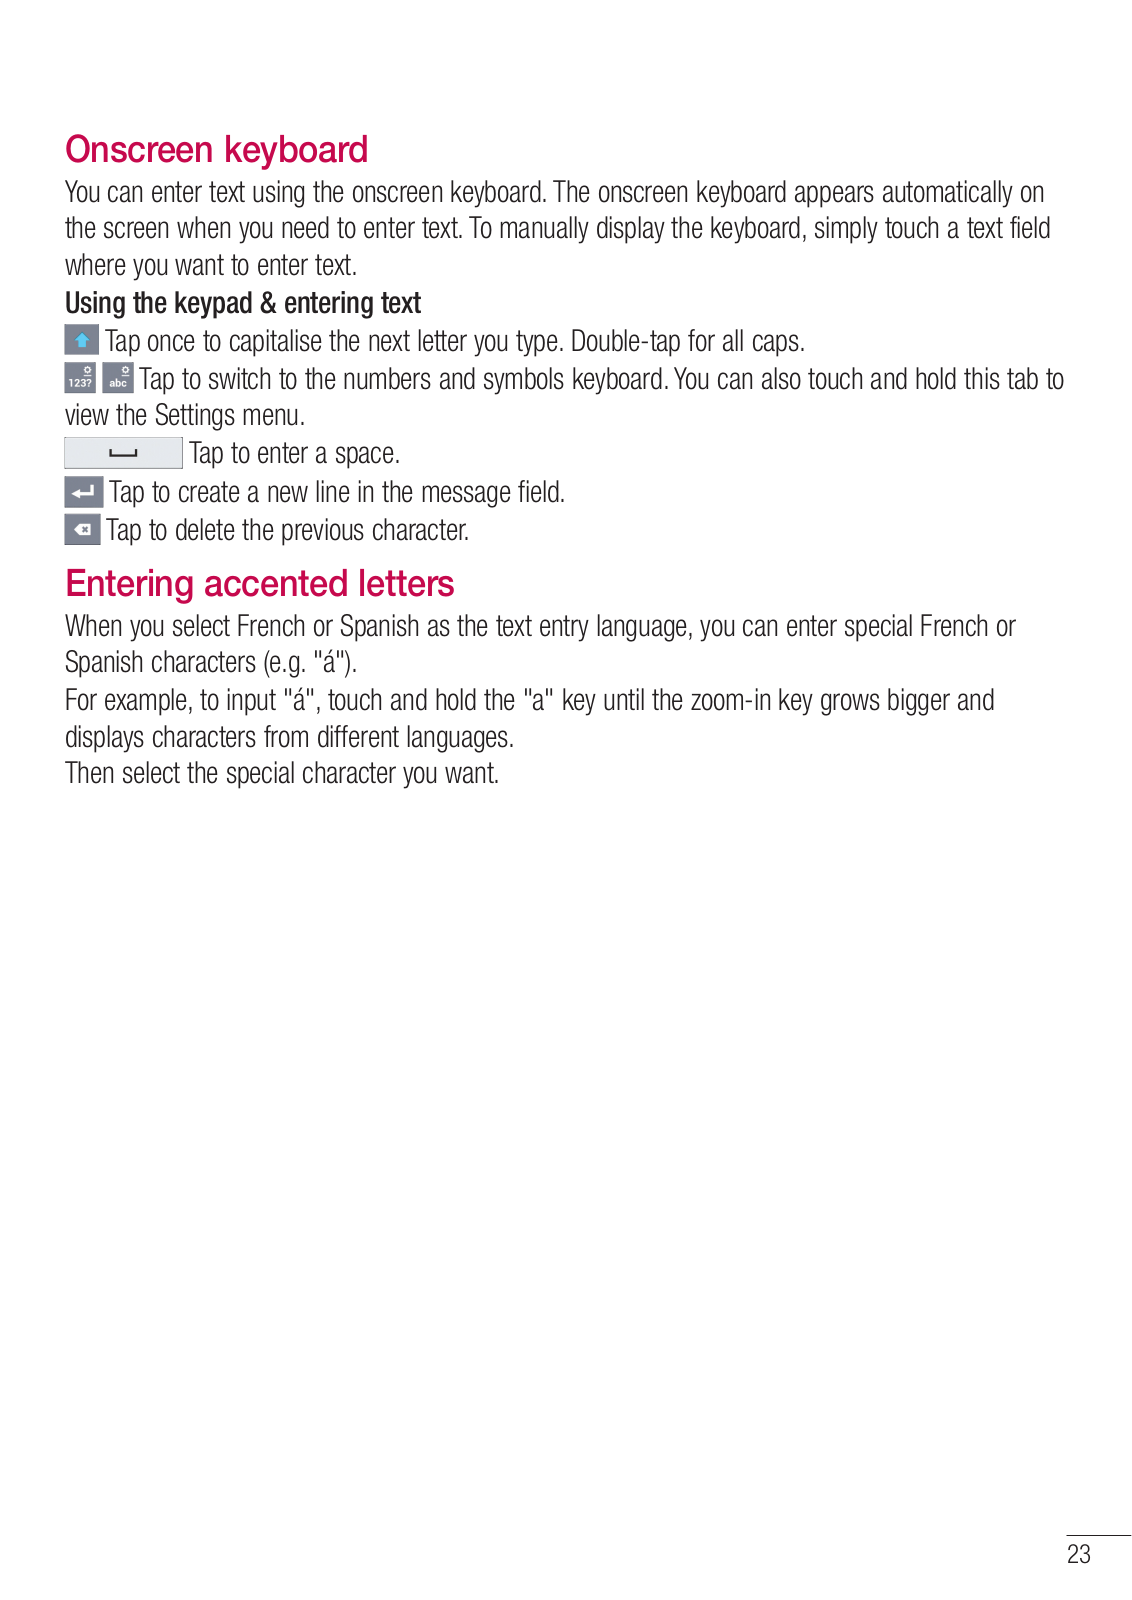
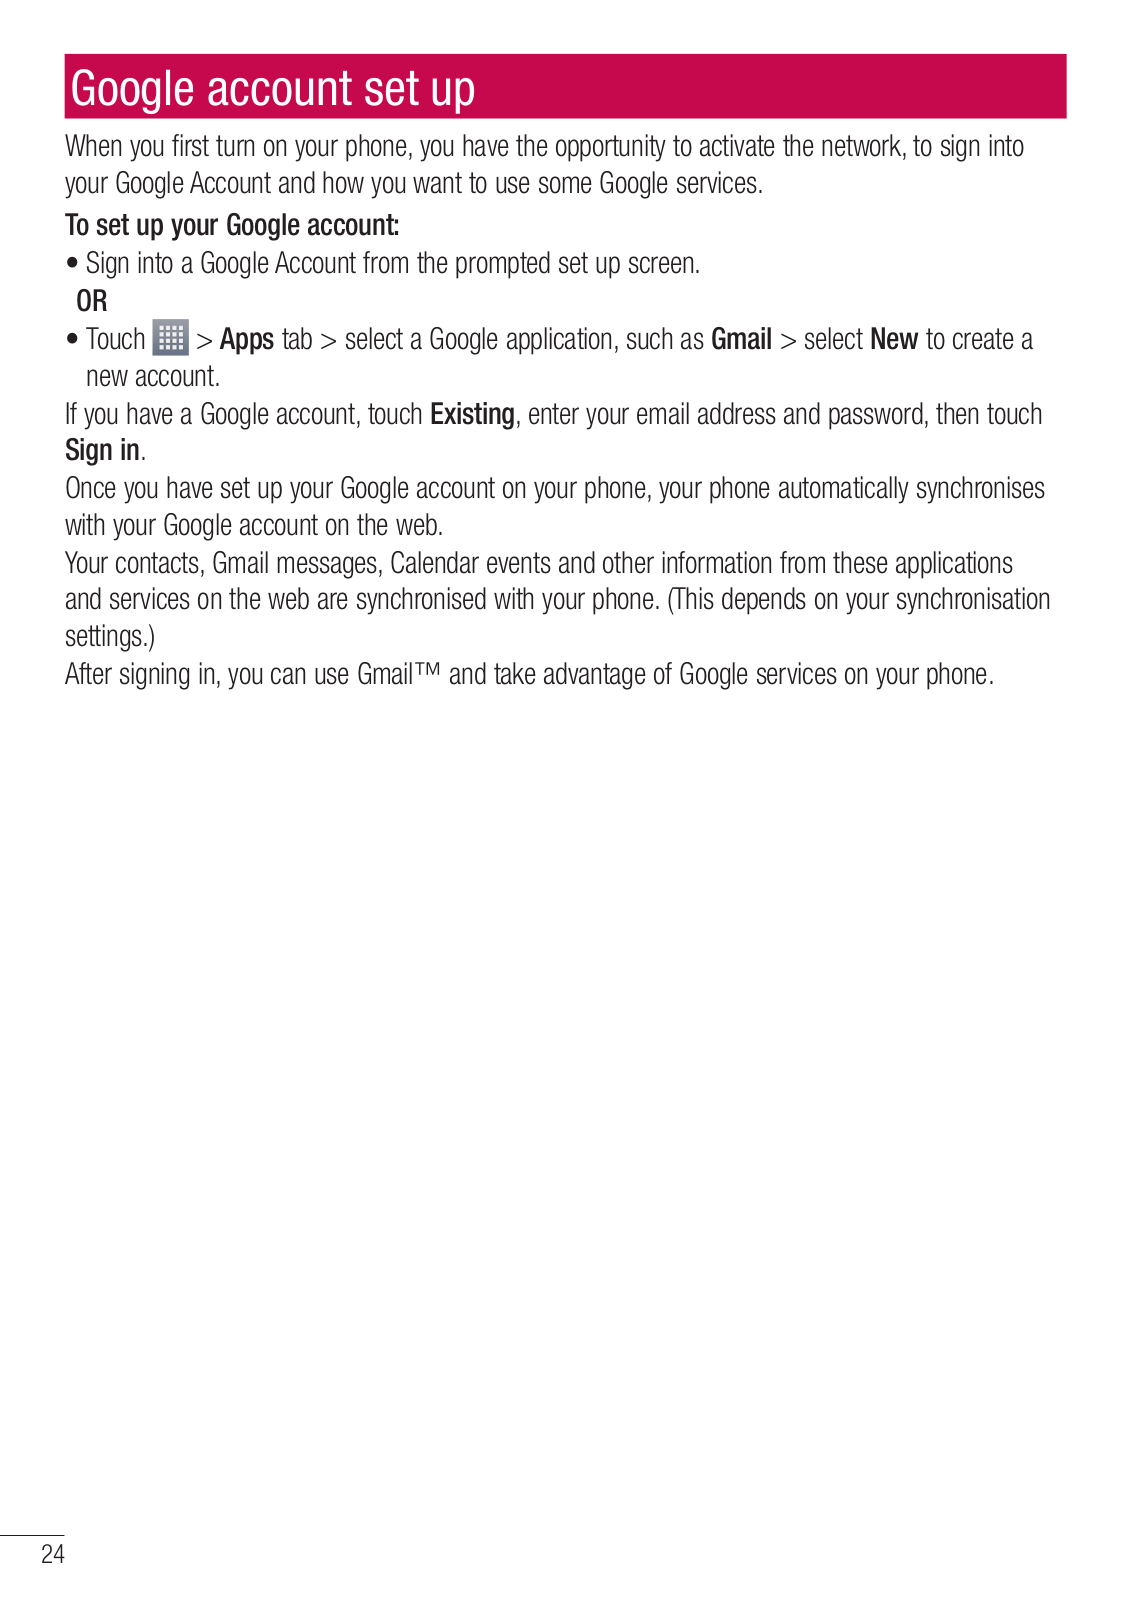
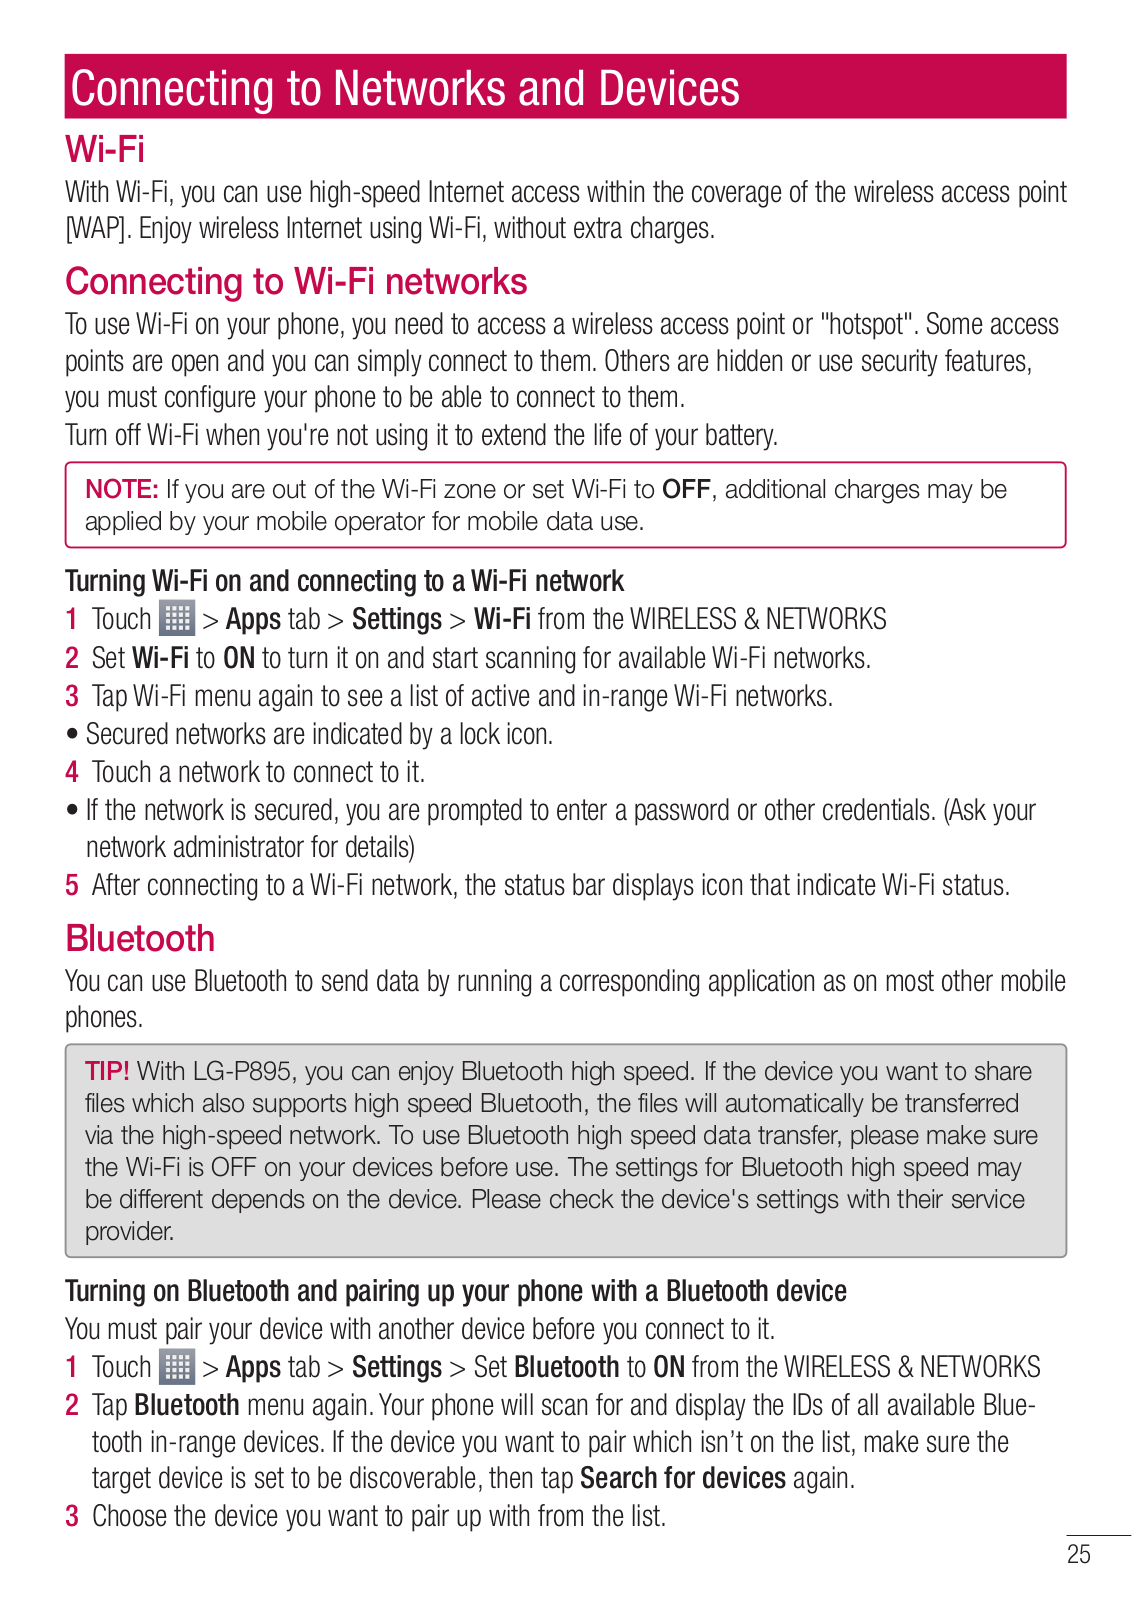
LG LGP895 Owner’s Manual [en,fr]
...
LG Owner’s Manual [en,fr]
Download
Specifications and Main Features
Frequently Asked Questions
User Manual
Download
Loading...
+
176
hidden pages
Unhide
You need points to download manuals.
1 point = 1 manual.
You can buy points or you can get point for every manual you upload.
Buy points
Upload your manuals