

LG LBN10551, LBN12551 User Manual
MFL67783564
Rev.02_021317
Copyright © 2015 - 2017 LG Electronics Inc. All Rights Reserved.
INSTALLATION
345
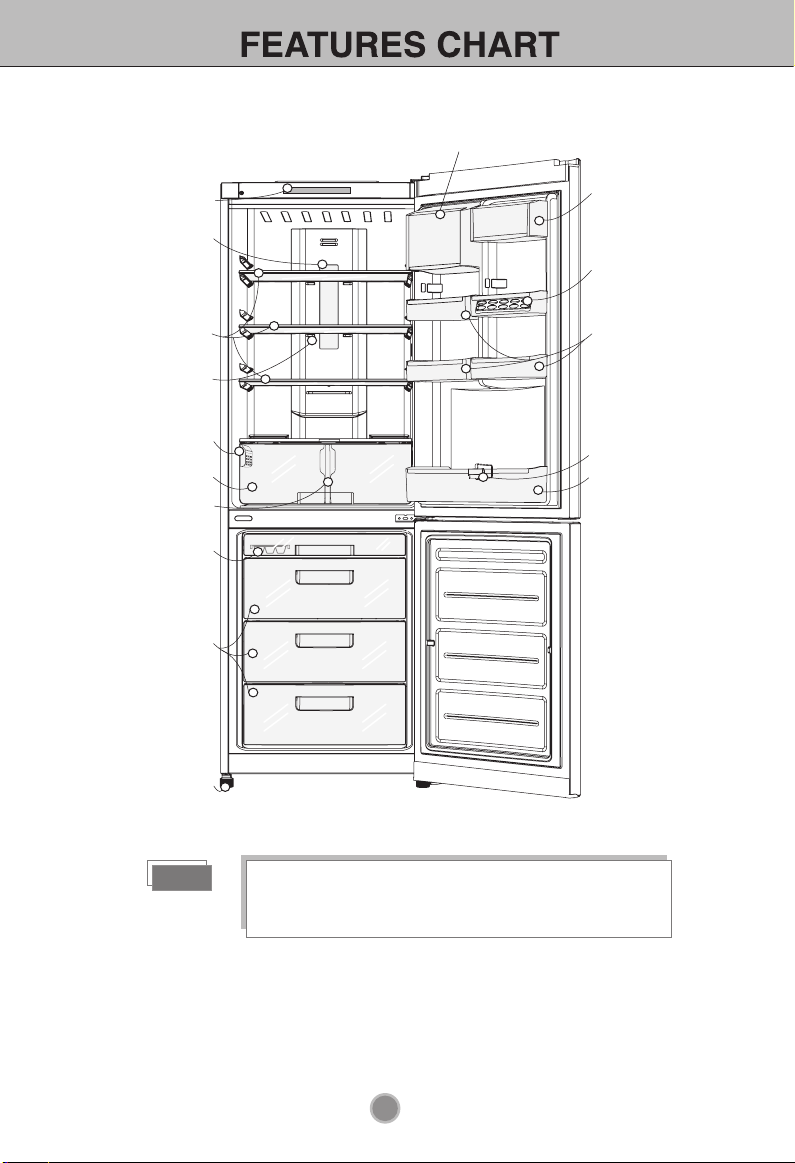
Universal section
(not in all models)
(not in all models)
Removable glass shelf
refrigeration system
Vitamin Plus system
(not in all models)
vegetables and fruits
Separator for foodstuffs
(not in all models)
freezing compartment
Display
LED lamp
Multi-flow
Drawer for
Ice tray
Drawers of
Section for dairy products
(not in all models)
Egg tray
Door baskets
Separator for bottles
(not in all models)
Door basket for 2L bottles
Height-adjustable foot
Note
If you find some parts missing from your unit, they
may be parts only used in other models.
6
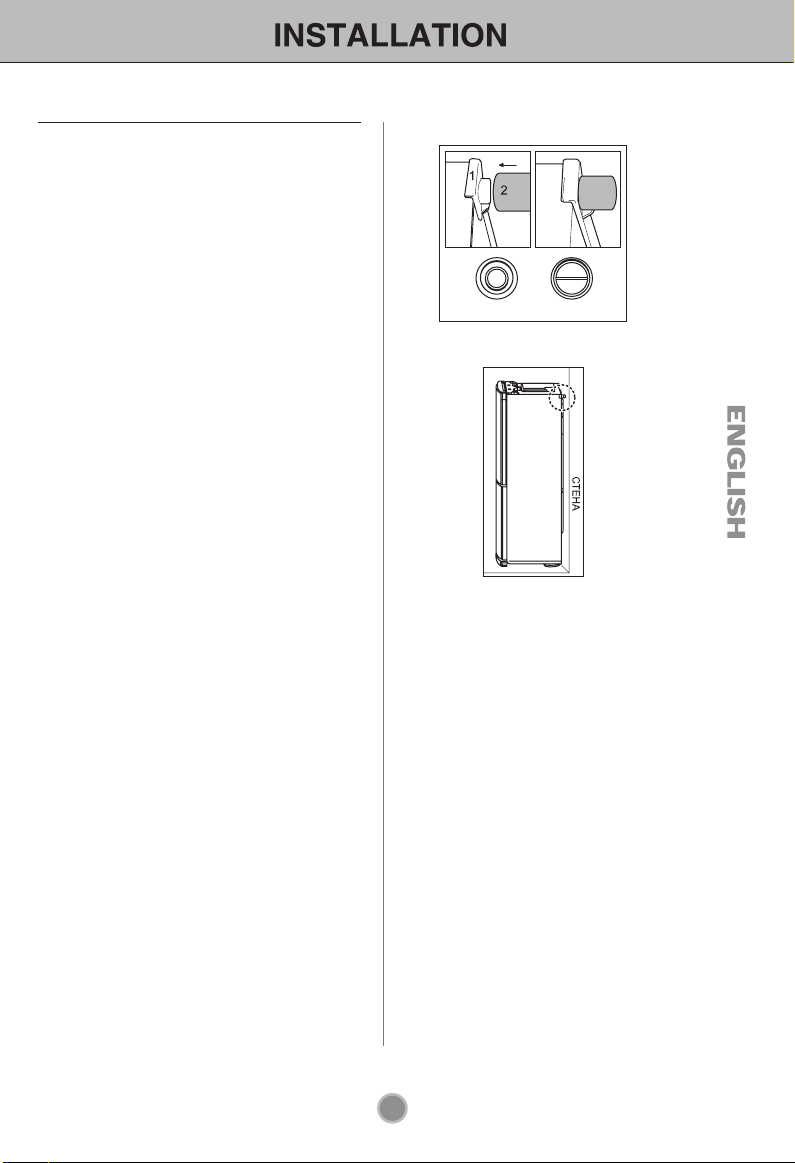
CONNECTION
• Install the limit stops to the upper corners
on the rear wall of the refrigerator as shown
in Fig.1. The stops are supplied in the door
basket inside the refrigeration compartment;
• Choose the suitable place. Locate the
refrigerator in a place convenient for its
use;
• The refrigerator is not a built-in appliance.
Free space not less than 5 cm should be
provided from above, from its rear and side
faces for air circulation and reduction of
power consumption. Fig.2;
• Do not install the refrigerator near heat
sources and in a zone exposed to direct
sunlight or high humidity;
• Make sure that electrical voltage indicated
in the manual meets the parameters of
your mains;
• Do not remove the round stickers on the
rear side of the refrigerator.
They have a decorative function closing
the fabrication holes;
• To exclude vibration, check the refrigerator
installation using a level. If necessary, turn
the adjustable feet to compensate irregularity
of the floor.
To ensure better closing of the door, the
refrigerator should be slightly inclined
backwards. To turn the adjustable feet,
slightly incline the refrigerator.
• Before use, carefully wash the refrigerator;
• Install the removable parts, such as ice tray,
etc. to the appropriate places.
It is necessary to prevent possible damages
during transportation;
• Insert the power cord plug to the power
outlet. Do not power other electric appliance
from the same outlet.
forward backward
Figure 1. Installation of limit stops
Figure 2. Installation of refrigerator to wall
NOTE
The limit stops are located in the door basket of
the refrigeration compartment.
They should be installed to get higher operational
efficiency of the refrigerator.
After first installation of the refrigerator, let it
work for 2-3 hours for stabilization of the
operating temperature inside and only then
fill the refrigerator with fresh or frozen
foodstuffs. After disconnection of the
refrigerator from the mains, wait at least 5
minutes to switch on it again. Now, the
refrigerator is ready for service.
7
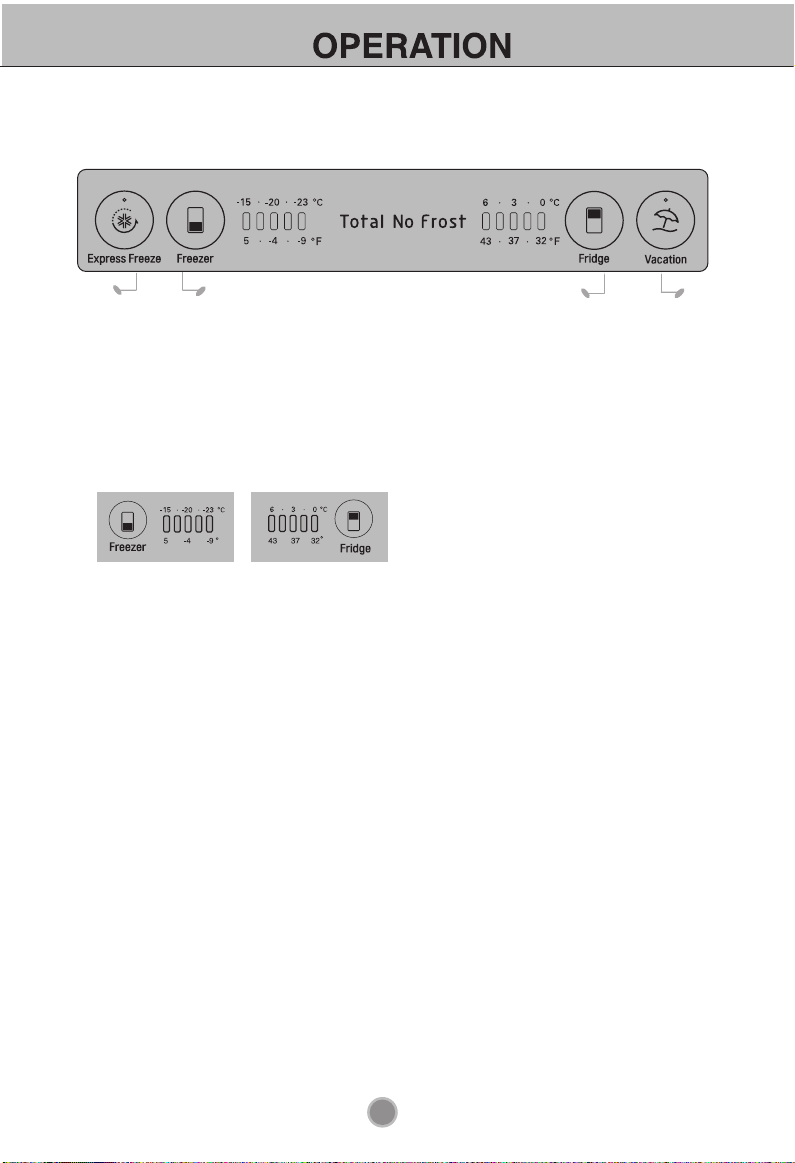
CONTROL PANEL
Internal display
Quick freeze Temperature control in
freezing compartment
Temperature control
in refrigeration compartment
Vacation mode
TEMPERATURE CONTROL
The initial temperature in the refrigeration and freezing compartments is 3 °C(37 °F)
and -20 °C(-4 °F),
respectively.
If you wish, you can change it pushing the temperature control button of the appropriate
compartment.
Internal LED display
F
NOTE:
F
The actual inner temperature varies depending on the food status, as the indicated
setting temperature is a target temperature, not actual temperature within refrigerator.
Refrigeration function is weak in the initial time.
Please adjust temperature as above after using refrigerator for minimum 2~3 days.
QUICK FREEZE
It is used, if it is necessary to quickly freeze foodstuffs.
Push once the "Quick freeze
The "
Quick freeze
" lamp will light up and quick freezing will be started.
" button(on the internal display)
Quick freeze takes about 24 hours.
8
 Loading...