

LG LAC7700 Owner’s Manual
R
LAC7700_ENG_GF
P/NO : MFL36538242
ENGLISH
CAR CD/MP3/WMA Receiver
Read the manual carefully before using the unit
LAC7700/7710
2
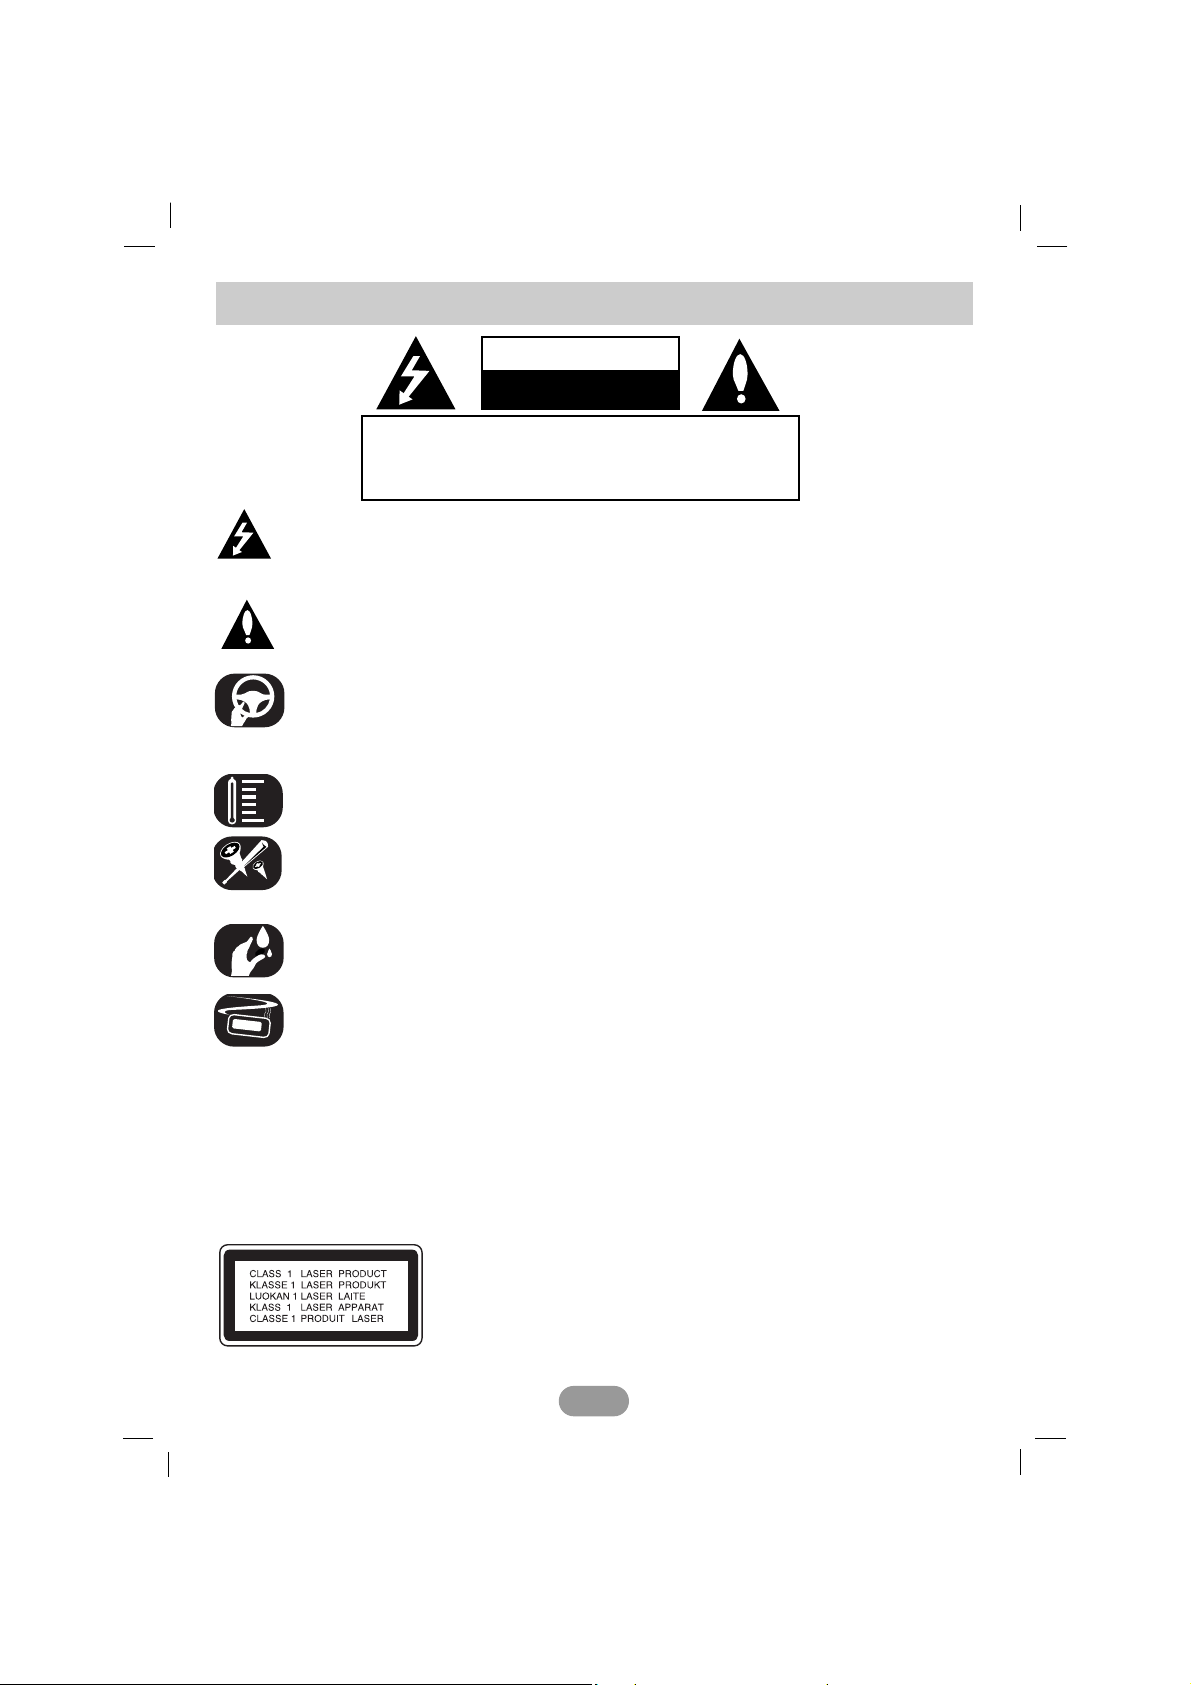
The lightning flash with the arrowhead symbol, within an equilateral
triangle is intended to alert the user about the presence of uninsulated dangerous
voltage within the product’s enclosure that may be of
sufficient magnitude to constitute a risk of electric shock.
The exclamation point within an equilateral triangle is intended to alert the user to
the presence of important operating and maintenance (servicing) instructions in the
literature accompanying the appliance.
Always operate the vehicle in a safe manner.
Do not become distracted by the vehicle while driving, and always be fully aware of
all driving condition. Do not change settings, or any functions.
Pull over in a safe and legal manner before attempting such operations.
Do not use for many hours at extremely low or high temperature.
(-10~60°C)
To reduce the risk of electric shock, do not remove the cover or back of this product. There are no user-serviceable parts inside.
Refer servicing to qualified service personnel.
To reduce the risk of fire or electric shock, do not expose this product to dripping or
splashing water, rain, or moisture.
The temperature of unit’s outside can be extremely high, please use the unit after
proper installation in your vehicle.
CAUTION : TO REDUCE THE RISK OF ELECTRIC
SHOCK DO NOT SPLIT COVER(OR BACK) NO USER
SERVICEABLE PARTS INSIDE. REFER SERVICING
TO QUALIFIED SERVICE PERSONNEL.
CAUTION
RISK OF ELECTRIC SHOCK
DO NOT OPEN
Safety note
CAUTION : This product uses a Laser System.
To ensure proper use of this product, please read this owner’s manual carefully and retain it
for future reference.
Should the unit require maintenance, contact an authorized service center.
Performing controls, adjustments, or carrying out procedures other than those specified
herein may result in hazardous radiation exposure.
To prevent direct exposure to laser beam, do not try to open the enclosure. Visible laser
radiation when open. DO NOT STARE INTO BEAM.
3
8 cm
• A defective or soiled disc inserted into unit can cause sound to drop out
during playback.
• Handle the disc by holding its inner and outer edges.
• Do not touch the surface of the unlabeled side of the disc.
Do not stick paper or tape etc. on the surface.
Do not expose the disc to direct sunlight or excessive heat.
This unit cannot play 8cm disc (use 12cm disc only).
• Clean the disc before playback. Wipe the disc from the center outward
with a cleaning cloth.
• Never use solvents such as benzine or alcohol to clean the disc.
Periodically wipe the contacts on the back of the control panel with a
cotton swap moistened with alcohol.
Bluetooth®wireless technology is a system which allows radio contact between electronic
devices within a max. range of 10 meters.
Connecting individual devices under Bluetooth
®
wireless technology does not incur any
charges. A mobile phone with Bluetooth®wireless technology can be operated via the
Cascade if the connection was made via Bluetooth
®
wireless technology.
The Bluetooth
®
word mark and logos are owned by the Bluetooth®SIG, Inc. and any use of
such marks by LG Electronics is under license.
Other trademarks and trade names are those of their respective owners.
Operating condition for using a Bluetooth function
- Close windscreen.
- Turn off the air conditioner/ heater.
- Stop the vehicle or drive at low speed.
- Make the call in a quiet location.
• There may be differences in call quality depending on phone type, road conditions weather,
etc.
• Using the phone while driving may cause unexpected accidents.
• The Bluetooth function may not operate properly with certain types of Bluetooth phones.
R
A section whose title has one of the following symbols is applicable only to the disc represented by the symbol.
Audio CDs MP3 files WMA files
WMA
MP3CD
4
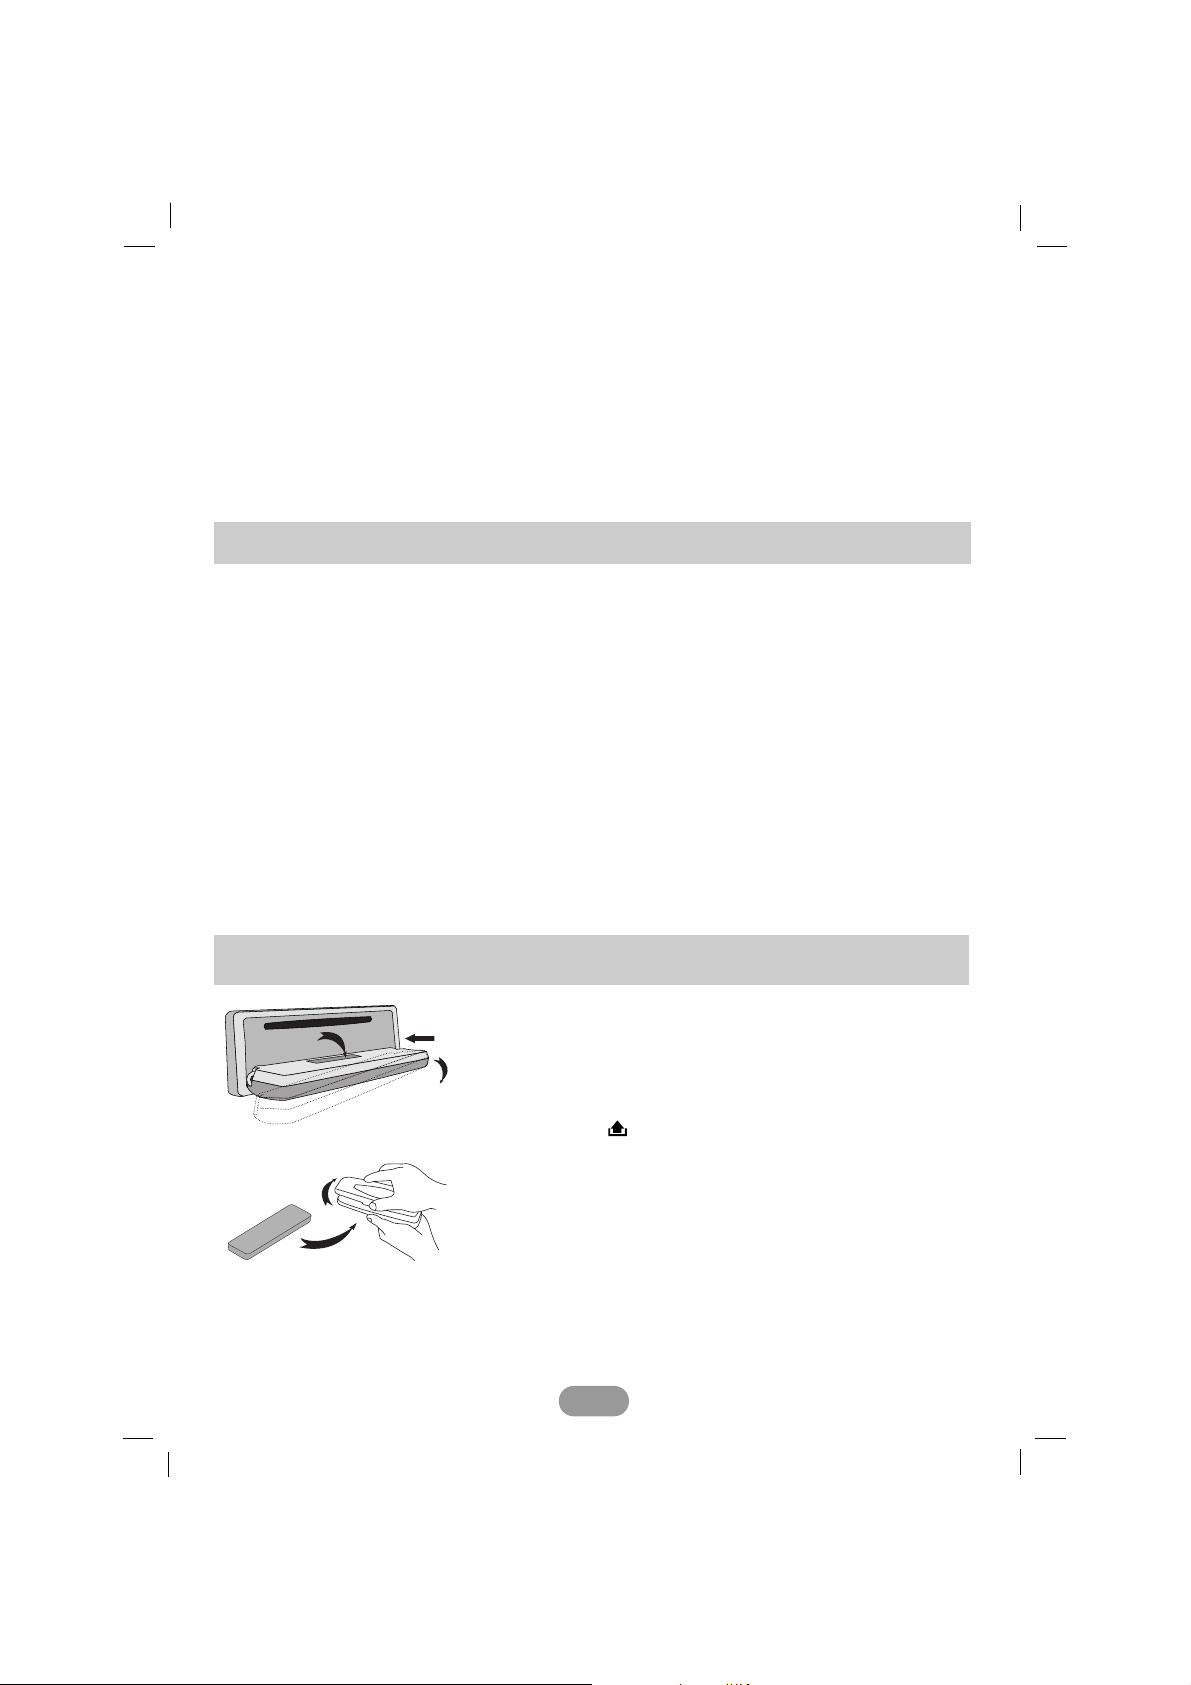
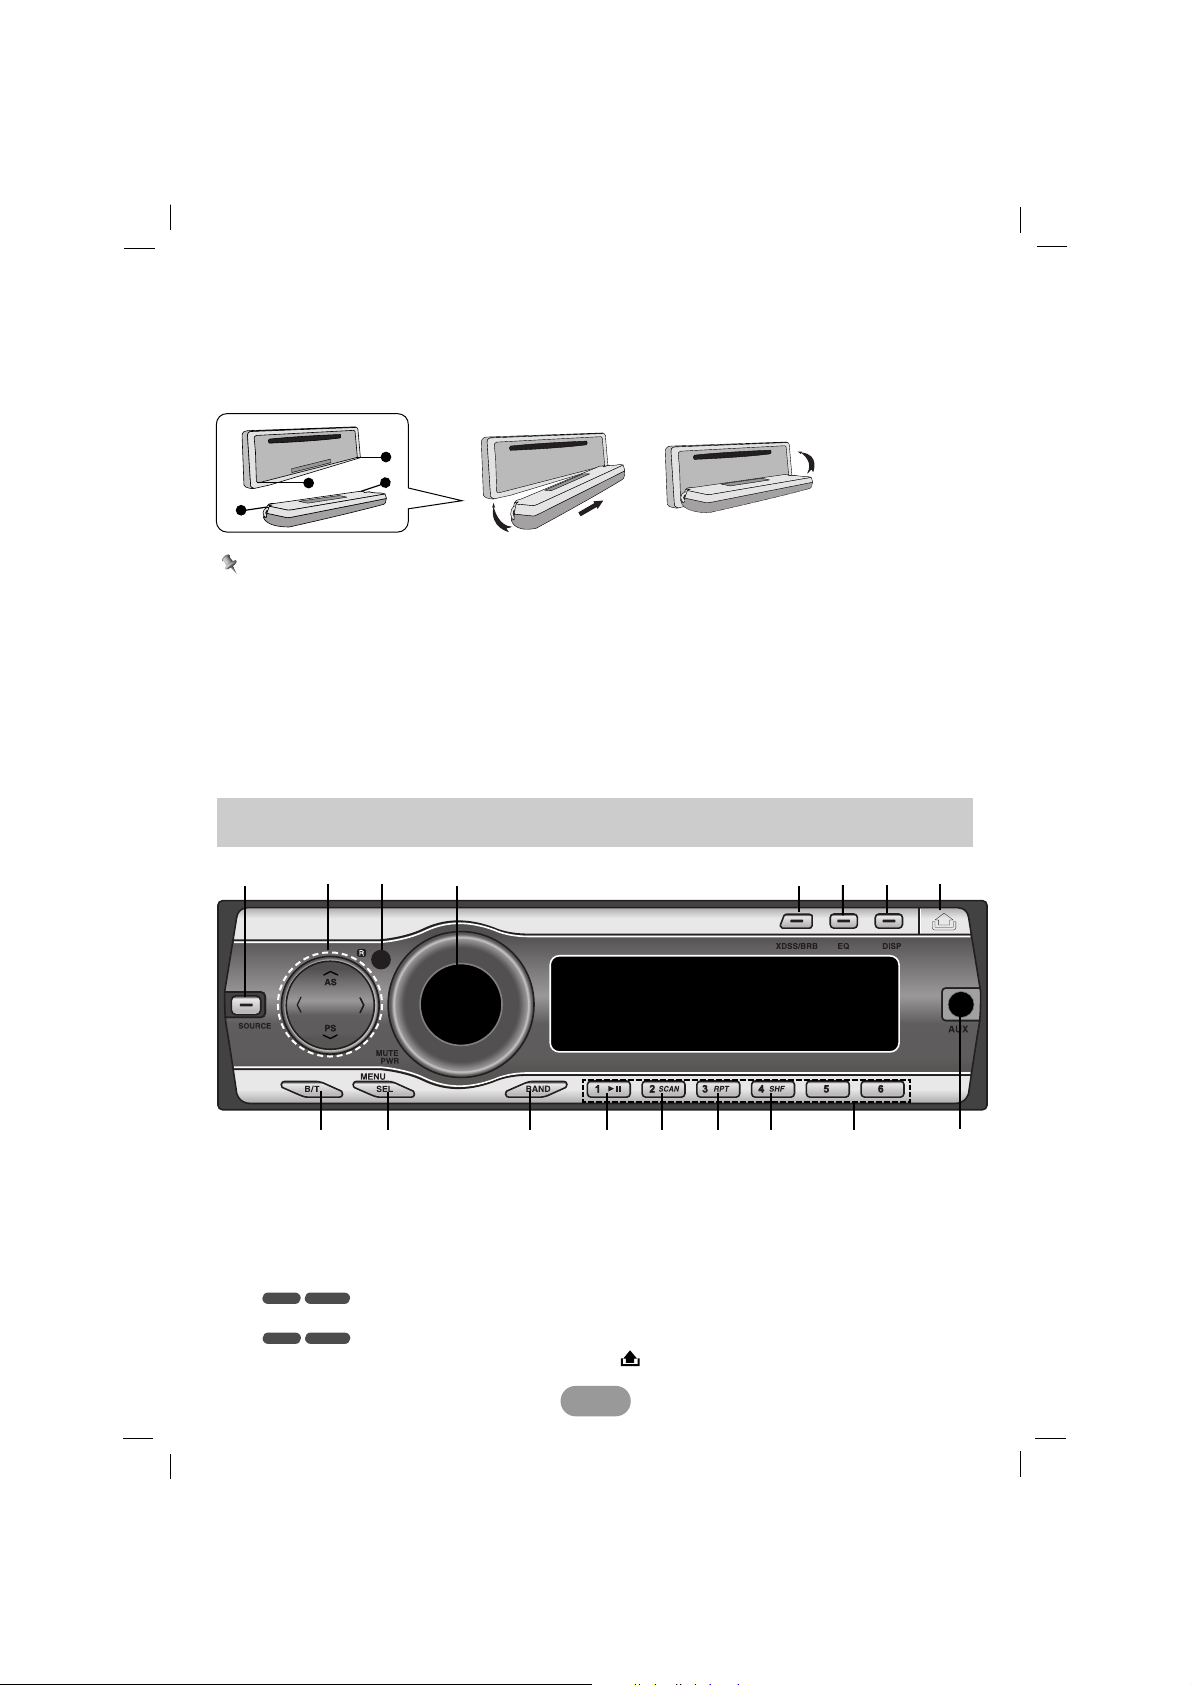
Detaching the control panel
You can detach the control panel when leaving the car.
When detaching or attaching the control panel, be careful
not to damage the connectors on the back of the control
panel and on the panel holder.
1 Press the “ ” button to unlock the control panel.
2 Push the control panel to right.
3 Pull the control panel out of the unit.
4 Put the detached control panel into the protective case.
Protective Case
4
2
3
Control panel
Safety note . . . . . . . . . . . . . . . . . . . . . . . . . . . . . . . . . . . . . . . . . . . . . . . . . . . . . . . . . .2-4
Table of contents . . . . . . . . . . . . . . . . . . . . . . . . . . . . . . . . . . . . . . . . . . . . . . . . . . . . . . . .4
Before use . . . . . . . . . . . . . . . . . . . . . . . . . . . . . . . . . . . . . . . . . . . . . . . . . . . . . . . . . .4-5
Control panel . . . . . . . . . . . . . . . . . . . . . . . . . . . . . . . . . . . . . . . . . . . . . . . . . . . . . . . . . .5
Remote control . . . . . . . . . . . . . . . . . . . . . . . . . . . . . . . . . . . . . . . . . . . . . . . . . . . . . . . . .6
Installation . . . . . . . . . . . . . . . . . . . . . . . . . . . . . . . . . . . . . . . . . . . . . . . . . . . . . . . . . . .6-7
Connection diagram . . . . . . . . . . . . . . . . . . . . . . . . . . . . . . . . . . . . . . . . . . . . . . . . . . . .7-9
Basic operation . . . . . . . . . . . . . . . . . . . . . . . . . . . . . . . . . . . . . . . . . . . . . . . . . . . . . . .9-11
Bluetooth operation . . . . . . . . . . . . . . . . . . . . . . . . . . . . . . . . . . . . . . . . . . . . . . . . . .12-15
Radio operation . . . . . . . . . . . . . . . . . . . . . . . . . . . . . . . . . . . . . . . . . . . . . . . . . . . . . . . .16
CD/MP3/WMA operation . . . . . . . . . . . . . . . . . . . . . . . . . . . . . . . . . . . . . . . . . . . . . . .16-18
Aux operation . . . . . . . . . . . . . . . . . . . . . . . . . . . . . . . . . . . . . . . . . . . . . . . . . . . . . . . . .18
Troubleshooting . . . . . . . . . . . . . . . . . . . . . . . . . . . . . . . . . . . . . . . . . . . . . . . . . . . . . . . 19
Specifications . . . . . . . . . . . . . . . . . . . . . . . . . . . . . . . . . . . . . . . . . . . . . . . . . . . . . . 19-20
Bluetooth phone compatibility list . . . . . . . . . . . . . . . . . . . . . . . . . . . . . . . . . . . . . . . . . . 20
Table of contents
Before use
MP3/WMA Disc compatibility with this unit is limited as follows:
1. Sampling Frequency / 8 - 48kHz (MP3) 22.05 - 48kHz (WMA)
2. Bit rate / within 8 - 320kbps (include VBR) (MP3) 32 -320kbps (WMA)
3. CD-R/CD-RW file system should be “ISO 9660”
4. If you record MP3/WMA files using software which cannot create a FILE SYSTEM, for example
“Direct-CD” etc., it will not be possible to playback MP3/WMA files. We recommend that you use
“Easy-CD Creator” which creates an ISO9660 file system.
Customers should also note that permission is required in order to download MP3/WMA files and
music from the Internet. Our company has no right to grant such permission.
Permission should always be sought from the copyright owner.
5
Attachable control panel
1 Attach part A of the control panel to part B of the unit.
2 Attach part C of the control panel to part D of the unit while pushing the control panel to
right.
3 Close the control panel.
Control panel
A
B
D
C
Caution
• When detaching or attaching the control panel, do not press the display or control buttons.
• The control buttons may not work properly if the control panel is not attached properly. If this
occurs, gently press the control panel.
• Do not leave the control panel in any area exposed to high temperatures or direct sunlight.
• Do not drop the control panel or otherwise subject it to strong impact.
• Do not allow such volatile agents as benzine, thinner, or insecticides to come into contact
with the surface of the control panel.
• Do not try to disassemble the control panel.
1[SOURCE]
2 • Skip / Search II/
ii
• Seek/ Tune
• Auto Store [AS]
• Preset Scan [PS]
• MP3 Track +10/-10 UU/
uu
• Folder Up/Down UU/
uu
3 Remote Sensor
4 • Volume
• [MUTE]
• Power [PWR]
5 • Extreme Dynamic Sound
System [XDSS]
• Bass Reverb Blaste
[BRB]
6 Equalizer [EQ]
7 Display [DISP]
8 Release/Eject
9 AUX In [AUX]
10 Preset Station [1~6]
11 Shuffle [SHF]
12 Repeat [RPT]
13 Intro Scan [SCAN]
14 Play/Pause B/X
15 [BAND]
16 • [MENU]
• Select [SEL]
17 Bluetooth [B/T]
WMAMP3
WMAMP3
12 4 67
915
3
17 14 13 12 11 10
8
16
5
6
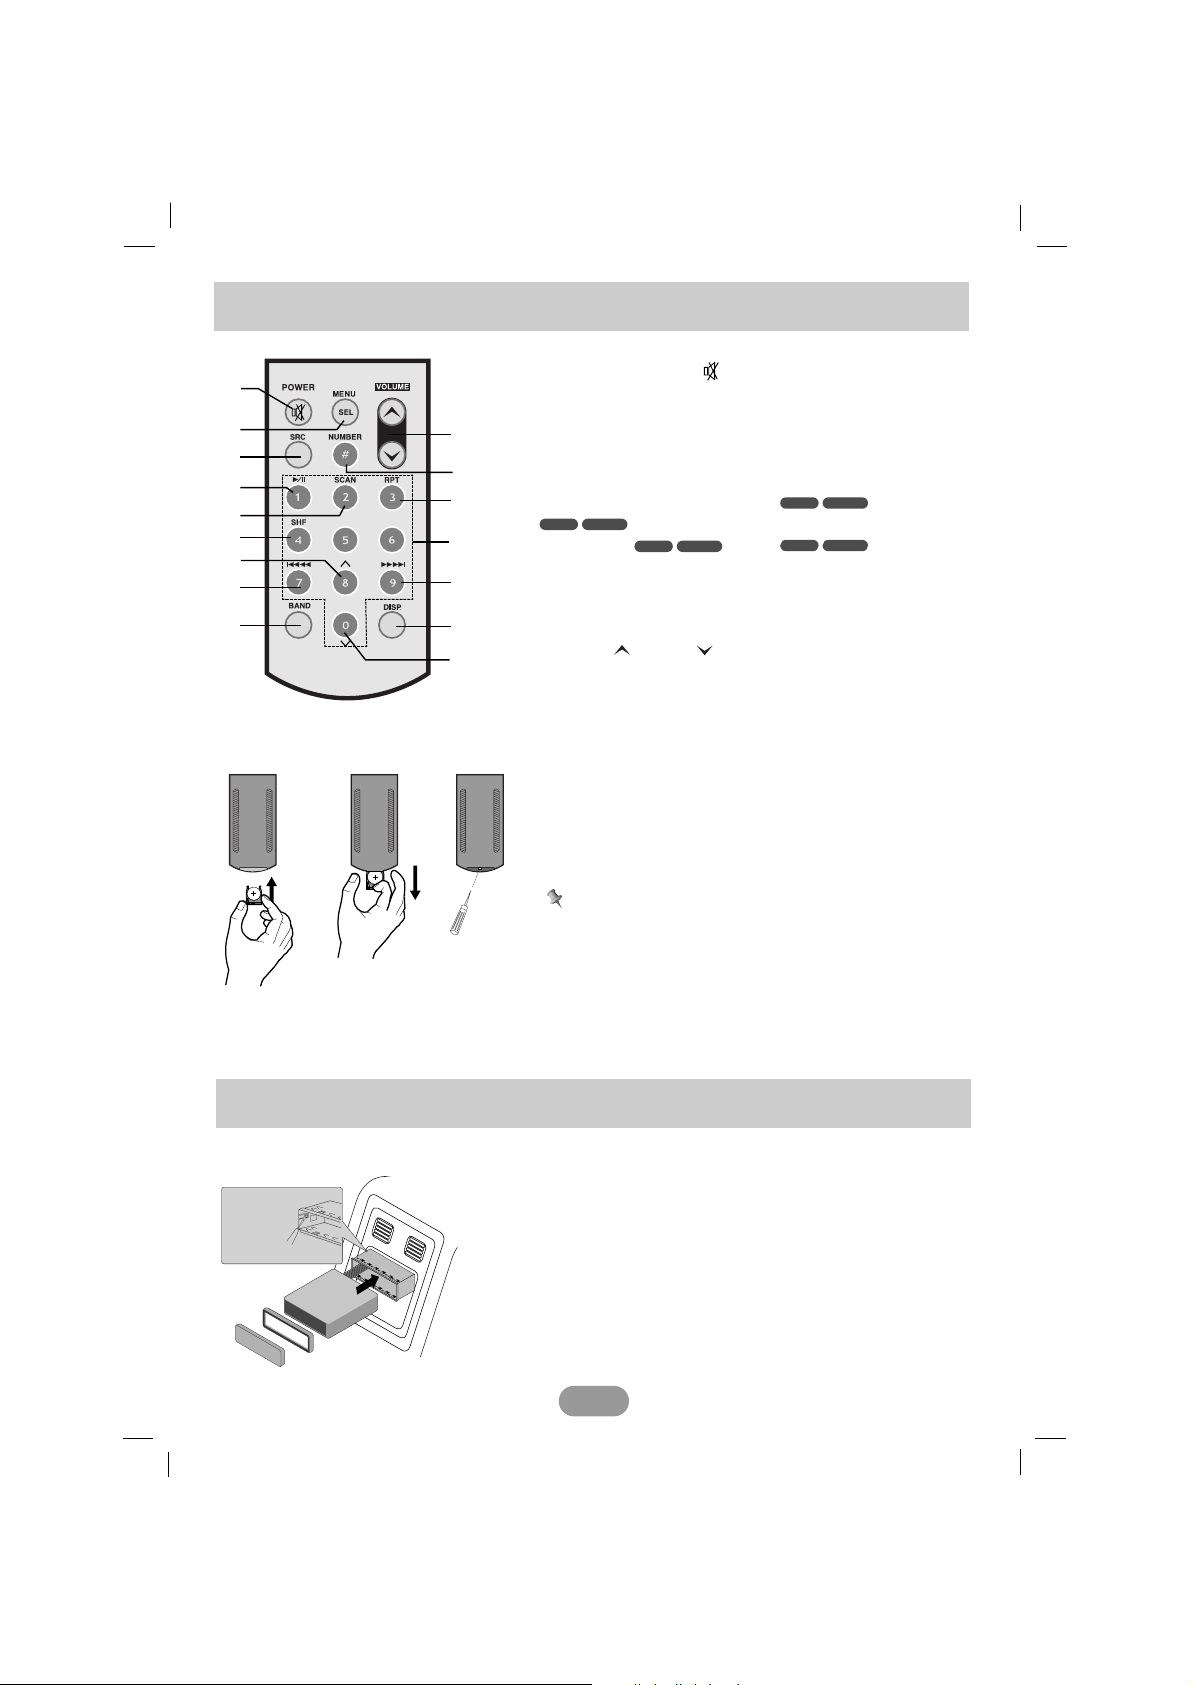
1 Remove the battery holder with a sharp product
like a ball point pen.
2 Install the battery on the battery holder.
3 Install the battery holder back into its original
position.
Note
• Use only one CR2025 (3V) lithium battery.
• Remove the battery if the remote control is not
used for a long period of time.
• Do not leave the product in a hot or humid place.
• Do not handle the battery with metallic tools.
• Do not store the battery with metallic materials.
1 Power [POWER] / Mute
2 Select [MENU/SEL]
3 Source [SRC]
4 Play / Pause B/X
5 Intro Scan [SCAN]
6 Shuffle [SHF]
7 • MP3 Track +10
• Folder Up
UU
8
• CD Skip / Search
?m m
• Seek / Tune ?m m
9 [BAND]
10 Volume Up / Down
11
Number [#]
12 Repeat [RPT]
13 Number [0 -9]
14 • CD Skip / Search
M M?
• Seek / Tune M M?
15 Display [DISP.]
16 • MP3 Track -10
• Folder Down
uu
WMAMP3
WMAMP3
WMAMP3
WMAMP3
10
12
14
15
16
1
3
8
9
4
5
2
6
7
11
13
Before installing, make sure that the ignition-switch is set to
OFF and remove the terminal of the car battery to avoid
short-circuiting.
1 Remove the existing receiver unit.
2 Make the necessary connections.
3 Install the installation sleeve.
4 Install the unit into the installation sleeve.
Bend the claws
according to
the thickness
of the
dashboard
Control panel
Battery Installation
Basic Installation
Installation
Remote control
 Loading...