

LG GR500FD Owner’s Manual

GR500FD User Guide
ENGLISH

Bluetooth QD ID B014683

LIMITED WARRANTY STATEMENT
1. WHAT THIS WARRANTY COVERS:
LG offers you a limited warranty that the enclosed subscriber unit and its enclosed accessories will be
free from defects in material and workmanship, according to the following terms and conditions:
1. The limited warranty for the product extends for ONE (1) year beginning on the date of purchase of the
product by the original end user.
2. The limited warranty extends only to the original end user of the product and is not assignable or
transferable to any subsequent purchaser/end user.
3. This warranty is good only to the original end user of the product during the warranty period as long
as it is in Canada.
4. Upon request from LG, the consumer must provide information to reasonably prove the date of
purchase.
5. During the applicable warranty period, LG will repair or replace at LG’s sole option, without charge to
the original end user, any defective component part of the phone or accessory.
6. LG may use rebuilt, reconditioned or new parts or components when repairing any product or replace a
product with a rebuilt, reconditioned or new product.
2. WHAT THIS WARRANTY DOES NOT COVER:
1. Defects or damages resulting from use of the product in other than its normal and customary manner.
2. Defects or damages from abnormal use, abnormal conditions, improper storage, exposure to moisture or
dampness, unauthorized modifi cations, unauthorized connections, unauthorized repair, misuse, neglect,
abuse, accident, alteration, improper installation or other acts which are not the fault of LG, including
damage caused by spills of food or liquids.
3. Breakage or damage to antennas unless caused directly by defects in material or workmanship.
4. The fact that the Customer Service Department at LG was not notifi ed by the original end user of the
alleged defect or malfunction of the product, during the warranty period.
5. Products which have had their serial numbers removed or made illegible.
6. Damage resulting from use of non-LG approved accessories.
7. All plastic surfaces and all other externally exposed parts that are scratched or damaged due to normal
customer use.

8. Products serviced by non-authorized persons or companies.
Notes:
1. This limited warranty supersedes all other warranties, expressed or implied either in fact or by
operations of law, statutory or otherwise, including, but not limited to any implied warranty of
merchantability or fi tness for a particular purpose.
2. Shipping damage is the sole responsibility of the shipping company.
3. EXCLUSION OF LIABILITY:
No other express warranty is applicable to this product.
THE DURATION OF ANY IMPLIED WARRANTIES, INCLUDING THE IMPLIED WARRANTY OF
MARKETABILITY, IS LIMITED TO THE DURATION OF THE EXPRESS WARRANTY HEREIN. LG ELECTRONICS
CANADA, INC. SHALL NOT BE LIABLE FOR THE LOSS OF THE USE OF THE PRODUCT, INCONVENIENCE,
LOSS OR ANY OTHER DAMAGES, DIRECT OR CONSEQUENTIAL, ARISING OUT OF THE USE OF, OR
INABILITY TO USE, THIS PRODUCT OR FOR ANY BREACH OF ANY EXPRESS OR IMPLIED WARRANTY,
INCLUDING THE IMPLIED WARRANTY OF MARKETABILITY APPLICABLE TO THIS PRODUCT.
4. HOW TO GET WARRANTY SERVICE:
To obtain warranty service, please call the following telephone number from anywhere in Canada:
LG Electronics Canada, Inc.
Tel. 1-888-542-2623
www.lg.ca (see links to “Wireless Phone Service”)
Electronics Canada Inc.
Mississauga, Ontario

Some of the contents in this
manual may differ from your phone
depending on the software of the
phone or your service provider.
GR500FD User Guide

Contents
Your Phone ..................................4
Phone Components ............................4
Slide Open View ....................................5
Rear View .................................................6
Getting Started...........................7
Installing the SIM Card and
Battery ......................................................7
Installing a Memory Card ...............10
Touch Calibration ................... 12
Start Up Guide ......................... 13
General Functions .................. 14
Making a Call .......................................14
Adjusting the Volume ...................... 16
Answering a Call ................................ 17
Adjusting the Volume ...................... 17
Setting Pro les ...................................18
Entering Text ....................................... 20
Qwerty Keypad .................................. 23
Contacts ..................................... 26
Contact List ..........................................26
New Contact ........................................ 27
Caller Groups.......................................28
Speed Dial Lists .................................. 28
Contact Management ...................... 29
Service Dial Numbers .......................30
My Numbers ........................................30
In-Call Menu ............................. 31
During a Call ........................................31
Conference Calls ................................33
Your Standby Screen ............. 35
Menu Tree ................................. 41
Messaging ................................. 42
New Message ......................................42
Inbox ...................................................... 47
MobileMail ........................................... 48
IM............................................................. 49
Drafts ..................................................... 51
Outbox .................................................. 51
Sent ........................................................ 53
Call Voicemail ......................................53
Message Settings ..............................53
Communities .......................................56
Internet ...................................... 57

Games ......................................... 60
Applications ............................. 61
Get New Applications ...................... 61
Multimedia ............................... 62
Camera .................................................. 62
Video ...................................................... 67
Pictures ..................................................67
Music Player .............................. 68
Music Player ......................................... 68
Organizer ................................... 76
Audio & Ring Tunes ...........................76
Calendar ................................................ 76
Alarm Clock .........................................77
Calculator ............................................. 78
Tools .......................................................78
Settings ...................................... 86
Call .......................................................... 86
Date & Time ......................................... 88
Audio & Ring Tunes ...........................89
Display ................................................... 90
Touch .....................................................91
Phone ..................................................... 91
Bluetooth®............................................ 96
More ....................................................... 99
Accessories .............................107
For Your Safety .......................108
Safety Guidelines .................. 115
Trouble Shooting ..................138
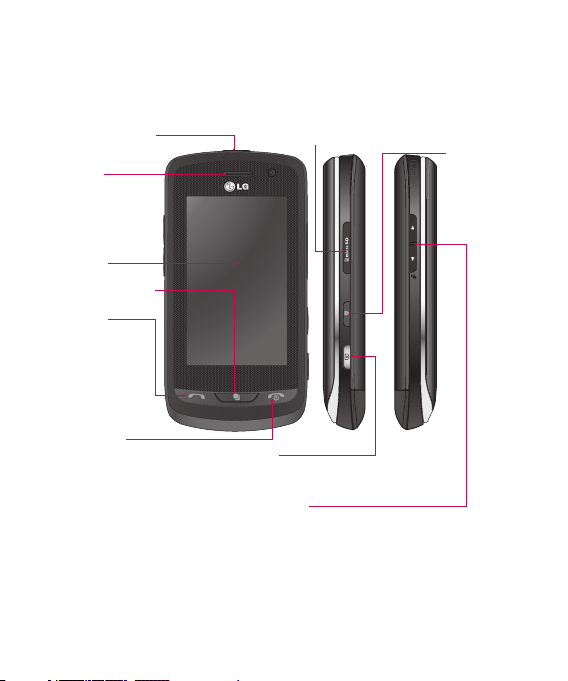
Your Phone
Phone Components
Charger/USB Port
Earpiece
Let you hear
the caller and
automated
prompts.
Main LCD
Multi-tasking key
SEND key
Press this key in
standby mode
to quickly access
the most recent,
missed, dialed and
received calls.
END / Power
Ends or rejects a call.
Turns the phone on/off.
Press once to return to
the standby screen.
Camera key
Press to start the Camera function. Press
and hold to start the Video record function.
Side volume keys
• When on the Standby screen: Allows you to set the
Ringtone and Touchtone volume. Hold the Down key to
toggle the Vibration Mode On and Off.
• During a call: Allows you to change the Earpiece volume.
• When playing background music: Allows you to change
the music volume.
4 LG GR500FD | User Guide
microSD™ memory card socket
Lock /
Unlock key
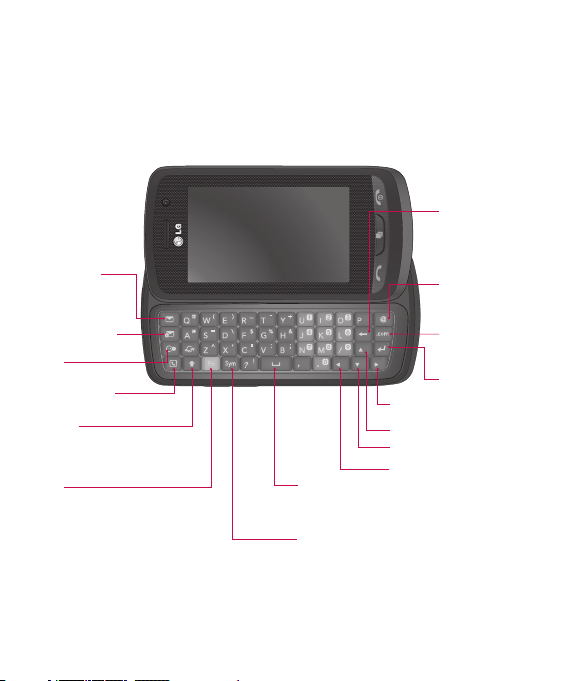
Slide Open View
Text Msg
MobileMail
IM
Contact list
Caps
Press to change between
Upper Case and Lower Case.
Fn
Press to input symbols and
numbers on Qwerty key pad.
Del
Deletes digits
and letters.
Press to input
“@”.
Press to input
“. c o m ”.
Press to
move to the
Right
next row.
Up
Down
Space
Press to create a space between words.
Sym
Press to open the menu with Symbol
entry options.
Left
5

Your Phone
Rear View
Battery cover
Flash
External
camera lens
microSD™ memory
card socket
6 LG GR500FD | User Guide
Battery
SIM card socket
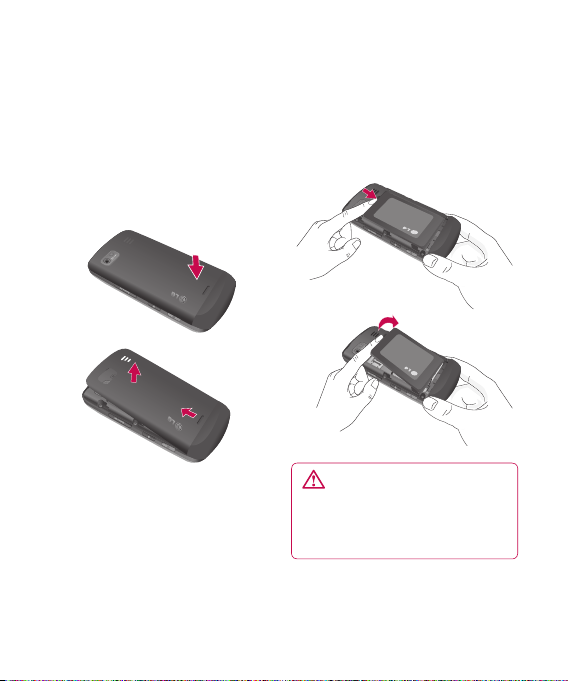
Getting Started
Installing the SIM Card and
Battery
1 Remove the battery cover
Press the battery cover release
latch. The battery cover should lift
off easily.
2 Remove the battery
Lever the bottom edge of the
battery and remove it carefully
from the battery compartment.
WARNING: Do not remove
the battery when the phone
is switched on, as this may
damage the phone.
7
Getting Started
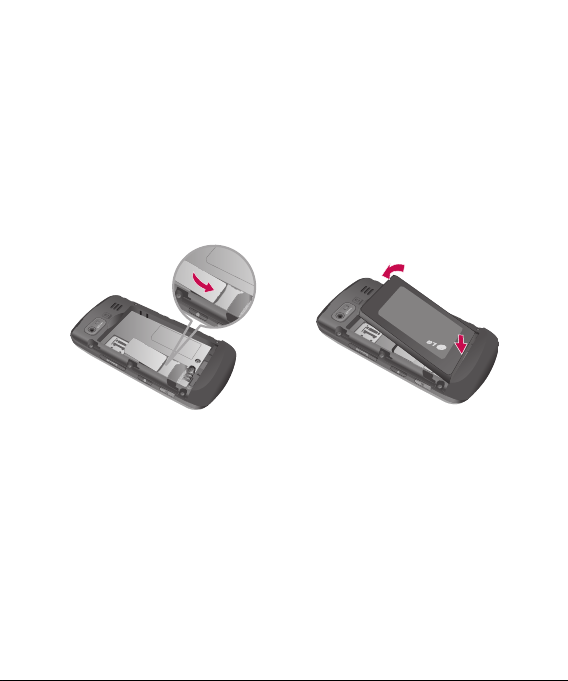
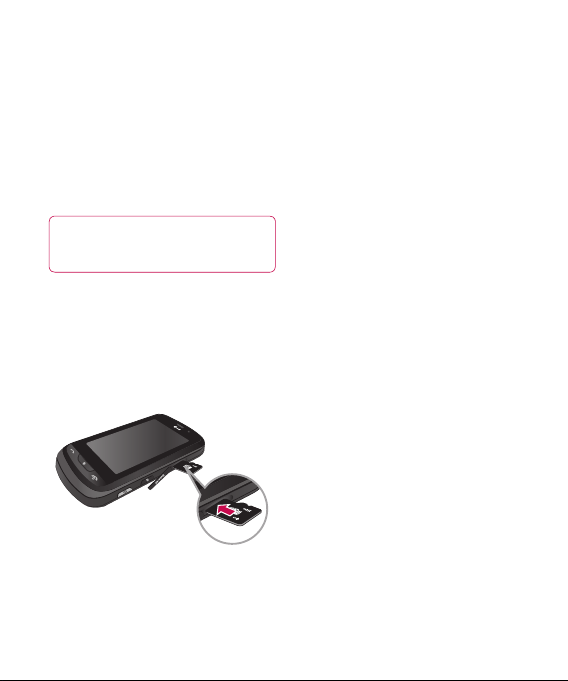
3 Install the SIM card
Slide the SIM card into the SIM
card holder. Make sure that the
gold contact area on the card
is facing downward. To remove
the SIM card, pull it gently in the
opposite direction.
8 LG GR500FD | User Guide
4 Install the battery
Insert the top of the battery first
into the top edge of the battery
compartment. Ensure that the
battery contacts align with the
terminals on the phone. Press the
bottom of the battery down until
it clips into place.
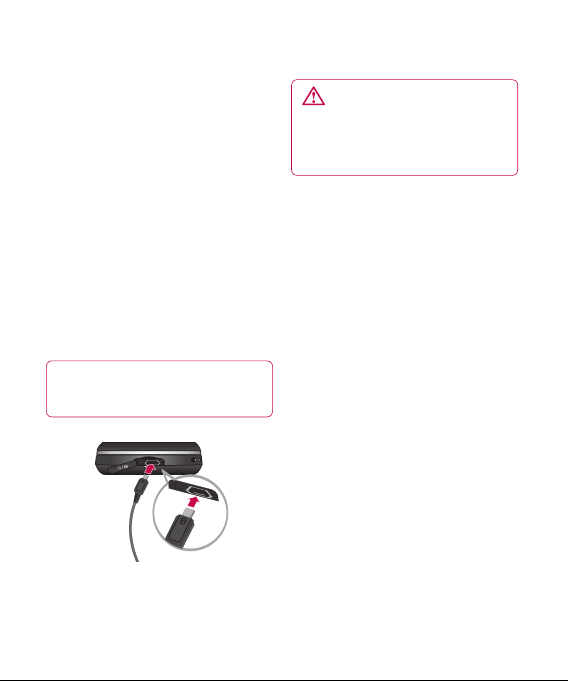
5 Charging your phone
Lift the charger port cover on the
top side of your GR500FD. Insert
the charger connector to the
phone (‘B’ side of the connector
has to be facing up when
connecting to the phone) and
then plug into the wall socket.
Your GR500FD will need to be
charged until a message reading
“Battery full. Please unplug
charger to save energy.” appears
on the screen.
Important! You should insert
the battery before charging.
WARNING: Use of
unauthorized accessories could
damage your phone and void
your warranty.
9
Getting Started
Installing a Memory Card
You can expand the memory
available on your phone by using
a microSD™ memory card. The
GR500FD will support up to a 16 GB
microSD™ memory card.
TIP! A memory card is an
optional accessory.
1 Lift the memory card cover and
insert a microSD™ card with
the gold contact area facing
downwards. Close the memory
card cover so that it clicks shut.
10 LG GR500FD | User Guide
Note: If your memory card has
existing content it will automatically
be filed in the correct folder. For
example, videos will be accessible
from the Videos folder. If your
memory card has protected
content (i.e. content such as songs
or graphics with Digital Rights
Management copywriting loaded
from another device), it will not
work. You will need to reformat the
memory card prior to using it with
this device.

On-Screen Icons
The table below describes various
display indicators or icons that
appear on the phone's display
screen.
ICON DESCRIPTION
Multitasking
Network signal strength
(number of bars will vary)
No network signal
Battery empty
New text message
New email
An alarm is set
Normal profile in use
Silent profile in use
3G available
Bluetooth® is active
The browser is active
Vibration mode
Speakerphone
Call in Progress
Voicemail
Battery Full
Battery Charging
Flight Mode
11
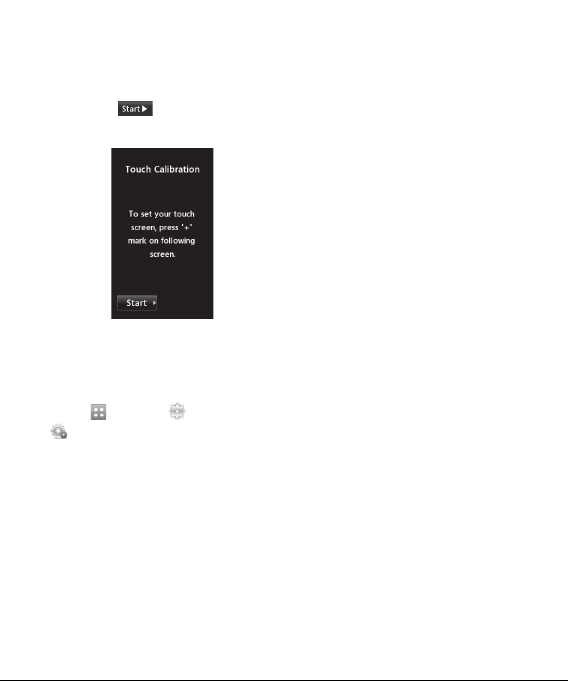
Touch Calibration
Set your touch screen for ease of
use. Touch
markers to calibrate the screen.
• Once you’ve finished calibrating
your screen, Save the settings.
Note: To reset the touch calibration,
touch
, and choose Touch Calibration.
and press the ‘+’
, and the tab. Touch
12 LG GR500FD | User Guide
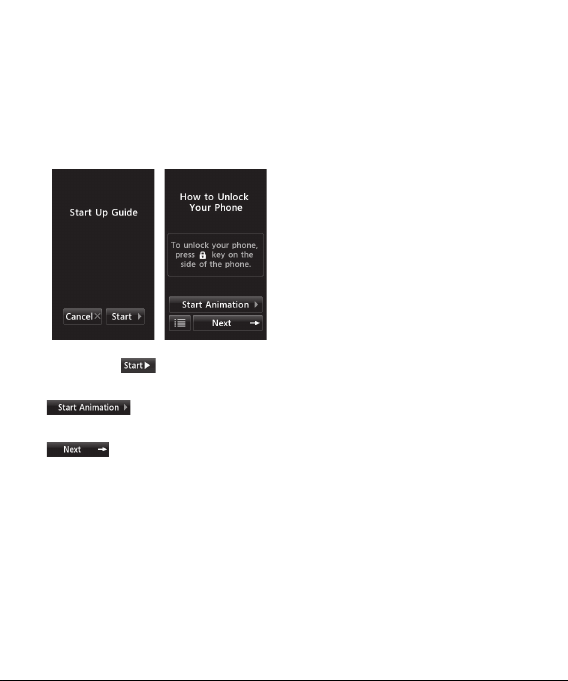
Start Up Guide
After you install SIM card and
battery, and turn on the GR500FD,
you will see Start Up Guide on the
screen.
Touch Start to begin the
Start Up Guide feature. Touch
to play the animated
Guide for that subject. Or, touch
to move on to the next
Guide. Available Guides include:
• How to Unlock Your Phone
• How to Open Menu and Select
Item
• How to Scroll
• How to Navigate Between Items
• How to Rotate Screen Orientation
• How to Open Keypad and Enter
Tex t
• How to Change Home Screen
• How to Add Shortcuts on Home
Screen
• How to Add Contacts on Home
Screen
13
General Functions
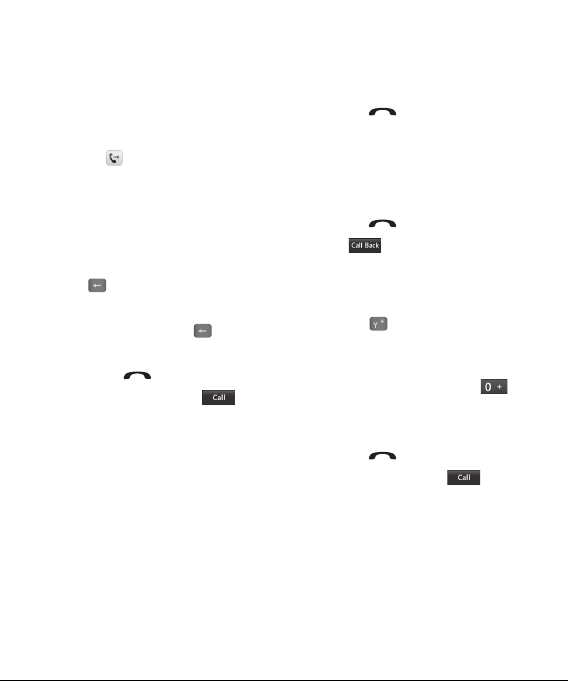
Making a Call
1 Make sure your phone is powered
on.
2 Touch and enter a phone
number using the touch pad or
slide open the qwerty pad and
enter a phone number using the
qwerty keys. To edit a number on
the display screen, simply press
key to erase one digit at a
the
time.
– Press and hold the
erase the entire number.
3 Press the [SEND] key to call
the number. Or touch
the touch pad.
14 LG GR500FD | User Guide
key to
on
Making a Call with the Send Key
1 Press the [SEND] key, and the
most recent missed, dialed and
received phone numbers will be
displayed.
2 Select the desired number.
3 Press the [SEND] key or
touch
.
Making International Calls
1 When entering a phone number,
press the
international access character ‘+’
will appear. When using the touch
pad to dial, touch and hold
2 Enter the country code, area code
and the phone number.
3 Press the [SEND] key to call
the number. Or touch
the pad.
key and the
on
.

Ending a Call
When you have finished a call, press
[END] key.
the
Making a Call from the Contacts
You can store frequently called
names and phone numbers in the
SIM card as well as in the phone
memory known as the Contacts.
You can dial a number by simply
selecting a name in the contacts
and pressing the [SEND] key.
Making a Video Call
You can make a video call in a
3G-covered service area if the user
you are calling also has a 3G video
phone in a 3G-covered service area.
You can also receive video calls.
To make a video call, do the
following.
1 Enter the phone number, as
before.
2 To start the video function, touch
and choose Make Video Call.
You will be notified that you will
need to close other applications
to make the video call.
3 Adjust the camera position if
necessary.
4 If you do not want to use the
speakerphone, ensure you have
the headset plugged in.
5 Press to finish the call, or
close the handset.
15

Getting Started
Note: The video call may take
some time to connect. Please
be patient. While the video call
is connecting, you will see your
own image; after the other party
has answered, their image will be
displayed on the screen.
Changing your video call
settings
1 Press , select Settings and
choose Call.
2 Select Video call.
3 Choose the settings of your video
calling. Determine whether to Use
Substitute Image and select one,
switch on the Mirror (so you can
see yourself on screen).
16 LG GR500FD | User Guide
Making a video call from
Contacts
It is easy to call anyone whose
number you have stored in your
Contacts.
Press the down navigation key to
access the contacts list. Scroll to
your chosen contact. Press the right
soft key Options and select Make
Video call. Press the
finish the call.
key to
Adjusting the Volume
During a call, if you want to adjust
the earpiece volume, use the side
volume keys of the phone.
In idle mode, you can adjust the ring
volume using the side volume keys.
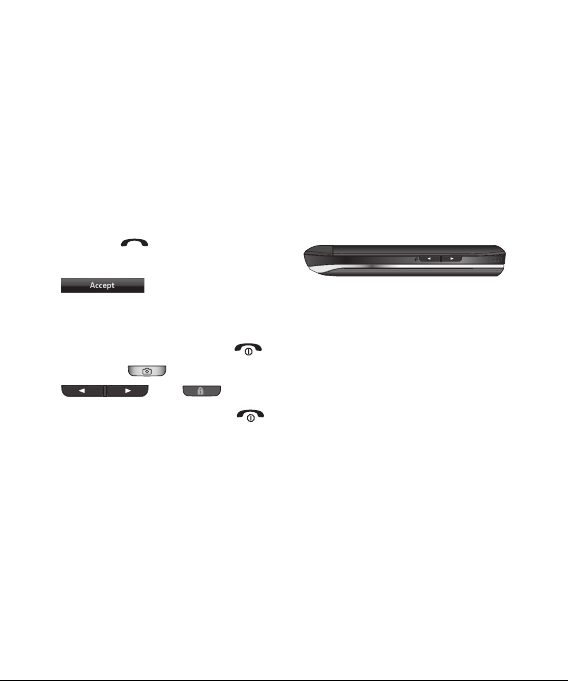
Answering a Call
When you receive a call, the phone
rings and the phone icon appears
on the screen. If the caller can
be identified, the caller’s phone
number (or name if stored in your
Address Book) is displayed.
1 Press the [SEND] or
unlock the screen and touch
.
If Any Key has been set as the
Answer Mode, any key press will
answer a call except for the
[END] key, ,
and .
2 End the call by pressing the
[END] key.
Note: You can answer a call while
using the Address Book or other
menu features.
Adjusting the Volume
During a call, if you want to adjust
the earpiece volume, use the side
volume keys of the phone.
In the Standby screen, you can
adjust the ring volume using the
side volume keys.
17
Getting Started
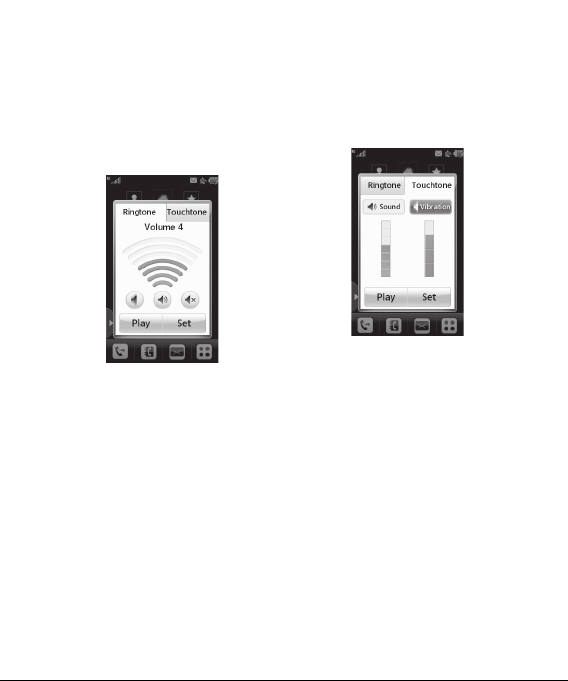
Setting Profiles
Press either of the side volume keys.
You can set your Ringtone to Vibrate
All, Alarm Only or Silent All.
18 LG GR500FD | User Guide
You can also adjust the touchtone
sound and vibration volume from
the Touchtone tab.
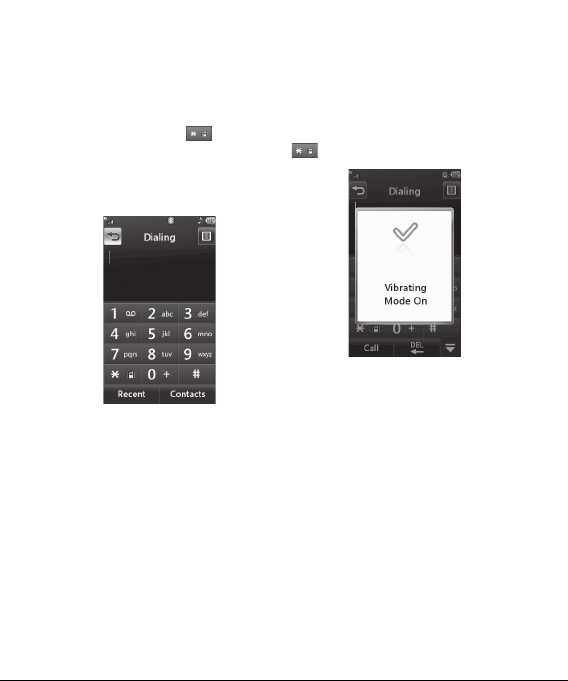
Vibration Mode (Quick)
Vibration Mode can be activated by
touching and holding
dial pad. You can also set Vibration
Mode by pressing and holding
down side volume key as well.
from the
The phone will display ‘Vibrating
Mode On’. If you would like to turn
Vibration mode Off, touch and hold
again.
Signal Strength
If you are inside a building, being
near a window may give you better
reception. You can see the strength
of your signal by the signal indicator
on your phone’s display screen.
19

Getting Started
Entering Text
You can enter alphanumeric
characters by using the phone’s
touch pad. For example, storing
names in the Address Book, writing
a message or scheduling events in
the calendar all require text to be
entered.
The following text input modes are
available on the phone.
Using the Symbol Mode
The Symbol Mode enables you to
enter various symbols or special
characters. To enter a symbol, touch
. Then select the desired symbol.
20 LG GR500FD | User Guide
ABC Mode
This mode allows you to enter
letters by touching the key labeled
with the required letter once, twice,
three or four times until the letter is
displayed.
123 Mode (Numbers Mode)
Type numbers using one keytouch
per number. To change to 123 mode
in a text entry field, touch
.
Changing the Text Input Mode
You can change the text input mode
by touching pressing the Text Input
Mode toggle button
touch screen.
on the
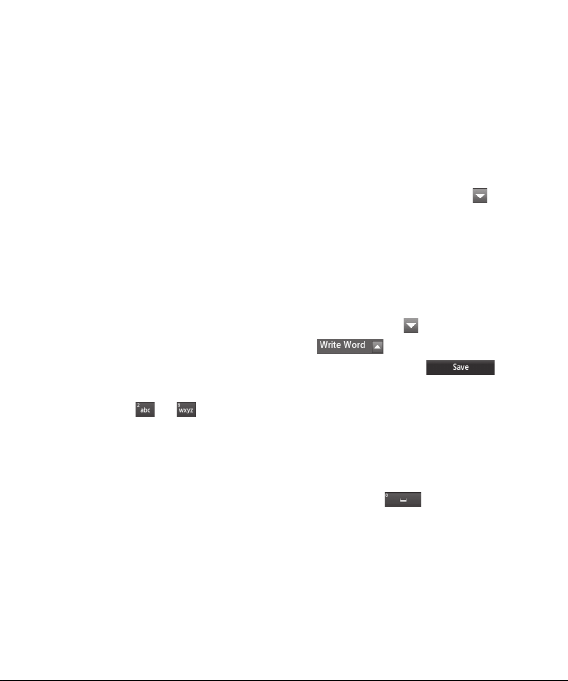
Using the T9 Mode
The T9 predictive text input mode
allows you to enter words easily
with a minimum number of key
presses. As you touch each key,
the phone begins to display
the characters that it thinks you
are typing based on a built-in
dictionary. As new letters are added,
the word changes to reflect the
most likely candidate from the
dictionary.
1 When you are in the T9 predictive
text input mode, begin entering
a word by pressing the touch
screen keys
Press one key per letter.
to .
• The word changes as letters are
typed - ignore what is displayed
on the screen until the word is
typed completely.
• If the word is still incorrect after
typing completely, press
the pop up menu to see the
options. Then select the word
you want by touch.
• If the desired word is missing
from the word choices list, add
it by pressing
word. Then press
save the word into the built-in
dictionary.
2 Enter the whole word before
editing or deleting any letters.
3 Complete each word with a space
by touching
and selecting
to enter the new
.
on
to
21
Getting Started
To delete letters, touch
and hold down
. Touch
to erase the
entire text entry.
Note: Pressing the
[END] key
will save your unsaved message in
the Drafts folder.
Using the ABC Mode
Use the touch pad keys to enter
your text.
1 Touch the touch key labeled with
the required letter:
• Once for the first letter
• Twice for the second letter
• And so on
2 To insert a space, touch . To
delete letters, touch
and hold down
. Touch
to erase the
entire text entry.
22 LG GR500FD | User Guide
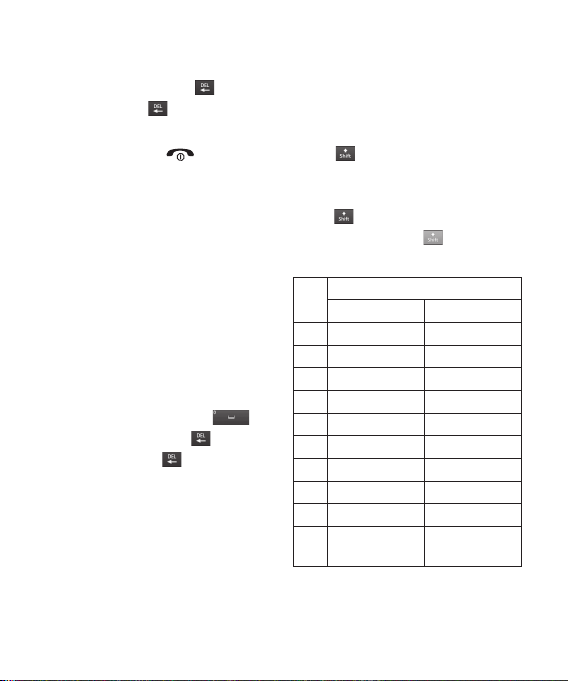
Note: Refer to the table below for
more information on the characters
available using the keys.
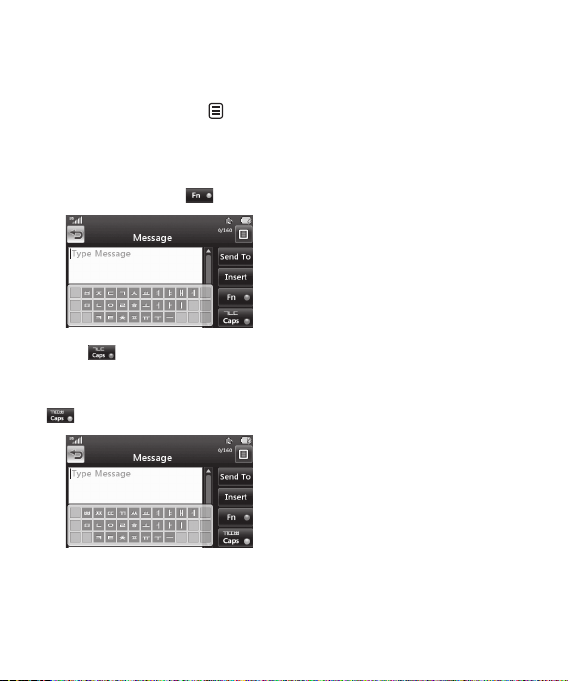
Touch
to input a Upper Case
letter. To change text entry mode
from Lower Case to Upper Case,
touch
turn to orange color
twice and the key will
- indicating
that Caps Lock has been activated.
Characters in the Order Display
Key
Upper Case Lower Case
1 . , ' @ ? ! - : / 1 . , ' @ ? ! - : / 1
2 A B C 2 a b c 2
3 D E F 3 d e f 3
4 G H I 4 g h i 4
5 J K L 5 j k l 5
6 M N O 6 m n o 6
7 P Q R S 7 p q r s 7
8 T U V 8 t u v 8
9 W X Y Z 9 w x y z 9
0
Space Key,
0 (Long press)
Space Key,
0 (Long press)
Using the 123 (Numbers) Mode
The 123 Mode enables you to
enter numbers in a text message
(a telephone number, for example)
more quickly. Touch the keys
corresponding to the required digits
before manually switching back to
the appropriate text entry mode.
T9 Dictionary
The T9 Dictionary is a feature
that allows the user to add any
unique or personal words to the T9
standard language database. The T9
Dictionary function can be selected
from the Text Entry Settings by
using Options
Dictionary function, the user can
add, modify, delete or reset personal
words.
Note: You can select a different T9
language from the same Options
menu. The default setting on the
phone is the T9 disabled mode.
. Within the T9
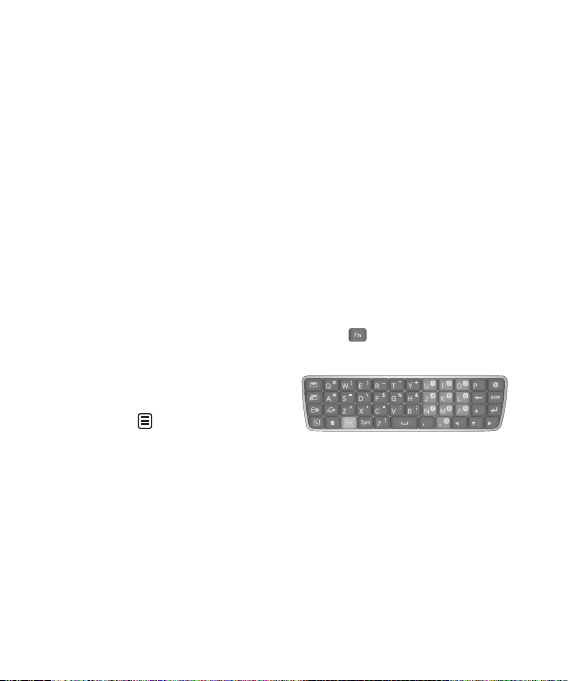
Qwerty Keypad
Text input mode using the
Qwerty Keypad
When you are required to enter
text, for example when writing a
message, the keypad will default
to ABC mode. If you are entering a
number, for example when making
a call, the keypad number keys will
default to numbers. In ABC mode
you can enter numbers by first
pressing
you require.
Note: Some fields may allow only
one text input mode (e.g. telephone
number in Address Book fields).
and then the number
23
Getting Started
To input a symbol in the text entry
field, press the
a symbol from touch screen. Or to
enter a symbol from the qwerty
keys, just press
the corresponding key. To return to
ABC mode, press again.
Complete each word with a space
by pressing
character, press
key and select
and then press
. To delete a
key.
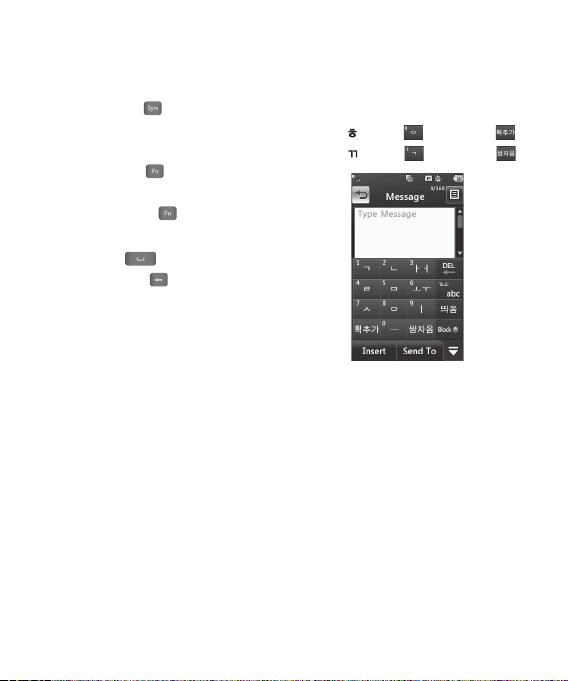
Using the Korean Mode
Allows you to type in Korean when
you set the language to Korean.
24 LG GR500FD | User Guide
When you use Touch Keypad
Allows you easily input the letters.
To input , touch
To input , touch
and touch .
and touch .
When you use Qwerty Keypad
Open the slide and touch
Choose Text Entry Settings and
Show Key Guide. You can see the
Korean key guide on the monitor. To
input numbers, touch
Touch once, and you can see
the Korean key guide as below. To
return its normal input mode, touch
again.
.
.
25
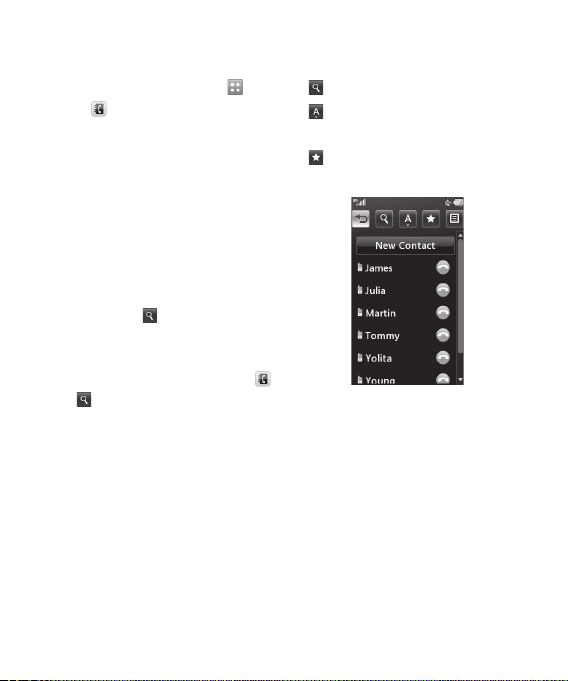
Contacts
From standby screen, touch and
touch
Address Book’s submenus.
. You will see following
Contact List
This menu allows you to save
and manage contact address
information. The Contact List's
functions allow you to add a new
address or search saved contact
addresses by name. To search a
contact, touch
contact person’s name. From the
standby screen, you can directly
search for a contact by touching
.
and
26 LG GR500FD | User Guide
and input the
• : Search a contact.
• : Shows your contacts by first
letter/character.
• : Shows your contacts
designated as Favorites.
 Loading...