How it Works
Log In / Sign Up
Buy Points
How it Works
FAQ
Contact Us
Questions and Suggestions
Users
LG
Loading...
A
ABNC246HLAA
ABNC306GLAA
ABNC368GLAA
ABNC488ELAA
ABNC608ELAA
ABNH186HLAA
2
ABNH186HLAB
6
ABNH186HLAC
5
ABNH18GHLA2
4
ABNH246BHLAC
ABNH246HLAA
ABNH246HLAB
ABNH246HLAC
3
ABNH246HLAD
2
ABNH24GHLA2
4
ABNH306GLAA
ABNH306GLAB
5
ABNH306GLAC
4
ABNH306GLAD
ABNH366BGLAC
ABNH366GLAB
4
ABNH366GLAC
ABNH366GLAD
ABNH366KSB0
ABNH368GLAA
4
ABNH426RLAC
ABNH426RLAD
2
ABNH486RLAB
4
ABNH486RLAC
4
ABNH486RLAD
3
ABNH606RLAB
3
ABNH606RLAC
2
ABNH606RLAD
ABNQ18GHLA0
3
ABNQ18GL2A0
3
ABNQ18GL2A1
2
ABNQ18GL2A2
2
ABNQ18GM1T1
6
ABNQ18GM1T2
2
ABNQ21GHLA0
ABNQ21GL2A0
ABNQ22GM1A4
4
ABNQ24GGLA0
2
ABNQ24GM1A2
2
ABNQ36GM3A4
ABNQ42GM3T2
4
ABNQ48GM3A2
4
ABNQ48GRLA0
2
ABNQ54GM3T1
3
ABNQ60LM3T1
6
ABNW12GL5S1
2
ABNW18GBHC0
ABNW18GM1S1
8
ABNW24GBHC0
ABNW24GGLT0
5
ABNW24GM1A0
4
ABNW24GM1E4
4
ABNW24GM1S1
4
ABNW27GM1T1
2
ABNW366KSA1
ABNW366KSA3
2
ABNW36GM2A0
ABNW36GM2S1
3
ABNW426KSA1
ABNW426KSA3
2
ABNW486KSA1
2
ABNW48LM3S1
7
ABNW50LM3S1
2
ABNW54GRLT0
3
ABNW606LTA1
2
ABNW60LM3S1
ABNW85GB9A0
ABR521
3
ABUH4287SS1
ABUM1400WT4
ABUQ18GHLA0
3
ABUQ18GL2A0
ABUQ18GL2A2
ABUQ21GHLA0
2
ABUQ21GL2A0
ABUQ24GGLA0
2
ABUQ24GL3A0
ABUQ30GM1A4
ABUQ30GM1T1
6
ABUQ42GM3T2
2
ABUQ60LM3T1
3
ABUW12GL5S1
ABUW18GM1S1
3
ABUW24GM1E4
2
ABUW24GM1S1
ABUW3066SS0
ABUW3666SS1
ABUW366KSA0
ABUW366KSA1
2
ABUW366KSA3
2
ABUW36GM2S1
2
ABUW426KSA1
2
ABUW426KSA3
ABUW486KSA0
ABUW486KSA1
2
Loading...
Loading...
Nothing found
ABNW12GL5S1
INSTALLATION MANUAL
84 pgs
12.83 Mb
0
User manual
60 pgs
5.96 Mb
0
Table of contents
Loading...
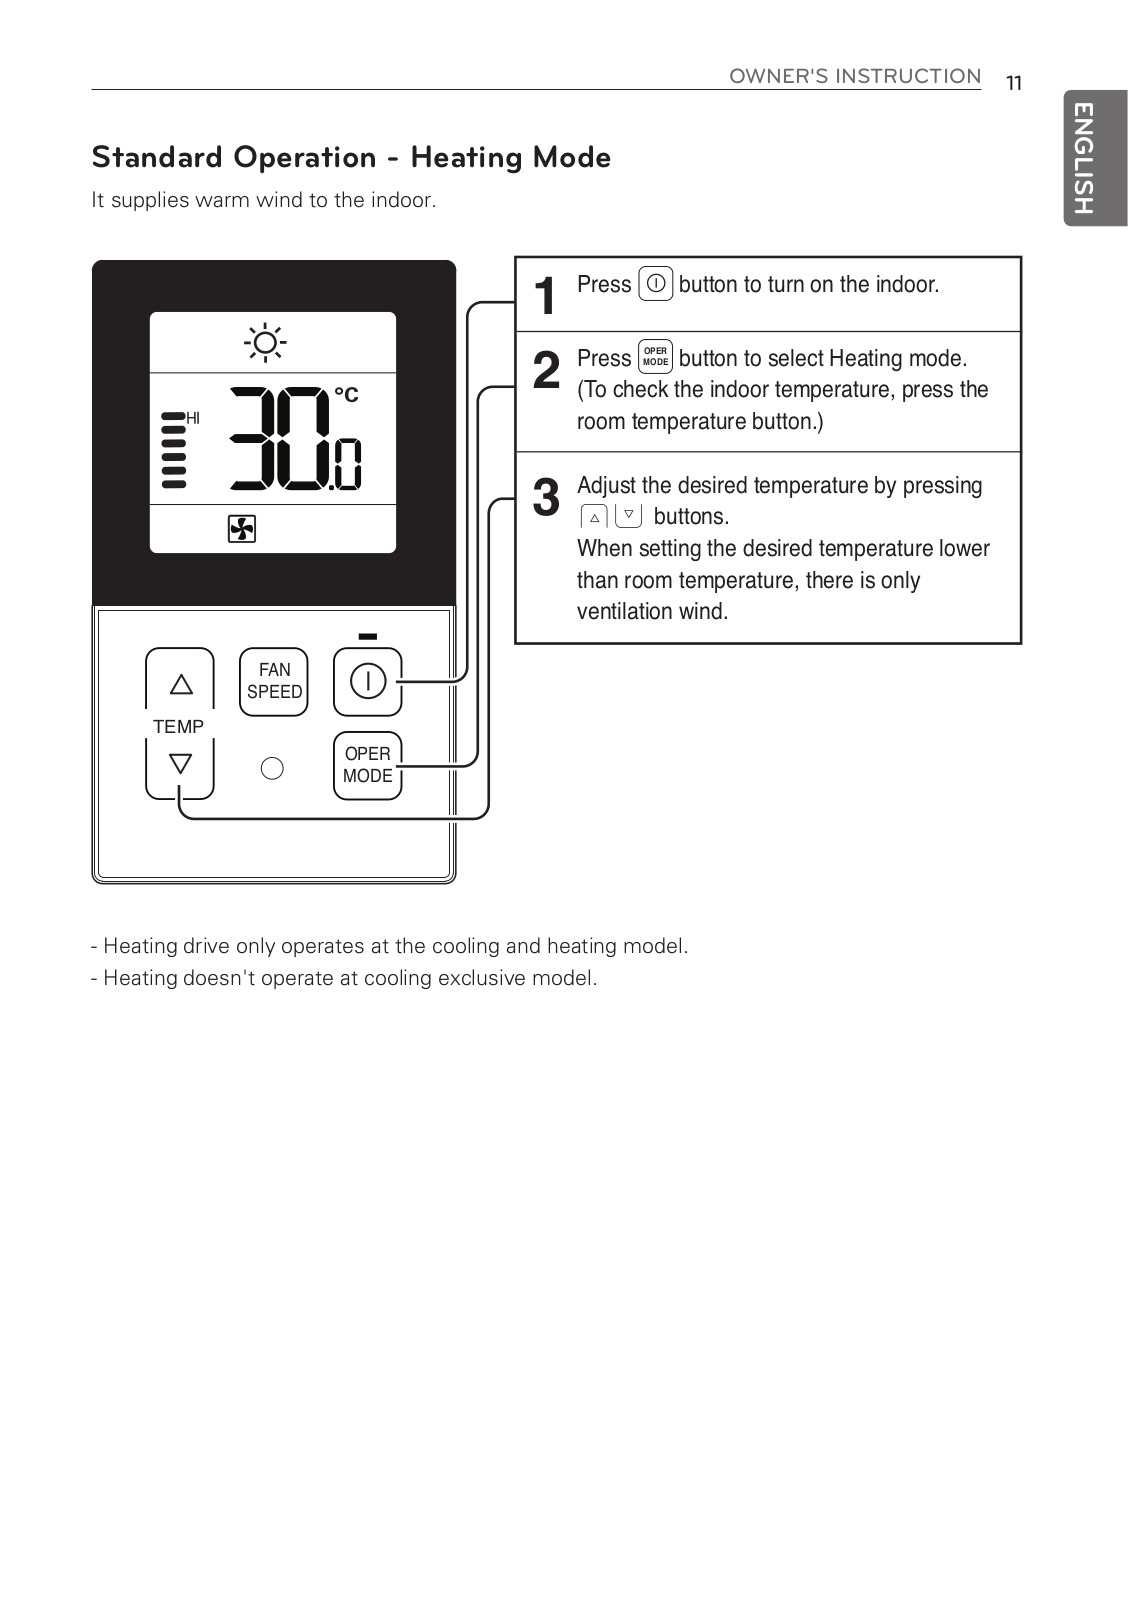
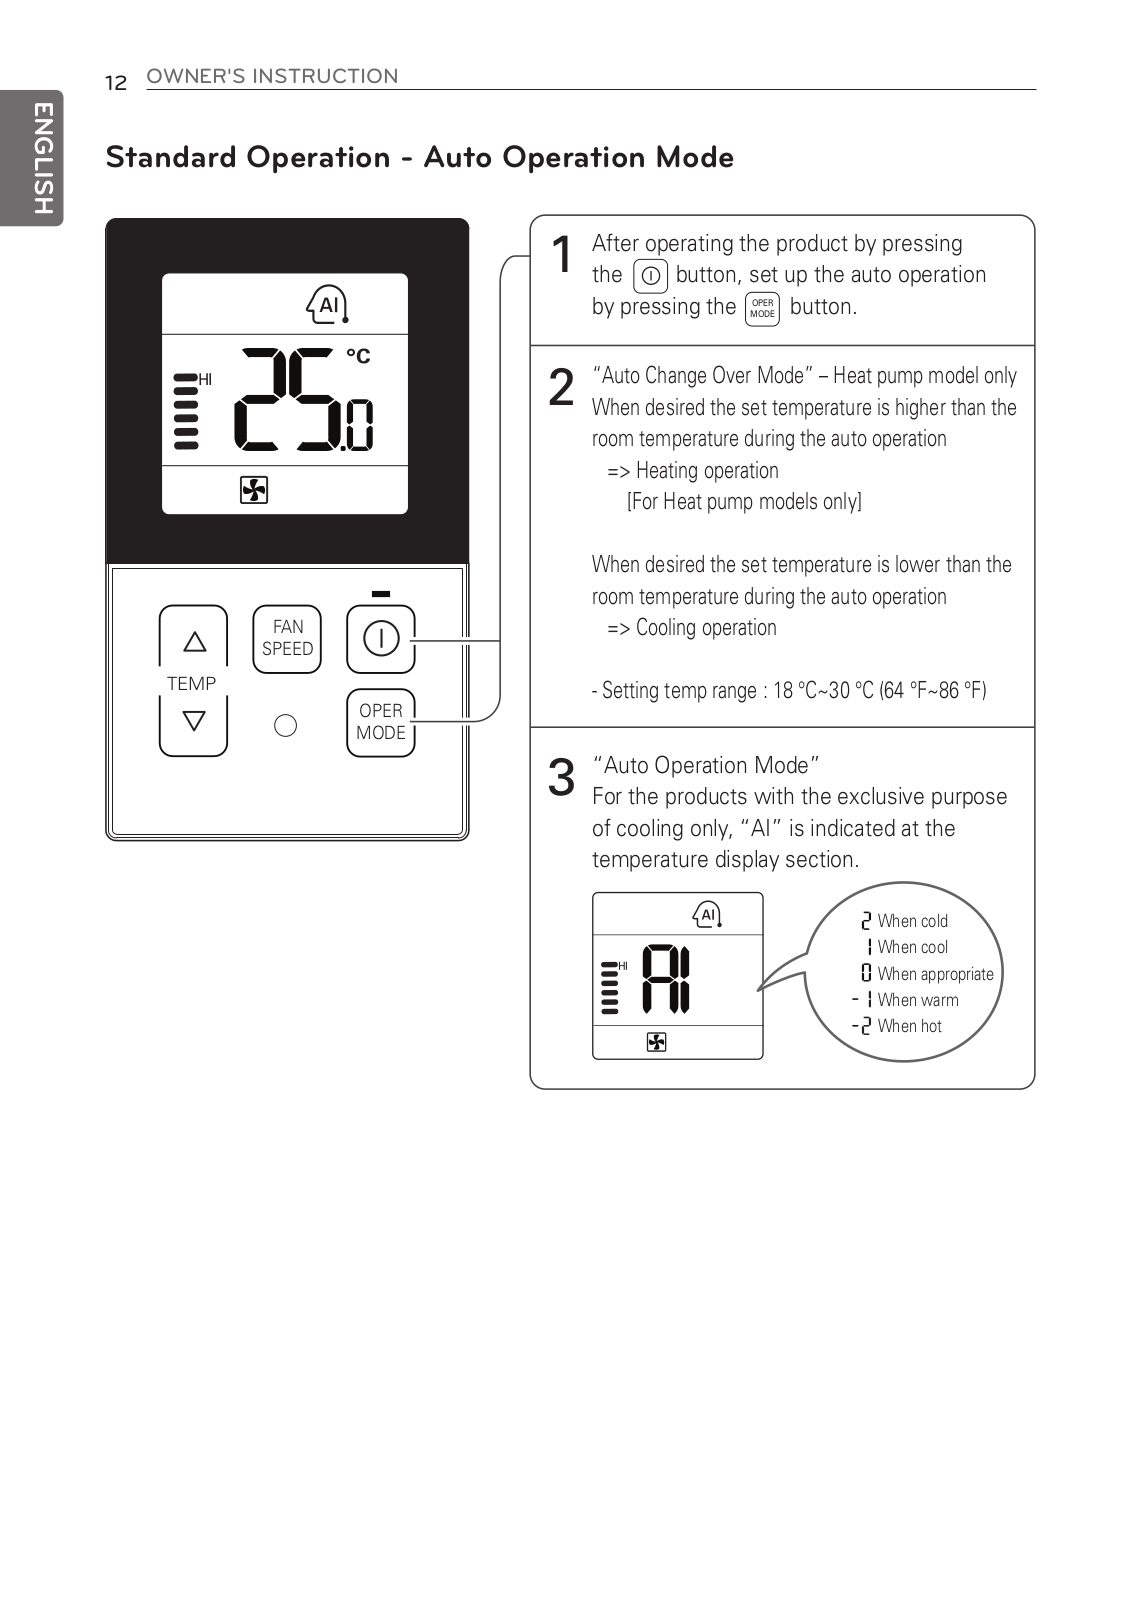
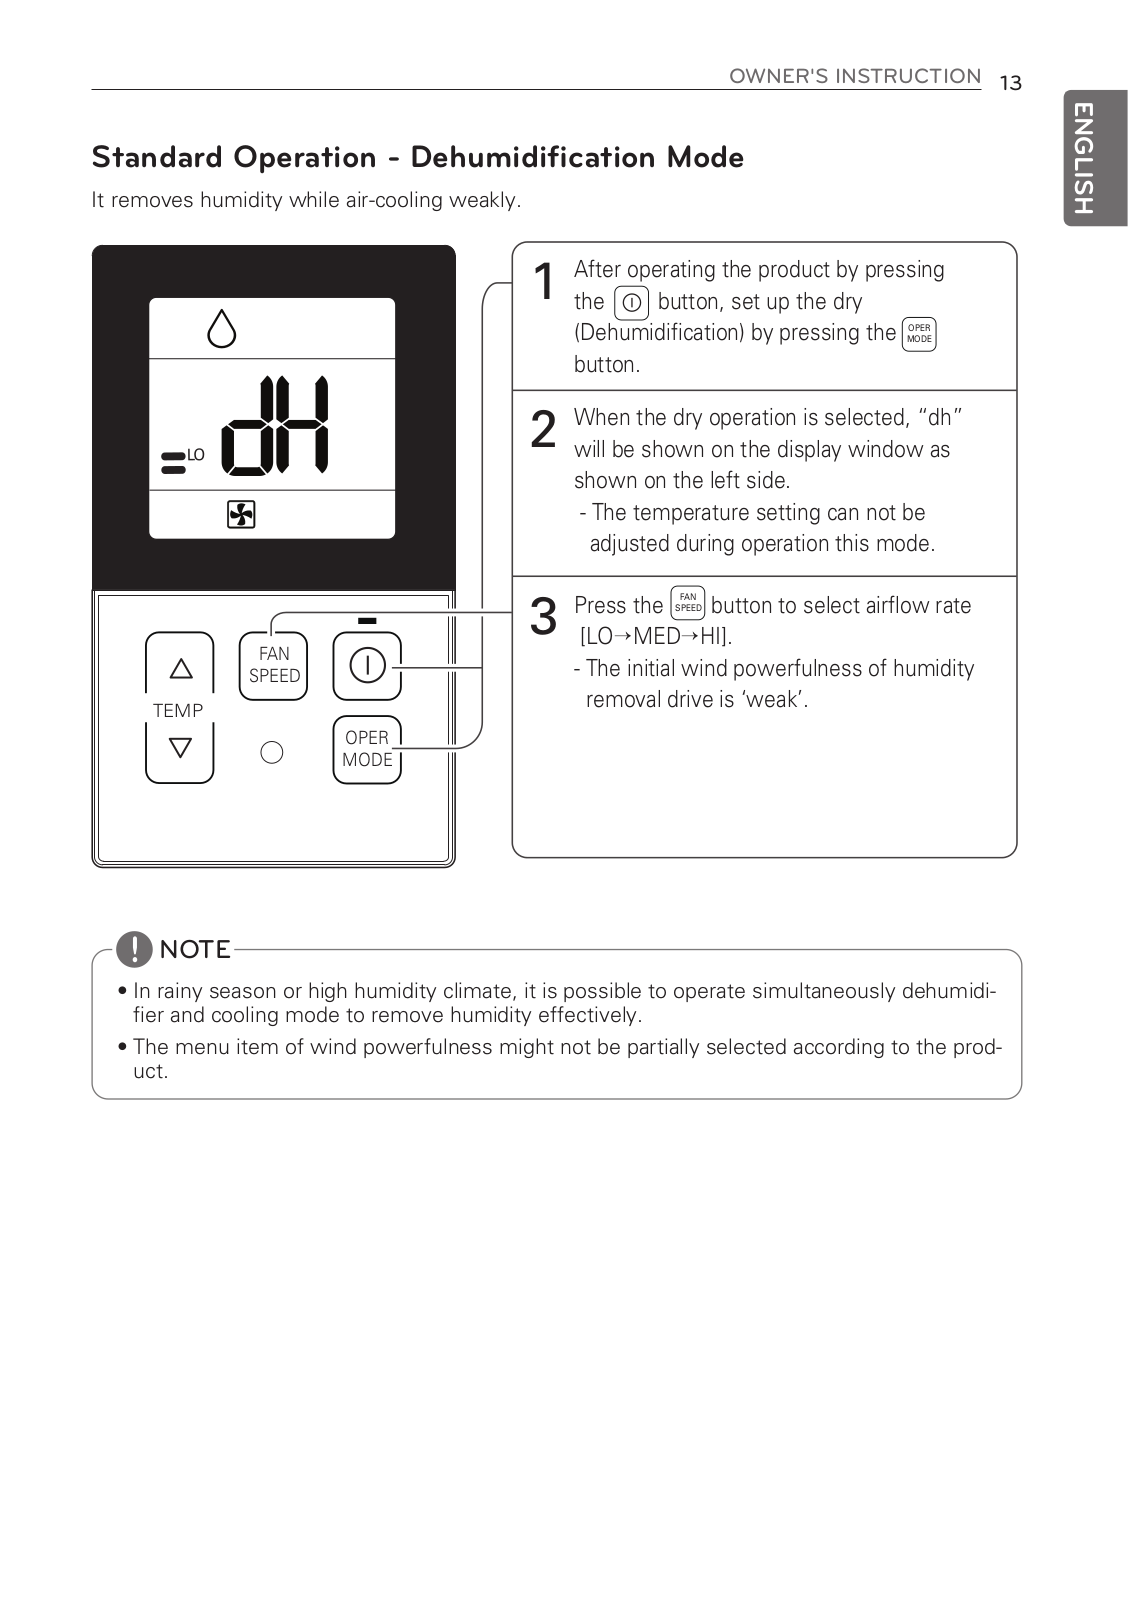
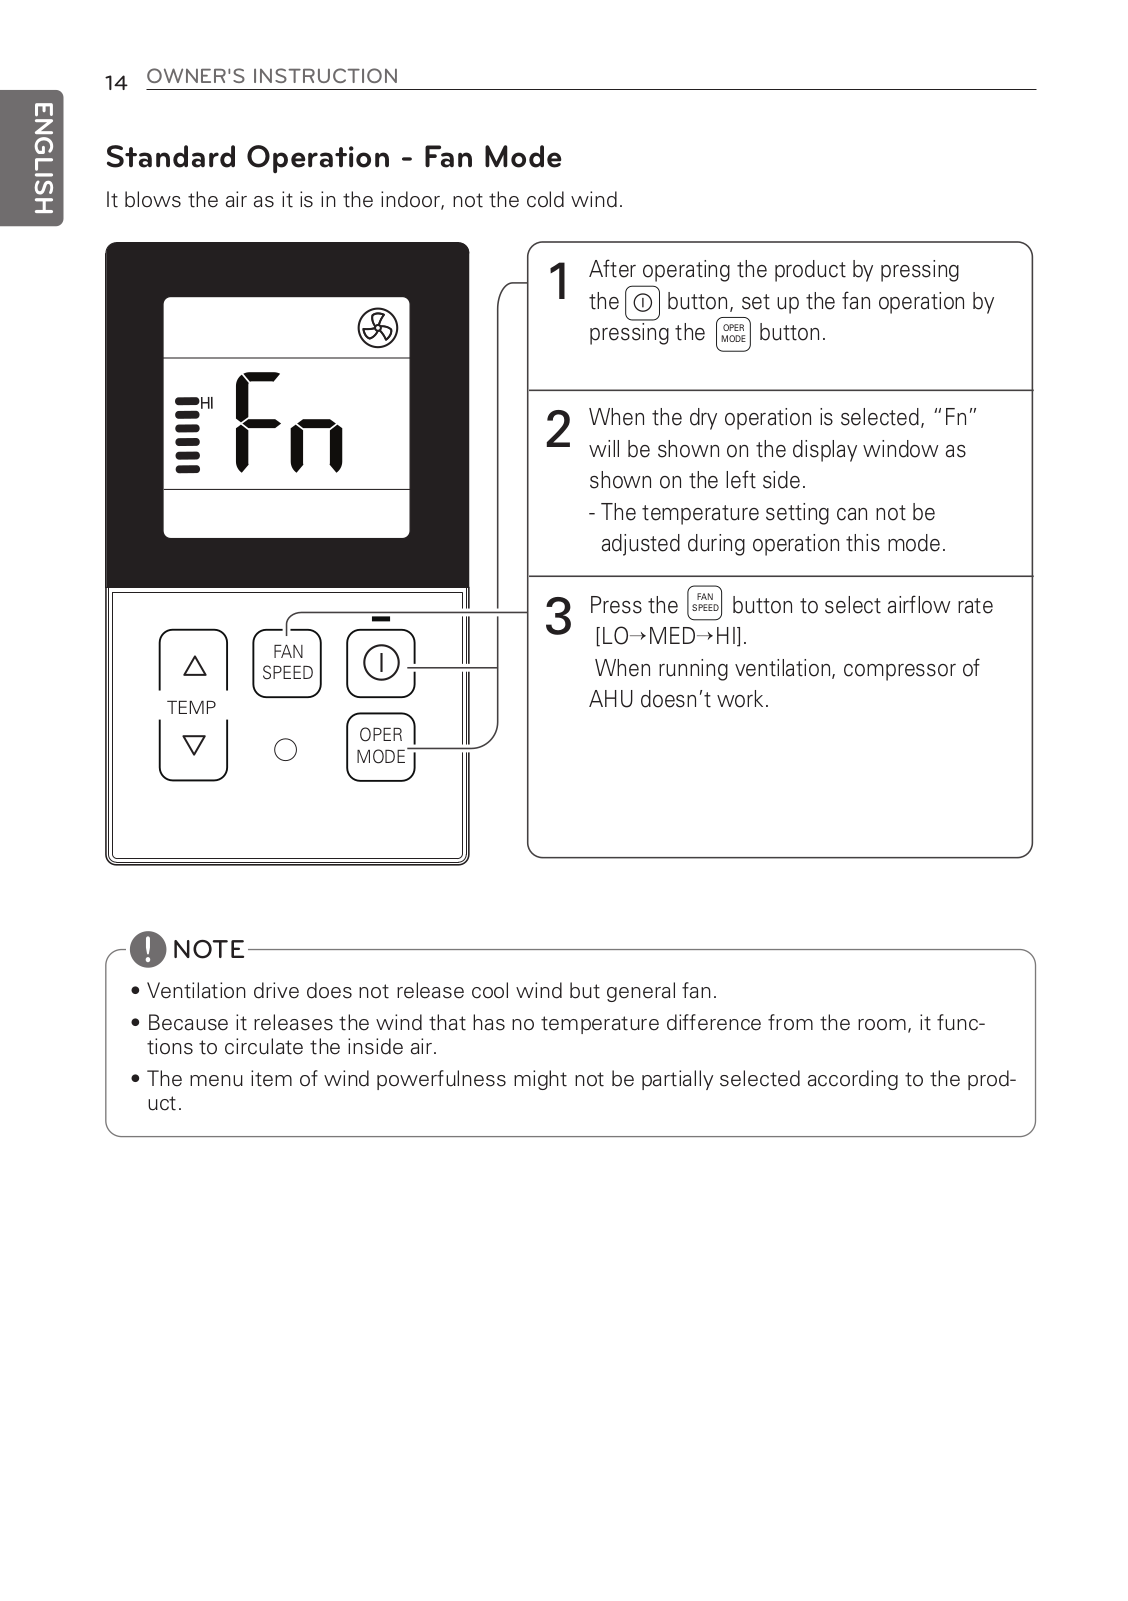
LG ABNW12GL5S1 User manual
...
LG User manual
Download
Specifications and Main Features
Frequently Asked Questions
User Manual
Download
Loading...
+
42
hidden pages
Unhide
You need points to download manuals.
1 point = 1 manual.
You can buy points or you can get point for every manual you upload.
Buy points
Upload your manuals
 Loading...