

LG 32/43LH51 series, 49LH54 series, 32/43LH52 series, 43LH54 series, 55LH54 series Owner's Manual
...
Please read this manual carefully before operating your set and
retain it for future reference.
www.lg.com
Safety and Reference
OWNER’S MANUAL
LED TV*
* LG LED TV applies LCD screen with LED backlights.
*MFL69309713*
P/NO : MFL69309713 (1601-REV00)
Printed in Korea

2
ENGLISH
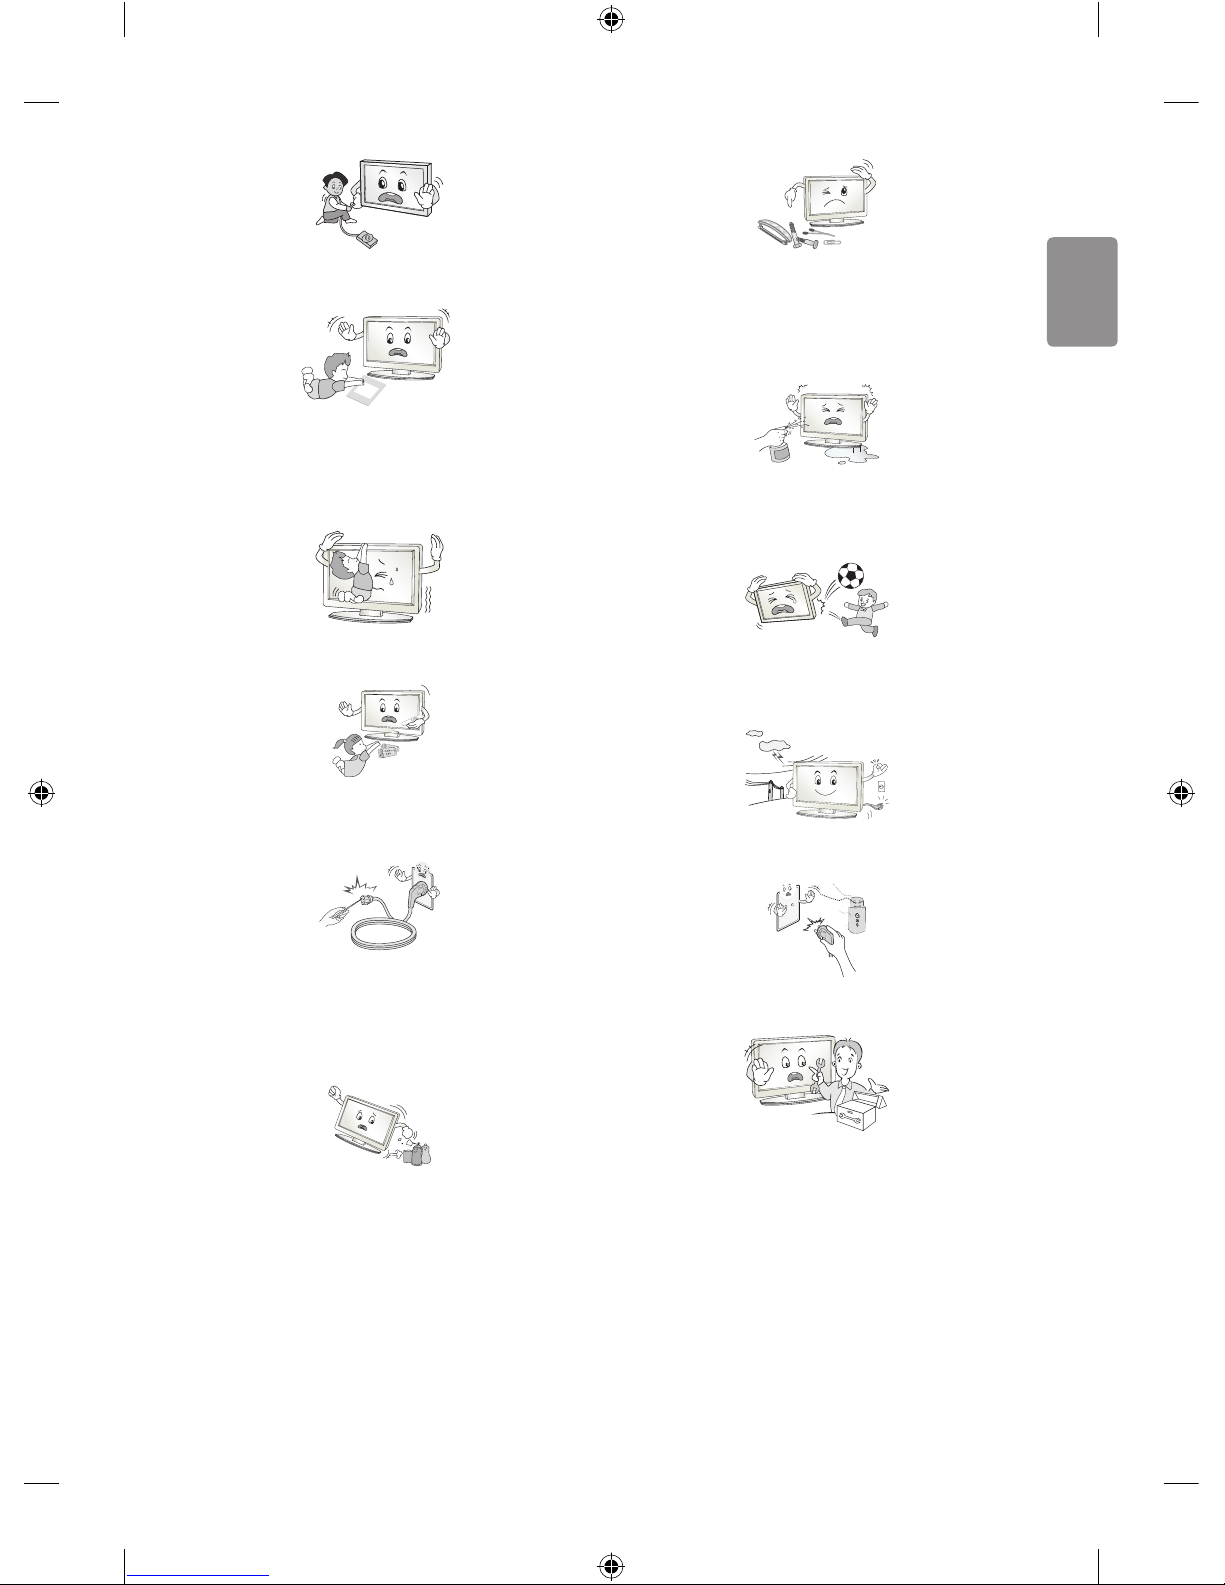
Safety instructions
Please read these safety precautions carefully before
using the product.
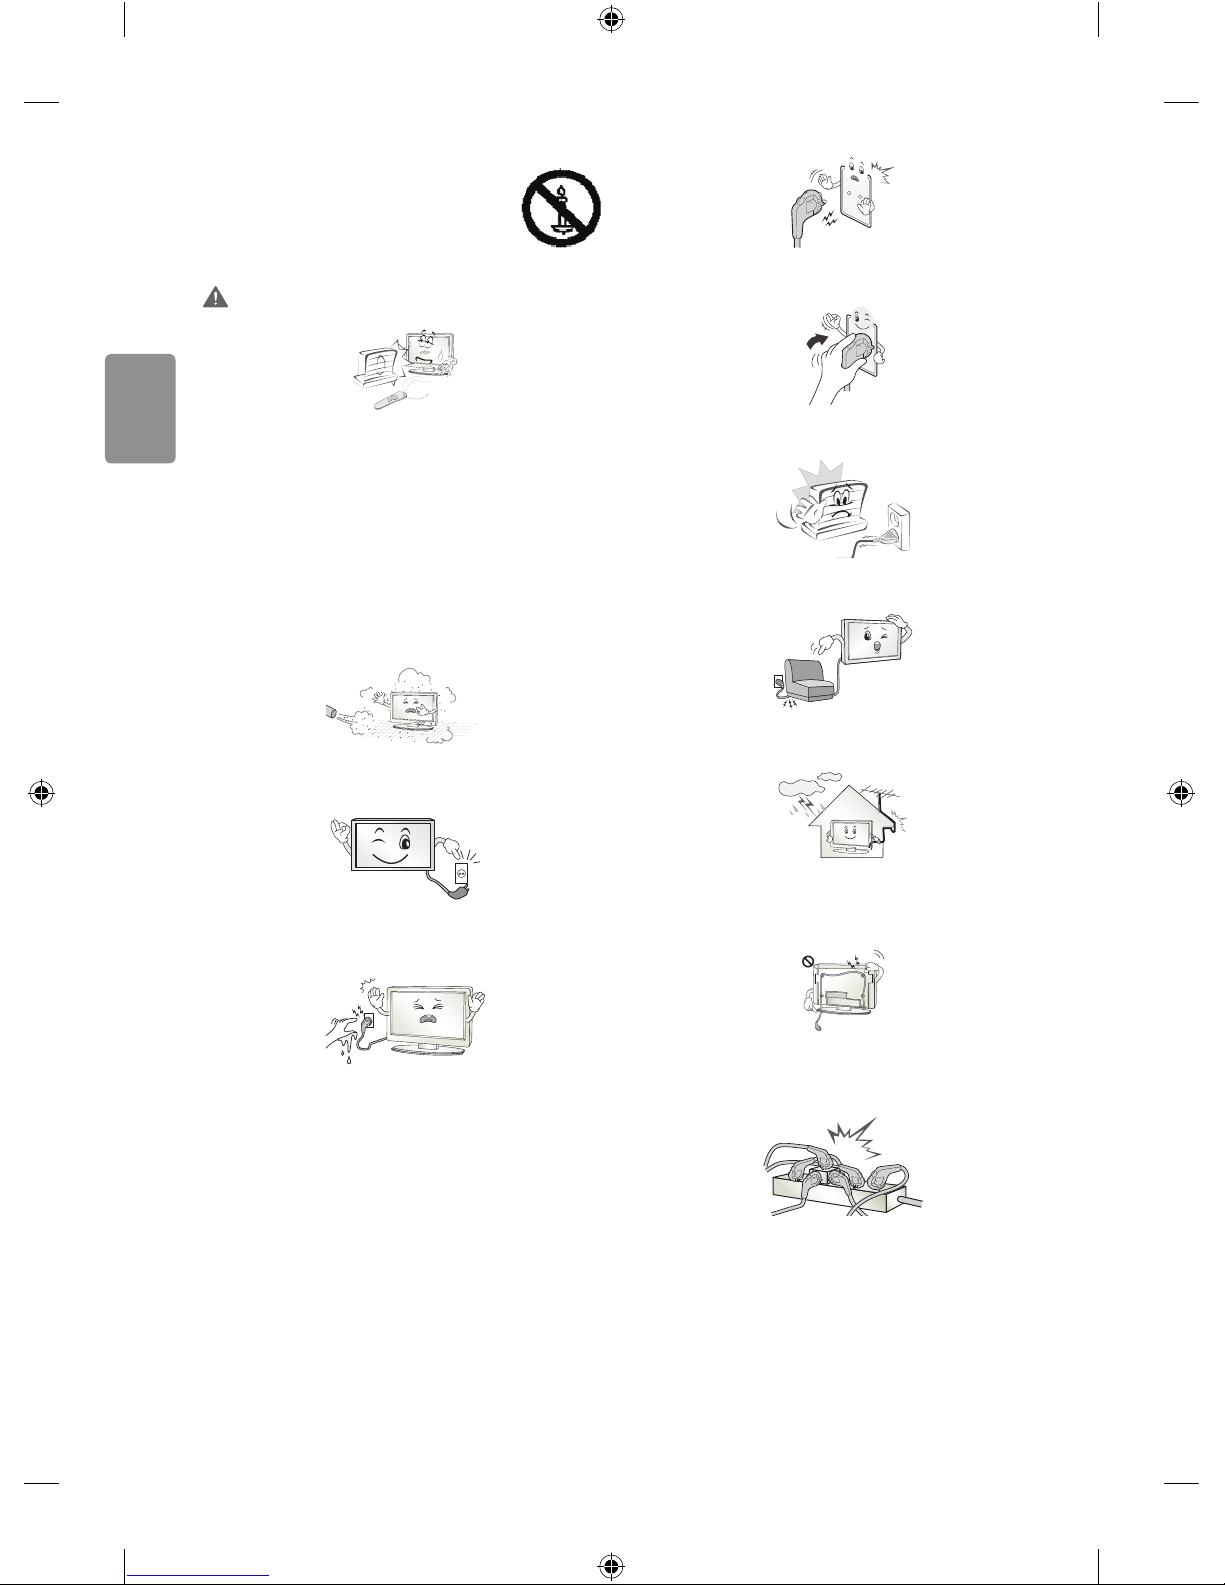
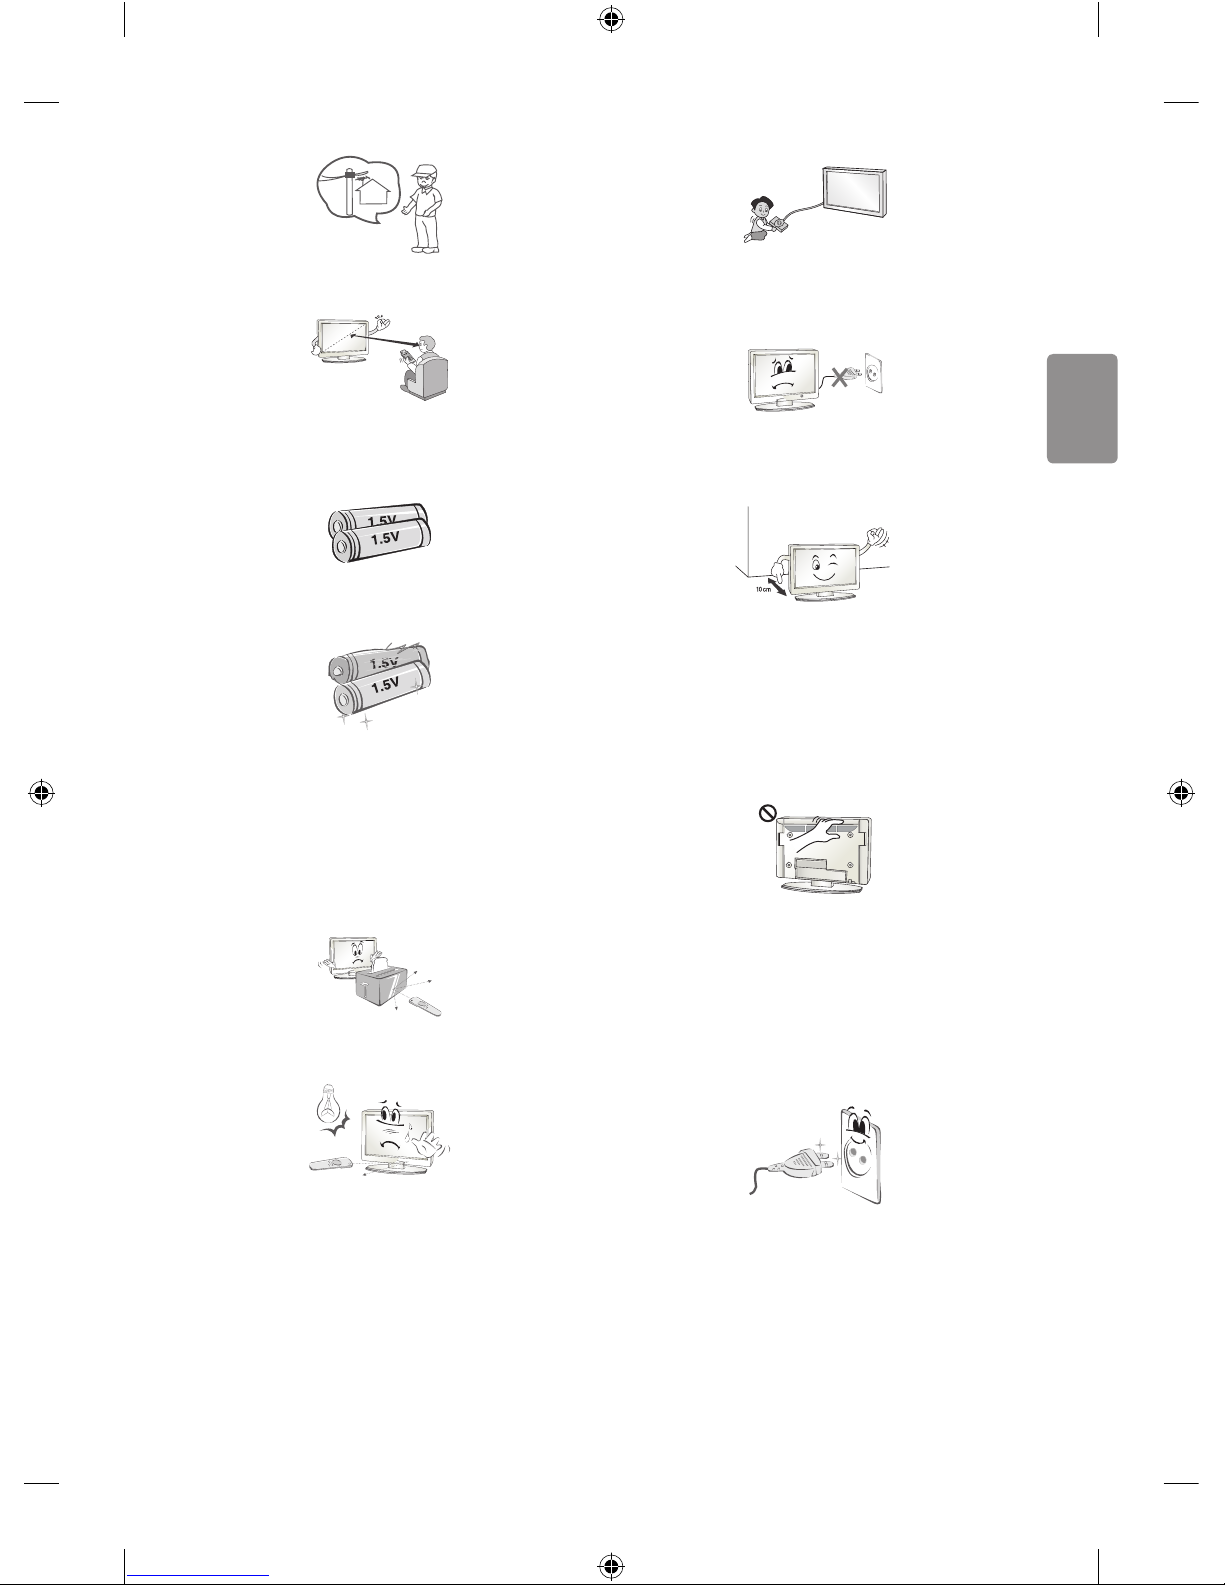
WARNING
Do not place the TV and/or remote control in the following
environments:
• A location exposed to direct sunlight
• An area with high humidity such as a bathroom
• Near any heat source such as stoves and other devices that
produce heat
• Near kitchen counters or humidi ers where they can easily be
exposed to steam or oil
• An area exposed to rain or wind
• Near containers of water such as vases
Otherwise, this may result in re, electric shock, malfunction or product
deformation.
Do not place the product where it might be exposed to dust. This may
cause a re hazard.
Mains Plug is the TV connecting/disconnecting device to AC mains
electric supply. This plug must remain readily attached and operable
when TV is in use.
Do not touch the power plug with wet hands. Additionally, if the cord
pin is wet or covered with dust, dry the power plug completely or wipe
dust o . You may be electrocuted due to excess moisture.
Make sure to connect Mains cable to compliant AC mains socket with
Grounded earth pin. (Except for devices which are not grounded on
earth.) Otherwise possibility you may be electrocuted or injured.
Insert power cable plug completely into wall socket otherwise if not
secured completely into socket, re ignition may break out.
Ensure the power cord does not come into contact with hot objects
such as a heater. This may cause a re or an electric shock hazard.
Do not place a heavy object, or the product itself, on power cables.
Otherwise, this may result in re or electric shock.
Bend antenna cable between inside and outside building to prevent
rain from owing in. This may cause water damaged inside the Product
and could give an electric shock.
When mounting TV onto wall make sure to neatly install and isolate
cabling from rear of TV as to not create possibility of electric shock /
re hazard.
Do not plug too many electrical devices into a single multiple electrical
outlet. Otherwise, this may result in re due to over-heating.
ENGLISH
3
Do not drop the product or let it fall over when connecting external
devices. Otherwise, this may result in injury or damage to the product.
Desiccant
Keep the anti-moisture packing material or vinyl packing out of the
reach of children. Anti-moisture material is harmful if swallowed. If
swallowed by mistake, force the patient to vomit and visit the nearest
hospital. Additionally, vinyl packing can cause suocation. Keep it out
of the reach of children.
Do not let your children climb or cling onto the TV.
Otherwise, the TV may fall over, which may cause serious injury.
Dispose of used batteries carefully to ensure that a small child does not
consume them. Please seek Doctor- Medical Attention immediately if
child consumes batteries.
Do not insert any metal objects/conductors (like a metal chopstick/
cutlery/screwdriver) between power cable plug and input Wall Socket
while it is connected to the input terminal on the wall. Additionally,
do not touch the power cable right after plugging into the wall input
terminal. You may be electrocuted. (Depending on model)
Do not put or store inammable substances near the product. There is a
danger of combustion/explosion or re due to careless handling of the
inammable substances.
Do not drop metallic objects such as coins, hair pins, chopsticks or wire
into the product, or inammable objects such as paper and matches.
Children must pay particular attention. Electrical shock, re or injury
can occur. If a foreign object is dropped into the product, unplug the
power cord and contact the service centre.
Do not spray water on the product or scrub with an inammable
substance (thinner or benzene). Fire or electric shock accident can
occur.
Do not allow any impact, shock or any objects to fall into the unit,
and do not drop anything onto the screen. You may be injured or the
product can be damaged.
Never touch this product or antenna during a thunder or lighting storm.
You may be electrocuted.
Never touch the wall outlet when there is leakage of gas, open the
windows and ventilate. It may cause a re or a burn by a spark.
Do not disassemble, repair or modify the product at your own
discretion. Fire or electric shock accident can occur.
Contact the service centre for check, calibration or repair.
4
ENGLISH
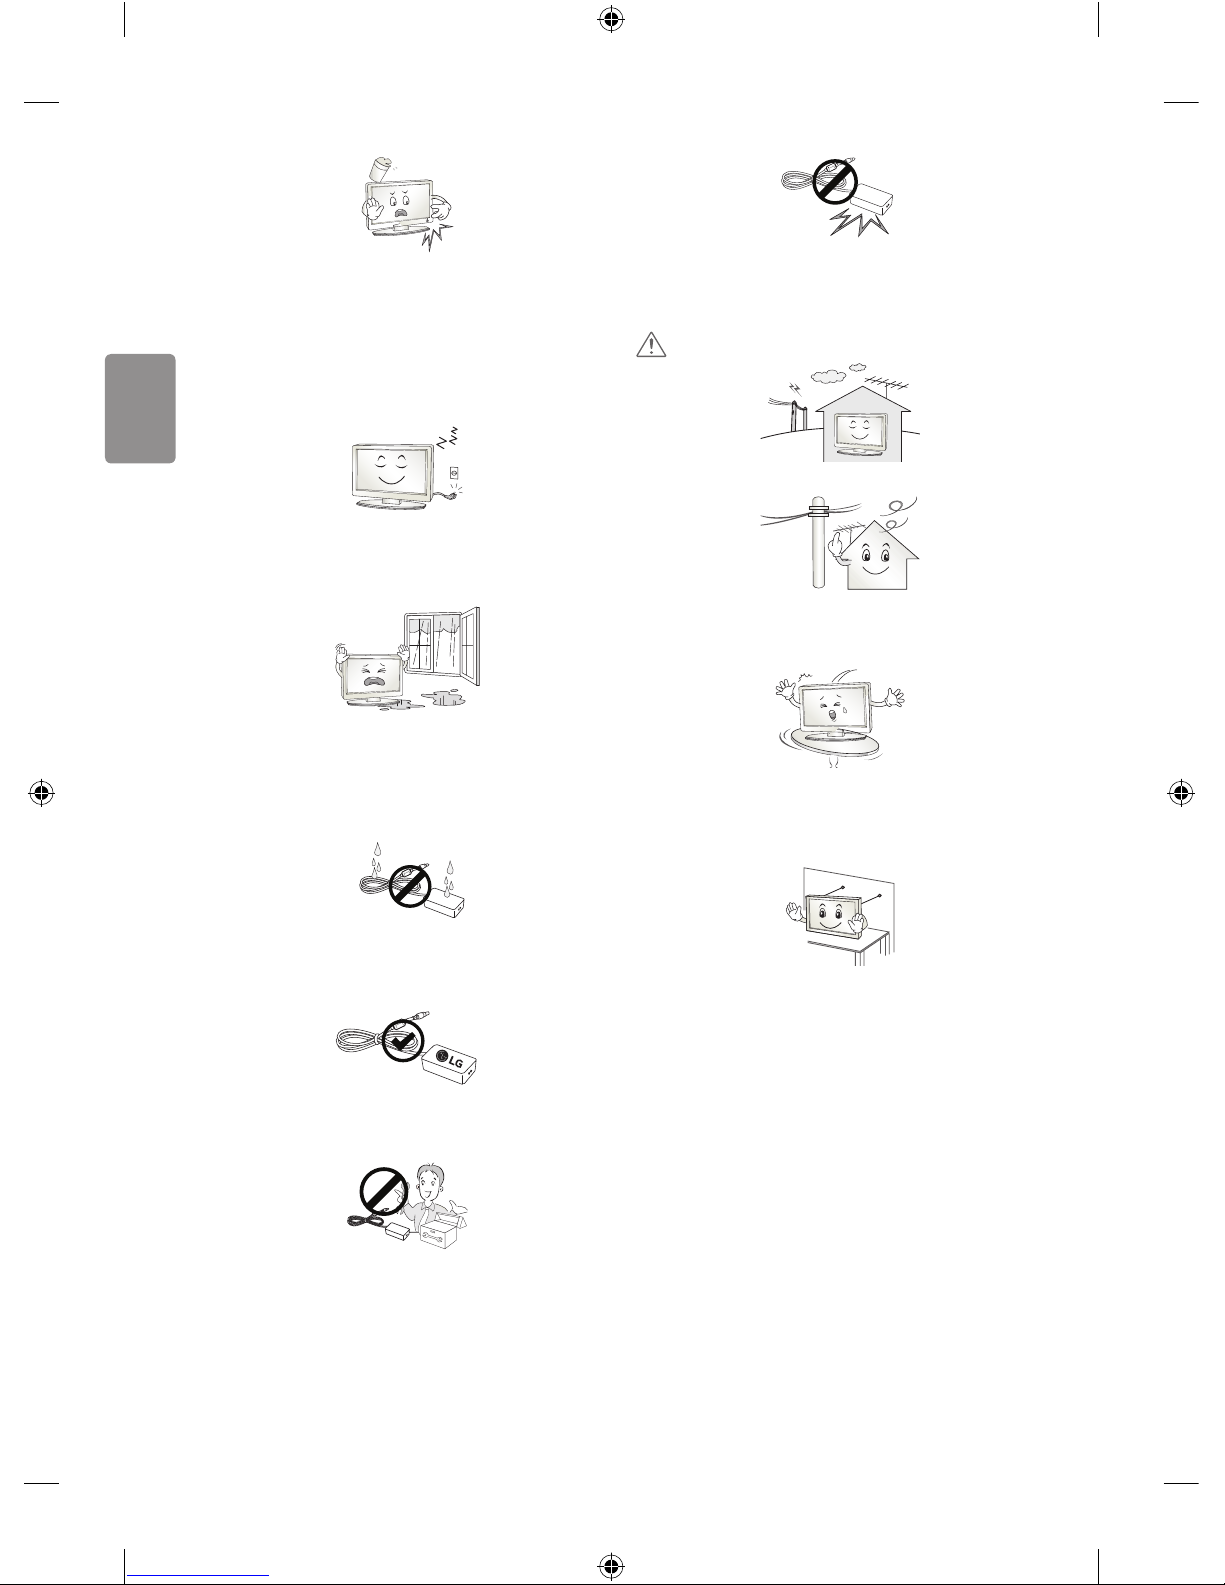
If any of the following occur, unplug the product immediately and
contact your local service centre.
• The product has been impacted by shock
• The product has been damaged
• Foreign objects have entered the product
• The product produced smoke or a strange smell
This may result in re or electric shock.
Unplug the TV from AC mains wall socket if you do not intend to use the
TV for a long period of time. Accumulated dust can cause re hazard
and insulation deterioration can cause electric leakage/shock/re.
Apparatus shall not be exposed to dripping or splashing and no objects
lled with liquids, such as vases, shall be placed on the apparatus.
Do not install this product on a wall if it could be exposed to oil or oil
mist. This may damage the product and cause it to fall.
If water enters or comes into contact with TV, AC adapter or power
cord please disconnect the power cord and contact service centre
immediately. Otherwise, this may result in electric shock or re.
Only use an authorized AC adapter and power cord approved by
LG Electronics. Otherwise, this may result in re, electric shock,
malfunction or product deformation.
Never Disassemble the AC adapter or power cord. This may result in re
or electric shock.
Be careful in handling the adapter to prevent any external shocks to it.
An external shock may cause damage to the adapter.
CAUTION
Install the product where no radio wave occurs.
There should be enough distance between an outside antenna and
power lines to keep the former from touching the latter even when the
antenna falls. This may cause an electric shock.
Do not install the product on places such as unstable shelves or inclined
surfaces. Also avoid places where there is vibration or where the
product cannot be fully supported. Otherwise, the product may fall or
ip over, which may cause injury or damage to the product.
If you install the TV on a stand, you need to take actions to prevent the
product from overturning. Otherwise, the product may fall over, which
may cause injury.
If you intend to mount the product to a wall, attach VESA standard
mounting interface (optional parts) to the back of the product. When
you install the set to use the wall mounting bracket (optional parts), x
it carefully so as not to drop.
Only use the attachments / accessories specied by the manufacturer.

ENGLISH
5
When installing the antenna, consult with a qualied service
technician. If not installed by a qualied technician, this may create a
re hazard or an electric shock hazard.
We recommend that you maintain a distance of at least 2 to 7 times
the diagonal screen size when watching TV. If you watch TV for a long
period of time, this may cause blurred vision.
Only use the specied type of battery. This could cause damage to the
remote control.
Do not mix new batteries with old batteries. This may cause the
batteries to overheat and leak.
Batteries should not be exposed to excessive heat. For example, keep
away from direct Sunlight , open replace and electric heaters.
Do not place non-rechargeable batteries in charging device.
Make sure there are no objects between the remote control and its
sensor.
Signal from Remote Control can be interrupted due to external/internal
lighting eg Sunlight, uorescent lighting. If this occurs turn o lighting
or darken viewing area.
When connecting external devices such as video game consoles, make
sure the connecting cables are long enough. Otherwise, the product
may fall over, which may cause injury or damage the product.
Do not turn the product On/O by plugging-in or unplugging the power
plug to the wall outlet. (Do not use the power plug for switch.) It may
cause mechanical failure or could give an electric shock.
Please follow the installation instructions below to prevent the product
from overheating.
• The distance between the product and the wall should be more
than 10cm.
• Do not install the product in a place with no ventilation (e.g., on a
bookshelf or in a cupboard).
• Do not install the product on a carpet or cushion.
• Make sure the air vent is not blocked by a tablecloth or curtain.
Otherwise, this may result in re.
Take care not to touch the ventilation openings when watching the TV
for long periods as the ventilation openings may become hot. This does
not aect the operation or performance of the product.
Periodically examine the cord of your appliance, and if its appearance
indicates damage or deterioration, unplug it, discontinue use of the
appliance, and have the cord replaced with an exact replacement part
by an authorized servicer.
Prevent dust collecting on the power plug pins or outlet. This may cause
a re hazard.
6
ENGLISH
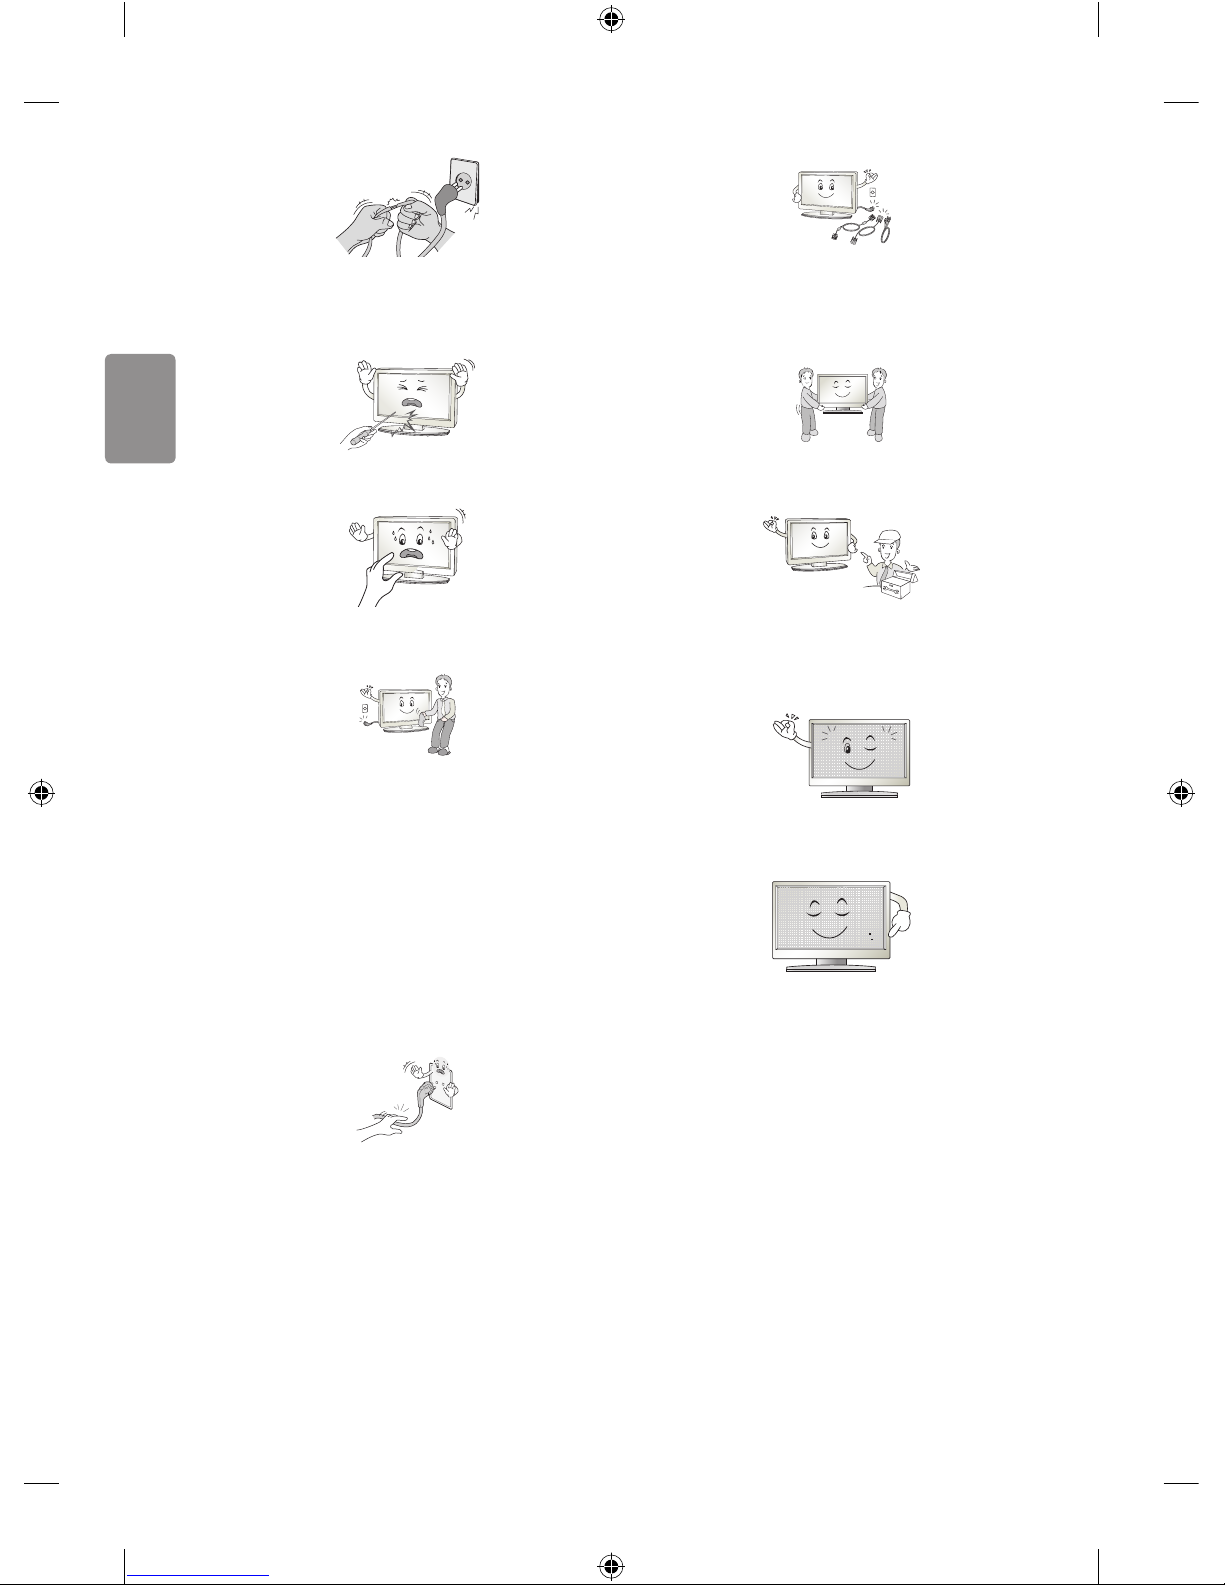
Protect the power cord from physical or mechanical abuse, such as
being twisted, kinked, pinched, closed in a door, or walked upon. Pay
particular attention to plugs, wall outlets, and the point where the cord
exits the appliance.
Do not press strongly upon the panel with a hand or sharp object such
as nail, pencil or pen, or make a scratch on it, as it may causedamage
to screen.
Avoid touching the screen or holding your nger(s) against it for long
periods of time. Doing so may produce some temporary or permanent
distortion/damage to screen.
When cleaning the product and its components, unplug the power
rst and wipe it with a soft cloth. Applying excessive force may cause
scratches or discolouration. Do not spray with water or wipe with a wet
cloth. Never use glass cleaner, car or industrial shiner, abrasives or wax,
benzene, alcohol etc., which can damage the product and its panel.
Otherwise, this may result in re, electric shock or product damage
(deformation, corrosion or breakage).
As long as this unit is connected to the AC wall outlet, it is not
disconnected from the AC power source even if you turn o this unit
by SWITCH.
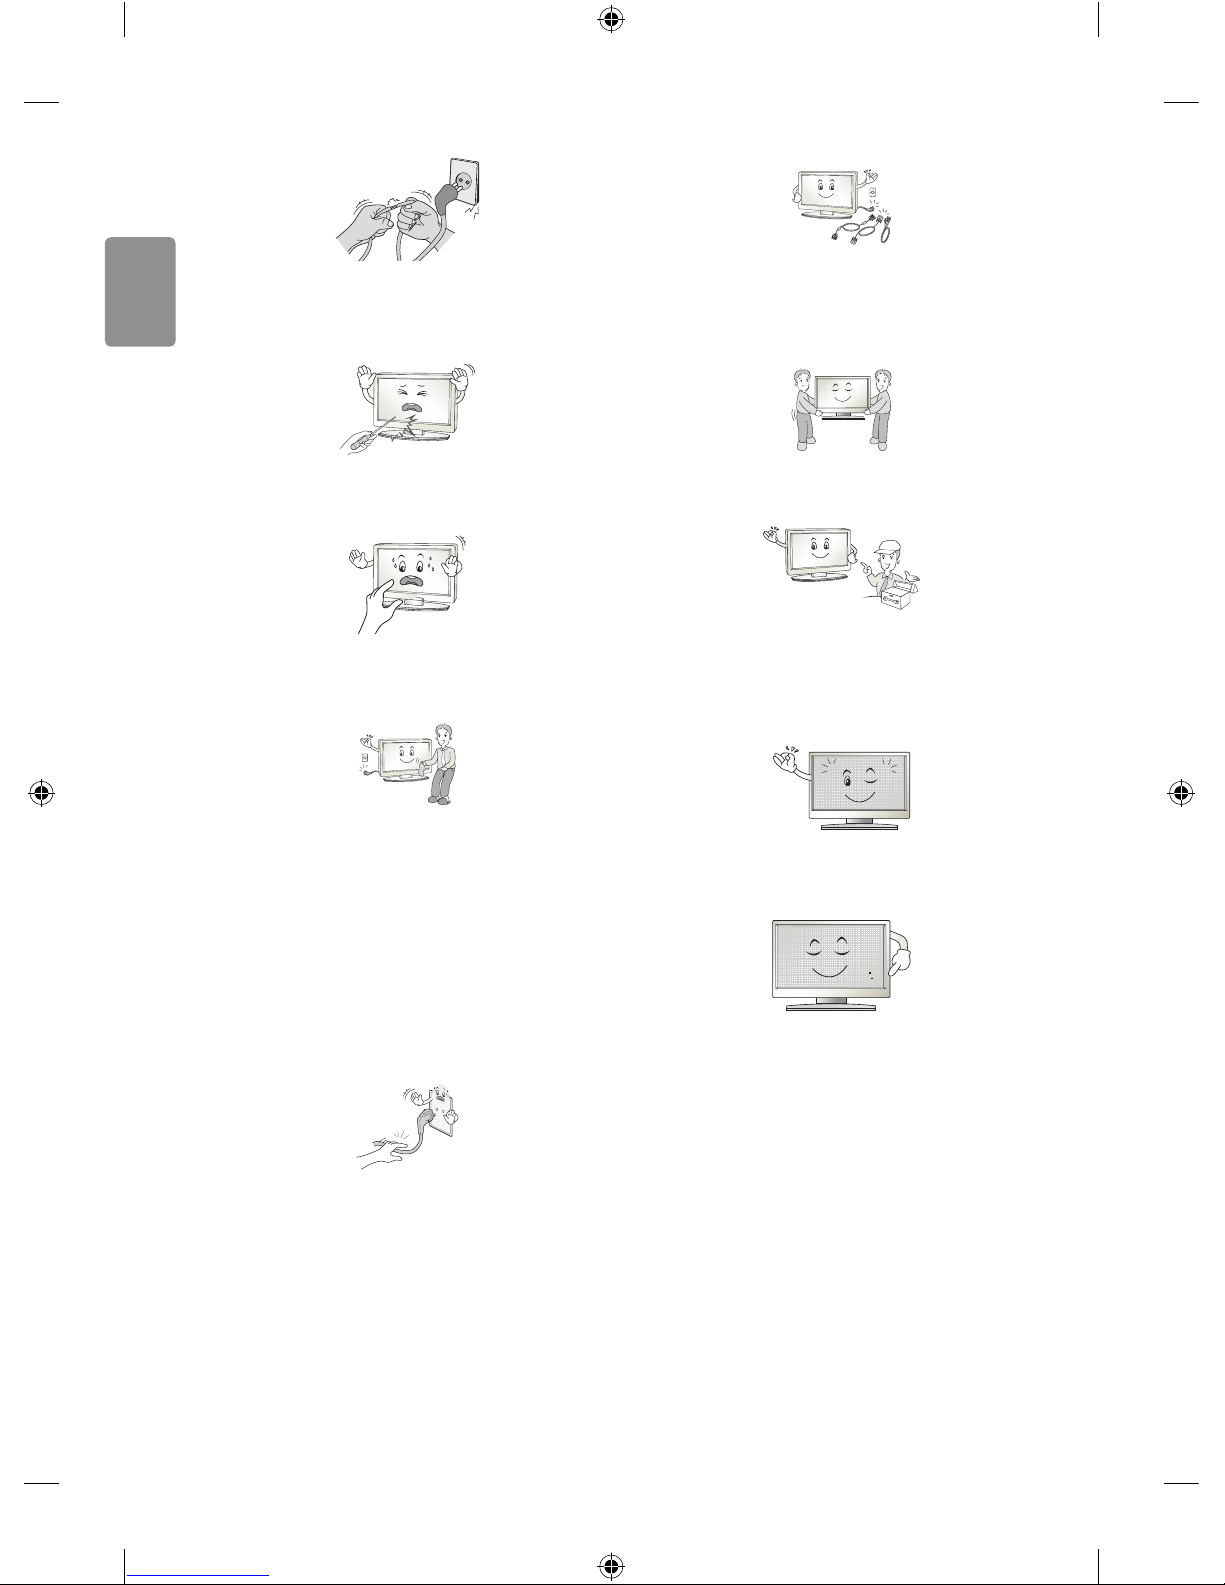
When unplugging the cable, grab the plug and unplug it, by pulling at
the plug.
Don’t pull at the cord to unplug the power cord from the power board,
as this could be hazardous.
When moving the product, make sure you turn the power o rst. Then,
unplug the power cables, antenna cables and all connecting cables.
The TV set or power cord may be damaged, which may create a re
hazard or cause electric shock.
When moving or unpacking the product, work in pairs because the
product is heavy. Otherwise, this may result in injury.
Refer all servicing to qualied service personnel. Servicing is required
when the apparatus has been damaged in any way, such as power
supply cord or plug is damaged, liquid has been spilled or objects have
fallen into the apparatus, the apparatus has been exposed to rain or
moisture, does not operate normally, or has been dropped.
If the product feels cold to the touch, there may be a small “icker”
when it is turned on. This is normal, there is nothing wrong with
product.
The panel is a high technology display product with resolution of two
million to six million pixels. You may see tiny black dots and/or brightly
coloured dots (red, blue or green) at a size of 1ppm on the panel. This
does not indicate a malfunction and does not aect the performance
and reliability of the product.
This phenomenon also occurs in third-party products and is not subject
to exchange or refund.
ENGLISH
7
You may nd dierent brightness and color of the panel depending on
your viewing position(left/right/top/down).
This phenomenon occurs due to the characteristic of the panel. It is not
related with the product performance, and it is not malfunction.
Displaying a still image for a prolonged period of time may cause image
sticking. Avoid displaying a xed image on the TV screen for a long
period of time.
Generated sound
“Cracking” noise: A cracking noise that occurs when watching or turning
o the TV is generated by plastic thermal contraction due to temperature and humidity. This noise is common for products where thermal
deformation is required. Electrical circuit humming/panel buzzing:
A low level noise is generated from a high-speed switching circuit,
which supplies a large amount of current to operate a product. It varies
depending on the product.
This generated sound does not aect the performance and reliability
of the product.
Do not use high voltage electrical goods near the TV (e.g. electric
mosquito-swatter). This may result in product malfunction.
Preparing
NOTE
• Image shown may dier from your TV.
• Your TV’s OSD (On Screen Display) may dier slightly from that
shown in this manual.
• The available menus and options may dier from the input source
or product model that you are using.
• New features may be added to this TV in the future.
• The items supplied with your product may vary depending on the
model.
• Product specications or contents of this manual may be changed
without prior notice due to upgrade of product functions.
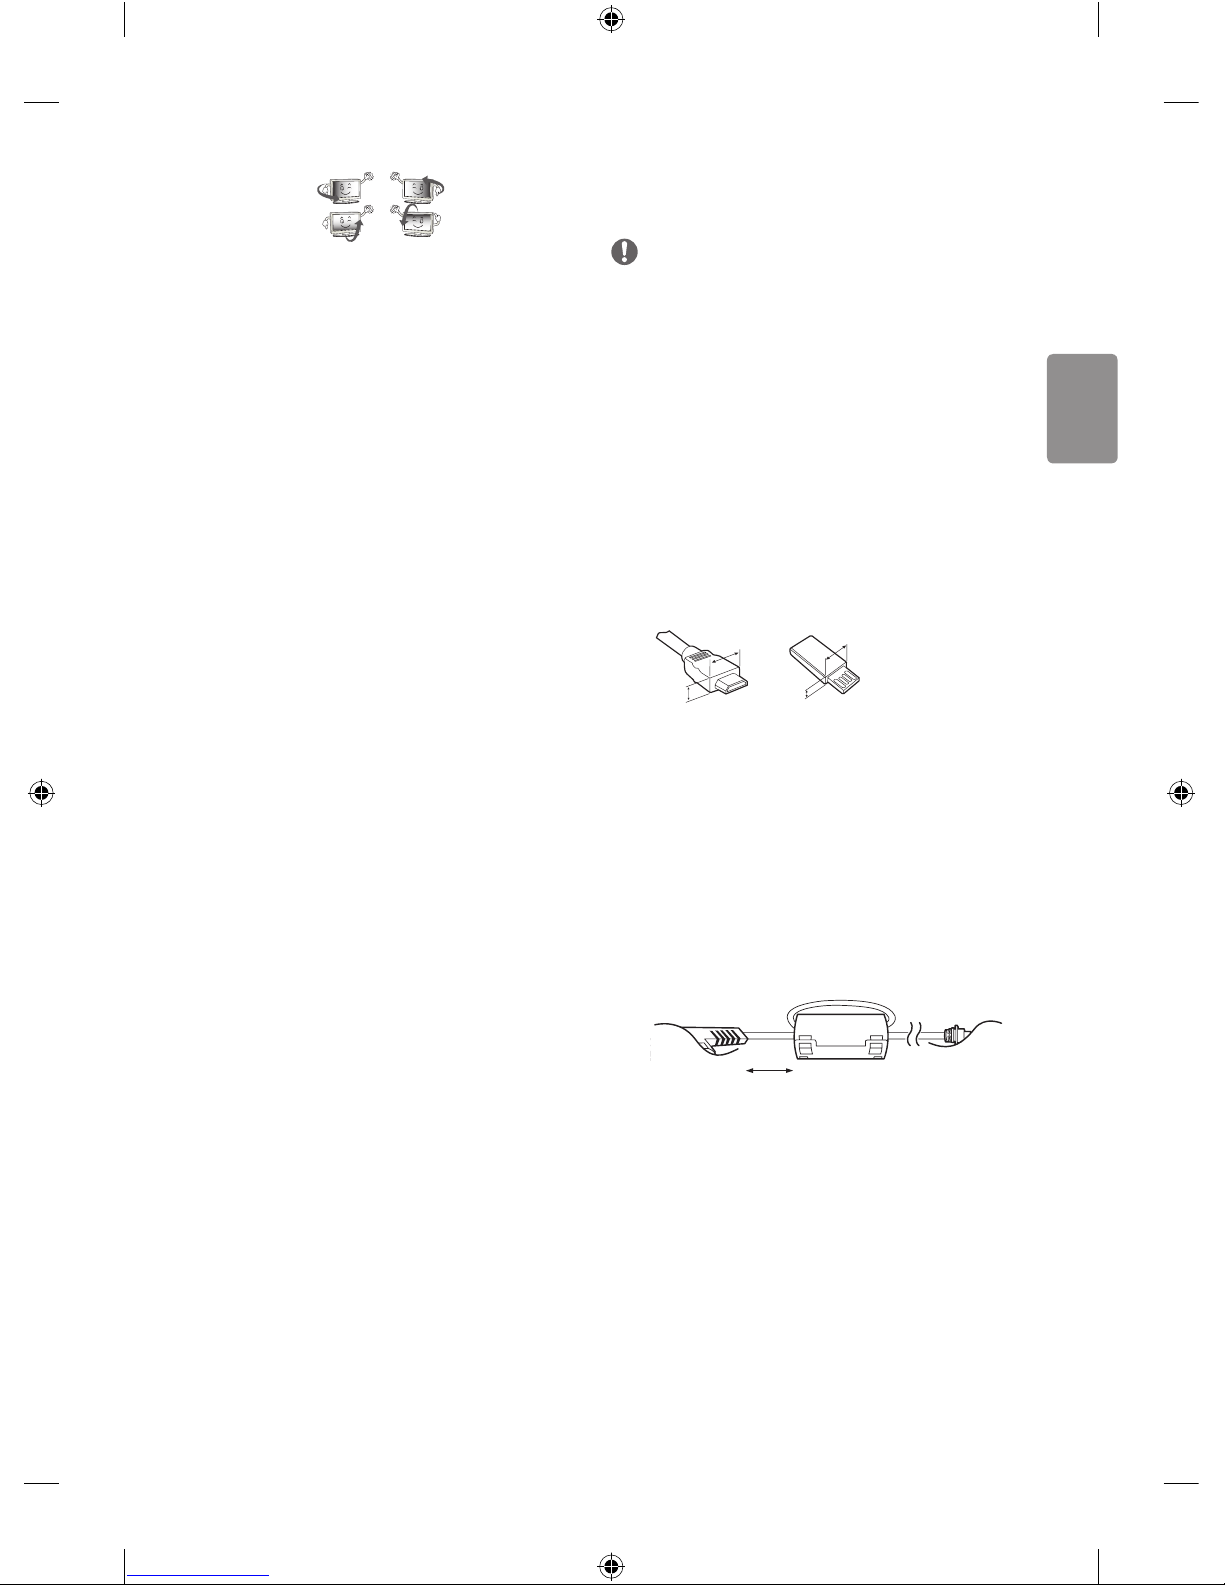
• For an optimal connection, HDMI cables and USB devices should
have bezels less than 10 mm thick and 18 mm width. Use an
extension cable that supports USB 2.0 if the USB cable or USB
memory stick does not t into your TV’s USB port.
A
B
A
B
*A
<
10 mm
*B
<
18 mm
• Use a certied cable with the HDMI logo attached.
• If you do not use a certied HDMI cable, the screen may not display
or a connection error may occur. (Recommended HDMI Cable Types)
- High-Speed HDMI
®/TM
cable (3 m or less)
- High-Speed HDMI®/TM cable with Ethernet (3 m or less)
• How to use the ferrite core (Depending on model)
- Use the ferrite core to reduce the electromagnetic interference in
the power cord. Wind the power cord on the ferrite core once.
[Wall side]
[TV side]
10 cm (+ / -2 cm)

8
ENGLISH
CAUTION
• Do not use any unapproved items to ensure the safety and product
life span.
• Any damage or injuries caused by using unapproved items are not
covered by the warranty.
• Some models have a thin lm attached on to the screen and this
must not be removed.
• When attaching the stand to the TV set, place the screen facing
down on a cushioned table or at surface to protect the screen
from scratches.
• Make sure that the screws are inserted correctly and fastened
securely. (If they are not fastened securely enough, the TV may tilt
forward after being installed.) Do not use too much force and over
tighten the screws; otherwise screw may be damaged and not
tighten correctly.
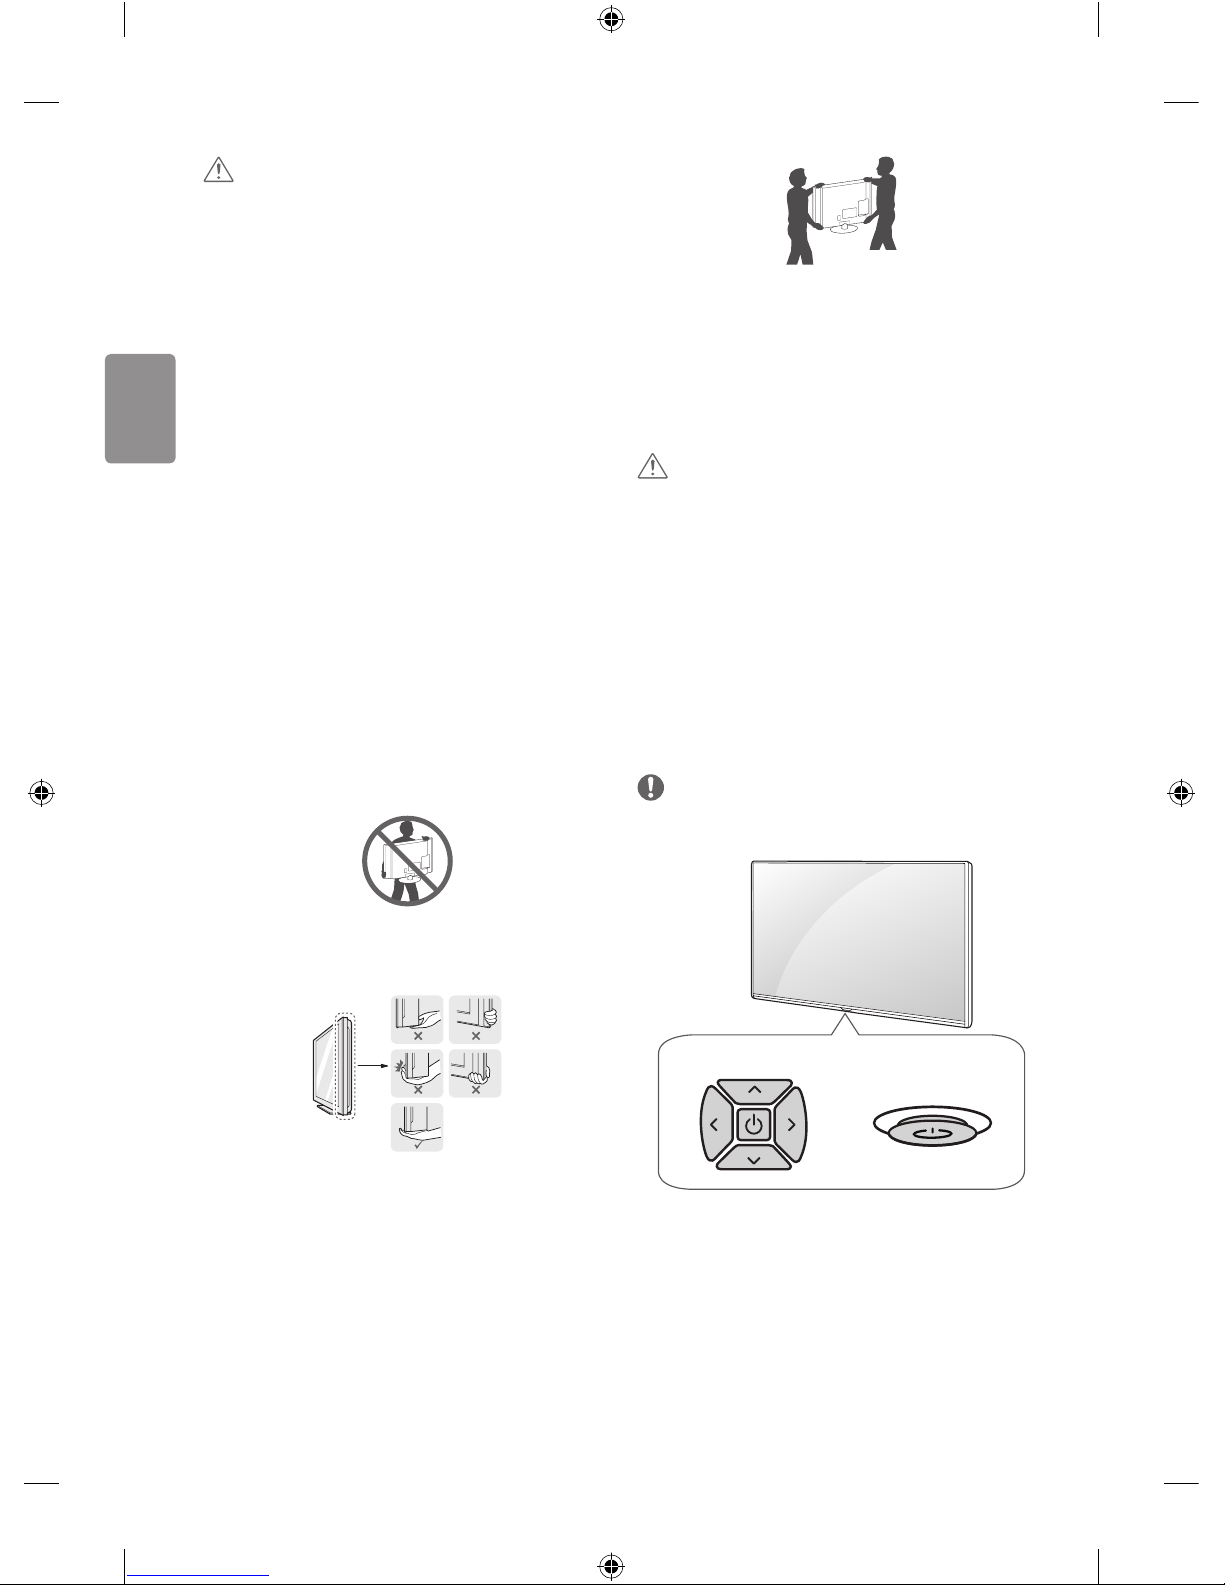
Lifting and moving the TV
Please note the following advice to prevent the TV from being scratched
or damaged and for safe transportation regardless of its type and size.
• It is recommended to move the TV in the box or packing material
that the TV originally came in.
• Before moving or lifting the TV, disconnect the power cord and
all cables.
• When holding the TV, the screen should face away from you to
avoid damage.
• Hold the top and bottom of the TV frame rmly. Make sure not to
hold the transparent part, speaker, or speaker grill area.
• When transporting a large TV, there should be at least 2 people.
• When transporting the TV by hand, hold the TV as shown in the
following illustration.
• When transporting the TV, do not expose the TV to jolts or
excessive vibration.
• When transporting the TV, keep the TV upright, never turn the TV
on its side or tilt towards the left or right.
• Do not apply excessive pressure to cause exing /bending of frame
chassis as it may damage screen.
• When handling the TV, be careful not to damage the protruding
buttons.
CAUTION
• Avoid touching the screen at all times, as this may result in damage
to the screen.
• Do not move the TV by holding the cable holders, as the cable
holders may break, and injuries and damage to the TV may occur.
Using the button
(Depending on model)
You can simply operate the TV functions, pressing or moving the button.
NOTE
• LH51, LH52 series does not have a Joystick button but has only a
power On/O button.
Dome button
or
Joystick button
ENGLISH
9
Basic functions
Power On (Press)
Power O (Press and hold)
1
Volume Control
Programmes Control
1 If the Menu button is on the screen, pressing and holding the button
will let you exit the Menu.
Adjusting the menu
When the TV is turned on, press the button one time. You can adjust
the Menu items pressing or moving the buttons.
Turns the power o.
Clears on-screen displays and returns to TV viewing.
Changes the input source.
Accesses the settings menu.
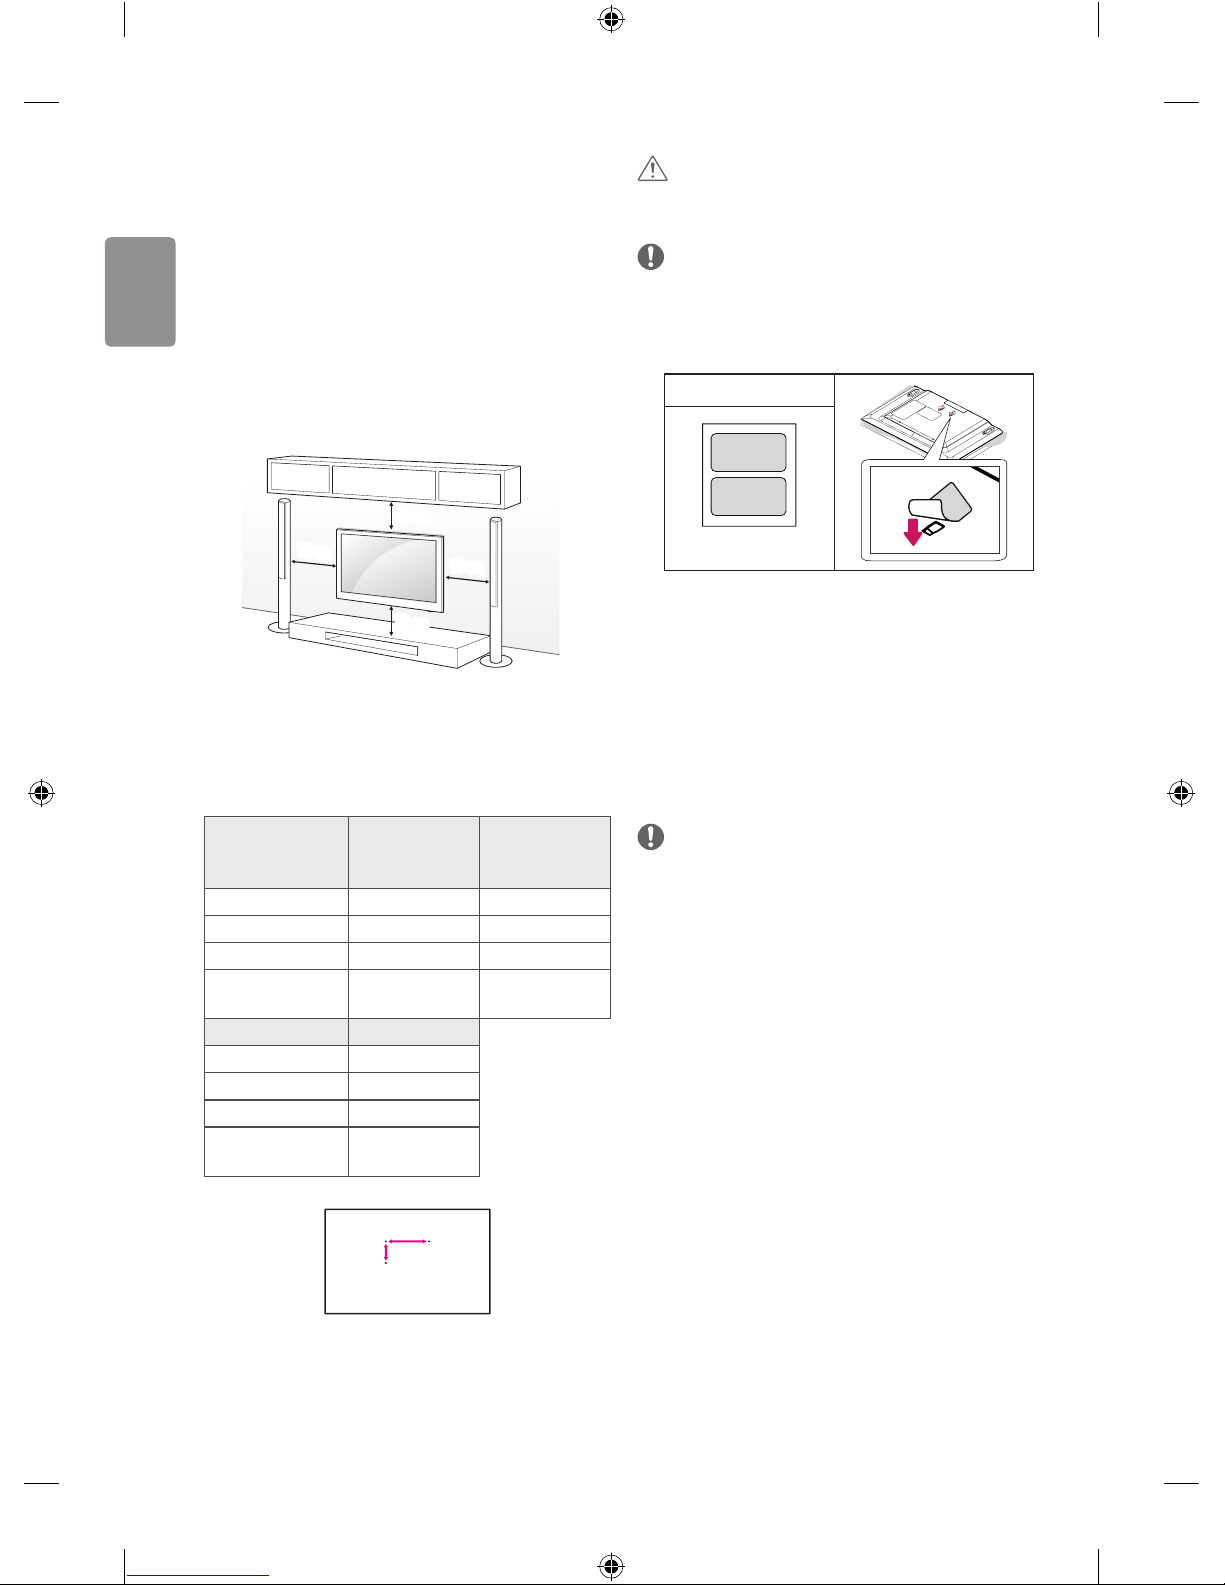
Mounting on a table
1 Lift and tilt the TV into its upright position on a table.
• Leave a 10 cm (minimum) space from the wall for proper
ventilation.
10 cm
10 cm
10 cm
10 cm
10 cm
2 Connect the power cord to a wall outlet.
CAUTION
• Do not place the TV near or on sources of heat, as this may result in
re or other damage.
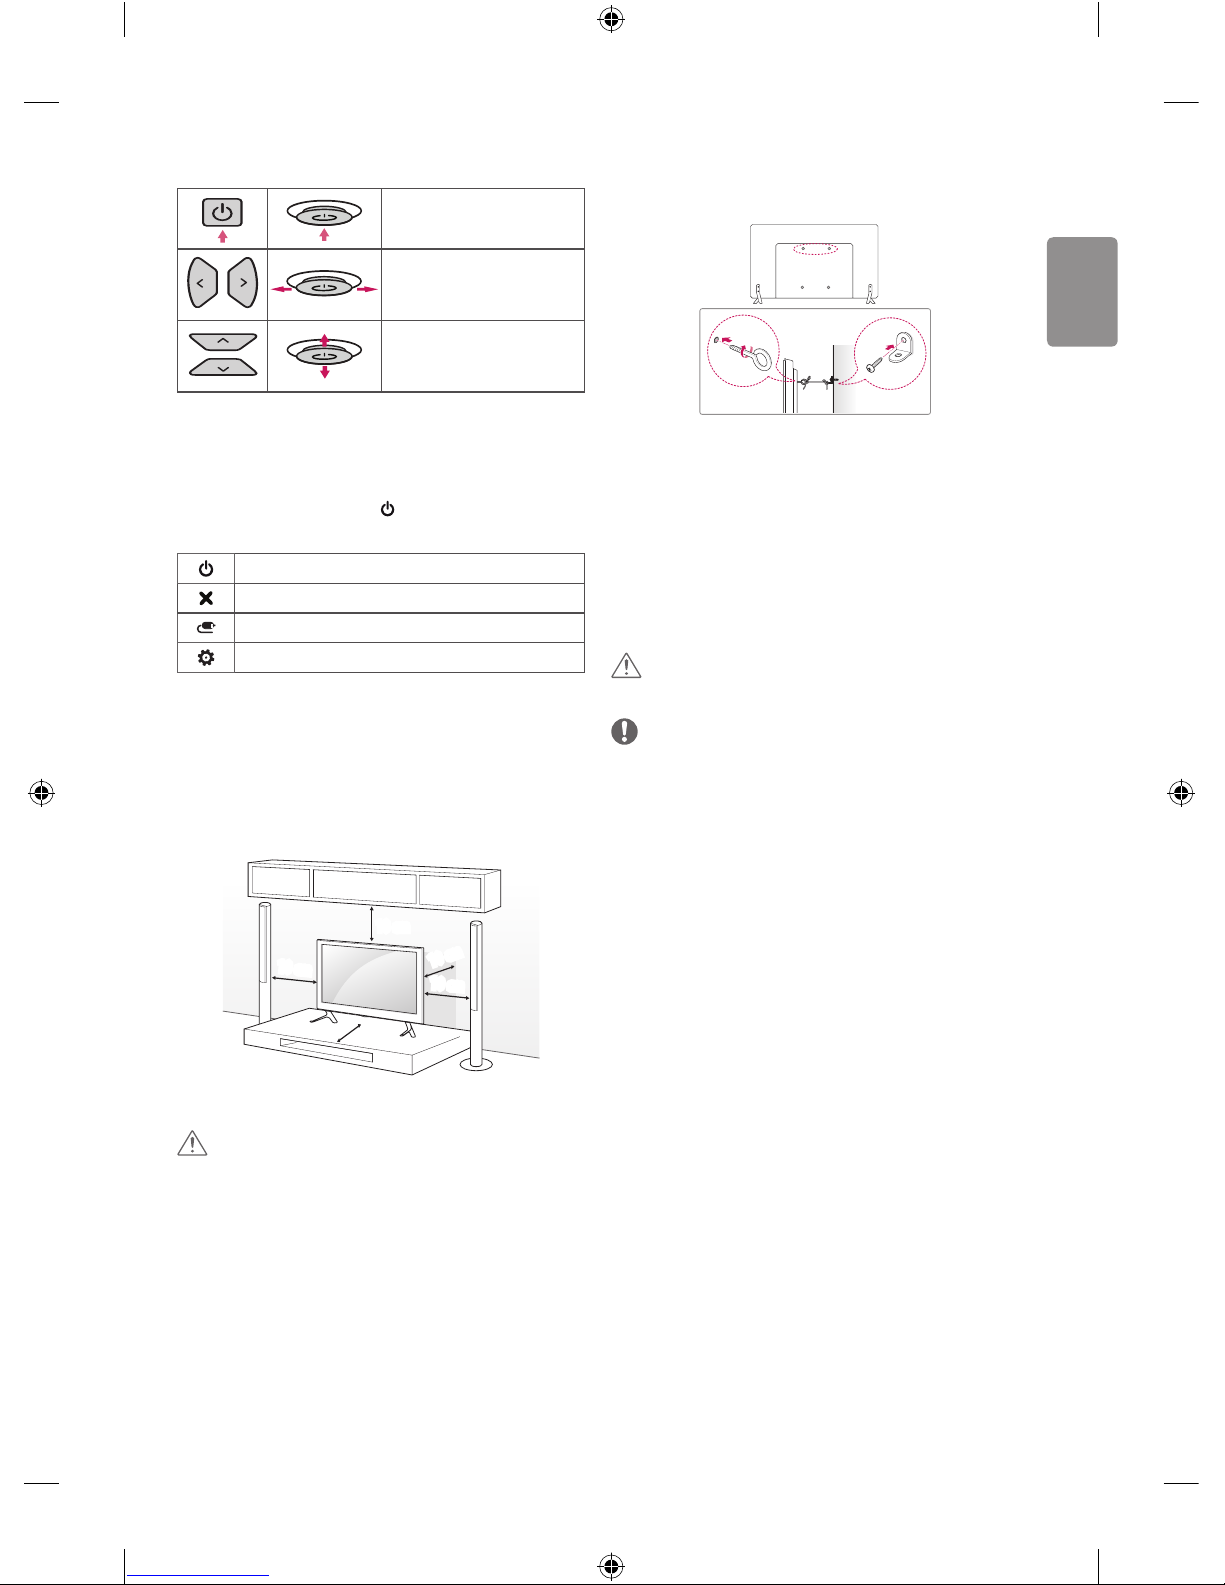
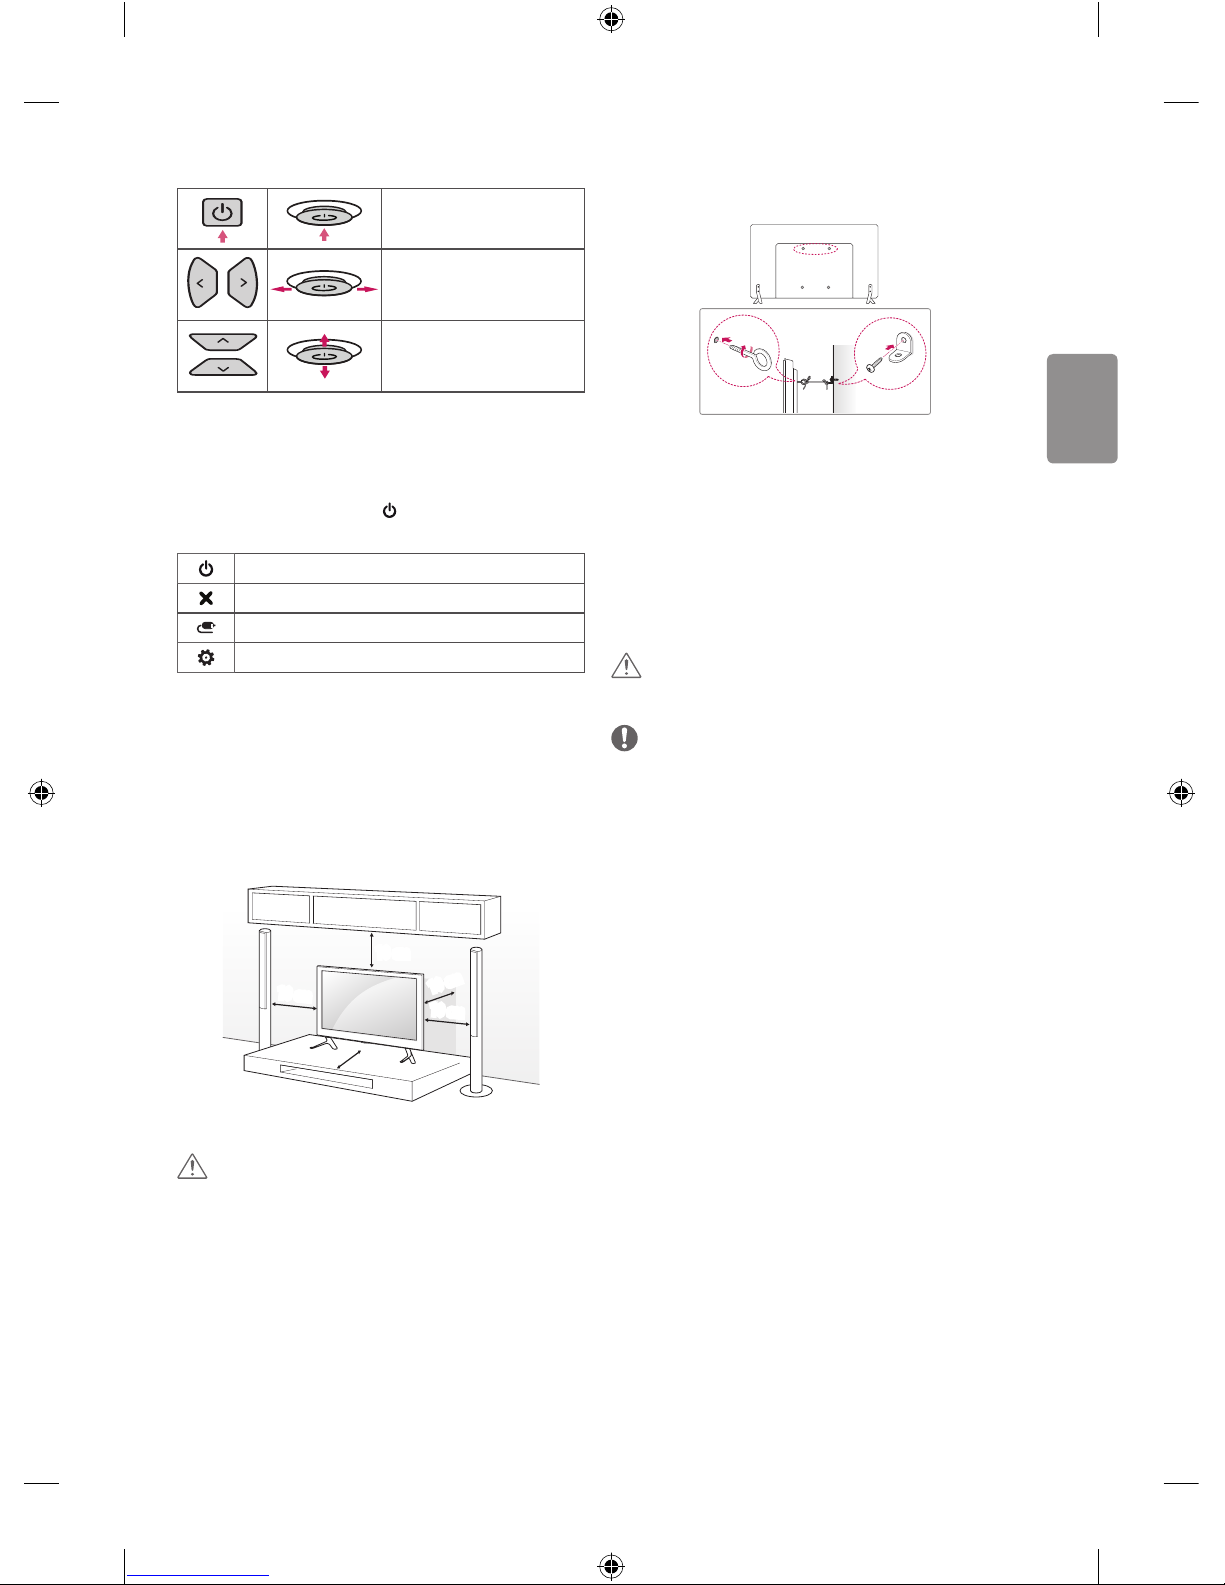
Securing the TV to a wall
(This feature is not available for all models.)
1 Insert and tighten the eye-bolts, or TV brackets and bolts on the back
of the TV.
• If there are bolts inserted at the eye-bolts position, remove the
bolts rst.
2 Mount the wall brackets with the bolts to the wall.
Match the location of the wall bracket and the eye-bolts on the rear
of the TV.
3 Connect the eye-bolts and wall brackets tightly with a sturdy rope.
Make sure to keep the rope horizontal with the at surface.
CAUTION
• Make sure that children do not climb on or hang on the TV.
NOTE
• Use a platform or cabinet that is strong and large enough to
support the TV securely.
• Brackets, bolts and ropes are not provided. You can obtain
additional accessories from your local dealer.
10
ENGLISH
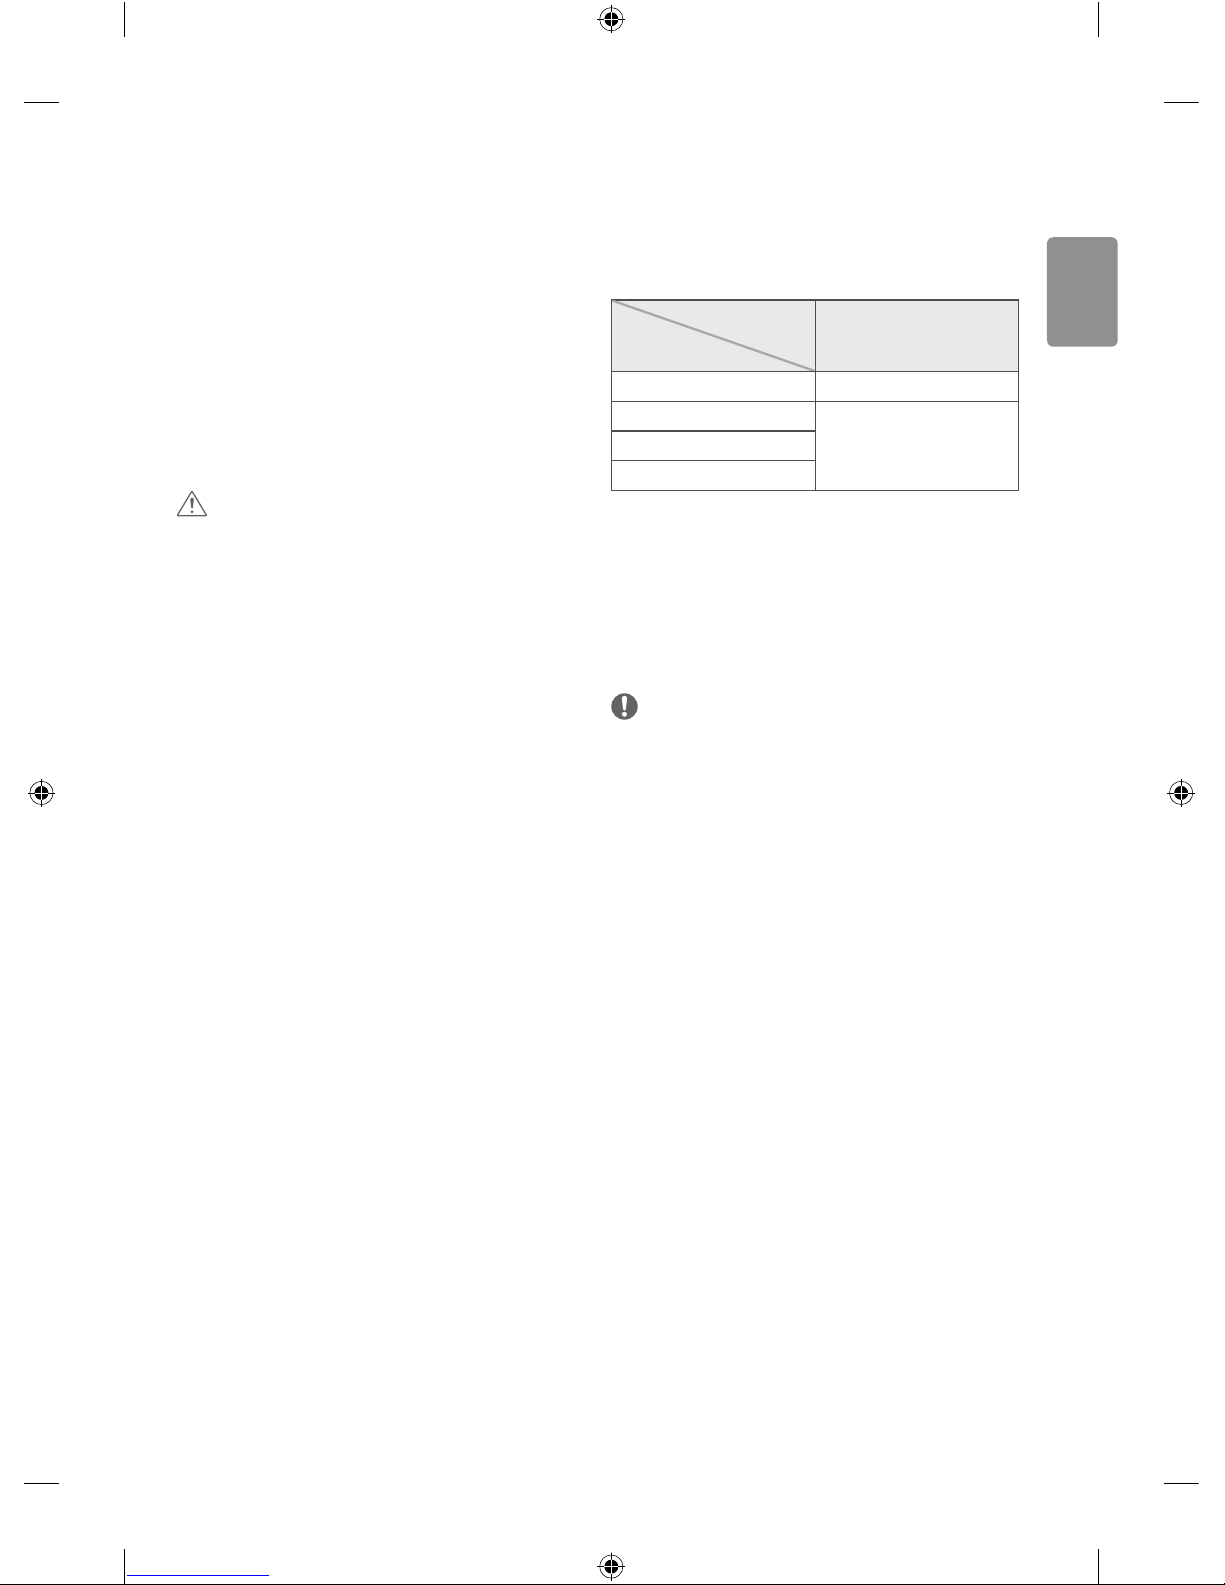
Mounting on a wall
Attach an optional wall mount bracket at the rear of the TV carefully
and install the wall mount bracket on a solid wall perpendicular to
the oor. When you attach the TV to other building materials, please
contact qualied personnel. LG recommends that wall mounting be
performed by a qualied professional installer. We recommend the use
of LG’s wall mount bracket. LG’s wall mount bracket is easy to move with
cables connected. When you do not use LG’s wall mount bracket, please
use a wall mount bracket where the device is adequately secured to the
wall with enough space to allow connectivity to external devices. It is
advised to connect all the cables before installing xed wall mounts.
10 cm
10 cm
10 cm
10 cm
Make sure to use screws and wall mount bracket that meet the VESA
standard. Standard dimensions for the wall mount kits are described in
the following table.
Separate purchase (Wall mounting bracket)
Model
32/43LH51**
32/43LH52**
43LH54**
49LH51**
49LH52**
49LH54**
VESA (A x B) (mm) 200 x 200 300 x 300
Standard screw M6 M6
Number of screws 4 4
Wall mount bracket
LSW240B
MSW240
LSW350B
MSW240
Model 55LH54**
VESA (A x B) (mm) 400 x 400
Standard screw M6
Number of screws 4
Wall mount bracket
LSW440B
MSW240
A
B
CAUTION
• Remove the stand before installing the TV on a wall mount by
performing the stand attachment in reverse.
NOTE
• When installing the wall mounting bracket, use the adhesive
label provided. The adhesive label will protect the opening from
accumulating dust and dirt. (Only when the item of the following
form is provided)
Provided item
Adhesive label
Connections (notications)
Connect various external devices to the TV and switch input modes to
select an external device. For more information of external device’s
connection, refer to the manual provided with each device.
Available external devices are: HD receivers, DVD players, VCRs, audio
systems, USB storage devices, PC, gaming devices, and other external
devices.
NOTE
• The external device connection may dier from the model.
• Connect external devices to the TV regardless of the order of the
TV port.
• If you record a TV program on a DVD recorder or VCR, make sure to
connect the TV signal input cable to the TV through a DVD recorder
or VCR. For more information of recording, refer to the manual
provided with the connected device.
• Refer to the external equipment’s manual for operating
instructions.
• If you connect a gaming device to the TV, use the cable supplied
with the gaming device.
• In PC mode, there may be noise associated with the resolution,
vertical pattern, contrast or brightness. If noise is present, change
the PC output to another resolution, change the refresh rate to
another rate or adjust the brightness and contrast on the PICTURE
menu until the picture is clear.
• In PC mode, some resolution settings may not work properly
depending on the graphics card.
ENGLISH
11
Antenna connection
Connect the TV to a wall antenna socket with an RF cable (75 Ω).
• Use a signal splitter to use more than 2 TVs.
• If the image quality is poor, install a signal amplier properly to
improve the image quality.
• If the image quality is poor with an antenna connected, try to
realign the antenna in the correct direction.
• An antenna cable and converter are not supplied.
• Supported DTV Audio: MPEG, Dolby Digital, Dolby Digital Plus,
HE-AAC
Adapter connection
(Depending on model)
CAUTION
• Please be sure to connect the TV to the AC-DC power adapter
before connecting the TV’s power plug to a wall power outlet.
Satellite dish connection
(Only satellite models)
Connect the TV to a satellite dish to a satellite socket with a satellite RF
cable (75 Ω).
CI module connection
(Depending on model)
View the encrypted (pay) services in digital TV mode.
• Check if the CI module is inserted into the PCMCIA card slot in the
right direction. If the module is not inserted properly, this can
cause damage to the TV and the PCMCIA card slot.
• If the TV does not display any video and audio when CI+ CAM is
connected, please contact to the Terrestrial/Cable/Satellite Service
Operator.
Euro scart connection
(Depending on model)
Transmits the video and audio signals from an external device to the
TV set. Connect the external device and the TV set with the euro scart
cable.
Output Type
Current
input mode
AV1
(TV Out
1
)
Digital TV Digital TV
Analogue TV, AV
Analogue TVComponent
HDMI
1 TV Out : Outputs Analogue TV or Digital TV signals.
• Any Euro scart cable used must be signal shielded.
Other connections
Connect your TV to external devices. For the best picture and audio
quality, connect the external device and the TV with the HDMI cable.
Some separate cable is not provided.
NOTE
• Supported HDMI Audio format :
Dolby Digital (32 KHz, 44.1 KHz, 48 KHz),
PCM (32 KHz, 44.1 KHz, 48 KHz, 96 KHz, 192 KHz)
(Depending on model)
12
ENGLISH
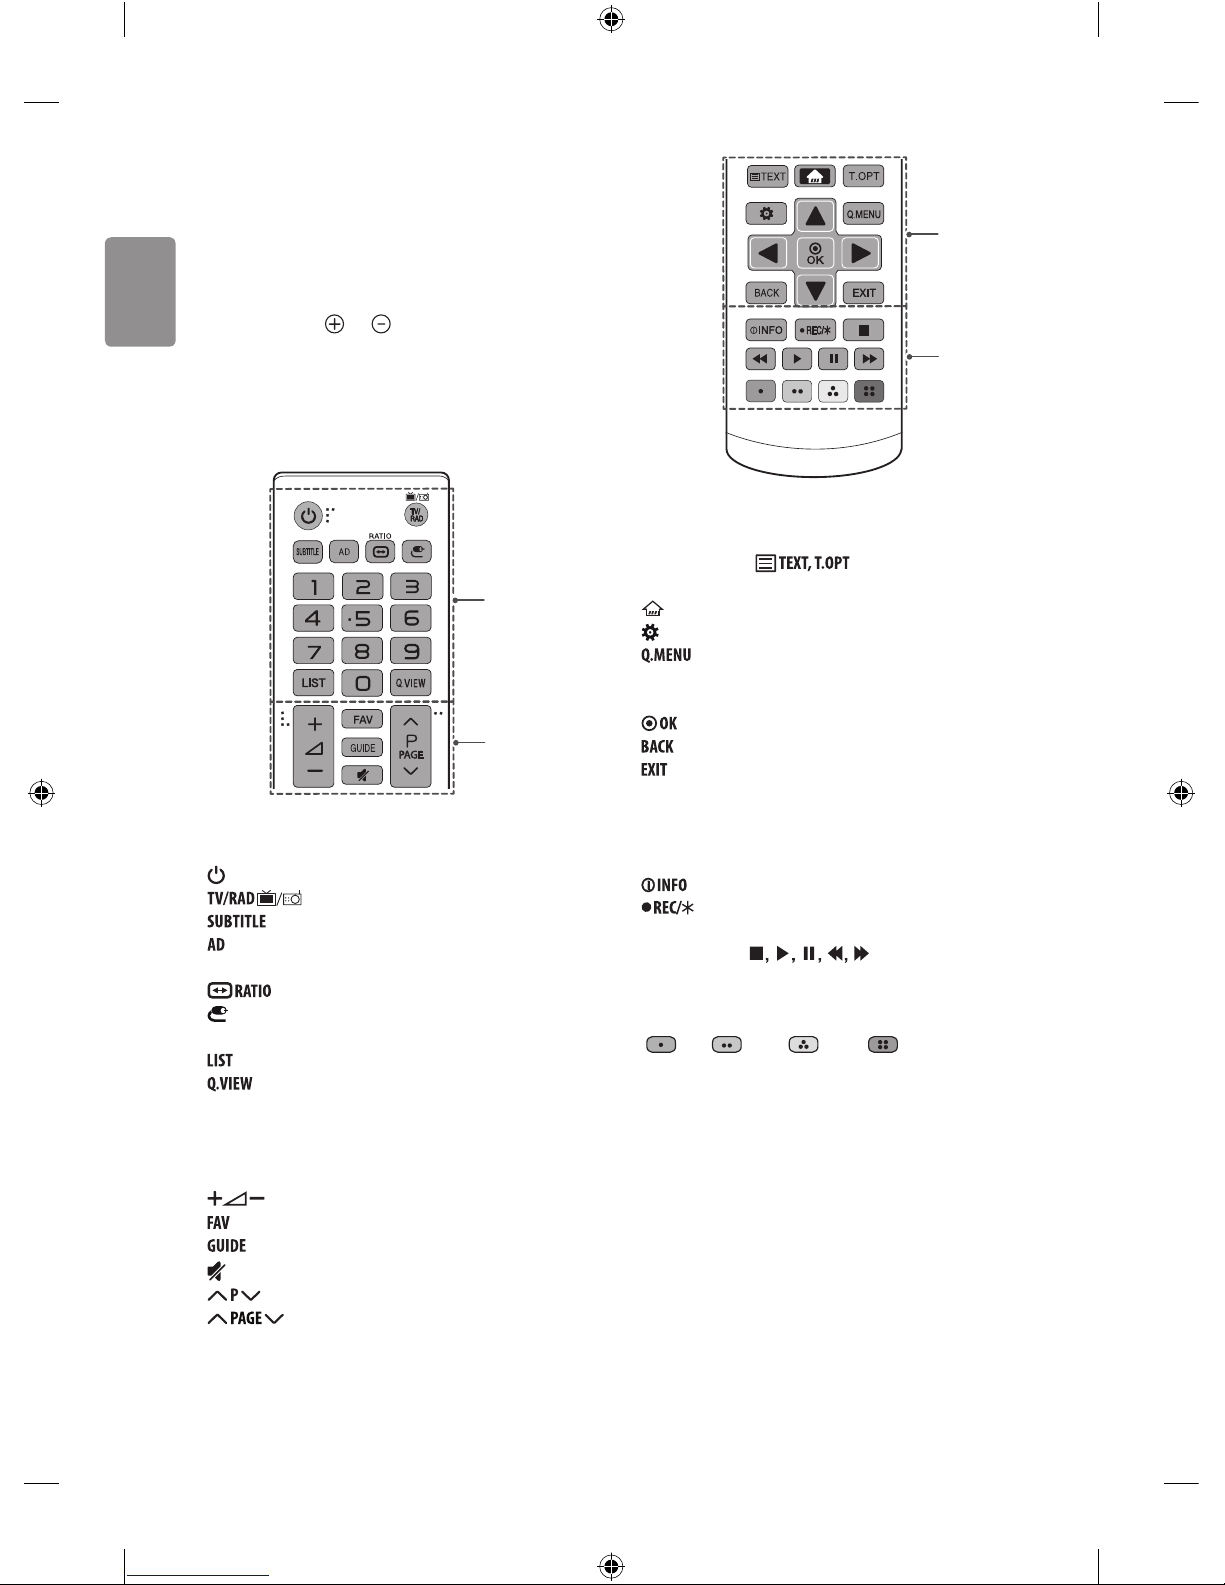
Remote control
(Depending on model)
The descriptions in this manual are based on the buttons on the remote
control. Please read this manual carefully and use the TV correctly.
To replace batteries, open the battery cover, replace batteries (1.5
V AAA) matching the
and ends to the label inside the
compartment, and close the battery cover. To remove the batteries,
perform the installation actions in reverse.
Make sure to point the remote control toward the remote control sensor
on the TV.
A
B
A
(POWER) Turns the TV on or o.
Selects Radio, TV and DTV programme.
Recalls your preferred subtitle in digital mode.
By pressing the AD button, audio descriptions function will be
enabled.
Resizes an image.
(INPUT) Changes the input source.
Number buttons Enters numbers.
Accesses the saved programme list.
Returns to the previously viewed programme.
B
Adjusts the volume level.
Accesses your favourite programme list.
Shows programme guide.
(MUTE) Mutes all sounds.
Scrolls through the saved programmes.
Moves to the previous or next screen.
C
D
C
Teletext buttons ( ) These buttons are used for
teletext.
(HOME) Accesses the Home menu.
(Settings) Accesses the Settings menu.
Accesses the Quick menus.
Navigation buttons (up/down/left/right) Scrolls through menus
or options.
Selects menus or options and conrms your input.
Returns to the previous level.
Clears on-screen displays and returns to TV viewing.
D
Views the information of the current programme and screen.
Starts to record and displays record menu. (Only Time
Machine
Ready
supported model) (Depending on model)
Control buttons (
) Controls the MY MEDIA
menus, Time Machine
Ready
control or the SIMPLINK compatible devices
(USB, SIMPLINK or Time Machine
Ready
). (Depending on model)
Coloured buttons These access special functions in some menus.
(
: Red, : Green, : Yellow, : Blue)
ENGLISH
13
Licenses
Supported licenses may dier by model. For more information about
licenses, visit www.lg.com.
Manufactured under license from Dolby Laboratories.
Dolby and the double-D symbol are trademarks of Dolby
Laboratories.
The terms HDMI and HDMI High-Denition Multimedia Interface,
and the HDMI logo are trademarks or registered trademarks of HDMI
Licensing LLC in the United States and other countries.
This DivX Certied® device has passed rigorous testing to ensure it
plays DivX® video.
To play purchased DivX movies, rst register your device at vod.divx.
com. Find your registration code in the DivX VOD section of your
device setup menu.
DivX Certied® to play DivX® video up to HD 1080p, including
premium content.
DivX®, DivX Certied® and associated logos are trademarks of DivX,
LLC and are used under license.
Covered by DivX Patents 7,295,673; 7,515,710; RE45,052; and others
available at [www.divx.com/patents].
Open source software
notice information
To obtain the source code under GPL, LGPL, MPL and other open source
licenses, that is contained in this product, please visit http://opensource.
lge.com.
In addition to the source code, all referred license terms, warranty
disclaimers and copyright notices are available for download.
LG Electronics will also provide open source code to you on CD-ROM
for a charge covering the cost of performing such distribution (such
as the cost of media, shipping, and handling) upon email request to
opensource@lge.com. This oer is valid for three (3) years from the date
on which you purchased the product.
Settings
Automatically Setting Up Programme
(Settings) Programmes Auto Tuning
Automatically tunes the programmes.
• If Input Source is not connected properly, programme registration
may not work.
• Auto Tuning only nds programmes that are currently
broadcasting.
• If Lock System is turned on, a pop-up window will appear asking
for password.
To select Picture Mode
(Settings) Picture Picture Mode Settings Picture
Mode
Select the picture mode optimized for the viewing environment or the
programme.
• Vivid : Heightens contrast, brightness and sharpness to display
vivid images.
• Standard : Displays images in standard levels of contrast,
brightness and sharpness.
• Eco / APS : [Depending on model]
The Energy Saver feature changes settings on the TV to reduce
power consumption.
• Cinema / Game : Displays the optimum picture for movie, game.
• Sports : [Depending on model]
Optimizes the video image for high and dynamic actions by
emphasizing primary colours such as white, grass, or sky blue.
•
Expert 1, 2 : Menu for adjusting picture quality that
allows experts and amateurs to enjoy the best TV viewing. This
is the adjustment menu provided for ISF-certied picture tuning
professionals. (ISF logo can only be used on ISF-certied TVs.)
ISFccc: Imaging Science Foundation Certied Calibration Control
• Depending on input signal, available range of picture modes may
dier.
• Expert mode is for picture tuning professionals to control
and ne-tune using a specic image. For normal images, the
eects may not be dramatic.
• The ISF function is only available on some models.

14
ENGLISH
Fine-tuning Picture Mode
(Settings) Picture Picture Mode Settings
This feature allows you to adjust the selected picture mode in detail.
• Backlight : Controls the level of screen brightness by adjusting the
backlight. The closer to 100, the brighter the screen.
• Contrast : Adjusts the contrast of the bright and dark areas of the
picture. The closer to 100, the higher the contrast.
• Brightness : Adjusts the overall screen brightness. The closer to
100, the brighter the screen.
• Sharpness : Adjusts the sharpness of the image. The closer to 50,
the sharper and clearer the image.
• Colour : Tones down or up the colours displayed on the screen. The
closer to 100, the deeper the colour.
• Tint : Adjusts the colour balance between red and green displayed
on the screen. The closer to Red 50, the more red the colour will be.
The closer to Green 50, the more green the colour will be.
• Colour Temperature : Adjusts the colour temperature from cold
to warm.
• Depending on input signal or other picture settings, the range of
detailed items for adjustment may dier.
To set advanced controls
(Settings) Picture Picture Mode Settings Advanced
Controls / Expert Controls
Calibrates the screen for each picture mode; or adjusts picture settings
for a special screen.
• Dynamic Contrast : Adjusts the contrast to the optimal level
according to the brightness of the image.
• Dynamic Colour : Adjusts colours to make the image appear in
more natural colours.
• Preferred Colour : Adjust the colours of skin, grass and sky to
your personal preferences.
• Gamma : Sets the gradation curve according to the output of
picture signal in relation to the input signal.
• Colour Gamut : Selects the range of colours that can be
expressed.
• Edge Enhancer : Shows clearer and distinctive yet natural edges
of the video.
• Colour Filter : Filters a specic colour spectrum in RGB colours to
ne-tune colour saturation and hue accurately.
• White Balance : Adjusts the overall tone of the screen as desired.
• Colour Management System : This is a system that experts use
when they adjust colour with a test pattern. They can select from
six colour areas (Red / Green / Blue / Cyan / Magenta / Yellow)
without aecting other colours. For normal images, adjustments
may not result in noticeable colour changes.
• Depending on input signal or other picture settings, the range of
detailed items for adjustment may dier.
To set additional picture options
(Settings) Picture Picture Mode Settings Picture
Options
Adjusts detailed setting for images.
• Noise Reduction : Eliminates noise in the picture.
• MPEG Noise Reduction : Eliminates noise generated while
creating digital picture signals.
• Black Level : Adjusts the brightness and contrast of the screen
to suit the black level of the input picture by using the blackness
(black level) of the screen.
• Real Cinema : Optimizes the screen for movie viewing.
• Motion Eye Care : Automatically adjusts brightness and reduces
image blur based on image data to reduce eyestrain.
• Depending on input signal or other picture settings, the range of
detailed items for adjustment may dier.
Resetting picture settings
(Settings) Picture Picture Mode Settings Picture
Reset
Resets picture settings that the user customizes. Each picture mode is
reset. Select the picture mode you wish to reset.
To use Energy Saving feature
(Settings) Picture Energy Saving
Reduces power consumption by adjusting screen brightness.
• Auto : [Depending on model]
The TV sensor detects the ambient lighting and automatically
adjusts the screen brightness.
• Off : Turns o the Energy Saving mode.
• Minimum / Medium / Maximum : Applies the pre-set Energy
Saving mode.
• Screen Off : Screen is turned o and only sound is played. Press
any button except Power button on the remote control to turn the
screen back on.
To use Eye Comfort Mode feature
(Settings) Picture Eye Comfort Mode
If you turn this option on, colour temperature will be automatically
adjusted to reduce eye strain.
• On : Automatically adjusts the screen color temperature.
• Off : Turns o the Eye Comfort Mode.

ENGLISH
15
Selecting Sound Mode
(Settings) Sound Sound Mode Settings Sound Mode
Adjusts TV audio to an optimal level based on a selected sound mode.
• Standard : Optimizes the sound for all types of content.
• Clear Voice : Boosts voice clarity from the TV.
• Music : [Depending on model] Optimizes the sound for music.
• Cinema : Optimizes the sound for cinemas.
• Sports : [Depending on model] Optimizes the sound for sports.
• Game : Optimizes the sound for gameplay.
Adjusting audio balance
(Settings) Sound Sound Mode Settings Balance
Adjust the volume of the left and right speakers.
Using the Sound Eect function
(Settings) Sound Sound Mode Settings
The user can select various sound eects.
• Virtual Surround : Enjoy an immersive soundscape with the
virtual multi-channel surround sound eect.
• Equalizer : Set the desired sound by adjusting the equalizer
directly.
• Reset : Reset the sound eect settings.
• This is only available if Sound Mode is set to Standard.
To synchronize audio and video
(Settings) Sound AV Sync Adjustment
[Depending on model]
Synchronizes video and audio directly when they do not match. If you
set AV Sync Adjustment to On, you can adjust the sound output (TV
speakers or External Speaker) to the screen image.
• If you select the Bypass, Outputs the broadcast signals or the
sound from external devices without any audio delay. The audio
may be output before the video because of the time the TV takes to
process the video input.
To use SIMPLINK
[Depending on model]
SIMPLINK is a feature that enables you to control and manage various
multimedia devices conveniently via the SIMPLINK menu.
1 Connect the TV’s HDMI IN terminal and the SIMPLINK device’s HDMI
output terminal using an HDMI cable.
• [Depending on model]
For home theatre units with a SIMPLINK function, connect HDMI
terminals as above, and use an optical cable to connect Optical
Digital Audio Out from the TV to Optical Digital Audio In of the
SIMPLINK device.
2 Select
(Settings) General SIMPLINK.
SIMPLINK menu window appears.
3 In SIMPLINK Setting window, set SIMPLINK function to On.
4 Congure the Auto Power Sync settings to On or Off.
• You can also set the SIMPLINK in
(HOME) Inputs
SIMPLINK. In SIMPLINK menu window, selects the device you
want to control.
• This function is only compatible with devices with the SIMPLINK
logo.
• To use the SIMPLINK function, you need to use a high-speed HDMI®
cable (with CEC (Consumer Electronics Control) feature added).
High-speed HDMI® cables have the No. 13 pin connected for
information exchange between devices.
• If you switch to another input, the SIMPLINK device will stop.
• If a third-party device with the HDMI-CEC function is also used, the
SIMPLINK device may not work normally.
• [Depending on model]
If you select or play media from a the device with a home theatre
function, the HT Speaker(Speaker) is automatically connected.
Be sure to connect with an optical cable (sold separately) to use the
HT Speaker(Speaker) function.

16
ENGLISH
SIMPLINK function description
• Direct Play : Plays the multimedia device on the TV instantly.
• Controlling devices with the TV remote control : Manages
the multimedia device with the TV remote control.
• Main Power Off : If Auto Power Sync is set to On in the
SIMPLINK settings and turn o your TV, the devices connected to
your TV via SIMPLINK will also be turned o.
• Main Power On : If Auto Power Sync is set to On in the
SIMPLINK settings, turning on a SIMPLINK-linked device will turn
the TV on.
• Speaker : [Depending on model]
Select speaker either on the home theatre unit or the TV.
To set password
(Settings) Safety Set Password
Sets or changes the TV password.
• The initial password is set to ‘0000’.
• When France is selected for Country, password is not ‘0000’ but
‘1234’.
• When France is selected for Country, password cannot be set to
‘0000’.
To return Reset to Initial Settings
(Settings) General Reset to Initial Settings
All stored information is deleted and TV settings are reset.
The TV turns itself o and back on, and all settings are reset.
• When Lock System is in place, a pop-up window appears and
asks for password.
• Do not turn o the power during initialization.
To remove the USB device
Select the connected USB HDD from
(HOME) Inputs and select
the Eject button to disconnect the USB HDD storage device.
When you see a message that the USB device has been removed,
separate the device from the TV.
• Once a USB device has been selected for removal, it can no longer
be read. Remove the USB storage device and then re-connect it.
Using a USB storage device - warning
• If the USB storage device has a built-in auto recognition program
or uses its own driver, it may not work.
• Some USB storage devices may not work or may work incorrectly.
• Use only USB storage devices formatted with the Windows FAT32
or NTFS File System.
• For external USB HDDs, it is recommended that you use devices
with a rated voltage of less than 5 V and a rated current of less
than 500 mA.
• It is recommended that you use USB memory sticks of 32 GB or less
and USB HDDs of 2 TB or less.
• If a USB HDD with power-saving function does not work properly,
turn the power o and on. For more information, refer to the user
manual of the USB HDD.
• Data in the USB storage device can be damaged, so be sure to back
up important les to other devices. Data maintenance is the user’s
responsibility and the manufacturer is not responsible for data loss.
My Media supporting le
• Maximum data transfer rate : 20 Mbps (Mega bit per second)
• External supported subtitle formats : *.srt (SubRip), *.smi
(SAMI), *.sub (SubViewer, MicroDVD, DVDsubtitleSystem,
SubIdx(Vobsub)), *.ass/*.ssa (SubStation Alpha), *.txt (TMplayer),
*.psb (PowerDivX)
• Internal supported subtitle formats: *.dat/*.mpg/*.mpeg/*.
vob (DVD Subtitle), *.ts/*.tp/*.m2ts (DVB Subtitle), *.mp4 (DVD
Subtitle, UTF-8 Plain Text), *.mkv (ASS, SSA, UTF-8 Plain Text,
Universal Subtitle Format, VobSub, DVD Subtitle), *.divx/*.avi
(XSUB
1
, XSUB+)
1 XSUB : Supports internal subtitles generated from DivX6

ENGLISH
17
Supported Video Formats
• Maximum : 1920 x 1080 @ 30p (Only Motion JPEG 640 x 480 @ 30p)
• .asf, .wmv
[Video] MPEG-4 Part2, XViD, H.264/AVC, VC1(WMV3, WVC1), MP43
[Audio] WMA Standard, WMA9(Pro), MP3, AAC, AC3
• .divx, .avi
[Video] MPEG-2, MPEG-4 Part2, DivX3.11, DivX4, DivX5, DivX6,
XViD, H.264/AVC
[Audio] HE-AAC, LPCM, ADPCM, MPEG- 1 Layer I, MPEG-1 Layer II,
Dolby Digital, MPEG-1 Layer III (MP3)
• .ts, .trp, .tp, .mts, .m2ts
[Video] H.264/AVC, MPEG-2, H.265/HEVC
[Audio] MPEG-1 Layer I, MPEG-1 Layer II, MPEG-1 Layer III (MP3),
Dolby Digital, Dolby Digital Plus, AAC, HE-AAC
• .vob
[Video] MPEG-1, MPEG-2
[Audio] Dolby Digital, MPEG-1 Layer I, MPEG- 1 Layer II, DVD-LPCM
• .mp4, .m4v, .mov
[Video] MPEG-2, MPEG-4 Part2, DivX3.11, DivX4, DivX5, XVID,
H.264/AVC
[Audio] AAC, MPEG-1 Layer III (MP3)
• .mkv
[Video] MPEG-2, MPEG-4 Part2, XVID, H.264/AVC
[Audio] HE-AAC, Dolby Digital, MPEG-1 Layer III (MP3), LPCM
• motion JPEG
[Video] MJPEG
[Audio] LPCM, ADPCM
• .mpg, .mpeg, .mpe
[Video] MPEG-1, MPEG-2
[Audio] MPEG-1 Layer I, MPEG-1 Layer II, Dolby Digital, LPCM
• dat
[Video] MPEG-1, MPEG-2
[Audio] MP2
• v
[Video] Sorenson H.263, H.264/AVC
[Audio] MP3, AAC, HE-AAC
• 3gp, 3gp2
[Video] H.264/AVC, MPEG-4 Part2
[Audio] AAC, AMR(NB/WB)
Supported Audio Formats
• File type : mp3
[Bit rate] 32 Kbps - 320 Kbps
[Sample freq.] 16 kHz - 48 kHz
[Support] MPEG1, MPEG2, Layer2, Layer3
• File Type : AAC
[Bit rate] Free Format
[Sample freq.] 8 kHz ~ 48 kHz
[Support] ADIF, ADTS
• File Type : M4A
[Bit rate] Free Format
[Sample freq.] 8 kHz ~ 48 kHz
[Support] MPEG-4
• File Type : WMA
[Bit rate] 128 Kbps ~ 320 Kbps
[Sample freq.] 8 kHz ~ 48 kHz
[Support] WMA7, WMA8, WMA9 Standard
• File Type : WMA10 Pro
[Bit rate] ~ 768 Kbps
[Channel / Sample freq.]
M0 : up to 2 Channel @ 48 kHz
(Except LBR mode),
M1 : up to 5.1 Channel @ 48 kHz,
M2 : up to 5.1 Channel @ 96 kHz
[Support] WMA10 Pro
• File Type : OGG
[Bit rate] Free Format
[Sample freq.] 8 kHz ~ 48 kHz
[Support] OGG Vorbis
• File Type : WAV
[Bit rate] 64 kbps ~ 1.5 Mbps
[Sample freq.] 8 kHz ~ 48 kHz
[Support] LPCM
[Bitdepth] 8 bit / 16 bit / 24 bit
Supported Photo Formats
• Category : 2D (jpeg, jpg, jpe)
[Available le type]
SOF0: Baseline,
SOF1 : Extend Sequential,
SOF2 : Progressive
[Photo size]
Minimum : 64 x 64,
Maximum (Normal Type) : 15360 (W) x 8640 (H),
Maximum (Progressive Type) : 1920 (W) x 1440 (H)
• Category : BMP
[Photo size] Minimum : 64 x 64, Maximum : 9600 x 6400
• Category : PNG
[Available le type] Interlace, Non-Interlace
[Photo size]
Minimum : 64 x 64,
Maximum (Interlace) : 1200 x 800,
Maximum (Non-Interlace) : 9600 x 6400
• BMP and PNG format les may be slower to display than JPEG.

18
ENGLISH
To see web manual
To obtain detailed User Guide information, please visit www.lg.com.
External control device
setup
To obtain the external control device setup information, please visit
www.lg.com.
Troubleshooting
Cannot control the TV with the remote control.
• Check the remote control sensor on the product and try again.
• Check if there is any obstacle between the product and the remote
control.
• Check if the batteries are still working and properly installed (
to , to ).
No image display and no sound is produced.
• Check if the product is turned on.
• Check if the power cord is connected to a wall outlet.
• Check if there is a problem in the wall outlet by connecting other
products.
The TV turns o suddenly.
• Check the power control settings. The power supply may be
interrupted.
• Check if the Auto Power Off (Depending on model) / Sleep
Timer / Timer Power Off is activated in the Timers settings.
• If there is no signal while the TV is on, the TV will turn o
automatically after 15 minutes of inactivity.
When connecting to the PC (HDMI), ‘No signal’ or ‘Invalid Format’ is
displayed.
• Turn the TV o/on using the remote control.
• Reconnect the HDMI cable.
• Restart the PC with the TV on.

Läs den här handboken noggrant innan du använder produkten
och spara den för framtida bruk.
www.lg.com
Säkerhet och referens
HANDBOK
LED TV*
* LG LED-TV har en LCD-skärm med LED-belysning.
2
SVENSKA
Säkerhetsföreskrifter
Läs säkerhetsföreskrifterna noggrant innan du
använder produkten.
VARNING
Placera inte TV:n och ärrkontrollen i följande omgivningar:
• En plats med direkt solljus
• En plats med hög fuktighet, t.ex. ett badrum
• I närheten av en värmekälla, t.ex. en spis, och andra apparater
som genererar värme
• Nära diskbänkar eller luftfuktare där de lätt kan utsättas för ånga
eller olja
• En plats med regn och vind
• Nära behållare med vatten, t.ex. vaser
Annars nns risk för brand, elektriska stötar eller tekniska fel.
Placera inte produkten där den kan utsättas för damm. Detta medför
risk för brand.
Kontakten till eluttaget används för bortkoppling. Kontakten måste
alltid vara fullt fungerande.
Rör aldrig nätkontakten med våta händer. Torka genast av hela
nätsladden noga om stickkontakten blir blöt eller täckt av damm.
Annars kan du få livshotande elektriska stötar på grund av fukten.
Anslut nätkabeln till ett jordat uttag. (Med undantag för apparater som
inte är jordade.) Annars kan du få livsfarliga elektriska stötar.
Anslut nätkabeln noga så den inte glappar. Om kabeln glappar kan
eldsvåda uppstå.
Kontrollera att strömsladden inte kommer i kontakt med varma
föremål som element. Detta ökar risken för brand och elektriska stötar.
Placera inte tunga föremål eller själva produkten på strömsladdar.
Detta kan resultera i eldsvåda eller elektriska stötar.
Böj antennkabeln längs med husfasaden, så nära som möjligt, för att
förhindra att regn läcker in. Annars kan det uppstå vattenskador inuti
produkten vilket kan leda till elektriska stötar.
När du monterar en TV på väggen ska du se till du inte installerar den
genom att hänga ström- och signalkablar på baksidan av den. Detta
kan orsaka eldsvåda eller elektriska stötar.
Anslut inte för många elektriska apparater till en och samma
förgreningsdosa. Detta kan leda till att eldsvåda uppstår på grund av
överhettning.
SVENSKA
3
Se till att inte tappa eller välta produkten när du ansluter externa
enheter. Det kan resultera i personskador eller skador på produkten.
Desiccant
Förvara torkmedel, plast och annat förpackningsmaterial utom räckhåll
för barn. Antifuktmaterial är skadligt vid förtäring. Vid oavsiktlig
förtäring ska du tvinga patienten att kräkas och sedan besöka
närmaste sjukhus. Plastemballaget kan dessutom orsaka kvävning.
Förvaras utom räckhåll för barn.
Låt inte barn klättra eller hänga på TV:n.
Då kan TV:n ramla och detta kan orsaka allvarliga skador.
Kassera använda batterier noggrant så att barn inte kommer åt att äta
dem. Om detta händer ska du omedelbart ta barnet till en läkare.
Sätt inte in strömledande föremål (som metallbestick) i ena änden
av strömkabeln medan den andra änden är ansluten till ingången i
väggen. Rör inte heller strömkabeln direkt efter att du anslutit den
till ingången i väggen. Då kan du få elektriska stötar. (Beroende på
modell)
Du bör inte ställa eller förvara brandfarliga ämnen i närheten av
produkten. Vårdslös hantering av brandfarliga ämnen innebär risk för
explosion eller eldsvåda.
Se till att metallföremål som mynt, hårnålar och gem inte kan falla ner
i produkten. Var också försiktig med lättantändliga föremål som papper
eller tändstickor. Barn måste vara extra försiktiga.
Elektriska stötar, eldsvåda eller skador kan inträa. Om ett främmande
föremål hamnar i produkten kopplar du från strömsladden och
kontaktar servicecenter.
Spreja inte vatten på produkten och gnugga inte brandfarliga vätskor
på den (som thinner eller bensen). Det kan leda till elektriska stötar
eller eldsvåda.
Skydda produkten från stötar, se till att inte något objekt ramlar in i
produkten eller på skärmen. Du eller produkten kan skadas.
Vidrör aldrig denna produkt under åskväder. Då kan du få elektriska
stötar.
Rör aldrig vid vägguttaget vid gasläckor. Öppna fönstren och vädra.
Eldsvådor eller brännskador kan uppstå på grund av gnistor.
Ta inte själv isär produkten. Försök inte heller att reparera eller
modiera den på egen hand. Det kan leda till elektriska stötar eller
eldsvåda. Kontakta servicecentret vid kontroll, njustering eller
reparation.
4
SVENSKA
Om något av följande inträar kopplar du ur produkten och kontaktar
ett lokalt servicecenter.
• Produkten har utsatts för stötar
• Produkten har skadats
• Främmande föremål har kommit in i produkten
• Det kom rök eller konstig lukt från produkten
Detta kan resultera i eldsvåda eller elektriska stötar.
Dra ur nätkabeln om du vet att du inte kommer att använda produkten
under en längre tid. Ansamlat damm kan orsaka eldsvåda, och försämrad
isolering kan leda till krypströmmar, kortslutning eller eldsvåda.
Produkten får inte utsättas för vatten (droppar eller stänk). Placera inte
föremål som innehåller vätska, t.ex. vaser, på apparaten.
Placera inte produkten där den kan komma att utsättas för olja eller
oljestänk. Det kan skada produkten och få den att falla ned.
Om vatten eller ett annat ämne hamnar i produkten (t.ex. en
nätadapter, strömsladd, TV), koppla från strömsladden och kontakta
servicecentret omedelbart. Det kan leda till brand och elektriska stötar.
Använd endast en auktoriserad nätadapter och strömsladd som har
godkänts av LG Electronics. Annars nns risk för brand, elektriska stötar
eller tekniska fel.
Montera aldrig isär nätadaptern eller strömsladden. Det kan orsaka
brand och elektriska stötar.
Var försiktig med adaptern så att den inte utsätts för externa stötar.
Externa stötar kan skada adaptern.
VARNING!
Installera produkten på en plats där det inte förekommer radiovågor.
Avståndet mellan utomhusantennen och eventuella kraftledningar ska
vara tillräckligt stort så att antennen inte nuddar kraftledningarna om
den faller. Detta medför risk för elektriska stötar.
Installera inte produkten på platser som instabila hyllor eller lutande
ytor. Undvik också platser där det nns vibrationer eller där produkten
inte har ordentligt stöd. Annars kan produkten falla eller välta vilket kan
orsaka personskada eller skada på produkten.
Om du installerar TV:n på ett stativ måste montera den på ett säkert
sätt så att den inte kan välta. Om produkten välter kan det orsaka
allvarliga skador.
Om du tänker montera apparaten på en vägg fäster du VESA
standardväggmonteringsfäste (valfri komponent) på apparatens
baksida. När du installerar TV:n med hjälp av väggmonteringsfästet
(valfri komponent) ska du sätta fast det ordentligt så att det inte ramlar
ner.
Använd endast tillbehör som angivits av tillverkaren.
SVENSKA
5
Kontakta en kvalicerad serviceperson när du installerar antennen.
På så sätt minimeras risken för brand eller elektriska stötar.
Vi rekommenderar att du håller ett avstånd på minst fem till sju gånger
den diagonala skärmstorleken när du tittar på TV.
Om du tittar på TV under lång tid kan du börja se suddigt.
Använd enbart angiven typ av batteri. Annars kan ärrkontrollen gå
sönder.
Blanda inte gamla och nya batterier. Detta kan leda till att batterierna
överhettas och läcker.
Batterier ska inte utsättas för extrema temperaturer. Förvara dem inte i
direkt solljus och håll dem på avstånd från element och öppen eld.
Använd ALDRIG icke återuppladdningsbara batterier i laddaren.
Kontrollera att det inte nns några föremål mellan ärrkontrollen och
sensorn.
Signalen från ärrkontrollen kan störas av solljus eller annat starkt ljus.
I så fall ska du göra det mörkare i rummet.
Se till att anslutningskablarna är tillräckligt långa vid anslutning av
externa enheter som t.ex spelkonsoler. Annars kan produkten ramla
vilket kan orsaka personskada eller skada på produkten.
Använd inte stickproppen för att knäppa på eller stänga av apparaten.
(Använd inte strömkabeln som kontakt.) Det kan orsaka mekaniska fel
eller leda till elektriska stötar.
Följ installationsanvisningarna nedan för att förhindra att produkten
överhettas.
• Avståndet mellan apparat och vägg bör vara minst 10 cm.
• Installera inte produkten på en plats som saknar ventilation (t.ex. i
en bokhylla eller ett skåp).
• Installera inte produkten på en matta eller en dyna.
• Se till att luftventilen inte blockeras av en duk eller gardin.
Annars kan eldsvåda uppstå.
Vidrör inte ventilationshålen när du tittar på TV eftersom dessa kan vara
heta. Detta påverkar inte produktens funktion eller prestanda.
Kontrollera produktens sladdar regelbundet, och om utseendet visar på
skador eller nedbrytning kopplar du från den, slutar att använda den
och får sladden ersatt med exakt samma ersättningsprodukt från en
auktoriserad återförsäljare.
Se till att damm inte samlas på nätkontakten eller i vägguttaget.
Detta medför risk för brand.
6
SVENSKA
Skydda nätsladden från fysisk eller mekanisk felanvändning, t.ex.
att böja, slå knutar på, klämma i dörrar eller gå på den. Var extra
uppmärksam på kontakter, vägguttag och de punkter där sladden
kommer ut från apparatens hölje.
Tryck eller skrapa inte på skärmytan med handen eller med vassa
föremål som naglar, spik, pennor eller liknande, som kan orsaka repor.
Undvik att vidröra skärmen eller hålla ngrarna mot den en längre tid.
Detta kan orsaka tillfälliga förvrängningseekter på skärmen.
När du rengör produkten och dess komponenter kopplar du bort
strömmen och torkar med en mjuk trasa. Om du trycker för hårt
kan det leda till repor eller missfärgningar. Spraya inte vatten på
produkten eller torka den med en våt trasa. Använd aldrig fönsterputs,
rengöringsmedel för bilar, industriella rengöringsmedel, skurmedel,
vax, bensen, alkohol o.s.v. som kan skada produkten och dess panel.
Annars kan det uppstå eldsvåda, elektriska stötar eller produktskada
(deformation, korrosion eller att produkten går sönder).
Så länge som den här enheten är ansluten till ett vägguttag kommer
den inte att kopplas från växelströmkällan, även om du stänger av
enheten med strömbrytaren.
När du ska dra ur sladden tar du tag i stickproppen och drar ur den.
Om ledningarna inuti strömkabeln kopplas bort kan det orsaka
eldsvåda.
Se till att du stänger av strömmen innan du yttar produkten. Sedan
drar du ur strömkablarna, antennkablarna och alla anslutningskablar.
TV:n eller strömsladden kan vara skadade vilket kan leda till brand eller
orsaka elektriska stötar.
Ta hjälp av någon annan när du yttar eller packar upp produkten
eftersom den är tung. Annars kan personskador uppstå.
Lämna all service till kvalicerad servicepersonal. Service krävs när
produkten har skadats, t.ex. när strömsladden eller -kontakten har
skadats, vätska har spillts i produkten, produkten har utsatts för regn
eller fukt, inte fungerar normalt eller har tappats.
Om produkten är sval kan det hända att du ser lite ”immer” när den
slås på. Det är helt normalt. Det är inte fel på produkten.
Panelen är en högteknologisk produkt med en upplösning på två
miljoner till sex miljoner pixlar. Det kan hända att du ser små svarta
prickar och/eller färgade prickar (röda, blå eller gröna) i storleken
1ppm på panelen. Detta är inte ett tecken på att något är fel, och det
påverkar inte produktens prestanda eller pålitlighet.
Det här fenomenet förekommer också i produkter från tredje part och
ger inte rätt till byte eller återbetalning.
SVENSKA
7
Panelens ljusstyrka och färg kan se olika ut beroende på vilken vinkel du
tittar från (vänster/höger/uppåt/nedåt).
Det här fenomenet uppstår på grund av panelens egenskaper. Det har
inget med produktens prestanda att göra och det är inte ett tecken på
att något är fel.
Inbrända bilder kan uppstå om en stillbild visas under en längre period.
Undvik att visa samma bild alltför länge på tv-skärmen.
Genererat ljud
”Knäppande” ljud: Ett knäppande ljud som hörs när du tittar på eller
stänger av TV:n orsakas av termisk sammandragning i plasten på grund
av temperatur och fuktighet. Detta ljud är vanligt för produkter där
termisk deformation krävs. Brummande från elektrisk krets/surrande
från panelen: Ett lågfrekvent ljud genereras från en snabb växlingskrets
som tillhandahåller en stor mängd ström för att driva produkten. Detta
varierar beroende på produkten.
De här genererade ljuden påverkar inte produktens prestanda eller
pålitlighet.
Använd inga elektriska produkter med hög spänning i närheten av tv:n
(t.ex. en elektrisk ugsmälla). Då kan produkten fungera sämre.
Förberedelser
Obs!
• Illustrationen kan skilja sig från vad som syns på TV:n.
• TV-apparatens skärmvisningar (OSD, On Screen Display) kan se lite
annorlunda ut jämfört med vad som visas i användarhandboken.
• Tillgängliga menyer och alternativ kan skilja sig åt beroende på
vilken ingångskälla eller produktmodell du använder.
• I framtiden kommer den här TV:n att förses med nya funktioner.
• Vilka föremål som medföljer din produkt kan variera beroende på
modell.
• Produktspecikationer och innehåll i den här användarhandboken
kan ändras utan föregående meddelande på grund av
uppgradering av produktens funktioner.
• För bästa möjliga anslutning bör HDMI-kablar och USB-enheter
inte vara större än 10mm tjocka och 18mm breda. Använd en
förlängningskabel med stöd för USB 2.0 om USB-kabeln eller USBminnet inte passar i TV:ns USB-port.
A
B
A
B
*A
<
10 mm
*B
<
18 mm
• Använd en certierad kabel med HDMI-logotypen på.
• Om du inte använder en certierad HDMI-kabel kan det hända
att skärmen inte visas eller att det uppstår anslutningsfel.
(Rekommenderade HDMI-kabeltyper)
- HDMI®/
TM
-höghastighetskabel (upp till 3 m)
- HDMI®/TM-höghastighetskabel med Ethernet (upp till 3 m)
• Användning av ferritkärnan (Beroende på modell)
- Minska störningar från elektromagnetisk strålning i strömkabeln
med hjälp av ferritkärnan. Linda strömkabeln ett varv runt
ferritkärnan.
[Vägg]
[Tv ]
10 cm (+ / -2 cm)
8
SVENSKA
VARNING!
• Använd inte några ej godkända produkter eftersom det kan ha
negativ inverkan på säkerheten och produktens livslängd.
• Alla skador eller personskador som orsakats av användning av ej
godkända produkter täcks inte av garantin.
• Vissa modeller har en tunn lm som sitter fast på skärmen och den
här lmen får inte tas bort.
• När du monterar foten på tv:n bör du lägga bildskärmen med
skärmen nedåt på ett täckt bord eller en plan yta så att skärmen
inte riskerar att repas.
• Kontrollera att skruvarna har dragits åt ordentligt. (Om de inte
skruvas i tillräckligt kan det hända att tv:n tippar framåt.) Dra inte
åt skruvarna alltför hårt eftersom de kan skadas och inte fästa
ordentligt.
Lyfta och ytta TV:n
Innan du lyfter eller yttar TV:n bör du läsa följande så att den inte
repas eller skadas, samt som en garanti för säker transport oavsett
TV-apparatens typ eller storlek.
• Vi rekommenderar att TV:n är kvar i kartongen eller
förpackningsmaterialet när du yttar den.
• Koppla bort strömsladden och alla kablar innan du yttar eller
lyfter TV:n.
• Se till att skärmen är vänd bort från dig när du håller TV:n för att
skydda den mot skador.
• Håll den övre och undre delen av ramen i ett fast grepp. Se
till att inte hålla i den transparenta delen, högtalarna eller
högtalargallren.
• Det krävs minst 2 personer för att ytta en större TV.
• Om du ska bära TV:n ska den hållas på samma sätt som bilden
visar.
• Utsätt inte TV:n för stötar eller stora vibrationer vid transport.
• Håll TV:n upprätt när du lyfter den och se till att inte vända den på
sidan eller luta den åt vänster eller höger.
• Var försiktig så att du inte trycker för hårt när du bär bildskärmen,
då kan den bli böjd och skadas.
• Var försiktig så att du inte skadar de utskjutande knapparna när
du yttar tv:n.
VARNING!
• Undvik att röra vid skärmen eftersom det kan skada den.
• Håll inte i kabelhållarna när du yttar tv:n. Hållarna kan gå sönder,
vilket kan leda till skador på personer eller på tv-apparaten.
Använda knappen
(Beroende på modell)
Du kan enkelt använda tv:ns funktioner genom att trycka på eller röra
knappen.
Obs!
• LH51, LH52 -serien har ingen joystickknapp utan bara ström på/
av-knappar.
Knappsats
eller
Joystickknapp
SVENSKA
9
Grundläggande funktioner
Ström på (Tryck på)
Ström av (Håll nedtryckt)
1
Volymkontroll
Programkontroll
1 Om menyknappen visas på skärmen kan du lämna menyn genom att
hålla ner knappen.
Justera menyn
När tv:n är på trycker du en gång på -knappen. Du kan justera
menyalternativen genom att trycka på eller ytta knapparna.
Stäng av strömmen.
Stänger alla skärmbilder och återgår till normalt TV-läge.
Ändrar ingångskällan.
Öppnar inställningsmenyn.
Placera TV:n på ett bord
1 Lyft upp TV:n i upprätt position på ett bord.
• Lämna ett utrymme på (minst) 10 cm mellan bildskärmen och
väggen för god ventilation.
10 cm
10 cm
10 cm
10 cm
10 cm
2 Anslut strömsladden till ett eluttag.
VARNING!
• Placera inte TV:n i närheten av eller på värmekällor eftersom det
kan leda till brand eller annan skada.
Säkra TV:n i en vägg
(Denna funktion nns inte på alla modeller.)
1 Sätt i och skruva åt skruvöglorna eller vinkeljärnen och skruvarna på
baksidan av TV:n.
• Om det redan sitter skruvar där skruvöglorna ska sättas fast tar du
bort dem först.
2 Fäst vinkeljärnen med skruvarna på väggen.
Passa in vinkeljärnen på väggen mot skruvöglorna på baksidan av
TV:n.
3 Fäst ihop skruvöglorna och vinkeljärnen ordentligt med ett stadigt rep.
Se till att repet är horisontellt mot den plana ytan.
VARNING!
• Se till att barn inte klättrar på TV:n eller hänger i den.
Obs!
• Använd en hållare eller ett skåp som är stark/t och stor/t nog att
klara TV:ns vikt på ett säkert sätt.
• Vinkeljärn, skruvar och rep medföljer inte. Du kan köpa ytterligare
tillbehör från din lokala återförsäljare.

10
SVENSKA
Montering på vägg
Sätt försiktigt fast ett valfritt väggmonteringsfäste på baksidan av
TV:n och montera väggfästet på en bärkraftig vägg i rät vinkel mot
golvet. Kontakta kvalicerad personal om du vill fästa TV:n i andra
byggnadsmaterial. LG rekommenderar att väggmonteringen utförs av
en professionell installatör. Vi rekommenderar att du använder LG:s
väggmonteringsfäste. Det är lätt att ytta LG:s väggmonteringsfäste
med kablarna anslutna. Om du inte använder det bör du använda ett
väggmonteringsfäste av VESA-standard som fäster enheten ordentligt
vid väggen och lämnar tillräckligt med utrymme för att du ska kunna
ansluta externa enheter. Du rekommenderas att ansluta alla kablar
innan du monterar fasta väggfästen.
10 cm
10 cm
10 cm
10 cm
Se till att använda skruvar och väggmonteringsfästen som uppfyller
VESA-standarden. Standardmått för väggmonteringsutrustningen
anges i tabellen nedan.
Köps separat (Väggmonteringsfäste)
Modell
32/43LH51**
32/43LH52**
43LH54**
49LH51**
49LH52**
49LH54**
VESA (A x B) (mm) 200 x 200 300 x 300
Standardskruv M6 M6
Antal skruvar 4 4
Väggmonteringsfäste
LSW240B
MSW240
LSW350B
MSW240
Modell 55LH54**
VESA (A x B) (mm) 400 x 400
Standardskruv M6
Antal skruvar 4
Väggmonteringsfäste
LSW440B
MSW240
A
B
VARNING!
• Ta bort foten innan du monterar tv:n på ett väggmonteringsfäste
genom att utföra proceduren för montering av foten i omvänd
ordning.
Obs!
• Använd skyddsetiketten vid installation av väggmonteringsfästet.
Skyddsetiketten skyddar öppningen från ansamling av damm och
smuts. (Gäller endast om det medföljer en del som ser ut så här.)
Medföljande del
Skyddsetikett
Anslutningar (information)
Anslut olika externa enheter till TV:n och byt inställningsläge för att
välja en extern enhet. Mer information om anslutning av externa
enheter nns i manualen för varje enhet.
Tillgängliga externa enheter är: HD-mottagare, DVD-spelare,
videobandspelare, ljudanläggningar, USB-lagringsenheter, datorer,
spelenheter och andra externa enheter.
Obs!
• Anslutningen för den externa enheten kan skilja sig från modellen.
• Externa enheter kan anslutas till TV:n oberoende av ordningen på
TV:ns portar.
• För att spela in ett TV-program på en DVD-spelare eller
videobandspelare måste du se till att signalkabeln till TV:n går
genom en DVD-spelare eller videobandspelare. Mer information
om inspelning nns i manualen till den anslutna enheten.
• Användningsinstruktioner hittar du i användarhandboken för den
externa enheten.
• Om du ansluter en spelenhet till TV:n ska du använda den kabel
som följer med spelenheten.
• I datorläge kan det uppstå störningar i upplösning, vertikalt
mönster, kontrast eller ljusstyrka. Om det inträar störningar, kan
du prova med att ändra datorutgången till en annan upplösning,
ändra uppdateringsfrekvensen till en annan inställning eller justera
ljusstyrka och kontrast på menyn BILD tills bilden blir tydlig.
• I PC-läge kanske inte vissa upplösningsinställningar fungerar som
de ska beroende på grakkortet.

SVENSKA
11
Antennanslutning
Anslut TV:n till ett antennuttag i väggen med en RF-kabel (75 Ω).
• Använd en signalfördelare om du använder er än två TVapparater.
• Om bildkvaliteten är dålig kan du installera en signalförstärkare för
att förbättra bildkvaliteten.
• Om bildkvaliteten är dålig när en antenn är ansluten ska den riktas
åt rätt håll.
• Antennkabel och omvandlare medföljer ej.
• DTV-ljud som stöds: MPEG, Dolby Digital, Dolby Digital Plus,
HE-AAC
Adaptern-anslutning
(Beroende på modell)
VARNING!
• Var noga med att ansluta TV:n till likströmsadaptern innan
nätkontakten till TV:n ansluts till vägguttaget.
Parabolanslutning
(Endast satellitmodeller)
Anslut TV:n till ett parabolantennuttag med en satellit-RF-kabel (75 Ω).
Ansluta en CI-modul
(Beroende på modell)
Titta på kanaler med förvrängd signal (betal-TV) i läget digital-TV.
• Kontrollera att CI-modulen sitter åt rätt håll i kortöppningen för
PCMCIA. Om modulen inte sätts i ordentligt kan TV-apparaten och
kortöppningen för PCMCIA skadas.
• Om TV:n saknar bild och ljud när CI+ CAM är anslutet kan du
kontakta tjänsteoperatören för digital jordbunden/kabel/satellit.
Euro scart-anslutning
(Beroende på modell)
Sänder video- och ljudsignalerna från en extern enhet till TV:n. Anslut
den externa enheten till tv:n med euro scart-kabeln.
Typ av utgång
Aktuellt
insignalsläge
AV1
(TV-utgång
1
)
Digital-TV Digital-TV
Analog-TV, AV
Analog-TVKomponent
HDMI
1 TV-utgång: Utdatasignaler för analog- eller digital-TV.
• Om du vill använda en scartkabel måste du använda en
signalavskärmade typ.
Andra anslutningar
Anslut TV:n till externa enheter. För att få bästa bild- och ljudkvalitet
ska du ansluta den externa enheten till tv:n med HDMI-kabeln. Vissa
separata kablar medföljer inte.
Obs!
• HDMI-ljudformat som stöds :
Dolby Digital (32 kHz, 44,1 kHz, 48 kHz),
PCM (32 kHz, 44,1 kHz, 48 kHz, 96 kHz, 192 kHz)
(Beroende på modell)
 Loading...