How it Works
Log In / Sign Up
Buy Points
How it Works
FAQ
Contact Us
Questions and Suggestions
Users
LG
Loading...
#
42LK466C
42LK469C
2
42LK520
6
42LK520 T-CON
42LK520UA
42LK53
42LK530
16
42LK530-CC
2
42LK530N
3
42LK530T
42LK530-TC
2
42LK530UC
42LK530Y
42LK53 Series
2
42LK55
42LK550
7
42LK550UA
42LK55 Series
42LK95
42LM3100-CC
42LM3150-CA
42LM3150-CE
42LM3400
39
42LM3400-SB
4
42LM3400-TB
6
42LM3400UC
42LM340S
2
42LM340S-ZA
42LM340T-ZA
2
42LM3410
4
42LM3410-TC
42LM3450
7
42LM345S
3
42LM345T-ZA
42LM3700
5
42LM3700UC
42LM4400
42LM4600
3
42LM4600-UA
42LM4650
42LM4650-UA
42LM5700-CB
42LM5700-CE
42LM5800
22
42LM5800-TC
2
42LM5800UC
42LM580S
5
42LM580S-ZA
3
42LM580T
4
42LM580T-ZA
5
42LM580Y
3
42LM580Y-TC
42LM5850
2
42LM5850UF
42LM585S-ZD
5
42LM585T-ZD
3
42LM610C
42LM615H
42LM615S
11
42LM615S-ZE
42LM615T
10
42LM615T-ZE
4
42LM6200
18
42LM6200-CC
42LM6200-CE
42LM6200-DA
2
42LM6200-SA
42LM6200-TA
5
42LM6200-UE
2
42LM620S-ZA
42LM620S-ZE
42LM620T
6
42LM620T-ZE
2
42LM620Y
5
42LM620Y-TA
2
42LM621S-ZD
42LM621T-ZD
42LM625S
42LM625S-ZG
42LM6400
10
42LM6400-CA
42LM6400-DJ
42LM6400-SA
42LM6400-TA
2
42LM640S-ZA
42LM640T-ZA
42LM640Y-TA
2
42LM6410
5
42LM6410-TB
42LM641Y
2
42LM649S
4
42LM649T
2
42LM64 Series
42LM660
42LM6600-CA
42LM6600-CE
42LM660S-ZA
42LM660T
8
42LM660T-ZA
2
42LM66 Series
Loading...
Loading...
Nothing found
42LM580Y
User guide
98 pgs
22.02 Mb
0
User guide
84 pgs
9.97 Mb
0
User guide [he]
84 pgs
5.05 Mb
0
Table of contents
Loading...
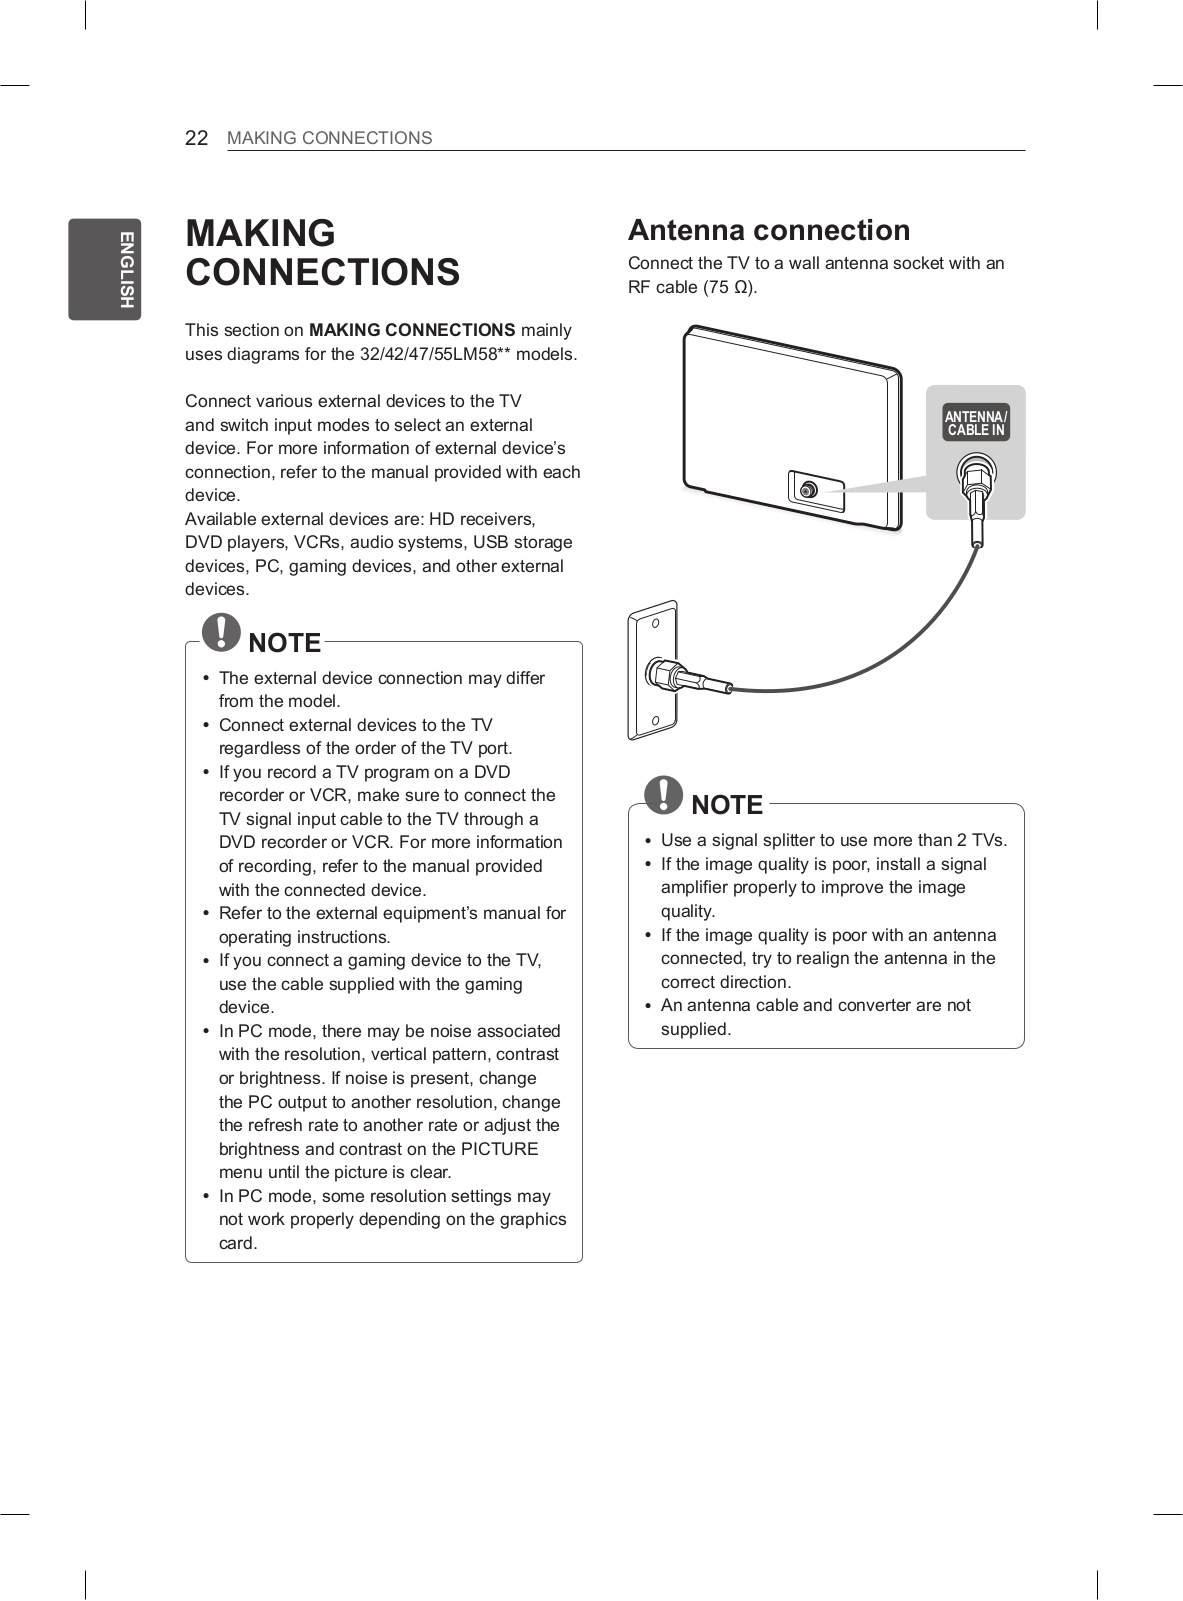
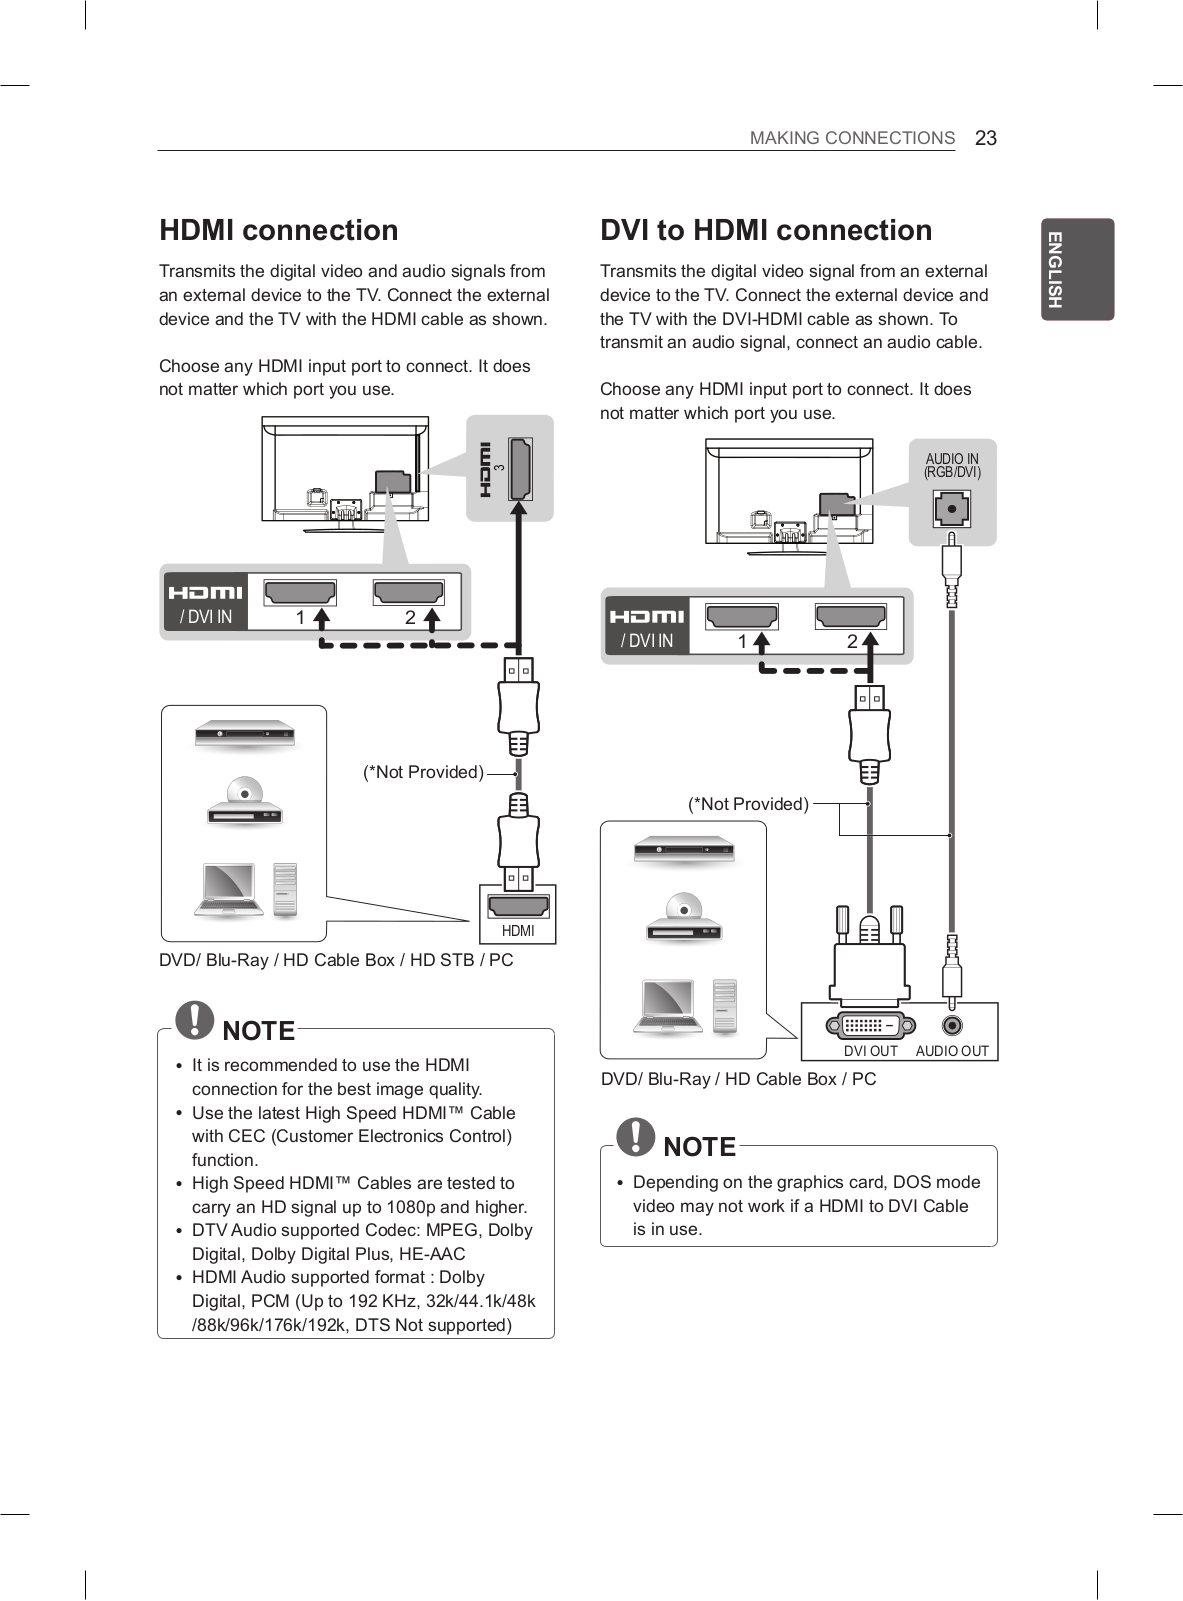
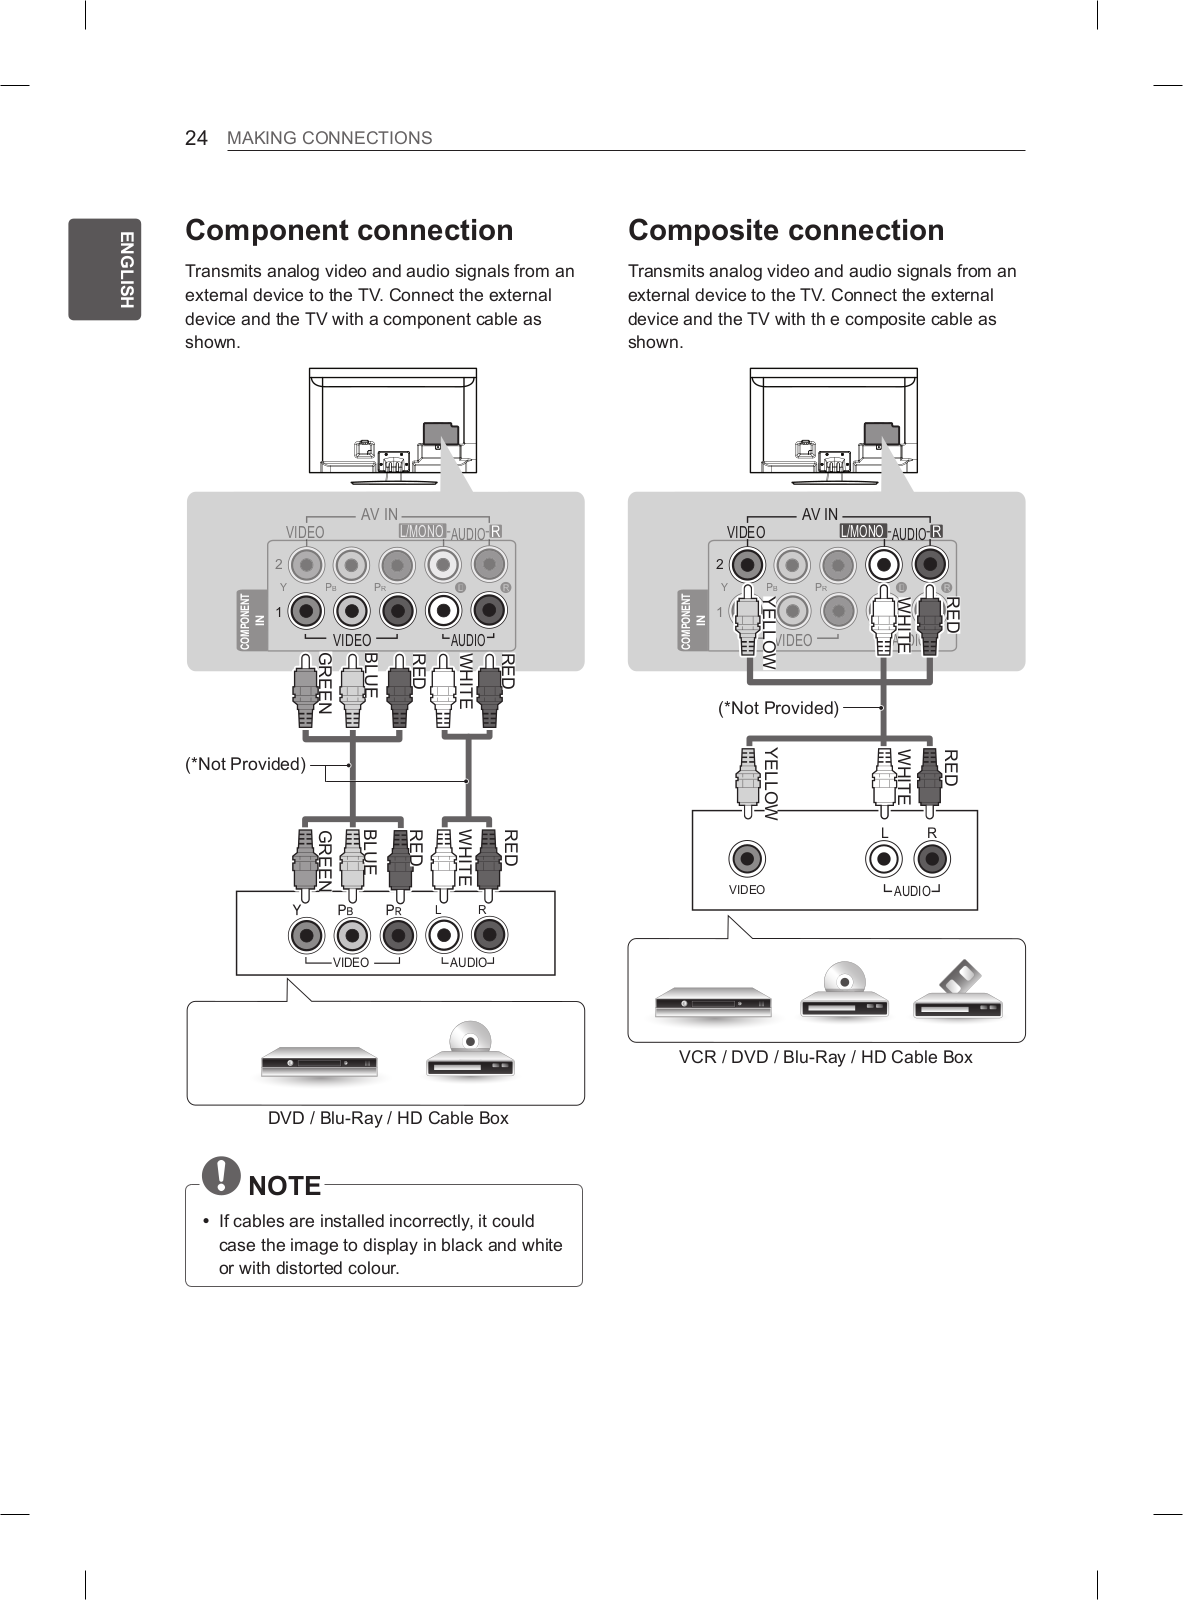
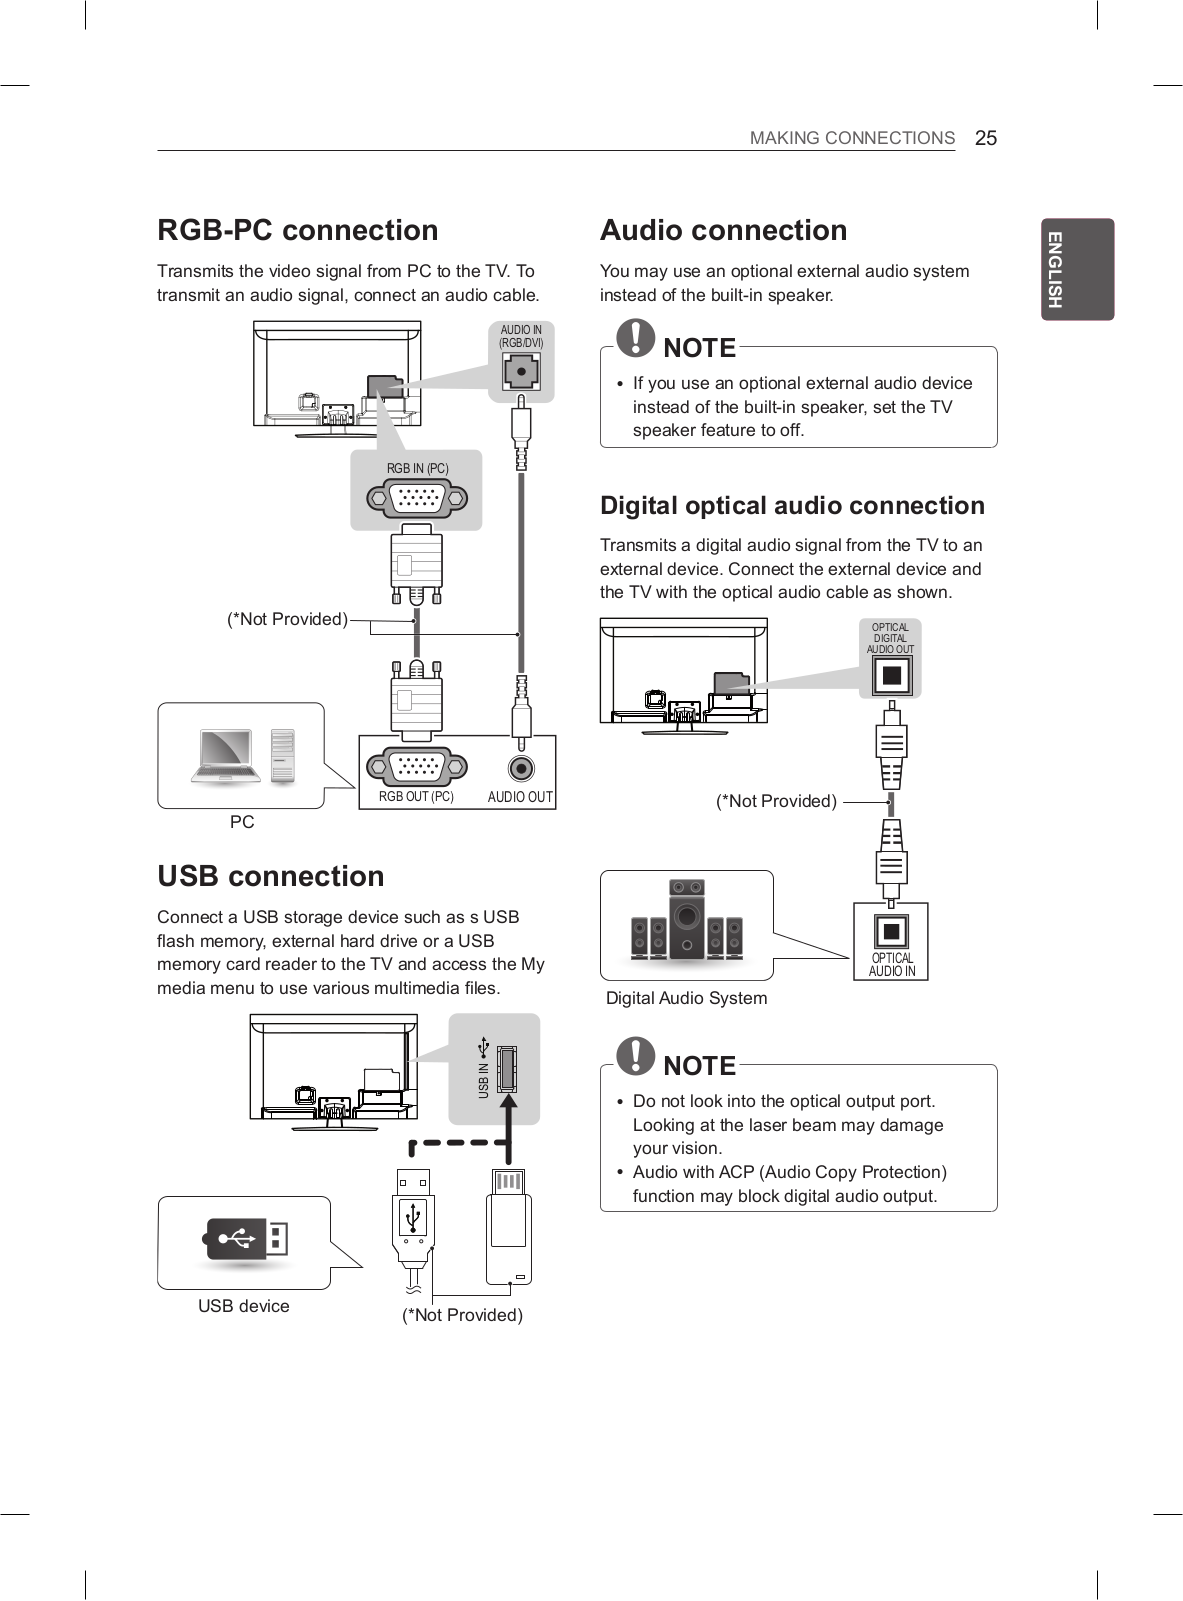
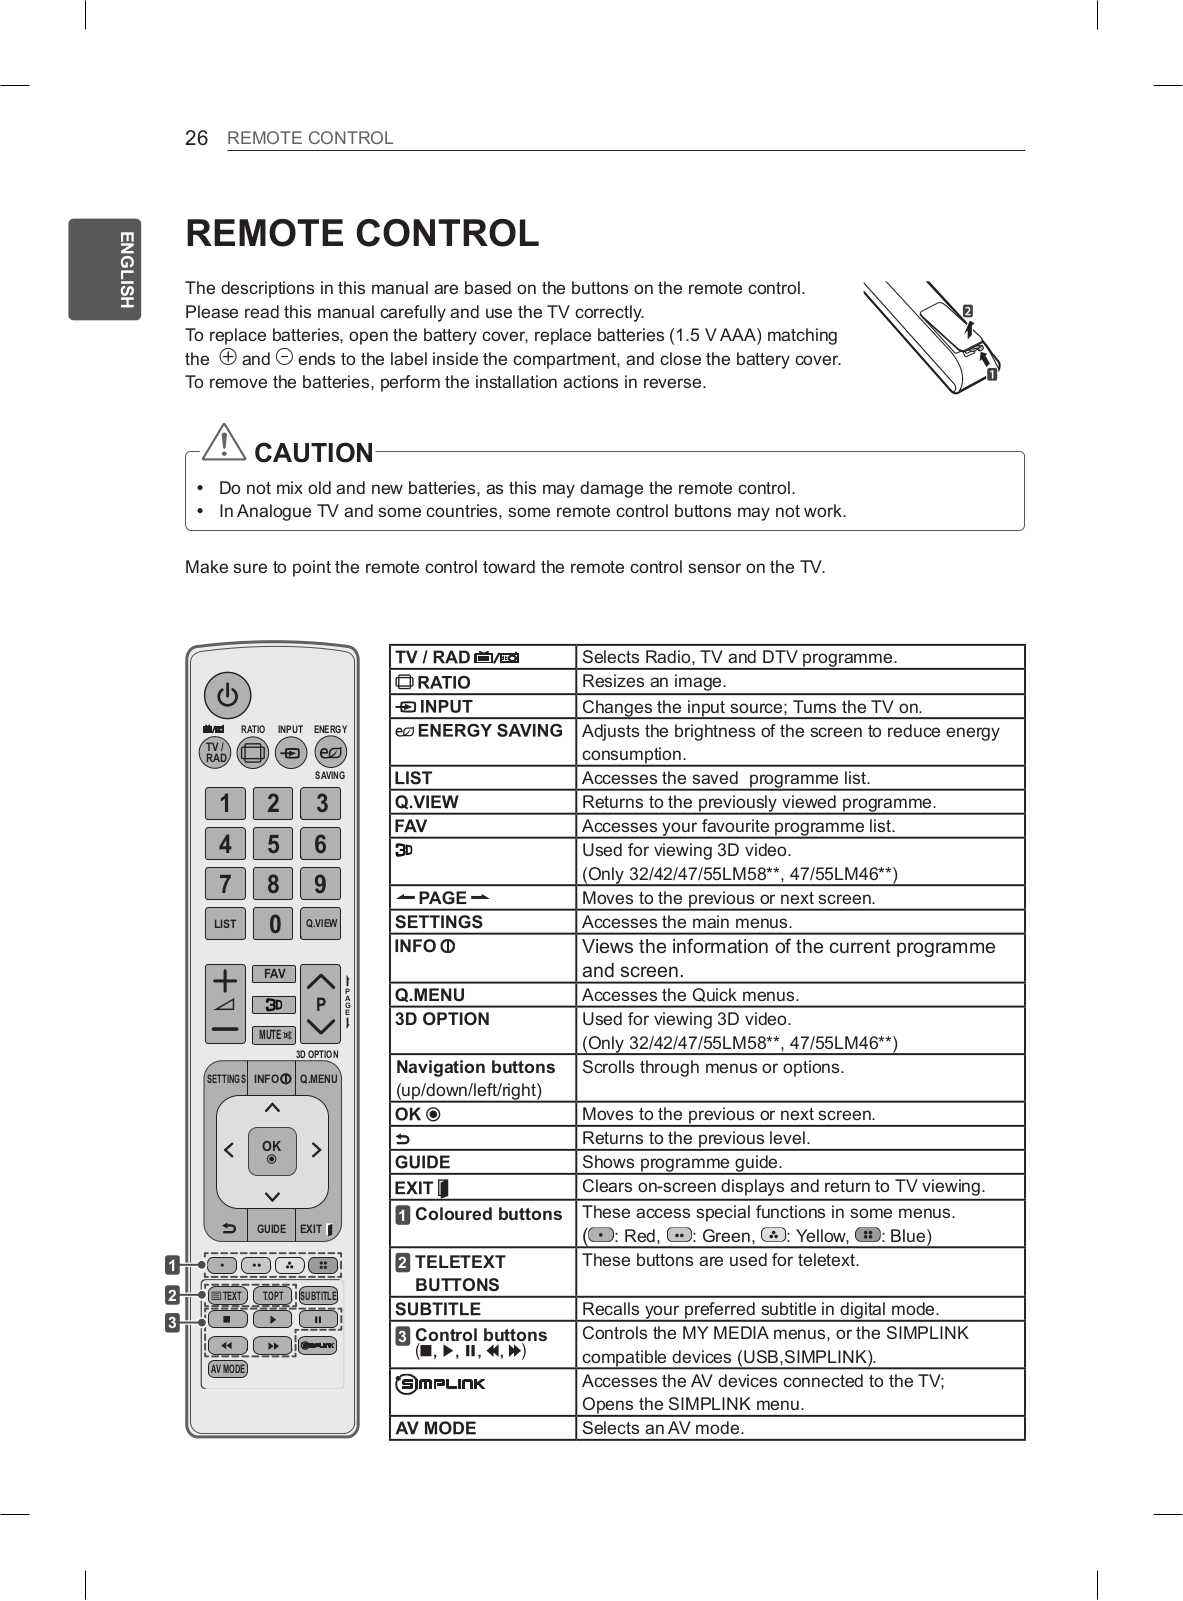
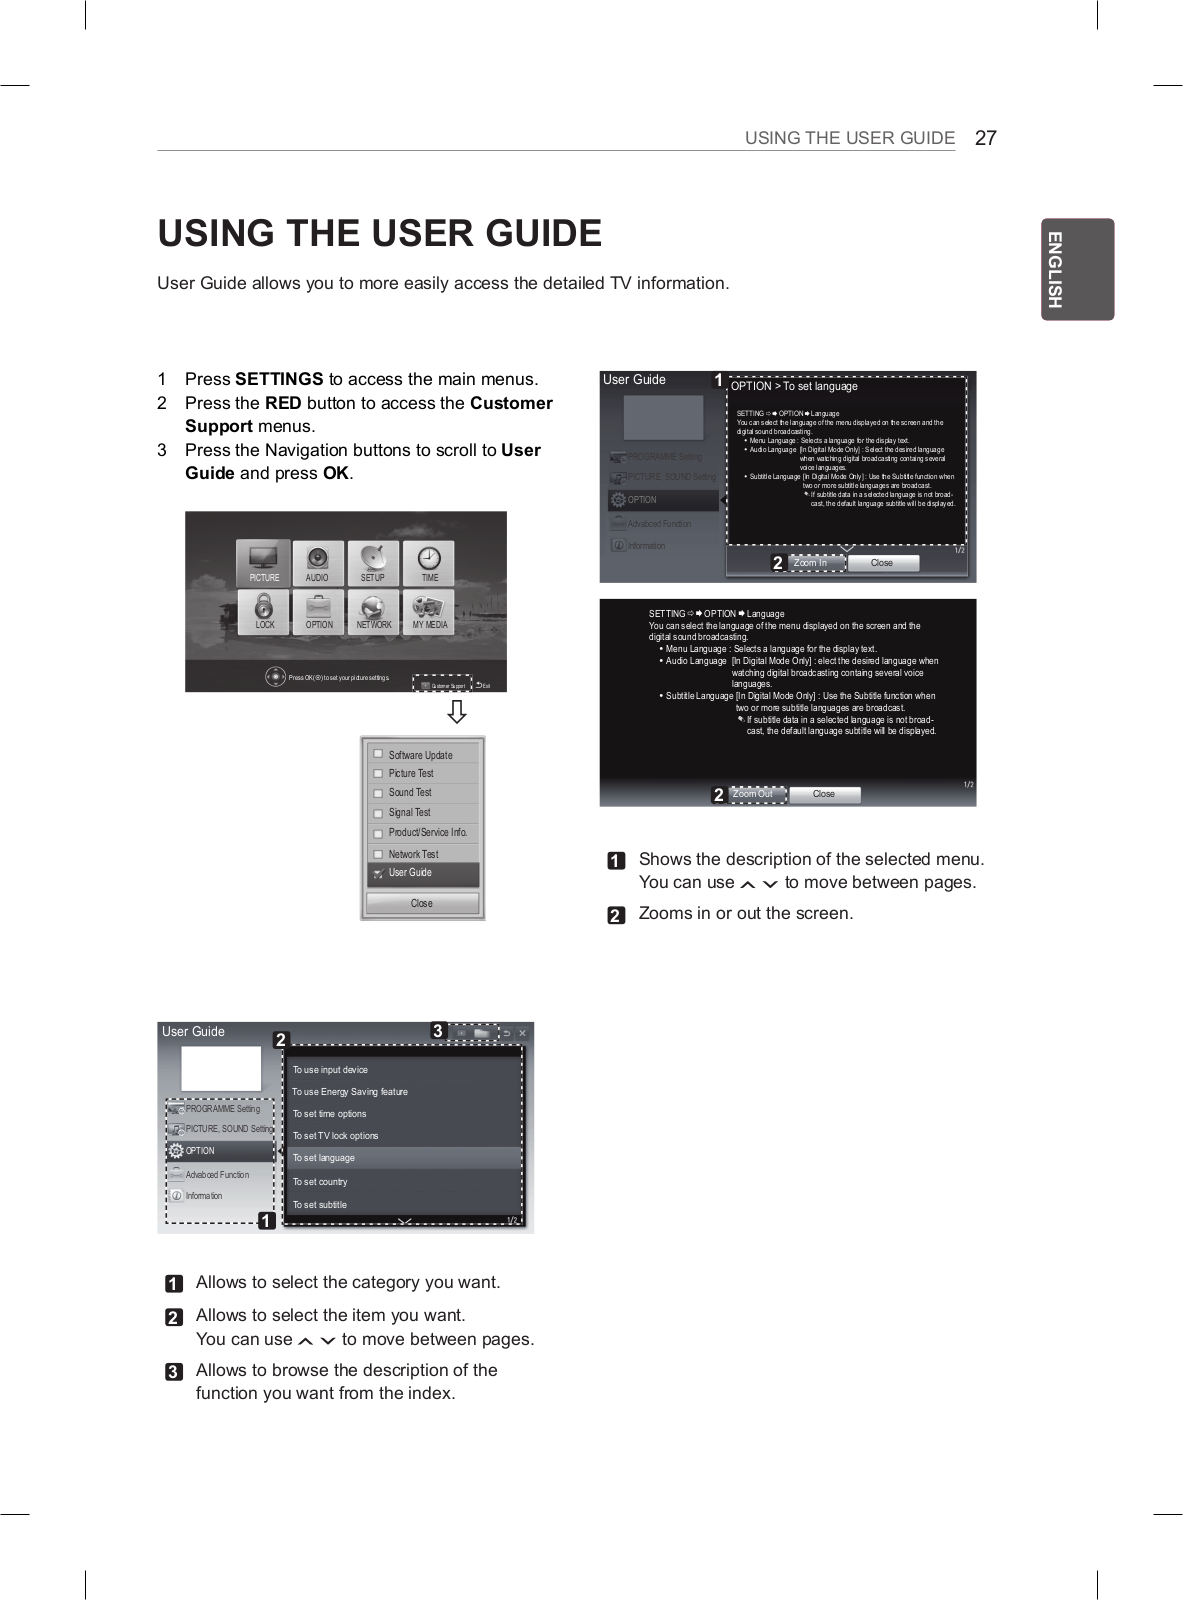
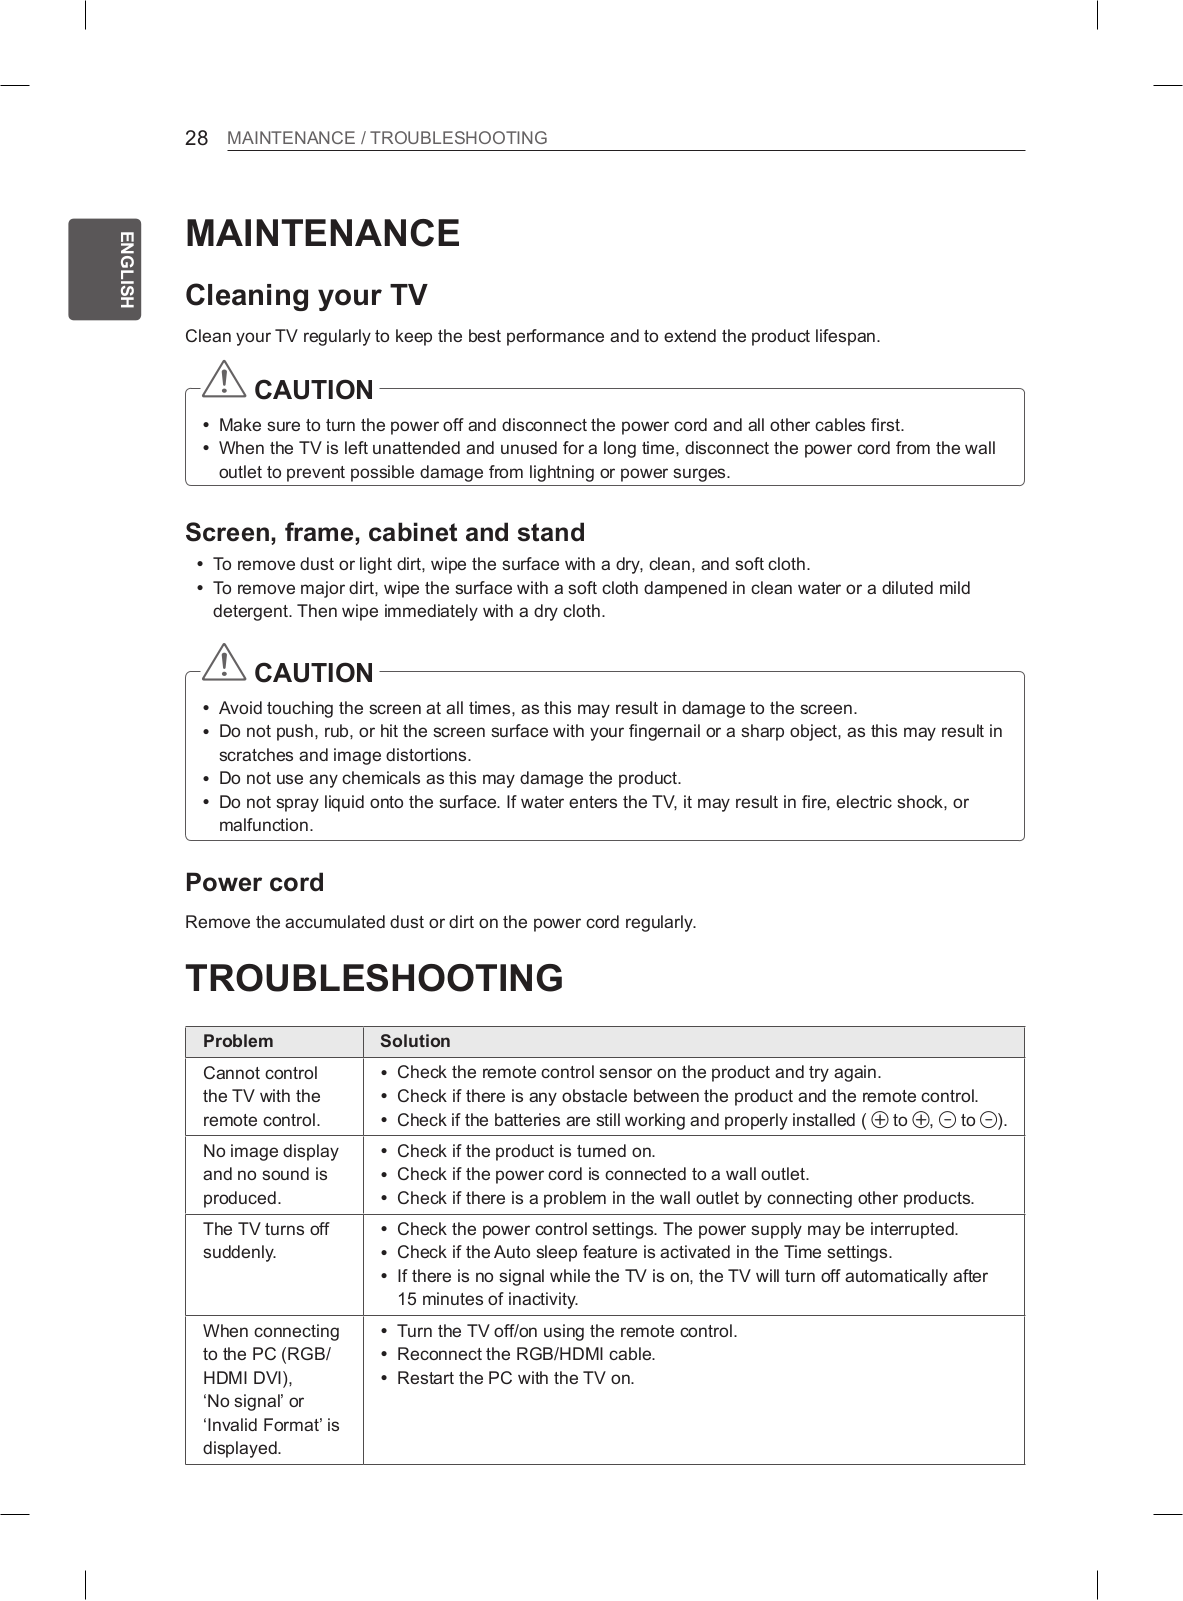
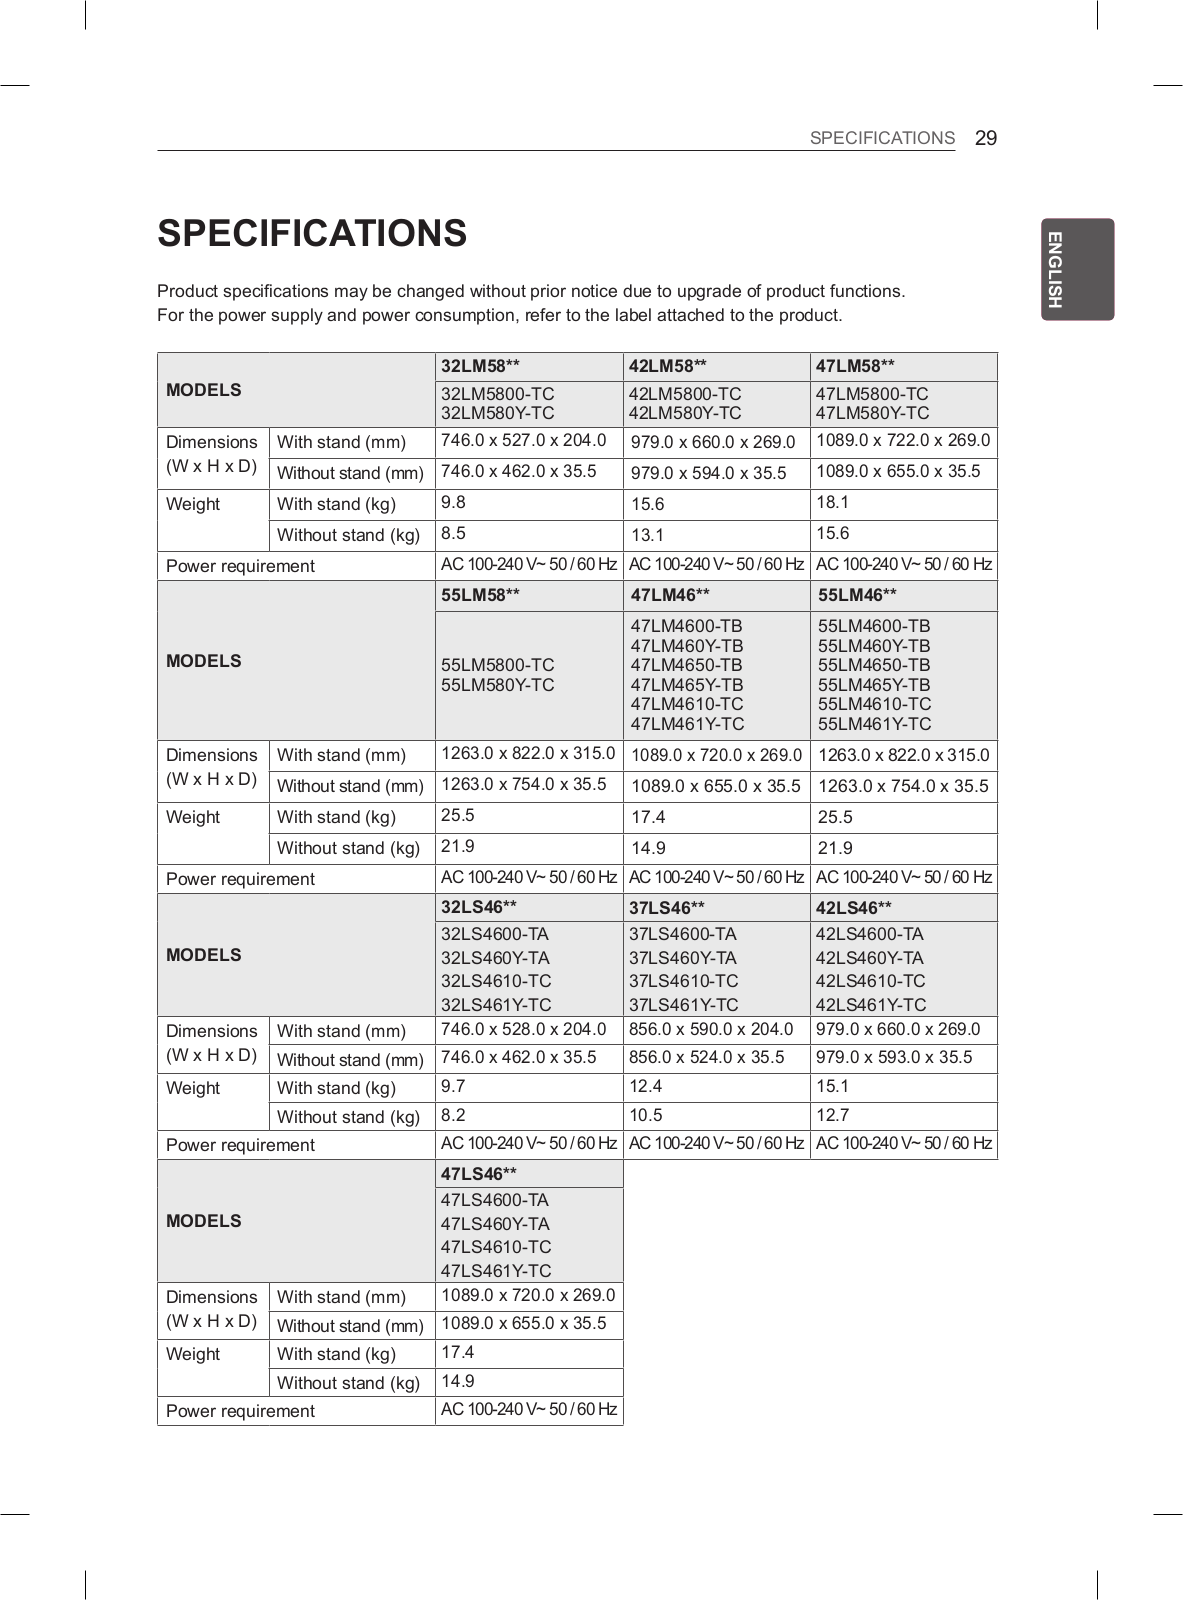
LG 42LM580Y User guide
...
LG User guide
Download
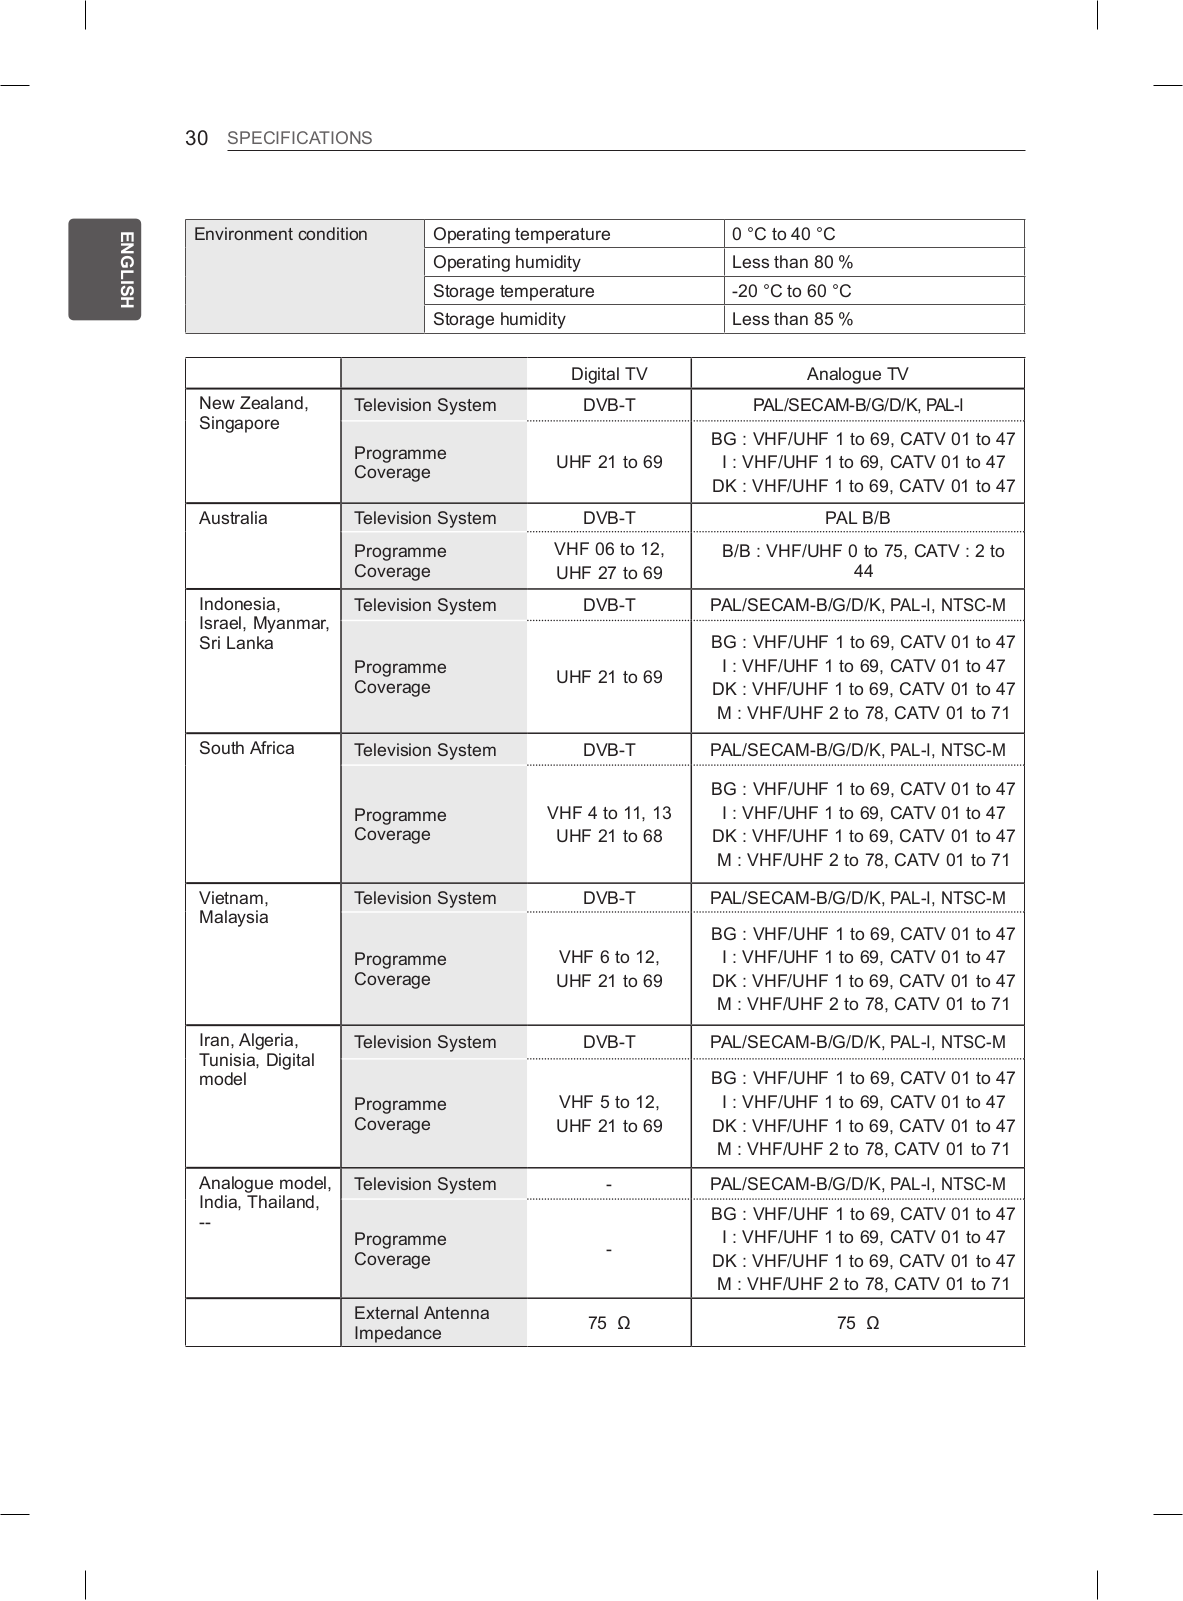
Specifications and Main Features
Frequently Asked Questions
User Manual
Download
Loading...
+
hidden pages
Unhide
You need points to download manuals.
1 point = 1 manual.
You can buy points or you can get point for every manual you upload.
Buy points
Upload your manuals
 Loading...