


OWNER’S MANUAL
User Guide
LED Monitor*
* LG LED Monitors applies LCD Monitors
with LED backlights.
Please read this manual carefully before operating your set and
retain it for future reference.
*MFL68662455*
www.lg.com
P/NO : MFL68662455 (1506-REV00)
Printed in Korea

ENGLISH
Picture/sound setting
To adjust aspect ratio
SMART SETTINGS PICTURE Aspect Ratio
Selects the screen aspect ratio.
16:9 Resizes images to fit the screen width.
Just Scan Displays video images in the original size without removing parts of the edge of
the image.
• In HDMI / Component (over 720p) mode, Just Scan is available.
Original When your monitor receives a wide screen signal it will automatically change to
the picture format.
Full Wide When monitor receives the wide screen signal, it will let you adjust the picture
horizontally or vertically, in a linear proportion, to fill the entire screen fully.
• In AV mode, Full Wide is available.
4:3 Resizes images to the previous standard 4:3.
14:9 You can view a picture format of 14:9 in the 14:9 mode. The 14:9 screen is
viewed in the same way as in 4:3, but is moved up or down.
Zoom Resizes the image to fit the screen width. The top and bottom parts of the
image may be cut off.
Cinema
Zoom 1
Choose Cinema Zoom when you want to enlarge the picture in correct
proportion.
• While viewing an external device, these cases may result in image burn :
-A video with stationary caption (such as network name)
-4:3 aspect ratio mode for an extended period
• Take caution when using these functions.
• Available picture size may dier depending on the input signal.
• The screen aspect ratios on HDMI-PC input are available in 4:3 and 16:9 only.
• [For models supporting 2160p] When a 2160p signal is input or your PC resolution is set to 3840
x 2160, the Aspect Ratio is xed to Just Scan.
2

ENGLISH
To use energy saving feature
SMART SETTINGS PICTURE
Reduces power consumption by adjusting screen brightness.
Auto /
Intelligent
Sensor
Off Turns off the Energy Saving mode.
Minimum /
Medium /
Maximum
Screen Off Screen is turned off and only sound is played.
[This feature is available on certain models only.]
The Monitor sensor detects the ambient lighting and automatically adjusts
the screen brightness.
Minimum / Medium / Maximum
Press any button except Power button on the remote control to turn the
screen back on.
Energy Saving
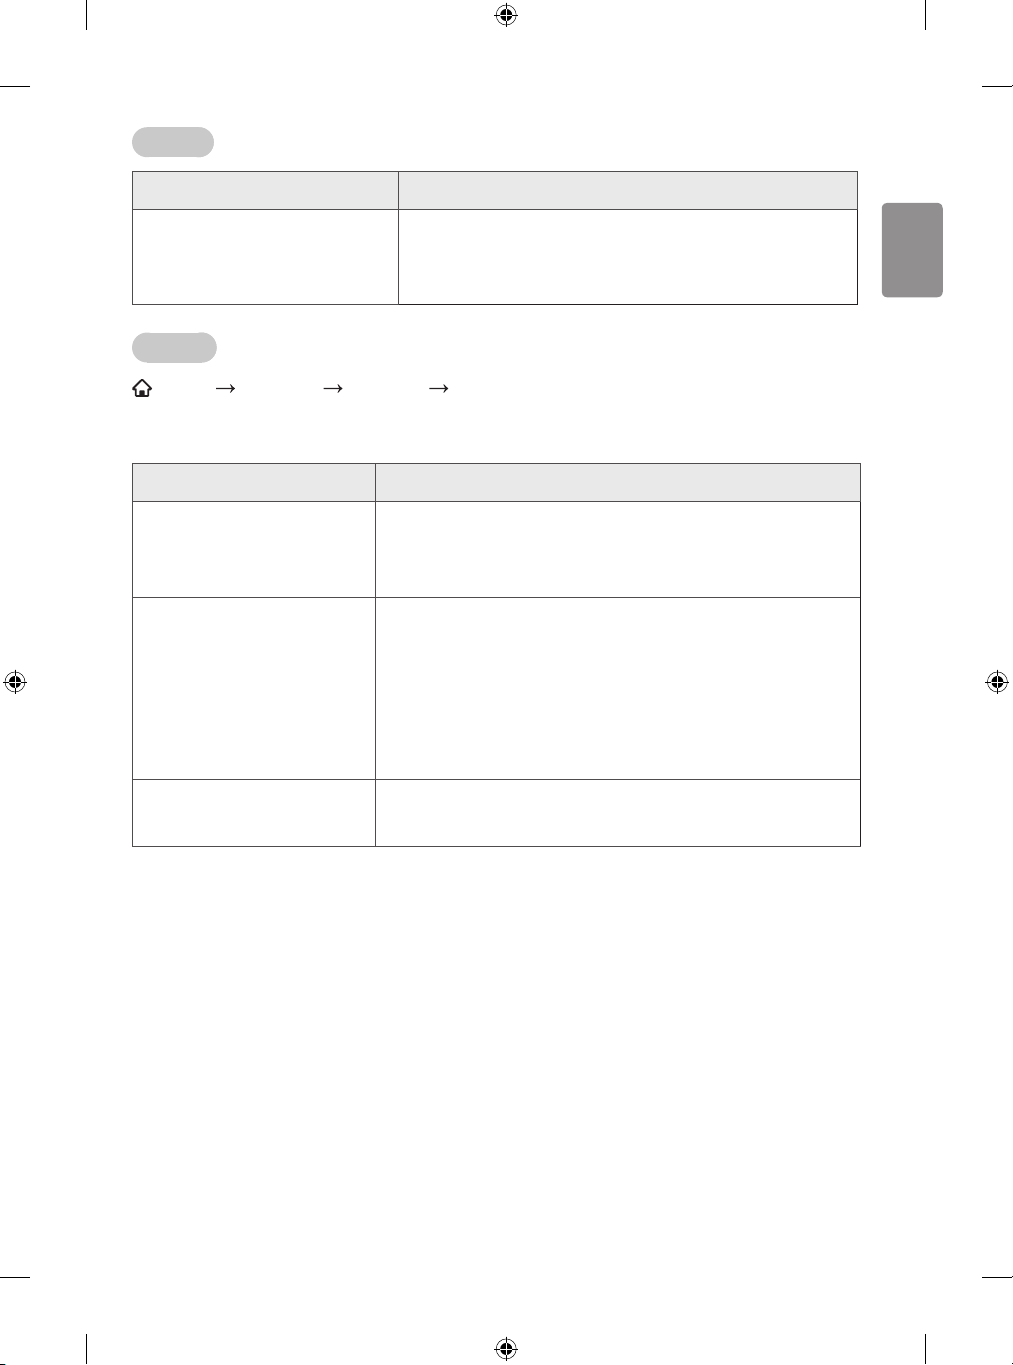
To set audio/video modes
SMART MY APPS Quick Menu AV Mode
Views the monitor with the best picture / audio optimized for different AV modes.
Off Views with the value set at the picture/sound menu.
Sport [This feature is available in certain countries only.]
Optimizes picture and audio settings for sports.
Cinema /
Cinema
Game Optimizes picture and audio settings for games.
Certication is the only performance benchmark recognized by professionals and
•
consumers alike. THX Certied monitor’s pass more than 400 tests ensuring they deliver bestin-class picture quality and movie experiences with the same stunning clarity and detail found
in the lmmaker’s studio.
Cinema : Depending on model]
[
Optimizes picture and audio settings for movies.
3

ENGLISH
To select picture mode
SMART SETTINGS PICTURE Picture Mode
Selects the picture mode optimized for the viewing environment or the programme.
Vivid Heightens contrast, brightness and sharpness to display vivid images.
Standard Displays images in standard levels of contrast, brightness and sharpness.
Eco [This feature is available on certain models only.]
Adjusts the screen brightness to reduce power consumption.
Cinema /
Cinema
Sport [This feature is available in certain countries only.]
Game Displays the optimum picture for game.
Expert1/
Expert2
• Depending on the input signal, the available range of picture modes may dier.
Expert mode is for picture tuning professionals to control and ne-tune using a specic
•
image. For normal images, the eects may not be dramatic.
Certication is the only performance benchmark recognized by professionals and
•
consumers alike. THX Certied monitor’s pass more than 400 tests ensuring they deliver bestin-class picture quality and movie experiences with the same stunning clarity and detail found
in the lmmaker’s studio.
[ Cinema : Depending on model]
Displays the optimum picture for movie.
Optimised picture mode for sport. The pitch and kits are presented in
vibrant colours, with crystal-clear images even for fast movements.
Menu for adjusting picture quality that allows experts and amateurs to
enjoy the best monitor viewing. This menu is ISF-certified and provided for
picture tuning experts. (ISF logo can only be used on ISF-certified monitor
units.)
ISFccc : Imaging Science Foundation Certified Calibration Control
4

ENGLISH
To ne-tune picture mode
SMART SETTINGS PICTURE Backlight / Contrast / Brightness / Sharpness /
Colour / Tint / Colour Temp.
First select a Picture Mode of your choice.
Backlight Adjusts the screen brightness by adjusting the backlight brightness. Values
closer to 100 mean a brighter screen.
Contrast Adjusts the contrast level to control the difference between the bright portions
and dark portions of an image. Values closer to 100 mean a greater difference.
Brightness Adjusts the overall brightness of the screen. Values closer to 100 mean a
brighter screen.
Sharpness Adjusts the sharpness to make the edges appear clean and straight. Values
closer to 50 mean cleaner edges.
Colour Adjusts the overall tone of the screen colours to become lighter or darker.
Values closer to 100 mean darker colours.
Tint Adjusts the balance between the red and green colours displayed on the
screen. Values closer to Red 50 mean a stronger red colour. Values closer to
Green 50 mean a stronger green colour.
Colour Temp. Adjusts the overall tone of colours to warm or cool.
• Depending on the input signal or other picture settings, the range of detailed items for
adjustment may dier.
5

ENGLISH
To set advanced control
SMART SETTINGS PICTURE Advanced control or Expert Control
Calibrates the screen for each picture mode or adjusts picture settings for a special screen.
First select a Picture Mode of your choice.
Dynamic Contrast Adjusts the contrast to the optimal level according to the brightness of
the image.
Dynamic Colour Adjusts colours for more natural-looking colours.
Colour Gamut Selects the range of colours that can be expressed.
Preferred Colour • Skin Colour : Skin colour spectrum can be separately set to
implement the skin colour as dened by the user.
• Grass Colour : Natural colour spectrum (meadows, hills, etc.) can
be separately set.
• Sky Colour : Sky colour is set separately.
Super Resolution Provides a crystal-clear picture by improving the details in areas where
the picture is blurry or unclear.
Gamma Sets the gradation curve according to the output of the picture signal in
relation to the input signal.
• Depending on input signal or other picture settings, the range of detailed items for adjustment
may dier.
6

ENGLISH
To set additional picture options
SMART SETTINGS PICTURE
Adjusts detailed setting for images.
Noise Reduction Removes the small dots that are randomly generated to display a clear
image.
MPEG Noise
Reduction
Black Level Adjusts the darkness of the screen to compensate for the screen brightness
Real Cinema Displays an image just like the ones you see in a movie theatre.
Motion Eye Care [This feature is available on certain models only.]
TruMotion [Depending on model]
Reduces noise caused by compressing digital video.
and contrast.
Saves power consumption by adjusting the brightness corresponding to
the movement of the image on the screen.
• It does not work while watching 3D images.
Optimizes the image quality of fast-moving pictures.
• O : Turns o the TruMotion.
• Smooth : Softens fast-moving pictures.
• Clear : Makes fast-moving pictures clearer.
• User : Sets De-Judder / De-Blur manually.
De-Judder : Adjusts juddering on the screen.
De-Blur : Reduces the blurring eects of motion.
Auto means Juddering and blurring range that depend on input video
status is controlled by TruMotion mode.
Picture Option
• Depending on input signal or other picture settings, the range of detailed items for adjustment
may dier.
To reset picture mode
SMART SETTINGS PICTURE
Resets values customized by the user.
Each picture mode is reset. Select the picture mode you wish to reset.
Picture Reset
7

ENGLISH
To use sound mode
SMART SETTINGS SOUND Sound Mode
Optimizes monitor audio to the selected sound mode.
Standard Suitable for all types of video.
News / Music / Cinema /
Sport / Game
User Setting Adjusts the volume to the desired level using the User Setting.
[The configurable items differ depending on model or country.]
Sets audio optimized for a specific genre.
To ne-tune the volume
SMART SETTINGS SOUND Sound Mode User Setting
Sets Sound Mode at User Setting first.
100 Hz / 300 Hz / 1 kHz / 3 kHz / 10 kHz Sets EQ by manually adjusting sound bands.
Reset Resets previously changed equalizer value.
To use smart sound mode
SMART SETTINGS SOUND Smart Sound Mode
Provides the optimized sound adjusted for each content type.
• If the Smart Sound Mode function is enabled, Sound Mode, Virtual Surround Plus and
Clear Voice ll are automatically adjusted.
To use virtual surround sound
SMART SETTINGS SOUND Virtual Surround plus
LG’s proprietary audio processing technology allows 5.1ch-like surround sound from two speakers.
• If Clear Voice ll is set to On, Virtual Surround plus will not be chosen.
To use clear voice ll function
SMART SETTINGS SOUND Clear Voice ll
Boosts voice clarity.
8

ENGLISH
To set volume mode
SMART SETTINGS SOUND Volume Mode
Sets various modes for volume control.
Auto Volume Sets Auto Volume to On. Different volume outputs from signal to signal.
They are then automatically adjusted for convenient monitor watching,
when clicking through different signal.
Volume Control Using a single volume curve may result in an inaudible or loud sound
depending on the environment. Adjusts volume levels depending on the
time of day (day / night).
To synchronize audio and video
SMART SETTINGS SOUND AV Sync. Adjust
Synchronizes video and audio directly when they do not match.
If you set AV Sync. Adjust to On, you can adjust the sound output (monitor speakers or SPDIF) to
the screen image.
Speaker [This feature is available on certain models only.]
Adjusts the synchronization of the sound from the monitor’s internal
speakers.
The “-” button makes the sound output faster and the “+” button slower
than the default value.
External Speaker Adjusts how the sound is synced from external speakers, such as an
external speaker connected to the digital audio output port, LG audio
device and headphone.
The “-” button makes the sound output faster and the “+” button slower
than the default value.
• The LG audio device can be connected via an optical digital port or
HDMI-ARC port.
Bypass Outputs the audio of an external device without audio delay. Audio may
be output before video as it takes time to process video input into the
monitor.
9

ENGLISH
To use sound option setting
[This feature is available on certain models only.]
SMART SETTINGS SOUND Sound Option Setting
Balance
[This feature is available on certain models only.]
Adjusts left / right audio balance.
Sound Optimizer
[This feature is available on certain models only.]
Allows optimized sound for custom monitor installation.
Off General sound mode.
Wall-mounted Type Optimizes sound for a wall-mounted monitor.
Stand Type Optimizes sound for a stand-mounted monitor.
To use monitor’s speakers
[This feature is available on certain models only.]
SMART SETTINGS SOUND Sound Out Speaker
Sound is output through the speaker.
To use external speaker
[Only available for models with an optical or HDMI (ARC) port]
SMART SETTINGS SOUND Sound Out External Speaker (Optical / HDMI
ARC)
Sound is output through the speaker connected to the optical port.
• SIMPLINK is supported.
10

To use digital sound out
SMART SETTINGS SOUND Sound Out External Speaker (Optical / HDMI ARC)
Digital Sound Out
Sets up Digital Sound Output.
Item Sound Input Digital Sound output
Auto MPEG PCM
Dolby Digital Dolby Digital
Dolby Digital Plus Dolby Digital
HE-AAC Dolby Digital
PCM All PCM
To connect and use LG audio device
LG audio device allows you to enjoy rich powerful sound easily.
Wired Connection
SMART SETTINGS SOUND Sound Out LG Sound Sync (Optical)
Connect LG audio device with the
• Only available for models with the optical digital port.
logo to the optical digital audio output port.
ENGLISH
Wireless Connection
SMART SETTINGS SOUND Sound Out LG Sound Sync (Wireless)
LG audio device with the
• You can use the monitor remote control to adjust the volume of the connected device.
• When wirelessly connecting, attach the dongle and connect it if the model needs the Magic
Remote dongle. (Purchase separately)
• For wireless connection, if the device fails to connect. Check the device power to connect and if
the LG Audio device is in a proper operating condition.
• If you select LG Sound Sync (Wireless), devices available for connection are searched and one
of searched devices is automatically connected. When a device is connected, its name is shown.
• If two or more devices are detected, the rst detected device is connected rst. To view more
detected devices to connect, press the Show More button.
• If LG Sound Sync (Wireless) is being selected and you turn on the monitor, it search and try
to connect the device which recently connected.
logo can be connected wirelessly.
11

ENGLISH
To use analogue out / headphone
[This feature is available on certain models only.]
SMART SETTINGS SOUND Sound Out External Speaker (Audio Out) /
Headphone
Select Headphone or External Speaker (Audio Out) depending on the device connected to set
the analogue out.
• The available menu may vary depending on whether you select Headphone or External
Speaker (Audio Out) in Sound Option Setting
Analogue Out.
• Some models may support the Headphone function only.
• If you connect headphones while the Monitor is powered on, it automatically detects the
headphones and sounds through them.
Option
Input list
To select an external input
SMART INPUT LIST
Selects external input.
• Image shown may dier from your monitor.
INPUT LIST
Select an input device to view.
Transcend 8GB HDMI1 AV Component HDMI2 HDMI3
12
Speaker
Change Device Name SIMPLINK Setting Set the Universal Control
3
4
5
1
2

ENGLISH
1
Selects speaker.
2
Selects input.
3
Changes Device Name.
4
Sets SIMPLINK.
5
Sets Universal Remote Control. [This feature is available in certain countries only.]
To use SIMPLINK
SIMPLINK is a feature that enables you to control and manage various multimedia devices
conveniently using the monitor remote control only via the SIMPLINK menu.
1 Connect the monitor’s HDMI IN terminal with the SIMPLINK device’s HDMI output terminal
using an HDMI cable. For home theatre units with a SIMPLINK function, connect HDMI terminals
as above, and use an optical cable to connect Optical Digital Audio Out from the monitor to
Optical Digital Audio In of the SIMPLINK device. (When connecting HDMI-ARC-enabled devices
via the HDMI-ARC port, an optical cable is not required.)
2 Select
3 Select SIMPLINK Setting on SIMPLINK menu window. SIMPLINK setup window appears.
4 Set SIMPLINK to On in SIMPLINK setup window.
5 Close SIMPLINK setup window.
6 Select the device to control from SMART MY APPS SIMPLINK.
SMART MY APPS SIMPLINK. SIMPLINK menu window appears.
• This function only works on devices with the SIMPLINK logo (
).
• Verify that the external device has a SIMPLINK logo.
• To use the SIMPLINK function, you need to use a high-speed HDMI cable (with CEC, or Consumer
Electronics Control, feature added). High-speed HDMI cables have the No. 13 pin connected for
information exchange between devices.
• Turn on or select the media of a device with home theatre features to see the speaker switch to
External Speaker.
• To use the Listen via External Speaker function, connect an optical cable (Purchase separately)
or HDMI-ARC-enabled device via the HDMI-ARC port.
• Switching to external input causes devices operating with SIMPLINK to stop.
• Use of a third-party device with HDMI-CEC features may cause malfunctions.
• Optical cable connection is supported only for models with the optical digital port.
13

ENGLISH
Explanation of SIMPLINK features
Direct Play Plays the multimedia device on the monitor instantly.
Select multimedia
device
Disc playback Manages the multimedia device with the monitor remote control.
Power off all devices If the Auto Power function is set to On in the SIMPLINK settings,
Sync Power on If the Auto Power function is set to On in the SIMPLINK settings,
Speaker Selects speaker either on the home theatre unit or the monitor.
Selects the desired device via the SIMPLINK menu to control it from
the monitor screen instantly.
turning the monitor off will turn the power off on all SIMPLINKconnected devices.
turning on a SIMPLINK device will turn the monitor on.
Time setting
To use sleep timer
SMART SETTINGS TIME Sleep Timer
Turns off the Monitor after a preset number of minutes.
To cancel the Sleep Timer, select Off.
To set current time
SMART SETTINGS TIME Clock
Checks or changes the time while watching monitor.
To set the monitor to turn on and o automatically
SMART SETTINGS TIME On Time / Off Time
Sets On / Off time.
Select Off on repeat to discontinue On Time / Off Time.
• To use On Time / O Time, set the current time correctly.
• [This feature is available in certain countries only.]
Even when the On Time function is On, the monitor will turn o automatically in 120 minutes
when no button is pressed within that time.
14

ENGLISH
To set automatic standby
[This function is available on certain models or in certain countries only.]
SMART SETTINGS TIME Automatic Standby
If you do not press any button on the monitor or remote control for a certain period, the monitor
will automatically switch to standby mode.
• This function does not work on Store Demo mode or while software update via network.
Lock
To set password
SMART SETTINGS LOCK Set Password
Sets or changes monitor password.
• The initial password is set as [0000].
To lock system
SMART SETTINGS LOCK Lock System
Permits only specific external input.
Select the Lock System to On.
Input Block Block the input sources.
Application Lock Lock the Application.
Magic remote
* Magic Remote is Separate purchase items.
To register the magic remote
To use the Magic Remote, register it with your monitor first.
Register Magic Remote as follows before use.
1 Turn on the monitor and wait for about 10 seconds and then press Wheel (OK) button while
pointing the remote control at the monitor.
2 The remote control is automatically registered and the registration completion message
appears on the monitor screen.
• If you failed to register the Magic Remote, turn o the monitor and try again.
15

ENGLISH
To re-register the magic remote
1 Press the and buttons together for about 5 seconds.
2 Press the Wheel (OK) button towards the monitor to re-register the Magic Remote.
• Press the
Remote.
• Press the
and re-register it.
button and button at the same time, for ve seconds, to reset the Magic
button while pointing the remote control at the monitor for ve seconds to reset
To set the pointer of the magic remote
SETTINGS OPTION Pointer
Sets the speed and shape of the pointer that appears on the monitor screen.
Speed Sets the moving speed of the pointer.
Shape Selects a pointer shape from various options.
Size Chooses the size of the pointer.
Alignment Set to On. If there is any misalignment between the pointer and the actual
direction the remote control indicates, move the Magic Remote left and right to
realign. The pointer will automatically realign to the centre, making it easier to
control.
• If it is set to O, the Alignment function will not work even when you move
the Magic Remote left and right.
• If the pointer has not been used for a certain period of time, it will disappear. When the pointer
disappears from the screen, shake the Magic Remote to the right and left. Then, it appears
again.
• If the pointer is not responding smoothly, you can reset the pointer by moving it to the edge of
the screen.
• If you press the Navigation button while moving the pointer on the screen, the pointer
disappears, and the Magic Remote works as a common remote control.
• Use within an eective distance of 10 metres. Using the Remote Control from greater distances
or when obstructions block the sight line may cause malfunctions.
• Electronic devices nearby may cause communication interference. Devices such as microwave
ovens and wireless LANs use the same frequency range (2.4 GHz) as the Magic Remote and may
cause interference.
• The Magic Remote may be broken if dropped or damaged in any other way.
• Take care not to bang it against other hard objects such as furniture or the oor.
16

ENGLISH
To set other options
To change monitor mode
SMART SETTINGS OPTION Mode Setting
Selects Standard or Store.
For use at home, select Standard.
Store is a mode used for store display.
To return to initial settings
SMART SETTINGS OPTION Factory Reset
Deletes all optional settings and returns to initial default mode.
Once initialization is complete, the monitor will turn off and on by itself.
• If Lock System is activated, a pop-up password prompt will appear.
• Do not turn o the power during initialisation.
Smart Monitor function
Smart Home
To use home screen
Press SMART button on the remote control.
With all Smart monitor features on one screen, everyone can access a wealth of content and applications
conveniently via the quick and easy-to-use menu, arranged by themes such as MY APPS, etc.
• Image shown may dier from your monitor.
HOME
RECENT LIST
2
1
RECENT LIST
2
Sign in
3
MY APPS
MY APPS
1
3
17

To use MY APPS
ENGLISH
SMART MY APPS
Select MY APPS at the lower right of the home screen.
Check pre-installed apps and apps you have downloaded.
To edit items in MY APPS
SMART MY APPS Edit
On the MY APPS page, select Edit at the top of the screen to move or delete apps. Please note that
system apps can be moved, but cannot be deleted.
• Changes orders / deletes items by dragging the app icons if your device has a Magic Remote.
• Image shown may di er from your monitor.
MY APPS
Network
To connect network
A wireless or wired network connection is required to use Smart features.
When connected to the network, you can use PREMIUM content, LG Smart World, Contents
Sharing and more.
One-click network connection
Connects easily to a wired / wireless network.
SMART SETTINGS NETWORK Network Connection to connect to an available
network automatically. Follow the prompts on the monitor.
18

ENGLISH
To connect to a network through set expert
SMART SETTINGS NETWORK Network Connection
For use in special circumstances such as in offices (in cases where a static IP is used).
1 Select a Network Connection, either Wired or Wireless.
2 When connecting via Wi-Fi, use the one of the following network connection methods.
AP List Connects to the network selected from the AP List.
Enter the SSID Connects to the wireless AP typed in.
WPS-PBC Connects easily when the button of a wireless AP supporting PBC is pressed.
WPS-PIN Connects easily when the PIN of the wireless AP that you wish to connect to
is entered in to the AP website.
To use the wi- direct function
SMART SETTINGS NETWORK Wi-Fi Direct
Wi-Fi Direct is a function that allows your monitor to connect with a Wi-Fi Direct device without
Internet connection. With SmartShare
Wi-Fi Direct.
1 Set Wi-Fi Direct to On. (If you do not use it, please change it to O.)
2 Enable the Wi-Fi Direct settings on the device that you want to connect to.
3 A list of devices that can be connected to the monitor is displayed.
4 Select a device to connect.
5 Select Yes, when the connection request message appears.
6 If the device that you want to connect accepts the request, Wi-Fi Direct is connected.
TM
, you can watch the files stored on a device connected via
To use the MiracastTM / Intel’s WIDI function
SMART SETTINGS NETWORK MiracastTM / Intel’s WiD
You can view the screen of a device with MiracastTM and Intel’s WiDi technologies on your
Monitor.
1 Set Miracast
TM
/ Intel’s WiDi to On. (If you do not use it, please change it to O.)
2 Enable the MiracastTM / Intel’s WiDi settings on the device that you want to connect to.
3 A list of devices that can be connected to the monitor is displayed.
4 Select a device to connect.
5 Select Yes, when the connection request message appears.
6 If the device that you want to connect accepts the request, MiracastTM and Intel’s WiDi is
connected.
i
19

ENGLISH
• Some models may provide the Intel’s WiDi function only.
• When Wi-Fi Direct is set to O, if you set MiracastTM / Intel’s WiDi to On, Wi-Fi Direct is
automatically set to On.
• When you set the MiracastTM / Intel’s WiDi function to O, Wi-Fi Direct returns to the
previous setting.
• It is recommended to connect a laptop using Intel’s WiDi within close range.
• Though Intel’s WiDi can be connected without a wireless router, it is recommended to connect
the wireless router rst for optimal performance.
• You may not connect your monitor to a non-LG Electronics device even when it is detected.
• It is recommended you to connect a device to a 5 GHz router.
• The response rate may vary depending on the user’s environment.
• For more information on the device you want to connect to, refer to its owner’s manual.
Setting a network - warning
• Use a standard LAN cable (Cat5 or higher with RJ45 connector, 10 Base-T or 100 Base TX LAN
port).
• Resetting your modem can cause network connection problems. To resolve the problem, turn
the power o, disconnect and reconnect, and then turn the power back on.
• LG Electronics is not responsible for any network connection problems or any faults,
malfunctions and errors caused by an network connection.
• A network connection may not work properly depending on the Internet service provider.
• A DSL modem is required for a DSL service; a cable modem is required for a cable service. Only
a limited number of network connections may be available, and monitor network setting may
not be available depending on your contract with your Internet Service Provider (ISP). (If only
one device is allowed per line and the PC is already connected, other devices cannot be used.)
• Wireless networks can be subject to interference from other devices operating at a frequency
of 2.4 GHz (wireless phones, Bluetooth devices or microwave ovens). There may also be
interference from devices with a frequency of 5 GHz, same as other Wi-Fi devices.
• The surrounding wireless environment can cause the wireless network service to run slowly.
• If you do not turn o the entire local home network, network trac may occur on some devices.
• For an AP connection, an access point device that supports wireless connection is required and
the wireless connection feature must be enabled on the device. Contact your service provider
regarding availability of wireless connection on your access point.
• Check the SSID and security settings of the AP for AP connection. Refer to the appropriate
documentation for SSID and security settings of the AP.
20

ENGLISH
• Invalid settings on network devices (wired / wireless line sharer, hub) can cause the monitor
to run slowly or not operate properly. Install the devices correctly according to the appropriate
manual and set the network.
• Connection method may dier according to the AP manufacturer.
Soft AP
To use the Soft AP function
SMART SETTINGS NETWORK Soft AP
This function allows you to change a wired Internet connection to your monitor to Wi-Fi, allowing
you to connect various external devices or to use wireless Internet.
Soft AP Sets to On / Off.
Security Key Sets the Wi-Fi security number.
• You can set the security key with a combination of English letters and
numbers between 8 and 64 characters long.
• The default setting is “LG123456”.
• To enable the Soft AP function, your monitor must be turned on and have a wired Internet
connection.
• Up to four external devices can be connected.
• If the Soft AP function is enabled, the Wi-Fi Direct and Miracast
unavailable. You must set the Soft AP function to O to use the Wi-Fi Direct and MiracastTM
functions.
TM
functions become
USB
To connect a USB device
Connect a USB storage device (external HDD, USB memory) to the USB port of monitor to enjoy the
content files stored in the USB device on your monitor.
To remove a USB storage device, select the Quick Menu
do not remove physically until you see the message that the USB has been removed. If detached
early, an error may occur on the monitor or the USB storage device.
• Once a USB device has been selected for removal, it can no longer be read. Remove the USB
storage device and then re-connect it.
USB Device that you wish to remove;
21

ENGLISH
Using a USB storage device - warning
• If the USB storage device has a built-in auto recognition programme or uses its own driver, it
may not work.
• Some USB storage devices may not work or may work incorrectly.
• If you use a USB extension cable, the USB device may not be recognized or may not work
properly.
• Use only USB storage devices formatted with the Windows FAT32 or NTFS le system.
• For external USB HDD, it is recommended that you use devices with a rated voltage of less than
5 V and a rated current of less than 500 mA.
• It is recommended to use a USB hub or hard disk drive with power supplied. (If the power
supplied is not enough, the USB storage device may not be detected properly.)
• It is recommended that you use USB Flash Drives of 32 GB or less and USB HDD of 2 TB or less.
• If a USB HDD with power-saving function does not work properly, turn the power o and on.
For more information, refer to the user manual of the USB HDD.
• Data in USB storage device can be damaged so be sure to back up important les to other
devices. Data maintenance is the user’s responsibility and the manufacturer is not responsible
for data loss.
SmartShare
To use SmartShare
TM
TM
SMART MY APPS SmartShareTM
Provides photo / music / video files on your monitor by connecting to a USB device or home
network.
• Image shown may dier from your monitor.
SmartShare
TM
Recent
Videos
Photos
Music
Linked Device
Settings Delete History Connecting guide
22
1
2

ENGLISH
1
Displays photo / music / video files on all devices connected to the monitor.
2
Shows how to connect PC, smartphone / device, and USB.
To control video playback
Controls playback and sets options while viewing videos.
• Image shown may dier from your monitor.
1
Option
2 3
1
Selects the desired point and plays.
2
Plays.
3
Sets options.
To control photo view
Controls playback and sets options while viewing pictures in full screen.
• Image shown may dier from your monitor.
1
Displays photos as a slideshow.
2
Plays background music.
3
Rotates or enlarges the picture.
4
Sets the filter. [This feature is available on certain models only.]
5
Sets options.
Option
23

ENGLISH
To control music playback
Controls playback and sets options while playing music.
• Image shown may dier from your monitor.
A to Z
WOOSICK5
1
Selects the desired point and plays.
2
Plays.
3
Sets the repeat / random function.
4
Listens to music with the monitor turned off.
5
Sets options.
• You can control playback using the
• If you use the USB device, time information will be not shown on screen.
24
, and keys on a standard remote control.

ENGLISH
To set SmartShareTM related functions
SMART MY APPS SmartShareTM
Changes settings related to SmartShareTM content playback.
Settings
Settings
My Monitor Name Changes the name that appears when searching for the monitor from
other devices.
Network Status Shows Network Status.
Wi-Fi Direct Allows use of wireless connection functions such as Wi-Fi Direct and
WiDi.
Auto Play on Receive Choosing whether to ask before playing the content that is shared by
other devices.
DivX(R) VOD Registers or releases DivX.
Checks DivX Registration Code for playing DivX-protected videos.
Register at
Uses Registration Code to rent or purchase movies at
http://vod.divx.com
.
www.divx.com/
vod.
• Rented / purchased DivX les cannot be played if the DivX
Registration Code of a dierent device is used. Use only the DivX
Registration Code granted to this device.
• Converted les not conforming to the DivX Codec Standard may
not play or may produce abnormal images and sound.
Delete history
To delete contents history, press Delete History button below. Use the contents at Recent menu.
SmartShareTM supporting le
Maximum data transfer rate 20 Mbps (megabits per second)
Internal subtitle formats
supported
External subtitle formats
supported
XSUB (supports internal subtitles generated from DivX6)
*.smi, *.srt, *.sub (MicroDVD, SubViewer 1.0 / 2.0), *.ass,
*.ssa, *.txt (TMPlayer), *.psb (PowerDivX), *.dcs (DLP
Cinema)
25

ENGLISH
Video supported codec
Maximum : 1920 x 1080 @ 30p
Extension Codec
.asf
.wmv
.divx
.avi
.mp4
.m4v
.mov
.3gp
.3g2
.mkv
.ts
.trp
.tp
.mts
.m2ts
Video VC-1 Simple and Main Profile
Audio WMA Standard, WMA 10 Professional
Video
Audio
Video H.264 / AVC, MPEG-4 Part 2
Audio AAC, MPEG-1 Layer III (MP3)
Video H.264 / AVC, MPEG-4 Part 2
Audio AAC, AMR-NB, AMR-WB
Video H.264 / AVC
Audio HE-AAC, Dolby Digital
Video H.264 / AVC, MPEG-2
Audio
DivX3.11, DivX4, DivX5, DivX6, XViD, H.264 / AVC, Motion Jpeg,
MPEG-4 Part 2
MPEG-1 Layer I, II, MPEG-1 Layer III (MP3), Dolby Digital, LPCM,
ADPCM, DTS
MPEG-1 Layer I, II, MPEG-1 Layer III (MP3), Dolby Digital,
Dolby Digital Plus, AAC, PCM
26
.vob
.mpg
.mpeg
Video MPEG-1, MPEG-2
Audio Dolby Digital, MPEG-1 Layer I, II, DVD-LPCM
Video MPEG-1, MPEG-2
Audio MPEG-1 Layer I, II, MPEG-1 Layer III(MP3)

ENGLISH
Available music file
File type Item
mp3 32 Kbps - 320 Kbps
mp3
Sample freq. 16 kHz - 48 kHz
Support MPEG1, MPEG2, Layer2, Layer3
Info
Available photo file
File type Item Profile
• Minimum : 64 x 64
2D
(jpeg, jpg, jpe)
JPEG
• Maximum
-Normal Type : 15360 (W) x 8640 (H)
-Progressive Type : 1920 (W) x 1440 (H)
Playing video - warning
• Some subtitles created by users may not work properly.
• The video and subtitle les should be placed in the same folder. For subtitles to display
correctly, the video and subtitle les must have the same name.
• Subtitles on an NAS (Network Attached Storage) device may not be supported depending on
the manufacturer and model.
• We do not support any stream that contains GMC (Global Motion Compensation) or Qpel
(Quarterpel Motion Estimation).
• Only H.264 / AVC prole level 4.1 and lower is supported.
• The le size limit is dependent on the encoding environment.
• It works only the above version of Window Media Audio V2.
• It’s not supported AAC Main Prole.
• Video les created by some encoders may not be played back.
• Video les in formats other than the ones specied here may not be played back.
• Playback of video les stored on the USB device that do not support High Speed, may not work
properly.
• The monitor supports DTS audio codec when the USB / HDMI video le playback.
27

ENGLISH
Contents Sharing
Content Share allows you to enjoy videos, music and photos saved on your PC or Smartphone that
are connected to the same network.
Connecting Smartphone with your monitor
1 Check that Wi-Fi is enabled on your mobile device.
The monitor and smartphone should be connected to the same wireless network.
2 Install and run an app that allows you to share les on your mobile device.
3 Choose to share on your mobile device.
4 Select the type of content (video/music/photo) to play.
5 Select the video, music or photo to play on your monitor.
6 Click the Add icon to open the PLAYLIST.
7 Select the monitor model on the device where the le will play. (You can nd the monitor
model name on the product label.)
8 Play (
Play the content with sharing software on the PC
If the computer operating system is Windows 7 or Windows 8, you can play music, video or photos
on your monitor without installing an additional program.
) Shows the selected le on monitor.
1 Congure the monitor and PC on the same network. Also congure the network on the PC
installed with Windows 7 or Windows 8.
2 Right-click the desired music, video or photo le, and select the model using the Play To
function provided in Windows 7 or Windows 8 to play what is selected.
To play on other devices like your mobile phone, refer to the relevant user guide
3 Even when multiple monitors or devices are connected, the selected le is only played through
one device. The playback rate may vary depending on the network connection.
Use the SmartShareTM PC Software to play the content saved on the
PC/Smartphone
You can use SmartShareTM PC Software or Smartphone to connect the music/videos/photos saved
on the PC to your home network and play them on your monitor.
1 Congure the monitor and device (e.g., smartphone) installed with SmartShare
same network. The SmartShareTM service is only available when the monitor and all the
devices are connected to a single router.
28
TM
on the

ENGLISH
2 If you are using a PC, download and install SmartShareTM PC Software from the website.
Before installation, exit all programs running on the PC, such as a rewall or an anti-virus
software.
3 The server should be running in order to watch the shared le on your monitor.
• For the website information, go to SMART SETTINGS SUPPORT Product /
Service Info.
• For information on how to use the SmartShareTM PC Software, refer to the software's help
section.
When Content Share is Malfunctioning
• Check your network settings if the content share option does not work properly.
• To watch the 1080p video through Contents Share function, a router that uses 5 GHz frequency
is required. If a 2.4 GHz router is used, the video may not play properly.
• May not work properly on a wireless network. It is recommended that you connect to a wired
network.
• When playing a video, Multi Audio and internal subtitles are not supported.
• If multiple monitors are connected to one device, the content may not be played properly
depending on server performance.
• Captions are only supported on some connected devices.
• May not work properly depending on the network environment.
• The Content Share function may not be supported for a router that does not support multi-
cast. For more information, refer to the user guide that came with your router or contact the
manufacturer.
• Even for the le format supported by the monitor, the supported le format may dier
depending on the connected device environment.
• If there are too many folders or les in a folder, it may not work properly.
• The information on the le imported from the connected device may not be displayed correctly.
• SmartShareTM PC Software is recommended for reading captions.
• When a subtitle le is added later, disable the shared folder and then enable it again.
• The DRM les in the connected device will not play.
• ULTRA HD videos (3840 x 2160) are not supported.
29

ENGLISH
Premium
To use premium
SMART PREMIUM
This service gives you easy access to a wide variety of content, such as video, news and UCC, at
any time, as long as you are connected to a network. For Premium content, specialized countryspecific services are offered that take into account regional cultural interests, in addition to globally
provided content.
• Image shown may dier from your monitor.
Premium
Premium service is affected by your internet connection.
Add To My Apps Option
30
1
Search
2
Sign in.
3
Premium content. Selects Content that you want to use.
4
Add To My Apps
5
Sets options.

ENGLISH
To use paid content
A fee is payable for some Premium content. Fee-paying services are paid for either through LG
Electronics’ proprietary billing system or through that of the relevant content provider.
Before using the LG billing system, you will need to sign up for membership and register payment
information on monitor or the website (
You can sign up for membership on the login screen on your monitor or our website. You can then
log into both the monitor and the website with one ID.
1 Click Sign In button on the upper-right side of the screen on the Home page to sign in.
2 Moves to the desired Premium service.
(For some premium services, separate sign-in is required after signing up for the premium
service.)
3 After reviewing the pricing and service information for the content, click the Purchase button.
(There may be limitations on the available period and number of times depending on content.)
4 Once the purchasing process is complete, view your purchased content by clicking the Buy
button.
5 Select your ID on upper menu of Home screen and check history of purchases from My Page
Payment inquiry. It is also available on My Page Purchase History of web site (
com
).
• The website (
www.lgappstv.com
www.lgappstv.com
) is not available in some countries.
) to purchase paid content.
www.lgappstv.
To reset premium
SMART PREMIUM Option Initialization of Premium
Resets Premium list, Premium information and user sign-in information. Resetting will resolve
errors occurring during Premium update.
• Content oered by service providers are subject to change or deletion without prior notice
to enhance their service quality. Refer to the website of the relevant content provider for
questions, troubleshooting or the latest information about content. LG Electronics assumes
no legal responsibility for content services and related information, even when a service is
discontinued by the service provider.
• The quality of your Premium service may be aected by your Internet connection. For any
questions related to Internet speed or other service problems, consult your Internet service
provider.
• For best service quality, we recommend that you subscribe to an Internet service providing a
speed of 4.0 Mbps (1.5 Mbps or faster). If you experience any Internet speed problem, contact
your Internet service provider.
• Some content providers may provide content that is unsuitable for minors. Parental discretion
is advised.
31

ENGLISH
LG Smart World
To use LG Smart World
[This feature is available in certain countries only.]
SMART MY APPS LG Smart World
LG Smart World is a monitor application service available through Smart monitor Service. You can
download and enjoy various kinds of hot paid / free apps including education, entertainment, life
and news.
• Image shown may dier from your monitor.
SMART WORLD
All
Hot
Top Paid
Top Free
New
18+
Total
Game
Entertainment
Life
Education
News/Info
1
Sign in.
When you sign in, ID is displayed.
When you select the ID, you can select My Page and Sign Out.
2
Select the app to install.
To sign up with LG Smart World
SMART Sign In
Sign up is required to download and run apps.
MY APPS
1
2
1 Select Sign Up and agree to Legal Notice.
2 Enter ID and password.
3 In Conrm Password box, enter password again.
4 Select Register to complete sign-up process.
• You can sign up for membership on either your monitor or the website (
• After signing up for membership, log into your monitor and our website with the same ID.
32
www.lgappstv.com
).

ENGLISH
• You can sign in to up to ve monitors with a single ID.
• The website (
www.lgappstv.com
) is not available in some countries.
To install an app on your monitor
SMART MY APPS LG Smart World
1 Click the Sign In button at the top of the home screen to log in.
2 Select the LG Smart World card.
3 Select an app you want from the list.
4 Check the details of the app, then select the Install or Buy button.
5 Check that you have the functions or monitor accessories required to install the app, then select
the OK button.
6 For paid apps, payment and purchase authentication is required.
7 Select Launch once installation is complete to run the app immediately. If you do not want to
run immediately, select Close. If you want to run the app later, select My Apps to check the list
of apps installed on monitor.
• You can purchase apps via PC or monitor, but you must use the monitor to install and run them.
• If you have insucient storage space on your monitor, you can download apps to a USB storage
device connected through the monitor’s terminal for USB apps. Apps stored on USB can be run /
deleted / moved from the My Apps screen.
• A USB Flash Drive containing apps cannot be used for other data. (For USB Apps Only)
To manage my information
SMART MY APPS LG Smart World
1 Sign in.
2 Select the currently signed-in ID at the top of the screen.
3 Select My Page.
4 Manages by examining Member Information, My Purchased Apps List and monitor Installed
Apps List.
My Information Shows basic information about the ID currently signed in. To change your
member information, visit
Payment Inquiry Shows Payment History of the signed-in ID.
Purchased Apps Shows My Purchased Apps List for the signed-in ID. You can delete / re-
install the purchased apps.
www.lgappstv.com
on your PC.
33

ENGLISH
Universal search
To use search function
SMART MY APPS Search
You can search apps and contents using the Search function of LG Smart monitor.
When you enter keywords using the input device, such as the remote control, you can find apps of
LG Smart World and some contents of the PREMIUM service. Links are also provided to go for
web search. If you are using SmartShare
TM
, you can also search contents of SmartShareTM. The
Search categories and content types vary depending on the country and will be kept updating.
• Image shown may dier from your monitor.
SEARCH
Prev. Keywords weather rain festival crime
All
LG Smart World
YouTube
Web
weather
SEARCH
1
34
2 3 4
1
Enters search terms.
2
Category of search results.
3
Search results.
4
Detailed information about the search item.

ENGLISH
Voice recognition
To use the voice recognition function
• This feature is available in certain countries only.
Using this function through search
1 Go to SMART MY APPS (Search). Select the voice recognition icon ( ) on the left
of the text eld.
2 Speak slowly and clearly after the voice recognition window appears.
3 After the voice recognition is completed, the Similar List window pops up. If the pop-up
window does not have the results you want, press Retry to try again. Select the most similar
result, then it will be displayed in the text eld. Press the (Search) button to get the result
you want.
Using this function on the internet
1 Go to SMART MY APPS Internet. Move the Magic Remote pointer in the text eld
on a website to open the virtual keyboard.
2 Select the voice recognition icon ( ) on the left of the text eld on the virtual keyboard.
3 Speak slowly and clearly after the voice recognition window appears.
4 After the voice recognition is completed, the Similar List window pops up. If the pop-up
window does not have the results you want, press Retry to try again. Select the most similar
result, then it will be displayed on the text eld. Press the Search button on the website to get
the result you want.
• The website (
• While the recognised result is in the text eld, if you retry the voice recognition function, the
previous result will be replaced with the new one.
• You can use Voice Search when you press the ( ) on the Magic Remote even if Qwerty
keyboard is shown on your screen.
• Check the network connection before using the voice recognition function.
• It is recommended to use the remote control no further than 10 cm from your face.
• The voice recognition may fail if you speak too fast or too slowly.
• The recognition rate may vary depending on the user’s characteristics (voice, pronunciation,
intonation, and speed) and the environment (noise and monitor volume).
• To change the voice recognition language, go to
Language (Language)
• You can set Avatar to On / O in SMART SETTINGS OPTION See Avatar.
www.lgappstv.com
Voice Recognition Language.
) is not available in some countries.
SMART SETTINGS OPTION
35

ENGLISH
Powered by:
See Avatar
Using the avatar
SMART SETTINGS OPTION See Avatar
You can use the avatar when you use voice recognition. You can check the voice recognition status
via the message from the avatar and it helps you to enter your speech correctly.
• If you set See Avatar to On, the avatar is activated on the bottom right of the screen.
• The voice recognition is still supported, even if See Avatar is set to O.
• The speech balloon guide of See Avatar may vary depending on voice recognition features,
languages and models.
36
Internet
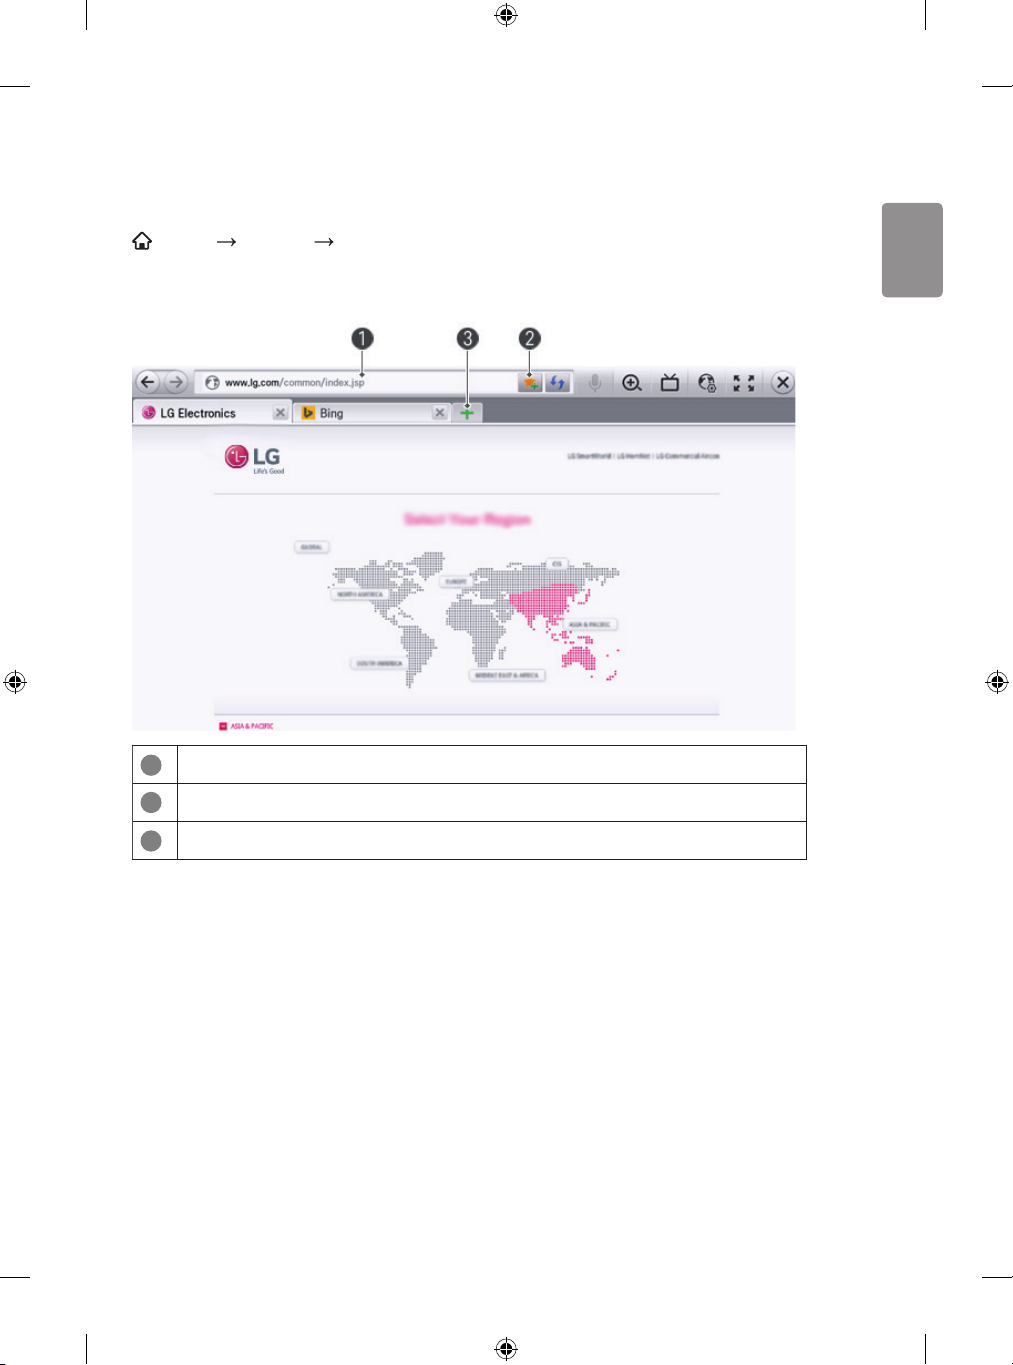
To use internet
SMART MY APPS Internet
Types URL manually on monitor or visits websites added to Favourite.
• Image shown may di er from your monitor.
1
Types in the web address.
ENGLISH
2
Add the current page to favourites.
3
Chooses when you open several web browsers.
• Internet supports up to Flash 11 but does not support platform-dependent technology like
ActiveX.
• Internet only works with a pre-installed plug-in.
• Internet may not play any media le format other than the following : JPEG / PNG / GIF
• Internet will be forcibly closed when there is insu cient memory.
• For the Internet, fonts installed on the monitor are used and may not be displayed normally
depending on the content played.
• Internet does not support le and font download.
• Internet is made for monitor so it may have a di erent function to browsers made for PC.
• Internet is a monitor browser and may not work properly when playing some content les.
37

ENGLISH
Frequently asked questions for smart monitor
Sign up is required to use LG Smart World.
Free apps are available immediately after signing up, but you should register your payment method
in order to use paid apps.
You can sign up and register payment methods on the monitor or on our website. (
com
)
Problem Solution
www.lgappstv.
When entering menu, the
“Initializing” message always
appears.
While using internet features,
there is a blank space on some Web
pages.
Internet closes automatically when
visiting website.
I already signed up on monitor. Do
I need to sign up again at web site?
www.lgappstv.com
(
Can each family member use a
different ID with a single monitor?
)
• The “Initializing” message shows you how long it
takes to reboot the microprocessor and hardware, set
up network communications, and communications
with SDP (device authentication and basic information
download). It takes about 20 seconds and this is a
normal process.
• The internet of the Monitor supports up to Flash 11 and
may not replay any le format other than the following
: JPEG, PNG, GIF
• If memory is insucient because of large volume of
image information in the web page, internet may be
forced to close.
• If you sign up on your monitor, no additional sign-up
on the LG website (
After signing up on monitor, you can sign into the
website by using the same ID and password and
entering the additional information to complete the
email verication process.
• It is possible to register and use more than one ID on
one monitor.
www.lgappstv.com
) is required.
38
• To check the ID registered with monitor from
SMART Sign in ID List.
• You can check the list of apps purchased by each ID.
However, you can see all apps installed by each ID in
SMART Sign in My Page.

ENGLISH
Problem Solution
What should I do if I forget my ID? • After signing up on a PC, use “Forgot ID?” feature on
web site (
www.lgappstv.com
) when needed.
I purchased an app from the LG
Apps Web site. How can I use it on
monitor?
Can I see history of my purchased
apps?
I deleted a paid app. Do I have to
purchase again to download it?
Can I use apps from LG Smart
monitor’s LG Smart World on
both a monitor and a PC?
• After signing up on monitor, check it from
Sign in Find ID.
• To check purchased apps from the monitor, sign in and
open the Purchased Apps menu.
Select the ID at the top of Home and check the app in
My Page
• Select the ID at the top of Home and check the app in
My Page
• Sign in to website (
My Page Purchased History.
• If a purchased app is accidentally deleted, you can
download and reinstall it without having to buy it
again, as long as it is still in service.
Select the ID at the top of Home and re-download apps
in My Page
apps may not be re-downloaded or run depending on
the software version.)
• Please check if the monitor model supports LG Smart
World.
• The apps provided from LG Smart monitor’s LG Smart
World can only be used on an LG Smart Monitor.
Purchased Apps.
Purchased Apps.
www.lgappstv.com
Purchased History. (Previously owned
SMART
) and then select
How can I check the ID currently
signed in on the monitor?
• Apps may be purchased from the website (
lgappstv.com
care when purchasing.
• Select the ID at the top of Home and check the currently
signed-in ID in My Page
) but cannot be used on a PC or Mac. Use
My Information.
www.
39

ENGLISH
Problem Solution
I installed an app on the monitor.
Where can I check the installed app?
There is a difference between the
app size shown on the screen and
the actual app size installed on
monitor.
I forgot my password on the
monitor. What should I do?
Do I need to store payment
information in web site to purchase
paid apps?
• Select SMART My Apps. All paid and free apps
installed on monitor are displayed.
• The app size shown in the screen includes the
additional space needed for installing apps so it may be
dierent from actually installed app size.
• If you only provide the ID and password when signing
up on your monitor, you cannot recover your password
when it is lost. Create a new ID and sign up with the ID.
• If you provide other information than the ID and
password when signing up on your monitor or the LG
website (
password on the website.
• The following payment methods are available to
purchase paid apps on your monitor: credit card,
credits, and carrier billing.
To purchase paid apps using your credit card or credits,
you should have a credit card registered with the LG
website (
Paid apps can also be purchased through carrier billing
if your credit card details are not registered with the
website or you do have enough credits. If you purchase
paid apps on the website, the following payment
methods are available: credit card or credits.
www.lgappstv.com
www.lgappstv.com
), you can recover your
) or have enough credits.
Can I cancel an app that I have
purchased?
40
• As a member you cannot demand refund just because
you changed your mind after purchase.
• If there is a defect in the product or a problem of using
the product, which does not caused by your fault, you
can ask for a refund. However, the valid reason for
refund must be provided.

ENGLISH
Problem Solution
I signed up on my monitor, but I
cannot purchase paid apps.
Should I only use an email address
for my ID?
Do I need to change my ID format
to the email address?
What is the LG account? • The LG account allows you to sign into all of the LG
• To purchase paid apps, you need to have a credit card
registered with the website. (
you can have your credit ready by charging it on the
website to purchase them.
You cannot purchase paid apps if your credit card
details are not registered with us or you don’t have
enough credit.
• For new sign-up members, the ID format has changed
from a combination of alphanumerics to your email
address.
• You can only use an email address for your ID when
signing up.
• For new sign-up members, the ID format has changed
from a combination of numbers and alphabets to the
email address.
• If you are already a member, you can still use your
existing ID or change it to the email address.
Smart service with a single ID and password.You can
use the following services with your LG account LG
Smart monitor, LG Cloud, LG Smart World (excluding
some countries), LG Smart ThinQ, and LG Smart air
conditioning, etc.
www.lgappstv.com
) Also,
• Additional information may be required depending on
the service.
41
ENGLISH
Advanced function
13
46
79
Screen remote
To use screen remote
* Magic Remote is Separate purchase items.
Press the /INPUT button on the Magic Remote.
Select a button on the Screen Remote displayed on the screen using the Magic Remote.
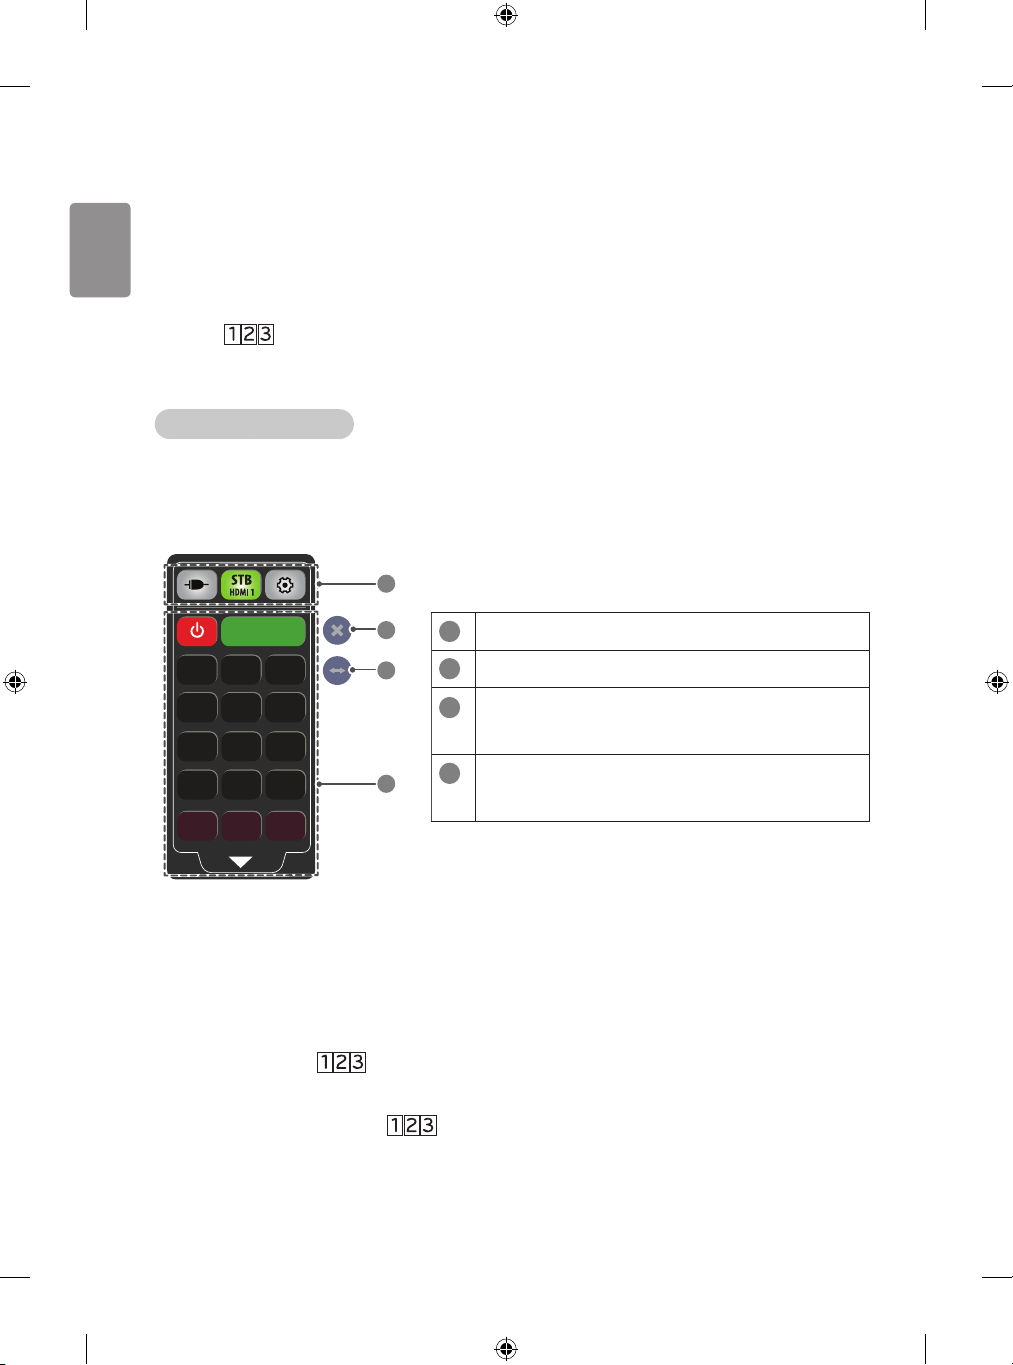
To use screen remote
• The type of buttons on the Screen Remote varies depending on the region or the type of a
connected device.
• Image shown may dier from your monitor.
1
2
5
8
-0
GUIDE
MENU
LG
OK
EXIT
2
3
4
1
Changes Device tab.
2
Exits the Screen Remote.
3
Moves the position of the Screen Remote to left or
right.
4
Monitor operation buttons.
The type of buttons varies depending on the model.
To control a device connected to the monitor using the Screen
Remote
You can control a device connected via SIMPLINK using the Screen Remote.
1 Check if the device is connected to the monitor.
2 After pressing the
control in the Change Device tab. The Screen Remote that can control the device appears.
• This may not work with the
42
/INPUT button on the Magic Remote, select the device you want to
/INPUT button for some models.

Universal control
To use the Universal control function
[For Magic Remote only]
[This function is only available in some countries.]
With the Magic Remote, you can control a set-top box, Blu-ray player, home theatre system, etc.
1 Check if a device you want to set is connected to your monitor.
2 After pressing the
want in the Change Device tab. If there is no device you want, press the
select the external device you want. Once the setup is complete, the name of the selected
device is displayed in the Change Device tab.
3 When you select a device you want in the Change Device tab, the Screen Remote that can
control the device appears on the screen. To see more control buttons, select
bottom of the Screen Remote.
To change or clear the universal control settings
1 After pressing the /INPUT button on the Magic Remote, select the button.
2 Select Change Settings or Cancel Settings at the bottom of the device to be changed.
• When Change Setting, check if the power of the device to be changed is turned on.
• You can set one device per type.
• With the Screen Remote, you can only control the devices of a brand or manufacturer that you
can select in the setup screen.
• If you connect to a network before setting the universal remote control, update for the latest
manufacturer list is available.
• Some buttons may not work depending on the external device model.
• Place the device near the monitor for seamless operation.
• If the device is in a drawer, open the drawer.
• Go to
LIST Set the Universal Control and add, delete, or change a device.
• Please be advised that the programmeme tuning feature may not work properly if you have
already manually assigned programmeme numbers that di er from the original set-top box
programmeme numbers.
SMART MY APPS Universal Control or SMART MY APPS INPUT
/INPUT button on the Magic Remote, select the icon of a device you
on the tab, and
at the
ENGLISH
43

Taking pictures and video
ENGLISH
To take a picture using the monitor camera
You can take a picture or video using the Smart monitor camera.
1 Prepare the Smart monitor camera for use. If your Smart monitor is not equipped with a
camera, install an LG video call camera (AN-VC500, sold separately). (For more information,
please refer to the installation manual or owner’s manual of the camera.)
2 Go to
3 Take a picture by selecting (Picture Mode) or (Video Mode).
To take a picture
SMART MY APPS Camera (Picture Mode) (Start)
To take a video
SMART MY APPS Camera.
SMART MY APPS Camera (Video Mode) (Start)
To stop taking a video, press (Stop) again.
• Image shown may di er from your monitor.
1
Settings.
2
Zoom in / out.
3
Take a picture.
4
Picture mode.
5
Video mode.
6
View the picture / video taken.
44
ENGLISH
To set up the camera
SMART MY APPS Camera
Properties You can set the properties of pictures / videos you will take.
Storage device You can select a device where the pictures / videos taken will be saved.
• For a USB storage device, use only a USB hard disk that is formatted with an NTFS le system
provided in Windows. If a storage device is formatted with a non-Windows Programme, it may
not be recognized.
• In case of watching the videos or seeing the pictures, you can only open one recent le.
• Go to SmartShare
stored in the internal memory.
-You cannot delete pictures or videos stored on the USB storage device.
TM
Linked Device Camera Memory to delete the pictures or videos
(Settings)
USB input device
To use a USB wired / wireless mouse
Connect your mouse to the USB port. Use the mouse to move the pointer on the monitor screen and
select the menu you want.
Mouse Magic Remote
Left Button OK Button on Magic Remote.
Wheel Button Wheel Button on Magic Remote.
• The right and the special buttons on the mouse do not work.
• The usability of a wireless USB mouse and keyboard may be aected by Radio Frequency
environment and the distance.
To use a USB wired / wireless keyboard
Connect your keyboard to the USB port. You can enter text with the keyboard when using the
search function and the Internet.
• Text cannot be entered on some screens.
• It is recommended to use the product which is tested for compatibility with LG monitor.
LOGITECH K200, LOGITECH K400, MICROSOFT Comfort Curve 2000, MICROSOFT MS800, and LG
Electronics ST-800.
• You can change the input language by pressing the language switch key (or the right Alt key)
on your keyboard.
45
ENGLISH
To use a gamepad
Connect your gamepad to the USB port on the monitor if the game requires a gamepad.
• It is recommended to use an authorized gamepad which is tested for compatibility with LG
monitor.
Logitech F310, Logitech F510, Logitech F710, Logitech Rumblepad 2, Logitech Cordless
Rumblepad 2, Logitech Dual Action Gamepad, Microsoft Xbox 360 Controller (wired) and SONY
PLAYSTATION®3 Controller.
Etc.
Software update
To update software
SMART SETTINGS SUPPORT Software Update
Uses Software Update to check and obtain the latest version.
It is also possible to check manually for available updates.
Software Update Set it to On.
If an update is available, a prompt will appear to perform the
update.
Automatic update mode If an update is available, the update automatically starts without
prompting.
Check Update Version Checks the version installed and when an update is available, the
download process can be performed manually.
• When the update starts, the update progress window appears for a short time and disappears.
• The latest version can be obtained via internet connections.
• If software is not updated, certain functions may not work properly.
Troubleshooting
Check before
If the following symptoms occur, please carry out the checks and adjustments described below.
There may be no malfunction.
46
ENGLISH
General
Problem Solution
There is a delay after the Monitor
is switched on before the image is
fully visible.
• This is not a problem. Image noise that may occur when
the monitor is rst switched is being cleaned up.
Pictures
SMART SETTINGS SUPPORT Picture Test
First run a Picture Test to verify that the image signal output is normal.
If there is no problem with the test image, check external device connections.
Problem Solution
Vibrating horizontal / vertical
lines and fishnet patterns
appear momentarily.
The display is inactive or
unclear when connected to an
HDMI source.
Does not work with a USB
storage device.
• Such a problem may happen when there is strong electronic
interference. Turn o other electronic devices such as mobile
phones, power tools and other small electrical appliances.
• Check the HDMI cable specications. If your HDMI cable
is not genuine, images may fade in and out or not be
displayed properly.
• Ensure that all cables are securely connected. When
connections are not secure, images may not be properly
displayed.
• Verify that the USB device and cable is version 2.0 or higher.
47

ENGLISH
Sound
SMART SETTINGS SUPPORT Sound Test
First run a Sound Test to verify that the sound signal output is normal.
If there is no problem with the test sound, check connected external devices.
Problem Solution
Screen display is on but there
is no sound.
The volume changes when I
change signal.
There is no sound when
connected to HDMI / USB.
• Ensure the Speaker is set to On.
• Volume can vary from signal to signal.
• Set Auto Volume to On.
• Verify that the HDMI cable is high speed.
• Check if the USB device and cable is version 2.0 or higher.
• Use only regular music (*.mp3) les.
PC connection problem
Problem Solution
The screen display does not
come on after connecting to
the computer.
There is no sound after
connecting the computer
with the HDMI cable.
• Verify that the computer and the monitor are securely
connected.
• Turn the monitor o and back on using the remote control.
• Restart the PC with the monitor on.
• Check whether the resolution is correctly set for PC input.
• To use the monitor as a secondary monitor, check if the
connected desktop or laptop supports dual monitor display.
• Reconnect the HDMI cable.
• Check with manufacturer of your video card to ensure it
supports HDMI voice output. (Video cards in DVI format
require connection of a separate sound cable.)
When connected to the
computer, the display is
partially cut off or shifts to
one side.
48
• Set the resolution to support PC input. (If this does not work,
reboot the computer.)
• [This feature is available on certain models only.]
Select Screen and adjust Position / Size / Phase.

ENGLISH
Problems replaying movies in SmartShare
Problem Solution
TM
I cannot view the files on the
Movie List.
• Check whether the le on the USB storage device can be read
on a computer.
• Check whether the le extension is supported.
“This file is invalid.” message
appears or the image display
is not normal even though
the sound is OK.
• Make sure that the le replays normally on the computer’s
video player. (Check for damaged les.)
• Check whether the resolution is supported by the computer.
• Verify that the video / audio codec is supported.
• Verify that the frame rate is supported.
“Audio not supported.”
message appears or the
sound is not normal even
though the image display is
OK.
• Make sure that the le replays normally on the computer’s
video player. (Check for damaged les.)
• Check if the audio codec is supported by the computer.
• Verify that the bit rate is supported.
• Verify that the sample rate is supported.
Subtitles are not displayed. • Make sure that the le replays normally on the computer’s
video player. (Check for damaged les.)
• Check if the video le has the same name as the subtitle le.
• Make sure that the video and subtitle les are in the same
folder.
• Verify that the subtitle le format is supported.
• Verify that the subtitle language is supported. (Subtitle les
can be opened in Notepad to check the language.)
Requesting service
For information on requesting service, refer to the following menu.
SMART SETTINGS SUPPORT Product / Service Info
49

ENGLISH
Supported resolution
HDMI-PC supported mode
Resolution Horizontal Frequency (kHz) Vertical Frequency (Hz)
640 x 350 31.468 70.09
720 x 400 31.469 70.08
640 x 480 31.469 59.94
800 x 600 37.879 60.31
1024 x 768 48.363 60.00
1152 x 864 54.348 60.053
1280 x 1024 63.981 60.020
1360 x 768 47.712 60.015
1920 x 1080 67.5 60.00
HDMI-DTV supported mode
Resolution Horizontal Frequency (kHz) Vertical Frequency (Hz)
640 x 480 31.469 / 31.5 59.94 / 60
720 x 480 31.469 / 31.5 59.94 /60
720 x 576 31.25 50
15.625 50
1280 x 720 37.500 50
44.96 / 45 59.94 / 60
1920 x 1080 33.72 / 33.75 59.94 / 60
28.125 50
26.97 / 27 23.97 / 24
28.125 25
33.716 / 33.75 29.976 / 30.00
56.250 50
67.43 / 67.5 59.94 / 60
50

ENGLISH
Component port connecting information
Component ports on the monitor Y P
Y P
Y B-Y R-Y
Video output ports on DVD player
Y Cb Cr
Y Pb Pr
Signal Component
480i / 576i O
480p / 576p O
720p / 1080i O
1080p O (Only 50 Hz / 60 Hz)
B
B
P
R
P
R
51

ENGLISH
Licenses
Supported licenses may differ by model. For more information about licenses, visit
This DivX Certified® device has passed rigorous testing to ensure it plays
DivX® video.
To play purchased DivX movies, first register your device at vod.divx.com.
Find your registration code in the DivX VOD section of your device setup
menu.
DivX Certified® to play DivX® video up to HD 1080p, including premium
content.
DivX®, DivX Certified® and associated logos are trademarks of DivX, LLC and
are used under license.
Covered by one or more of the following U.S. patents:
7,295,673; 7,460,668; 7,515,710; 7,519,274.
Manufactured under license from Dolby Laboratories.
Dolby and the double-D symbol are trademarks of Dolby Laboratories.
For DTS patents, see
from DTS Licensing Limited. DTS, the Symbol, & DTS and the Symbol
together are registered trademarks, and DTS 2.0+Digital Out is a trademark
of DTS, Inc. © DTS, Inc. All Rights Reserved.
The terms HDMI and HDMI High-Definition Multimedia Interface, and the
HDMI logo are trademarks or registered trademarks of HDMI Licensing LLC
in the United States and other countries.
http://patents.dts.com
. Manufactured under license
www.lg.com
.
52
ENGLISH
Regulatory
0197
0197
EU conformity notice
Monitor
LG Electronics hereby declares that this product is in compliance with the following Directives.
EMC Directive 2004/108/EC
LOW VOLTAGE Directive 2006/95/EC
RoHS Directive 2011/65/EU
ErP Directive 2009/125/EC
European representative:
LG Electronics Inc. Krijgsman 1, 1186 DM Amstelveen, The Netherlands
Wi-Fi/Bluetooth built-in model & Wi-Fi built-in model
LG Electronics hereby declares that this product is in compliance with the following Directives. A
copy of the complete Declaration of Conformity can be found at http://www.lg.com/global/support/
cedoc/RetrieveProductCeDOC.jsp.
R&TTE Directive 1999/5/EC
EMC Directive 2004/108/EC
LOW VOLTAGE Directive 2006/95/EC
RoHS Directive 2011/65/EU
ErP Directive 2009/125/EC
This device is a 2.4 GHz and 5 GHz wideband transmission system, intended for use in all EU
member states and EFTA countries, with indoor use restriction for 5GHz band. (5150 – 5250MHz)
53

ENGLISH
This device should be installed and operated with minimum distance 20 cm between the device
and your body.
And this phrase is for the general statement for consideration of user environment.
LG recycling policy
LG Electronics offers a customized e-waste take-back & recycling service that meets local needs and
requirements in the countries where e-waste regulations are in place, and also provides product
and packaging take-back & recycling service voluntarily in some countries. LG Electronics evaluates
products’ recyclability at the design step using LG’s recyclability evaluation tool, with the goal
of improving recyclability where practicable. Through these activities, LG seeks to contribute to
conserving natural resources and protecting the environment.
For more information about the LG Recycling Policy, please visit our global site at http://www.
lg.com/global/sustainability/environment/take-back-recycling.
Energy saving
Energy efficiency cuts energy consumption and thus saves money by reducing electricity bills.
The following indications allow to reduce power consumption when the monitor is not being
watched:
• turning the monitor o at its mains supply, or un-plugging it, will cut energy use to zero for all
monitors, and is recommended when the monitor is not being used for a long time, e.g. when
on holiday,
• putting the monitor into standby mode, will reduce energy consumption, but will still draw
some power,
• reducing the brightness of the screen will reduce energy use.
54


Record the model number and serial number of the monitor.
Refer to the label on the back cover and quote this
information to your dealer when requiring any service.
MODEL
SERIAL

KULLANIM KILAVUZU
Güvenlik ve Referans
LED Monitör*
* LG LED Monitör, LED arka ışıkları
olan LCD ekranına sahiptir.
Setinizi çalıştırmadan önce bu kılavuzu lütfen dikkatle okuyun
ve ileride başvurmak için saklayın.
www.lg.com
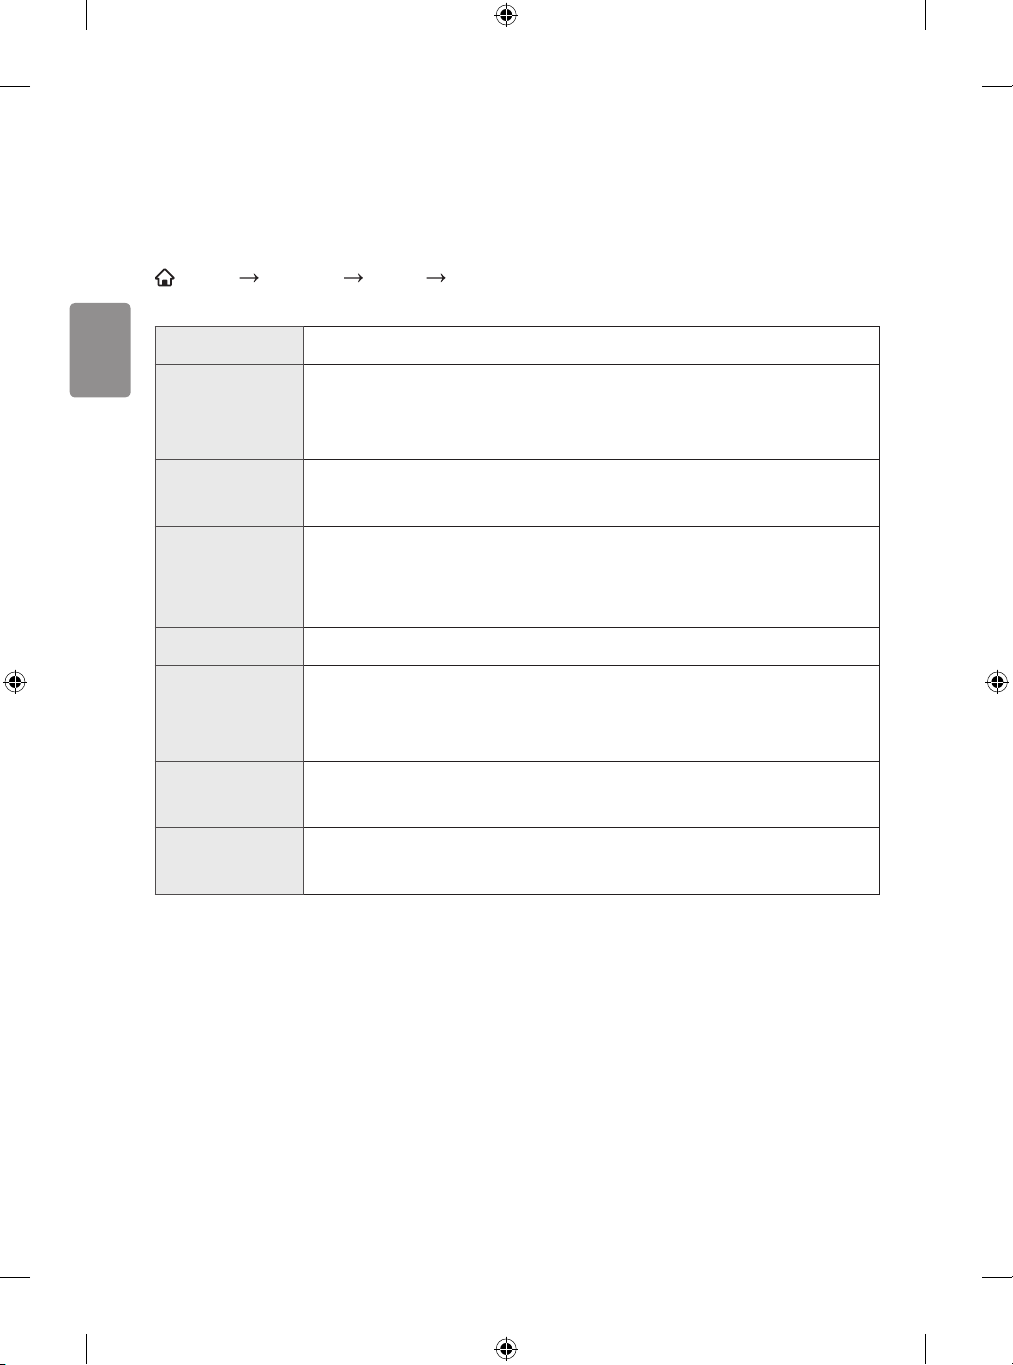
TÜRKÇE
Resim/ses ayarı
İzleme oranını ayarlamak için
SMART AYARLAR RESİM İzleme Oranı
Ekran izleme oranını seçer.
16:9 Görüntüleri ekran genişliğine sığdıracak şekilde yeniden boyutlandırır.
Sadece Tarayın Video görüntülerini, kenarlarda görüntü kaybına neden olmadan ve orijinal
boyutunda görüntüler.
• HDMI / Komponent (720p üzeri) modunda Sadece Tarayın kullanılabilir.
Orjinal Monitörünüz geniş ekran sinyali aldığında otomatik olarak resim formatını
değiştirir.
Tam Geniş Monitör geniş ekran sinyalini aldığında ekranı tamamen doldurmak için
doğrusal oranda resmi yatay veya dikey olarak ayarlamanızı sağlar.
• AV modunda, Tam Geniş özelliği kullanılabilir.
4:3 Görüntüleri önceki standart olan 4:3 oranına göre tekrar boyutlandırır.
14:9 14:9 modunda 14:9 resim formatı görüntüleyebilirsiniz. 14:9 ekran, 4:3
ekran ile aynı şekilde görüntülenebilir; ancak görüntü aşağı veya yukarıya
doğru kayar.
Yakınlaştırma Görüntüyü ekran genişliğine sığacak şekilde yeniden boyutlandırır.
Görüntünün üst ve alt parçaları kesilebilir.
Sinema Zoom 1 Resmi doğru oranda büyütmek istediğinizde Sinema Yakınlaştırma
seçeneğini seçin.
• Harici bir aygıt görüntülenirken aşağıdaki durumlarda görüntü yanabilir:
-Sabit altyazısı olan bir video (ağ adı gibi)
-4:3 izleme oranı modunun uzun bir süre kullanılması
• Bu işlevleri kullanırken dikkat edin.
• Mevcut resim boyutu, giriş sinyaline bağlı olarak farklılık gösterebilir.
• HDMI-PC girişindeki ekran izleme oranları sadece 4:3 ve 16:9 oranlarında kullanılabilir.
• [2160p desteği bulunan modellerde] 2160p sinyal girişi yapılırsa veya PC çözünürlüğünüz 3840
x 2160 ise İzleme Oranı, Sadece Tarayın olarak ayarlanır.
2

TÜRKÇE
Enerji tasarrufu özelliğini kullanmak için
SMART AYARLAR RESİM
Ekran parlaklığını ayarlayarak güç tüketimini azaltır.
Oto. /
Akıllı Sensör
Kapalı Enerji Tasarrufu modunu kapatır.
Minimum /
Orta /
Maksimum
Video Sessiz Ekran kapatılır ve yalnızca ses çalınır.
[Bu özellik yalnızca belirli modellerde bulunur.]
Monitör sensörü ortam aydınlatmasını algılayarak ekran parlaklığını otomatik
olarak ayarlar.
Minimum / Orta / Maksimum
Ekranı tekrar açmak için uzaktan kumandanın Güç düğmesi hariç herhangi bir
düğmesine basın.
Enerji tasarrufu
Ses video modlarını ayarlamak için
SMART UYGULAMALARIM Hızlı Menü AV Modu
Monitörü farklı AV modları için optimize edilmiş en iyi resim / sese ayarlar.
Kapalı Resim/ses menüsünde belirlenen değere ayarlar.
Spor [Bu özellik yalnızca belirli ülkelerde bulunur.]
Spor için resim ve ses ayarlarını en iyi duruma ayarlar.
Sinema /
Sinema
Oyun Resim ve ses ayarlarını oyunlar için optimize eder.
Sertikasyon profesyoneller ve müşteriler tarafından tanınan tek performans ölçütüdür.
•
THX Sertikalı monitörler 400'den fazla testten geçer ve bu sayede bir lm yapımcısının
stüdyosunda bulunacak mükemmellikte netlik ve ayrıntı ile sınıfının en iyisi resim kalitesi ve
lm deneyimi sunmaları sağlanır.
Sinema : Modele bağlı olarak değişkenlik gösterebilir]
[
Filmler için resim ve ses ayarlarını en iyi duruma getirir.
3
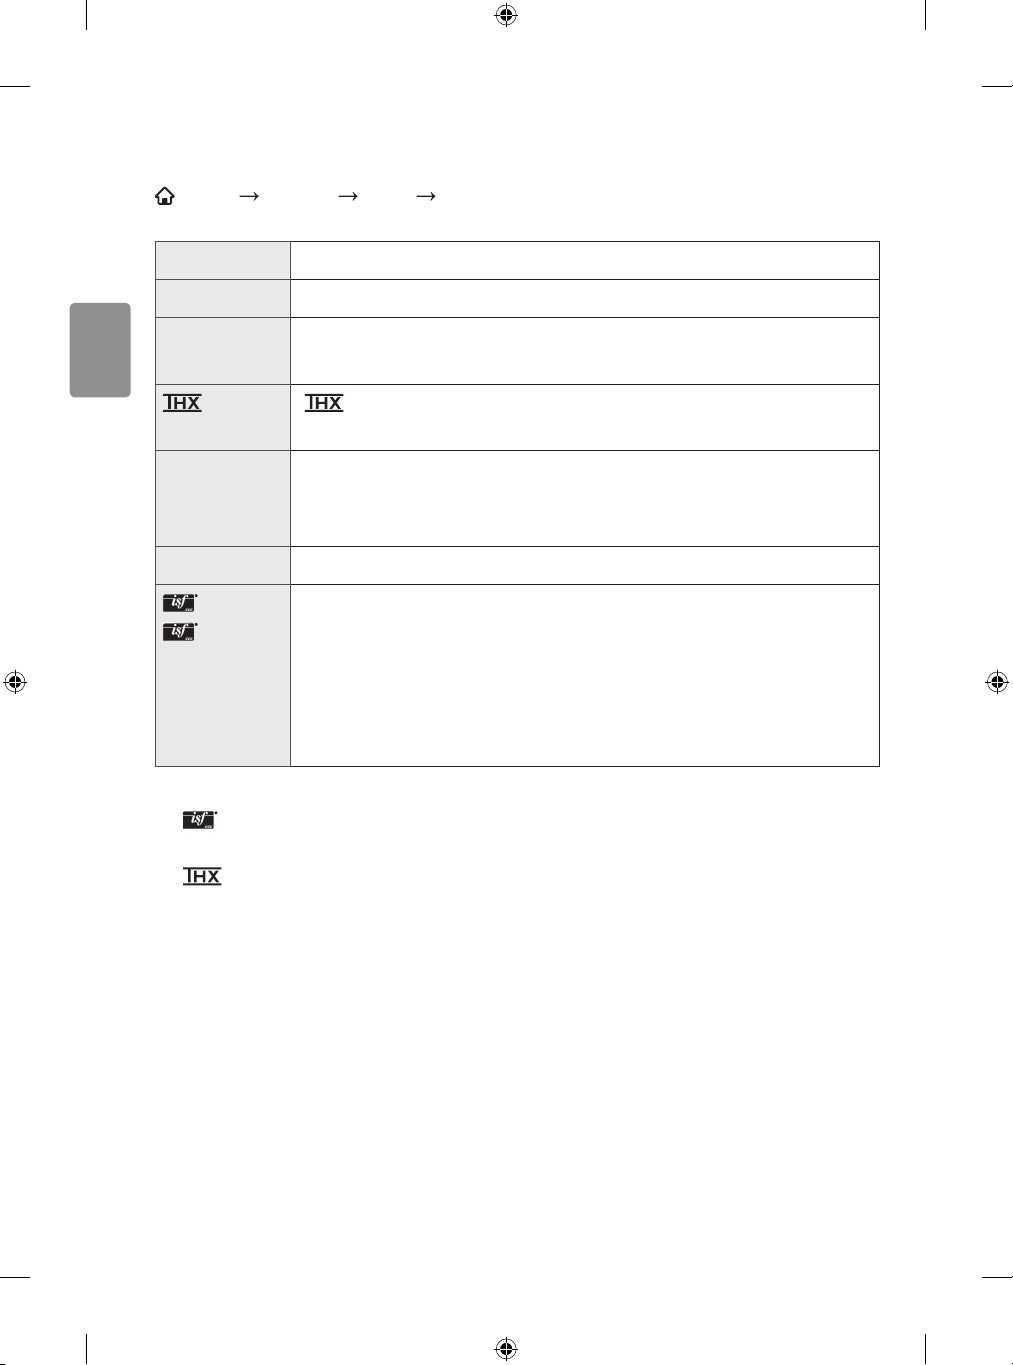
TÜRKÇE
Resim modunu seçmek için
SMART AYARLAR RESİM Resim Modu
Görüntüleme ortamı veya program için optimize edilmiş resim modunu seçer.
Canlı Canlı görüntüler görüntülemek için kontrast, parlaklık ve keskinliği yükseltir.
Standard Görüntüleri standart kontrast, parlaklık ve keskinlik seviyelerinde görüntüler.
Eco [Bu özellik yalnızca belirli modellerde bulunur.]
Güç tüketimini azaltmak için ekranın parlaklığını ayarlar.
Sinema /
Sinema
Spor [Bu özellik yalnızca belirli ülkelerde bulunur.]
Oyun Oyun için optimum resmi görüntüler.
Uzman1/
Uzman2
• Giriş sinyaline bağlı olarak kullanabileceğiniz resim modları aralığı değişebilir.
•
Uzman modu, resim ayarı yapan profesyonellerin belirli bir görüntüyü kullanarak kontrol
etmesi ve ince ayar yapması içindir. Normal görüntülerde efektler çarpıcı olmayabilir.
• Sertikasyon profesyoneller ve müşteriler tarafından tanınan tek performans ölçütüdür.
THX Sertikalı monitörler 400'den fazla testten geçer ve bu sayede bir lm yapımcısının
stüdyosunda bulunacak mükemmellikte netlik ve ayrıntı ile sınıfının en iyisi resim kalitesi ve
lm deneyimi sunmaları sağlanır.
[ Sinema : Modele bağlı olarak değişkenlik gösterebilir]
Film için optimum resmi görüntüler.
Spor için optimize edilmiş resim modu. Hızlı hareketler için bile kristal
netliğinde görüntüler için aralık ve kitler titrek renklerle sunulur.
Uzmanların ve amatörlerin en iyi monitör izleme deneyimini edinmeleri için
resim kalitesini ayarlama menüsü. Bu menü ISF sertifikalıdır ve resim ayarlama
uzmanları için sağlanır. (ISF logosu yalnızca ISF sertifikalı monitör ünitelerinde
kullanılabilir.)
ISFccc: Imaging Science Foundation Certified Calibration Control; Görüntüleme
Bilimi Vakfı Sertifikalı Kalibrasyon Kontrolü
4
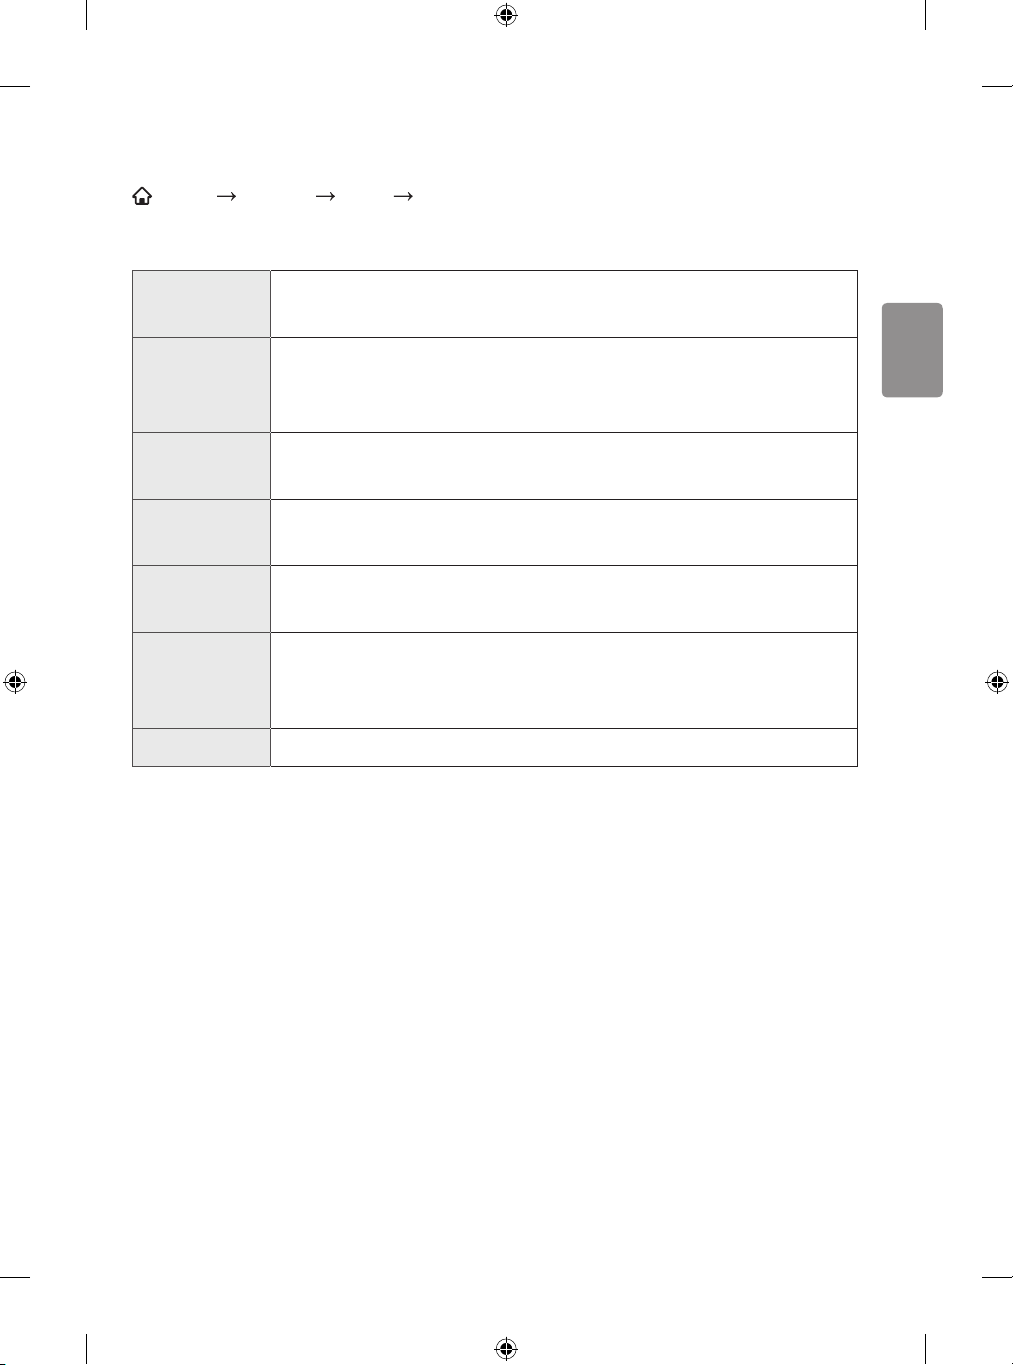
TÜRKÇE
Resim modunda ince ayar yapmak için
SMART AYARLAR RESİM Arka Işık / Kontrast / Parlaklık / Keskinlik / Renk / Ton
/ Renk Sıcaklığı
Öncelikle istediğiniz bir Resim Modunu seçin.
Arka Işık Arka ışık parlaklığını ayarlayarak ekran parlaklığını ayarlar. Verilen değer 100'e
yaklaştıkça parlaklık artar.
Kontrast Bir görüntünün parlak noktaları ve karanlık noktaları arasındaki farkı kontrol
etmek için kontrast seviyesini ayarlar. Verilen değer 100'e yaklaştıkça fark
artar.
Parlaklık Ekranın genel parlaklığını ayarlar. Verilen değer 100'e yaklaştıkça parlaklık
artar.
Keskinlik Kenarların net ve düz görüntülenmesi için keskinliği ayarlar. Verilen değer
50'ye yaklaştıkça kenarların netliği artar.
Renk Ekrandaki renklerin genel tonunun koyuluğunu veya açıklığını ayarlar. Değer
100'e yaklaştıkça renklerin koyuluğu artar.
Ton Ekranda görüntülenen renklerin kırmızı ve yeşil dengesini ayarlar. Değer
Kırmızı 50'ye yaklaştıkça daha keskin kırmızı renk sağlanır. Değer Yeşil 50'ye
yaklaştıkça daha keskin yeşil renk sağlanır.
Renk Sıcaklığı Genel renk tonunu sıcak veya soğuk olarak ayarlar.
• Giriş sinyaline veya diğer resim ayarlarına bağlı olarak ayara ilişkin ayrıntılı öğe aralığı
değişebilir.
5
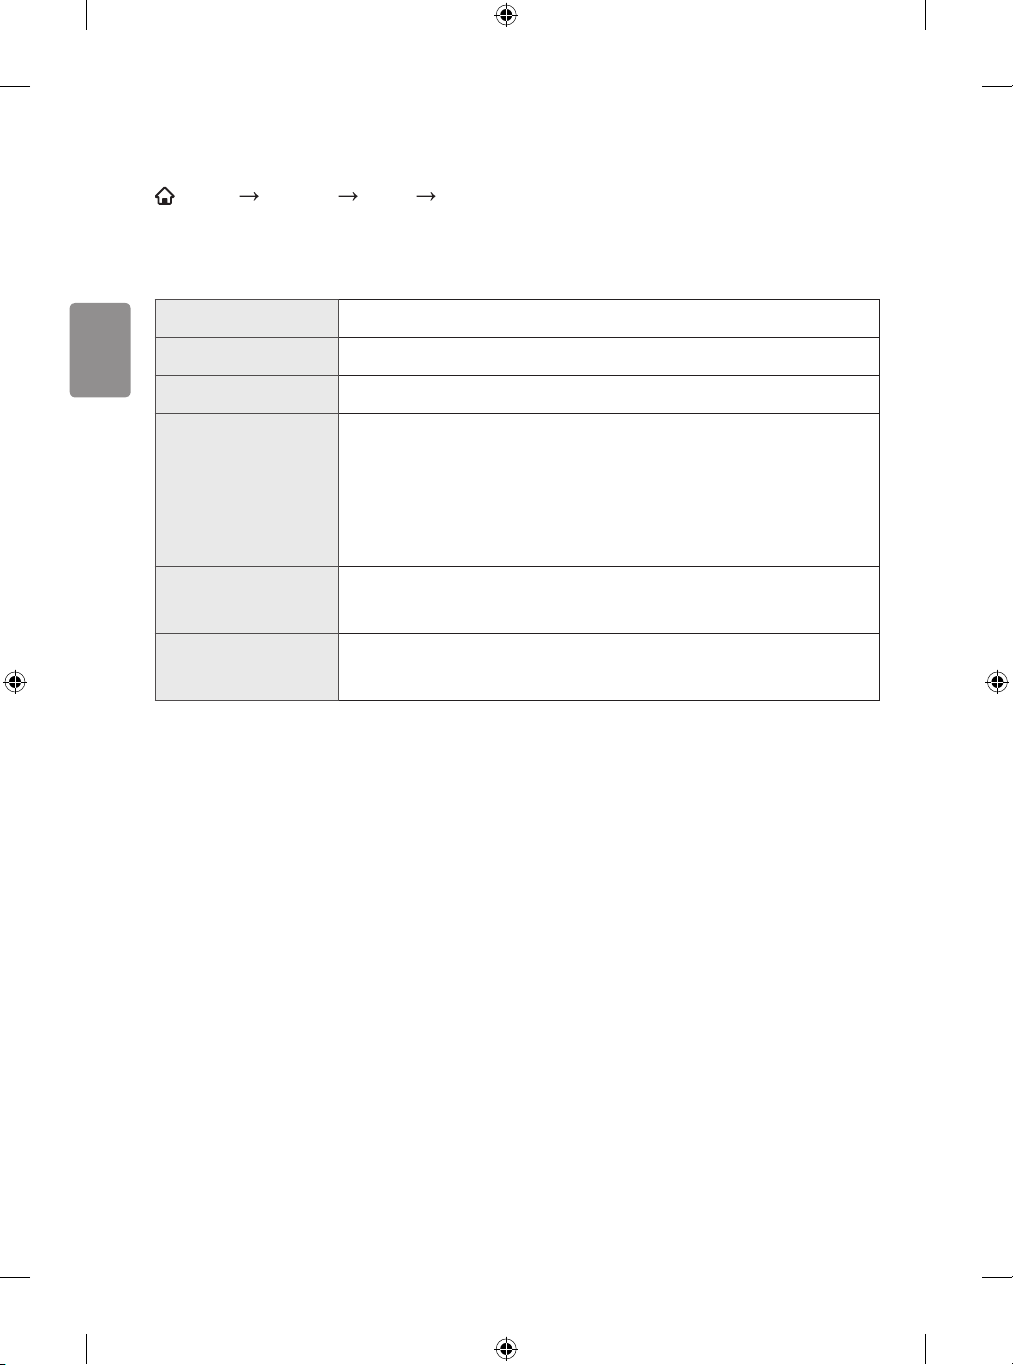
TÜRKÇE
Gelişmiş kontrolü ayarlamak için
SMART AYARLAR RESİM Gelişmiş Kontrol veya Uzman Kontrolü
Her bir resim modu için ekranın kalibrasyonunu sağlar veya belirli bir ekrana ilişkin resim ayarlarını
yapar.
Öncelikle istediğiniz bir Resim Modunu seçin.
Dinamik Kontrast Görüntünün parlaklığına göre kontrastı en iyi seviyeye ayarlar.
Dinamik Renk Renkleri daha doğal görünecek şekilde ayarlar.
Renk Gamı Yansıtılabilecek renklerin aralığını seçer.
Tercih Edilen Renk • Ten Rengi : Ten renk tayfı ayrı olarak kullanıcının tanımladığı ten
rengini uygulamaya ayarlanabilir.
• Çimen Rengi : Doğal renk tayfı (çayır, tepe vb.) ayrı olarak
ayarlanabilir.
• Gökyüzü Rengi : Gökyüzü rengi ayrı olarak ayarlanır.
Süper Çözünürlük Görüntüdeki net olmayan veya bulanık alanların ayrıntılarını
iyileştirerek kristal netliğinde bir görüntü sunar.
Gama Dereceleme eğrisini giriş sinyaliyle ilişkili olarak resim sinyalinin çıkışına
göre ayarlar.
• Giriş sinyaline veya diğer resim ayarlarına bağlı olarak ayara ilişkin ayrıntılı öğe aralığı
değişebilir.
6
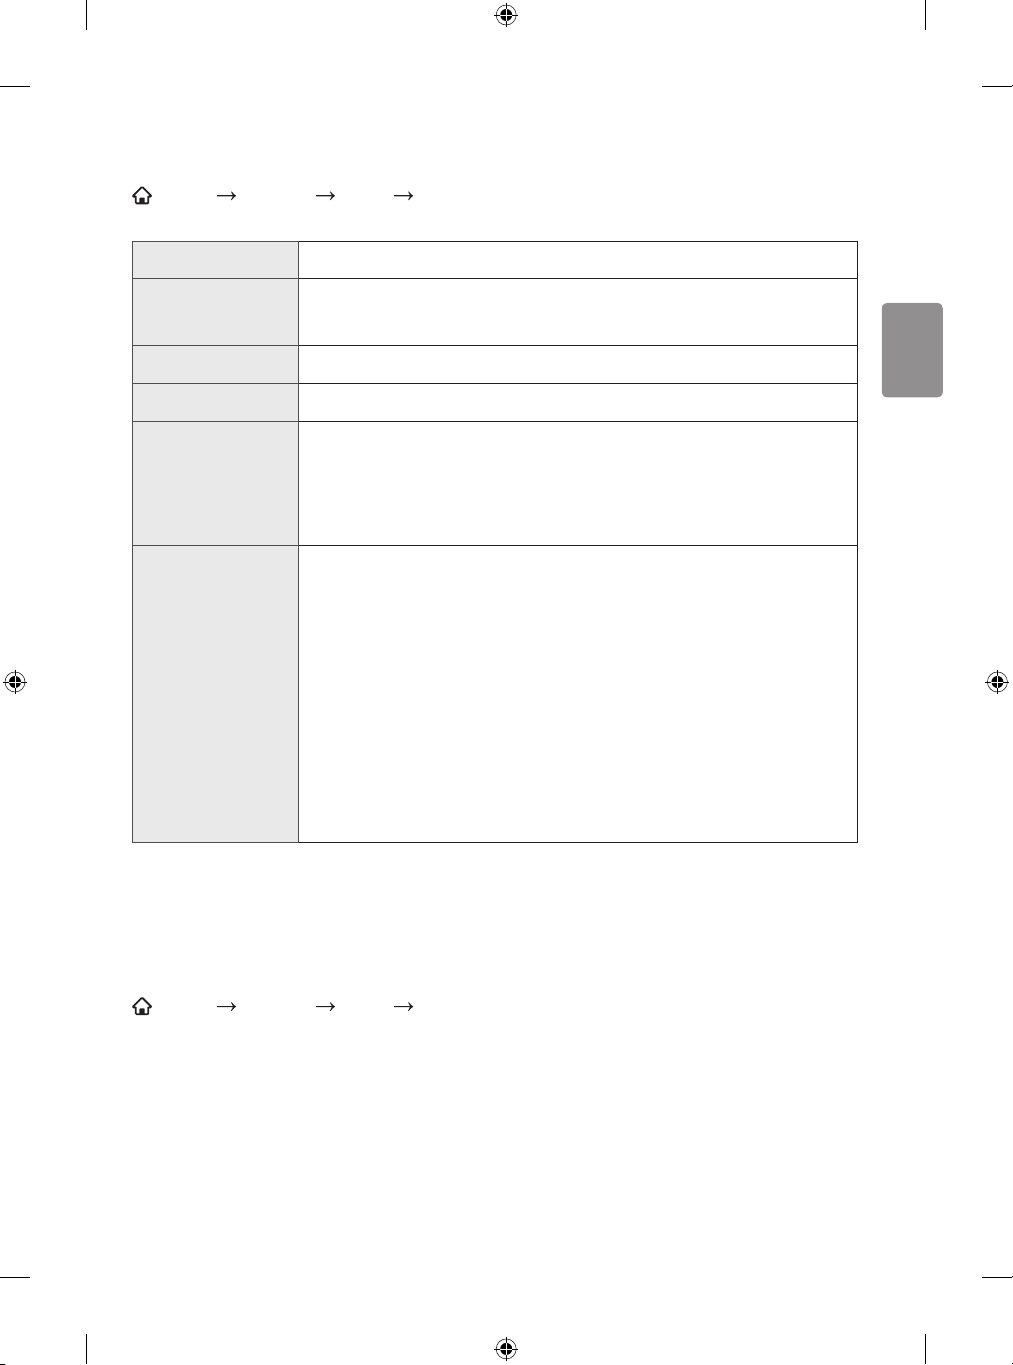
TÜRKÇE
Ek resim seçenekleri ayarlamak için
SMART AYARLAR RESİM
Ayrıntılı görüntü ayarlarını düzenler.
Gürültü Filtresi Daha net görüntü sağlamak için rastgele oluşan küçük noktaları kaldırır.
MPEG Parazit
Azaltması
Siyah Seviye Ekran parlaklık ve kontrast telafisi için ekranın karanlığını ayarlar.
Gerçek Sinema Sinemalarda gördüğünüz gibi bir görüntü sunar.
Motion Eye Care [Bu özellik yalnızca belirli modellerde bulunur.]
TruMotion [Modele bağlı olarak değişkenlik gösterebilir]
Dijital videonun sıkıştırılmasından kaynaklanan parazit oluşumunu azaltır.
Ekrandaki görüntünün hareketine karşılık gelen parlaklığı ayarlayarak güç
tasarrufu sağlar.
• 3D görüntüleri izlerken çalışmaz.
Daha yumuşak hareket dizileri görüntülemek için görüntüleri düzeltir.
• Kapalı : TruMotion’ı kapatır.
• Pürüzsüz : Hızlı hareket eden resimleri yumuşatır.
• Temizle : Hızlı hareket eden resimleri netleştirir.
• Kullanıcı : De-judder / De-blur öğelerini manuel olarak ayarlar.
Oto. ibaresi, TruMotion modu tarafından kontrol edilen giriş video
durumuna bağlı titreme ve bulanıklık aralığı anlamına gelir.
Resim Seçeneği
De-Judder : Ekranın titremesini ayarlar.
De-Blur : Hareketin bulanıklık etkilerini azaltır.
• Giriş sinyaline veya diğer resim ayarlarına bağlı olarak ayara ilişkin ayrıntılı öğe aralığı
değişebilir.
Resim modu işlevini sıfırlamak için
SMART AYARLAR RESİM
Kullanıcı tarafından özelleştirilen değerleri sıfırlar.
Tüm resim modları sıfırlanır. Sıfırlamak istediğiniz resim modunu seçin.
Resim Sıfırlama
7
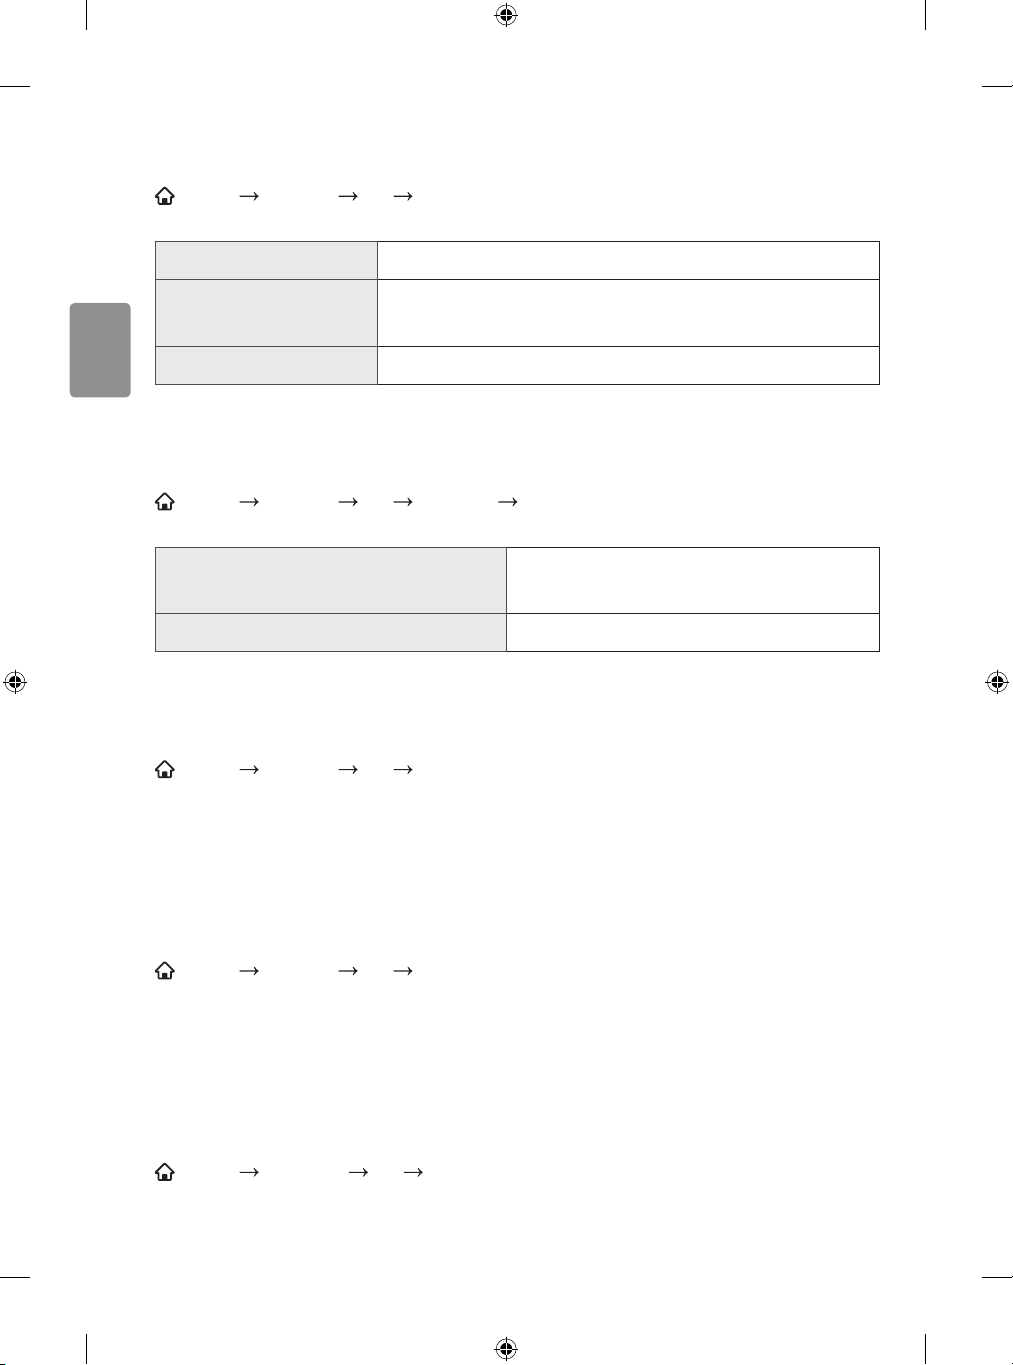
TÜRKÇE
Ses modu özelliğini kullanmak için
SMART AYARLAR SES Ses Modu
Monitörün sesini seçilen ses modu için optimize eder.
Standard Tüm video tipleri için uygundur.
Haberler / Müzik /
Sinema / Spor / Oyun
Kullanıcı Ayarı Kullanıcı Ayarı özelliğini kullanarak sesi istenen seviyeye ayarlar.
[Yapılandırılabilir öğeler, modele veya ülkeye göre değişir.]
Sesi belirli bir tür için en uygun duruma ayarlar.
Ses ince ayarı yapmak için
SMART AYARLAR SES Ses Modu Kullanıcı Ayarı
Ses Modu menüsünden Kullanıcı Ayarı seçeneğini seçin.
100 Hz / 300 Hz / 1 kHz / 3 kHz / 10 kHz Ses bantlarını manuel olarak ayarladıktan sonra
EQ'yu ayarlar.
Sıfırla Önceden değiştirilmiş ekolayzır değerini sıfırlar.
Smart ses modu işlevini kullanmak için
SMART AYARLAR SES Smart Ses Modu
Her içerik tipi için ayarlanan en uygun hale getirilmiş sesi sağlar.
• Smart Ses Modu işlevi etkinleştirildiyse Ses Modu, Virtual Surround Plus ve Net Ses II
otomatik ayarlanır.
Sanal surround sesi kullanmak için
SMART AYARLAR SES Virtual Surround Plus
LG'nin özel ses işleme teknolojisi sayesinde iki hoparlörden 5.1 kanala benzer surround ses
alabilirsiniz.
• Net Ses ll Açık olarak ayarlanırsa Virtual Surround Plus seçilmez.
Net ses II işlevini kullanmak için
SMART
Ses netliğini artırır.
8
AYARLAR
SES Net Ses ll
TÜRKÇE
Ses seviyesi Modu işlevini ayarlamak için
SMART AYARLAR SES Ses Seviyesi Modu
Ses seviyesi kontrolüne ilişkin çeşitli modları ayarlar.
Oto Ses Oto Ses öğesini Açık olarak ayarlar. Ses çıkışları sinyalden sinyale farklılık
gösterir. Farklı sinyallerde gezinirken Monitörü uygun bir şekilde izlemek
için daha sonra otomatik olarak ayarlanır.
Ses Seviyesi
Kontrolü
Tek bir ses seviyesi eğrisi kullanmak ortama bağlı olarak duyulamayan veya
yüksek bir sese neden olabilir. Ses seviyelerini günün saatine göre (gündüz/
gece) ayarlar.
Ses ve videoyu senkronize etmek için
SMART AYARLAR SES AV Senk. Ayarla
Videoyu ve sesi eşleşmediklerinde doğrudan senkronize eder.
AV Senk. Ayarla öğesini Açık olarak ayarlarsanız ses çıkışını (monitör hoparlörleri veya SPDIF)
ekran görüntüsüne ayarlayabilirsiniz.
Hoparlör [Bu özellik yalnızca belirli modellerde bulunur.]
Monitörün dahili hoparlörlerinden gelen sesi senkronize eder.
"-"düğmesi ses çıkışını varsayılan değere göre hızlandırır ve "+" düğmesi
yavaşlatır.
Harici Hoparlör Sesin dijital ses çıkış bağlantı noktasına bağlı harici hoparlör, LG ses aygıtı
ve kulaklık gibi harici hoparlörlerden nasıl eşitleneceğini ayarlar.
"-"düğmesi ses çıkışını varsayılan değere göre hızlandırır ve "+" düğmesi
yavaşlatır.
• LG ses aygıtı, optik dijital bağlantı noktası veya HDMI-ARC bağlantı
noktası üzerinden bağlanabilir.
Bypass Harici bir aygıtın sesini ses gecikmesi yaşanmadan verir. Video girişini
monitöre işlemek zaman aldığı için ses videodan önce verilebilir.
9

TÜRKÇE
Ses Ayarları işlevini kullanmak için
[Bu özellik yalnızca belirli modellerde bulunur.]
SMART AYARLAR SES Ses Ayarları
Denge
[Bu özellik yalnızca belirli modellerde bulunur.]
Sol/sağ ses dengesini ayarlar.
Ses Optimizer
[Bu özellik yalnızca belirli modellerde bulunur.]
Özel monitör kurulumu için en uygun hale getirilmiş sesi sağlar.
Kapalı Genel ses modu.
Duvar Tipi Duvara monte edilmiş monitör için sesi optimize eder.
Stand Tipi Ayaklığa monte edilmiş monitör için sesi optimize eder.
Monitörün hoparlörlerini kullanmak için
[Bu özellik yalnızca belirli modellerde bulunur.]
SMART AYARLAR SES Ses Çıkışı Hoparlör
Ses çıkışı hoparlörle sağlanır.
Harici Hoparlör kullanmak için
[Sadece optik veya HDMI (ARC) bağlantı noktası olan modeller için geçerlidir]
SMART AYARLAR SES Ses Çıkışı Harici Hoparlör (Optik / HDMI / ARC)
Ses çıkışı optik bağlantı noktasına bağlanan hoparlör ile sağlanır.
• SIMPLINK desteklenir.
10

Dijital Ses Çıkışı kullanmak için
SMART AYARLAR SES Ses Çıkışı Harici Hoparlör (Optik / HDMI / ARC)
Dijital Ses Çıkışı
Dijital Ses Çıkışı öğesini ayarlar.
Öğe Ses Girişi Dijital Ses çıkışı
Otomatik MPEG PCM
Dolby Digital Dolby Digital
Dolby Digital Plus Dolby Digital
HE-AAC Dolby Digital
PCM Tümü PCM
LG ses aygıtı bağlamak ve kullanmak için
LG ses aygıtı, zengin ve güçlü ses kalitesinin keyfini kolaylıkla çıkarmanızı sağlar.
Kablolu Bağlantı
SMART AYARLAR SES Ses Çıkışı LG Ses Eşitleme (Optik)
LG ses aygıtını
• Sadece optik dijital bağlantı noktası olan modeller için geçerlidir.
Kablosuz Bağlantı
SMART AYARLAR SES Ses Çıkışı LG Ses Eşitleme (Kablosuz)
logo ile birlikte optik dijital ses çıkışı bağlantı noktasına bağlayın.
TÜRKÇE
logolu LG ses aygıtı kablosuz olarak bağlanabilir.
• Bağlanan aygıtın ses düzeyini ayarlamak için monitörün uzaktan kumandasını kullanabilirsiniz.
• Kablosuz olarak bağlanırken dongle'ı takın ve model gerektiriyorsa Sihirli Kumanda dongle'ını
bağlayın. (Ayrı satın alın)
• Aygıt bağlanamazsa kablosuz bağlantı için. Bağlanmak için aygıt gücünü ve LG Ses aygıtının
doğru çalışma koşulunda olup olmadığını kontrol edin.
• LG Ses Eşitleme (Kablosuz) öğesini seçerseniz bağlantı için uygun olan aygıtlar aranır ve
aranan aygıtlardan biri otomatik olarak bağlanır. Bir aygıt bağlandığında adı görüntülenir.
• İki veya daha fazla aygıt algılandıysa önce ilk algılanan aygıt bağlanır. Bağlanmak üzere
algılanan diğer aygıtları görüntülemek için Daha Fazla Göster düğmesine basın.
• LG Ses Eşitleme (Kablosuz) seçiliyken monitörü açarsanız en son bağlanan aygıtı arar ve
bağlanmayı dener.
11

TÜRKÇE
Analog Çıkış / Kulaklık kullanmak için
[Bu özellik yalnızca belirli modellerde bulunur.]
SMART AYARLAR SES Ses Çıkışı Harici Hoparlör (Ses Çıkışı) / Kulaklık
Analog çıkışı ayarlamak için bağlanan aygıta bağlı olarak Kulaklık ya da Harici Hoparlör (Ses
Çıkışı) öğesini seçin.
• Kullanılabilir menü, Ses Ayarları
Analog Çıkış altında seçilen Kulaklık veya Harici
Hoparlör (Ses Çıkışı) öğesine göre değişiklik gösterir.
• Bazı modeller sadece Kulaklık işlevini destekleyebilir.
• Monitör açıkken kulaklık takarsanız kulaklıkları otomatik olarak algılar ve sesi kulaklıktan
vermeye başlar.
Opsiyon
Giriş Listesi
Harici giriş seçmek için
SMART GİRİŞ LİSTESİ
Harici giriş seçer.
• Gösterilen şekil Monitörünüzden farklı olabilir.
12
GIRIŞ LISTESI
Görüntülemek için bir giriş cihazı seçin.
Hoparlör
Transcend 8GB HDMI1 AV Komponent HDMI2 HDMI3
Cihaz Adını Değiştir SIMPLINK Ayarı
3
4
Çok Amçlı Uz. Kmnd. Ayrla
5
1
2

TÜRKÇE
1
Hoparlör seçer.
2
Giriş seçer.
3
Aygıt adını değiştirir.
4
SIMPLINK'i ayarlar.
5
Çok Amaçlı Uzaktan Kumandayı ayarlar. [Bu özellik yalnızca belirli ülkelerde bulunur.]
SIMPLINK’i kullanmak için
SIMPLINK, SIMPLINK menüsü aracılığıyla yalnızca monitörün uzaktan kumandasını kullanarak
çeşitli multimedya aygıtlarını kolayca kontrol etmenizi ve yönetmenizi sağlayan bir özelliktir.
1 HDMI kablosu kullanarak monitörün HDMI IN terminalini SIMPLINK aygıtının HDMI çıkış
terminaliyle bağlayın. SIMPLINK işlevi olan ev sinema sistemi ünitelerinde, HDMI girişlerini
yukarıdaki gibi bağlayın ve monitörün Optik Dijital Ses Çıkışını SIMPLINK aygıtının Optik Dijital
Ses Girişine bağlamak için optik bir kablo kullanın. (HDMI-ARC özellikli aygıtları, HDMI-ARC
bağlantı noktası üzerinden bağlarken optik kablo gerekmez.)
2
SMART UYGULAMALARIM SIMPLINK öğesini seçin. SIMPLINK menü penceresi
görüntülenir.
3 SIMPLINK menü penceresinde SIMPLINK Ayarı öğesini seçin. SIMPLINK kurulum penceresi
görüntülenir.
4 SIMPLINK kurulum penceresinde, SIMPLINK'i Açık olarak ayarlayın.
5 SIMPLINK kurulum penceresini kapatın.
6 SMART UYGULAMALARIM SIMPLINK öğesinden kontrol edilecek aygıtı seçin.
• Bu işlev yalnızca SIMPLINK logosuna (
• Harici aygıtın üzerinde bir SIMPLINK logosu bulunduğunu doğrulayın.
• SIMPLINK işlevini kullanmak için yüksek hızlı HDMI kablosu (CEC, yani Tüketici Elektroniği
Kontrolü özelliği eklenmiş) kullanmanız gerekir. Yüksek hızlı HDMI kablolarında aygıtlar
arasında bilgi alışverişi için bağlanan 13 numaralı pimi kullanın.
• Hoparlörün Harici Hoparlöre geçtiğini görmek için ev sinema sistemi özelliklerine sahip bir
aygıt açın veya böyle bir aygıtın medyasını seçin.
• Harici Hoparlörden Dinle işlevini kullanmak için optik kabloyu (Ayrı satın alınır) veya HDMI-ARC
özellikli aygıtı HDMI-ARC bağlantı noktası üzerinden bağlayın.
• Harici girişe geçilmesi, SIMPLINK ile çalışan aygıtların durmasına neden olur.
• HDMI-CEC özelliklerine sahip bir üçüncü taraf aygıtın kullanılması arızalara neden olabilir.
• Optik kablo bağlantısı sadece optik dijital bağlantı noktası olan modellerde desteklenir.
) sahip aygıtlarda çalışır.
13

TÜRKÇE
SIMPLINK özelliklerinin açıklaması
Doğrudan Oynatma Multimedya aygıtını monitörde anında oynatır.
Multimedya aygıtı seç SIMPLINK menüsü aracılığıyla monitör ekranından kontrol etmek
istediğiniz aygıtı anında seçer.
Disk oynatma Multimedya aygıtını monitörün uzaktan kumandasıyla yönetir.
Tüm aygıtları kapat Otomatik Güç işlevini SIMPLINK ayarlarında Açık olarak ayarlanırsa
monitörün kapatılması SIMPLINK bağlantılı tüm aygıtları kapatır.
Senkronize Güç açma Otomatik Güç işlevini SIMPLINK ayarlarında Açık olarak ayarlanırsa
SIMPLINK aygıtını açtığınızda monitör de açılır.
Hoparlör Ev sinema sistemi ünitesinde veya monitörde hoparlörü seçer.
Saat Ayarı
Uyuma zamanı işlevini kullanmak için
SMART AYARLAR SAAT Uyuma Zamanı
Belirlenen sayıda dakika geçtikten sonra Monitörü kapatır.
Uyuma Zamanı işlevini iptal etmek için Kapalı öğesini seçin.
Geçerli saati ayarlamak için
SMART AYARLAR SAAT Saat
Monitörü izlerken saati kontrol eder veya değiştirir.
Monitörü otomatik olarak açma ve kapatmaya ayarlamak için
SMART AYARLAR SAAT Açma Zamanı / Kapatma Zamanı
Açma / Kapatma zamanını ayarlar.
Açma Zamanı / Kapatma Zamanı işlevini devre dışı bırakmak için tekrarla seçeneğini Kapalı
olarak ayarlayın.
• Açma Zamanı / Kapatma Zamanı işlevini kullanmak için geçerli saati doğru şekilde
ayarlayın.
• [Bu özellik yalnızca belirli ülkelerde bulunur.]
Açma Zamanı işlevi Açık olduğunda bile 120 dakika içerisinde hiçbir düğmeye basılmazsa
monitör otomatik olarak kapatılır.
14
TÜRKÇE
Otomatik Bekleme işlevini ayarlamak için
[Bu işlev sadece belirli modellerde veya belirli ülkelerde bulunur.]
SMART AYARLAR SAAT Otomatik Bekleme
Belli bir süre içerisinde monitör veya uzaktan kumanda üzerindeki hiçbir tuşa basılmazsa monitör
otomatik olarak bekleme moduna alınır.
• Bu işlev Mağaza Demosu modunda veya ağ üzerinden yazılım güncellemesi yapılırken çalışmaz.
Kilitle
Parola oluşturmak için
SMART AYARLAR KİLİT Parola Oluştur
Monitör parolasını ayarlar veya değiştirir.
• İlk parola [0000] olarak ayarlanmıştır.
Sistemi kilitlemek için
SMART AYARLAR KİLİT Kilit Sistemi
Yalnızca belirli harici girişlere izin verir.
Kilit Sistemi öğesini Açık olarak ayarlayın.
Giriş Bloğu Giriş kaynaklarını engeller.
Uygulama Kilidi Uygulamaların çalışmasını engeller.
Sihirli Kumanda
* Sihirli Kumanda ve bağlantı aparatı ayrı ayrı satın alınmalıdır.
Sihirli Kumanda’yı kaydetmek için
Sihirli Kumanda'yı kullanmak için öncellikle kumandayı monitörünüze kaydedin.
Sihirli Kumanda'yı kullanmadan önce aşağıdaki talimatları izleyerek kaydedin.
1 Monitörü açın ve yaklaşık 10 saniye bekledikten sonra uzaktan kumandayı monitöre
doğrultarak Hareket Tuşu'na (OK) basın.
2 Uzaktan kumanda otomatik olarak kaydedilir ve kayıt tamamlandı mesajı monitör ekranında
görünür.
• Sihirli Kumanda'yı kaydedemezseniz monitörü kapatın ve tekrar deneyin.
15

TÜRKÇE
Sihirli Kumanda’yı yeniden kaydetmek için
1 Yaklaşık 5 saniye boyunca ve düğmelerine basın.
2 Sihirli Kumanda'yı yeniden kaydetmek için monitöre doğru tutun ve Hareket Tuşu'na (OK)
basın.
• Sihirli Kumanda'yı sıfırlamak için beş saniye boyunca düğmesine ve düğmesine birlikte
basın.
• Uzaktan kumandayı sıfırlamak ve yeniden kaydetmek için monitörünüze doğru tutun ve bu
sırada 5 saniye boyunca
düğmesine basın.
Sihirli Kumanda imlecini ayarlamak için
AYARLAR OPSİYON İmleç
Monitör ekranında görünen imlecin hızını ve şeklini ayarlar.
Hız İmlecin hareket etme hızını ayarlar.
Şekil Çeşitli seçenekler arasından bir imleç şekli seçer.
Boyut İmlecin boyutunu seçer.
Hizalama Açık olarak ayarlayın. İmleç ile uzaktan kumandanın gösterdiği gerçek yön
arasında kayma varsa Sihirli Kumanda'yı sağa ve sola kaydırarak yeniden
hizalayın. İmleç otomatik olarak ortada yeniden hizalanarak kontrolü
kolaylaştıracaktır.
• Hizalama işlevi Kapalı olarak ayarlanmışsa Sihirli Kumanda'yı sola ve sağa
hareket ettirseniz bile çalışmaz.
• İmleç belirli bir süre boyunca kullanılmazsa kaybolur. İmleç ekrandan kaybolduğunda Sihirli
Kumanda'yı sola ve sağa doğru sallayın. Böylece imleç yeniden belirir.
• İmleç düzgün şekilde tepki vermiyorsa imleci ekranın köşesine taşıyarak sıfırlayabilirsiniz.
• İmleci ekranda hareket ettirirken Navigasyon düğmesine basarsanız imleç kaybolur ve Sihirli
Kumanda normal bir uzaktan kumanda gibi çalışmaya devam eder.
• 10 metrelik etkin uzaklık sınırı içinde kullanın. Uzaktan Kumandayı fazla uzun mesafelerden
veya görüş alanını kapatan engeller olduğunda kullanmak arızalara sebep olabilir.
• Çevredeki elektronik aygıtlar iletişim parazitine yol açabilir. Mikrodalga fırın ve kablosuz LAN
gibi aygıtlar Sihirli Kumanda ile aynı frekans aralığını (2,4 GHz) kullanır ve parazite yol açabilir.
• Sihirli Kumanda yere düşerse veya başka bir şekilde hasar görürse bozulabilir.
• Uzaktan kumandayı mobilya veya zemin gibi sert nesnelere vurmamaya dikkat edin.
16
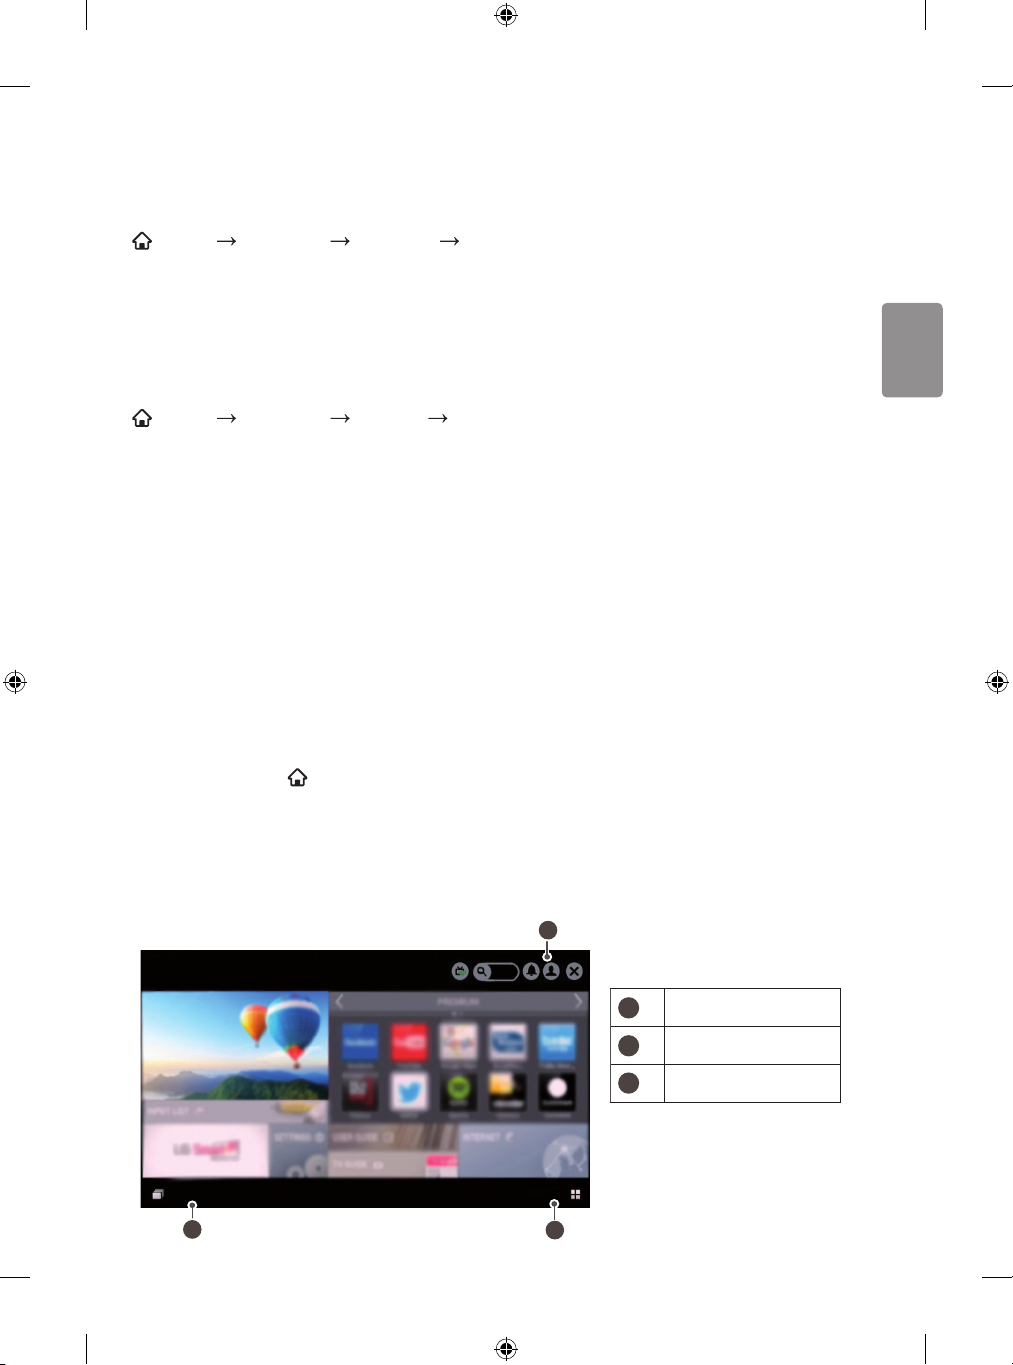
TÜRKÇE
Diğer seçenekleri ayarlamak için
Monitör modunu değiştirmek için
SMART
AYARLAR
OPSİYON
Mod Ayarı
Standard veya Mağaza öğesini seçer.
Evde kullanmak için Standard öğesini seçin.
Mağaza, mağazada sergileme için kullanılan bir moddur.
Başlangıç ayarlarına dönmek için
SMART
İsteğe bağlı tüm ayarları siler ve varsayılan başlangıç moduna döner.
Sıfırlama işlemi tamamlandıktan sonra monitör kendi kendine kapanır ve açılır.
• Kilit Sistemi etkinleştirildiyse bir parola istemi açılır.
• Sıfırlama sırasında gücü kapatmayın.
AYARLAR
OPSİYON Fabrika Ayarları
Smart Monitör işlevi
Smart Home
Ana ekranı kullanmak için
Uzaktan kumandada SMART düğmesine basın.
Tüm Smart monitör işlevlerini tek bir ekranda görüntüleyen bu özellik sayesinde herkes
UYGULAMALARIM gibi temalara göre düzenlenmiş hızlı ve kolay kullanılır menü aracılığıyla çok
çeşitli içerik ve uygulamalara erişebilir.
• Gösterilen şekil Monitörünüzden farklı olabilir.
EV
ÖNCEKİLER LİSTESİ
2
1
ÖNCEKİLER LİSTESİ
2
Oturum aç
3
UYGULAMALARIM
UYGULAMALARIM
1
3
17

UYGULAMALARIM’ı kullanmak için
SMART UYGULAMALARIM
Ana ekranın sağ alt köşesindeki UYGULAMALARIM öğesini seçin.
Önceden kurulmuş uygulamalar ve indirdiğiniz uygulamalara göz atın.
UYGULAMALARIM altındaki öğeleri düzenlemek için
TÜRKÇE
SMART UYGULAMALARIM Düzelt
Uygulamaları taşımak veya silmek için UYGULAMALARIM sayfasının üst kısmındaki Düzelt
öğesini seçin. Sistem uygulamaları taşınabilir ancak silinemez.
• Aygıtınız Sihirli Kumanda'ya sahipse uygulama simgelerini sürükleyerek öğeleri sıralar / siler.
• Gösterilen şekil Monitörünüzden farklı olabilir.
UYGULAMALARIM
Ağ
Ağ bağlantısı kurmak için
Akıllı özellikleri kullanabilmek için kablosuz ya da kablolu bir ağ bağlantısı gerekir.
Ağa bağlandığınızda PREMIUM içerik, LG Smart World, İçerik Paylaşımı ve daha fazlasını
kullanabilirsiniz.
Tek tıkla ağ bağlantısı
Bir kablolu / kablosuz ağa kolayca bağlanır.
SMART AYARLAR AĞ Ağ Bağlantısı ile kullanılabilir bir ağa otomatik olarak
bağlanabilirsiniz. Monitördeki istemleri uygulayın.
18

TÜRKÇE
Gelişmiş ayarlar aracılığıyla bir ağa bağlanmak için
SMART AYARLAR AĞ Ağ Bağlantısı
Ofis gibi özel durumlarda (statik IP kullanılan durumlarda) kullanım içindir.
1 Kablolu veya Kablosuz bir ağ bağlantısı seçin.
2 Wi-Fi ile bağlandığınızda aşağıdaki ağ bağlantısı yöntemlerinden birini kullanın.
Erişim Noktası Listesi Erişim noktası listesinden seçilen ağa bağlanır.
SSID'yi girin Girilen kablosuz erişim noktasına bağlanır.
WPS-PBC PBC destekleyen bir kablosuz erişim noktasının düğmesine
basıldığında kolayca bağlanır.
WPS-PIN Bağlanmak istediğiniz kablosuz erişim noktasının PIN'i erişim noktası
web sitesine girildiğinde kolayca bağlanır.
Wi-Fi Direct işlevini kullanmak için
SMART AYARLAR AĞ Wi-Fi Direct
Wi-Fi Direct, monitörünüzün İnternet bağlantısı olmadan bir Wi-Fi Direct aygıtına bağlanmasına
olanak sağlar. SmartShare
izleyebilirsiniz.
1 Wi-Fi Direct öğesini Açık olarak ayarlayın. (Kullanmıyorsanız lütfen Kapalı olarak ayarlayın.)
2 Bağlanmak istediğiniz aygıtın Wi-Fi Direct ayarlarını etkinleştirin.
3 Monitöre bağlanabilecek aygıtların listesi görüntülenir.
4 Bağlanacağınız aygıtı seçin.
5 Bağlantı isteği mesajı görüntülendiğinde Evet öğesini seçin.
6 Bağlanmak istediğiniz aygıt isteği kabul ederse Wi-Fi Direct bağlanır.
TM
sayesinde Wi-Fi Direct ile bağlı bir aygıtta depolanan dosyaları
MiracastTM / Intel’s WIDI işlevini kullanmak için
SMART AYARLAR AĞ MiracastTM / Intel’s WiD
Monitörünüzün MiracastTM ve Intel’s WiDi teknolojileriyle bir aygıtın ekranını
1 MiracastTM / Intel’s WiDi öğesini Açık olarak ayarlayın. (Kullanmıyorsanız lütfen Kapalı
olarak ayarlayın.)
2 Bağlanmak istediğiniz aygıtta MiracastTM / Intel’s WiDi ayarlarını etkinleştirin.
3 Monitöre bağlanabilecek aygıtların listesi görüntülenir.
4 Bağlanacağınız aygıtı seçin.
5 Bağlantı isteği mesajı görüntülendiğinde Evet öğesini seçin.
6 Bağlanmak istediğiniz aygıt isteği kabul ederse
MiracastTM ve Intel’s WiDi
i
görüntüleyebilirsiniz.
bağlanır.
19
TÜRKÇE
• Bazı modellerde sadece Intel’s WiDi işlevi bulunur.
• Wi-Fi Direct öğesi Kapalı iken Miracast
TM
/ Intel's WiDi öğesini Açık olarak ayarlarsanız Wi-
Fi Direct otomatik olarak Açık olur.
• MiracastTM/ Intel’s WiDi işlevini Kapalı olarak ayarladığınızda Wi-Fi Direct öğesi önceki
ayara döner.
• Yakın mesafedeki bir dizüstü bilgisayarı Intel’s WiDi teknolojisini kullanarak bağlamanız
önerilir.
• Intel’s WiDi kablosuz yönlendirici olmadan bağlanabilir; ancak optimum performans için
öncelikle kablosuz yönlendiricinin bağlanması önerilir.
• LG Electronics marka olmayan bir aygıtı, algılansa bile monitörünüze bağlayamazsınız.
• Aygıtınızı 5 GHz bir yönlendiriciye bağlamanız önerilir.
• Kullanıcının bulunduğu ortama bağlı olarak tepki hızı farklılık gösterebilir.
• Bağlanmak istediğiniz aygıt hakkında daha fazla bilgi edinmek için aygıtın kullanım kılavuzuna
bakın.
Ağ ayarlama - uyarı
• Standart bir LAN kablosu (RJ45 konektör, 10 Base-T veya 100 Base TX LAN bağlantı noktalı Cat5
veya üstü) kullanın.
• Modeminizi sıfırlamanız halinde ağ bağlantısı sorunları oluşabilir. Sorunu çözmek için gücü
kapatın, bağlantıyı kesin ve yeniden bağlanın, ardından gücü tekrar açın.
• LG Electronics, ağ bağlantısı sorunlarından veya bir ağ bağlantısının neden olduğu arızalardan,
bozukluklardan ve hatalardan sorumlu değildir.
• İnternet servis sağlayıcısına bağlı olarak ağ bağlantısı düzgün çalışmayabilir.
• DSL hizmeti için bir DSL modem; kablo hizmeti için ise bir kablo modem gerekir. Yalnızca sınırlı
sayıda ağ bağlantısı kullanılabilir ve monitörün ağ ayarları, İnternet Servis Sağlayıcınızla (İSS)
olan sözleşmenize bağlı olarak kullanılamayabilir. (Hat başına yalnızca bir aygıta izin veriliyorsa
ve PC önceden bağlanmışsa diğer aygıtlar kullanılamaz.)
• Kablosuz ağlar 2,4 GHz frekansında çalışan diğer aygıtların (kablosuz telefonlar, Bluetooth
aygıtları veya mikrodalga fırınlar) girişimine maruz kalabilir. Diğer Wi-Fi aygıtlarla aynı şekilde
5 GHz frekansında çalışan aygıtlar da girişime neden olabilir.
• Çevredeki kablosuz ortam, kablosuz ağ hizmetinin yavaş çalışmasına neden olabilir.
• Yerel ev ağınızın tamamını kapatmazsanız bazı aygıtlarda ağ traği gerçekleşebilir.
• Erişim noktası bağlantısı kurmak için kablosuz bağlantıyı destekleyen bir erişim noktası
aygıtı gerekir ve aygıtta kablosuz bağlantı özelliği etkin olmalıdır. Erişim noktanızda kablosuz
bağlantının kullanılabilirliği için hizmet sağlayıcınızla irtibata geçin.
• Erişim noktası bağlantısı için erişim noktasının SSID ve güvenlik ayarlarını kontrol edin. Erişim
noktasının SSID ve güvenlik ayarları için ilgili belgelere başvurun.
20
TÜRKÇE
• Ağ aygıtlarındaki (kablolu/kablosuz hat paylaştırıcı, hub) geçersiz ayarlar monitörün yavaş
çalışmasına ya da düzgün çalışmamasına neden olabilir. Uygun kılavuza göre aygıtları doğru bir
şekilde kurun ve ağı ayarlayın.
• Bağlantı yöntemi erişim noktası üreticisine göre farklılık gösterebilir.
Soft AP
Soft AP işlevini kullanmak için
SMART AYARLAR AĞ Soft AP
Bu işlev, monitörünüzün kablolu İnternet bağlantısını Wi-Fi'a çevirerek çeşitli harici aygıtlar
bağlamanıza veya kablosuz İnternet kullanmanıza olanak sağlar.
Soft AP Açık / Kapalı olarak ayarlar.
Güvenlik Anahtarı Wi-Fi güvenlik anahtarını ayarlar.
• İngilizce harer ve rakamlardan oluşan, 8 ila 64 karakter
uzunluğunda bir güvenlik anahtarı belirleyebilirsiniz.
• Varsayılan ayar "LG123456" dır.
• Soft AP işlevini etkinleştirmek için monitörünüz açık olmalı ve kablolu İnternet bağlantısına
sahip olmalıdır.
• Dört adede kadar harici aygıt bağlanabilir.
• Soft AP işlevi etkinken Wi-Fi Direct ve Miracast
Miracast
TM
işlevlerini kullanmak için Soft AP işlevini Kapalı olarak ayarlamalısınız.
TM
işlevleri kullanılamaz. Wi-Fi Direct ve
USB
USB aygıtı bağlamak için
USB aygıtınızdaki içerik dosyalarının keyfini monitörünüzde çıkarmak için USB depolama
sürücüsünü (harici HDD, USB bellek) monitörün USB bağlantı noktasına takın.
USB depolama sürücüsünü kaldırmak için Hızlı Menü kaldırmak istediğiniz USB Aygıtı öğesini
seçin; USB aygıtının kaldırıldığı mesajını görmeden fiziksel bağlantıyı kesmeyin. Erken kaldırılırsa
monitörde veya USB depolama sürücüsünde hata oluşabilir.
• USB aygıtı kaldırılmak üzere seçildikten sonra okunamaz. USB depolama sürücüsünü kaldırın ve
yeniden bağlayın.
21
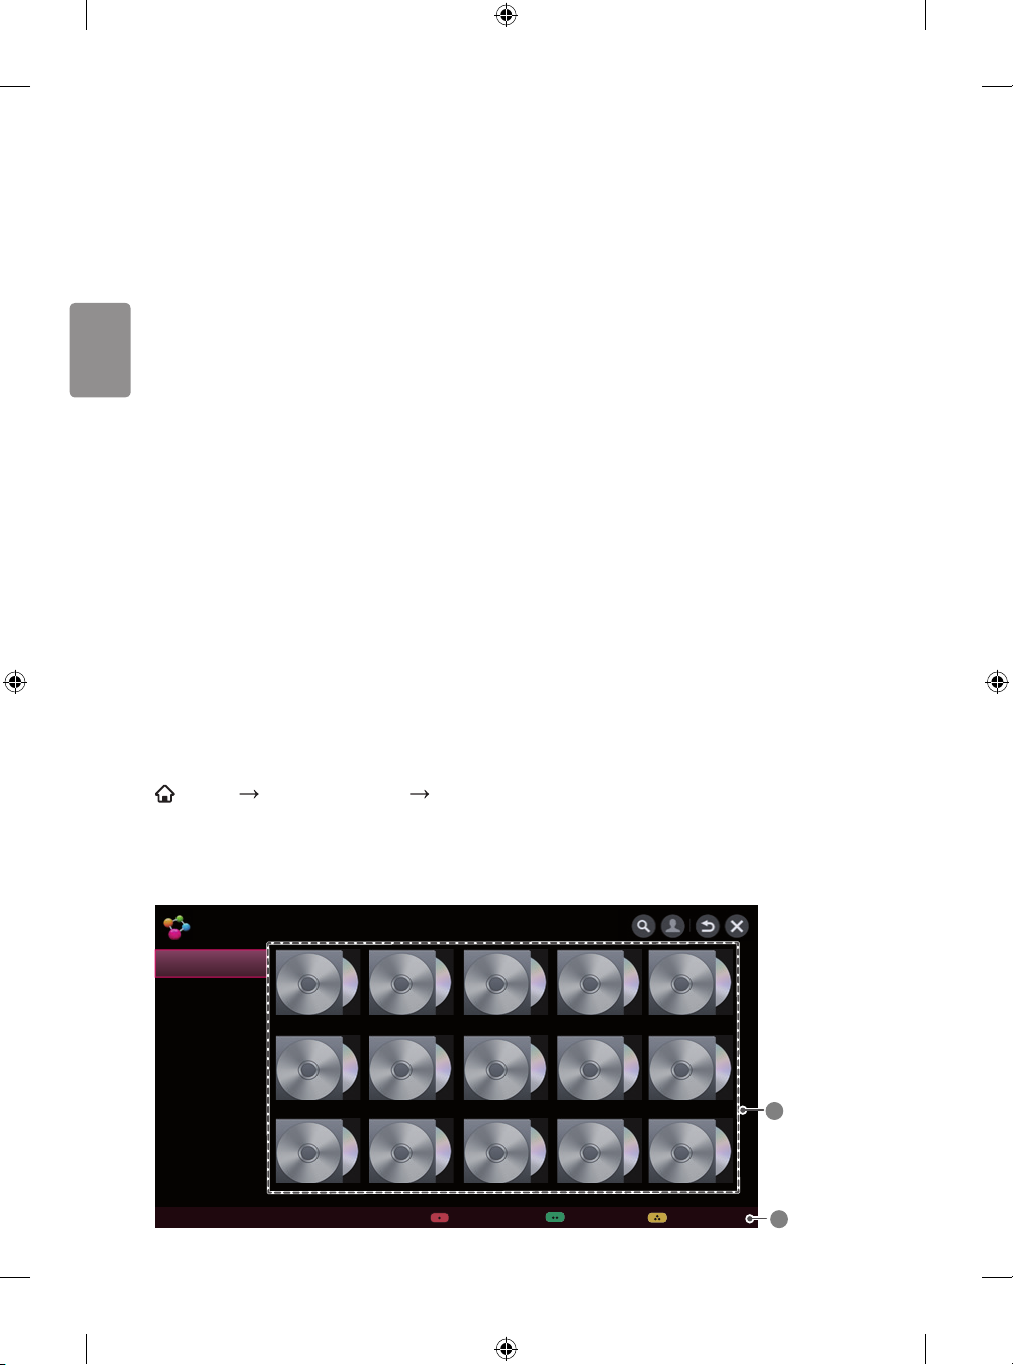
TÜRKÇE
USB depolama sürücüsünü kullanma - uyarı
• USB depolama sürücüsünde yerleşik otomatik tanıma programı varsa veya aygıt kendi
sürücüsünü kullanıyorsa çalışmayabilir.
• Bazı USB depolama sürücüleri hiç çalışmayabilir veya yanlış şekilde çalışabilir.
• Bir USB uzatma kablosu kullanırsanız USB aygıtı tanınmayabilir veya düzgün çalışmayabilir.
• Yalnızca Windows FAT32 veya NTFS dosya sistemi ile biçimlendirilmiş USB depolama
sürücülerini kullanın.
• Harici USB HDD aygıtları için 5 V'den küçük nominal voltaja ve 500 mA'dan düşük nominal
akıma sahip aygıtları kullanmanız önerilir.
• Güç beslemeli bir USB hub veya sabit disk sürücüsü kullanmanız önerilir. (Sağlanan güç yeterli
değilse USB depolama sürücüsü doğru algılanmayabilir.)
• 32 GB veya daha küçük USB Flash Sürücüleri ve 2 TB veya daha küçük USB HDD aygıtları
kullanmanız önerilir.
• Güç tasarrufu işlevi olan bir USB HDD aygıtı düzgün çalışmazsa gücü kapatıp açın. Daha fazla
bilgi edinmek için USB HDD aygıtının kullanıcı kılavuzuna bakın.
• USB depolama sürücüsündeki veriler bozulabilir, bu nedenle önemli dosyaları başka aygıtlara
yedeklediğinizden emin olun. Veri bakımı kullanıcının sorumluluğundadır ve veri kaybından
üretici sorumlu değildir.
SmartShare
SmartShare
TM
TM
özelliğini kullanmak için
SMART UYGULAMALARIM SmartShareTM
USB aygıtı veya ev ağına bağlanarak fotoğraf/müzik/video dosyalarını monitörünüzde
görüntülemenizi sağlar.
• Gösterilen şekil Monitörünüzden farklı olabilir.
SmartShare
TM
En son
Videolar
Fotoğraflar
Müzik
Bağlı Cihaz
Ayarlar Geçmişi Sil
Bağlanma kılavuzu
22
1
2
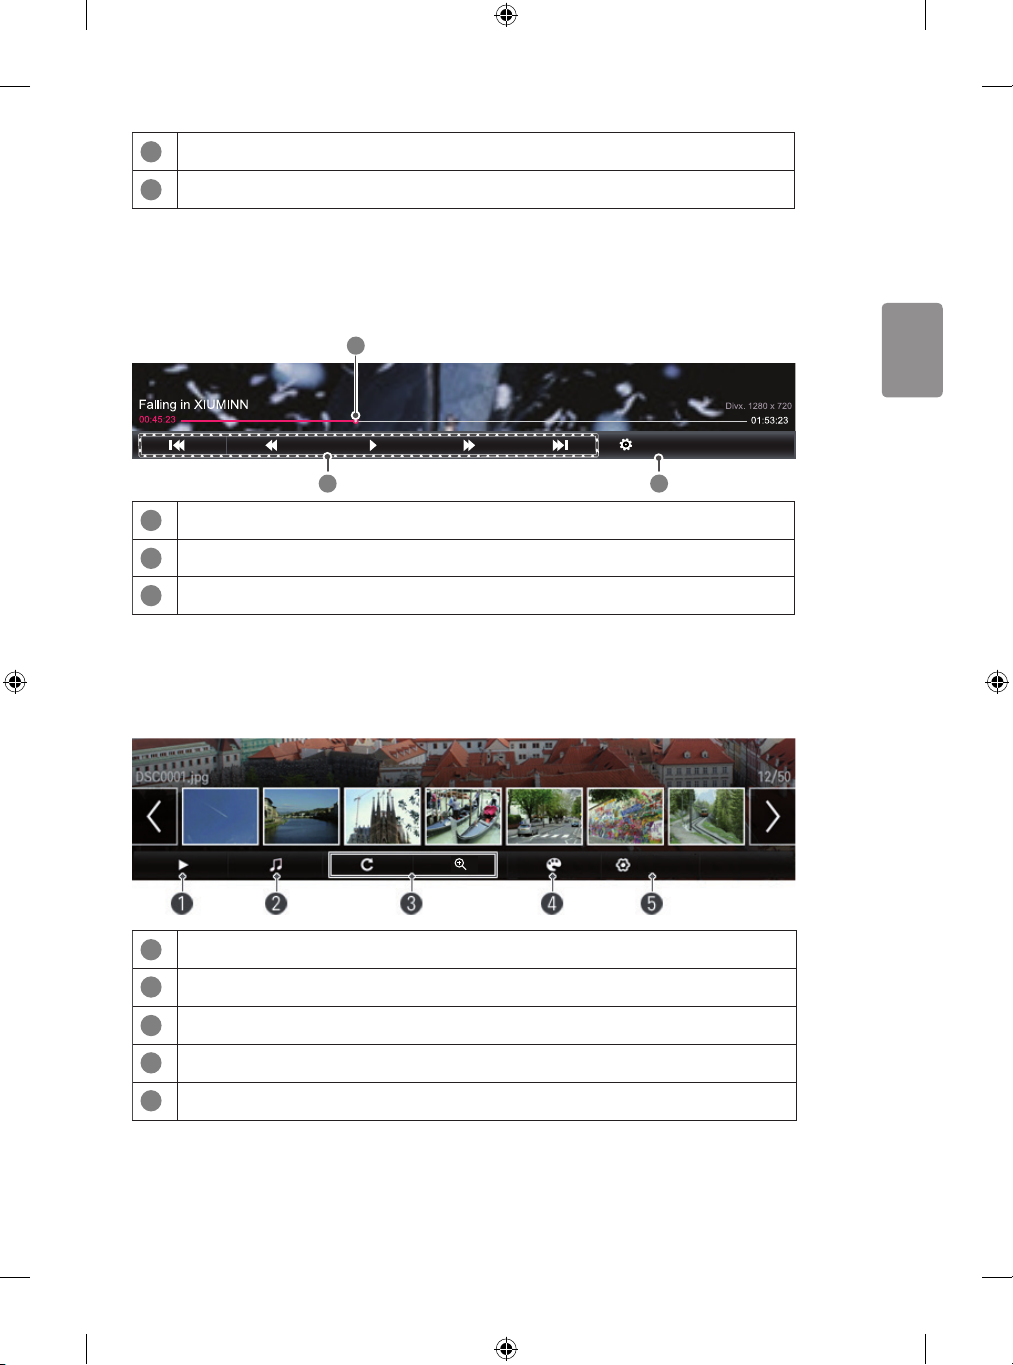
TÜRKÇE
1
Monitöre bağlı tüm aygıtlardaki fotoğraf / müzik / video dosyalarını görüntüler.
2
Bilgisayarın, akıllı telefonun / aygıtın ve USB'nin nasıl bağlanacağını gösterir.
Video oynatmayı kontrol etmek için
Oynatmayı kontrol eder ve video izlerken seçenekleri ayarlar.
• Gösterilen şekil Monitörünüzden farklı olabilir.
1
Opsiyon
2 3
1
Oynatılmak istenen noktayı seçmenize yarar.
2
Oynatma, durdurma ve ileri-geri alma butonları.
3
Oynatma ile ilgili detaylı seçeneklere gider.
Fotoğraf görüntülemeyi kontrol etmek için
Tam ekranda resim görüntülerken oynatmayı kontrol eder ve seçenekleri ayarlar.
• Gösterilen şekil Monitörünüzden farklı olabilir.
1
Fotoğrafları slayt gösterisi olarak görüntüler.
2
Arka plan müziği çalar.
3
Resmi döndürür veya büyütür.
4
Filtreyi ayarlar. [Bu özellik yalnızca belirli modellerde bulunur.]
5
Seçenekleri ayarlar.
Opsiyon
23
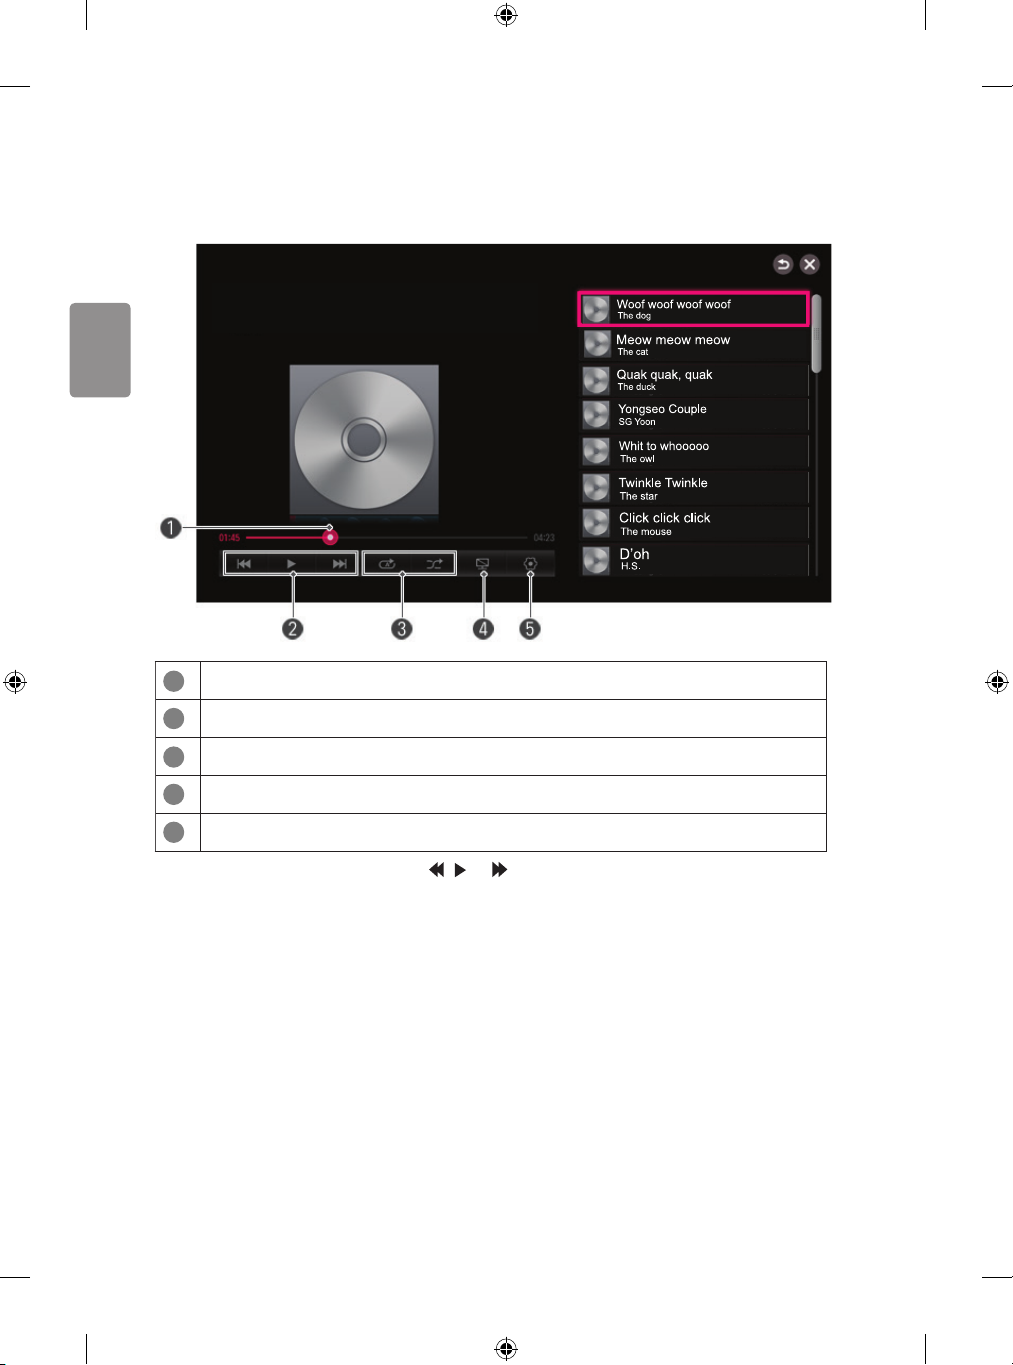
TÜRKÇE
Müzik çalma işlevini kontrol etmek için
Müzik çalınırken oynatmayı kontrol eder ve seçenekleri ayarlar.
• Gösterilen şekil Monitörünüzden farklı olabilir.
A’dan Z’ye
WOOSICK5
1
İstenilen noktayı seçer ve oynatır.
2
Oynatır.
3
Tekrarlama / rastgele işlevini ayarlar.
4
Monitör kapalıyken müzik çalar.
5
Seçenekleri ayarlar.
• Standart bir uzaktan kumandada
edebilirsiniz.
• USB aygıtını kullanırsanız zaman bilgisi ekranda görüntülenmez.
24
, ve tuşlarını kullanarak oynatmayı kontrol

TÜRKÇE
SmartShareTM ile ilgili işlevleri ayarlamak için
SMART UYGULAMALARIM SmartShareTM
SmartShareTM içeriğini oynatma işleviyle ilgili ayarları değiştirir.
Ayarlar
Ayarlar
Monitörümün Adı Monitörü diğer aygıtlardan ararken görüntülenen adı değiştirir.
Ağ Durumu Ağ Durumunu Görüntüler.
Wi-Fi Direct Wi-Fi Direct ve WiDi gibi kablosuz bağlantı işlevlerinin kullanılmasını
sağlar.
Alındığında Otomatik
Oynat
DivX(R) VOD DivX'i kaydeder veya kaydı kaldırır.
Diğer aygıtlar tarafından paylaşılan içeriği oynatmadan önce soru
sorulup sorulmayacağını seçer.
DivX korumalı videoları oynatmak için DivX Kayıt Kodunu kontrol eder.
http://vod.divx.com adresinde kaydolun.
www.divx.com/vod adresinden film kiralamak veya satın almak için
Kayıt Kodunu kullanır.
• Kiralanan / satın alınan DivX dosyaları, farklı bir aygıtın DivX Kayıt
Kodu kullanılıyorsa oynatılamaz. Yalnızca bu aygıt için verilen DivX
Kayıt Kodunu kullanın.
• DivX Codec Standardına uymayan dönüştürülmüş dosyalar
oynatılmayabilir veya anormal görüntüler ve sesler oluşabilir.
Geçmişi Sil
İçerik geçmişini silmek için lütfen aşağıdaki Geçmişi Sil düğmesine basın. En son menüsündeki
içerikleri kullanın.
SmartShareTM destekleyen dosya
Maksimum veri aktarım hızı 20 Mbps (megabit / saniye)
Desteklenen dahili altyazı
formatları
Desteklenen harici altyazı
formatları
XSUB (DivX6 ile oluşturulan dahili altyazıları destekler)
*.smi, *.srt, *.sub (MicroDVD, SubViewer 1.0/2.0), *.ass,
*.ssa, *.txt (TMPlayer), *.psb (PowerDivX), *.dcs (DLP
Cinema)
25
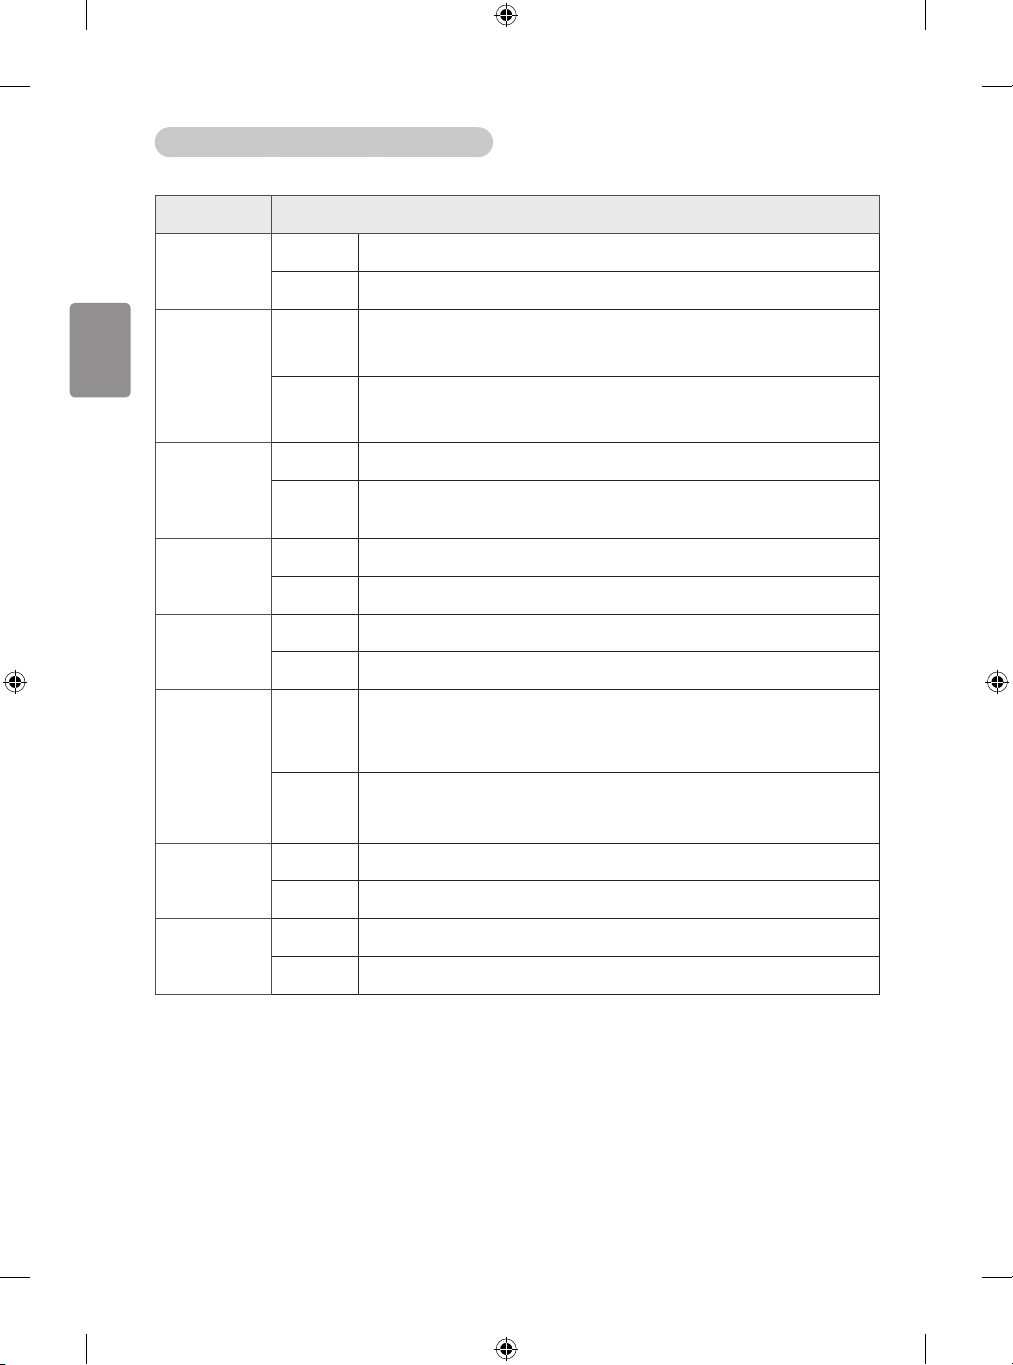
TÜRKÇE
Video Tarafından Desteklenen Codec
Maksimum
Uzantı Codec
: 1920 x 1080 @ 30p
.asf
.wmv
.divx
.avi
.mp4
.m4v
.mov
.3gp
.3g2
.mkv
.ts
.trp
.tp
.mts
.m2ts
Video VC-1 Basit ve Ana Profil
Ses WMA Standard, WMA 10 Professional
Video
Ses
Video H.264 / AVC, MPEG-4 Part 2
Ses AAC, MPEG-1 Layer III (MP3)
Video H.264 / AVC, MPEG-4 Part 2
Ses AAC, AMR-NB, AMR-WB
Video H.264 / AVC
Ses HE-AAC, Dolby Digital
Video H.264 / AVC, MPEG-2
Ses
DivX3.11, DivX4, DivX5, DivX6, XViD, H.264 / AVC, Motion Jpeg,
MPEG-4 Part 2
MPEG-1 Layer I, II, MPEG-1 Layer III (MP3), Dolby Digital, LPCM,
ADPCM, DTS
MPEG-1 Layer I, II, MPEG-1 Layer III (MP3), Dolby Digital,
Dolby Digital Plus, AAC, PCM
26
.vob
.mpg
.mpeg
Video MPEG-1, MPEG-2
Ses Dolby Digital, MPEG-1 Layer I, II, DVD-LPCM
Video MPEG-1, MPEG-2
Ses MPEG-1 Layer I, II, MPEG-1 Layer III(MP3)

TÜRKÇE
Kullanılabilir müzik dosyası
Dosya tipi Öğe Bilgi
mp3 32 Kbps - 320 Kbps
mp3
Örnek frekans 16 kHz - 48 kHz
Destek MPEG1, MPEG2, Layer2, Layer3
Kullanılabilir fotoğraf dosyası
Dosya tipi
2D
(jpeg, jpg, jpe)
Öğe
JPEG
Profil
• Minimum
• Maksimum
: 64 x 64
-Normal Tip: 15360 (G) x 8640 (Y)
-Aşamalı Tip: 1920 (G) x 1440 (Y)
Video oynatma - uyarı
• Kullanıcı tarafından oluşturulan bazı altyazılar doğru çalışmayabilir.
• Video ve altyazı dosyaları aynı klasöre yerleştirilmelidir. Altyazıların doğru görüntülenmesi için
video ve altyazı dosyaları aynı adı taşımalıdır.
• NAS (Ağa Bağlı Depolama) aygıtı üzerindeki altyazılar üretici ve modele bağlı olarak
desteklenmeyebilir.
• GMC (Global Hareket Dengelemesi) veya Qpel (Hareketleri Çeyrek Piksellik bir Doğruluk Payıyla
Tahmin Etme) içeren akışlar desteklenmemektedir.
• Yalnızca H.264/AVC prol seviyesi 4.1 ve altı desteklenmektedir.
• Dosya boyutu sınırı kodlama ortamına bağlıdır.
• Yalnızca Window Media Audio V2'nin üstündeki sürümlerde çalışır.
• AAC Ana Prol desteklenmez.
• Bazı kodlayıcılarla oluşturulan video dosyaları oynatılamayabilir.
• Burada belirtilenler dışındaki video dosya formatları oynatılamayabilir.
• Yüksek hızı destekleyen USB aygıtlarındaki video dosyaları düzgün oynatılamayabilir.
• Monitör, USB/HDMI video dosyasının oynatılması sırasında DTS ses codec bileşenini destekler.
27

TÜRKÇE
İçerik Paylaşımı
İçerik Paylaşımı, aynı ağa bağlı PC'nizde veya akıllı telefonunuzda kayıtlı olan videoların, müziklerin
ve fotoğrafların tadını çıkarmanızı sağlar.
Monitör-Akıllı Telefon Bağlantısı
1 Mobil aygıtınızda Wi-Fi özelliğinin etkinleştirilmiş olup olmadığını kontrol edin.
Monitör ve akıllı telefon aynı kablosuz ağa bağlı olmalıdır.
2 Mobil aygıtınızdaki dosyaları paylaşmanızı sağlayan bir uygulama kurun ve çalıştırın.
3 Mobil aygıtınızda paylaşacağınız içeriği seçin.
4 Oynatılacak içerik türünü (video/müzik/fotoğraf) seçin.
5 Monitör'ünüzde oynatılacak video, müzik veya fotoğraf dosyasını seçin.
6 Ekle simgesine tıklayarak ÇALMA LİSTESİ öğesini açın.
7 Aygıtta, dosyanın oynatılacağı Monitör modelini seçin. (Monitör model adını ürün etiketinde
bulabilirsiniz.)
8 Oynat ( ) Seçili dosyayı Monitör'de gösterir.
Paylaşım yazılımıyla PC’nizdeki içeriği oynatın
Bilgisayar işletim sistemi Windows 7 veya Windows 8 ise ek program kurmadan müzikleri, videoları
veya fotoğrafları Monitör'ünüzde oynatabilirsiniz.
1 Monitör'yi ve PC'yi aynı ağda olacak şekilde yapılandırın. Ayrıca Windows 7 veya Windows 8
kurulu olan PC'nin ağını yapılandırın.
2 İstediğiniz müzik, video veya fotoğraf dosyasına sağ tıklayın ve seçilen dosyayı oynatmak için
Windows 7 veya Windows 8'de sağlanan Burada Oynat işlevini kullanarak modeli seçin.
Cep telefonu gibi diğer aygıtlarda oynatmak için ilgili kullanıcı kılavuzuna bakın.
3 Birden fazla Monitör veya aygıt bağlı olduğunda bile seçilen dosya yalnızca bir aygıtta oynatılır.
Oynatma hızı ağ bağlantısına göre değişebilir.
Bilgisayar/Akıllı Telefonda kayıtlı içeriği oynatmak için SmartShareTM
PC Yazılımını kullanın
Bilgisayarınızda kayıtlı olan müzik/video/fotoğraf dosyalarını ev ağınıza bağlamak ve bunları
Monitör'ünüzde oynatmak için SmartShareTM PC Yazılımını veya Akıllı Telefonu kullanabilirsiniz.
1 Monitör'yi ve SmartShare
yapılandırın. SmartShareTM hizmeti yalnızca Monitör ve tüm aygıtlar tek bir yönlendiriciye
bağlıyken kullanılabilir.
28
TM
kurulu aygıtı (örn. akıllı telefon) aynı ağda olacak şekilde

TÜRKÇE
2 Bilgisayar kullanıyorsanız SmartShareTM PC Yazılımını web sitesinden indirip kurun.
Kurulumdan önce güvenlik duvarı veya anti-virüs yazılımı gibi PC'de çalışan tüm programlardan
çıkın.
3 Paylaşılan dosyayı Monitör'ünüzde izleyebilmeniz için sunucu çalışıyor olmalıdır.
• Web sitesi bilgileri için SMART Ayarlar DESTEK Ürün / Hizmet Bilgisi öğesine
gidin.
• SmartShareTM PC Yazılımını kullanma hakkında bilgi için yazılımın yardım bölümüne bakın.
İçerik Paylaşımı Düzgün Çalışmıyorsa
• İçerik paylaşımı seçeneği düzgün çalışmıyorsa ağ ayarlarınızı kontrol edin.
• İçerik Paylaşımı işleviyle 1080p video izlemek için 5 GHz frekansını kullanan bir yönlendirici
gerekir. 2,4 GHz yönlendirici kullanılıyorsa video düzgün oynatılamayabilir.
• Kablosuz ağda düzgün çalışmadığı durumlarda bir kablolu ağa bağlanmanız önerilir.
• Video oynatılırken Çoklu Ses ve Altyazı özellikleri desteklenmez.
• Bir aygıta birden fazla Monitör bağlıysa sunucu performansına bağlı olarak içerik düzgün
şekilde oynatılamayabilir.
• Altyazılar yalnızca bazı bağlı aygıtlarda desteklenir.
• Ağ ortamına bağlı olarak düzgün çalışmayabilir.
• Çok noktaya iletme işlevini desteklemeyen yönlendiriciler İçerik Paylaşımı işlevini
desteklemeyebilir. Daha fazla bilgi için yönlendiricinizle birlikte verilen kullanıcı kılavuzuna
bakın veya üreticiyle irtibata geçin.
• Dosya formatı Monitör tarafından desteklense bile bağlı aygıt ortamına bağlı olarak
desteklenen dosya formatı değişebilir.
• Bir klasörde çok fazla klasör veya dosya varsa düzgün biçimde çalışmayabilir.
• Bağlı aygıttan aktarılan dosyanın bilgileri düzgün görüntülenmeyebilir.
• Altyazıları okumak için SmartShareTM PC Yazılımı önerilir.
• Bir altyazı dosyası daha sonra eklendiğinde paylaşım klasörünü devre dışı bırakın ve yeniden
etkinleştirin.
• Bağlı aygıttaki DRM dosyaları oynatılmaz.
• ULTRA HD videolar (3840 x 2160) desteklenmez.
29

TÜRKÇE
Premium
Premium işlevini kullanmak için
SMART PREMIUM
Bu hizmet, ağa bağlı olduğunuz müddetçe video, haber ve UCC gibi içerik seçeneklerine dilediğiniz
zaman kolayca erişebilmenizi sağlar. Premium içerik için küresel olarak sağlanan içeriğe ek olarak
bölgenin kültürel ilgi alanlarını dikkate alan ülkeye özel hizmetler sunulur.
• Gösterilen şekil Monitörünüzden farklı olabilir.
Premium
30
Premium hizmeti, internet bağlantınızdan etkileniyor.
1
Arama
2
Oturum aç.
3
Premium içerik. Kullanmak istediğiniz İçeriği seçin.
4
Uygulamalarıma Ekle
5
Seçenekleri ayarlar.
Uygulamalarıma Ekle Opsiyon

TÜRKÇE
Ücretli içeriği kullanmak için
Bazı Premium içerikler için ücret ödenmesi gerekebilir. Ücretli servislerin ödemeleri LG Electronics'in
özel faturalandırma sistemi veya ilgili içerik sağlayıcısı üzerinden yapılabilir.
LG faturalandırma sistemini kullanmadan önce ücretli içerikleri satın alabilmek için monitörde
veya web sitesinde (www.lgappstv.com) üyelik için kaydolmanız ve ödeme bilgilerini kaydetmeniz
gerekir.
Monitörünüzün oturum açma ekranında veya web sitemizde üyelik için kaydolabilirsiniz. Ardından
tek bir kullanıcı adı ile hem monitörde, hem de web sitesinde oturum açabilirsiniz.
1 Giriş yapmak için Ana sayfanın sağ üst köşesindeki Giriş Yap düğmesine tıklayın.
2 İstediğiniz Premium hizmete gider.
(Bazı Premium hizmetler için Premium hizmete kaydolduktan sonra ayrıca giriş yapmanız
gerekebilir.)
3 İçeriğe ilişkin yatlandırma ve hizmet bilgilerini gözden geçirdikten sonra Satın al düğmesine
tıklayın. (İçeriğe bağlı olarak kullanım süresinde ve sayısında kısıtlamalar olabilir.)
4 Satın alma işlemi tamamlandıktan sonra Satın Al düğmesine tıklayarak satın aldığınız içeriği
görüntüleyebilirsiniz.
5 Ana ekranın üst menüsünde kullanıcı adınızı seçin ve Sayfam
öğesinden satın alma geçmişinizi kontrol edin. Ayrıca web sitesindeki (www.lgappstv.com)
Sayfam Satın Alma Geçmişi öğesini de kullanabilirsiniz.
• Web sitesi (www.lgappstv.com) bazı ülkelerde kullanılamamaktadır.
Ödeme sorgulama
Premium işlevini sıfırlamak için
SMART PREMIUM Opsiyon Premium'un Başlatılması
Premium listesini, Premium bilgilerini ve kullanıcı oturum açma bilgilerini sıfırlar. Sıfırlama,
Premium güncellemesi sırasında ortaya çıkan hataları çözer.
• Servis sağlayıcıları tarafından sunulan içerik, hizmet kalitesini geliştirmek amacıyla önceden
haber verilmeden değiştirilebilir veya silinebilir. Sorular, sorun giderme veya içerikle ilgili en
güncel bilgiler için ilgili içerik sağlayıcısının web sitesine bakın. Bir hizmet, servis sağlayıcı
tarafından artık sunulmuyor olsa dahi LG Electronics, içerik hizmetleri ve ilgili bilgiler için yasal
herhangi bir sorumluluk almaz.
• Premium hizmetinizin kalitesi, İnternet bağlantınıza göre değişir. İnternet hızı veya diğer
hizmet sorunlarıyla ilgili sorularınız için İnternet servis sağlayıcınıza başvurun.
• En iyi hizmet kalitesi için 4,0 Mbps (1,5 Mbps veya daha hızlı) hız sağlayan bir İnternet
hizmetine abone olmanızı öneririz. İnternet hızıyla ilgili herhangi bir sorun yaşarsanız İnternet
servis sağlayıcınıza başvurun.
• Bazı içerik sağlayıcıları, çocuklar için uygun olmayan içerikler sunabilir. Ebeveyn denetimi
tavsiye edilir.
31
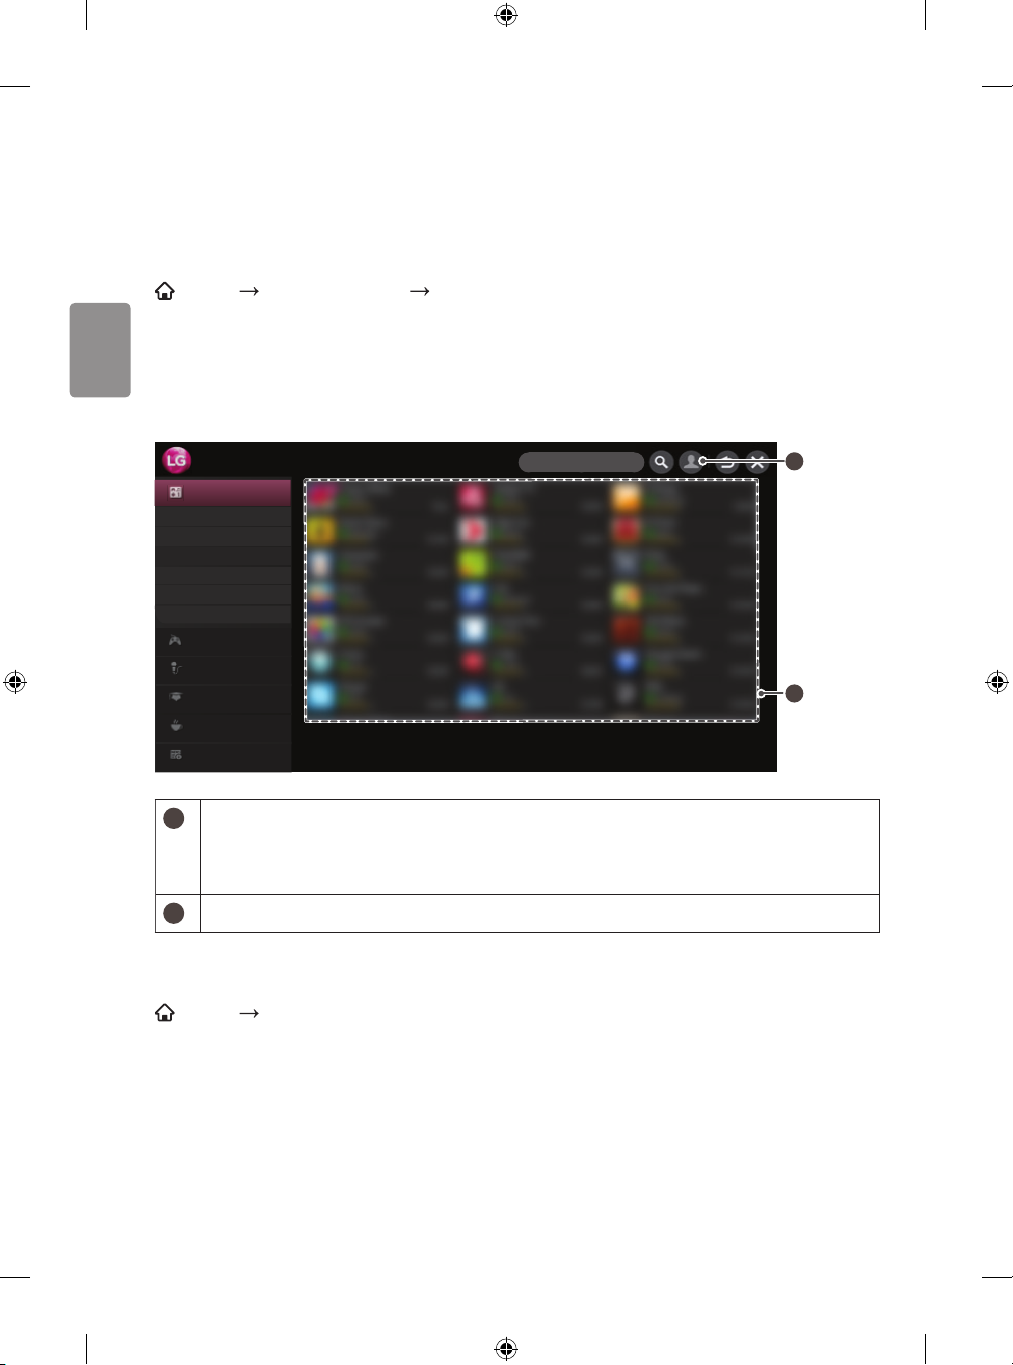
TÜRKÇE
LG Smart World
LG Smart World’ü kullanmak için
[Bu özellik yalnızca belirli ülkelerde bulunur.]
SMART UYGULAMALARIM LG Smart World
LG Smart World, Smart monitör Hizmeti aracılığıyla erişilebilen bir monitör uygulama hizmetidir.
Eğitim, eğlence, yaşam ve haber konulu çok çeşitli ücretli / ücretsiz uygulamaları indirebilir ve
kullanabilirsiniz.
• Gösterilen şekil Monitörünüzden farklı olabilir.
SMART WORLD
Tümü
Popüler
En İyi Ödemeli
En İyi Ücretsiz
Yeni
18+
Toplam
Oyun
Eğlence
Yaşam
Eğitim
Haber/Bilgi
1
Giriş yapın.
UYGULAMALARIM
1
2
Oturum açtığınızda kullanıcı adı görüntülenir. Kullanıcı adını seçtiğinizde Sayfam ve Çıkış
Yap öğesini seçebilirsiniz.
2
Kurulacak uygulamayı seçin.
LG Smart World’e kaydolmak için
SMART Giriş Yap
Uygulamaları indirmek ve çalıştırmak için kaydolmak gerekir.
1 Üye Ol öğesini seçin ve Kanuni Bildirimi kabul edin.
2 Kullanıcı adı ve parola girin.
3 Parolayı Onaylayın kutusuna parolayı yeniden girin.
4 Kaydolma işlemini tamamlamak için Kaydol öğesini seçin.
• Monitörünüzden veya web sitesinden (www.lgappstv.com) üyelik için kaydolabilirsiniz.
• Üyelik için kaydolduktan sonra monitörünüzde ve web sitemizde aynı kullanıcı adı ile oturum açın.
32

TÜRKÇE
• Tek bir kullanıcı adıyla beş adede kadar monitöre giriş yapabilirsiniz.
• Web sitesi (www.lgappstv.com) bazı ülkelerde kullanılamamaktadır.
Monitörünüze uygulama kurmak için
SMART UYGULAMALARIM LG Smart World
1 Oturum açmak için ana sayfa ekranının üst kısmındaki Giriş Yap düğmesine tıklayın.
2 LG Smart World kartını seçin.
3 Listeden istediğiniz bir uygulamayı seçin.
4 Uygulamanın bilgilerini kontrol edin, ardından Kur veya Satın Al öğesini seçin.
5 Uygulamayı kurmak için gereken işlevlere veya monitör aksesuarlarına sahip olup olmadığınızı
kontrol edin ve ardından Tamam düğmesini seçin.
6 Ücretli uygulamalar için ödeme ve satın alma doğrulaması gerekir.
7 Kurulum tamamlandıktan sonra uygulamayı hemen çalıştırmak için Çalıştır öğesini seçin.
Hemen çalıştırmak istemiyorsanız Kapat öğesini seçin. Uygulamayı daha sonra çalıştırmak
istiyorsanız monitörde kurulu uygulamaların listesini görmek için Uygulamalarım öğesini seçin.
• Uygulamaları bilgisayar veya monitörden satın alabilirsiniz; ancak kurmak ve çalıştırmak için
monitörü kullanmanız gerekir.
• Monitörünüzdeki depolama alanı yetersizse uygulamaları monitörün USB uygulamaları
terminaline takılı bir USB depolama sürücüsüne indirebilirsiniz. USB'de depolanan uygulamalar
Uygulamalarım ekranından çalıştırılabilir / silinebilir / taşınabilir.
• Uygulama içeren USB Flash Sürücü, diğer veriler için kullanılamaz. (Yalnızca USB Uygulamaları
için)
Bilgilerimi yönetmek için
SMART UYGULAMALARIM LG Smart World
1 Giriş yapın.
2 Ekranın üst kısmında giriş yapmış olan kullanıcı adını seçin.
3 Sayfam öğesini seçin.
4 Üye Bilgileri, Satın Alınan Uygulamalarım Listesi ve monitöre Kurulu Uygulamalar Listesini
inceleyerek yönetir.
Bilgilerim Giriş yapmış olan kullanıcı adı hakkındaki temel bilgileri gösterir. Üyelik
bilgilerinizi değiştirmek için bilgisayarınızda www.lgappstv.com adresini
ziyaret edin.
Ödeme Sorgulama Giriş yapmış olan kullanıcı adının Ödeme Geçmişini gösterir.
Satın Alınan
Uygulamalar
Giriş yapmış olan kullanıcı adının Satın Alınan Uygulamalarım Listesini
gösterir. Satın alınan uygulamaları silebilir / yeniden kurabilirsiniz.
33
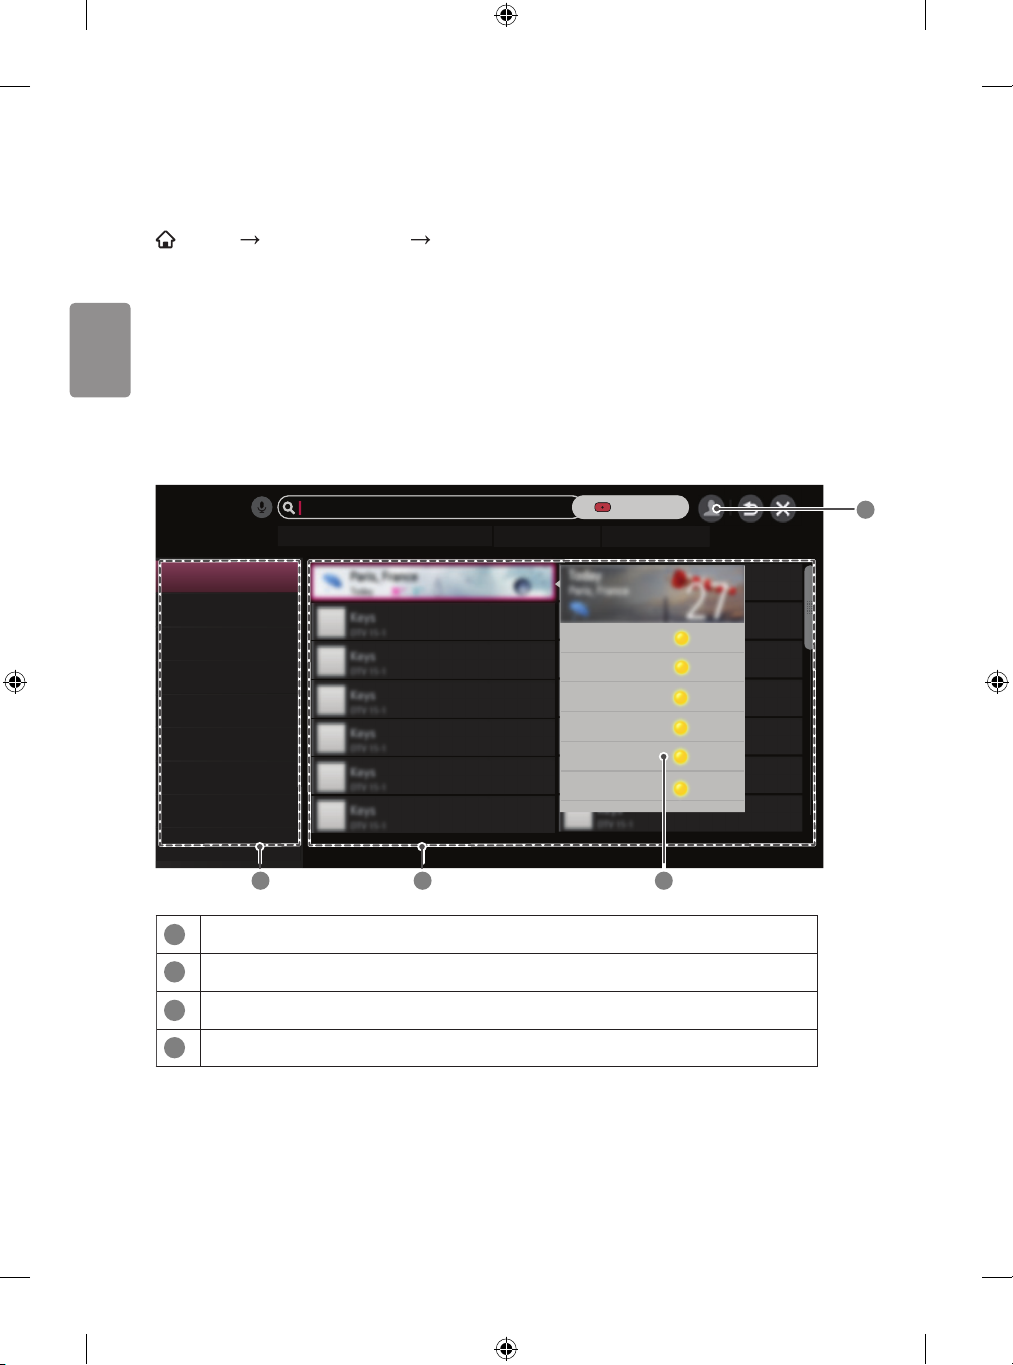
TÜRKÇE
Evrensel Arama
Arama işlevini kullanmak için
SMART UYGULAMALARIM Ara
LG Smart monitörün Ara işlevini kullanarak uygulama ve içerikleri arayabilirsiniz.
Uzaktan kumanda gibi bir giriş kaynağı kullanarak anahtar sözcük girdiğinizde LG Smart
World uygulamalarını ve bazı PREMIUM servis içeriklerini bulabilirsiniz. Aynı zamanda web'de
arama yapabilmeniz için bağlantılar da verilmiştir. SmartShare
SmartShareTM içeriğini de arayabilirsiniz. Ara kategorileri ve içerik türleri ülkeye göre değişiklik
gösterir ve güncellenmeye devam edecektir.
• Gösterilen şekil Monitörünüzden farklı olabilir.
TM
özelliğini kullanıyorsanız
ARAMA
Önceki Anahtar Sözcükler
Tümü
LG Smart World
YouTube
Web
1
Arama terimlerini girin.
2
Arama sonuçları kategorisi.
3
Arama sonuçları.
4
Arama öğesi hakkında ayrıntılı bilgi.
hava
hava yağmur festival suç
2 3 4
ARAMA
1
34

TÜRKÇE
Ses Tanıma
Ses tanıma işlevini kullanmak için
• Bu özellik yalnızca belirli ülkelerde mevcuttur.
Bu işlevi arama üzerinden kullanma
1 SMART UYGULAMALARIM (Ara) öğesine gidin. Metin alanının solundaki ses
tanıma simgesini ( ) seçin.
2 Ses tanıma penceresi açıldıktan sonra yavaşça ve net bir şekilde konuşun.
3 Ses tanıma tamamlandıktan sonra Benzer Liste penceresi açılır. Açılan pencerede istediğiniz
sonuçlar yoksa Yeniden Dene'ye basarak yeniden deneyin. En benzer sonucu seçtikten sonra
sonuç metin alanında gösterilir. İstediğiniz sonucu almak için (Ara) düğmesine basın.
Bu işlevi İnternette kullanma
1 SMART UYGULAMALARIM İnternet öğesine gidin. Klavye penceresini açmak için
Sihirli Kumanda imlecini portal sitesinin metin alanına götürün.
2 Sanal klavyede, metin alanının solundaki ses tanıma simgesini ( ) seçin.
3 Ses tanıma penceresi açıldıktan sonra yavaşça ve net bir şekilde konuşun.
4 Ses tanıma tamamlandıktan sonra Benzer Liste penceresi açılır. Açılan pencerede istediğiniz
sonuçlar yoksa Yeniden Dene'ye basarak yeniden deneyin. En benzer sonucu seçtikten
sonra sonuç metin alanında gösterilir. İstediğiniz sonucu almak için web sitesindeki Arama
düğmesine basın.
• Web sitesi (www.lgappstv.com) bazı ülkelerde kullanılamamaktadır.
• Tanınan sonuç metin alanındayken ses tanıma işlevini yeniden denerseniz yeni sonuç önceki
sonucun yerine geçer.
• Sihirli Kumanda'da (
Sesli Arama işlevini kullanabilirsiniz.
• Ses tanıma işlevimi kullanmadan önce ağ bağlantısını kontrol edin.
• Uzaktan kumandayı yüzünüze 10 cm'den fazla yaklaştırmamanız önerilir.
• Çok hızlı veya çok yavaş konuştuğunuzda ses tanıma özelliği başarısız olabilir.
• Tanıma hızı, kullanıcının konuşma özelliklerine (ses, telauz, tonlama ve hız) ve ortama (gürültü
ve monitör sesi) göre değişiklik gösterir.
• Ses tanıma dilini değiştirmek için SMART AYARLAR OPSİYON Dil(Dil) Sesli
Arama Dili öğesine gidin.
• SMART AYARLAR OPSİYON Avatar'a bakın öğesinde Avatar'ı Açık / Kapalı
olarak ayarlayabilirsiniz.
) düğmesine bastığınızda ekranınızda QWERTY klavye görüntülense dahi
35
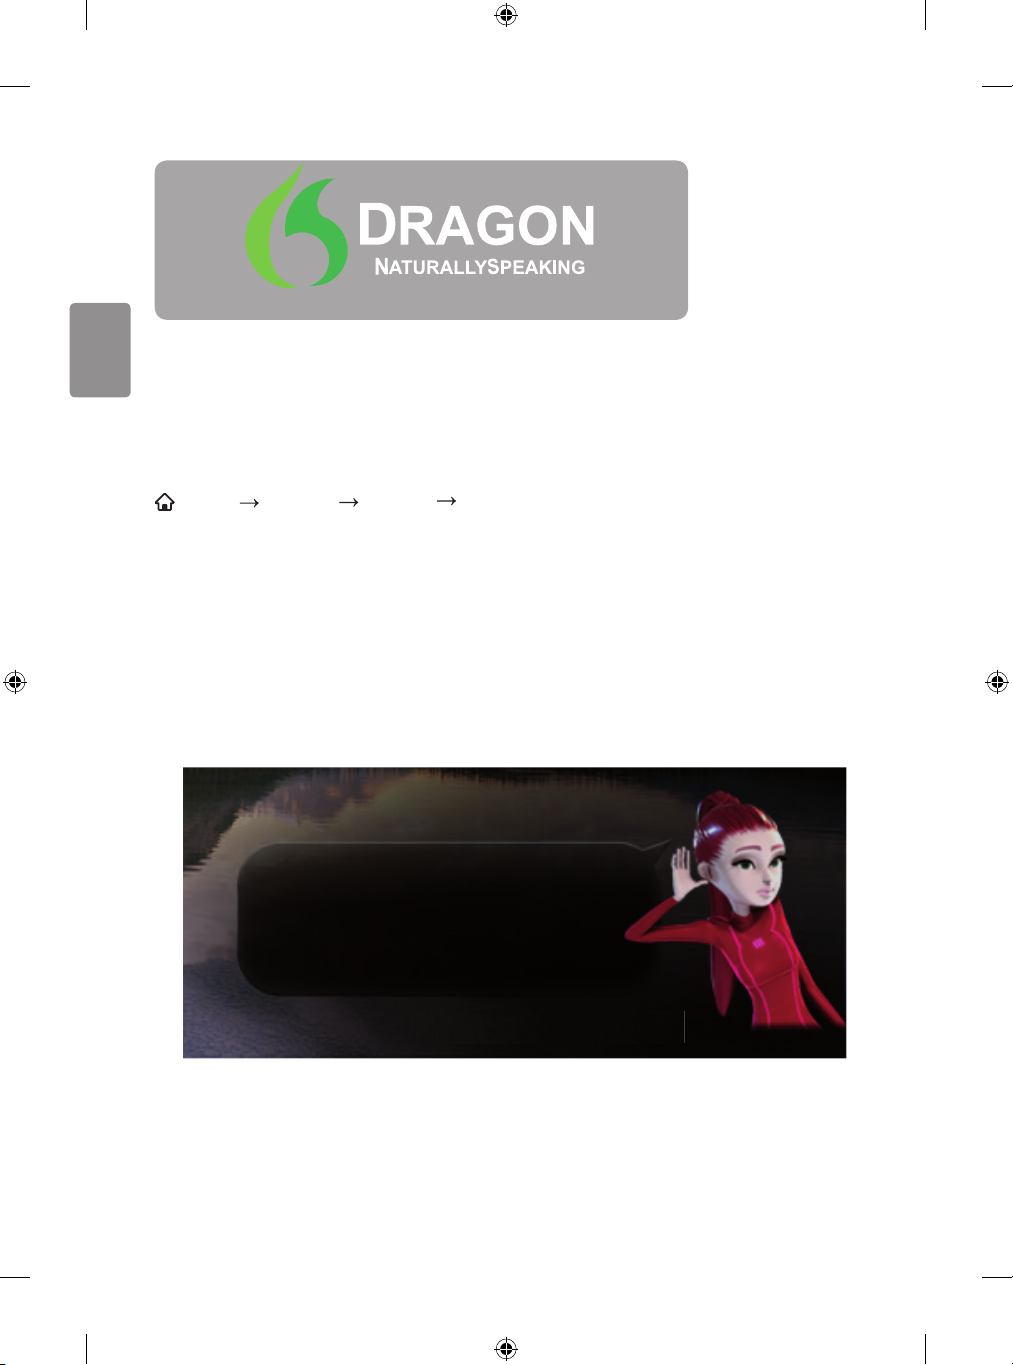
TÜRKÇE
desteğiyle
Avatar’a bakın
Avatar’ı kullanma
SMART AYARLAR OPSİYON Avatar'a bakın
Ses tanımayı kullanırken avatar kullanabilirsiniz. Avatar mesajı ile ses tanımayı kontrol edebilirsiniz,
bu sayede konuşmanızı doğru bir şekilde kaydedersiniz.
• Avatar'a bakın öğesini Açık olarak ayarlarsanız avatar ekranın sağ alt kısmında etkinleşir.
• Avatar'a bakın öğesi Kapalı olarak ayarlanmış olsa bile ses tanıma desteklenmeye devam
eder.
• Avatar'a bakın seçeneğinin konuşma balonu kılavuzu ses tanıma özelliklerine, dillere ve
modellere bağlı olarak değişebilir.
• Gösterilen şekil monitörünüzden farklı olabilir.
36
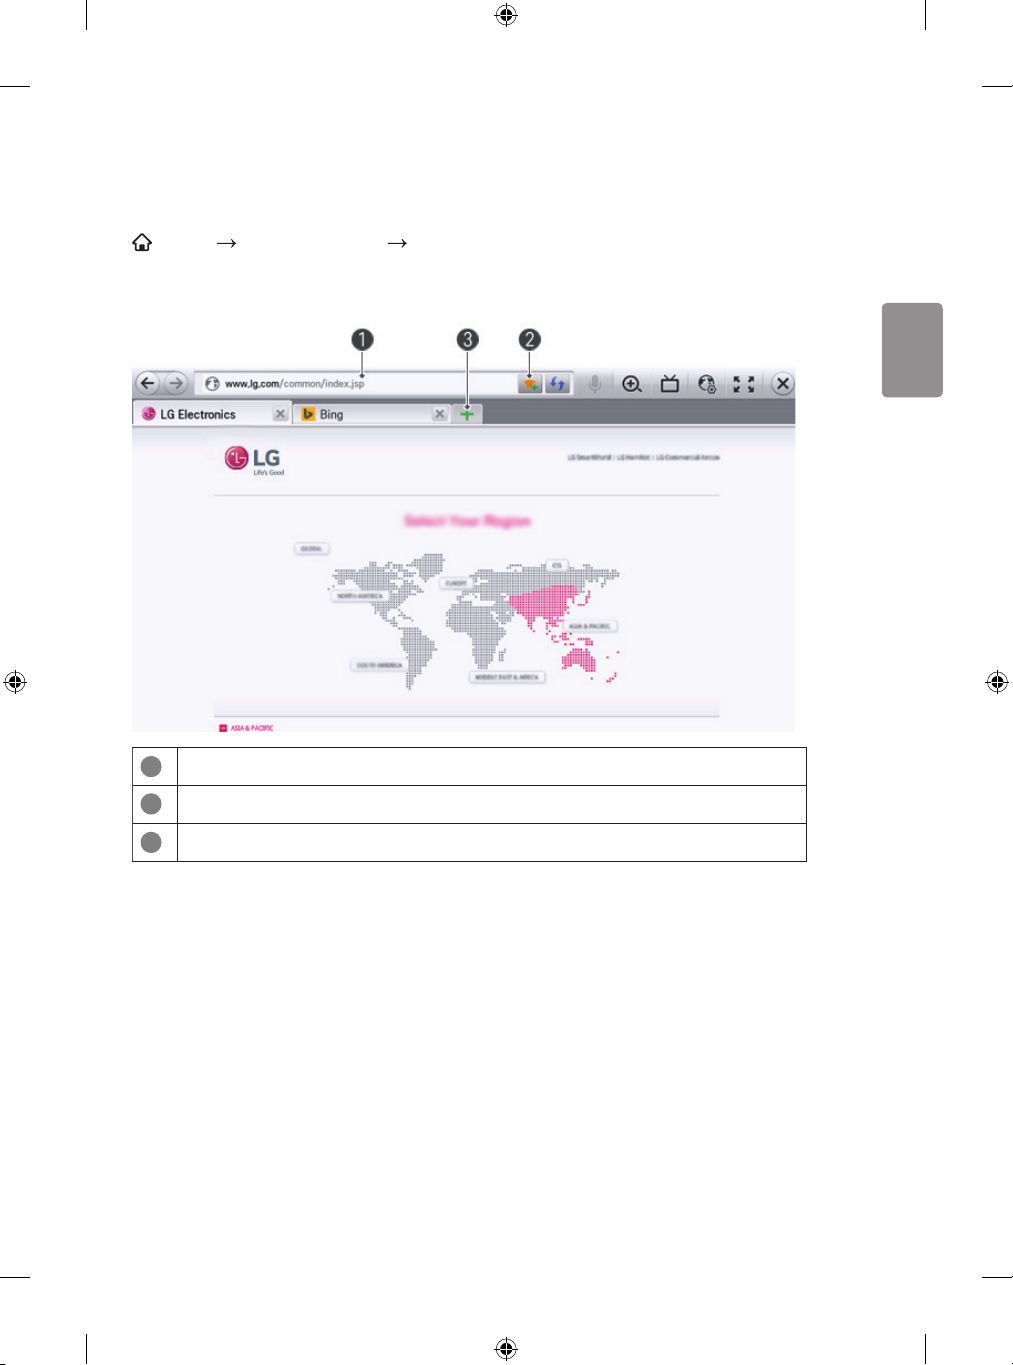
İnternet
İnterneti kullanmak için
SMART UYGULAMALARIM İnternet
URL'yi monitöre manuel olarak yazar ya da Favori listesine eklenen web sitelerini ziyaret eder.
• Gösterilen şekil Monitörünüzden farklı olabilir.
1
Web adresi yazma alanı.
2
Geçerli sayfayı favorilere ekler.
3
Web tarayıcınızda farklı sekmeler açmanıza ve aralarında geçiş yapmanıza yarar.
TÜRKÇE
• İnternet Flash 11'i destekler; ancak ActiveX gibi platforma bağlı teknolojiyi desteklemez.
• İnternet yalnızca önceden kurulmuş eklentiyle çalışır.
• İnternet, JPEG/PNG/GIF dışındaki medya dosya biçimlerini oynatamayabilir.
• İnternet, bellek yetersiz olduğunda zorunlu olarak kapanır.
• İnternet için monitörde kurulu olan yazı tipleri kullanılır ve oynatılan içeriğe bağlı olarak
normal bir şekilde görüntülenmeyebilir.
• İnternet dosya ve yazı tipi indirme işlevlerini desteklemez.
• İnternet monitör için üretilmiştir, dolayısıyla bilgisayar için üretilmiş tarayıcılardan farklı işleve
sahip olabilir.
• İnternet bir monitör tarayıcısıdır ve bazı içerik dosyalarını oynatırken düzgün çalışmayabilir.
37

TÜRKÇE
Smart monitör hakkında Sık Sorulan Sorular
LG Smart World'ü kullanmak için kaydolmak gerekir.
Kaydolur olmaz ücretsiz uygulamalara erişebilirsiniz; ancak ücretli uygulamaları kullanabilmek için
ödeme yönteminizi kaydetmeniz gerekir.
Monitör veya web sitemiz üzerinden kaydolabilir ve ödeme yöntemlerinizi kaydedebilirsiniz. (
lgappstv.com
Sorun Çözüm
Menüye her girildiğinde
"Başlatılıyor" mesajı
görünüyor.
)
• "Başlatılıyor" mesajı mikro işlemci ve donanımı yeniden
başlatma, ağ iletişimleri ve SDP iletişimlerini (aygıt kimliği
doğrulama ve temel bilgileri indirme) kurarken geçen
süreyi gösterir. Yaklaşık 20 saniye sürer ve normal bir
işlemdir.
www.
İnternet özelliklerini kullanırken
bazı Web sayfalarında boş alan
görünüyor.
Bir web sitesini ziyaret ederken
İnternet otomatik olarak
kapanıyor.
Monitörde zaten kaydoldum.
Web sitesinde tekrar
kaydolmam gerekiyor mu?
www.lgappstv.com
(
Her aile üyesi tek monitör
ile farklı bir kullanıcı adı
kullanabilir mi?
)
• Monitörün internet işlevini Flash 11'e kadar destek verir ve
JPEG, PNG, GIF dışındaki dosya biçimlerini oynatamayabilir.
• Web sayfasındaki görüntü bilgilerinin yüksek hacimli
olması nedeniyle bellek yetersiz kalıyorsa İnternet zorunlu
olarak kapanabilir.
• Monitörünüzde kaydolduysanız LG web sitesinden (
lgappstv.com
Monitörünüzde kaydolduktan sonra web sitesine giriş
yapmak için aynı kullanıcı adını/şifreyi kullanın ve ek
bilgileri girerek e-posta doğrulama işlemini tamamlayın.
• Tek monitörde birden fazla kullanıcı adı kaydetmek ve
kullanmak mümkündür.
• Monitöre kayıtlı kullanıcı adını kontrol etmek için
SMART Oturum Aç Kullanıcı Adı Listesi
öğesine gidin.
• Her kullanıcı adı tarafından satın alınmış uygulamaların
listesini kontrol edebilirsiniz. Ancak her kullanıcı adı
tarafından kurulan tüm uygulamaları
Oturum Aç Sayfam altında görebilirsiniz.
) tekrar kaydolmanız gerekmez.
SMART
www.
38

TÜRKÇE
Sorun Çözüm
Kullanıcı adımı unutursam ne
yapmalıyım?
LG Apps Web sitesinden
uygulama satın aldım. Bunu
monitörde nasıl kullanabilirim?
Satın aldığım uygulamaların
geçmişini görebilir miyim?
Ücretli bir uygulamayı sildim.
İndirmek için tekrar satın almam
gerekiyor mu?
• Bilgisayarda kaydolduktan sonra gerektiğinde web
sitesindeki (www.lgappstv.com) "Kullanıcı Adınızı mı
Unuttunuz?" özelliğini kullanın.
• Monitörde kaydolduktan sonra
Kimliği Bul öğesine bakın.
• Satın alınan uygulamaları monitörden kontrol etmek için
giriş yapın ve Satın Alınan Uygulamalar menüsünü açın.
Ana ekranın üst kısmındaki kullanıcı adını seçin ve
Sayfam
uygulamayı kontrol edin.
• Ana ekranın üst kısmındaki kullanıcı adını seçin ve
Sayfam
uygulamayı kontrol edin.
• Web sitesine (
Satın Alma Geçmişi öğesini seçin.
• Satın alınan bir uygulama yanlışlıkla silinirse uygulama
hizmet verdiği müddetçe yeniden satın almaya gerek
olmadan indirebilir ve yeniden yükleyebilirsiniz.
Ana ekranın üst kısmındaki kullanıcı adını seçin ve
Sayfam
uygulamaları yeniden indirin. (Yazılım sürümüne bağlı
olarak önceden sahip olunan uygulamalar yeniden
indirilmeyebilir veya çalışmayabilir.)
Satın Alınan Uygulamalar bölümünden
Satın Alınan Uygulamalar bölümünden
www.lgappstv.com
Satın Alınan Uygulamalar bölümünden
SMART Oturum Aç
) giriş yapın ve Sayfam
LG Smart monitörün LG Smart
World uygulamalarını hem
monitörde, hem de bilgisayarda
kullanabilir miyim?
Monitörde oturum açmış olan
kullanıcı adını nasıl kontrol
edebilirim?
• Lütfen monitör modelinin LG Smart World'ü destekleyip
desteklemediğini kontrol edin.
• LG Smart monitörün LG Smart World uygulamaları
yalnızca LG Smart Monitörde kullanılabilir.
• Uygulamalar web sitesinden (www.lgappstv.com) satın
alınabilir ancak PC veya Mac bilgisayarda kullanılamaz.
Satın alırken dikkatli olun.
• Ana ekranın üst kısmındaki kullanıcı adını seçin ve
oturum açmış olan kullanıcı adını Sayfam
bölümünden kontrol edin.
Bilgilerim
39

TÜRKÇE
Sorun Çözüm
Monitöre bir uygulama kurdum.
Kurulmuş uygulamayı nereden
kontrol edebilirim?
Ekranda gösterilen uygulamanın
boyutu ile monitöre kurulmuş
olan asıl uygulamanın boyutu
arasında fark var.
Monitörde şifremi unuttum. Ne
yapmalıyım?
Ücretli uygulamaları satın
almak için web sitesine ödeme
bilgilerini kaydetmem gerekiyor
mu?
SMART Uygulamalarım öğesini seçin. Monitöre
•
kurulmuş olan tüm ücretli ve ücretsiz uygulamalar
görüntülenir.
• Ekranda gösterilen uygulamanın boyutuna uygulamaları
kurmak için gereken ek alan dahildir, bu yüzden kurulan
asıl uygulamanın boyutundan farklı olabilir.
• Monitörünüzde kaydolurken sadece kullanıcı adı ve şifreyi
sağlarsanız şifrenizi kaybettiğinizde kurtaramazsınız. Yeni
bir kullanıcı adı oluşturun ve bu kullanıcı adıyla kaydolun.
• Monitörünüzde veya LG web sitesinde (www.lgappstv.
com) kaydolurken kullanıcı adı ve şifre dışındaki bilgileri de
sağlarsanız şifrenizi web sitesi üzerinden kurtarabilirsiniz.
• Monitörünüzde ücretli uygulamaları satın almak için şu
ödeme yöntemlerini kullanabilirsiniz: kredi kartı, kredi ve
operatör faturalandırması.
Kredi kartı veya kredilerinizi kullanarak ücretli uygulama
satın almak için LG web sitesine (www.lgappstv.com)
kayıtlı bir kredi kartınız veya yeterli krediniz olmalıdır.
Kredi kartı bilgileriniz web sitesinde kayıtlı değilse veya
yeterli krediniz yoksa operatör faturalandırma yöntemiyle
de ücretli uygulamaları satın alabilirsiniz. Web sitesinde
ücretli uygulama satın alıyorsanız şu ödeme yöntemlerini
kullanabilirsiniz: kredi kartı veya kredi.
Satın aldığım bir uygulamayı
iptal edebilir miyim?
40
• Bir üye olarak satın alma işlemi sonrasında krinizi
değiştirdiğiniz için para iadesi isteyemezsiniz.
• Üründe bir hasar varsa veya ürünü kullanırken sizden
kaynaklanmayan bir sorun oluşursa para iadesi
isteyebilirsiniz. Ancak para iadesi almak için geçerli bir
nedeniniz olmalıdır.

TÜRKÇE
Sorun Çözüm
Monitörümde kaydoldum
ancak ücretli uygulamaları satın
alamıyorum.
Kullanıcı adım için
sadece e-posta adresi mi
kullanmalıyım?
Kullanıcı adımın biçimini
e-posta adresine değiştirmeli
miyim?
LG hesabı nedir? • LG hesabı, tek bir kullanıcı adı ve şifreyle tüm LG Smart
• Ücretli uygulamaları satın almak için web sitesinde
(www.lgappstv.com) kayıtlı bir kredi kartınız olmalıdır.
Ayrıca uygulamaları satın almak için web sitesinden kredi
yüklemesi yapabilirsiniz.
Kredi kartı bilgileriniz kayıtlı değilse ya da yeterli krediniz
yoksa ücretli uygulamaları satın alamazsınız.
• Yeni kaydolan üyeler için kullanıcı adı biçimi, alfanümerik
kombinasyondan e-posta adresine değişmiştir.
• Kaydolurken kullanıcı adı olarak sadece e-posta adresi
kullanabilirsiniz.
• Yeni kaydolan üyeler için kullanıcı adı biçimi, rakam ve
harf kombinasyonundan e-posta adresine değişmiştir.
• Zaten üyeyseniz var olan kullanıcı adınızı kullanmaya
devam edebilir veya e-posta adresinize değiştirebilirsiniz.
hizmetlerinde oturum açmanızı sağlar. LG hesabınızla şu
hizmetleri kullanabilirsiniz: LG Smart monitör, LG Cloud,
LG Smart World (bazı ülkeler hariç), LG Smart ThinQ ve
LG Smart klima vs.
• Servise bağlı olarak daha fazla bilgi gerekebilir.
41

TÜRKÇE
13
46
79
Gelişmiş işlev
Ekran Uzaktan Kumandası
Uzak Ekran işlevini kullanmak için
* Sihirli Kumanda ve bağlantı aparatı ayrı ayrı satın alınmalıdır.
Sihirli Kumanda'daki
Sihirli Kumanda'yı kullanarak ekranda görüntülenen Uzak Ekran'ın bir düğmesini seçin.
Uzak Ekran işlevini kullanmak için
• Uzak Ekran üzerindeki düğme tipleri, bağlı aygıtın bölgesine veya tipine göre değişir.
• Gösterilen şekil Monitörünüzden farklı olabilir.
/INPUT düğmesine basın.
1
REHBER
Monitöre bağlı bir aygıtı Uzak Ekran ile kontrol etmek için
SIMPLINK üzerinden bağlı bir aygıtı Uzak Ekran'ı kullanarak kontrol edebilirsiniz.
1 Aygıtın monitöre bağlı olup olmadığını kontrol edin.
2 Sihirli Kumanda'da
kontrol etmek istediğiniz aygıtı seçin. Aygıtı kontrol edebilen Uzak Ekran görünür.
• Bu işlev bazı modeller için
LG
2
5
8
-0
MENÜ
Tamam
ÇIKIŞ
2
3
4
1
Aygıt Değiştir sekmesi.
2
Uzak Ekran'dan çıkar.
3
Uzak Ekran'ın konumunu sola ya da sağa taşır
4
Monitör işlem düğmeleri.
Düğmelerin tipi modele göre değişir.
/INPUT düğmesine bastıktan sonra Aygıt Değiştir sekmesinden
/INPUT düğmesiyle çalışmayabilir.
42

Çok Amaçlı Kumanda
Çok Amaçlı Kumanda işlevini kullanmak için
[Yalnızca Sihirli Kumanda için]
[Bu işlev yalnızca bazı ülkelerde kullanılabilir.]
Sihirli Kumanda ile bir set üstü kutuyu, Blu-ray oynatıcıyı, ev sineması sistemini vb. kontrol
edebilirsiniz.
1 Kurmak istediğiniz aygıtın monitörünüze bağlı olup olmadığını kontrol edin.
2 Sihirli Kumanda'da
istediğiniz aygıtın simgesini seçin. İstediğiniz aygıt bulunmuyorsa sekmede
basın ve istediğiniz harici aygıtı seçin. Kurulum tamamlandıktan sonra seçili aygıtın adı Aygıt
Değiştir sekmesinde görüntülenir.
3 Aygıt Değiştir sekmesinde istediğiniz bir aygıtı seçtiğinizde ekranda aygıtı kontrol edebilen
Uzak Ekran görünür. Daha fazla kontrol düğmesi görmek için Uzak Ekran'ın alt kısmındaki
öğesini seçin.
/INPUT düğmesine bastıktan sonra, Aygıt Değiştir sekmesinde
düğmesine
Çok Amaçlı Kumanda ayarlarını değiştirmek ya da silmek için
1 Sihirli Kumandada /INPUT düğmesine bastıktan sonra düğmesini seçin.
2 Değiştirilecek aygıtın alt kısmındaki Ayarları Değiştir ya da Ayarları İptal Et öğesini seçin.
• Ayarları değiştirirken değiştirilmekte olan aygıtın gücünün açık olup olmadığını kontrol edin.
• Her tip başına bir aygıt kurabilirsiniz.
• Uzak Ekran ile yalnızca kurulum ekranına seçebileceğiniz marka ya da üreticilerin aygıtlarını
kontrol edebilirsiniz.
• Çok amaçlı uzaktan kumandanın ayarını yapmadan önce bir ağa bağlanırsanız en yeni üretici
listesi güncellemesi yapılabilir.
• Bazı düğmeler harici aygıt modeline göre çalışmayabilir.
• İşlevin sorunsuz çalışması için aygıtı monitörün yanına yerleştirin.
• Aygıt çekmecedeyse çekmeceyi açın.
• SMART UYGULAMALARIM Çok Amaçlı Kumanda veya SMART
UYGULAMALARIM GİRİŞ LİSTESİ Çok Amaçlı Uzaktan Kumandayı Ayarla öğesine
gidin ve bir aygıt ekleyin, silin ya da değiştirin.
• Manuel olarak orijinal set üstü kutunun program numaralarından farklı program numaraları
atadıysanız program ayarlama özelliğinin düzgün çalışmayacağını unutmayın.
TÜRKÇE
43

Resim ve Video çekmek
Monitör kamerasını kullanarak resim çekmek için
Smart monitör kamerasını kullanarak resim ya da video çekebilirsiniz.
1 Smart Monitör kamerasını kullanıma hazırlayın. Smart monitörünüzde kamera yoksa bir
TÜRKÇE
LG görüntülü arama kamerası (AN-VC500, ayrı satılır) kurun. (Daha fazla bilgi almak için
kameranın kurulum kılavuzuna ya da kullanıcı kılavuzuna bakın.)
2
SMART UYGULAMALARIM Fotoğraf Makinesi öğesine gidin.
3 Resim çekmek için (Resim Modu) veya (Video Modu) öğesini seçin.
Resim çekmek için
SMART UYGULAMALARIM Fotoğraf Makinesi (Resim Modu) (Başlat)
Video çekmek için
SMART UYGULAMALARIM Fotoğraf Makinesi (Video Modu) (Başlat)
Video çekimini durdurmak için tekrar (Durdur) öğesine basın.
• Gösterilen şekil Monitörünüzden farklı olabilir.
44
1
Ayarlar.
2
Yakınlaştır / Uzaklaştır.
3
Resim çekin.
4
Resim modu.
5
Video modu.
6
Çekilen resmi / videoyu görüntüleyin.
 Loading...