How it Works
Log In / Sign Up
Buy Points
How it Works
FAQ
Contact Us
Questions and Suggestions
Users
LG
Loading...
#
327000.AEU
327000.BEU
32700H
2
328BG
329G
2
32BK50Q
32BL95U
2
32BN50U
32BN50U-B
2
32BN67U-B
3
32BN88U
32CL20
4
32CL20UA
32CL40
8
32CL40UA
32CM540-CA
32CS410
7
32CS410-TB
4
32CS410Y-TB
32CS411-TA
32CS411Y
2
32CS411Y-TA
32CS412-TD
32CS460
50
32CS460C
32CS460-DA
4
32CS460S
2
32CS460T
8
32CS460-TA
32CS460UC
3
32CS460Y
2
32CS460Y-TA
32CS461
17
32CS461-TB
2
32CS461-UA
2
32CS461Y-TB
32CS463
32CS465
3
32CS465-ZA
32CS466
32CS470
32CS470-TA
2
32CS480
4
32CS480-TA
2
32CS560
28
32CS560 3
32CS560-SD
2
32CS560-TD
2
32CS560-UE
3
32CS560Y
32CS560Y-TD
32CS560-ZD
32CS669C
3
32CS669C-ZD
32EP950-B
2
32FS1RMB
2
32FS1RMB-LM
32FS2AMB
32FS2ANB
2
32FS2ANX
2
32FS2RMB
3
32FS2RMP
5
32FS2RNB
3
32FS2RNB-TP
32FS2RNP
2
32FS2 series
32FS4D
7
32FS4D-TE
32FS4D-UC
32FS4RMB
3
32FS4RMP
2
32FS4RNB
3
32FS4RNP
32FS4 series
32FZ1DC
2
32FZ1DC-UB
3
32FZ4D
3
32FZ4D-UA
3
32GD640R-CB
32GK650F
2
32GK650F-B
11
32GK650G
2
32GK650G-B
4
32GK65B
32GK850F
2
32GK850F-B
9
32GK850G
2
32GK850G-B
8
32GN500-B
10
32GN550-B
4
32GN600-B
6
32GN650-B
11
32HIZ10
5
326
328
3260
3270
2
3280
2
326000
327000
Loading...
Loading...
Nothing found
32CS480-TA
Owner’s Manual
42 pgs
10.29 Mb
0
Owner’s Manual [fr]
42 pgs
9.62 Mb
0
Table of contents
Loading...
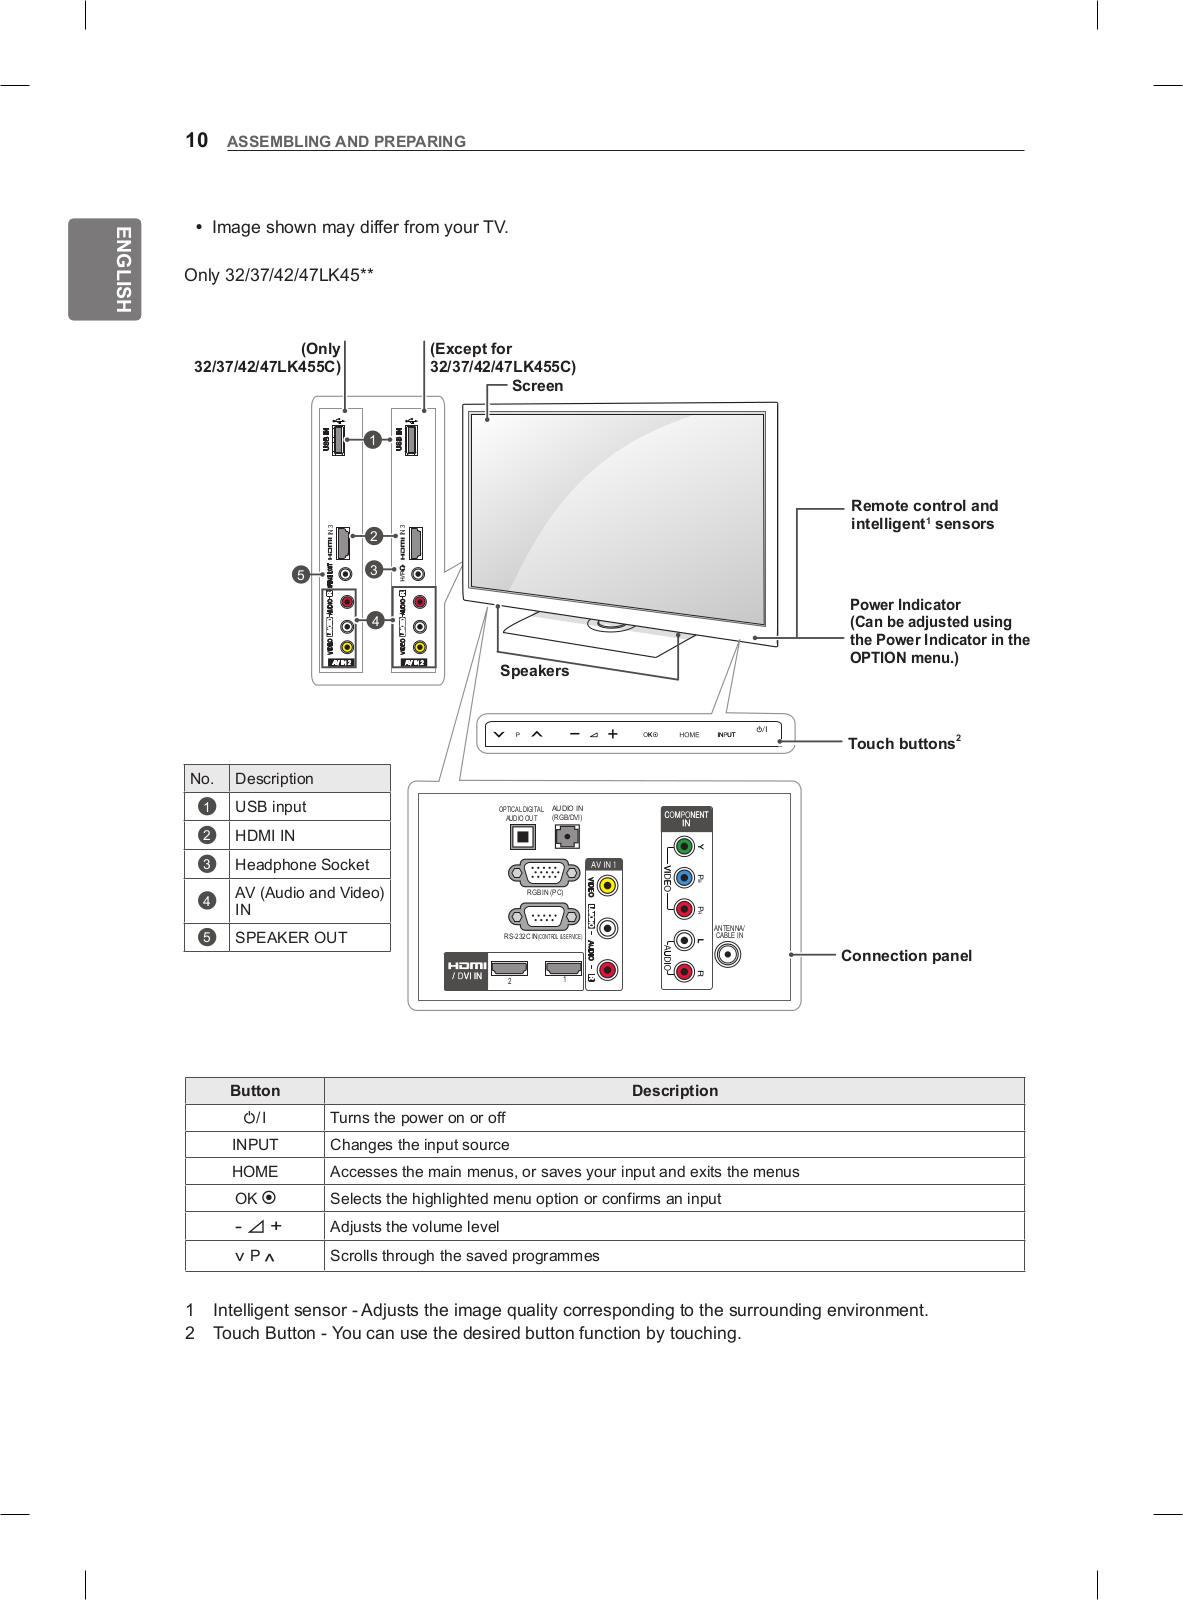
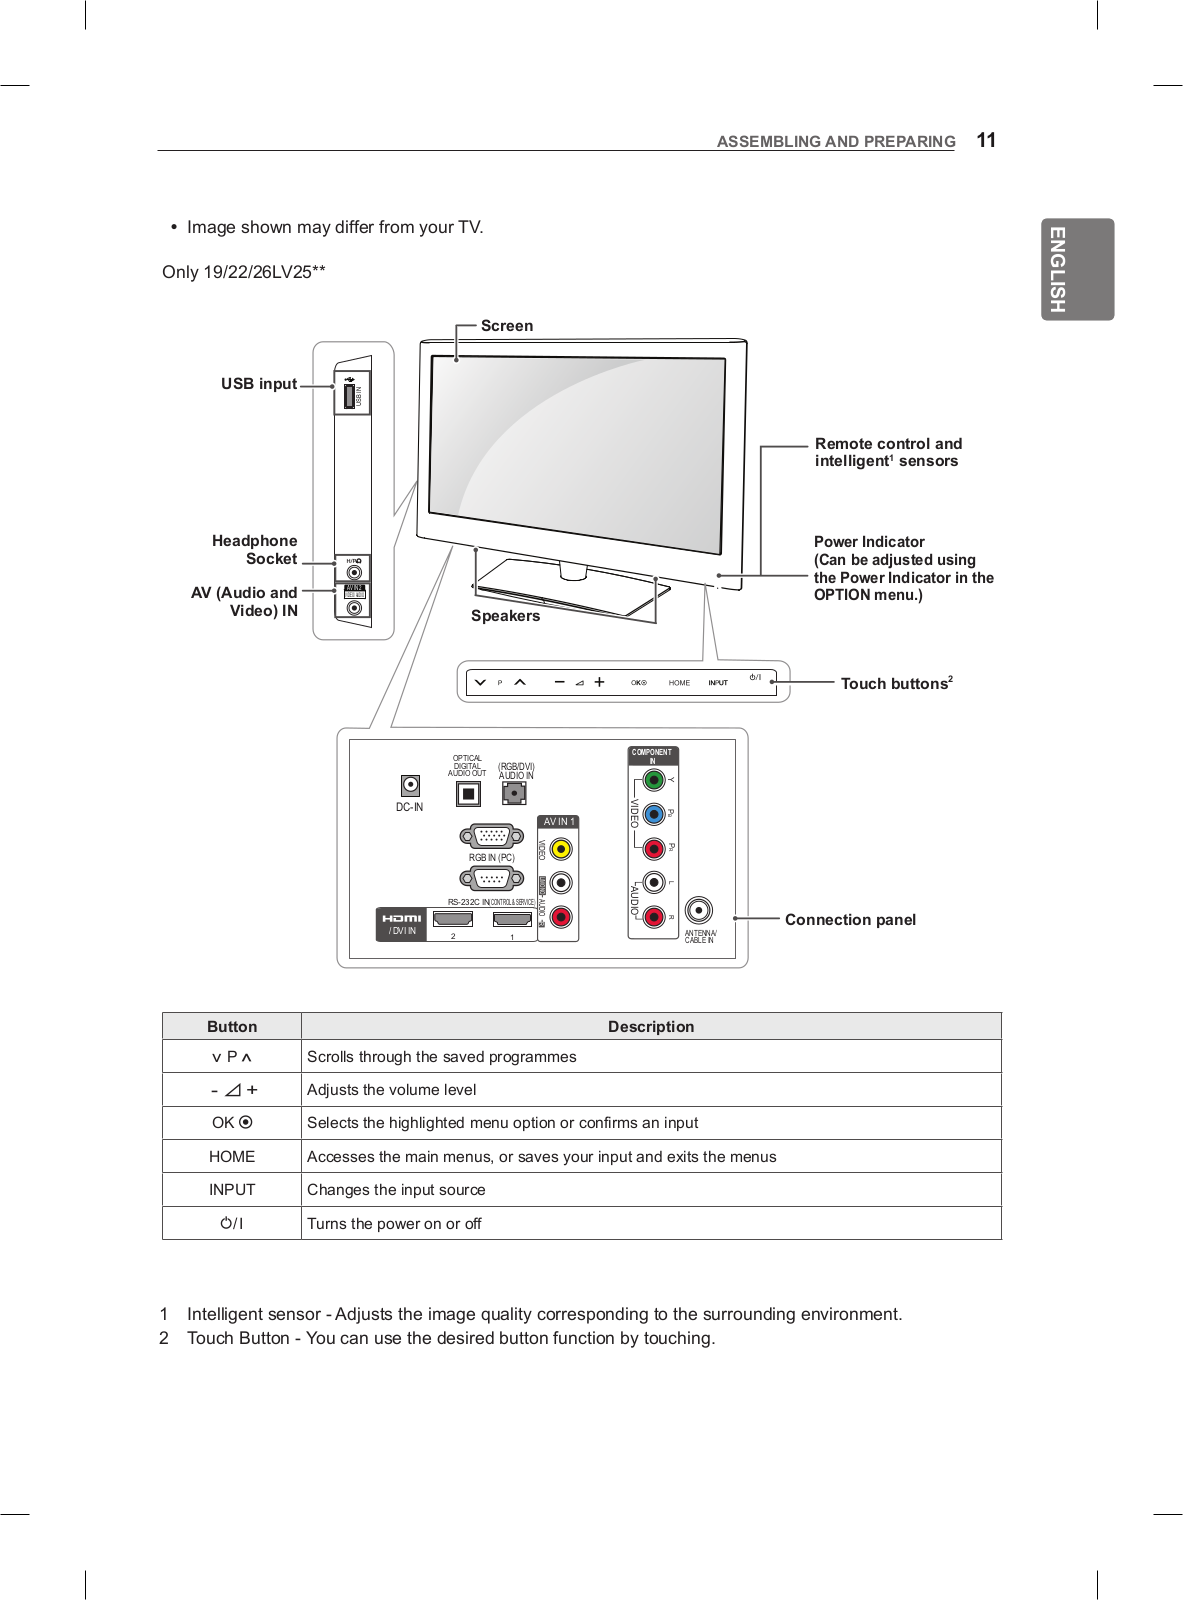
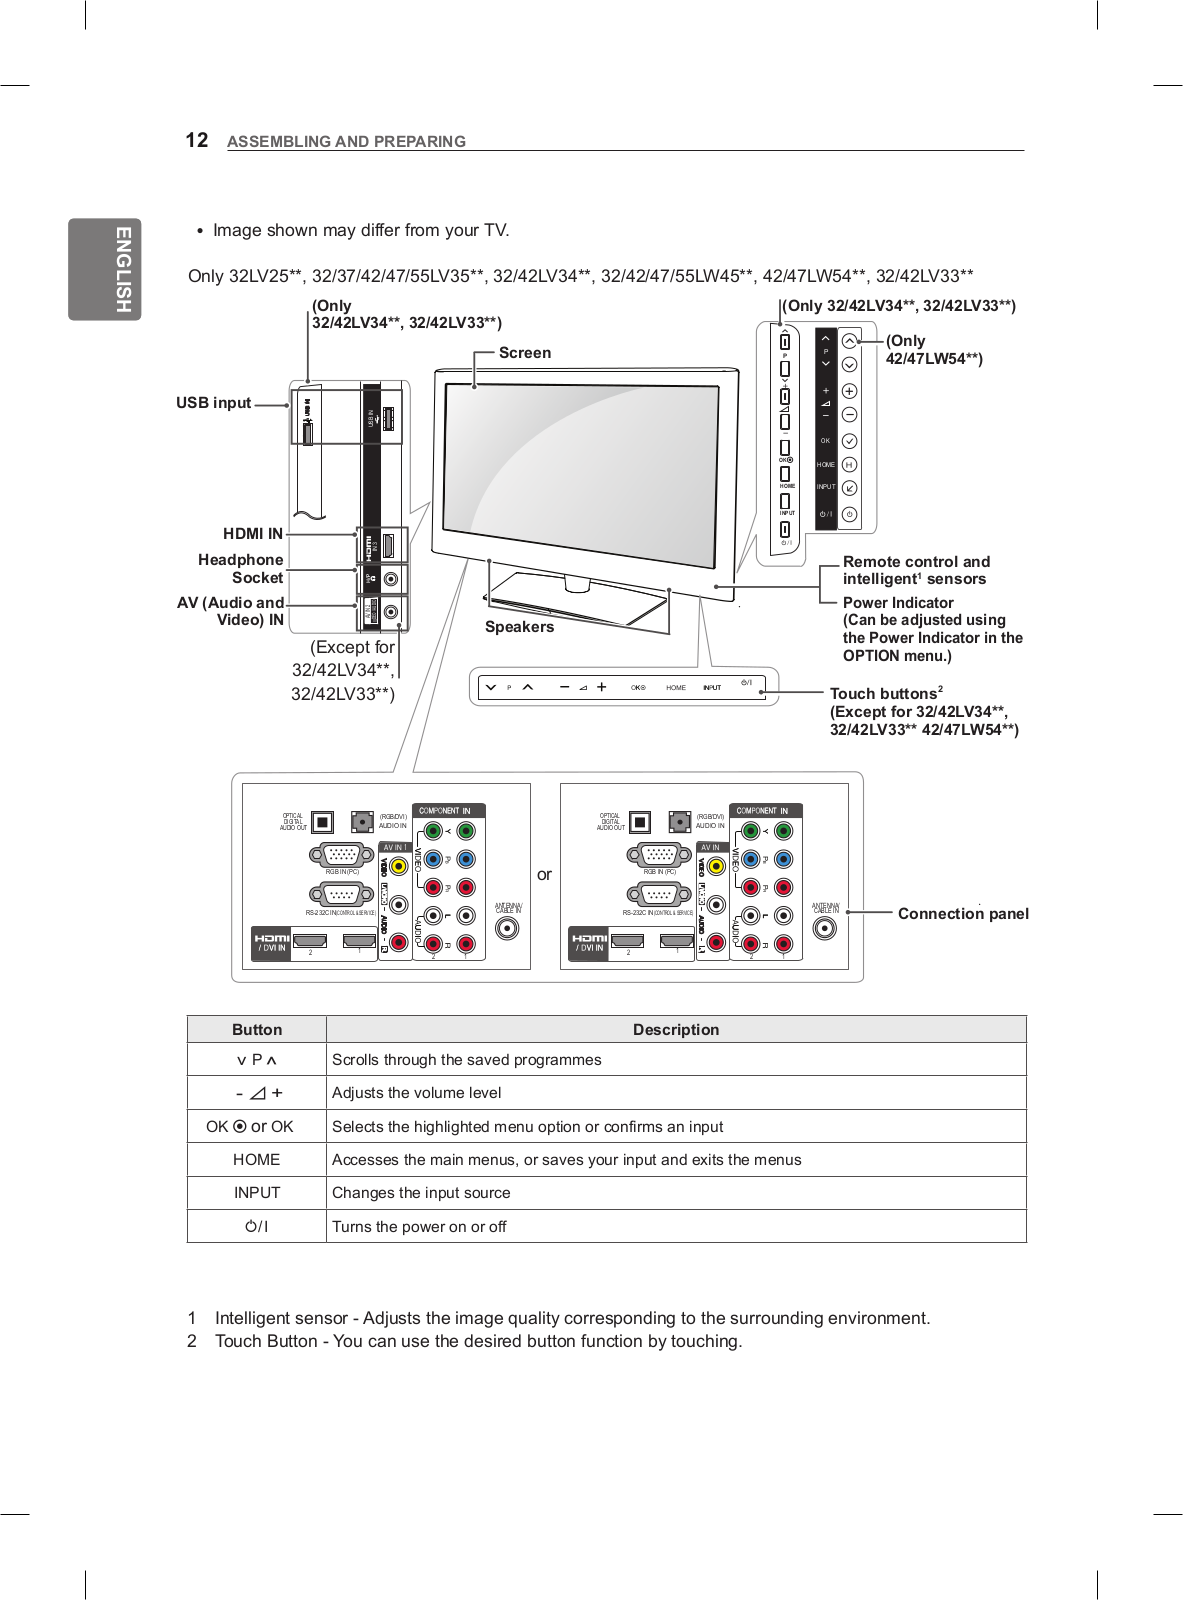
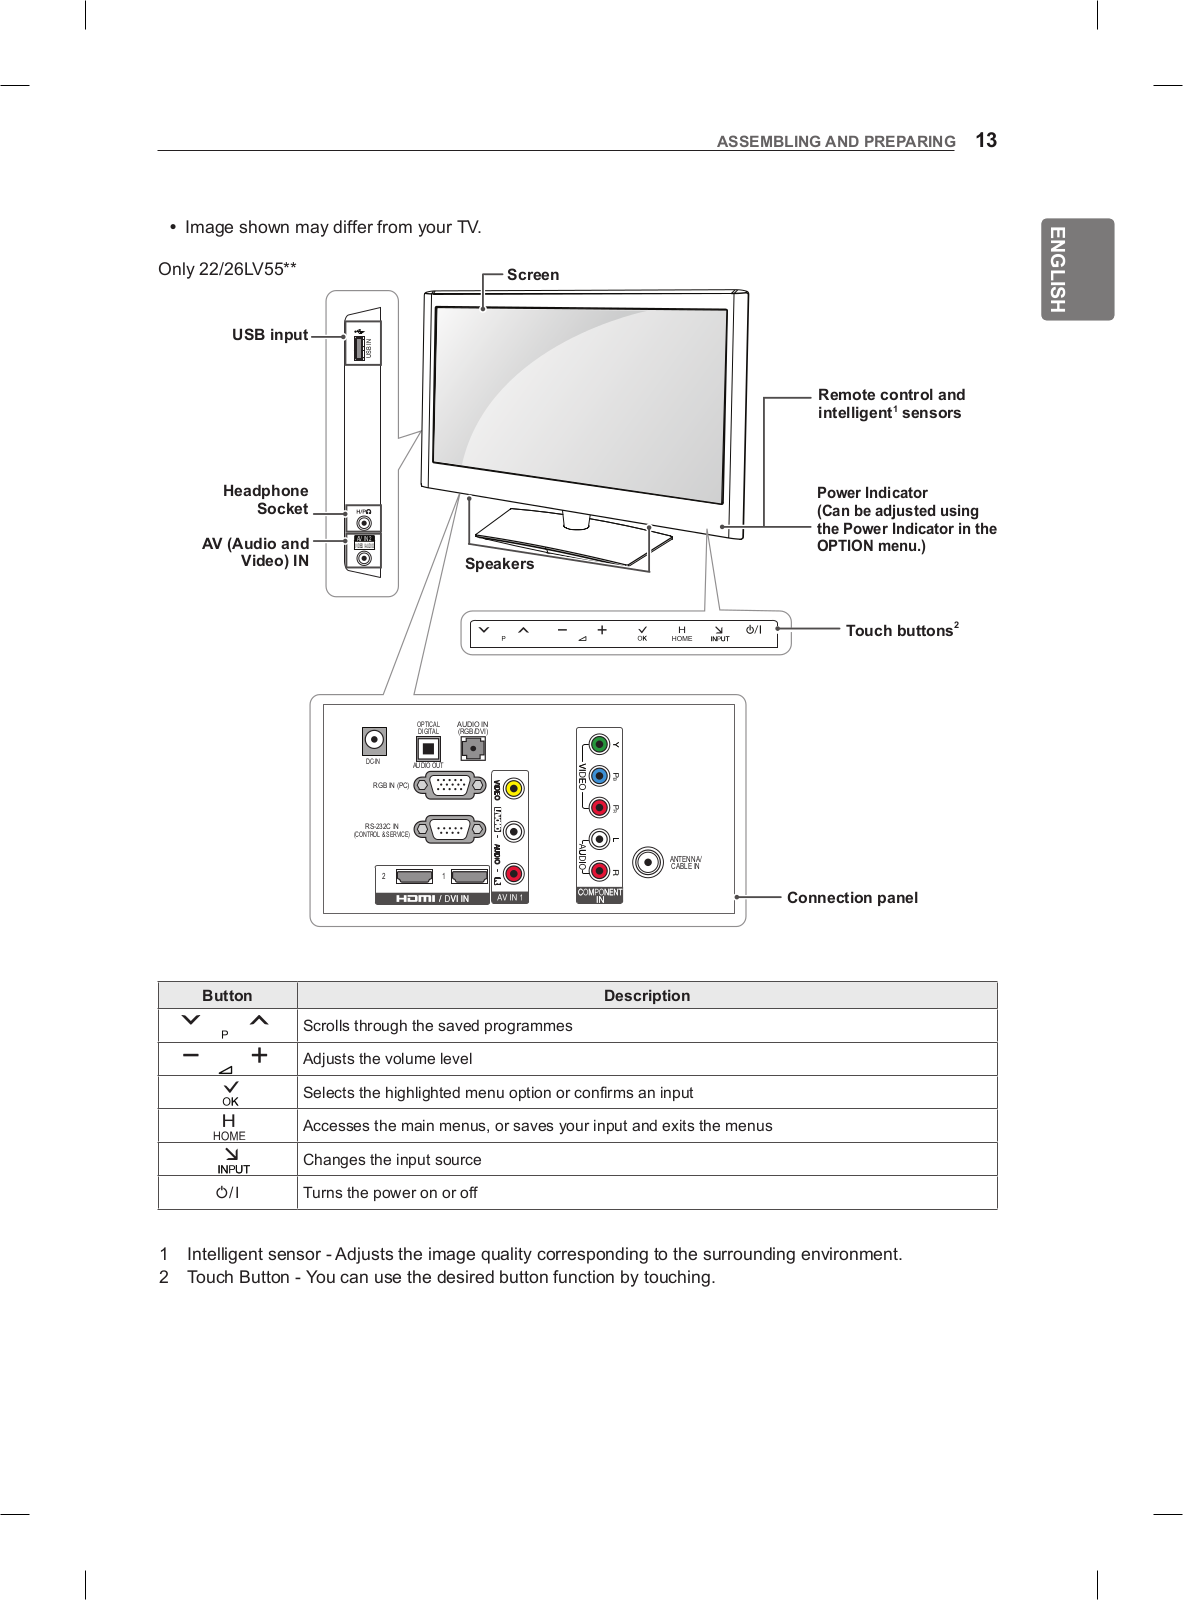
LG 32CS480-TA Owner’s Manual
...
LG Owner’s Manual
Download
Specifications and Main Features
Frequently Asked Questions
User Manual
Download
Loading...
+
29
hidden pages
Unhide
You need points to download manuals.
1 point = 1 manual.
You can buy points or you can get point for every manual you upload.
Buy points
Upload your manuals
 Loading...