

LG 22MN42A-PM Owner's Manual

ENGLISH
OWNER’S MANUAL
LCD TV
Please read this manual carefully before operating the
your set and retain it for future reference.
LCD TV MODEL
22MN42A
24MN42A
www.lg.com

TABLE OF CONTENTS
2
ENGLISH
CONTENTS
4 ASSEMBLING AND PREPARING
4 Unpacking
5 Parts and buttons
6 Lifting and moving the Monitor set
6 Setting up the Monitor set
6 - Attaching the Stand Base
6 - Detaching the Stand Base and Body
7 - Mounting on a table
8 - Mounting on a wall
10 REMOTE CONTROL
12 USING THE MONITOR SET
12 Connecting to a PC
12 - RGB connection
13 Adjusting the screen
13 - Selecting an image mode
13 - Customizing image options
14 - Customizing PC display options
14 Adjusting the sound
14 - Selecting an sound mode
15 - Customizing sound options
16 WATCHING TV
16 Connecting an antenna or cable
16 - Connecting an antenna or basic cable
16 - Connecting with a cable box
17 Accessing the Monitor set for the first
18 Watching TV
18 Managing channels
18 - Automatically setting up channels
18 - Manually setting up channels
19 - Editing your Channel list
19 - Favorite channel setup
20 Using additional options
20 - Adjusting aspect ratio
20 - Using the input list
21 - On-screen menu language
21 - Locking the buttons on the Monitor set
22 ENTERTAINMENT
22 Using integrated media features
22 - Connecting USB storage devices
23 - Browsing files
24 - Viewing Photos
25 - Listening to Music
27 CUSTOMIZING SETTINGS
27 Accessing main menus
28 Customizing settings
28 - CHANNEL settings
29 - PICTURE settings
31 - AUDIO settings
32 - TIME settings
33 - OPTION settings
34 - USB settings
35 MAKING CONNECTIONS
35 Connection overview
37 Connecting to a Camcorder, Camera,
HD receiver, DVD or VCR player, Gaming
device
37 - HDMI connection
37 - Composite connection
37 Connecting to a USB
time
38 MAINTENANCE
38 Screen and frame
38 Cabinet and stand
38 Power cord
39 TROUBLESHOOTING
39 General

40 PC mode
42 SPECIFICATIONS
45 LICENSES
TABLE OF CONTENTS
3
ENGLISH

ASSEMBLING AND PREPARING
/
DC-IN
HDMI
RGB IN (PC)
ANTENNA
CABLE IN
AV IN
VIDEO
(MONO)
AUDIO
L
R
US B5 V
0. 5 A
4
ENGLISH
ASSEMBLING AND PREPARING
Unpacking
Check your product box for the following items. If there are any missing accessories, contact the local
dealer where you purchased your product. The illustrations in this manual may differ from the actual
product and accessories.
Remote control and Batteries
Power Cord AC-DC Adapter
(Depending on the country)
or
AC-DC Adapter
(Depending on the country)
(See p.7) (See p.7) (See p.7)
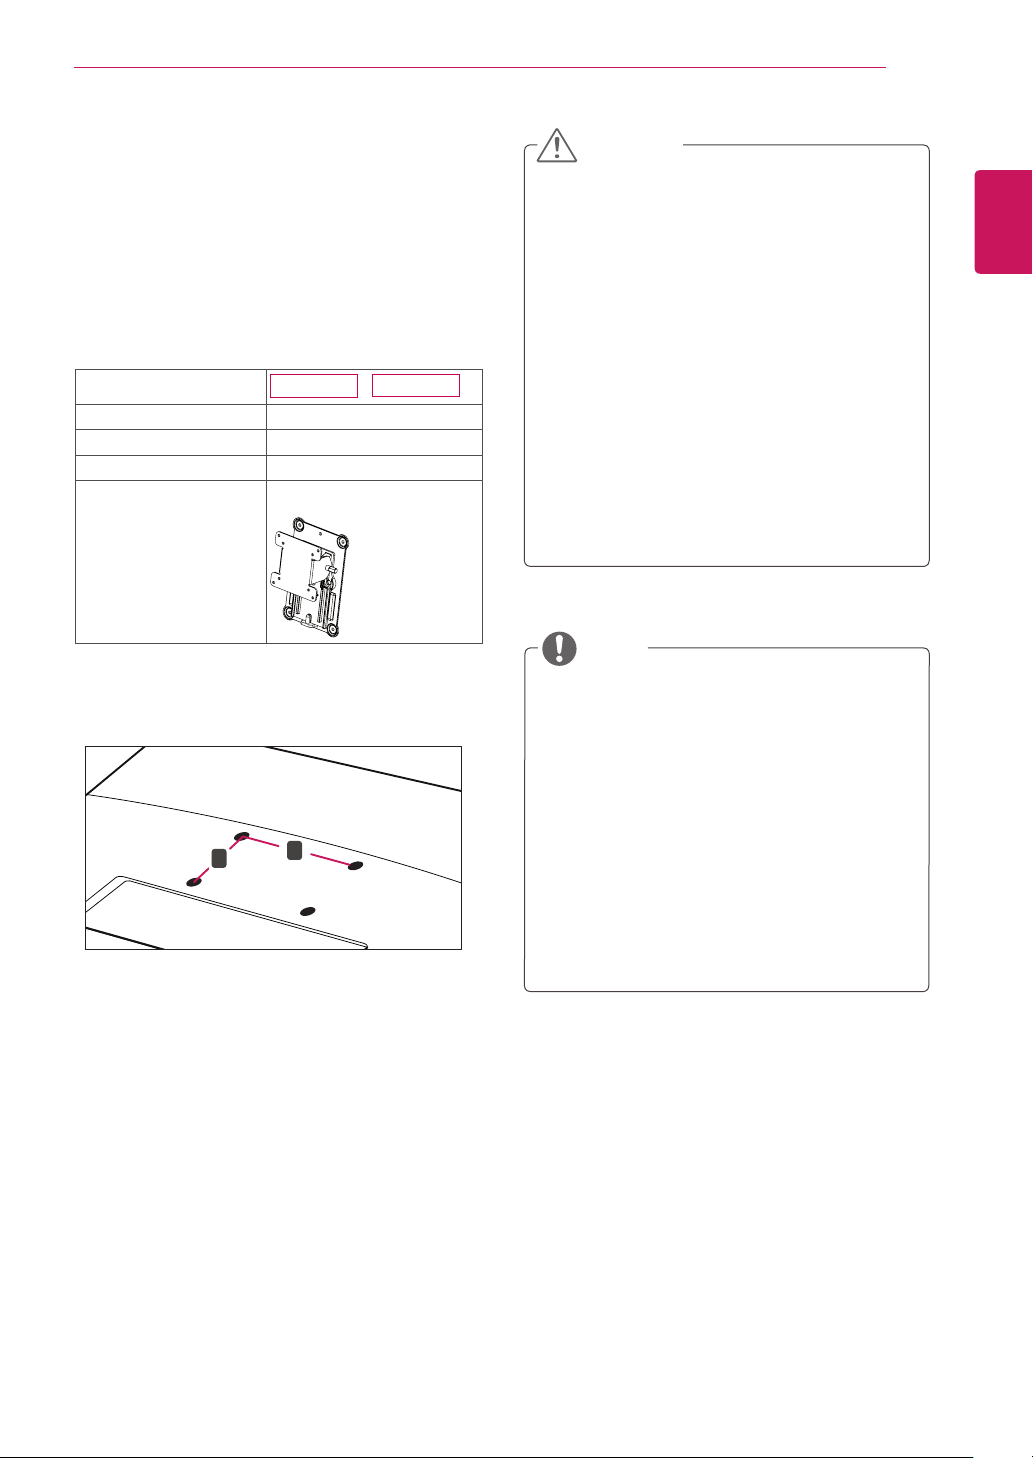
Stand Base CD(Owner's Manual) / CardD-SUB Cable
CAUTION
Do not use any pirated items to ensure the safety and product life span.
y
Any damages or injuries by using pirated items are not covered by the warranty.
y
NOTE
The accessories supplied with your product may vary depending on the model.
y
Product specifications or contents in this manual may be changed without prior notice due to
y
upgrade of product functions.
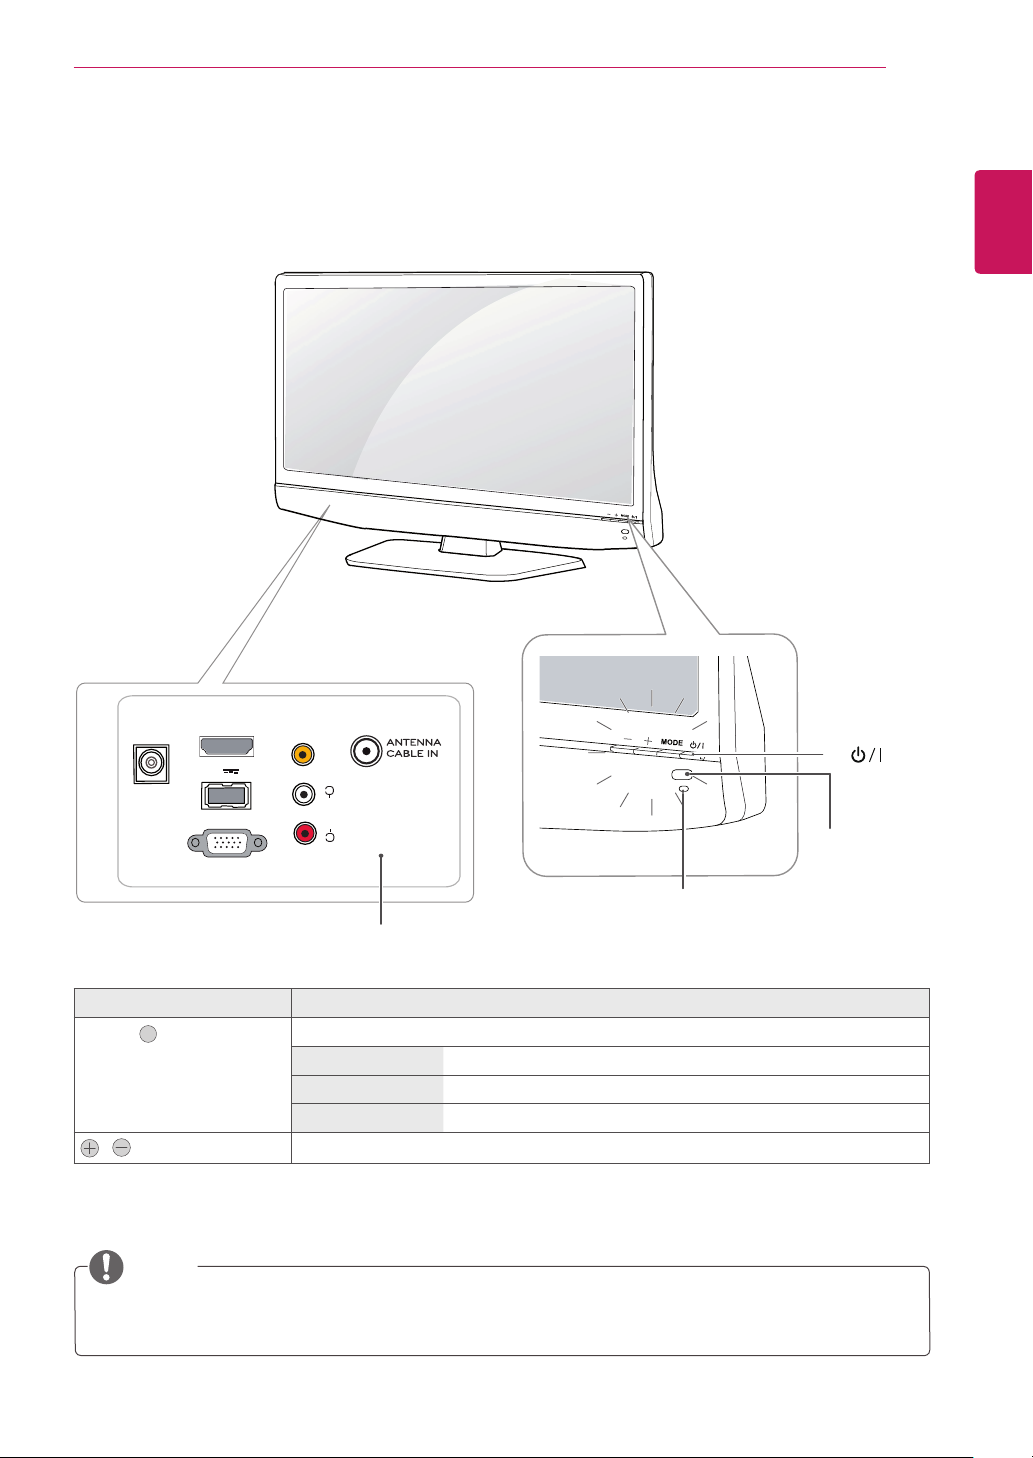
Parts and buttons
/
DC-IN
HDMI
RGB IN (PC)
ANTENNA
CABLE IN
AV IN
VIDEO
(MONO)
AUDIO
L
R
US B5 V
0. 5 A
ASSEMBLING AND PREPARING
5
ENGLISH
Connection panel (See p.35)
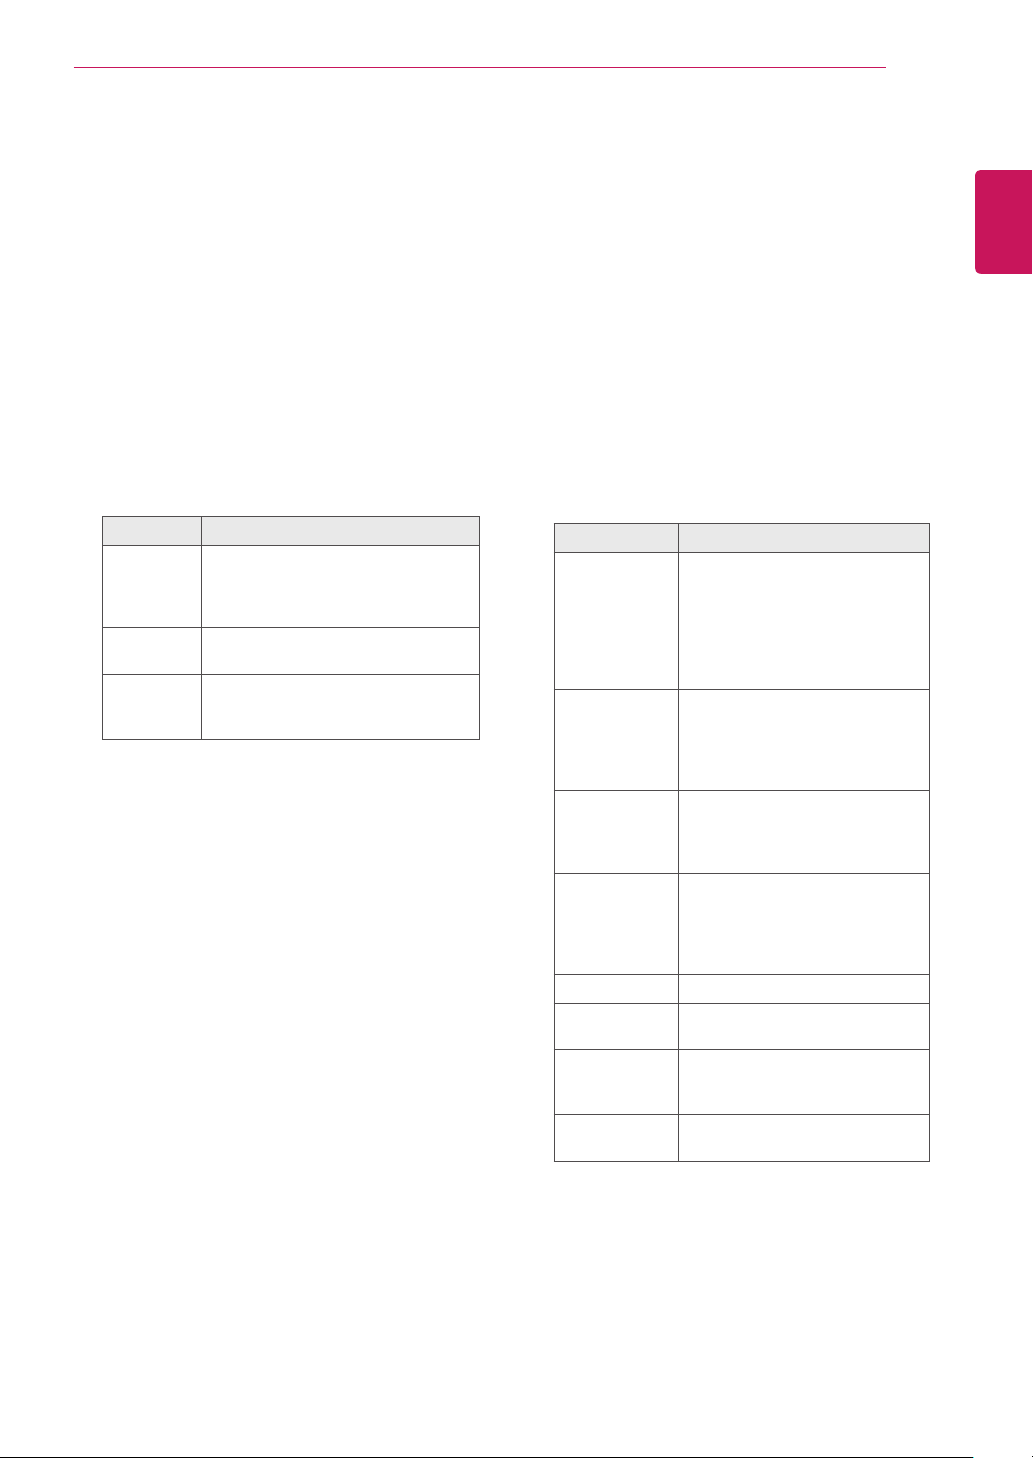
button Description
MODE " "
Selects the mode.(Channel ☞ Volume ☞ Input)
Channel Scrolls through the saved Channel.
Volume Adjust the Volume level.
,
Input Changes the Input source.
Adjusts the mode button level.
NOTE
You can set the Power indicator to on or off by selecting
y
Local keys work on
y
Power, Channel, Volume
and
Input
OPTION
only.
Standby Light
y
» Lighting On: Turned off
» Lighting Off: Turned on
in the main menus.
(Power Button)
y
Remote Control
Sensor
ASSEMBLING AND PREPARING
6
Lifting and moving the
ENGLISH
Monitor set
When moving or lifting the Monitor set, read the
following to prevent the Monitor set from being
scratched or damaged and for save transportation
regardless of its type and size.
CAUTION
Avoid touching the screen at all times, as
this may result in damage to the screen or
some of the pixels used to create images.
It is recommended to move the Monitor
y
set in the box or packing material that the
Monitor set originally came in.
Before moving or lifting the Monitor set,
y
disconnect the power cord and all cables.
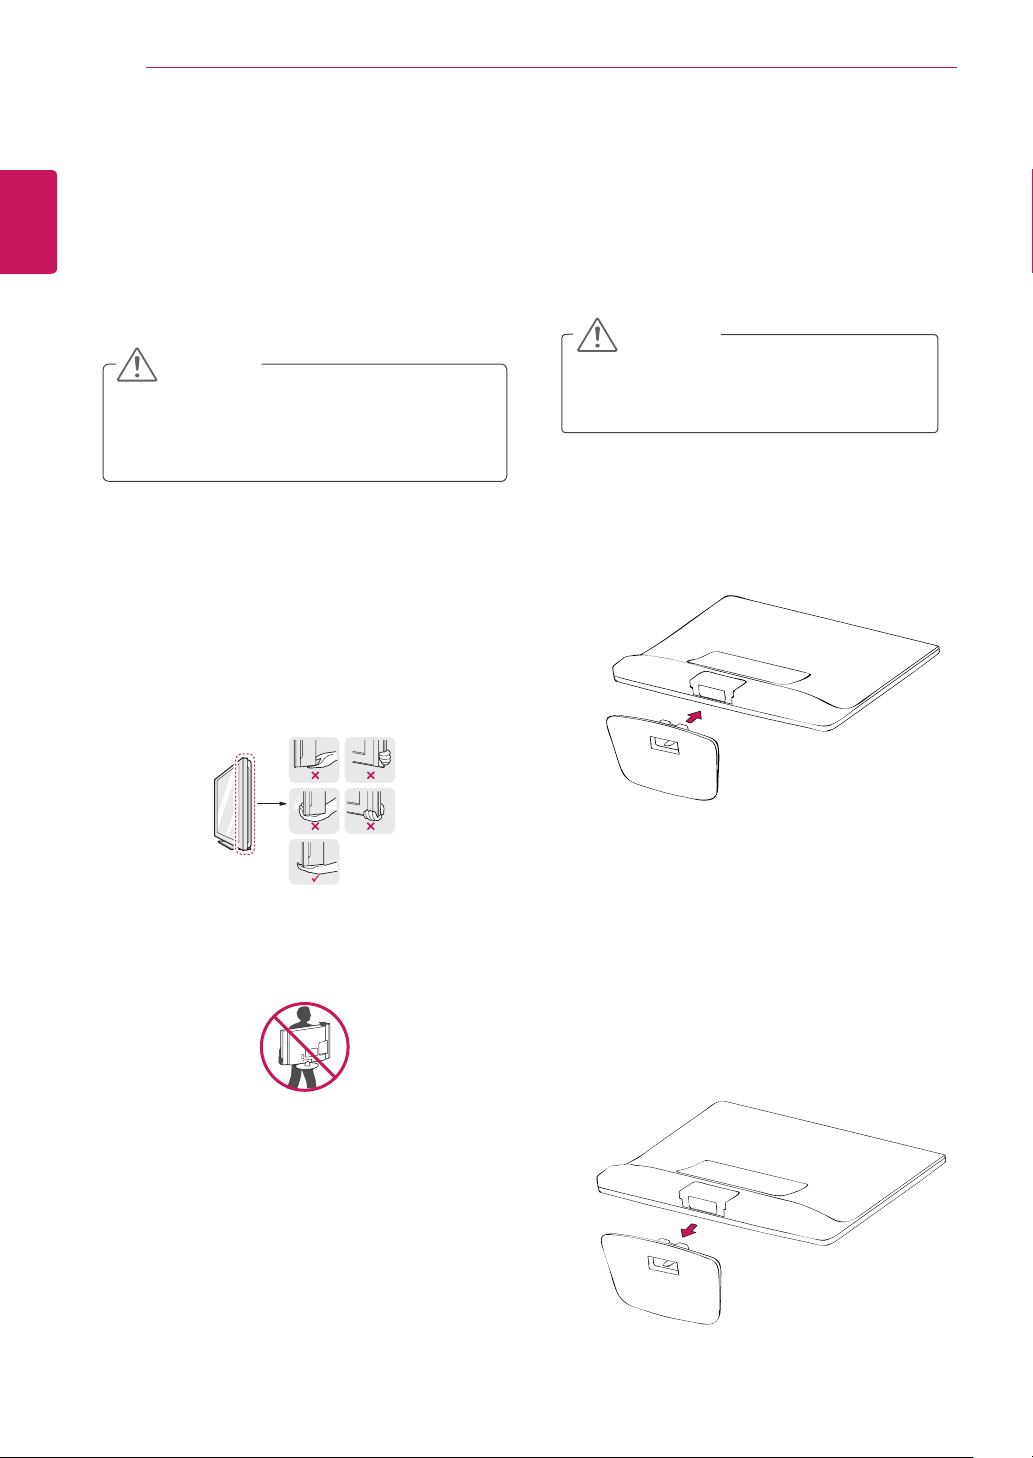
Hold the top and bottom of the Monitor
y
set frame firmly. Make sure not to hold the
transparent part, speaker, or speaker grill
area.
Setting up the Monitor set
Attaching the Stand Base
Place the Monitor set with the screen side
1
down on a flat and cushioned surface.
CAUTION
Lay a foam mat or soft protective cloth
on the surface to protect the screen
from damage.
Insert the Stand Base into the product.
2
When holding the Monitor set, the screen
y
should face away from you to prevent the
screen from scratches.
When transporting the Monitor set, do not
y
expose the Monitor set to jolts or excessive
vibration.
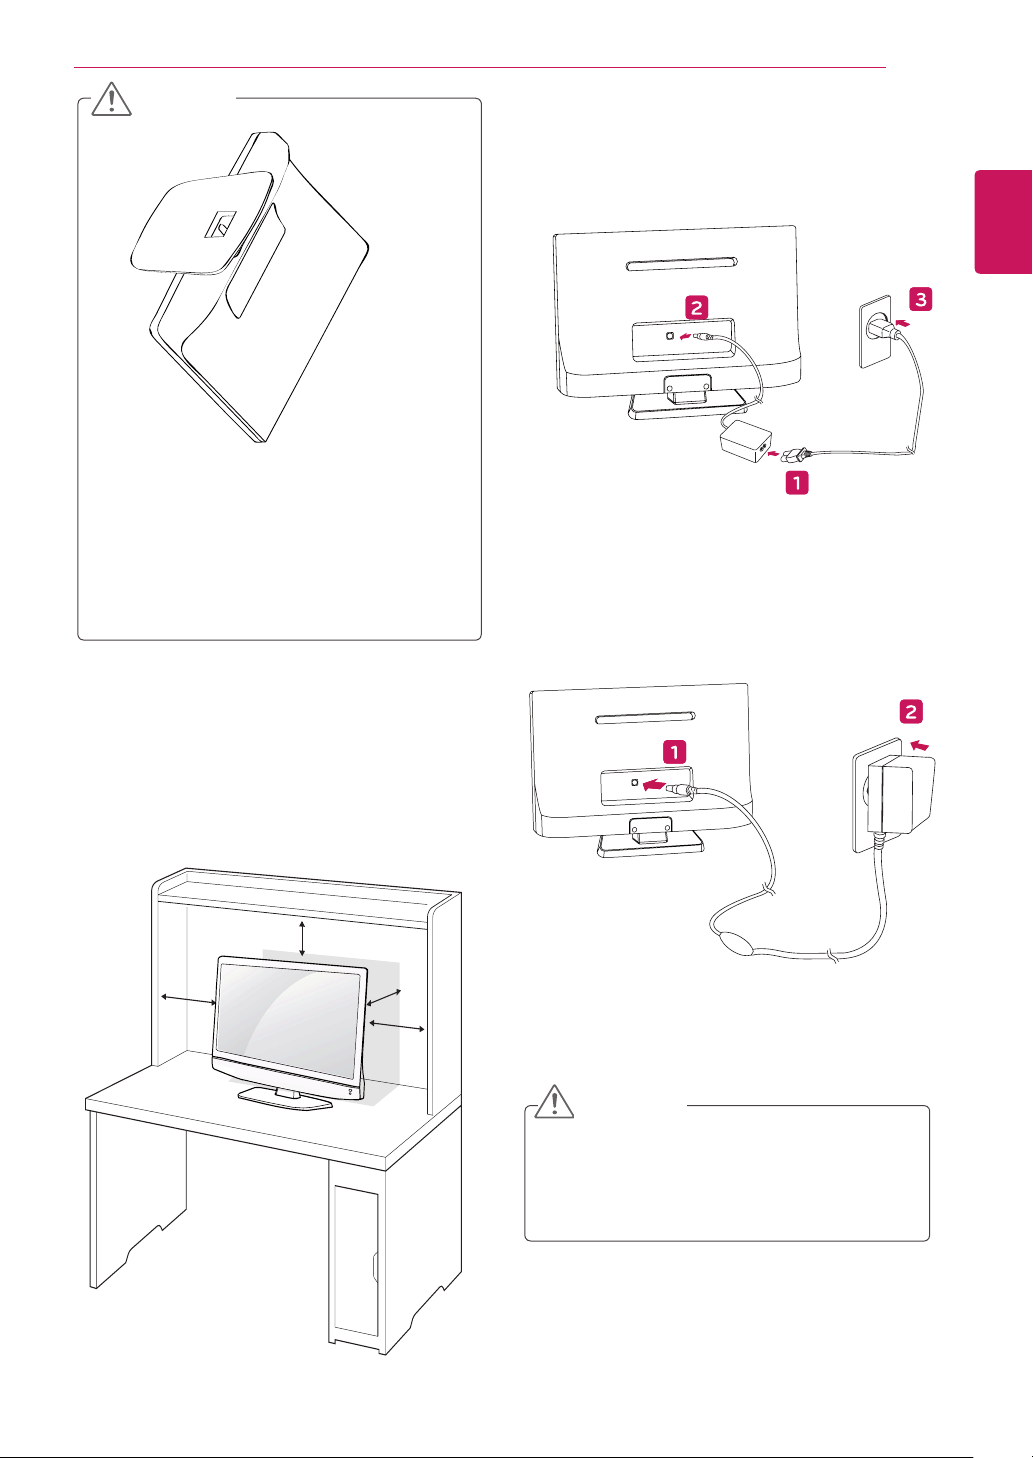
When transporting the Monitor set, keep the
y
Monitor set upright, never turn the Monitor
set on its side, or tilt towards the left or right.
Detaching the Stand Base and Body
Place the Monitor set with the screen side
1
down on a flat and cushioned surface.
Lift up the latch at the bottom of the Stand
2
Base and detach the Stand Base from the
Monitor set.
CAUTION
Do not carry the monitor upside-down
y
as this may cause it to fall off its stand,
resulting in damage or injury.
The illustration shows a general example
y
of installation and may look different
from the actual product.
ASSEMBLING AND PREPARING
Connect the AC-DC Adapter and Power Cord
2
to a wall outlet.
or
7
ENGLISH
Mounting on a table
Lift and tilt the Monitor set into its upright
1
position on a table.
Leave a 10 cm (minimum) space from the wall
for proper ventilation.
10 cm
10 cm
10 cm
10 cm
CAUTION
Do not place the TV near or on sources of heat,
as this may result in fire or other damage.
ASSEMBLING AND PREPARING
8
ENGLISH
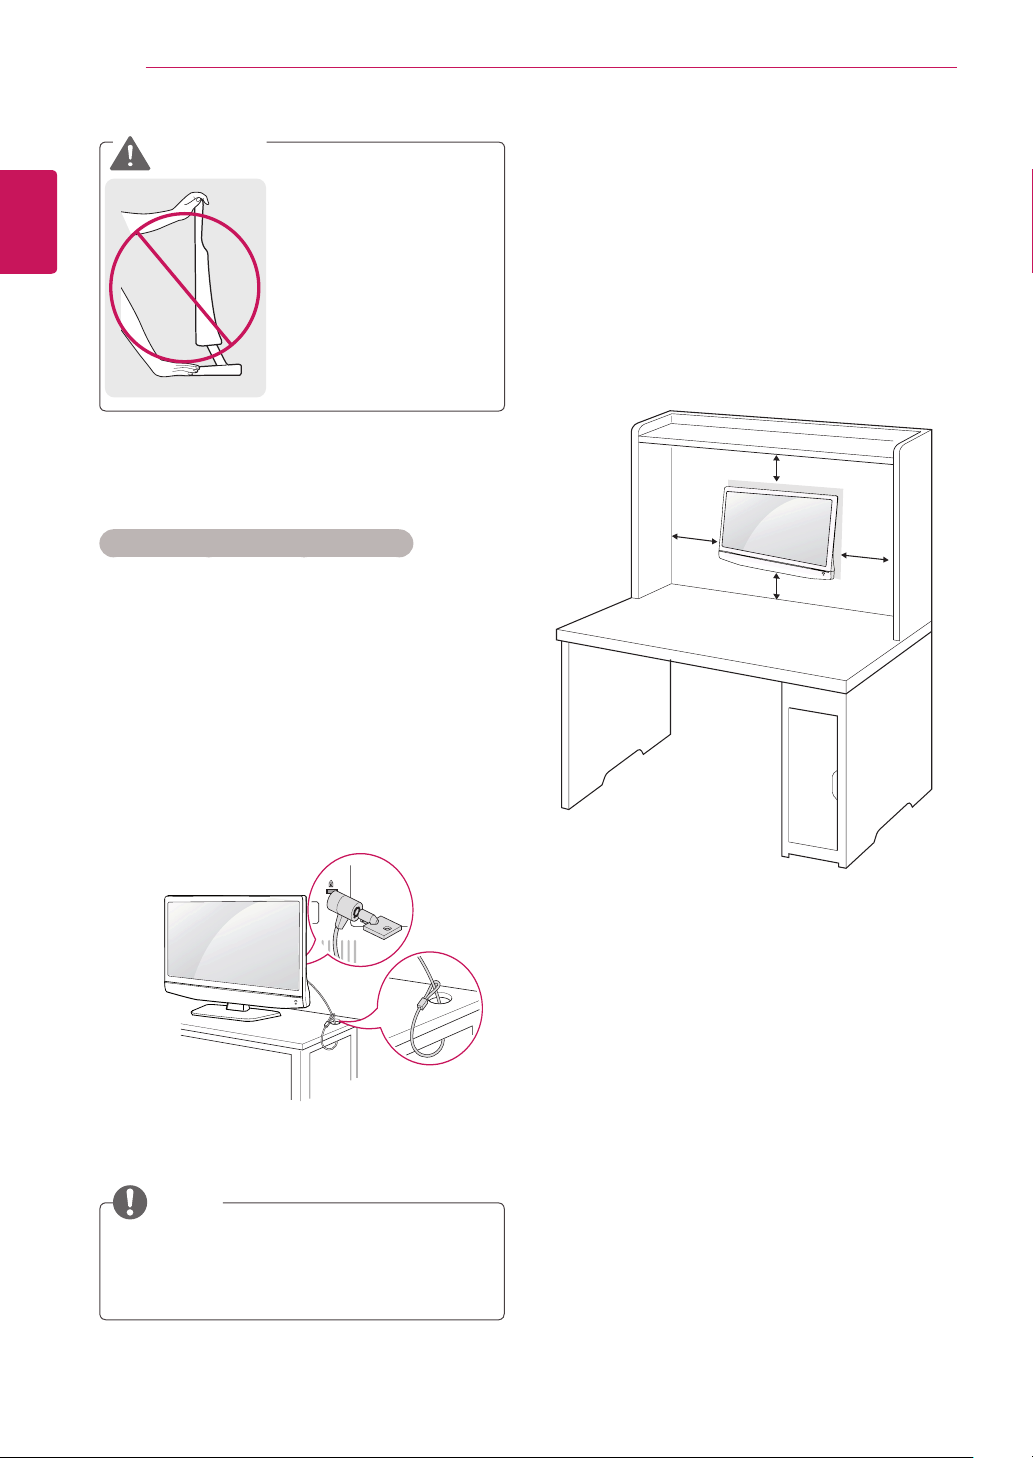
WARNING
It's a head fixed model
y
and prohibited from
adjusting the angle.
If you try to adjust the
y
angle forcibly, It can be
damaged.
Using the Kensington security system
The Kensington security system connector is
located at the back of the Monitor set. For more
information of installation and using, refer to the
manual supplied with the Kensington security
system or visit
http://www.kensington.com
.
Mounting on a wall
For proper ventilation, allow a clearance of 10
cm on each side and from the wall. Detailed
installation instructions are available from your
dealer, see the optional Tilt Wall Mounting
Bracket Installation and Setup Guide.
10 cm
10 cm
10 cm
10 cm
Connect the Kensington security system cable
between the Monitor set and a table.
NOTE
The Kensington security system is optional.
You can obtain additional accessories from
most electronics stores.
If you intend to mount the Monitor set to a wall,
attach Wall mounting interface (optional parts) to
the back of the set.
When you install the Monitor set using the wall
mounting interface (optional parts), attach it
carefully so it will not drop.
Please, Use the screw and wall mount
1
interface in accordance with VESA Standards.
If you use screw longer than standard, the TV
2
might be damaged internally.
If you use improper screw, the product might
3
be damaged and drop from mounted position.
In this case, LG Electronics is not responsible
for it.
VESA compatible only with respect to screw
4
mounting interface dimensions and mounting
screw specifications.
ASSEMBLING AND PREPARING
9
Please use VESA standard as below.
5
784.8 mm (30.9 inch) and under
y
* Wall Mount Pad Thickness : 2.6 mm
* Screw : Φ 4.0 mm x Pitch 0.7 mm x
Length 10 mm
787.4 mm (31.0 inch) and above
y
* Please use VESA standard wall mount pad
and screws.
Model
VESA (A x B) 75 x 75
Standard screw M4
Number of screws 4
Wall mount bracket
(optional)
VESA (A x B)
y
B
22MN42A
RW120
A
24MN42A
CAUTION
Disconnect the power cord first, and then
y
move or install the Monitor set. Otherwise
electric shock may occur.
If you install the Monitor set on a ceiling or
y
slanted wall, it may fall and result in severe
injury. Use an authorized LG wall mount
and contact the local dealer or qualified
personnel.
Do not over tighten the screws as this may
y
cause damage to the Monitor set and void
your warranty.
Use the screws and wall mounts that
y
meet the VESA standard. Any damages
or injuries by misuse or using an improper
accessory are not covered by the warranty.
NOTE
Use the screws that are listed on the VESA
y
standard screw specifications.
The wall mount kit includes an installation
y
manual and necessary parts.
The wall mount bracket is optional. You
y
can obtain additional accessories from your
local dealer.
The length of screws may differ depending
y
on the wall mount. Be sure to use the
proper length.
For more information, refer to the
y
instructions supplied with the wall mount.
ENGLISH
REMOTE CONTROL
10
ENGLISH
REMOTE CONTROL
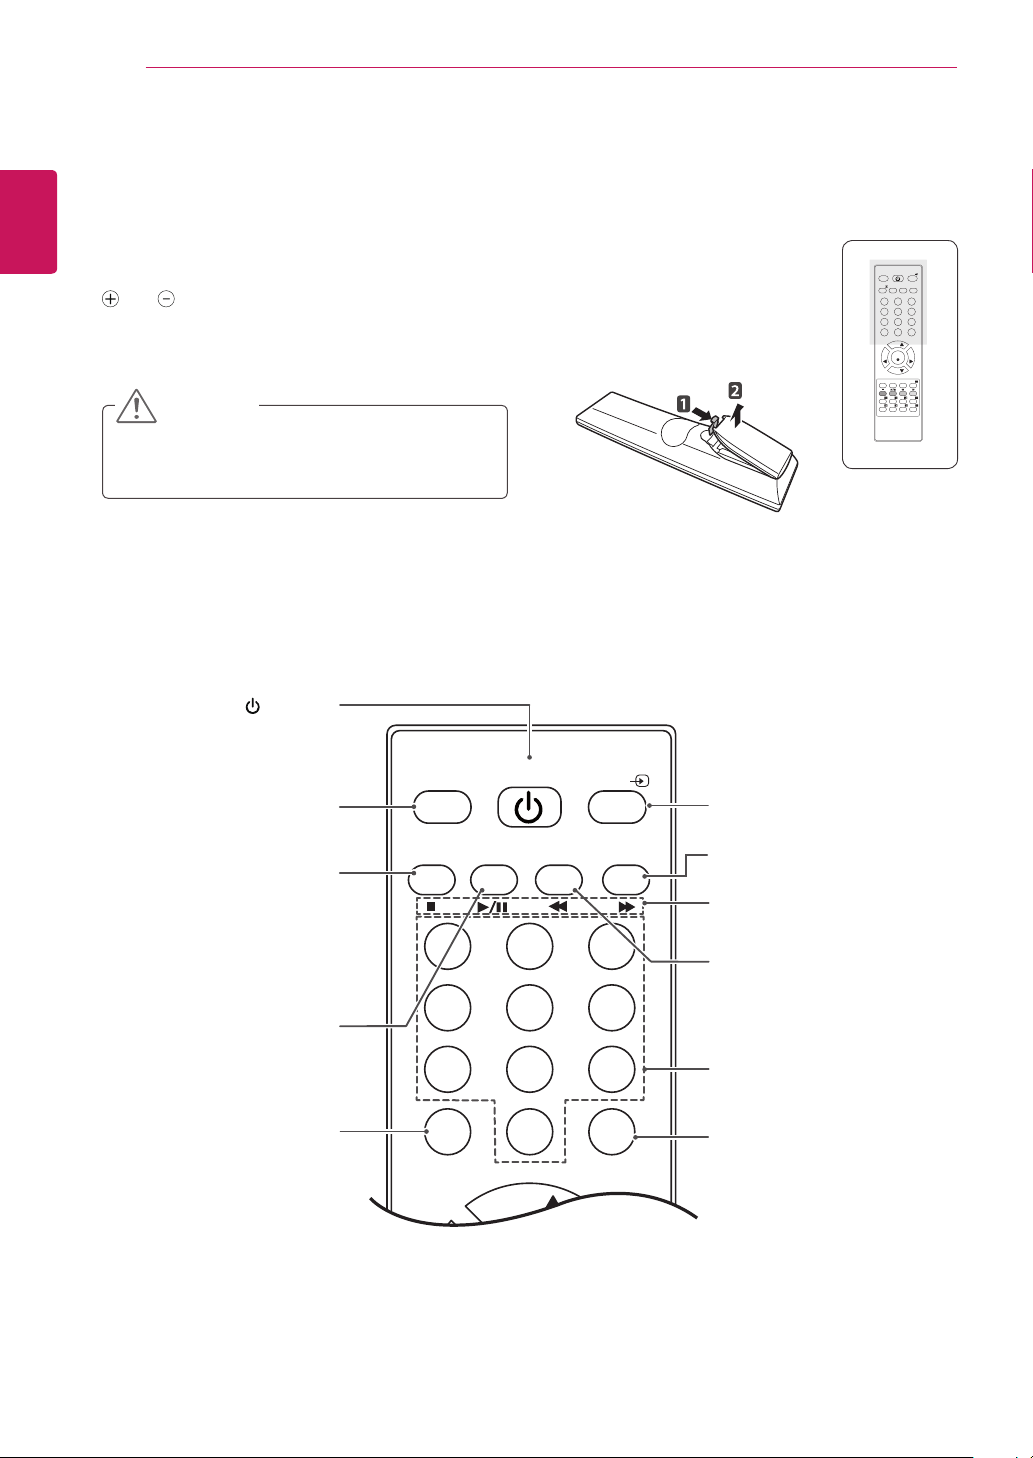
The descriptions in this manual are based on the buttons of the remote control.
Please read this manual carefully and use the Monitor set correctly.
To replace batteries, open the battery cover, replace batteries (1.5 V AAA) matching
To remove the batteries, perform the installation actions in reverse.
Make sure to point the remote control to the remote control sensor on the Monitor set.
and ends to the label inside the compartment, and close the battery cover.
CAUTION
Do not mix old and new batteries, as this may
damage the remote control.
(POWER)
Turns the Monitor set on or
off.
TV/PC
POWER
INPUT
TV/PC
Selects TV or PC mode.
MTS FCR
MEMORY/ERASE CAPTION
MTS
Press repeatedly to select
Mono, Stereo, SAP sound
tone. But Stereo, SAP mode
are available only if included
1 2 3
on the broadcast signal.
FCR
4 5 6
Favorite channel button.
7 8 9
POWER
TV/PC
INPUT
MUTE PSM
SSM I/II
1 2 3
4 5 6
7 8 9
0
LIST Q.VIEW
PR
OK
VOL VOL
PR
MENU EXIT
ARC/MARK
TEXT
HOLD
SIZE MIX TIME
REVEAL
INDEX
MODE
UPDATE
USB VOL -USB VOL +
INPUT (See p.20)
Selects the input mode.
CAPTION
On <-> Off
USB Menu control buttons
USB menu(Music List).
MEMORY/ERASE
User can do manual channel
selection and store or erase
individual channels.
Number buttons
Enters numbers.
Switches the sound on or
MUTE
off.
MUTE REVIEW
0
REVIEW
Turn to the last channel
viewed.
CH
INPUT
POWER
TV/PC
MTS FCR
MEMORY/ERASE CAPTION
1 2 3
4 5 6
7 8 9
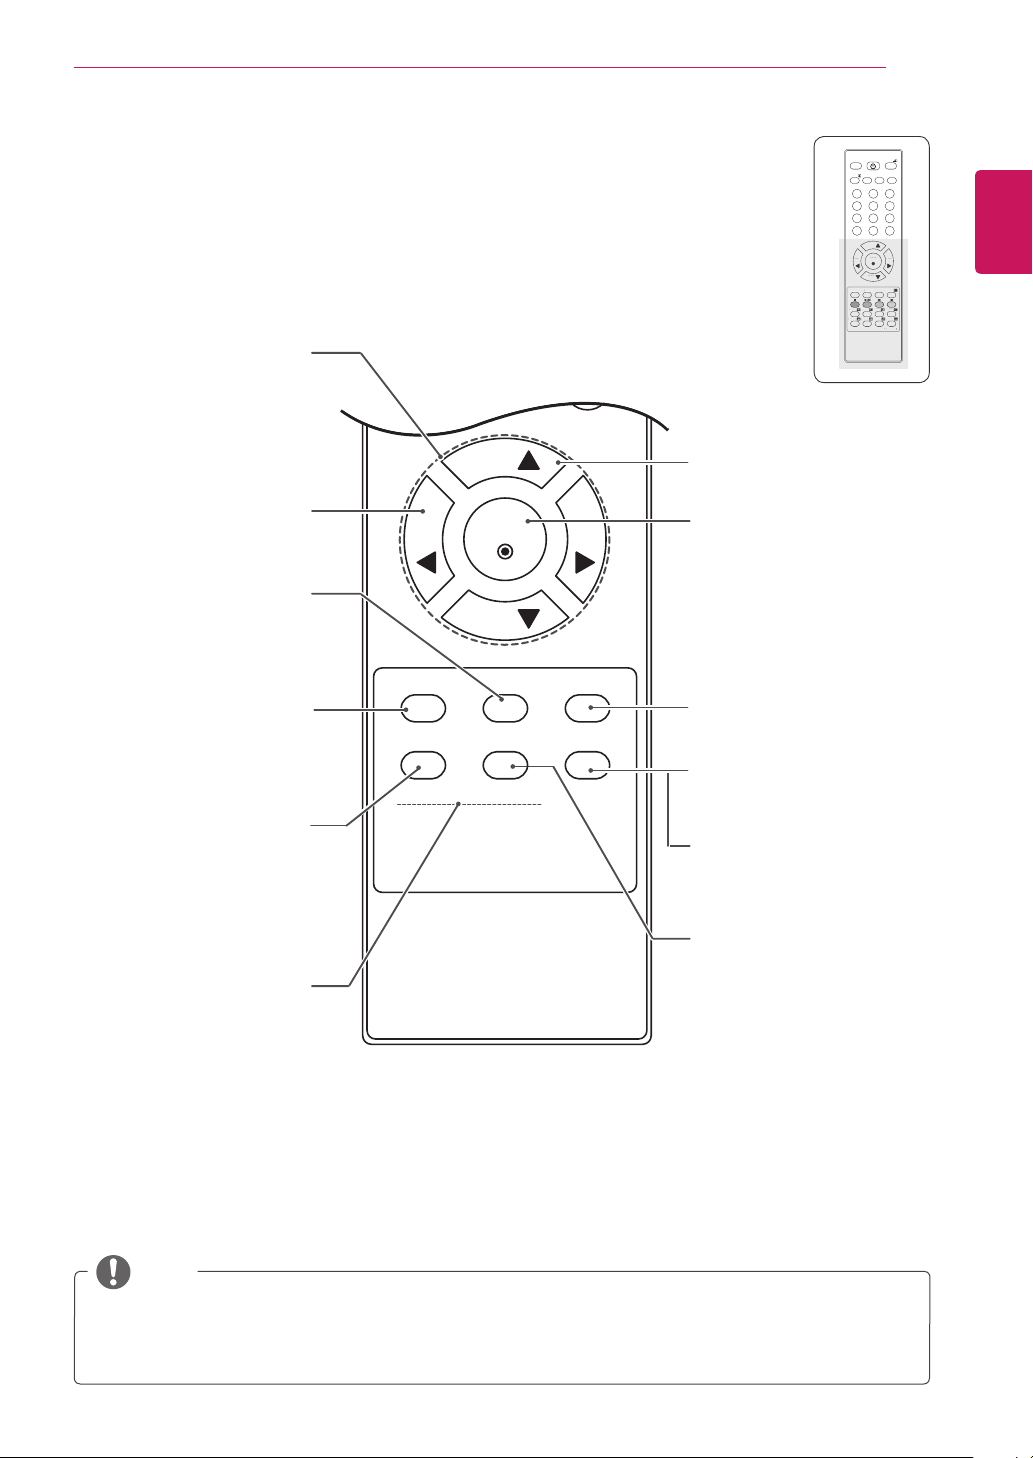
NAVIGATION BUTTONS
Q
MENU
XIT
D
US
OK
PR
PR
OL
VOL
S
MIX
TIME
TEXT
REVEAL
INDEX
E
UPDATE
Scrolls through menus or
options.
0
MUTE REVIEW
REMOTE CONTROL
POWER
TV/PC
MUTE PSM
1 2 3
4 5 6
7 8 9
LIST Q.VIEW
PR
OK
VOL VOL
V
PR
MENU EXIT
E
HOLD
SIZE MIX TIME
HOL
IZE
REVEAL
INDEX
SSM I/II
0
ARC/MARK
ARC/MARK
MODE
MOD
USB VOL -USB VOL +
B VOL USB VOL
11
INPUT
ENGLISH
TEXT
UPDATE
Adjusts the volume level.
Clears all on-screen displays
and returns to Monitor set
viewing from any menu.
Accesses the main menus
or saves your input and exit
Press repeatedly to select
Standard, Vivid or Cinema
USB VOL(Only USB Mode)
MENU (See p.27)
Auto Picture Control.
Adjusts the USB volume
VOL
EXIT
menus.
APC
mode.
level.
CH
VOL VOL
ENTER
CH
MENU EXIT SLEEP
APC DASP
USB VOL -USB VOL +
ARC/MARK
CHANNEL
Selects a channel.
ENTER
Selects menus or options and
confirms your input.
SLEEP
Sets the sleep timer.
ARC(See p.20)
Selects your desired picture
format.
MARK
Check and un-check files in
the USB menu.
DASP
Digital Auto Sound
Processing.
Use this button to select the
sound tone.
Press repeatedly to select
Stantard, Music or Cinema.
NOTE
If you lose Remote Control then you need to purchase replacement unit as only the POWER/
y
CHANNEL/VOLUME and INPUT keys operate on Front TV Panel.
USING THE MONITOR SET
(
MO
N
O
)
A
U
DI
O
L
R
USB5 V
0.5 A
A
12
ENGLISH
USING THE MONITOR SET
Connecting to a PC
Your Monitor set supports the Plug & Play*
feature.
* Plug & Play: Plug and play is a computer feature
that allows the new device, normally a peripheral,
without requiring reconfiguration or manual
installation of device drivers.
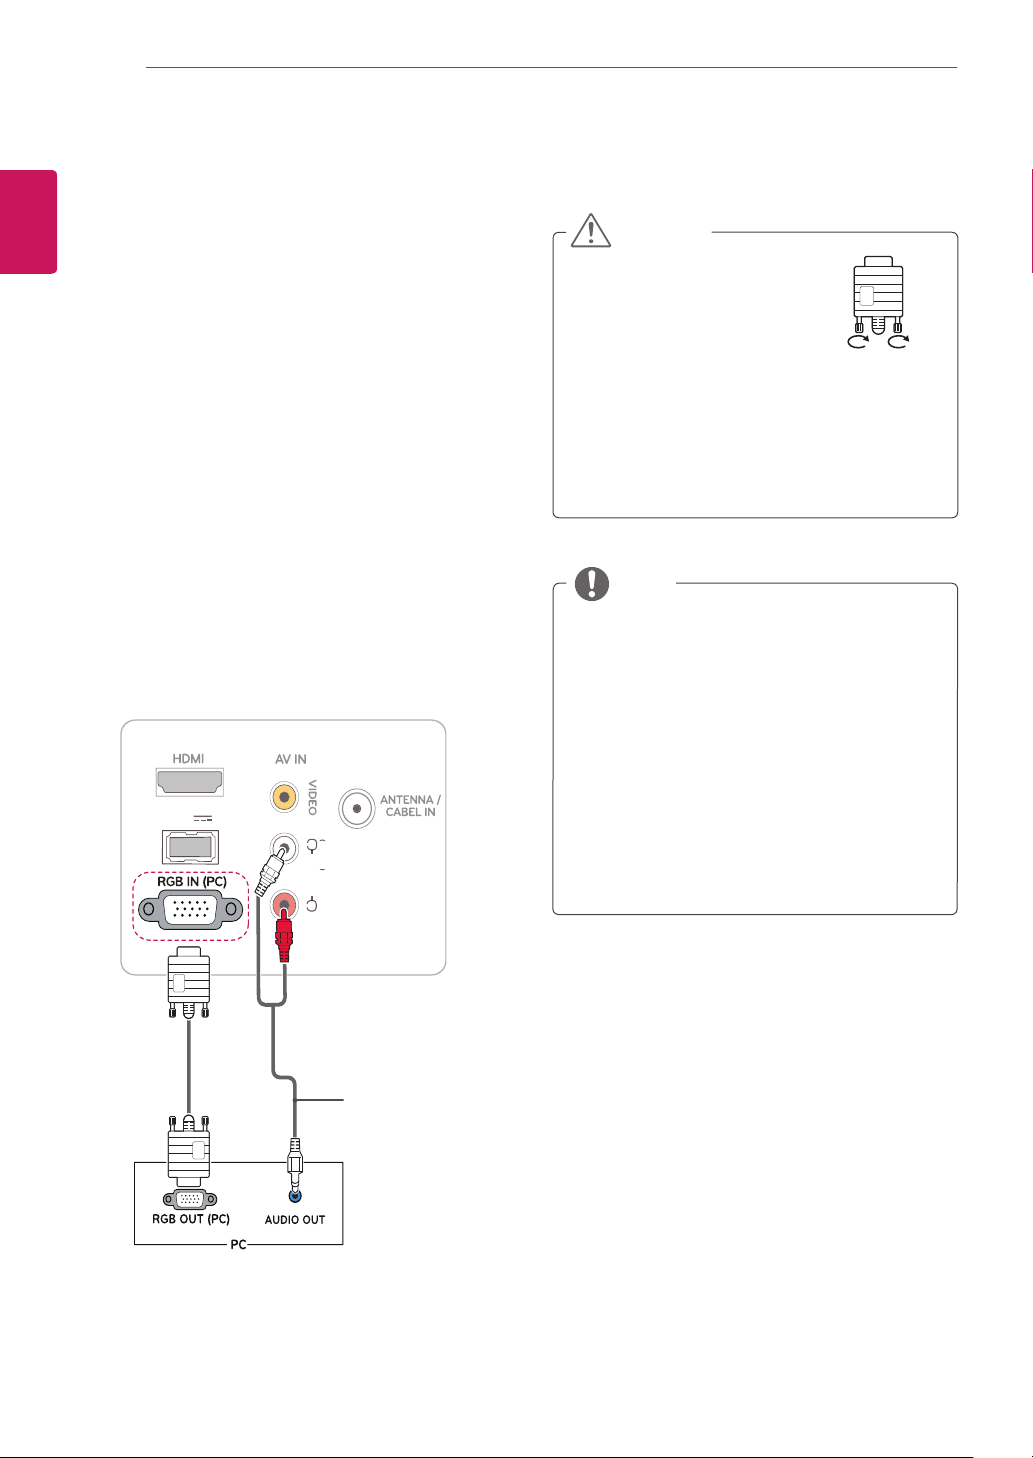
RGB connection
Transmits the analog video signal from your PC to
the Monitor set. Connect the PC and the Monitor
set with the D-sub 15 pin cable as shown the
following illustrations. To transmit an audio signal,
connect an optional audio cable as shown the
following illustrations.
CAUTION
Connect the signal input cable
y
and tighten it by turning the
screws clockwise.
Do not press the screen with
y
your finger for a long time as this may
result in temporary distortion on the screen.
Avoid displaying a fixed image on the
y
screen for a long period of time to prevent
image burn. Use a screensaver if possible.
NOTE
If you do not use an optional external
y
speaker, connect the PC to the Monitor set
with the optional audio cable.
The Audio cable is optional. You can
y
obtain additional accessories from most
electronics stores.
If you turn the Monitor set on when the set
y
becomes cold, the screen may flicker. This
is normal.
Some red, green, or blue spots may appear
y
on the screen. This is normal.
(Not Provided)
USING THE MONITOR SET
13
Adjusting the screen
Selecting an image mode
Display images in its optimized settings by
selecting one of the preset image modes.
Press
1
Press the Navigation buttons to scroll to
2
PICTURE
Press the Navigation buttons to scroll to
3
Picture Mode
Press the Navigation buttons to scroll to an
4
image mode you want and press
Mode Description
Vivid
Standard Adjusts the image for the normal
Cinema Optimizes the video image for the
When you are finished, press
5
When you return to the previous menu, press
MENU
to access the main menus.
MENU
and press
and press
Adjusts the video image for the
retail environment by enhancing the
Contrast, Brightness, Color,
Sharpness
environment.
cinematic look and enjoy movies as if
you are in a movie theater.
ENTER
ENTER
.
.
EXIT
.
.
ENTER
and
.
Customizing image options
Customize basic and advanced options of each
image mode for the best screen performance.
Press
1
Press the Navigation buttons to scroll to
2
PICTURE
Press the Navigation buttons to scroll to
3
Picture Mode
Press the Navigation buttons to scroll to an
4
image mode you want and press
Select and adjust following options, and then
.
5
press
Option Description
Backlight Adjusts the brightness of the
Contrast Increases or decreases the
Brightness Adjusts the base level of the
Sharpness Adjusts the level of crispness in
Color Adjusts intensity of all
Tint Adjusts the balance between
Advanced
Control
Picture
Reset
to access the main menus.
MENU
and press
ENTER
.
.
ENTER
screen by controlling the LCD
backlight. If you decrease the
brightness level, the screen
becomes darker and the power
consumption will be reduced
without any video signal loss.
gradient of the video signal.
You may use
the bright part of the image is
saturated.
signal in the image. You may use
Brightness
the image is saturated.
the edges between the light and
dark areas of the picture. The
lower the level, the softer the
image.
and
Green
Customizes the advanced
options. See more information
about advanced options See p.30.
Restores the options to the
default setting.
.
.
ENTER
Contrast
when the dark part of
levels.
when
Colors
.
Red
ENGLISH
When you are finished, press
6
EXIT
.
When you return to the previous menu, press
.
MENU
USING THE MONITOR SET
14
Customizing PC display options
ENGLISH
Customize options of each image mode for the
best image quality.
1
2
3
4
This function works in the following mode:
y
RGB[PC] mode.
Press
Press the Navigation buttons to scroll to
PICTURE
Press the Navigation buttons to scroll to
Screen
Select and adjust following options, and then
press
Option Description
Resolution Selects a proper
Auto
Config.
Position/
Size/Phase
Reset Restores the options to the default
to access the main menus.
MENU
and press
and press
ENTER
ENTER
.
Sets to adjust the screen
and
Size
displayed image may be unstable
for a few seconds while the
configuration is in progress.
Adjusts the options when the
image is not clear, especially when
characters are shaky, after the auto
configuration.
setting.
.
ENTER
.
Resolution
automatically. The
Phase
.
Position
,
Adjusting the sound
Selecting an sound mode
Play the sound in its optimized settings by
selecting one of the preset sound modes.
Press
1
Press the Navigation buttons to scroll to
2
AUDIO
Press the Navigation buttons to scroll to
3
Mode
Press the Navigation buttons to scroll to a
4
sound mode you want and press
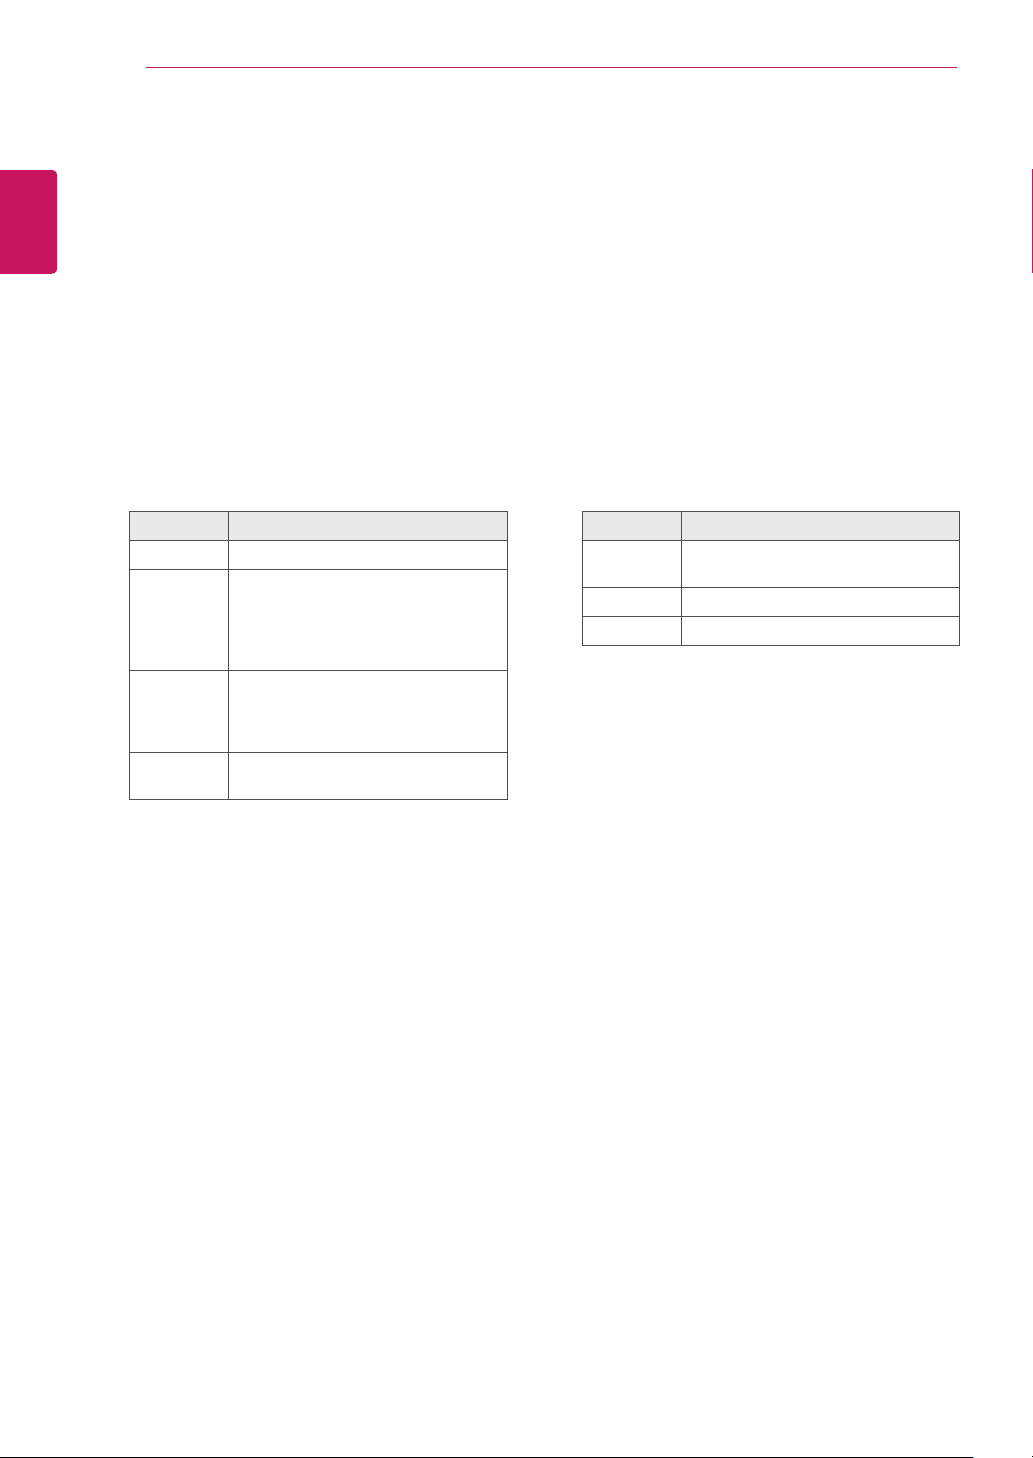
Mode Description
Standard Selects when you want standard-
Music Selects when you listen to music.
Cinema Selects when you watch movies.
When you are finished, press
5
When you return to the previous menu, press
MENU
to access the main menus.
MENU
and press
and press
.
ENTER
ENTER
quality sound.
.
.
ENTER
.
EXIT
Sound
.
When you are finished, press
5
When you return to the previous menu, press
.
MENU
EXIT
.
 Loading...