

Quick Reference
Using the 2.4-inch display printer model
Learning about the printer
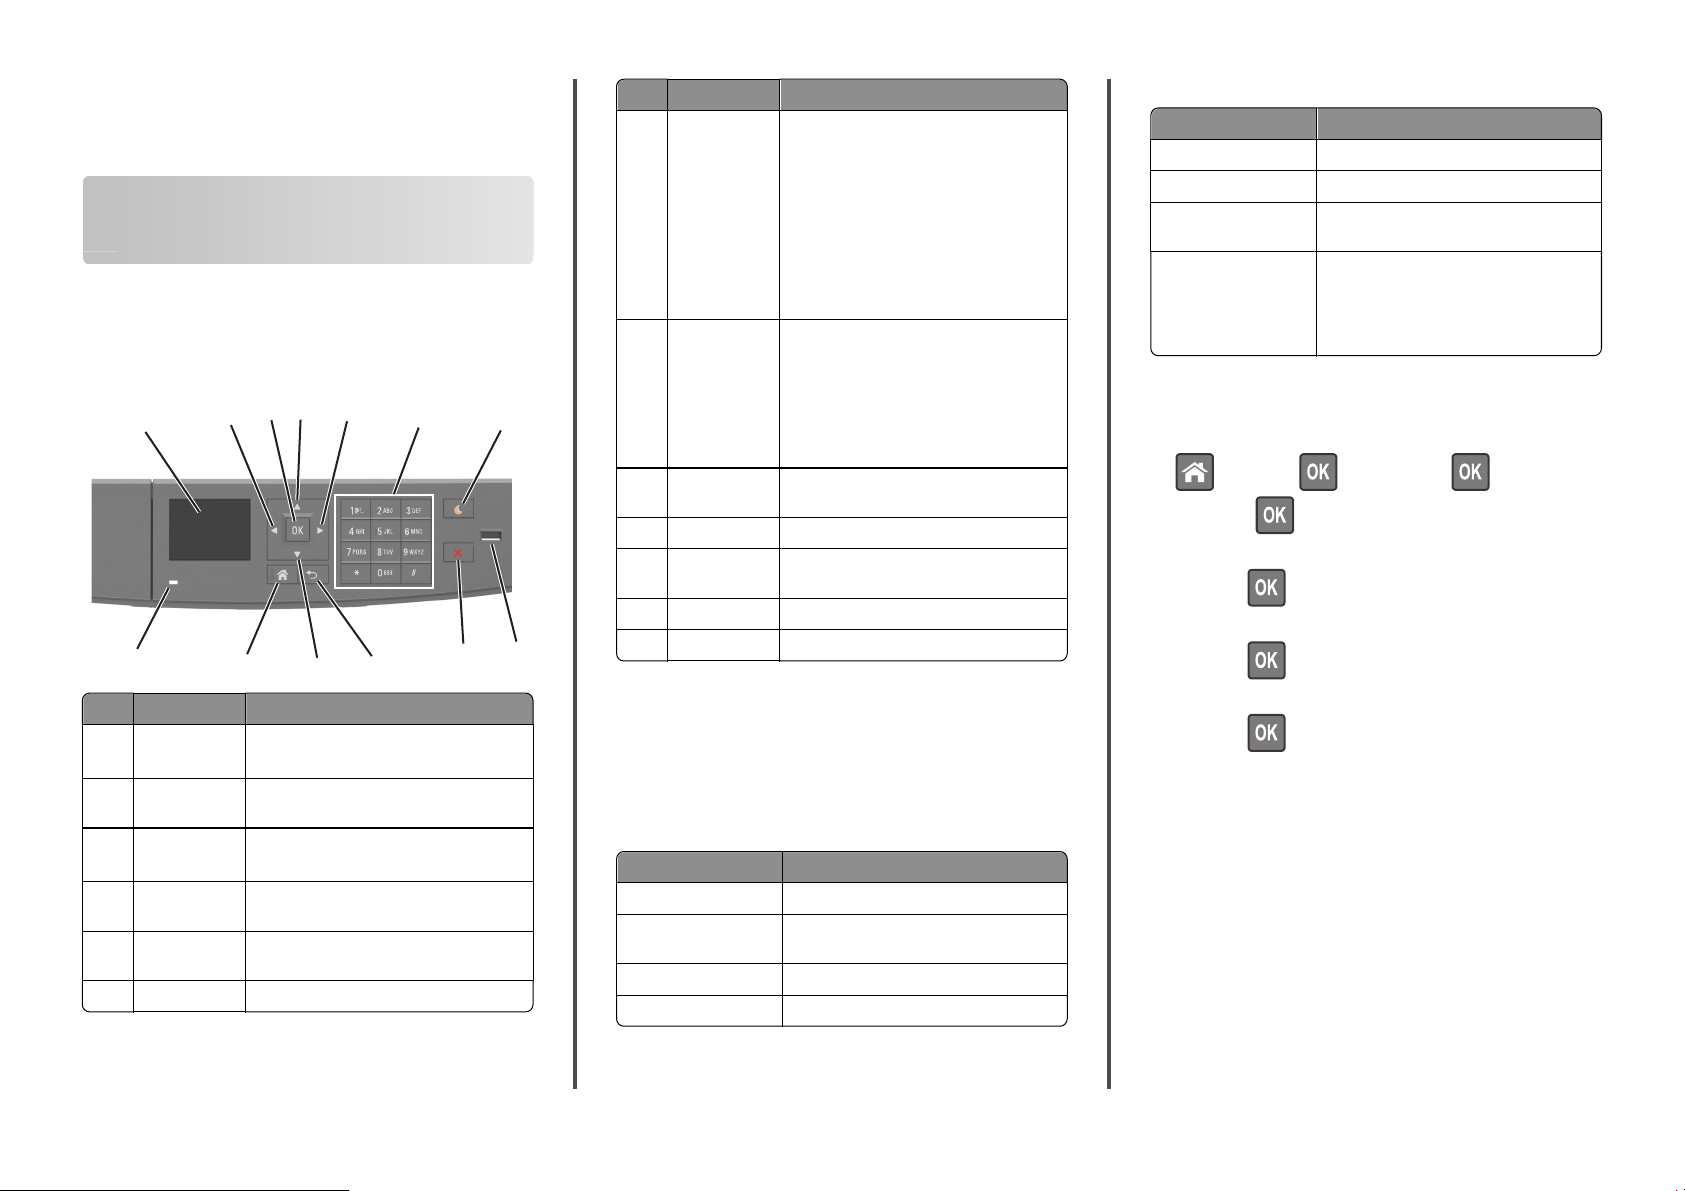
Using the printer control panel
3
4
11
5
10
6
9
1
13
Use the To
1 Display View the printer status and messages.
2 Left arrow
button
3 Select button Select menu options.
4 Up arrow
button
5 Right arrow
button
6 Keypad Enter numbers, letters, or symbols.
2
12
Set up and operate the printer.
Scroll to the left.
Save settings.
Scroll up.
Scroll to the right.
Use the To
7 Sleep button Enable Sleep mode or Hibernate mode.
The following actions wake the printer from
Sleep mode:
• Pressing any hard button
• Opening a tray or the front door
• Sending a print job from the computer
• Performing a power ‑on reset using the
main power switch
• Attaching a device in the USB port
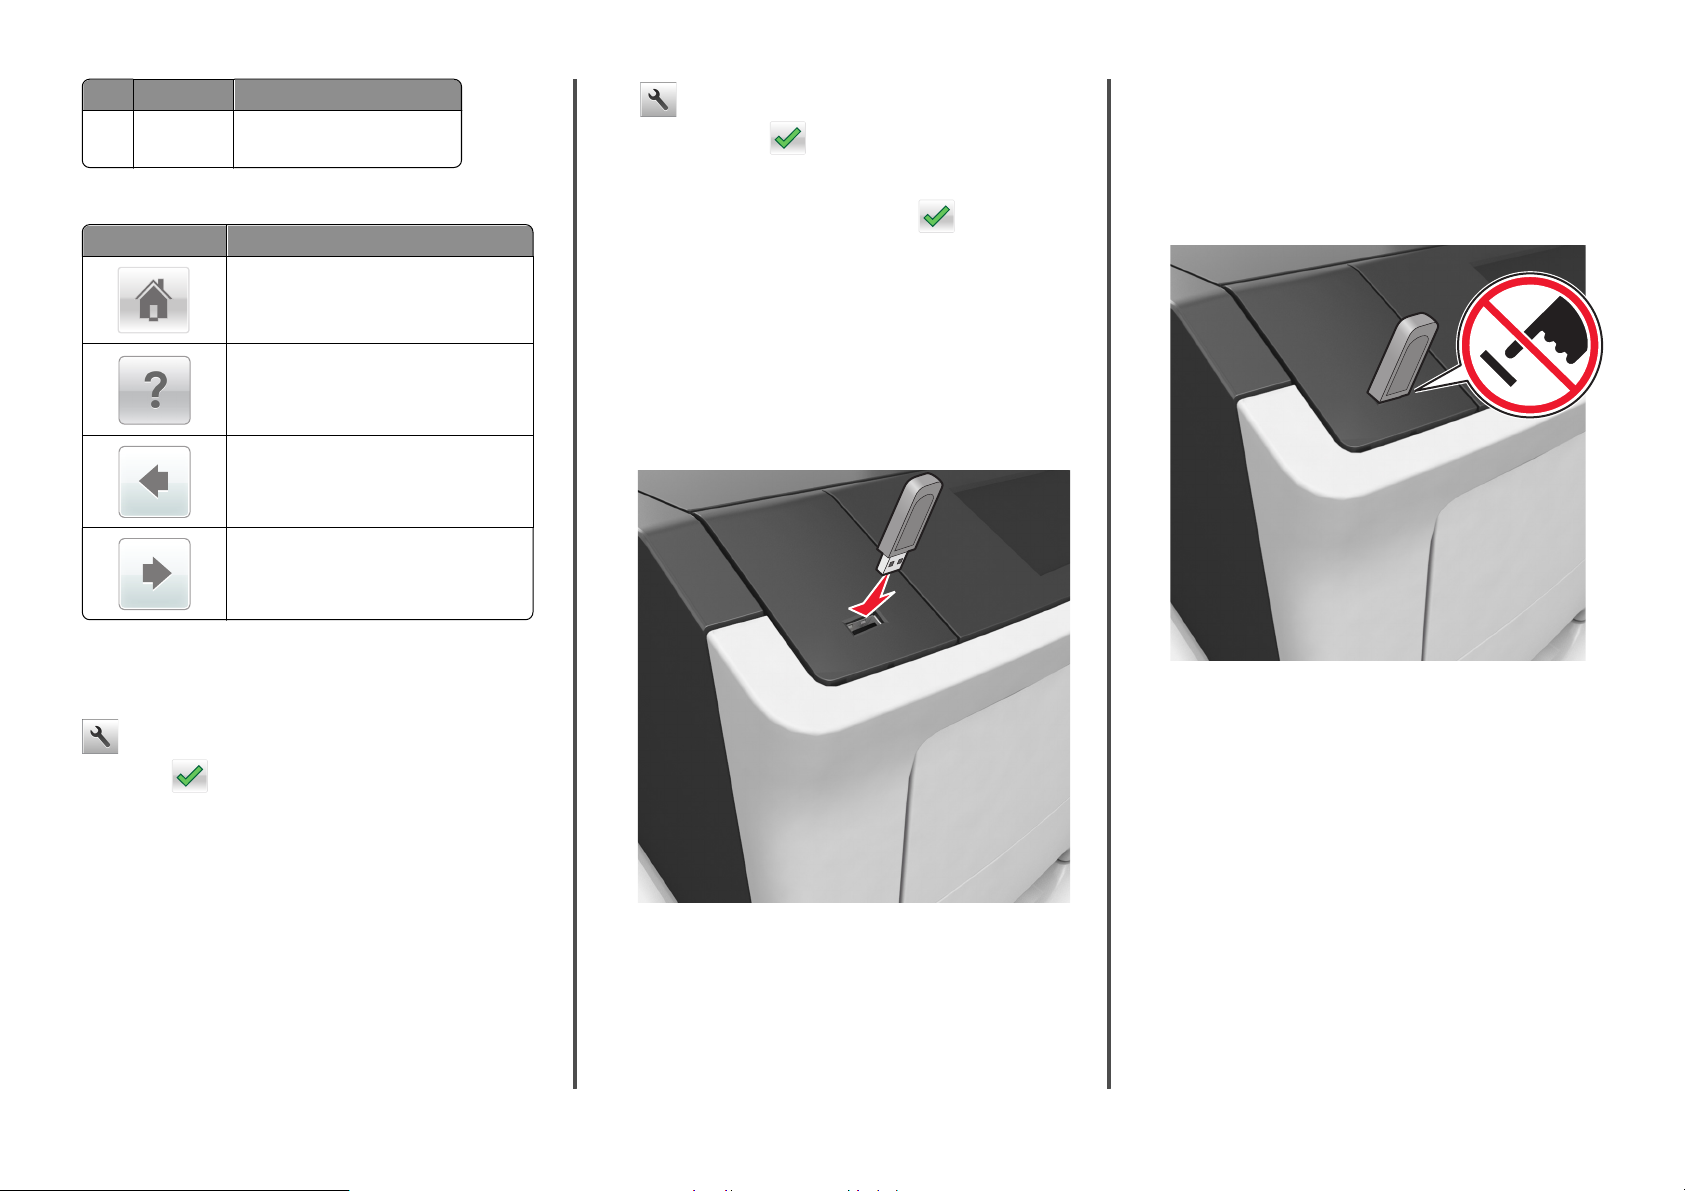
8 USB port Connect a flash drive to the print er.
Notes:
• Only the front USB port supports flash
7
9 Stop or cancel
button
10 Back button Return to the previous screen.
11 Down arrow
button
12 Home button Go to the home screen.
8
13 Indicator light Check the status of the printer.
drives.
• This feature is available only in select
printer models.
Stop all printer activities.
Scroll down.
Understanding the colors of the Sleep button and indicator lights
The colors of the Sleep button and indicator lights on the printer control
panel signify a certain printer status or condition.
Sleep button light color and its corresponding printer status
Sleep button light Printer status
Off The printer is off, idle or in Ready state.
Solid amber The printer is in Sleep mode.
Blinking amber The printer is entering or waking from
Blinking amber for 0.1
second, then goes
completely off for 1.9
seconds in a slow, p ulsing
pattern
Hibernate mode.
The printer is in Hibernate mode.
Setting the paper size and type
1 From the printer control panel, navigate to:
> Settings > > Paper Menu > > Paper
Size/Type >
2 Press the up or down arrow button to select the tray or feeder, and
then press
3 Press the up or down arrow button to select the paper size, and
then press
4 Press the up or down arrow button to select the paper type, and
then press
.
.
to change the settings.
Configuring Universal paper settings
Indicator light color and its corresponding printer status
Indicator light Printer status
Off The printer is off or in Hibernate mode.
Blinking green The printer is warming up, processing data,
or printing.
Solid green The printer is on, but idle.
Blinking red The printer requires user intervention.
The Universal paper size is a user‑defined setting that lets you print on
paper sizes that are not preset in the printer menus.
Notes:
• The smallest Universal paper size is 6 x 127 mm (3 x 5 inches),
and is supported only from the multipurpose feeder.
• The largest Universal paper size is 216 x 355.6 mm (8.5
x 14 inches), and is supported from all paper sources.
1 From the printer control panel, navigate to:
1
> Settings > > Paper Menu > > Universal
Setup >
measure >
> Units of Measure > > select a unit of
2 Select Portrait Width or Portrait Height, and then press .
3 Press the left or right arrow button to change the setting, and then
• You cannot print files for which you do not have printing
permissions.
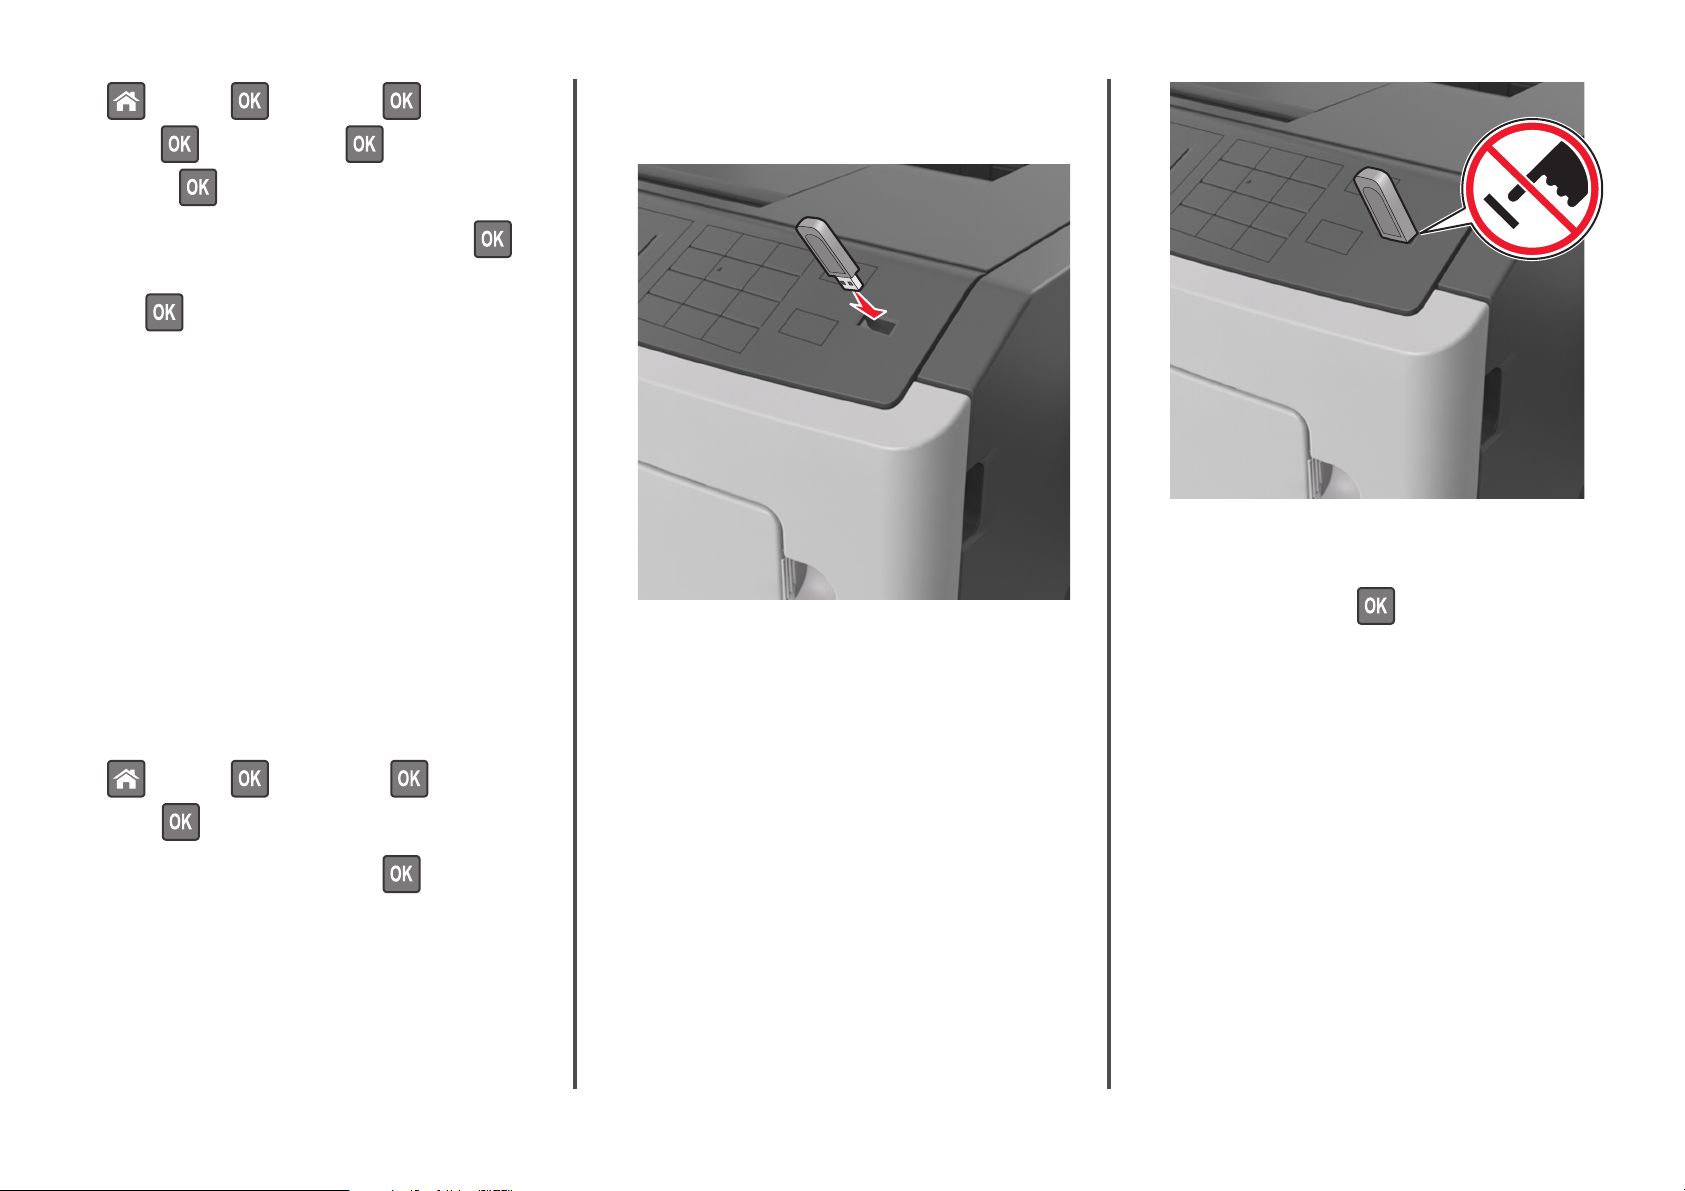
1 Insert a flash drive into the USB port.
press
.
Adjusting toner darkness
Using the Embedded Web Server
1
Open a Web browser, and then type the IP address of the printer
in the address field.
Notes:
• View the printer IP address in the TCP/IP section in the
Network/Ports menu. The IP address appears as four sets of
numbers separated by periods, such as 123.123.123.123.
• If you are using a proxy server, then temporarily disable it to
load the Web page correct ly.
2 Click Settings > Print Settings > Quality Menu > Toner Darkness.
3 Adjust the toner darkness, and then click Submit.
Using the printer control panel
1
From the printer control panel, navigate to:
> Settings > > Print Settings > > Quality
Menu >
2 Adjust the toner darkness, and then press .
> Toner Darkness
Notes:
• A flash drive icon appears on the printer control panel and in
the held jobs icon when a flash drive is installed.
• If you insert the flash drive when the printer requires
attention, such as when a jam has occurred, then the printer
ignores the flash drive.
• If you insert the flash drive while the printer is processing
other print jobs, then Busy appears. After these print jobs
are processed, you may need to view the held jobs list to
print document s from the flash drive.
Warning—Potential Damage: Do not touch the printer or the
flash drive in the area shown while actively printing, reading, or
writing from the memory device. Loss of data can occur.
2 From the printer control panel, select the document you want to
print.
3 Press the left or right arrow button to specify the number of copies
for printing, and then press
Notes:
.
• Do not remove the flash drive from the USB port until the
document has finished printing.
• If you leave the flash drive in the printer after leaving the
initial USB menu screen, then access held jobs from the
printer control panel to print files from the flash drive.
Printing from a flash drive
Notes:
• Before prin ting an encrypted PDF file, you will be prompted to
enter the file password from the printer control panel.
2
Supported flash drives and file types
Flash drive File type
Many flash drives are tested and approved for use with
the printer. For more information, contact the place
where you purchased the printer.
Notes:
• Hi‑speed USB flash drives must support the
full‑speed standard. Low-speed USB devices are
not supported.
• USB flash driv es must support the File Allocation
Table (FAT) system. Devices formatted with New
Technol ogy File System (NTFS) or any other file
system are not supported.
Documents:
• .pdf
• .xps
Images:
• .dcx
• .gif
• .JPEG
or .jpg
• .bmp
• .pcx
• .TIFF
or .tif
• .png
Canceling a print job from the printer control panel
From the printer control panel, press > .
Linking and unlinking trays
1 Open a Web browser, and then type the printer IP address in the
address field.
Notes:
• View the printer IP address on the printer control panel in
the TCP/IP section under the Network/Ports menu. The IP
address appears as four sets of numbers separated by
periods, such as 123.123.123.123.
• If you are using a proxy server, then temporarily disable it to
load the Web page correct ly.
2 Click Settings > Paper Menu.
3 Change the p aper size and type se ttings for the trays you are linking.
• To link trays, make sure the paper size and type for the tray
match that of the other tray.
• To unlink trays, make sure the paper size or type for the tray
does not match that of the other tray.
4 Click Submit.
Note: You can also change the paper size and type settings using the
printer control panel. For more information, see “Setting the paper
size and type” on page 1.
Warning—Potential Damage: Paper loaded in the tray should match
the paper type name assigned in the printer. The temperature of the
fuser varies according to the specified paper type. Prin ting issues
may occur if settings are not properly configured.
Using the 4.3-inch display printer model
Learning about the printer
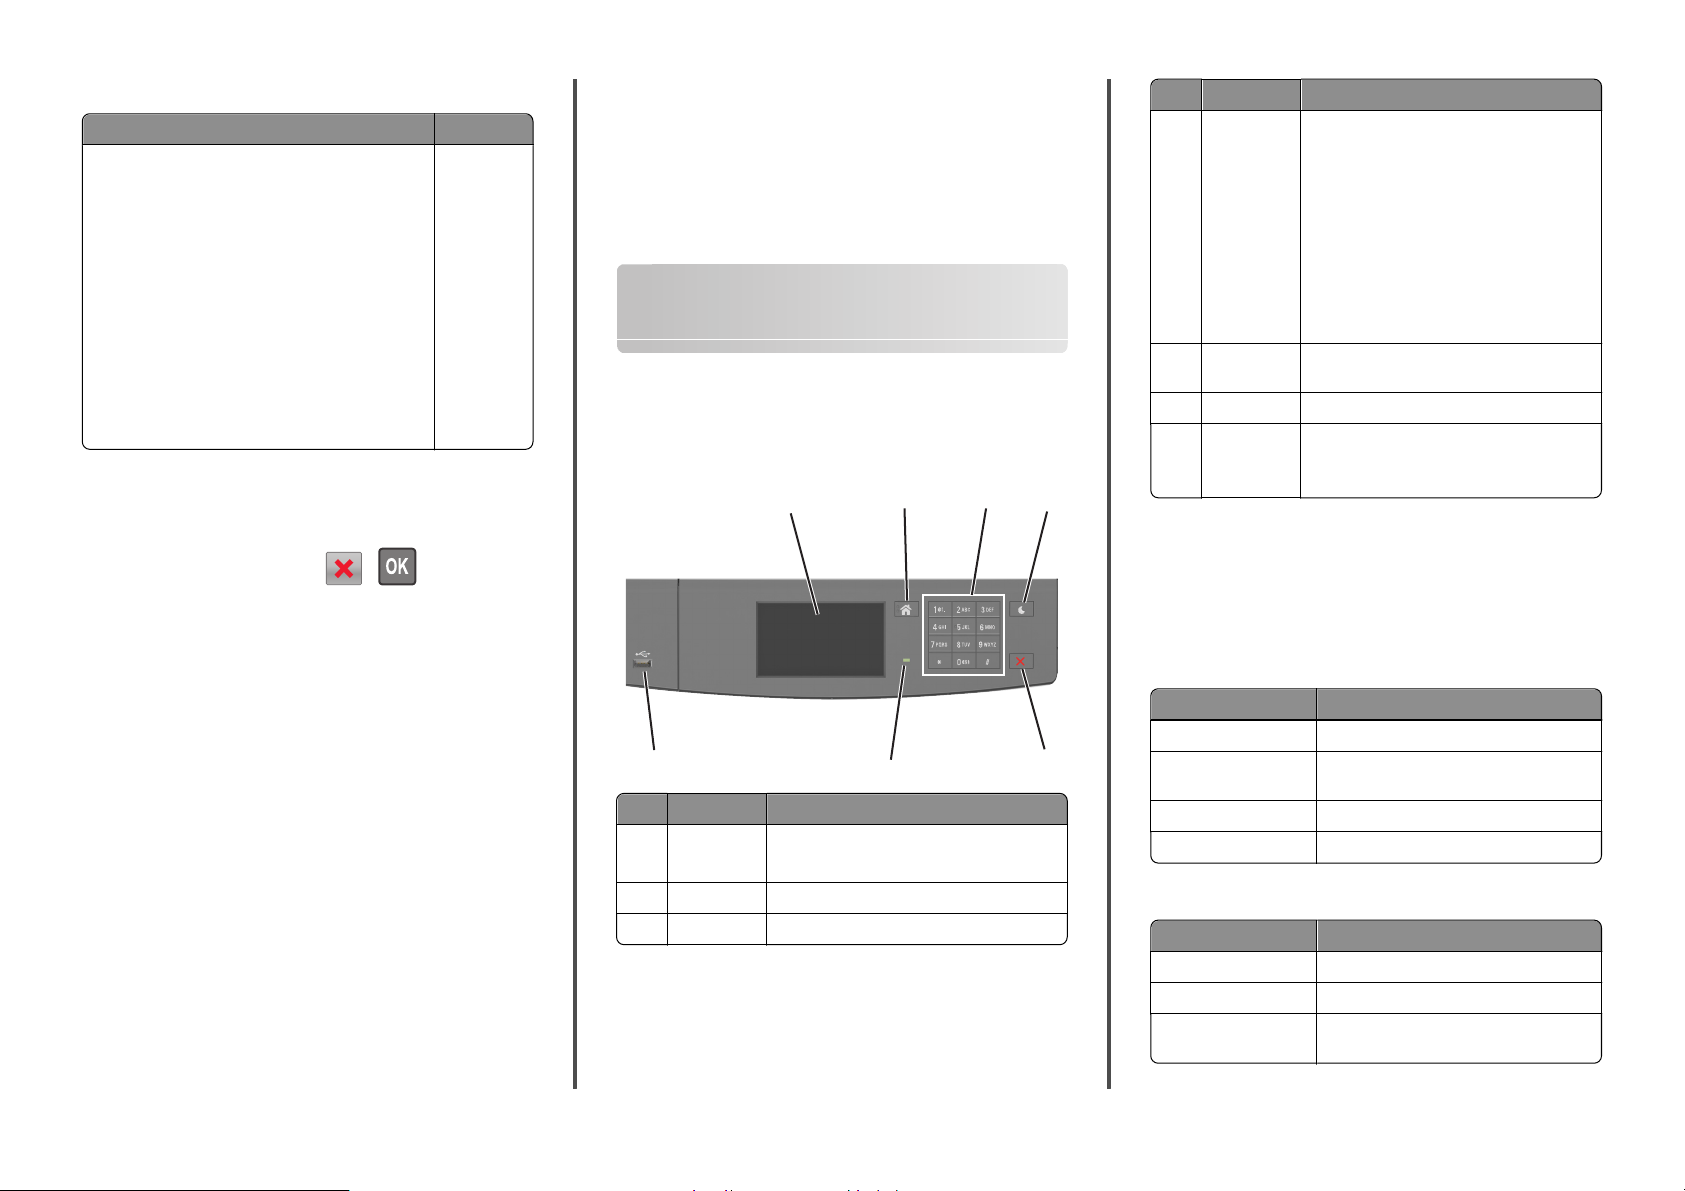
Using the printer control panel
1
7
Use the To
1 Display
2 Home button Go to the home screen.
3 Keypad Enter numbers, letters, or symbols.
• View the printer status and messages.
• Set up and operate the printer.
2
6
3
4
5
Use the To
4 Sleep button Enable Sleep mode or Hibernate mode.
The following actions wake the printer from
Sleep mode:
• Touching the screen
• Pressing any hard button
• Opening a tray or the front door
• Sending a print job from the computer
• Performi ng a power‑on reset using the main
power sw itch
• Attaching a device to the USB port
5 Stop or cancel
button
6 Indicator light Check the status of the printer.
7 USB port Connect a flash drive to the printer.
Stop all printer activity.
Note: Only the front USB port supports flash
drives.
Understanding the colors of the Sleep button and indicator lights
The colors of the Sleep button and indicator lights on the printer control
panel signify a certain printer status or condition.
Indicator light color and its corresponding printer status
Indicator light Printer status
Off The printer is off or in Hibernate mode.
Blinking green The printer is warming up, processing data,
Solid green The printer is on, but idle.
Blinking red The printer requires user intervention.
Sleep button light color and its corresponding printer status
Sleep button light Printer status
Off The printer is off, idle or in Ready state.
Solid amber The printer is in Sleep mode.
Blinking amber The printer is entering or waking from
or printing.
Hibernate mode.
3
Sleep button light Printer status
Blinking amber for 0.1
second, then goes
completely off for 1.9
seconds in a slow, p ulsing
pattern
The printer is in Hibernate mode.
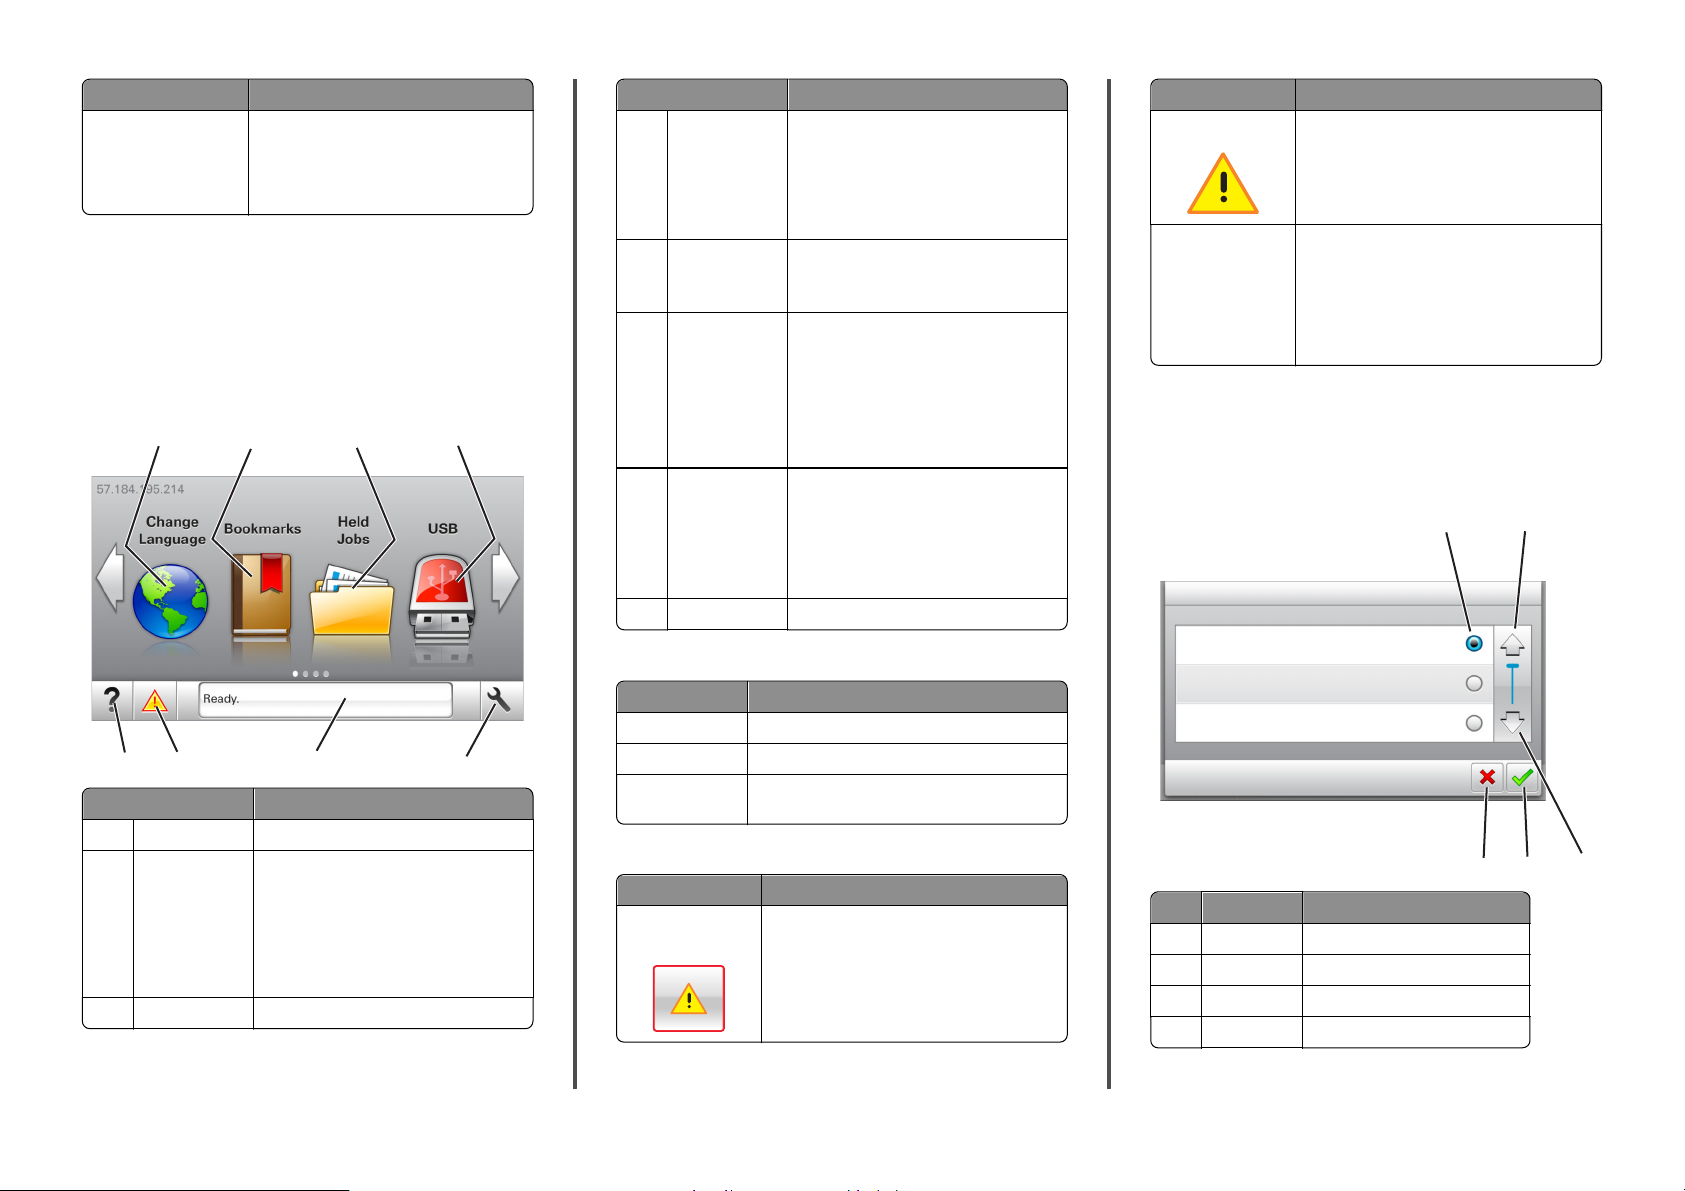
Understanding the home screen
When the printer is turned on, the display shows a basic screen,
referred to as the home screen. Use the home screen buttons and icons
to initiate an action.
Note: Your home screen may vary depending on your home screen
customization settings, administrative setup, and active embedded
solutions.
1
2
3
4
Touch To
4 USB View, sele ct, or print photos an d document s
5 Menus Access printer menus.
6 Status message
bar
from a flash drive.
Note: This icon appears only when you
return to the home screen while a memory
card or flash drive is connected to the
printer.
Note: These menus are available only
when the printer is in ready state.
• Show the current printer status such as
Ready or Busy.
• Show printe r conditions such a s
Imaging unit low or Cartridge
Low.
• Show intervention messages and the
instructions on how to clear them.
7 Status/Supplies
• Show a printer warning or error
message whenever the printer requires
intervention to continue processing.
• View more information on the printer
warning or message, and on how to
clear it.
8 Tips View a context‑sensitive help information.
This may also appear on the home screen:
Feature Description
Warning
Printer IP address
Example:
123.123.123.12
3
If an error condition occurs, then this icon
appears.
The IP address of your printer is located at the
top left corner of the home screen and appears
as four sets of numbers separated by periods.
You can use the IP address when accessing the
Embedded Web Server to view and remotely
configure printer settings even when you are not
physically near the printer.
Using the touch-screen buttons
Note: Your home screen may vary, depending on your home screen
customization settings, administrative setup, and active embedded
solutions.
1
2
7
8
Touch To
1 Change Language Change the primary language of the printer.
2 Bookmarks Create, organize, and save a set of
3 Held Jobs Display all current held jobs.
6
bookmarks (URLs) into a tree view of folders
and file li nks.
Note: The tree view does not include
bookmarks created within Forms and
Favorites, and the ones in the tree are not
usable in Forms and Favorites.
5
Touch To
Search Held Jobs Search current held jobs.
Jobs by user Access print jobs saved by user.
Profiles and
Solutions
Access profiles and s olutions.
Features
Feature Description
Attendance message
alert
If an attendance message affects a function,
then this icon ap pears and the red indicator ligh t
blinks.
4
Touch the To
1 Radio button Select or clear an item.
2 Up arrow Scroll up.
3 Down arrow Scroll down.
4 Accept button Save a setting.
3
4
5
Touch the To
5 Cancel button
• Cancel an action or a selection.
• Return to the previous screen.
Other touch-screen buttons
Touch To
Return to th e home screen.
Open a context-sensitive Help dialog on the
printer control panel.
Scroll to the left.
Scroll to the right.
Setting the paper size and type
From the home screen navigate to:
> Paper Menu > Paper Si ze/Typ e > select a tray > select the paper
size or type >
Configuring Universal paper settings
The Universal paper size is a user‑defined setting that lets you print on
paper sizes that are not preset in the printer menus.
Notes:
• The smallest Universal paper size is 6 x 127 mm (3 x 5 inches),
and is su pported only from the multipurpose feeder.
• The largest Universal paper size is 216 x 355.6 mm
(8.5 x 14 inches), and is supported from all paper sources.
1 From the printer control panel, navigate to:
> Paper Menu > Universal Setup > Units of Measure > select
a unit of measure >
2 Touch Portrait Width or Portrait Height.
3 Select the width or height, and then touch .
Printing from a flash drive
Notes:
• Before prin ting an encrypted PDF file, you will be prompted to
type the file password from the printer control panel.
• You cannot print files for which you do not have printing
permissions.
1 Insert a flash drive into the USB port.
Notes:
• A flash drive icon appears on the printer home screen when
a flash drive is inserted.
• If you insert the flash drive when the printer requires
attention, such as when a jam has occurred, then the printer
ignores the flash drive.
• If you insert the flash drive while the printer is processing
other print jobs, then Busy appears. After these print jobs
are processed, you may need to view the held jobs list to
print documents from the flash drive.
Warning—Potential Damage: Do not touch the printer or the
flash drive in the area shown while actively printing, reading, or
writing from the memory device. Loss of data can occur.
2 From the printer control panel, touch the document you want to
print.
3 Touch the arrows to specify the number of copies for printing, and
then touch Print.
Notes:
• Do not remove the flash drive from the USB port until the
document has finished printing.
• If you leave the flash drive in the printer after leaving the
initial USB menu screen, then touch Held Jobs on the home
screen to print files from the flash drive.
5
Supported flash drives and file types
Flash drive File type
Many flash drives are tested and approved for use with
the printer. For more information, contact the place
where you purchased the printer.
Notes:
• High‑speed USB flash drives must support the
fullspeed standard. L ow-speed USB devices are
not supported.
• USB flash driv es must support the File Allocation
Table (FAT) system. Devices formatted with New
Technol ogy File System (NTFS) or any other file
system are not supported.
Documents:
• .pdf
• .xps
Images:
• .dcx
• .gif
• .jpeg
or .jpg
• .bmp
• .pcx
• .tiff or .tif
• .png
• .fls
Canceling a print job from the printer control panel
1 Touch Cancel Jobs on the touch screen, or press on the
keypad.
2 Touch the job you want to cancel, and then touch Delete Selected
Jobs.
Adjusting toner darkness
Using the Embedded Web Server
1
Open a Web browser, and then type the printer IP address in the
address field.
Notes:
• View the printer IP address on the printer home screen. The
IP address appears as four sets of numbers separated by
periods, such as 123.123.123.123.
• If you are using a proxy server, then temporarily disable it to
load the Web page correct ly.
2 Click Settings > Print Settings > Quality Menu > Toner Darkness.
3 Adjust the setting, and then click Submit.
Using the printer control panel
1
From the home screen, navigate to:
> Settings > Print Settings > Quality Menu > Toner Darkness
2 Adjust the setting, and then touch .
Linking and unlinking trays
1 Open a Web browser, and then type the printer IP address in the
address field.
Notes:
• View the printer IP address on the printer home screen. The
IP address appears as four sets of numbers separated by
periods, such as 123.123.123.123.
• If you are using a proxy server, then temporarily disable it to
load the Web page correct ly.
2 Click Settings > Paper Menu.
3 Change the p aper size and type se ttings for the trays you are linking.
• To link trays, make sure the paper size and type for the tray
match that of the other tray.
• To unlink trays, make sure the paper size or type for the tray
does not match that of the other tray.
4 Click Submit.
Note: You can also change the paper size and type settings using the
printer control panel. For more information, see “Setting the paper
size and type” on page 5.
Warning—Potential Damage: Paper loaded in the tray should match
the paper type name assigned in the printer. The temperature of the
fuser varies according to the specified paper type. Prin ting issues
may occur if settings are not properly configured.
Setting up and using the home screen applications
Notes:
• Your home screen may vary depending on your home screen
customization settings, administrative setup, and active
embedded applications. Some applications are supported only in
select printer models.
• There may be additional solutions and applications available for
purchase. To learn more, inquire at your point of purchase.
Accessing the Embedded Web Server
The Embedded Web Server is the printer Web page that lets you view
and remotely configure printer settings even when you are not
physically near the printer.
1 Obtain the printer IP address:
• From the printer control panel home screen
• From the TCP/IP section in the Network/Ports menu
• By printing a network setup page or menu settings page, and
then finding the TCP/IP section
Note: An IP address appears as four sets of numbers separated
by periods, such as 123.123.123.123.
2 Open a Web browser, and then type the printer IP address in the
address field.
3 Press Enter.
Note: If you are using a proxy server, then temporarily disable it
to load the Web page correctly.
Customizing the home screen
1 Open a Web browser, and then type the printer IP address in the
address field.
Note: View the printer IP address on the printer home screen.
The IP address appears as four sets of numbers separated by
periods, such as 123.123.123.123.
2 Do one or more of the following:
• Show or hide the icons of basic printer functions.
a Click Settings > General Settings > Home screen
customization.
b Select the check boxes to specify which icons appear on the
home screen.
Note: If you clear a check box beside an icon, then the
icon does not appear on the home screen.
c Click Submit.
• Customize the icon for an application. For more information,
see “Finding information about the home screen applications”
on page 7 or see the documentation that came with the
application.
6

Activating the home screen applications
Finding information about the home screen applications
Your printer comes with preinstalled home screen applications. Before
you c an use the se applic ations, you must first ac tivate an d set up these
application s using the Embedded Web Server. For more information
on accessing the Embedded Web Server, see “Accessing the Embedded
Web Server” on page 6.
For detailed information on configuring and using the home screen
applications, contact the place where you purchased the printer.
Using Background and Idle Screen
Icon Description
The application lets you customize the
background and idle screen of your printer
home screen.
1 From the home screen, navigate to:
Change Background > select background to use
2 Touch .
Setting up Forms and Favorites
Icon Description
The application helps you simplify and
streamline work processes by letting you
quickly find and print frequently used online
forms directly from the printer home screen.
Note: The printer must have permission to
access the network folder, FTP site, or Web
site where the bookmark is stored. From the
computer w here the bookmark is stored,
use sharing, security, and firewall settings to
allow the printer at least a read access. For
help, see the documentation that came with
your operating system.
1 Open a Web browser, and then type the printer IP address in the
address field.
Note: View the printer IP address on the printer home screen.
The IP address appears as four sets of numbers separated by
periods, such as 123.123.123.123.
2 Click Settings > Apps > Apps Management > Forms and Favorites.
3 Define the bookmarks, and then customize the settings.
4 Click Apply.
To use the application, to uch Forms and Fav orites on the printer home
screen, and then navigate through form categories, or search for forms
based on a form number, name, or description.
Understanding Eco‑Settings
Icon Description
The applic ation lets you easily manage ener gy
consumption, noise, toner, and paper usage
settings to help reduce the environmental
impact of your printer.
Setting up Remote Operator Panel
This application shows the printer control panel on your computer
screen and lets you interact with the printer control panel, even when
you are not physically near the network printer. From your computer
screen, you can view the printer status, release held print jobs, create
bookmarks, and do other print-related tasks you might normally do
while standing at the network printer.
1 Open a Web browser, and then type the printer IP address in the
address field.
Note: View the printer IP address on the printer home screen.
The IP address appears as four sets of numbers separated by
periods, such as 123.123.123.123.
2 Click Settings > Remote Operator Panel Settings.
3 Select the Enabled check box, and then customize the settings.
4 Click Submit.
To use the application, click Remote Operator Panel > Launch VNC
Applet.
Exporting and importing a configuration
You can export configuration settings into a text file, and then import
the file to apply the settings to other printers.
1 Open a Web browser, and then type the printer IP address in the
address field.
Note: View the printer IP address on the printer home screen.
The IP address appears as four sets of numbers separated by
periods, such as 123.123.123.123.
2 Click Settings > Apps > Apps Management.
3 From the list of installed applications, click the name of the
application you want to configure.
4 Click Configure, and then do one of the following:
• To export a configuration to a file, click Export, and then follow
the instructions on the computer screen to save the
configuration file.
Notes:
– When saving the configuration file, you can type a
unique file name or use the default name.
– If a "JVM Out of Memory” error occurs, then repeat the
export process until the configuration file is saved.
• To import a configuration from a file, click Import, and then
browse to the saved configuration file that was exported from
a previously configured printer.
Notes:
– Before importing the configuration file, you can choose
to preview it first or load it directly.
– If a timeout occurs and a blank screen appears, then
refresh the Web browser, and then click Apply.
Printing
Printing a document
1 From the Paper menu on the printer control panel, set the paper
type and size to match the paper loaded.
2 Send the print job:
7

For Windows users
a With a document open, click File > Print.
b Click Properties, Preferences, Options, or Setup.
c Adjust the settings, if necessary.
d Click OK > Print.
For Macintosh users
a Customize the settings in the Page Setup dialog if necessary:
1 With a document open, choose File > Page Setup.
2 Choose a paper size or create a custom size to match the
paper loaded.
3 Click OK.
b Customize the settings in the Page Setup dialog if necessary:
1 With a document open, choose File > Print.
If necessary, click the disclosure triangle to see more
options.
2 From the Print dial og and pop‑up menus adjust the settings
if necessary.
Note: To print on a specific paper type, adjust the
paper type setting to match the paper loaded, or select
the appropriate tray or feeder.
3 Click Print.
Canceling a print job from the computer
For Macintosh users
1 From the Apple menu, navigate to either of the following:
• System Preferences > Print & Scan > select your printer > Open
Print Queue
• System Preferences > Print & Fax > select your printer > Open
Print Queue
2 From the printer window, select the print job you want to cancel,
and then delete it.
Loading paper and specialty media
Loading trays
CAUTION—POTENTIAL INJURY: To reduce the risk of
equipment instability, load each tray separately. Keep all other
trays closed until needed.
1 Pull out the tray completely.
Note: Do not remove trays while a job prints or while Busy
appears on the printer display. Doing so may cause a jam.
2 Squeeze and then slide the width guide tab to the correct position
for the size of the paper you are loading.
LT
LG
R
L
E
X
E
A
C
1
4
B
5
A
5
2
A
4
LT
R
E
X
E
C
B
5
A5
For Windows users
1 Open the printers folder.
In Windows 8
From the Search charm, type run, and then navigate to:
Apps list > Run > type control printers > OK
In Windows 7 or earlier
Click or click Start, and then click Run.
a
b In the Start Search or Run dialog, type control printers.
c Press Enter, or click OK.
2 Double‑click the printer icon.
3 Select the print job you want to cancel.
4 Click Delete.
4
A
R
LT
C
E
X
E
5
B
5
A
6
A
8

3 Squeeze and th en slide the length guide tab to the correct position
for the size of the paper you are loading.
1
LT
R
LG
L
E
X
E
C
A
4
B
5
A
5
A
6
Notes:
• For some paper sizes like letter, legal, and A4, squeeze and
slide the length guide tab backward to accommodate their
length.
• When loading legal‑size paper, the length guide extends
beyond the base leaving the paper exposed to dust. To
protect the paper from dust, you can purchase a dust cover
separately. For more information, contact customer support.
• If you are loading A6-size paper in the standard tray, then
squeeze and then slide the length guide tab toward the
center of the tray to the A6‑size position.
• Make sure the width and length guides are aligned with the
paper size indicators on the bottom of the tray.
2
A4
LTR
E
X
E
C
B
5
A
5
LT
R
LG
L
E
X
E
A
C
4
B
5
A
5
A
6
A
4
LT
R
E
X
E
C
B
5
A
5
4 Flex the sheets back and forth to loosen them, and then fan them.
Do not fold or crease the paper. Straighten the edges on a level
surface.
5 Load the paper stack.
Notes:
• Load with the printable side facedown when using recycled
or preprinted paper.
• Load prepunch ed paper with the holes on the top edge
toward the front of the tray.
• Load letterhead facedown, with the top edge of the sheet
toward the front of the tray. For two‑sided printing, load
letterhead faceup with the bottom edge of the sheet toward
the front of the tray.
• Make sure the paper is below the maximum paper fill
indicator located on the side of the width guide.
9

7 From the printer control panel, set the paper size and paper type
a Pull the multipurpose feeder extender.
in the Paper menu to match the paper loaded in the tray.
Note: Set the correct paper size and paper type to avoid paper
jams and print quality problems.
Loading the multipurpose feeder
Use the multipurpose feeder when printing on different paper sizes
and types or specialty media, such as card stock, transparencies, and
envelopes. You can also use it for single‑page print jobs on letterhead.
1 Open the multipurpose feeder.
LT
R
LG
L
E
X
E
A
C
4
B
5
A
5
A
6
A
4
LT
R
E
X
E
C
B5
A
5
2
1
b Pull the extender gently so that the multipurpose feeder is fully
extended and open.
6 Insert the tray.
10

2 Squeeze the tab on the left width gu ide, and then move the guid es
for the paper you are loading.
1
2
3 Prepare the paper or specialty media for loading.
• Flex sheets of paper back and forth to loosen them, and then
fan them. Do not fold or crease the paper. Straighten the edges
on a level surface.
• Flex the stack of envelopes back and forth to loosen them, and
then fan them. Straighten the edges on a level surface.
4 Load the paper or specialty media.
Notes:
• Do not force paper or specialty media into the multipurpose
feeder.
• Make sure the paper or specialty media is below the
maximum paper fill indicator located on the paper guides.
Overfilling may cause paper jams.
the printer first. For more information on loading
transparencies, see the packaging that the transparencies came
in.
Note: When loading A6‑size paper, make sure the
multipurpose feeder extender rests lightly against the edge
of the paper so that the last few sheets of paper remain in
place.
• Hold transparencies by the edges. Flex the stack of
transparencies back and forth to loosen them, and then fan
them. Straighten the edges on a level surface.
Note: Avoid touching the printable side of the
transparencies. Be careful not to scratch them.
• Load paper, transparencies, and card stock with the
recommended printable side faceup and the top edge entering
11

• Load letterhead faceup with the top edge entering the printer
first. For two‑sid ed (duplex ) printing , load le tterhead f acedown
with the bottom edge entering the printer first.
• Load envelopes with the flap on the left side facedown.
Clearing jams
Avoiding jams
Load paper properly
• Make sure paper lies flat in the tray.
Correct loading of paper Incorrect loading of paper
• Do not slide the paper into the tray. Load paper as shown in the
illustration.
Warning—Potential Damage: Never use envelopes with
stamps, clasps, snaps, windows, coated linings, or self‑stick
adhesives. These envelopes may severely damage the
printer.
5 From the printer control panel, set the paper size and paper type
in the Paper menu to match the paper or specialty media loaded
in the multipurpose feeder.
• Do not remove a tray while the printer is printing.
• Do not load a tray while the printer is printing. Load it before
printing, or wait for a prompt to load it.
• Do not load too much paper. Make sure the stack height is below
the maximum paper fill indicator.
12
• Make sure the guides in the tray or the multipurpose feeder are
properly positioned and are not pressing tightly against the paper
or envelopes.
• Push the tray firmly into the printer after loading paper.
Use recommended paper
• Use only recommended paper or specialty media.
• Do not load wrinkled, creased, damp, bent, or curled paper.
• Flex, fan, and straighten paper before loading it.
• Do not use paper th at has been cut or trimmed by hand.
• Do not mix paper sizes, weights, or types in the same tray.

• Make sure the paper size and type are set correctly on the
Embedded Web Server or the computer.
Note: Depending on your operating system, access the Paper
menu using Local Prin ter Settings Utility or Print er Settings.
• Store paper according to manufacturer recommendations.
Understanding jam messages and locations
When a jam occurs, a message indicating the jam location and
information to clear the jam appears on the printer display. Open the
doors, covers, and trays indicated on the display to remove the j am.
Notes:
• When Jam Assist is set to On, the printer automatically flushes
blank pages or pages with partial prints to the standard bin after
a jammed page has been cleared. Check your printed output
stack for discarded pages.
• When Jam Recovery is set to On or Auto, the printer reprints
jammed pages. However, the Auto setting does not guarantee
that the page will print.
1
2
6
Area Printer control
1 Standard bin [x]‑page jam, clear
2 Rear door [x]‑page jam, open
3 Tray 1 [x]‑page jam,
4 Tray [x] [x]‑page jam,
5 Multipurpose
feeder
6 Front door [x]‑page jam, open
panel message
standard
bin. [20y.xx]
rear door. [20y.xx]
remove tray 1 to
clear
duplex. [23y.xx]
remove tray
[x]. [24y.xx]
[x]‑page jam, clear
manual
feeder. [250.xx]
front door. [20y.xx]
What to do
Remove the jammed
paper.
Open the rear door, and
then remove the
jammed paper.
Pull tray 1 completely
out, then push the front
duplex flap down, and
then remove the
jammed paper.
Note: You may need to
open the rear door to
clear some 23y.xx
paper jams.
Pull the indicated tray
out, and then remove
the jammed paper.
Remove all paper from
the multipurpose
feeder, an d then
remove the jammed
paper.
Open the front door,
then remove the toner
cartridge, im aging unit,
and jammed paper.
[x]‑page jam, open front door. [20y.xx]
CAUTION—HOT SURFACE: The inside of the printer might be
hot. To reduce the risk of injury from a hot component, allow
the surface to cool before touching it.
1 Press the button on the right side of the printer, an d then open the
front door.
1
2
2 Pull out the toner cartridge using the handle.
5
3
4
13

3 Lift the green handle, and then pull out the imaging unit from the
printer.
Warning—Potential Damage: Do not touch the shiny blue
photoconductor drum under the imaging unit. Doing so may
affect the quality of future print jobs.
5 Lift the green flap in front of the printer.
6 Firmly grasp the jammed paper on each side, and then gently pull
it out.
Note: Make sure all paper fragments are removed.
7 Insert the imaging unit by aligning the arrows on the side rails of
the unit with the arrows on the side rails inside the printer, and
then insert the imaging unit into the printer.
8 Insert the toner cartridge by aligning the side rails of the cartridge
with the arrows on the side rails inside the printer, and then insert
the cartridge into the printer.
4 Place the imaging unit aside on a flat, smooth surface.
Warning—Potential Damage: Do not expose the imaging unit to
direct light for more than 10 minutes. Extended exposure to
light may cause print quality problems.
14
9 Close the front door.
10 From the printer control panel, touch to clear the message
and continue pri nting. For non‑touch‑screen printer models, select
Next >
> Clear the jam, press OK > .

[x]‑page jam, open rear door. [20y.xx]
1 Open the front door.
2
2 Gently pull down the rear door.
CAUTION—HOT SURFACE: The inside of the printer might
be hot. To reduce the risk of injury from a hot component,
allow the surface to cool before touching it.
Note: Make sure all paper fragments are removed.
[x]‑page jam, remove tray 1 to clear
duplex. [23y.xx]
CAUTION—HOT SURFACE: The inside of the printer might be
hot. To reduce the risk of injury from a hot component, allow
the surface to cool before touching it.
1
4 Close the rear door.
5 From the printer control panel, touch to clear the message
and continue printing. For non‑touch‑screen printer models, select
Next >
> Clear the jam, press OK > .
1 Pull the tray completely out of the printer.
3 Firmly grasp the jammed paper on each side, and then gently pull
it out.
[x]‑page jam, clear standard bin. [20y.xx]
1 Firmly grasp the jammed paper on each side, and then gently pull
it out.
Note: Make sure all paper fragments are removed.
2 From the printer control panel, touch to clear the message
and continue printing. For non‑touch‑screen printer models, select
Next >
> Clear the jam, press OK > .
15

2 Locate the blue lever, and then pull it down to release the jam.
4 Insert the tray.
5 From the printer control panel, touch to clear the message
and continue printing. For non‑touch‑screen printer models, select
2 Firmly grasp the jammed paper on each side, and then gently pull
it out.
Note: Make sure all paper fragments are removed.
3 Firmly grasp the jammed paper on each side, and then gently pull
it out.
Note: Make sure all paper fragments are removed.
Next >
> Clear the jam, press OK > .
[x]‑page jam, open tray [x]. [24y.xx]
1 Pull the tray completely out of the printer.
Note: The message on the printer display indicates the tray
where the jammed paper is located.
16
3 Insert the tray.
4 From the printer control panel, touch to clear the message
and continue pri nting. For non‑touch‑screen printer models, select
Next >
> Clear the jam, press OK > .

[x]‑page jam, clear manual
feeder. [25y.xx]
1 From the multipurpose feeder, firmly grasp the jammed paper on
each side, and then gently pull it out.
Note: Make sure all paper fragments are removed.
2 Flex the sheets of paper back and forth to loosen them, and then
fan them. Do not fold or crease the paper. Straighten the edges on
a level surface.
4 From the printer control panel, touch to clear the message
and continue printing. For non‑touch‑screen printer models, select
Next >
> Clear the jam, press OK > .
3 Reload paper into the multipurpose feeder.
Note: Make sure the paper guide lightly rests against the edge of
the paper.
17
 Loading...