

Page 1
®
Instruction Manual - Guide de l’utilisateur
RP200SP
Page 2

---------- ENGLISH
---------- FRANÇAIS
GB
FR
Page 3
INTRODUCTION
Congratulations on the purchase of your Spider-ManTM Radio
Alarm Clock TimeProjector® RP200SP with exclusive functions:
time projection and temperature display. Please read this manual
carefully to ensure you understand the operations and keep it in a
safe place for future reference.
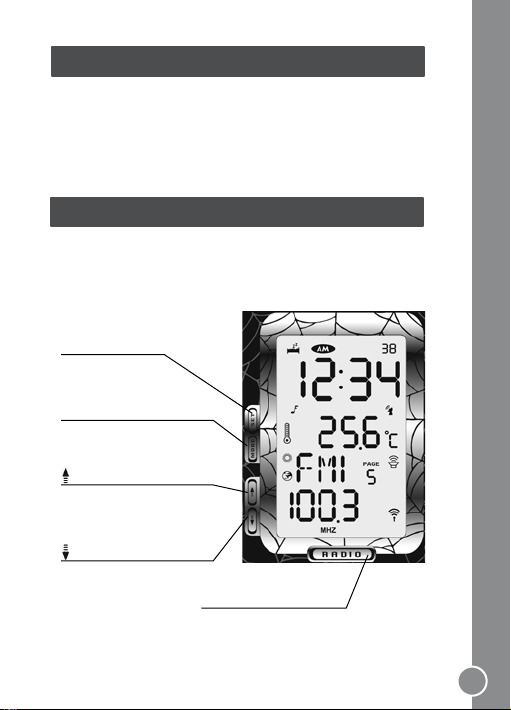
UNIT LAYOUT
Function of the keys
Front view
Set
This key is used to
perform settings.
Mode
This key is used to go from
one mode to another.
This key is used to move
time or radio frequency
digits upwards.
This key is used to move
time or radio frequency
digits downwards.
Radio
To turn the radio on and off.
English
1
Page 4

English
MARVEL, SPIDER-MAN:
TM & © 2007 Marvel Characters, Inc.
All rights reserved. www.marvel.com.
This Power Spider-Man is produced
underlicense fromMarvelCharacters,
Inc.
Top and bottom view
S1 to S5
Memory spaces to store
radio frequencies.
Snooze/Light
To activate the snooze
function and to project the
time on the ceiling or wall
of a room.
Volume Knob
Volume knob at the base of the unit.
Back view
Focus knob
To adjust the focus of the
projection.
Rotation knob
To rotate the projection to
the right angle.
Projector swi tch
To turn the projection on
and off if the uni t is
connected to the mains.
Projector
Adjust to choose the location
of the projection.
2
Reset key
To reset the unit’s settings.
Page 5

LCD Screen Layout
1.
2.
English
3.
4.
5.
6.
7.
8.
9.
10.
1.
Snooze icon
2.
Time
3.
Alarm icon
4.
Countdown icon
5.
Temperature icon
6.
Temperature °C / °F
7.
Summer time icon
8.
World time icon
Day / FM1-FM6
9.
DATE / Radio frequency
10.
RCC icon
11.
(Radio Controlled Clock)
Preset radio turn on icon
12.
Radio sleep mode icon
13.
Page (frequency saving) icon
14.
Radio on icon
15.
11.
12.
13.
14.
15.
3
Page 6

English
4
GETTING STARTED
When you use the RP200SP for the rst time:
1. Remove the plastic static label on the screen display.
2. Open the battery door located on the underside of the unit.
3. Insert 4 AA batteries according to the polarities (+/- signs).
SETTINGS
Clock
RCC Clock (Radio Controlled Clock)
1. The RP200SP is designed to automatically synchronize its
calendar clock once it is brought within a range of 1500km of
the Frankfurt DCF77 radio signal. When the RP200SP is brought
within this range, its auto-control mechanism will override all
manual settings.
2. The clock automatically starts scanning the signal after new
batteries are inserted in the main unit. When receiving the radio
signal, the Radio Tower symbol starts to blink. A complete
reception generally takes about 10 minutes, depending on the
strength of the radio signal.
3. When the reception is complete, the Radio Tower symbol will
stop blinking and remain solid.
Page 7
4. For an optimal reception, place the clock away from metal objects
and electrical appliances (i.e. television, computer, monitor, etc) to
minimize interference.
Notes:
• The unit will receive the RCC signals every day at 2am.
• The RCC signal can also be triggered by holding the key for 2
seconds in time mode.
• When the unit is searching or receiving the RCC signal (which lasts
about 5 minutes), none of the keys is working except the key.
• Press and hold the key for 2 seconds if you wish to stop to the
RCC signal search.
If the RP200SP is brought outside the range of the Frankfurt DCF77
radio signal or if the signal is interfered, please set the time and date
manually according to the instructions below. If the unit is located
within the radio-controlled range, you may want to customize some
of the clock settings.
Note: When no key is pressed for more than one minute, the unit
returns to time mode (time, date and temperature display).
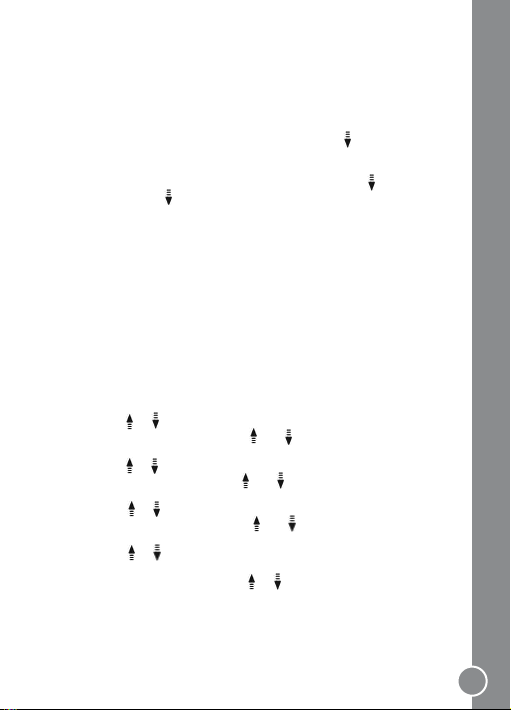
Manual Time Settings
1. In time mode, hold the [SET] key for 2 seconds until the seconds
digits ash.
2. Press the or keys to reset the seconds. Press [SET] to conrm.
3. The hour digit ashes. Press the and keys to adjust the hour.
4. Press [SET] to conrm. The minutes’ digits ash.
Press the or keys to adjust the minutes. Press [SET] to conrm.
5.
6. The year digits ash. Press the and keys to adjust the year.
7. Press [SET] to conrm. The month’s digit ashes.
8. Press the
9. The day’s digit ashes. Press the
10. Press [SET] to conrm. The 12/24 hour digit ashes.
11. Press the
24 hour time display. Press [SET] to conrm.
12. The language ashes. Press the
language in which the date will be displayed (French, English,
Portuguese, German, Spanish or Italian).
13. Press [SET] to conrm and end your settings.
or keys to adjust the month. Press [SET] to conrm.
or keys to toggle between the 12 hour (am/pm) and
and keys to adjust the day.
or keys to select the
English
5
Page 8

English
Alarm
1. In time mode, press [MODE] once to select alarm mode.
2. Press and hold [SET] until hour digit ashes.
3. Press or to adjust digit.
4. Press [SET] to select minute for adjustment.
5. Press [SET] to conrm alarm time settings.
Press the key to activate/deactivate the alarm. When the alarm is
on, the icon is displayed onscreen.
Notes:
- When the alarm rings, press any key (but not the Snooze/Light
button) to stop it. It will ring again the next day at the same time
unless the alarm is turned off.
- When the alarm rings and the snooze function is on, press any key
to stop the alarm momentarily. It will ring again 10 minutes later,
unless the snooze function is turned off.
- When the alarm rings press the Snooze/Light button to activate the
snooze function. The alarm will stop momentarily and start again
10 minutes later.
- During the 10 minutes snoozing period press and hold the Snooze/
Light button for 2 seconds to stop the alarm. It will ring again the
next day at the same time.
World Time Clock
This function allows you to adjust the clock to a time zone. It is
particularly useful for travelers. Set the clock to the city you are
located in, or to a city in the same time zone.
1. In time mode, press [MODE] three times to select the world time clock.
2. Press the key to select the code of the city in which you are
located. Please refer to the city code list located at the end of the
user guide.
3. Press to adjust the summer saving time function.
4. Press and hold [SET] to set the world time as the local time. When
the local time is the same as the world time, the icon ashes.
Thermometer
In time mode, press the key to toggle between temperature display
in ºC or in ºF.
6
Page 9

Countdown
1.
In time mode, press [MODE] thrice to select the countdown
function.
2. To set the time at which you wish the unit to count down from,
press and hold [SET] until hour digit ashes. The maximum time
is 23 hours, 59 minutes and 59 seconds.
3. Press the or keys to set the hour. Press [SET] to conrm.
The minutes’ digits ash. Press the and keys to adjust the
4.
minutes.
5. Press [SET] to conrm. The seconds’ digits ash.
6. Press the
conrm and launch the countdown.
Press the key to stop/continue the countdown. When the
countdown is paused, press the key if you wish to reset it.
or keys to adjust the seconds. Press [SET] to
RADIO
Setting a radio frequency and storing a channel
The RP200SP radio displays 6 FM groups (FM1 to FM6) and each
group has 5 memory spaces (S1 to S5) available to store up to 30
radio frequencies.
1. Press the [RADIO] key to turn on the radio or the radio wake-up
function.
2. Press [SET] to go from the FM1 to the FM6 radio group.
3. Press the or key to change the radio frequency.
4. To store a frequency into one of the 5 spaces available (S1 to
S5), select a frequency and press and hold for 2 seconds the
space key (S1 to S5) you wish to store it in. Once a frequency is
stored, simply press the corresponding space key to tune in to
that frequency.
Searching radio frequencies automatically
This function allows you to scan all the radio frequencies within the
reception range of your unit and saves them into the radio memory
spaces. The rst frequency will be saved in the S1 space of FM1,
the second frequency in S2, FM1, and the last one in S5, FM6.
Please note that the RP200SP can save up to 30 radio frequencies.
English
7
Page 10

English
8
1. Press the radio key to turn on the radio.
2. Press and hold the [RADIO] key for 2 seconds. ‘SLP’ is displayed
onscreen.
3. Press and hold the [SET] key for 2 seconds.
4. ‘SCN’ is displayed onscreen during the auto scan and the
frequency digits move up quickly. Once the auto scan is over, the
rst frequency stored will be displayed.
Volume
To set the volume of the radio, spin the circle base of the clock.
Setting the radio wake-up time
1. In time mode, press [MODE] four times to enter the radio mode.
2. Press the key. The icon appears.
3. To set the time at which you wish the radio to turn on, press and
hold [SET] until hour digit ashes.
4. Press the or keys to set the hour. Press [SET] to conrm.
5. The minutes’ digits ash. Press the
minutes.
6. Press [SET] to conrm.
and keys to adjust the
Sleep Function
This function allows you to program the time duration (5 to 85
minutes) after which the radio will automatically stop playing.
Hence, you can fall asleep without worrying about turning the radio
off.
1. In radio mode (the radio is playing), press and hold the [RADIO]
key for 2 seconds.
2. ‘SLP’ is displayed onscreen.
3. Set the time duration after which the radio will turn off using the
or key.
4. The icon is displayed onscreen and the unit returns to radio
mode display.
PROJECTOR CLOCK
If the unit is battery operated only:
1.
Press [SNOOZE/LIGHT] to activate the projection function. The
current time in Hour: Minutes will be projected for about 3 seconds.
Page 11

2. Adjust the angle of the projector to choose the projection
location. The projected distance is up to 3 metres.
3. Rotate the focus to adjust the focus of the projection.
4.
Adjust the rotation knob to rotate the projection to the right angle.
When using a DC adaptor (optional and not included)
- If an exte rnal t ransf orme r is plug ged into the DC ja ck, the
projector will stay on while the projector switch is set to the position
- Please only use a 4.5v adapter with a positive centre .
Please contact your retailer to get a compatible adaptor following
this specication.
REPLACING BATTERIES
This clock uses 4 x AA/LR06 batteries.
1. Remove the battery cover on the bottom of the unit.
2. Insert the batteries, taking care to follow their polarity directions.
3. Replace the cover.
Do not use rechargeable batteries. Non-rechargeable batteries are
not to be recharged. Rechargeable batteries are only to be charged
under adult supervision. Different types of batteries or new and
used batteries are not to be mixed. Only batteries of the same or
equivalent type as recommended are to be used. Batteries are to
be inserted with the correct polarity. Exhausted batteries are to
be removed from the toy. The supply terminals are not to be short
circuited. Do not throw batteries into a re. Remove the batteries if
you are not going to use the game for a long period of time.
WARNING: If the unit malfunctions or receives an electrostatic
shock, remove the batteries and/or perform the Reset procedure.
SAVE NATURE! Ensure batteries are disposed of safely according
to the battery manufacturers’ instructions.
RESET
Should an error occur, press [RESET] at the back of the unit with a
pointed object to resume normal operation.
English
.
9
Page 12

English
GENERAL CARE
• Never place the projection clock in areas subject to vibrations and
shocks as this may damage it and cause inaccurate readings.
• Avoid exposure to sudden changes in temperature such as direct
sunlight, extreme cold and wet or moist conditions.
• When cleaning the display and casing, only use a soft damp cloth.
Do not use solvents or scouring agents as they may mark the
LCD and casing.
• Do not drop the alarm clock or immerse in water.
• Do not attempt to make any repairs to the alarm clock yourself.
Return it to the original retailer for repair.
WARRANTY
This product is covered by our two-year warranty.
For warranty or after-sales service, please return the product to
the retailer with proof of purchase. Our warranty covers material or
production defects attributable to the manufacturer and excludes
any damage arising from the disrespect of the instructions for use
or any inappropriate handling of the unit (such as dismantling,
exposure to heat or moisture, etc.).
Customer Service
LEXIBOOK UK ltd
Unit 10 Peterseld Industrial Estate
Bedford Road, Peterseld
Hampshire, GU32 3QA,
United Kingdom
Freephone helpline: 0808 100 3015
http://www.lexibook.com
Environmental Protection
Unwanted electrical appliances can be recycled and
should not be discarded along with regular household
waste! Please actively support the conservation of
resources and help protect the environment by returning
this appliance to a collection centre (if available).
10
Page 13

INTRODUCTION
Félicitations pour l’achat de votre Radio-réveil TimeProjector®
Spider-ManTM RP200SP qui offre des fonctions exclusives :
projection de l’heure et afchage de la température.
Veuillez lire attentivement ce manuel pour vous assurer de
comprendre son utilisation complète et conservez-le dans un
endroit sûr pour toute future consultation.
PRESENTATION DE L’APPAREIL
Fonctions des touches
Vue de face
Set
Cette touche est utilisée
pour effectuer des réglages.
Mode
Cette touche est utilisée
pour passer d’un mode à
l’autre.
Cette touche est utilisée
pour augmenter les valeurs
numériques d’un réglage ou
des fréquences radio.
cette touche est utilisée
pour diminuer les valeurs
numériques d’un réglage
ou des fréquences radio.
Radio
Pour allumer ou éteindre
la radio.
Français
11
Page 14

Français
MARVEL, SPIDER-MAN:
TM & © 2007 Marvel Characters, Inc.
All rights reserved. www.marvel.com.
This Power Spider-Man is produced
underlicense fromMarvelCharacters,
Inc.
12
Vue du dessus
S1 à S5
Mémoires pour sauvegarder
des fréquences de stations
de radio.
Répétition de
l’alarme/ Lumière
Pour afcher la fonction
Snooze (Répétition) et
projeter l’heure au plafond
ou au mur de la pièce.
Molette de volume
Molette de volume à la base de l’unité.
Vue de dos
Molette de focus
Pour ajuster la projection.
Molette de rotation
Pour faire pivoter l’heure
jusqu’à l’angle désiré.
Interrupteu r du projecteu r
Pour all umer et éteind re
la projectio n conti nue si
l’unité es t bran chée à une
prise s ecteu r.
Projecteur
Pour choisir l’endroit de
projection.
Touche reset
Pour réinitialiser les
réglages de l’unité.
Page 15

Présentation de l’écran
1.
2.
3.
4.
5.
6.
7.
8.
9.
10.
1.
Icône de rappel d’alarme
2.
Heure
3.
Icône d’alarme
4.
Icône de compte à rebours
5.
Icône de température
6.
Température °C / °F
7.
Icône de l’heure d’été
8.
Icône de l’horloge mondiale
9.
JOUR / FM1-FM6
10.
DATE / Fréquence radio
11.
Icône RCC (Réglage
automatique de l’heure)
12.
Activation de la radio
programmée
13.
Arrêt de la radio programmée
14.
Icône de « Page » :
sauvegarde et mise en
mémoire de fréquences radio
15.
Icône de mise en marche de
la radio
Français
11.
12.
13.
14.
15.
13
Page 16

Français
14
POUR COMMENCER
Lorsque vous utilisez le radio-réveil RP200SP pour la première fois :
1. Retirez la pellicule statique qui protège l’écran à l’aide de la
languette.
2. Ouvrez le couvercle du compartiment des piles situé au-dessous
de l’appareil.
3. Insérez 4 piles de type LR06 en respectant les polarités
(indications +/- ).
REGLAGES
Horloge
Horloge RCC (Horloge radio-contrôlée: Réglage
automatique de l’horloge)
1. Le RP200SP est conçu pour synchroniser automatiquement le
réglage de l’heure une fois qu’il se trouve dans un périmètre de
1500km du signal radio DCF77 émis par Francfort. Lorsque le
RP200SP est situé au sein de ce périmètre, son mécanisme
contrôlé automatiquement annulera tous les réglages manuels.
2. L’horloge commencera à balayer automatiquement dès
que des nouvelles piles seront insérées dans l’appareil.
Page 17

Lors de la réception du signal, le symbole de la Tour de Radio
commencera à clignoter. Une session de réception dure
généralement environ 10 minutes, selon la puissance du signal
radio.
3. Lorsque la réception est terminée, le symbole de la Tour de Radio
s’arrêtera de clignoter et restera xe.
4. Pour une réception optimale, éloignez l’horloge des objets
métalliques et des appareils électriques (exemples : téléviseur,
ordinateur, écran etc.) pour diminuer les interférences.
Notes :
•
L’appareil recevra les signaux RCC chaque jour à 2 heures du matin.
• Le signal RCC peut également être déclenché en maintenant la
touche durant 2 secondes en mode horloge.
• Lorsque l’appareil cherche ou reçoit le signal RCC (qui dure environ
5 minutes), aucune des touches ne fonctionne sauf la touche .
• Appuyez et maintenez la touche durant 2 secondes si vous
désirez arrêter la recherche du signal RCC.
Si le RP200SP se trouve en dehors du périmètre du signal radio
DCF77 de Francfort ou s’il subit des interférences, veuillez régler
l’heure et la date manuellement en suivant les instructions données
ci-dessous. Si l’appareil se trouve au sein du périmètre contrôlé
automatiquement, vous pouvez aussi personnaliser certains des
réglages de l’horloge.
Note : Si aucune touche n’est pressée durant plus d’une minute,
l’appareil retourne en mode horloge (afchage de l’heure, de la date
et de la température).
Réglage manuel de l’heure
1. En mode horloge, maintenez la touche [SET] durant 2 secondes
jusqu’à ce que les chiffres des secondes clignotent.
2. Appuyez sur la touche ou pour régler les secondes.
Appuyez sur [SET] pour conrmer.
3. Les chiffres des heures clignotent. Appuyez sur les touches ou
pour régler les heures.
4.
Appuyez sur [SET] pour conrmer. Les chiffres des minutes clignotent.
Appuyez sur la touche ou pour régler les minutes. Appuyez
5.
sur [SET] pour conrmer.
6. Les chiffres des années clignotent. Appuyez sur la touche ou
pour régler l’année.
7.
Appuyez sur [SET] pour conrmer. Les chiffres du mois clignotent.
Français
15
Page 18

Français
8. Appuyez sur la touche ou pour régler le mois. Appuyez sur
[SET] pour conrmer.
9. Les chiffres des jours clignotent. Appuyez sur les touches
pour régler le jour.
10. Appuyez sur [SET] pour conrmer. L’afchage de 12/24 heures
clignote.
11. Appuyez sur la touche
(am/pm) et 24 heures selon votre choix d’afchage. Appuyez sur
[SET] pour conrmer.
12. L’afchage de la langue clignote. Appuyez sur les touches
pour sélectionner la langue dans laquelle la date sera afchée
(français, anglais, portugais, allemand, espagnol ou italien)
13. Appuyez sur [SET] pour conrmer et terminer vos réglages.
ou pour permuter entre 12 heures
ou
ou
Alarme
1. En mode horloge, appuyez une fois sur [MODE] pour sélectionner
le mode alarme.
2. Appuyez et maintenez [SET] jusqu’à ce que les heures clignotent.
3. Appuyez sur ou sur pour régler les heures.
4. Appuyez sur [SET] pour sélectionner le réglage des minutes.
5. Appuyez sur [SET] pour conrmer le réglage de l’heure de l’alarme.
Appuyez sur la touche pour activer/désactiver l’alarme. Lorsque
l’alarme est activée, l’icône s’afche sur l’écran.
Remarques :
- Lorsque l’alarme sonne, appuyez sur n’importe quelle touche (sauf
le bouton Snooze/Lumière) pour l’arrêter. L’alarme sonnera de
nouveau le jour suivant à la même heure sauf si l’alarme est
désactivée.
- Lorsque l’alarme sonne et que la fonction de rappel (snooze) est
activée, appuyez sur n’importe quelle touche pour arrêter
momentanément l’alarme. Elle sonnera de nouveau 10 minutes
après, sauf si la fonction de rappel (snooze) est désactivée.
- Lorsque l’alarme sonne, appuyez sur le bouton Snooze/Lumière
pour activer la fonction de rappel (snooze). L’alarme s’arrêtera
momentanément et redémarrera de nouveau 10 minutes après.
Horloge mondiale
Cette fonction vous permet de régler l’horloge sur un fuseau horaire.
Cette fonction est particulièrement utile pour les voyageurs. Réglez
16
Page 19

l’horloge sur la ville dans laquelle vous vous trouvez, ou sur une ville
située dans le même fuseau horaire.
1.
En mode horloge, appuyez deux fois sur [MODE] pour sélectionner
l’horloge mondiale.
2. Appuyez sur la touche
dans laquelle vous vous trouvez. Veuillez vous référer à la liste
des codes des villes à la n de ce guide.
3. Appuyez sur la touche pour régler la fonction de l’heure d’été.
4. Appuyez et maintenez [SET] pour sélectionner l’heure mondiale
comme heure locale. Lorsque l’heure locale est la même que
l’heure mondiale, l’icône clignote.
pour sélectionner le code de la ville
Thermomètre
En mode horloge, appuyez sur la touche pour permuter entre
l’afchage de température en ºC ou en ºF.
Compte à rebours
1.
En mode horloge, appuyez trois fois sur [MODE] pour sélectionner
la fonction de compte à rebours.
2. Pour régler la durée que vous désirez pour le compte à rebours,
appuyez et maintenez [SET] jusqu’à ce que les heures clignotent.
La durée maximum est de 23 heures, 59 minutes et 59 secondes.
3. Appuyez sur la touche
sur [SET] pour conrmer.
4. Les chiffres des minutes clignotent. Appuyez sur les touches
ou pour régler les minutes.
5. Appuyez sur [SET] pour conrmer. Les secondes clignotent.
6. Appuyez sur la touche
Appuyez sur [SET] pour conrmer et lancer le compte à rebours.
Appuyez sur la touche pour arrêter/continuer le compte à
rebours. Lorsque le compte à rebours est arrêté momentanément,
appuyez sur la touche si vous désirez le régler de nouveau.
ou pour régler les heures. Appuyez
ou pour régler les secondes.
Français
17
Page 20

Français
RADIO
Régler une fréquence radio et mémoriser une station
La radio du RP200SP contient 6 groupes FM (FM1 à FM6) et pour
chacune 5 mémoires disponibles (S1 à S5), vous permettant de
mémoriser jusqu’à 30 stations.
1. Appuyez sur la touche [RADIO] pour allumer la radio ou mettre la
fonction de réveil radio en marche (cf ci après).
2. Appuyez sur [SET] pour aller du groupe radio FM1 au FM6.
3. Appuyez sur la touche ou pour changer la fréquence radio.
4. Pour enregistrer une fréquence sur l’une des 5 mémoires
disponibles (S1 to S5), sélectionnez une fréquence, appuyez et
maintenez durant 2 secondes la touche de mémoire (S1 à S5) sur
laquelle vous désirez l’enregistrer.
Une fois que la fréquence est enregistrée, appuyez simplement sur
la touche espace correspondante pour accéder à cette fréquence.
Effectuer une recherche automatique des fréquences radio
Cette fonction scanne toutes les fréquences radio à la portée de
votre unité et les garde en mémoire dans les espaces disponibles.
La première station sauvegardée sera dans l’espace S1 de la bande
FM1, la deuxième dans S2, FM1 et la dernière au S5, FM6.
Rappel : le RP200SP peut garder en mémoire jusqu’à 30
fréquences radio.
1. Appuyez sur la touche [RADIO].
2. Appuyez et maintenez la touche [RADIO] durant 2 secondes.
‘SLP’ apparaît à l’écran.
3. Appuyez et maintenez la touche [SET] durant 2 secondes.
4. SCN s’afche à l’écran durant la recherche automatique et
les fréquences délent rapidement. La première fréquence
enregistrée s’afchera à l’écran une fois la recherche
automatique terminée.
Volume
Pour régler le volume de la radio, faîtes tourner la base ronde de
l’appareil.
18
Page 21

Régler l’heure de réveil en radio
1. En mode horloge, appuyez quatre fois sur [MODE] pour accéder
au mode radio.
2. Appuyez sur la touche . L’icône apparaît.
3. Pour régler l’heure à laquelle vous désirez que la radio se mette
en marche, appuyez et maintenez [SET] jusqu’à ce que les
heures clignotent.
4. Appuyez sur la touche
sur [SET] pour conrmer.
5. Les chiffres des minutes clignotent. Appuyez sur la touche
pour régler les minutes.
6. Appuyez sur [SET] pour conrmer.
ou pour régler les heures. Appuyez
ou
Fonction “SLEEP”
La fonction « SLEEP » vous permet de programmer un temps
d’écoute (de 5 à 85 minutes) avant extinction automatique de votre
radio réveil. Elle vous permet donc de vous endormir en musique
sans vous soucier de l’arrêt de l’appareil.
1. En mode radio, appuyez et maintenez la touche [RADIO] durant
2 secondes.
2. L’écran afche « SLP ».
3. Réglez le nombre de minutes souhaitées (de 5 à 85 minutes) à
l’aide des touches ou jusqu’à extinction de l’appareil.
4. L’icône apparaît et l’écran retourne à l’écran radio après
quelques secondes.
PROJECTION DE L’HORLOGE
Si l’appareil est alimenté seulement par des piles :
1. Appuyez sur [LIGHT] pour activer la fonction de projection.
L’heure en cours « Heure : Minutes » sera projetée durant environ
3 secondes. Ajustez l’angle du projecteur pour choisir l’endroit de
projection. La distance de projection peut être jusqu’à 3 mètres.
2. Faites tourner la molette de focus pour ajuster la mise au point
de la projection.
3. Faites tourner la molette de focus pour ajuster la mise au point
de la projection.
4. Faites tourner la molette de rotation pour faire pivoter l’heure
sur elle-même jusqu’à l’angle désiré.
Français
19
Page 22

Français
Si vous utilisez un adaptateur secteur (optionnel et non inclus)
- Si un transformateur externe est branché à une prise secteur, la
projection restera allumée lorsque l’interrupteur du projecteur est
mis en position (projection continue).
- Veuillez utiliser uniquement un adaptateur de 4.5V avec un centre
positif .
Veuillez contacter votre revendeur ou spécialiste pour obtenir un
adaptateur compatible selon ces spécications.
REMPLACER LES PILES
Cette horloge fonctionne avec 4 piles de type AA/LR06.
1. Enlevez le couvercle des piles situé sous l’appareil.
2. Insérez les piles, en respectant la direction des polarités.
3. Remettez le couvercle en position.
Ne pas utili ser de piles rechargeables. Ne pas recharger les piles
non rechargeables. Retirer les accumulate urs du jeu avant de les
recharger. Ne charger les accumulateurs que sous la surveillance
d’un adulte. Ne pas mélanger différents types de piles ou accumulateurs,
ou des piles et accumulateurs neufs et usagés. Les piles et
accumulateur s doivent être mis en place en respectant la polarité.
Les piles et accumulateurs usagés doivent être enlevés du j ouet.
Les bornes d’une pile ou d’un accumulateur n e doivent pas être
mises en cou rt-circuit. N e pas jeter les piles au feu. Reti rer les
piles en cas de non utilisation prolongée.
PROTEGEZ L’ENVIRONNEMENT ! Assurez-vous de jeter les piles
d’une manière adéquate en suivant les recommandations du
fabricant de piles.
RESET
ATTENTION : Si le produit présente un mauvais fonctionnement
ou subit des décharges électrostatiques, éteindre puis allumer le
produit. Si le produit ne fonctionne toujours pas correctement,
enlever puis remettre les piles ou effectuer la procédure de RESET.
Appuyez sur [RESET] au dos de l’appareil avec un objet pointu pour
remettre à zéro et redémarrer normalement.
20
Page 23

PRECAUTIONS D’EMPLOI
• Ne jamais placer le réveil projecteur à un endroit susceptible
de recevoir des vibrations et chocs car cela peut endommager
l’appareil et causer une lecture faussée.
• Evitez d’exposer l’appareil à de soudains changements de
températures tels que la lumière directe du soleil, des froids
extrêmes et des conditions d’humidité.
• Utilisez un chiffon doux légèrement humide pour nettoyer
l’appareil et l’écran. Ne pas utiliser de solvants ou des agents
corrosifs car ils risquent de marquer l’écran et la coque.
• Ne pas laisser tomber le réveil ou le plonger dans l’eau.
• Ne pas essayer de faire des réparations soi-même. Le retourner
au distributeur pour toute réparation.
GARANTIE
Ce produit est couvert par notre garantie de deux ans.
Pour toute mise en oeuvre de la garantie ou de service aprèsvente, vous devez vous adresser à votre revendeur muni de votre
preuve d’achat. Notre garantie couvre les vices de matériel ou
de montage imputables au constructeur à l’exclusion de toute
détérioration provenant du non-respect de la notice d’utilisation ou
de toute intervention intempestive sur l’article (telle que démontage,
exposition à la chaleur ou à l’humidité…).
LEXIBOOK S.A
2, avenue de Scandinavie
91953 Courtaboeuf Cedex France
Assistance technique : 0892 23 27 26 (0,34 € TTC/Min)
Site Internet : www.lexibook.com
© 2007 Lexibook
Informations sur la protection de l’environnement
Tout appareil électrique usé est une matière recyclable
et ne devrait pas faire partie des ordures ménagères!
Nous vous demandons de bien vouloir nous soutenir en
contribuant activement au ménagement des ressources
et à la protection de l’environnement en déposant cet
appareil dans des sites de collecte (si existants).
Français
21
Page 24

CITY CODE LIST /
LISTE DES CODES DES VILLES
No. GMT CODE CITY/VILLE
1. GMT -10 HNL Honolulu
2. GMT -9 ANC Anchorage
3. GMT -8 SFO San Francisco
4. GMT -8 LAX Los Angeles
5. GMT -8 VAR Vancouver
6. GMT -7 DEN Denver
7. GMT -6 CHI Chicago
8. GMT -6 MEX Mexico City
9. GMT -5 NYC New York
10. GMT -5 MIA Miami
11. GMT -4 CCS Caracas
12. GMT -3 RIO Rio De Janeiro
13. GMT -3 BAI Buenos Aires
14. GMT -2 AGM Angmagssalik
15. GMT LON London/
Londres
16. GMT +1 PAR Paris
17. GMT +1 BER Berlin
22
No. GMT CODE CITY/VILLE
18. GMT +1 MIL Milan
19. GMT +1 ROM Rome
20. GMT +2 CAI Cairo/Le Caire
21. GMT +2 IST Istanbul
22. GMT +2 JRS Jerusalem
23. GMT +3 MOW Moscow/
Moscou
24. GMT +4 DXB Dubai
25. GMT +5 KHI Karachi
26. GMT +6 DAC Dhaka
27. GMT +7 BKK Bangkok
28. GMT +8 HKG Hong Kong
29. GMT +8 SIN Singapore/
Singapour
30. GMT +9 TYO Tokyo
31. GMT +9 SEL Seoul
32. GMT +10 SYD Sydney
33. GMT +11 NOU Noume
34. GMT +12 WLG Wellington
IM code: RP200SPIM0257
 Loading...