

Page 1

LevelOne
WNC-0304USB
11g USB Adapter w/LCD WiFi Detector
User Manual
V1.0.1-0607
Page 2

CONTENTS
1
INTRODUCTION................................................................................................................. 1
1.1 FEATURES .......................................................................................................................... 1
1.2 SPECIFICATIONS ................................................................................................................. 2
1.3 PACKA GE CONTENTS ........................................................................................................... 3
2 HOW TO CHARGE THE BATTERY OF WI-FI DETECTOR............................................. 4
3 HOW TO USE THE WI-FI DETECTOR .............................................................................. 5
4 HOW TO INSTALL THE DRIVER AND UTILITY ............................................................. 8
4.1 INSTALL THE CONFIGURATION UTILITY ................................................................................. 8
4.2 INSTALL THE USB ADAPTER .............................................................................................. 11
4.3 USING THE CONFIGURATION UTILITY ................................................................................. 13
5 HOW TO CONFIGURE THE UTILITY ............................................................................ 15
5.1 WIRELESS CONNECTION STATUS......................................................................................... 16
5.2 GENERAL CONNECTION SETTING ........................................................................................ 18
5.3 WEP AND WPA ENCRYPTION ............................................................................................. 21
5.3.1 WEP Setting............................................................................................................... 21
5.3.2 WPA/WPA2 Setting..................................................................................................... 24
5.4 ADVANCED SETTINGS ........................................................................................................ 27
5.5 SOFTWARE AP MODE......................................................................................................... 29
5.5.1 AP Connection Status ................................................................................................. 29
5.5.2 AP General Connection Setting ................................................................................... 30
5.5.3 MAC Address Filter.................................................................................................... 33
6 X-LINK INSTALLATION .................................................................................................. 34
7 TROUBLESHOOTING...................................................................................................... 39
Page 3

1 Introduction
Thank you for purchasing LevelOne 11g USB adapter with Wi-Fi Detector. This convenient de vice
instantly detects wireless hotspots anywhere. The backlight LCD display tells the user detailed
information about any detected hotspot. There’s no need to purchase any battery because there
is a rechargeable Li-Polymer battery which recharges whenever the detector is inserted in to any
USB port.
This Wi-Fi detector also allows the user to go online wirelessly and is de signed to comply with
IEEE 802.11g Wireless LAN standard. It is suitable for any laptop or desktop computer.
This detector supports 64/128/256-bit WEP data encryption that protects your wireless network
from eavesdropping. It also supports WPA (Wi-Fi Protected Access) and WPA2 that combines
IEEE 802.1x and TKIP (Temporal Key Integrity Protocol) technologies. Client users are required
to authorize before accessing to APs or AP Routers, and the data transmitted in the network is
encrypted/decrypted by a dynamically changed secret key. This adapter has built-in AES engine
which ensure the highest degree of security and authenticity for digital information a nd it is the
most advanced solution defined by IEEE 802.11i for the security in the wireless network.
1.1 Features
• Complies with the IEEE 802.11b and IEEE 802.11g 2.4GHz standards.
• LCD displays: SSID, Signal Strength, Network type (802.11b/g), Network Mode (infrastructure,
Adhoc), operating channel, number of AP’s detected, battery strength, Link/Act indicator)
• Up to 54Mbps high data transfer rate.
• Support 64/128/256-bit WEP, WPA (TKIP with IEEE 802.1x) and WPA2 (AES with IEEE 802.1x)
functions for high level of security.
* WPA2 supports Windows 2000/XP only.
• Supports Software AP function, which turns the wireless station into a wireless AP.
• Complies with IEEE 802.11d co untry roaming standard.
• Support the most popular operating system: Windo ws 98SE/ME/2000/XP.
• Supports USB 2.0/1.1 interface.
• Portable and mini-size design.
1
Page 4

• Suitable for Any Notebook or Desktop PC.
1.2 Specifications
• Standard: IEEE 802.11g/b
• LCD Size: 96x32 with EL backlight
• Battery: 4.2V Rechargeable Li-Polymer Battery
• Bus Type: USB 2.0 Type A
• Frequency Band: 2.4000~2.4835GHz (Industrial Scientific Medical Band)
• Modulation: OFDM with BPSK, QPSK, 16QAM, 64QAM (11g)
BPSK, QPSK, CCK (11b)
• Data Rate: 54/48/36/24/18/12/11/9/6/5.5/2/1Mbp s auto fallback
• Security: 64/128/256-bit WEP Data Encryption, WPA (TKIP with IEEE 802.1x) and WPA2 (AES
with IEEE 802.1x)
*WPA2 supports Windows 2000/XP only
• Antenna: Internal Antenna
• Drivers: Windows 98SE/M E/2000/XP/
• Transmit Power: 16dBm (Typical)
• Dimension: 14(H) x 28.5(W) x 91(D)
• Temperature: 32~1 40°F (0 ~60°C)
• Humidity: 0-85% (NonConden sing)
• Certification: FCC, CE
2
Page 5

1.3 Package Contents
Before you begin the installation, please check the items of your package. The package should
include the following items:
• WNC-0304USB
• USB Cable
• CD Manual/Driver/Utility
• Quick Installation Guide
If any of the above items is missing, contact your supplier as soon as possible.
3
Page 6
2 How to charge the battery of Wi-Fi Detector
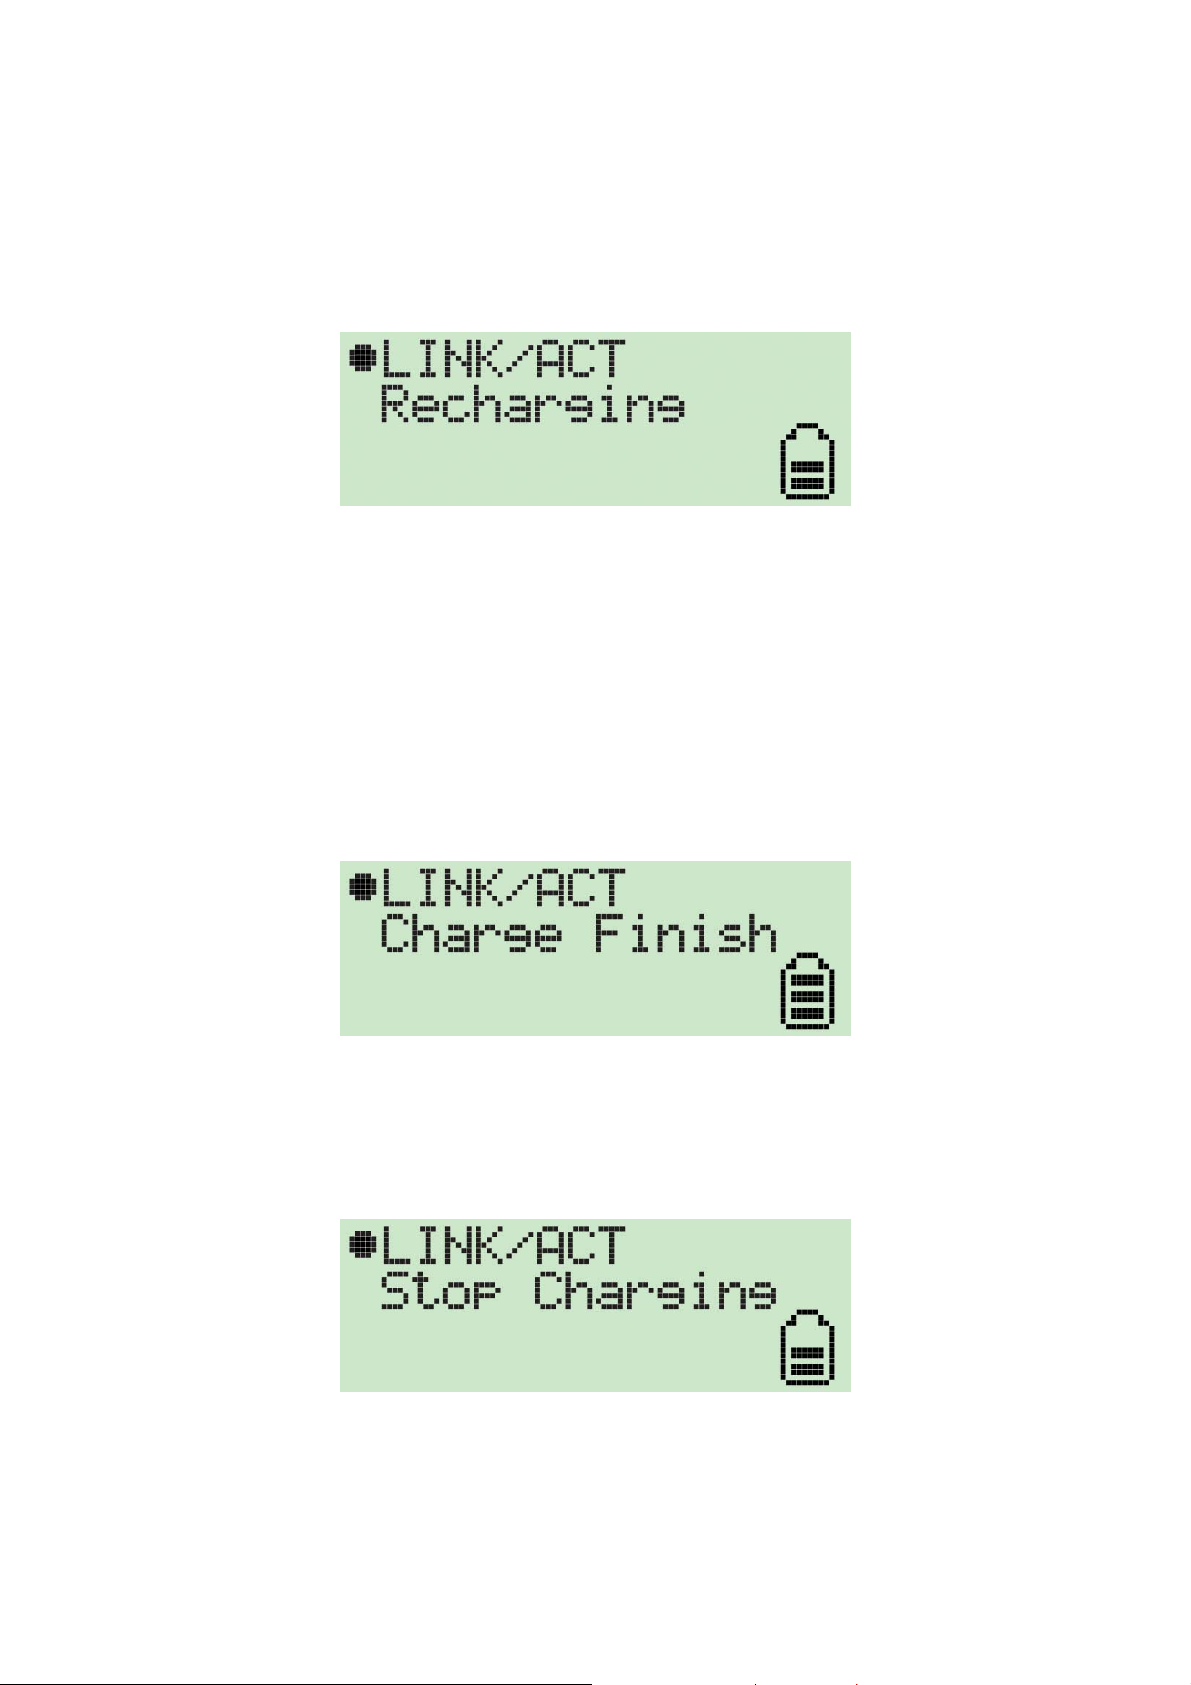
1. Remove the cap from the Wi-Fi Detector, slide the power switch to the “ON” position and
carefully insert the USB connector into any available USB port on your computer. You will see
the recharging screen.
The battery strength indicator will be animated while the Wi-Fi detector is being recharged.
The “Link/Act” icon will blink when the Wi-Fi detector is being used as a wireless USB adapter to
surf the internet.
2. When the Wi-Fi detector is finished recharging it will automatically stop charging the battery.
When it is finished recharging the battery you will see “Charge Finish” displayed on the LCD
and the battery strength indicator will stop blinking.
3. If you slide the power switch to the “OFF” position when in recharging, the Wi-Fi detector will
stop recharging the battery and you will see “Stop charging” displayed on the LCD and the
battery strength indicator will stop blinking.
z Please note that, this adapter cannot be charged through hub devices, charging through
PC only. Charging through hub devices might result damage to the battery.
4
Page 7
3 How to use the Wi-Fi Detector
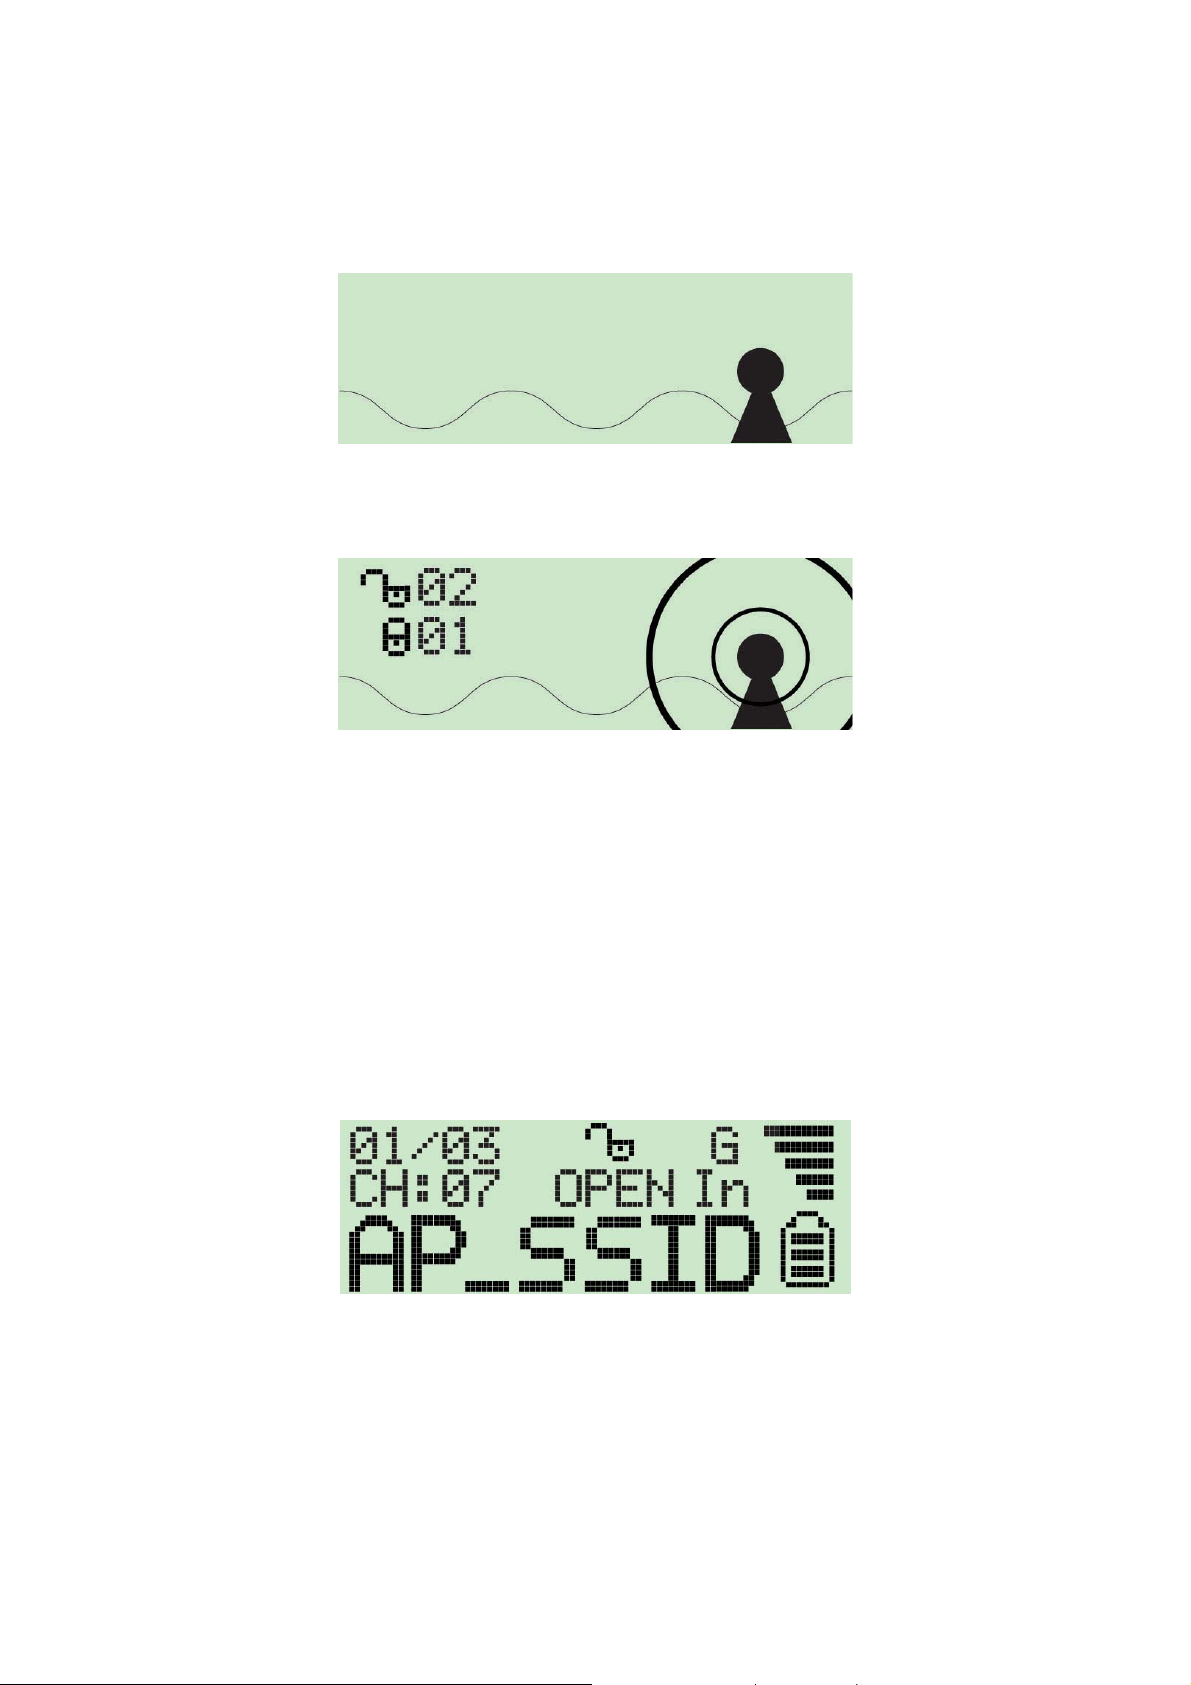
1. Slide the power switch to the “ON” position.
2. The Wi-Fi detector will automatically enter scanning mode to detect Wi-Fi signals.
In scanning mode the display will display the total number o f both non-encrypted and
encrypted Wi-Fi signals detected.
3. Once scanning mode is complete, the detector will enter its standard display mode.
The detector automatically sorts the signals by the following criteria:
Non-encrypted AP’s according to signal strength followed by encrypted AP’s according to
signal strength.
5
Page 8

2
4
3
5
1
8
The Icons on the LCD display are displayed as follows:
1. Operating Channel: Indicates the current operating channel of the detected Wi-Fi
signal.
2. Number of AP’s Detected: the left digit indicates which detected Wi-Fi signal is
currently displayed and the right digit indicates the total amount of Wi-Fi signals
detected.
3. Encryption indicator: “WEP” for WEP encryption, “WPA” for WPA encryption, and
“WPA2” for WPA2 encryption and “OPEN” indicates it is a non-encrypted signal.
7
6
4. “G” indicates the signal is a 802.11g wireless signal. “B” indicates the signal is a
802.11b wireless signal.
5. Signal strength indicator with 5 bars indicating the signal strength.
6. “In” indicates the signal is an infrastructure mode signal, “Ad” indicates the signal is an
Ad-hoc mode signal.
7. Battery indicator with 3 bars indicating battery power. When the indicator is emp ty,
please recharge the detector by inserting it into PC’s USB port.
8. SSID Indicator: Displays the SSID of the detected Wi-Fi signal, if the SSID is too long
the SSID indicator will scroll to dis play the complete SSID.
4. If the user wishes to re-scan/re-detect wireless SSID, just simply press “Seek/Lock” button
once. If the user wishes to re-detect a specific discovered SSID, then the user has to hold
down the “Seek/Lock” button for 4 seconds to enter “lock mode”. When the detector is in “lock
mode” an icon with a capitalized “L” appears in the top middle corner of the screen.
6
Page 9

In “lock mode” the detector constantly re-detects and refreshes the signal streng th to this
specific SSID so the user can move around to find the op timal spot with strongest signal.
Press and hold the “Seek/Lock” button for 4 seconds to unlock the “lock mode”.
Seek/Lock
7
Page 10
4 How to install the driver and utility
Before you proceed with the installation, please pay attention to the following descriptions.
Note1: Please do not install the USB adapter into your computer before installing the software
program from the CD.
Note2: The following installation was operated in Windows XP. (Procedures are similar for Windows
98SE/ME/2000/XP)
Note3: If you have installed the Wireless PC Card driver & utility before, please uninstall the old
version first.
Please follow below instructions to install the USB adapter.
4.1 Install the Configuration Utility
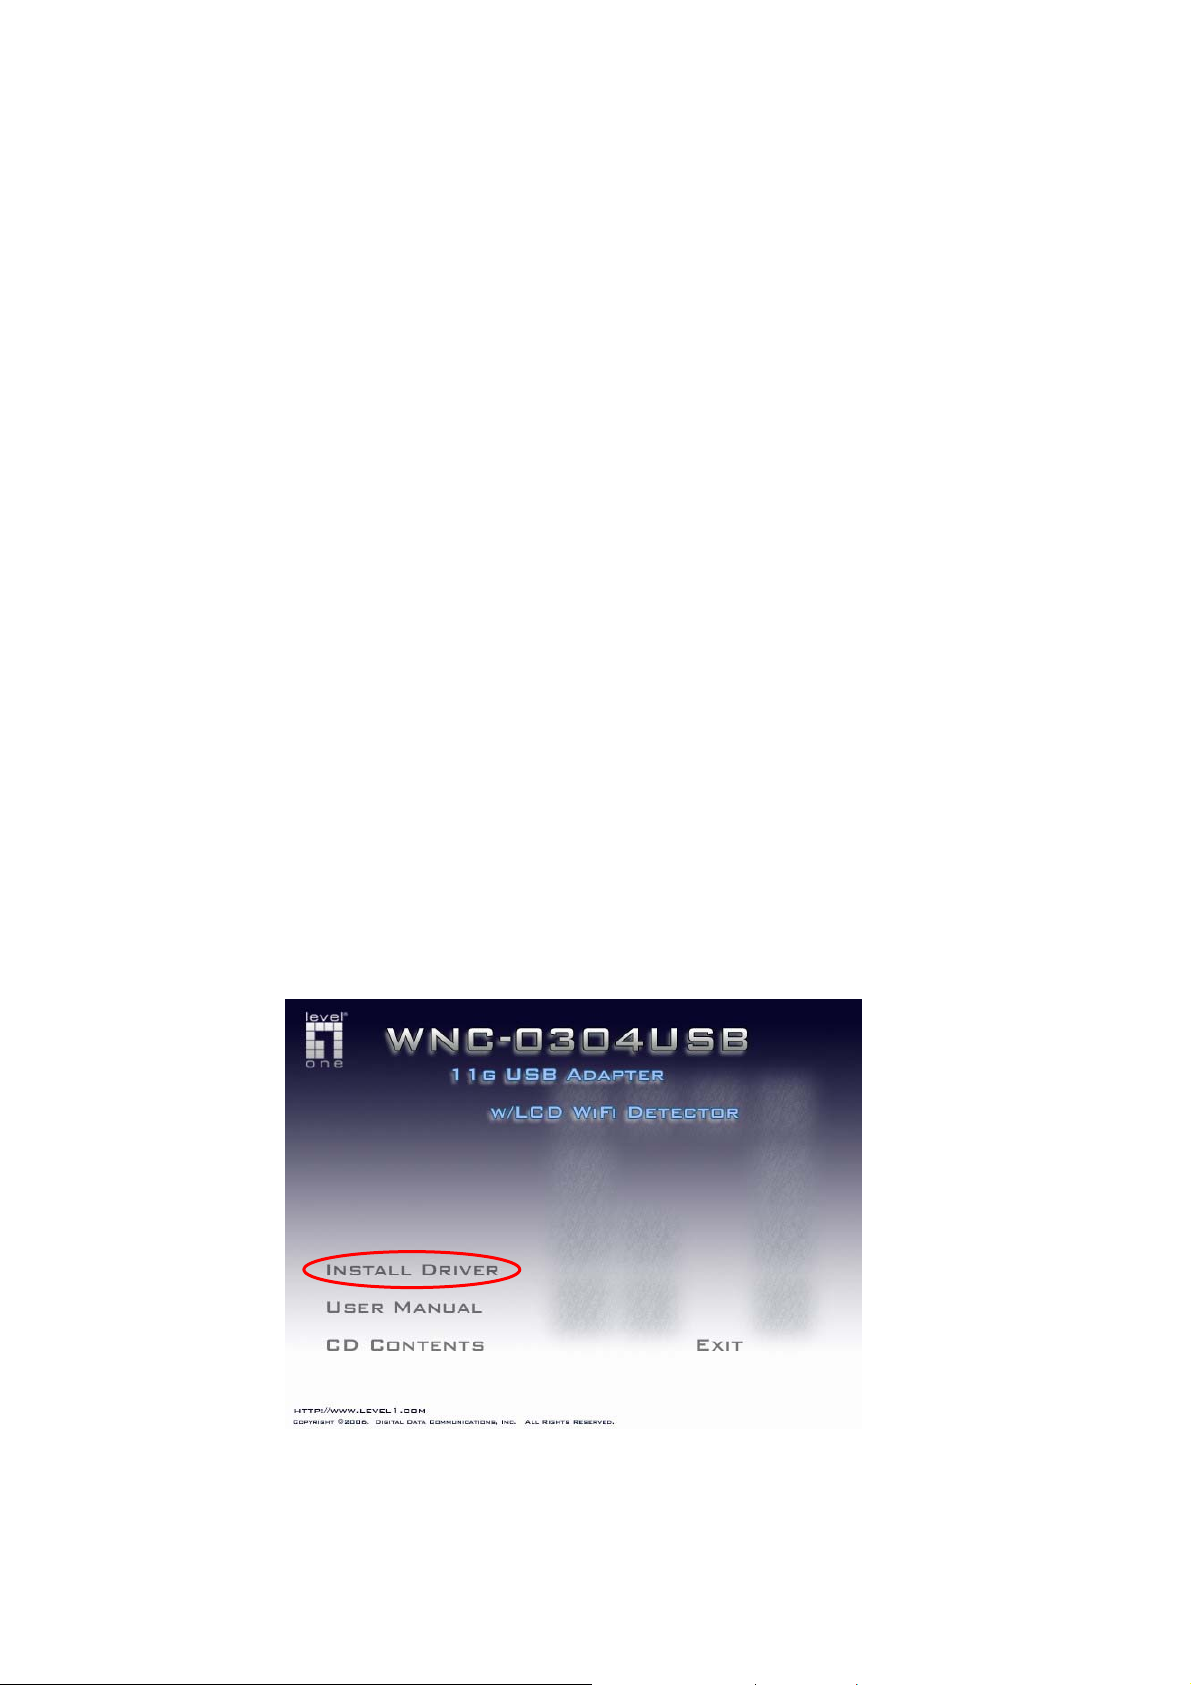
Insert the Installation CD to your CD-ROM Drive.
The WNC-0304USB installation menu will start up automatically from the CD.
Click “Install Driver”.
If the CD does not startup automatically (this function may be disabled in the Wind ows operating
system), simply browse the CD from Windows and click on the autorun.exe program to access
the installation menu.
8
Page 11

Please click “Next” to continue the installation.
If you want to install the software program in another location, click “ Browse” and select an
alternative destination. Then, click “Next”.
9
Page 12
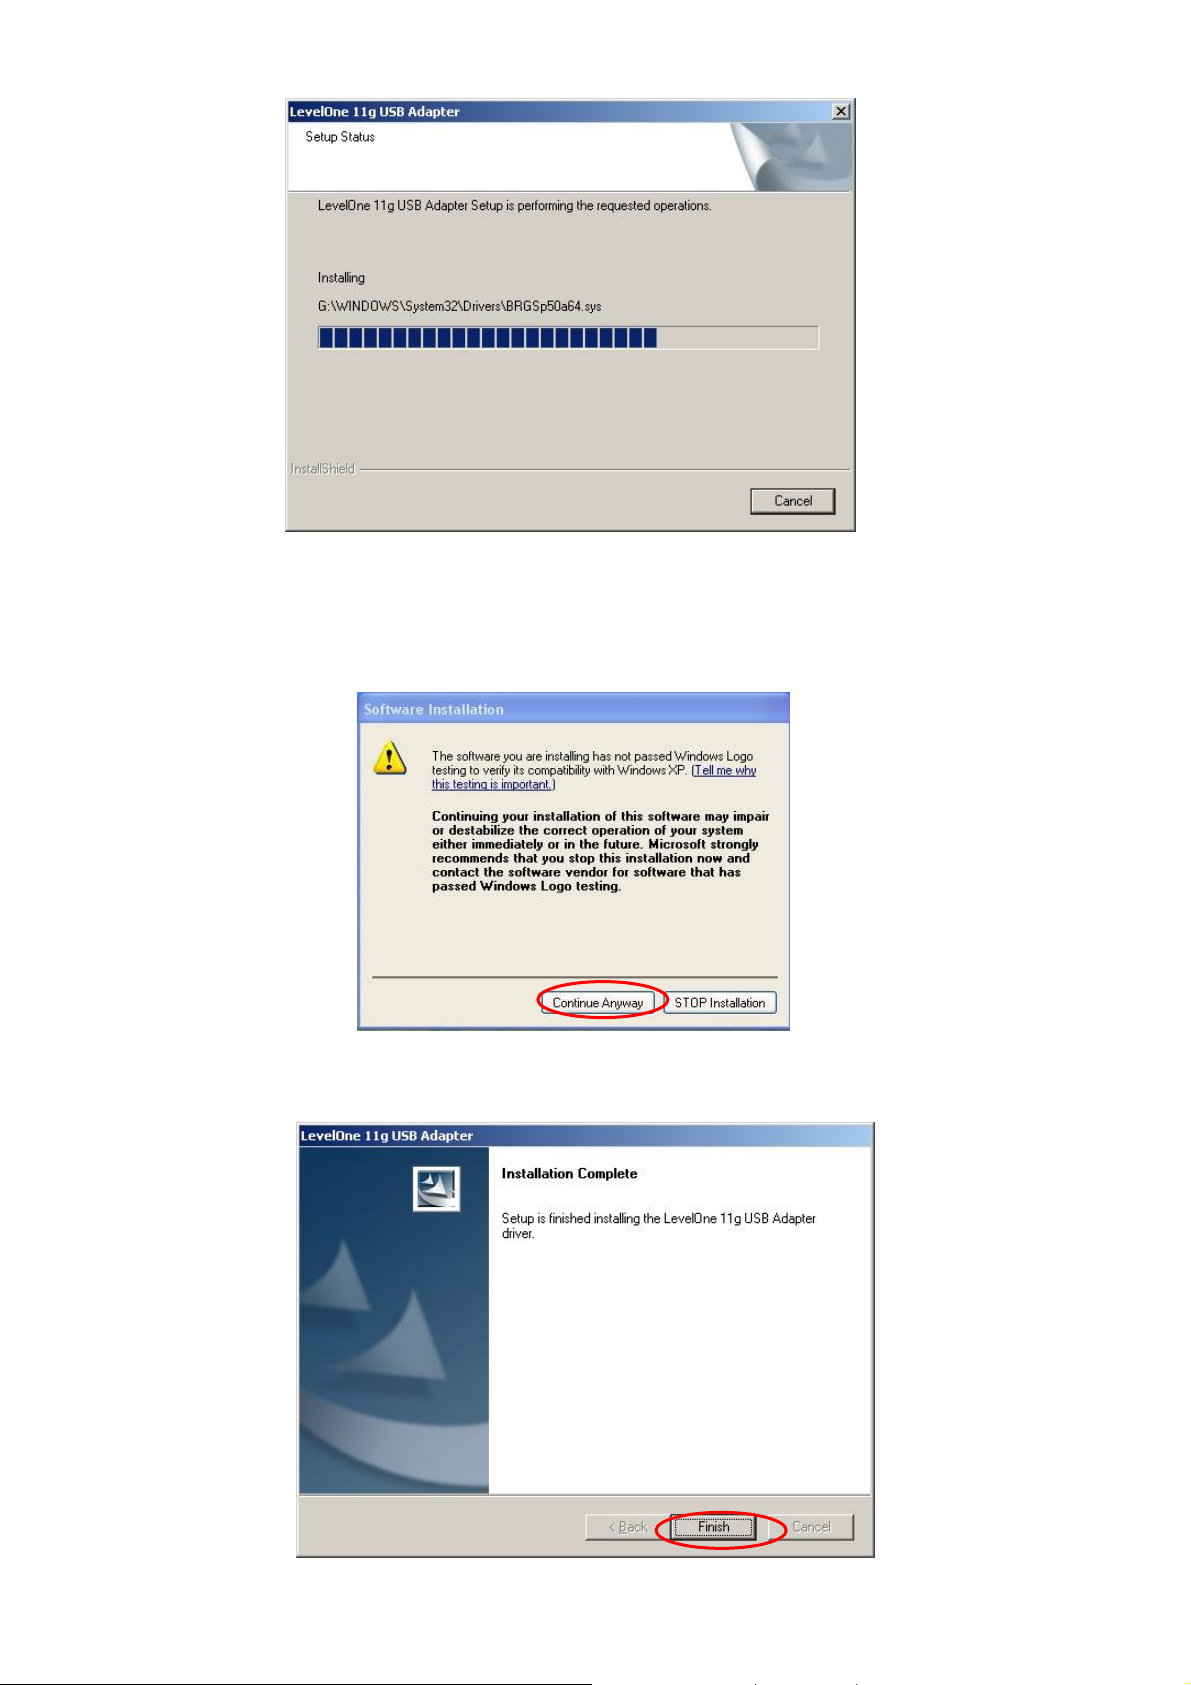
The system will display “Software Installation” screen. Click “Continue An yway” to continue.
Click “Finish” to complete the installation.
10
Page 13

4.2 Install the USB adapter
Plug the USB adapter into the USB port of your computer.
The “Found New Hardware Wizard” is displayed, select “I nstall the software automatic ally
(Recommended)” and click “Next”.
Click “Continue Anyway” and the system will start to install the USB adapter.
11
Page 14
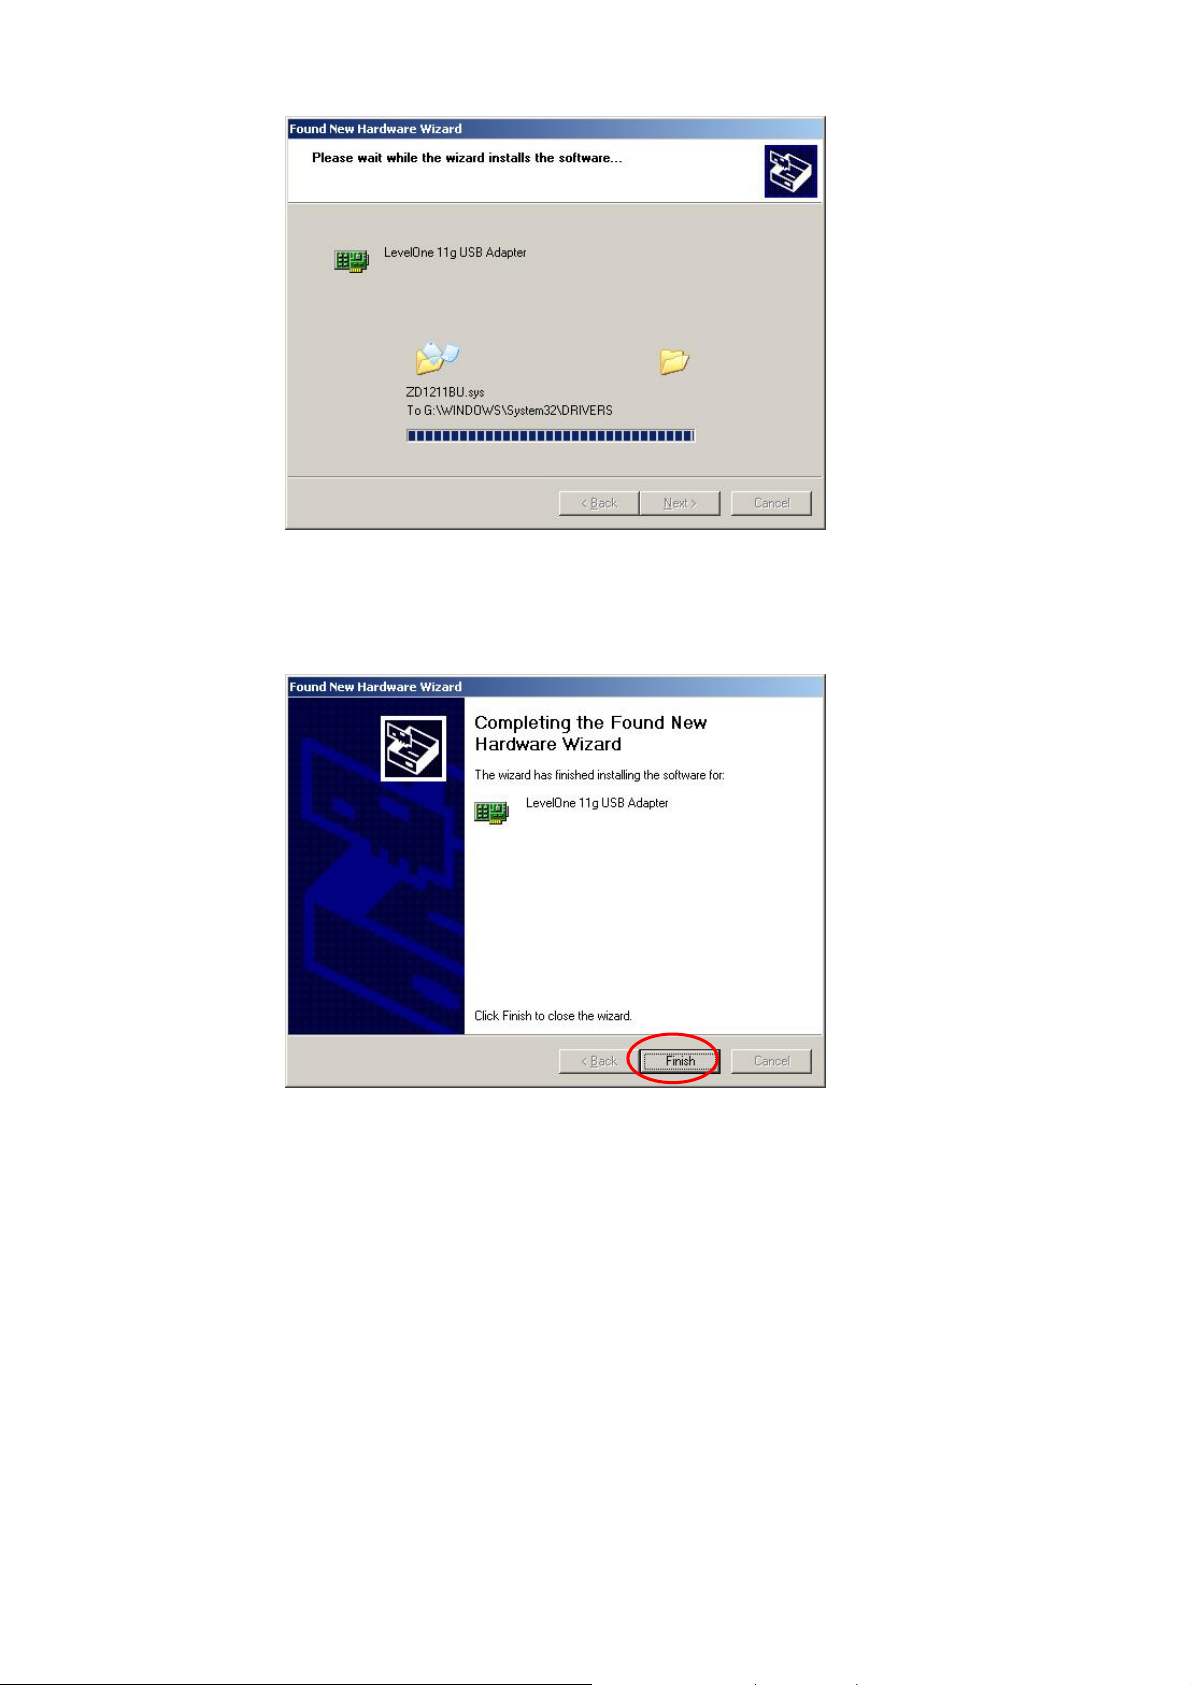
Click “Finish” to complete the install ation.
12
Page 15

4.3 Using the Configuration Utility
To setup the USB adapter, double-click the icon in the system tra y.
For Windows XP, there is a “Windows Zero Configuration Tool” by default for you to setup
wireless clients. If you want to use the Utility of the USB adapter, please follow one of the ways
as below.
First Way
A. Double-click the utility
icon in the system tray.
B. Click “Yes” to use the
utility of the USB adapter.
13
Page 16

Second Way
A. Double-click the icon.
B. Click “Advance”.
C. Uncheck “Use Windows to
configure my wireless
network settings”.
14
Page 17

5 How to configure the utility
The Configuration Utility is a powerful application that helps you configure the 11g Wireless LAN
USB adapter and monitor the link status during the communication process.
The Configuration Utility appears as an icon on the system tray of Windows while the adapter is
running. You can open it by double-click on the icon.
Right click the icon, there are some items for you to operate the configu ration utility.
z Open Utility Window
Select “Open Utility Window” to open the Configuration Utility tool.
z Exit LevelOne
Select “Exit LevelOne” to close the Configuration Utility tool.
Before using the utility, you have to know some restrictions of the utility.
1. If you want to connect to 11g (up to 54Mbps) network, please ensure to install the adapter to
PC or laptop with USB 2.0 interface. This adapter runs a t lower performance while you
connect it to the USB 1.1/1.0 port of your computer instead.
2. This adapter will work in 11b mode when the network type is in Adhoc mode. It is defines by
Wi-Fi organization. If you want to enable the data rate up to 54Mbps (11g), please follow
steps listed below.
A. Go to “Network Connections”.
B. Right Click the “Wireless Network Connection” and select “Properties”.
C. From the pop-up screen, click “Configure”.
D. Enter into “Advanced” page of the “Properties” screen.
E. Enable the setting of “IBSS_G_Mode”.
15
Page 18

5.1 Wireless Connection Status
When you open the Configuration Utility, the system will scan all the channels to find all the
access points/stations within the accessible range of your adapter and automatically connect to
the wireless device with the highest signal strength. From the screen, you may know all the
infomration about the wireless connection.
Parameter Description
Mode Station – Set the USB adapter as a wireless client.
Access Point – Turns the USB adapter to function as a wireless
AP. Please refer to Section 6.5 for the AP settings.
Network Adapter Display the product information of the USB adapter.
Available Network Display all the SSID and Signal Strength of wireless stations
nearby. To re-survey the available wireless devices please click
“Refresh”.
There are two ways to automatically make the connection
between the USB adapter and the wireless station on the list.
1. Double-click the wireless station on the list directly.
2. Select the station you intend to connect and then click
“Connect this site“.
Current Network Information Display the information about the wireless network this adapter is
16
Page 19

connecting to. The information includes Channel, Type, SSID, TX
Rate and Encrypt settings. Note: Plea se refer to Section 5.2 for
the description of each item.
More Setting For setting more functions including disable/enable WEP and
Power Saving Mode, etc. Please refer to Section 5.2, 5.3 and 5.4
for more detail.
Link Status Display the status of the wireless connection.
BSSID Display the MAC Address of the network the adapter is
connecting to.
Parameter Description
Signal Strength This bar shows the signal strength level. The higher percentage
shown in the bar, the more radio signal been received by the
adapter. This indicator helps to find the proper position of the
wireless station for quality network operation.
Link Quality This bar indicates the quality of the link. The higher the
percentage, the better the quality.
TX Frame It shows the number of data frames which are transmitted b y the
adapter successfully.
RX Frame It shows the number of data frames which are received by the
adapter successfully.
17
Page 20

5.2 General Connection Setting
Click “More Setting”, users are allowed to setup the wireless connection setting, Encryption
Setting of the USB adapter and other advanced functions.
Parameter Description
General Connection Setting
Wireless Mode 802.11b+g Mix Mode, it will auto scan all available 802.11b and
802.11g wireless station.
Channel Select one of the radio channel to be used for the wireless
network.
The channel setting of the wireless stations within a network
should be the same.
Parameter Description
Tx Rate There are several options including
Auto/1/2/5.5/11/6/9/12/18/24/36/48/54Mbps for you to select.
When the “Auto” is selected, the device will choose the most
suitable transmission rate automatically. The higher data rate you
select in the network, the shorter distance is allowed between the
adapter and the wireless stations.
18
Page 21

When the adapter works in 11b mode, the maximum data rate is
11Mbps so that there are only “Auto/1/2/5.5/11Mbps” options you
can select.
SSID The SSID (up to 32 printable ASCII characters) is the unique
name identified in a WLAN. The ID prevents the unintentional
merging of two co-located WLANs.
You may specify a SSID for the adapter and then only the device
with the same SSID can interconnect to the adapter.
Any If “Any“ check box is enabled, the adapter will survey and connect
to one of the available wireless stations without checking the
consistency of channel and SSID with the wireless station.
Network Type Ad-Hoc – This mode enables wireless network adapters
interconnecting without through AP or Router. Select this mode if
there is no AP or Router in the network.
Infrastructure – This operation mode requires the presence of an
802.11 Access Point. All communication is done via the Access
Point or Router.
Change/Apply Click “Change“ will enable you to setup the parameters of
“General Connection Setting“. In the meantime, the button will
change to “Apply“ for you to confirm your settings.
Encryption Setting In the block, users may enable/disable WEP and WPA encryption
within the network. Please refer to Section 5.3 for more
description.
19
Page 22

Parameter Description
Authentication Mode This setting has to be consistent with the wireless networks that
the adapter intends to connect.
Open System – No authentication is needed among the wireless
network.
Shared Key – Only wireless stations using a shared key (WEP
Key identified) are allowed to connect each other.
Auto – Auto switch the authentication algorithm depending on the
wireless networks that the adapter is connecting to.
WEP Encryption Key Setting Click this button to setup the WE P key. Please refer to Section
5.3 for the details.
WPA Encryption Setting Click this button to setup the WP A function. Please refer to
Section 5.3 for the details.
Profile
Profile Name You can save the network setting as a profile. To connect to the
network without making additional configuration, you can load the
profile.
Load Load the setting values from the file in the “Profile Name“ list. The
new settings will be activated immediately.
Save Current Input a file name and click “Save Current“ to write the current
setting values to be a profile in the “Profile Name“ list.
Delete Delete the profile you select.
Other
Advanced Setting... For more advanced setting, please click it. To know more of the
setting, please refer to Section 5.4.
Information Click this button to view the version of the driver, firmware and
the MAC Address of the adapter.
20
Page 23

5.3 WEP and WPA Encryption
WEP is an data encryption algorithm, which protects Wireless LAN data in the network against
eavesdropping. WEP has been found that it has some security problems. The adapter supports
WPA (Wi-Fi Protected Access) that combines IEEE 802.1x and TKIP (Temporal Key Integrity
Protocol) technologies. Client users are required to authorize before accessing to APs or AP
Routers, and the data transmitted in the netw ork is encrypted/decrypted by a dynamically
changed secret key. This adapter is also built-in AES engine which ensure the highest degree of
security and authenticity for digital information and it is the most advan ced solution defined by
IEEE 802.11i for the security in the wireless network.
5.3.1 WEP Setting
In “More Setting”, clicks “WEP Encryption Key Setting” to setup WEP security key
21
Page 24

Parameter Description
Key Length You may select the 64-bit, 128-bit or 256-bit to encrypt
transmitted data. Larger key length will provide higher level of
security, but the throughput will be lower.
Default Key ID Select one of the keys (1~4) as the encryption key.
Key Format Hexdecimal – Only “A-F“, “a-f“ and “0-9“ are allowed to be set as
WEP key.
ASCII –Numerical values, characters or signs are allowed to be
the WEP key. It is more recognizable for user.
Parameter Description
Key1 ~ Key4 The keys are used to encrypt data tr ansmitted in the wireless
network. Fill the text box by following the rules below.
64-bit – Input 10-digit Hex values or 5-digit ASCII values as the
encryption keys. For example: “0123456aef“ or “Guest“.
128-bit – Input 26-digit Hex values or 13-digit ASCII values as the
encryption keys. For example:
“01234567890123456789abcdef“ or “administrator“.
256-bit – Input 58-digit Hex values or 29-digit ASCII values as the
encryption keys.
Change/Apply Clcik “Change“ will enable you to setup the WEP key. In th e
22
Page 25

meantime, the button will change to “Apply“ for you to confirm
your settings.
23
Page 26

5.3.2 WPA/WPA2 Setting
The adapter can automatically detect the WPA setting of the AP which the adapter intends to
connect to. To connect to the AP, you should setup the same setting as the AP.
There are two kinds of WPA mode: WPA and WPA-PSK. WPA is designed for enterprise which
requires a RADIUS Server and Certificate Server for the authentication. WPA-PSK is a special
mode designed for home and small business users who do not have access to network
authentication servers. In this mode, the user manually enters the starting password in their
access point or gateway, as well as in each wireless stations in the network. WPA takes over
automatically from that point, keeping unauthorized users that don't have the matching password
out of the network, while encrypting the data traveling between authorized devices.
WPA2 – Like WPA, WPA2 supports IEEE 802.1x/EAP authentication or PSK technology. It also
includes a new advanced encryption mechanism using the Advanced Encryption Standard (AES) .
AES is required to the corporate user or government users. The difference between WPA and
WPA2 is that WPA2 provides data encryption via the AES. In contrast, WPA uses T emporal Key
Integrity Protocol (TKIP).
*WPA2 supports Windows 2000/XP only
WPA2-PSK – WPA2-PSK is also for home and small business. The difference between WPA-PSK
and WPA2-PSK is that WPA2-PSK provides data encryption via the AES. In contrast, WPA-PSK
uses Temporal Key Integrity Protocol (TKIP).
*WPA2 supports Windows 2000/XP only
24
Page 27

In “More Setting“ clicks “WPA Encryption Setting“ to setup WPA security key
25
Page 28

Parameter Description
Connect Information It is the setting for WPA mode.
Protocol This adapter supports three kinds of protocol for authentication
including TLS, TTLS and PEAP. These three protocols require a
certificate which is provided by the Certificate Server. PEAP and
TTLS require a set of user name and password in addition. To get
the certificate and the personal user name and password, please
contact with your administrator.
TLS – Select a certificate from the “ Certificate“ list.
PEAP – Input the “User Name“ and “Password“ and also select a
certificate from the “Certificate“ lis t.
TTLS – Input the “User Name“, “Password“ and “Phase2Auth“ and
also select a certificate from the “Certific ate“ list.
User Name It is the setting for PEAP protocol.
Password It is the setting for PEAP protocol.
Phase2Auth It is the setting for TTLS protocol, including PAP, CHAP,
MSCHAP and MSCHAPv2
Pre-shared Key It is the setting for WPA-PSK mode. Input a 8 to 63 digits of ASCII
format to be the password for the authentication within the
network.
Certificate All the available certificates for TLS or PEAP will display in the
list. Please select a proper certificate for the wireless
authentication.
Parameter Description
WEP Key If the AP uses WEP data encryption function, please clcik “WEP
KEY SETTING“ to setup the WEP key.
WEP KEY SETTING Setup the four sets of WEP key by clicking the button .
Change/Apply Clcik “Change“ will enable you to setup the WPA setting. In the
meantime, the button will change to “Apply“ for you to confirm
your settings.
26
Page 29

5.4 Advanced Settings
The “Advanced Setting” allows user to enable/disable country roaming and power consumption
mode, setup the fragmentation threshold and RTS/CTS thre shold of the adapter.
Parameter Description
User Interface Select the display language of the utility. Two languages are
enabled: English and Chinese.
Country Roaming IEEE 802.11d (Country Roaming) is a standard that enable the
wireless devices work at the proper transmission power and radio
channel regulated by the country where the user is located.
World Mode – Enable the country roaming function, the adapter
will follow the setting of the connecting AP automatically.
User Select – Disable the country roaming function, users can
select the country where they are located. The channel setting
differs from country user selected.
Parameter Description
Power Consumption Setting Continuous Access Mode (CAM) – The adapter will always set
in active mode.
Maximum Power-Saving Mode – Enable the adapter in the
power saving mode when it is idle.
Fast Power-Saving Mode – Enable the adapter in the power
27
Page 30

saving mode when it is idle, but some components of the adapter
is still alive. In this mode, the power consumption is larger than
“Maximum Power-Saving“ mode.
PSP XLink Mode XLink is an infrastructure tunneling program which allows you to play Ad-
hoc PSP multiplayer games through the Internet.
WMM QoS Mode The primary goal of Quality of Service (QoS) is to provide priority
including dedicated bandwidth, controlled jitter and latency (required by
some real-time and interactive traffic), and improved loss characteristics.
WiFi Multimedia (WMM) adds prioritized QoS capabilities to Wi-Fi
networks and optimizes its performance when multiple concurring
applications, each with different latency and throughput requirements,
compete for network resources.
Fragementation Threshold The value defines the maximum size of packets, any packet size
larger than the value will be fragmented. If you have decreased
this value and experience high packet error rates, you can
increase it again, but it will likely decrease overall network
performance. Select a setting within a range of 256 to 2346 bytes.
Minor change is recommended.
RTS / CTS Threshold Minimum packet size required for an RTS/CTS (Request To
Send/Clear to Send). For packets smaller than this threshold, an
RTS/CTS is not sent and the packet is transmitted directly to the
WLAN. Select a setting within a range of 0 to 2347 bytes. Minor
change is recommended
28
Page 31

5.5 Software AP Mode
This adapter can run as a wireless AP. The relative configurations of the AP including channel,
SSID, MAC Address Filtering, WEP encryption and so on are described as follows.
5.5.2 AP Connection Status
Parameter Description
Mode Station – Set the USB adapter a wireless client.
Access Point – Turns the USB adapter to function as a wireless
AP.
Network Adapter Display the product information of the USB Adapter.
Connect Station List Display all the MAC Addresses of the wireless adapters which are
Current Network Setting Display the connection setting of the current network. It includes
connecting to the AP.
Channel, SSID, and WEP
More Setting For setting more functions including disable/enable WEP, MAC
Address Filter and Bridge Adapter, etc. Please refer to Section
5.5.2.
TX Frame It shows the number of data frames which are transmitted b y the
AP successfully.
RX Frame It shows the number of data frames which are received by the AP
successfully.
29
Page 32

5.5.2 AP General Connection Setting
Click “More Setting”, users are allowed to setup the AP connection setting , Encryption Setting and
other advanced functions.
Parameter Description
General Connection Setting
Channel Select the number of the radio channel used by the AP. The
wireless adapters which connects to the AP should set up the
same channel.
Parameter Description
SSID The SSID (up to 32 printable ASCII characters) is the unique
name identified in a WLAN. The ID prevents the unintentional
merging of two co-located WLANs.
The default SSID of the AP is WLAN_AP. Wireless adapters
connect to the AP should set up the same SSID as the AP.
30
Page 33

Hide SSID If “Hide SSID“ check box is enabled, the AP will not appear in the
site survey list of any wireless adapters. It means Only the
wireless adapters set the same SSID can connect to the AP. It
aviods the AP being connected by unauthorized users.
Change/Apply Clcik “Change“ will enable you to setup the parameters of
“General Connection Setting“. In the meantime, the button will
change to “Apply“ for you to confirm your settings.
Authentication Mode Open System – No authentication is needed for connecting to the
AP.
Shared Key – Only wireless adapters using a shared key (WEP Key
identified) are allowed to connecting to the AP.
WEP Enable or disable WEP encryption function. If the WEP function is
enabled, only wireless adapters with the same default key and
WEP key setting can connect to the AP.
Setting Click “Setting“ to setup the WEP key. Please refer to Section 5.3
for more WEP key description.
Parameter Description
Fragement The value defines the maximum size of packets, any packet size
larger than the value will be fragmented. If you have decreased
this value and experience high packet error rates, you can
increase it again, but it will likely decrease overall network
performance. Select a setting within a range of 256 to 2346 bytes.
Minor change is recommended.
RTS / CTS Minimum packet size required for an RTS/CTS (Request To
Send/Clear to Send). For packets smaller than this threshold, an
RTS/CTS is not sent and the packet is transmitted directly to the
WLAN. Select a setting within a range of 0 to 2347 bytes. Minor
change is recommended.
Preamble The preamble defines the length of the CRC block for
communication among the wireless networks. There are two
modes including Long and Short. High network traffic areas
31
Page 34

should use the shorter preamble type.
MAC Address Filter This AP can protect from the unauthorized users by MAC Address
filtering. Please refer to Section 6.5.3.
Bridge Adapter Wireless adapters connect to the AP can access to the wired
network through the bridge adapter. You can select an Ethernet
adapter in the list be the bridge between the wireless and wired
networks.
32
Page 35

5.5.3 MAC Address Filter
Parameter Description
Filter Type Disable – Disable the MAC Address filter function.
Accept – Only the wireless adapters with the MAC Address setup
in the table can connect to the AP.
Reject – The wireless adapters with the MAC Address setup in
the table will be rejected to connect to the AP.
Filter MAC Address MAC Address is a un ique identification for hardware device s in
the network. It is a 12-digit hexadecimal values.
There are fifty sets of MAC Address can setup in the table. Fill the
MAC Addresses of wireless adapters you want to accept or reject
to access the AP in this table.
33
Page 36

6 X-Link Installation
Clicks “Advanced Setting” and check the “PSP XLink Mode” & “WMM QoS Mode”
1) Open Control Panel --Æ Internet Connection
Right Click “Wireless Network Connection” and select “Properties”
34
Page 37

2) Under “General”, select “Internet Protocol (TCP/IP) and click “Properties”
35
Page 38

3) Select “Use the following IP address:” and enter “192.168.0.1” for IP address:
“255.255.255.0” for Subnet mask then clicks “OK”
4) Under Wireless Internet Network Enable “Use Windows to configure my wireless network
setting”
Then select “Advanced”
36
Page 39

5) Select “Computer-to-computer (ad hoc) networks only”
Enable “Automatically connect to non-preferred networks”
Clicks “Close” back to previous page and clicks “OK” to confirm setting
6) Setting completed, please turn your PSP into online statu s
7) Please go to X-Link official site to download X-Link software and register to X-Link
http://www.teamxlink.co.uk/
8) Start the X-Link software after the installation
37
Page 40

9) Enter username and password when you registered to X-Link official site
Clicks “OK” to start online gaming
38
Page 41

7 Troubleshooting
This chapter provides solutions to problems usually encountered during the installation and
operation of the adapter.
1. What is the IEEE 802.11g standard?
802.11g is the new IEEE standard for high-speed wireless LAN communications that
provides for up to 54 Mbps data rate in the 2.4 GHz band. 802.11g is quickly becoming the
next mainstream wireless LAN technology for the home, office and public networks.
802.11g defines the use of the same OFDM modulation technique specified in IEEE 802.11a
for the 5 GHz frequency band and applies it in the same 2.4 GHz frequency band as IEEE
802.11b. The 802.11g standard requires backward compatibility with 802.11b.
The standard specifically calls for:
A. A new physical layer for the 802.11 Medium Access Control (MAC) in th e 2.4 GHz
frequency band, known as the extended rate PHY (ERP). Th e ERP adds OFDM as a
mandatory new coding scheme for 6, 12 and 24 Mbps (mandatory speeds), and 18, 36,
48 and 54 Mbps (optional speeds). The ERP includes the modulation schemes found in
802.11b including CCK for 11 and 5.5 Mbps and Barker code modulation for 2 and 1
Mbps.
B. A protection mechanism called RTS/CTS that governs how 802.11g devices and 802.11b
devices interoperate.
2. What is the IEEE 802.11b standard?
The IEEE 802.11b Wireless LAN standard subcommittee, which formulates the standard for
the industry. The objective is to enable wireless LAN hardware from different manufactures
to communicate.
3. What does IEEE 802.11 feature support?
The product supports the following IEEE 802.11 functions:
z CSMA/CA plus Acknowledge Protocol
z Multi-Channel Roaming
z Automatic Rate Selection
z RTS/CTS Feature
z Fragmentation
z Power Management
4. What is Ad-hoc?
An Ad-hoc integrated wireless LAN is a group of computers, each has a Wireless LAN
adapter, Connected as an independent wireless LAN. Ad hoc wireless LAN is applicable at a
departmental scale for a branch or SOHO operation.
39
Page 42

5. What is Infrastructure?
An integrated wireless and wireless and wired LAN is called an Infrastructure configuration.
Infrastructure is applicable to enterprise scale f or wireless access to central datab ase, or
wireless application for mobile workers.
6. What is BSS ID?
A specific Ad hoc LAN is called a Basic Service Set (BSS). Computers in a BSS mu st be
configured with the same BSS ID.
7. What is WEP?
WEP is Wired Equivalent Privacy, a data privacy mechanism based on a 40 bit shared key
algorithm, as described in the IEEE 802 .11 standard.
8. What is TKIP?
TKIP is a quick-fix method to quickly overcome the inherent weaknesses in WEP security,
especially the reuse of encryption keys. TKIP is involved in the IEEE 802.11i WLAN security
standard, and the specification might be officially released by early 2003.
9. What is AES?
AES (Advanced Encryption Standard), a chip-based security, has been developed to ensure
the highest degree of security and authenticity for digital information, wherever and however
communicated or stored, while making more efficient use of hardware and/or software than
previous encryption standards. It is also included in IEEE 802.11i standard. Comp are with
AES, TKIP is a temporary protocol for replacing WEP security until manufacturers implement
AES at the hardware level.
10. Can Wireless products support printer sharing?
Wireless products perform the same function as LAN products. Therefore, Wireless products
can work with Netware, Windows 2000, or other LAN operating systems to support printer or
file sharing.
11. Would the information be intercepted while transmitting on air?
WLAN features two-fold protection in security. On the hardware side, as with Direct
Sequence Spread Spectrum technology, it has the inherent security feature of scrambling.
On the software side, WLAN series offer the encryption function (WEP) to enhance security
and Access Control. Users can set it up depending upon their needs.
40
Page 43

12. What is DSSS?What is FHSS?And w hat are their differences?
Frequency-hopping spread-spectrum (FHSS) uses a narrowband carrier that changes
frequency in a pattern that is known to both tr ansmitter and receiver. Properly s ynchronized,
the net effect is to maintain a single logical channel. To an unintended receiver, FHSS
appears to be short-duration impulse noise. Direct-sequence spread-spectrum (DSSS)
generates a redundant bit pattern for each bit to be transmitted. This bit pattern is called a
chip (or chipping code). The longer the chip is, the greater the probability that the original
data can be recovered. Even if one or more bits in the chip are damage d during transmission,
statistical techniques embedded in the radio can recover the original data without-th e need
for retransmission. To an unintended receiver, DSSS appears as low power wideband noise
and is rejected (ignored) by most narrowband receivers.
13. What is Spread Spectrum?
Spread Spectrum technology is a wideband radio frequency technique developed by the
military for use in reliable, secure, mission-critical communication systems. It is designed to
trade off bandwidth efficiency for reliability, integrity, and security. In other words, more
bandwidth is consumed than in the case of narrowband transmission, but the trade off
produces a signal that is, in effect, louder and thus easier to detect, provided tha t the
receiver knows the parameters of the spread-spectrum signal being broadcast. If a receiver
is not tuned to the right frequency, a spread –spectrum signal looks like background noise.
There are two main alternatives, Direct Sequence Spread Spectrum (DSSS) and Frequency
Hopping Spread Spectrum (FHSS).
14. What is the maximum AP that can be detected?
Detector can detect up to 16 APs in a certain area.
For example, If there are 20 APs in an area, detector can only de tect 16 APs.
15. What is the maximum detection distance?
200M ~ 250M in a open space.
16. How long it will take for the battery to be fully charged?
The charging period should be one hour or less, it depends on the le ft-over battery strength.
17. What is the battery life?
The battery contains recharging cycle up to 250 times.
41
Page 44

42
 Loading...