

lepan MD-S50009, MD-50010, MD-S50010 User Manual

User Manual
MD-S50009/50010

APPEARANCE AND KEYPAD OPERATIONS. ... ... ... ... ... ... ... ... . .. . .. . .. . .3
USING MEMORY CARD AS U DISK. . .. . .. . ... . .. . .. . .. . .. . .. . ... . .. . .. . .. . .. . .4 - 5
WIFI.. .. .. .. .. .. .. .. ..... .. .. .. .. .. .. .. ..... .. .. .. .. .. .. .. ..... .. .. .. .. .. .. .. ..... .. .. .. .. .. .. .6 -8
BLUETOOTH......................................................................................9-10
MAIL... .. ..... ..... ..... ..... ...... .. ..... ..... ..... ..... ...... .. ..... ..... ..... ...... .. ..... ..... ....1 1
DIALLING. . ... . . .. . . . .. . . ... . . .. . . . .. . . .. . . . .. . . ... . . .. . . . .. . . .. . . . .. . . . .. . . .. . . . .1 4 - 20
MESSAGING. .. ... .. . .. .. . .. ... .. . .. .. . .. ... .. . .. .. . .. ... .. . .. .. . .. ... .. . .. .. . .. .. . .2 1 -2 3
CONTACTS. .. . .. . .. .. . .. . .. .. . .. ... .. . .. ... .. . .. ... .. . .. .. . .. . .. .. . .. . .. .. . .. . .. .. . .2 4 -2 7
INTENET EXPLOR..... ........ ... ..... ... ..... ... ........ ... ..... ... ..... ... ........ ... ....2 8-2 9
RECORDER... .. .. .. .. ......... .. .. .. .. ......... .. .. .. .. ...... ......... .. .. .. .. ......... .. .. .. .. ....30
5.1 GMAIL....................................................................................11/12
5.2 EMAIL. . .. .. .. .. .. . .. .. .. .. .. ... .. .. .. .. ... .. .. .. .. ... .. .. .. .. ... .. .. .. .. ... .. .. .. .. ..1 3
1.
2.
3.
4.
5.
6.
7.
8.
9.
10.
Contents
1

CLOCK. .. ..... .. ..... .. ..... .. ..... ..... .. ..... .. ..... .. ..... .. ..... .. ..... .. ..... .. ..... .. ..... 31-32
CACULATOR.. .. .. ..... .. .. ..... .. .. ... .. .. .. ... .. .. ..... .. .. ..... .. .. ... .. .. .. ... .. .. .. ... .3 3
CAMERA. ... ... ... ... . .. . .. . .. . .. . .. . .. . .. . .. . .. . .. . .. . .. . .. . .. . .. . .. . .. . .. . .. . .. . .. . .. . .3 4
13.1 IMAGE MODE.... ... ... .. ... ... .. ... ... ..... ... ... .. ... ... .. ... ... ..... ... ... .3 4-3 5
13.2 VIDEO MODE. ... .. ... .. ... .. .. ... .. ... .. ... .. ..... .. ... .. ... .. ... .. ..... .. ... 36 -37
IMAGES..... .. .. ....... .. .. .. ....... .. .. ....... .. .. .. ..... .. .. .. ....... .. .. ....... .. .. .. ..... .3 8- 42
MUSIC. ... ... ... ... ... ..... ... ... ... ... ... ..... ... ... ... ... ... ... ..... ... ... ... ... ... ..... .43 -44
CALENDER............ ... .......... ... ............. ... .......... ... .......... ... .......... ... .45-46
FM RADIO............ ... .......... .......... ... .......... .......... ... .......... .......... ... .47-48
SET TINGS....... ..... ... .. ... ..... ..... ..... ..... ... .. ... ..... ..... ..... ..... ... .. ... ..... ....4 9-56
NOTICES FOR THE USE OF PHONE................................................57-58
11.
12.
13.
14.
15.
16.
17.
18.
19.
2
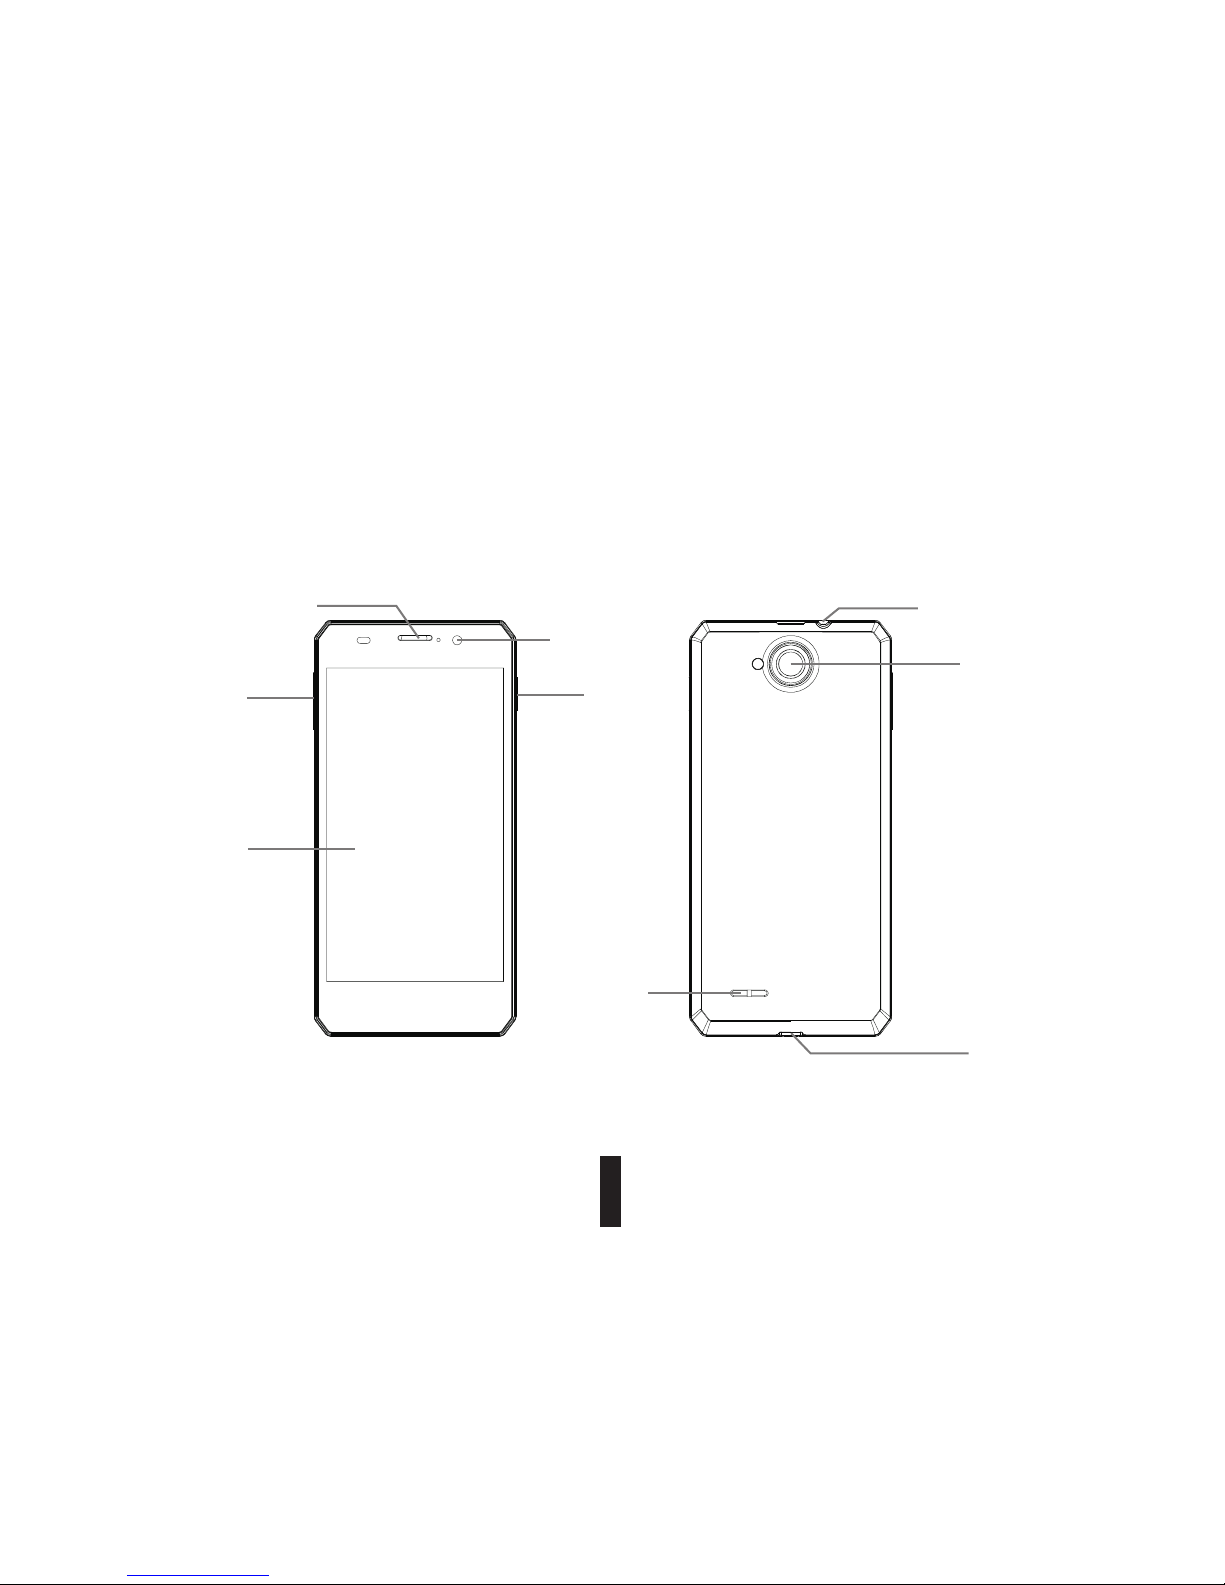
1 . Appearance and Keypad Operations
Back ca mera
Power k ey
Side vo lume key
Charg er/
Micro U SB
conne ctor
Louds peaker
Touch scr een
Front c amera
Recie ver
Headp hone
3
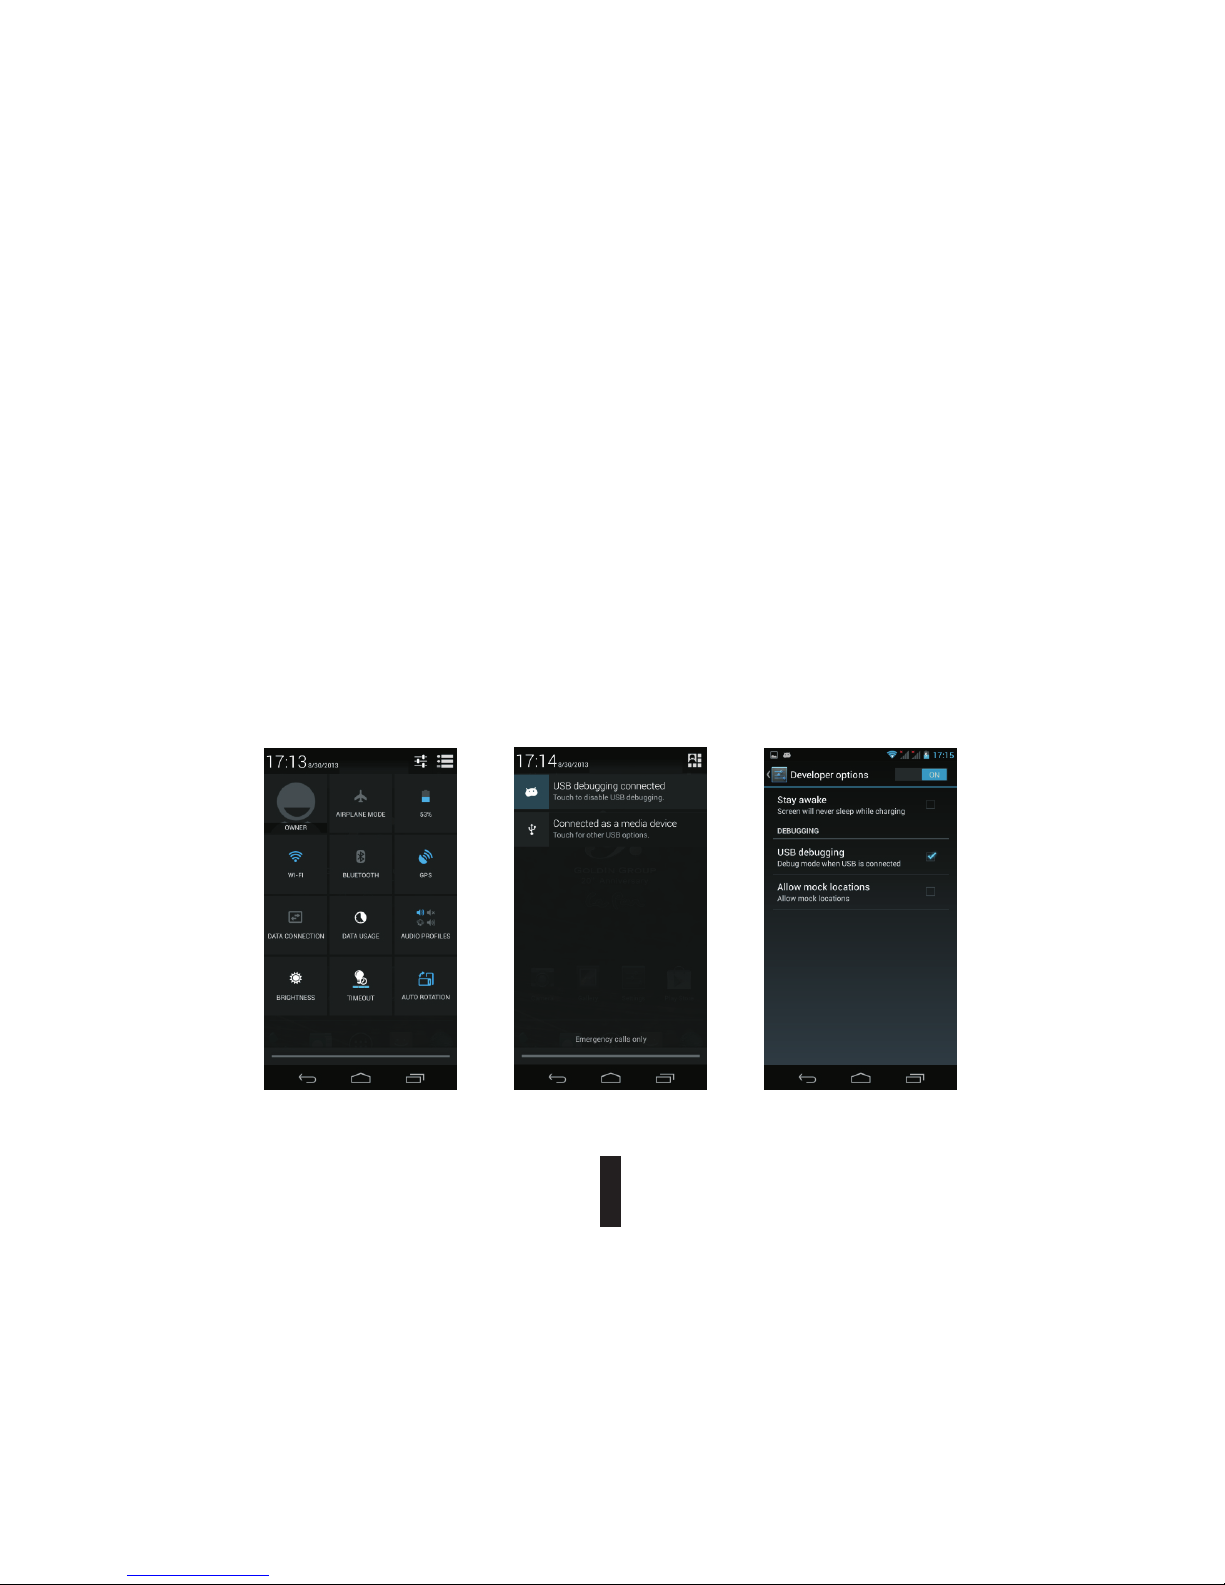
2. Using Memory Card as U Disk
4
If you want to send music, pictures or other files to the phone’s memory card from the computer,
you should set memory card as u disk first.
Set memory card as u disk
1) Connect the phone to the computer with USB cable. The notification icon will appear in
the status box.
2) Use USB mobile transmission line will connected to the computer
3) In the notification panel, touch USB is connected, then touch“Open the USB Storage
Device”
5
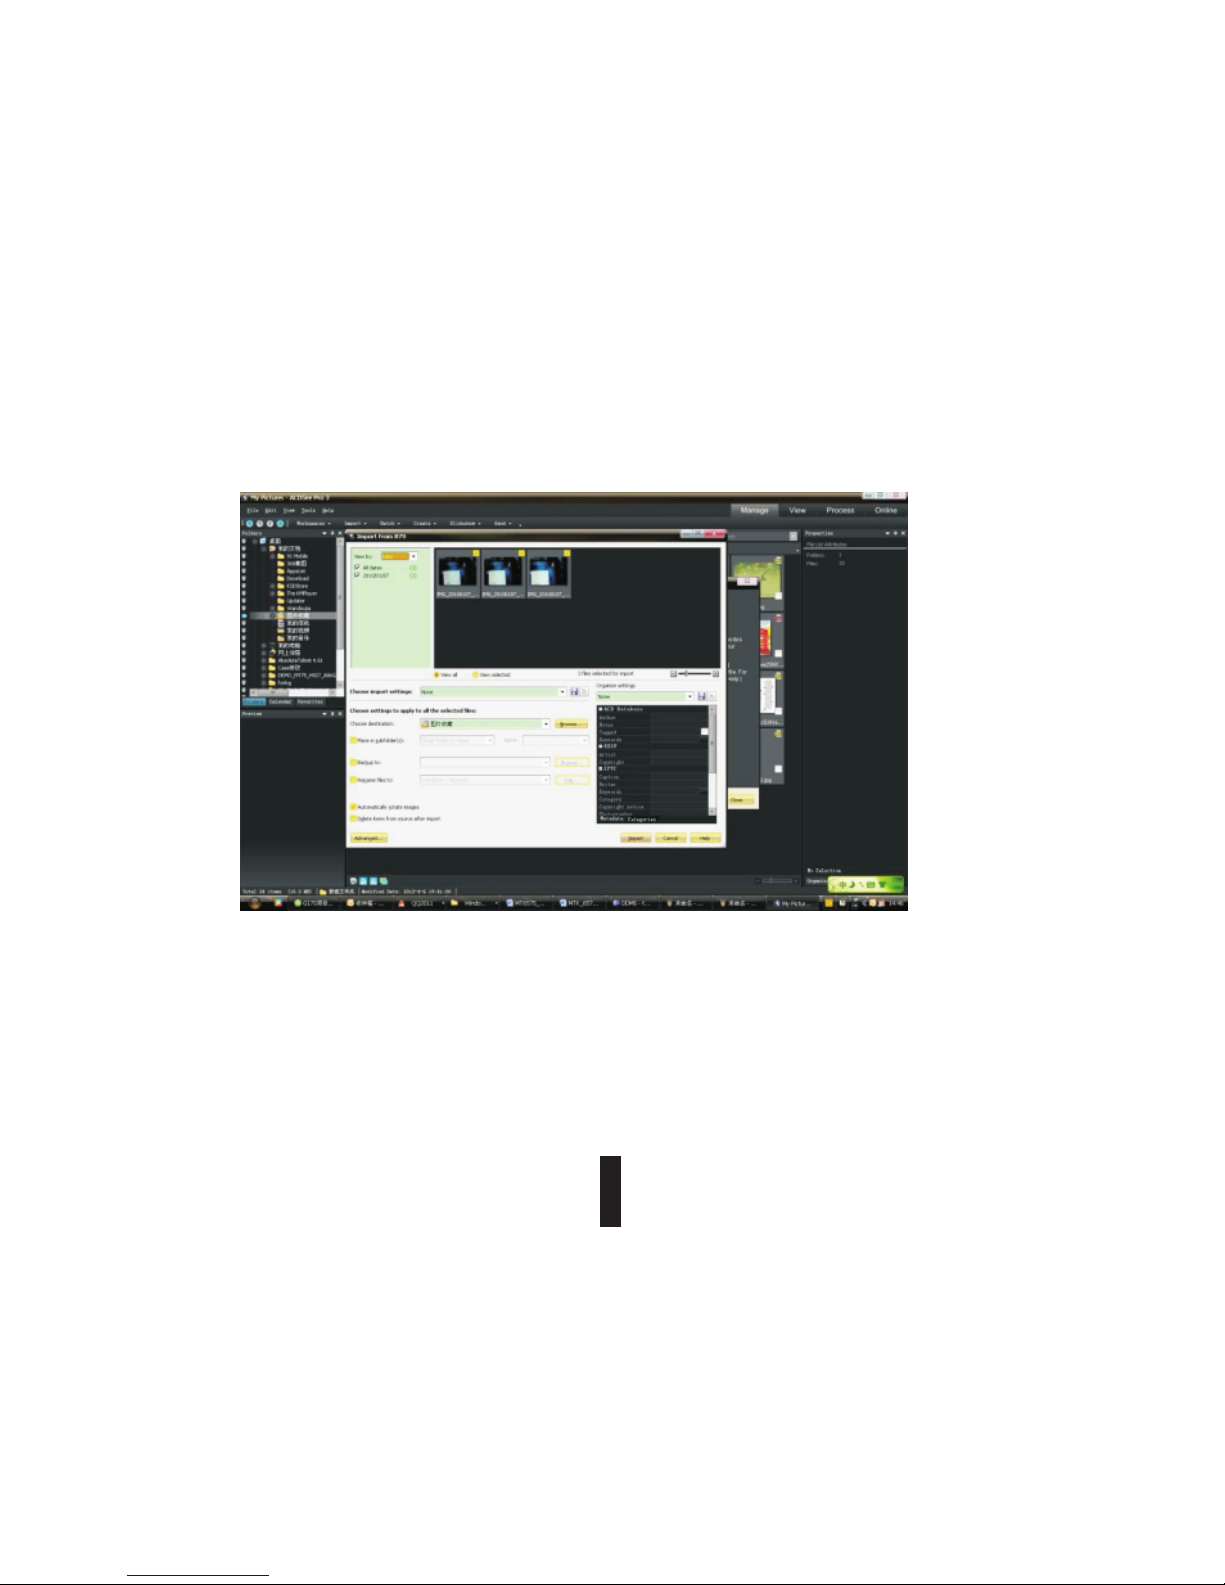
After the connection can be directly in the PC check images captured on camera.
Notice: different PC operating system to how to operate to normal use the U disk.
1) WIN7 Can directly use
2) XP update windows media player to 11
3) Install wpdmtp.inf driver
4) Vista Unconfirmed
Notice: On the PC operation assistant tool such as mobile phone,Must be open the USB debugging.

3. WIFI
6
Wi-Fi provides as far as 300feet (100M) range of wireless network access. If you use cell phone to
connect wifi, you should connect to the wireless access point or 「hot spots」.
Notices:The availability and coverage of Wi-Fi signal depend on the number, infrastructure
and other objects penetrated by the signal.
Open Wi-Fi and to connect to the wireless network
1) Press home>menu, then touch settings>wifi and internet
2) Select the wi-fi box, to open Wi-Fi. Phone will automatically scan for available wireless
networks.
3) Touch Wi-Fi settings. Then a list of Wi-Fi network will show the founded network name and
security settings. (open network or WEP、WPA/WPA2 with password).If you enable the
notification in Wi-Fi settings, The status box will show this icon ( ) when open available
wireless network founded.
4) Touch one of the Wi-Fi choices to connect the network. When you choose open network,
phone will connect to it automatically. If you choose WEP、WPA/WPA2 with password,
you should type the password first, then touch to connect it.
7
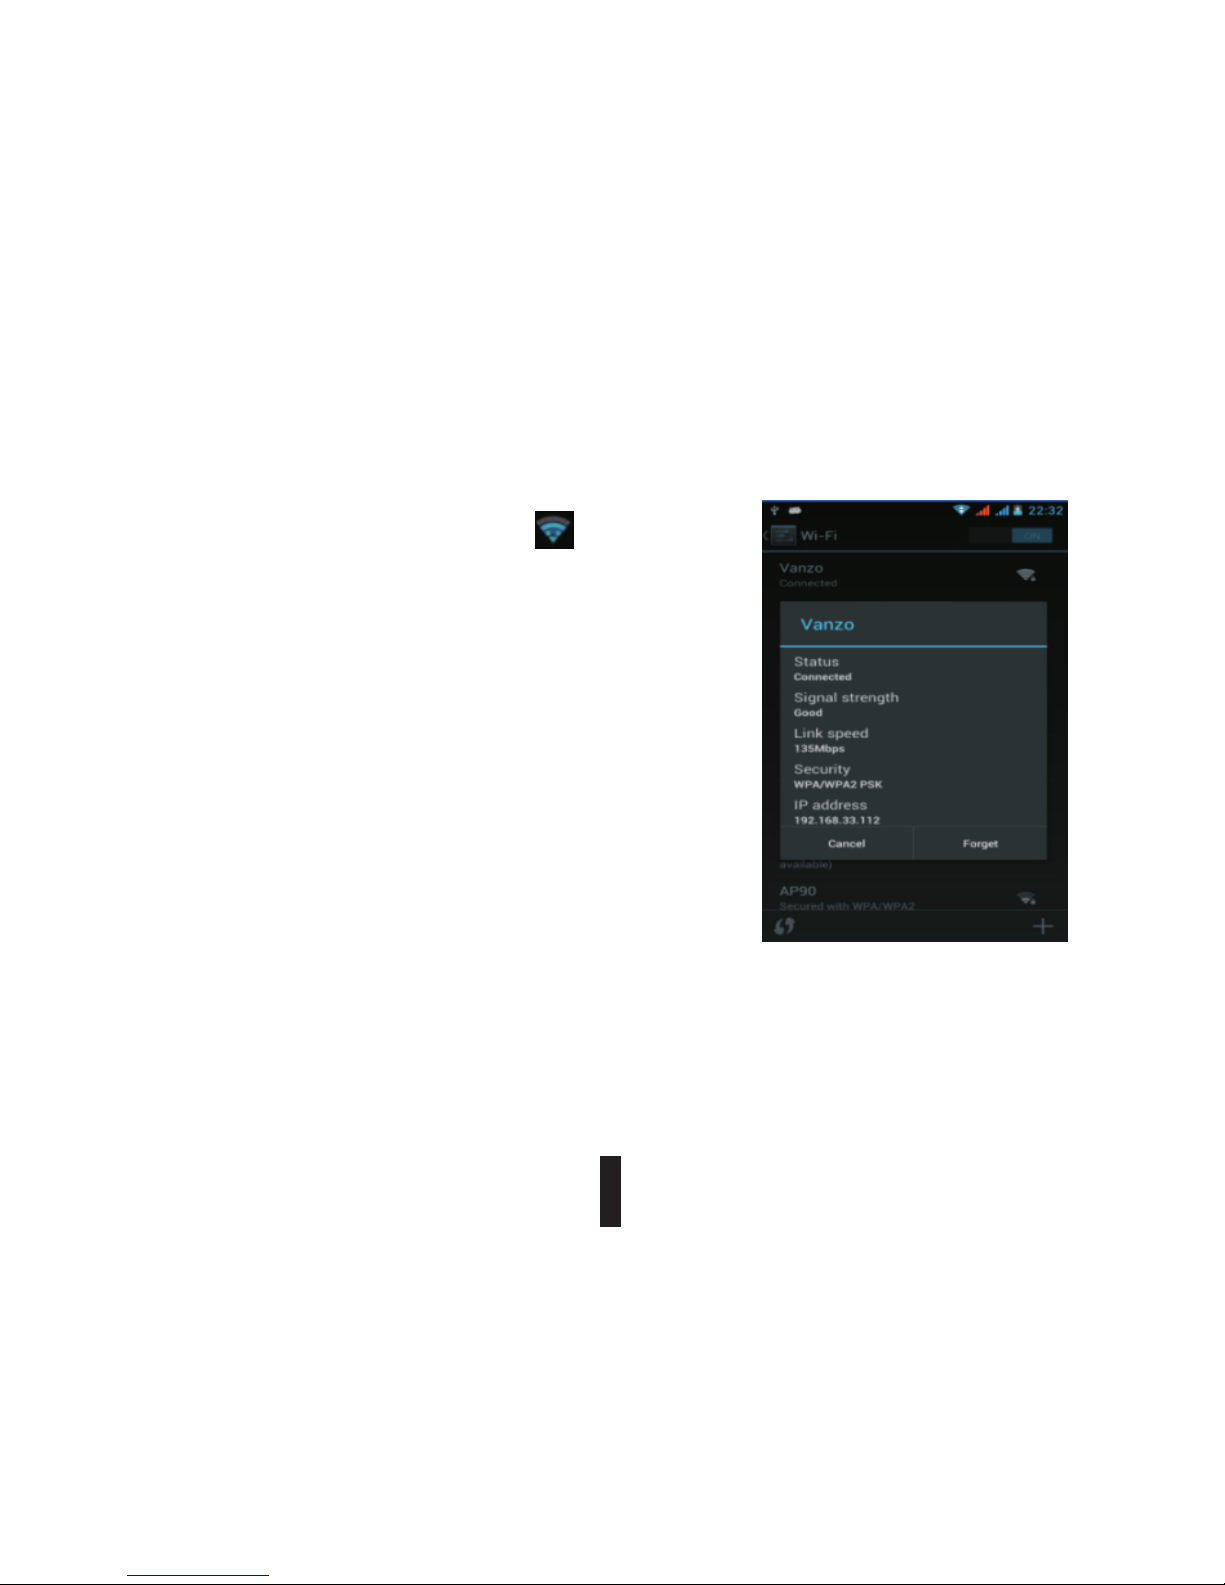
Notices:
When the phone is connected to the wireless network,
The status box will show this Wi-Fi icon ( and the
approximate signal strengthen (the number of lit bars).If
touch the connected network, will display the name of Wi-Fi
network,status,speed,signal,strength,security,information
and IP address. If you want to delete the wireless settings,
please touch“not reserve”as in the right picture. If you want
to connect to this network, you should re-enter these settings.
Notices:
Unless you choose not to reserve the network, otherwise,
there is no need to re-enter the corresponding password when
next time connecting to the previously encrypted wireless
network.Wi-Fi will search automatically, that is,phone needn’t
to perform additional steps to connect Wi-Fi networks.
Notices:
Unless you choose not to reserve the network with password, otherwise, there is no need to
re-enter the corresponding password when next time connecting to the previously encrypted
wireless network. Wi-Fi will search automatically, that is, phone needn’t to perform additional
steps to connect Wi-Fi networks.
),

8
Connect to other Wi-Fi networks
1) In the interface of wireless and network, touch Wi-Fi settings. The founded Wi-Fi networks
will show on the Wi-Fi network list.
2) Touch other Wi-Fi networks, and then you can connect to this network.
Notices: in addition, you can surf the internet via GPRS. We default that the GPRS in SIM1 is
opened after started, users can select manually ,the specific location is “settings>wireless and
internet>data connection”, touch “SIM1, SIM2, no data connection”, when the dot turns green,
it’s already opened.

4. Bluetooth
9
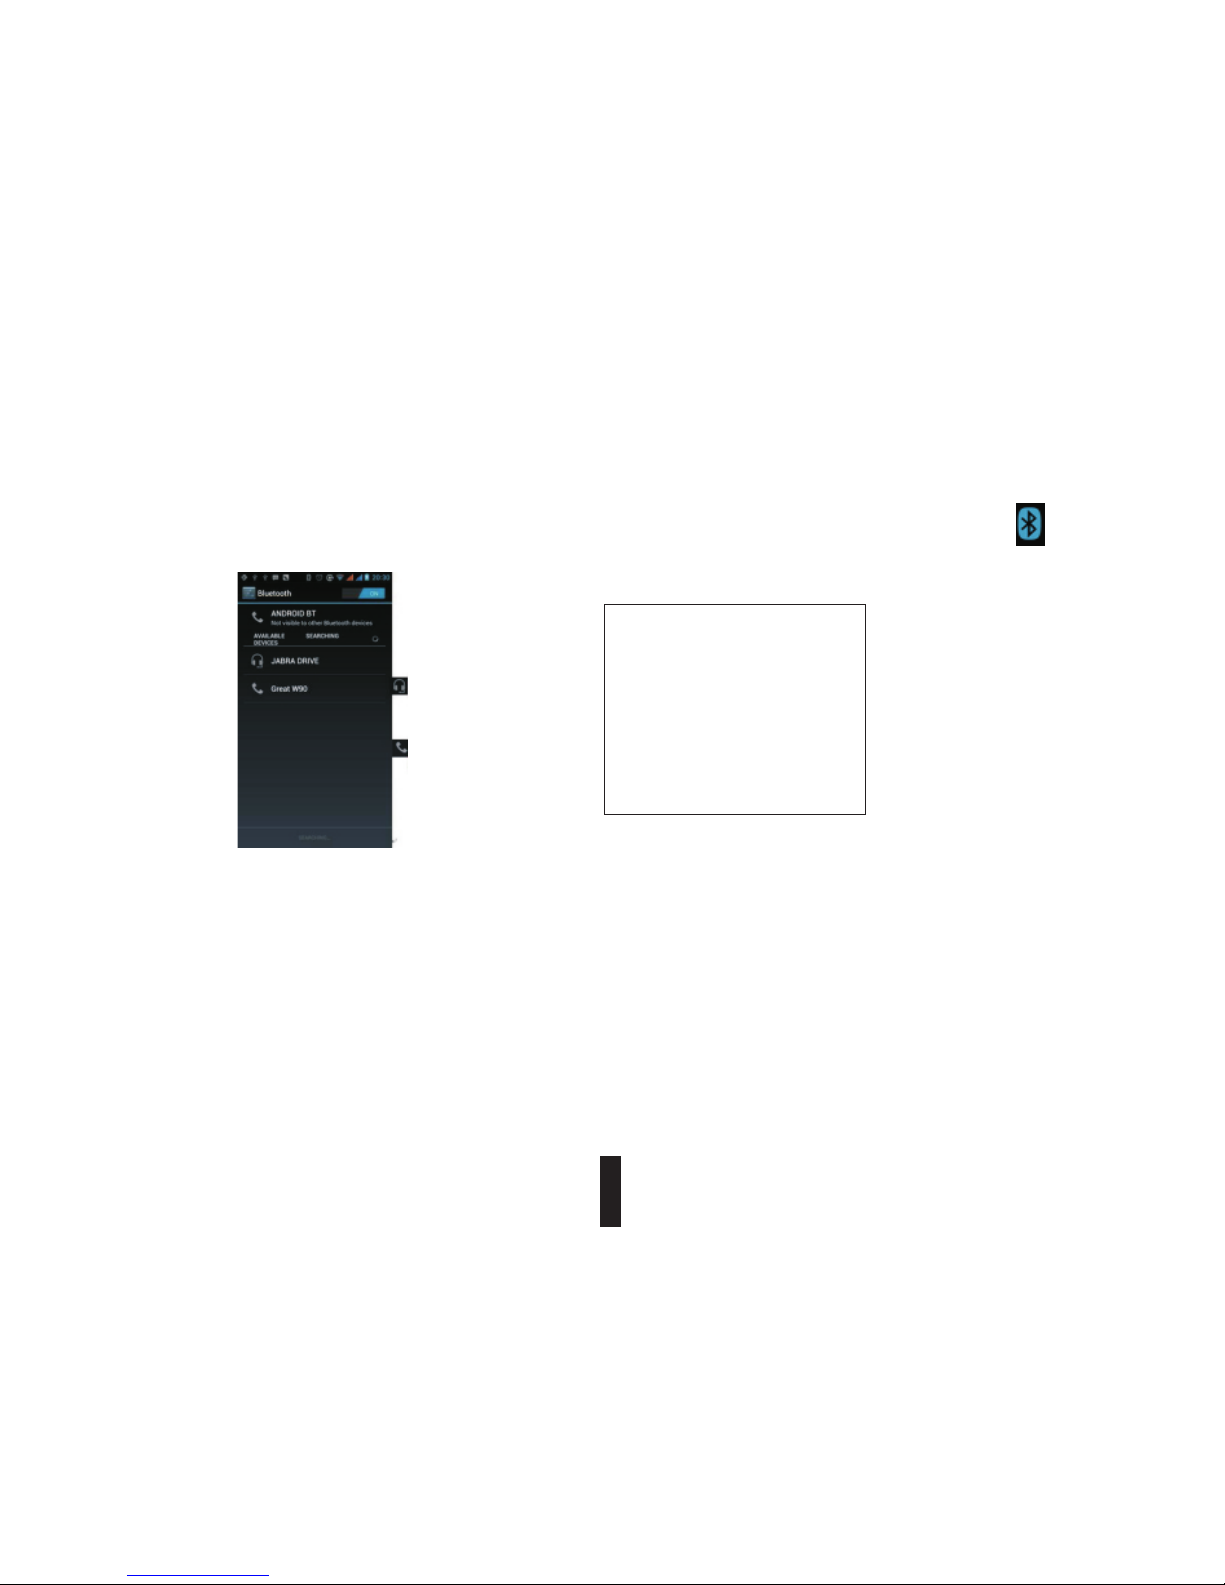
Turn on Bluetooth or set the phone can be detected
1) Press home>menu, the touch settings.
2) Touch wireless and internet, then choose Bluetooth box to open the Bluetooth function.
After started, the status box will show this icon ( ). Touch “scan for devices”the it
starts to scan for all devices within range.
3) Touch Bluetooth settings, all the devices founded will display in the list under the icon.
select the box “can be detected”, set it to be detected, the other Bluetooth devices will
be able to find the phone.)
important: the maximum detecting time of the phone is 2 minutes.
Pairing and connection of Bluetooth headset
1) Press home>menu, then touch settings.
2) Touch wireless and internet>Bluetooth settings, then select Bluetooth box, then your
Phone will scan for the Bluetooth devices within range, and show the founded devices
in the list under the icon.
Tips:
a. If the list can’t find your equipment, touch scanning equipment to re-scan it.
b. Make sure that the devices wanted are under the detected mode.
3) Touch headset in the equipment list to finish the connection.
(
Notices: generally Bluetooth devices need password to be paired, often use「0000」as the default
password.4 The pairing and connecting status will show under the headset in the Bluetooth
devices list. When the headset connected to your phone, the status box will show this icon ( )
means connected. Then you can use the headset to make or receive callings.
Cut the connection to the Bluetooth
1) Press home>menu>settings>wireless and internet>Bluetooth settings.
2) In the list of Bluetooth equipment, touch or tap and hold the connected hand-free headset.
3) Press and select “cancel the pairing”.
Bluetooth proximity sensor
After pairing the two device, you can test out the signal is strong or weak by the Bluetooth
proximity sensor device
Not ices:
Onl y on pair ing nee ded bet ween tw o
Blu etoot h devic es. Onc e conne cted,
the re is no ne ed to ide ntify p artne rship
and e xchan ge of inf ormat ion. If y ou
alr eady co nnect o ne head set and w ant
to co nnect a s econd o ne, the f irst on e
wil l be disc onnec ted.
If yo u want to s witch t o the fir st one,
you s hould r e-sel ect it ma nuall y in the
Blu etoot h equip ment li st.
Mea ns that i t’s Blu et oot h
hea dset
Mea ns that p hone is u nder
the m ode of “c an be det ected ”
10

5. Mail
5. 1 Gmail
Create an electronic mail account
Select mail> settings. You can activate or edit existing e-mail accounts as well as create a
new e-mail account.
a. Select mail, Google account setting interface appears. Then touch ‘next step’> create
account>enter name, last name and e-mail account.
b. Google servers determine whether the name can be used, if so, new interface appears
prompting enter password, then judge the password’ security, users who doesn’t meet the
requirements need to re-enter the password.
c. Successfully register a new Gmail account, a messenger created automatically for testing.
Loading mail account
a. Open Gmail skip introduction screen>loading interface appears >select load
b. Enter name, password then load E-mail account initialization, prompting “login successful”
All Google accounts will be synchronized.
Creating and sending ,mails
When creating mails, select mail > creating mails. Enter the address(recipient), theme and
contents.
Press MENU you could ‘append’, ‘Add Cc/Bcc’, select send or discarded.
11

Receive mails
There is tone for new mails, in the status box will show this button , Press Menu
>‘refresh’, refresh and update the number of the unread mails in a proper way.
Delete mails
When loading a mail account, if you want to delete it, you need to restore factory settings.
When loading a second one, you could press the menu button to delete it.
Notices: many functions depend on Gmail Account, for example: Electronic Market, Google
Talk, Sync Contact and Calendar.
12
Load Email.
a. Open network connection.
b. In setting the account interface, input the correct email address and password and click next
mobile phone automatically complete the sending and receiving server Settings. Pop-up
mail find frequency, and user Settings interface, complete Settings, click next.
c. For account creation name, the editor of the law that email user name, and click next.
Complete set, synchronous mailbox.
Create and send Email
When creating mails, select mails > create mails. Enter
the address(recipient), theme and contents. Press
MENU you could ‘append’, ‘Add Cc/Bcc’, select send
or discarded or save as draft.
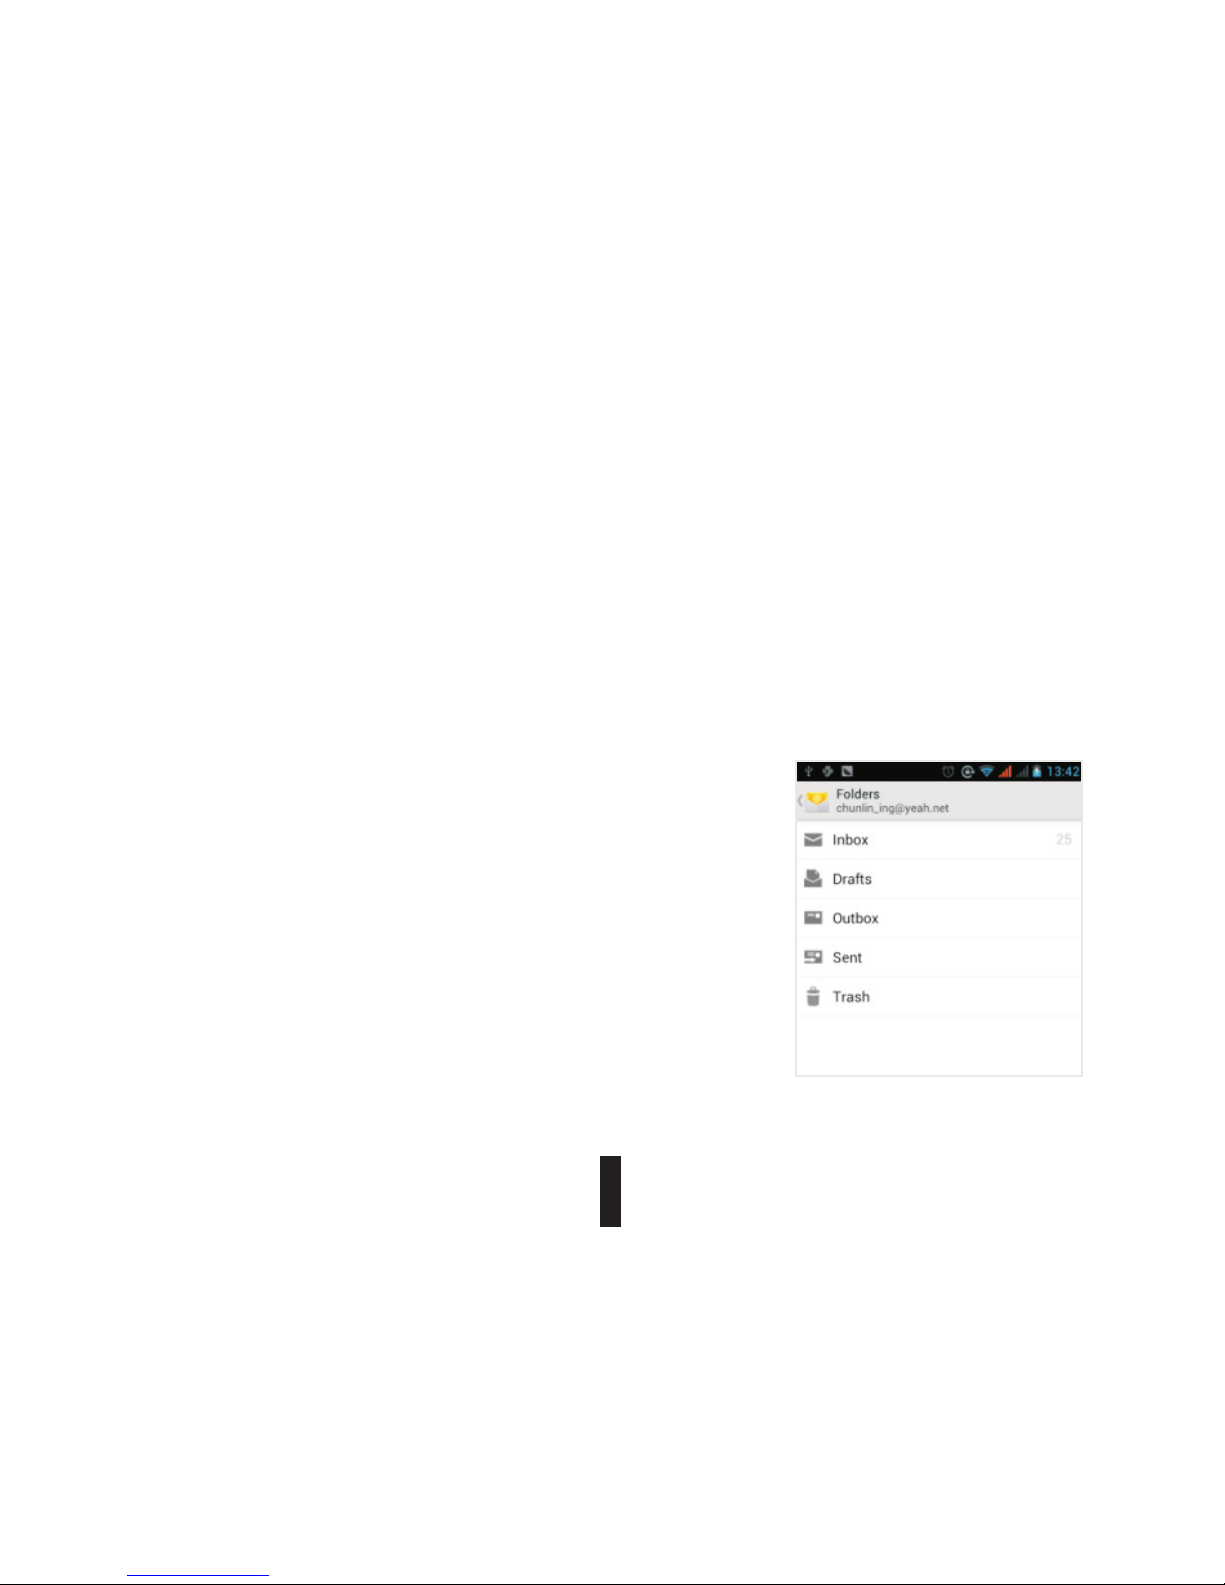
Check the Email files
Click on the bottom folder options, list all folder options
5. 2 Email
13
6. Dialling
When the icon of internet server appears in the screen, you could dial or receive callings. The
signal bar on the top right corner show the strength of network signal (the maximum with 4 signal
bars).
Start dialing
Open application’s main menu>dial. You could choose SIM1 or SIM2 to do the dialing.
14

Dialling
At the dialing Keboard , enter the phone number, and then click the dialing key, after that, you
should choose one SIM card or internet call. If needed to call the extension, you could click the
“dial pad” in the bottom of the screen to open the interface or press menu key to select “delay 2
seconds”, and then enter the number of the extension.
The dialup keyboard input number, click Menu can IP dial-up or speed dial
Video call: video call usually refers to the Internet and mobile Internet based on (3 G Internet) end,
through the phone between the speech of the real-time transmission and image (user of bust,
photographs, items, etc.) of a way to communicate. Only 3G to support this function. Input a
number click video dial-up, each other answers the phone after both can through camera for video
calls.
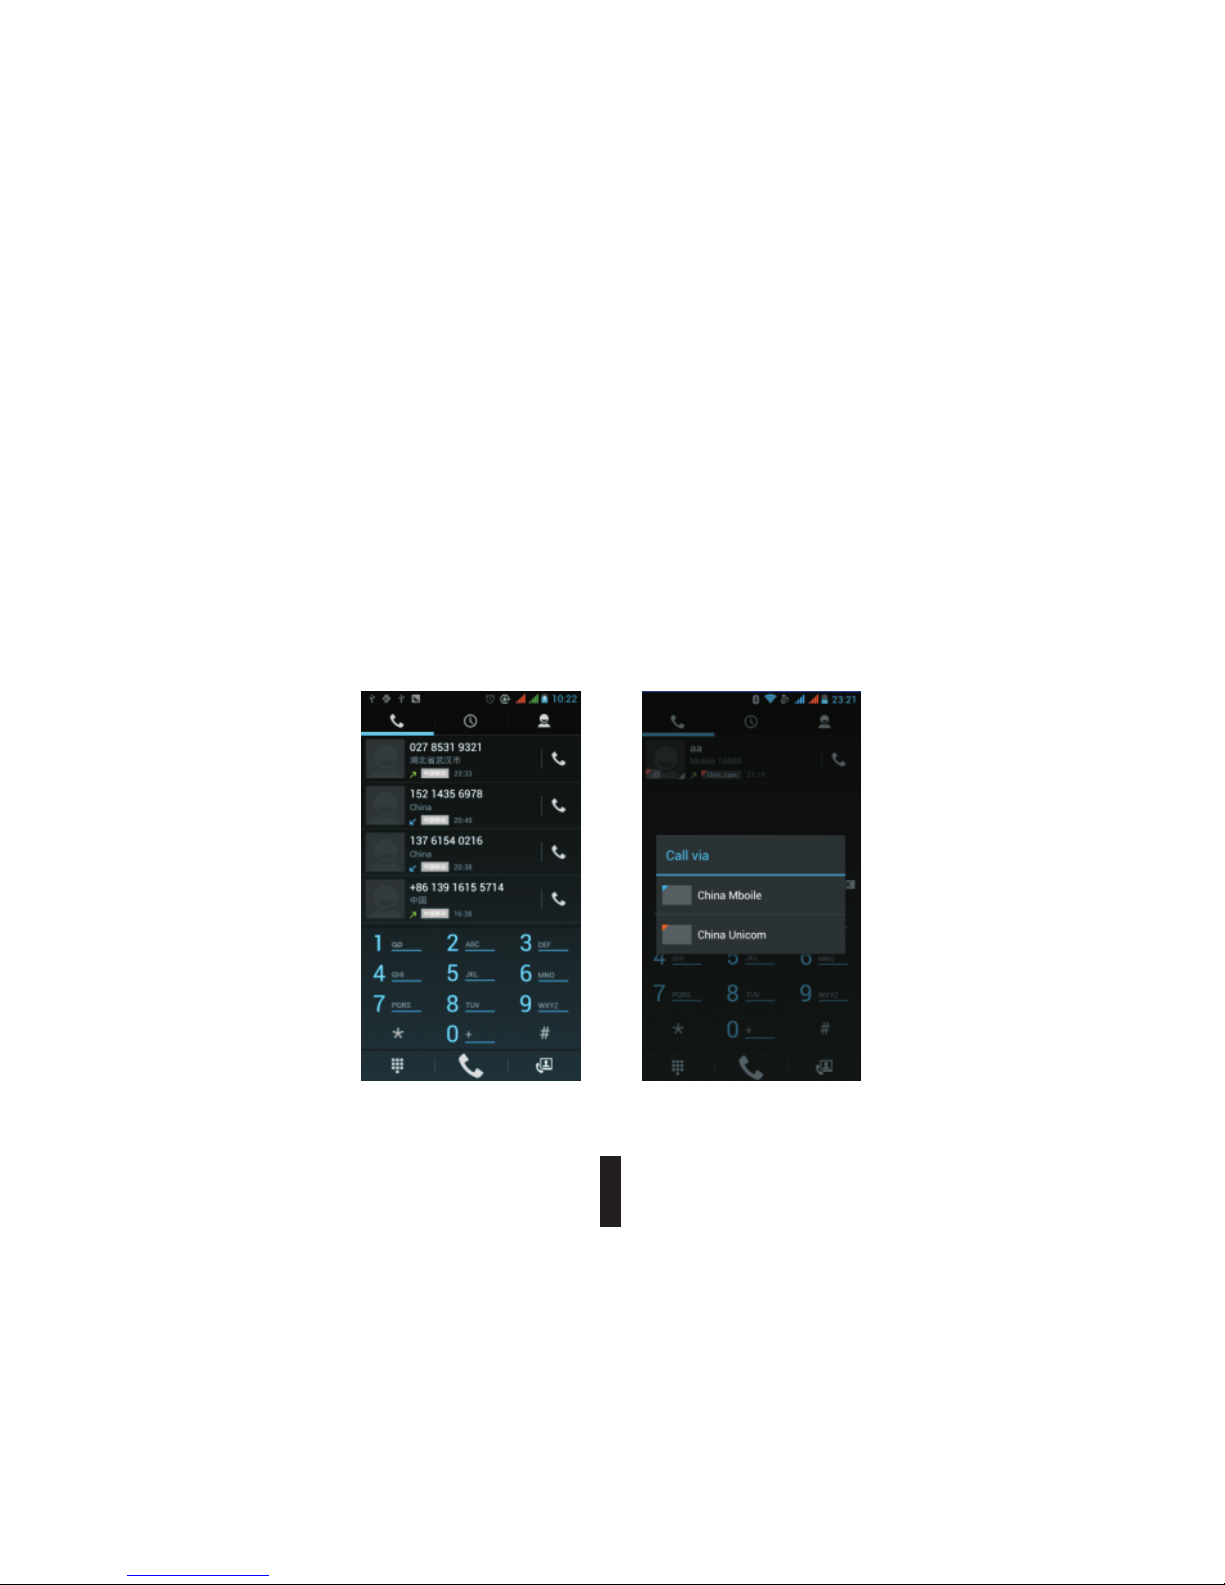
Telephone calls in the call log
Every telephone number called and received in“SIM1, SIM2”will reserved in phone’s menu of
call log. On the top left of every call record will show“SIM1 or SIM2”
All numbers in the call log can be dialed by clicking the button “dial” on the right side of the
screen.
When number list appearing, click it to catch details; press it for long you could dial via “SIM1
or SIM2”, meanwhile you can edit, delete, save the number or do other operations.
15

Receive callings
When calling comes (top left will show from which SIM card) press“Answer”and slide towards
right until the middle button, then you can receive callings.
Proximity sensor
According to the distance between phone and human body, it will adjust automatically the
switch of the backlight. During the call, close the phone to the ear, the backlight will turn off
automatically, which could save batteries and prevent inadvertently touching.
Refuse to answer the phone
a. When standby, calling comes, press “refuse” button and slide towards left side until the
middle button, then you could refuse the calling.
b. When using, calling comes, click on the “refuse”button to refuse the calling.
Two-way call/multiparty call (conference call)
Notices: this function needs that SIM card open multiparty call features.
1) Already exist a call in the phone
16
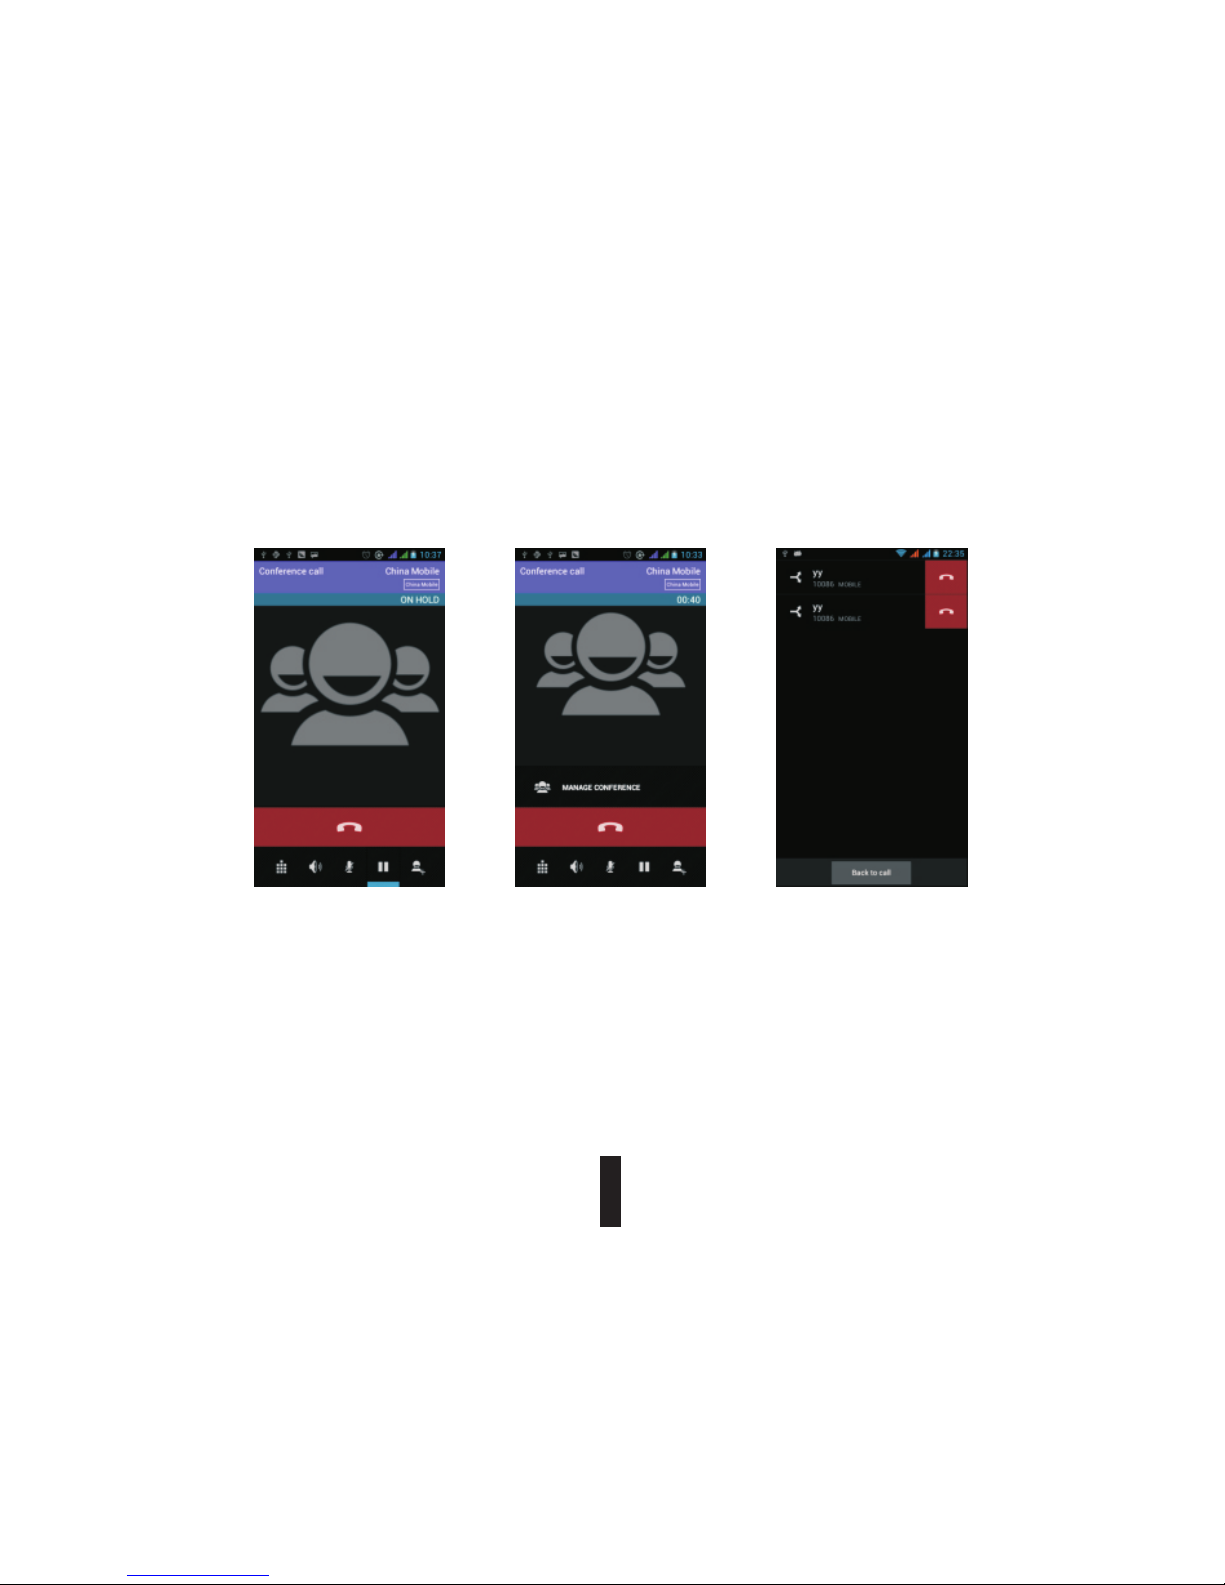
2) Click“Add calls”, dial another call (or receive another call) , phone default open call
waiting” (settings–dialing settings–other dialing settings), after both connected, could view the
status of calling.
3) Select“combine call”– you can combine two calls into one way.
4) After multiparty call connected , you could separate the calls or hangup one of them via “the
small arrow of conference call”.
Telephone recording
During the call, more>start record, you could record the dialog of the call.
“
17
 Loading...