

Lenovo Windows 8.1 Quick Start Guide [sl]
Getting Started with
Windows 8.1
Windows 8.1 Support Center @ Lenovo
support.lenovo.com/windows8.1

Hello. We at Lenovo® developed this publication to help you get started
1
with the Microsoft
new computer user or are simply new to Windows 8.1, we are confident
that you find this information helpful now and in the future.
®
Windows® 8.1 operating system. Whether you are a
Contents
• Start screen
• Desktop
• Charms
• Touch gestures and mouse controls
• More Windows 8.1 tips
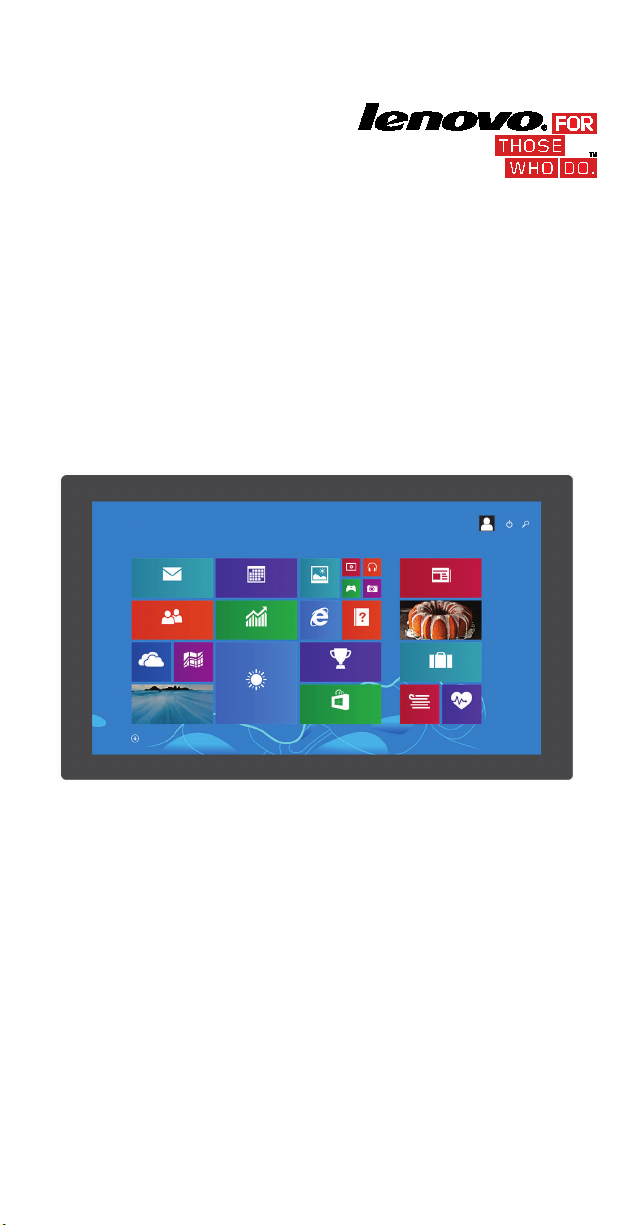
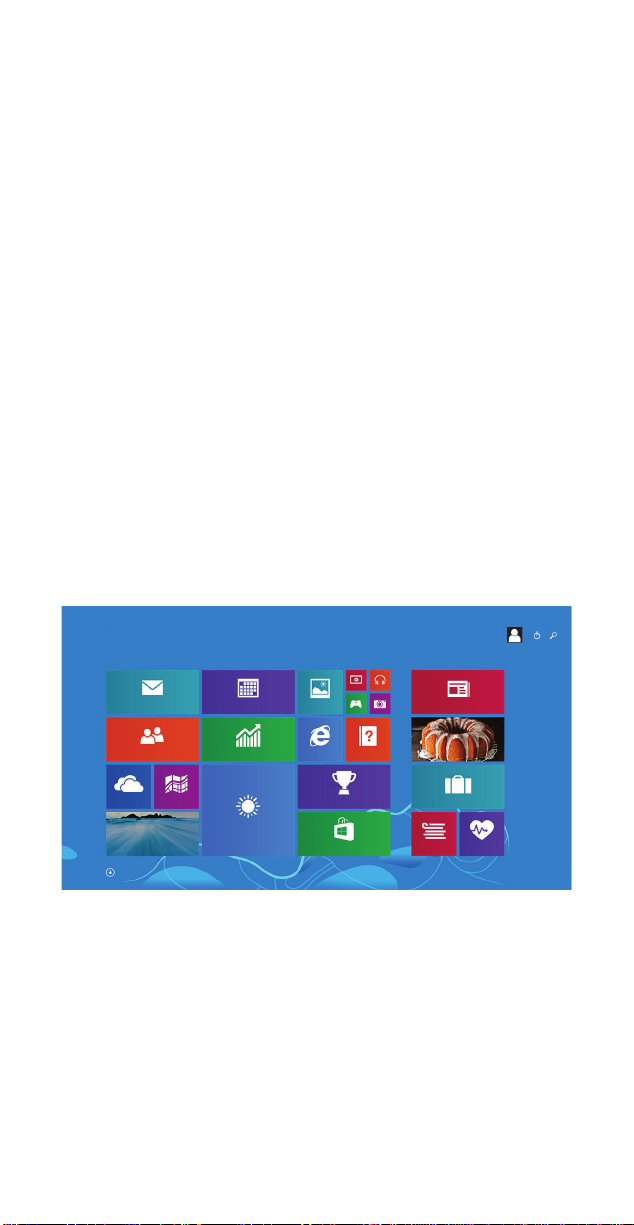
Start screen
The Start screen is a simplified interface optimized for touch screens, but
equally usable with a mouse or other pointing device. Each tile on the
Start screen is associated with an app, Web site, playlist, person, or
whatever else you find important. Some tiles are animated to show you
the latest information, such as status updates or weather forecasts.
Notes:
• The user interface might look slightly different from the illustrations
due to variations within Windows updates.
• The features marked with an asterisk (*) are not supported in some
earlier versions of Windows 8.1.

You can do the following on the Start screen:
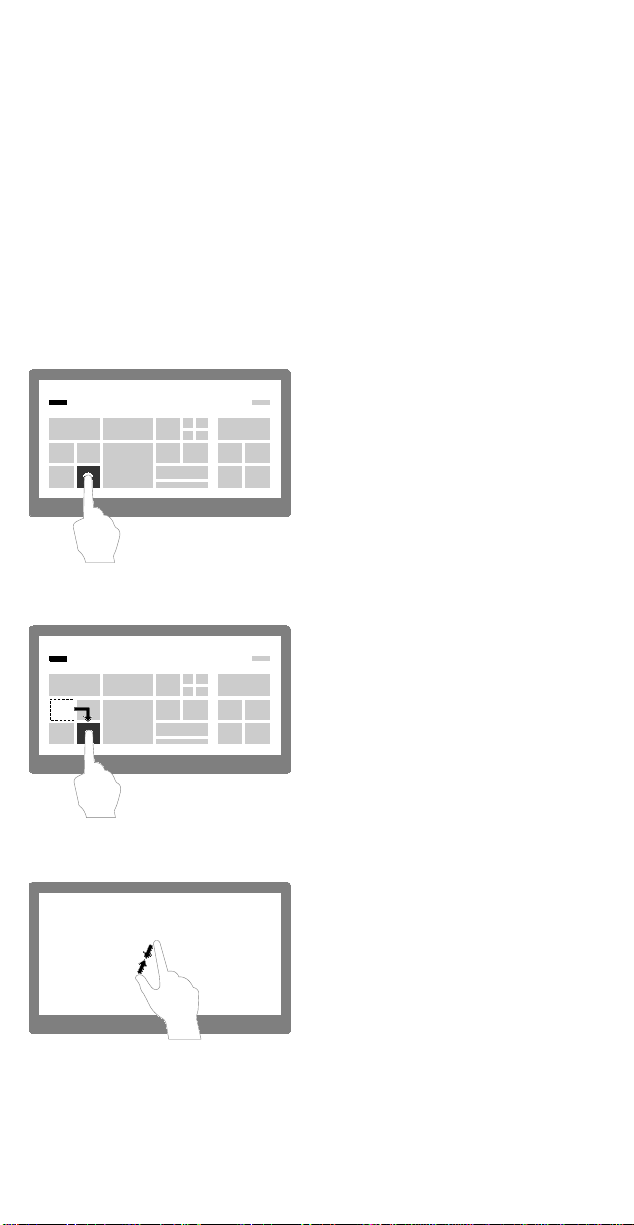
Windows Start-screen control: This control is located at the
bottom-left corner of the screen. Tap or click this control to get
2
• To open the associated app or function, tap or click the tile.
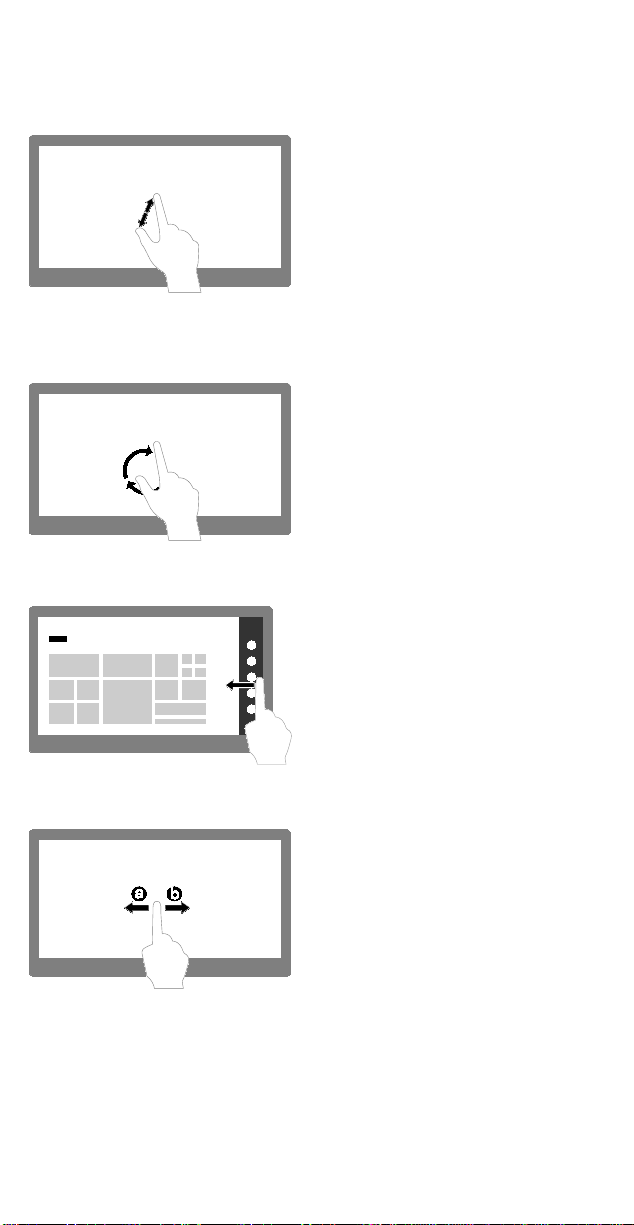
• *To get to the Apps screen, slide up from the middle of the screen,
or click the down arrow near the bottom-left corner of the
screen.
• To get to the desktop, tap or click the desktop tile.
• *To search for available apps, settings, and files, tap or click the
search icon in the upper-right corner of the screen.
• *To shut down, restart, or set your computer to power-saving
modes, tap or click the power icon in the upper-right corner of
the screen.
• *To get to the taskbar, move the pointer to the bottom edge of the
screen and slide down to show the taskbar.
Desktop
The Windows 8.1 desktop is similar in appearance and function to the
desktop in earlier Windows versions. You can run traditional Windows
programs, manage files, and access Control Panel settings on the
desktop. Functions, such as search and navigation to programs and
settings, which were on the Start menu of Windows 7 and earlier
versions are now provided by the charms in Windows 8.1. See “Charms”
later in this document for details.
The desktop provides the following components:
to the Start screen.
Taskbar: This component is located at the bottom of the
Toolbar: This component is located at the bottom of the
Desktop area: This is the largest area of the screen and is
3
screen, next to the Windows Start-screen control. It contains
shortcuts to some apps. You can pin additional shortcuts to the
taskbar. The taskbar also displays icons for open desktop
programs.
screen near the right edge. It contains shortcuts to certain
tools, features, and settings.
where you can add icons as shortcuts to your programs and
arrange the icons to your preference. You also can customize
the appearance of your desktop.
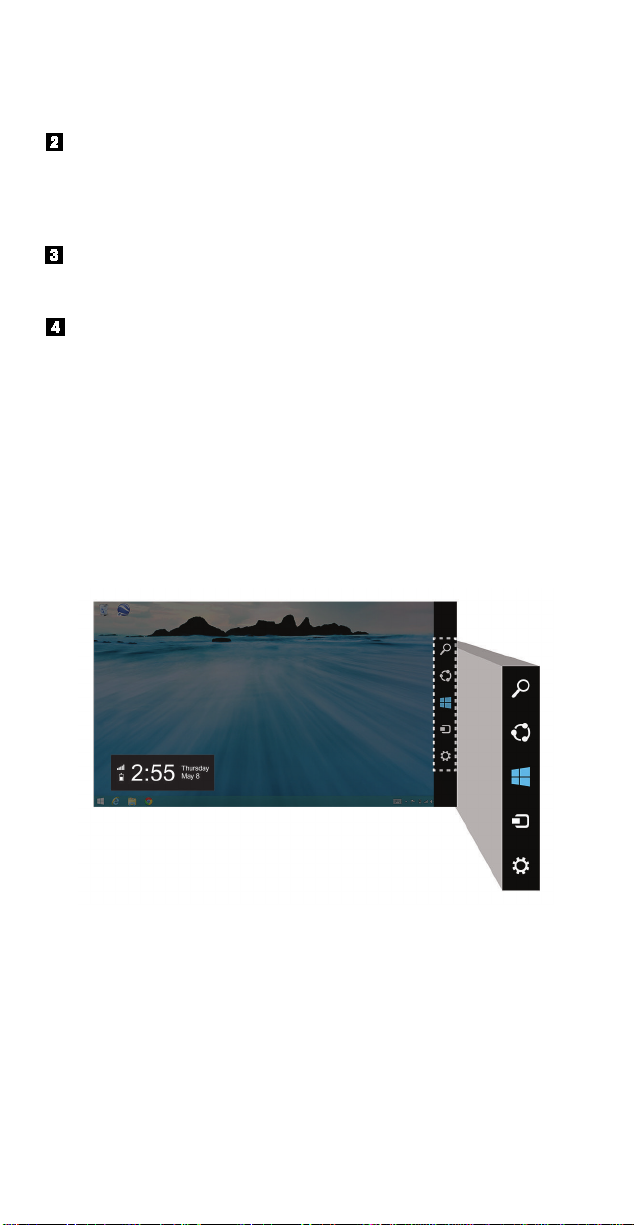
Charms
The charms enable you to navigate throughout Windows 8.1, perform
searches, access settings, share files, and so on. You can open the
charms from the Start screen, desktop, or any other workspace.
To open the charms, do one of the following:
• Mouse: Move the pointer to the top-right corner or bottom-right
corner of the screen.
• Touch: Swipe in from the right edge of the screen.
• Keyboard: Press the Windows logo key + C.
The following sections describe the navigation functions supported on
both the desktop and the Start screen or apps.
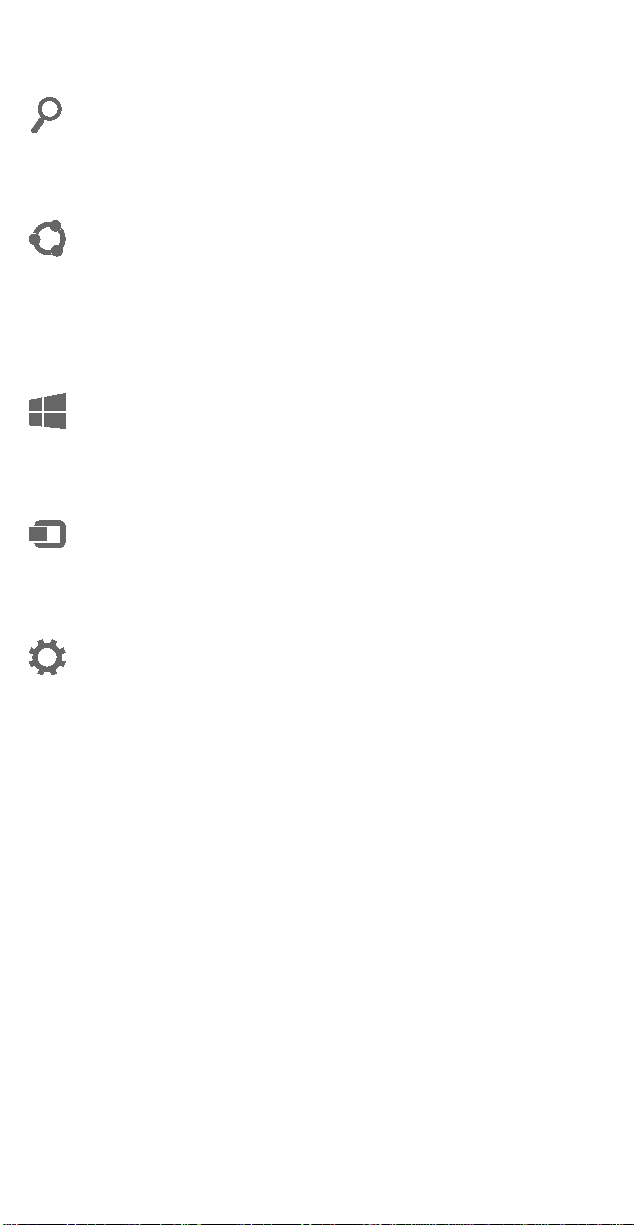
Search
4
Search for available apps, settings, and files.
Share
Share files, Web links, and other items with others. Full support is limited
to Windows Store apps. Open a Windows Store app, select the item you
want to share, open the charms, and then tap or click Share.
Start
Go to the Start screen or the last app you were using.
Devices
Interact with devices connected to your computer.
Settings
Customize your computer settings.
Touch gestures and mouse controls
Touch
Touch
Touch
5
Windows 8.1 supports the use of both touch gestures and mouse
controls. The following are basic actions you can do using a touch
screen or pointing device.
Notes:
• Touch gestures are supported on touch-screen computers only.
• The touch gestures and mouse controls marked with an asterisk (*)
are not supported in some earlier versions of Windows 8.1.
Open an app or make selections from an app
Tap.
Mouse
Click.
Move an object
Drag an item to the desired
location.
Mouse
Click, hold, and drag an item.
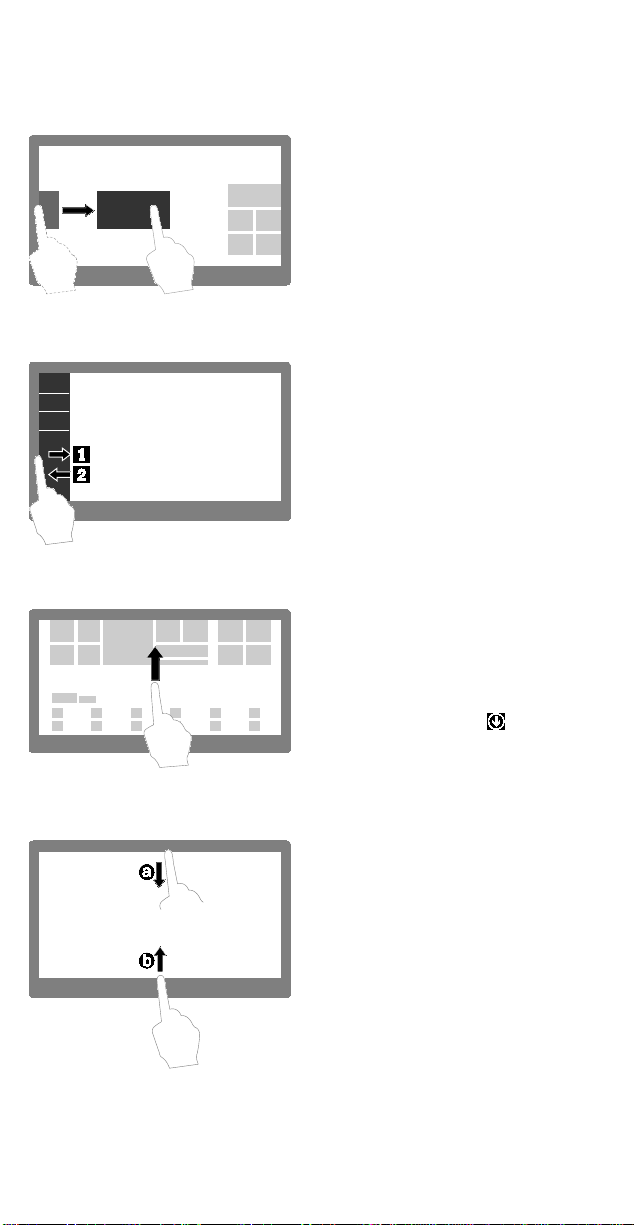
Zoom out
Move two fingers closer together.
Mouse
Press the Ctrl key while scrolling
the mouse wheel forward.
Zoom in
Touch
Touch
Touch
Touch
scrollbar.
6
Move two fingers farther apart.
Mouse
Press the Ctrl key while scrolling
the mouse wheel backward.
Rotate an item
Note: Some apps do not support rotate.
Put two or more fingers on an
item, and then rotate your fingers.
Mouse
If the app supports rotation, click
the rotation icon.
Display the charms
Swipe in from the right edge.
Mouse
Move the pointer to the top-right
corner or bottom-right corner of
the screen.
Scroll through items
Slide.
Mouse
• Rotate the mouse wheel.
• Move the pointer to display the
scrollbar; then use the
Switch between apps
Touch
through all open apps.
Touch
the left edge.
Touch
Start screen.
Touch
7
View recently used apps
View all apps
Swipe in from the left edge.
Mouse
Move the pointer to the upper-left
corner of the screen, and then
click. Keep clicking to cycle
Swipe in and out from the left
edge.
Mouse
Move the pointer to the top-left
corner of the screen, and then
move the pointer downward along
Slide up from the middle of the
Start screen.
Mouse
Click the arrow icon located
near the bottom-left corner of the
Customize tiles or display app options
Swipe in from the top or bottom
edge of the Start screen or app.
Mouse
Right-click a blank area on the
screen or on a tile.
Close an app
Touch
Touch
and click the next desired app.
8
Slide downward from the top edge
of the screen to the bottom.
Mouse
• From the top edge of the
screen, click, hold, and
move the pointer to the
bottom. Then, release the
button.
• *Move the pointer to the top
of the screen and then click
the Close button in the title
bar.
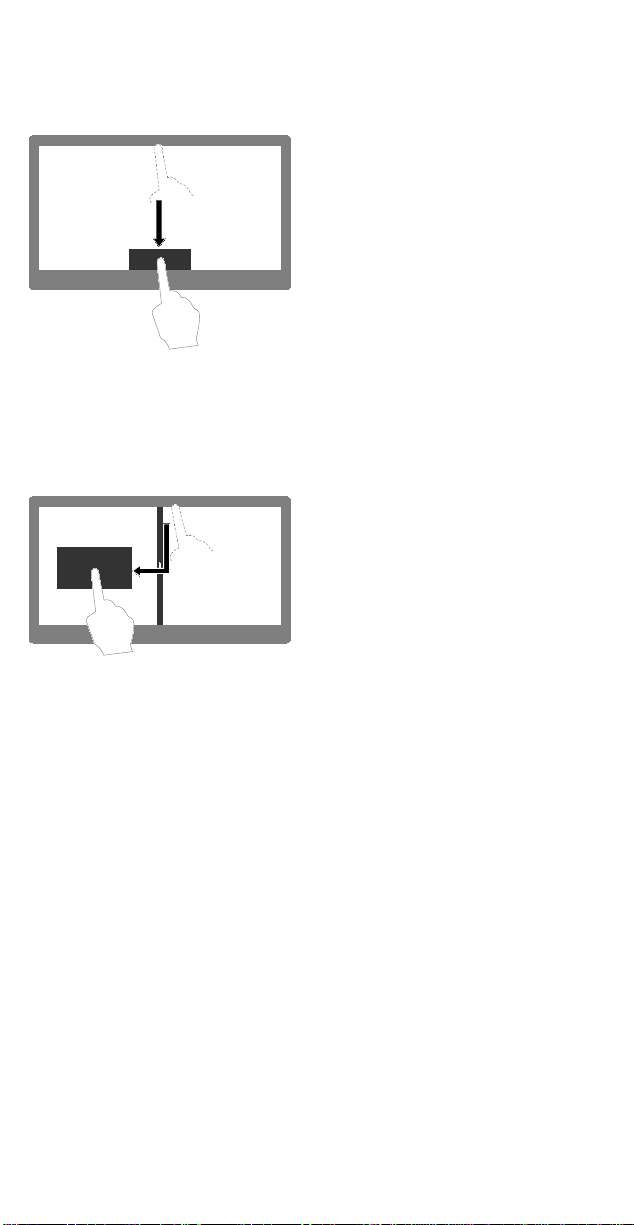
Display multiple apps side by side
Slide downward from the top edge
of the screen to the left side or
right side until you see a divider.
Then, go to the Start or Apps
screen and tap the next desired
app.
Mouse
1. From the top edge of the
screen, click, hold, and move
the pointer downward and then
to the left or right. Release the
button when you see a divider.
2. Go to the Start or Apps screen
 Loading...