

Page 1
LENOVO THINKSTATION P920 RACK
WINDOWS 10 INSTALLATION
Page 2

Contents
OVERVIEW
SECTION 1 – BIOS & PRE-INSTALLATION STEPS
SECTION 2 – RAID SETUP
SECTION 3 – WINDOWS 10 INSTALLATION
SECTION 4 – ADDENDUM
SECTION 5 – DOCUMENT REVISION HISTORY
Page 3

Overview
The purpose of this document is to provide guidance for users on how to install a
Windows 10 retail operating system on their ThinkStation P920 Rack system.
When necessary, focus points in the screen shots are circled in red.
Section 1 – Pre-Installation Steps
The first step before installing Windows is to make sure the BIOS is setup
correctly in UEFI or Legacy mode.
For UEFI Setup (recommended)
o Boot into “System Setup” by pressing the F1 key at the Lenovo
splash screen.
Page 4
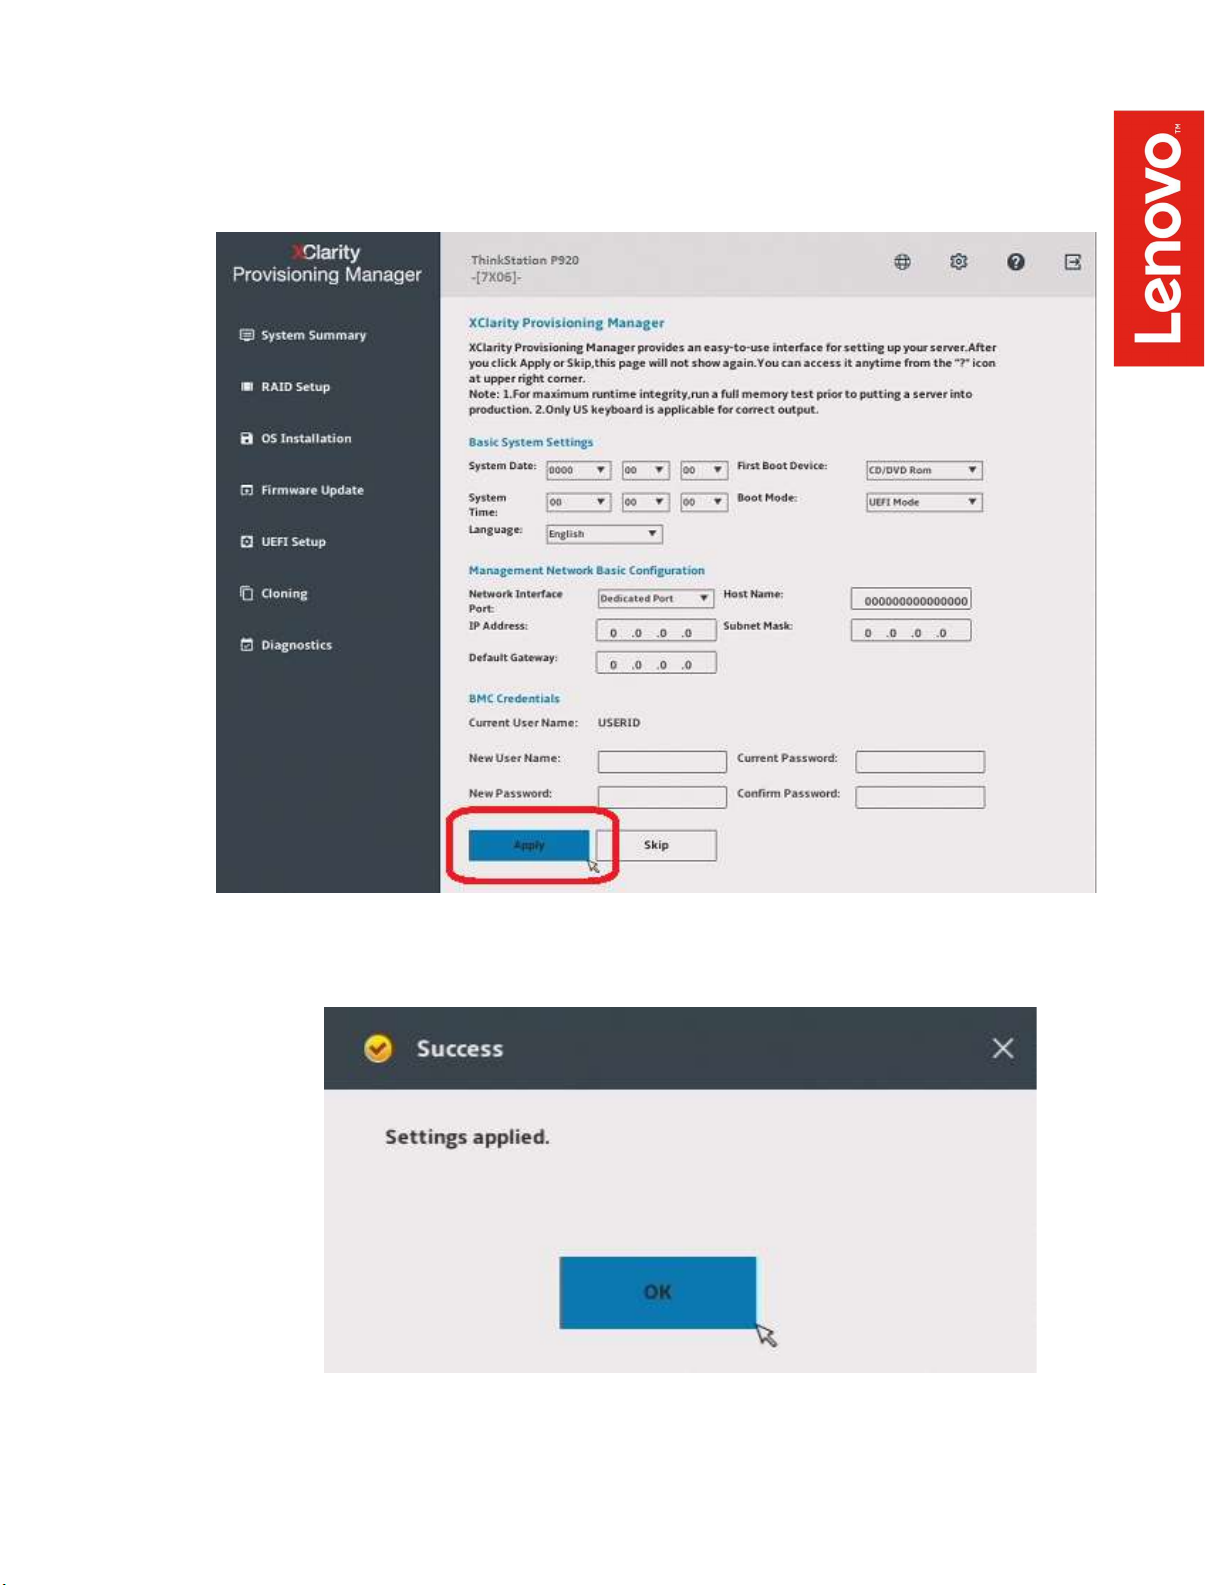
o First time users will see an “XClarity Provisioning Manager”
welcome screen indicated below. Select “Skip” or make any
appropriate changes and select “Apply”.
o If applying changes, select “OK” in the confirmation window.
Page 5
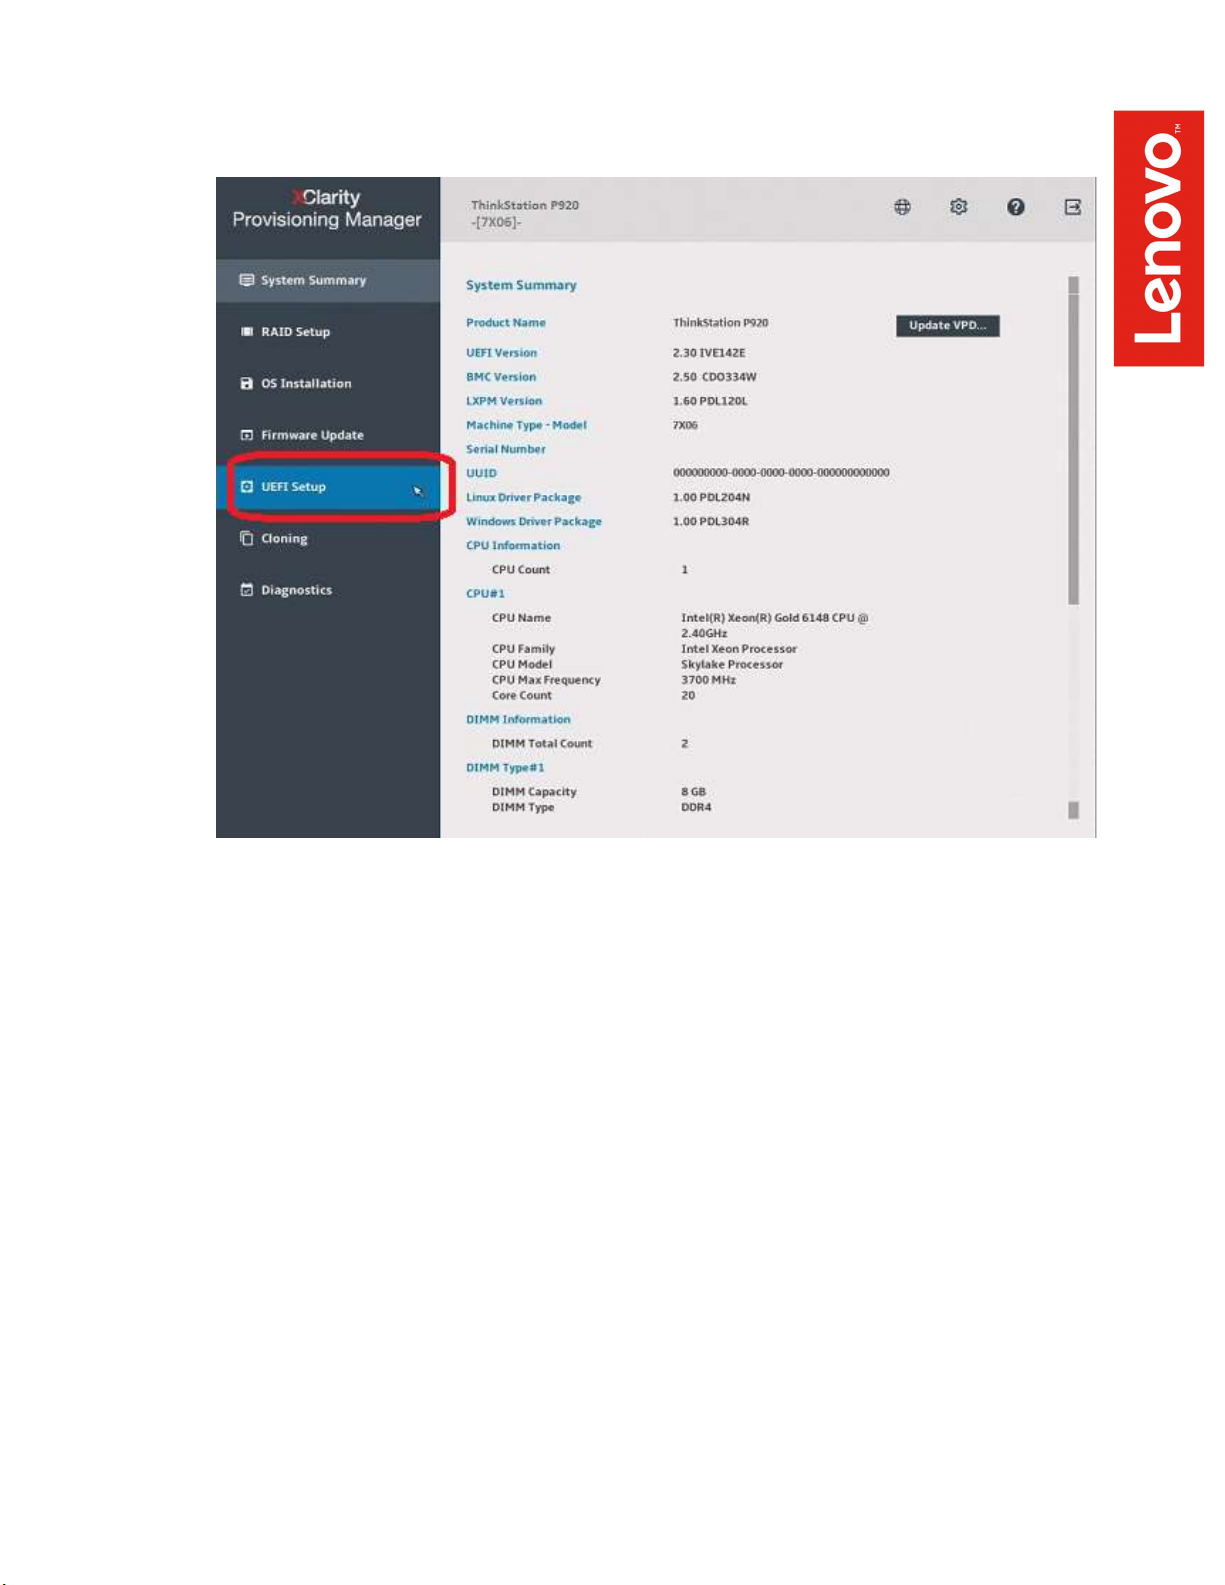
o Select “UEFI Setup” from the left side of the screen.
Page 6
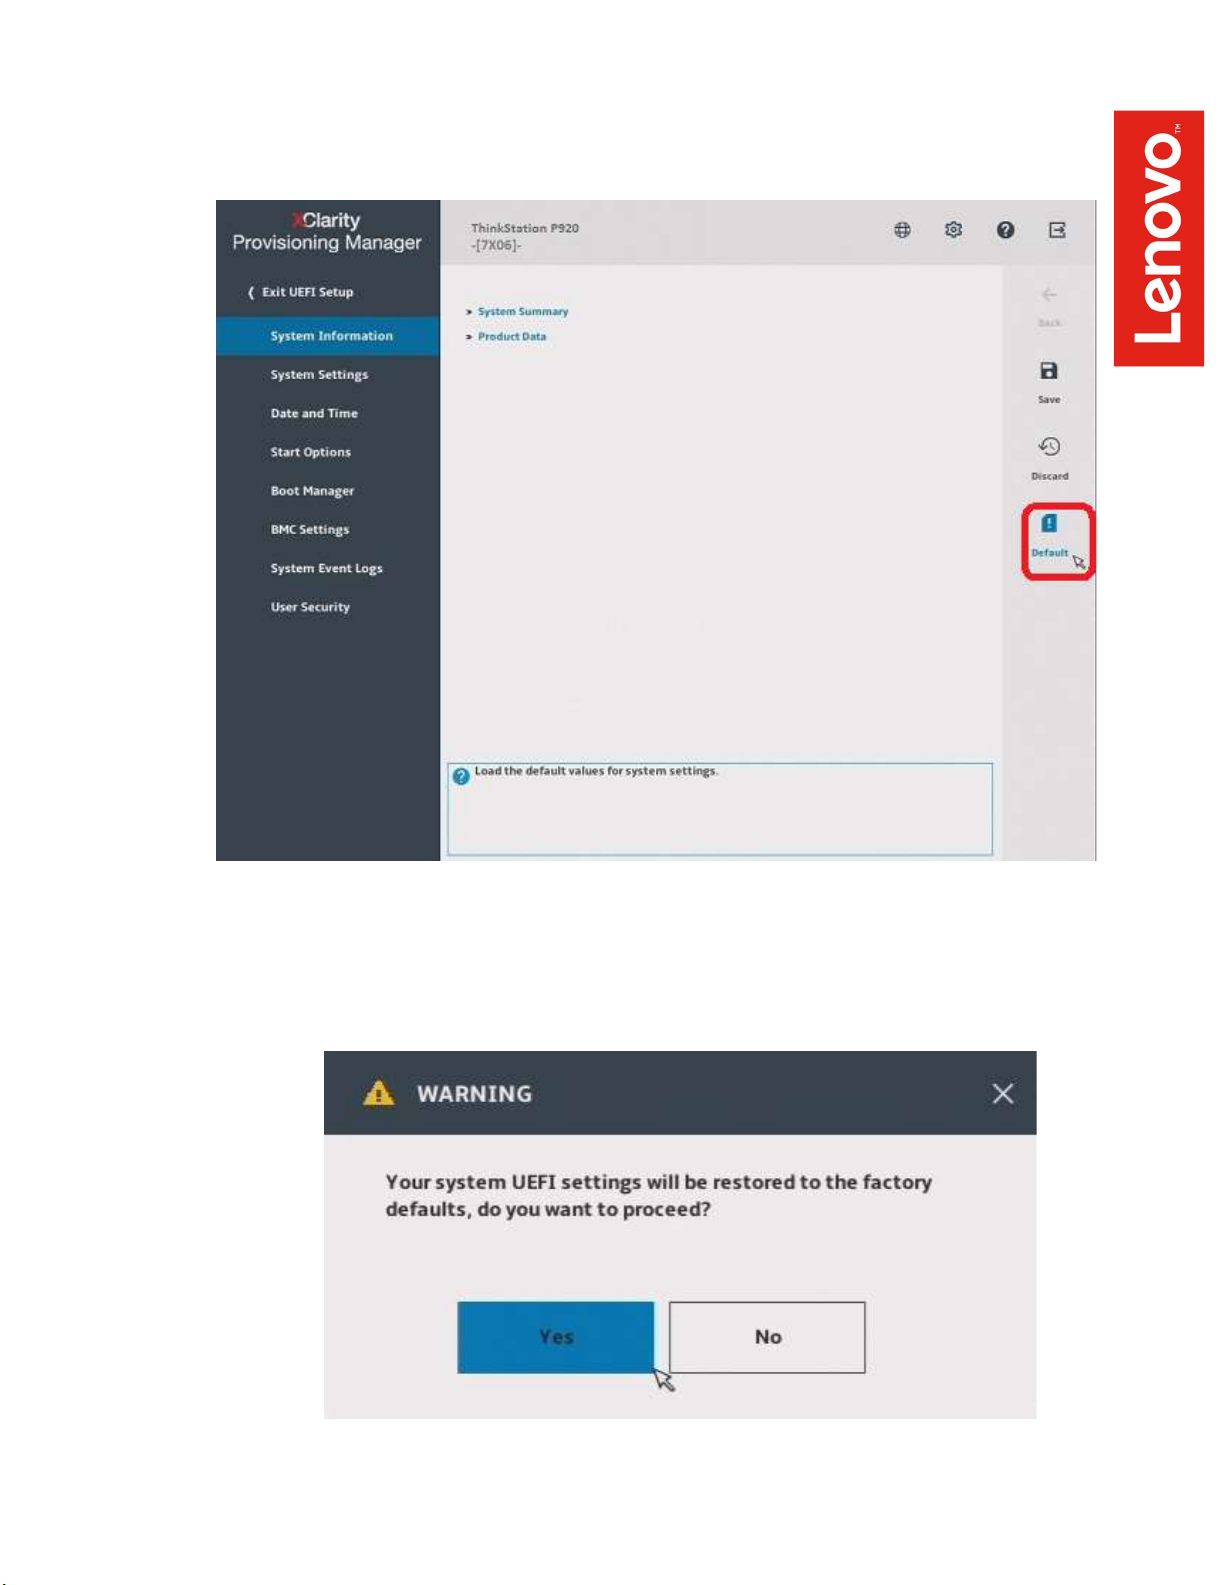
o Select “Default” from the right side of the screen.
o Select “Yes” in the confirmation window.
Page 7
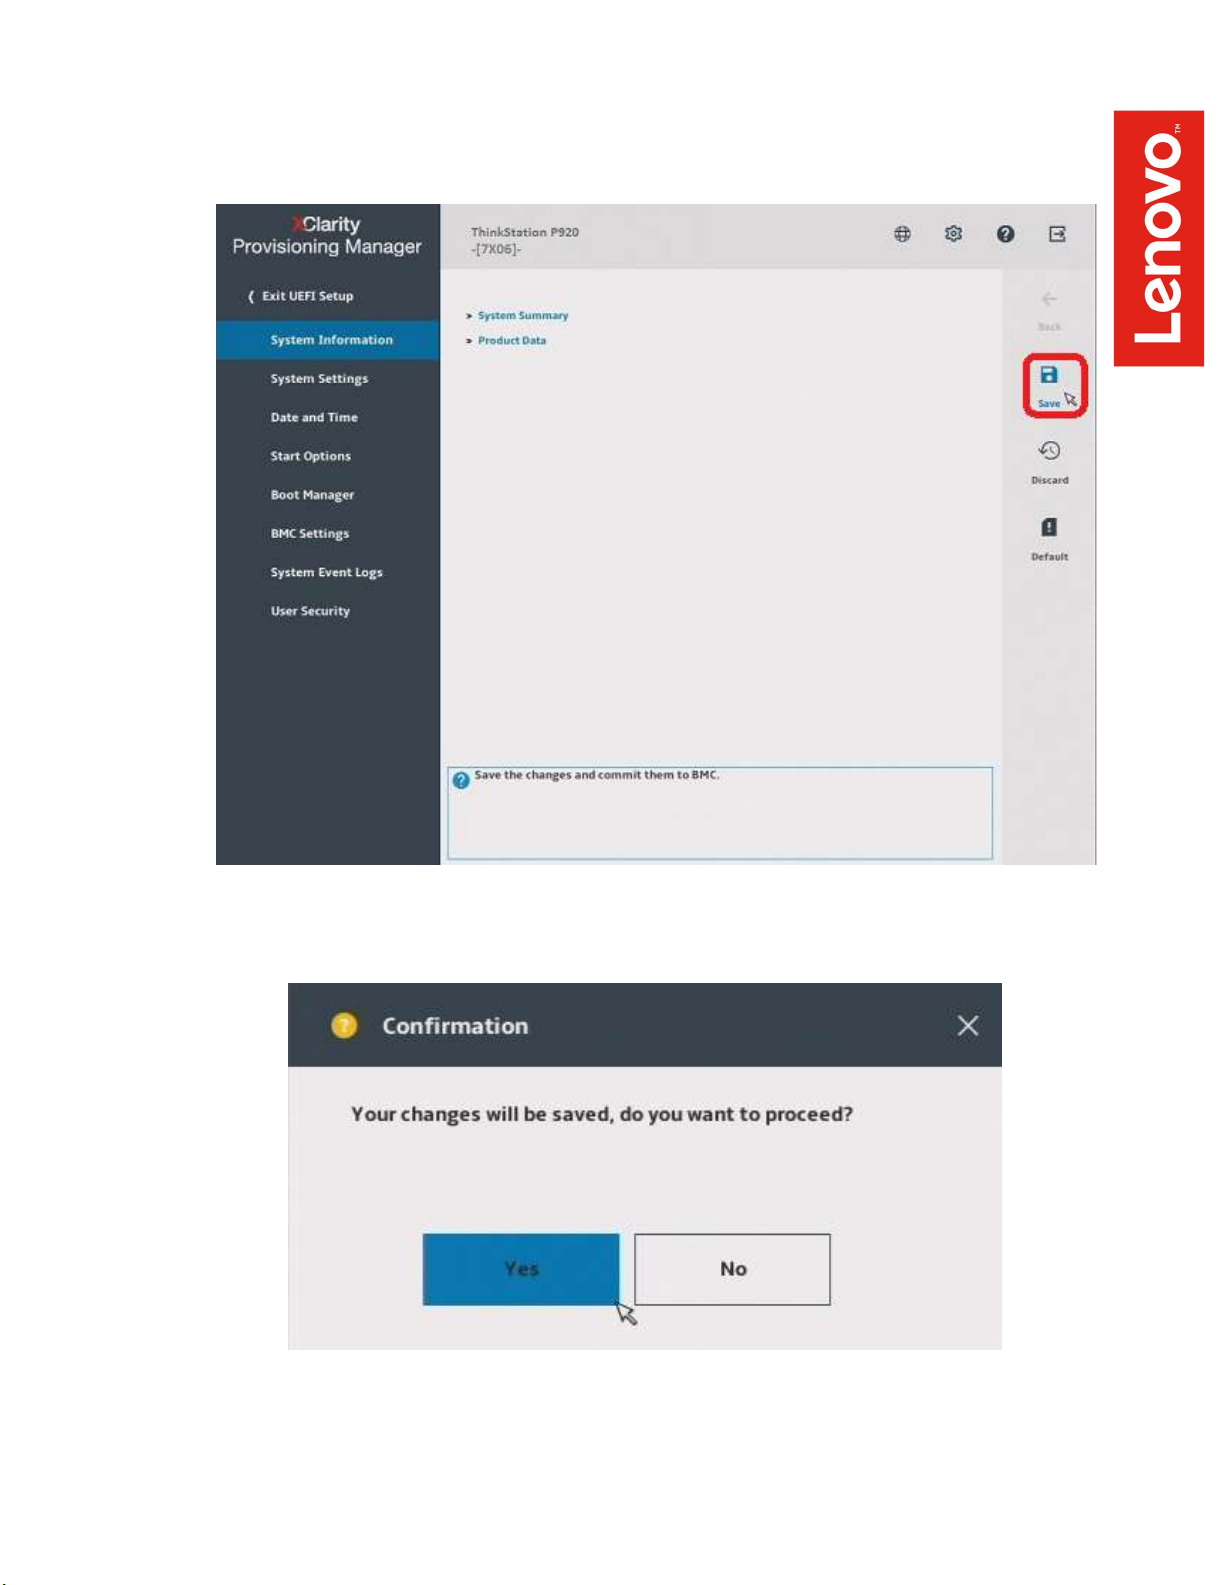
o Select “Save” from the right side of the screen indicated below to
save the UEFI default settings.
o Select “Yes” in the confirmation window.
Page 8
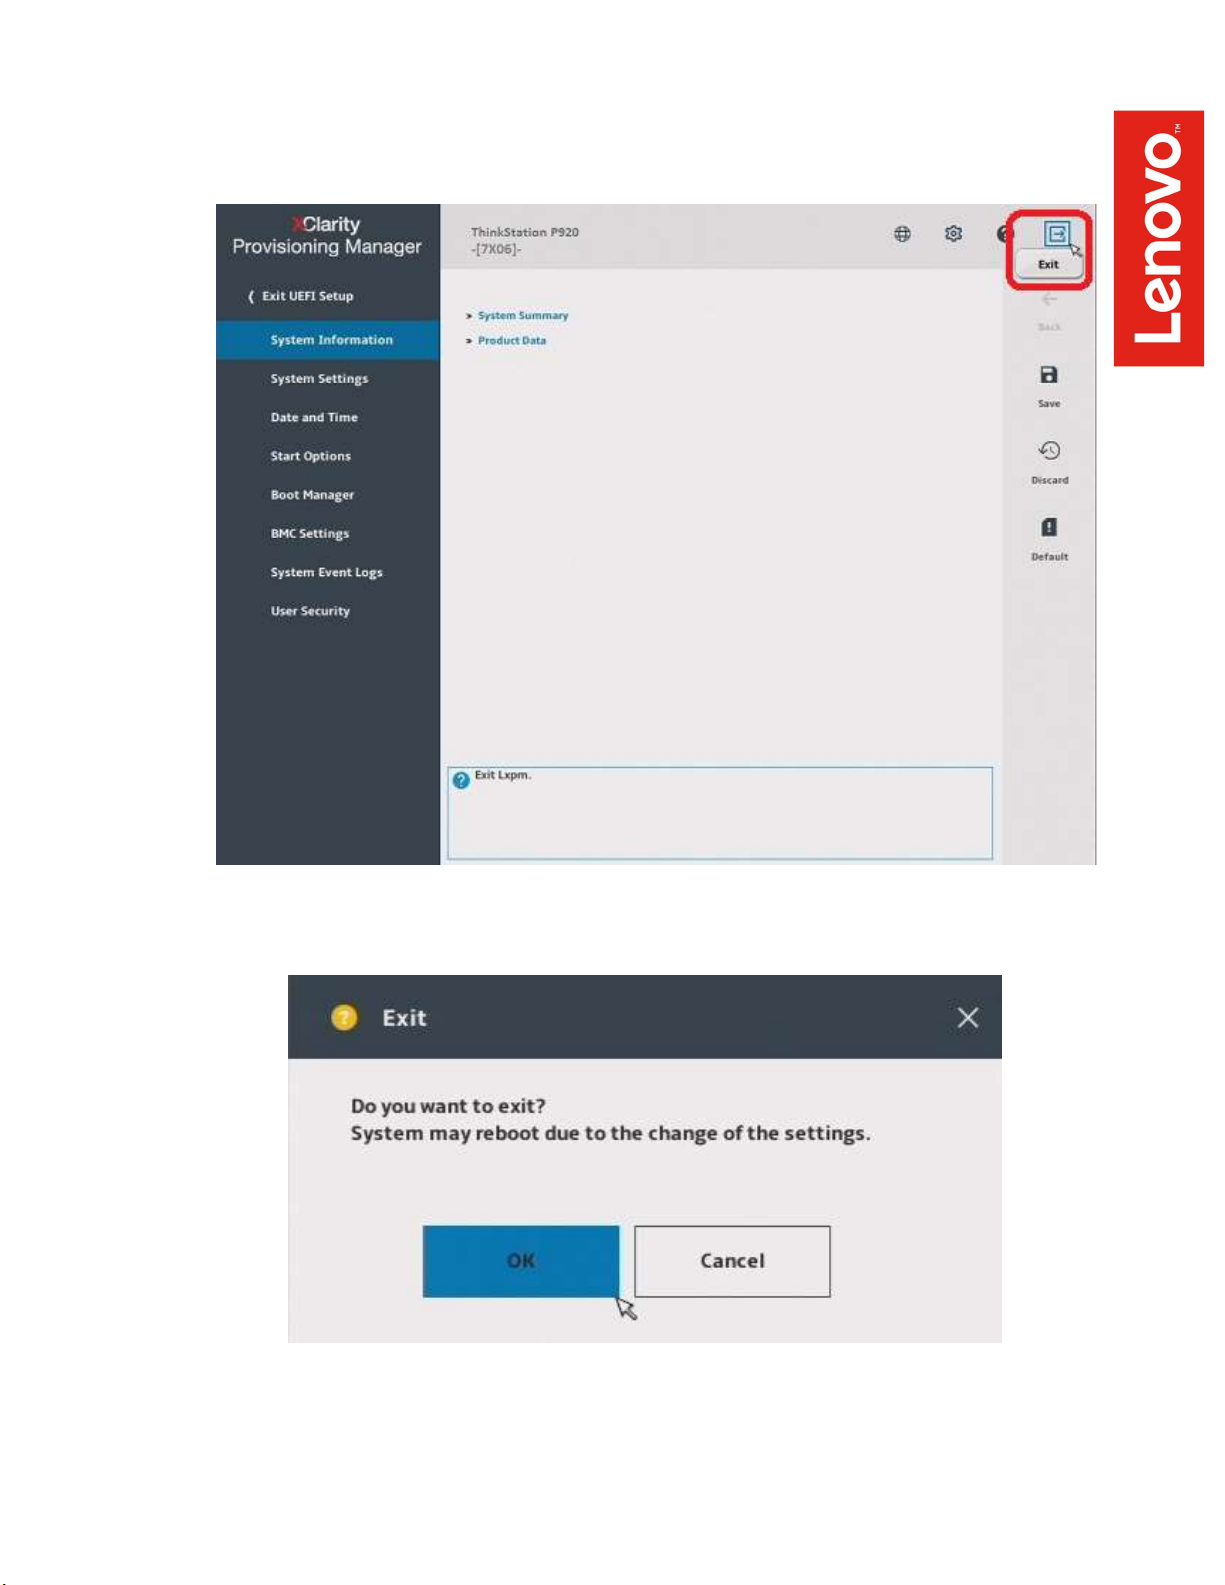
o Select “Exit” from the upper right corner of the screen indicated
below to exit System Setup and reboot the system.
o Select “OK” in the confirmation window to reboot the system.
Page 9
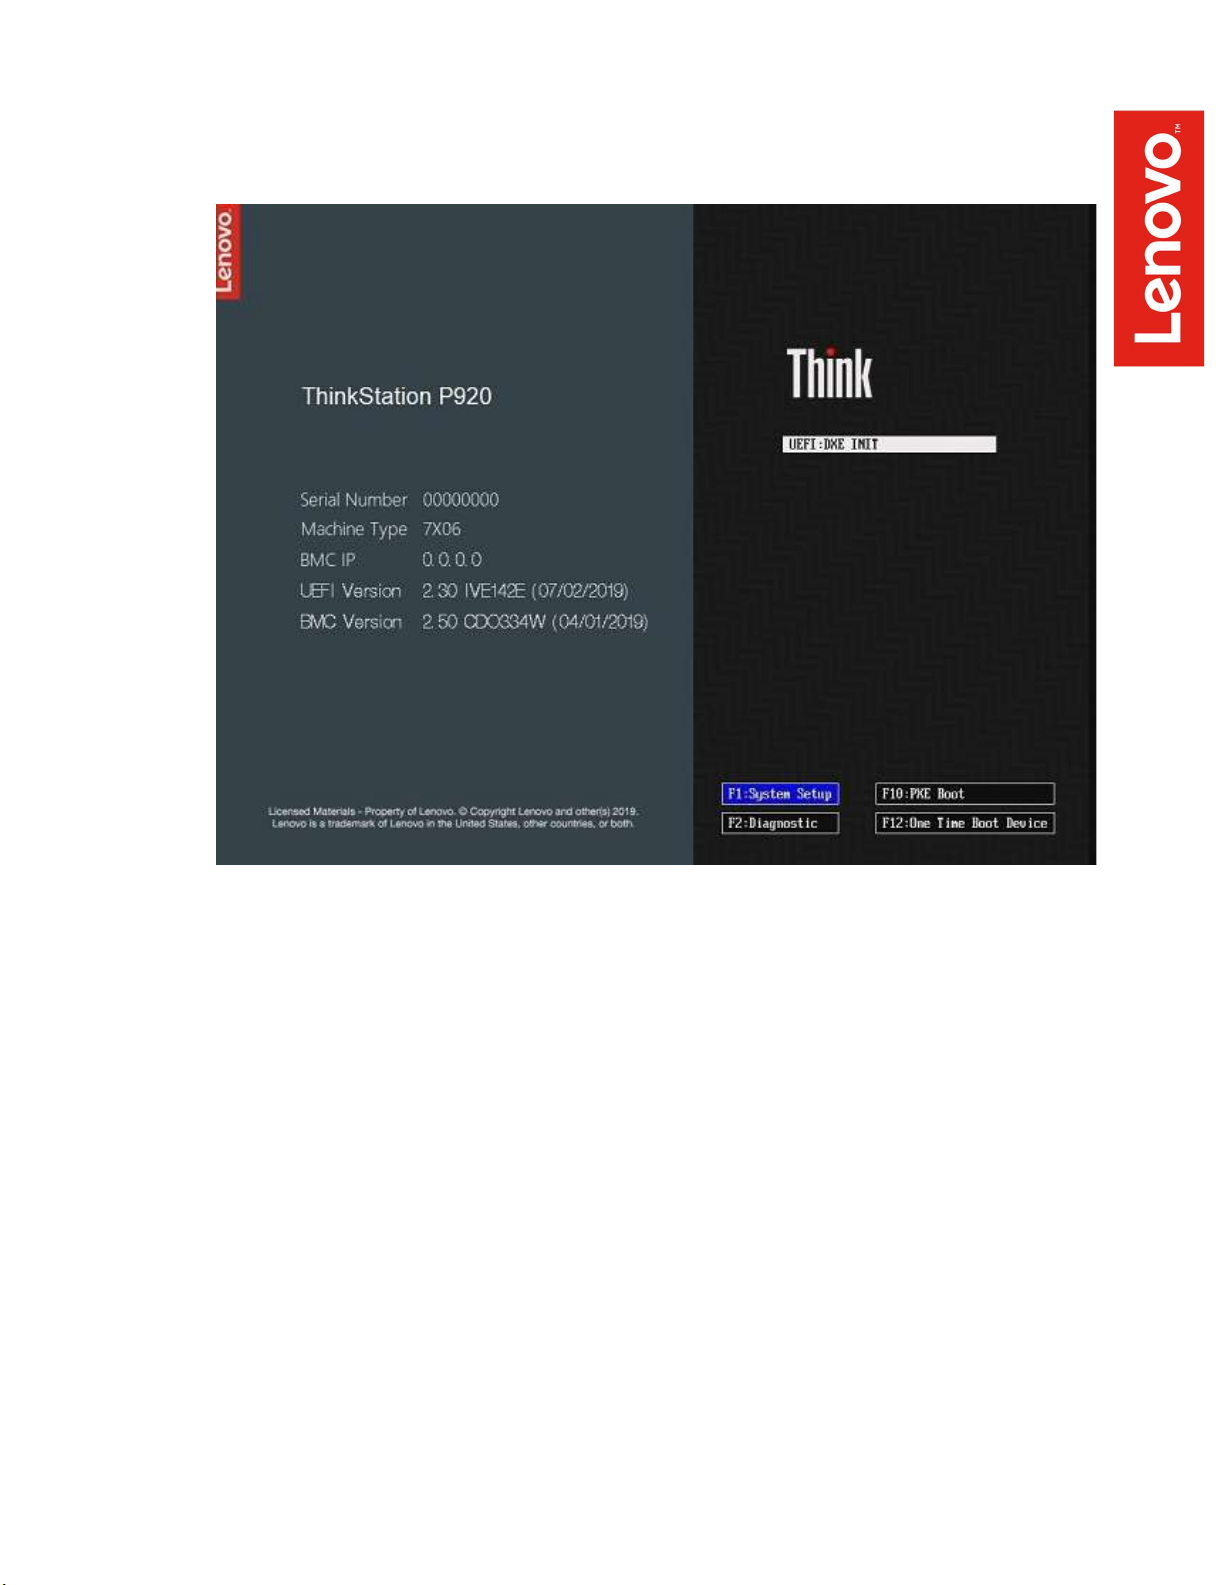
o Boot into “System Setup” by pressing the F1 key at the Lenovo
splash screen.
o At this time, if a RAID array is required, it will need to be configured.
Please refer to Section 2, “RAID Setup”.
o When the storage devices are configured as needed reboot the
system.
Page 10
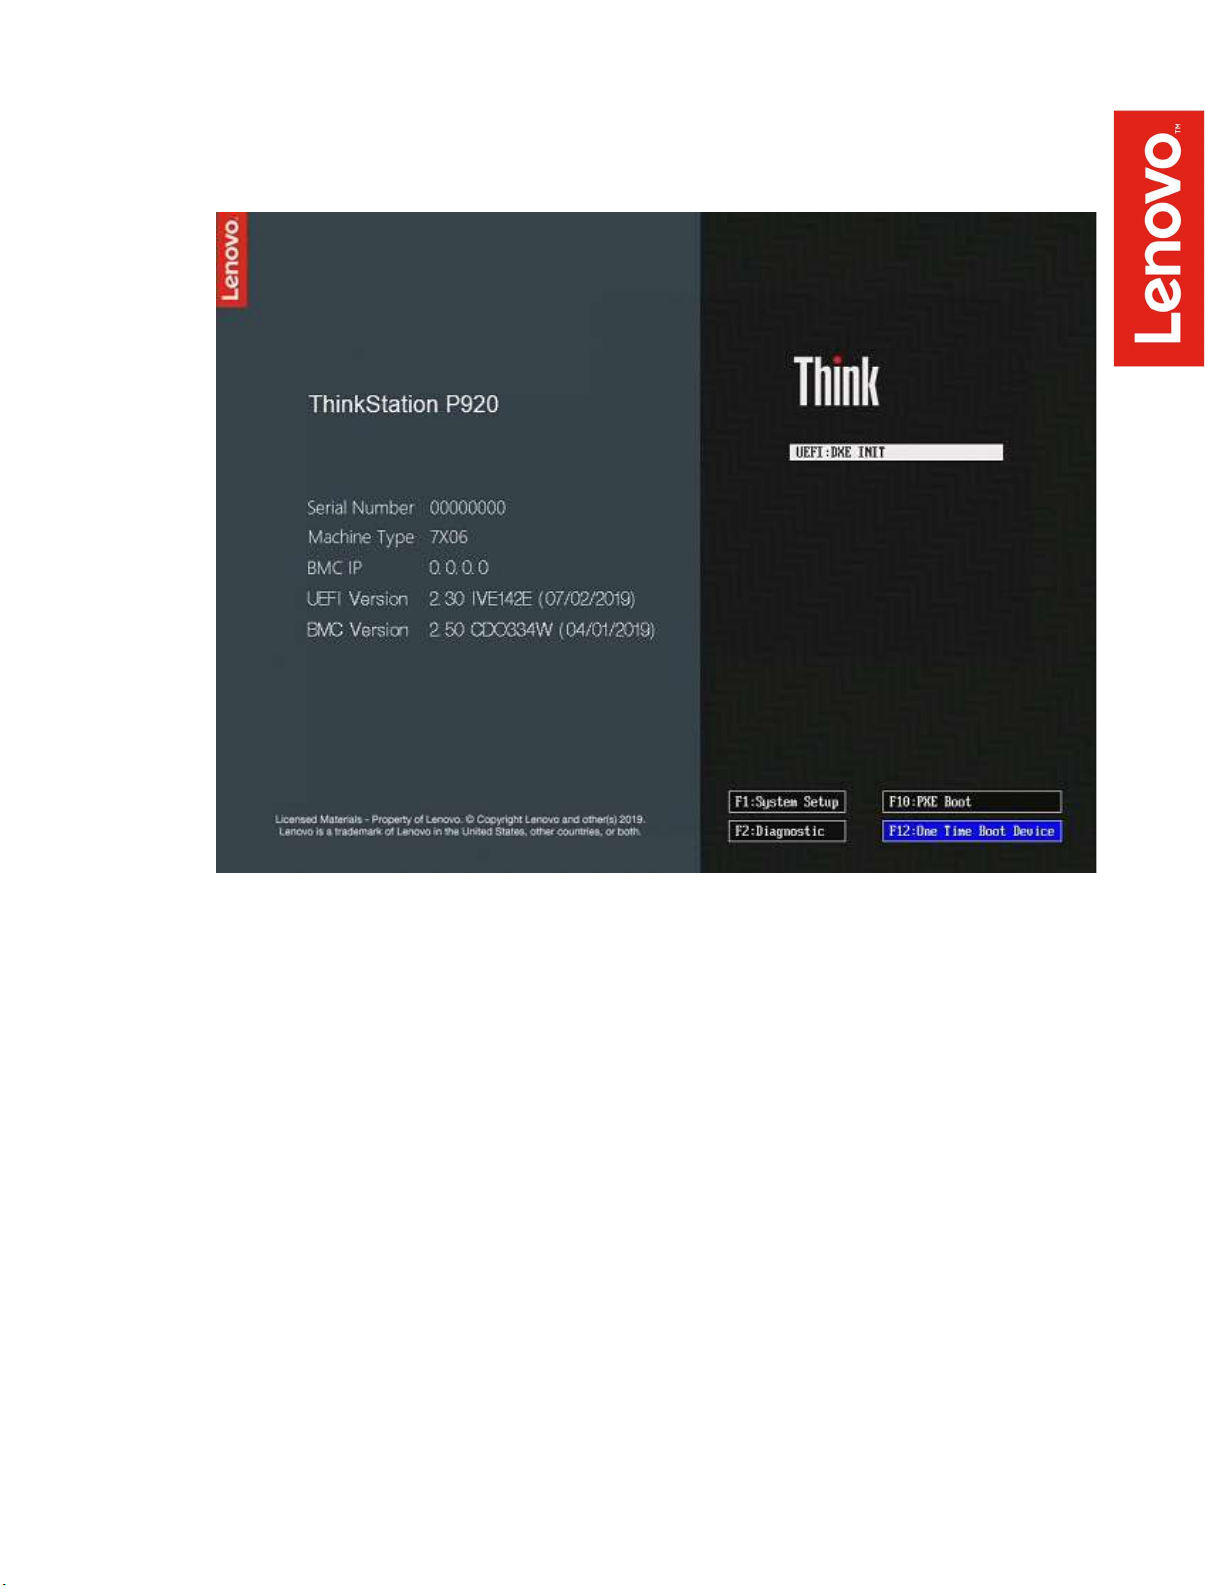
o Upon rebooting, boot into the “One Time Boot Device” menu by
pressing the F12 key at the Lenovo splash screen.
Page 11
o Select the Windows bootable installation media “UEFI” option from
the F12 boot menu to begin the Windows 10 installation. Based on
the installation media in use, the options displayed will vary.
Page 12

For Legacy/MBR installations:
o Boot into System Setup by pressing the F1 key at the “Lenovo”
splash screen.
Page 13

o First time users will see an “XClarity Provisioning Manager”
welcome screen indicated below. Select “Skip” or make any
appropriate changes and select “Apply”.
o If applying changes, select “OK” in the confirmation window.
Page 14

o Select “UEFI Setup” from the left side of the screen.
Page 15

o Select “Default” from the right side of the screen.
o Select “Yes” in the confirmation window.
Page 16

o Select “Save” from the right side of the screen indicated below to
save the UEFI default settings.
o Select “Yes” in the confirmation window.
Page 17

o Select “Exit” from the upper right corner of the screen indicated
below to exit System Setup and reboot the system.
o Select “OK” in the confirmation window to reboot the system.
Page 18

o Boot into “System Setup” by pressing the F1 key at the Lenovo
splash screen.
o At this time, if a RAID array is required, it will need to be configured.
Please refer to Section 2, “RAID Setup”.
o When the storage devices are configured as needed reboot the
system.
Page 19

o Upon rebooting, boot into the “One Time Boot Device” menu by
pressing the F12 key at the Lenovo splash screen.
Page 20

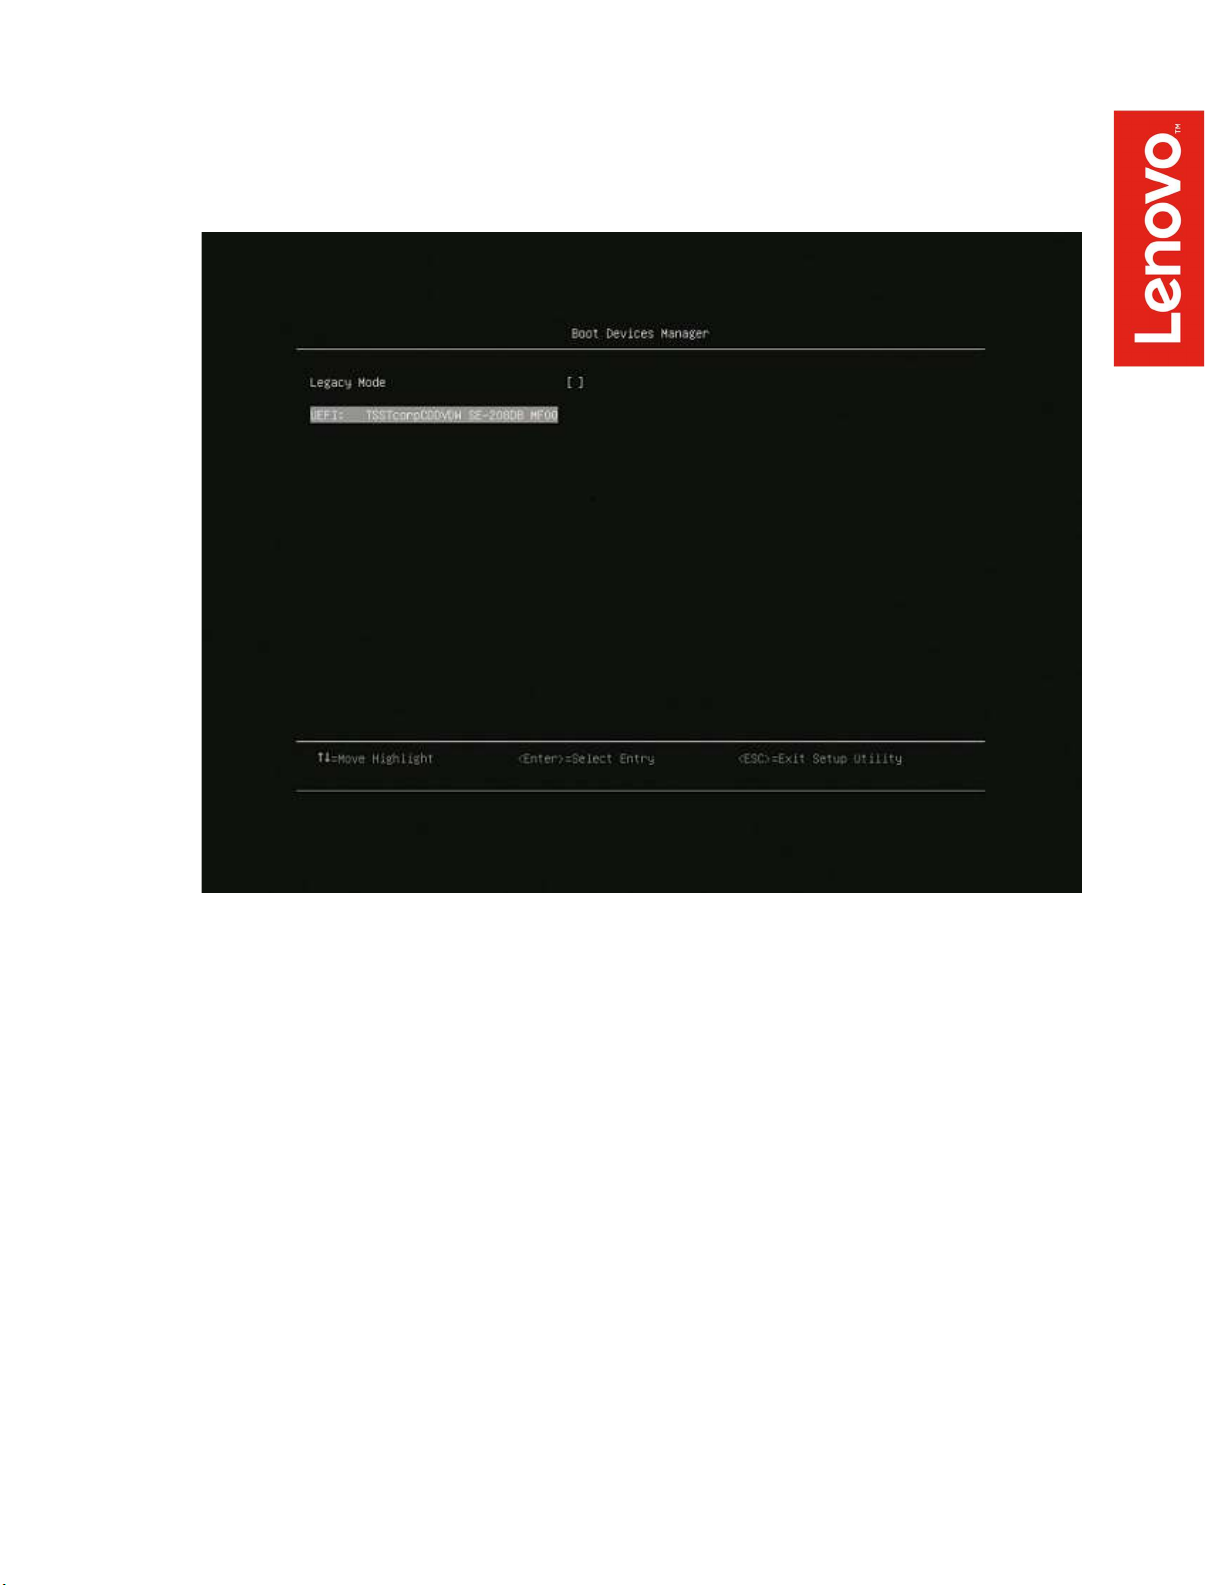
o Select the Windows bootable installation media “Legacy” option from the
F12 boot menu to begin the Windows 10 installation.
Page 21

Section 2 – RAID Setup
Follow the steps below to create a Simple RAID 1 array on the M.2 SATA SSD
adapter. The M.2 adapter holds a maximum of two drives and is capable of RAID
0/1.
o Boot into System Setup by pressing the F1 key at the “Lenovo”
splash screen.
Page 22

o Select “RAID Setup” from the left side of the screen indicated below.
Page 23

o Verify the information and select the “Next” arrow on the right side of
the screen to proceed.
Page 24

o Select the radio button for “Simple configuration” and select “Next”.
o Select the radio button for the desired RAID level and select “Next”.
Page 25

o Verify the RAID settings for the desired configuration and select
“Next”.
o Select “Yes” in the confirmation window.
Page 26

o Wait while the system completes the creation of the RAID array.
o When the process has completed select “Next” to continue.
Page 27

o At the “RAID Setup” screen verify the information and select “Exit”
from the upper right corner of the screen indicated below to exit
System Setup and reboot the system.
o Select “OK” in the confirmation window to reboot the system.
Page 28

o Boot into “System Setup” by pressing the F1 key at the Lenovo
splash screen.
Page 29

o Select the appropriate Windows bootable installation media option
from the F12 boot menu, select Legacy Mode if necessary. Based
on the installation media in use, the options displayed will vary.
Page 30

Section 3 – Windows 10 Installation
Follow the steps below to proceed with the Windows 10 installation.
1. Select the following Language, Time, and Keyboard Layout and select
“Next”.
2. Select “Install now” option.
Page 31

3. Enter the product key to activate Windows and press “Next”, or press
“Skip” to enter a valid product key later.
4. Check the box next to “I accept the license terms” and select “Next”.
Page 32

5. Choose the type of installation to perform.
- To upgrade to Windows 10 from an earlier version of Windows, select the “Upgrade”
option below.
- To perform a clean OS installation, select “Custom: Install Windows only (advanced)”
option below. For instructional purposes, this option was selected below.
6. Select the drive to install Windows and select “Next” at the bottom.
Page 33

7. Installing Windows screen.
8. After the installation completes, the system will automatically reboot into
Windows setup to set regional and privacy preferences. The screens for
this process can change periodically as newer versions of Windows 10 are
released. Make the appropriate choices for each to complete the Windows
10 setup.
Page 34

9. At this point, download and install the appropriate device drivers. At a
minimum, these will include the Intel Chipset Device Software driver, the
Matrox Video driver, the appropriate Ethernet device driver, and the
appropriate Broadcom RAID controller driver. The Ethernet and Broadcom
devices will vary based on what was configured and ordered. Any
additional peripherals added to the systems should also be configured with
the proper device drivers. The device drivers for all Lenovo peripherals can
be found on the Lenovo Support website here. See the next section for
any update issues
Page 35

Version
Date
Author
Changes/Updates
1.0
10/19/19
Scott Crowe
Initial launch release
1.1 5/11/20
Scott Crowe
Addendum for installation issues
Section 4 – Addendum
As Windows 10 has been continually updated, there have been some reported
issues on newer versions for installing the driver update packages from the
Lenovo website. Here are recommendations for any issues during installation.
It is always recommended to “Extract” a package when given the option. Once the
update package has been extracted browse to the extracted location. Find and
run the executable for that package.
If there is no option for “Extract” or running the initial update package executable
fails, it is recommended to manually extract the contents of the update package.
The best way to accomplish this is by using a 3rd party file compression utility
such as 7zip, Winrar, and Winzip. Using a file compression utility, extract the
executable package. After the extraction process completes, browse to the
extracted package location. Typically, the first folder level contains the information
for the executable package and it will be necessary to browse down to a second
folder level to find and run the executable for the update.
Section 5 – Revision History
 Loading...