

Lenovo ThinkPad 11e Chromebook 3rd Gen, ThinkPad Yoga 11e Chromebook 3rd Gen Hardware Maintenance Manual [en, ar, cs, da, de, es, fi, fr, he, id, it, ko, nb, nl, pl, pt, ro, ru, th, uk, zc, zh]
Page 1

HardwareMaintenanceManual
ThinkPad11eChromebookandThinkPadYoga11eChromebook
Page 2

Note:Beforeusingthisinformationandtheproductitsupports,besuretoreadthegeneralinformation
underAppendixA“Notices”onpage77.
SecondEdition(August2014)
©CopyrightLenovo2014.
LIMITEDANDRESTRICTEDRIGHTSNOTICE:IfdataorsoftwareisdeliveredpursuantaGeneralServicesAdministration
“GSA”contract,use,reproduction,ordisclosureissubjecttorestrictionssetforthinContractNo.GS-35F-05925.
Page 3

Contents
Aboutthismanual...........iii
Chapter1.Safetyinformation.....1
Generalsafety...............1
Electricalsafety..............1
Safetyinspectionguide...........2
Handlingdevicesthataresensitivetoelectrostatic
discharge.................3
Groundingrequirements...........4
Safetynotices(multilingualtranslations).....4
Chapter2.Importantservice
information..............19
Powermanagement............19
Symptom-to-FRUindex...........19
LCD-relatedsymptoms.........20
Intermittentproblems..........20
Undeterminedproblems.........21
OverviewoftheChromebookUSBrepairshim..21
Creatingtherepairshim.........22
Removingandreinstallingthewrite-protect
screw................22
Usingtherepairshim..........23
Factorytestitems............24
StrategyforreplacingFRUs.........25
Importantnoticeforreplacingasystem
board................25
Howtouseerrormessage........25
StrategyforreplacingFRUsforCTO,special-bid,
andstandardmodels............25
Productdefinition............25
FRUidentification............26
Chapter3.Generalcheckout.....27
Whattodofirst..............27
Powersystemcheckout...........28
Checkingtheacpoweradapter......28
Checkingthebatteryandoperational
charging...............29
Chapter4.Locations.........31
Locatingcomputercontrols,connectors,and
indicators.................31
Frontview...............31
Left-sideview.............33
Bottomview..............33
LocatingFRUsandCRUs..........34
MajorFRUs..............35
LCDFRUs..............37
MiscellaneouspartsandotherFRUs....40
LookingupFRUinformation.........40
Chapter5.FRUreplacement
notices................41
Commonservicetools...........41
Screwnotices...............41
Hardwareidentity.............42
PrerequisiteforreplacingaFRU........42
Chapter6.Removingorreplacinga
FRU..................45
Generalguidelines.............45
Disablingthebuilt-inbattery.........46
1010Bottomcover.............46
1020Battery...............47
1030Harddiskdrivebracket.........49
1040WirelessLANcard...........50
1050Keyboard..............51
1060Keyboardbezelassembly,speakerassembly,
media-card-readerboard..........52
1070BracketfordummyEthernetconnector,
bracketforUSBconnector,bracketfordc-in
connector,dc-inconnector,systemboard
assembly,andthermalfan..........57
1080LCDunit...............60
RemovinganLCDFRUformodelswithouttouch
panel..................62
2010LCDbezelassembly........62
2020LCDpanel............63
2030Camera/microphoneboard......64
2040Antennakit,hinges,LCDcable,andLED
cableassembly............65
RemovinganLCDFRUformodelswithtouch
panel..................68
3010LCDpanelassembly........68
3020Camera/microphoneboardandsensor
board................70
3030Antennakit,hinges,LCDcable,andLED
cableassembly............72
AppendixA.Notices..........77
Electronicemissionsnotices.........78
Trademarks................78
©CopyrightLenovo2014
i
Page 4

iiHardwareMaintenanceManual
Page 5

Aboutthismanual
ThismanualcontainsserviceandreferenceinformationforthefollowingThinkPad
ThinkPad11eChromebook
andThinkPadY oga
®
11e
Machinetypes(MT)20DBand20DU
®
products.
Chromebook
Usethismanualalongwiththeadvanceddiagnosticteststotroubleshootproblems.
Important:ThismanualisintendedonlyfortrainedservicetechnicianswhoarefamiliarwithThinkPad
products.Usethismanualalongwiththeadvanceddiagnosticteststotroubleshootproblemseffectively.
BeforeservicingaThinkPadproduct,besuretoreadalltheinformationunderChapter1“Safetyinformation”
onpage1andChapter2“Importantserviceinformation”onpage19.
©CopyrightLenovo2014
iii
Page 6

ivHardwareMaintenanceManual
Page 7

Chapter1.Safetyinformation
Thischapterpresentsfollowingsafetyinformationthatyoumustbefamiliarwithbeforeyouservicea
ThinkPadnotebookcomputer.
•“Generalsafety”onpage1
•“Electricalsafety”onpage1
•“Safetyinspectionguide”onpage2
•“Handlingdevicesthataresensitivetoelectrostaticdischarge”onpage3
•“Groundingrequirements”onpage4
•“Safetynotices(multilingualtranslations)”onpage4
Generalsafety
Followtheserulestoensuregeneralsafety:
•Observegoodhousekeepingintheareaofthemachinesduringandaftermaintenance.
•Whenliftinganyheavyobject:
1.Makesurethatyoucanstandsafelywithoutslipping.
2.Distributetheweightoftheobjectequallybetweenyourfeet.
3.Useaslowliftingforce.Nevermovesuddenlyortwistwhenyouattempttolift.
4.Liftbystandingorbypushingupwithyourlegmuscles;thisactionremovesthestrainfromthe
musclesinyourback.Donotattempttoliftanyobjectthatweighsmorethan16kg(35lb)orthat
youthinkistooheavyforyou.
•Donotperformanyactionthatcauseshazardstothecustomer,orthatmakestheequipmentunsafe.
•Beforeyoustartthemachine,makesurethatotherservicetechniciansandthecustomer'spersonnelare
notinahazardousposition.
•Placeremovedcoversandotherpartsinasafeplace,awayfromallpersonnel,whileyouareservicing
themachine.
•Keepyourtoolcaseawayfromwalkareassothatotherpeoplewillnottripoverit.
•Donotwearlooseclothingthatcanbetrappedinthemovingpartsofamachine.Makesurethatyour
sleevesarefastenedorrolledupaboveyourelbows.Ifyourhairislong,fastenit.
•Inserttheendsofyournecktieorscarfinsideclothingorfastenitwithanonconductiveclip,about8
centimeters(3inches)fromtheend.
•Donotwearjewelry,chains,metal-frameeyeglasses,ormetalfastenersforyourclothing.
Attention:Metalobjectsaregoodelectricalconductors.
•Wearsafetyglasseswhenyouarehammering,drilling,soldering,cuttingwire,attachingsprings,using
solvents,orworkinginanyotherconditionsthatmightbehazardoustoyoureyes.
•Afterservice,reinstallallsafetyshields,guards,labels,andgroundwires.Replaceanysafetydevice
thatiswornordefective.
•Reinstallallcoverscorrectlybeforereturningthemachinetothecustomer.
•Fanlouversonthemachinehelptopreventoverheatingofinternalcomponents.Donotobstructfan
louversorcoverthemwithlabelsorstickers.
Electricalsafety
Observethefollowingruleswhenworkingonelectricalequipment.
Important:Useonlyapprovedtoolsandtestequipment.Somehandtoolshavehandlescoveredwithasoft
materialthatdoesnotinsulateyouwhenworkingwithliveelectricalcurrents.Manycustomershave,near
theirequipment,rubberfloormatsthatcontainsmallconductivefiberstodecreaseelectrostaticdischarges.
Donotusethistypeofmattoprotectyourselffromelectricalshock.
©CopyrightLenovo2014
1
Page 8

•Findtheroomemergencypower-off(EPO)switch,disconnectingswitch,orelectricaloutlet.Ifanelectrical
accidentoccurs,youcanthenoperatetheswitchorunplugthepowercordquickly.
•Donotworkaloneunderhazardousconditionsornearequipmentthathashazardousvoltages.
•Disconnectallpowerbefore:
–Performingamechanicalinspection
–Workingnearpowersupplies
–Removingorinstallingmainunits
•Beforeyoustarttoworkonthemachine,unplugthepowercord.Ifyoucannotunplugit,askthecustomer
topower-offthewallboxthatsuppliespowertothemachine,andtolockthewallboxintheoffposition.
•Ifyouhavetoworkonamachinethathasexposedelectricalcircuits,observethefollowingprecautions:
–Ensurethatanotherperson,familiarwiththepower-offcontrols,isnearyou.
Attention:Anotherpersonmustbetheretoswitchoffthepower,ifnecessary.
–Useonlyonehandwhenworkingwithpowered-onelectricalequipment;keeptheotherhandinyour
pocketorbehindyourback.
Attention:Anelectricalshockcanoccuronlywhenthereisacompletecircuit.Byobservingtheabove
rule,youmaypreventacurrentfrompassingthroughyourbody.
–Whenusingtesters,setthecontrolscorrectlyandusetheapprovedprobeleadsandaccessoriesfor
thattester.
–Standonsuitablerubbermats(obtainedlocally,ifnecessary)toinsulateyoufromgroundssuchas
metalfloorstripsandmachineframes.
Observethespecialsafetyprecautionswhenyouworkwithveryhighvoltages;Instructionsforthese
precautionsareinthesafetysectionsofmaintenanceinformation.Useextremecarewhenmeasuring
highvoltages.
•Regularlyinspectandmaintainyourelectricalhandtoolsforsafeoperationalcondition.
•Donotusewornorbrokentoolsandtesters.
•Neverassumethatpowerhasbeendisconnectedfromacircuit.First,checkthatithasbeenpoweredoff.
•Alwayslookcarefullyforpossiblehazardsinyourworkarea.Examplesofthesehazardsaremoistfloors,
nongroundedpowerextensioncables,powersurges,andmissingsafetygrounds.
•Donottouchliveelectricalcircuitswiththereflectivesurfaceofaplasticdentalmirror.Thesurfaceis
conductive;suchtouchingcancausepersonalinjuryandmachinedamage.
•Donotservicethefollowingpartswiththepoweronwhentheyareremovedfromtheirnormaloperating
placesinamachine:
–Powersupplyunits
–Pumps
–Blowersandfans
–Motorgenerators
–Similarunitsaslistedabove
Thispracticeensurescorrectgroundingoftheunits.
•Ifanelectricalaccidentoccurs:
–Usecaution;donotbecomeavictimyourself.
–Switchoffpower.
–Sendanotherpersontogetmedicalaid.
Safetyinspectionguide
Thepurposeofthisinspectionguideistoassistyouinidentifyingpotentiallyunsafeconditions.Aseach
machinewasdesignedandbuilt,requiredsafetyitemswereinstalledtoprotectusersandservicetechnicians
frominjury.Thisguideaddressesonlythoseitems.Y oushouldusegoodjudgmenttoidentifypotential
safetyhazardsduetoattachmentofnon-ThinkPadfeaturesoroptionsnotcoveredbythisinspectionguide.
Ifanyunsafeconditionsarepresent,youmustdeterminehowserioustheapparenthazardcouldbeand
whetheryoucancontinuewithoutfirstcorrectingtheproblem.
2HardwareMaintenanceManual
Page 9

Considertheseconditionsandthesafetyhazardstheypresent:
•Electricalhazards,especiallyprimarypower(primaryvoltageontheframecancauseseriousorfatal
electricalshock)
•Explosivehazards,suchasadamagedbatteryorabulgingcapacitor
•Mechanicalhazards,suchaslooseormissinghardware
Todeterminewhetherthereareanypotentiallyunsafeconditions,usethefollowingchecklistatthebeginning
ofeveryservicetask.Beginthecheckswiththepoweroff,andthepowercorddisconnected.
Checklist:
1.Checkexteriorcoversfordamage(loose,broken,orsharpedges).
2.Poweroffthecomputer.Disconnectthepowercord.
3.Checkthepowercordfor:
a.Athird-wiregroundconnectoringoodcondition.Useametertomeasurethird-wireground
continuityfor0.1ohmorlessbetweentheexternalgroundpinandtheframeground.
b.Thepowercordshouldbetheauthorizedtypespecifiedforyourcomputer.Goto:
http://www.lenovo.com/serviceparts-lookup
c.Insulationmustnotbefrayedorworn.
4.Checkforcrackedorbulgingbatteries.
5.Removethecover.
6.Checkforanyobviousnon-ThinkPadalterations.Usegoodjudgmentastothesafetyofany
non-ThinkPadalterations.
7.Checkinsidetheunitforanyobviousunsafeconditions,suchasmetalfilings,contamination,wateror
otherliquids,orsignsoffireorsmokedamage.
8.Checkforworn,frayed,orpinchedcables.
9.Checkthatthepower-supplycoverfasteners(screwsorrivets)havenotbeenremovedortamperedwith.
Handlingdevicesthataresensitivetoelectrostaticdischarge
Anycomputerpartcontainingtransistorsorintegratedcircuits(ICs)shouldbeconsideredsensitiveto
electrostaticdischarge(ESD.)ESDdamagecanoccurwhenthereisadifferenceinchargebetweenobjects.
ProtectagainstESDdamagebyequalizingthechargesothatthemachine,thepart,theworkmat,andthe
personhandlingthepartareallatthesamecharge.
Notes:
1.Useproduct-specificESDprocedureswhentheyexceedtherequirementsnotedhere.
2.MakesurethattheESDprotectivedevicesyouusehavebeencertified(ISO9000)asfullyeffective.
WhenhandlingESD-sensitiveparts:
•Keepthepartsinprotectivepackagesuntiltheyareinsertedintotheproduct.
•Avoidcontactwithotherpeople.
•Wearagroundedwriststrapagainstyourskintoeliminatestaticonyourbody.
•Preventthepartfromtouchingyourclothing.Mostclothingisinsulativeandretainsachargeeven
whenyouarewearingawriststrap.
•Useagroundedworkmattoprovideastatic-freeworksurface.Thematisespeciallyusefulwhen
handlingESD-sensitivedevices.
•Selectagroundingsystem,suchasthoselistedbelow,toprovideprotectionthatmeetsthespecific
servicerequirement.
Note:TheuseofagroundingsystemtoguardagainstESDdamageisdesirablebutnotnecessary.
–AttachtheESDgroundcliptoanyframeground,groundbraid,orgreen-wireground.
Chapter1.Safetyinformation3
Page 10
–Whenworkingonadouble-insulatedorbattery-operatedsystem,useanESDcommongroundor
referencepoint.Y oucanusecoaxorconnector-outsideshellsonthesesystems.
–Usetheroundgroundprongoftheacplugonac-operatedcomputers.
Groundingrequirements
Electricalgroundingofthecomputerisrequiredforoperatorsafetyandcorrectsystemfunction.Proper
groundingoftheelectricaloutletcanbeverifiedbyacertifiedelectrician.
Safetynotices(multilingualtranslations)
Thesafetynoticesinthissectionareprovidedinthefollowinglanguages:
•English
•Arabic
•BrazilianPortuguese
•French
•German
•Hebrew
•Japanese
•Korean
•Spanish
•T raditionalChinese
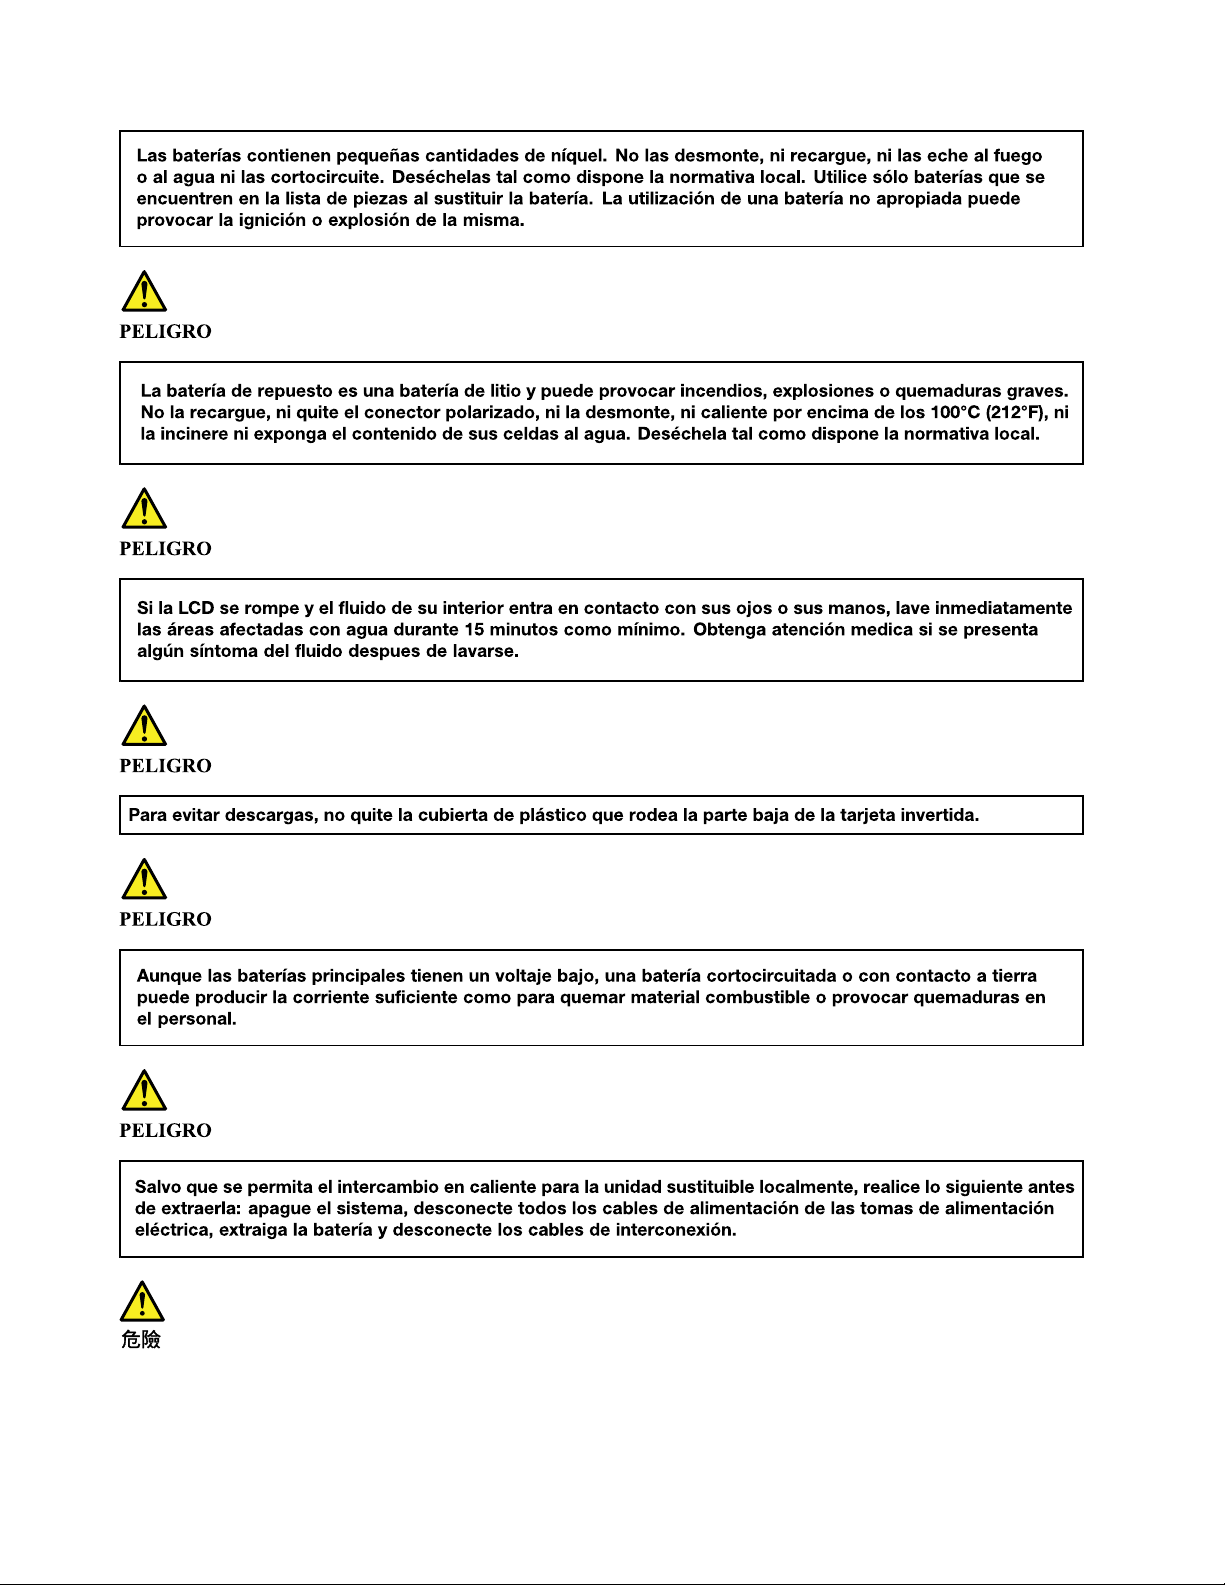
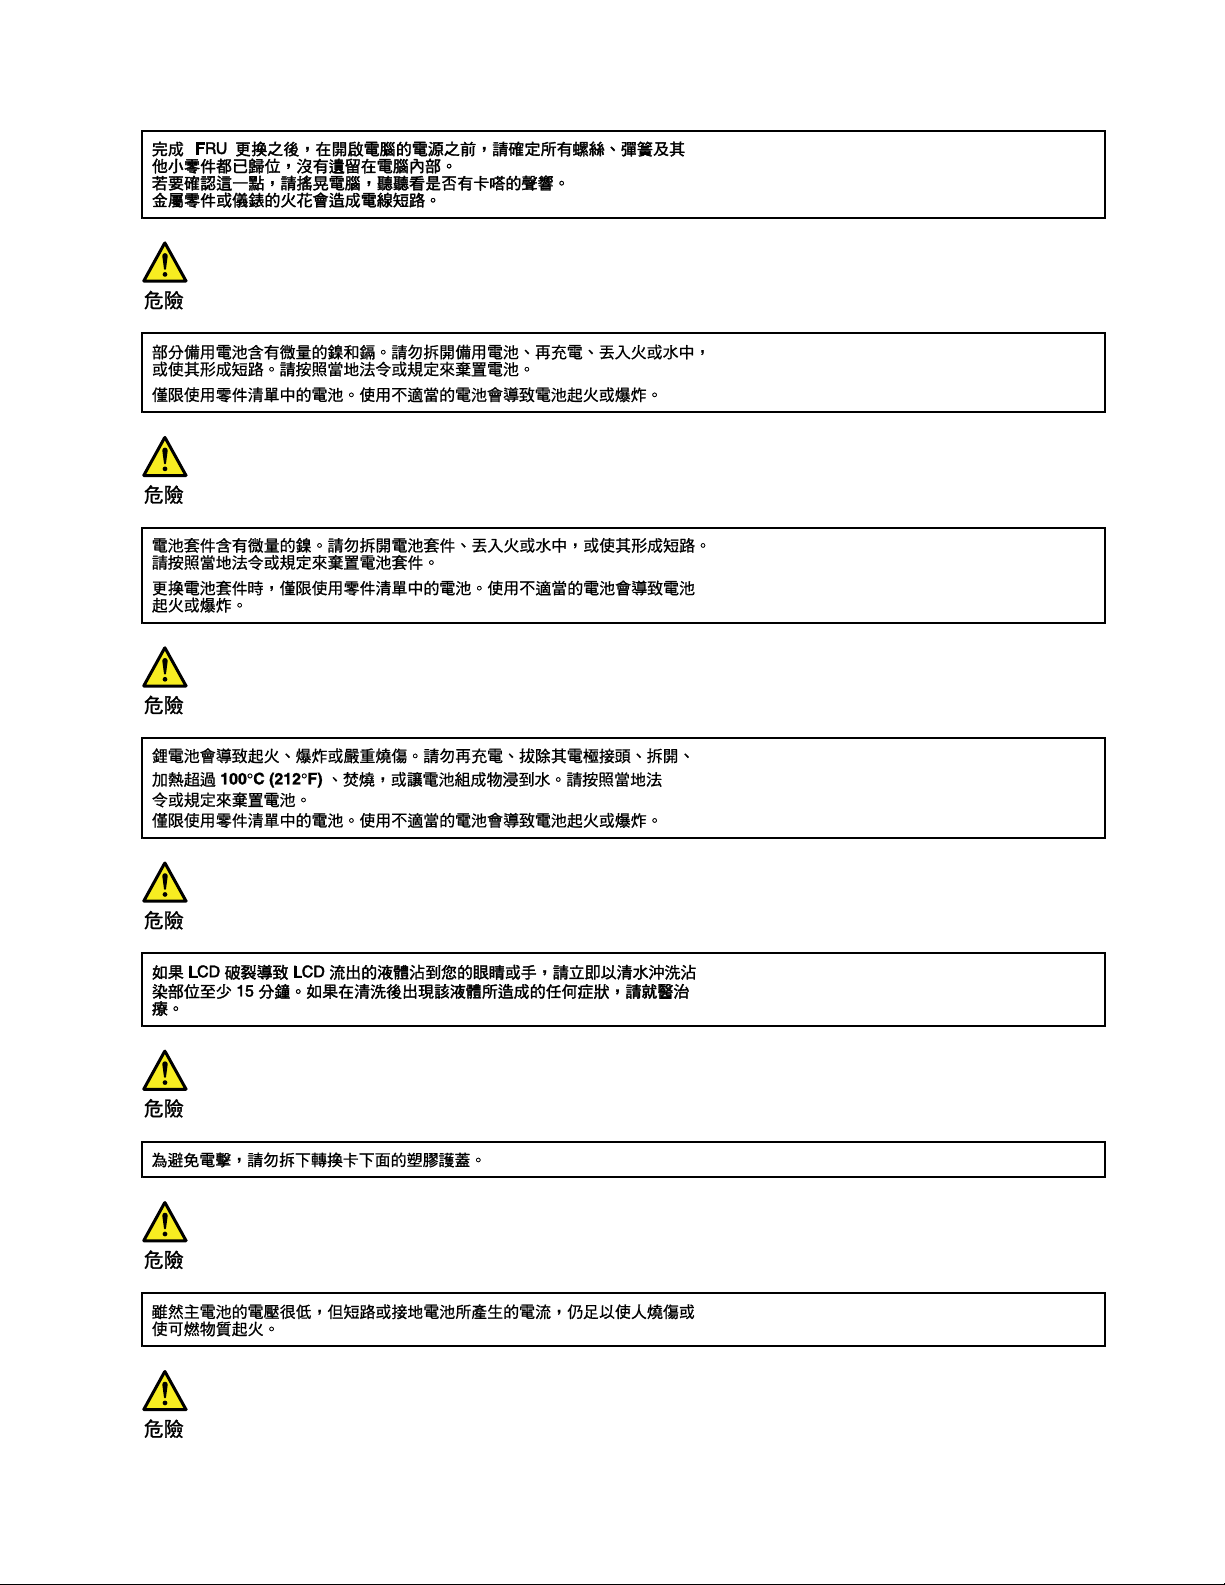
DANGER
DANGER
DANGER
4HardwareMaintenanceManual
Page 11
DANGER
DANGER
DANGER
DANGER
DANGER
Chapter1.Safetyinformation5
Page 12
6HardwareMaintenanceManual
Page 13
PERIGO
PERIGO
PERIGO
PERIGO
Chapter1.Safetyinformation7
Page 14
PERIGO
PERIGO
PERIGO
PERIGO
DANGER
8HardwareMaintenanceManual
Page 15
DANGER
DANGER
DANGER
DANGER
DANGER
DANGER
Chapter1.Safetyinformation9
Page 16
DANGER
VORSICHT
VORSICHT
VORSICHT
VORSICHT
10HardwareMaintenanceManual
Page 17
VORSICHT
VORSICHT
VORSICHT
VORSICHT
Chapter1.Safetyinformation11
Page 18
12HardwareMaintenanceManual
Page 19
Chapter1.Safetyinformation13
Page 20
14HardwareMaintenanceManual
Page 21
Chapter1.Safetyinformation15
Page 22
16HardwareMaintenanceManual
Page 23
Chapter1.Safetyinformation17
Page 24

18HardwareMaintenanceManual
Page 25

Chapter2.Importantserviceinformation
Thischapterintroducesfollowingimportantserviceinformationthatappliestoallmachinetypessupported
bythismanual:
•“StrategyforreplacingFRUs”onpage25
–“Importantnoticeforreplacingasystemboard”onpage25
–“Howtouseerrormessage”onpage25
•“StrategyforreplacingFRUsforCTO,special-bid,andstandardmodels”onpage25
–“Productdefinition”onpage25
–“FRUidentification”onpage26
Important:
•AdvisecustomerstovisittheLenovo
softwarefixes,downloadthedrivers,andfollowtheon-screeninstructionstoinstallthedrivers.For
additionalassistance,customersmightcalltheLenovoCustomerSupportCenter.T elephonenumbersfor
theLenovoSupportCenterareavailableat:
http://www.lenovo.com/support/phone
•ServicetrainingdocumentsforLenovoauthorizedservicetechniciansareavailableatthefollowingWeb
site.ThedisassemblyandreassemblyvideosthatshowtheFRUremovalandreplacementprocedures
arecontainedinthedocuments.
http://www.lenovoservicetraining.com
®
SupportWebsiteathttp://www.lenovo.com/supporttoviewthe
Powermanagement
Toreducepowerconsumption,putthecomputerintosleepmodeifyoudonotuseit.
Whenthecomputerenterssleepmode,thefollowingeventsoccur:
•TheLCDispoweredoff.
•Themicroprocessorstops.
Toentersleepmode,closethelidifyouareloggedin.Toresumefromsleepmode,openthecomputer
lidandpressanykey.
Note:Ifyouarenotloggedin,closingthelidwillshutdownthecomputer.
Incertaincircumstances,thecomputergoesintosleepmodeautomatically:
•Afteraperiodofinactivity
•Whenthebatteryindicatorblinksorange,indicatingthatthebatterypowerislow
Note:Thecomputerdoesnotacceptanyinputimmediatelyafteritenterssleepmode.Waitafewseconds
beforetakinganyactiontoreenteroperationmode.
Also,ineitherofthefollowingevents,thecomputerautomaticallyreturnsfromsleepmodeandresumes
operation:
Symptom-to-FRUindex
Thissectioncontainsfollowinginformation:
•“LCD-relatedsymptoms”onpage20
•“Intermittentproblems”onpage20
•“Undeterminedproblems”onpage21
©CopyrightLenovo2014
19
Page 26

Thesymptom-to-FRUindexinthissectionlistssymptomsanderrorsandtheirpossiblecauses.Themost
likelycauseislistedfirst,inboldfacetype.
Note:DotheFRUreplacementorotheractionsinthesequenceshowninthecolumnheaded“FRUor
action,insequence. ”IfreplacingaFRUdoesnotsolvetheproblem,puttheoriginalpartbackinthe
computer.DonotreplaceanondefectiveFRU.
Thisindexcanalsohelpyoudetermine,duringregularservicing,whatFRUsarelikelytoneedtobe
replacednext.
AnumericerrorisdisplayedforeacherrordetectedinPOSTorsystemoperation.Inthedisplays,ncan
beanynumber.
Ifnonumericcodeisdisplayed,checkthenarrativedescriptionsofsymptoms.Ifthesymptomisnot
describedthere,goto“Intermittentproblems”onpage20.
Note:ForadevicenotsupportedbydiagnosticcodesintheThinkPadnotebookcomputers,seethe
manualforthatdevice.
LCD-relatedsymptoms
Important:TheTFTLCDforthenotebookcomputercontainsmanythin-filmtransistors(TFTs).The
presenceofasmallnumberofdotsthataremissing,discolored,oralwayslightedischaracteristicofTFT
LCDtechnology,butexcessivepixelproblemscancauseviewingconcerns.IftheLCDyouareservicinghas
twoorlessvisibledefectivepixels,itshouldnotbeconsideredfaulty.However,iftheLCDhasthreeormore
visibledefectivepixels,itwillbedeemedasdefectivebyLenovoanditshouldbereplaced.
Notes:
•ThispolicyappliestoallThinkPadnotebookspurchasedon1January,2008orlater.
•LenovowillnotprovidereplacementiftheLCDiswithinspecificationaswecannotguaranteethat
anyreplacementLCDwillhavezeropixeldefects.
•OnepixelconsistsofR,G,Bsub-pixels.
Table1.LCD-relatedsymptoms
Symptomorerror
Nobeep,system-statusindicatoron,andablankLCD
duringPOST.
•LCDbacklightnotworking.
•LCDtoodark.
•LCDbrightnesscannotbeadjusted.
•LCDcontrastcannotbeadjusted.
•LCDscreenunreadable.
•Charactersmissingpixels.
•Screenabnormal.
•Wrongcolordisplayed.
HorizontalorverticallinesdisplayedonLCD.LCDassembly
FRUoraction,insequence
Systemboard
1.ReseattheLCDconnectors.
2.LCDassembly
3.Systemboard
1.Seeimportantnotefor“LCD-relatedsymptoms.”
2.ReseatallLCDconnectors.
3.LCDassembly
4.Systemboard
Intermittentproblems
Intermittentsystemhangproblemscanbeduetoavarietyofcausesthathavenothingtodowithahardware
defect,suchascosmicradiation,electrostaticdischarge,orsoftwareerrors.FRUreplacementshouldbe
consideredonlywhenaproblemrecurs.
Whenanalyzinganintermittentproblem,dothefollowing:
20HardwareMaintenanceManual
Page 27

1.Runthediagnostictestforthesystemboardinloopmodeatleast10times.
2.Ifnoerrorisdetected,donotreplaceanyFRUs.
3.Ifanyerrorisdetected,replacetheFRUshownbytheFRUcode.Rerunthetesttoverifythatno
moreerrorsexist.
Undeterminedproblems
Ifthediagnostictestsdidnotidentifytheadapterordevicethathasfailed,ifwrongdevicesareinstalled,
orifthesystemsimplyisnotoperating,followtheseprocedurestoisolatethefailingFRU(donotisolate
FRUsthathavenodefects).
Verifythatallattacheddevicesaresupportedbythecomputer.
Verifythatthepowersupplybeingusedatthetimeofthefailureisoperatingcorrectly.See“Powersystem
checkout”onpage28.
1.Turnoffthecomputer.
2.VisuallycheckeachFRUfordamage.ReplaceanydamagedFRU.
3.Removeordisconnectallofthefollowingdevices:
a.Non- ThinkPaddevices
b.Printer,mouse,andotherexternaldevices
c.Externaldiskettedriveoropticaldrive
d.Wirelesscards
4.Turnonthecomputer.
5.Determinewhethertheproblemhasbeensolved.
6.Iftheproblemdoesnotrecur,reconnecttheremoveddevicesoneatatimeuntilyoufindthefailingFRU.
7.Iftheproblemremains,replacethefollowingFRUsoneatatime(donotreplaceanondefectiveFRU):
a.Systemboard
b.LCDassembly
OverviewoftheChromebookUSBrepairshim
YoucanuseaChromebookUSBrepairshim(hereafterreferredtoastherepairshim)astherecoverysolution
ontheChromeOSoperatingsystem.
Therepairshimisabootabledevicethatisrequiredtoservicethecomputer.Therepairshimisusedfor
thefollowingpurposes:
•Diagnoseproblemsandrestorethesystemtothefactory-defaultsettings.
•Refreshthesystemwiththelatestfirmwareandsoftware.
TherepairshimisnotnecessarywhenaCustomerReplaceableUnit(CRU)isreplaced.Ifanon-CRUis
broken,orthereisastrongsuspicionthataparticularnon-CRUisdefective,itcanbereplaceddirectly.
Otherwise,therepairshimmustbeusedtodiagnoseproblemsbeforeanynon-CRUisreplaced.
ThefollowingisthelistofCRUsforyourcomputer:
1.acpoweradapter
2.Powercord
3.Bottomcover
4.Keyboard
ForCRUdefinition,see“LocatingFRUsandCRUs”onpage34.
Chapter2.Importantserviceinformation21
Page 28

Creatingtherepairshim
AsaLenovoservicetechnician,dothefollowingtocreatetherepairshim:
1.PrepareaUSBstoragedevicewithatleast8gigabyte(GB)space.TherequiredUSBstoragecapacity
dependsonthesizeoftherecoveryimage.
Attention:CreatingtherepairshimwilldeletealldatastoredontheUSBdevice.Toavoiddataloss,
makeabackupcopyofallthedatathatyouwanttokeep.
2.DownloadlatestversionoftherepairshimimagefromtheLenovoSupportWebsiteat:
http://www.lenovo.com/supporttocreatearepairshim.ALenovoservicecredentialisrequired.
Note:Ensurethatyoucreatetherepairshimusingthelatestversionoftherepairshimimage.Usingan
earlierversionmightcausetherepairprocesstofail.
3.Extractthedownloadedfilethatcontainstherepairshimimage.
4.DownloadtheWin32DiskImagertoolfromhttp://sourceforge.net/projects/win32diskimager/.
5.Runtheimagertoolandfollowtheon-screeninstructionstocreatetherepairshim.
6.Afterusingtherepairshim,ifyouwanttorecovernormalusageoftheUSBstoragedevice,youwillneed
toformatthedevice.Otherwise,youcannotusethestoragespaceonthedevice.
Removingandreinstallingthewrite-protectscrew
Bydefault,theon-boardRead-OnlyMemories(ROMs)aresetaswrite-protected.Beforerefreshingthe
Chromebookfirmware,settheROMsasunprotectedbyremovingthewrite-protectscrewonthesystem
board.Aftertherefresh,reinstallingthewrite-protectscrew.
Toremovethewrite-protectscrew,dothefollowing:
1.Disablethebuilt-inbattery.See“Disablingthebuilt-inbattery”onpage46.
2.Disconnecttheacpoweradapterandallcablesfromthecomputer,andthenremovethebottom
cover.See“1010Bottomcover”onpage46.
3.Removethebattery.See“1020Battery”onpage47.
4.Removetheharddiskdrivebracket.See“1030Harddiskdrivebracket”onpage49.
5.Removethekeyboard.See“1050Keyboard”onpage51.
6.Removethekeyboardbezelassembly.See“1060Keyboardbezelassembly,speakerassembly,
media-card-readerboard”onpage52.
7.Locatethewrite-protectscrewonthesystemboardasshowninthefollowingillustration.Toturnoffthe
write-protectfunction,removethewrite-protectscrew.
22HardwareMaintenanceManual
Page 29

8.Afteryouhaveremovedthewrite-protectscrew,reassemblethecomputer.Reconnecttheacpower
adapterandallcables.
9.Toturnonthewrite-protectfunction,followthepreviousstepstolocatetheholeforthewrite-protect
screwandreinstallthescrew.Thenreassembleyourcomputerandreconnectthecables.
Usingtherepairshim
Tousetherepairshimthatyouhavecreated,dothefollowing:
1.Turnoffthewrite-protectfunction.See“Removingandreinstallingthewrite-protectscrew”onpage22.
2.Attachtheacpoweradaptertothepowerconnectoronthecomputer.Pressandholdescandthe
refreshkey(),andthenpressthepowerbuttontostartthecomputerandenterrecoverymode.
Note:Afteryouturnoffthewrite-protectfunction,thecomputerwillbeinDevelopermode.Insome
cases,thecomputermightnotinDevelopermodeafteryouturnoffthewrite-protectfunction(step1).If
thishappens,pressandholdctrl+dwhentherecoveryscreenisdisplayed,andthenpressenter.The
computerautomaticallyrestartsandentersDevelopermodeafterseveralminutes.Whenprompted
tologontothecomputer,turnoffthecomputer.Thenrepeatstep2tostartthecomputerandenter
recoverymode.
3.Whentherecoveryscreenisdisplayed,connecttherepairshimtoanavailableUSBconnectorofthe
computer.Therepairshimwillupdatethefirmwareandimageautomatically.Whenprompted,choose
“i”toinstalltheshimtothecomputer.Whentheupdateprocessfinishes,thecomputerrestartsand
entersthefactory-test-imageenvironment.
Note:Theupdateprocessisautomatic,andtakeslessthan10minutes.Informationabouttheupdate
statuswillbedisplayedonthecomputerscreenduringtheprocess.
4.Removetherepairshimandputitinasafeplace.TheRuninteststartsautomaticallyandyouwillbe
promptedfortheVitalProductData(VPD).IftheVPDisalreadypresent,youmaypressesctocontinue.
Ifthewrite-protectfunctionisstillon,thisstepwillnotproceed.
Note:Ifthesystemboardisreplaced,youarerequiredtoreenterVPD,a20-charactermachinetype
andmodel(MTM)andserialnumber(SN)string.Thestringconsistsofthe7-digitmachinetype,3-digit
modelnumber,8-digitSN,andisprecededbythecharacters“1S”.Y oucanfindtheMTMandSN
informationonthebottomcover.T olocatetheMTMandSNlabel,see
“Applyinglabelstothebottomcover”onpage47
IftheMTMandSNinformationisalreadydisplayed,andmatchthenumbersshownonbottomcover,
pressesctoleavethevaluesastheyare.
.
Chapter2.Importantserviceinformation23
Page 30

5.TheStresstestwillrunfor10minutesandthentheFinalAssemblyT estandPack(FATP)sectionwillstart.
Thissectionincludestheindependenttestsforeachcomponent.Followtheinstructionsonthescreen
tostartthetests.Forinformationaboutthefactorytestitems,see“Factorytestitems”onpage24
6.Ifthefactorytestitemsrevealadefectivecomponent,turnoffthecomputer,disconnecttheacpower
adapter,andthenreplacethedefectivecomponent.Forinformationaboutthereplacementprocedure,
seeChapter6“RemovingorreplacingaFRU”onpage45.
7.Turnonthewrite-protectfunction.See“Removingandreinstallingthewrite-protectscrew”onpage22.
8.Turnonthecomputer.Thecomputerentersthefactory-test-imageenvironmentagain.Itis
recommendedthatyourunStressT estandFATPTeststoensurethatnewcomponentsfunction
correctly.
Note:Itisnotnecessarytoturnoffthewrite-protectfunctionagainifadditionalcomponentsmust
bereplaced.
9.RuntheGoogleRequiredT ests.Ifthetestsfinishsuccessfully,alldatastoredonthecomputerwillbe
deletedandthecomputerwillbeturnedoff.IftheGoogleRequiredTestsfails,refertothecommon
mistakesthatleadtoGoogleRequiredT estsfailurein“Factorytestitems”onpage24.
Note:Ifanytestismarkedasfailed,thefinalprocesscannotbecompleted.Thefinalprocesscanbe
forcedtoendbypressingf.Donotforcethefinalprocesstoendwhenacomponentfailsthetest.Force
thefinalprocesstoendonlywhenthetesthastobebypassedbecauseitcannotbeperformed.
10.Aftertherepairprocessfinishes,thebuilt-inbatteryisdisabled.Thesystemisinacleanout-of-box
state.Inordertoturnonthecomputer,attachtheacpoweradaptertothepowerconnectoronthe
computerfirst.Ifapplicable,customersmustre-enrollthesystemforenterpriseenrollment.
.
Factorytestitems
Afterthesystementersthefactory-test-imageenvironment,factorytestitemswillrun.Thefactorytest
processcontainsthefollowingthreetypesoftests:
•StressT est:TheStressTestisdesignedtotesthowthesystemfunctionsunderstressbyrunningthe
maximumworkloadapplications.TheStressTestincludesthetestofmemory,microprocessor,and
graphicscard.Thetesttakesabout10minutestofinish.
•FATPT est:TheFATPT estisdesignedtotesttheindividualcomponenttoverifyitsfunction,suchas
theTPM,display,audio,camera,keyboard,andothercomponents.Itisrecommendedthatyourunall
theFA TPT estitems.SometestitemsmightrequireanHDMImonitororanSDcard.Ifthedevicesare
notavailable,thetestscanbebypassed,butwiththeoveralltestmarkedasfailed.Thiswillrequirethe
finalizedstepoftheGoogleRequiredTeststobeforcedinordertocompletetheservicingofthecomputer
(seestep9in“Usingtherepairshim”onpage23
•GoogleRequiredT ests:GoogleRequiredT estschecksthesystemstatusandhelpsresetthesystemback
tothefactory-defaultsettings.Ifanytestsfails,thesystemcannotbefinalized.Thefollowingitemsare
somecommonmistakesthatleadtoGoogleRequiredTestsfailure:
–HWIDmismatch:EachChromebookhasaknownhardwareconfiguration.Eachconfigurationis
assignedanHWID.HWIDmismatchcanbecausedbyusingunauthorizedparts,ormissingparts.
ForinformationaboutHWID,see“Hardwareidentity”onpage42.
Ifthewrite-protectfunctionisnotturnedoffbeforerecoveringthecomputerwiththerepairshim,it
willalsocauseHWIDmismatch.Forinstructionsonhowtoturnoffthewrite-protectfunction,see
“Removingandreinstallingthewrite-protectscrew”onpage22
–Write-protectfunctionisoff:Systemcannotbefinalizeduntilthewrite-protectfunctionisturned
backon.
).
.
24HardwareMaintenanceManual
Page 31

StrategyforreplacingFRUs
UsethefollowingstrategytopreventunnecessaryexpenseforreplacingandservicingFRUs:
•IfyouareinstructedtoreplaceaFRUbutthereplacementdoesnotcorrecttheproblem,reinstallthe
originalFRUbeforeyoucontinue.
•Somecomputershavebothaprocessorboardandasystemboard.Ifyouareinstructedtoreplaceeither
theprocessorboardorthesystemboard,andreplacingoneofthemdoesnotcorrecttheproblem,
reinstallthatboard,andthenreplacetheotherone.
•IfanadapteroradeviceconsistsofmorethanoneFRU,anyoftheFRUsmaybethecauseoftheerror.
Beforereplacingtheadapterordevice,removetheFRUs,onebyone,toseeifthesymptomschange.
ReplaceonlytheFRUthatchangedthesymptoms.
Importantnoticeforreplacingasystemboard
Somecomponentsmountedonasystemboardareverysensitive.Improperhandlingofasystemboardcan
causedamagetothosecomponents,andmaycauseasystemmalfunction.
Attention:Whenhandlingasystemboard:
•Donotdropasystemboardorapplyanyexcessiveforcetoit.
•Avoidroughhandlingofanykind.
•AvoidbendingasystemboardandhardpushingtopreventcrackingateachBGA(BallGridArray)chipset.
Howtouseerrormessage
Usetheerrorcodesdisplayedonthescreentodiagnosefailures.Ifmorethanoneerrorcodeisdisplayed,
beginthediagnosiswiththefirsterrorcode.Whatevercausesthefirsterrorcodemayalsocausefalseerror
codes.Ifnoerrorcodeisdisplayed,seewhethertheerrorsymptomislistedintheSymptom-to-FRU
Indexforthecomputeryouareservicing.
StrategyforreplacingFRUsforCTO,special-bid,andstandardmodels
ThistopicprovidesinformationaboutthemodeltypesandFRUidentification.
Productdefinition
Thistopicintroducesdifferentmodeltypesandhowtoidentifyeachtype.
Dynamicconfigure-to-order(CTO)model
ThismodelprovidestheabilityforacustomertoconfigureaLenovosolutionfromaWebSite,andhavethis
configurationsenttofulfillment,whereitisbuiltandshippeddirectlytothecustomer.Themachinelabeland
eSupportwillloadtheseproductsasthe4-characterMT,4-charactermodel,and2-charactercountrycode.
Themodelis“CTO1”andthedefaultcountrycodeis“WW”(example:20A7CTO1WW).
Special-bidmodel
ThisisauniqueconfigurationthathasbeennegotiatedbetweenLenovoandthecustomer.Auniquemachine
typemodel(MTM)consistsofa4-characterMT,a4-charactermodel,andanumeric2-charactercountry
codeisprovidedtothecustomertoplaceorders(example:20A7000955).Thecountrycodeassignedis
numericanddoesnotdesignateaspecificcountryorregion.ThecustommodelfactsheetfortheMTM
indicateswhichcountrythespecialbidMTMissetupfor.Special-bidofferingisnotgenerallyannounced.
Standardmodel
Standardmodels(fixedconfiguration)areannouncedandofferedtoallcustomers.TheMTMportionofthe
machinelabelconsistsofa4-characterMT,a4-charactermodel,andanalphabetic2-charactercountry
Chapter2.Importantserviceinformation25
Page 32

code.Thecountrycodeassignedisalphabeticandrepresentsadesignatedcountryorregion(example:
20A70009UK).
FRUidentification
UseLenovoeSupporttoidentifymajorFRUs,FRUpartnumbers,andFRUdescriptionsforaproductatan
MT-serialnumberlevel.ExamplesofmajorFRUsaresolid-statedrive,systemboard,andliquidcrystal
display(LCD).
ToidentifythemajorFRUsforaproduct,dothefollowing:
1.Goto:
http://www.lenovo.com/support
2.ClickWarranty&Services.
3.ClickCheckWarrantyStatus.
4.OntheWarrantyStatusLookuppage,clickPartsLookup.
5.Typeyourmachinetypeandserialnumber,andthenclickSubmit.
eSupportalsocanbeusedtoviewthegeneralFRUlistforaproduct.
TogetthegeneralFRUlistforaproduct,dothefollowing:
1.Goto:
http://www.lenovo.com/support
2.ClickParts&Accessories.
3.Followtheinstructionsonthescreentoselectproduct.
4.ClickProductsandPartsDetail.
5.OnthePRODUCTANDP ARTSDET AILpage,clickthePartsDetailtabtoviewtheFRUlist.
Note:TheFRUlistisagenerallistofcomponentsanddoesnotcontainspecificmodelinformation.
26HardwareMaintenanceManual
Page 33

Chapter3.Generalcheckout
Thischapterintroducesfollowinginformation:
•“Whattodofirst”onpage27
•“Powersystemcheckout”onpage28
Besuretoreadthefollowingimportantnotes.
Important:
•Onlycertifiedtrainedpersonnelshouldservicethecomputer.PersonnelrepairingtheLenovo
ChromebookcomputermusthavecompletedthecertificationcoursenumberRTPW1170or
CTPi217.
•BeforereplacinganyFieldreplaceableUnit(FRU),readtheentirepageonremovingandreplacing
FRUs.
•WhenyoureplaceFRUs,itisrecommendedusenewnylon-coatedscrews.
•Beextremelycarefulduringsuchwriteoperationsascopying,saving,orformatting.Thesequence
ofthedrivesinthecomputerthatyouareservicingmighthavebeenaltered.Ifyouselectanincorrect
drive,dataorprogramsmightbeoverwritten.
•ReplaceaFRUonlywithanotherFRUofthecorrectmodel.WhenyoureplaceaFRU,ensure
thatthemodelofthemachineandtheFRUpartnumberarecorrectbyreferringtothewebsite:
http://www.lenovo.com/serviceparts-lookup
•AFRUshouldnotbereplacedbecauseofasingle,unreproduciblefailure.Singlefailurescan
occurforvariousreasonsthathavenothingtodowithahardwaredefect,suchascosmicradiation,
electrostaticdischarge,orsoftwareerrors.ConsiderreplacingaFRUonlywhenaproblemrecurs.Ifyou
suspectthataFRUisdefective,cleartheerrorlogandrunthetestagain.Iftheerrordoesnotrecur,do
notreplacetheFRU.
•BecarefulnottoreplaceanondefectiveFRU.
Whattodofirst
WhenyoureturnaFRU,youmustincludethefollowinginformationinthepartsexchangeformorparts
returnformthatyouattachtoit:
1.Nameandphonenumberofservicetechnician
2.Dateofservice
3.Dateonwhichthemachinefailed
4.Dateofpurchase
5.Failuresymptoms,errorcodesappearingonthedisplay,andbeepsymptoms
6.ProcedureindexandpagenumberinwhichthefailingFRUwasdetected
7.FailingFRUnameandpartnumber
8.Machinetype,modelnumber,andserialnumber
9.Customer'snameandaddress
Note:Duringthewarrantyperiod,thecustomermayberesponsibleforrepaircostsifthecomputerdamage
wascausedbymisuse,accident,modification,unsuitablephysicaloroperatingenvironment,orimproper
maintenancebythecustomer.Followingisalistofsomecommonitemsthatarenotcoveredunderwarranty
andsomesymptomsthatmightindicatethatthesystemwassubjectedtostressbeyondnormaluse.
Beforecheckingproblemswiththecomputer,determinewhetherthedamageiscoveredunderthewarranty
byreferringtothefollowinglist:
©CopyrightLenovo2014
27
Page 34

Thefollowingarenotcoveredunderwarranty:
(20V)
1
3
2
•LCDpanelcrackedfromtheapplicationofexcessiveforceorfrombeingdropped
•Scratched(cosmetic)parts
•Distortion,deformation,ordiscolorationofthecosmeticparts
•Plasticparts,latches,pins,orconnectorsthathavebeencrackedorbrokenbyexcessiveforce
•Damagecausedbyliquidspilledintothesystem
•DamagecausedbytheimproperinsertionofaPCcardortheinstallationofanincompatiblecard
•Fusesblownbyattachmentofanonsupporteddevice
•Forgottencomputerpassword(makingthecomputerunusable)
•Stickykeyscausedbyspillingaliquidontothekeyboard
•Useofanincorrectacpoweradapteronlaptopproducts
Thefollowingsymptomsmightindicatedamagecausedbynonwarrantedactivities:
•Missingpartsmightbeasymptomofunauthorizedserviceormodification.
Powersystemcheckout
Toverifyifabatteryandanacpoweradapterarefunctional,dothefollowing:
1.Turnoffthecomputer.
2.Connecttheacpoweradapter.
3.Turnonthecomputer.Ifthecomputercanbeturnedon,itmeansthateitherthebatteryortheac
poweradapterisfunctional.
4.Turnoffthecomputer.
5.Disconnecttheacadapterandturnonthecomputer.Ifthecomputercanbeturnedon,itmeansthe
batteryisfunctional.
Ifyoususpectapowerproblem,seetheappropriateoneofthefollowingpowersupplycheckouts:
•“Checkingtheacpoweradapter”onpage28
•“Checkingthebatteryandoperationalcharging”onpage29
Checkingtheacpoweradapter
Youareherebecausethecomputerfailsonlywhentheacpoweradapterisused.
•Ifthesystem-statusindicatordoesnotblinkthreetimeswhenanacpowersourceisconnected,check
thepowercordoftheacpoweradapterforcorrectcontinuityandinstallation.
•Ifthecomputerdoesnotchargeduringoperation,goto“Checkingthebatteryandoperationalcharging”
onpage29
Tochecktheacpoweradapter,dothefollowing:
1.Disconnecttheacpoweradaptercablefromthecomputer.
2.Measuretheoutputvoltageattheplugoftheacpoweradaptercable.Seethefollowingillustration:
.
Pin
1+20
20
3
Voltage(Vdc)
Ground
Note:Outputvoltageofpin2oftheacpoweradaptermightdifferfromtheoneyouareservicing.
3.Ifthevoltageisnotcorrect,replacetheacpoweradapter.
4.Ifthevoltageisacceptable,replacethesystemboard.
28HardwareMaintenanceManual
Page 35

Note:Noisefromtheacpoweradapterdoesnotalwaysindicateadefect.
Checkingthebatteryandoperationalcharging
Checkingthebattery
ThissystemsupportsonlybatteriesspeciallydesignedforthisspecificsystemandmanufacturedbyLenovo
oranauthorizedbuilder.Thesystemdoesnotsupportunauthorizedbatteriesorbatteriesdesignedforother
systems.Ifanunauthorizedbatteryorabatterydesignedforanothersystemsisinstalled,thesystemwill
notcharge.
Attention:Lenovohasnoresponsibilityfortheperformanceorsafetyofunauthorizedbatteries,and
providesnowarrantiesforfailuresordamagearisingoutoftheiruse.
Thebatterystatusindicatorislocatedinthelower-rightcornerofthescreen.Toviewthepercentageof
batterypowerremaining,clickthebatterystatusicon.
Checkingtheoperationalcharging
Tocheckwhetherthebatterychargesproperlyduringoperation,dothefollowing:
1.Dischargethebatteryuntiltheremainedbatterypowerislessthan50%.
2.Performoperationalcharging.Clickthebatterystatusiconinthelower-rightcornerofthescreento
displaydetailedbatteryinformation.Ifitindicatesthatthebatteryisnotcharging,replacethebattery.
3.Checkthebatterystatusagain.Ifthesameerrorstillexists,replacethesystemboard.
Chapter3.Generalcheckout29
Page 36

30HardwareMaintenanceManual
Page 37

Chapter4.Locations
1
2
3
4
5
6
7
8
9
10
11
Thischapterintroducesthelocationsofthehardwarecomponentsonyourcomputer.
Locatingcomputercontrols,connectors,andindicators
Thistopicintroducesthelocationsofthecomputercontrols,connectors,andindicators.
Frontview
FrontviewoftheThinkPad11eChromebook
1Microphone
3Camera4Speakers
5Security-lockslot
7USB3.0connector
9Powerbutton
11Touchpad
1
:TheilluminateddotintheThinkPadlogoworksasasystem-statusindicator.
2Camera-in-useindicator
6HDMI™connector
8Volume-controlbuttons
10System-statusindicator
Blinksforthreetimes:Thecomputerisinitiallyconnectedtopower.
On:Thecomputerison(innormalmode).
Blinksslowly:Thecomputerisinsleepmode.
©CopyrightLenovo2014
1
31
Page 38

Off:Thecomputerisoff.
1
2
3
4
5
6
7
8
9
10
11
12
FrontviewoftheThinkPadYoga11eChromebook
1Microphone
3Camera4Speakers
5Security-lockslot
7USB3.0connector
9Powerbutton
11Touchpad12Multi-touchscreen
Note:Themulti-touchscreenisonlyavailableonThinkPadY oga11eChromebook.
1
:TheilluminateddotintheThinkPadlogoworksasasystem-statusindicator.
Blinksforthreetimes:Thecomputerisinitiallyconnectedtopower.
On:Thecomputerison(innormalmode).
Blinksslowly:Thecomputerisinsleepmode.
Off:Thecomputerisoff.
2Camera-in-useindicator
6HDMI™connector
8Volume-controlbuttons
10System-statusindicator
1
32HardwareMaintenanceManual
Page 39

Left-sideview
1
2
6
5
4
3
1
2
1System-statusindicator
3Mediacardslot4Audioconnector
5AlwaysOnUSBconnector(USB2.0connector)
1
:TheilluminateddotintheThinkPadlogoworksasasystem-statusindicator.
1
2Wireless-statusindicator
6Powerconnector
Blinksforthreetimes:Thecomputerisinitiallyconnectedtopower.
On:Thecomputerison(innormalmode).
Blinksslowly:Thecomputerisinsleepmode.
Off:Thecomputerisofforinhibernationmode.
2
:Thewireless-statusindicatorislocatedontheouterlidofthecomputer.
On:Thewirelessfeaturesofthecomputerareon.
Off:Thewirelessfeaturesofthecomputerareoff.
Bottomview
2
1Bottomcover2Fanlouvers
Chapter4.Locations33
Page 40

LocatingFRUsandCRUs
Thistopicintroducesthefollowingserviceparts:
•“MajorFRUs”onpage35
•“LCDFRUs”onpage37
Notes:
•EachFRUisavailableforalltypesormodels,unlessotherwisespecified.
•CRUstatementforcustomers:
Youcanresolvesomeproblemswithyourproductwithareplacementpartyoucaninstallyourself,calleda
“CustomerReplaceableUnit”or“CRU.”SomeCRUsaredesignatedasself-serviceCRUsandothersare
designatedasoptional-serviceCRUs.Installationofself-serviceCRUsisyourresponsibility.Foroptional-service
CRUs,youcaneitherinstalltheCRUyourselforyoucanrequestthataServiceProviderinstalltheCRUaccording
tothewarrantyserviceforyourproduct.IfyouintendoninstallingtheCRU,LenovowillshiptheCRUtoyou.CRU
informationandreplacementinstructionsareshippedwithyourproductandareavailablefromLenovoatanytime
uponrequest.Y oucanfindalistofCRUsforyourproductinthisHardwareMaintenanceManual.Anelectronic
versionofthismanualcanbefoundathttp://www.lenovo.com/support.ClickGuides&Manualsandthenfollow
theon-screeninstructionstofindthemanualforyourproduct.Youmightberequiredtoreturnthedefectivepart
thatisreplacedbytheCRU.Whenreturnisrequired:(1)returninstructions,aprepaidshippinglabel,anda
containerwillbeincludedwiththereplacementCRU;and(2)youmightbechargedforthereplacementCRUif
LenovodoesnotreceivethedefectiveCRUwithinthirty(30)daysofyourreceiptofthereplacementCRU.Seeyour
LenovoLimitedWarrantydocumentationforfulldetails.
ThinkPadcomputerscontainthefollowingtypesofCRUs:
–Self-serviceCRUs:TheseCRUsunplugorareheldbynomorethantwoscrews.Examplesofthesetypesof
CRUsincludetheacpoweradapterandpowercord.Otherself-serviceCRUsdependingonproductdesign
mightincludethewirelesscard,keyboard,andpalmrestwithfingerprintreaderandtouchpad.
–Optional-serviceCRUs:TheseCRUsareisolatedpartswithinthecomputerthatareconcealedbyanaccess
panelthatistypicallysecuredbymorethantwoscrews.Oncetheaccesspanelisremoved,thespecific
CRUisvisible.
•ACRUisidentifiedbyasingleasterisk(*)ortwoasterisks(**)intheCRUIDcolumn.AnNintheCRUIDcolumn
meansthatthepartisnotaCRU.Asingleasterisk(*)meansthatthepartisaself-serviceCRU;twoasterisks
(**)meansthatthepartisanoptional-serviceCRU.
34HardwareMaintenanceManual
Page 41

12
13
a
b
c
11
10
1
2
3
4
5
6
7
8
9
MajorFRUs
Chapter4.Locations35
Page 42

No.FRUdescriptions
1
LCDunit(see“LCDFRUs”onpage37)
2Keyboard**
3
Speakerassembly
4KeyboardbezelassemblyN
5
Thermalfan
6
Systemboardassembly
7
Harddiskdrivebracket(availableonThinkPadY oga11eChromebookonly)
8BasecoverassemblyN
9Bottomcover**
10BatteryN
11WirelessLANcardN
a
BracketfortheUSBconnector(see“MiscellaneouspartsandotherFRUs”onpage40)
b
Bracketforthedc-inconnector(see“MiscellaneouspartsandotherFRUs”onpage40
c
BracketforthedummyEthernetconnector(See“MiscellaneouspartsandotherFRUs”on
page40)
12dc-inconnectorN
13MediacardreaderboardN
CRUID
N
N
N
N
)
36HardwareMaintenanceManual
Page 43

LCDFRUs
1
3
4
5
6
7
2
a
8
b
Formodelswithouttouchpanel:
No.FRUdescriptions
1
LCDbezel
a
Mylarscrewcaps(see“MiscellaneouspartsandotherFRUs”onpage40
2
Camera/microphoneboard
3
LCDpanelwithouttouchfunction
4HingesN
)
CRUID
N
N
N
Chapter4.Locations37
Page 44

No.FRUdescriptions
5
AntennakitN
6LEDcableassemblyN
7
LCDrearcoverassembly
8
LCDcable
b
Hingerubbers(see“MiscellaneouspartsandotherFRUs”onpage40)
CRUID
N
N
N
38HardwareMaintenanceManual
Page 45

Formodelswithtouchpanel:
1
4
b
5
6
7
3
a
8
2
No.FRUdescriptions
1
LCDpanelassemblywithtouchfunction
a
Mylarscrewcaps(see“MiscellaneouspartsandotherFRUs”onpage40
2
Sensorboard
3
Camera/microphoneboard
CRUID
N
)
N
N
4HingesN
b
Hingerubbers(see“MiscellaneouspartsandotherFRUs”onpage40
)
N
Chapter4.Locations39
Page 46

No.FRUdescriptions
5
AntennakitN
6LEDcableassemblyN
7
LCDrearcoverassembly
8
LCDcablefortouchpanel
MiscellaneouspartsandotherFRUs
Miscellaneouspart
FRUdescriptions
Screwkit
Systemmiscellaneouskit
•Bracketforthedc-inconnector
•Bracketforthemicroprocessor
•BracketforthedummyEthernetconnector
•Screwrubbercaps
LCDmiscellaneouskit
•Mylarscrewcaps
•Hingerubbersfortouchmodel
•Hingerubbersfornon-touchmodel
CRUID
N
N
CRUID
No
No
No
OtherFRUs
FRUdescriptions
acpoweradapter*
Powercord*
CRUID
LookingupFRUinformation
FordetailedFRUinformation,includingpartnumbers,descriptions,andsubstitutionpartnumbers,goto
http://www.lenovo.com/serviceparts-lookup.
40HardwareMaintenanceManual
Page 47

Chapter5.FRUreplacementnotices
Thischapterpresentsnoticesrelatedtoremovingandreplacingparts.Readthischaptercarefullybefore
replacinganyFRU.
CRUstatementforcustomers:
Youcanresolvesomeproblemswithyourproductwithareplacementpartyoucaninstallyourself,called
a“CustomerReplaceableUnit”or“CRU.”SomeCRUsaredesignatedasself-serviceCRUsandothers
aredesignatedasoptional-serviceCRUs.Installationofself-serviceCRUsisyourresponsibility.For
optional-serviceCRUs,youcaneitherinstalltheCRUyourselforyoucanrequestthataServiceProvider
installtheCRUaccordingtothewarrantyserviceforyourproduct.IfyouintendoninstallingtheCRU,
LenovowillshiptheCRUtoyou.CRUinformationandreplacementinstructionsareshippedwithyour
productandareavailablefromLenovoatanytimeuponrequest.YoucanfindalistofCRUsforyour
productinthisHardwareMaintenanceManual.Anelectronicversionofthismanualcanbefoundat
http://www.lenovo.com/support.ClickGuides&Manualsandthenfollowtheon-screeninstructionstofind
themanualforyourproduct.YoumightberequiredtoreturnthedefectivepartthatisreplacedbytheCRU.
Whenreturnisrequired:(1)returninstructions,aprepaidshippinglabel,andacontainerwillbeincluded
withthereplacementCRU;and(2)youmightbechargedforthereplacementCRUifLenovodoesnot
receivethedefectiveCRUwithinthirty(30)daysofyourreceiptofthereplacementCRU.SeeyourLenovo
LimitedWarrantydocumentationforfulldetails.
Commonservicetools
Belowisthelistofcommonservicetoolsthatyoumightneedwhileservicingthecomputer.
•Screwdriverkit(includingT5Torxscrewdriver)
•1/4"drivespinnerhandle
•1/4"Sq.to1/4"hextorxadapter
•TR7- TR-10tamperresistanttorxbits
•RemovaltoolantennaRFconnector
•USB2.0CD-RW/DVD-ROMcombodriveII
•USBcable
•USBfloppydiskettedriveformaintenancediskette
•USBfloppydiskettedrivetoolkit
•T estcardforintegratedSmartCard
•LENOVOThinkPadHardwareMaintenanceDisketteVersion1.76orlater
Note:DownloadthefilefromthefollowingWebsite:
http://www.lenovo.com/support
Screwnotices
Loosescrewscancauseareliabilityproblem.IntheThinkPadnotebookcomputer,thisproblemisaddressed
withspecialnylon-coatedscrewsthathavethefollowingcharacteristics:
•Theymaintaintightconnections.
•Theydonoteasilycomeloose,evenwithshockorvibration.
•Theyarehardertotighten.
Dothefollowingwhenyouservicethismachine:
•Keepthescrewkitinyourtoolbag.Forthepartnumberofthescrewkit,goto
http://www.lenovo.com/serviceparts-lookup.
•Itisrecommendedtousenewscrews.
•Itisrecommendedtouseeachscrewonlyonce.
©CopyrightLenovo2014
41
Page 48

Tightenscrewsasfollows:
90degreesmore
(Cross-section)
180degreesmore
(Cross-section)
•Plastictoplastic
Turnanadditional90degreesafterthescrewheadtouchesthesurfaceoftheplasticpart.
•Logiccardtoplastic
Turnanadditional180degreesafterthescrewheadtouchesthesurfaceofthelogiccard.
Notes:
•Ensurethatyouusethecorrectscrew.Itisrecommendedtousenewscrewsforreplacements.Ifyou
haveatorquescrewdriver,tightenallscrewsfirmlytothetorquespecifiedinthescrewinformation
tableforeachstep.
•Ensurethattorquescrewdriversarecalibratedcorrectlyfollowingcountryspecifications.
Hardwareidentity
Asetofvalidhardwareidentities(HWIDs)areprovidedbyGoogle.Googlelogstheexacthardware
combinationintoaChromebookandcreatesaHWID.TheHWIDisusedtoensurethatallpartsarevalid
duringtherepairoftheChromebook.TheHWIDisusedforthefollowingpurposes:
•Auto-updatenewpatchesandsoftwareforthelifetimeofthecomputer
•Recoverthecomputertothefactorydefaultsettings
Ifunauthorizedpartsareinstalled,youmightnotgetthecorrectauto-updatesforyourcomputer,oryou
mightnotrecoveryourcomputersuccessfullytothefactorydefaultsettings.Forexample,ifyouinstalla
differentmodelofthewirelessLANcard,whichisnottherequiredconfiguration,theHWIDwillnotmatch.
HWIDischeckedbyusingtherepairshim.Forinformationabouttherepairshim,see“Overviewofthe
ChromebookUSBrepairshim”onpage21.
PrerequisiteforreplacingaFRU
Usetherepairshimbeforereplacinganynon-CRUs.ThefollowingisthelistofCRUsforyourChromebook:
1.acpoweradapter
2.Powercord
3.Bottomcover
4.Keyboard
42HardwareMaintenanceManual
Page 49

ForCRUdefinition,see“LocatingFRUsandCRUs”onpage34.
Forinformationabouthowtousetherepairshim,see“Usingtherepairshim”onpage23.
Chapter5.FRUreplacementnotices43
Page 50

44HardwareMaintenanceManual
Page 51

Chapter6.RemovingorreplacingaFRU
ThischapterprovidesinstructionsonhowtoremoveorreplaceaFRU.
CRUstatementforcustomers:
Youcanresolvesomeproblemswithyourproductwithareplacementpartyoucaninstallyourself,called
a“CustomerReplaceableUnit”or“CRU.”SomeCRUsaredesignatedasself-serviceCRUsandothers
aredesignatedasoptional-serviceCRUs.Installationofself-serviceCRUsisyourresponsibility.For
optional-serviceCRUs,youcaneitherinstalltheCRUyourselforyoucanrequestthataServiceProvider
installtheCRUaccordingtothewarrantyserviceforyourproduct.IfyouintendoninstallingtheCRU,
LenovowillshiptheCRUtoyou.CRUinformationandreplacementinstructionsareshippedwithyour
productandareavailablefromLenovoatanytimeuponrequest.YoucanfindalistofCRUsforyourproduct
inthisHardwareMaintenanceManual.Anelectronicversionofthismanualisavailablefordownloadingat
http://www.lenovo.com/support.Y oumightberequiredtoreturnthedefectiveCRU.Whenreturnisrequired:
(1)returninstructions,aprepaidshippinglabel,andacontainerwillbeincludedwiththereplacement
CRU;and(2)youmightbechargedforthereplacementCRUifLenovodoesnotreceivethedefective
partwithinthirty(30)daysofyourreceiptofthereplacementCRU.SeeyourLenovoLimitedWarranty
documentationforfulldetails.
Generalguidelines
DANGER
BeforeremovinganyFRU,turnoffthecomputer,unplugallpowercordsfromelectricaloutlets,
disconnectanyinterconnectingcables,andthendisablethebuilt-inbattery.
Forinstructionsonhowtodisablethebuilt-inbattery,see“Disablingthebuilt-inbattery”onpage46.
WhenremovingorreplacingaFRU,besuretoobservethefollowinggeneralguidelines:
1.Donottrytoserviceanycomputerunlessyouhavebeentrainedandcertified.Anuntrainedpersonruns
theriskofdamagingparts.
2.BeforereplacinganyFRU,reviewChapter5“FRUreplacementnotices”onpage41.
3.BeginbyremovinganyFRUsthathavetoberemovedbeforereplacingthefailingFRU.AnysuchFRUs
arelistedatthebeginningofeachFRUreplacementsection.Removethemintheorderinwhichthey
arelisted.
4.FollowthecorrectsequenceinthestepsforremovingaFRU,asgiveninthedrawingsbythenumbers
insquarecallouts.
5.Whenturningascrew,turnitinthedirectionasgivenbythearrowinthedrawing.
6.WhenremovingaFRU,moveitinthedirectionasgivenbythearrowinthedrawing.
7.ToputthenewFRUinplace,reversetheremovalprocedureandfollowanynotesthatpertainto
replacement.
8.WhenreplacingaFRU,usethecorrectscrewsasshowninthereplacementprocedures.
Attention:AfterreplacingaFRU,donotturnonthecomputeruntilyouhavemadesurethatallscrews,
springs,andothersmallpartsareinplaceandnonearelooseinsidethecomputer.Verifythisbyshaking
thecomputergentlyandlisteningforrattlingsounds.Metallicpartsormetalflakescancauseelectrical
shortcircuits.
©CopyrightLenovo2014
45
Page 52

Attention:Thesystemboardissensitiveto,andcanbedamagedby,electrostaticdischarge(ESD).Before
2
2
2
2
2
2
2
2
2
3
1
touchingit,establishpersonalgroundingbytouchingagroundpointwithonehandorbyusinganESDstrap.
Disablingthebuilt-inbattery
BeforereplacinganyFRU,ensurethatyouhavedisabledthebuilt-inbatterybydoingthefollowing:
Note:Followtheinstructionsonthescreeninadditiontotheinstructionsinthistopic.
1.Turnoffyourcomputeranddisconnectallcablesfromthecomputer.Connecttheacpoweradapterto
thepowerconnectoronyourcomputer.
2.DothefollowingtoenterDevelopermode:
a.Pressandholdtheesckey,therefreshkey,andthepowerbuttonatthesametime.
WhenthemessageChromeOSismissingordamaged.PleaseinsertarecoveryUSBstickorSDcard.
isdisplayed,pressctrl+d.
Note:IfyouarepromptedtoturnofftheOSverification,pressenter.
b.WhenthemessageOSvericationisOFF .PressSPACEtore-enable.isdisplayed,donotpressthe
spacekey.Thecomputerwillrestartautomatically.Thisprocesstakesseveralminutes.
3.Whenpromptedtologontothecomputer,pressandholdthectrl+alt+forwardkeyatthe
sametime,thentheT erminalwindowisdisplayed.
4.Whenpromptedtologontothelocalhost,typechronosinthelocalhostlogin:fieldandpressenter.
5.Typesudobashinthechronos@localhostfieldandpressenter.
6.Typeectoolbatterycutoffinthelocalhostuserfieldandpressenter.
7.WhenthemessageSUCCESS.Thebatteryhasarrangedacut-offandthesystemshouldbeshutdown
immediately.isdisplayed,disconnecttheacpoweradapterfromthecomputerandthecomputerturns
offimmediately.Thebuilt-inbatteryisdisabled.Waitseveralminutestoletthecomputercool.
1010Bottomcover
Removalstepsofthebottomcover
46HardwareMaintenanceManual
Page 53

Applyinglabelstothebottomcover
1 2
3
7
6
5
4
8
9
10
Thenewbottomcoverassemblyisshippedwithakitcontaininglabelsofseveralkinds.Applythoselabels
whenyoureplacethebottomcoverassembly.Forthelabelsthatarenotshippedwiththenewbottomcover,
peelthemfromtheoldbottomcoverandadherethemtothenewone.
Thefollowingillustrationshowsthelocationofeachlabel.
1S/Nlabel
3Assettag
5Israellabel6Indonesiaratinglabel
7IndonesiaPostellabel8BrazilANATELlabel
9IndiaBISlabel10FCC/IClabel
1020Battery
2Ratinglabel
4SIRIMlabel
Importantnoticesforreplacingabattery
Attention:Lenovohasnoresponsibilityfortheperformanceorsafetyofunauthorizedbatteries,and
providesnowarrantiesforfailuresordamagearisingoutoftheiruse.
Chapter6.RemovingorreplacingaFRU47
Page 54

Foraccess,removethisFRU:
1
1
1
1
2
•“1010Bottomcover”onpage46
Removalstepsofthebattery
DANGER
Useonlytheauthorizedbatteryspecifiedforyourcomputer.Anyotherbatterycouldigniteor
explode.
StepScrew(quantity)Color
1
M2×L4mm,flat-head,nylon-coated(4)
Torque
Black0.181Nm
(1.85kgf-cm)
48HardwareMaintenanceManual
Page 55

3
4
1030Harddiskdrivebracket
1
Note:TheharddiskdrivebracketisonlyavailableontheThinkPadY oga11eChromebook.
Foraccess,removethisFRU:
•“1010Bottomcover”onpage46
Removalstepsoftheharddiskdrivebracket
Chapter6.RemovingorreplacingaFRU49
Page 56

StepScrew(quantity)Color
2
2
1
1
1
M2×L4mm,flat-head,nylon-coated(1)
Wheninstalling:Ensurethattheharddiskdrivebracketisfirmlyattached.
1040WirelessLANcard
Foraccess,removethisFRU:
•“1010Bottomcover”onpage46
Torque
Black0.181Nm
(1.85kgf-cm)
RemovalstepsofthewirelessLANcard
StepScrew(quantity)Color
2
M2×L3mm,hexagonstarhead,nylon-coated(1)
Torque
Black0.181Nm
(1.85kgf-cm)
50HardwareMaintenanceManual
Page 57

3
Wheninstalling:Attachthegraycabletotheconnectormarked“MAIN”onthecard,andattachtheblack
1
1
2
2
cabletotheconnectormarked“AUX”.
1050Keyboard
Foraccess,removethisFRU:
•“1010Bottomcover”onpage46
Removalstepsofthekeyboard
StepScrew(quantity)Color
1
M2×L4mm,flat-head,nylon-coated(2)
Black0.181Nm
Torque
(1.85kgf-cm)
Chapter6.RemovingorreplacingaFRU51
Page 58

3
4
5
6
Wheninstalling:Ensurethattheconnectorisattachedfirmly.
1060Keyboardbezelassembly,speakerassembly,media-card-reader board
Foraccess,removetheseFRUsinorder:
•“1010Bottomcover”onpage46
•“1020Battery”onpage47
•“1030Harddiskdrivebracket”onpage49
•“1050Keyboard”onpage51
52HardwareMaintenanceManual
Page 59

Removalstepsofthekeyboardbezelassembly
1
1
3
3
4
4
4
4
2
2
2
2
StepScrewcapScrew(quantity)Color
1
M2×L4mm,flat-headshoulder,
nylon-coated(2)
StepScrew(quantity)Color
2
3
4
M2.5×L8mm,flat-head,nylon-coated(4)
M2×L4mm,flat-head,nylon-coated(2)
M2-0.4,big-head,nylon-coated(4)Silver
Torque
Black0.181Nm
(1.85kgf-cm)
Torque
Black0.294Nm
(3.0kgf-cm)
Black0.181Nm
(1.85kgf-cm)
0.181Nm
(1.85kgf-cm)
Chapter6.RemovingorreplacingaFRU53
Page 60

5
5
5
5
StepScrew(quantity)Color
6
8
7
5
M2×L4mm,flat-head,nylon-coated(4)
Torque
Black0.181Nm
(1.85kgf-cm)
54HardwareMaintenanceManual
Page 61

9
9
9
10
9
9
9
9
9
Wheninstalling:Ensurethattheconnectorsareattachedfirmly.
1
1
3
2
22
3
Removalstepsofthespeakerassembly
StepScrew(quantity)Color
1
M2×L3mm,flat-headshoulder,nylon-coated(2)
Black0.181Nm
Torque
(1.85kgf-cm)
Chapter6.RemovingorreplacingaFRU55
Page 62

4
4
Removalstepsofthemedia-card-readerboard
1
1
2
5
4
3
StepScrew(quantity)Color
1
Wheninstalling:Ensurethattheconnectorisattachedfirmly.
M2×L3mm,flat-head,nylon-coated(2)
Torque
Black0.181Nm
(1.85kgf-cm)
56HardwareMaintenanceManual
Page 63

1070BracketfordummyEthernetconnector,bracketforUSBconnector,
1
1
2
bracketfordc-inconnector,dc-inconnector,systemboardassembly,
andthermalfan
Importantnoticesforhandlingthesystemboard
Whenhandlingthesystemboard,readthefollowing:
•Thesystemboardhasanaccelerometer,whichcanbebrokenwhenseveralthousandsofG-forces
areapplied.
Note:Droppingasystemboardfromaheightofaslittleas15cm(6inches)sothatitfallsflatonahard
benchcansubjecttheaccelerometertoasmuchas6000G'sofshock.
•Becarefulnottodropthesystemboardonabenchtopthathasahardsurface,suchasmetal,wood,or
composite.
•Avoidroughhandlingofanykind.
•Ateverypointintheprocess,besurenottodroporstackthesystemboard.
•Ifyouputasystemboarddown,besuretoputitonlyonapaddedsurfacesuchasanESDmatora
corrugatedconductivematerial.
Foraccess,removetheseFRUsinorder:
•“1010Bottomcover”onpage46
•“1020Battery”onpage47
•“1030Harddiskdrivebracket”onpage49
•“1040WirelessLANcard”onpage50
•“1050Keyboard”onpage51
•“1060Keyboardbezelassembly,speakerassembly,media-card-readerboard”onpage52
RemovalstepsofthebracketfordummyEthernetconnector,bracketforUSBconnector,bracketfor
dc-inconnector,dc-inconnector,systemboardassembly,andthermalfan
Chapter6.RemovingorreplacingaFRU57
Page 64

4
3
3
StepScrew(quantity)Color
5
3
4
M2×L4mm,flat-head,nylon-coated(2)
M2×L5mm,flat-head,nylon-coated(1)
Torque
Black0.181Nm
(1.85kgf-cm)
Black0.181Nm
(1.85kgf-cm)
58HardwareMaintenanceManual
Page 65

6
7
8
9
Chapter6.RemovingorreplacingaFRU59
Page 66

10
11b
11c
11a
11d
12
13
Wheninstalling:Ensurethattheconnectorsareattachedfirmly.
1080LCDunit
Foraccess,removetheseFRUsinorder:
•“1010Bottomcover”onpage46
•“1020Battery”onpage47
•“1030Harddiskdrivebracket”onpage49
•“1040WirelessLANcard”onpage50
•“1050Keyboard”onpage51
•“1060Keyboardbezelassembly,speakerassembly,media-card-readerboard”onpage52
•“1070BracketfordummyEthernetconnector,bracketforUSBconnector,bracketfordc-inconnector,
dc-inconnector,systemboardassembly,andthermalfan”onpage57
60HardwareMaintenanceManual
Page 67

RemovalstepsoftheLCDunit
1
1
1
1
1
1
1
1
2
2
3
3
3
3
3
StepScrew(quantity)Color
3
M2.5×L5mm,flat-head,nylon-coated(5)
Torque
Black0.294Nm
(3.0kgf-cm)
Chapter6.RemovingorreplacingaFRU61
Page 68

4
4
RemovinganLCDFRUformodelswithouttouchpanel
1
1
ThissectionprovidesinstructionsonhowtoremoveanLCDFRUformodelswithouttouchpanel.
2010LCDbezelassembly
Foraccess,removetheseFRUsinorder:
•“1010Bottomcover”onpage46
•“1020Battery”onpage47
•“1030Harddiskdrivebracket”onpage49
•“1040WirelessLANcard”onpage50
•“1050Keyboard”onpage51
•“1060Keyboardbezelassembly,speakerassembly,media-card-readerboard”onpage52
•“1070BracketfordummyEthernetconnector,bracketforUSBconnector,bracketfordc-inconnector,
dc-inconnector,systemboardassembly,andthermalfan”onpage57
•“1080LCDunit”onpage60
RemovalstepsoftheLCDbezelassembly
62HardwareMaintenanceManual
Page 69

StepScrewcapScrew(quantity)Color
2
2
2
2
2
2
2
2
2
2
2
2
2
2
2
2
1
M2.5×L5mm,flat-head,nylon-coated(2)
Wheninstalling:Ensurethatallthelatchesareattachedfirmly.
Torque
Black0.294Nm
(3.0kgf-cm)
2020LCDpanel
Foraccess,removetheseFRUsinorder:
•“1010Bottomcover”onpage46
•“1020Battery”onpage47
•“1030Harddiskdrivebracket”onpage49
•“1040WirelessLANcard”onpage50
•“1050Keyboard”onpage51
•“1060Keyboardbezelassembly,speakerassembly,media-card-readerboard”onpage52
•“1070BracketfordummyEthernetconnector,bracketforUSBconnector,bracketfordc-inconnector,
dc-inconnector,systemboardassembly,andthermalfan”onpage57
•“1080LCDunit”onpage60
•“2010LCDbezelassembly”onpage62
Chapter6.RemovingorreplacingaFRU63
Page 70

RemovalstepsofLCDpanel
1
1
1
1
2
5
4
0
3
StepScrew(quantity)Color
1
M1.7xL3mm,flat-head,nylon-coated(4)Silver
Wheninstalling:EnsurethattheLCDconnectorisattachedfirmly.
Torque
0.181Nm
(1.85kgf-cm)
2030Camera/microphoneboard
Foraccess,removetheseFRUsinorder:
•“1010Bottomcover”onpage46
•“1020Battery”onpage47
•“1030Harddiskdrivebracket”onpage49
•“1040WirelessLANcard”onpage50
•“1050Keyboard”onpage51
64HardwareMaintenanceManual
Page 71

•“1060Keyboardbezelassembly,speakerassembly,media-card-readerboard”onpage52
2
3
1
•“1070BracketfordummyEthernetconnector,bracketforUSBconnector,bracketfordc-inconnector,
dc-inconnector,systemboardassembly,andthermalfan”onpage57
•“1080LCDunit”onpage60
•“2010LCDbezelassembly”onpage62
•“2020LCDpanel”onpage63
Removalstepsofthecamera/microphoneboard
Wheninstalling:Ensurethattheconnectorisattachedfirmly.
2040Antennakit,hinges,LCDcable,andLEDcableassembly
Foraccess,removetheseFRUsinorder:
•“1010Bottomcover”onpage46
•“1020Battery”onpage47
•“1030Harddiskdrivebracket”onpage49
•“1040WirelessLANcard”onpage50
•“1050Keyboard”onpage51
•“1060Keyboardbezelassembly,speakerassembly,media-card-readerboard”onpage52
•“1070BracketfordummyEthernetconnector,bracketforUSBconnector,bracketfordc-inconnector,
dc-inconnector,systemboardassembly,andthermalfan”onpage57
•“1080LCDunit”onpage60
•“2010LCDbezelassembly”onpage62
•“2020LCDpanel”onpage63
•“2030Camera/microphoneboard”onpage64
Chapter6.RemovingorreplacingaFRU65
Page 72

Removalstepsoftheantennakit,hinges,andLCDcable
1
2
2
2
2
1
1
1
1
1
1
1
1
3
3
3
3
3
3
StepScrew(quantity)Color
3
M2.5×L3mm,big-head,nylon-coated(6)
Black0.294Nm
Torque
(3.0kgf-cm)
66HardwareMaintenanceManual
Page 73

5
4
4
4
4
6
6
7
Wheninstalling:Whenyouinstallthewirelessantennakit,routethecablesasshowninthefollowing
illustration.Asyouroutethecables,ensurethattheyarenotsubjecttoanytension.T ensioncouldcausethe
cablestobedamagedbythecableguides,orawiretobebroken.
Chapter6.RemovingorreplacingaFRU67
Page 74

a
b
aWLANmainantenna(gray)
bWLANauxiliaryantenna(black)
RemovalstepoftheLEDcableassembly
RemovinganLCDFRUformodelswithtouchpanel
ThissectionprovidesinstructionsonhowtoremoveanLCDFRUformodelswithtouchpanel.
3010LCDpanelassembly
Foraccess,removetheseFRUsinorder:
•“1010Bottomcover”onpage46
•“1020Battery”onpage47
•“1030Harddiskdrivebracket”onpage49
•“1040WirelessLANcard”onpage50
•“1050Keyboard”onpage51
•“1060Keyboardbezelassembly,speakerassembly,media-card-readerboard”onpage52
68HardwareMaintenanceManual
Page 75

•“1070BracketfordummyEthernetconnector,bracketforUSBconnector,bracketfordc-inconnector,
1
1
2
2
2
2
2
2
2
2
2
2
2
2
2
3
dc-inconnector,systemboardassembly,andthermalfan”onpage57
•“1080LCDunit”onpage60
RemovalstepsoftheLCDpanelassembly
StepScrewcapScrew(quantity)Color
1
M2.5×L5mm,flat-head,nylon-coated(2)
Black0.294Nm
Torque
(3.0kgf-cm)
Chapter6.RemovingorreplacingaFRU69
Page 76

2
6
5
4
11
7
Wheninstalling:Ensurethattheconnectorsareattachedfirmly.
3020Camera/microphoneboardandsensorboard
Foraccess,removetheseFRUsinorder:
•“1010Bottomcover”onpage46
•“1020Battery”onpage47
•“1030Harddiskdrivebracket”onpage49
•“1040WirelessLANcard”onpage50
•“1050Keyboard”onpage51
•“1060Keyboardbezelassembly,speakerassembly,media-card-readerboard”onpage52
•“1070BracketfordummyEthernetconnector,bracketforUSBconnector,bracketfordc-inconnector,
dc-inconnector,systemboardassembly,andthermalfan”onpage57
•“1080LCDunit”onpage60
•“3010LCDpanelassembly”onpage68
70HardwareMaintenanceManual
Page 77

Removalstepsofthecamera/microphoneboard
2
3
1
1
2
Wheninstalling:Ensurethattheconnectorisattachedfirmly.
Removalstepsofthesensorboard
Chapter6.RemovingorreplacingaFRU71
Page 78

Wheninstalling:Takethetwosidesofthesensorboard,andthenpushitintothehookfromtheright
1
2
sidetotheleftside
1.Thentakethetwosidesofthesensorboardandpressitintothehook2.Ensure
thattheconnectorisattachedfirmly.
Note:Donotpressthesurfaceofthesensorboard.
3030Antennakit,hinges,LCDcable,andLEDcableassembly
Foraccess,removetheseFRUsinorder:
•“1010Bottomcover”onpage46
•“1020Battery”onpage47
•“1030Harddiskdrivebracket”onpage49
•“1040WirelessLANcard”onpage50
•“1050Keyboard”onpage51
•“1060Keyboardbezelassembly,speakerassembly,media-card-readerboard”onpage52
•“1070BracketfordummyEthernetconnector,bracketforUSBconnector,bracketfordc-inconnector,
dc-inconnector,systemboardassembly,andthermalfan”onpage57
•“1080LCDunit”onpage60
•“3010LCDpanelassembly”onpage68
•“3020Camera/microphoneboardandsensorboard”onpage70
72HardwareMaintenanceManual
Page 79

Removalstepsoftheantennakit,hinges,LCDcable
1
2
2
2
1
1
1
1
1
1
1
1
2
3
3
3
3
StepScrew(quantity)Color
3
M2.5×L3mm,big-head,nylon-coated(4)
Torque
Black0.294Nm
(3.0kgf-cm)
Chapter6.RemovingorreplacingaFRU73
Page 80

4
4
5
6
6
7
Wheninstalling:Whenyouinstallthewirelessantennakit,routethecablesasshowninthefollowing
illustration.Asyouroutethecables,ensurethattheyarenotsubjecttoanytension.T ensioncouldcausethe
cablestobedamagedbythecableguides,orawiretobebroken.
74HardwareMaintenanceManual
Page 81

a
b
aWLANmainantenna(gray)
bWLANauxiliaryantenna(black)
RemovalstepoftheLEDcableassembly
Chapter6.RemovingorreplacingaFRU75
Page 82

76HardwareMaintenanceManual
Page 83

AppendixA.Notices
Lenovomaynotoffertheproducts,services,orfeaturesdiscussedinthisdocumentinallcountries.Consult
yourlocalLenovorepresentativeforinformationontheproductsandservicescurrentlyavailableinyour
area.AnyreferencetoaLenovoproduct,program,orserviceisnotintendedtostateorimplythatonlythat
Lenovoproduct,program,orservicemaybeused.Anyfunctionallyequivalentproduct,program,orservice
thatdoesnotinfringeanyLenovointellectualpropertyrightmaybeusedinstead.However,itistheuser’s
responsibilitytoevaluateandverifytheoperationofanyotherproduct,program,orservice.
Lenovomayhavepatentsorpendingpatentapplicationscoveringsubjectmatterdescribedinthis
document.Thefurnishingofthisdocumentdoesnotgiveyouanylicensetothesepatents.Youcansend
licenseinquiries,inwriting,to:
Lenovo(UnitedStates),Inc.
1009ThinkPlace-BuildingOne
Morrisville,NC27560
U.S.A.
Attention:LenovoDirectorofLicensing
LENOVOPROVIDESTHISPUBLICA TION“ASIS”WITHOUTWARRANTYOFANYKIND,EITHEREXPRESS
ORIMPLIED,INCLUDING,BUTNOTLIMITEDTO,THEIMPLIEDWARRANTIESOFNON-INFRINGEMENT,
MERCHANTABILITYORFITNESSFORAPARTICULARPURPOSE.Somejurisdictionsdonotallow
disclaimerofexpressorimpliedwarrantiesincertaintransactions,therefore,thisstatementmaynotapply
toyou.
Thisinformationcouldincludetechnicalinaccuraciesortypographicalerrors.Changesareperiodically
madetotheinformationherein;thesechangeswillbeincorporatedinneweditionsofthepublication.
Lenovomaymakeimprovementsand/orchangesintheproduct(s)and/ortheprogram(s)describedinthis
publicationatanytimewithoutnotice.
Theproductsdescribedinthisdocumentarenotintendedforuseinimplantationorotherlifesupport
applicationswheremalfunctionmayresultininjuryordeathtopersons.Theinformationcontainedinthis
documentdoesnotaffectorchangeLenovoproductspecificationsorwarranties.Nothinginthisdocument
shalloperateasanexpressorimpliedlicenseorindemnityundertheintellectualpropertyrightsofLenovo
orthirdparties.Allinformationcontainedinthisdocumentwasobtainedinspecificenvironmentsandis
presentedasanillustration.Theresultobtainedinotheroperatingenvironmentsmayvary.
Lenovomayuseordistributeanyoftheinformationyousupplyinanywayitbelievesappropriatewithout
incurringanyobligationtoyou.
Anyreferencesinthispublicationtonon-LenovoWebsitesareprovidedforconvenienceonlyanddonotin
anymannerserveasanendorsementofthoseWebsites.ThematerialsatthoseWebsitesarenotpartof
thematerialsforthisLenovoproduct,anduseofthoseWebsitesisatyourownrisk.
Anyperformancedatacontainedhereinwasdeterminedinacontrolledenvironment.Therefore,theresult
obtainedinotheroperatingenvironmentsmayvarysignificantly.Somemeasurementsmayhavebeen
madeondevelopment-levelsystemsandthereisnoguaranteethatthesemeasurementswillbethesame
ongenerallyavailablesystems.Furthermore,somemeasurementsmayhavebeenestimatedthrough
extrapolation.Actualresultsmayvary.Usersofthisdocumentshouldverifytheapplicabledatafortheir
specificenvironment.
©CopyrightLenovo2014
77
Page 84

Electronicemissionsnotices
ForelectronicemissioninformationonClassBdigitaldevices,refertothecorrespondinginformationin
theUserGuide.
EUContact:Lenovo,Einsteinova21,85101Bratislava,Slovakia
Trademarks
ThefollowingtermsaretrademarksofLenovointheUnitedStates,othercountriesorboth:
Lenovo
ThinkPad
ThinkPadlogo
Yoga
ChromeOSandChromebookaretrademarksofGoogleInc.
ThetermsHDMIandHDMIHigh-DefinitionMultimediaInterfacearetrademarksorregisteredtrademarksof
HDMILicensingLLCintheUnitedStatesandothercountries.
Othercompany,product,orservicenamesmaybethetrademarksorservicemarksofothers.
78HardwareMaintenanceManual
Page 85

Page 86

PartNumber:SP40A26992_01
Printedin
(1P)P/N:SP40A26992_01
*1PSP40A26992_01*
 Loading...