

Page 1

ThinkCentreChromebox
HardwareMaintenanceManual
MachineTypes:10H2,10H3,10H4,10H5,10H6,10H7,10H8,and
10H9
Page 2

Note:Beforeusingthisinformationandtheproductitsupports,besuretoreadandunderstandtheChapter
1“Readthisfirst:Importantsafetyinformation”onpage1
andAppendixF“Notices”onpage103.
FourthEdition(July2016)
©CopyrightLenovo2015,2016.
LIMITEDANDRESTRICTEDRIGHTSNOTICE:IfdataorsoftwareisdeliveredpursuantaGeneralServicesAdministration
“GSA”contract,use,reproduction,ordisclosureissubjecttorestrictionssetforthinContractNo.GS-35F-05925.
Page 3

Contents
Aboutthismanual...........iii
Chapter1.Readthisfirst:Important
safetyinformation............1
Powercordsandpoweradapters........1
Generalsafety................1
Electricalsafety...............2
Glasspartsnotice..............4
Safetyinspectionguide............4
Handlingelectrostaticdischarge-sensitive
devices..................4
Groundingrequirements............5
Safetynotices(multi-lingualtranslations).....5
Chapter2.Productoverview.....27
Locations.................27
Locatingconnectors,controls,andindicators
onthefrontofyourcomputer.......27
Locatingconnectorsontherearofyour
computer...............28
Locatingcomponents..........30
LocatingmajorFRUsandCRUs......30
Locatingpartsonthesystemboard....32
Locatingthemachinetypeandmodellabel.34
Features.................34
Specifications...............36
Chapter3.Usingyourcomputer...37
Registeringyourcomputer..........37
Frequentlyaskedquestions.........37
Chapter4.Youandyourcomputer..39
Accessibilityandcomfort..........39
Arrangingyourworkspace........39
Comfort...............39
Glareandlighting............40
Aircirculation.............40
Electricaloutletsandcablelengths.....40
Accessibilityinformation.........40
Movingyourcomputertoanothercountryor
region..................41
Chapter5.Security..........43
AttachingaKensington-stylecablelock.....43
Chapter6.Preventingproblems...45
Basics..................45
Cleaningyourcomputer...........45
Computer...............45
Displayscreen.............45
Movingyourcomputer...........46
Chapter7.Troubleshootingand
diagnostics..............47
Basictroubleshooting............47
Troubleshootingprocedure..........47
Troubleshooting..............48
Audioproblems............48
Intermittentproblems..........48
Monitorproblems............49
Networkingproblems..........49
Insufficientfreestoragedrivespace....50
Serialconnectorcannotbeaccessed....50
Softwareproblems...........50
MyUSBconnectorscannotbeaccessed..51
Chapter8.Servicecheckoutand
symptom-to-FRUindex........53
Servicecheckout..............53
Problemdeterminationtips........53
Symptom-to-FRUindex...........54
Powersupplyproblems.........54
Miscellaneouserrorconditions......54
Undeterminedproblems.........56
OverviewoftheUSBrecoveryshim......56
Chapter9.Installingorreplacing
hardware...............61
Handlingstatic-sensitivedevices.......61
Installingorreplacinghardware........61
Installingexternaloptions........61
Replacingtheacpoweradapter......61
Removingthefrontcover.........63
Replacingthesystemfan.........65
Replacingamemorymodule.......66
Replacingthesystemboardframe.....68
Replacingthepowerbuttonboard.....69
Replacingthecoin-cellbattery......71
ReplacingtheM.2storagedrive......72
ReplacingtheM.2Wi-Ficardmodule....73
ReplacingtheM.2Wi-Fiantennas.....74
Replacingtheresetbuttonboard.....78
Replacingthesystemboard.......79
Completingthepartsreplacement.....81
©CopyrightLenovo2015,2016
i
Page 4

Chapter10.Gettinginformation,help,
andservice..............85
Informationresources............85
SafetyandWarranty...........85
LenovoWebsite............85
LenovoSupportWebsite.........85
Helpandservice..............86
Callingforservice............86
Usingotherservices..........86
Purchasingadditionalservices......87
AppendixA.Regulatory
information..............89
Exportclassificationnotice..........89
Electronicemissionsnotices.........89
FederalCommunicationsCommission
DeclarationofConformity........89
Eurasiancompliancemark..........91
Brazilregulatorynotice...........91
Mexicoregulatorynotice...........91
Additionalregulatoryinformation.......91
AppendixB.WEEEandrecycling
information..............93
ImportantWEEEinformation.........93
RecyclinginformationforJapan........93
RecyclinginformationforBrazil........94
BatteryrecyclinginformationforT aiwan.....94
BatteryrecyclinginformationfortheEuropean
Union..................95
AppendixC.RestrictionofHazardous
SubstancesDirective(RoHS).....97
EuropeanUnionRoHS...........97
ChinaRoHS................97
TurkishRoHS...............97
UkraineRoHS...............98
IndiaRoHS................98
TaiwanRoHS...............98
AppendixD.ChinaEnergyLabel...99
AppendixE.ENERGYSTARmodel
information.............101
AppendixF .Notices.........103
Trademarks................104
iiThinkCentreChromeboxHardwareMaintenanceManual
Page 5

Aboutthismanual
ThismanualprovidesserviceandreferenceinformationforThinkCentre®computerslistedonthefrontcover.
Usethismanualalongwiththeadvanceddiagnosticteststotroubleshootproblems.
Important:ThismanualisintendedonlyfortrainedservicetechnicianswhoarefamiliarwithThinkCentre
computers.Usethismanualalongwiththeadvanceddiagnosticteststotroubleshootproblemseffectively.
BeforeservicingaThinkCentrecomputer,besuretoreadandunderstandChapter1“Readthisfirst:
Importantsafetyinformation”onpage1
.
©CopyrightLenovo2015,2016
iii
Page 6

ivThinkCentreChromeboxHardwareMaintenanceManual
Page 7

Chapter1.Readthisfirst:Importantsafetyinformation
Thischaptercontainsthesafetyinformationthatyoumustbefamiliarwith.
Powercordsandpoweradapters
Useonlythepowercordsandpoweradapterssuppliedbytheproductmanufacturer.Donotusetheac
powercordforotherdevices.
Thepowercordsshallbesafetyapproved.ForGermany,itshallbeH03VV-F,3G,0.75mm
connectedtothepoweradapter),H05VV-F,3G,0.75mm
supplyassembly),orbetter.Forothercountries,thesuitabletypesshallbeusedaccordingly.
Neverwrapapowercordaroundapoweradapterorotherobject.Doingsocanstressthecordinwaysthat
cancausethecordtofray,crack,orcrimp.Thiscanpresentasafetyhazard.
Alwaysroutepowercordssothattheywillnotbewalkedon,trippedover,orpinchedbyobjects.
Protectpowercordandpoweradaptersfromliquids.Forinstance,donotleaveyourpowercordorpower
adapternearsinks,tubs,toilets,oronfloorsthatarecleanedwithliquidcleansers.Liquidscancausea
shortcircuit,particularlyifthepowercordorpoweradapterhasbeenstressedbymisuse.Liquidsalsocan
causegradualcorrosionofpowercordterminalsand/ortheconnectorterminalsonapoweradapter,
whichcaneventuallyresultinoverheating.
Ensurethatallpowercordconnectorsaresecurelyandcompletelypluggedintoreceptacles.
Donotuseanypoweradapterthatshowscorrosionattheacinputpinsorshowssignsofoverheating(such
asdeformedplastic)attheacinputoranywhereonthepoweradapter.
Donotuseanypowercordswheretheelectricalcontactsoneitherendshowsignsofcorrosionor
overheatingorwherethepowercordappearstohavebeendamagedinanyway.
2
(thepowercordconnectedtotheinternalpower
2
(thepowercord
Generalsafety
Followtheserulestoensuregeneralsafety:
•Observegoodhousekeepingintheareaofthemachinesduringandaftermaintenance.
•Whenliftinganyheavyobject:
1.Ensureyoucanstandsafelywithoutslipping.
2.Distributetheweightoftheobjectequallybetweenyourfeet.
3.Useaslowliftingforce.Nevermovesuddenlyortwistwhenyouattempttolift.
4.Liftbystandingorbypushingupwithyourlegmuscles;thisactionremovesthestrainfromthe
musclesinyourback.
Attention:
Donotattempttoliftanyobjectsthatweighmorethan16kg(35lb)orobjectsthatyouthinkare
tooheavyforyou.
•Donotperformanyactionthatcauseshazardstothecustomer,orthatmakestheequipmentunsafe.
©CopyrightLenovo2015,2016
1
Page 8

•Beforeyoustartthemachine,ensurethatotherservicerepresentativesandthecustomer'spersonnelare
notinahazardousposition.
•Placeremovedcoversandotherpartsinasafeplace,awayfromallpersonnel,whileyouareservicing
themachine.
•Keepyourtoolcaseawayfromwalkareassothatotherpeoplewillnottripoverit.
•Donotwearlooseclothingthatcanbetrappedinthemovingpartsofamachine.Ensurethatyoursleeves
arefastenedorrolledupaboveyourelbows.Ifyourhairislong,fastenit.
•Inserttheendsofyournecktieorscarfinsideclothingorfastenitwithanonconductiveclip,approximately
8centimeters(3inches)fromtheend.
•Donotwearjewelry,chains,metal-frameeyeglasses,ormetalfastenersforyourclothing.
Remember:Metalobjectsaregoodelectricalconductors.
•Wearsafetyglasseswhenyouare:hammering,drilling,soldering,cuttingwire,attachingsprings,using
solvents,orworkinginanyotherconditionsthatmightbehazardoustoyoureyes.
•Afterservice,reinstallallsafetyshields,guards,labels,andgroundwires.Replaceanysafetydevice
thatiswornordefective.
•Reinstallallcoverscorrectlybeforereturningthemachinetothecustomer.
CAUTION:
Hazardousmovingparts.Keepfingersandotherbodypartsaway.
CAUTION:
Beforeyouopenthecomputercover,turnoffthecomputerandwaitseveralminutesuntilthe
computeriscool.
Electricalsafety
CAUTION:
Electricalcurrentfrompower,telephone,andcommunicationcablescanbehazardous.T oavoid
personalinjuryorequipmentdamage,disconnecttheattachedpowercords,telecommunication
systems,networks,andmodemsbeforeyouopenthecomputercovers,unlessinstructedotherwise
intheinstallationandconfigurationprocedures.
Observethefollowingruleswhenworkingonelectricalequipment.
Important:Useonlyapprovedtoolsandtestequipment.Somehandtoolshavehandlescoveredwithasoft
materialthatdoesnotinsulateyouwhenworkingwithliveelectricalcurrents.Manycustomershave,near
2ThinkCentreChromeboxHardwareMaintenanceManual
Page 9

theirequipment,rubberfloormatsthatcontainsmallconductivefiberstodecreaseelectrostaticdischarges.
Donotusethistypeofmattoprotectyourselffromelectricalshock.
•Findtheroomemergencypower-off(EPO)switch,disconnectingswitch,orelectricaloutlet.Ifanelectrical
accidentoccurs,youcanthenoperatetheswitchorunplugthepowercordquickly.
•Donotworkaloneunderhazardousconditionsornearequipmentthathashazardousvoltages.
•Disconnectallpowerbefore:
–Performingamechanicalinspection
–Workingnearpowersupplies
–RemovingorinstallingFieldReplaceableUnits(FRUs)
•Beforeyoustarttoworkonthemachine,unplugthepowercord.Ifyoucannotunplugit,poweroffthe
wallboxthatsuppliespowertothemachineandlockthewallboxintheoffposition.
•Ifyouneedtoworkonamachinethathasexposedelectricalcircuits,observethefollowingprecautions:
–Ensurethatanotherperson,familiarwiththepower-offcontrols,isnearyou.
Remember:Anotherpersonmustbetheretoswitchoffthepower,ifnecessary.
–Useonlyonehandwhenworkingwithpowered-onelectricalequipment;keeptheotherhandinyour
pocketorbehindyourback.
Remember:Theremustbeacompletecircuittocauseelectricalshock.Byobservingtheaboverule,
youmaypreventacurrentfrompassingthroughyourbody.
–Whenusingatester,setthecontrolscorrectlyandusetheapprovedprobeleadsandaccessoriesfor
thattester.
–Standonsuitablerubbermats(obtainedlocally,ifnecessary)toinsulateyoufromgroundssuchas
metalfloorstripsandmachineframes.
Observethespecialsafetyprecautionswhenyouworkwithveryhighvoltages;theseinstructionsarein
thesafetysectionsofmaintenanceinformation.Useextremecarewhenmeasuringhighvoltages.
•Regularlyinspectandmaintainyourelectricalhandtoolsforsafeoperationalcondition.
•Donotusewornorbrokentoolsandtesters.
•Neverassumethatpowerhasbeendisconnectedfromacircuit.First,checkthatithasbeenpowered-off.
•Alwayslookcarefullyforpossiblehazardsinyourworkarea.Examplesofthesehazardsaremoistfloors,
nongroundedpowerextensioncables,powersurges,andmissingsafetygrounds.
•Donottouchliveelectricalcircuitswiththereflectivesurfaceofaplasticdentalmirror.Thesurfaceis
conductive;suchtouchingcancausepersonalinjuryandmachinedamage.
•Donotservicethefollowingpartswiththepoweronwhentheyareremovedfromtheirnormaloperating
placesinamachine:
–Powersupplyunits
–Pumps
–Blowersandfans
–Motorgenerators
andsimilarunits.(Thispracticeensurescorrectgroundingoftheunits.)
•Ifanelectricalaccidentoccurs:
–Usecaution;donotbecomeavictimyourself.
–Switchoffpower.
–Sendanotherpersontogetmedicalaid.
Chapter1.Readthisfirst:Importantsafetyinformation3
Page 10

Glasspartsnotice
CAUTION:
Somepartsofyourproductmaybemadeofglass.Thisglasscouldbreakiftheproductisdropped
onahardsurfaceorreceivesasubstantialimpact.Ifglassbreaks,donottouchorattempttoremove
it.Stopusingyourproductuntiltheglassisreplacedbytrainedservicepersonnel.
Safetyinspectionguide
Theintentofthisinspectionguideistoassistyouinidentifyingpotentiallyunsafeconditionsonthese
products.Eachmachine,asitwasdesignedandbuilt,hadrequiredsafetyitemsinstalledtoprotectusers
andservicepersonnelfrominjury.Thisguideaddressesonlythoseitems.However,goodjudgmentshould
beusedtoidentifypotentialsafetyhazardsduetoattachmentoffeaturesoroptionsnotcoveredbythis
inspectionguide.
Ifanyunsafeconditionsarepresent,youmustdeterminehowserioustheapparenthazardcouldbeand
whetheryoucancontinuewithoutfirstcorrectingtheproblem.
Considertheseconditionsandthesafetyhazardstheypresent:
•Electricalhazards,especiallyprimarypower(primaryvoltageontheframecancauseseriousorfatal
electricalshock).
•Explosivehazards,suchasadamagedCRTfaceorbulgingcapacitor
•Mechanicalhazards,suchaslooseormissinghardware
Theguideconsistsofaseriesofstepspresentedinachecklist.Beginthecheckswiththepoweroff,and
thepowercorddisconnected.
Checklist:
1.Checkexteriorcoversfordamage(loose,broken,orsharpedges).
2.Power-offthecomputer.Disconnectthepowercord.
3.Checkthepowercordfor:
a.Athird-wiregroundconnectoringoodcondition.Useametertomeasurethird-wireground
continuityfor0.1ohmorlessbetweentheexternalgroundpinandframeground.
b.Thepowercordshouldbetheappropriatetypeasspecifiedinthepartslistings.
c.Insulationmustnotbefrayedorworn.
4.Removethecover.
5.Checkforanyobviousalterations.Usegoodjudgmentastothesafetyofanyalterations.
6.Checkinsidetheunitforanyobviousunsafeconditions,suchasmetalfilings,contamination,wateror
otherliquids,orsignsoffireorsmokedamage.
7.Checkforworn,frayed,orpinchedcables.
8.Checkthatthepower-supplycoverfasteners(screwsorrivets)havenotbeenremovedortamperedwith.
Handlingelectrostaticdischarge-sensitivedevices
Anycomputerpartcontainingtransistorsorintegratedcircuits(ICs)shouldbeconsideredsensitiveto
electrostaticdischarge(ESD).ESDdamagecanoccurwhenthereisadifferenceinchargebetweenobjects.
ToprotectagainstESDdamage,equalizethechargebetweenobjects.Then,themachine,thepart,the
workmat,andthepersonhandlingthepartareallatthesamecharge.
Notes:
4ThinkCentreChromeboxHardwareMaintenanceManual
Page 11

1.Useproduct-specificESDprocedureswhentheyexceedtherequirementsnotedhere.
2.MakesurethattheESDprotectivedevicesyouusehavebeencertified(ISO9000)asfullyeffective.
WhenhandlingESD-sensitiveparts:
•Keepthepartsinprotectivepackagesuntiltheyareinsertedintotheproduct.
•Avoidcontactwithotherpeoplewhilehandlingthepart.
•Wearagroundedwriststrapagainstyourskintoeliminatestaticonyourbody.
•Preventthepartfromtouchingyourclothing.Mostclothingisinsulativeandretainsachargeeven
whenyouarewearingawriststrap.
•Usetheblacksideofagroundedworkmattoprovideastatic-freeworksurface.Thematisespecially
usefulwhenhandlingESD-sensitivedevices.
•Selectagroundingsystem,suchasthoselistedbelow,toprovideprotectionthatmeetsthespecific
servicerequirement.
Note:TheuseofagroundingsystemisdesirablebutnotrequiredtoprotectagainstESDdamage.
–AttachtheESDgroundcliptoanyframeground,groundbraid,orgreen-wireground.
–UseanESDcommongroundorreferencepointwhenworkingonadouble-insulatedor
battery-operatedsystem.Youcanusecoaxorconnector-outsideshellsonthesesystems.
–Usetheroundground-prongoftheacplugonac-operatedcomputers.
Groundingrequirements
Electricalgroundingofthecomputerisrequiredforoperatorsafetyandcorrectsystemfunction.Proper
groundingoftheelectricaloutletcanbeverifiedbyacertifiedelectrician.
Safetynotices(multi-lingualtranslations)
Thecautionanddangersafetynoticesinthissectionareprovidedinthefollowinglanguages:
•English
•Arabic
•Brazilian/Portuguese
•Chinese(simplified)
•Chinese(traditional)
•French
•German
•Hebrew
•Italian
•Korean
•Spanish
DANGER
Chapter1.Readthisfirst:Importantsafetyinformation5
Page 12
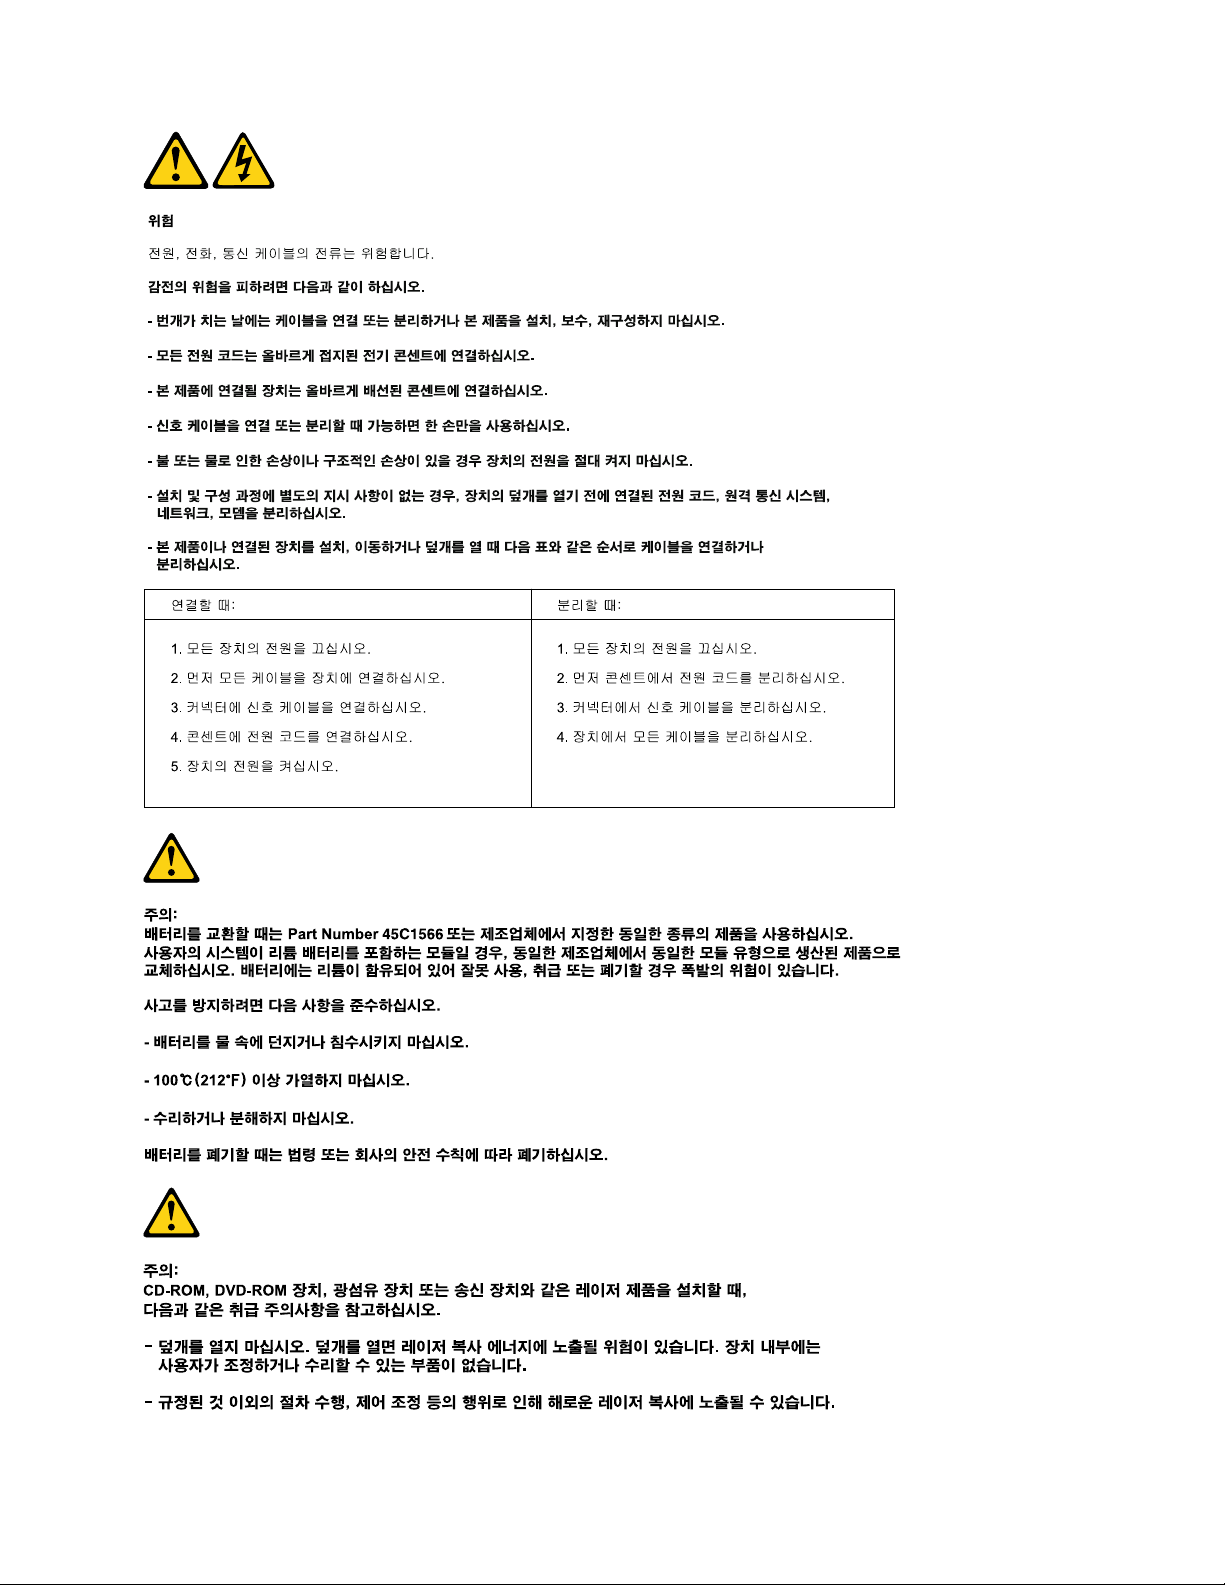
Electricalcurrentfrompower,telephoneandcommunicationcablesishazardous.
Toavoidashockhazard:
•Donotconnectordisconnectanycablesorperforminstallation,maintenance,orreconfiguration
ofthisproductduringanelectricalstorm.
•Connectallpowercordstoaproperlywiredandgroundedelectricaloutlet.
•Connecttoproperlywiredoutletsanyequipmentthatwillbeattachedtothisproduct.
•Whenpossible,useonehandonlytoconnectordisconnectsignalcables.
•Neverturnonanyequipmentwhenthereisevidenceoffire,water,orstructuraldamage.
•Disconnecttheattachedpowercords,telecommunicationssystems,networks,andmodems
beforeyouopenthedevicecovers,unlessinstructedotherwiseintheinstallationandconfiguration
procedures.
•Connectanddisconnectcablesasdescribedinthefollowingtableswheninstalling,moving,or
openingcoversonthisproductorattacheddevices.
ToConnectToDisconnect
1.TurneverythingOFF.
2.First,attachallcablestodevices.
3.Attachsignalcablestoconnectors.
4.Attachpowercordstooutlet.
5.TurndeviceON.
1.TurneverythingOFF.
2.First,removepowercordsfromoutlet.
3.Removesignalcablesfromconnectors.
4.Removeallcablesfromdevices.
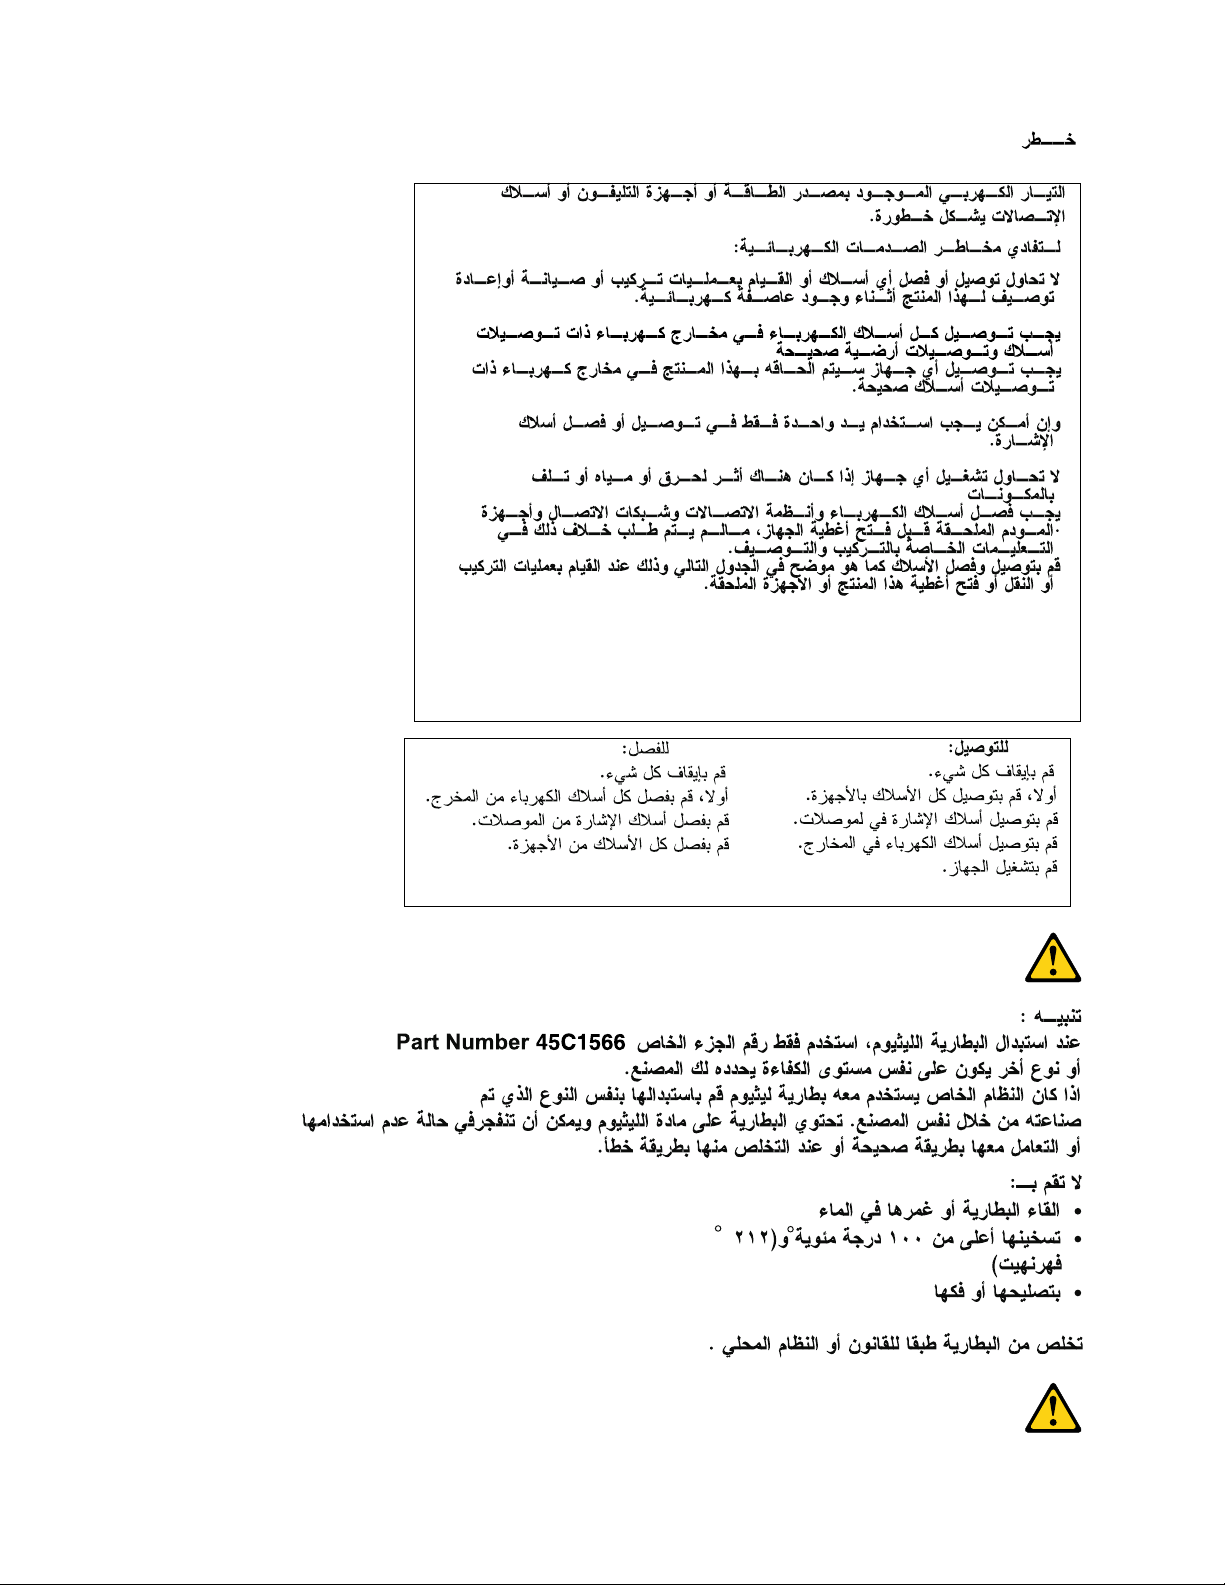
CAUTION:
Whenreplacingthelithiumbattery,useonlyPartNumber45C1566oranequivalenttypebattery
recommendedbythemanufacturer.Ifyoursystemhasamodulecontainingalithiumbattery,replace
itonlywiththesamemoduletypemadebythesamemanufacturer.Thebatterycontainslithiumand
canexplodeifnotproperlyused,handled,ordisposedof.Donot:
•Throworimmerseintowater
•Heattomorethan100°C(212°F)
•Repairordisassemble
Disposeofthebatteryasrequiredbylocalordinancesorregulations.
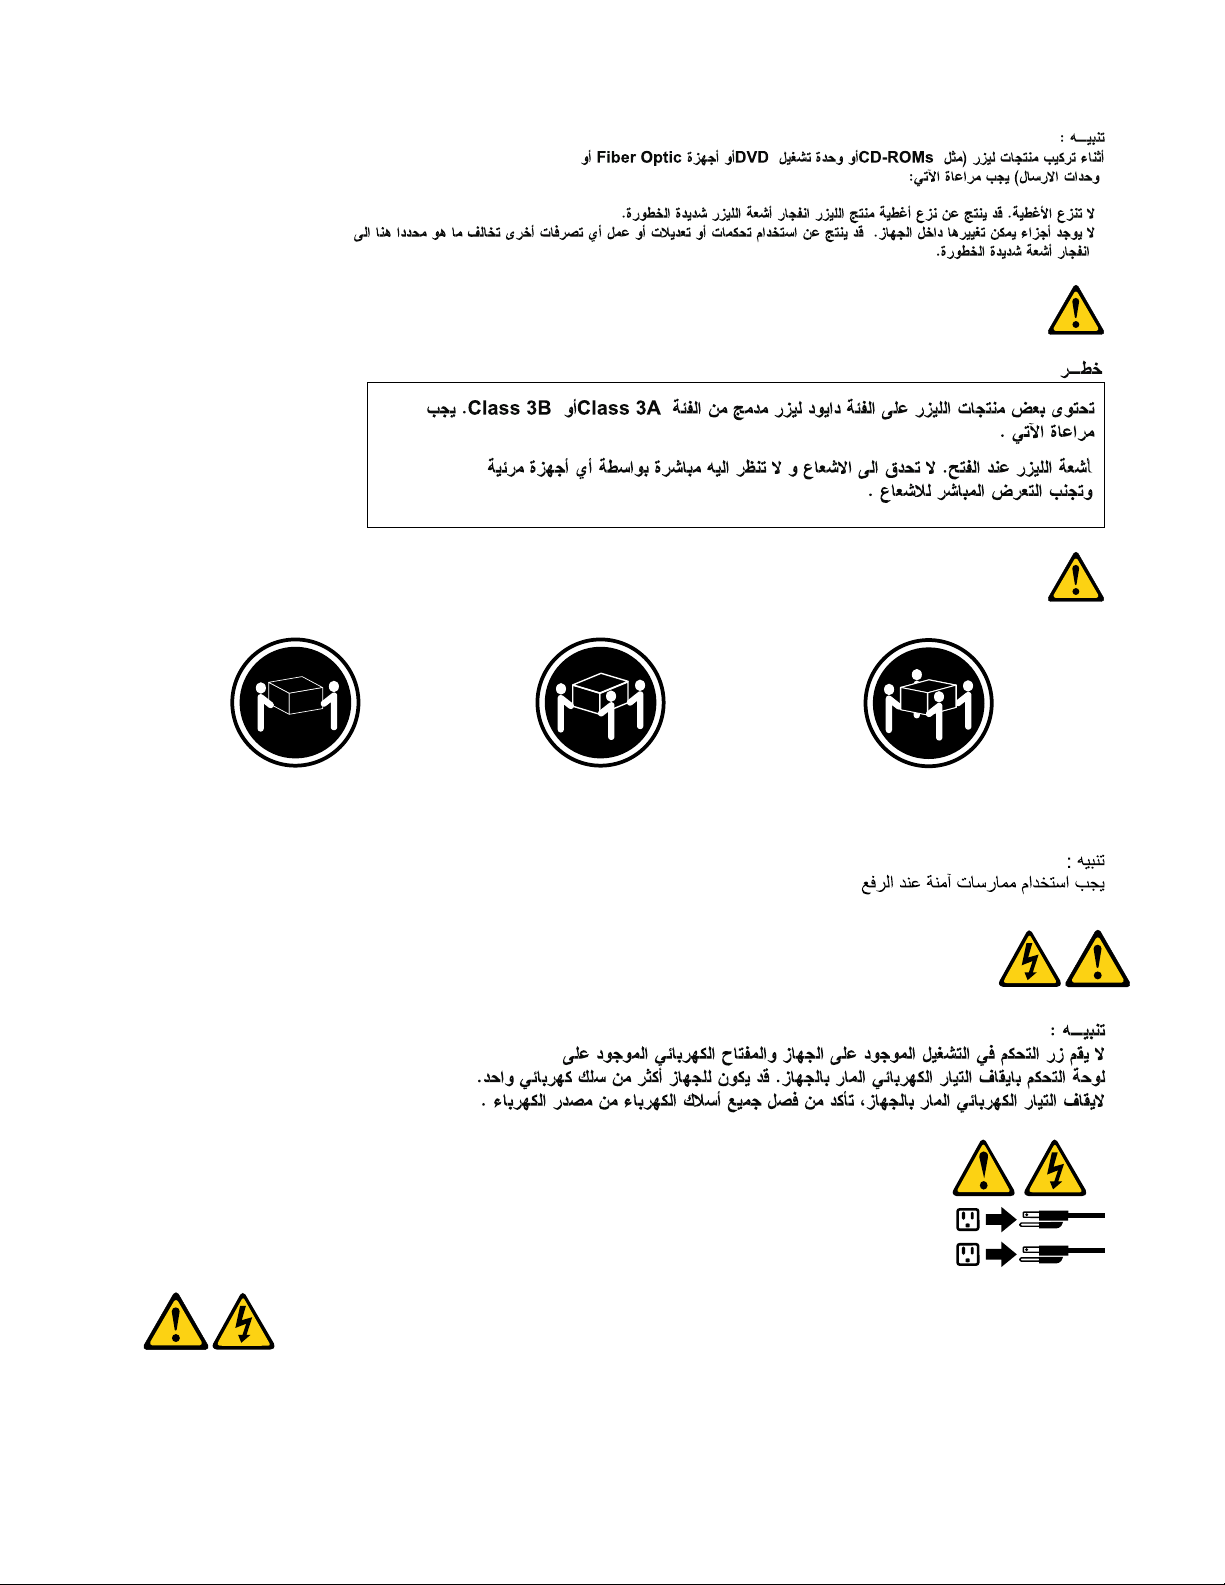
CAUTION:
Whenlaserproducts(suchasCD-ROMs,DVD-ROMdrives,fiberopticdevices,ortransmitters)are
installed,notethefollowing:
•Donotremovethecovers.Removingthecoversofthelaserproductcouldresultinexposureto
hazardouslaserradiation.Therearenoserviceablepartsinsidethedevice.
•Useofcontrolsoradjustmentsorperformanceofproceduresotherthanthosespecifiedherein
mightresultinhazardousradiationexposure.
6ThinkCentreChromeboxHardwareMaintenanceManual
Page 13
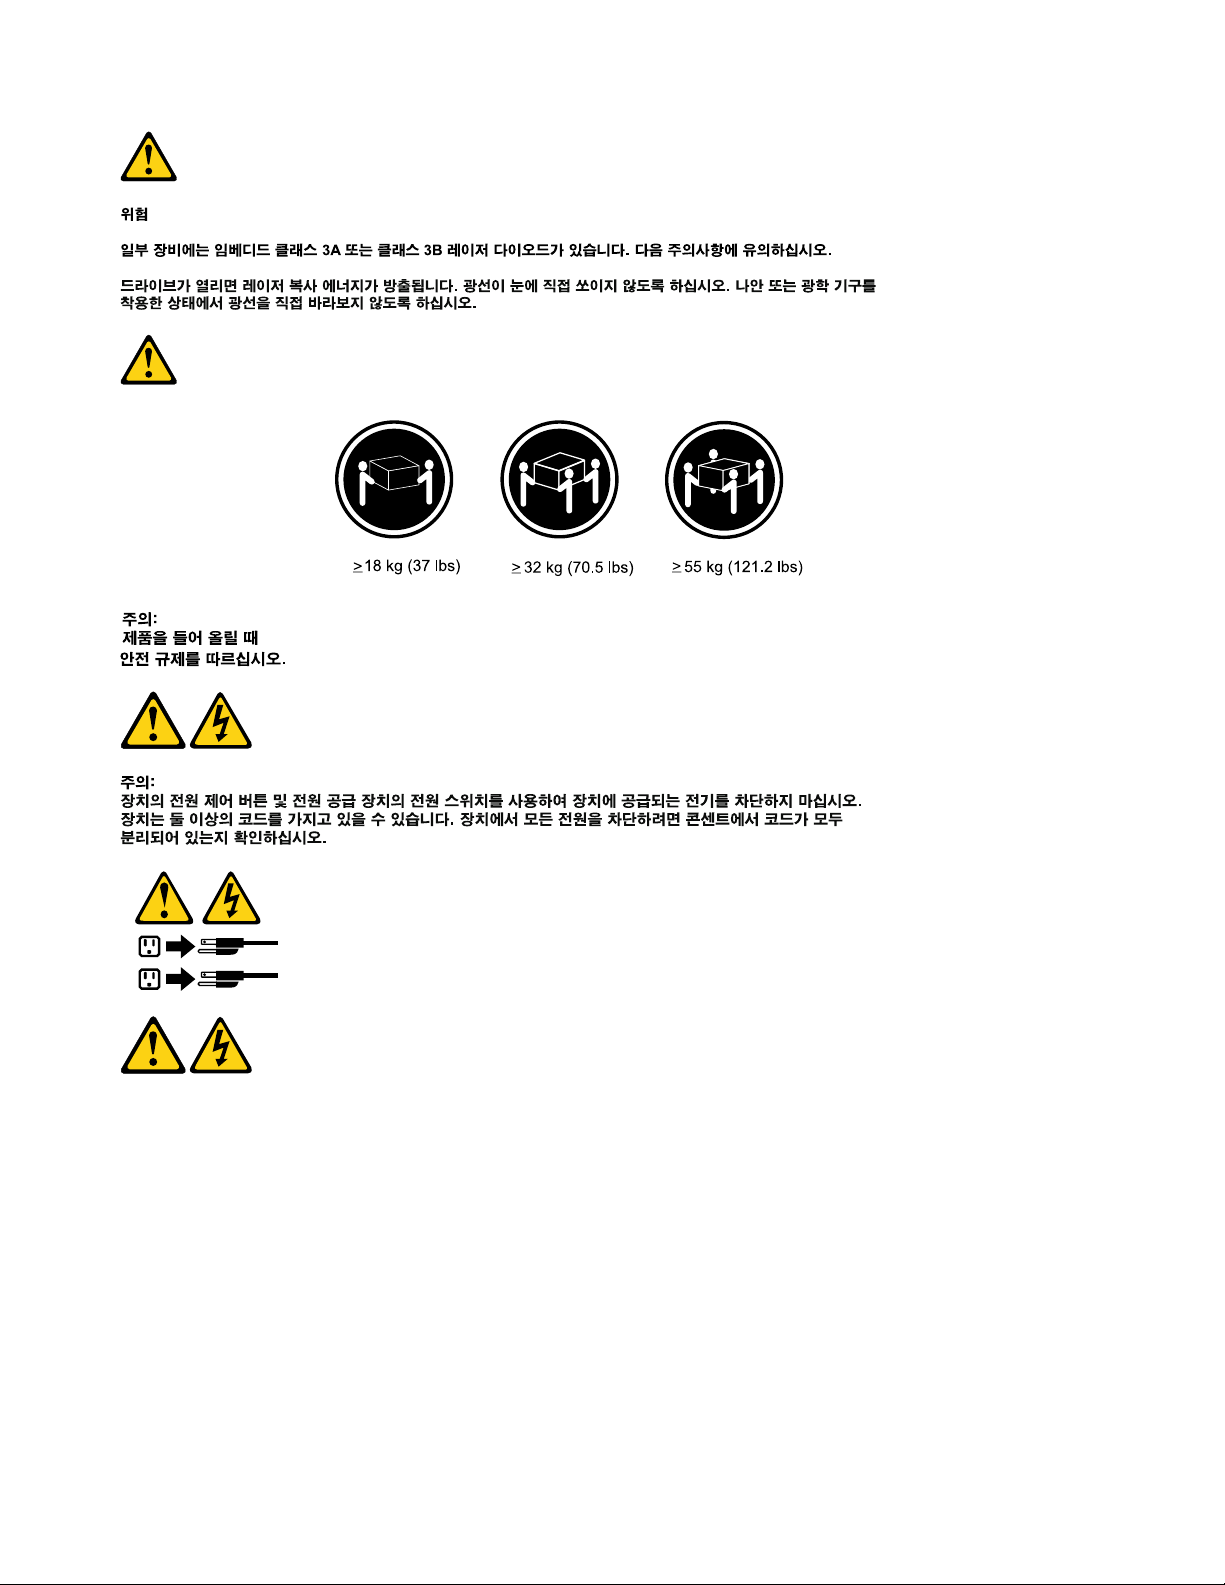
DANGER
1
2
SomelaserproductscontainanembeddedClass3AorClass3Blaserdiode.Notethefollowing:
Laserradiationwhenopen.Donotstareintothebeam,donotviewdirectlywithoptical
instruments,andavoiddirectexposuretothebeam.
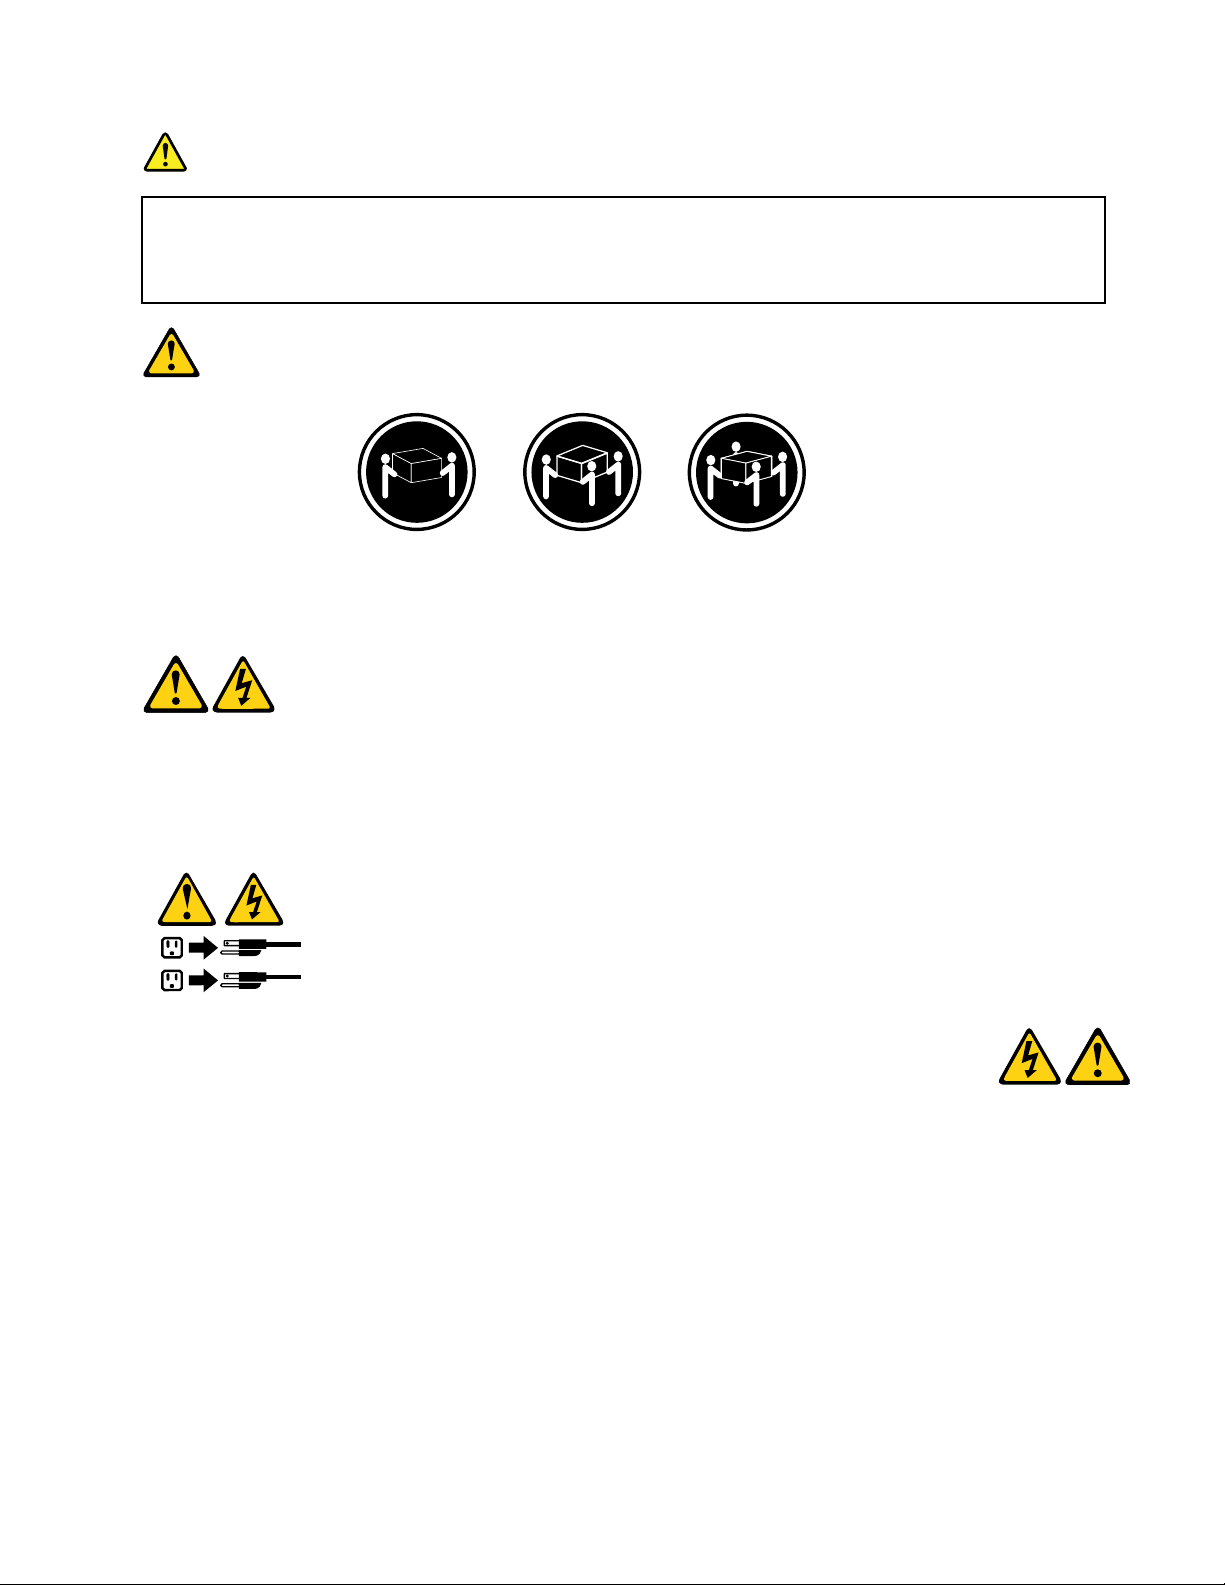
≥18kg(37lb)≥32kg(70.5lb)≥55kg(121.2lb)
CAUTION:
Usesafepracticeswhenlifting.
CAUTION:
Thepowercontrolbuttononthedeviceandthepowerswitchonthepowersupplydonotturnoff
theelectricalcurrentsuppliedtothedevice.Thedevicealsomighthavemorethanonepower
cord.Toremoveallelectricalcurrentfromthedevice,ensurethatallpowercordsaredisconnected
fromthepowersource.
Chapter1.Readthisfirst:Importantsafetyinformation7
Page 14
8ThinkCentreChromeboxHardwareMaintenanceManual
Page 15
≥18kg(37lb)≥32kg(70.5lb)≥55kg(121.2lb)
1
2
PERIGO
Acorrenteelétricaprovenientedecabosdealimentação,detelefoneedecomunicaçõeséperigosa.
Chapter1.Readthisfirst:Importantsafetyinformation9
Page 16

Paraevitarriscodechoqueelétrico:
•Nãoconectenemdesconectenenhumcaboouexecuteinstalação,manutençãooureconfiguração
desteprodutoduranteumatempestadecomraios.
•Conectetodososcabosdealimentaçãoatomadaselétricascorretamenteinstaladaseaterradas.
•Todoequipamentoqueforconectadoaesteprodutodeveserconectadoatomadascorretamente
instaladas.
•Quandopossível,utilizeapenasumadasmãosparaconectaroudesconectarcabosdesinal.
•Nuncaliguenenhumequipamentoquandohouverevidênciadefogo,águaoudanosestruturais.
•Antesdeabrirtampasdedispositivos,desconectecabosdealimentação,sistemasdetelecomunicação,
redesemodemsconectados,amenosqueespecificadodemaneiradiferentenosprocedimentosde
instalaçãoeconfiguração.
•Conecteedesconecteoscabosconformedescritonatabelaapresentadaaseguiraoinstalar,moverou
abrirtampasdesteprodutooudedispositivosconectados.
ParaConectar:ParaDesconectar:
1.DESLIGUETudo.
2.Primeiramente,conectetodososcabosaos
dispositivos.
3.Conecteoscabosdesinalaosconectores.
4.Conecteoscabosdealimentaçãoàstomadas.
5.LIGUEosdispositivos.
1.DESLIGUETudo.
2.Primeiramente,removaoscabosdealimentaçãodas
tomadas.
3.Removaoscabosdesinaldosconectores.
4.Removatodososcabosdosdispositivos.
CUIDADO:
Aosubstituirabateriadelítio,utilizeapenasumabateriacomNúmerodePeça45C1566ouumtipo
debateriaequivalenterecomendadopeloSeoseusistemapossuiummódulocomumabateriade
lítio,substitua-oapenasporummódulodomesmotipoedomesmofabricante.Abateriacontémlítio
epodeexplodirsenãoforutilizada,manuseadaoudescartadademaneiracorreta.
Não:
•Jogueoucoloquenaágua
•Aqueçaamaisde100°C(212°F)
•Consertenemdesmonte
Descarteabateriaconformerequeridopelasleisouregulamentoslocais.
PRECAUCIÓN:
Quandoprodutosalaser(comounidadesdeCD-ROMs,unidadesdeDVD-ROM,dispositivosdefibraótica
outransmissores)estivereminstalados,observeoseguinte:
•Nãoremovaastampas.Aremoçãodastampasdeumprodutoalaserpoderesultaremexposição
prejudicialàradiaçãodelaser.Nãoexistempeçasquepodemserconsertadasnointeriordodispositivo.
10ThinkCentreChromeboxHardwareMaintenanceManual
Page 17
•Autilizaçãodecontrolesouajustesouaexecuçãodeprocedimentosdiferentesdosespecificadosaqui
1
2
poderesultaremexposiçãoprejudicialàradiação.
PERIGO
AlgunsprodutosalasercontêmdiododelaserintegradodaClasse3AoudaClasse3B.Observeoseguinte:
Radiaçãoalaserquandoaberto.Nãoolhediretamenteparaofeixeaolhonuoucominstrumentosópticose
eviteexposiçãodiretaaofeixe.
≥18kg(37lb)≥32kg(70.5lb)≥55kg(121.2lb)
CUIDADO:
Utilizeprocedimentosdesegurançaparalevantarequipamentos.
CUIDADO:
Obotãodecontroledealimentaçãododispositivoeobotãoparaligar/desligardafontedealimentação
nãodesligamacorrenteelétricafornecidaaodispositivo.Odispositivotambémpodetermaisdeumcabo
dealimentação.Pararemovertodaacorrenteelétricadodispositivo,assegurequetodososcabosde
alimentaçãoestejamdesconectadosdafontedealimentação.
Chapter1.Readthisfirst:Importantsafetyinformation11
Page 18
12ThinkCentreChromeboxHardwareMaintenanceManual
Page 19

1
2
Chapter1.Readthisfirst:Importantsafetyinformation13
Page 20
1
2
14ThinkCentreChromeboxHardwareMaintenanceManual
Page 21
DANGER
Lecourantélectriqueprovenantdel'alimentation,dutéléphoneetdescâblesdetransmissionpeutprésenter
undanger.
Pourévitertoutrisquedechocélectrique:
•Nemanipulezaucuncâbleetn'effectuezaucuneopérationd'installation,d'entretienoudereconfiguration
deceproduitaucoursd'unorage.
•Brancheztouslescordonsd'alimentationsurunsocledeprisedecourantcorrectementcâbléetmisàla
terre.
•Branchezsurdessoclesdeprisedecourantcorrectementcâbléstoutéquipementconnectéàceproduit.
•Lorsquecelaestpossible,n'utilisezqu'uneseulemainpourconnecteroudéconnecterlescâbles
d'interface.
•Nemettezjamaisunéquipementsoustensionencasd'incendieoud'inondation,ouenprésencede
dommagesmatériels.
•Avantderetirerlescartersdel'unité,mettezcelle-cihorstensionetdéconnectezsescordons
d'alimentation,ainsiquelescâblesquilarelientauxréseaux,auxsystèmesdetélécommunicationetaux
modems(saufinstructioncontrairementionnéedanslesprocéduresd'installationetdeconfiguration).
•Lorsquevousinstallez,quevousdéplacez,ouquevousmanipulezleprésentproduitoudespériphériques
quiluisontraccordés,reportez-vousauxinstructionsci-dessouspourconnecteretdéconnecterles
différentscordons.
ConnexionDéconnexion
1.MettezlesunitésHORSTENSION.
2.Commencezparbranchertouslescordonssurles
unités.
3.Branchezlescâblesd'interfacesurdesconnecteurs.
4.Branchezlescordonsd'alimentationsurdesprises.
5.MettezlesunitésSOUSTENSION.
1.MettezlesunitésHORSTENSION.
2.Débranchezlescordonsd'alimentationdesprises.
3.Débranchezlescâblesd'interfacedesconnecteurs.
4.Débrancheztouslescâblesdesunités.
ATTENTION:
Remplacerlapileaulithiumusagéeparunepilederéférenceidentiqueexclusivement,(référence
45C1566),ousuivrelesinstructionsdufabricantquiendéfinitleséquivalences.Sivotresystèmeest
dotéd'unmodulecontenantunepileaulithium,vousdevezleremplaceruniquementparunmodule
identique,produitparlemêmefabricant.Lapilecontientdulithiumetpeutexploserencasde
mauvaiseutilisation,demauvaisemanipulationoudemiseaurebutinappropriée.
Nepas:
•lajeteràl'eau,
•l'exposeràdestempératuressupérieuresà100°C,
•chercheràlaréparerouàladémonter.
Nepasmettrelapileàlapoubelle.Pourlamiseaurebut,sereporteràlaréglementationenvigueur.
Chapter1.Readthisfirst:Importantsafetyinformation15
Page 22
ATTENTION:
Sidesproduitsàlaser(telsquedesunitésdeCD-ROM,deDVD-ROM,desunitésàfibresoptiques,ou
desémetteurs)sontinstallés,prenezconnaissancedesinformationssuivantes:
•Neretirezpaslecarter.Enouvrantl'unitédeCD-ROMoudeDVD-ROM,vousvousexposezau
rayonnementdangereuxdulaser.Aucunepiècedel'unitén'estréparable.
•Pourévitertoutrisqued'expositionaurayonlaser,respectezlesconsignesderéglageet
d'utilisationdescommandes,ainsiquelesprocéduresdécritesdansleprésentmanuel.
DANGER
Certainsproduitsàlasercontiennentunediodeàlaserintégréedeclasse3Aou3B.Prenez
connaissancedesinformationssuivantes:
Rayonnementlaserlorsquelecarterestouvert.Eviteztouteexpositiondirecteaurayonlaser.Evitez
deregarderfixementlefaisceauoudel'observeràl'aided'instrumentsoptiques.
≥18kg(37lb)≥32kg(70.5lb)≥55kg(121.2lb)
ATTENTION:
Soulevezlamachineavecprécaution.
ATTENTION:
L'interrupteurdecontrôled'alimentationdel'unitéetl'interrupteurdublocd'alimentationnecoupent
paslecourantélectriquealimentantl'unité.Enoutre,lesystèmepeutêtreéquipédeplusieurs
cordonsd'alimentation.Pourmettrel'unitéhorstension,vousdevezdéconnectertouslescordons
delasourced'alimentation.
16ThinkCentreChromeboxHardwareMaintenanceManual
Page 23
1
2
VORSICHT
AnNetz-,Telefon-undDatenleitungenkönnengefährlicheSpannungenanliegen.
AusSicherheitsgründen:
•BeiGewitterandiesemGerätkeineKabelanschließenoderlösen.FernerkeineInstallations-,
Wartungs-oderRekonfigurationsarbeitendurchführen.
•GerätnuraneineSchutzkontaktsteckdosemitordnungsgemäßgeerdetemSchutzkontakt
anschließen.
•AlleangeschlossenenGeräteebenfallsanSchutzkontaktsteckdosenmitordnungsgemäß
geerdetemSchutzkontaktanschließen.
•DieSignalkabelnachMöglichkeiteinhändiganschließenoderlösen,umeinenStromschlagdurch
BerührenvonOberflächenmitunterschiedlichemelektrischemPotenzialzuvermeiden.
•Geräteniemalseinschalten,wennHinweiseaufFeuer,WasseroderGebäudeschädenvorliegen.
•DieVerbindungzudenangeschlossenenNetzkabeln,Telekommunikationssystemen,Netzwerken
undModemsistvordemÖffnendesGehäuseszuunterbrechen,sofernindenInstallations-und
KonfigurationsprozedurenkeineanderslautendenAnweisungenenthaltensind.
•ZumInstallieren,TransportierenundÖffnenderAbdeckungendesComputersoderder
angeschlossenenEinheitendieKabelgemäßderfolgendenT abelleanschließenundabziehen.
ZumAnschließenderKabelgehenSiewiefolgtvorZumAbziehenderKabelgehenSiewiefolgtvor
1.SchaltenSiealleEinheitenAUS.
2.SchließenSieerstalleKabelandieEinheitenan.
3.SchließenSiedieSignalkabelandieBuchsenan.
4.SchließenSiedieNetzkabelandieSteckdosean.
5.SchaltenSiedieEinheitEIN.
1.SchaltenSiealleEinheitenAUS.
2.ZiehenSiezuerstalleNetzkabelausden
Netzsteckdosen.
3.ZiehenSiedieSignalkabelausdenBuchsen.
4.ZiehenSiealleKabelvondenEinheitenab.
CAUTION:
EineverbrauchteLithiumbatterienurdurcheineBatteriemitderTeilenummer45C1566odereine
gleichwertige,vomHerstellerempfohleneBatterieersetzen.EnthältdasSystemeinModulmiteiner
Lithiumbatterie,diesesnurdurcheinModuldesselbenTypsundvondemselbenHerstellerersetzen.
DieBatterieenthältLithiumundkannbeiunsachgemäßerVerwendung,HandhabungoderEntsorgung
explodieren.
DieBatterienicht:
•mitWasserinBerührungbringen.
Chapter1.Readthisfirst:Importantsafetyinformation17
Page 24
•über100Cerhitzen.
•reparierenoderzerlegen.
DieörtlichenBestimmungenfürdieEntsorgungvonSondermüllbeachten.
ACHTUNG:
BeiderInstallationvonLasergeräten(wieCD-ROM-Laufwerken,DVD-aufwerken,Einheitenmit
LichtwellenleitertechnikoderSendern)Folgendesbeachten:
•DieAbdeckungennichtentfernen.DurchEntfernenderAbdeckungendesLasergerätskönnen
gefährlicheLaserstrahlungenfreigesetztwerden.DasGerätenthältkeinezuwartendenTeile.
•WerdenSteuerelemente,EinstellungenoderDurchführungenvonProzedurenandersalshier
angegebenverwendet,kanngefährlicheLaserstrahlungauftreten.
VORSICHT
EinigeLasergeräteenthalteneineLaserdiodederKlasse3Aoder3B.BeachtenSieFolgendes:
LaserstrahlungbeigeöffneterVerkleidung.NichtindenStrahlblicken.KeineLupenoderSpiegel
verwenden.Strahlungsbereichmeiden.
≥18kg≥32kg≥55kg
ACHTUNG:
ArbeitsschutzrichtlinienbeimAnhebenderMaschinebeachten.
ACHTUNG:
MitdemNetzschalteranderEinheitundamNetzteilwirddieStromversorgungfürdieEinheit
nichtunterbrochen.DieEinheitkannauchmitmehrerenNetzkabelnausgestattetsein.Umdie
StromversorgungfürdieEinheitvollständigzuunterbrechen,müssenallezumGerätführenden
NetzkabelvomNetzgetrenntwerden.
18ThinkCentreChromeboxHardwareMaintenanceManual
Page 25
1
2
Chapter1.Readthisfirst:Importantsafetyinformation19
Page 26
1
2
20ThinkCentreChromeboxHardwareMaintenanceManual
Page 27
PERICOLO
Lacorrenteelettricaprovenientedaicavidialimentazione,deltelefonoedicomunicazionepuòessere
pericolosa.
Perevitareilrischiodiscosseelettriche:
•Noncollegareoscollegarequalsiasicavooppureeffettuarel'installazione,lamanutenzioneola
riconfigurazionedelprodottoduranteuntemporale.
•Collegaretuttiifilielettriciaunapresadialimentazionecorrettamentecablataedotatadimessaa
terra.
•Collegareallepreseelettricheappropriatetutteleapparecchiaturecheverrannoutilizzateper
questoprodotto.
•Sepossibile,utilizzaresolounamanopercollegareoscollegareicavidisegnale.
•Nonaccendereassolutamenteapparecchiatureinpresenzadiincendi,perdited'acquaodanno
strutturale.
•Scollegareicavidialimentazione,isistemiditelecomunicazione,leretieilmodemprimadi
aprireicoperchideldispositivo,salvoistruzionicontrarierelativealleprocedurediinstallazionee
configurazione.
•Collegareescollegareicavicomedescrittonellaseguentetabellaquandovengonoeffettuate
operazionidiinstallazione,spostamentooaperturadeicoperchidiquestoprodottoodelleunità
collegate.
PercollegarsiPerscollegarsi
1.SPEGNEREleapparecchiature.
2.Innanzitutto,collegaretuttiicavialleunità.
3.Collegareicavidisegnaleaiconnettori.
4.Collegareicavidialimentazioneallapresa.
5.Accenderel'unità.
1.SPEGNEREleapparecchiature.
2.Innanzitutto,rimuovereicavidialimentazionedalla
presa.
3.Rimuovereicavidisegnaledaiconnettori.
4.Rimuoveretuttiicavidalleunità.
ATTENZIONE:
Quandosisostituiscelabatteriaallitio,utilizzaresoloilNumeroparte45C1566ountipodibatteria
equivalenteconsigliatodalproduttore.Sesulsistemaèpresenteunmodulochecontieneunabatteria
allitio,sostituirlosoloconuntipodimodulodellostessotipodellastessacasadiproduzione.La
batteriacontienelitioepuòesplodereseusata,maneggiataosmaltitainmodononcorretto.
Non:
•Gettareoimmergerelabatterianell'acqua
•Riscaldarlaadunatemperaturasuperioreai100gradiC(212gradiF)
•Smontarla,ricaricarlaotentarediripararla
Lebatterieusatevannosmaltiteinaccordoallanormativainvigore(DPR915/82esuccessive
disposizioniedisposizionilocali).
Chapter1.Readthisfirst:Importantsafetyinformation21
Page 28
ATTENZIONE:
1
2
Quandovengonoinstallatiprodottilaser(qualiCD-ROM,unitàDVD-ROM,unitàafibreotticheo
trasmittenti),tenerpresentequantosegue:
•Nonrimuovereglisportelli.L'aperturadiun'unitàlaserpuòdeterminarel'esposizionearadiazioni
laserpericolose.All'internodell'unitànonvisonopartisucuieffettuarel'assistenzatecnica.
•L'utilizzodicontrolli,regolazioniol'esecuzionediprocedurenondescrittinelpresentemanuale
possonoprovocarel'esposizionearadiazionipericolose.
PERICOLO
AlcuneunitàlasercontengonoundiodolaserdiClasse3AoClasse3B.Tenerpresentequantosegue:
Aprendol'unitàvengonoemesseradiazionilaser.Nonfissareilfascio,nonguardarlodirettamente
construmentiotticiedevitarel'esposizionealfascio.
≥18kg≥32kg≥55kg
ATTENZIONE:
Prestareattenzionenelsollevarel'apparecchiatura.
ATTENZIONE:
Ilpulsantedicontrollodell'alimentazionepresentesull'unitàel'interruttoredell'alimentatorenon
disattivanol'alimentazionecorrentefornitaall'unità.E'possibilechel'unitàdispongadipiùcavidi
alimentazione.Perdisattivarel'alimentazionedall'unità,accertarsichetuttiicavidialimentazione
sianoscollegatidallafontedialimentazione.
22ThinkCentreChromeboxHardwareMaintenanceManual
Page 29
Chapter1.Readthisfirst:Importantsafetyinformation23
Page 30
1
2
PELIGRO
Lacorrienteeléctricaprocedentedecablesdealimentación,teléfonosycablesdecomunicaciónpuede
serpeligrosa.
Paraevitarelriesgodedescargaeléctrica:
•Noconectenidesconecteloscablesnirealiceningunatareadeinstalación,mantenimientoo
reconfiguracióndeesteproductoduranteunatormentaeléctrica.
•Conectetodosloscablesdealimentaciónatomasdecorrientedebidamentecableadasy
conectadasatierra.
•Cualquierequipoqueseconecteaesteproductotambiéndebeconectarseatomasdecorriente
debidamentecableadas.
•Siemprequeseaposible,utiliceunasolamanoparaconectarodesconectarloscablesdeseñal.
24ThinkCentreChromeboxHardwareMaintenanceManual
Page 31

•Noenciendanuncaunequipocuandohayseñalesdefuego,aguaodañosestructurales.
•Desconecteloscablesdealimentación,lossistemasdetelecomunicaciones,lasredesylos
módemsconectadosantesdeabrirlascubiertasdelosdispositivos,amenosqueseindiquelo
contrarioenlosprocedimientosdeinstalaciónyconfiguración.
•Conecteydesconecteloscables,comosedescribeenlatablasiguiente,cuandoinstale,muevao
abralascubiertasdeesteproductoodelosdispositivosconectados.
ParaconectarParadesconectar
1.APÁGUELOtodo.
2.Enprimerlugar,conectetodosloscablesalos
dispositivos.
3.Conecteloscablesdeseñalalosconectores.
4.Enchufeloscablesdealimentaciónalastomasde
corriente.
5.Enciendaeldispositivo.
1.APÁGUELOtodo.
2.Enprimerlugar,desenchufeloscablesdealimentación
delastomasdecorriente.
3.Desconecteloscablesdeseñaldelosconectores.
4.Desconectetodosloscablesdelosdispositivos.
PRECAUCIÓN:
Cuandosustituyaunabateríadelitio,utilicesolamenteunabateríanúmerodepieza45C1566uotra
detipoequivalenterecomendadaporelfabricante.Sisusistemadisponedeunmóduloquecontiene
unabateríadelitio,reemplácelosóloconelmismotipodemódulo,delmismofabricante.Labatería
contienelitioypuedeexplotarsinoseutiliza,manipulaodesechacorrectamente.
Nodebe:
•Arrojarlaalaguaosumergirlaenella
•Exponerlaatemperaturassuperioresa100°C(212°F)
•Repararlaodesmontarla
Deshágasedelabateríasegúnespecifiquenlasleyesonormaslocales.
PRECAUCIÓN:
Cuandohayaproductosláser(comounidadesdeCD-ROM,unidadesdeDVD,dispositivosdefibra
ópticaotransmisores)instalados,tengaencuentalosiguiente:
•Noquitelascubiertas.Siquitalascubiertasdelproductoláser,podríaquedarexpuestoaradiación
láserpeligrosa.Dentrodeldispositivonoexisteningunapiezaquerequieraserviciotécnico.
•Siusacontrolesoajustesorealizaprocedimientosquenoseanlosespecificadosaquí,podría
exponersearadiacionespeligrosas.
PELIGRO
Chapter1.Readthisfirst:Importantsafetyinformation25
Page 32

Algunosproductoslásertienenincorporadoundiodoláserdeclase3Aoclase3B.T engaencuentalo
1
2
siguiente:
Cuandoseabre,quedaexpuestoaradiaciónláser.Nomiredirectamentealrayoláser,nisiquieracon
instrumentosópticos,yeviteexponersedirectamentealrayoláser.
≥18kg≥32kg≥55kg
PRECAUCIÓN:
Adopteprocedimientossegurosallevantarelequipo.
PRECAUCIÓN:
Elbotóndecontroldealimentacióndeldispositivoyelinterruptordealimentacióndelafuentede
alimentaciónnodesconectanlacorrienteeléctricasuministradaaldispositivo.Además,eldispositivo
podríatenermásdeuncabledealimentación.Parasuprimirtodalacorrienteeléctricadeldispositivo,
asegúresedequetodosloscablesdealimentaciónesténdesconectadosdelatomadecorriente.
26ThinkCentreChromeboxHardwareMaintenanceManual
Page 33

Chapter2.Productoverview
Thischapterprovidesthegeneralinformationaboutyourcomputer.
Locations
Thissectionprovidesthefollowingtopics:
•“Locatingconnectors,controls,andindicatorsonthefrontofyourcomputer”onpage27
•“Locatingconnectorsontherearofyourcomputer”onpage28
•“Locatingcomponents”onpage30
•“Locatingpartsonthesystemboard”onpage32
•“Locatingthemachinetypeandmodellabel”onpage34
Note:Thecomponentsinyourcomputermightlookslightlydifferentfromtheillustrations.
Locatingconnectors,controls,andindicatorsonthefrontofyour computer
Thefollowingillustrationshowsthelocationsoftheconnectors,controls,andindicatorsonthefrontofyour
computer.
Figure1.Frontconnector,control,andindicatorlocations
©CopyrightLenovo2015,2016
27
Page 34

1Powerbutton2Powerindicator
3USB3.0connectors(2)
4Headsetconnector
•Headsetconnector
Usedtoconnectaheadsetoraheadphonetoyourcomputer.Youcanusetheheadsettorecordsounds,
usespeech-recognitionsoftware,andlistentothesoundsfromyourcomputerwithoutdisturbinganyone.
Youcanusetheheadphoneonlytolistentothesoundsfromyourcomputer.
•Powerbutton
Usedtoturnonyourcomputer.Youcanusethepowerbuttontoturnoffyourcomputeronlywhenyou
cannotuseanyGoogleChromeOS
TM
shutdownproceduretoturnoffyourcomputer.
•Powerindicator
Usedtoindicatethepowerstatus.Whentheindicatorison,thepowerissuppliedtoyourcomputer
properly.Whentheindicatorisoff,thepowercordorpoweradapterisnotconnectedorotherproblems
occur.
•USB3.0connector
UsedtoconnectadevicethatrequiresaUSB2.0orUSB3.0connection,suchasakeyboard,amouse,a
scanner,aprinter,orapersonaldigitalassistant(PDA).
Locatingconnectorsontherearofyourcomputer
Thefollowingillustrationshowsthelocationsoftheconnectorsontherearofyourcomputer.Some
connectorsontherearofyourcomputerarecolor-codedtohelpyoudeterminewheretoconnectthe
cablesonyourcomputer.
Figure2.Rearconnectorlocations
28ThinkCentreChromeboxHardwareMaintenanceManual
Page 35

1USB3.0connector
3HDMI
5Resetbutton
7DisplayPort
9Security-lockslot
TM
connector
®
connector8acpoweradapterconnector
2Ethernetconnector
4SDcardreaderslot(availableonsomemodels)
6USB3.0connector
10Wi-Fiantennaslot
•acpoweradapterconnector
Usedtoconnecttheacpoweradaptertoyourcomputerforpowersupply.
•DisplayPortconnector
Usedtoconnectahigh-performancemonitor,adirect-drivemonitor,orotherdevicesthatusea
DisplayPortconnector.
•Ethernetconnector
UsedtoconnectanEthernetcableforalocalareanetwork(LAN).
Note:TooperatethecomputerwithinFederalCommunicationsCommission(FCC)ClassBlimits,usea
Category5eorbetterEthernetcable.
•HDMIconnector
Usedtodeliveruncompressedhigh-definitionvideoandmultichanneldigitalaudiosignalsthrougha
singlecable.Ahigh-performancemonitor,adirectdrivemonitor,oranotheraudioorvideodevicethat
usesaHigh-DefinitionMultimediaInterface(HDMI)connectorcanbeattachedtothisHDMIconnector.
•Resetbutton
Usedtoputthecomputerintotherecoverymode.Formoreinformationaboutrestoringyourcomputer,
contacttheLenovoCustomerSupportCenter.
•SDcardreaderslot
Usedtoholdasecuredigital(SD)cardandmakethecardbereadbythecardreader.
•Security-lockslot
Forinformation,see“AttachingaKensington-stylecablelock”onpage43
.
•USB3.0connector
UsedtoconnectadevicethatrequiresaUSB2.0orUSB3.0connection,suchasakeyboard,amouse,a
scanner,aprinter,oraPDA.
•Wi-Fiantennaslot
UsedtoinstalltherearWi-Fiantennacableconnectorthatisavailableonlyonsomemodels.Therear
Wi-FiantennaisinstalledontherearWi-Fiantennacableconnector.
Chapter2.Productoverview29
Page 36

Locatingcomponents
Thefollowingillustrationshowsthelocationsofthevariouscomponentsinyourcomputer.Toremovethe
frontcover,see“Removingthefrontcover”onpage63.
Figure3.Componentlocations
1Frontcover
3Powercord(availableonsomemodels)4Memorymodules(2)
5Powerbuttonboard
7M.2storagedrive
9M.2Wi-Ficardmodule
2acpoweradapter(availableonsomemodels)
6Coin-cellbattery
8Systemboardframe
10Systemfan
LocatingmajorFRUsandCRUs
ThefollowingillustrationshowsthelocationsofthemajorFRUsandCustomerReplaceableUnits(CRUs)in
thecomputer.Toremovethefrontcover,see“Removingthefrontcover”onpage63.
30ThinkCentreChromeboxHardwareMaintenanceManual
Page 37

Figure4.LocatingmajorFRUsandCRUs
ThefollowingtableliststhemajorFRUsshownintheillustrationaboveandidentifieswhichFRUsare
alsoself-serviceCRUsoroptional-serviceCRUs.
Notes:
Chapter2.Productoverview31
Page 38

•Self-serviceCRUs:TheseCRUsunplugoraresecuredbynomorethantwoscrews.Examplesof
thesetypesofCRUsincludethekeyboard,themouse,anyUSBdevice,andthepowercord.Other
self-serviceCRUsdependingonproductdesignmightincludememorymodules,adaptercards,hard
diskdrives,andopticaldrives.
•Optional-serviceCRUs:TheseCRUsareisolatedpartswithinthecomputerandareconcealedbyan
accesspanelthatistypicallysecuredbymorethantwoscrews.Oncetheaccesspanelisremoved,the
specificCRUisvisible.
NumberFRUdescription
1
2
3
4
5
6
7
8
9
10
11
12
13
14
15
16
17
FrontcoverYesNo
Poweradapter(availableonsomemodels)
Powercord(availableonsomemodels)
MemorymoduleNoNo
Coin-cellbattery
FrontantennaNoNo
PowerbuttonboardNoNo
Systemboardframe
RearantennaNoNo
RearcoverNoNo
ResetbuttonboardNoNo
M.2storagedriveNoNo
M.2Wi-FicardmoduleNoNo
Systemboard
Systemfan
KeyboardYesNo
MouseYesNo
Self-serviceCRUOptional-serviceCRU
YesNo
YesNo
NoNo
NoNo
NoNo
NoNo
FordetailedFRUinformation,suchastheFRUpartnumbersandsupportedcomputermodels,goto:
http:/www.lenovo.com/serviceparts-lookup
Locatingpartsonthesystemboard
Thefollowingillustrationshowsthelocationsofthepartsonthesystemboard.
32ThinkCentreChromeboxHardwareMaintenanceManual
Page 39

Figure5.Systemboardpartlocations
1Microprocessorheatsinkassembly2Memoryslot1
3Memoryslot24Powerbuttonboardconnector
5Coin-cellbattery
7M.2Wi-Ficardslot
9Resetbuttonboardconnector10Debugconnector
6M.2storagedriveslot
8Systemfanconnector
Chapter2.Productoverview33
Page 40

Locatingthemachinetypeandmodellabel
Themachinetypeandmodellabelidentifiesyourcomputer.WhenyoucontactLenovoforhelp,themachine
typeandmodelinformationhelpssupporttechnicianstoidentifyyourcomputerandprovidefasterservice.
Themachinetypeandmodellabelisattachedonthesideofyourcomputerasshown.
Figure6.Machinetypeandmodellabel
Features
Thecomputerfeaturesintroducedinthissectioncoversavarietyofmodels.
34ThinkCentreChromeboxHardwareMaintenanceManual
Page 41

Microprocessor
•Intel
®
•IntelCore
Celeron
®
microprocessor
™
microprocessor
Memory
Yourcomputersupportstwodoubledatarate3smalloutlinedualinlinememorymodules(DDR3SODIMM).
Internaldrives
YourcomputersupportsanM.2storagedrive.
Videofeatures
•Integratedgraphicssupportsthefollowingconnectorsonyourcomputer:
–DisplayPortconnector
–HDMIconnector
Formoreinformation,see“Locatingconnectorsontherearofyourcomputer”onpage28.
Audiofeatures
Integratedaudiocontrollersupportstheheadsetconnectoronyourcomputer:
Formoreinformation,see“Locatingconnectors,controls,andindicatorsonthefrontofyourcomputer”
onpage27.
Input/Output(I/O)features
•Headsetconnector
•Displayconnectors(DisplayPortconnectorandHDMIconnector)
•Ethernetconnector
•USBconnectors
Formoreinformation,see“Locatingconnectors,controls,andindicatorsonthefrontofyourcomputer”on
page27
and“Locatingconnectorsontherearofyourcomputer”onpage28.
Powersupply
Yourcomputercomeswitha65-wattacpoweradapter.
Wirelessfeatures
Dependingonyourcomputermodel,thefollowingwirelessfeaturesaresupported:
•WirelessLAN
•Bluetooth
Chapter2.Productoverview35
Page 42

Specifications
Thissectionliststhephysicalspecificationsforyourcomputer.
Note:Lenovocomputersmeettheeco-designrequirementsoftheErPLot3regulation.Formore
information,goto:
http://www.lenovo.com/ecodeclaration
Dimensions
Width:179mm(7.05inches)
Height:34.5mm(1.36inches)
Depth:182mm(7.17inches)
Weight
Maximumconfigurationasshipped:4.86kg(10.71lb)(withpackage)
Maximumconfigurationasshipped:4.14kg(9.13lb)(withoutpackage)
Environment
•Airtemperature:
Operating:From10°C(50°F)to35°C(95°F)
Storageinoriginalshippingpackage:From-40°C(-40°F)to60°C(140°F)
Storagewithoutpackage:From-10°C(14°F)to60°C(140°F)
•Humidity:
Operating:20%–80%(non-condensing)
Storage:20%–90%(non-condensing)
•Altitude:
Operating:From-15.2m(-50ft)to3048m(10000ft)
Storage:From-15.2m(-50ft)to10668m(35000ft)
Electricalinput
Inputvoltage:From100Vacto240Vac
Inputfrequency:50/60Hz
36ThinkCentreChromeboxHardwareMaintenanceManual
Page 43

Chapter3.Usingyourcomputer
Thischapterprovidesinformationaboutthefollowingtopics:
•“Registeringyourcomputer”onpage37
•“Frequentlyaskedquestions”onpage37
Registeringyourcomputer
WhenyouregisteryourcomputerwithLenovo,youenterrequiredinformationintoaLenovodatabase.The
informationenablesLenovotocontactyouwhenthereisarecallorothersevereproblemandprovide
quickerservicewhenyoucallLenovoforhelp.Inaddition,somelocationsofferextendedprivilegesand
servicestoregisteredusers.
ToregisteryourcomputerwithLenovo,gotohttp://www.lenovo.com/registerandfollowtheinstructionson
thescreentoregisteryourcomputer.
Frequentlyaskedquestions
Thefollowingaresomeofthefrequentlyaskedquestionsandtheiranswers.Theanswerscanhelpyou
optimizetheuseofyourcomputer.
Fortheanswerstomorefrequentlyaskedquestionsaboutusingyourcomputer,goto:
http://www.lenovo.com/support/faq
HowcanIgetmyuserguideinanotherlanguage?
Theuserguideisavailableinvariouslanguagesat:
http://www.lenovo.com/UserManuals
HowcanIrestoremycomputersettings?
Incaseofanycomputerfailure,youcancontacttheLenovoCustomerSupportCenter.Forinformation
aboutcontactingtheCustomerSupportCenter,seeChapter10“Gettinginformation,help,andservice”
onpage85
FormoreinformationaboutusingandconfiguringtheChromeOSoperatingsystem,gototheGoogleWeb
siteathttp://support.google.comandthenfollowtheinstructionsonthescreen.
.
©CopyrightLenovo2015,2016
37
Page 44

38ThinkCentreChromeboxHardwareMaintenanceManual
Page 45

Chapter4.Youandyourcomputer
Thischapterprovidesinformationaboutaccessibility,comfort,andrelocatingyourcomputertoother
countriesorregions.
Accessibilityandcomfort
Goodergonomicpracticeisimportanttogetthemostfromyourpersonalcomputerandtoavoiddiscomfort.
Arrangeyourworkplaceandtheequipmentyouusetosuityourindividualneedsandthekindofwork
thatyouperform.Inaddition,usehealthyworkhabitstomaximizeyourperformanceandcomfortwhile
usingyourcomputer.
Thefollowingtopicsprovideinformationaboutarrangingyourworkarea,settingupyourcomputer
equipment,andestablishinghealthyworkhabits.
Arrangingyourworkspace
Togetthemostfromyourcomputer,arrangeboththeequipmentyouuseandyourworkareatosuityour
needsandthekindofworkyoudo.Yourcomfortisofforemostimportance,butlightsources,aircirculation,
andthelocationofelectricaloutletscanalsoaffectthewayyouarrangeyourworkspace.
Comfort
Althoughnosingleworkingpositionisidealforeveryone,hereareafewguidelinestohelpyoufinda
positionthatsuitsyoubest.
Sittinginthesamepositionforalongtimecancausefatigue.Thebackrestandseatofyourchairshould
adjustindependentlyandprovidegoodsupport.Theseatshouldhaveacurvedfronttorelievepressureon
thethighs.Adjusttheseatsothatyourthighsareparalleltothefloorandyourfeetareeitherflatonthe
floororonafootrest.
Whenusingthekeyboard,keepyourforearmsparalleltothefloorandyourwristsinacomfortableposition.
Usealighttouchonthekeyboardandyourhandsandfingersrelaxed.Changetheangleofthekeyboard
formaximumcomfortbyadjustingthepositionofthekeyboardfeet.
Adjustthemonitorsothetopofthescreenisat,orslightlybelow,eyelevel.Placethemonitorata
comfortableviewingdistance,usually51–61cm(20–24inches).Then,positionthemonitorsothatyoucan
viewitwithouttwistingyourbody.Also,positionotherequipmentyouuseregularly,suchasthetelephone
oramouse,withineasyreach.
©CopyrightLenovo2015,2016
39
Page 46

Glareandlighting
Positionthemonitortominimizeglareandreflectionsfromoverheadlights,windows,andotherlightsources.
Reflectedlightfromshinysurfacescancauseannoyingreflectionsonyourmonitorscreen.Placethe
monitoratrightanglestowindowsandotherlightsources,whenpossible.Reduceoverheadlighting,if
necessary,byturningofflightsorusinglowerwattagebulbs.Ifyouinstallthemonitornearawindow,use
curtainsorblindstoblockthesunlight.Youcanadjustthebrightnessandcontrastcontrolsonthemonitor
astheroomlightingchangesthroughouttheday.
Whereitisimpossibletoavoidreflectionsortoadjustthelighting,anantiglarefilterplacedoverthescreen
mightbehelpful.However,thesefiltersmightaffecttheclarityoftheimageonthescreen;trythemonlyafter
youhaveexhaustedothermethodsofreducingglare.
Dustbuildupcompoundsproblemsassociatedwithglare.Remembertocleanyourmonitorscreen
periodicallyusingasoftclothasdirectedinyourmonitordocumentation.
Aircirculation
Yourcomputerandmonitorproduceheat.Thecomputerhasafanthatpullsinfreshairandforcesouthot
air.Themonitorletshotairescapethroughvents.Blockingtheairventscancauseoverheating,whichmight
resultinamalfunctionordamage.Placethecomputerandmonitorsothatnothingblockstheairvents;
usually,51mm(2inches)ofairspaceissufficient.Also,ensurethattheventedairisnotblowingonpeople.
Electricaloutletsandcablelengths
Thefollowingfactorsmightdeterminethefinalplacementofyourcomputer:
•Locationofelectricaloutlets
•Lengthofpowercords
•Lengthofthecablesthatareconnectedtothemonitorandotherdevices
Whenarrangingyourworkspace:
•Avoidtheuseofextensioncords.Whenpossible,plugthecomputerpowercorddirectlyintoanelectrical
outlet.
•Keeppowercordsandcablesneatlyroutedawayfromwalkwaysandotherareaswheretheymight
getkickedaccidentally.
Formoreinformationaboutpowercords,see“Powercordsandpoweradapters”onpage1
.
Accessibilityinformation
Lenovoiscommittedtoprovidingpeoplewithdisabilitiesgreateraccesstoinformationandtechnology.
Asaresult,thefollowinginformationprovideswaystohelpusersthathavehearing,vision,andmobility
limitationsgetthemostoutoftheircomputerexperience.
Assistivetechnologiesenableuserstoaccessinformationinthemostappropriateway.Someofthese
technologiesarealreadyprovidedinyouroperatingsystem.Otherscanbepurchasedthroughvendors,or
accessedthroughtheWorldWideWebhttp://www.lenovo.com/healthycomputing.
Assistivetechnologies
SomeaccessibilitytechnologiesareavailablethroughtheAccessibilityOptionsprogram.Depending
onyouroperatingsystem,thenumberofaccessibilityoptionsavailablevaries.Ingeneral,accessibility
optionsenhancethewayuserswithhearing,vision,ormobilitylimitationsnavigateandusetheircomputer.
Forexample,someusersmightnothavethefinemotorskillsrequiredtouseamouseorselectkey
40ThinkCentreChromeboxHardwareMaintenanceManual
Page 47

combinations.Otherusersmightrequirelargerfontsorhigh-contrastdisplaymodes.Insomecases,
magnifiersandbuilt-inspeechsynthesizersareavailable.
Screen-readertechnologies
Screen-readertechnologiesareprimarilyfocusedonsoftwareprograminterfaces,helpinformationsystems,
andavarietyofonlinedocuments.Foradditionalinformationaboutscreenreaders,seethefollowing:
•UsingPDFswithscreenreaders:
http://www.adobe.com/accessibility.html?promoid=DJGVE
•UsingtheJAWSscreenreader:
http://www.freedomscientific.com/jaws-hq.asp
•UsingtheNVDAscreenreader:
http://www.nvaccess.org/
Industry-standardconnectors
Yourcomputerprovidesindustry-standardconnectorsthatenableyoutoconnectassistivedevices.
Formoreinformationaboutthelocationandfunctionoftheconnectors,seeChapter2“Productoverview”
onpage27.
Documentationinaccessibleformats
Lenovoprovideselectronicdocumentationinaccessibleformats,suchasproperlytaggedPDFfilesor
HyperTextMarkupLanguage(HTML)files.Lenovoelectronicdocumentationisdevelopedtoensure
thatvisuallyimpaireduserscanreadthedocumentationthroughascreenreader.Eachimageinthe
documentationalsoincludesadequatealternativetextsothatvisuallyimpaireduserscanunderstandthe
imagewhentheyuseascreenreader.
Movingyourcomputertoanothercountryorregion
Whenyoumoveyourcomputertoanothercountryorregion,youmusttakelocalelectricalstandards
intoconsideration.
Ifyourelocateyourcomputertoacountryorregionthatusesanelectricaloutletstyledifferentfromthe
typeyouarecurrentlyusing,youhavetopurchaseeitheranelectricalplugadapteroranewpowercord.
YoucanorderapowercorddirectlyfromLenovo.
Forpowercordinformationandpartnumbers,goto:
http://www.lenovo.com/powercordnotice
Chapter4.Youandyourcomputer41
Page 48

42ThinkCentreChromeboxHardwareMaintenanceManual
Page 49

Chapter5.Security
Thischapterprovidesinformationabouthowtoprotectyourcomputerfromtheftandunauthorizeduse.
AttachingaKensington-stylecablelock
YoucanuseaKensington-stylecablelocktosecureyourcomputertoadesk,table,orothernon-permanent
fixture.Thecablelockconnectstothesecurity-lockslotattherearofyourcomputer.Dependingonthetype
selected,thecablelockcanbeoperatedwithakeyorcombination.Thecablelockalsolocksthebuttons
usedtoopenthecomputercover.Thisisthesametypeoflockusedwithmanynotebookcomputers.Y ou
canordersuchacablelockdirectlyfromLenovobysearchingforKensingtonat:
http://www.lenovo.com/support
Figure7.Kensington-stylecablelock
©CopyrightLenovo2015,2016
43
Page 50

44ThinkCentreChromeboxHardwareMaintenanceManual
Page 51

Chapter6.Preventingproblems
Thischapterprovidesinformationthatcanhelpyouavoidcommonproblemsandkeepyourcomputer
runningsmoothly.
Basics
Herearesomebasicpointsaboutkeepingyourcomputerfunctioningproperly:
•Keepyourcomputerinaclean,dryenvironment.Ensurethatthecomputerrestsonaflat,steadysurface.
•Donotcoveranyoftheventsinthecomputerormonitor.Theseventsprovideairflowtokeepyour
computerfromoverheating.
•Keepfoodanddrinksawayfromallpartsofyourcomputer.Foodparticlesandspillsmightmakethe
keyboardandmousestickandunusable.
•Donotgetthepowerbuttonorothercontrolswet.Moisturecandamagethesepartsandcausean
electricalhazard.
•Alwaysdisconnectapowercordbygraspingthepluginsteadofthecord.
Cleaningyourcomputer
Itisagoodpracticetocleanyourcomputerperiodicallytoprotectthesurfacesandensuretrouble-free
operation.
CAUTION:
Besuretoturnoffthecomputerandmonitorbeforecleaningthecomputerandmonitorscreen.
Computer
Useonlymildcleaningsolutionsandadampclothtocleanthepaintedsurfacesofthecomputer.
Displayscreen
Dustbuildupcompoundsproblemsassociatedwithglare.Remembertocleanyourmonitorscreen
periodically.
Cleaningaflat-panelmonitorsurface
Tocleantheflexiblefilmsurfaceofaflat-panelcomputerdisplay,wipeitgentlywithasoft,drycloth,or
blowonthescreentoremovegritandotherlooseparticles.ThenmoistenaclothwithLCDcleanerand
wipethescreensurface.
Manycomputersupplystorescarrythespecialcleaningfluidsfordisplays.Usecleaningfluidsdevelopedfor
LCDdisplaysonly.Firstapplythefluidtoalint-free,softcloth,thencleantheLCDdisplay.Somecomputer
supplystorescarrypre-moistenedtowelettesforLCDmaintenance.
Cleaningaglass-screensurface
Tocleanaglass-screensurface,wipeitgentlywithasoft,drycloth,orblowonthescreentoremovegritand
otherlooseparticles.Thenuseasoftclothmoistenedwithanonabrasiveliquidglasscleaner.
©CopyrightLenovo2015,2016
45
Page 52

Movingyourcomputer
Takethefollowingprecautionsbeforemovingyourcomputer:
1.Backupallfilesanddatafromthestoragedrive.Thereareavarietyofbackupprogramsavailable
commercially.
2.Removeallmediafromyourcomputer,suchasdiscs,USBstoragedevices,memorycards,andsoon.
3.T urnoffthecomputerandallconnecteddevices.
4.Unplugthepowercordsfromelectricaloutlets.
5.Disconnectcommunicationcables,suchasmodemornetworkcables,fromtheoutletsfirst,andthen
disconnecttheotherendsfromthecomputer.
6.Notewhereanyremainingcablesareconnectedtothecomputer;then,removethem.
7.Ifyousavedtheoriginalshippingcartonsandpackingmaterials,usethemtopacktheunits.Ifyouare
usingdifferentcartons,cushiontheunitstoavoiddamage.
46ThinkCentreChromeboxHardwareMaintenanceManual
Page 53

Chapter7.Troubleshootinganddiagnostics
Thischapterprovidesinformationaboutdiagnosingandtroubleshootingcomputerproblems.Ifyour
computerproblemisnotdescribedhere,seeChapter10“Gettinginformation,help,andservice”onpage85
foradditionaltroubleshootingresources.
Basictroubleshooting
Thefollowingtableprovidessomebasicinstructionstohelpyoutroubleshootyourcomputerproblems.
Note:Ifyoucannotcorrecttheproblem,havethecomputerserviced.Foralistofserviceandsupport
telephonenumbers,refertotheSafety,Warranty,andSetupGuidethatcomeswithyourcomputerorgoto
theLenovoSupportWebsiteat:
http://www.lenovo.com/support/phone
SymptomAction
Thecomputerdoesnotstart
whenyoupressthepower
button.
Themonitorscreenisblank.Ensurethat:
Thecomputerbeepsmultiple
timesbeforetheoperating
systemstarts.
Ensurethat:
•Thepowercordiscorrectlyconnectedtotherearofthecomputerandtoa
workingelectricaloutlet.
•Ifyourcomputerhasasecondarypowerswitchontherearofthecomputer,
ensurethatitisswitchedon.
•Thepowerindicatoronthefrontofthecomputerison.
•Thecomputervoltagematchesthevoltageavailableattheelectricaloutletfor
yourcountryorregion.
•Themonitorsignalcableiscorrectlyconnectedtothemonitorandtothe
appropriatemonitorconnectoronthecomputer.
•Themonitorpowercordiscorrectlyconnectedtothemonitorandtoaworking
electricaloutlet.
•Themonitoristurnedonandthebrightnessandcontrastissetcorrectly.
•Thecomputervoltagematchesthevoltageavailableattheelectricaloutletfor
yourcountryorregion.
•Ifyourcomputerhasadiscretegraphicscardinstalled,besuretouseamonitor
connectoronthediscretegraphicscard.
Ensurethatnokeysarestuck.
Troubleshootingprocedure
Usethefollowingprocedureasastartingpointfordiagnosingproblemsyouareexperiencingwithyour
computer:
1.Ensurethatthecablesforallconnecteddevicesareconnectedcorrectlyandsecurely.
2.Ensurethatallconnecteddevicesthatrequireacpowerareconnectedtoproperlygrounded,functioning
electricaloutlets.
3.T ryusingapreviouslycapturedconfigurationtoseeifarecentchangetohardwareorsoftwaresettings
hascausedaproblem.Beforerestoringapreviousconfiguration,captureyourcurrentconfigurationin
casetheolderconfigurationsettingsdonotsolvetheproblemorhaveadverseeffects.
©CopyrightLenovo2015,2016
47
Page 54

Note:FormoreinformationaboutrestoringChromeOSoperatingsystem,gototheGoogleWebsiteat
http://support.google.comandthenfollowtheinstructionsonthescreen.
4.Ifnoneoftheseactionssolvetheproblem,seektechnicalassistance.SeeChapter10“Getting
information,help,andservice”onpage85formoreinformation.
Troubleshooting
Usethetroubleshootinginformationtofindsolutionstoproblemsthathavedefinitesymptoms.
Ifthesymptomoccurredimmediatelyafteryouinstallednewsoftwareoranewhardwareoption,dothe
followingbeforereferringtothetroubleshootinginformation:
1.Removethenewhardwareoptionorsoftware.Ifyoumustremovethecomputercovertoremovea
hardwareoption,ensurethatyoureviewandfollowtheelectricalsafetyinformationprovidedwithyour
computer.Foryoursafety,donotoperatethecomputerwiththecoverremoved.
2.Reinstallthenewhardwareoptionorsoftwarefollowingtheinstructionsprovidedbythemanufacturer.
Audioproblems
Thissectionprovidessolutionstoaudio-relatedproblems.
NoaudioinChrome
Solutions:
•IfyouareusingpoweredexternalspeakersthathaveanOn/Offcontrol,ensurethefollowing:
–TheOn/OffcontrolissettotheOnposition.
–Thespeakerpowercableisconnectedtoaproperlygrounded,functionalacelectricaloutlet.
•Ifyourexternalspeakershaveavolumecontrol,ensurethatthevolumeisnotsettoolow.
•Somemodelshaveafrontaudiopanelyoucanusetoadjustvolume.Ifyouhaveafrontaudiopanel,
ensurethatthevolumeisnotsettoolow.
•Ensurethatyourexternalspeakers(andheadphones,ifused)areconnectedtothecorrectaudio
connectoronthecomputer.Mostspeakercablesarecolor-codedtomatchtheconnector.
Note:Whenexternal-speakerorheadphonecablesareconnectedtotheaudioconnector,theinternal
speaker,ifpresent,isdisabled.Inmostcases,ifanaudioadapterisinstalledinoneoftheexpansion
slots,theaudiofunctionbuiltintothesystemboardisdisabled.Therefore,youmustusetheaudio
connectorsontheaudioadapter.
Soundcomesonlyfromoneexternalspeaker
Solutions:
•Ensurethatthespeakercableisinsertedcompletelyintotheconnectoronthecomputer.
•Ensurethatthecablethatconnectstheleftspeakertotherightspeakerissecurelyconnected.
•Ensurethatthesoundlevelsettingissetcorrectly.
Intermittentproblems
Someproblemsoccuronlyoccasionallyandaredifficulttorepeat.
Solutions:
•Ensurethatallcablesandcordsaresecurelyconnectedtothecomputerandconnecteddevices.
48ThinkCentreChromeboxHardwareMaintenanceManual
Page 55

•Ensurethatwhenthecomputerison,thefangrillisnotblocked(thereisairflowaroundthegrill),andthe
fansareworking.Ifairflowisblockedorthefansarenotworking,thecomputermightoverheat.
•IfSmallComputerSystemInterface(SCSI)devicesareinstalled,ensurethatthelastexternaldevicein
eachSCSIchainisterminatedcorrectly.Formoreinformation,seeyourSCSIdocumentation.
Monitorproblems
Thissectionprovidessolutionstomonitor-relatedproblems.
Myscreengoesblankwhilethecomputerison
Solutions:Yourscreensaverorpowermanagementmighthavebeenenabled.Dooneofthefollowing:
•Pressakeytoexitthescreensaver.
•Pressthepowerbuttontoresumethecomputerfromsleeporhibernationmode.
ThemonitorworkswhenIturnonthecomputer,butgoesblankwhenIstartsome
applicationprograms
Solutions:
•Connectthemonitorsignalcablefromyourmonitortoanappropriateconnectoronthecomputer.A
loosecablemightcauseintermittentproblems.
•Installthedevicedriversfortheapplicationprograms.Refertothedocumentationfortheaffected
applicationprogramtocheckwhetheranydevicedriversarerequired.
Theimageisdiscolored
Solution:Themonitormightbeaffectedbyinterferencefromnearbyequipment.Movefluorescentdesk
lightingoranyequipmentthatproducesmagneticfieldsfurtherawayfromthemonitor.Iftheproblem
persists,dothefollowing:
1.T urnoffthemonitor.
2.Adjusttheplacementofthemonitorandotherdevicessothattheyareatleast305mm(12inches)apart.
3.T urnonthemonitor.
Networkingproblems
Thissectionprovidessolutionstonetworking-relatedproblems.
Mycomputercannotbeconnectedtothenetwork
Solutions:
•ConnectthecablefromtheEthernetconnectortotheRJ45connectorofthehub.
•Havethelatestdevicedriverinstalledonyourcomputer.
•Setthesameduplexfortheswitchportandtheadapter.
Ifyouconfiguredtheadapterforfullduplex,ensurethattheswitchportisalsoconfiguredforfullduplex.
Settingthewrongduplexmodemightdegradeperformance,causedataloss,orresultinlostconnections.
•Installallnetworkingsoftwarethatisnecessaryforyournetworkenvironment.
CheckwithyourLANadministratorforthenecessarynetworkingsoftware.
Theadapterstopsworkingfornoreason
Solution:Thenetworkdriverfilesmightbecorruptormissing.Updatethedriverbyreferringtothe“Solution”
descriptionforthepreviousproblemtoensurethatthelatestdevicedriverisinstalled.
Chapter7.Troubleshootinganddiagnostics49
Page 56

MycomputerisaGigabitEthernetmodelandIuseaspeedof1000Mbps,butthe
connectionfailsorerrorsoccur
Solution:ConnectthenetworkcabletotheEthernetconnectorusingCategory5wiringanda100BASE-T
hub/switch(not100BASE-X).
MycomputerisaGigabitEthernetmodel,butitcannotbeconnectedtothenetwork
at1000Mbps,butatonly100Mbps
Solutions:
•Tryanothercable.
•Setthelinkpartnertoauto-negotiate.
•Settheswitchtobe802.3ab-compliant(gigabitovercopper).
IcannotconnecttoawirelessLANusingthebuilt-inwirelessnetworkingcard
Solutions:
•InstallthelatestwirelessLANdrivers.
•Placeyourcomputerwithintherangeofawirelessaccesspoint.
•Enablethewirelessradio.
•CheckNetworkName(SSID)andyourpassword.
Insufficientfreestoragedrivespace
Solution:Freeupstoragedrivespace.Cleanoutyourfoldersfromyoure-mailapplication.Thefolder
namesandproceduresvarydependingonyoure-mailapplication.Ifyouneedassistance,seethehelp
systemforyoure-mailapplication.
Serialconnectorcannotbeaccessed
Solutions:
•Connecttheserialcabletotheserialconnectoronthecomputerandtotheserialdevice.Iftheserial
devicehasitsownpowercord,connectthepowercordtoagroundedelectricaloutlet.
•Turnontheserialdeviceandkeepthedeviceonline.
•Installanyapplicationprogramssuppliedwiththeserialdevice.Refertothedocumentationthatcomes
withtheserialdeviceformoreinformation.
•Ifyouaddedoneserial-connectoradapter,installtheadaptercorrectly.
Softwareproblems
Thissectionprovidessolutionstosoftware-relatedproblems.
Whenusingasortfeature,datescannotbesortedinthecorrectorder
Solution:Someprogramsdevelopedbeforetheyear2000usedonlythelasttwodigitsofayeartosort
dates,assumingthefirsttwodigitswere19.Consequently,datescannotbesortedinthecorrectorder.
Checkwithyoursoftwaremanufacturertoseeifanyupdatesareavailable.Manysoftwaremanufacturers
makeupdatesavailablefromtheWorldWideWeb.
Someapplicationprogramsdonotworkasexpected
Solutions:
•Ifyouarehavingdifficultywithperformingaspecifictaskwithinanapplicationprogram,refertothe
helpsystemfortheprogram.
50ThinkCentreChromeboxHardwareMaintenanceManual
Page 57

•IfyouarehavingdifficultywiththeChromeOSoperatingsystemoroneofitscomponents,refertothe
ChromeOShelpinformationsystem.
•Checkwhethertheproblemsarecausedbyanewly-installedapplicationprogram.
1.Ensurethatthesoftwareiscompatiblewithyourcomputer.Refertotheinformationsuppliedwiththe
softwareformoreinformation.
2.Verifythatothersoftwareworkscorrectlyonyourcomputer.
3.Verifythatthesoftwareyouareusingworksonanothercomputer.
•Ifyoureceivedanyerrormessageswhileusingtheprogram,seetheprinteddocumentationthatcomes
withtheprogramorthehelpsystemforsolutions.
•CheckifanyupdatesareavailablefromyourmanufacturerorWebsite.Manysoftwaremanufacturers
makeupdatesavailablefromtheWorldWideWeb.
•Ifthesoftwareprogramusedtoworkcorrectly,butdoesnotworkcorrectlynow,uninstalltheapplication
programandreinstallit.
MyUSBconnectorscannotbeaccessed
Solutions:
•ConnecttheUSBcablefromtheUSBconnectortotheUSBdevice.IftheUSBdevicehasitsownpower
cord,connectthepowercordtoagroundedelectricaloutlet.
•TurnontheUSBdeviceandkeepthedeviceonline.
•InstallanydevicedriversorapplicationprogramssuppliedwiththeUSBdevice.Refertothe
documentationthatcomeswiththeUSBdeviceformoreinformation.
•DetachandreconnecttheUSBconnectortoresettheUSBdevice.
Chapter7.Troubleshootinganddiagnostics51
Page 58

52ThinkCentreChromeboxHardwareMaintenanceManual
Page 59

Chapter8.Servicecheckoutandsymptom-to-FRUindex
Thischapterprovidesinformationaboutgeneralservicecheckoutandsymptom-to-FRUindex.
Servicecheckout
Attention:Thedrivesinthecomputeryouareservicingmighthavebeenrearrangedorthedrivestartup
sequencechanged.Beextremelycarefulduringwriteoperationssuchascopying,saving,orformatting.
Dataorprogramscanbeoverwrittenifyouselectanincorrectdrive.
Generalerrormessagesappearifaproblemorconflictisfoundbyanapplicationprogram,theoperating
system,orboth.Foranexplanationofthesemessages,refertotheinformationsuppliedwiththatsoftware
package.
Problemdeterminationtips
Duetothevarietyofhardwareandsoftwarecombinationsthatcanbeencountered,usethefollowing
informationtoassistyouinproblemdetermination.Ifpossible,havethisinformationavailablewhen
requestingassistancefromServiceSupportandEngineeringfunctions.
•Machinetypeandmodel
•Processororharddiskdriveupgrades
•Failuresymptom
–Dodiagnosticsindicateafailure?
–What,when,where,single,ormultiplesystems?
–Isthefailurerepeatable?
–Hasthisconfigurationeverworked?
–Ifithasbeenworking,whatchangesweremadepriortoitfailing?
–Isthistheoriginalreportedfailure?
•Diagnosticsversion
–Typeandversionlevel
•Hardwareconfiguration
–Print(printscreen)configurationcurrentlyinuse
–BIOSlevel
•Operatingsystemsoftware
–Typeandversionlevel
Notes:Toeliminateconfusion,identicalsystemsareconsideredidenticalonlyifthey:
1.Aretheexactmachinetypeandmodels
2.HavethesameBIOSlevel
3.Havethesameadapters/attachmentsinthesamelocations
4.Havethesameaddressjumpers/terminators/cabling
5.Havethesamesoftwareversionsandlevels
6.HavethesameDiagnosticDiskettes(version)
7.Havethesameconfigurationoptionssetinthesystem
©CopyrightLenovo2015,2016
53
Page 60

8.Havethesamesetupfortheoperatingsystemcontrolfiles
Comparingtheconfigurationandsoftwareset-upbetween“workingandnon-working”systemswilloften
leadtoproblemresolution.
Symptom-to-FRUindex
TheSymptom-to-FRUindexlistserrorsymptomsandpossiblecauses.Themostlikelycauseislistedfirst.
Alwaysbeginwith“Servicecheckout”onpage53.Thisindexcanalsobeusedtohelpyoudecidewhich
FRUstohaveavailablewhenservicingacomputer.Ifyouareunabletocorrecttheproblemusingthis
index,goto“Undeterminedproblems”onpage56
Notes:
•TheSymptom-to-FRUindexisnotspecifictoanymachinetypeandareapplicabletoallThinkCentrecomputers.
•Ifyouhavebothanerrormessageandanincorrectaudioresponse,diagnosetheerrormessagefirst.
•Ifyoucannotrunthediagnostictestsorgetadiagnosticerrorcodewhenrunningatest,firstdiagnosethePOST
errormessageyoureceive.
•Ifyoudidnotreceiveanyerrormessage,lookforadescriptionofyourerrorsymptomsinthefirstpartofthisindex.
.
Powersupplyproblems
Ifyoususpectapowerproblem,usethefollowingprocedures.
Check/VerifyFRU/Action
Checkthefollowingforproperinstallation.
•Powercord
•On/Offswitchconnector
•On/Offswitchpowersupplyconnector
•Systemboardpowersupplyconnectors
•Microprocessor(s)connection
Checkthepowercordforcontinuity.
Checkthepower-onswitchforcontinuity.
Reseatconnectors
Powercord
Power-onswitch
Miscellaneouserrorconditions
Message/SymptomFRU/Action
ChangingdisplaycolorsDisplay/Monitor
Computerwillnotpower-off..1.PowerSwitch
2.SystemBoard
3.Risercard,ifinstalled.
ComputerwillnotRPLfromserver
54ThinkCentreChromeboxHardwareMaintenanceManual
1.Ensurethatnetworkisinstartupsequenceasfirst
deviceorfirstdeviceafterdiskette.
2.EnsurethatnetworkadapterisenabledforRPL.
3.Networkadapter(Advisenetworkadministratorof
newMACaddress)
Page 61

Message/SymptomFRU/Action
ComputerwillnotperformaWakeOnLAN
®
(ifapplicable)1.Checkpowersupplyandsignalcableconnections
tonetworkadapter.
2.EnsurenetworkadministratorisusingcorrectMAC
address.
3.EnsurenointerruptorI/Oaddressconflicts.
4.Networkadapter(advisenetworkadministratorof
newMACaddress)
Deadcomputer.
1.PowerSupply
2.SystemBoard
Diskettedrivein-uselightremainsonordoesnotlight
whendriveisactive.
1.DisketteDrive
2.SystemBoard
3.DisketteDriveCable
Blankscreenexceptforflashingcursor.
1.SystemBoard
2.PrimaryHardDiskDrive
3.HardDiskDriveCable
IncorrectmemorysizeduringPOST
1.RuntheMemorytests.
2.MemoryModule
3.SystemBoard
“InsertaDiskette”iconappearswithaknown-good
diagnosticsdisketteinthefirst3.5-inchdiskettedrive.
1.SystemBoard
2.DisketteDriveCable
3.NetworkAdapter
Intensityorcolorvariesfromlefttorightofcharacters
andcolorbars
1.Display
2.Videoadapter(ifpresent)
3.SystemBoard
Non-systemdiskordiskerror-typemessagewitha
known-gooddiagnosticdiskette.
1.DisketteDrive
2.SystemBoard
3.DisketteDriveCable
Otherdisplaysymptomsnotlistedabove(includingblank
orillegibledisplay)
Power-onindicatororharddiskdrivein-uselightnoton,
butcomputerworkscorrectly
1.Display
2.SystemBoard
1.Powerswitch/LEDassembly
2.SystemBoard
Printerproblems1.Printer
2.SystemBoard
Programloadsfromtheharddiskwithaknown-good
diagnosticsdisketteinthefirst3.5-inchdiskettedrive
1.RuntheSetupUtilityprogramandcheckStartup
sequence.
2.DisketteDrive
3.DisketteDriveCable
4.SystemBoard
5.PowerSupply
Chapter8.Servicecheckoutandsymptom-to-FRUindex55
Page 62

Message/SymptomFRU/Action
RPLcomputercannotaccessprogramsfromitsownhard
disk.
RPLcomputerdoesnotRPLfromserver
Serialorparallelconnectordevicefailure(systemboard
connector)
Serialorparallelconnectordevicefailure(adapter
connector)
Someorallkeysonthekeyboarddonotwork
1.IfnetworkadministratorisusingLCCMHybridRPL,
checkstartupsequence:
a.Firstdevice-network
b.Seconddevice-harddisk
2.Harddiskdrive
1.Checkstartupsequence.
2.CheckthenetworkadapterLEDstatus.
1.ExternalDeviceSelf-TestOK?
2.ExternalDevice
3.Cable
4.SystemBoard
1.ExternalDeviceSelf-TestOK?
2.ExternalDevice
3.Cable
4.AlternateAdapter
5.SystemBoard
1.Keyboard
2.KeyboardCable
3.SystemBoard
Undeterminedproblems
Thissectionprovidesinstructionsonhowtofindoutthefailingdevicesoradapters.
1.Power-offthecomputer.
2.Removeordisconnectthefollowingcomponents(ifinstalled)oneatatime.
a.Anyadapters
b.Diskettedrive
c.ExternalCache
d.ExternalCacheRAM
e.Externaldevices(modem,printer,ormouse)
f.Extendedvideomemory
g.Memorymodules
h.Storagedrive
3.Power-onthecomputertore-testthesystem.
4.Repeatsteps1through3untilyoufindthefailingdeviceoradapter.
Ifalldevicesandadaptershavebeenremoved,andtheproblemcontinues,replacethesystemboard.See
“Replacingthesystemboard”onpage79.
OverviewoftheUSBrecoveryshim
YoucanuseaUSBrecoveryshim(hereafterreferredtoastherecoveryshim)asarecoverysolutioninthe
ChromeOSoperatingsystem.
56ThinkCentreChromeboxHardwareMaintenanceManual
Page 63

Therecoveryshimisabootabledevicethatisrequiredtoservicethecomputer.Therecoveryshimis
usedforthefollowingpurposes:
•Diagnoseproblemsandrestorethesystemtothefactory-defaultsettings.
•Refreshthesystemwiththelatestfirmwareandsoftware.
TherecoveryshimisnotnecessarywhenaCustomerReplaceableUnit(CRU)isreplaced.Ifanon-CRUis
broken,orthereisastrongsuspicionthataparticularnon-CRUisdefective,itcanbereplaceddirectly.
Otherwise,therecoveryshimmustbeusedtodiagnoseproblemsbeforeanynon-CRUisreplaced.
ThefollowingisthelistofCRUsforyourcomputer:
1.Frontcover
2.Keyboard
3.Mouse
4.Poweradapter
5.Powercord
ForthedefinitionofCRUs,see“LocatingmajorFRUsandCRUs”onpage30.
Creatingtherecoveryshim
Tocreatearecoveryshim,dothefollowing:
1.PrepareaUSBstoragedevicewithatleast8gigabytes(GB)space.TherequiredUSBstoragecapacity
dependsonthesizeoftherecoveryimage.
Attention:CreatingtherecoveryshimwilldeletealldatastoredontheUSBdevice.T oavoiddata
loss,backupallthedatathatyouwanttokeep.
2.DownloadlatestversionoftherecoveryshimimagefromtheLenovoSupportWebsiteat
http://www.lenovo.com/supporttocreatearecoveryshim.ALenovoservicecredentialisrequired.
Note:Ensurethatyoucreatetherecoveryshimusingthelatestversionoftherecoveryshimimage.
Usinganearlierversionmightcausetherecoveryprocesstofail.
3.Extractthedownloadedfilethatcontainstherecoveryshimimage.
4.DownloadtheWin32DiskImagertoolfromhttp://sourceforge.net/projects/win32diskimager/.
5.Runtheimagertoolandfollowtheon-screeninstructionstocreatetherecoveryshim.
Note:Afterusingtherecoveryshim,ifyouwanttorestorenormalusageoftheUSBstoragedevice,youwill
needtoformatthedevice.Otherwise,youcannotusethestoragespaceonthedevice.
Enablingordisablingthewrite-protectfunction
Bydefault,theon-boardRead-OnlyMemories(ROMs)aresettobewrite-protected.Beforerefreshing
theChromeboxfirmware,settheROMstobeunprotectedbydisablingthewrite-protectfunctiononthe
systemboard.
Toenableordisablethewrite-protectfunction,dothefollowing:
1.T urnoffthecomputer.
2.Removeanymediafromthedrivesandturnoffallconnecteddevicesandthecomputer.Then,
disconnectallpowercordsfromelectricaloutletsanddisconnectallcablesthatareconnectedtothe
computer.
3.Removethefrontcover.See“Removingthefrontcover”onpage63.
Chapter8.Servicecheckoutandsymptom-to-FRUindex57
Page 64

4.Thescrew1onthesystemboardisthewrite-protectscrew.Todisablethewrite-protectionfunction,
removethescrew.Otherwise,installthescrewtoenablethewrite-protectionfunction.
Figure8.Locatingthewrite-protectscrew
5.Installthefrontcover.See“Removingthefrontcover”onpage63.
Usingtherecoveryshim
Tousetherecoveryshimthatyouhavecreated,dothefollowing:
1.ConnecttheHDMIcabletotheHDMIconnectoronthecomputerandtooneexternalmonitor.Then,
connecttheDisplayPortcabletotheDisplayPortconnectoronthecomputerandtoanotherexternal
monitor.
2.Disablethewrite-protectfunction.See“Enablingordisablingthewrite-protectfunction”onpage57.
3.Attachtheacpoweradaptertothepowerconnectoronthecomputer.
4.Insertthepointedendofapaperclipintotheresetbuttonholeattherearofthecomputer.While
pressingthepaperclip,pressthepowerbuttontoturnonthecomputer.Releasethepowerbuttonand
thenreleasetheresetbutton.Then,therecoverymodescreenwillbedisplayed.
5.PressCTRL+Dtoenterrecoverymode.
6.Insertthepointedendofapaperclipintotheresetbuttonholeattherearofthecomputer.Then,
releasetheresetbutton.
7.Poweroffthecomputer.
8.Plug-inUSBkeywithRMAshimimage.
9.Insertthepointedendofapaperclipintotheresetbuttonholeattherearofthecomputer.While
pressingthepaperclip,pressthepowerbuttontoturnonthecomputer.Releasethepowerbuttonand
thenreleasetheresetbutton.
10.Enter“I”toinstalltheimage.Youwillseevariousprogressindicatorsduringthistime.
58ThinkCentreChromeboxHardwareMaintenanceManual
Page 65

Note:Oncetheprocesscompletes,youwillsee“Waitingfordevice...”onthescreen.Waitforthe
“CrOSFactory”screentoappearbeforeremovingtheUSBkey.
11.Aftertheupdateprocessfinishes,thecomputerwillenterthefactory-test-imageenvironment.Ifthe
factorytestrevealsadefectivecomponentonyourcomputer,turnoffthecomputer,disconnectthe
acpoweradapter,andthenreplacethedefectivecomponent.Forinformationaboutthereplacement
procedure,seeChapter9“Installingorreplacinghardware”onpage61
.
12.Enablethewrite-protectfunction.See“Enablingordisablingthewrite-protectfunction”onpage57.
13.T urnonthecomputer.Thecomputerentersthefactory-test-imageenvironmentagain.Itis
recommendedthatyoure-runanyfailedtestsandRunintestsuntilthetestscanbecompleted
successfullytoensurethatnewcomponentsfunctioncorrectly.
14.RuntheGoogleRequiredTeststesttorestoretheoperatingsystemtothefactorydefaultsettings.After
thetest,allthedatastoredonthecomputerwillbedeletedandthecomputerwillbeturnedoff.If
theGoogleRequiredTeststestfails,refertothecommonmistakesthatleadtoGoogleRequiredTests
testfailurein“Factorytestitems”onpage59
.
Note:TheGoogleRequiredTeststestcanbeforcedtofinalizebypressingf.Forcethe
GoogleRequiredTeststesttofinalizeonlywhenthetesthastobebypassedbecauseitcannotbe
performed.
15.Aftertherecovery,theChromeOSoperatingsystemisinacleanout-of-the-boxstate.Inorderto
turnonthecomputer,attachtheacpoweradaptertothepowerconnectoronthecomputerfirst.If
applicable,customersmustre-enrollthesystemforenterpriseenrollment.
Factorytestitems
Afterthesystementersthefactory-test-imageenvironment,factorytestitemswillrun.Thefactorytest
processcontainsthefollowingthreetypesoftests:
1.FATPTest:Thistestchecksanindividualcomponenttoverifyitsfunction,suchastheTPM,display,
audio,camera,keyboard,andothercomponents.ItisrecommendedthatyouruntheFATPtestonyour
computer,especiallyafteryoureplaceahardwarecomponent.SometestitemsmightrequireanHDMI
monitororanSDcard.Ifthedevicesarenotavailable,thetestitemscanbebypassed,butwiththe
overalltestmarkedasfailed.Inthiscase,youneedtoforcetheGoogleRequiredTeststesttoendin
ordertocompletetheservicingofthecomputer.
2.RuninTest:Thistestcheckshowthesystemfunctionsunderstressbyrunningthemaximumworkload
applications.TheRunintestincludesthetestofmemory,microprocessor,andgraphicscard.
3.GoogleRequiredT ests:Thistestchecksthestatusofthecurrentoperatingsystemandhelpsrestorethe
operatingsystemtothefactorydefaultsettings.Ifanytestitemfails,theoperatingsystemmightnotbe
restored.ThefollowinglistshowssomecommonmistakesthatleadtoGoogleRequiredTeststestfailure:
•HWIDmismatch:EachChromeboxhasaknownhardwareconfiguration.Eachconfigurationis
assignedanHWID.UnauthorizedpartsormissingpartsonthecomputermightresultinHWID
mismatch.
•Write-protectfunctionisoff:TheChromeOSrecoveryisnotcompleteduntilthewrite-protect
functionisenabled.
Chapter8.Servicecheckoutandsymptom-to-FRUindex59
Page 66

60ThinkCentreChromeboxHardwareMaintenanceManual
Page 67

Chapter9.Installingorreplacinghardware
Thischapterprovidesinstructionsonhowtoinstallorreplacehardwareforyourcomputer.
Handlingstatic-sensitivedevices
Donotopenthestatic-protectivepackagecontainingthenewpartuntilthedefectiveparthasbeenremoved
andyouarereadytoinstallthenewpart.Staticelectricity,althoughharmlesstoyou,canseriouslydamage
computercomponentsandparts.
Whenyouhandlepartsandothercomputercomponents,taketheseprecautionstoavoidstatic-electricity
damage:
•Limityourmovement.Movementcancausestaticelectricitytobuilduparoundyou.
•Alwayshandlepartsandothercomputercomponentscarefully.HandlePCIcards,memorymodules,
systemboards,andmicroprocessorsbytheedges.Nevertouchanyexposedcircuitry.
•Preventothersfromtouchingthepartsandothercomputercomponents.
•Touchthestatic-protectivepackagecontainingtheparttoametalexpansion-slotcoverorother
unpaintedmetalsurfaceonthecomputerforatleasttwoseconds.Thisreducesstaticelectricityfrom
thepackageandyourbodybeforeyouinstallorreplaceanewpart.
•Whenpossible,removethenewpartfromthestatic-protectivepackage,andinstallitdirectlyinthe
computerwithoutsettingthepartdown.Whenthisisnotpossible,placethestatic-protectivepackage
thatthepartcameinonasmooth,levelsurfaceandplacethepartonthepackage.
•Donotplacethepartonthecomputercoverorothermetalsurface.
Installingorreplacinghardware
Thissectionprovidesinstructionsonhowtoinstallorreplacehardwareforyourcomputer.Youcanexpand
thecapabilitiesofyourcomputerandmaintainyourcomputerbyinstallingorreplacinghardware.
Attention:DonotopenyourcomputerorattemptanyrepairbeforereadingandunderstandingtheChapter
1“Readthisfirst:Importantsafetyinformation”onpage1.
Notes:
•UseonlycomputerpartsprovidedbyLenovo.
•Wheninstallingorreplacinganoption,usetheappropriateinstructionsinthissectionalongwiththe
instructionsthatcomewiththeoption.
Installingexternaloptions
Youcanconnectexternaloptionstoyourcomputer,suchasexternalspeakers,aprinter,orascanner.For
someexternaloptions,youmustinstalladditionalsoftwareinadditiontomakingthephysicalconnection.
Wheninstallinganexternaloption,see“Locatingconnectors,controls,andindicatorsonthefrontofyour
computer”onpage27
requiredconnector.Usetheinstructionsshippedwiththeoptiontohelpyoumaketheconnectionandinstall
anysoftwareordevicedriversthatarerequiredfortheoption.
and“Locatingconnectorsontherearofyourcomputer”onpage28toidentifythe
Replacingtheacpoweradapter
Attention:DonotopenyourcomputerorattemptanyrepairbeforereadingandunderstandingtheChapter
1“Readthisfirst:Importantsafetyinformation”onpage1
.
©CopyrightLenovo2015,2016
61
Page 68

CAUTION:
Beforeyouopenthefrontcover,turnoffthecomputerandwaitseveralminutesuntilthecomputeris
cool.
Toreplacetheacpoweradapter,dothefollowing:
1.Removeanymediafromthedrivesandturnoffallconnecteddevicesandthecomputer.Then,
disconnectallpowercordsfromelectricaloutletsanddisconnectallcablesthatareconnectedtothe
computer.See“Locatingconnectors,controls,andindicatorsonthefrontofyourcomputer”onpage
and“Locatingconnectorsontherearofyourcomputer”onpage28.
27
2.Removethepoweradaptercablefromtheacpoweradaptercableloopattherearofthecomputerand
thendisconnecttheacpoweradapterfromthecomputer.
Figure9.Removingtheacpoweradapter
3.Connectanewacpoweradaptertotheacpoweradapterconnectorattherearofyourcomputeranda
workableelectricaloutlet.Then,securethepoweradaptercableintothepoweradaptercableloopat
therearofthecomputerasshown.
62ThinkCentreChromeboxHardwareMaintenanceManual
Page 69

Figure10.Installingtheacpoweradapter
Removingthefrontcover
Attention:DonotopenyourcomputerorattemptanyrepairbeforereadingandunderstandingtheChapter
1“Readthisfirst:Importantsafetyinformation”onpage1.
CAUTION:
Beforeyouopenthefrontcover,turnoffthecomputerandwaitseveralminutesuntilthecomputeris
cool.
Toremovethefrontcover,dothefollowing:
1.Removeanymediafromthedrivesandturnoffallconnecteddevicesandthecomputer.Then,
disconnectallpowercordsfromelectricaloutletsanddisconnectallcablesthatareconnectedtothe
computer.See“Locatingconnectors,controls,andindicatorsonthefrontofyourcomputer”onpage
27and“Locatingconnectorsontherearofyourcomputer”onpage28.
2.Unlockanylockingdevicethatsecuresthefrontcover.SeeChapter5“Security”onpage43.
Chapter9.Installingorreplacinghardware63
Page 70

3.Removethescrewthatsecuresthefrontcover.
Figure11.Removingthescrewthatsecuresthefrontcover
64ThinkCentreChromeboxHardwareMaintenanceManual
Page 71

4.Slidethefrontcovertothefrontofthecomputer.Then,liftthefrontcovertoremoveitfromthecomputer.
Figure12.Removingthefrontcover
Replacingthesystemfan
Attention:DonotopenyourcomputerorattemptanyrepairbeforereadingandunderstandingtheChapter
1“Readthisfirst:Importantsafetyinformation”onpage1.
Toreplacethesystemfan,dothefollowing:
1.Removeanymediafromthedrivesandturnoffallconnecteddevicesandthecomputer.Then,
disconnectallpowercordsfromelectricaloutletsanddisconnectallcablesthatareconnectedtothe
computer.
2.Removethefrontcover.See“Removingthefrontcover”onpage63.
3.Disconnectthesystemfancablefromthesystemfanconnectoronthesystemboard.See“Locating
partsonthesystemboard”onpage32.
Chapter9.Installingorreplacinghardware65
Page 72

4.Removethefourscrewsthatsecurethesystemfan,andthenremovethesystemfanasshown.
Figure13.Removingthesystemfan
5.Positionanewsystemfanasshown,andalignthefourscrewholesinthesystemfanwiththe
correspondingmountingstudsonthesystemboard.Then,installthefourscrewstosecurethesystem
fantothesystemboard.
Figure14.Installingthesystemfan
6.Connectthesystemfancabletothesystemfanconnectoronthesystemboard.See“Locatingpartson
thesystemboard”onpage32.
Whattodonext:
•Toworkwithanotherpieceofhardware,gototheappropriatesection.
•Tocompletetheinstallationorreplacement,goto“Completingthepartsreplacement”onpage81.
Replacingamemorymodule
Attention:DonotopenyourcomputerorattemptanyrepairbeforereadingandunderstandingtheChapter
1“Readthisfirst:Importantsafetyinformation”onpage1.
66ThinkCentreChromeboxHardwareMaintenanceManual
Page 73

YourcomputerhastwoslotsforinstallingorreplacingDDR3SODIMMsthatprovideuptoamaximumof8
GBsystemmemory.Wheninstallingorreplacingamemorymodule,use2GBor4GBDDR3SODIMMsin
anycombinationuptoamaximumof8GB.
Note:Whenthereisonlyonememorymoduleonyoucomputer,ensurethatthememorymoduleisinstalled
inthememoryslot1.
Toreplaceamemorymodule,dothefollowing:
1.Removeanymediafromthedrivesandturnoffallconnecteddevicesandthecomputer.Then,
disconnectallpowercordsfromelectricaloutletsanddisconnectallcablesthatareconnectedtothe
computer.
2.Removethefrontcover.See“Removingthefrontcover”onpage63.
3.Laythecomputeronitssideforeasieraccesstothesystemboard.
4.Locatethememoryslot.See“Locatingpartsonthesystemboard”onpage32.
5.Opentheretainingclipsandgentlypullthememorymoduleoutofthememoryslot.
Figure15.Removingamemorymodule
6.Positionanewmemorymoduleoverthememoryslot.Ensurethatthenotch1onthememorymodule
alignscorrectlywiththeslotkey2onthesystemboard.Pushthememorymodulestraightdowninto
theslotuntiltheretainingclipsclose.
Figure16.Installingamemorymodule
Whattodonext:
•Toworkwithanotherpieceofhardware,gototheappropriatesection.
•Tocompletetheinstallationorreplacement,goto“Completingthepartsreplacement”onpage81
.
Chapter9.Installingorreplacinghardware67
Page 74

Replacingthesystemboardframe
Attention:DonotopenyourcomputerorattemptanyrepairbeforereadingandunderstandingtheChapter
1“Readthisfirst:Importantsafetyinformation”onpage1.
CAUTION:
Thesystemfanmightbeveryhot.Beforeyouopenthefrontcover,turnoffthecomputerandwait
severalminutesuntilthecomputeriscool.
Toreplacethesystemboardframe,dothefollowing:
1.Removeanymediafromthedrivesandturnoffallconnecteddevicesandthecomputer.Then,
disconnectallpowercordsfromelectricaloutletsanddisconnectallcablesthatareconnectedtothe
computer.
2.Removethefrontcover.See“Removingthefrontcover”onpage63.
3.Laythecomputeronitssideforeasieraccesstothesystemboard.
4.Removethetwoscrewsthatsecurethesystemboardframe.Slidethesystemboardframeasshownto
unlockit,andthenliftthesystemboardframetoremoveitfromthesystemboard.
Figure17.Removingthesystemboardframe
68ThinkCentreChromeboxHardwareMaintenanceManual
Page 75

5.Positionanewsystemboardframeonthesystemboardsothatthetwoholesonthesystemboard
framearealignedwiththestandoffsonthesystemboard.Slidethesystemboardframeasshownuntil
thetwoscrewholes1arealignedwiththecorrespondingmountingstudsonthesystemboard.
Figure18.Installingthesystemboardframe
6.Installthetwoscrewstosecurethesystemboardframe.
Figure19.Installingthescrewstosecurethesystemboardframe
Whattodonext:
•Toworkwithanotherpieceofhardware,gototheappropriatesection.
•Tocompletetheinstallationorreplacement,goto“Completingthepartsreplacement”onpage81.
Replacingthepowerbuttonboard
Attention:DonotopenyourcomputerorattemptanyrepairbeforereadingandunderstandingtheChapter
1“Readthisfirst:Importantsafetyinformation”onpage1.
Toreplacethepowerbuttonboard,dothefollowing:
Chapter9.Installingorreplacinghardware69
Page 76
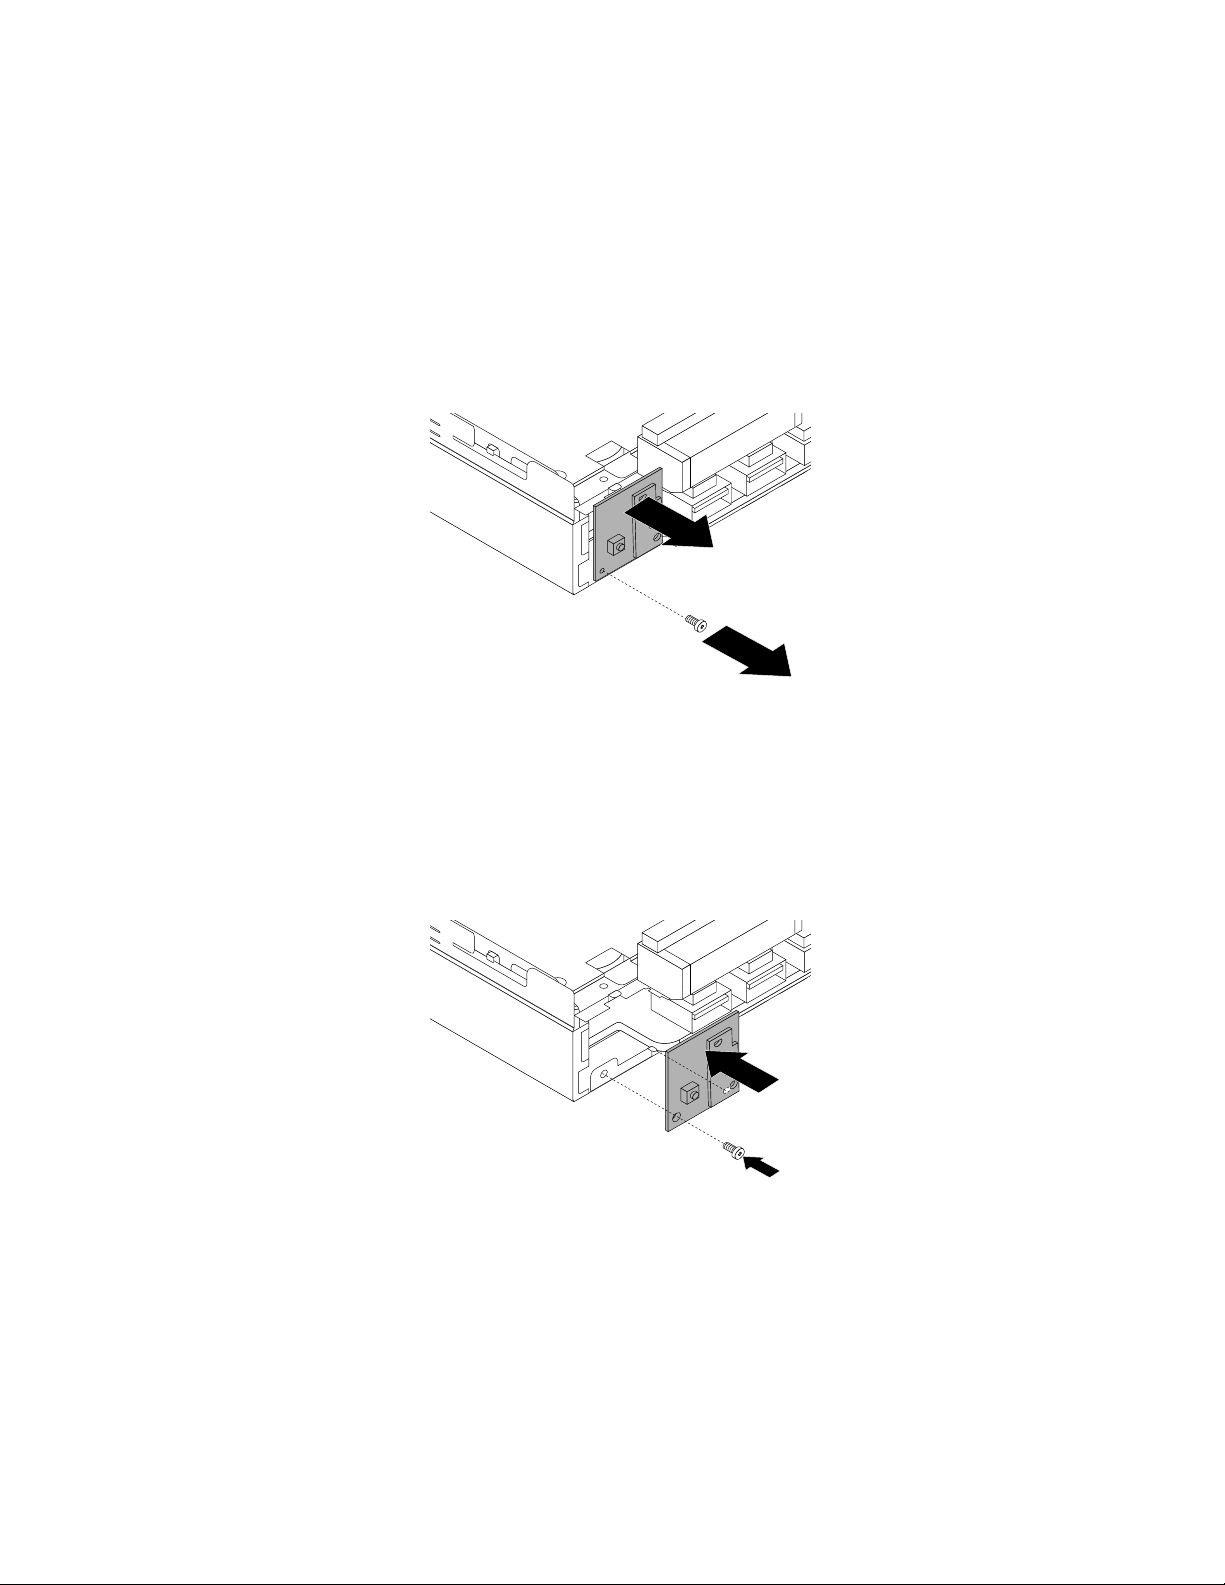
1.Removeanymediafromthedrivesandturnoffallconnecteddevicesandthecomputer.Then,
disconnectallpowercordsfromelectricaloutletsanddisconnectallcablesthatareconnectedtothe
computer.
2.Removethefrontcover.See“Removingthefrontcover”onpage63.
3.Removethesystemboardframe.See“Replacingthesystemboardframe”onpage68.
4.Disconnectthepowerbuttonboardcablefromthepowerbuttonboardconnectoronthesystemboard.
See“Locatingpartsonthesystemboard”onpage32
.
5.Removethescrewthatsecuresthepowerbuttonboardtothecomputer,andthenpullthepower
buttonboardtoremoveitfromthecomputer.
Figure20.Removingthepowerbuttonboard
6.Alignthescrewholeinthenewpowerbuttonboardwiththetabonthecomputerandpositionthenew
powerbuttonboardinthecomputer.Then,installthescrewtosecurethenewpowerbuttonboard
ontherearcover.
Figure21.Installingthepowerbuttonboard
7.Connectthepowerbuttonboardcabletothepowerbuttonboardconnectoronthesystemboard.See
“Locatingpartsonthesystemboard”onpage32.
8.Reinstallthesystemboardframe.See“Replacingthesystemboardframe”onpage68.
70ThinkCentreChromeboxHardwareMaintenanceManual
Page 77

Whattodonext:
•Toworkwithanotherpieceofhardware,gototheappropriatesection.
•Tocompletetheinstallationorreplacement,goto“Completingthepartsreplacement”onpage81.
Replacingthecoin-cellbattery
Attention:DonotopenyourcomputerorattemptanyrepairbeforereadingandunderstandingtheChapter
1“Readthisfirst:Importantsafetyinformation”onpage1.
Yourcomputerhasaspecialtypeofmemorythatmaintainsthedate,time,andsettingsforbuilt-infeatures,
suchasparallel-connectorassignments(configuration).Acoin-cellbatterykeepsthisinformationactive
whenyouturnoffthecomputer.
Thecoin-cellbatterynormallyrequiresnochargingormaintenancethroughoutitslife;however,nocoin-cell
batterylastsforever.Ifthecoin-cellbatteryfails,thedate,time,andconfigurationinformation(including
passwords)arelost.Anerrormessageisdisplayedwhenyouturnonthecomputer.
Refertothe“Lithiumcoin-cellbatterynotice”intheSafety,Warranty,andSetupGuideforinformationabout
replacinganddisposingofthecoin-cellbattery.
Toreplacethecoin-cellbattery,dothefollowing:
1.Removeanymediafromthedrivesandturnoffallconnecteddevicesandthecomputer.Then,
disconnectallpowercordsfromelectricaloutletsanddisconnectallcablesthatareconnectedtothe
computer.
2.Removethefrontcover.See“Removingthefrontcover”onpage63.
3.Removethesystemboardframe.See“Replacingthesystemboardframe”onpage68.
4.Locatethecoin-cellbattery.See“Locatingpartsonthesystemboard”onpage32.
5.Removethecoin-cellbattery.
Figure22.Removingthecoin-cellbattery
6.Installanewcoin-cellbattery.
Figure23.Installinganewcoin-cellbattery
7.Reinstallthesystemboardframe.See“Replacingthesystemboardframe”onpage68.
Chapter9.Installingorreplacinghardware71
Page 78

8.Reinstallthefrontcoverandconnectthecables.See“Completingthepartsreplacement”onpage81.
9.T urnonthecomputerandallconnecteddevices.
Note:Whenthecomputeristurnedonforthefirsttimeafterreplacingthecoin-cellbattery,anerror
messagemightbedisplayed.Thisisnormalafterreplacingthecoin-cellbattery.
ReplacingtheM.2storagedrive
ToreplacetheM.2storagedrive,dothefollowing:
1.Removeanymediafromthedrivesandturnoffallconnecteddevicesandthecomputer.Then,
disconnectallpowercordsfromelectricaloutletsanddisconnectallcablesthatareconnectedtothe
computer.
2.Removethefrontcover.See“Removingthefrontcover”onpage63.
3.Removethesystemboardframe.See“Replacingthesystemboardframe”onpage68.
4.LocatetheM.2storagedriveslot.See“Locatingpartsonthesystemboard”onpage32.
5.RemovethescrewthatsecurestheM.2storagedrivetothesystemboardsothattheM.2storage
drivepopsup.
Figure24.RemovingthescrewthatsecurestheM.2storagedrive
6.PulltheM.2storagedrivetoremoveitfromtheM.2storagecardslot.
Figure25.RemovingtheM.2storagedrive
7.InsertanewM.2storagedriveintotheM.2storagedriveslot.Then,pivottheM.2storagedrive
downward.
Figure26.InstallingtheM.2storagedrive
72ThinkCentreChromeboxHardwareMaintenanceManual
Page 79

8.InstallthescrewtosecuretheM.2storagedrivetothesystemboard.
Figure27.InstallingthescrewthatsecurestheM.2storagedrive
9.Reinstallthesystemboardframe.See“Replacingthesystemboardframe”onpage68.
Whattodonext:
•Toworkwithanotherpieceofhardware,gototheappropriatesection.
•Tocompletetheinstallationorreplacement,goto“Completingthepartsreplacement”onpage81.
ReplacingtheM.2Wi-Ficardmodule
Attention:DonotopenyourcomputerorattemptanyrepairbeforereadingandunderstandingtheChapter
1“Readthisfirst:Importantsafetyinformation”onpage1.
ToreplacetheM.2Wi-Ficardmodule,dothefollowing:
1.Removeanymediafromthedrivesandturnoffallconnecteddevicesandthecomputer.Then,
disconnectallpowercordsfromelectricaloutletsanddisconnectallcablesthatareconnectedtothe
computer.
2.Removethefrontcover.See“Removingthefrontcover”onpage63.
3.Removethesystemboardframe.See“Replacingthesystemboardframe”onpage68.
4.LocatetheM.2Wi-Ficardslot.See“Locatingpartsonthesystemboard”onpage32.
5.DisconnecttheM.2Wi-FiantennacablesfromtheM.2Wi-Ficardmodule.Then,removethescrew
thatsecuresthecardmodulesothattheM.2Wi-Ficardpopsup.
Figure28.RemovingtheM.2Wi-Ficardmodulecables
Chapter9.Installingorreplacinghardware73
Page 80

6.PulltheM.2Wi-FicardmoduletoremoveitfromtheM.2Wi-Ficardslot.
Note:DonotoverpivottheM.2Wi-Ficardmodule.
Figure29.RemovingtheM.2Wi-Ficardmodule
7.InsertanewM.2Wi-FicardmoduleintotheM.2Wi-Ficardslot.Then,pivottheM.2Wi-Ficardmodule
downward.
Note:DonottouchthenotchededgeoftheM.2Wi-Ficardmodule.
Figure30.InstallingtheM.2Wi-Ficardmodule
8.InstallthescrewtosecuretheM.2Wi-Ficardmoduleintothesystemboard.Then,connecttheM.2
Wi-FiantennacablestotheM.2Wi-Ficardmodule.
Figure31.ConnectingtheM.2Wi-Fiantennacables
9.Reinstallthesystemboardframe.See“Replacingthesystemboardframe”onpage68.
Whattodonext:
•Toworkwithanotherpieceofhardware,gototheappropriatesection.
•Tocompletetheinstallationorreplacement,goto“Completingthepartsreplacement”onpage81.
ReplacingtheM.2Wi-Fiantennas
Attention:DonotopenyourcomputerorattemptanyrepairbeforereadingandunderstandingtheChapter
1“Readthisfirst:Importantsafetyinformation”onpage1.
ToreplacetheM.2Wi-Fiantennas,refertothefollowingsections:
•“ReplacingthefrontM.2Wi-Fiantenna”onpage75
•“ReplacingtherearM.2Wi-Fiantenna”onpage77
74ThinkCentreChromeboxHardwareMaintenanceManual
Page 81

ReplacingthefrontM.2Wi-Fiantenna
Attention:DonotopenyourcomputerorattemptanyrepairbeforereadingandunderstandingtheChapter
1“Readthisfirst:Importantsafetyinformation”onpage1.
ToreplacethefrontM.2Wi-Fiantenna,dothefollowing:
1.Removeanymediafromthedrivesandturnoffallconnecteddevicesandthecomputer.Then,
disconnectallpowercordsfromelectricaloutletsanddisconnectallcablesthatareconnectedtothe
computer.
2.Removethefrontcover.See“Removingthefrontcover”onpage63.
3.PeeloffthepaperthatprotectsthestickeronthebottomofthefrontWi-Fiantenna.
Figure32.RemovingthefrontM.2Wi-Fiantenna
Chapter9.Installingorreplacinghardware75
Page 82

4.AlignthetwosmallcolumnsonthebottomofthefrontM.2Wi-Fiantennawiththetwoholesonthe
systemboardframeasshown.Then,stickthefrontM.2Wi-Fiantennaontothesystemboardframe.
Figure33.StickingthefrontM.2Wi-Fiantenna
5.RoutethefrontM.2Wi-Fiantennacablethroughthefivehooksonthesystemboardframeasshown.
Figure34.RoutingthefrontM.2Wi-Fiantennacable
6.RoutethefrontM.2Wi-Fiantennacableasshown,andthenconnectittotheM.2Wi-Ficardmodule.
76ThinkCentreChromeboxHardwareMaintenanceManual
Page 83

Figure35.InstallingthefrontM.2Wi-Fiantennacable
Whattodonext:
•Toworkwithanotherpieceofhardware,gototheappropriatesection.
•Tocompletetheinstallationorreplacement,goto“Completingthepartsreplacement”onpage81.
ReplacingtherearM.2Wi-Fiantenna
Attention:DonotopenyourcomputerorattemptanyrepairbeforereadingandunderstandingtheChapter
1“Readthisfirst:Importantsafetyinformation”onpage1.
ToreplacetherearM.2Wi-Fiantenna,dothefollowing:
1.Removeanymediafromthedrivesandturnoffallconnecteddevicesandthecomputer.Then,
disconnectallpowercordsfromelectricaloutletsanddisconnectallcablesthatareconnectedtothe
computer.
2.StraightentherearM.2Wi-Fiantennasothatitcanbemoreeasilytwisted.
3.HoldthethickerendoftherearM.2Wi-FiantennaandunscrewtheM.2Wi-Fiantennafromtherear
ofthecomputer.
Figure36.RemovingtherearM.2Wi-Fiantenna
Chapter9.Installingorreplacinghardware77
Page 84

4.InstallthenewrearM.2Wi-FiantennatotherearM.2Wi-Fiantennacableconnectorattachedonthe
rearofthecomputer.
5.Adjusttheangleoftherearantennatoreducetheriskofbreakingtheantennabyaccident.
Figure37.InstallingtherearM.2Wi-Fiantenna
Whattodonext:
•Toworkwithanotherpieceofhardware,gototheappropriatesection.
•Tocompletetheinstallationorreplacement,goto“Completingthepartsreplacement”onpage81.
Replacingtheresetbuttonboard
Attention:DonotopenyourcomputerorattemptanyrepairbeforereadingandunderstandingtheChapter
1“Readthisfirst:Importantsafetyinformation”onpage1.
Toreplacetheresetbuttonboard,dothefollowing:
1.Removeanymediafromthedrivesandturnoffallconnecteddevicesandthecomputer.Then,
disconnectallpowercordsfromelectricaloutletsanddisconnectallcablesthatareconnectedtothe
computer.
2.Removethefrontcover.See“Removingthefrontcover”onpage63.
3.Locatetheresetbuttonboard.See“Locatingcomponents”onpage30.
4.Disconnecttheresetbuttonboardcablefromtheresetbuttonboardconnectoronthesystemboard.
See“Locatingpartsonthesystemboard”onpage32.
78ThinkCentreChromeboxHardwareMaintenanceManual
Page 85

5.Removethescrewthatsecurestheresetbuttonboard,andthenpulltheresetbuttonboardtoremove
itfromtherearcover.
Figure38.Removingtheresetbuttonboard
6.Alignthenewresetbuttonboardwiththescrewholeintherearcover,andtheninstallthescrewto
securetheresetbuttonboard.
Figure39.Installingtheresetbuttonboard
7.Connecttheresetbuttonboardcabletotheresetbuttonboardconnectoronthesystemboard.See
“Locatingpartsonthesystemboard”onpage32.
Whattodonext:
•Toworkwithanotherpieceofhardware,gototheappropriatesection.
•Tocompletetheinstallationorreplacement,goto“Completingthepartsreplacement”onpage81.
Replacingthesystemboard
Attention:DonotopenyourcomputerorattemptanyrepairbeforereadingandunderstandingtheChapter
1“Readthisfirst:Importantsafetyinformation”onpage1
Toreplacethesystemboard,dothefollowing:
.
Chapter9.Installingorreplacinghardware79
Page 86

1.Removeanymediafromthedrivesandturnoffallconnecteddevicesandthecomputer.Then,
disconnectallpowercordsfromelectricaloutletsanddisconnectallcablesthatareconnectedtothe
computer.
2.Removethefrontcover.See“Removingthefrontcover”onpage63.
3.Removethesystemfan.See“Replacingthesystemfan”onpage65.
4.Removethememorymodules.See“Replacingamemorymodule”onpage66.
5.RemovethefrontM.2Wi-Fiantenna.See“ReplacingthefrontM.2Wi-Fiantenna”onpage75.
6.Removethepowerbuttonboard.See“Replacingthepowerbuttonboard”onpage69.
7.Removethesystemboardframe.See“Replacingthesystemboardframe”onpage68.
8.Removethecoin-cellbattery.See“Replacingthecoin-cellbattery”onpage71.
9.RemovetheM.2storagedrive.See“ReplacingtheM.2storagedrive”onpage72.
10.RemovetheM.2Wi-Ficardmodule.See“ReplacingtheM.2Wi-Ficardmodule”onpage73.
11.RemovetherearM.2Wi-Fiantenna.See“ReplacingtherearM.2Wi-Fiantenna”onpage77.
12.Removetheresetbuttonboard.See“Replacingtheresetbuttonboard”onpage78.
13.Recordthecableroutingandcableconnections,andthendisconnectallcablesfromthesystemboard.
14.Removethefivescrewsthatsecurethesystemboard,andthencarefullyliftthesystemboardto
removeitfromtherearcover.
Note:Carefullyhandlethesystemboardbyitsedges.
Figure40.Removingthefivescrewsthatsecurethesystemboard
15.Installthenewsystemboardintoplacebyaligningthefivescrewholesinthenewsystemboard
withthecorrespondingmountingstudsontherearcover.Then,installthefivescrewstosecurethe
systemboard.
16.Installtheresetbuttonboard.See“Replacingtheresetbuttonboard”onpage78.
80ThinkCentreChromeboxHardwareMaintenanceManual
Page 87

17.InstalltherearM.2Wi-Fiantenna.See“ReplacingtherearM.2Wi-Fiantenna”onpage77.
18.InstalltheM.2Wi-Ficardmodule.See“ReplacingtheM.2Wi-Ficardmodule”onpage73.
19.InstalltheM.2storagedrive.See“ReplacingtheM.2storagedrive”onpage72.
20.Installthecoin-cellbattery.See“Replacingthecoin-cellbattery”onpage71.
21.Installthesystemboardframe.See“Replacingthesystemboardframe”onpage68.
22.Installthepowerbuttonboard.See“Replacingthepowerbuttonboard”onpage69.
23.InstallthefrontM.2Wi-Fiantenna.See“ReplacingthefrontM.2Wi-Fiantenna”onpage75.
24.Installthememorymodules.See“Replacingamemorymodule”onpage66.
25.Installthesystemfan.See“Replacingthesystemfan”onpage65.
26.Routeallthecablesthatyoudisconnectedfromthesystemboard,andthenconnectthecablestothe
systemboard.See“Locatingpartsonthesystemboard”onpage32tolocatetheconnectorson
thesystemboardandconnectcables.
Whattodonext:
•Toworkwithanotherpieceofhardware,gototheappropriatesection.
•Tocompletetheinstallationorreplacement,goto“Completingthepartsreplacement”onpage81
Completingthepartsreplacement
Aftercompletingtheinstallationorreplacementforallparts,youneedtoreinstallthefrontcoverand
reconnectcables.
.
Toreinstallthefrontcoverandreconnectcablestoyourcomputer,dothefollowing:
1.Ensurethatallcomponentshavebeenreassembledcorrectlyandthatnotoolsorloosescrewsareleft
insideyourcomputer.See“Locatingcomponents”onpage30forthelocationsofvariouscomponents
inyourcomputer.
2.Ensurethatthecablesareroutedcorrectlybeforereinstallingthefrontcover.Keepcablesclearofthe
hingesandsidesoftherearcovertoavoidinterferencewithreinstallingthefrontcover.
Chapter9.Installingorreplacinghardware81
Page 88

3.Positionthefrontcoverontherearcoversothattherailguidesonthebottomofthefrontcoverengage
therailsontherearcover.Then,pushthefrontcovertothefrontofthecomputeruntilitsnapsinto
position.
Figure41.Reinstallingthefrontcover
82ThinkCentreChromeboxHardwareMaintenanceManual
Page 89

4.Installthescrewtosecurethefrontcover.
5.Ifthereisanylockingdeviceavailable,lockthecomputercover.SeeChapter5“Security”onpage43.
6.Reconnecttheexternalcablesandpowercordstothecomputer.See“Locatingconnectorsonthe
rearofyourcomputer”onpage28.
Note:Inmostareasoftheworld,LenovorequiresthereturnofthedefectiveCRU.Informationaboutthiswill
comewiththeCRUorwillcomeafewdaysaftertheCRUarrives.
Chapter9.Installingorreplacinghardware83
Page 90

84ThinkCentreChromeboxHardwareMaintenanceManual
Page 91

Chapter10.Gettinginformation,help,andservice
Thischaptercontainsinformationabouthelp,service,andtechnicalassistanceforproductsmanufactured
byLenovo.
Informationresources
Youcanusetheinformationinthissectiontoaccessusefulresourcesrelatingtoyourcomputingneeds.
SafetyandWarranty
TheSafety,Warranty,andSetupGuidethatisprovidedwithyourcomputercontainsinformationonsafety,
setup,warranty,andnotices.ThesafetyinformationintheSafety,Warranty,andSetupGuideprovides
informationyouneedtoknowbeforesettingupandusingthisproduct.Readandunderstandallsafety
informationprovidedintheSafety,Warranty,andSetupGuidebeforeusingthisproduct.
TheinformationinChapter1“Readthisfirst:Importantsafetyinformation”onpage1
providesadditionalsafetyinformationthatappliestotopicsandtasksdescribedinthispublication.Readand
understandallsafetyinformationprovidedinthatsectionbeforedisassemblingorupgradingthisproduct.
ofthisUserGuide
LenovoWebsite
TheLenovoWebsite(http://www.lenovo.com)providesup-to-dateinformationandservicestohelpyoubuy,
upgrade,andmaintainyourcomputer.Y oucanalsodothefollowing:
•Shopfordesktopandnotebookcomputers,monitors,projectors,upgradesandaccessoriesforyour
computer,andspecialoffers.
•Purchaseadditionalservices,suchassupportforhardware,operatingsystems,applicationprograms,
networksetupandconfiguration,andcustominstallations.
•Purchaseupgradesandextendedhardwarerepairservices.
•Accesstheonlinemanualsforyourproducts.
•AccesstheLenovoLimitedWarranty.
•Accesstroubleshootingandsupportinformationforyourcomputermodelandothersupportedproducts.
•Findtheserviceandsupportphonenumbersforyourcountryorregion.
•FindaServiceProviderlocatednearyou.
LenovoSupportWebsite
TechnicalsupportinformationisavailableontheLenovoSupportWebsiteat:
http://www.lenovo.com/support
ThisWebsiteisupdatedwiththelatestsupportinformationsuchasthefollowing:
•Diagnosticsolutions
•Productandservicewarranty
•Productandpartsdetails
•Userguidesandmanuals
•Knowledgebaseandfrequentlyaskedquestions
©CopyrightLenovo2015,2016
85
Page 92

Helpandservice
Thissectioncontainsinformationaboutobtaininghelpandservice.
Callingforservice
Duringthewarrantyperiod,youcangethelpandinformationbytelephonethroughtheCustomerSupport
Center.
Thefollowingservicesareavailableduringthewarrantyperiod:
•Problemdetermination-Trainedservicepersonnelareavailabletoassistyouwithdetermininga
hardwareproblemanddecidingwhatactionisnecessarytofixtheproblem.
•Hardwarerepair-Iftheproblemiscausedbyhardwareunderwarranty,trainedservicepersonnelare
availabletoprovidetheapplicablelevelofservice.
•EngineeringChangemanagement-Theremightbechangesthatarerequiredafteraproducthas
beensold.LenovooryourresellerwillmakeselectedEngineeringChanges(ECs)thatapplytoyour
hardwareavailable.
Theseitemsarenotcoveredbythewarranty:
•ReplacementoruseofpartsnotmanufacturedfororbyLenovoornon-warrantedLenovoparts
•Identificationofsoftwareproblemsources
•ConfigurationofBIOSaspartofaninstallationorupgrade
•Changes,modifications,orupgradestodevicedrivers
•Installationandmaintenanceofnetworkoperatingsystems(NOS)
•Installationandmaintenanceofapplicationprograms
RefertotheSafety,Warranty,andSetupGuidethatcomeswithyourcomputerforinformationaboutyour
warrantytypeandduration.Youmustretainyourproofofpurchasetoobtainwarrantyservice.
ForalistofLenovoSupportphonenumbers,gotohttp://www.lenovo.com/support/phoneorrefertothe
Safety,Warranty,andSetupGuidethatcomeswithyourcomputer.
Note:Phonenumbersaresubjecttochangewithoutnotice.Ifthenumberforyourcountryorregionisnot
provided,contactyourLenovoresellerorLenovomarketingrepresentative.
Ifpossible,beatyourcomputerwhenyoucall.Havethefollowinginformationavailable:
•Machinetypeandmodel
•Serialnumbersofyourhardwareproducts
•Descriptionoftheproblem
•Exactwordingofanyerrormessages
•Hardwareandsoftwareconfigurationinformation
Usingotherservices
Youmighttravelwithyourcomputerorrelocateittoacountryorregionwherethemachinetypeforyour
desktopornotebookcomputerissold.Insuchasituation,yourcomputermightbeeligibleforInternational
WarrantyService,whichautomaticallyentitlesyoutoobtainwarrantyservicethroughoutthewarrantyperiod.
Servicewillbeperformedbyserviceprovidersauthorizedtoperformwarrantyservice.
Servicemethodsandproceduresvarybycountry,andsomeservicesmightnotbeavailableinallcountries.
InternationalWarrantyServiceisdeliveredthroughthemethodofservice(suchasdepot,carry-in,or
on-siteservice)thatisprovidedintheservicingcountry.Servicecentersincertaincountriesmightnotbe
abletoserviceallmodelsofaparticularmachinetype.Insomecountries,feesandrestrictionsmight
applyatthetimeofservice.
86ThinkCentreChromeboxHardwareMaintenanceManual
Page 93

TodeterminewhetheryourcomputeriseligibleforInternationalWarrantyServiceandtoviewalistofthe
countriesorregionswhereserviceisavailable,gotohttp://www.lenovo.com/support.
Fortechnicalassistancewiththeinstallationoforquestionsrelatedtotheprogramsforyourpreinstalled
GoogleChromeproduct,gototheGoogleWebsiteathttp://support.google.comandfollowtheinstructions
onthescreen.YoualsocancontacttheLenovoCustomerSupportCenterforhelp.Somefeesmightapply.
Purchasingadditionalservices
Duringandafterthewarrantyperiod,youcanpurchaseadditionalservices.Examplesoftheseadditional
servicesinclude:
•Supportforhardware,operatingsystems,andapplicationprograms
•Networksetupandconfigurationservices
•Upgradedorextendedhardwarerepairservices
•Custominstallationservices
Serviceavailabilityandservicenamemightvarybycountryorregion.Formoreinformationaboutthese
services,gototheLenovoWebsiteat:
http://www.lenovo.com
Chapter10.Gettinginformation,help,andservice87
Page 94

88ThinkCentreChromeboxHardwareMaintenanceManual
Page 95

AppendixA.Regulatoryinformation
Exportclassificationnotice
ThisproductissubjecttotheUnitedStatesExportAdministrationRegulations(EAR)andhasanExport
ClassificationControlNumber(ECCN)of5A992.c.Itcanbere-exportedexcepttoanyoftheembargoed
countriesintheEARE1countrylist.
Electronicemissionsnotices
ThefollowinginformationreferstoLenovopersonalcomputermachinetypes10H2,10H3,10H4,10H5,
10H6,10H7,10H8,and10H9.
FederalCommunicationsCommissionDeclarationofConformity
ThisequipmenthasbeentestedandfoundtocomplywiththelimitsforaClassBdigitaldevice,pursuant
toPart15oftheFCCRules.Theselimitsaredesignedtoprovidereasonableprotectionagainstharmful
interferenceinaresidentialinstallation.Thisequipmentgenerates,uses,andcanradiateradiofrequency
energyand,ifnotinstalledandusedinaccordancewiththeinstructions,maycauseharmfulinterference
toradiocommunications.However,thereisnoguaranteethatinterferencewillnotoccurinaparticular
installation.Ifthisequipmentdoescauseharmfulinterferencetoradioortelevisionreception,whichcanbe
determinedbyturningtheequipmentoffandon,theuserisencouragedtotrytocorrecttheinterferenceby
oneormoreofthefollowingmeasures:
•Reorientorrelocatethereceivingantenna.
•Increasetheseparationbetweentheequipmentandreceiver.
•Connecttheequipmentintoanoutletonacircuitdifferentfromthattowhichthereceiverisconnected.
•Consultanauthorizeddealerorservicerepresentativeforhelp.
Lenovoisnotresponsibleforanyradioortelevisioninterferencecausedbyusingotherthanspecifiedor
recommendedcablesandconnectorsorbyunauthorizedchangesormodificationstothisequipment.
Unauthorizedchangesormodificationscouldvoidtheuser'sauthoritytooperatetheequipment.
ThisdevicecomplieswithPart15oftheFCCRules.Operationissubjecttothefollowingtwoconditions:(1)
thisdevicemaynotcauseharmfulinterference,and(2)thisdevicemustacceptanyinterferencereceived,
includinginterferencethatmaycauseundesiredoperation.
ResponsibleParty:
Lenovo(UnitedStates)Incorporated
1009ThinkPlace-BuildingOne
Morrisville,NC27560
PhoneNumber:919-294-5900
IndustryCanadaClassBemissioncompliancestatement
CANICES-3(B)/NMB-3(B)
EuropeanUnion-CompliancetoDirectivesforITE(InformationTechnologyEquipment)andRadio
Equipment
©CopyrightLenovo2015,2016
89
Page 96

Modelswithoutaradiodevice:ThisproductisinconformitywiththeprotectionrequirementsofEUCouncil
Directive2004/108/EC(until19April,2016)andCouncilDirective2014/30/EU(from20April,2016)onthe
approximationofthelawsoftheMemberStatesrelatingtoelectromagneticcompatibility.
Modelswitharadiodevice:Thisproductisinconformitywithalltherequirementsandessentialnormsthat
applytoEUCouncilR&TTEDirective1999/5/EContheapproximationofthelawsoftheMemberStates
relatingtoradioequipment.
Lenovocannotacceptresponsibilityforanyfailuretosatisfytheprotectionrequirementsresultingfrom
anon-recommendedmodificationoftheproduct,includingtheinstallationofoptioncardsfromother
manufacturers.ThisproducthasbeentestedandfoundtocomplywiththelimitsforClassBequipment
accordingtoEuropeanStandardsharmonizedintheDirectivesincompliance.ThelimitsforClassB
equipmentwerederivedfortypicalresidentialenvironmentstoprovidereasonableprotectionagainst
interferencewithlicensedcommunicationdevices.
Lenovo,Einsteinova21,85101Bratislava,Slovakia
GermanClassBcompliancestatement
DeutschsprachigerEUHinweis:
HinweisfürGerätederKlasseBEURichtliniezurElektromagnetischenVerträglichkeit
DiesesProduktentsprichtdenSchutzanforderungenderEURichtlinie2014/30/EU(früher2004/108/EC)zur
AngleichungderRechtsvorschriftenüberdieelektromagnetischeVerträglichkeitindenEU-Mitgliedsstaaten
undhältdieGrenzwertederKlasseBderNormgemäßRichtlinie.
Umdiesessicherzustellen,sinddieGerätewieindenHandbüchernbeschriebenzuinstallierenundzu
betreiben.DesWeiterendürfenauchnurvonderLenovoempfohleneKabelangeschlossenwerden.
LenovoübernimmtkeineVerantwortungfürdieEinhaltungderSchutzanforderungen,wenndasProdukt
ohneZustimmungderLenovoverändertbzw.wennErweiterungskomponentenvonFremdherstellernohne
EmpfehlungderLenovogesteckt/eingebautwerden.
Deutschland:
EinhaltungdesGesetzesüberdieelektromagnetischeVerträglichkeitvonBetriebsmitteln
DiesesProduktentsprichtdem„GesetzüberdieelektromagnetischeVerträglichkeitvonBetriebsmitteln“
EMVG(früher„GesetzüberdieelektromagnetischeVerträglichkeitvonGeräten“).DiesistdieUmsetzungder
EMVEURichtlinie2014/30/EU(früher2004/108/EWG)inderBundesrepublikDeutschland.
ZulassungsbescheinigunglautdemDeutschenGesetzüberdieelektromagnetischeVerträglichkeit
vonBetriebsmitteln,EMVGvom20.Juli2007(früherGesetzüberdieelektromagnetische
VerträglichkeitvonGeräten),bzw.derEMVEURichtlinie2014/30/EU(früher2004/108/EC),für
GerätederKlasseB.
DiesesGerätistberechtigt,inÜbereinstimmungmitdemDeutschenEMVGdasEG-Konformitätszeichen
-CE-zuführen.VerantwortlichfürdieKonformitätserklärungnachParagraf5desEMVGistdieLenovo
(Deutschland)GmbH,Meitnerstr.9,D-70563Stuttgart.
InformationeninHinsichtEMVGParagraf4Abs.(1)4:
DasGeräterfülltdieSchutzanforderungennachEN55024undEN55022KlasseB.
KoreaClassBcompliancestatement
90ThinkCentreChromeboxHardwareMaintenanceManual
Page 97

JapanVCCIClassBcompliancestatement
Japancompliancestatementforproductswhichconnecttothepowermainswithratedcurrent
lessthanorequalto20Aperphase
Japannoticeforacpowercord
Theacpowercordshippedwithyourproductcanbeusedonlyforthisspecificproduct.Donotusetheac
powercordforotherdevices.
LenovoproductserviceinformationforTaiwan
KeyboardandmousecompliancestatementforTaiwan
Eurasiancompliancemark
Brazilregulatorynotice
Ouvirsonscommaisde85decibéisporlongosperíodospodeprovocardanosaosistemaauditivo.
Mexicoregulatorynotice
Advertencia:EnMexicolaoperacióndeesteequipoestásujetaalassiguientesdoscondiciones:(1)es
posiblequeesteequipoodispositivonocauseinterferenciaperjudicialy(2)esteequipoodispositivodebe
aceptarcualquierinterferencia,incluyendolaquepuedacausarsuoperaciónnodeseada.
Additionalregulatoryinformation
Foradditionalregulatoryinformation,refertotheRegulatoryNoticeshippedwithyourcomputer.Depending
ontheconfigurationofyourcomputerandthecountryorregionwherethecomputerwaspurchased,
youmighthavereceivedadditionalprintedregulatorynotices.Allregulatorynoticesareavailableonthe
AppendixA.Regulatoryinformation91
Page 98

LenovoSupportWebsiteinelectronicformat.T oaccesselectroniccopiesofthedocumentation,goto
http://www.lenovo.com/UserManuals.
92ThinkCentreChromeboxHardwareMaintenanceManual
Page 99

AppendixB.WEEEandrecyclinginformation
Lenovoencouragesownersofinformationtechnology(IT)equipmenttoresponsiblyrecycletheirequipment
whenitisnolongerneeded.Lenovooffersavarietyofprogramsandservicestoassistequipmentownersin
recyclingtheirITproducts.ForinformationonrecyclingLenovoproducts,goto:
http://www.lenovo.com/recycling
ImportantWEEEinformation
TheWEEEmarkingonLenovoproductsappliestocountrieswithWEEEande-wasteregulations(for
example,theEuropeanWEEEDirective,IndiaE-WasteManagement&HandlingRules).Appliancesare
labeledinaccordancewithlocalregulationsconcerningwasteelectricalandelectronicequipment(WEEE).
Theseregulationsdeterminetheframeworkforthereturnandrecyclingofusedappliancesasapplicable
withineachgeography.Thislabelisappliedtovariousproductstoindicatethattheproductisnottobe
thrownaway,butratherputintheestablishedcollectionsystemsforreclaimingtheseendoflifeproducts.
Usersofelectricalandelectronicequipment(EEE)withtheWEEEmarkingmustnotdisposeofendoflife
EEEasunsortedmunicipalwaste,butusethecollectionframeworkavailabletothemforthereturn,recycle,
andrecoveryofWEEEandtominimizeanypotentialeffectsofEEEontheenvironmentandhumanhealth
duetothepresenceofhazardoussubstances.Lenovoelectricalandelectronicequipment(EEE)maycontain
partsandcomponents,whichatend-of-lifemightqualifyashazardouswaste.
EEEandwasteelectricalandelectronicequipment(WEEE)canbedeliveredfreeofchargetotheplaceof
saleoranydistributorthatsellselectricalandelectronicequipmentofthesamenatureandfunctionas
theusedEEEorWEEE.
ForadditionalWEEEinformation,goto:
http://www.lenovo.com/recycling
WEEEinformationforHungary
Lenovo,asaproducer,bearsthecostincurredinconnectionwiththefulfillmentofLenovo’sobligations
underHungaryLawNo.197/2014(VIII.1.)subsections(1)-(5)ofsection12.
RecyclinginformationforJapan
CollectingandrecyclingadisusedLenovocomputerormonitor
IfyouareacompanyemployeeandneedtodisposeofaLenovocomputerormonitorthatistheproperty
ofthecompany,youmustdosoinaccordancewiththeLawforPromotionofEffectiveUtilizationof
Resources.Computersandmonitorsarecategorizedasindustrialwasteandshouldbeproperlydisposed
ofbyanindustrialwastedisposalcontractorcertifiedbyalocalgovernment.InaccordancewiththeLaw
forPromotionofEffectiveUtilizationofResources,LenovoJapanprovides,throughitsPCCollecting
©CopyrightLenovo2015,2016
93
Page 100

andRecyclingServices,forthecollecting,reuse,andrecyclingofdisusedcomputersandmonitors.For
details,visittheLenovoWebsiteathttp://www.lenovo.com/recycling/japan.PursuanttotheLawfor
PromotionofEffectiveUtilizationofResources,thecollectingandrecyclingofhome-usedcomputers
andmonitorsbythemanufacturerwasbegunonOctober1,2003.Thisserviceisprovidedfreeof
chargeforhome-usedcomputerssoldafterOctober1,2003.Fordetails,visittheLenovoWebsiteat
http://www.lenovo.com/recycling/japan.
DisposingofLenovocomputercomponents
SomeLenovocomputerproductssoldinJapanmayhavecomponentsthatcontainheavymetalsorother
environmentalsensitivesubstances.Toproperlydisposeofdisusedcomponents,suchasaprintedcircuit
boardordrive,usethemethodsdescribedaboveforcollectingandrecyclingadisusedcomputerormonitor.
DisposingofdisusedlithiumbatteriesfromLenovocomputers
Abutton-shapedlithiumbatteryisinstalledinsideyourLenovocomputertoprovidepowertothecomputer
clockwhilethecomputerisoffordisconnectedfromthemainpowersource.Ifyouneedtoreplaceitwitha
newone,contactyourplaceofpurchaseorcontactLenovoforservice.Ifyouneedtodisposeofadisused
lithiumbattery,insulateitwithvinyltape,contactyourplaceofpurchaseoranindustrial-waste-disposal
operator,andfollowtheirinstructions.Disposalofalithiumbatterymustcomplywithlocalordinances
andregulations.
RecyclinginformationforBrazil
DeclaraçõesdeReciclagemnoBrasil
DescartedeumProdutoLenovoForadeUso
Equipamentoselétricoseeletrônicosnãodevemserdescartadosemlixocomum,masenviadosàpontosde
coleta,autorizadospelofabricantedoprodutoparaquesejamencaminhadoseprocessadosporempresas
especializadasnomanuseioderesíduosindustriais,devidamentecertificadaspelosorgãosambientais,de
acordocomalegislaçãolocal.
ALenovopossuiumcanalespecíficoparaauxiliá-lonodescartedessesprodutos.Casovocêpossua
umprodutoLenovoemsituaçãodedescarte,ligueparaonossoSACouencaminheume-mailpara:
reciclar@lenovo.com,informandoomodelo,númerodesérieecidade,afimdeenviarmosasinstruções
paraocorretodescartedoseuprodutoLenovo.
BatteryrecyclinginformationforTaiwan
94ThinkCentreChromeboxHardwareMaintenanceManual
 Loading...