

Page 1
Page 2

z Introduction
z Warning
z Caution
z Main Unit Description
z Remote Control
z OSD basic adjustment
z DVD manual
Contents
z Specifications
z Trouble Shooting
1
Page 3

Introduction
Thank you very much for your purchase of our product of LCD TV. It serves as a normal color
TV and PC monitor. To enjoy your set to the full from the very beginning, read this manual
carefully and keep it handy for ready reference.
INSTALLATION
① Locate the receiver in the room where direct light does not strike the screen. Total darkness or
a reflection on the picture screen can cause eyestrain. Soft and indirect lighting is recommended
for comfortable viewing.
② Allow enough space between the receiver and the wall to permit ventilation.
③ Avoid excessively warm locations to prevent possible damage to the cabinet or premature
component failure.
④ This TV receiver can be connected to AC100-240V 50/60HZ.
⑤ Do not install the receiver in a location near heat sources such as radiator, air ducts, direct
sunlight, or in a place somewhere like close compartment and close area. Do not cover the
ventilation openings when using the set.
⑥ The indicator light will last about 30 seconds to go out after cutting off the electricity, during
this period, you cannot repower it on until the indicator light goes out. Thanks a lot for your
attention!
2
Page 4

Warning
RISK OF ELECTRIC SHOCK
CAUTION: TO AVOID THE RISK OF ELECTRIC SHOCK.
DO NOT REMOVE COVER (OR BACK).
NO USER- SERVICEABLE PARTS INSIDE.
REFER SERVICING TO QUALIFIED SERVICE PERSONNEL.
This symbol is intended to alert the user to avoid the risk
of electric shock, do not disassemble this equipment by anyone
except a qualified service personnel.
CAUTION
DO NOT OPEN
This symbol is intended to alert the user to the presence
of important operation and maintenance instructions in
the literature accompanying the equipment.
3
Page 5

Caution
Caution
High voltages are used in the operation of this product.
- Do not remove the back cabinet from your set. Refer
servicing to qualified service personnel.
Caution
To prevent fire or electrical shock hazard, Do not expose
the main unit to moisture.
Caution
Do not drop or push objects into the television cabinet
slots or openings. Never spill any kind of liquid on the
television receiver.
Caution
Avoid exposing the main unit to direct sunlight and other
source of the heat. Do not stand the television receiver
directly on other produces which give off heat. E. g. video
cassette players, Audio amplifiers. Do not block the
ventilation holes in the back cover. Ventilation is essential
to prevent failure of electrical component. Do not squash
power supply cord under the main unit.
4
Page 6

Caution
Caution
Never stand on, lean on, push suddenly the product
or its stand. You should pay special attention to
Do not place the main unit on an unstable cart stand,
shelf or table. Serious injury to an individual, and
damage to the television, may result if it should fall.
children.
Caution
Caution
When the product is not used for an extended period
of time, it is advisable to disconnect the AC power
cord from the AC outlet.
Caution
The LCD panel used in this product is made of glass.
Therefore, it can break when the product is dropped
or applied with impact. Be careful not to be injured
by broken glass pieces in case the LCD panel breaks.
5
Page 7

Main unit description
Control Panel Button Function
VOL+ : Volume up.
VOL- : Volume down.
CH+ : TV channel up.
CH- : TV channel down.
MENU : Press to select the main menu.
TV/AV : Select the input signal.
POWER : Switch on when at standby mode or enter the standby mode.
TV Terminal Connections
1. HDMI input terminal.
2. VGA input terminal of simulation signal of PC.
3. SCART input terminal.
4. S-video input terminal.
5. Video input terminal.
6. AUDIO input terminal.
7. PC AUDIO terminal.
8. HEADPHONE output terminal.
9. ATV antenna/close circuit TV network port.
Power Input Configuration
AC POWER
6
Page 8

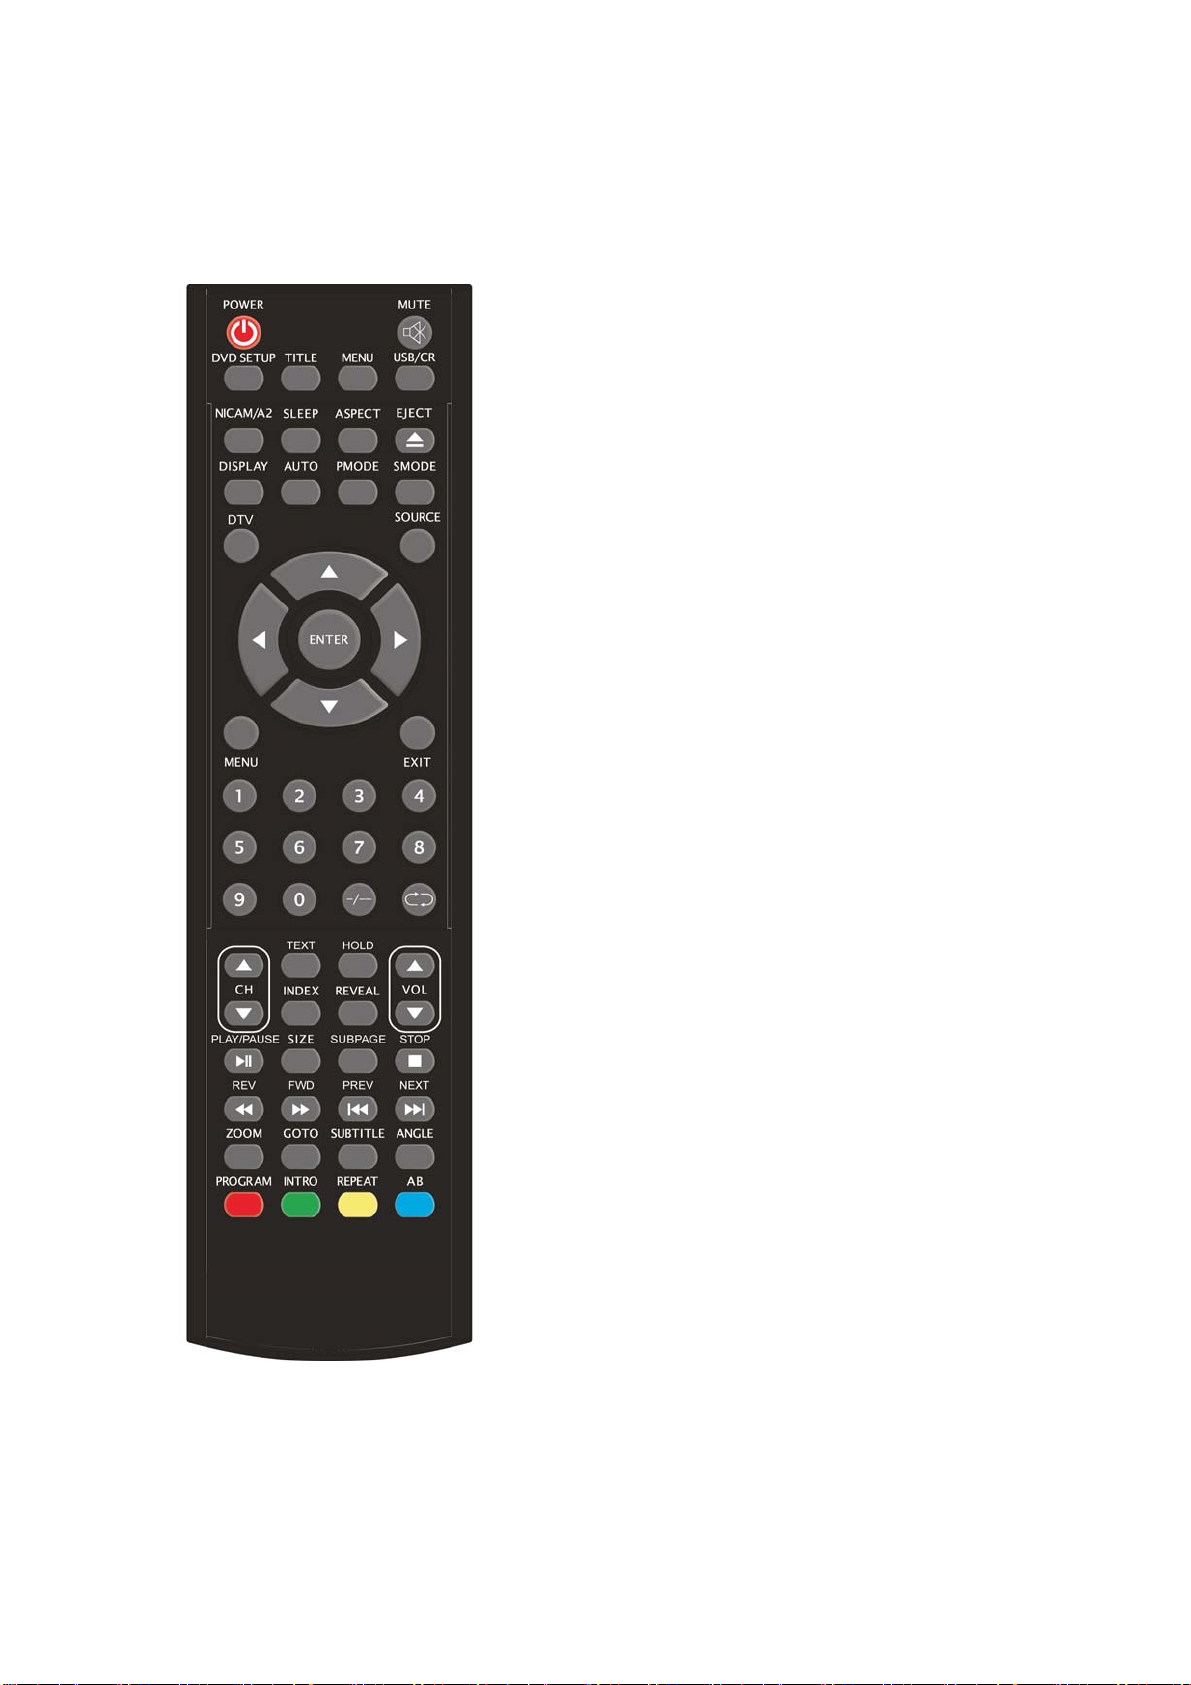
Remote control
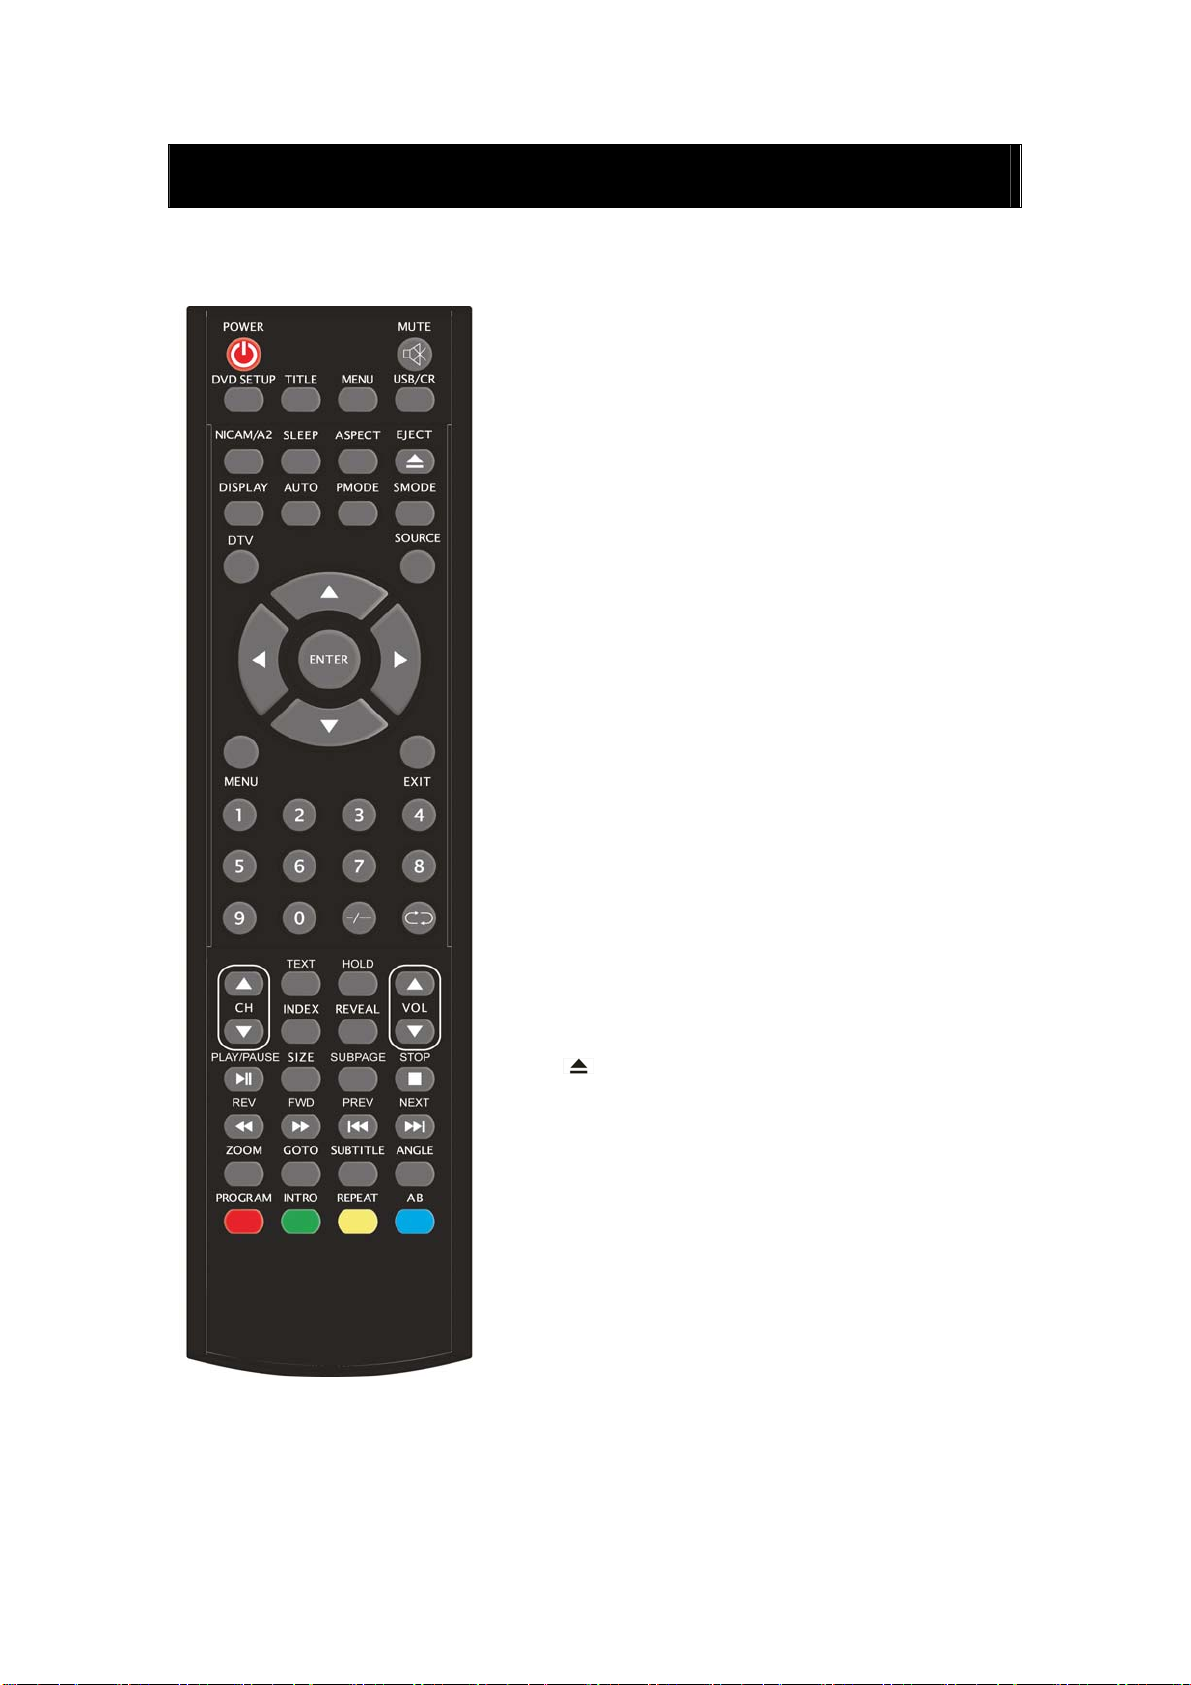
POWER: Power on/off button, press once to turn the TV on
and press again to turn the TV off.
MUTE: Press this button to mute or restore sound.
DVD SETUP: Press this button to enter the DVD main menu
and press again to exit the main menu.
(Used for models with DVD function only)
TITLE: Press this button to return the title menu.
(Used for models with DVD function only)
MENU(BLUE): Press this button to return the root menu or
exit the DVD main menu.
(Used for models with DVD function only)
USB/CR: Press to select the MEDIA signal source.
(Used for models with USB/CR function only)
NICAM/A2: In the TV condition, press this key to select the
stereo effects.
SLEEP: Set the sleep timer.
ASPECT: Press to select the different picture size.
EJECT
(Used for models with DVD function only)
DISPLAY: Display TV information.
AUTO: Press to adjust the picture automatically in PC mode.
PMODE: Select picture mode.
SMODE: Select sound mode.
DTV:
This button is not available.
SOURCE: Press to change signal source.
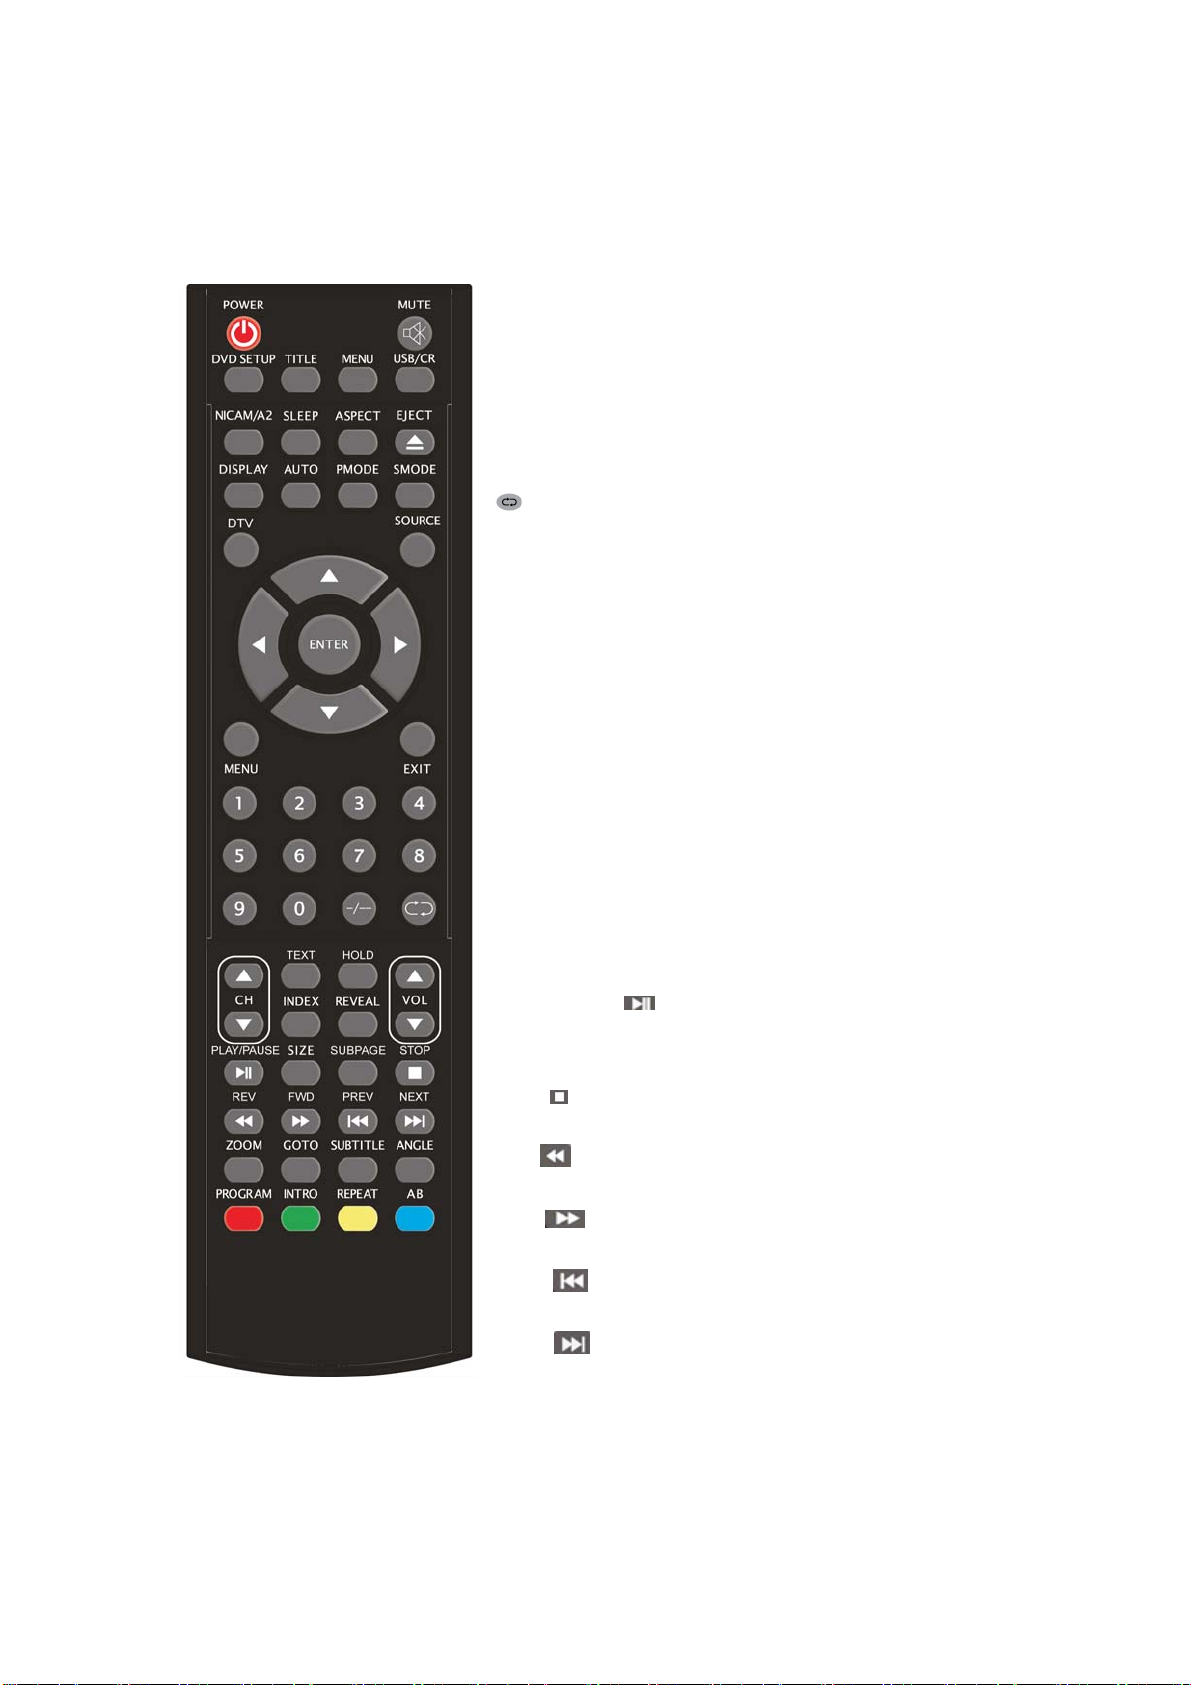
ENTER: Enter the selected option or perform the selected
operation.
MENU: Press this button to enter the main menu for various
optional adjustable setting.
EXIT: Exit the OSD (On-screen display).
0-9: Select and switch to a channel using 0 - 9.
-/--: Switch the program digit.
: Switch back and front between the current and previous
channels.
: press to eject the DVD-disc in DVD mode.
7
Page 9

CHc/CHd: Change the channel up and down.
VOLc/VOLd : Adjust the volume.
TEXT: Press to enter the Teletext mode.
HOLD: Freeze a multi-page passage on screen in Teletext
mode.
INDEX: Press this button to go to the index page.
REVEAL: Press this button to reveal the hidden information
in Teletext page. Press again to hide the information.
SIZE: Display the top, bottom or all of page to read easily in
Teletext mode.
SUBPAGE: Carry out the function of SUBCODE in the text
while enter the text display mode.
PLAY/PAUSE
:Press to start playing the disc or Media,
or to pause playing.
(Used for models with DVD or USB/CR function only)
STOP
:Stop playing the disc or Media.
(Used for models with DVD or USB/CR function only)
REV
:Press to play backward.
(Used for models with DVD or USB/CR function only)
FWD
:Press to play forward.
(Used for models with DVD or USB/CR function only)
PREV
: Skip to previous chapter
(Used for models with DVD or USB/CR function only)
NEXT
:Skip to next chapter
(Used for models with DVD or USB/CR function only)
ZOOMǖSelect the zoom picture.
(Used for models with DVD function only)
GOTOǖJump to the appointed chapter or title.
(Used for models with DVD function only)
SUBTITLE(BLUE)ǖSelect the disc caption.
(Used for models with DVD function only)
ANGLEǖSelect the angle.
(Used for models with DVD function only)
8
Page 10

PROGRAMǖSelect the disc program.
(
Used for models with DVD function)
INTROǖPress the button to display the time of chapter
remain or elapsed.
Used for models with DVD function)
(
REPEATǖSelect the repeat mode.
Used for models with DVD function)
(
ABǖSelect the segment to repeat.
Used for models with DVD function)
(
RED, GREEN, YELLOW, BLUE: Correspond to the
different colored subjects.
(
Used for models with european region function)
9
Page 11

OSD basic adjustment
PICTURE
You can select the type of picture, which best corresponds to your viewing.
1. Press the “MENU” button to enter the
OSD menu. Then press “c/d” button
to select the “PICTURE” menu. Enter
the “PICTURE” menu by pressing
“f” button.
2. Press “c/d” button to select
“PICTURE MODE” and press the
“e/f” button to select the picture
mode .
3. Press “c/d” button to select “BRIGHTNESS” and press the “e/f” button to enter brightness
adjustment menu to adjust brightness.
4. Press “c/d” button to select “CONTRAST” and press the “e/f” button to enter contrast
adjustment menu to adjust contrast.
5. Press “c/d” button to select “SATURATION” and press the “e/f” button to enter color
adjustment menu to adjust saturation.
6. Press “c/d” button to select “SHARPNESS” and press the “e/f” button to enter sharpness
adjustment menu to adjust sharpness.
7. Press “c/d” button to select “HUE” and press the “e/f” button to enter hue adjustment
menu to adjust hue.
Note: The item hue is only for NTSC
8. Press “c/d” button to select “COLOUR TEMP” menu and press the “e/f” button to select
the color temp.
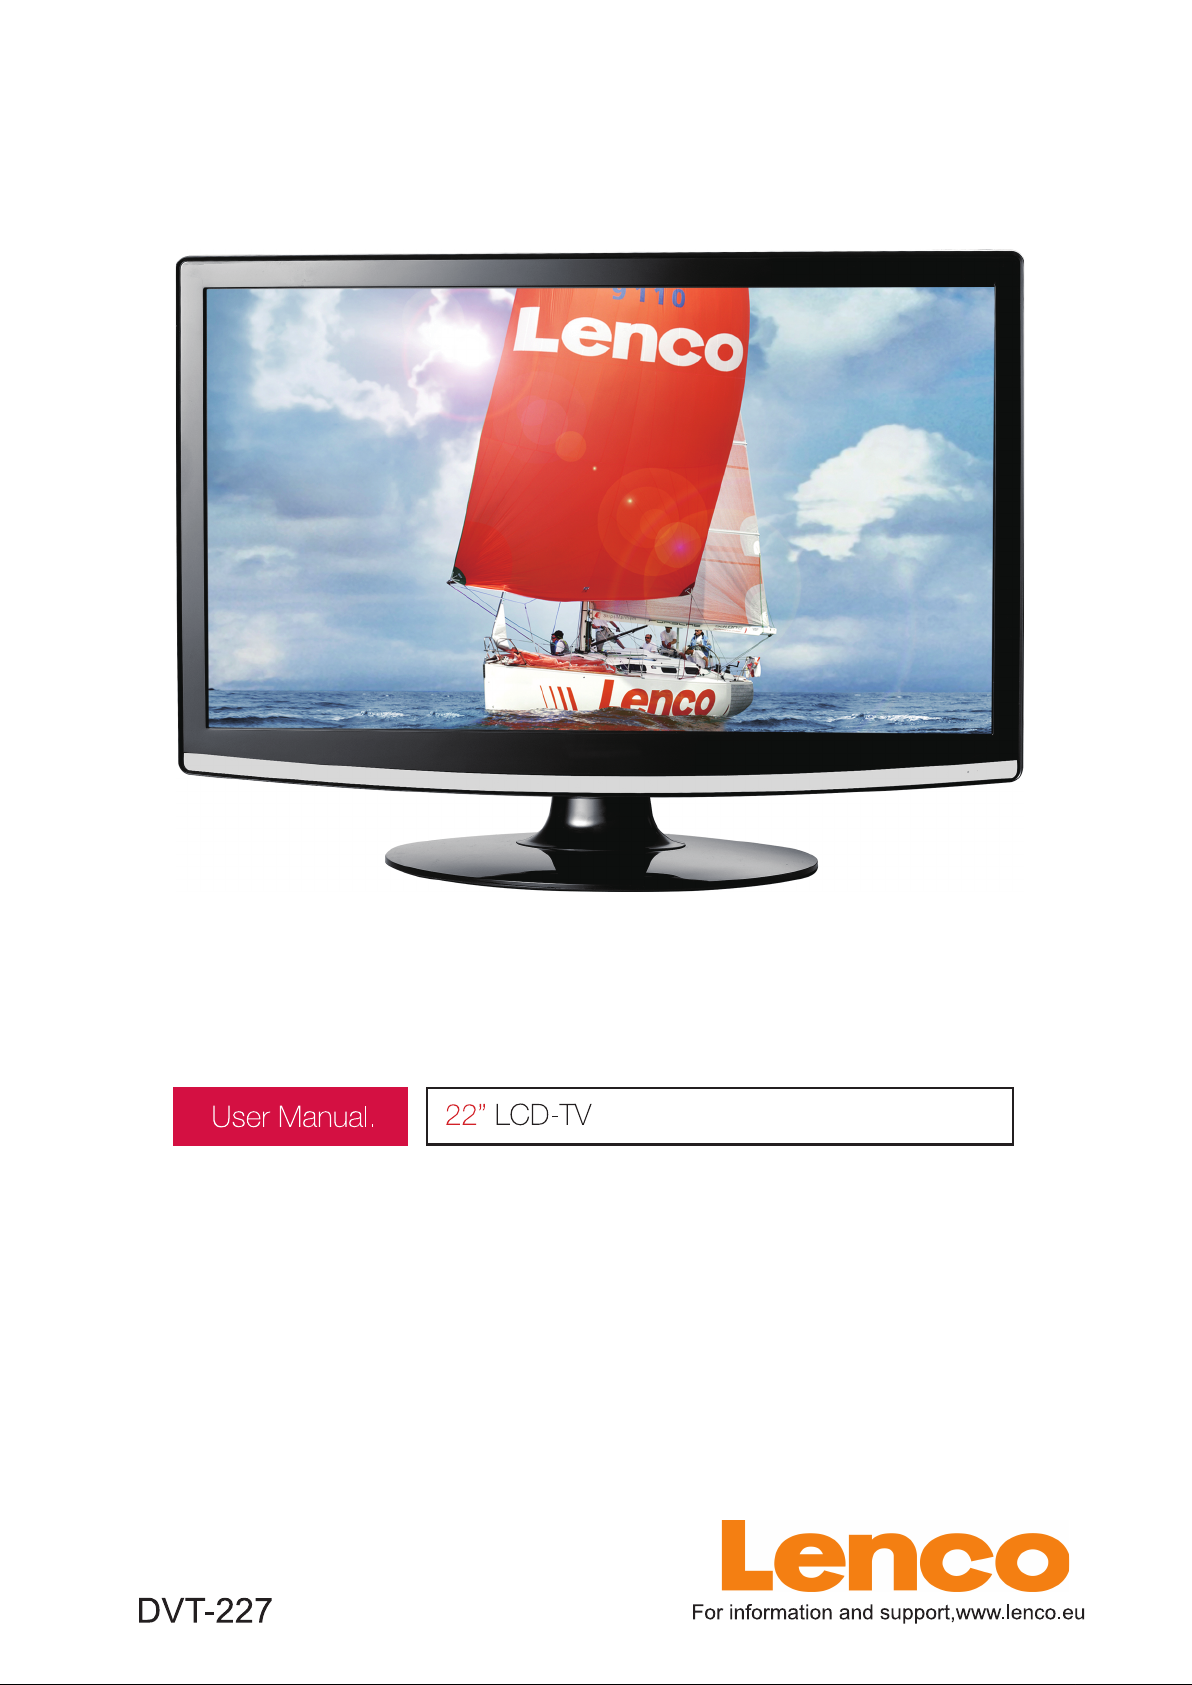
SOUND
You can select the type of sound, which best
corresponds to your listening.
1. Press the “MENU” button to enter the
OSD menu. Then press “c/d” button to
select the “SOUND” menu. Enter the
“SOUND” menu by pressing “f” button .
2. Press “c/d” button to select “SOUND
MODE” and press the “e/f” button to
select the sound mode.
3. Press “c/d” button to select “BASS” and press the “e/f” button to enter bass adjustment
menu to adjust bass.
10
Page 12
4. Press “c/d” button to select “TREBLE”
and press the “e/f” button to enter treble
adjustment menu to adjust treble.
5. Press “c/d” button to select
“BALANCE” and press the “e/f” button
to enter balance adjustment menu to adjust
balance.
6. Press “c/d” button to select “AVL” and
press the “e/f”button to select the avl
function on or off.
7. Press “c/d” button to select “EQ” and press the “ENTER” button to enter. Press “e/f”
button to select the frequency of wave band and press the “c/d” button to adjust .
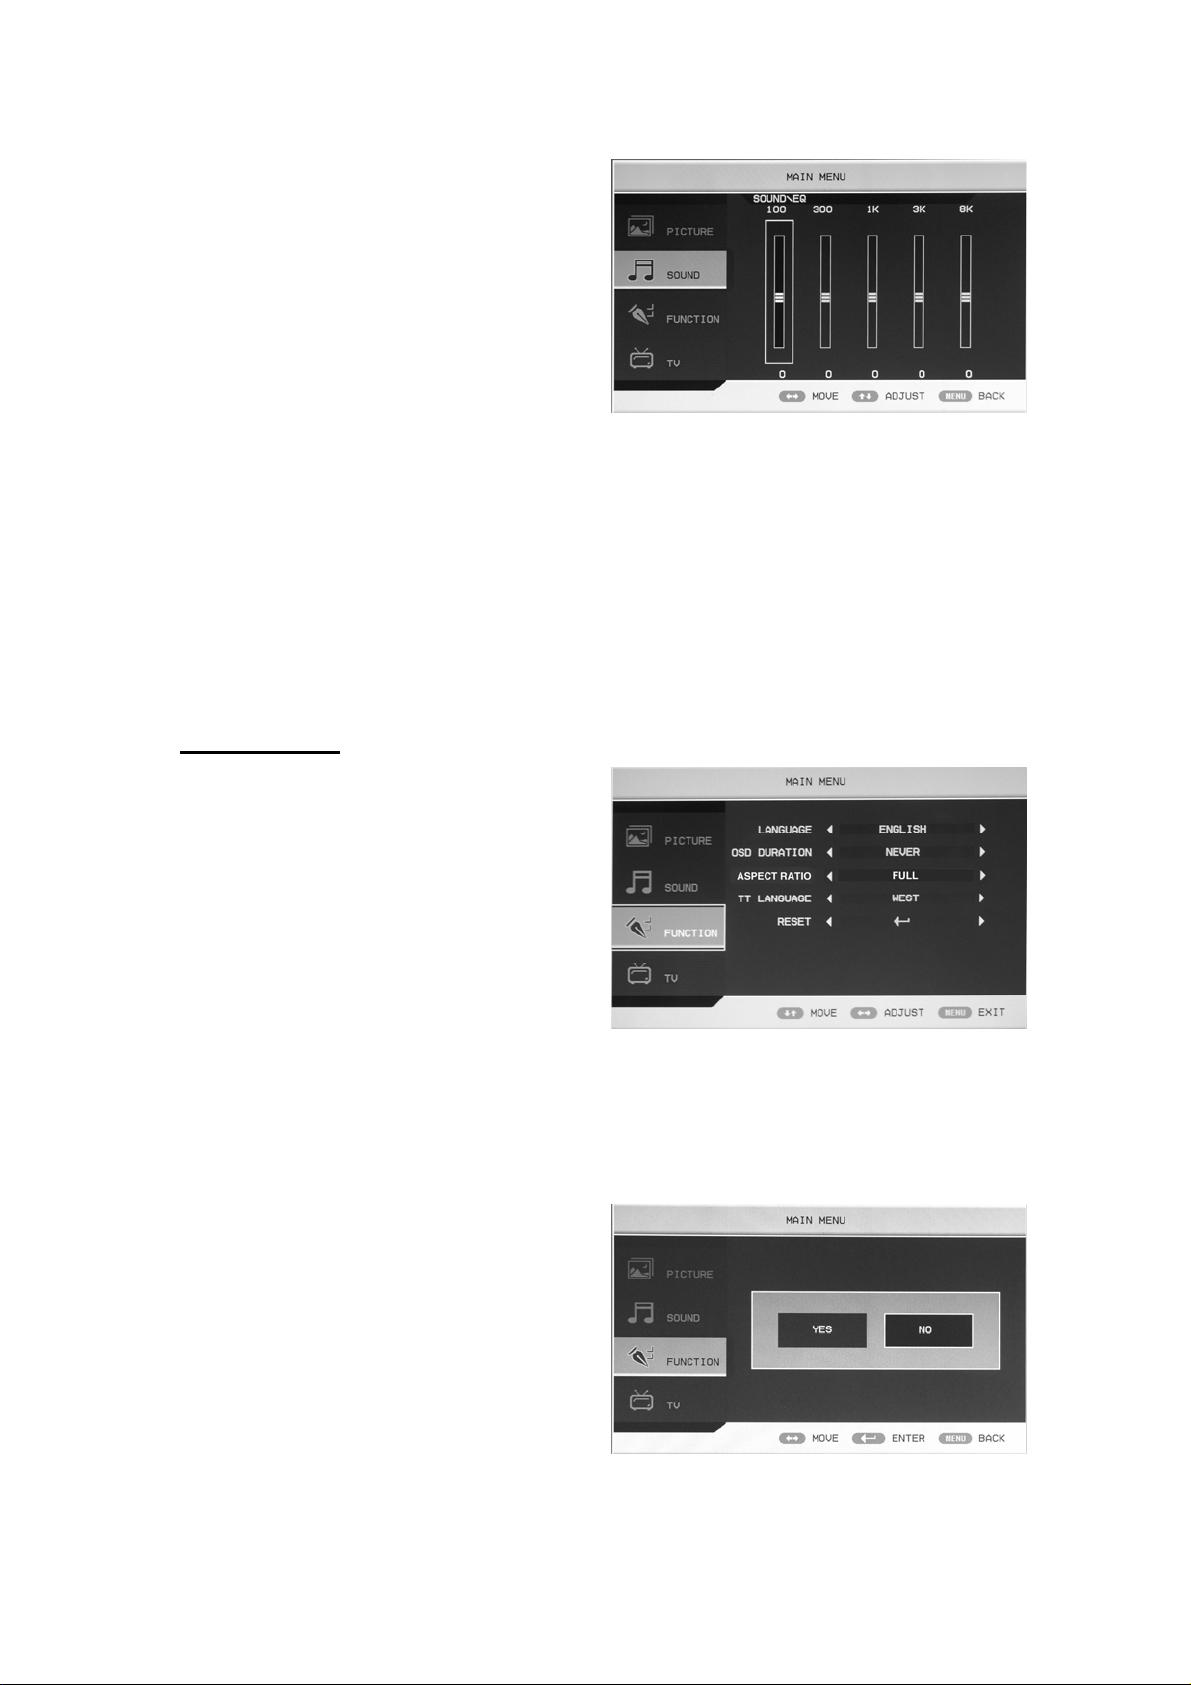
FUNCTION
1. Press the “MENU” button to enter the
OSD menu. Then press “c/d” button to
select the “FUNCTION” menu. Enter the
“FUNCTION” menu by pressing “f”
button .
2. Press “c/d” button to select
“LANGUAGE” menu and press the
“e/f” button to select the OSD language
which you desire.
3. Press “c/d” button to select “OSD DURATION” and press the “e/f” button to select the
OSD duration which you desire.
4. Press “c/d” button to select “ASPECT RATIO” and press the “e/f” button to select the
aspect ratio which you desire.
5. Press “c/d” button to select “TT LANGUAGE” menu and press the “e/f” button to select
local teletext language.
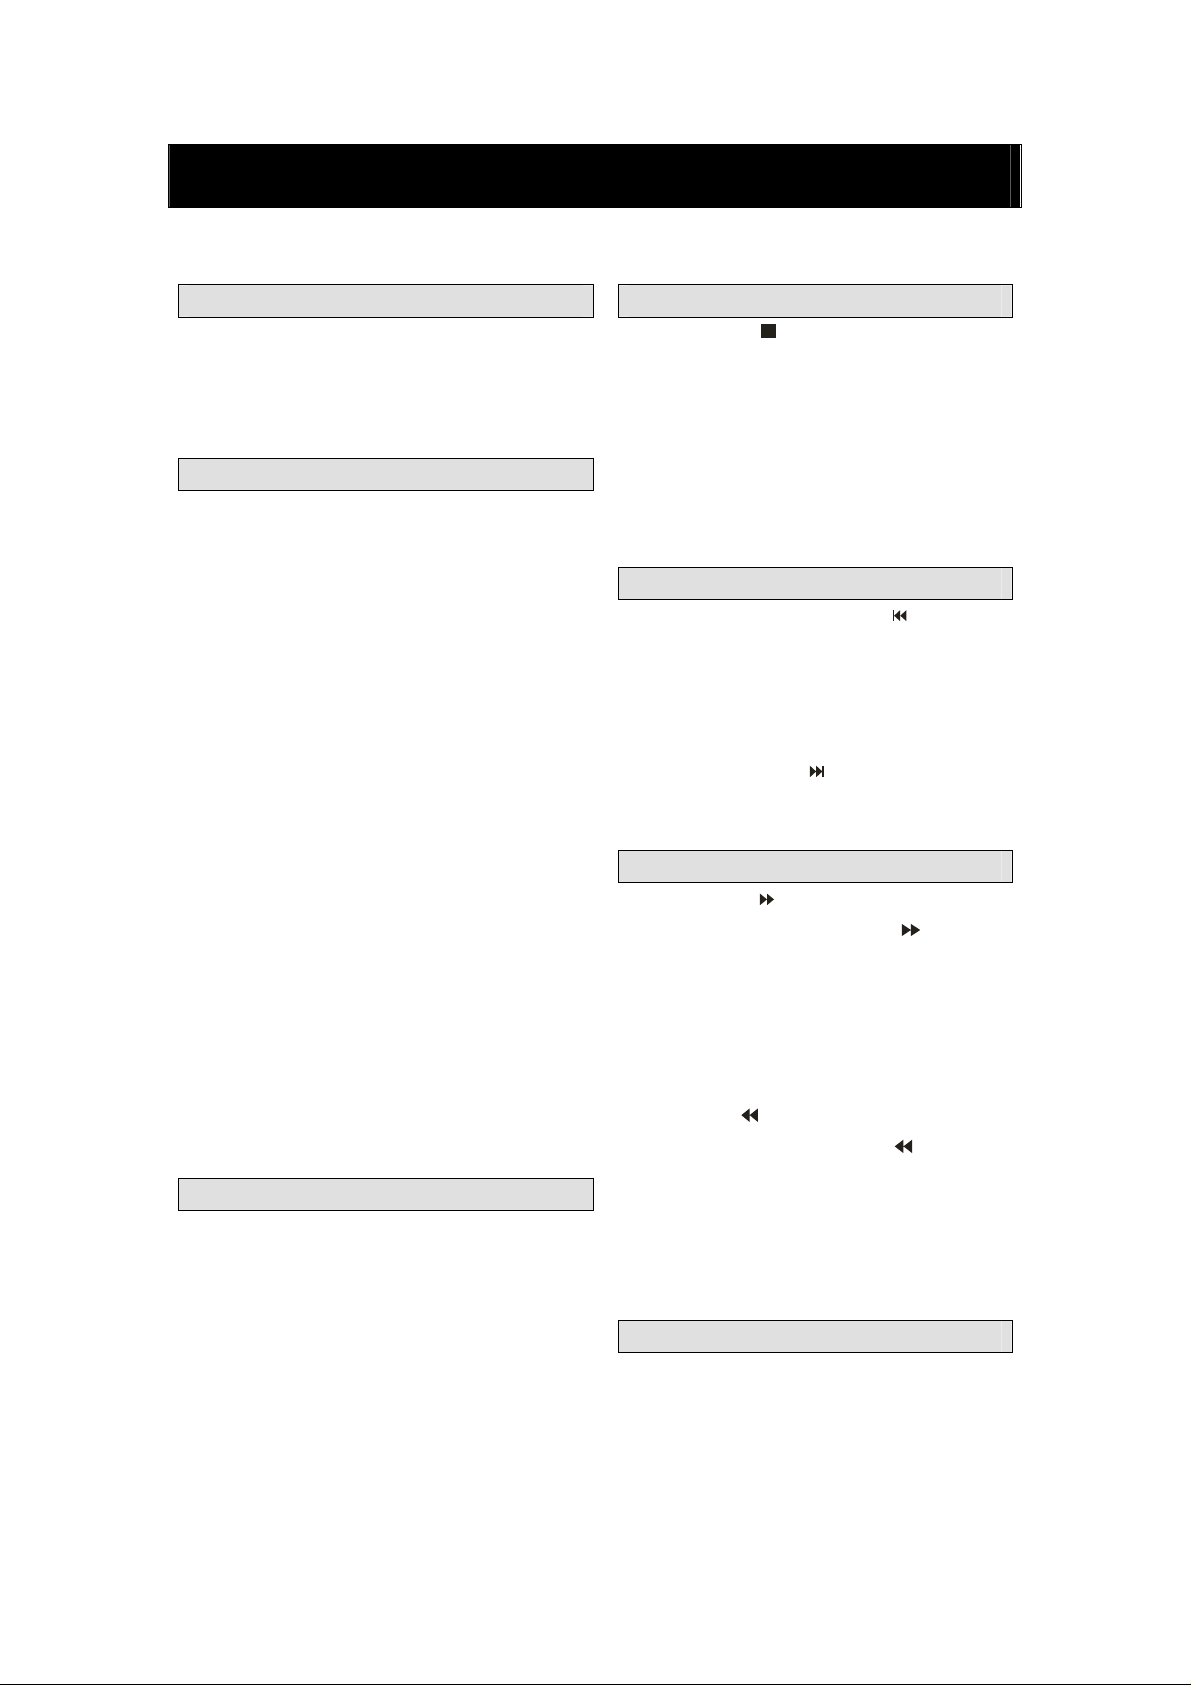
6. Press “c/d” button to select “RESET”
and press the “ENTER” button to enter.
Press the “e/f” button to select “YES” or
“NO” and press “ENTER” button to
confirm. Select “YES” to reset the
function and select “NO” to return the
previous menu.
11
Page 13

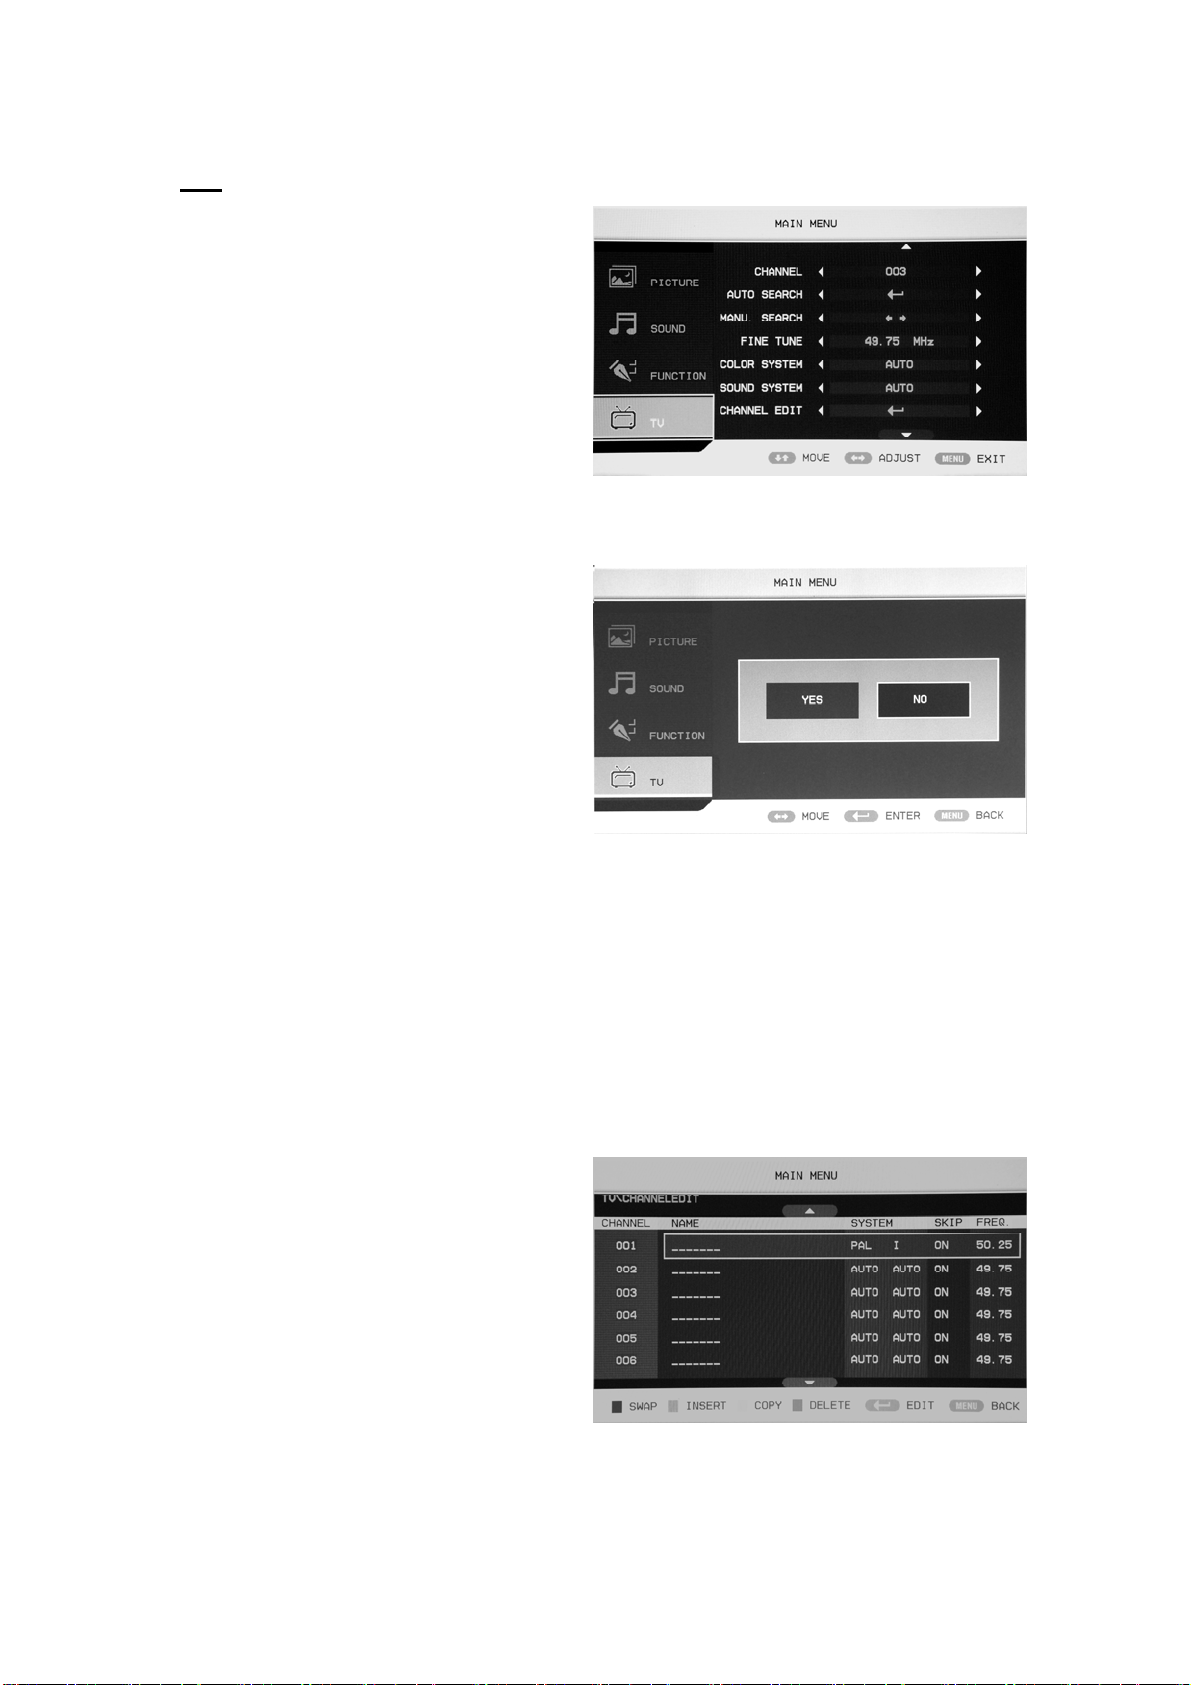
TV
You can make the desired adjustment in the TV
mode.
1. Press “c/d” button to select “CHANNEL”
and press the “e/f” button to select the
different channel.
2. Press “c/d” button to select “AUTO
SEARCH” and press the “ENTER” button
to enter. Press the “e/f” button to select
“YES” or “NO” and press “ENTER”
button to confirm . Select “YES” to
do auto search and select “NO” to
return the previous menu.
3.Press“c/d” button to select
“MANU.SEARCH” and press the “e/f”
button to enter. Press the “e/f” button to
select
“YES” or “NO” and press
“ENTER” button to confirm . Select
“YES” to do manual search and select
“NO” to return the previous menu.
4. Press “c/d” button to select “FINE TUNE”
and press the “e/f” button to select the
frequency which you want to fine tune.
5. Press “c/d” button to select “COLOR
SYSTEM” and press the “e/f” button to
select the local color system .
6. Press “c/d” button to select “SOUND
SYSTEM” and press the “e/f” button to
select the local sound system.
7. Press “c/d” button to select “CHANNEL EDIT” and press the “ENTER” button to enter.
a. Press “c/d” button to select one channel
and press “RED” button to pitch on. Press
“c/d” button to select another channel
which you want to swap . Press “ENTER”
button to confirm.
b. Press “c/d” button to select one channel
and press “GREEN” button to pitch on.
Press “c/d” button to select another
channel which you want to insert . Press
“ENTER” button to confirm.
c. Press “c/d” button to select one channel and press “YELLOW” button to pitch on.. Press
“c/d” button to select another channel which you want to copy. Press “ENTER” button to
confirm.
12
Page 14

d. Press “c/d” button to select the channel
which you want to delete and press
“BLUE” button to pitch on. Press
“ENTER” button to confirm.
e. Press “c/d” button to select the channel
in the list, press “ENTER” button to enter
the “EDIT SUB” menu.
f. Press “c/d” button to select“CHANNEL
EDIT NAME”menu and press “ENTER”
button to enter the rename channel’s window.
Input channel name at “____”, press
“c/de/f” button to select “letter”,
“number”, “_”, “〔”, “〕”, “EMPTY” or
“BAK SPC”, and press “ENTER” button
to confirm.
Press “c/de/f” button to select “OK”
to save and return to the previous menu.
Press “c/de/f” button to select
“CANCEL” to exit and return to the
previous menu.
8. Press “c/d” button to select “SKIP” and press the “e/f”button to select skip the channel on
or off.
PC
1. Press the “MENU” button to enter the
OSD menu. Then press “c/d” button to
select the “PC” menu. Enter the “PC”
menu by pressing “f” button.
2. Press “c/d” button to select
“H POSITION” menu and press the
“e/f” button to enter “H Position”
adjustment menu to adjust “H Position”.
3. Press “c/d” button to select
“V POSITION” and press the “e/f” button to enter “V Position” adjustment menu to adjust
“V Position”.
4. Press “c/d” button to select “PHASE” and press the “e/f” button to enter phase adjustment
menu to adjust phase.
5. Press “c/d” button to select “CLOCK” and press the “e/f” button to enter clock adjustment
menu to adjust clock.
6. Press “c/d” button to select “AUTO ADJUST” menu and press the “ENTER” button to do
auto adjustment.
13
Page 15
BASIC PLAY BACK
IMPORTANT NOTE;
DVD manual
Preparations
Press the TV/AV button on the front panel or
SOURCE button to select the DVD source.
Basic playback
1. press EJECT to open the disc tray,
Place a disc on the disc tray,.(If there is no disc
placed on the disc tray in DVD mode, OPEN will
display on the screen all the times )
There is only one disc size. Place the
disc in the correct guide on the disc tray.
If the disc is out of the guide, it may
damage the disc and cause the DVD player
to malfunction Do not place a disc Which
is unplayable in this DVD player.
2. Press EJECT to close the disc tray. The
playback will automatically start.
Some disc may not playback automatically,
you can press PLAY/PAUSE or ENTER button
to start playback.
Some disc may start playback with a
menu .use the cursor button on the remote
control to select menu options and press
PLAY/PAUSE or ENTER to start, or press
digits to select a menu options directly.
Pause playback
Press PLAY/PAUSE or ENTER to pause
playback (still mode).The sound will be muted
during still mode.
Press PLAY/PAUSE or ENTER to resume
normal playback.
Stop playback
1. Press STOP button to go to stop mode,
the TV screen will show the start-up logo, For
some disc the player can recall the location
where stopped, such as DVDs and audio CDs,.
Press PLAY/PAUSE or ENTER to resume
playback from the location where playback is
stopped,
3. Press STOP twice to stop completely
Previous and Next
During play back, press PREV key can go
back to the beginning of this chapter , then
each press of this key will skip a chapter till
the start of the disc .( note; Disc function may
vary depending on disc format)
Each press of NEXT
will skip the current chapter and play the next
one,.
Fast forward and Fast reverse
key during playback
Press F.FWD to fast forward through the
disc. Each time the
pressed , the fast forward motion speed
changes . it would cycle through 2x, 4x, 8x,
16x, 32x, and normal.
press PLAY/ENTER to resume normal
playback,
press F.REV to fast reverse through the
disc. Each time the F.REV
pressed, the fast reverse motion speed
changes, it would cycle through 2X, 4X, 8X,
16X, 32X and normal.
press PLAY/ENTER to resume normal
playback.
ZOOM
Press this button can zoom enlarge or lessen
the picture . Each time pressed the picture
times will be change, in zoom mode press
navigation buttons to move the picture
displayed on the screen
F.FWD button is
button is
14
Page 16

ALL DESCRIBING FUNCTION IS FOR DVD DISCS. IF YOU PLAY OTHER FORMAT
DISC, THE OPERATION AND DISPLAY ON SCREEN MAY DIFFERENT.
SUBTITLE
Press “ SUBTITLE ”, the screen will display
“ SUBTI-TLE 01/XX XXXXX “, “01” indicates
the ordinal number of this language; “XX”
indicates total number of language; “XXXXX”
indicates the language of country, (the number
of language depends on disc). This function can
select up to 32 languages display-ed on screen.
REPEAT
Press REPEAT button multiple times to reach
desired play mode;
DVD
Chapter repeat, title repeat, all repeat
CD
Track repeat, all repeat
MP3
Single, Repeat one, Repeat folder, Folder,
Shuffle, random
REPEA T A-B
Press A-B to mark the start-point, press again to
set an end point to complete setting, The
selected section A-B will be repeated
immediately.,
Press the repeat A-B again to cancel this
function.
ANGLE
When enjoying sports, concert or theatre, press
this key to watch same actions in different
angles. (Valid for discs possessing this function ,
Using a disc recorded in multi-angle you can
view the scene from different angles, for
example, front, side, whole view and exterior
scene, )
MEUN
Press this key to display foot menu, select item
according to your preference. (This function
will work with a DVD having a multi-layer
menu.).
PROGRAM
When playing discs, press “PROGRAM” to
enter program mode. Press the digit buttons to
select the program number that you want ,
when finished, move the cursor to select
“START”. This will start the program
playback . if you want to cancel this function,
press “STOP”, then press PLAY/PAUSE or
ENTER NOTE; This function is invalid for
MP3
TITLE/PBC
With some DVD discs pressing this key will
display the title menu, You can then use the
digit buttons to select the item you prefer.
15
Page 17

SPECIAL FUNCTION PLAYBCK
You can view Kodak picture CD and JPEG picture CD on this TV.
Playback
Insert a Kodak picture CD or JPEG picture CD into the tray and the disc will be loaded
Automatically. If the disc type can be identified, the player will start showing the pictures one by
one (slide show mode).if a navigation menu will be displayed use the navigation buttons to select a
file, then press the ENTER button.
Each picture in the CD will be displayed consecutively in a slide-show fashion and will be scaled to
fit in the whole TV screen. Some slide show transition modes are provided use “PROGRAM” key
to select. Customer can set transition effects for each picture.
TO display an image indefinitely, press the “PAUSE” key .To view the next or previous picture
press “NEXT” or “PREV” key. To resume the slide show press the “ENTER” key.
Press the STOP button to preview the photos in a folder, press navigation buttons to rotate a picture.
ZOOM
We provide zoom in/out function for the pictures, press the ZOOM key to execute zoom function
and select the zoom enlarging scale by pressing and buttons.
SCREEN SAVER FUNCTION
If this unit is not working by 3 minutes, it will go to sleep mode with screen saver on. In this mode,
you can press any key on remote control or on front panel to activate the unit.
You can set SCREEN SAVER function to OFF in GENERAL SETUP PAGE of DVD SYSTEM
SETUP.
MP3 PLAYBACK
When playing an MP3 disc. a navigation menu will be displayed automatically. In the menu. Use
up or DOMN navigation buttons to choose the folder. Then PLAY/PAUSE or ENTER to enter the
folder. Use UP or DOMN navigation buttons to choose the file and press PLAY/PAUSE or. ENTER
Pressing the left navigation button will take you to the previous screen menu.
MPEG4 DISC FUNCTION INTRODUCTION
MPEG-4 is the forth video and audio encoding standard released by MPEG (The abbreviation of
“moving pictures Experts Group”).VCD is based on MPEG-1 technology and DVD is based on
MPEG-2 MPEG-4 takes advantage of narrow bandwidth, purser the best picture quality by
compress and transmit the data in frame reconstruct
technology.The audio data is compressed by WMA or MP3
standard.MPEG-4 is the most advanced compression
technology standard In AV field. It has the highest
compression rate. By MPEG-4 Technology, we can encode
and compress a DVD film into one Or two CD-R disc with
pretty good picture quality, or can burn Several films that
has same quality as VCD into one CD-R disc, Or can burn
several films that has similar quality to DVD into DVD-ROM disc.
Note:
1.The MPEG-4 discs in market now have many different formats, such as XVID,AVI,RM etc. But
some discs with “MPEG4” logo in market are not encoded by MPEG technology. It is normal that
some of the discs can’t be played well in this player because of the incorrect encoding standard.
16
Page 18

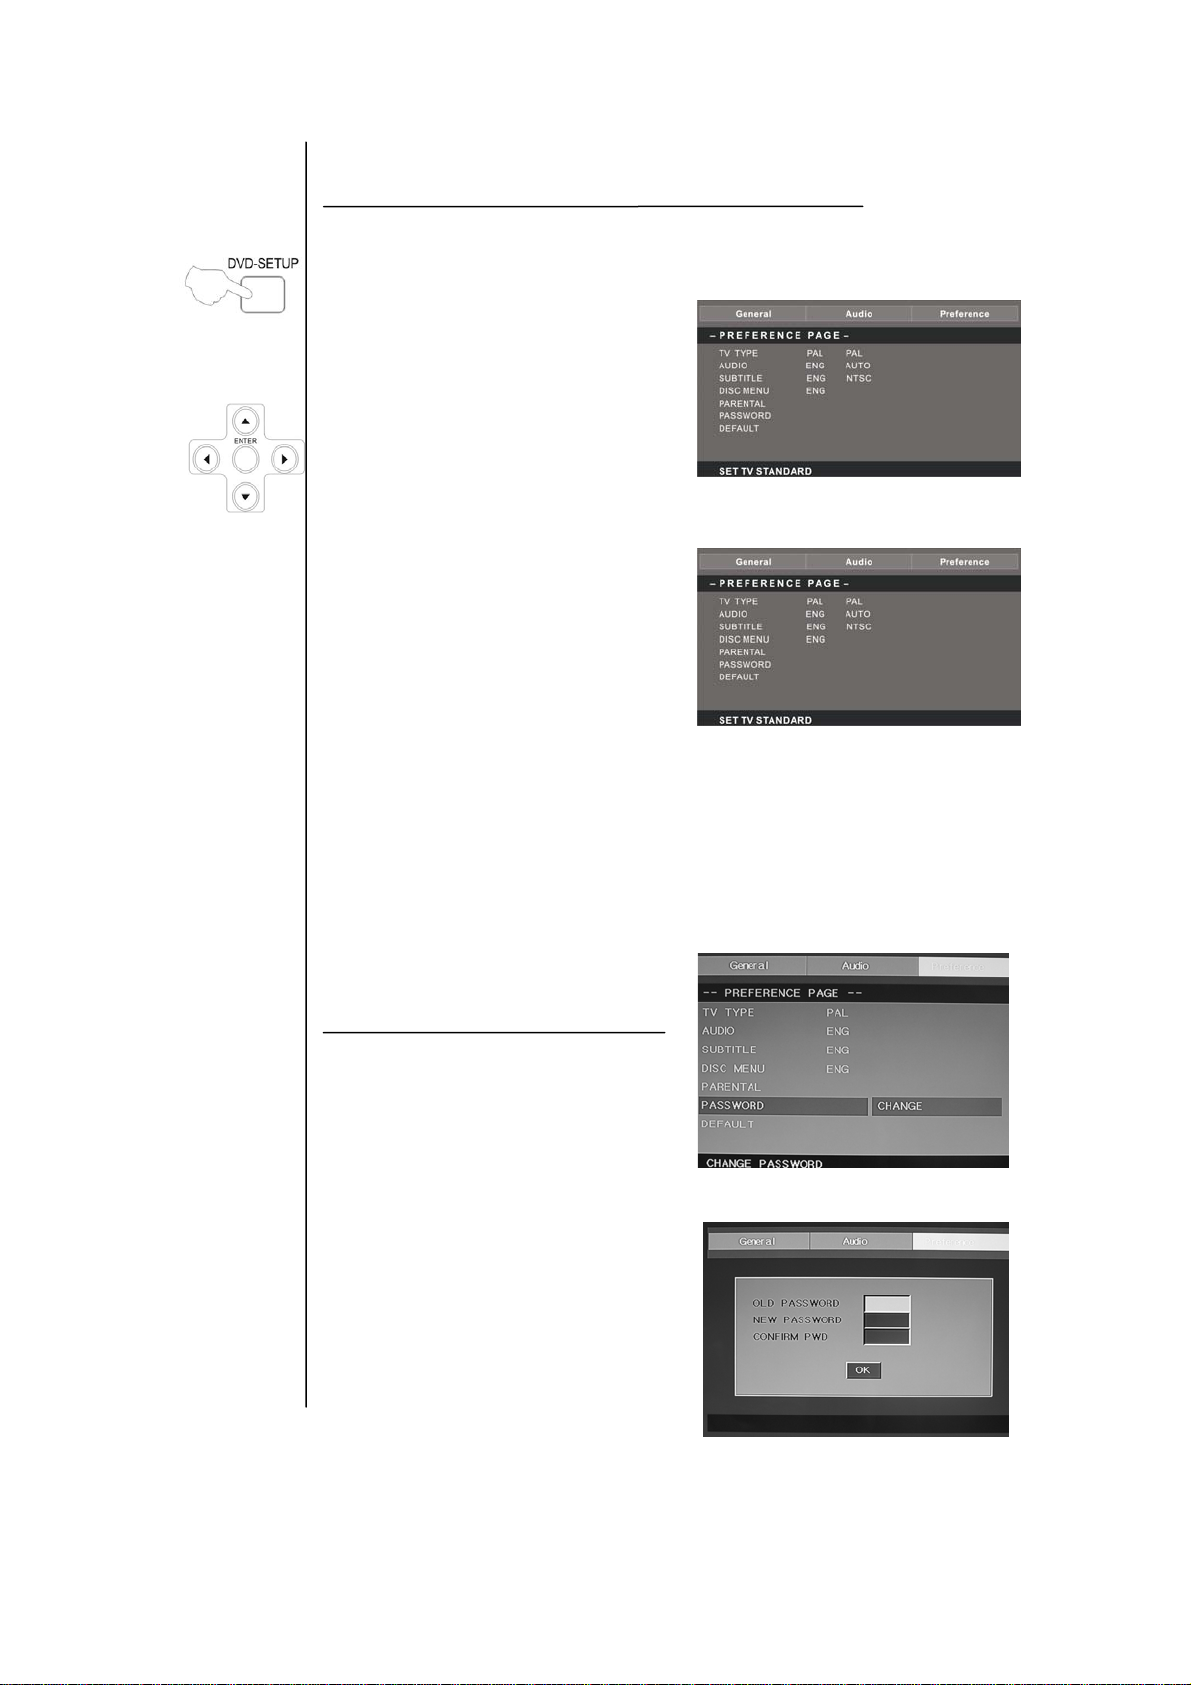
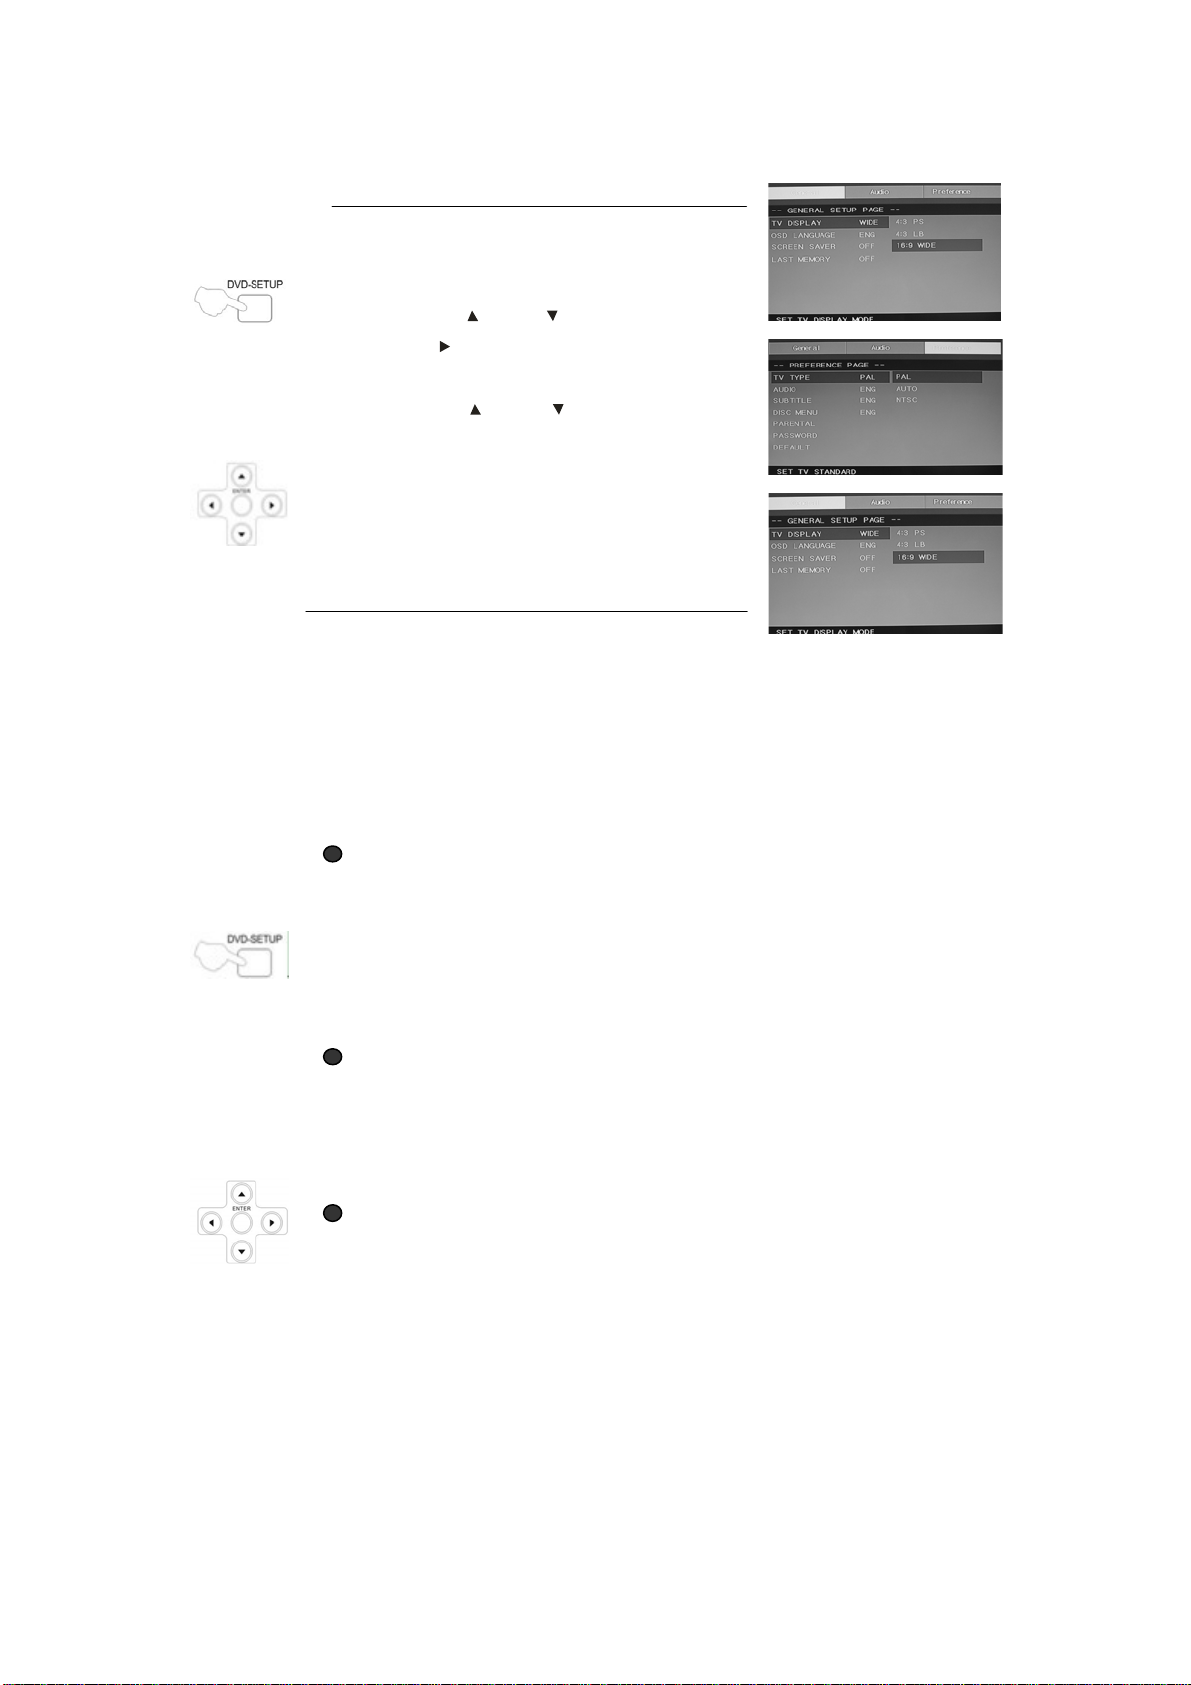
DVD SYSTEM SETUP
General Setup Process
press the DVD-SETUP button, the general setup
page, preference page will be displayed in turn,
press
enter the submenu.
press
ENTER to confirm.
press DVD SETUP repeatedly to exit the set-up
menus.
General setup page
ASPECT RATIO DESCRIPTION
When using the DVD with the internal TV, select
4:3/LB.
The following information applies only when the
DVD output is connected to an external TV.
or to select, the item, then press to
or to select, then press PLAY/PAUSE or
4:3 /PS (PS=Pan and Scan)
You may select if you have a normal aspect ratio (4:3) TV, although the
NORMAL/LB (letter box) is a more common (letter box) choice. In PS mode,
widescreen material will fill the screen, but at the expense of chopping off
extreme left and right edges of the original film picture. For this feature to
work, the disc must be specially coded. Such discs are uncommon.
4:3/LB (LB=Letter Box)
You may select this if you have a normal aspect ratio (4:3) TV. Widescreen
material will be shown in pure unaltered form, allowing the entire picture area
of the original film to be viewed without any side cropping. Black bars will
appear above and below the picture,
16:9
You may select this if you have a widescreen (16:9)TV, back bars may still
appear above and below the picture even if using a widescreen TV, this is
because some film directors prefer to use ultra widescreen aspect ratios e.. g .
2.35:1. This will normally be indicated on the DVD packaging.
17
Page 19

DVD SYSTEM SETUP(CONTINUED)
General Setup Page
TV Display: user can select different display wide
model such as 4:3 PS, 4:3 LB, 16:9 WIDE.
On Screen Display (OSD) Language:
Users can select on-screen display
Language.
Screen Saver: if the screen saver is on, then there
will be an animated picture of DVD on the screen
whenever the DVD player is idle for more than 3
minutes.
Last memory: memorize the chapter you have just
watched. When last memory is on , if you turn on the
DVD again after off it will display from the chapter
you watched when you turn off the DVD.
18
Page 20
Preference page
The preference page is only available when there is no disc in the player . these
settings are applied consistently to all discs which are inserted and played.
TV Type: this player
Supports different TV output, including
Auto, NTSC, and PAL systems.
Usually please set to Auto
Parental:the parental control function
works in conjunction with the different
censorship
classes assigned to DVDs.
These classes help to control the types of
DVDs that the family watches, there are
up to 8 censorship classes for DVDs.
Note;
To change this setting you must enter your password. (initial password is 8888)
Password change;
You can change your password. by
entering 4 digits. Your must confirm the
4 digits before the new password can be
accepted
NOTE: If you forget your password or a
password is accidentally set enter 8888
as the password, this will enable you to
regain control.
19
Page 21

Default: resets all settings (except password
and parental lock status) for this DVD player
back to the manufacturers original settings,
press ENTER to perform the reset,
Note;
Some functions may not be available
depending no the type of disc.
ANALOG AUDIO SETUP PAGE
1.Press the DVD-SETUP button,the Analog
Audio Setup Page, Preference
Page will be displayed in turn.
2.press c or d to select,the item,then press to enter the submenu.
3.Press c or d to select then press PLAY/PAUSE or ENTER to comfirm.
4.Press DVDSETUP repeatedly to exit the set-up menus.
Note1: If the DVD have the USB and CARD terminal, you can use the function with these
operation as below. When the current source is DVD, press “USB/CR” button to display the
threshold. Press “c/d” button to select “USB” or “CARD” and press “ENTER” button to confirm.
Press “c/d” button to select the item which you want to play and press the “ENTER” button to
play . Press “e” button to return back the previous catalogue when you have enter one
subdirectories at least . Press “
stop . Press “
” to play backward . Press “ ” button to play forward . Press “ ” button to
skip the previous chapter . Press “
” button to start playing or pause playing . Press “ ” button to
” button to skip the next chapter .
Note2:The DVD's work temperature is 0℃ to 40℃.
20
Page 22

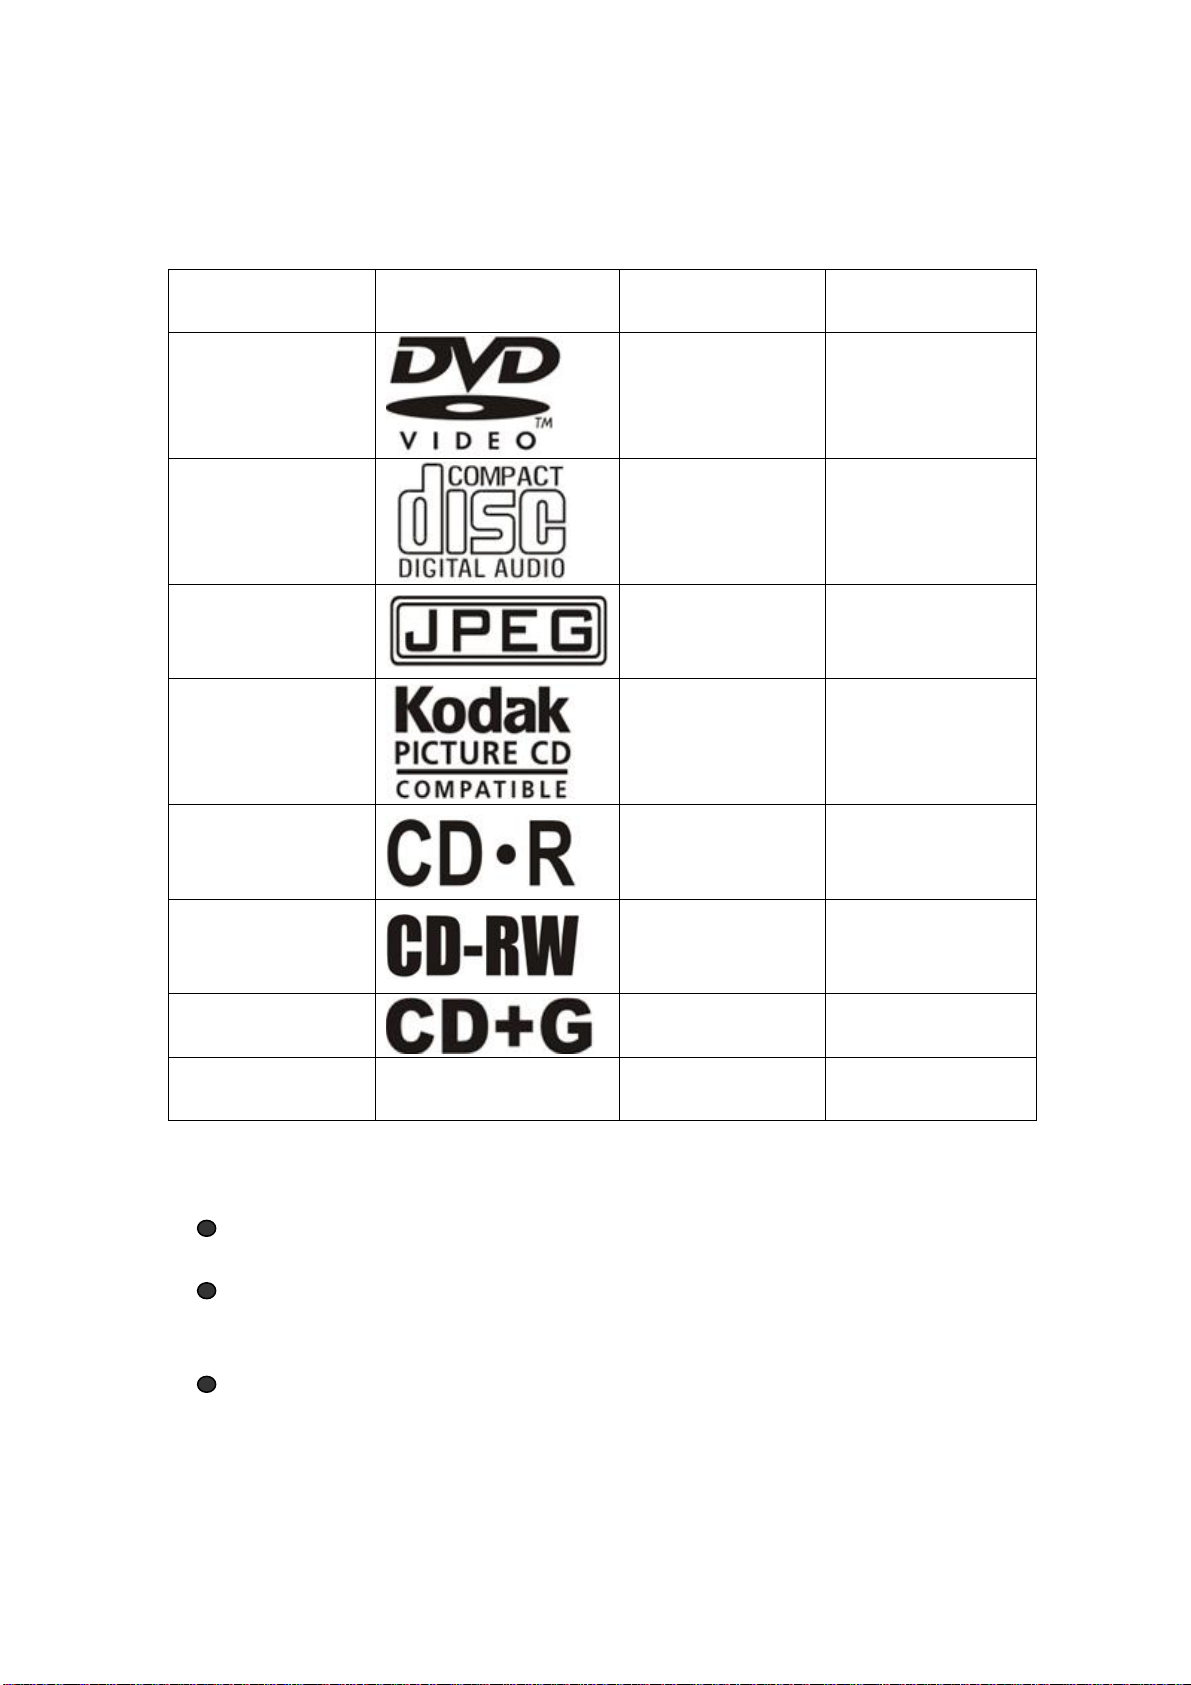
PLAYABLE DISCS
The following discs can be played;
DISCS
DVD VIDEO
AUDIO CD
JPEG
LABEL
CONTENTS
Audio + video
(moving picture)
Audio
Video(picture)
DIMENSION
12cm
12cm
12cm
KODAK CD
CD-R
CD-RW
CD+G
MPEG4
Support discs DVD, VCD, CD-R, CD-RW, SVCD, DVCD, HDCD, JPEG, CD+G, MPEG-4
Kodak CD , W MA.
You cannot play discs other than those listed above,
You cannot play non-standardized discs, even if they may be labeled as above,
The performance of CD-R or CD-RW disc is depend on the way of disc-burning. In a few
Cases, their performance may not be very well or even not playable.
Audio or video
Video(picture)
Audio or video
(moving picture)
Audio or video
(moving picture)
Video(picture)
(moving picture)
12cm
12cm
12cm
12cm
12cm
21
Page 23
DICS PROTECTION AND DVD CHARACTERSTICS
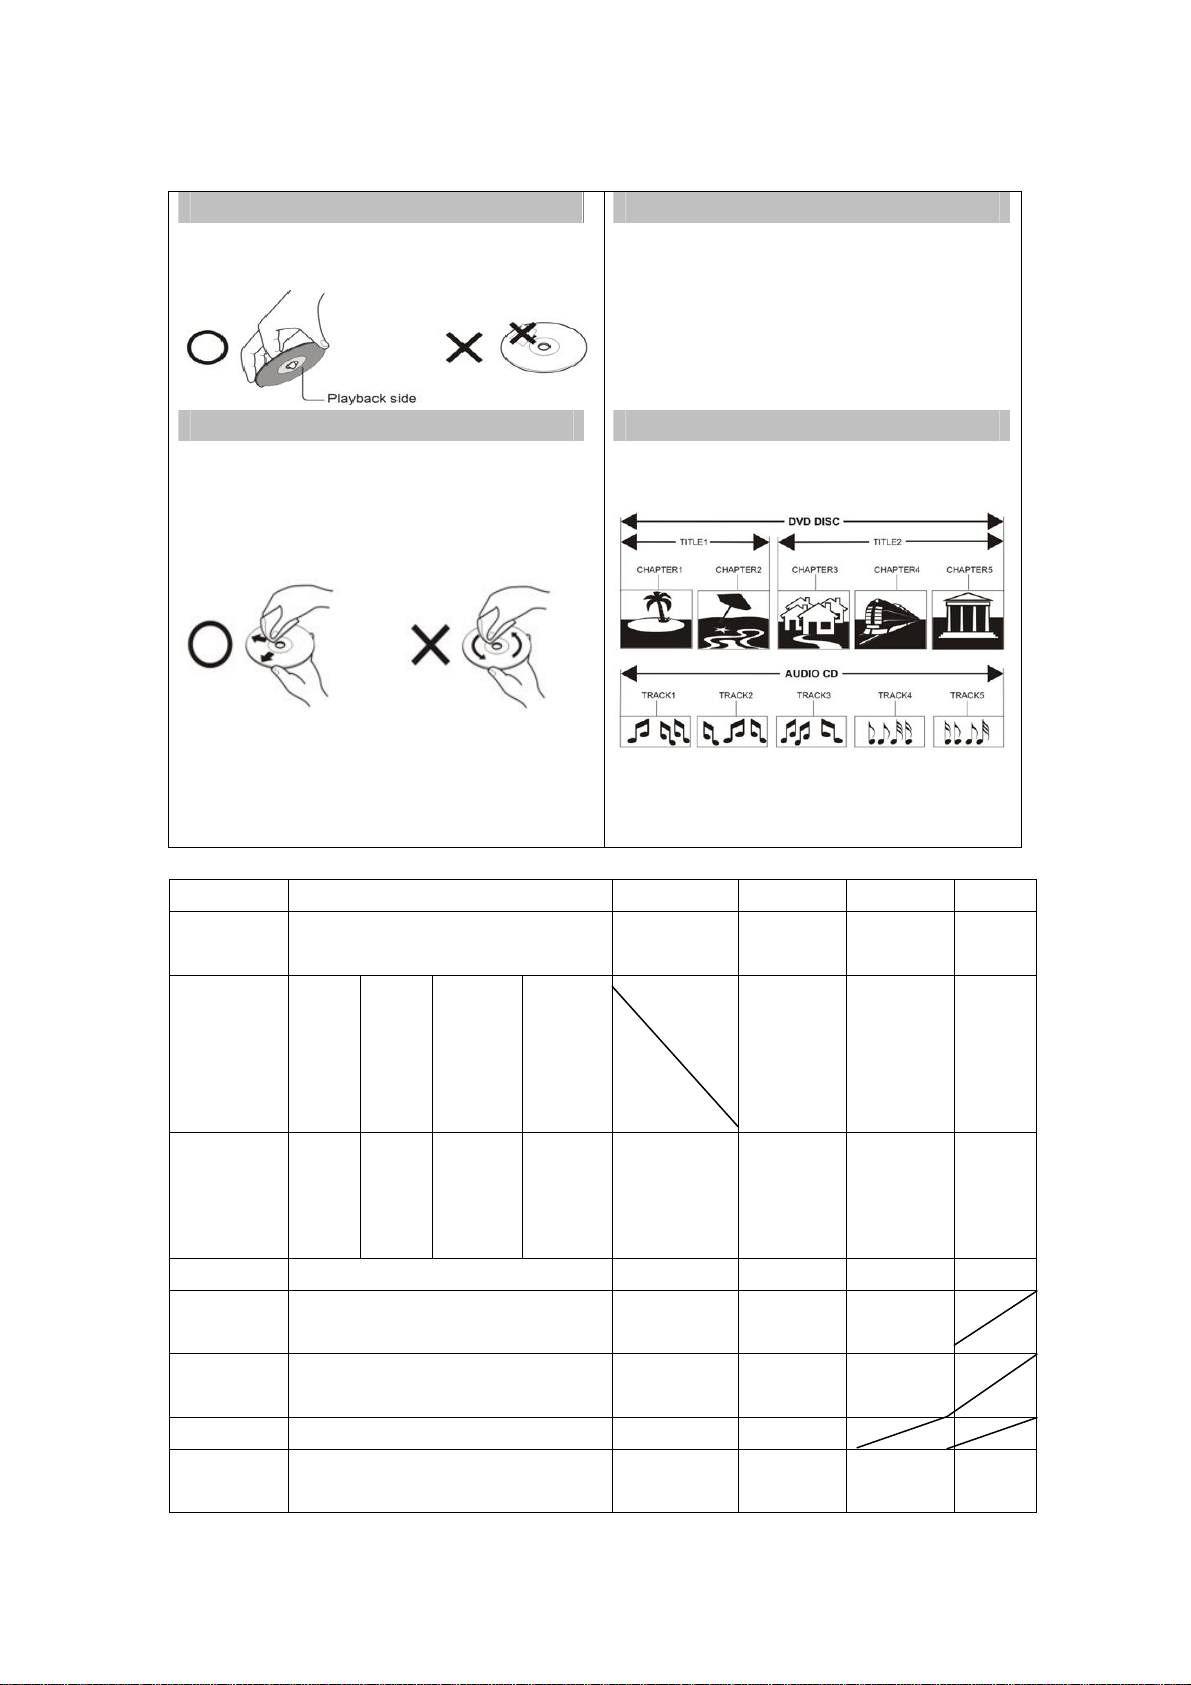
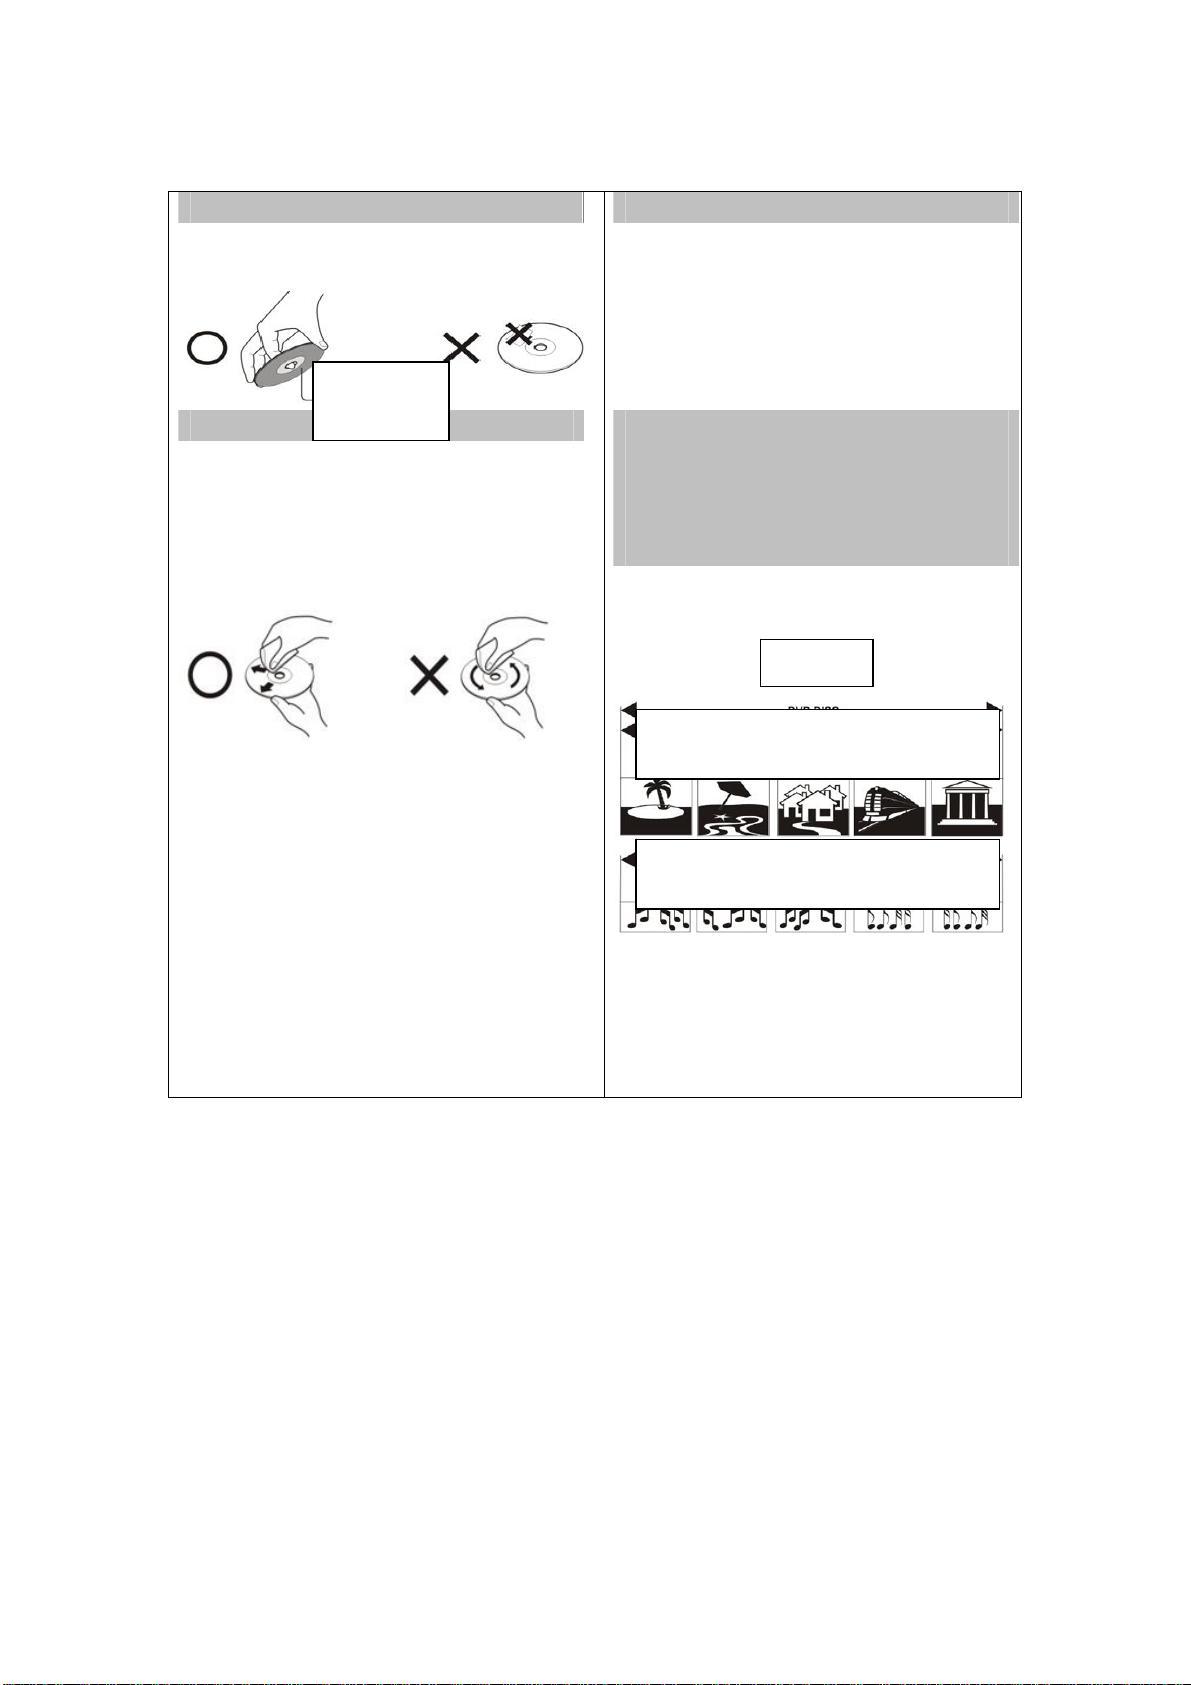
ON HANDLING DISCS
Do not touch the playback side of the disc.
. Do not attach paper or tape to disc.
ON CLEANING DISCS
Fingerprints and dust on the disc cause picture and sound deterioration.
Wipe the disc from the centre outwards with a soft cloth. Always keep the disc
clean.
If you can not wipe off the dust with a soft cloth, wipe the disc lightly with
a slightly moistened soft cloth and finish with a dry cloth.
Do not use any type of solvent such as thinner, benzene, commercially
available cleaners or anti-static spray for vinyl Lps. It may damage the disc.
ON STORING DISCS
Do not store discs in a place subject to direct sunlight or near heat
source,
Do not store discs in place subject to moisture and dust such as a
bathroom or near a humidifier.
Store discs vertically in a case. Stacking or placing object on discs
outside of their case may cause warping.
STRUCTURE OF DISC CONTENTS
Normally, DVD discs are divided into titles, and the titles are sub-divided
into chapters. Audio CD are divided into tracks.
Each title, chapter, or track is assigned a number, which is called title
number, chapter number or track number respectively.
There may be discs that do not have these number .
Compare DVD disc with other discs;
Encode
method
Capacity
Playing
Time
Disc diameter 12cm 30cm/20cm 12cm 12cm 12cm
Horizontal
resolution
Picture
proportion
Subtitle 32 kinds 16 kinds 4 kinds
Sound quality 48khz, 96khz/
DVD LG SVCD VCD CD
Digital/MPEG‖ Analog Digital Digital/MPEG 1 Digital
Single-
side
Single-
layer
4.7G
133
minutes
More than 500 line No more than
Multiple kinds One kind One kind One kind
6, 20 ,24bit
Double
-side
Single
-layer
8.5G
242
minutes
Single-
Side
Double-
Layer
9.4G
266
minutes
Double-
Side
Double-
Layer
17G
484
minutes
650MB
Single-side
60 minutes
Double-side
120 minutes
430 line
44.1khz/
16bit
45 minutes
No more than
350 line
44.1khz/
16bit
650MB
74 minutes
No more than
250 line
44.1khz/
16bit
650MB
74 minutes
44.1khz/
16bit
22
Page 24

Specifications
RGB INPUT
Horizontal
Model Resolution
DOS 720x400 31.5 70
VGA 640x480 31.5 60
SVGA 800x600 37.9 60
XGA 1024x768 48.4 60
WXGA 1360x768 47.7 60
WXGA+ 1440x900 55.9 60
Frequency
(KHz)
Vertical
Frequency
(HZ)
*1360x768 is only used for 22〞and 23〞LCD TV.
*1440x900 is only used for 19〞 LCD TV.
HDMI INPUT
Horizontal
Model Resolution
Frequency
(KHz)
Vertical
Frequency
(HZ)
VGA 640 x 480 31.47 59.94
480i 720 x480i 15.73 59.94/60
576i 720 x 576i 15.63 50
480p 720 x480p 31.47 59.94/60
576p 720 x 576p 31.26 50
720p 1280 x 720p 37.50
1080i 1920 x 1080i 28.13
23
44.96
33.75
50
59.94/60
50
59.94/60
Page 25

Trouble Shooting
Before consulting service personnel, check the following chart for a possible cause of the trouble
you are experiencing and for a solution.
PROBLEM SOLUTION
TV will not turn on
No picture, no sound
Poor picture, sound OK
●Make sure the power cord is plugged in.
●The batteries in the remote control may be
exhausted replace the batteries.
●Check the interface cable between TV and
antenna/cable TV.
●Press the power button on the remote.
●Press the SOURCE button the remote, then press the
“▲/▼”button repeatedly to select the TV source.
●Check the interface cable between TV and
antenna/cable TV.
●Try another channel, the station may have broadcast
difficulties.
●Adjust the brightness/contrast in the Video menu.
Audio noise ●Move any infrared equipment away from the TV.
The TFT LCD panel uses a panel consisting of sub pixels which requires sophisticated technology
to produce. However, there may be few bright or dark pixels on the screen. These pixels will have
no impact on the performance of the product.
24
Page 26

If at any time in the future you should need to dispose of this product please
note that: Waste electrical products should not be disposed of with household waste.
Please recycle where facilities exist. Check with your Local Authority or retailer for
recycling advice. (Waste Electrical and Electronic Equipment Directive)
Page 27

Page 28
Page 29

Inhalt
z Einleitung
z Warnhinweise
z Vorsichtsmaßnahmen
z Beschreibung des Hauptgeräts
z Fernbedienung
z Grundlegende OSD-Einstellungen
z DVD-Betrieb
z Technische Daten
z Fehlerbehebung
1
Page 30

Einleitung
Vielen Dank für den Kauf dieses LCD-Fernsehers. Sie können ihn als normalen Fernseher oder
PC-Monitor benutzen. Damit Sie die Funktionen dieses Gerät von Beginn an vollständig ausreizen
können, lesen Sie sich bitte die folgende Bedienungsanleitung durch und halten Sie sie zum
Nachschlagen ständig zur Hand.
AUFSTELLUNG
1. Stellen Sie das Gerät in einem Raum auf, in dem kein direktes Sonnenlicht auf den Bildschirm
fallen kann. Vollkommene Dunkelheit oder Reflexionen können zur Ermüdung der Augen
führen. Es wird empfohlen weiches, indirektes Licht zu benutzen.
2. Lassen zwischen dem Gerät und der Wand genügen Abstand, um eine ausreichende Ventilation
zu gewährleisten.
3. Vermeiden Sie besonders warme Orte, um möglichen Schäden am Gehäuse bzw.
Funktionsstörungen vorzubeugen.
4. Schließen Sie das Gerät an eine Wechselstromsteckdose mit 100-240 Volt und 50/60 Hz an.
5. Stellen Sie das Gerät nicht in der Nähe von Hitzequellen, wie z. B. Heizkörper,
Lüftungsschächte, direktes Sonnenlicht oder an Orten mit unzureichender Luftzirkulation, auf.
Blockieren Sie während der Benutzung niemals die Ventilationsöffnungen.
6. Die Kontrolllampe bleibt für ca. 30 Sekunden an, nachdem der Strom abgetrennt wurde.
Während Dessen es nicht möglich ist das Gerät wieder einzuschalten. Sie müssen dann warten,
bis die Kontrolllampe wieder aus geht.
2
Page 31

Warnhinweise
STROMSCHLAGGEFAHR!
ACHTUNG: ZUR VERMEIDUNG VON STROMSCHLAGGEFAHR,
GERÄT NICHT ÖFFNEN!
IM INNEREN DES GERÄTS SIND KEINE TEILE VORHANDEN, DIE
VOM BENUTZER GEWARTET WERDEN KÖNNEN.
WENDEN SIE SICH AN AUSGEBILDETES WARTUNGSPERSONAL.
Dieses Symbol dient dazu den Benutzer darauf hinzuweisen,
dass das Gerät nur von ausgebildetem Wartungspersonal
geöffnet werden darf, um Stromschlaggefahr zu vermeiden.
ACHTUNG
NICHT ÖFFNEN!
Dieses Symbol verweist auf wichtige Funktions- und
Wartungshinweise in der dem Gerät beigelegten
Bedienungsanleitung.
3
Page 32

Vorsichtsmaßnahmen
Achtung
Dieses Gerät arbeitet mit Hochspannung.
Öffnen Sie niemals das Gerätegehäuse. Wenden Sie sich an
ausgebildetes Wartungspersonal.
Achtung
Um Feuer und elektrischen Schlägen vorzubeugen, vermeiden Sie
es das Gerät Feuchtigkeit auszusetzen.
Achtung
Stecken Sie keine Gegenstände durch die Öffnungen des Gehäuses.
Lassen Sie niemals Flüssigkeiten irgendwelcher Art auf das Gerät
kommen.
Achtung
Vermeiden Sie es das Gerät direktem Sonnenlicht oder anderen
Hitzequellen auszusetzen. Stellen Sie das Gerät nicht direkt auf
andere Gerät, die Hitze produzieren, z. B. Videorekorder oder
Verstärker. Blockieren Sie keine der Ventilationsöffnungen auf der
Geräterückseite. Ventilation ist für einen einwandfreien Betrieb
ohne Funktionsstörungen besonders wichtig. Achten Sie darauf,
dass das Gerät nicht auf das Netzkabel gestellt wird.
4
Page 33

Caution
Achtung
Sie sollten sich niemals auf das Gerät stellen oder sich dagegen
lehnen bzw. auf das Gerät oder dessen Standfuß plötzlich drücken.
Achten Sie besonders auf Ihre Kinder.
Achtung
Benutzen Sie zur Aufstellung des Geräts keine instabilen Wagen,
Gestelle, Regale oder Tische. Es können schwere Verletzungen und
Schäden am Gerät entstehen, wenn es herunterfällt.
Achtung
Wenn das Gerät für längere Zeit nicht benutzt wird, sollte der
Netzstecker aus der Steckdose gezogen werden.
Achtung
Die Oberfläche des in diesem Produkt verwendeten
LCD-Bildschirms besteht aus Glas.
Diese kann brechen, wenn das Gerät herunterfällt oder starken
Stößen ausgesetzt wird. Vermeiden Sie Verletzungen, wenn die
Glasoberfläche brechen sollte.
5
Page 34

Beschreibung des Hauptgeräts
Bedienelemente und Tastenfunktionen
VOL+ : Lautstärke erhöhen
VOL- : Lautstärke verringern
CH+ : Fernsehkanal vor
CH- : Fernsehkanal zurück
MENU : Aufrufen des Hauptmenüs
TV/AV : Auswahl des Eingangssignals
POWER : Einschalten des Gerät oder Bereitschaftsbetrieb
TV Terminal Connections
1. HDMI-Eingang
2. VGA-Eingang zum Anschluss an einen PC
3. SCART-Eingang
4. S-Video-Eingang
5. Video-Eingang
6. AUDIO-Eingang
7. PC-AUDIO-Anschluss
8. Kopfhörerausgang
9. ATV-Antennen-/Kabelanschluss
Stromversorgung
Netzeingang Hauptschalter
6
Page 35
Fernbedienung
POWER: Ein-/Ausschalttaste – Betätigen Sie diese Taste, um
den Fernseher einzuschalten. Betätigen Sie die Taste ein
weiteres Mal, um den Fernseher wieder auszuschalten.
MUTE: Betätigen Sie diese Taste, um die Tonausgabe ausoder wieder einzuschalten.
DVD SETUP: Betätigen Sie diese Taste, um das
DVD-Hauptmenü aufzurufen. Betätigen Sie die Taste erneut,
um das Menü wieder zu verlassen.
(Nur für Modelle mit DVD-Funktion)
TITLE: Betätigen Sie diese Taste, um zum Titelmenü
zurückzukehren.
(Nur für Modelle mit DVD-Funktion)
MENU (BLAU): Betätigen Sie diese Taste, um in das
Hauptmenü zurückzukehren oder das DVD-Hauptmenü zu
verlassen.
(Nur für Modelle mit DVD-Funktion)
USB/CR: Benutzen Sie die Tasten zur Auswahl eines
Eingangssignals.
(Nur für Modelle mit USB/CR-Funktion)
NICAM/A2: Betätigen Sie diese Taste im TV-Modus zum
Aktivieren des Stereo-Effekts.
SLEEP: Einstellen der Einschlaffunktion.
ASPECT: Benutzen Sie diese Taste zur Auswahl eines
anderen Bildformats.
EJECT
Ladefach auszuwerfen.
(Nur für Modelle mit DVD-Funktion)
DISPLAY: Anzeige von TV-Informationen
AUTO: Benutzen Sie diese Taste zur automatischen
Einstellung des Bilds im PC-Modus.
PMODE: Auswahl des Bildmodus.!
SMODE: Auswahl des Soundmodus.
DTV:
SOURCE: Auswahl eines Eingangssignals
: Betätigen Sie diese Taste, um eine DVD aus dem
Diese Taste ist nicht verfügbar.
7
Page 36
ENTER: Auswahlbestätigung der gewählten Option oder
Aktivierung von Funktionen.
MENU: Betätigen Sie diese Taste, um in das Hauptmenü zur
Einstellung verschiedener Optionen zu gelangen.
EXIT: Bildschirmanzeige (OSD) ausschalten.
0-9: Kanalauswahl mithilfe der Zifferntasten 0 bis 9.
-/--: Eingabeziffer wechseln.
: Umschalten zwischen dem momentanen und vorigen
Kanal.
CHc/CHd: Kanalauswahl
VOLc/VOLd : Lautstärkeregelung
TEXT: Fernsehtextmodus
HOLD: Anhalten des Seitenvorschubs im Fernsehtextmodus.
INDEX: Betätigen Sie diese Taste zur Anzeige des
Inhaltsverzeichnisses.
REVEAL: Betätigen Sie diese Taste, um versteckte
Informationen von Fernsehtextseiten anzuzeigen. Betätigen
Sie die Taste ein zweites Mal, um die Informationen wieder
zu verstecken.
SIZE: Seitenanzeige im Fernsehtextmodus (obere/untere
Seitenhälfte, gesamte Seite).
SUBPAGE: Ausführung von SUBCODE im Text, wenn die
Textanzeige in den Anzeigemodus geht.
PLAY/PAUSE
: Starten oder vorübergehendes Anhalten
der Wiedergabe.
(Nur für Modelle mit DVD- oder USB/CR-Funktion)
STOP
: Stoppen der Disc- oder Media-Wiedergabe
(Nur für Modelle mit DVD- oder USB/CR-Funktion)
REV
: Schnellrücklauf.
(Nur für Modelle mit DVD- oder USB/CR-Funktion)
FWD
: Schnellvorlauf.
(Nur für Modelle mit DVD- oder USB/CR-Funktion)
PREV
: Voriges Kapitel
(Nur für Modelle mit DVD- oder USB/CR-Funktion)
NEXT
: Nächstes Kapitel
(Nur für Modelle mit DVD- oder USB/CR-Funktion)
8
Page 37
ZOOM: Bildvergrößerung !
(Nur für Modelle mit DVD-Funktion)
GOTO: Zum gewählten Kapitel oder Titel springen
(Nur für Modelle mit DVD-Funktion)
SUBTITLE (BLAU): Einstellen der Disc-Untertitel!
(Nur für Modelle mit DVD-Funktion)
ANGLE: Auswahl der Kameraperspektive!
(Nur für Modelle mit DVD-Funktion)
PROGRAM: Zusammenstellen eines Disc-Programms.
(Für Modelle mit DVD-Funktion)
INTRO: Anzeige der Kapitelabspielzeit!
(Für Modelle mit DVD-Funktion)
REPEAT: Auswahl des Wiederholungmodus!
(Für Modelle mit DVD-Funktion)
AB: Abschnittswiederholung
(Für Modelle mit DVD-Funktion)
Farbtasten Rot, Grün, Gelb, Blau: Tasten zum direkten
Zugriff auf farblich markierte Seiten.
(Für Modelle mit europäischer Regionsfunktion)
!
!
!
!
!
!
!
!
!
!
!
!
!
!
!
!
!
!
!
!
!
9
Page 38

Grundlegende OSD-Einstellungen
BILD
Sie können die Bildausgabe entsprechend Ihren Anforderungen einstellen.
1. Betätigen Sie die MENU-Taste, um das
OSD-Menü aufzurufen. Benutzen Sie
dann die Tasten c/d zur Auswahl des
PICTURE-Menüs. Betätigen Sie die
Tast e f, um in das Bildmenü zu gehen.
2. Benutzen Sie die Tasten c/d zur
Auswahl von „PICTURE MODE“ und
dann die Tasten e/f zur Auswahl des
gewünschten Bildmodus.
3. Benutzen Sie die Navigationstasten c/d zur Auswahl von „BRIGHTNESS“ und betätigen Sie
e/f, um die Helligkeit einzustellen.
4. Benutzen Sie die Navigationstasten c/d zur Auswahl von „CONTRAST“ und betätigen Sie
e/f, um den Kontrast einzustellen.
5. Benutzen Sie die Navigationstasten c/d zur Auswahl von „SATURATION“ und betätigen Sie
e/f, um die Sättigung einzustellen.
6. Benutzen Sie die Navigationstasten c/d zur Auswahl von „SHARPNESS“ und betätigen Sie
e/f, um die Bildschärfe einzustellen.
7. Benutzen Sie die Navigationstasten c/d zur Auswahl von „HUE“ und betätigen Sie e/f, um
den Farbton einzustellen.
Hinweis: Der Farbton kann nur bei der Benutzung von NTSC eingestellt werden.
8. Benutzen Sie die Navigationstasten ▲▼ zur Auswahl von „COLOR TEMP“ und benutzen Sie
die Navigationstasten ◄►, um die Farbtemperatur einzustellen.
AUDIO
Sie können die Audioausgabe entsprechend
Ihren Anforderungen einstellen.
1. Betätigen Sie die MENU-Taste, um das
OSD-Menü aufzurufen. Benutzen Sie
dann die Tasten c/d zur Auswahl des
SOUND-Menüs. Betätigen Sie die
Tast e f, um in das Audiomenü zu
gehen.
2. Benutzen Sie die Navigationstasten
▲/▼ zur Auswahl von „SOUND MODE“ und betätigen Sie die Tasten e/f zur Auswahl.
3. Benutzen Sie die Navigationstasten c/d zur Auswahl von „BASS“ und betätigen Sie e/f,
um die Bässe einzustellen.
10
Page 39

4. Benutzen Sie die Navigationstasten
c/d zur Auswahl von „TREBLE“ und
betätigen Sie e/f, um die Höhen
einzustellen.
5. Benutzen Sie die Navigationstasten
c/d zur Auswahl von
„BALANCE“ und betätigen Sie e/f,
um die Balance einzustellen.
6. Betätigen Sie zur Auswahl von
„AVL“ und dann die Tasten , um die AVL-Funktion ein- bzw. auszuschalten.
7. Benutzen Sie die Navigationstasten c/d zur Auswahl von „EQ“ und betätigen Sie die
ENTER-Taste zum Öffnen. Benutzen Sie die Tasten e/f zur Auswahl eines Frequenzbands
und betätigen Sie die Tasten c/d zum Einstellen.
FUNKTIONEN
1. Betätigen Sie die MENU-Taste, um das
OSD-Menü aufzurufen. Benutzen Sie
dann die Tasten c/d zur Auswahl des
FUNCTION-Menüs. Betätigen Sie die
Tast e f, um in das Funktionsmenü zu
gehen.
2. Benutzen Sie die Navigationstasten
c/d zur Auswahl von
„LANGUAGE“ und betätigen Sie die
Tast en e/f zur Auswahl der gewünschten Anzeigesprache.
3. Benutzen Sie die Navigationstasten c/d zur Auswahl von „OSD DURATION“ und betätigen
Sie die Tasten e/f zur Auswahl der gewünschten Anzeigedauer.
4. Benutzen Sie die Navigationstasten c/d zur Auswahl von „ASPECT RATIO“ und betätigen
Sie die Tasten e/f zur Auswahl des gewünschten Bildformats.
5. Benutzen Sie die Navigationstasten c/d zur Auswahl von „TT LANGUAGE“. Dann können
Sie mit den Tasten e/f die von Ihnen benutzte Fernsehtextsprache wählen.
6. Benutzen Sie die Navigationstasten
▲/▼ zur Auswahl von „RESET“ und
betätigen Sie die ENTER-Taste zur
Bestätigung. Benutzen Sie die
Navigationstasten ▲/▼ zur Auswahl
von YES oder NO und betätigen Sie die
ENTER-Taste zur Bestätigung. Wählen
Sie YES, um den Reset auszuführen und
NO, um zum vorgen Menü
zurückzukehren.
11
Page 40
TV
Sie können hier die gewünschten
Veränderungen am Fernsehmodus machen.
1. Benutzen Sie die Navigationstasten
c/d zur Auswahl von
„CHANNEL“ und benutzen Sie dann
die Navigationstasten e/f zur Auswahl
eines anderen Kanals.
2. Betätigen Sie die Navigationstasten
▲/▼ zur Auswahl von „AUTO
SEARCH“ und betätigen Sie die ENTER-Taste zur Bestätigung. Benutzen Sie die
Navigationstasten ▲/▼ zur Auswahl von YES oder NO und betätigen Sie die ENTER-Taste
zur Bestätigung.
die automatische Suche zu starten und
NO, um zum vorgen Menü
zurückzukehren.
3. Betätigen Sie die Navigationstasten
▲/▼ zur Auswahl von
„MANU.SEARCH“ und betätigen Sie
die Tasten e/f zum Öffnen. Benutzen
Sie die Navigationstasten ▲/▼ zur
Auswahl von YES oder NO und
betätigen Sie die ENTER-Taste zur Bestätigung.
starten und NO, um zum vorgen Menü zurückzukehren.
4. Benutzen Sie die Navigationstasten c/d zur Auswahl von „FINE TUNE“ und benutzen Sie
dann die Navigationstasten e/f zur Auswahl der Frequenz, die Sie feineinstellen wollen.
5. Benutzen Sie die Navigationstasten c/d zur Auswahl von „COLOR SYSTEM“ und benutzen
Sie dann die Navigationstasten e/f zur Auswahl des korrekten Farbsystems.
6. Benutzen Sie die Navigationstasten c/d zur Auswahl von „SOUND SYSTEM“ und benutzen
Sie dann die Navigationstasten e/f zur Auswahl des korrekten Tonsystems.
7. Benutzen Sie die Navigationstasten c/d zur Auswahl von „CHANNEL EDIT“ und betätigen
Sie die ENTER-Taste zur Bestätigung.
a. Benutzen Sie die Navigationstasten
c/d zur Auswahl eines Kanals gefolgt
von der roten Farbtaste, um ihn zu
aktivieren. Benutzen Sie die Tasten
c/d zur Auswahl eines zweiten Kanals,
der mit dem ersten getauscht werden
soll. Betätigen Sie die ENTER-Taste zur
Bestätigung.
Wählen Sie YES, um
Wählen Sie YES, um die manuelle Suche zu
12
Page 41

b. Benutzen Sie die Navigationstasten c/d zur Auswahl eines Kanals gefolgt von der grünen
Farbtaste, um ihn zu aktivieren. Benutzen Sie die Tasten c/d zur Auswahl eines zweiten
Kanals, den Sie einfügen wollen. Betätigen Sie die ENTER-Taste zur Bestätigung.
c. Benutzen Sie die Navigationstasten
c/d zur Auswahl eines Kanals gefolgt
von der gelben Farbtaste, um ihn zu
aktivieren. Benutzen Sie die Tasten
c/d zur Auswahl eines zweiten Kanals,
den Sie kopieren wollen. Betätigen Sie
die ENTER-Taste zur Bestätigung.
d. Benutzen Sie die Navigationstasten zur
Auswahl eines Kanals den Sie löschen wollen gefolgt von der blauen Farbtaste, um ihn zu
aktivieren. Betätigen Sie die ENTER-Taste zur Bestätigung.
e. Benutzen Sie die Navigationstasten
c/d zur Auswahl von eines Kanals in
der Liste und betätigen Sie die
ENTER-Taste zum Öffnen des
Bearbeitungsmenüs.
f. Benutzen Sie die Navigationstasten
c/d zur Auswahl von „CHANNEL
EDIT NAME“ und betätigen Sie die
ENTER-Taste, um den Kanalnamen zu ändern.
Geben Sie den neuen Kanalnamen unter „___“ ein. Benutzen Sie die Navigationstasten
c/de/f zur Auswahl der benötigten Buchstaben, Ziffern, „_“, „(“, „)“, EMPTY (Leer) oder
BAK SPC (Zurück). Betätigen Sie danach die ENTER-Taste zur Bestätigung.
Benutzen Sie die Navigationstasten c/de/f zur Auswahl von „OK“ und zum Zurückkehren
in vorige Menü.
Benutzen Sie die Navigationstasten
c/de/f zur Auswahl von
„CANCEL“, um die Eingabe
abzubrechen und ins vorige Menü
zurückzukehren.
8. Betätigen Sie die Navigationstasten
c/d zur Auswahl von „SKIP“ und
dann die Navigationstasten e/f, um
Kanäle ein- bzw. abzuschalten.
13
Page 42

PC
1. Betätigen Sie die MENU-Taste, um das
OSD-Menü aufzurufen. Benutzen Sie
dann die Tasten c/d zur Auswahl des
PC-Menüs. Betätigen Sie die Taste f,
um in das PC-Menü zu gehen.
2. Benutzen Sie die Navigationstasten
c/d zur Auswahl von „H
POSITION“ und betätigen Sie e/f, um
die gewünschte horizontale Bildposition
einzustellen.
3. Benutzen Sie die Navigationstasten c/d zur Auswahl von „V POSITION“ und betätigen Sie
e/f, um die gewünschte vertikale Bildposition einzustellen.
4. Benutzen Sie die Navigationstasten c/d zur Auswahl von „PHASE“ und betätigen Sie e/f,
um die Bildphase einzustellen.
5. Benutzen Sie die Navigationstasten c/d zur Auswahl von „CLOCK“ und betätigen Sie e/f,
um die Taktfrequenz einzustellen.
6. Benutzen Sie die Navigationstasten zur Auswahl von „AUTO ADJUST“ und betätigen Sie
die ENTER-Taste zum Starten der automatischen Einstellung.
14
Page 43

NORMALE WIEDERGABE
WICHTIGER HINWEIS:
DVD-Betrieb
Vorbereitung
Betätigen Sie die TV/AV-Taste auf dem Gerät oder die
Grundlegende Wiedergabe bedien ung
SOURCE-Taste zur Auswahl des DVD-Modus.
1. Betätigen Sie die EJECT-Taste zum Öffnen des Disc-Ladefachs.
Legen Sie eine CD in das Disc-Ladefach. (Wenn sich im DVD-Player
keine Disc befindet, erscheint „OPEN“ auf dem Bildschirm.)
Es wird lediglich eine Disc-Größe unterstützt. Legen Sie die Disc auf
korrekte Weise in das Disc-Ladefach. Wenn die Disc nicht richtig
eingelegt wurde, kann sie beschädigt werden und der DVD-Player
kann Funktionsstörungen aufweisen. Achten Sie darauf, dass Sie eine
abspielbare Disc in den DVD-Player einlegen.
2. Betätigen Sie die EJECT-Taste zum Öffnen des Disc-Ladefachs.
Die Wiedergabe startet automatisch.
Bei bestimmten Discs ist eine automatische Wiedergabe nicht
möglich. Betätigen Sie in diesem Fall die PLAY/PAUSE-Taste oder
die ENTER-Taste, um die Wiedergabe zu starten.
Bei bestimmten Discs kann die Wiedergabe nicht über das Menü
gestartet werden. Benutzen Sie in diesem Fall die Navigationstasten
auf der Fernbedienung zur Auswahl der Menüoptionen und betätigen
Sie die PLAY/PAUSE-Taste oder die ENTER-Taste, um die
Wiedergabe zu starten. Sie können ebenfalls die Zifferntasten zur
direkten Auswahl der Menüoptionen benutzen.
Wiedergabe vorübergehend Anhalten
Betätigen Sie die PLAY/PAUSE-Taste oder die ENTER-Taste,
um die Wiedergabe vorübergehend anzuhalten (Standbild). Die
Tonausgabe wird im Standbildmodus unterbunden.
Stoppen der Wiedergabe
Betätigen Sie PLAY/PAUSE-Taste oder die ENTER-Taste zum
Fortfahren der normalen Wiedergabe.
1. Betätigen Sie während der Wiedergabe die STOP-Taste
und die Wiedergabe springt zum Anfangsbildschirm zurück. Bei
manchen Discs, wie z. B. DVDs oder Audio-CDs, ist es für den
DVD-Player möglich sich die letzte Wiedergabeposition zu merken.
2. Betätigen Sie die PLAY/PAUSE-Taste oder die ENTER-Taste,
um danach die Wiedergabe von der letzten Wiedergabeposition
aus fortzuführen.
3. Betätigen Sie die STOP-Taste zweimal, um die Wiedergabe
vollständig zu stoppen.
Voriger und nächster Titel
Betätigen Sie die Taste
Anfang des Kapitels zurückzuspringen. Wenn Sie mit der
Betätigung der Taste fortfahren, springt die Wiedergabe mit jeder
Betätigung ein Kapitel zurück. (Hinweis: Diese Disc-Funktion
kann u. U. vom Disc-Format abhängig sein.)
Mit jeder Betätigung der NEXT-Taste
Wiedergabe ein Kapitel nach vorne.
Schnellvorlauf / Schnellrücklauf
Benutzen Sie die Taste , um den Schnellvorlauf zu aktivieren.
Mit jeder Betätigung der Taste wird die Geschwindigkeit
des Schnellvorlaufs verändert. Sie können die Geschwindigkeiten
2x, 4x, 8x, 16x, 32x und Normal einstellen.
Betätigen Sie die PLAY/ENTER-Taste, um mit der normalen
Wiedergabe fortzufahren.
Benutzen Sie die Taste , um den Schnellrücklauf zu
aktivieren. Mit jeder Betätigung der Taste wird die
Geschwindigkeit des Schnellrücklaufs verändert. Sie können die
Geschwindigkeiten 2x, 4x, 8x, 16x, 32x und Normal einstellen.
Betätigen Sie die PLAY/ENTER-Taste, um mit der normalen
Wiedergabe fortzufahren.
Bildvergrößerung
Betätigen Sie diese Taste zum Vergrößern oder Verkleinern des
Bilds. Mit jeder Tastenbetätigung wird die Bildgröße verändert.
Benutzen Sie die Navigationstasten im Vergrößerungsmodus, um
den Bildausschnitt zu bewegen.
während der Wiedergabe, um zum
springt die
15
Page 44

ALLE HIER BESCHRIEBENEN FUNKTIONEN GELTEN FÜR DVD-DISCS. DIE BEDIENUNG UND ANZEIGE
KANN BEI ANDEREN DISC-FORMATEN ABWEICHEN.
UNTERTITEL
Betätigen Sie die SUBTITLE-Taste und auf dem Bildschirm
erscheint „SUBTITLE 01/XX XXXXX“. 01 steht dabei für die
Nummer der jeweiligen Sprache. XX steht für die Gesamtzahl
der verfügbaren Sprachen. XXXXXX steht für die
Landessprache (die Nummer der Sprache ist abhängig von der
verwendeten Disc). Mit dieser Funktion haben Sie Zugriff auf
bis zu 32 Untertitelsprachen.
WIEDERHOLUNG
Benutzen Sie die REPEAT-Taste, um den Wiederholungsmodus
zu wechseln.
DVD
Kapitelwiederholung, Titelwiederholung, alle wiederholen
CD
Titelwiederholung, Alle Titel wiederholen
MP3
Normal, Einzelwiederholung, Verzeichniswiederholung,
Verzeichniswiedergabe, Zufallswiedergabe
A-B Abschnittswiederholung
Betätigen Sie die Taste A-B zum Markieren eines
Anfangspunkts (A) und dann ein weiteres Mal zum Markieren
eines Endpunkts (B). Der so markierte Abschnitt wird dann in
einer Endlosschleife wiederholt.
Betätigen Sie die Taste A-B erneut, um die Wiederholung
abzubrechen.
Kameraperspektive
Bei Sport-, Konzert- oder Theateraufzeichnungen können Sie
diese Taste zum Wechseln der Kameraperspektive benutzen.
(Nur gültig für Discs, die über diese Funktion verfügen. Wenn
Sie eine Disc abspielen, die mit verschiedenen
Kameraperspektiven aufgenommen wurde, können Sie diese
Wechseln. Beispiel: Vorne, Seite, Gesamtansicht und
Außenansicht.)
Menü
Benutzen Sie die MENU-Taste zur Anzeige des
Verzeichnismenüs und wählen Sie den gewünschten
MEnüpunkt. (Diese Funktion ist bei DVDs mit mehrseitigen
Menüs verfügbar.)
Programmmodus
Betätigen Sie während der Wiedergabe die PROGRAM-Taste,
um in den Programmmodus zu gehen. Press the digit buttons
to select the program number that you want , when finished,
move the cursor to select “START”. This will start the
program playback . if you want to cancel this function, press
“STOP”, then press PLAY/PAUSE or ENTER NOTE; This
function is invalid for MP3
TITLE/PBC
With some DVD discs pressing this key will display the title
menu, You can then use the digit buttons to select the item you
prefer.
16
Page 45

SPEZIELLE WIEDERGABEFUNKTIONEN
Sie können auf diesen Fernseher Kodak-Picture-CDs und JPEG-CDs wiedergeben.
Wiedergabe
Legen Sie eine Kodak-Picture-CD oder eine JPEG-CD in das Disc-Ladefach und die Disc wird
automatisch eingelesen. Sobald der Disc-Typ festgestellt ist, startet der Player die Wiedergabe der Bilder
im Diashow-Modus. Wenn ein Auswahlmenü erscheint, benutzen Sie die Navigationstasten zur Auswahl
einer Datei und betätigen Sie die ENTER-Taste.
Alle Bilder auf der CD werden nacheinander auf dem Bildschirm angezeigt und der Größe nach
angepasst. Sie können mithilfe der PROGRAM-Taste einen Bildübergangseffekt wählen Der Benutzer
kann für jedes Bild einen Übergangseffekt einstellen.
Um die Anzeige des Bilds unbegrenzt anzuhalten, betätigen Sie bitte die PAUSE-Taste. Benutzen Sie die
NEXT/PREV-Tasten zur Auswahl des vorigen bzw. nächsten Bilds. Um mit der Diashow fortzufahren,
betätigen Sie bitte die ENTER-Taste.
Betätigen Sie die STOP-Taste, um zur Vorschauansicht zu gehen. Benutzen Sie die Navigationstasten
zum Drehen des Bilds.
Bildvergrößerung
Betätigen Sie die ZOOM-Taste, um die Bildvergrößerungsfunktion zu aktivieren und benutzen Sie die
Tast en
und zur Auswahl eines Vergrößerungsfaktors.
BILDSCHIRMSCHONERFUNKTION
Wenn das Gerät für mindestens 3 Minuten inaktiv ist, wird der Bildschirmschoner automatisch aktiviert.
In diesem Zustand können Sie eine beliebige Taste auf dem Gerät oder auf der Fernbedienung betätigen,
um den normalen Betriebszustand wieder herzustellen.
Gehen Sie in das Einstellungsmenü des DVD-Systems, um die Bildschirmschonerfunktion auszustellen.
MP3-Wiedergabe
Bei der Wiedergabe von MP3-Discs, wird automatisch ein Navigationsmenü angezeigt. Benutzen Sie die
Navigationstasten Oben/Unten im Menü zur Auswahl eines Verzeichnisses. Betätigen Sie dann
PLAY/PAUSE- oder ENTER-Taste zum Öffnen des Verzeichnisses. Benutzen Sie die Navigationstasten
Oben/Unten zur Auswahl einer Datei und dann die PLAY/PAUSE- oder ENTER-Taste zum Starten der
Wiedergabe. Wenn Sie die linke Navigationstaste betätigen, gelangen Sie zum vorigen Menübildschirm.
MPEG4-FUNKTION
MPEG-4 ist der vierte Video/Audio-Standard der MPEG-Arbeitsgruppe (Moving Pictures Experts
Group). VCDs basieren auf MPEG1-Technologie und DVDs auf MPEG2. MPEG-4 bietet den Vorteil
geringerer Brandbreiten und die beste Bildqualität im Verhältnis zur Datenkomprimierung. Audiodaten
werden im WMA- oder MP3-Standard komprimiert. MPEG-4 ist
die modernste Kompressionstechnologie im AV-Bereich. Sie
verfügt über die höchsten Komprimierungsraten. Mit
MPEG4-Technologie können Sie einen DVD-Film auf ein oder
zwei CD-R-Discs mit relativ guter Bildqualität verkleinern oder
mehrere Film mit ähnlicher Qualität auf eine DVD brennen.
Hinweis:
1. MPEG4-Dateien liegen häufig in verschiedenen Formaten vor (XVID, AVI, RM, etc.) und manche
Discs, die mit MPEG4-Symbol verkauft werden, sind nicht mit MPEG-Technologie kodiert. Es ist
deswegen normal, dass nicht alle Discs wiedergegeben werden können, wenn nicht der richtige
Kodierungsstandard vorliegt.
17
Page 46
DVD-SYSTEMEINSTELLUNGEN
Allgemeiner Einstellungsvorgang
1.Betätigen Sie die DVD-SETUP-Taste zur
Anzeige der allgemeinen Einstellungsseite oder
der Benutzereinstellungsseite.
2.Benutzen Sie
Option und
Untermenüs.
3.Benutzen Sie
betätigen Sie dann die WIEDERGABE/PAUSEoder ENTER-Taste zur Bestätigung.
4.Benutzen Sie die DVD-SETUP-Taste ebenfalls
zum Verlassen des Einstellungsmenüs.
Allgemeine Einstellungen
BILDSEITENVERHÄLTNIS
Wenn Sie den DVD-Player mit dem internen
Fernseher benutzen, wählen Sie das Format
4:3/LB.
Benutzen Sie die folgende Anleitung, wenn Sie den
DVD-Player an einen externen Fernseher
anschließen.
4:3 /PS (PS=Pan and Scan)
Sie können das Bildformat entweder auf das normale Bildseitenverhältnis (4:3)
einstellen oder auf NORMAL/LB (was im Normalfall die bessere Wahl ist). Im
PS-Modus werden Breitbildfilme so dargestellt, dass der gesamte Bildschirm
ausgefüllt wird und links und rechts der äußerste Rand abgeschnitten wird.
Damit diese Funktion benutzt werden kann, muss die Disc entsprechend kodiert
worden sein. Auf diese Weise kodierte Discs sind allerdings selten.
4:3/LB (LB=Letter Box)
Wählen Sie diese Option, wenn Sie über einen Fernseher mit normalem
Bildseitenverhältnis (4:3) verfügen. Breitleinwandfilme werden in diesem Fall
unverändert dargestellt, ohne dass dabei Teile des Bilds entfernt werden.
Entsprechend erscheinen oben und unten im Bild schwarze Balken.
16:9
Wählen Sie diese Option, wenn Sie über einen Breitbildfernseher (16:9)
verfügen. Bedenken Sie bitte, dass selbst bei einem Breitbildfernseher unten
und oben im Bild schwarze Balken auftreten können. Dies liegt daran, dass
bestimmte von Filmregisseuren verwendete Bildseitenverhältnisse (z. B.
2,35:1) noch breiter sind als Ihr Fernseher. Das Bildseitenverhältnis des Film
wird normalerweise auf der DVD-Verpackung angegeben.
oder zur Auswahl einer
zum Aufrufen des jeweiligen
oder zur Auswahl und
18
Page 47

DVD-SYSTEMEINSTELLUNGEN
Allgemeine Einstellungen
Bildseitenverhältnis: Sie können hier verschiedene
Bildformate einstellen (z. B. 4:3 PS, 4:3 LB, 16:9
WIDE).
Einstellen der OSD-Sprache:
Wählen Sie hier die Bildschirmanzeigesprache.
Bildschirmschoner: Bei eingeschaltetem
Bildschirmschoner, erscheint ein animiertes Bild auf
dem Bildschirm, wenn der DVD-Player für mehr als
3 Minuten inaktiv ist.
Wiedergabespeicher: Hierbei merkt sich das Gerät
das zuletzt wiedergebene Kapitel. Wenn diese
Funktion eingeschaltet ist, könnenSie den
DVD-Player aus und wiedereinschalten und dann mit
der Wiedergabe des letzten Kapitels fortfahren.
19
Page 48

Voreinstellungen
Die Benutzereinstellungsseite ist
nur verfügbar, wenn sich im Gerät
keine Disc befindet. Die hier
gemachten Einstellungen beziehen
sich auf alle Discs die eingelegt und
abgespielt werden.
Farbsystem: Dieses Gerät
unterstützt die Videoausgabe auf
verschiedenen System, u. a. Auto,
NTSC und PAL.
Im Normalfall sollte die Option
„Auto“ gewählt werden.
Benutzersperre: Mit der
Altersstufenfunktion können Sie das
Altersstufensystem für DVDs benutzen.
Es stehen bis zu 8 Altersstufen zur Verfügung, mit denen Sie steuern können, auf
welche Discs Ihre Familienmitglieder zugriff haben.
Hinweis:
Um diese Einstellungen zu verändern, müssen Sie Ihre Passwort eingeben. (Das
werkmäßig eingestellte Passwort ist
8888.)
Passwort ändern:
Sie können das Passwort selbst
verändern, indem Sie vier Ziffern
eingeben. Sie müssen Ihr
vierstelliges Passwort bestätigen,
bevor es übernommen wird.
HINWEIS: Wenn Sie ihr Passwort
versehentlich vergessen oder
verändern, können Sie mit dem
Passwort 8888, den Zugriff
zurückerlangen.
20
Page 49

Systemreset: Durch diese Funktion
werden alle Einstellungen (mit
Ausnahme des Passworts und der
Alterseinstufung) gelöscht und auf
die ursprünglichen
Werkseinstellungen zurückgesetzt.
Betätigen Sie die ENTER-Taste, um
den Reset durchzuführen.
Hinweis:
Bestimmte Funktionen stehen u. U.
je nach Disc-Typ nicht zur
Verfügung.
ANALOGE
AUDIOEINSTELLUNGEN
1. Betätigen Sie die DVD-SETUP-Taste zur Anzeige der analogen
Audioeinstellungsseite.
2. Benutzen Sie die Tasten c oder d zur Auswahl und betätigen Sie die Taste ,
um ins Untermenü zu gelangen.
3. Benutzen Sie d oder c zur Auswahl und betätigen Sie dann die
PLAY/PAUSE- oder ENTER-Taste zur Bestätigung.
4. Benutzen Sie die DVD-SETUP-Taste ebenfalls zum Verlassen des
Einstellungsmenüs.
Hinweis 1: Wenn das Gerät über einen USB- oder Speicherkartenanschluss verfügt, können Sie
diese Funktion auf folgende Weise benutzen. Wenn sich das Gerät im DVD-Betrieb befindet,
benutzen Sie die USB/CR-Taste zur Anzeige der Auswahl. Benutzen Sie die Navigationstasten
▲/▼ zur Auswahl von USB oder CARD und betätigen Sie die ENTER-Taste zur Bestätigung.
Benutzen Sie dann erneut die Tasten c/d zur Auswahl der gewünschten Datei die Sie wiedergeben
wollen und betätigen Sie die ENTER-Taste zum Starten der Wiedergabe. Betätigen Sie die Taste e,
um zurück zur Auswahlliste zu gehen, wenn Sie sich in einem Unterverzeichnis befinden. Betätigen
Sie die Taste
Tast e
zum Stoppen der Wiedergabe. Betätigen Sie die Taste , um den Schnellrücklauf zu
zum Starten oder vorübergehenden Anhalten der Wiedergabe. Betätigen Sie die
aktivieren. Betätigen Sie die Taste , um den Schnellvorlauf zu aktivieren. Betätigen Sie die
Tast e
, um zum vorigen Kapitel zu springen. Betätigen Sie die Taste , um zum nächsten
Kapitel zu springen.
Hinweis 2: Die Betriebstemperatur des DVD-Players liegt zwischen 0°C und 40°C.
21
Page 50
ABSPIELBARE DISCS
Die folgenden Discs können mit diesem Gerät abgespielt werden:
DISC
DVD VIDEO
AUDIO CD
JPEG
BESCHRIFTUNG
INHALT
Audio + Video
(bewegte Bilder)
Audio
Video (Bild)
ABMESSUNGEN
12 cm
12 cm
12 cm
KODAK CD
CD-R
CD-RW
CD+G
MPEG4
Unterstützte Disc-Formate sind: DVD, VCD, CD-R, CD-RW, SVCD, DVCD, HDCD, JPEG, CD+G,
MPEG-4, Kodak CD , W MA.
Oben nicht aufgelistete Disc-Typen können nicht abgespielt werden.
Discs in nicht standardisierten Formaten können nicht abgespielt werden, selbst wenn sie ein
in der obigen Liste aufgeführtes Symbol tragen.
Die Abspielperformance einer CD-R/RW ist abhängig von der Art und Weise wie sie
aufgenommen wurde. In Einzelfällen kann die Abspielperformance zu wünschen übrig lassen oder
die Disc ist gar nicht abspielbar.
Audio oder video
Video (Bild)
Audio oder video
(bewegte Bilder)
Audio oder video
(bewegte Bilder)
Video (Bild)
(bewegte Bilder)
12 cm
12 cm
12 cm
12 cm
12 cm
22
Page 51
DISC-SCHUTZ UND DVD-EIGENSCHAFTEN
BENUTZUNG DER DISCS
Berühren Sie nicht die Abspielseite der Disc.
. Kleben Sie kein Papier oder Film an der Disc.
Wiedergabeseite
REINIGUNG DER DISCS
Fingerabdrücke und Schmutz können zur Abnahme
der Bild- und Tonqualität führen. Wischen Sie die Disc
von der Mitte ausgehend mit einem weichen Tuch ab.
Halten Sie die Disc immer sauber.
Wenn es nicht möglich ist den Schmutz mit einem
weichen Tuch zu entfernen, benutzen Sie ein weiches,
leicht angefeuchtetes Tuch und trocknen Sie mit einem
trockenen Tuch nach.
Benutzen Sie zur Reinigung niemals Lösungsmittel,
wie z. B. Verdünnungsmittel, handelsübliche
Reinigungsmittel oder Antistatik-Sprays für
Schallplatten. Diese können die Disc beschädigen.
AUFBEWAHRUNG DER DISCS
Bewahren Sie die Discs niemals in direktem
Sonnenlicht oder in der Nähe von Hitzequellen auf.
Bewahren Sie die Discs nicht an Orten auf, an
denen Sie Staub und Feuchtigkeit ausgesetzt sind, wie
z. B. im Badezimmer oder neben einem
Luftbefeuchter.
Bewahren Sie die Discs vertikal in ihrer Hülle
auf. Das Stapeln der Discs oder Darauflegen von
Gegenständen, wenn die Discs nicht in ihrer Hülle
sind, kann dazu führen, dass sie sich verformen.
AUFBAU DES DISC-INHALTS
Normalerweise werden DVDs in Titel unterteilt, die
wiederum in Kapitel unterteilt sind. Audio-CDs
werden in verschiedene Musiktitel unterteilt
(Audiospuren).
Title 1 Titel 2
Kapitel 1 Kapitel 2 Kapitel 3 Kapitel 4 Kapite 5
AUDIO-CD
Musiktitel 1 Musiktitel 2 Musiktitel 3 Musiktitel 4 Musiktitel 5
Jedem Titel, Kapitel oder Audiotitel wird eine
Nummer zugeordet (Titelnummer, Kapitelnummer
bzw. Musiktitelnummer).
Es kann vereinzelt vorkommen, dass eine Disc nicht
über diese Nummern verfügt.
DVD-DISC
23
Page 52

Vergleichstabelle – Disc-Typen
Kodierung
Kapazität
Wiedergabez
eit
Disc-Durch
messer
Horizontale
Auflösung
Bildverhältnis Mehrfache Arten Eine Art Eine Art Eine Art
DVD LG SVCD VCD CD
Digital/MPEG‖
Einseit
ig
Einsch
ichtig
4,7 G
B
133
Minut
en
12 cm 30 cm / 20 cm 12 cm 12 cm 12 cm
über 500 Zeilen Nicht mehr
Doppe
lseitig
Einsch
ichtig
8,5 G
B
242
Minut
en
Einseitig
Doppelsc
hichtig
9,4 GB
266
Minuten
Doppelse
itig
Doppelsc
hichtig
17 GB
484
Minuten
Analog Digital Digital/MP
EG1
650 MB
Einseitig
60 Minuten
Doppelseitig
120 Minuten
als
430 Zeilen
45 Minuten
Nicht mehr
als
350 Zeilen
650 MB
74 Minuten
Nicht mehr
als
250 Zeilen
Digital
650 MB
74
Minute
n
Untertitel 32 16 4
Tonqualität 48 khz, 96 khz / 6, 20,24 bit 44,1 khz / 16b
it
44,1 khz /
16bit
44,1 khz /
16bit
44,1 kh
z / 16bit
24
Page 53

Technische Daten
RGB-EINGANG
Modell Auflösung
DOS 720 x 400 31,5 70
VGA 640 x 480 31,5 60
SVGA 800 x 600 37,9 60
XGA 1024 x 768 48,4 60
WXGA 1360 x 768 47,7 60
WXGA+ 1440 x 900 55,9 60
*1360 x 768 ist nur für 22" und 23" LCD-Fernseher gültig.
*1440 x 900 ist nur für 19" LCD-Fernseher gültig.
Horizontalfrequenz
(KHz)
Vertikalfrequenz
HDMI-EINGANG
Modell Auflösung
VGA 640 x 480 31,47 59,94
Horizontalfrequenz
(KHz)
Vertikalfrequenz
(Hz)
(Hz)
480i 720 x 480i 15,73 59,94/60
576i 720 x 576i 15,63 50
480p 720 x 480p 31,47 59,94/60
576p 720 x 576p 31,26 50
720p 1280 x 720p 37,50
44,96
1080i 1920 x 1080i 28,13
33,75
59,94/60
59,94/60
50
50
25
Page 54

Fehlerbehebung
Bevor Sie den Kundenservice für Ihren Player in Anspruch nehmen, gehen Sie bitte durch folgende
Fehlerbehebungstabelle, um eine mögliche Ursache und Lösungsvorschläge für das Problem zu
finden.
PROBLEM BEHEBUNG
Der Fernseher geht nicht an
• Vergewissern Sie sich, dass das Netzkabel
angeschlossen ist.
• Die Batterien der Fernbedienung sind unter
Umständen leer.
Kein Bild, kein Ton
• Überprüfen Sie das Anschlusskabel zwischen
Fernseher und Antennenanschluss.
• Betätigen Sie die POWER-Taste auf der
Fernbedienung.
• Betätigen Sie die SOURCE-Taste auf der
Fernbedienung gefolgt von den Navigationstasten
▲/▼ zur Auswahl eines Eingangssignals.
Schlechte Bildqualität, Ton ist
OK
• Überprüfen Sie das Anschlusskabel zwischen
Fernseher und Antennenanschluss.
• Versuchen Sie es mit einem anderen Kanal. Das
Problem ist möglicherweise abhängig vom Sender.
• Stellen Sie Helligkeit/Kontrast im Videomenü ein.
Tonstörungen
• Bewegen Sie alle Infrarotgeräte vom Fernseher weg.
26
Page 55

Sollten Sie irgendwann zu späterer Zeit dieses Produkt entsorgen wollen, beachten Sie
bitte Folgendes: Elektroschrott sollte nicht mit dem Haushaltsmüll entsorgt werden. Bitte
recyceln Sie ihn, sofern Ihnen entsprechende Möglichkeiten zur Verfügung stehe
Setzen Sie sich mit Ihren kommunalen Behörden oder Ihrem Einzelhändler in Verbindung
und fragen Sie diese um Rat bezüglich der Wiederverwertung. (Elektro- und Elektronik
Altgeräte-Richtlinie (WEEE)
n.
-
)
Page 56

Page 57

Page 58

Inhoudsopgave
z Introductie
z Waarschuwing
z Let op
z Beschrijving hoofdapparaat
z Afstandsbediening
z OSD basis instellen
z DVD handleiding
z Specificaties
z Problemen oplossen
1
Page 59

Introductie
Bedankt voor de aanschaf van onze LCD TV. De TV dient als normale kleuren TV en PC monitor.
Lees de handleiding zorgvuldig vanaf het begin door en bewaar hem op een handige plaats om
volledig van uw toestel te genieten.
INSTALLATIE
① Plaats de ontvanger in een kamer waar het scherm niet is blootgesteld aan direct zonlicht.
Duisternis of reflectie kunnen leiden tot vermoeide ogen. Zachte en indirecte verlichting wordt
aangeraden voor comfortabel kijken.
② Laat voldoende ruimte tussen de ontvanger en de muur voor ventilatie.
③ Vermijd te warme locaties om mogelijke schade aan de behuizing of voortijdig falen van
onderdelen te voorkomen.
④ Deze TV-ontvanger kan worden aangesloten op 100-240V 50/60HZ netstroom.
⑤ Installeer de ontvanger niet op een plaats in de buurt van warmtebronnen, zoals
radiatoren, luchtkanalen, direct zonlicht of op een gesloten plaats. Bedek de
ventilatieopeningen niet tijdens het gebruik van het toestel.
⑥ Het indicatorlampje zal ongeveer 30 seconden aan blijven na het afsluiten van de stroom,
tijdens deze periode dient u het toestel niet opnieuw van stroom te voorzien tot het lampje uitgaat.
Bedankt voor uw aandacht!
2
Page 60

RISICO VAN ELEKTRISCHE
LET OP: OM RISICO VAN ELEKTRISCHE SCHOK TE VOORKOMEN.
VERWIJDER DE BEHUIZING (OF ACHTERKANT) NIET.
GEEN DOOR DE GEBRUIKER TE ONDERHOUDEN ONDERDELEN
BINNEN IN HET APPARAAT.
LAAT ONDERHOUD OVER AAN GEKWALIFICEERD
ONDERHOUDSPERSONEEL.
Dit symbool is bedoeld om de gebruiker erop attent te maken
om het risico van elektrische schokken te voorkomen,
alleen demonteren door gekwalificeerd onderhoudspersoneel.
Waarschuwing
LET OP
SCHOK
Dit symbool is bedoeld om de gebruiker te waarschuwen voor de
aanwezigheid van belangrijke gebruiks- en onderhoudsinstructies
in de handleiding die bij de apparatuur zit.
3
Page 61

Let op
Let op
Er worden hoge spanningen gebruikt bij omgang met
dit product.
- Verwijder de achterkant van de behuizing van het toestel niet.
Laat onderhoud over aan gekwalificeerd onderhoudspersoneel.
schokgevaar te voorkomen
Let op
Stel het hoofdapparaat niet bloot aan vocht om brand of elektrisch
Let op
Druk of laat geen voorwerpen in de behuizing
van de TV, de sleuven en openingen van de TV vallen.
Mors geen vloeistoffen op de televisie-ontvanger.
Let op
Voorkom blootstelling van het hoofdapparaat aan direct zonlicht en
a warmtebronnen. Zet de televisieontvanger niet direct op andere
voorwerpen die warmte afgeven, zoals videorecorders, versterkers.
Blokkeer de ventilatiegaten op de achterkant van de behuizing niet.
Ventilatie is essentieel om het falen van elektrische onderdelen te
Druk het netsnoer niet plat onder het hoofdapparaat.
voorkomen.
4
Page 62
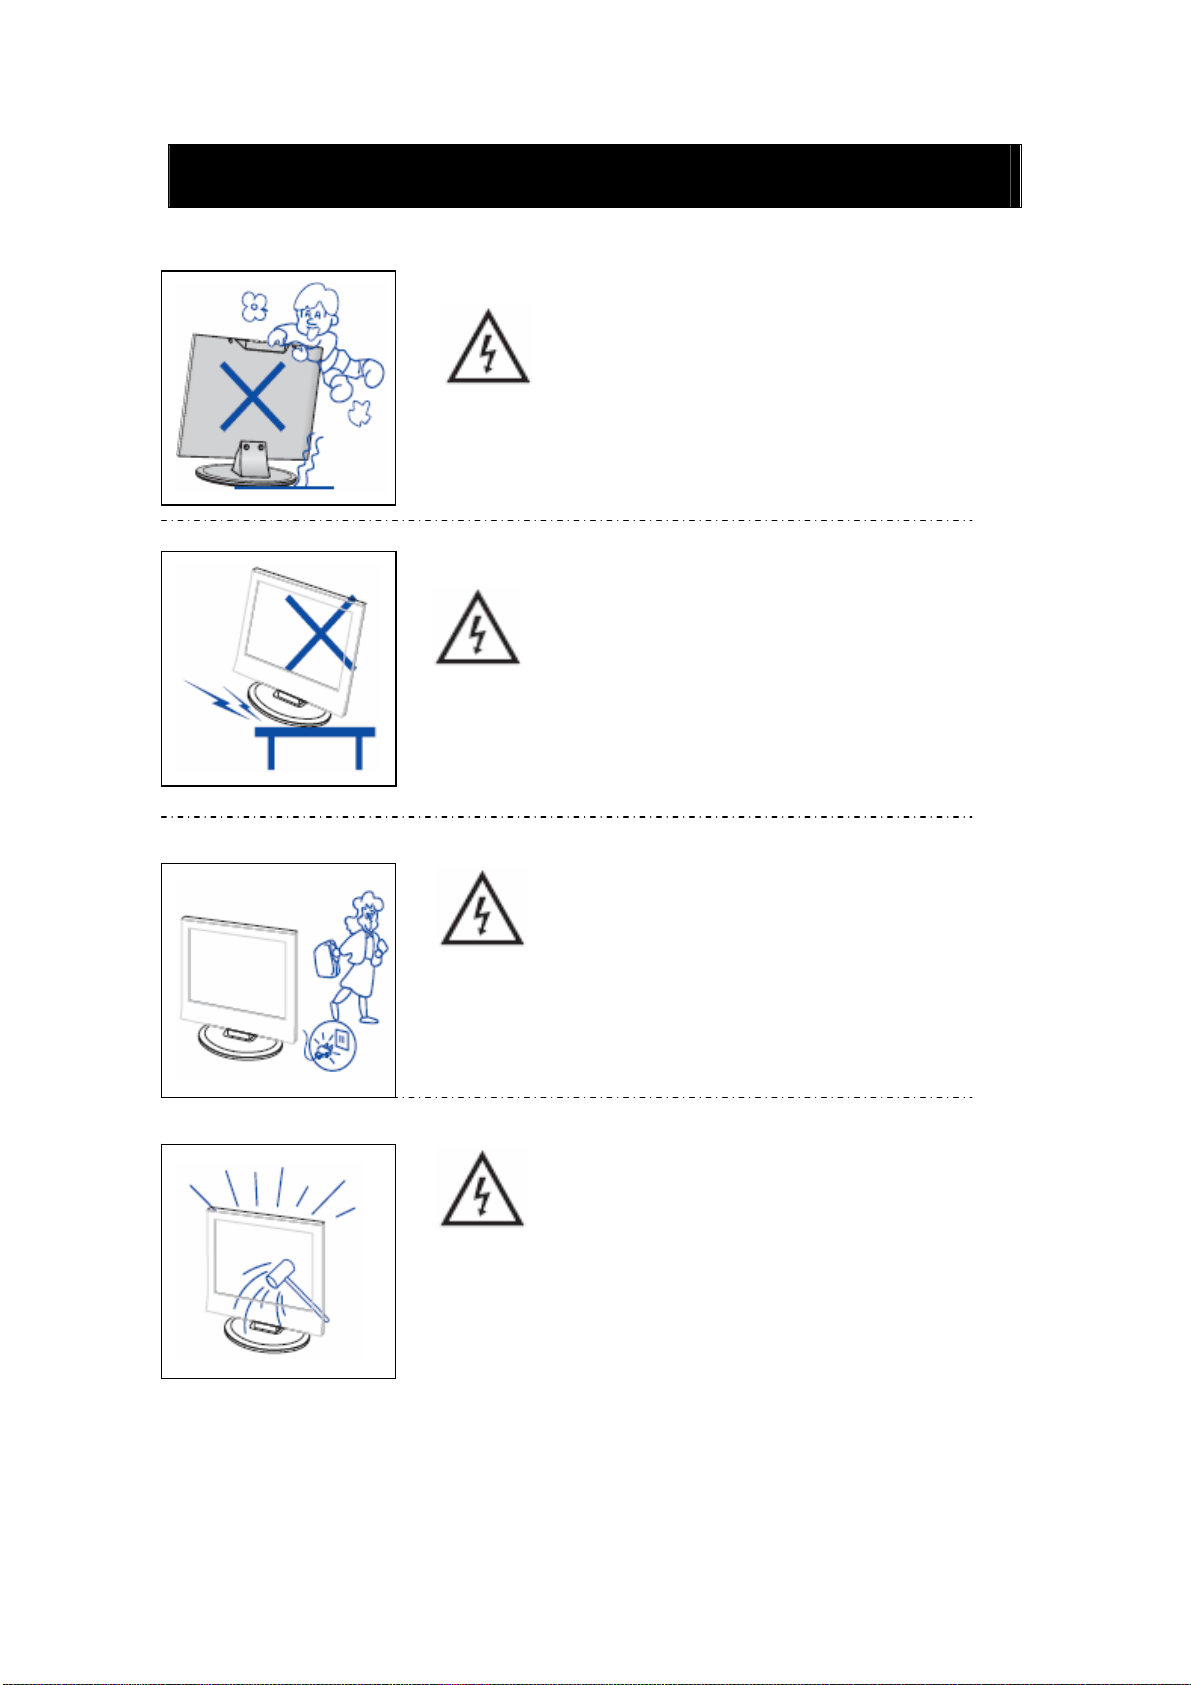
Let op
Let op
Nooit staan of leunen op het product en duw nooit plotseling tegen
het product of de standaard. Let goed op kinderen.
Let op
Plaats het hoofdapparaat niet op een onstabiel karretje, standaard,
plank of tafel. dit kan indien de TV valt leiden tot ernstige verwonding
van een persoon of schade aan de TV.
Let op
Haal het netsnoer uit het stopcontact wanneer het product voor
een langere periode niet wordt gebruikt.
Let op
Het LCD-paneel dat in dit product wordt gebruikt is gemaakt van glas.
Daarom kan het breken wanneer het product is gevallen
of een klap heeft gekregen. Wees voorzichtig om u niet te verwonden
aan gebroken glasscherven in het geval het LCD-paneel breekt.
5
Page 63
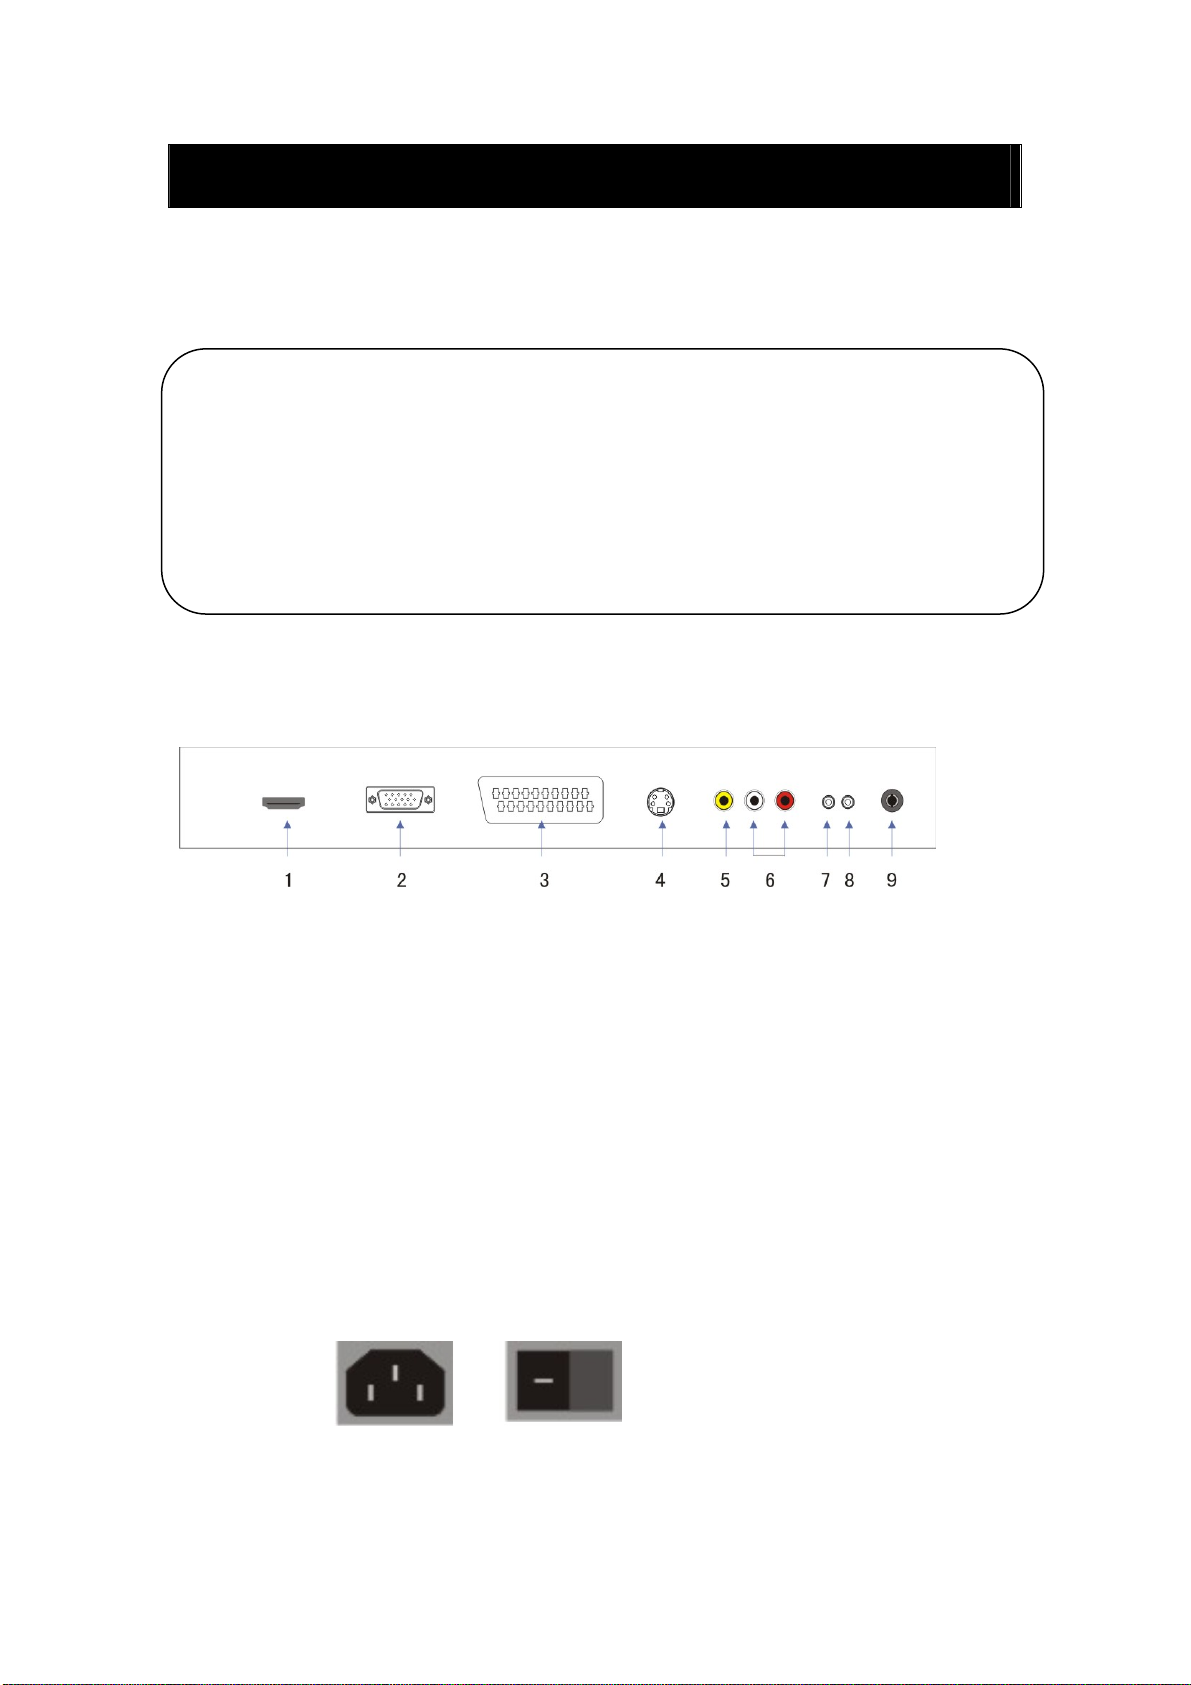
Beschrijving hoofdapparaat
t
Functies van knoppen op bedieningspaneel
VOL+ : Volume omhoog.
VOL- : Volume omlaag.
CH+ : TV-kanaal omhoog.
CH- : TV-kanaal omlaag.
MENU : Druk om het hoofdmenu te selecteren.
TV/AV : Selecteer het invoersignaal.
POWER : Zet de TV aan vanui
standby-modus of ga in standby-modus.
TV-Aansluitingen
1. HDMI-ingang.
2. VGA-ingang van simulatiesignaal van PC.
3. SCART-ingang.
4. S-video-ingang.
5. Video-ingang.
6. AUDIO-ingang.
7. PC AUDIO-aansluiting.
8. HOOFDTELEFOON-uitgang.
9. ATV antenne/gesloten circuit TV netwerkpoort.
Stroominvoer configuratie
NETSTROOM
6
Page 64

Afstandsbediening
POWER: Power aan/uit knop, druk één keer om de TV aan te
zetten en druk nogmaals om de TV uit te zetten.
MUTE: Druk op deze knop om het geluid te dempen of het
geluid weer te herstellen.
DVD SETUP: Druk op deze knop om het DVD-hoofdmenu
te openen en druk nogmaals om het hoofdmenu te verlaten.
(Alleen gebruikt bij modellen met DVD-functie)
TITLE: Druk op deze knop om terug te keren naar het
titelmenu.
(Alleen gebruikt bij modellen met DVD-functie)
MENU(BLAUW): Druk op deze knop om terug te keren naar
het hoofdmenu of om het DVD-hoofdmenu te verlaten.
(Alleen gebruikt bij modellen met DVD-functie)
USB/CR: Druk om de MEDIA-signaalbron te selecteren.
(Alleen gebruikt bij modellen met USB/CR-functie)
NICAM/A2: Druk in TV-modus op deze toets om de
stereo-effecten te selecteren.
SLEEP: Stel de slaaptimer in.
ASPECT: Druk om de verschillende beeldverhoudingen te
selecteren.
EJECT
werpen in DVD-modus.
(Alleen gebruikt bij modellen met DVD-functie)
DISPLAY: Toon TV-informatie.
AUTO: Druk om het beeld automatisch aan te passen in
PC-modus.
PMODE: Selecteer de beeldmodus.
SMODE: Selecteer de geluidsmodus.
DTV:
SOURCE: Druk op deze knop om de signaalbron te
veranderen.
ENTER: Voer de geselecteerde optie in of voer de
geselecteerde opdracht uit.
: druk op deze knop om de DVD-disk uit te
Deze knop is niet beschikbaar.
7
Page 65

MENU: Druk op deze knop om het hoofdmenu te openen en
de verschillende instellingen in te stellen.
EXIT: Verlaat het OSD (Menu op het scherm).
0-9: Selecteer en schakel naar een kanaal met behulp van 0 -
9.
-/--: Schakel tussen het aantal cijfers voor het selecteren van
de zender.
: Schakel heen en weer tussen het huidige en vorige
kanaal.
CHc/CHd: Verander het kanaal omhoog en omlaag.
VOLc/VOLd : Pas het volume aan.
TEXT: Druk op deze knop om Teletekst te openen.
HOLD: Bevries een pagina op het scherm in Teletekstmodus.
INDEX: Druk op deze knop om naar de index-pagina te gaan.
REVEAL: Druk op deze knop om de verborgen informatie
op een Teletekstpagina te tonen. Druk nogmaals om de
informatie weer te verbergen.
SIZE: Toon de bovenkant, onderkant of de gehele pagina in
teletekst-modus om deze zo eenvoudig te kunnen lezen.
SUBPAGE: Activeer de SUBCODE functie in de tekst
terwijl u in de tekst-weergavemodus bent.
PLAY/PAUSE
:Druk op deze knop om de disk of Media
af te spelen of te pauzeren.
(Alleen gebruikt bij modellen met DVD- of USB/CR-functie)
STOP
:Stop afspelen van de disk of Media.
(Alleen gebruikt bij modellen met DVD- of USB/CR-functie)
REV
:Druk op deze knop om achteruit te spoelen.
(Alleen gebruikt bij modellen met DVD- of USB/CR-functie)
FWD
:Druk op deze knop om vooruit te spoelen.
(Alleen gebruikt bij modellen met DVD- of USB/CR-functie)
PREV
: Ga na het vorige hoofdstuk
(Alleen gebruikt bij modellen met DVD- of USB/CR-functie)
NEXT
:Ga naar het volgende hoofdstuk
(Alleen gebruikt bij modellen met DVD- of USB/CR-functie)
8
Page 66

ZOOMǖSelecteer de zoom.
(Alleen gebruikt bij modellen met DVD- of USB/CR-functie)
GOTOǖSpring naar het toegewezen hoofdstuk of titel.
(Alleen gebruikt bij modellen met DVD-functie)
SUBTITLE(BLAUW)ǖSelecteer de ondertiteling.
(Alleen gebruikt bij modellen met DVD-functie)
ANGLEǖSelecteer de hoek.
(Alleen gebruikt bij modellen met DVD-functie)
PROGRAMǖSelecteer het diskprogramma.
(Alleen gebruikt bij modellen met DVD-functie)
INTROǖDruk op deze knop om de resterende of verstreken
tijd van een hoofdstuk te tonen.
(Alleen gebruikt bij modellen met DVD-functie)
REPEATǖSelecteer de herhaalmodus.
(Alleen gebruikt bij modellen met DVD-functie)
ABǖSelecteer het te herhalen segment.
(Alleen gebruikt bij modellen met DVD-functie)
ROOD, GROEN, GEEL, BLAUW: Deze knoppen
Corresponderen met de verschillend gekleurde onderwerpen.
(Alleen gebruikt bij modellen met DVD-functie)
9
Page 67
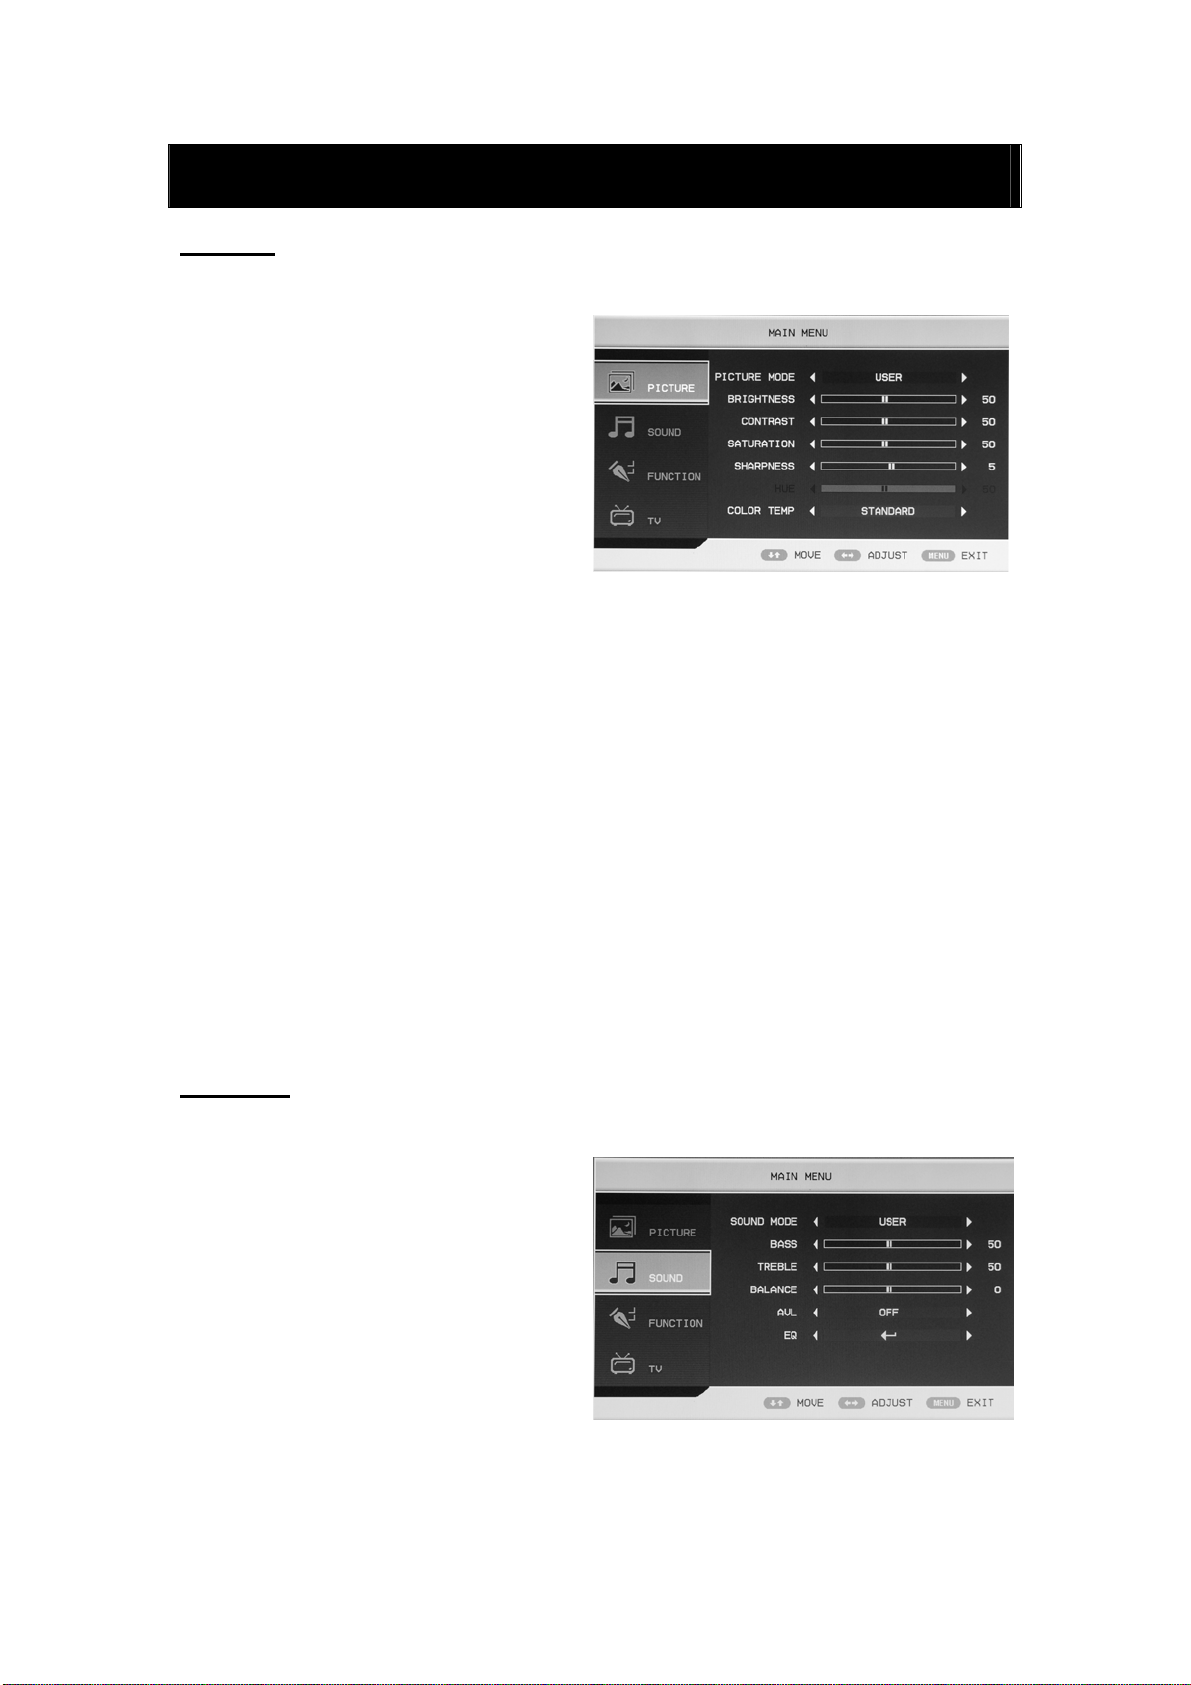
OSD basisinstellingen
BEELD
U kunt het soort beeld selecteren dat het best bij uw kijkwensen past.
1. Druk op de “MENU” knop om het
OSD-menu te openen. Druk vervolgens
op de “c/d” knop om het “PICTURE”
menu te selecteren. Open het
“PICTURE” menu door op de “f”
knop te drukken.
2. Druk op de “c/d” knop om
“PICTURE MODE” te selecteren en
druk op de “e/f” knop om de
beeldmodus te selecteren.
3. Druk op de “c/d” knop om “BRIGHTNESS” te selecteren en druk op de “e/f” knop om de
helderheid in te stellen.
4. Druk op de “c/d” knop om “CONTRAST” te selecteren en druk op de “e/f” knop om het
contrast in te stellen.
5. Druk op de “c/d” knop om “SATURATION” te selecteren en druk op de “e/f” knop om de
verzadiging in te stellen.
6. Druk op de “c/d” knop om “SHARPNESS” te selecteren en druk op de “e/f” knop om de
scherpheid in te stellen.
7. Druk op de “c/d” knop om “HUE” te selecteren en druk op de “e/f” om de tint in te stellen.
Opmerking: Dit item is alleen geldig bij het gebruik van NTSC
8. Druk op de “c/d” knop om “COLOUR TEMP” menu te selecteren en druk op de “e/f”
knop om de kleurtemperatuur in te stellen.
GELUID
U kunt het soort geluid selecteren dat het best bij uw luisterwensen past.
1. Druk op de “MENU” knop om het
OSD-menu te openen. Druk vervolgens
op de “c/d” knop om het “SOUND”
menu te selecteren. Open het
“SOUND” menu door op de “f” knop
te drukken.
2. Druk op de “c/d” knop om “SOUND
MODE” te selecteren en druk op de
“e/f” knop om de geluidsmodus in te
stellen.
3. Druk op de “c/d” knop om “BASS” te selecteren en druk op de “e/f” knop om de bass in
te stellen.
10
Page 68

4. Druk op de “c/d” knop om “TREBLE” te selecteren en druk op de “e/f” knop om de treble
in te stellen.
5. Druk op de “c/d” knop om “BALANCE” te selecteren en druk op de “e/f” knop om de
balans in te stellen.
6. Druk op de “c/d” knop om “AVL” te selecteren en druk op de “e/f”knop om de avl-functie
aan (on) of uit (off) te zetten.
7. Druk op de “c/d” knop om “EQ” te
selecteren en druk op de “ENTER”
knop om de EQ te openen. Druk op de
“e/f” knop om de frequentie van de
golf(lengte)band te selecteren en druk
op de “c/d” knop om de waarde aan
te passen.
FUNCTIE
1. Druk op de “MENU” knop om het
OSD-menu te openen. Druk daarna op
de “c/d” knop om het “FUNCTION”
menu te selecteren. Open het
“FUNCTION” menu door op de “f”
knop te drukken.
2. Druk op de “c/d” knop om het
“LANGUAGE” menu te selecteren en
druk op de “e/f” knop om de
gewenste OSD-taal te selecteren.
3. Druk op de “c/d” knop om “OSD DURATION” te selecteren en druk op de “e/f” knop om
de gewenste OSD-duur in te stellen.
4. Druk op de “c/d” knop om “ASPECT RATIO” te selecteren en druk op de “e/f” knop om
de gewenste beeldverhouding (aspect ratio) in te stellen.
5. Druk op de “c/d” knop om “TT LANGUAGE” menu te selecteren en druk op de “e/f”
knop om de lokale teleteksttaal te
selecteren.
6. Druk op de “c/d” knop om “RESET”
te selecteren en druk op de “ENTER”
knop om de optie te selecteren. Druk
vervolgens op de “e/f” knop om
“YES” of “NO” te selecteren en druk op
de “ENTER” knop om te bevestigen.
Selecteer “YES” om de functies te
resetten en selecteer “NO” om terug te keren naar het voorgaande menu.
11
Page 69
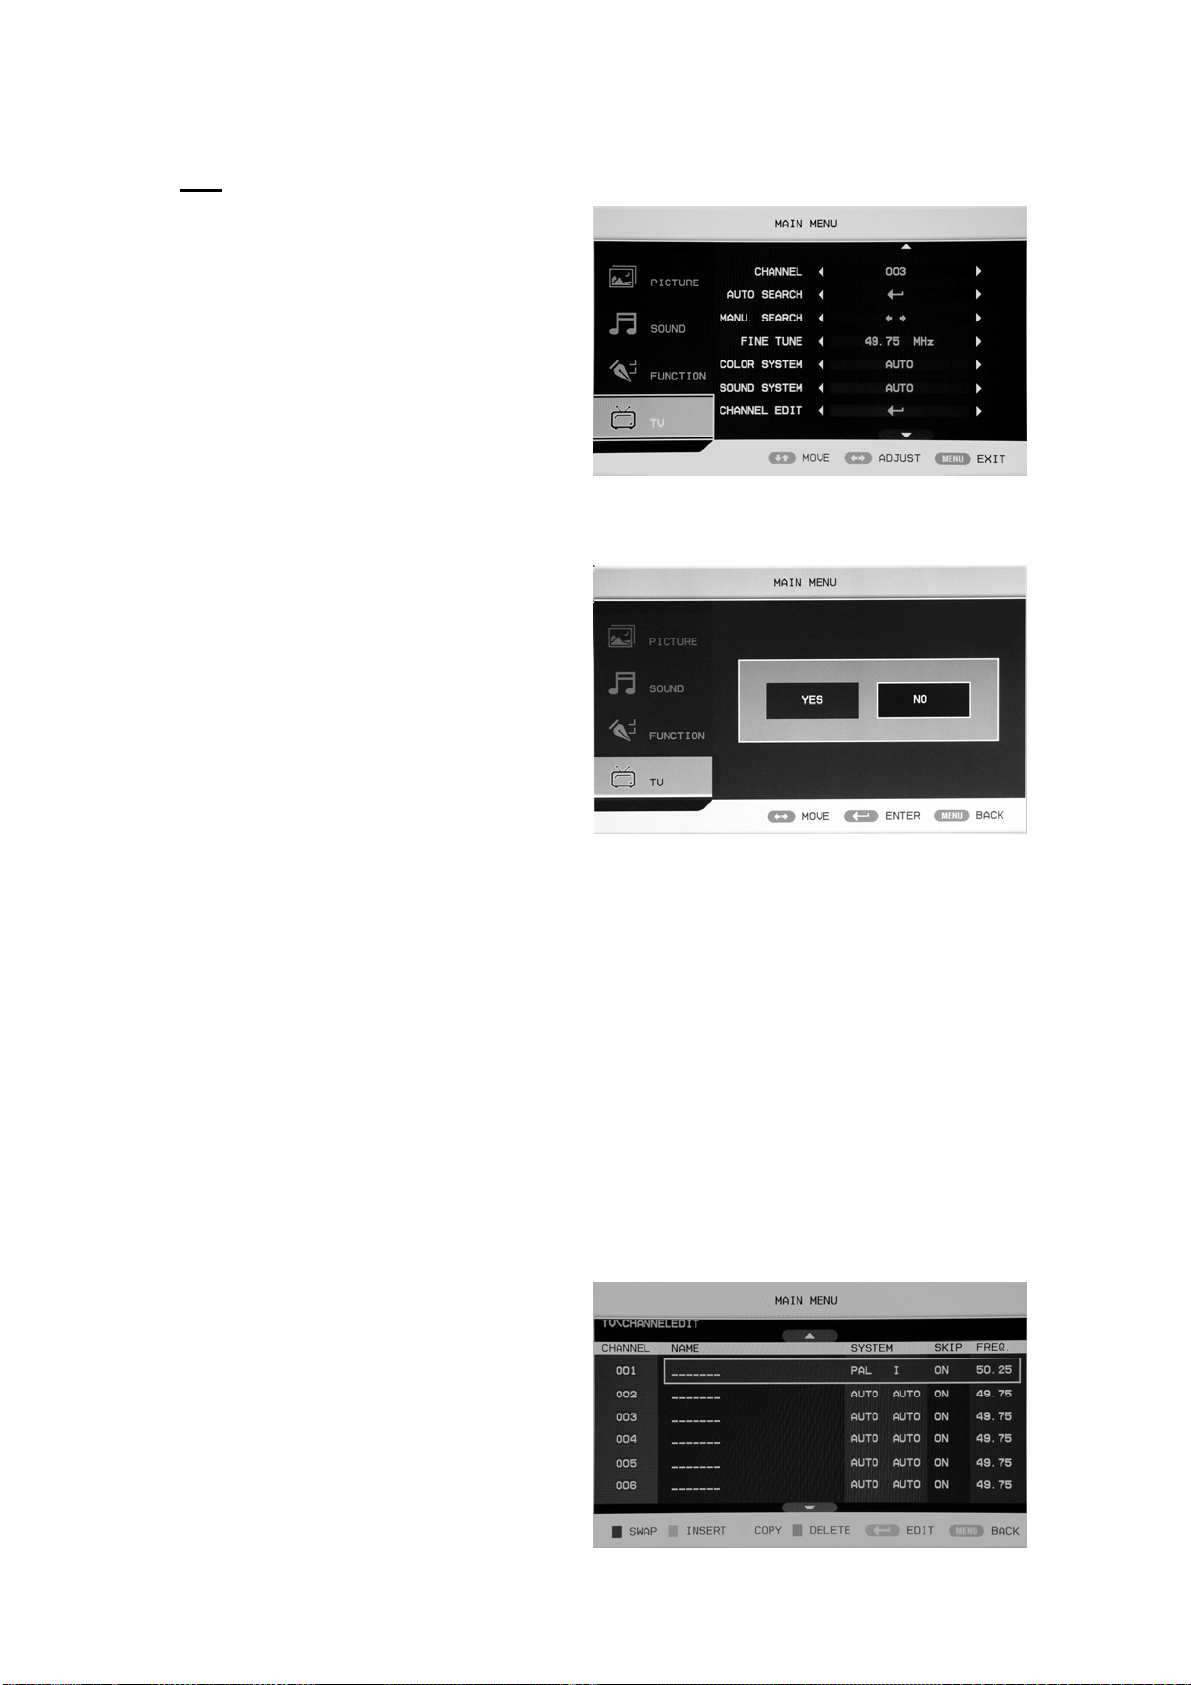
TV
U kunt hier de gewenste aanpassingen
maken in de TV-modus.
1. Druk op de “c/d” knop om
“CHANNEL” te selecteren en druk op de
“e/f” knop om een ander kanaal te
selecteren.
2. Druk op de “c/d” knop om “AUTO
SEARCH” te selecteren en druk op de
“ENTER” knop om de optie te selecteren. Druk vervolgens op de “e/f” knop om
“NO” te selecteren en druk op de “ENTER” knop om te bevestigen. Selecteer
“YES” om automatisch te zoeken
en selecteer “NO” om terug te
keren naar het voorgaande menu.
3.Druk op de“c/d” knop om
“MANU.SEARCH” te selecteren en druk op
de “e/f” knop om de optie te selecteren.
Druk vervolgens op de “e/f” knop om
“YES” of “NO” te selecteren en druk
op de “ENTER” knop om te
bevestigen. Selecteer “YES” om handmatig te zoeken en selecteer “NO” om terug
te keren naar het voorgaande menu.
4. Druk op de “c/d” knop om “FINE TUNE” te selecteren en druk op de “e/f” knop om de
frequentie voor het fijnafstemmen te selecteren.
5. Druk op de “c/d” knop om “COLOR SYSTEM” te selecteren en druk op de “e/f” knop om
het lokale kleursysteem te selecteren.
6. Druk op de “c/d” knop om “SOUND SYSTEM” te selecteren en druk op de “e/f” knop om
het lokale geluidssysteem te selecteren.
7. Druk op de “c/d” knop om “CHANNEL EDIT” te selecteren en druk op de “ENTER” knop
om het menu te openen.
a. Druk op de “c/d” knop om een kanaal
te selecteren en druk op de “RODE”
knop om te bevestigen. Druk op de
“c/d” knop om een ander kanaal,
waarmee u wilt wisselen, te selecteren .
Druk op de “ENTER” knop om te
“YES” of
12
Page 70
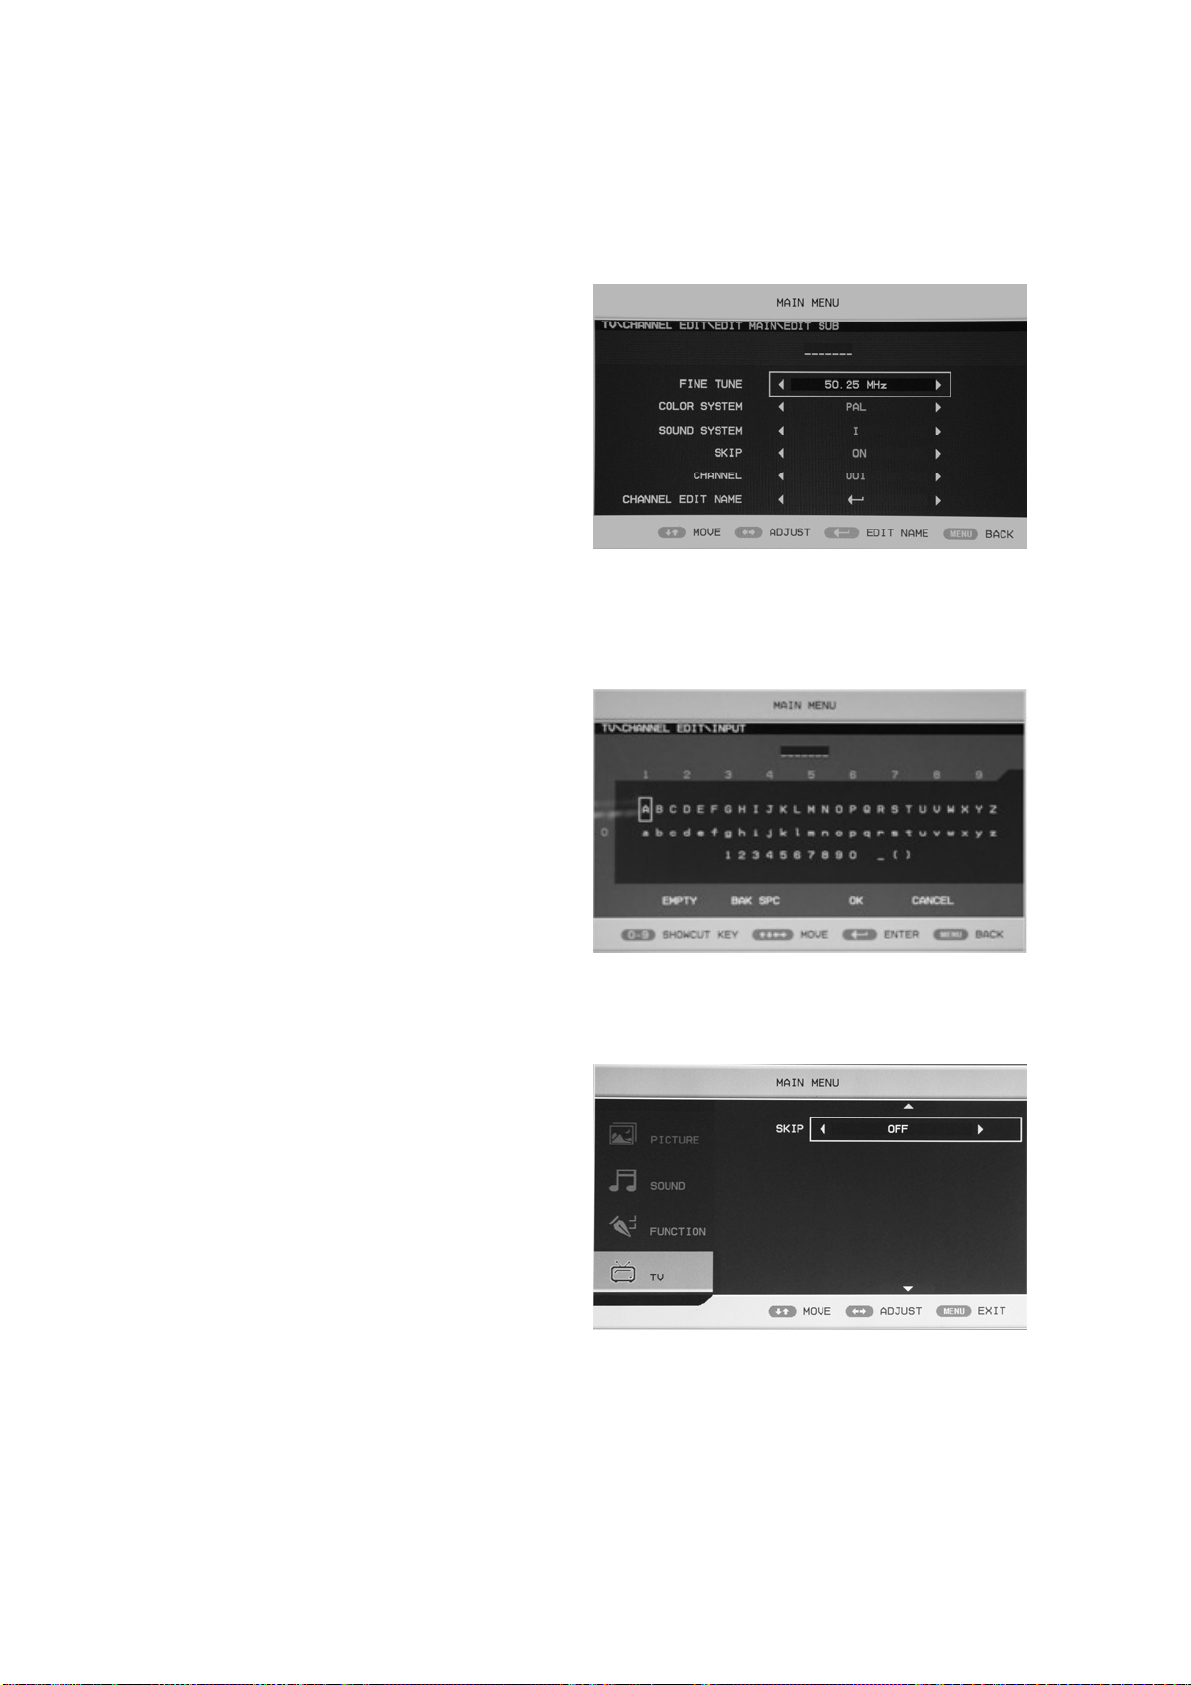
bevestigen.
b. Druk op de “c/d” knop om een kanaal te selecteren en druk op de “GROENE” knop om te
bevestigen. Druk op de “c/d” knop een ander kanaal wat u wilt invoegen te selecteren . Druk
op de “ENTER” knop om te
bevestigen.
c. Druk op de “c/d” knop om een kanaal
te selecteren en druk op de “GELE”
knop om te bevestigen. Druk op de
“c/d” knop om een ander kanaal dat u
wilt kopiëren te selecteren. Druk op de
“ENTER” knop om te bevestigen.
d. Druk op de “c/d” knop om het kanaal dat u wilt verwijderen te selecteren en druk op de
“BLAUWE” knop om te bevestigen. Druk op de “ENTER” knop om te bevestigen.
e. Druk op de “c/d” knop om het kanaal in de lijst te selecteren en druk op de “ENTER” knop
om het “EDIT SUB” menu te openen.
f. Druk op de “c/d” knop
om“CHANNEL EDIT NAME”menu te
selecteren en druk op de “ENTER”
knop om het venster voor het
hernoemen van het kanaal te openen.
Voor de kanaalnaam in op “____”, druk
op de “c/de/f” knoppen om letters,
nummers, “_”, “〔”, “〕”, “EMPTY” of “BAK SPC” te selecteren, en druk op de “ENTER”
knop om te bevestigen.
Druk op de “c/de/f” knoppen om “OK” te selecteren en de instelling op te slaan en terug
te gaan naar het voorgaande menu.
Druk op de “c/de/f” knoppen om
“CANCEL” te selecteren en het venster
te verlaten en terug te keren naar het
voorgaande menu.
8. Druk op de “c/d” knoppen om “SKIP”
te selecteren en druk op de “e/f”knop
om het overslaan van het kanaal in- of
uit te schakelen.
13
Page 71

PC
1. Druk op de “MENU” knop om het
OSD-menu te openen. Druk vervolgens
op de “c/d” knop om het “PC” menu
te selecteren. Open het “PC” menu door
op de “f” knop te drukken.
2. Druk op de “c/d” knop om “H
POSITION” selecteren en druk op de
“e/f” knop om de H-positie in te
stellen.
3. Druk op de “c/d” knop om “V POSITION” te selecteren en druk op de “e/f” knop om de
V-positie in te stellen.
4. Druk op de “c/d” knop om “PHASE” te selecteren en druk op de “e/f” knop om de fase in
te stellen.
5. Druk op de “c/d” knop om “CLOCK” te selecteren en druk op de “e/f” knop om de klok in
te stellen.
6. Druk op de “c/d” knop om “AUTO ADJUST” selecteren en druk op de “ENTER” knop om
de instellingen automatisch in te stellen.
14
Page 72

BASIS AFSPELEN
BELANGRIJKE OPMERKING:
DVD handleiding
Voorbereidingen
Druk op de TV/AV-knop op het voorpaneel of de
SOURCE-knop om de DVD-bron te selecteren.
Basis afspelen
1. Druk op EJECT om de disklade te openen.
Plaats een disk op de disklade.(Als er in de DVD-modus
geen disk in de lade is geplaatst, dan zal er te allen tijde
OPEN op het scherm worden getoond)
Er is maar één diskgrootte. Plaats de disk op de juiste
plaats op de disklade. Als de disk fout in de disklade
wordt geplaatst, dan kan dit de disk beschadigen en
storing bij de DVD-speler veroorzaken. Plaats geen disks
die niet kunnen worden afgespeeld door deze
DVD-speler.
2. Druk op EJECT om de disklade te sluiten. Het afspelen
zal automatisch starten.
Het is mogelijk dat sommige disks niet automatisch
afspelen, u kunt in dit geval op PLAY/PAUSE drukken of
de ENTER-knop om het afspelen te starten.
Sommige disks zullen het afspelen starten met een menu.
Gebruik de navigatieknoppen op de afstandsbediening
om de menu-opties te selecteren en druk op
PLAY/PAUSE of ENTER om een optie te selecteren of
gebruik de numerieke toetsen om rechtstreeks een
menu-optie te selecteren.
Afspelen pauzeren
Druk op PLAY/PAUSE of ENTER om het afspelen te
pauzeren (stille modus). Het geluid zal worden gedempt
tijdens stille modus.
Druk op PLAY/PAUSE of ENTER om het normaal
afspelen te hervatten.
15
Afspelen stoppen
1. Druk op de STOP knop om naar de stopmodus
te gaan, het TV-scherm toont het opstartlogo. Bij
sommige disks, zoals DVD’s en audio CD’s, kan de
speler de plek waar het afspelen is gestopt opnieuw
oproepen.
2. Druk op PLAY/PAUSE of ENTER om het afspelen
te hervatten vanaf het punt waar het afspelen is
gestopt,
3. Druk twee keer op STOP om helemaal te stoppen
Vorige en volgende
Druk tijdens het afspelen op de PREV -toets om
terug te gaan naar het begin van het hoofdstuk , daarna
zal elke druk op deze toets een hoofdstuk terug gaan,
tot het begin van disk bereikt is.(opmerking: de
diskfuncties kunnen variëren, afhankelijk van het
diskformaat)
Tijdens het afspelen zal elke druk op de NEXT
-toets het huidige hoofdstuk overslaan en het
volgende hoofdstuk afspelen.
Snel vooruit- en achteruitspoelen
Druk op F.FWD om snel vooruit te spoelen op de
disk. Bij elke druk op de F.FWD
snelheid van het vooruitspoelen veranderen. De
snelheden 2x, 4x, 8x, 16x, 32x en normaal worden
doorlopen.
Druk op PLAY/ENTER om het normaal afspelen te
hervatten.
Druk op F.REV
disk. Bij elke druk op de F.REV
snelheid van het terugspoelen veranderen. De
snelheden 2X, 4X, 8X, 16X, 32X en normaal worden
doorlopen.
Druk op PLAY/ENTER om het normaal afspelen te
hervatten.
ZOOM
Druk op deze knop om het beeld in of uit te zoomen.
Bij elke druk op de knop zal de vergroting veranderen.
Gebruik in de zoommodus de navigatieknoppen om
het beeld dat getoond wordt op het scherm te
verplaatsen.
om snel terug te spoelen op de
-knop zal de
-knop zal de
Page 73

ALLE HIER BESCHREVEN FUNCTIES ZIJN VOOR DVD-DISKS. WANNEER EEN
DISK VAN EEN ANDER FORMAAT AFSPEELT, DAN KAN DE WERKING EN DE
WEERGAVE OP HET BEELD ANDERS ZIJN.
ONDERTITEL
Druk op “ SUBTITLE ”, het scherm zal “ SUBTI-TLE
01/XX XXXXX “ tonen, “01” geeft het rangnummer
van deze taal aan; “XX” geeft het totaal aantal talen aan;
“XXXXX” geeft de taal van het land aan, (het aantal
talen is afhankelijk van de disk). Deze functie kan
maximaal 32 talen selecteren om te tonen op het scherm.
HERHAAL
Druk meermaals op de REPEAT-knop om de gewenste
afspeelmodus te bereiken;
DVD
Hoofdstuk herhalen, titel herhalen, alle herhalen
CD
Track herhalen, alle herhalen
MP3
Enkel, één herhalen, map herhalen, Map, Shuffle,
random
HERHAAL A-B
Druk op A-B om het startpunt te markeren, druk
nogmaals om een eindpunt in te stellen en de instelling
te voltooien. De geselecteerde sectie, A-B, zal
onmiddellijk herhaald worden.
Druk nogmaals op A-B om deze functie te annuleren.
HOEK
Wanneer u geniet van sport, concerten of theater drukt u
op deze toets om dezelfde acties uit verschillende
hoeken te bekijken. (Dit kan bij disks die deze functie
bevatten. Met behulp van een disk die is opgenomen in
multi-angle kunt u een scène uit verschillende hoeken
bekijken, bijvoorbeeld vanaf de voorkant, in het geheel
en de achterkant )
MENU
Druk op deze toets om het voetmenu te tonen, selecteer
items naar wens. (Deze functie werkt bij DVD’s met
een multi-layer menu.).
PROGRAMMA
Druk onder het afspelen van een disk op “PROGRAM”
om de programma-modus te betreden. Druk op de
numerieke knoppen om het gewenste
programmanummer te selecteren en wanneer u klaar
bent verplaatst u de cursor naar “START”. Dit zal het
afspelen van het programma starten. Druk om deze
functie te annuleren op “STOP” en vervolgens op
PLAY/PAUSE of ENTER.
OPMERKING; Deze functie is niet beschikbaar bij
MP3.
TITEL/PBC
Bij sommige DVD-disks zal het drukken op deze toets
het titelmenu tonen. U kunt daarna met de numerieke
knoppen het gewenste item selecteren.
16
Page 74

SPECIALE FUNCTIES AFSPELEN
U kunt Kodak foto CD’s en JPEG foto CD’s afspelen op deze TV.
Afspelen
Plaats een Kodak foto CD of JPEG foto CD in de lade en de disk zal automatisch geladen worden. De
speler zal wanneer de disksoort geïdentificeerd kan worden beginnen de afbeeldingen één voor één
tonen te tonen (diashow-modus). Gebruik als er een navigatiemenu wordt getoond de navigatieknoppen
om een bestand te selecteren en druk vervolgens op de ENTER knop.
Elke afbeelding op de CD zal achtereenvolgens worden weergegeven in de stijl van een diashow en zal
zo worden geschaald om op het gehele TV-scherm te passen. Er zijn een aantal overgangsmodi
beschikbaar voor de diashow, gebruik de “PROGRAM” toets om deze te selecteren. De
overgangseffecten kunnen voor elke afbeelding worden ingesteld.
Druk op de “PAUSE” toets om een afbeelding voor onbepaalde tijd te tonen .Druk op de “NEXT” of
“PREV” toets om de volgende of vorige afbeelding te tonen. Druk op de “ENTER” toets om de diashow
te hervatten.
Druk op de STOP-knop om foto’s in een map te previewen en druk op de navigatieknoppen om een
afbeelding te draaien.
ZOOM
Er is een in-/uitzoom functie beschikbaar voor de afbeeldingen. Druk op de ZOOM-toets om gebruik te
maken van de zoomfunctie en selecteer de zoomschaal met behulp van de
SCHERMBEVEILIGING
Als het apparaat 3 minuten niks doet, dan zal het in slaapmodus gaan en schermbeveiliging inschakelen.
In deze modus kunt u op een willekeurige toets op de afstandsbediening of op het voorpaneel drukken
om het apparaat te activeren.
U kunt de SCREEN SAVER (schermbeveiliging) functie op OFF (uit) zetten in de ALGEMENE SETUP
PAGINA van DVD SYSTEEM SETUP.
MP3 AFSPELEN
Er zal automatisch een navigatiemenu worden getoond wanneer een MP3-disk wordt afgespeeld.
Gebruik in het menu de omhoog of omlaag navigatietoetsen om de map te kiezen. Gebruik vervolgens
PLAY/PAUSE of ENTER om de map te openen. Gebruik de OMHOOG of OMLAAG navigatietoetsen
om een bestand te kiezen en druk op PLAY/PAUSE of. ENTER om het bestand af te spelen. Door op de
linkernavigatietoets te drukken zal u terugkeren naar het voorgaande menu.
MPEG4 DISK FUNCTIE-INTRODUCTIE
MPEG-4 is de vierde video- en audio-codeerstandaard
vrijgegeven door MPEG (De afkorting van “moving
pictures Experts Group”).VCD is gebaseerd op MPEG-1
technologie en DVD is gebaseerd op MPEG-2. MPEG-4
maakt gebruik van smalle bandbreedte, voor de beste
beeldkwaliteit door het comprimeren en verzenden van de
gegevens met een framereconstructie technologie. De
audio-gegevens zijn gecomprimeerd met de WMA- of
MP3-standaard. MPEG-4 is de meest avanceerde
comprimeertechnologie standaard op het gebied van AV. Het heeft de hoogste compressiegraad. Met
behulp van MPEG-4 Technologie is het mogelijk een DVD-film te coderen en comprimeren tot één of
en knoppen.
17
Page 75

twee CD-R disks met vrij goede beeldkwaliteit, of verschillende films met dezelfde kwaliteit als VCD
op één CD-R disk branden. Ook is het mogelijk verschillende films met een soortgelijke kwaliteit als
DVD op één DVD-ROM disk te branden.
Opmerking:
1.De MPEG-4 disks die op dit moment beschikbaar zijn hebben verschillende formaten, zoals
XVID,AVI,RM etc. Maar sommige disks die beschikbaar zijn met een “MPEG4” logo zijn niet
gecodeerd met behulp van MPEG technologie. Het is normaal dat sommige disks niet goed afgespeeld
kunnen worden in de speler door het gebruik van deze onjuiste codeerstandaard.
18
Page 76

DVD SYSTEEM SETUP
Algemeen Setupproces
Druk op de DVD-SETUP knop, de
algemene setuppagina en voorkeurspagina
zullen om de beurt getoond worden,
Druk op
selecteren druk vervolgens op
submenu te betreden.
Druk op
druk vervolgens op PLAY/PAUSE of
ENTER om te bevestigen.
Druk herhaaldelijk op DVD SETUP om
de setupmenu’s verlaten.
General setup page (Algemene
setuppagina)
BESCHRIJVING ASPECT RATIO
Selecteer 4:3/LB als u de DVD-speler
gebruikt in combinatie met de interne TV.
De volgende informatie is alleen van
toepassing wanneer de DVD-uitgang is
verbonden met een externe TV.
4:3 /PS (PS=Pan and Scan)
U kunt dit selecteren wanneer u een TV met normale beeldverhouding heeft
(4:3), hoewel de NORMAL/LB (brievenbus) een meer voorkomende keuze is.
In PS-modus zal breedbeeld materiaal het scherm vullen, maar de uiterste
linker- en rechterkant van het beeld van de originele film zullen worden
afgekapt. Deze functie werkt alleen wanneer disks speciaal zijn gecodeerd voor
deze functie. Zulke disks zijn niet veel voorkomend.
4:3/LB (LB=Letter Box)
U kunt dit selecteren wanneer u een TV met een normale beeldverhouding heeft
(4:3). Breedbeeld materiaal zal getoond worden in zuivere ongewijzigde vorm,
zodat het gehele beeldoppervlak van de originele film kan worden bekeken
zonder dat de zijkanten worden bijgesneden. Er zullen zwarte balken
verschijnen boven en onder het beeld.
16:9
U kunt dit selecteren wanneer u een breedbeeld TV heeft (16:9). Er kunnen nog
steeds zwarte balken boven en onder het beeld gebruiken, zelfs wanneer u
gebruik maakt van een breedbeeld TV. Dit komt doordat sommige
filmregisseurs liever ultra-breedbeeld beeldverhoudingen gebruiken bijv.
2.35:1. Dit zal normaal worden vermeld op de DVD-verpakking.
of om een item te
om het
of om te selecteren en
19
Page 77
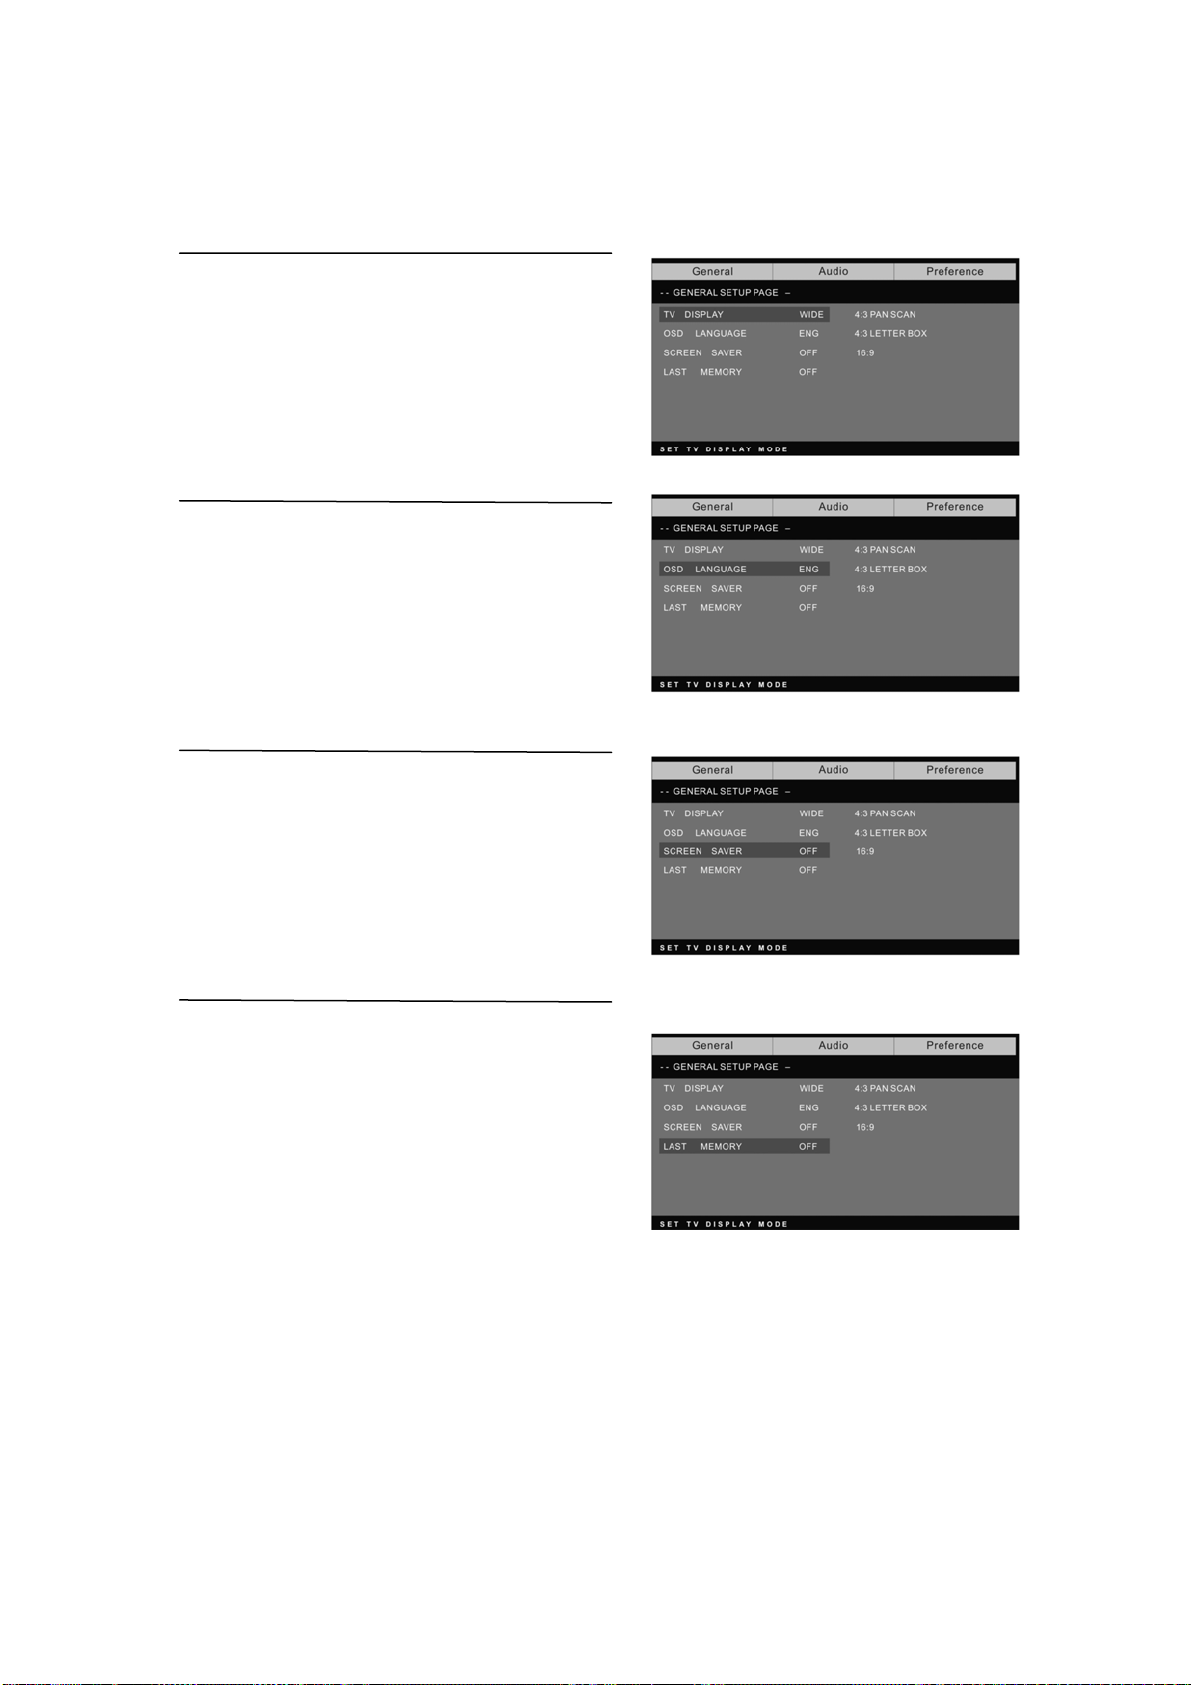
DVD SYSTEEM SETUP(VERVOLGD)
General Setup Page (Algemene setuppagina)
TV Display: de gebruiker kan een keuze maken uit de
verschillende weergave-modi, zoals 4:3 PS, 4:3 LB,
16:9 WIDE.
On Screen Display Language (OSD-taal):
Gebruikers kunnen de taal van de scherm menu’s
selecteren.
Screen Saver (Schermbeveiliging):
Als de schermbeveiliging is ingeschakeld, dan zal er
een geanimeerd beeld van de DVD op het scherm
verschijnen wanneer de DVD-speler voor meer dan 3
minuten inactief is.
Last memory (Hervatfunctie):
Onthoud het hoofdstuk dat u zojuist bekeken heeft.
Wanneer de hervat geheugenfunctie is ingeschakeld,
dan zal de DVD-speler bij het inschakelen van de
DVD-speler weer het hoofdstuk tonen dat u keek
voordat u de DVD-speler uitschakelde.
20
Page 78

Preference page (Voorkeurspagina)
De voorkeurspagina is alleen beschikbaar wanneer er geen disk in de speler zit.
De instellingen worden consequent toegepast op alle disks die worden geplaatst
en afgespeeld.
TV Type: deze speler ondersteunt
verschillende TV-uitvoer systemen,
waaronder Auto, NTSC, en PAL systemen.
Deze optie normaal gesproken instellen op Auto.
Parental (Ouderlijk):
De ouderlijke controlefunctie werkt in
combinatie met de verschillende
censuurklassen (ratings) die zijn
toegekend aan DVD’s.
Deze klassen helpen het controleren van welk soort DVD’s door het gezin worden
bekeken. Er zijn tot 8 verschillende censuurklassen (ratings) voor DVD's.
Opmerking;
U moet het wachtwoord invoeren om deze instelling te veranderen (initieel
wachtwoord is 8888)
Password change
(Wachtwoord veranderen):
U kunt uw wachtwoord veranderen door
4 cijfers in te voeren. U moet deze 4
cijfers bevestigen voordat het nieuwe
wachtwoord geaccepteerd kan worden.
OPMERKING: Als u uw wachtwoord
vergeet of als een wachtwoord per
ongeluk wordt ingesteld, dan kunt u 8888
invoeren als het wachtwoord. Hiermee
kunt u de controle herwinnen.
21
Page 79
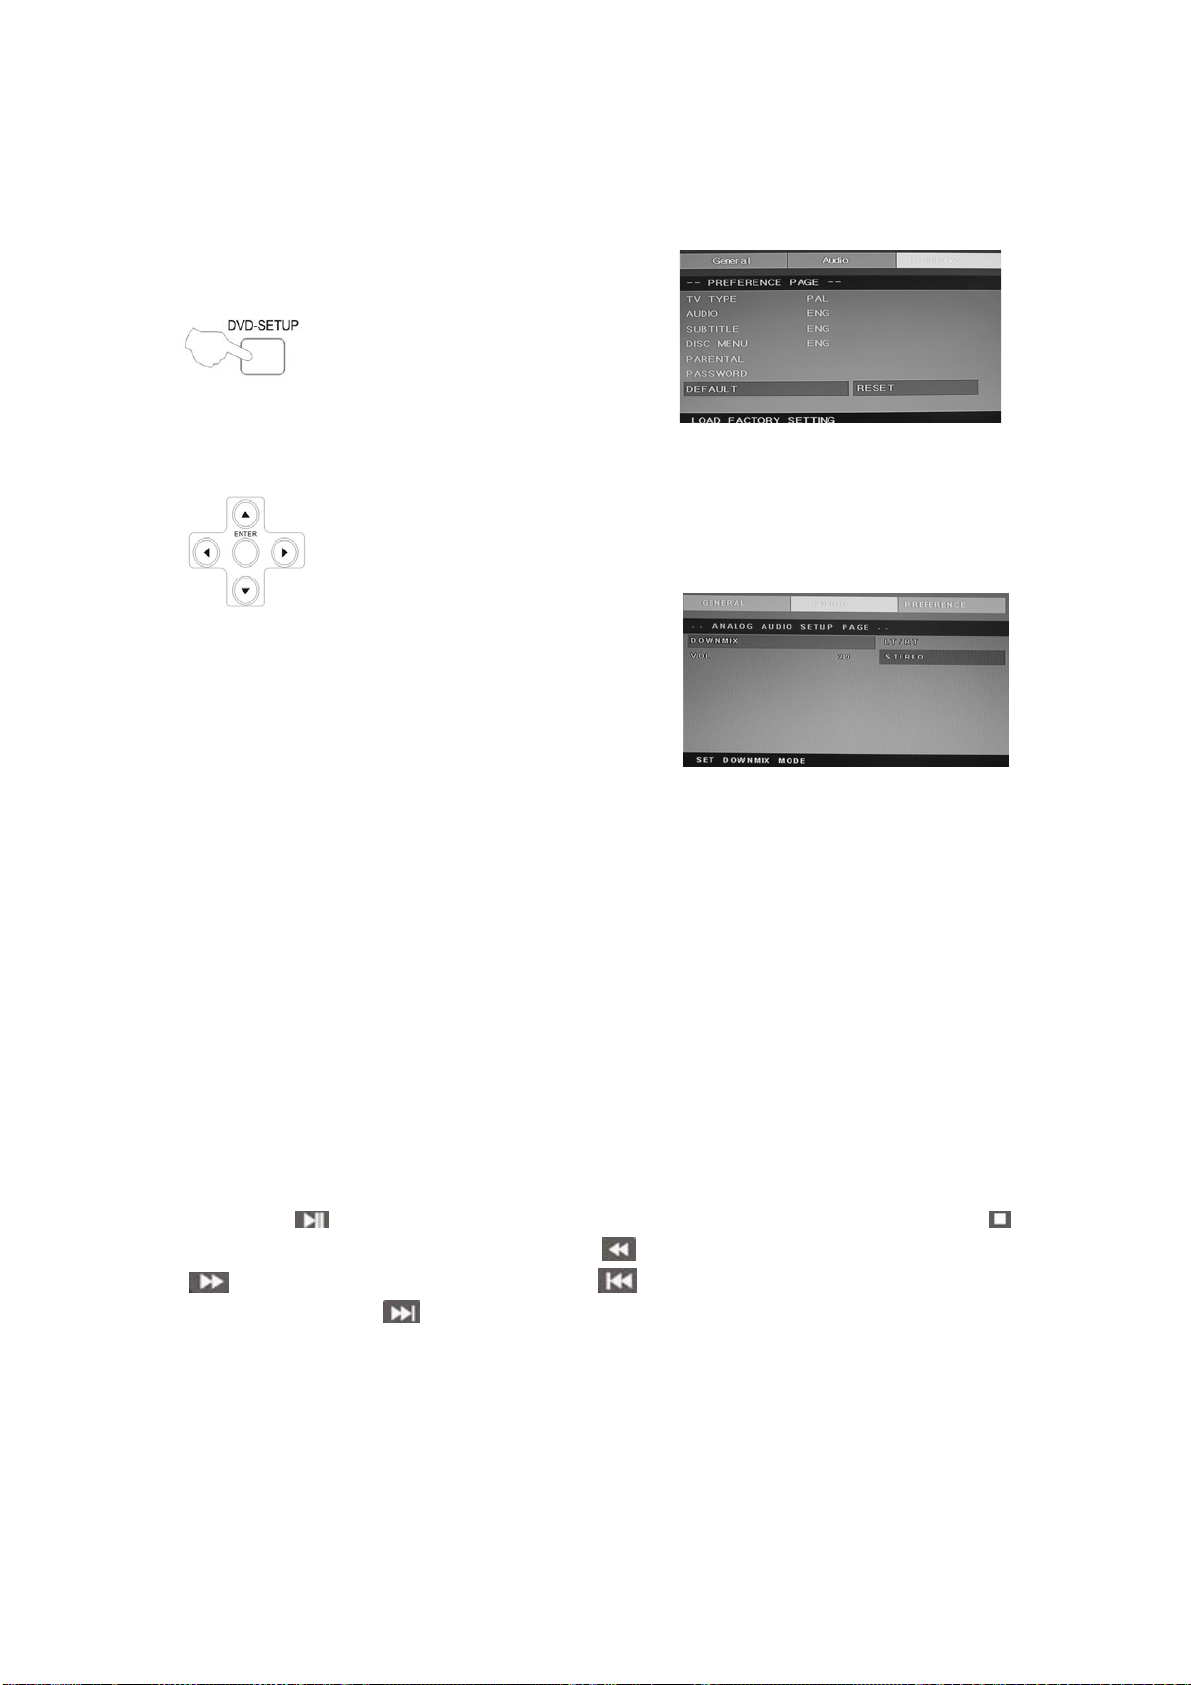
Default (Standaard): reset alle
instellingen (behalve wachtwoord en
ouderlijke vergrendelstatus) voor deze
DVD-speler naar de originele
instellingen van de fabrikant. Druk op
ENTER om de reset uit te voeren.
Opmerking;
Sommige functies zijn, afhankelijk van de disksoort, mogelijk niet beschikbaar.
ANALOG AUDIO SETUP PAGE
(ANALOGE AUDIO SETUPPAGINA)
1.Druk op de DVD-SETUP knop, de
Analoge
Audio Setuppagina, Voorkeurspagina
zullen om de beurt worden getoond.
2.Druk op c of d om een item te selecteren en druk vervolgens op om het
submenu te openen.
3.Druk op c of d om te selecteren en druk vervolgens op PLAY/PAUSE of
ENTER om te bevestigen.
4.Druk herhaaldelijk op DVDSETUP om de setupmenu’s te verlaten.
Opmerking1: Als de DVD-speler een USB- en CARD-ingang heeft, dan kunt u met de
onderstaande methode deze functie gebruiken. Druk op de “USB/CR” knop wanneer de huidige
bron DVD is om de selectie te tonen. Druk op de “c/d” knop om “USB” of “CARD” te selecteren
en druk op de “ENTER” knop om te bevestigen. Druk op de “c/d” knop om het item dat u af wilt
spelen te selecteren en druk op de “ENTER” knop om het item af te spelen . Druk wanneer u ten
minste één submap bent ingegaan op de “e” knop om terug te keren naar de voorgaande map.
Druk op de “
knop om het afspelen te stoppen . Druk op de “
“
” knop om vooruit te spoelen. Druk op de “ ” knop om terug te gaan naar het voorgaande
hoofdstuk. Druk op de “
” knop om het afspelen te starten of het afspelen te pauzeren. Druk op de “ ”
” knop om achteruit te spoelen. Druk op de
” knop om naar het volgende hoofdstuk te gaan.
Opmerking2: De bedrijfstemperatuur van de DVD-speler is 0 to℃ t 40 . ℃
22
Page 80

AFSPEELBARE DISKS
De volgende disks kunnen worden afgespeeld;
DISKS
DVD VIDEO
AUDIO CD
JPEG
LABEL
INHOUD
Audio + video
(bewegend beeld)
Audio
Video(foto)
AFMETING
12cm
12cm
12cm
KODAK CD
CD-R
CD-RW
CD+G
MPEG4
Ondersteunde disks: DVD, VCD, CD-R, CD-RW, SVCD, DVCD, HDCD, JPEG, CD+G, MPEG-4
Kodak CD , W MA.
U kunt geen disks afspelen die anders zijn dan de hierboven genoemde disks,
U kunt geen niet-gestandaardiseerde disks afspelen, zelfs als ze zoals hierboven worden
gelabeld,
De prestaties van CD-R of CD-RW disks is afhankelijk van de manier waarop ze gebrand zijn.
Het is in een aantal gevallen mogelijk dat de disks niet goed presteren of zelfs niet afspeelbaar zijn.
Audio of video
Video(foto)
Audio of video
(bewegend beeld)
Audio of video
(bewegend beeld)
Video(foto)
(bewegend beeld)
12cm
12cm
12cm
12cm
12cm
23
Page 81

DISK BESCHERMING EN DVD KENMERKEN
OVER HET BEHANDELEN VAN DISKS
Raak de speelzijde van de disk niet aan.
. Plak geen papier of plakband op de disk.
OVER HET SCHOONMAKEN VAN DISKS
Vingerafdrukken en stof op de disk kunnen leiden tot slechter beeld en
geluid. Veeg de disk van binnen naar buiten schoon met een zachte doek. Houd
de disk altijd schoon.
Als het stof niet van de disk geveegd kan worden, veeg dan met een licht
bevochtigde zachte doek over de disk en daarna met een droge doek.
Gebruik geen oplosmiddelen, zoals thinner, benzeen, in de handel
verkrijgbare reinigingsmiddelen of antistatische-sprays voor
grammofoonplaten. Dit kan de disk beschadigen.
OVER HET BEWAREN VAN DISKS
Bewaar disks niet op een plaats met direct zolicht of in de buurt van een
warmtebron,
Bewaar disks niet op plaatsen die onderworpen zijn aan vocht en stof,
zoals een badkamer of in de buurt van een luchtbevochtiger.
Bewaar disks verticaal in een doosje. Voorwerpen op disks buiten hun
doosje plaatsen of stapelen kan leiden tot kromtrekken.
STRUCTUUR VAN DISKINHOUD
Normaliter worden DVD-disks onderverdeeld in titels, en deze titels zijn
onderverdeeld in hoofdstukken Audio CD’s zijn onderverdeeld in tracks.
Aan elke titel, hoofdstuk of track is een nummer toegekend, deze worden
ook wel titel-, hoofdstuk- en of tracknummer genoemd.
Het is mogelijk dat er disks zijn die deze nummers niet hebben.
DVD-disk vergeleken met andere disks;
Codeermethode Digitaal/MPEG‖ Analoog Digitaal Digitaal/MPEG
Capaciteit
Speeltijd
Diskdiameter 12cm 30cm/20cm 12cm 12cm 12cm
Horizontale
resolutie
Beeldverhouding Meerdere soorten Eén soort Eén soort Eén soort
Ondertitels 32 soorten 16 soorten 4 soorten
Geluidskwaliteit 48khz, 96khz/
DVD LG SVCD VCD CD
Digitaal
1
Single-
side
Single-
layer
4.7G
133
minuten
Meer dan 500 lijnen Niet meer dan 430
6, 20 ,24bit
Double
-side
Single
-layer
8.5G
242
minuten
Single-
Side
Double-
Layer
9.4G
266
minuten
Double-
Side
Double-
Layer
17G
484
minuten
650MB
Single-side
60 minuten
Double-side
120 minuten
lijnen
44.1khz/
16bit
45 minuten
Niet meer dan
350 lijnen
44.1khz/
16bit
650MB
74 minuten
Niet meer dan
250 lijnen
44.1khz/
16bit
650MB
74 minuten
44.1khz/
16bit
24
Page 82

Specificaties
RGB-INVOER
Horizontale
Model Resolutie
DOS 720x400 31.5 70
VGA 640x480 31.5 60
SVGA 800x600 37.9 60
XGA 1024x768 48.4 60
WXGA 1360x768 47.7 60
WXGA+ 1440x900 55.9 60
Frequentie
(KHz)
Verticale
Frequentie
(HZ)
*1360x768 wordt alleen gebruikt bij 22〞en 23〞LCD TV.
*1440x900 wordt alleen gebruikt bij 19〞 LCD TV.
HDMI-INVOER
Horizontale
Model Resolutie
Frequentie
(KHz)
Verticale
Frequentie
(HZ)
VGA 640 x 480 31.47 59.94
480i 720 x480i 15.73 59.94/60
576i 720 x 576i 15.63 50
480p 720 x480p 31.47 59.94/60
576p 720 x 576p 31.26 50
720p 1280 x 720p 37.50
1080i 1920 x 1080i 28.13
25
44.96
33.75
50
59.94/60
50
59.94/60
Page 83

Problemen Oplossen
Controleer vóór het raadplegen van onderhoudspersoneel de volgende tabel voor een mogelijke
oorzaak en oplossing van de problemen die u ervaart.
PROBLEEM OPLOSSING
TV gaat niet aan
Geen beeld, geen geluid
●Zorg ervoor dat het netsnoer is aangesloten.
●De batterijen in de afstandsbediening zijn mogelijk
leeg, vervang de batterijen.
●Controleer de kabel tussen de TV en de antenne/kabel
TV.
●Druk op de power-knop op de afstandsbediening.
●Druk op de SOURCE-knop op de afstandsbediening en
druk vervolgens herhaaldelijk op de “▲/▼”knop om de
TV als bron te selecteren.
Slecht beeld, geluid OK
●Controleer de kabel tussen de TV en de antenne/kabel
TV.
●Probeer een ander kanaal, er is mogelijk een storing op
het huidige kanaal.
●Pas de helderheid/contrast aan in het Video-menu.
Geluidsruis ●Verplaats infrarood apparatuur uit de buurt van de TV.
26
Page 84

Indien u zich in de toekomst van dit toestel wenst te ontdoen, let er dan op dat elektrisch afvalmateriaal niet met het
huishoudelijk afval mag worden verwijderd. Breng het toestel naar een kringloopwinkel of anderevoorziening voor
recycling. Neem contact
(Richtlijn voor Afval van Elektrische en Elektronische Apparaten, AEEA).
op met uw plaatselijke autoriteit of winkelier indien u meer informatie wenst over recycling.
Page 85

Page 86

Page 87

z Introduction
z Précautions
z Caution
z Description de l’unité principale
z Télécommande
z Réglages de base OSD
z Manuel du DVD
z Spécifications
z Dépannage
Sommaire
1
Page 88

Introduction
Merci d’avoir fait l’acquisition d’un téléviseur LCD. Celui-ci intègre un téléviseur couleur et un
moniteur pour ordinateur. Pour apprécier votre téléviseur dès le début, lisez attentivement ce
manuel puis conservez-le afin de pouvoir vous y référer ultérieurement.
INSTALLATION
① Installez le récepteur dans une pièce où aucun rayon de soleil. L’obscurité totale et les
réflexions peuvent entrainer la fatigue des yeux. Un éclairage doux et indirect est recommandé.
② Laissez un espace suffisant entre le récepteur et le mur afin d’assurer une correcte ventilation.
③ Evitez d’installer l’unité dans un endroit chaud afin de ne pas endommager l’unité et de
prévenir toute panne de composant électrique.
④ Ce récepteur TV peut être raccordé à une source d’alimentation CA 100-240 V 50/60 HZ.
⑤ N’installez pas le récepteur dans un endroit situé près de sources de chaleur telles qu’un
radiateur, conduit d’air chaud, rayons de soleil, ou dans un espace confiné. Ne couvrez pas les
orifices de ventilation en cours d’utilisation.
⑥ Le témoin lumineux s’éteint au bout de 30 secondes après avoir éteint le courant, durant cette
période, vous ne pouvez pas mettre l’unité sous tension avant que le témoin de fonctionnement ne
se doit pas allumé. Merci de votre attention!
2
Page 89

Avertissement
RISQUE D’ELECTROCUTION
ATTENTION : AFIN DE RÉDUIRE LES RISQUES D’ÉLECTROCUTION,
NE PAS RETIRER LE COUVERCLE (OU LE DOS). L’UNITE NE CONTIENT
AUCUNE PIECE REPARABLE PAR L’UTILISATEUR. POUR TOUTE
RÉPARATION, RÉFÉREZ-VOUS À DU PERSONNEL DE REPARATION
QUALIFIÉ.
Ce symbole est destiné à alerter l’utilisateur d’une dangereuse
tension présente dans l’unité. Afin de prévenir toute
électrocution, confiez l’entretien de votre unité à du personnel de réparation qualifié.
ATTENTION
NE PAS OUVRIR
Ce symbole a pour but d’alerter l’utilisateur de la présence
d’importantes consignes d’utilisation et d’entretien (réparation) dans la documentation
accompagnant l’appareil.
3
Page 90
Attention
Attention
De hautes tensions sont présentes lors du fonctionnement de ce produit.
Ne retirez pas le panneau arrière de l’unité. Confiez l’entretien de l’unité à du
personnel de réparation qualifié.
Attention
Afin de prévenir tout incendie et électrocution, n’exposez pas
l’unité à la pluie ou l’humidité.
N’insérez aucun objet dans le boitier du
N’exposez pas l’unité aux rayons de soleil et sources de chaleur
N’installez apas le téléviseur sur un autre produit émettant de la chaleur. Exemple, lecteurs de
cassettes vidéo, amplificateur audio. Ne bloquez pas les orifices de
ventilation situés sur le panneau arrière de l’unité. La ventilation est
essentielle au fonctionnement de l’unité et permet de prévenir toute panne de composant
électrique. N’installez pas l’unité sur le cordon d’alimentation.
Attention
téléviseur. Ne versez aucun liquide sur le téléviseur.
Attention
4
Page 91

Précautions
Attention
Ne marchez pas sur le téléviseur, ne vous y appuyez pas, ne poussez pas
brusquement le produit de son support. Vous devez accorder une attention particulière aux enfants.
Attention
N’installez pas l’unité sur un chariot, étagère ou table instable. Une chute de l’unité
peut sérieusement blesser des personnes, et endommager l’unité.
.
Attention
Lors de périodes de non-utilisation prolongées de ce produit
, il est recommandé de déconnecte le cordon d’alimentation
de la prise de courant CA.
Attention
Le panneau LCD de ce produit est composé de verre.
Cependant, celui-ci peut se briser en cas de chute du produit
ou soumis à de chocs. Attention aux blessures résultant
de morceaux de verre.
5
Page 92

Description de l’unité principale
Présentation des touches du panneau de commandes
VOL+ : pour augmenter le volume.
VOL- : pour diminuer le volume.
CH+ : pour sélectionner la chaîne suivante
CH- : pour sélectionner la chaîne précédente.
MENU : Appuyez sur la touche pour sélectionner le menu principal.
TV/AV : permet de sélectionner un signal d’entrée.
POWER : permet de mettre en marche le lecteur lorsqu’en mode Attente
ou accéder au mode Attente.
Connecteurs TV
1. Connecteur d’entrée HDMI.
2. Connecteur d’entrée VGA permettant de recevoir le signal d’un ordinateur.
3. Connecteur d’entrée PERITEL.
4. Connecteur d’entrée S-vidéo.
5. Connecteur d’entrée Vidéo.
6. Connecteur d’entrée AUDIO.
7. Connecteur PC AUDIO.
8. Connecteur de sortie ECOUTEURS.
9. Antenne ATV/circuit TV fermé.
Connecteurs alimentation
AC POWER
6
Page 93

Télécommande
POWER: commutateur marche/arrêt, appuyez sur la touche
une fois pour mettre en marche le téléviseur et appuyez sur la
touche à nouveau pour éteindre le téléviseur.
MUTE: Appuyez sur cette touche pour couper/réactiver le
son.
DVD SETUP: Appuyez sur cette touche pour accéder au
menu principal DVD et appuyez sur la touche à nouveau pour
quitter le menu principal.
(Seulement disponible pour les modèles avec fonction DVD)
TITLE: Appuyez sur cette touche pour revenir au menu titre.
(Seulement disponible pour les modèles avec fonction DVD)
MENU(BLUE): Appuyez sur cette touche pour revenir au
menu racine ou quitter le menu principal DVD.
(Seulement disponible pour les modèles avec fonction DVD)
USB/CR: Appuyez sur la touche pour sélectionner une source
de lecture.
(Seulement disponible pour les modèles avec fonction
USB/CR)
NICAM/A2: En mode TV, appuyez sur cette touche pour
sélectionner un effet stéréo.
SLEEP: Permet de régler la minuterie Sommeil.
ASPECT: Appuyez sur la touche pour sélectionner un format
d’affichage.
EJECT
DVD en mode DVD.
(Seulement disponible pour les modèles avec fonction DVD)
DISPLAY: permet d’afficher les informations TV.
AUTO: Appuyez sur la touche pour automatiquement régler
l’image en mode PC.
PMODE: permet de sélectionner un mode d’image.
SMODE: permet de sélectionner un mode audio.
DTV: Cette touche est indisponible.
SOURCE: Appuyez sur la touche pour modifier signal
source.
: appuyez sur la touche pour éjecter le disque
7
Page 94

ENTER: permet d’accéder à l’option sélectionnée ou
effectuer l’opération sélectionnée.
MENU: Appuyez sur cette touche pour accéder au menu
principal et accéder à plusieurs options réglables.
EXIT: permet de quitter les informations OSD (affichage des
informations à l’écran).
0-9: Permet de sélectionner une chaîne de 0 - 9.
-/--: Permet de modifier les dizaines.
: Permet de basculer entre la chaine sélectionnée et la
chaîne précédemment sélectionnée.
CHc/CHd: Permet de sélectionner la chaîne
précédente/suivante.
VOLc/VOLd : permet de régler le volume.
TEXT: Appuyez sur la touche pour accéder au mode
Télétexte.
HOLD: permet de geler l’image en mode Télétexte.
INDEX: appuyez sur cette touche pour accéder au sommaire.
REVEAL: appuyez sur cette touche pour afficher les
informations masquées de la page Télétexte. Appuyez sur la
touche à nouveau pour masquer les informations.
SIZE: permet d’afficher la partie inférieure, supérieure ou la
totalité de la page en mode Télétexte.
SUBPAGE: permet d’activer la fonction SOUSCODE de
texte lorsque vous activez le mode de texte mode.
PLAY/PAUSE
:Appuyez sur la touche pour démarrer la
lecture du disque ou du média, ou mettre en pause la lecture.
(Destinés aux modèles disposant le la fonction USB/carte
mémoire)
STOP
:permet d’arrêter la lecture du disque ou du média.
(Destinés aux modèles disposant le la fonction USB/carte
mémoire)
REV
: Appuyez sur la touche pour effectuer un
rembobinage.
(Destinés aux modèles disposant le la fonction USB/carte
mémoire)
8
Page 95

FWD
:Appuyez sur la touche pour effectuer une avance
rapide.
(Destinés aux modèles disposant le la fonction USB/carte
mémoire)
PREV
: permet de sélectionner le chapitre précédent
(Destinés aux modèles disposant le la fonction USB/carte
mémoire)
NEXT
:permet de sélectionner le chapitre suivant
(Destinés aux modèles disposant le la fonction USB/carte
mémoire)
ZOOM:permet d’effectuer un zoom sur image.
(Seulement disponible pour les modèles avec fonction DVD)
GOTO:permet de directement accéder à une durée de lecture,
piste ou chapitre.
(Seulement disponible pour les modèles avec fonction DVD)
SUBTITLE(BLUE):permet de sélectionner une langue de
sous-titres.
(Seulement disponible pour les modèles avec fonction DVD)
ANGLE:permet de sélectionner un angle.
(Seulement disponible pour les modèles avec fonction DVD)
PROGRAM:permet de programmer la lecture du disque.
(Destinés aux modèles disposant le la fonction DVD)
INTRO:Appuyez sur la touche pour afficher la durée de
lecture restante du chapitre ou la durée de lecture écoulée.
(Destinés aux modèles disposant le la fonction DVD)
REPEAT:permet de sélectionner un mode de répétition.
(Destinés aux modèles disposant le la fonction DVD)
AB:permet de sélectionner un segment à répéter.
(Destinés aux modèles disposant le la fonction DVD)
ROUGE, VERTE, JAUNE, BLEUE : Correspond aux
fonctions de couleur.
(Disponible seulement sur le modèle européen)
9
Page 96
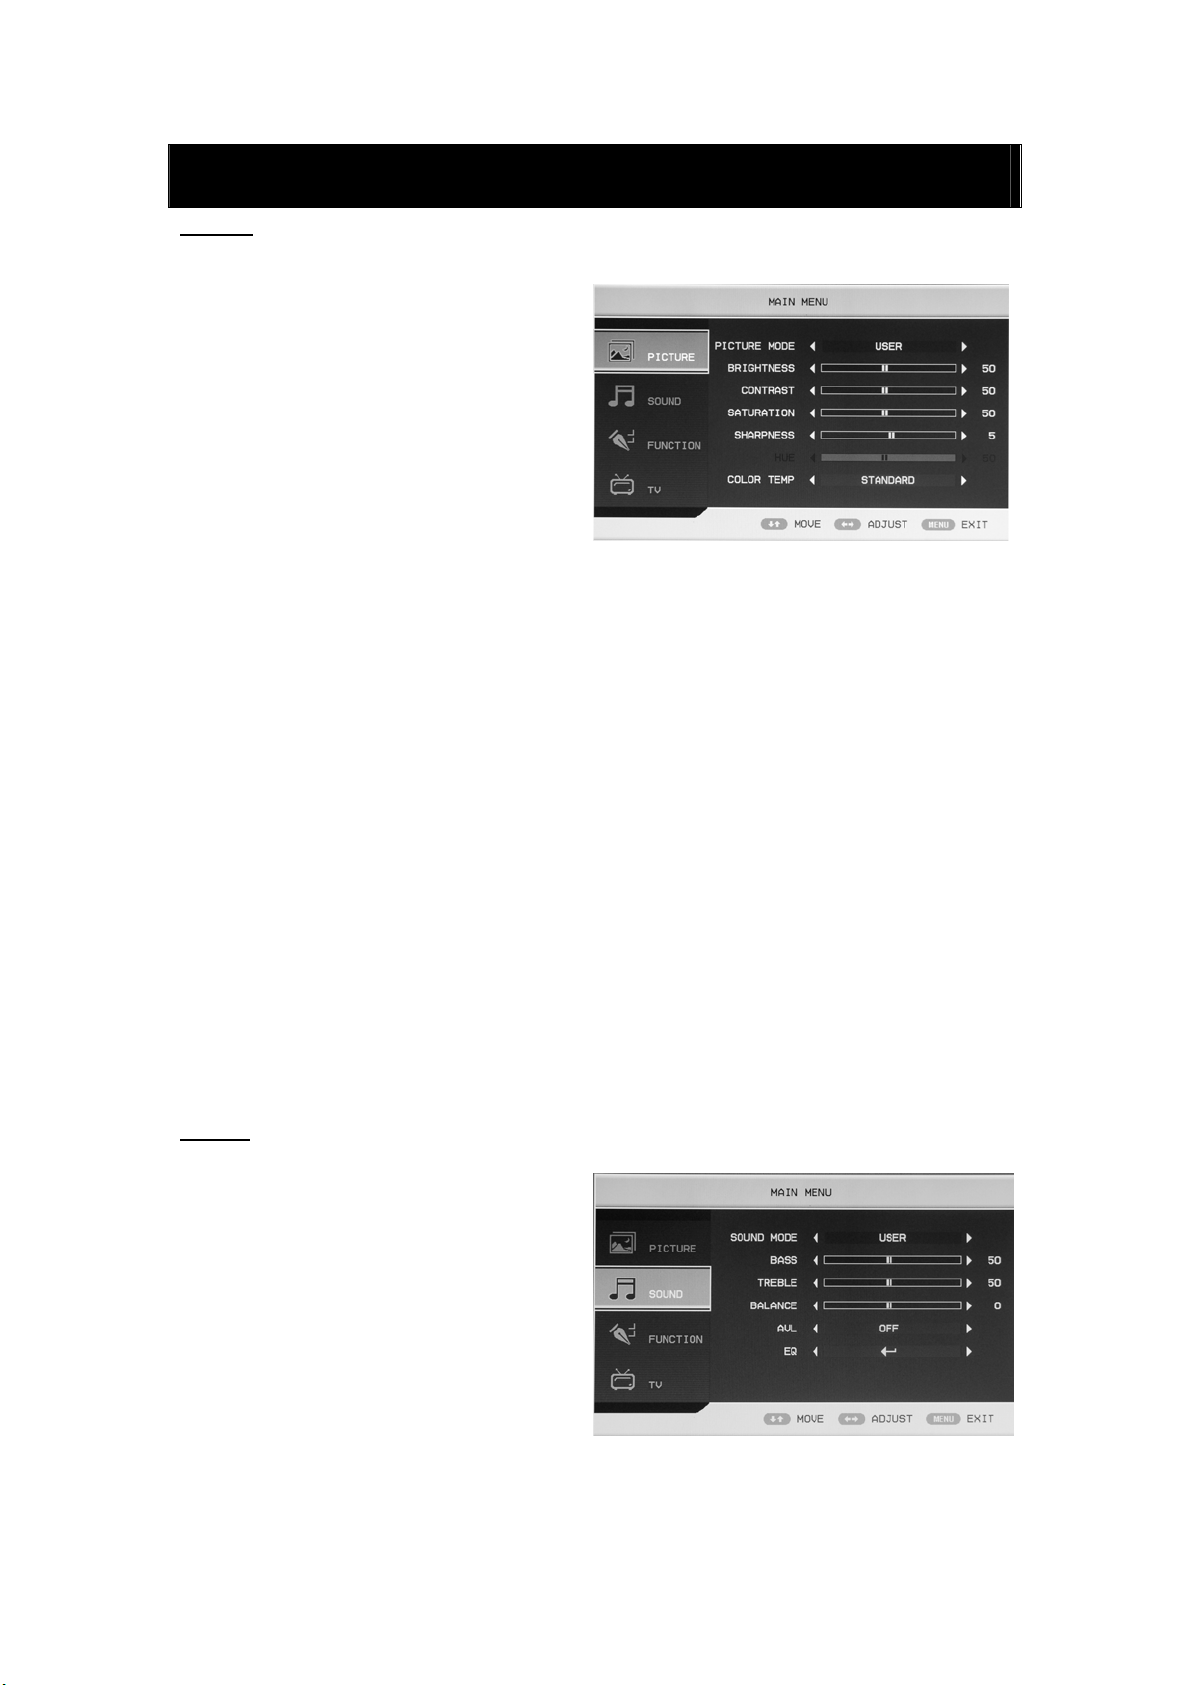
Réglage basique OSD
IMAGE
Vous pouvez sélectionner un type d’image correspondant le mieux à vos goûts.
1. Appuyez sur la touche “MENU” pour
accéder au menu OSD. Appuyez ensuite
sur la touche “c/d” pour sélectionner
l’option “ IMAGE ”. Accédez au menu
“IMAGE” en appuyant sur la touche
“f”.
2. Appuyez sur la touche “c/d” pour
sélectionner “MODE D’IMAGE” et
appuyez sur la touche “e/f” pour
sélectionner un mode d’image.
3. Appuyez sur la touche “c/d” pour sélectionner “LUMINOSITÉ” et appuyez sur la touche
“e/f” pour accéder à l’option de réglage de la luminosité pour régler la luminosité.
4. Appuyez sur la touche “c/d” pour sélectionner “CONTRASTE” et appuyez sur la touche
“e/f” pour accéder à l’option de réglage du contraste pour régler le contraste.
5. Appuyez sur la touche “c/d” pour sélectionner “SATURATION” et appuyez sur la touche
“e/f” pour accéder à l’option de réglage des couleurs pour régler la saturation.
6. Appuyez sur la touche “c/d” pour sélectionner “NETTETE” et appuyez sur la touche “e/f”
pour accéder à l’option réglage de la netteté pour régler la netteté.
7. Appuyez sur la touche “c/d” pour sélectionner “TEINTE” et appuyez sur la touche “e/f”
pour accéder à l’option de réglage de la teinte pour régler la teinte.
Remarque: Cette option est seulement disponible lorsque vous sélectionnez le format de signal
NTSC
8. Appuyez sur la touche “c/d
COULEURS” et appuyez sur la touche “e/f” pour sélectionner une température des couleurs.
AUDIO
Cette option vous permet de sélectionner un
mode audio correspondant le mieux à vos
goûts.
1. Appuyez sur la touche “MENU” pour
2. Appuyez sur la touche “c/d” pour
accéder au menu OSD. Appuyez ensuite
sur la touche “c/d” pour sélectionner
l’option “AUDIO”. Accédez au menu
“ AUDIO ” en appuyant sur la touche
“f”.
sélectionner “MODE AUDIO” et appuyez sur la touche “e/f” pour sélectionner un mode
audio.
” pour sélectionner l’option “TEMPERATURE DES
10
Page 97
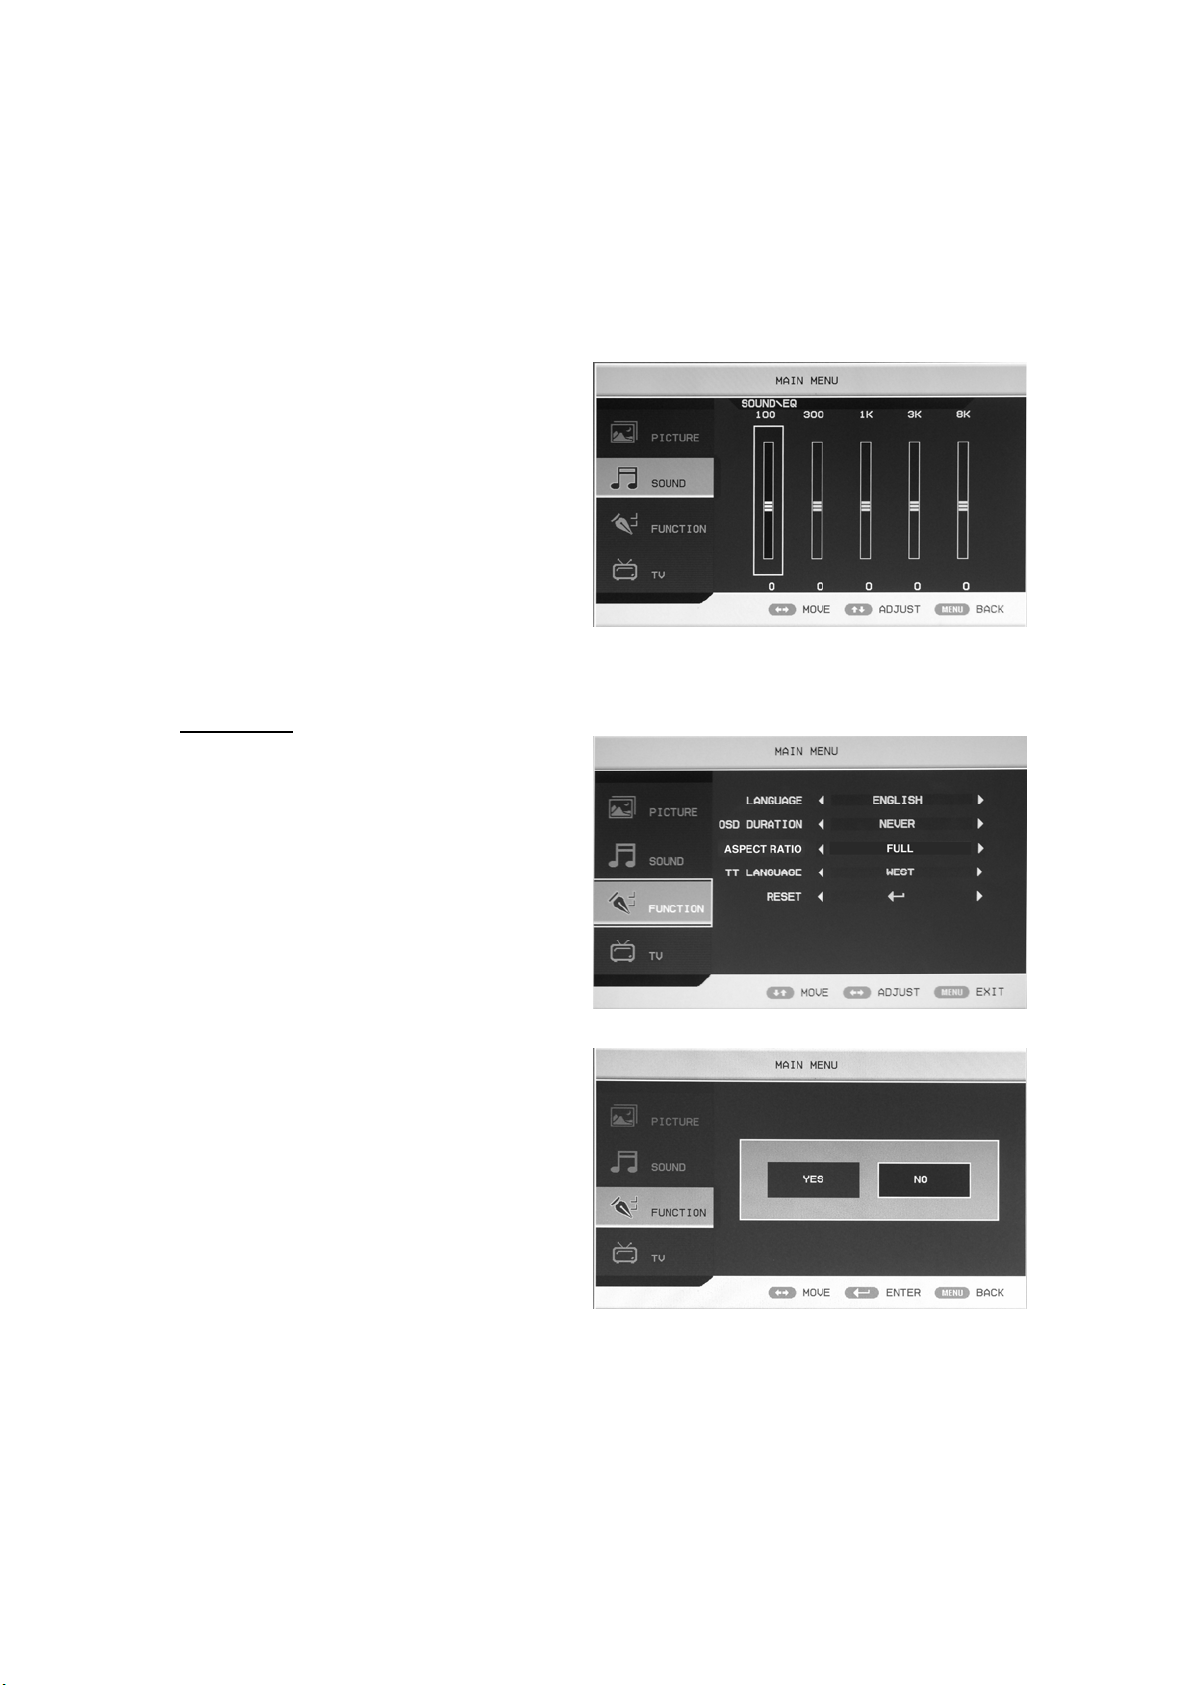
3. Appuyez sur la touche “c/d” pour sélectionner “BASSES” et appuyez sur la touche “e/f”
pour accéder à l’option de réglage des basses pour régler les basses.
4. Appuyez sur la touche “c/d” pour sélectionner “AIGUS” et appuyez sur la touche “e/f”
pour accéder à l’option de réglage des aigus pour régler les aigus.
5. Appuyez sur la touche “c/d” pour sélectionner “BALANCE” et appuyez sur la touche
“e/f” pour accéder à l’option de réglage de la balance pour régler la balance.
6. Appuyez sur la touche “c/d” pour sélectionner “AVL” et appuyez sur la touche “e/f”pour
activer/désactiver la fonction AVL.
7. Appuyez sur la touche “c/d” pour
sélectionner “EQ” et appuyez sur la
touche “ENTER” pour accéder à
l’option. Appuyez sur la touche “e/f”
pour sélectionner la fréquence de la
bande d’ondes et appuyez sur la touche
“c/d” pour régler .
FONCTION
1. Appuyez sur la touche “MENU” pour
accéder au menu OSD. Appuyez ensuite
sur la touche “c/d” pour sélectionner
l’option “FONCTION”. Accédez au
menu “FONCTION” en appuyant sur la
touche “f”.
2. Appuyez sur la touche “c/d” pour
sélectionner l’option “LANGUE” et
appuyez sur la touche “e/f” pour
sélectionner la langue OSD de votre choix.
3. Appuyez sur la touche “c/d” pour
sélectionner “DELAI OSD” et appuyez
sur la touche “e/f” pour sélectionner
le délai d’affichage OSD de votre choix.
4. Appuyez sur la touche “c/d” pour
sélectionner “FORMAT
D’AFFICHAGE” et appuyez sur la
touche “e/f” pour sélectionner le
format d’affichage de votre choix.
5. Appuyez sur la touche “c/d” pour sélectionner l’option “LANGUE TT ” et appuyez sur la
touche “e/f” pour sélectionner votre langue de télétexte.
6. Appuyez sur la touche “c/d” pour sélectionner “REINITIALISATION”
et appuyez sur la touche “ENTER” pour accéder à l’option. Appuyez sur la touche “e/f” pour
sélectionner “OUI” ou “NON” et appuyez sur la touche “ENTER” pour confirmer.
Sélectionnez “OUI” pour réinitialiser l’unité et “NON” pour revenir au menu précédent.
11
Page 98
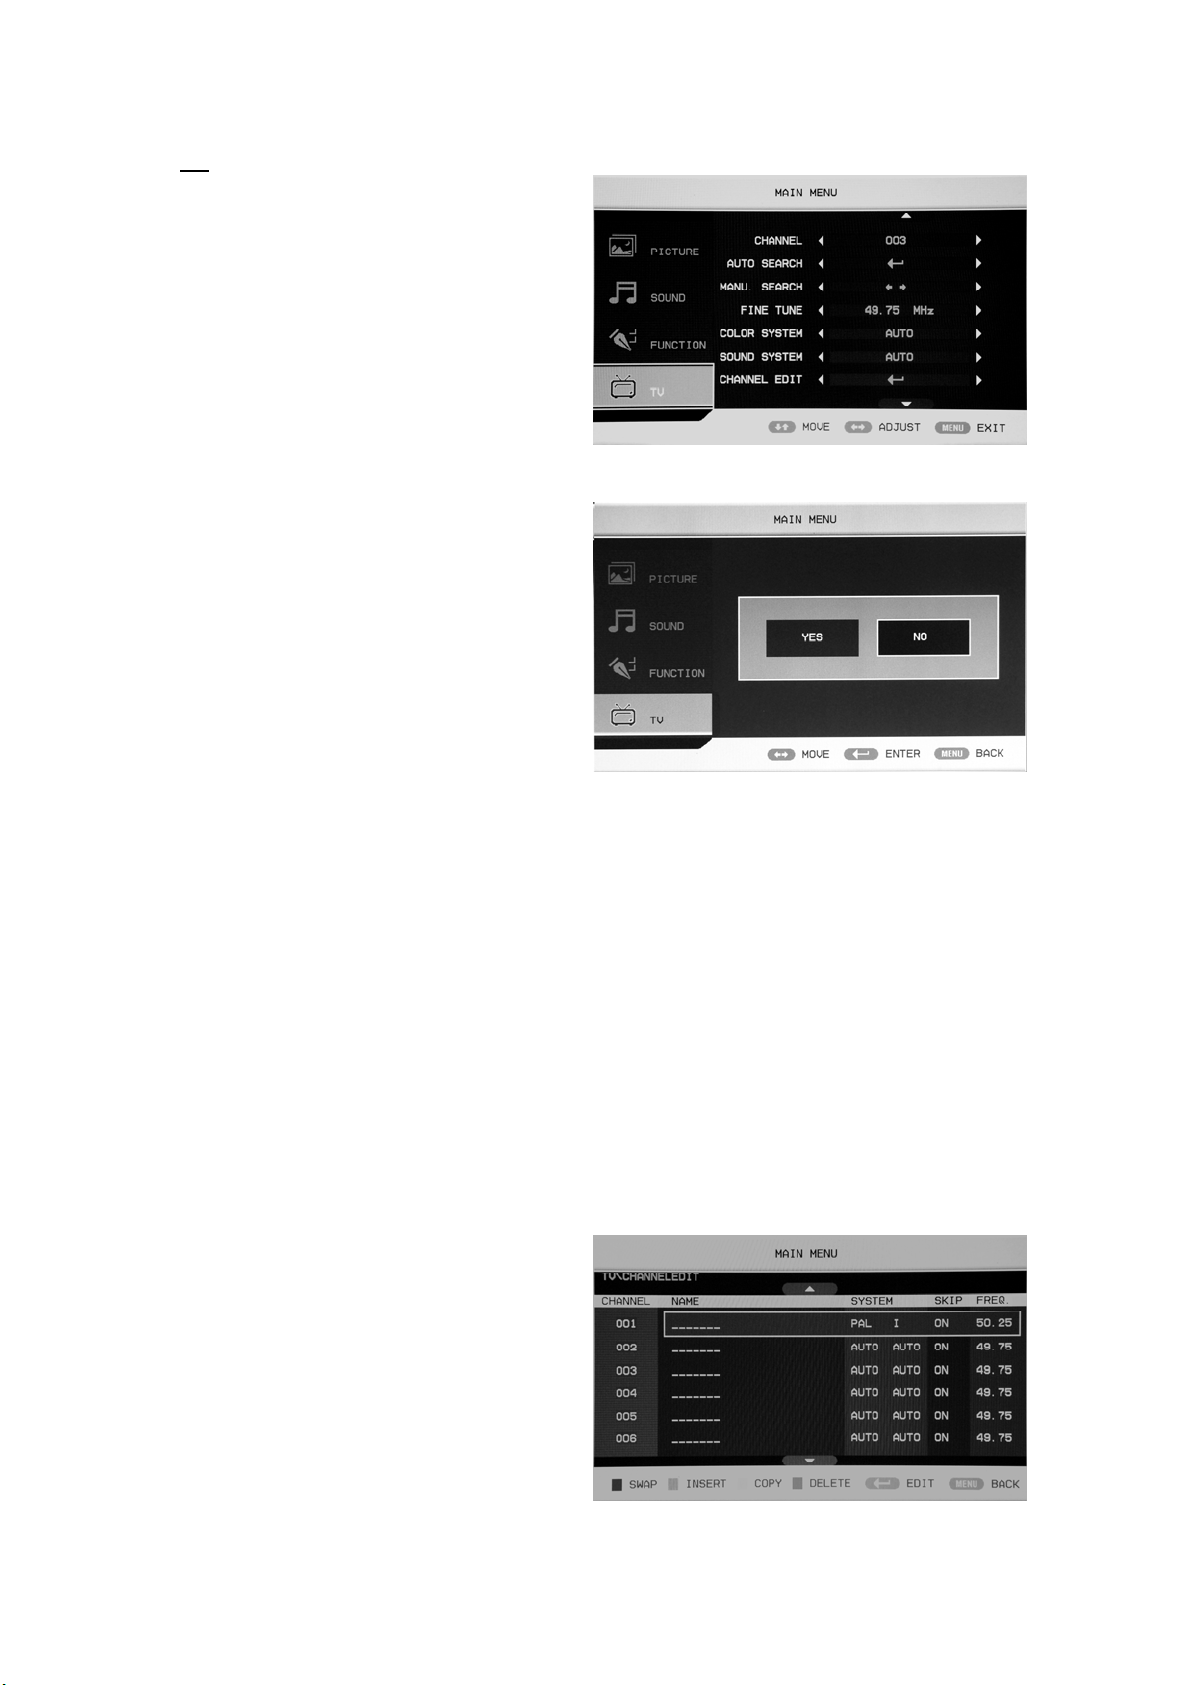
TV
Vous pouvez effectuer les réglages de votre
choix en mode TV.
1. Appuyez sur la touche “c/d” pour
sélectionner “CHAINE” et appuyez sur la
touche “e/f” pour sélectionner une chaîne.
2. Appuyez sur la touche “c/d” pour
sélectionner “RECHERCHE AUTO” et
appuyez sur la touche “ENTER” pour
accéder à l’option. Appuyez sur la touche “e/f” pour sélectionner “OUI” ou “NON” et appuyez
sur la touche “ENTER” pour confirmer.
Sélectionnez “OUI” pour effectuer une
recherche automatique et “NON” pour
revenir au menu précédent.
3.Appuyez sur la touche“c/d” pour
sélectionner “RECHERCHE MANUELLE”
et appuyez sur la touche “e/f” pour
accéder à l’option. Appuyez sur la touche
“e/f” pour sélectionner “OUI” ou “NON”
et appuyez sur la touche “ENTER” pour confirmer. Sélectionnez “OUI” pour effectuer une
recherche manuelle et sélectionnez “NON” pour revenir au menu précédent.
4. Appuyez sur la touche “c/d” pour sélectionner “RECHERCHE PRECISE” et appuyez sur la
touche “e/f” pour sélectionner la fréquence à régler.
5. Appuyez sur la touche “c/d” pour sélectionner “SYSTEME DE COULEURS” et appuyez sur
la touche “e/f” pour sélectionner un système de couleurs.
6. Appuyez sur la touche “c/d” pour sélectionner “SYSTEME AUDIO” et appuyez sur la touche
“e/f” pour sélectionner le système local.
7. Appuyez sur la touche “c/d” pour sélectionner “MODIFICATION DE CHAINE” et appuyez
sur la touche “ENTER” pour accéder à l’option.
a. Appuyez sur la touche “c/d” pour
sélectionner une chaîne et appuyez sur
la touche “RED” pour régler. Appuyez
sur la touche “c/d” pour sélectionner
une autre chaîne à modifier. Appuyez
sur la touche “ENTER” pour confirmer.
12
Page 99

b. Appuyez sur la touche “c/d” pour
sélectionner une chaîne et appuyez sur
la touche “VERTE” pour modifier.
Appuyez sur la touche “c/d” pour
sélectionner une autre chaîne à insérer.
Appuyez sur la touche “ENTER” pour
confirmer.
c. Appuyez sur la touche “c/d” pour
sélectionner une chaîne et appuyez sur la touche “JAUNE” pour régler. Appuyez sur la touche
“c/d” pour sélectionner une autre chaîne à copier. Appuyez sur la touche “ENTER” pour
confirmer.
d. Appuyez sur la touche “c/d” pour
sélectionner une chaîne à supprimer et
appuyez sur la touche “BLEUE” pour
régler. Appuyez sur la touche
“ENTER” pour confirmer.
e. Appuyez sur la touche “c/d” pour
sélectionner une chaîne de la liste,
appuyez sur la touche “ENTER” pour
accéder au menu “MODIFIER SUB”.
f. Appuyez sur la touche “c/d” pour sélectionner “MODIFIER LE NOM DE LA CHAINE” et
appuyez sur la touche “ENTER” pour accéder à la fenêtre de modification du nom de la
chaîne.
Saisissez le nom de la chaîne dans le
champ “____”, appuyez sur la touche
“c/de/f” pour sélectionner des
“lettres”, “chiffres”, “_”, “〔”, “〕”,
“ESPACE” ou “RETOUR”, appuyez
sur la touche “ENTER” pour confirmer.
Appuyez sur la touche “c/de/f”
pour sélectionner “OK” pour
mémoriser les paramètres et revenir au
menu précédent.
Appuyez sur la touche “c/de/f” pour sélectionner “ANNULER” pour quitter et revenir au
menu précédent.
8. Appuyez sur la touche “c/d” pour sélectionner “SKIP” et appuyez sur la touche “e/f”pour
activer/désactiver le saut de chaînes.
13
Page 100

PC
1. Appuyez sur la touche “MENU” pour
accéder au menu OSD. Appuyez ensuite
sur la touche “c/d” pour sélectionner
l’option “PC”. Accédez au menu “PC” en
appuyant sur la touche “f”.
2. Appuyez sur la touche “c/d” pour
sélectionner “POSITION H” menu et
appuyez sur la touche “e/f” pour accéder
à l’option “Position H” et régler la
“Position H”.
3. Appuyez sur la touche “c/d” pour sélectionner “POSITION V” et appuyez sur la touche
“e/f” pour accéder à l’option “Position v” et régler la “ Position V”.
4. Appuyez sur la touche “c/d” pour sélectionner “PHASE” et appuyez sur la touche “e/f”
pour accéder à l’option de réglage de la phase pour régler la phase.
5. Appuyez sur la touche “c/d” pour sélectionner “HORLOGE” et appuyez sur la touche
“e/f” pour accéder à l’option de réglage de l’horloge et régler l’horloge.
6. Appuyez sur la touche “c/d” pour sélectionner “REGLAGE AUTOMATIQUE” et appuyez
sur la touche “ENTER” pour régler.
14
 Loading...