

Page 1

PHDVT-12309C MTK-1389Q+MASTAR7801方案 前屏无按键 二合一 模拟屏 低成本 ERP2 ENGLISH MANUAL
USER'S MANUAL
DVP-9412
WWW.LENCO.COM
PORTABLE DVD
Before connecting, operating or adjusting this product,
please read this user's manual carefully and completely.
Page 2

Important Safety Instructions
Warning: To reduce the risk of electric shock, do not remove
the cover or back. There are no user-serviceable parts
inside. Refer servicing to qualified personnel.
Warning: To prevent fire or electric shock hazard, do not
expose the unit to rain or moisture.
Do not expose the Adaptor and portable DVD to water
(dripping or splashing) and no objects filled with liquids,
such as vases, should be placed on the unit.
Keep the portable DVD away from direct sunlight and heat
source such as radiators or stoves.
Do not block the ventilation openings. Slots and openings on
the unit are provided for ventilation. The openings should
never be blocked by placing your portable DVD on a cushion,
sofa or other similar surface.
Do not place the portable DVD on unstable cart, stand,
tripod, bracket or table. The unit may fall, resulting in
possible damage or injury.
Never place heavy or sharp objects on the LCD panel or
frame.
Only use the AC adapter included with portable DVD. Using
any other adapter will void your warranty.
The plug of AC adaptor is used as the disconnect device, the
disconnect device shall remain readily operable.
Unplug the power from the outlet when the unit is not in use.
CAUTION: Danger of explosion if battery is incorrectly
replaced. Replace only with the same or equivalent type.
WARNNING: The battery (battery or batteries or battery
pack) shall not be exposed to excessive heat such as
sunshine, fire or the like.
WARNNING: Excessive sound pressure from earphones or
headphones can cause hearing loss.
WARNNING: Only use attachments/accessories specified
provided by the manufacturer, the portable DVD is supplied
by AC adapter, the AC adapter is used as disconnect device,
the disconnect device shall remain readily operable.
Caution: Danger of explosion if battery is incorrectly
replaced, replaced only with the same or equivalent type
(Lithium battery)
This marking indicates that this product should
not be disposed with other household wastes
throughout the EU. To prevent possible harm to
the environment or human health from
uncontrolled waste disposal, recycle it
responsibly to promote the sustainable reuse
of material resources. To return your used
device, please use the return and collection
systems or contact the retailer where the
product was purchased. They can take this
product for environmental safe recycling.
Attention should be drawn to the environmental aspects of
battery disposal.
Power supply adaptor(For EU only)
Manufacturer:Shenzhen Mass Power Electronics Limited
Model number: EFF0900150E1BA
Use only the power supply listed in the user instructions
1
Page 3

Safety Precautions
WARNING
RISK OF ELECTRIC SHOCK
DO NOT OPEN
Warning: This digital video disc player employs a laser system.
Use of controls,adjustments, or the performance of procedures
other than those specified herein may result in hazardous
radiation Exposure.
Warning: To prevent direct exposure to laser beam,do not open
the enclosure.Visible laser radiation when open.
Warning: Never stare directly into the laser beam.
Caution: Do not install this product in a confined space such
as a book case or similar unit.
Warning: when the unit using by child, parents must make sure
to let the child understand all contents in Instruction book how
battery using to guarantee using battery correctly all the time.
Warning: when find battery overheat, swell or dour, please
stop using battery and contact service centre for getting
replacement.
Warning: do not charging battery on the place of insufficient
ventilation such as: mattress, sofa, cushion , soft mat......
Warning: we will not take any responsibility if user incorrectly
use battery, not following our warning instruction label on the
battery case.
Warning: more than 250mm USB extension cord is prohibited
to use for USB port
N
N
Notes on Copyrights:
It is forbidden by law to copy, broadcast, show,broadcast via
cable, play in public, or rent copyrighted material without
permission.
This product features the copy protection function developed by
Macrovision.Copy protection signals are recorded on some discs.
When recording and playing the pictures of these discs picture
noise will appear.This product incorporates copyright protection
technology that is protected by method claims of certain U.S.
Patents and other intellectual property rights owned by Macrovision
Corporation and other rights owners.Use of this copyright protection
technology must be authorized by Macrovision Corporation, and is
intended for home and other limited viewing uses only unless
otherwise authorized by macrovision Corporation. Reverse
engineering or disassembly is prohibited.
SERIAL NUMBER:
You can find the serial number on the back of the unit.This number
is unique to this unit and not available to others.You should record
requested information here and retain this guide as a permanent
record of your purchase.
Model No. ______________________________
Serial No. ______________________________
Date of Purchase_________________________
charge
strong
impact
over
heat
40 C
2
Page 4

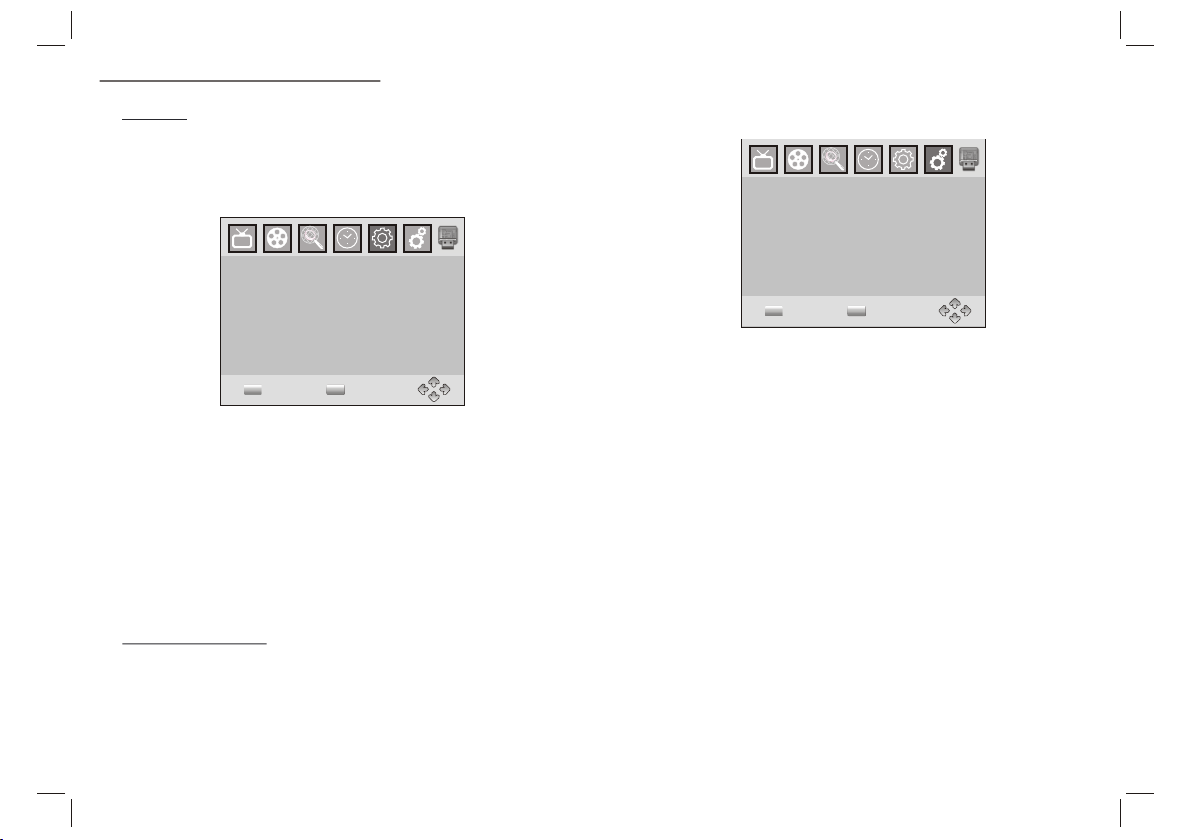
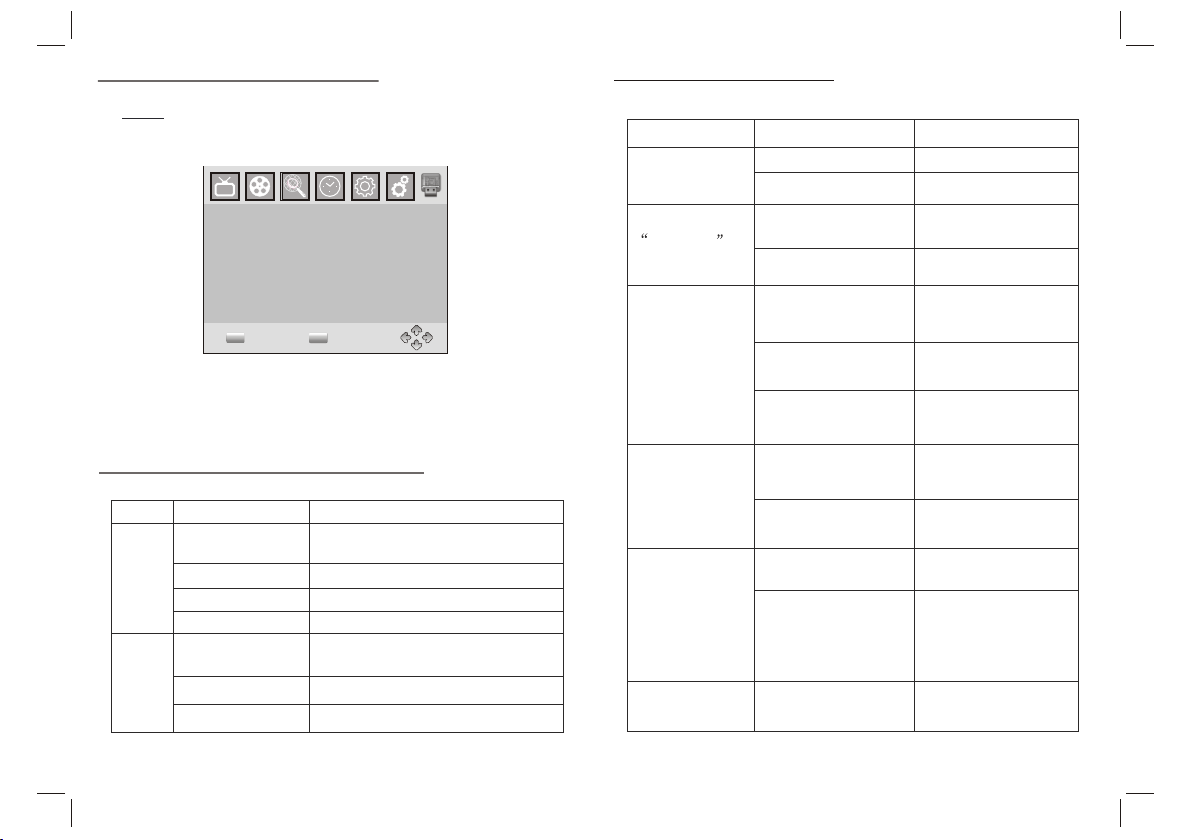
Identification of Controls
Main Unit
180°
SOURCE
VOL- VOL+ MENU
SETUP
1. PLAY/PAUSE
2.STOP
3.SOURCE
4.VOL-
5.VOL+
6.MENU
7.▲/▼/◄/►(up/down/right/left)
Select an item in the menu.OK key confirms menu selection.
when playing,VCD,DVD,if available:
1
2
3
6
5
4
7
8
10
9
right: fast forward
left: fast reverse
up: previous track
down: next track
8.ENTER
9.OPEN
10. SETUP
11. SD/MMC
12. USB
13. AV OUT
14. Earphone Socket
15. COAXIAL
16. ON/OFF
17. DC IN 9-12V
18. ANT
19. HDMI
11
13
14
18
15 17
16
19
12
3
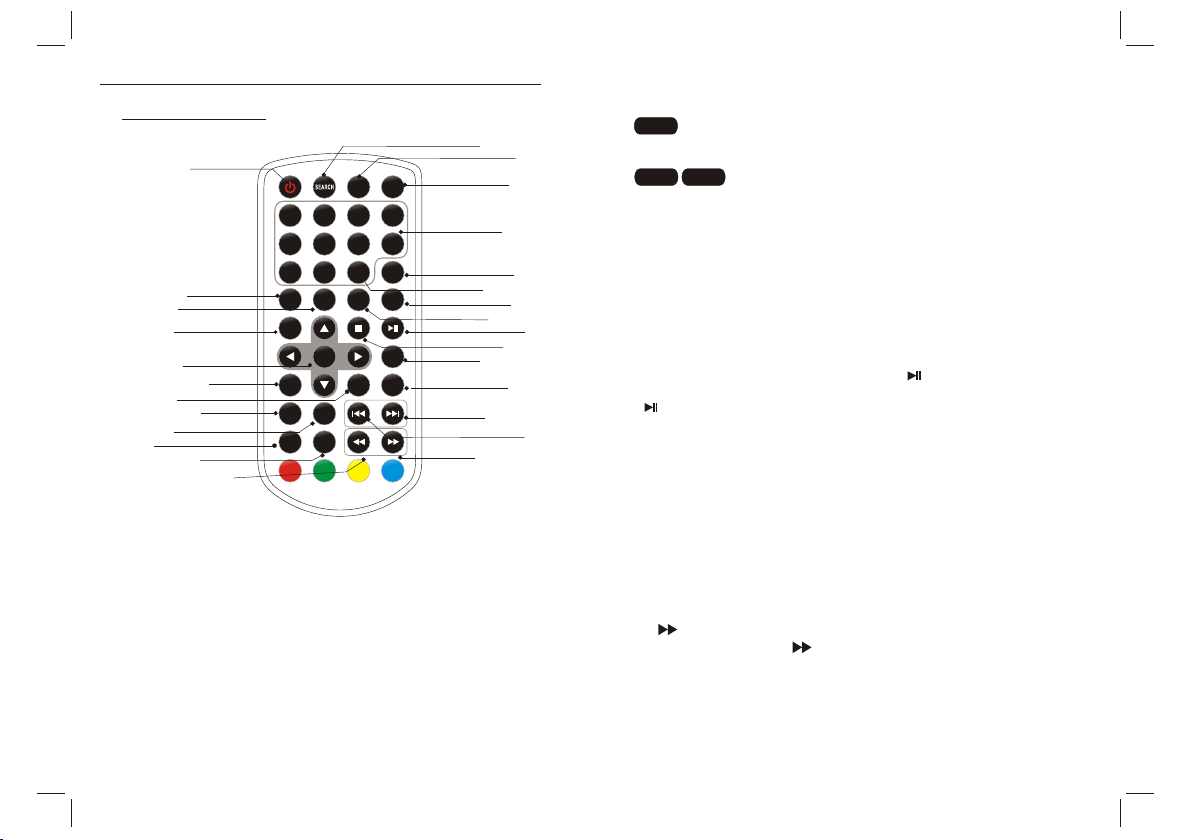
Page 5

Identification of Controls
Remote control unit
16
SOUR CE
MUTE
3
10+
/RECA LL
AUDI O
4
7
8
INFO
PBC
/FAV
STEP /
TV/R ADIO
VOL +VOL -
20
26
19
18
21
23
25
24
22
1 2
5
9 0
SUBT ITLE
TITL E
REPEAT
SETU P
PROG RAM
ANGL E
SLOW
/EXI T
ZOOM
6
OK
27
15
1. SOURCE
DVD/CARD/USB.
2. MUTE
Disable Audio output.
3.0-9 NUMBER BUTTON
Selects numbered items in a menu.
4.INFO
To display the playtime and status information.
17
14
5
7
10
12
9
3
11
2
1
4
6
8
13
5.10+ RECALL
In order to select a track 10 or greater, first press 10+, For example;
select track 12, first press 10+, and then press number 2 button.
6. PBC/FAV
PBC on/off sw it ch ( VC D) .
7.AUDIO
Press AUDIO repeatedly during playback to hear a different
DVD
audio language or audio track, if avilable.
Press AUDIO repeatedly during playback to
VCDCD
hear a diff er en t au dio channel ( Left,Right,Mix,Stereo).
8.PLAY/PAUSE
Press PLAY/PAUSE once to pause playback, pressing PLAY/
PAUS E se co nd t im e wi ll r es ume the playback.
9.STO P
When this buttom is pressed once, the unit records the stopped
point,from where playback will resume if PLAY( )is pressed after
wards. But if STO P button is pressd again instead of PLAY( )
button, there will be no resume function.
10.STEP/TV/RADIO
Step the motion in DVD mode.
11.VOL+
Adjust volume
12.Forward Skip
Go to next chapter/ track.
13.Reverse Skip
Go to previous chapter/ track to the beginning.
14. BUTTO N
Press BUTTO N al lo w sk ip pi ng a he ad at 5-level speed(X2->X4->
X8->X16->X32->PLAY), p re ss PLAY button return to normal playback.
4
Page 6

Identification of Controls
Remote control unit
15. BUTTO N
Press BUTTO N al lo w sk ip pi ng b ack at 5-level speed(X2->X4->
X8->X16->X32 PLAY), press PLAY button return to normal playback.->
16.
Turn on/off the power.
17.SEARCH
Goto time point , title or chapter you want in DVD Mode.
18.SUBTITLE
Press SUBTITLE repeatedly during playback to see a different
subtitle languages.
19.ANGLE
:Press ANGLE will change the view angle, on DVDs that
DVD
support this feature.
20.TITLE
Return to DVD title menu
21.OK
Confirms menu selection..
22.SETUP
Accesses or removes setup menu.
23.VOL-
Adjust volume
24.REPEAT
Press REPEAT during playback to select a desired repeat mode.
: you can play select repeat chapter/title/all.
DVD
VCD
CD
MP3
: you can select repeat track/all.
: you can select repeat shuffle/random/single/repeat one/
repeat folder/folder.
25.SLOW
Press Slow button repeatedly to enter slow playback, and cycle
between diffe re nt speeds. The speeds are 1/2,1/4,1/8,1/16,and
normal.
26.PROGRAM
:The program function enables you to store
DVD VCD
your favourite tracks from the disc. Press PROGRAM button ,then
PROGRAM MENU will appear on screen, now you can use the
number key to direct input the titles,chapters or tracks number and
select PLAY option. TO resume normal playback, press PROGRAM
and select clear program option on the program menu,press
PROGRAM again to exit program menu,Mp3 has function Folder/
File list..
27.ZOOM
DVD VCD
: Use ZOOM to enlarge or shrink the video image.
1.Press ZOOM during playback or still playback to activate the
Zoom function. Th e sq ua re frame appears briefly in the right bottom
of the picture.
2. Each press of the ZOOM button changes the TV screen in the
following sequence:
JPEG
: Use ZOOM to enlarge or shrink the picture.
1.Press 'ZOOM' .
2,Used " " to enlarge,or " " to shorten the picture.
Use the button to move through the zoomed picture.
CD
5
Page 7
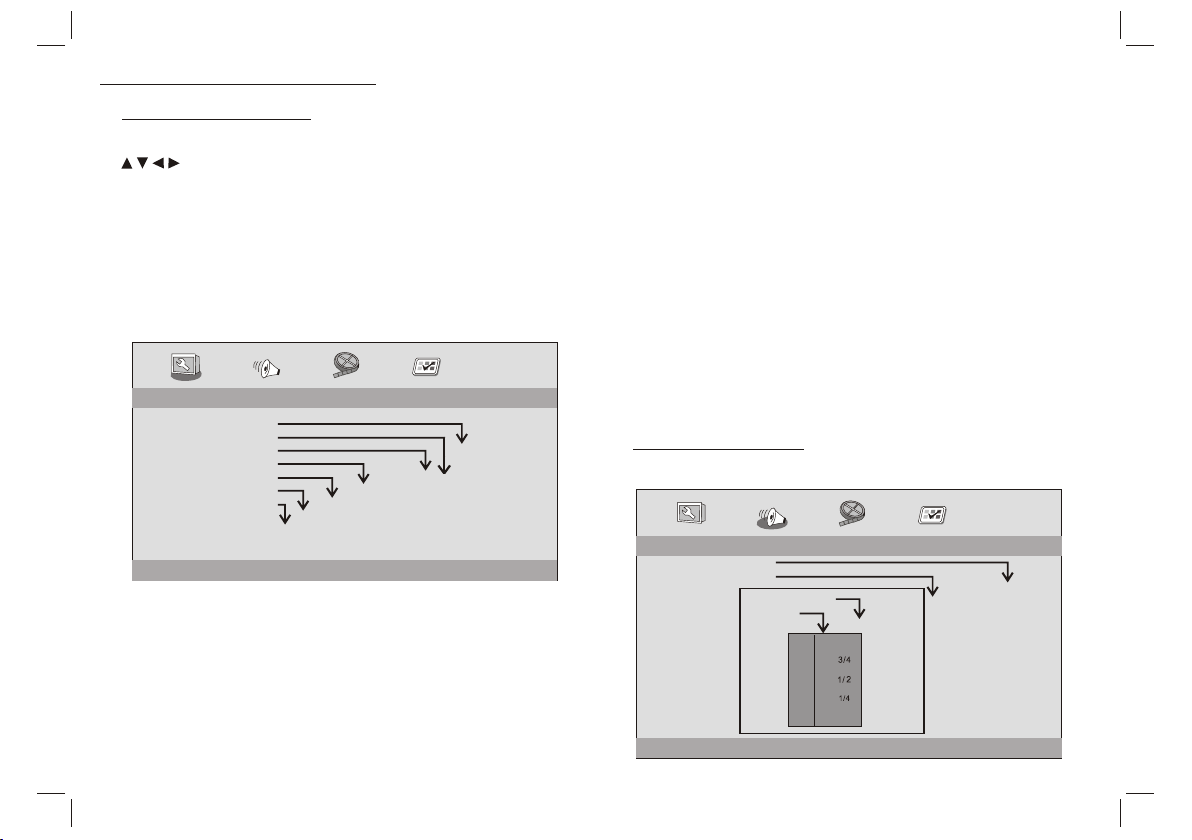
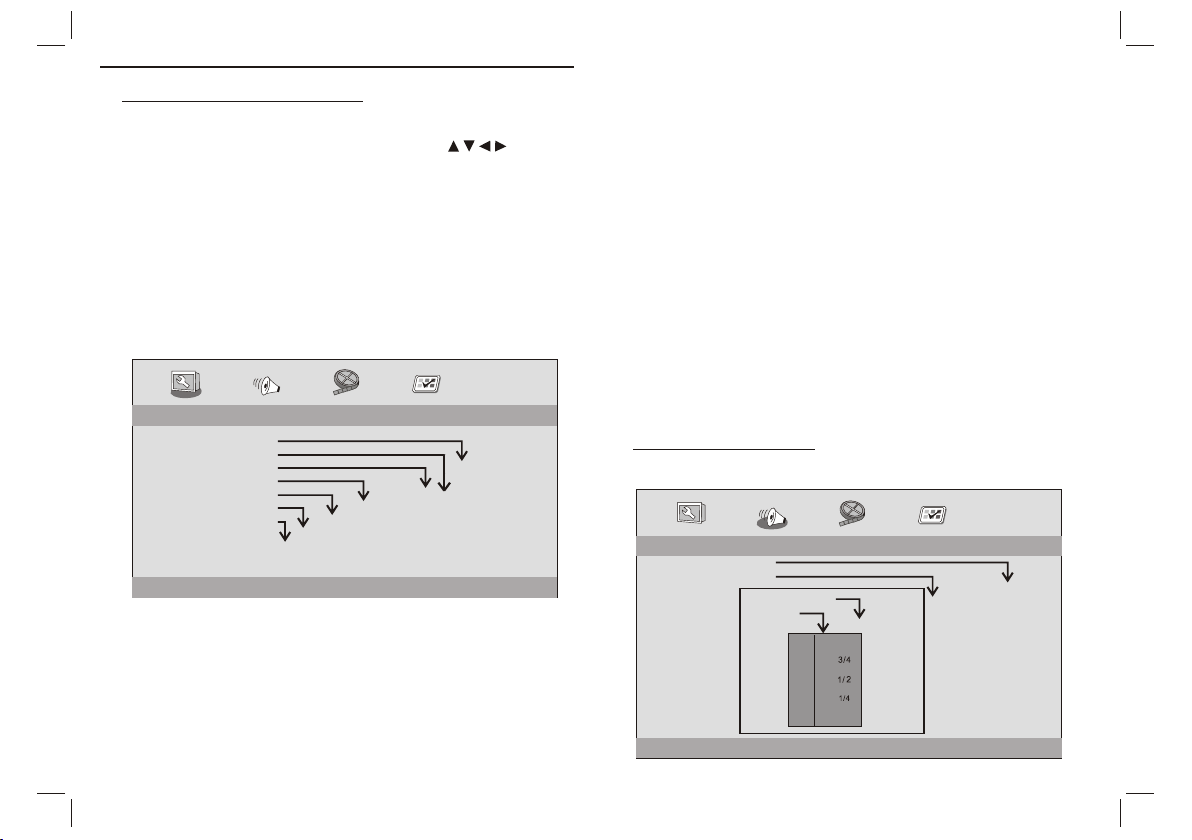
SETUP Menu Setting
General Setup Page
Press SETUP button to get the setup menu. Use direction buttons
to select the preferred item. After finishing settings, press
SETUP again to normal display.
The following menu items can be changed:
GENERAL: selects the GENERAL PAGE menu.
AUDIO: selects the AUDIO PAGE menu.
VIDEO: selects the VIDEO PAGE menu.
PREFERENCE : selects the PREFERENCE PAGE menu.
General Setup Page
- - GENERALSETUP PAGE - -
TV DISPLAY WIDE
TFT DISPLAY 16:9
ANGLE MARK ON
OSD LANGUAGE ENG
CLOSED CAPTIONS ON
SCREEN SAVER ON
AUTO STANDBY 3H
GOTO GENERAL SETUP PAGE
TV DISPLAY: selects the aspect ratio of the playback picture.
4:3 PANSCAN: if you have a normal TV and want both sides of the
picture to be trimmed or formatted to fit your TV screen.
4:3 LETTERBOX: if you have a normal TV. In this case, a wide
picture with black bands on the upper and lower portions of the TV
screen will be displayed.
16:9:wide screen display.
oFF
3 HOU R
4 HOU R
ON
OFF
ON
OFF
ENGLISH
FRENCH
GERMAN
SPANISH
DUTCH
HUNGARIAN
POLISH
TFT 16:9
TFT 4:3
4:3 PANSCAN
4:3 LETTERBOX
16:9
TFT DISPLAY
selects the aspect ratio during playback.
Angle Mark
Displays current angle setting information on the right hand corner
of the TFT screen if available on the disc.
OSD Language
You can select your own preferred language settings.
Closed Captions
Closed captions are data that are hidden in the video signal of some
discs.Before you select this function,please ensure that the disc
contains closed captions information and your TV set also has this
function.
Screen Saver
This function is used to turn the screen saver On or Off.
Auto Standby
This function is used to standby.
Audio Setup Page
Audio Setup Page
-- --
- - - -AUDIO SETUP PAGE
DOWNMINX
DIGITAL OUTPUT
DOLBY DIGITAL
GO TO AUDIO SETUP PAGE
STR
RAW
DUAL MONO
DYNAMIC
SPDIF/OFF
STR
STR
L-MONO
R-MONO
FULL
-
-
-
-
-
-
-
-
-
-
MIX-MONO
-
-
-
-
-
-
-
-
OFF
-
SPDIF/RAW
SPDIF/PCM
LT/RT
STEREO
6
Page 8

SETUP Menu Setting
Audio Setup Page
Downmix
This options allows you to set the stereo analog output of your
DVD Player.
LT/RT :Select this option if your DVD Player is connected to a
Dolby Pro Logic decoder.
Stereo :Select this option when output delivers sound from only
the two front speakers.
Digital Output
The function is used to select the SPDIF Output:SPDIF Off,SPDIF
/RAW,SPDIF/PCM.
SPDIF Off: Turns off the SPDIF output.
SPDIF/RAW: If you have connected your DIGITAL AUDIO OUT
to a multi-channel decoder/receiver.
SPDIF/PCM: Only if your receiver is not capable of decoding
multi-channel audio.
Dolby digital
The options included in Dolby Digital Setup are: 'Dual Mono ' and
'Dynamic '.
Dual Mono
Stereo:Left mono sound will send output signals to Left speaker
and Right mono sound will send output signals to Right speaker.
L-Mono:Left mono sound will send output signals to Left speaker
and Right speaker.
R-Mono:Right mono sound will send output signals to Left speaker
and Right speaker.
Mix-Mono:Left and Right mixed mono sound will send output
signals to Left and Right speakers.
Dynamic
Dynamic range compression.
Video Setup Page
Video Setup Page
- - VIDEO SETUP PAGE - -
SHARPNESS MID
BRIGHTNESS 00
CONTRAST 00
HUE 00
SATURATION 00
GOTO VIDEO SETUP PAGE
Sharpness,Brightness,Contrast,Hue,Saturation:setting the video
quality.
HIGH
MEDIUM
LOW
Preference Page
Preference Page
- - PREFERENCE SETUP PAGE - -
TV TYPE PAL
AUDIO ENG
SUBTITLE ENG
DISC MENU ENG
DEFAULT
GOTO PREFERENCE PAGE
RESET
ENGLISH
FRENCH
GERMAN
SPANISH
DUTCH
POLISH
HUNGARIAN
OTHERS
ENGLISH
FRENCH
GERMAN
SPANISH
DUTCH
POLISH
HUNGARIAN
OFF
OTHERS
TV Type
Selecting the colour system that corresponds to your TV when AV
outputs.This DVD Player is compatible with both NTSC and PAL.
ENGLISH
FRENCH
GERMAN
SPANISH
DUTCH
POLISH
HUNGARIAN
OTHERS
PAL
AUTO
NTSC
7
Page 9
SETUP Menu Setting
Preference Page
PAL - Select this if the connected TV is PAL system.It will change the
video signal of a NTSC disc and output in PAL format.
NTSC-Select this if the connected TV is NTSC system.It will change
the video signal of a PAL disc and output in NTSC format.
Auto:Change the video signal output automatic according to the
playing disk format.
Audio:Selects a language for audio (if available).
Subtitle:Selects a language for subtitle (if available).
Disc Menu:Selects a language for disc menu (if available).
Parameters and specifications
Electronical parameters
Item
Power requirements
Power consumption
Operating humidity
VIDEO OUT
AUDIO OUT
Output
Audio
System
Laser
Signal system
Frequency
response
Signal-to-noise ratio
Dynamic range
: AC 100-240 V , 50/60 Hz
: <10W
: 5 % to 90 %
:1.4 Vrms (1 KHz, 0 dB)
:Speaker:1WX2, outputHeadphones
:Semiconductor laser, wavelength 650 nm
: NTSC / PAL
: 20Hz to 20 kHz(1dB)
:More than 80 dB (ANALOG OUT connectors only)
:More than 85 dB (DVD/CD)
Standard requirement
Battery Parameters
Battery Specifications:
Output:7.4V
Charge / Discharge Time:
Standard charge time:3h ~ 4h
Storage and work circumstances:
1. Storage circumstances Temperature Humidity
6 months
1 week
2.Work circumstances Temperature Humidity
Standard charge
Standard discharge
-20°C +45°C~
-20°C +65°C~
0°C +45°C~
-20°C +65°C~
65±20%
65±20%
65±20%
65±20%
Battery Charging
Connect the DVD player to the supplied power adaptor, the LED
indicator will be RED when the battery is charging and will turn into
green when the battery is full charged.When battery is no power,
LED is OFF.
Note: Design and specifications are subject to change prior notice.
N
8
Page 10

First Time Installation
After all connections have been made properly, switch on TV and
makesure the receiver is connected to the Main Power. Press Power
Button toswitch receiver on. If you are using the receiver for the first
time or restored to Factory Default, the Main Menu will appear on
your TV screen.
Installation Guide
OSD Language English
Country Germany
Channel Search
Exit
(1) Select [OSD Language] and press RIGHT/LEFT key to select an
language.
(2) Select [Country] and press RIGHT/LEFT key to select your
country of residence.
(3) Select [Channel Search] and press RIGHT or OK key to begin
Automatic channel search.
(4) Once channel tuning is complete, you are now ready to watch TV.
OK
ConfirmExit
Basic Operation
Program Manage Settings
To access the Menu, press the MENU button and select [Program].
Menu provides options to adjust the
The Program Manage Settings.
Select an option and press OK or RIGHT to adjust that setting.
Press the EXIT button to exit the Menu.
Program
Program Edit
Sort By LCN
LCN On
Exit
OK
ConfirmReturn
Program Edit
To edit your program preferences (lock, skip, favourite,
move or delete), you will need to enter the Program Edit
Menu. This Menu requires a password to access. Enter
the default password '000000'.
Program Edit
ALL TV
003 ITV1
004 Channel 4
006 ITV2
010 ITV3
013 More 4
014 E4
030 ITV4
037 Quiz Call
LockMove
21:00-22:30 Secret Smile
22:30-22:50 ITV News
GOTO
FAV
DeleteSkip RenameFAV
9
Page 11

First Time Installation
Set Favourite Program/s
You can create a shortlist of favourite programs that you can easily
access.Set Favourite TV or Radio program:
1.Select the preferred program then press the PAVOURITE button.
A heart-shaped symbol will appear and the program is marked as a
favourite.
2.Repeat the previous step to select more Favourite programs.
3.To confirm and exit the Menu,press the EXIT key.
Disable Favourite TV or Radio Program:
Press the FAV buton on the Remote Control with the heart-shaped
symbol.
View Favourite Programs:
1.Press the Fav button and the Favourite Menu will appear.
2.Press UP/DOWN to selest your Favourite Programs.
3.Press OK to select your favourite program.
Delete a TV or Radio Program/s
1.Select the Program and then press the BLUE button A message
will appear.Press OK to delete the program.
2.Repeat the previous step to select more programs to delete.
Skip TV or Radio Program/s
1.Select the program you would like to skip and press the GREEN
button A skip symbol is displayed. The program is marked as a
skip.
2.Repeat the previous step to select more programs.
3.To confirm and exit themenu,press EXIT key.
Disable a skip TV or Radio Program:
Press the GREEN button on the skip program with the skip symbol.
Move a TV or Radio Program/s
1. Select the preferred program then press the RED button. A
move symbolwill appear.
2. Press UP/DOWN to move the program.
3. Press OK to confirm.
4. Repeat the above steps to move more channels .
Lock Program/s
You can lock selected programs for restricted view.
Lock a TV or Radio Program:
1.Select the preferred program then press the YELLOW button. A
lock-shaped symbol is displayed. The program is now marked as
locked.
2. Repeat the previous step to select more programs .
3. To confirm and exit the menu, press the EXIT button.
4. Press the YELLOW button to disable the locked program.
5. To view the locked program, you will be require to enter either
the default.
10
Page 12
First Time Installation
Sort
Sort your channels from the following options:
[LCN] - Sort the channels in ascending order.
[Name] - Sort the channels in alphabetical order.
[Service ID] - Sort the channels according to the station.
LCN (Logical channel number)
Set LCN on or off.
Video Setting
To access the Menu, press MENU then select [Picture]. The Menu
provides options to adjust the video settings. Press UP/DOWN to
select an option and press RIGHT/LEFT to adjust that setting.
Press EXIT to exit the menu.
Picture
HDMI Aspect Ratio 16:9 Wide Screen
HDMI Resolution 1080i
TV Format PAL
EXIT
Aspect Ratio
You must set the display format to either 4:3 PanScan, 4:3 Letter
Box,16:9 Wide Screen or Auto to get the maximum display when
watching TV.
OK
ConfirmReturn
Resolution
If the video does not appear correctly, change the setting. This
setting is to match the most common setting for HDMI.
[576i] for PAL system TV.
[576P]: for PAL system TV.
[720P]: for NTSC or PAL system TV.
[1080I]: for NTSC or PAL system TV.
TV format
If the video does not appear correctly, you need to change the
settings. This should match the most common setting for TVs in
your country.
[NTSC]: for NTSC system TV.
[PAL]: for PAL system TV.
Channel Search
To access the menu,press MENU and select [Search Channel].
The Menu provides options to adjust the Search Channel settings.
Select an option and press RIGHT/LEFT to adjust the settings.
Press EXIT to exit the Menu.
Channel Search
Auto Search
Manual Search
Country Germany
EXIT
OK
ConfirmReturn
11
Page 13
First Time Installation
Auto Search
Search and install all channels automatically. This option
overwrites all preset channels.
1. Select [Auto Search] and press OK or RIGHT to start channel
search.
2. To cancel channel search, press EXIT.
Channel Search
506.0MHz/8MHZ
DTV:009 Radio: 000
001 ITV1
002 ITV2
003 ITV3
004 ITV News
005 Channel 4
006 Quiz Call
007 E4
008 More 4
009 ITV4
Progress
EXIT
Manual Search
Install new channels manually. This option adds new channels
without changing the current channels list.
1. Select [Manual Search] then press OK or RIGHT. The channel
search screen will appear.
MENU
SkipExit
Manual Search
Frequency channel 5
Frequency(MHZ) 177.5
Bandwidth: 7M
Quality
EXIT
EXIT
OK
Confirm
2. Press the RIGHT/LEFT key to select the channel frequency.
3. Press OK to start searching channels.
If a channel is found, it is saved and added to the channels list. If
channels cant be found, then exit the menu.
Country
Select your country of residence.
Time Setting
To access the Menu,press MENU then select [Time]. The Menu
provides options to adjust the time settings.
s
elect an option and press RIGHT/LEFT to adjust the
settings.Press EXIT to exit the menu.
Time
Time Offset Auto
Country Region Berlin
Time Zore GMT +1
EXIT
OK
ConfirmReturn
Time offset
Select auto or manual for GMT offset adjustments.
Country Region
Country Region is set automatically when you set the country at channel
search menu.
Time Zone
Select the Time Zone Offset when [Time Offset] is set to Manual.
Press UP/DOWN to
12
Page 14
First Time Installation
Option
To access the Menu,press MENU and select [Option]. The menu
provides options to adjust the OSD Language, Subtitle Language
and Audio Language. Select an option and press RIGHT/LEFT to
adjust the setting.Press EXIT to exit The Menu.
Option
OSD Language English
Subtitle Language Off
Audio Language English
Digital Audio PCM
EXIT
OSD Language
Select an OSD language.
Audio Language
Select the preferred audio language for watching TV channels.If
the language is not available, the default program language will be
used.
Subtitle Language
Select the preferred subtitle language.
System Setting
To access the Menu,press MENU and select [System].The menu.
Provides options to adjust the system settings. Press the
UP/DOWN key to select an option and press RIGHT/LEFT to adjust
the setting.Press EXIT to exit the Menu.
OK
ConfirmReturn
Set Password
Restore Factory Default
Information
Software update
EXIT
Set Password
Set or change the password for Locked programs. Enter your old
Password or the default password '000000'. You will then be asked
to enter your new password. To confirm re-enter your new
password. Once it is confirmed, press EXIT to exit the Menu.
Restore Factory Default
Reset your Set Top Box to the Default Factory Settings.In Main
Menu select [Restore Factory Default] and press OK or RIGHT to
select. Enter your password or the default password '000000' and
press OK to confirm. This option will delete all preset channels and
settings.
OK
ConfirmReturn
Information
View model, hardware and software information.
Software update
Software update
System
13
Page 15
First Time Installation
USB
To access the Menu, press the Menu button and select USB.
USB
Multimedia
Photo Configure
Movie Configure
EXIT
Multi-Media
Switch to USB mode and plug in USB to view files.
OK
ConfirmReturn
Troubleshooting
Problem Potential Reasons What to do
No picture
Screen shows
No Signal
No sound from
speaker
Power isn't connected
The power switch
is not on
DVB-T cable not
connected
Incorrect setting
No or incorrect
with audio cable
Sound on mute
Incorrect sound track Try another sound track
connection
Connect the power
Switch on the power
Plug in the DVB-T cable
Reset setting
Connect the audio
correctly
Turn off mute function
cable
Technical Specifications
Item Sub Item Parameter
170~230MHz
470~860MHz
-25~-82dBm
7MHz and 8MHz
QPSK,16QAM,64QAM
MPEG4 AVC/H.264 HP@L4
MPEG2 MP@ML.HL
576P , 720P, 1080i, 4:3 and 16:9
HDMI
Tuner
Video
Input Frequency
RF Input level
IF Bandwidth
Modulation
Decoder Format
Output Format
Output Port
14
Only sound, no
image on the
screen
Remote Control
is not responding
The image stopped
suddenly or mosaic
No or incorrect connection
with AV cable
The program is a radio
program
The battery is exhausted
Remote Control is not
facing or close enough
to the Set Top Box
The signal is too weak
Make sure cables
connected correctly
Press <TV/RADIO> key
shift into TV mode
to
Change battery
Adjust the position
Remote Control and
closer to the unit
move
Strengthen the signal
are
of the
Page 16

Service and support
For information: www.lenco.com
Lenco off er s se rv ic e and warranty in accordance to European law,
which means that in case of repairs (both during and after the
warranty period) you should contact your local dealer.
Important note: It is not possible to send products that need repairs
to Lenco directly.
Important note: If this unit is opened or accessed by a non-official
service center in any way, the w arranty expires.
This device is not suitable for professional use. In case of professional
use, all warranty obligations of the manufacturer will be voided.
ENGLISH
WARNING: Prolonged exposure to loud sounds from
personal music players may lead to temporary or
permanent hearing loss.
Products with the CE marking comply with the EMC
Directive (2004/108/EC) and the Low Voltage Directive
(2006/95/EC) issued by the Commission of the European
Community.
The declaration of conformity may be consulted at
https://lencosupport.zendesk.com/forums/22413161-CEDocuments
This symbol indicates that the relevant electrical product
or battery should not be disposed of as general household
waste in Europe. To ens ure the correct waste treatment of
the product and battery, ple ase dispose them in
accordance to any applicable local laws of requirement for
disposal of electrical equipment or batteries. In so doing,
you will help to conserve natural resources and improve
standards of environmental protection in treatment and
disposal of electrical waste (Waste Electrical and
Electronic Equipment Directive).
®All rights reserved
15
Page 17

PHDVT-12309C MTK-1389Q+MASTAR7801方案 前屏无按键 二合一 模拟屏 低成本 ERP2 ENGLISH MANUAL
BEDIENUNGSANLEITUNG
DVP-9412
WWW.LENCO.COM
TRAGBARER DVD-PLAYER
Vor dem Anschluss, Betrieb oder der Einstellung dieses Geräts lesen Sie bitte
dieses Handbuch sorgfältig und vollständig durch.
Page 18

Wichtige Sicherheitshinweise
Warnung: Zur Verringerung eventueller Stromschlaggefahr
öff ne n Si e ni em als das Gehäuse (bzw. die Geräterückseite).Es
befinden sich im Inneren des Geräts keine Teile die vom
Benutzer gewartet werden können. Wenden Sie sich bei Bedarf
an entsprechend ausgebildetes Wartungspersonal.
Warnung: Um Feuer und Stromschlägen vorzubeugen,
vermeiden Sie es das Gerät Regen oder Feuchtigkeit
auszusetzen.
Setzen Sie den Adapter und den tragbaren DVD-Player niemals
Wassertropfen oder -spritzern aus. Gegenstände die mit
Flüssigkeiten gefüllt sind, wie z.B. Vasen sollten niemals auf das
Gerät gestellt werden.
Stellen Sie den tragbaren DVD-Player in ausreichender
Entfernung zu Hitzequellen wie z. B. Heizkörpern bzw. Öfen auf
und halten Sie ihn von direkter Sonnenstrahlung fern.
Blockieren Sie nicht die Lüftungsöffnungen. Die Öffnungen d es
Geräts dienen der Belüftung. Die Lüftungsöffnungen dürfen
niemals, indem Sie den DVD-Player auf ein Kissen, Sofa oder
ähnliche Oberflächen stellen, blockiert werden.
Benutzen Sie zur Aufstellung des tragbaren DVD-Players keine
instabilen Wagen, Gestelle, Stative, Haltevorrichtungen oder
Tische. Das Gerät kann herunterfallen und damit zu
Verletzungen oder Beschädigungen am Gerät führen.
Legen Sie niemals schwere oder scharfe Gegenstände auf den
LCD-Bildschirm oder den Bildschirmrahmen.
Verwenden Sie zusammen mit dem DVD-Player nur den im
Lieferumfang enthaltenen Netzadapter. Die Benutzung anderer
Netzadapter macht Ihre Garantie ungültig.
Der Netzstecker des Adapters dient dazu das Gerät vom Strom
zu trennen und sollte deshalb immer leicht zugänglich bleiben.
Ziehen Sie den Netzstecker aus der Steckdose, wenn das Gerät
nicht benutzt wird.
Entsorgen Sie Batterien umweltgerecht.
VORSICHT: Bei falsch eingelegten Batterien besteht
Explosionsgefahr! Benutzen Sie nur Batterien des gleichen
Typs.
WARNUNG: Die Batterien (Akkupack oder Batterien) dürfen
niemals übermäßiger Hitze, wie bei direkter Sonnenstrahlung,
Feuer oder dergleichen, ausgesetzt werden.
WARNUNG: Übermäßiger Schalldruck von Kopfhörern kann
zu Hörschäden führen.
WARNUNG: Verwenden Sie nur Zusatzgeräte bzw.
Zubehörteile, die vom Hersteller des Geräts geliefert oder
empfohlen werden. Der tragbare DVD-Player wird über einen
Netzadapter mit Strom versorgt. Der Netzadapter wird zudem
als Trennvorrichtung verwendet und sollte deshalb immer frei
zugänglich bleiben.
Achtung: Es besteht bei falsch eingelegtem Akku
Explosionsgefahr! Benutzen Sie zum Austauschen nur einen
Lithium-Akku eines gleichwertigen Typs.
Dieses Zeichen bedeutet, dass das vorliegende
Produkt innerhalb der EU nicht zusammen mit
dem Hausmüll entsorgt werden darf. Geben Sie
Altgeräte bei Sammelstellen ab oder wenden
Sie sich an den Händler bei dem das Gerät
gekauft wurde. Dort wird das Gerät dann auf
umweltverträgliche Weise entsorgt.
Netzstromadapter(Nur für die EU)
Hersteller:Shenzhen Mass Power Electronics Limited
Modellnummer:EFF0900150E1BA
Gerät nur an eine Stromversorgung gemäß den Angaben in der
Bedienungsanleitung anschließen
1
Page 19

Sicherheitshinweise
WARNUNG
STROMSCHLAGGEFAHR!
NICHT ÖFFNEN!
Warnung: Dieser digitale Disc-Player verwendet ein
Lasersystem. Die Verwendung von Bedienungsweisen, die
nicht in dieser Anleitung beschrieben werden, kann zudem zur
Aussetzung von gefährlicher Strahlung führen.
Achtung: Um direkte Laserstrahlen zu vermeiden, öffnen Sie
das Gehäuse niemals. Es tritt beim Öffnen des Gehäuses
sichtbare Laserstrahlung aus.
Warnung: Niemals direkt in den Laserstrahl blicken.
Achtung: Stellen Sie dieses Produkt nicht an beengten Orten,
wie z. B. einem Bücherregal, auf.
Achtung: We nn d as G er ät v on K indern benutzt wird, sind
dessen Eltern dazu verpflichtet dafür zu sorgen, dass vom Kind
der gesamte Inhalt der Bedienungsanleitung verstanden wird,
um sicher zu stellen, dass der Akku jederzeit sachgemäß
benutzt wird.
Warnung: Wenn der Akku überhitzt, anschwellt oder fehlerhaft
ist, hören Sie bitte auf den Akku zu benutzen und wenden Sie
sich an den Kundendienst für Ersatz.
Achtung: Laden Sie den Akku nicht an Orten auf, an denen
einen ausreichende Belüftung nicht gewährleistet ist, wie z. B.:
Matratzen, Sofas, Kissen, weiche Matten etc.
Achtung: Wir übernehmen keine Verantwortung, wenn der
Benutzer den Akku nicht ordnungsgemäß verwendet bzw. die
Warnhinweise auf dem Gehäuses des Akkupacks nicht befolgt.
Warnung: Die Benutzung eines USB-Verlängerungskabels von
einer Länge von mehr als 250 mm ist untersagt.
N
N
Hinweise zum Urheberrecht:
Es ist gesetzlich verboten urheberrechtlich geschütztes Material
ohne Erlaubnis zu kopieren, auszustrahlen, öffentlich
wiederzugeben oder zu vermieten.
Dieses Produkt verwendet eine der Firma Macrovision entwickelte
Kopierschutzfunktion. Auf bestimmten Discs werden
Kopierschutzsignale aufgezeichnet. Bei der Wiedergabe von
Kopien dieser Discs erscheint ein Bildrauschen. Dieses Produkt
verwendet Kopierschutzmechnismen der Firma Macrovision und
anderen Firmen, die durch bestimmte U.S. Patente und andere
Rechte für geistiges Eigentum geschützt sind. Die Benutzung
dieser Kopierschutztechnologie muss durch die Firma
Macrovision autorisiert werden und ist nur für die Benutzung zu
Hause und anderen eingeschränkten Benutzungsweisen gedacht,
solange es nicht ausdrücklich von der Firma Macrovision anders
angegeben wird. Reverse-Engineering und Auseinanderbauen
sind nicht gestattet.
SERIENNUMMER:
Sie können die Seriennummer auf der Rückseite des Gerätes finden.
Diese Zahl ist für dieses Gerät einzigartig und ist auf anderen
Geräten des gleichen Modells anders. Sie sollten die betreffenden
Informationen hier notieren und diese Bedienungsanleitung als
dauerhaft gültigen Kaufbeleg aufbewahren.
Modellnr. ______________________________
Seriennr. ______________________________
Kaufdatum __________________________
charge
strong
impact
over
heat
40 C
2
Page 20

Bezeichnung der Bedienelemente
Hauptgerät
180°
SOURCE
VOL- VOL+ MENU
SETUP
1
2
3
6
5
4
7
8
10
9
1. PLAY/ PAUSE
2. STOP P
3. EINGANGSSIGNAL
4. LAUTSTÄRKE -
5. LAUTSTÄRKE +
6. MENÜ
7.▲/▼/◄/► (oben/unten/rechts/links)
Wählen Sie ein Element im Menü. Betätigen Sie die OK-Taste zu
Bestätigung Ihrer Auswahl.
Während der Wiedergabe einer VCD / DVD, falls verfügbar:
rechts: Schnellvorlauf
links: Schnellrücklauf
oben: voriger Titel
unten: nächster Titel
8. EINGABE
9. ÖFFNEN
10. EINSTELLUNGEN
11. SD /M MC
12. USB-Anschluss
13. AV-AUS GA NG
14. Kopfhörerausgang
15. KOAXIALANSCHLUSS
16. EIN/AUS
17. Stromversorgungseingang 9 - 12 V
18. ANTENNE
19. HDMI
11
13
14
18
15 17
16
19
12
3
Page 21
Bezeichnung der Bedienelemente
Fernbedienung
17
14
5
7
10
12
9
2
1
3
4
6
8
11
13
16
SOUR CE
MUTE
3
10+
/RECA LL
AUDI O
4
7
8
INFO
PBC
/FAV
STEP /
TV/R ADIO
VOL +VOL -
20
26
19
18
21
23
25
24
22
1 2
5
9 0
SUBT ITLE
TITL E
REPEAT
SETU P
PROG RAM
ANGL E
SLOW
/EXI T
ZOOM
6
OK
27
15
1. EINGANGSSIGNAL
DVD/CARD/USB
2. TO N AUS
Deaktivieren der Tonausgabe.
3. 0-9 ZIFFERNTAST EN
Auswahl nummerierter Elemente in Menüs.
4. INFO
Anzeige der Spielzeit und Statusinformationen.
5. 10+AUFRUFEN
Auswahl von Titelnummer 10 oder höher. Betätigen Sie zunächst
10+ und dann einer weitere Ziffer. Beispiel Titel 12: Betätigen Sie
zuerst 10+ und dann die Zifferntaste 2.
6. PBC/FAV
PBC-Ein/Aus-Schalter (VCD) .
7. AUDIO
Betätigen Sie die AUDIO-Taste während der Wiedergabe,
DVD
um die Audiosprache zu wechseln, wenn weitere Audiosprachen
vorhanden sind.
Betätigen Sie die AUDIO-Taste während der
Wiedergabe, um den Audiokanal zu wechseln (Links, Rechts, Mix,
Stereo).
VCDCD
8. WIEDERGABE / PAUS E
Betätigen Sie die WIEDERGABE/PAUSE-Taste während der
Wiedergabe, um die Wiedergabe vorübergehend anzuhalten.
Betätigen Sie die WIEDERGABE/PAUSE-Taste ein zweites Mal,
um die Wiedergabe fortzusetzen.
9.STO PP
Wen n di es e Taste nur einmal betätigt wird, wird der letzte Punkt der
Wiedergabe gespeichert. Danach können Sie mit der Wiedergabe
durch Betätigung der Wiedergabetaste ( ) fortfahren. Wenn die
STO PP -Tas te a ll er di ngs ein zweites Mal anstelle der Wiedergabetaste
( ) betätigt wird, kann die Wiedergabe nicht fortgesetzt werden.
10. EINZELBILD/TV/RADIO
Einzelbildwiedergabe im DVD-Modus.
11. LAUTSTÄRKE +
Lautstärke anpassen
12. VOR
Springen zum nächsten Kapitel/Musiktitel.
13. ZURÜCK
Springen zum vorigen Kapitel/Musiktitel.
14. 10+
Betätigen Sie die Taste , um de n Sc hn ellvorlauf zu aktivieren.
Es stehen 5 Suchlaufgeschwindigkeiten zur Verfügung (2fach →
4fach → 8fach → 16fach → 32fach → NORMAL). Sie können
jederzeit die Wiedergabetaste betätigen, um zur normalen
Wiedergabe zurückzukehren.
4
Page 22

Bezeichnung der Bedienelemente
Fernbedienung
15. 10+
Betätigen Sie die Taste , um de n Sc hn ellrücklauf zu aktivieren. Es
stehen 5 Suchlaufgeschwindigkeiten zur Verfügung (2fach → 4fach →
8fach → 16fach → 32fach → NORMAL). Sie können jederzeit die
Wiedergabetaste betätigen, um zur normalen Wiedergabe
zurückzukehren.
16.
Ein-/Ausschalten des Geräts.
17. SUCHFUNKTION
Direktsuche nach Wiedergabepunkt, Titel oder Kapitel im DVD-Modus.
18. UNTERTITEL
Benutzen Sie die SUBTITLE-Taste, um während der Wiedergabe eine
andere Untertitelsprache zu wählen.
19. KAMERAPERSPEKTIVE
DVD
: Betätigen Sie die ANGLE-Taste, um die Kameraperspektive zu
wechseln (nur bei DVDs, die diese Funktion unterstützen).
20. TITEL
Zurück zum DVD-Titelmenü
21. EINGABE
Bestätigung der Menüauswahl.
22. EINSTELLUNGEN
Aufrufen oder Verlassen des Einstellungsmenüs.
23. VOL –
Einstellen der Lautstärke
24. WIEDERHOLUNG
Betätigen Sie die REPEAT-Taste während der Wiedergabe zur
Auswahl des Wiederholungsmodus.
DVD
Sie können die Wiederholung von Kapiteln, Titeln oder allem
wählen.
VCD
CD
Sie können die Wiederholung von Titeln oder Allem
wählen.
MP3
:Sie können Zufallswiedergabe, Einzelwiederholung oder
Verzeichniswiederholung wählen.
:
25. ZEITLUPE
Benutzen Sie die SLOW-Taste, um die Wiedergabe in Zeitlupe in
verschiedenen Geschwindigkeiten zu schalten. Zur Verfügung
stehende Geschwindigkeiten sind 1/2, 1/4, 1/8, 1/16 und Normal.
26. PROGRAMMWIEDERGABE
:Die Programmfunktion ermöglicht es Ihnen Ihre
DVD VCD
Lieblingstitel von einer Disc zu speichern. Betätigen Sie die
PROGRAM-Taste und das Programmmenü erscheint auf dem
Bildschirm. Sie können dann die Zifferntasten benutzen, um die Titeloder Kapitelnummern direkt einzugeben und dann die PLAY-Option
zu wählen. Um mit der normalen Wiedergabe fortzufahren, betätigen
Sie die PROGRAM-Taste und löschen Sie das Programm über das
Programmmenü. Betätigen Sie die PROGRAM-Taste erneut, um das
Programmmenü zu verlassen. MP3-Discs verfügen über eine
Verzeichnislistenfunktion.
27. BILDVERGRÖSSERUNG
DVD VCD
: Mit der ZOOM-Taste können Sie das Vid eo bi ld
vergrößern bzw. verkleinern.
1. Betätigen Sie die ZOOM-Taste während der Wiedergabe oder
Pause, um die Bildvergrößerungsfunktion zu aktivieren. Ein Quadrat
erscheint kurzzeitig auf der unteren Bildseite rechts.
2. Mit jeder Betätigung der ZOOM-Taste wird der Fernsehbildschirm
in folgender Reihenfolge verändert:
2X si ze → 3 X size→ 4X siz e → 1/2 size → 1/ 3X size → 1/4 X size→norm al size
JPEG
: Benutzen Sie die ZOOM-Taste, um das Vid eo bi ld
vergrößern bzw. verkleinern.
1. Betätigen Sie die ZOOM-Taste.
2. Benutzen Sie " " zum Vergrößern oder " ", um das Bild zu
verkleinern.
Verwenden Sie die Navigationstasten , um das den
vergrößerten Bildausschnitt zu verschieben.
CD
5
Page 23
EINSTELLUNGEN Einstellungsmenü
Allgemeine Einstellungen
Betätigen Sie die SETUP-Taste, um das Einstellungsmenü
aufzurufen. Benutzen Sie die Navigationstasten zur Auswahl
des gewünschten Menüpunkts. Nachdem Sie die gewünschten
Einstellungen vorgenommen haben, betätigen Sie die SETUP-Taste,
um zur normalen Anzeige zurückzukehren.
Folgende Einstellungen können gemacht werden:
ALLGEMEIN: wählt die Einstellungsseite für allgemeine
Einstellungen.
AUDIO: Auswahl der Audiomenüseite.
VIDEO: Auswahl der Videomenüseite.
VOREINSTELLUNGEN: Auswahl der Menüseite für
Benutzereinstellungen.
Allgemeine Einstellungen
- - GENERALSETUP PAGE - -
TV DISPLAY WIDE
TFT DISPLAY 16:9
ANGLE MARK ON
OSD LANGUAGE ENG
CLOSED CAPTIONS ON
SCREEN SAVER ON
AUTO STANDBY 3H
GOTO GENERAL SETUP PAGE
BILDFORMAT: Auswahl des Bildseitenverhältnisses.
4:3 PANS CA N: Wenn Sie einen normalen Fernseher benutzen und
wünschen, dass die beiden Seiten des Bilds abgeschnitten bzw. so
formatiert werden, dass sie dem Fernsehbildschirm angepasst
werden, dann wählen Sie diese Option.
4:3 LETTERBOX: für normale Fernsehgeräte. In diesem Fall
werden mit dieser Option schwarze Balken am oberen und unteren
Teil des Bildschirms angezeigt.
16:9: Breitbildanzeige
oFF
3 HOU R
4 HOU R
ON
OFF
ON
OFF
ENGLISH
FRENCH
GERMAN
SPANISH
DUTCH
HUNGARIAN
POLISH
TFT 16:9
TFT 4:3
4:3 PANSCAN
4:3 LETTERBOX
16:9
TFT-BILDSCHIRM
Auswahl des Bildseitenverhältnisses während der Wiedergabe.
Kameraperspektive
Zeigt die aktuelle Perspektive in der rechten Ecke oben des TFTBildschirms an, wenn die Funktion von der Disc unterstützt wird.
Anzeigesprache
Wählen Sie hier die von Ihnen bevorzugte Sprache.
Geschlossene Untertitel
Geschlossene Untertitel sind Daten für Hörgeschädigte, die im
Vid eo si gn al einiger Discs enthalten sind. Bevor Sie diese Funktion
wählen, stellen Sie bitte sicher, dass die eingelegte Disc und ihr
Fernsehgerät diese Funktion unterstützt.
Bildschirmschoner
Diese Funktion wird verwendet, um den Bildschirmschoner einbzw. auszuschalten.
Automatischer Bereitschaftsmodus
Dieses Funktion versetzt das Gerät in den Bereitschaftsmodus.
Audioeinstellungen
Audioeinstellungen
-- --
- - - -AUDIO SETUP PAGE
DOWNMINX
DIGITAL OUTPUT
DOLBY DIGITAL
GO TO AUDIO SETUP PAGE
STR
RAW
DUAL MONO
DYNAMIC
SPDIF/OFF
STR
STR
L-MONO
R-MONO
FULL
-
-
-
-
-
-
-
-
-
-
MIX-MONO
-
-
-
-
-
-
-
-
OFF
-
SPDIF/RAW
SPDIF/PCM
6
LT/RT
STEREO
Page 24

EINSTELLUNGEN Einstellungsmenü
Audioeinstellungen
Downmix
Mit dieser Option können Sie den analogen Stereo-Ausgang Ihres
DVD-Player eingestellen.
LT/R T : Wä hl en S ie d ie se O pt io n, w en n Ih r DV D- Player an einen
Dolby-Pro-Logic-Dekoder angeschlossen ist.
Stereo : Wählen Sie diese Option, wenn das Audiosignal nur an
die beiden Frontlautsprecher geliefert wird.
Digitalausgang
Die Funktion wird verwendet, um den SPDIF-Ausgang zu
konfigurieren: SPDIF OFF, SPDIF/RAW, SPDIF/PCM.
SPDIF OFF: Schaltet die SPDIF-Ausgabe aus.
SPDIF/RAW: Wenn Sie den Digitalausgang an einen
Multikanal-Dekoder angeschlossen haben.
SPDIF/PCM: Nur wenn Ihr Empfänger nicht zur Dekodierung
des Multikanalsignal geeignet ist.
Dolby Digital
Verfügbare Optionen für Dolby Digital sind: "Dual Mono" und
"Dynamic".
Dual-Mono
Stereo: Das linke Monosignal wird an den linken Lautsprecher
gesendet und das rechte Monosignal wird an den rechten
Lautsprecher gesendet.
L-Mono: Das linke Monosignal wird an den linken und den
rechten Lautsprecher gesendet.
R-Mono: Das rechte Monosignal wird an den linken und den
rechten Lautsprecher gesendet.
Mix-Mono: Das linke und das rechte Monosignal werden zu
einem Signal gemischt und an den linken und den rechten
Lautsprecher gesendet.
Dynamikbereich
Dynamikkompression.
Videoeinstellungen
Videoeinstellungen
- - VIDEO SETUP PAGE - -
SHARPNESS MID
BRIGHTNESS 00
CONTRAST 00
HUE 00
SATURATION 00
GOTO VIDEO SETUP PAGE
Bildschärfe, Helligkeit, Kontrast, Farbton, Sättigung: Einstellung der
Videoqualität.
HIGH
MEDIUM
LOW
Voreinstellungen
Voreinstellungen
- - PREFERENCE SETUP PAGE - -
TV TYPE PAL
AUDIO ENG
SUBTITLE ENG
DISC MENU ENG
DEFAULT
GOTO PREFERENCE PAGE
Bildformat
Die Auswahl des Farbsystems, das dem Ihres Fernsehers
entspricht, wenn Sie die AV-Ausgänge benutzen. Dieser DVDPlayer ist kompatibel mit den Systemen NTSC und PAL.
RESET
ENGLISH
FRENCH
GERMAN
SPANISH
DUTCH
POLISH
HUNGARIAN
OTHERS
ENGLISH
FRENCH
GERMAN
SPANISH
DUTCH
POLISH
HUNGARIAN
OFF
OTHERS
ENGLISH
FRENCH
GERMAN
SPANISH
DUTCH
POLISH
HUNGARIAN
OTHERS
PAL
AUTO
NTSC
7
Page 25

EINSTELLUNGEN Einstellungsmenü
Voreinstellungen
PAL - Wählen Sie diese Option, wenn das angeschlossene
Fernsehgerät das PAL -S ys te m benutzt. Dadurch wird das Videosignal
von NTSC-Discs im PAL- Fo rm at a us gegeben.
NTSC - Wählen Sie diese Option, wenn das angeschlossene
Fernsehgerät das NTSC-System benutzt. Dadurch wird das
Vid eo si gn al von PAL-Discs im NTSC-Format ausgegeben.
Auto: Das Ausgabevideosignal wird automatisch dem Format auf der
Disc angepasst.
Audio: Auswahl der Audiosprache (falls vorhanden).
Untertitel: Auswahl der Untertitelsprache (falls verfügbar).
Disc-Menü: Wählt eine Sprache für Disc-Menü (wenn verfügbar).
Parameters and specifications
Electronical parameters
Bezeichnung
Stromnetzanforderungen
Stromverbrauch
Betriebsluftfeuchtigkeit
Videoausgang
Audioausgang
Ausgang
Audio
System
Laser
Farbsystem
Frequenzbereich
Rauschabstand
Dynamikbereich
: AC 100-240 V , 50/60 Hz
: <10W
: 5 % to 90 %
:1.4 Vrms (1 KHz, 0 dB)
:Lautsprecher: 2x 1W, Kopfhörerausgang
Halbleiterlaser, Wellenlänge 650 nm
NTSC / PAL
20 Hz bis 20 kHz (-1 dB)
Mehr als 80 dB (nur ANALOG-OUT-Ausgang)
Mehr als 85 dB (DVD/CD)
Standardanforderungen
Akku
Batteriespezifikationen:
Ausgangssstrom: 7,4 V
Auflade-/Benutzungsdauer:
Standardladezeit: 3 Std. ~ 4 Std.
Lager- und Betriebsbedingungen:
1. Lagerung Tempe ra tu r Lu ft fe uc ht ig ke it
6 Monate -20ºC ~ +45ºC 65 ±20%
1 Woc he - 20 ºC ~ + 65 ºC 6 5 ±2 0%
2. Betrieb Temp er at ur L uf tf eu ch ti gk ei t
Aufladen 0ºC ~ +45ºC 65 ±20%
Entladen -20ºC ~ +65ºC 65 ±20%
Aufladen des Akkus
Verbinden Sie den DVD-Player mit dem mitgeliefertem Netzadapter
und die LED-Lampe leuchtet ROT auf, wenn der Akku aufgeladen
wird. Die LED wechselt zu grün, wenn der Akku vollständig
aufgeladen ist. Wen n der Akku über keinen Strom verfügt, geht die
LED aus.
Hinweis: Änderung am Design und Spezifikationen vorbehalten.
N
8
Page 26

Systemeinrichtung
Nachdem alle Anschlüsse korrekt hergestellt wurden, schalten den
Fernseher ein und vergewissern Sie sich, dass das Gerät am
Strom angeschlossen ist. Betätigen Sie die Ein/Aus-Taste, um den
Empfänger einzuschalten. Wenn Sie den Empfänger zum ersten
Mal einschalten oder ihn auf die Werkseinstellungen
zurückgesetzt haben, erscheint das Hauptmenü auf Ihrem TVBildschirm.
Installation Guide
OSD Language English
Country Germany
Channel Search
Exit
1) Wählen Sie [Anzeigesprache] und benutzen Sie die
Navigationstasten RECHTS / LINKS, um eine Sprache zu wählen.
2) Wählen Sie [Land] und betätigen Sie die Navigationstasten
RECHTS / LINKS, um das Land Ihres Wohnsitzes zu wählen.
3) Wählen Sie [Kanalsuche] und betätigen Sie die
Navigationstaste RECHTS oder die OK-Taste, um eine
automatische Kanalsuche zu starten.
4) Nachdem die Kanalsuche abgeschlossen ist, können Sie Ihr
Fernsehgerät benutzen.
OK
ConfirmExit
Grundlegende Bedienung
Programmeinstellungen
Betätigen die MENU-Taste, um das Menü aufzurufen und wählen
Sie [Programm]. Das Menü bietet Optionen zum Einstellen der
Programme. Wählen Sie eine Option und betätigen Sie die OKTaste oder die Navigationstaste RECHTS, um die Einstellungen
anzupassen..
Betätigen Sie die EXIT-Taste zum Verlassen des Menüs.
Program
Program Edit
Sort By LCN
LCN On
Exit
OK
ConfirmReturn
Programme bearbeiten
Um Ihre Programmeinstellungen (Sperren, Ignorieren, Favoriten,
Verschieben oder Löschen) zu bearbeiten, müssen Sie zunächst
das Programmbearbeitungsmenü aufrufen. Für den Zugang zu
diesem Menü ist ein Kennwort erforderlich. Benutzen Sie das
werksmäßig voreingestellte Passwort "000000".
Program Edit
ALL TV
003 ITV1
004 Channel 4
006 ITV2
010 ITV3
013 More 4
014 E4
030 ITV4
037 Quiz Call
LockMove
21:00-22:30 Secret Smile
22:30-22:50 ITV News
GOTO
FAV
DeleteSkip RenameFAV
9
Page 27

Systemeinrichtung
Einstellen der Favoritenprogramme
Sie können eine Liste von bevorzugten Programmen erstellen, auf
die Sie dann leichter zugreifen können.
Setzen von Favoriten-TV- oder Radioprogrammen:
1.Wählen Sie die gewünschte Programm und betätigen Sie dann die
FAVOU RI TE -Tas te .
Ein herzförmiges Symbol erscheint und das Programm wird als
Favorit markiert.
2.Wiederholen Sie den vorigen Schritt, um weitere Favoriten zu
setzen.
3.Zur Bestätigung und zum Verlassen des Menüs, betätigen Sie die
EXIT-Taste.
TV- oder Radioprogramme aus der Favoritenliste entfernen:
Betätigen Sie die FAV-Taste auf der Fernbedienung und das
herzförmige Symbol verschwindet.
Favoritenprogramme aufrufen.
1.Betätigen Sie die FAV-Taste und die Favoritenliste wird angezeigt.
2.Benutzen Sie die Navigationstasten OBEN / UNTEN zur Auswahl
eines Favoritenprogramms.
3.Betätigen Sie die OK-Taste, um das gewünschte Programm
auszuwählen.
Löschen einer TV- oder Radioprogrammen
1.Wählen Sie das gewünschte Programm und betätigen Sie dann die
BLAUE Farbtaste.
Es erscheint eine Sicherheitsabfrage. Betätigen Sie die OK-Taste
erneut, um das Programm zu löschen.
2.Wiederholen Sie den vorigen Schritt, um weitere Programme zu
löschen.
TV- oder Radioprogramme aus der Programmliste ausklammern:
1.Wählen Sie ein Programm, dass Sie aus der Programmliste
ausklammern wollen, betätigen Sie die GRÜNE Farbtaste.
Ein entsprechendes Symbol wird angezeigt. Das Programm ist als
ausgeklammert markiert.
2.Wiederholen Sie den vorigen Schritt, um weitere Programme zu
wählen.
3.Zur Bestätigung und zum Verlassen des Menüs, betätigen Sie die
EXIT-Taste.
Reaktivieren ausgeklammerter TV- oder Radioprogramme:
Betätigen Sie die GRÜNE Farbtaste und das Symbol verschwindet
wieder.
Verschieben von TV- oder Radioprogrammen/
1. Wählen Sie die gewünschte Programm und betätigen Sie dann
die ROTE Farbtaste. Ein entsprechendes Symbol erscheint.
2. Benutzen Sie die Navigationstasten OBEN / UNTEN zum
Verschieben des Programms.
3. Betätigen Sie die OK-Taste zur Bestätigung.
4. Wiederholen Sie die obigen Schritte, um weitere Kanäle zu
verschieben.
Programme sperren
Sie können Programme sperren, um den Zugriff darauf
einzuschränken.
Sperren eines TV- oder Radioprogramms:
1. Wählen Sie die gewünschte Programm und betätigen Sie dann
die GELBE Farbtaste. Ein Schloss-Symbol wird angezeigt. Das
jeweilige Programm ist damit gesperrt.
2. Wiederholen Sie den vorigen Schritt, um weitere Programme zu
wählen.
3. Zur Bestätigung und zum Verlassen des Menüs, betätigen Sie
die EXIT-Taste.
4. Betätigen Sie die GELBE Farbtaste, um die Programmsperre
wieder zu deaktivieren.
5. Um auf gesperrte Programme zuzugreifen, benötigen Sie das
Standard.
10
Page 28

Systemeinrichtung
Sortieren
Sortieren Sie Ihre Kanäle mit einer der folgenden Optionen:
[LCN] - Sortieren der Kanäle in aufsteigender Reihenfolge.
[Name] - Sortieren der Kanäle in alphabetischer Reihenfolge.
Service ID: Sortieren der Kanäle nach Senderinformationen.
Logische Kanalnummer [LCN]
LCN ein- oder ausschalten.
Videoeinstellungen
Betätigen die MENU-Taste, um das Menü aufzurufen und wählen Sie
[Bild]. Das Menü bietet Optionen zum Einstellen der Videoausgabe.
Benutzen Sie die Navigationstasten OBEN / UNTEN, um eine Option
auszuwählen und dann die Navigationstasten RECHTS / LINKS, um
die Einstellung anzupassen. Betätigen Sie die EXIT-Taste zum
Verlassen des Menüs.
Picture
HDMI Aspect Ratio 16:9 Wide Screen
HDMI Resolution 1080i
TV Format PAL
Auflösung
Wen n da s Videobild nicht korrekt angezeigt wird, ändern Sie die
Einstellung. Diese Einstellungen entsprechen den häufigsten
Einstellungen für HDMI.
[576i]: für PAL- Fe rn se he r.
[576P]: für PAL- Fe rn se he r.
720p: für NTSC- oder PAL -F er ns eher
1080i: für NTSC- oder PAL- Fe rn seher
TV-Format
Wen n da s Videobild nicht korrekt angezeigt wird, müssen Sie die
Einstellungen ändern. Die Einstellung muss der gängigen
Einstellung für Fernsehgeräte in Ihrem Land entsprechen.
[NTSC]: NTSC-Farbsystem
[PAL ]: PAL-Farbsystem.
Kanalsuche
Betätigen die MENU-Taste, um das Menü aufzurufen und wählen
Sie [Kanalsuche]. Das Menü bietet Optionen zum Einstellen der
Suchfunktion. Wählen Sie eine Option und benutzen Sie die
Navigationstasten RECHTS / LINKS, um die Einstellungen
anzupassen.
Betätigen Sie die EXIT-Taste zum Verlassen des Menüs.
EXIT
Bildseitenverhältnis
Sie müssen das Anzeigeformat, entweder auf 4:3 PanScan, 4:3
Letterbox, 16:9 FullScreen oder 4:3 Full, 16:9 PillarBox oder 16:9
Panscan Auto setzen, um ein optimales Anzeigebild zum
Fernsehen zu bekommen.
OK
ConfirmReturn
11
Channel Search
Auto Search
Manual Search
Country Germany
EXIT
OK
ConfirmReturn
Page 29

Systemeinrichtung
Automatische Suche
Automatische Suche und Einrichtung aller Kanäle. Diese Option
überschreibt alle Speicherplätze.
1. Wählen Sie [Automatische Suche] und betätigen Sie die OKTaste oder die Navigationstaste RECHTS, um die Kanalsuche zu
starten.
2. Zum Abbrechen der Kanalsuche, betätigen Sie die EXIT-Taste.
Channel Search
506.0MHz/8MHZ
DTV:009 Radio: 000
001 ITV1
002 ITV2
003 ITV3
004 ITV News
005 Channel 4
006 Quiz Call
007 E4
008 More 4
009 ITV4
Progress
EXIT
Manuelle Suche
Manuelles Einrichten neuer Kanäle. Diese Option fügt neue
Kanäle ein, ohne die aktuelle Kanalliste zu ändern.
1. Wählen Sie [Manuelle Suche] und betätigen Sie die OK-Taste
oder die Navigationstaste RECHTS. Die Kanalsuchbildschirm
erscheint daraufhin.
MENU
SkipExit
2. Benutzen Sie die Navigationstasten LINKS / RECHTS, um die
Kanalfrequenz einzustellen.
3. Betätigen Sie die OK-Taste, um die Kanalsuche zu starten
Wen n ei n Ka na l ge fu nden wird, wird er in der Kanalliste
gespeichert.
Wen n ke in e Ka nä le gefunden werden können, wird das Menü
verlassen.
Land
Wählen Sie das Land Ihres Wohnorts.
Uhrzeiteinstellung
Betätigen die MENU-Taste, um das Menü aufzurufen und wählen
Sie [Uhrzeit]. Das Menü bietet Optionen zum Einstellen der
Uhrzeit.
Benutzen Sie die Navigationstasten OBEN / UNTEN, um eine
Option auszuwählen und dann die Navigationstasten RECHTS /
LINKS, um die Einstellung anzupassen. Betätigen Sie die EXITTaste zum Verlassen des Menüs.
Time
Time Offset Auto
Country Region Berlin
Time Zore GMT +1
EXIT
OK
ConfirmReturn
Manual Search
Frequency channel 5
Frequency(MHZ) 177.5
Bandwidth: 7M
Quality
EXIT
EXIT
OK
Confirm
Zeitverschiebung
Wählen Sie AUTO od er M anuell zum Einstellen des Unterschieds
zur GMT-Zeitzone.
Länderregion
Die Länderregion wird automatisch eingestellt, wenn Sie Ihr Land
im Kanalsuchmenü einstellen.
Zeitzone
Wählen Sie die Zeitzone, wenn [Zeitverschiebung] ist auf Manuell
gestellt wurde.
12
Page 30

Systemeinrichtung
Option
Betätigen die MENU-Taste, um das Menü aufzurufen und wählen Sie
[Option]. Dieses Menü bietet Ihnen Optionen zum Einstellen der
Anzeigesprache, Untertitelsprache und Audiosprache.
Wählen Sie eine Option und benutzen Sie die Navigationstasten
RECHTS / LINKS, um die Einstellungen anzupassen.
Betätigen Sie die EXIT-Taste zum Verlassen des Menüs.
Option
OSD Language English
Subtitle Language Off
Audio Language English
Digital Audio PCM
EXIT
Anzeigesprache
Auswahl der Anzeigesprache.
Audiosprache
Auswahl der gewünschten Audiosprache für den Empfang von TVKanälen.
Wen n di e Sp ra ch e ni cht verfügbar ist, wird die Standardsprache
verwendet.
Untertitelsprache
Auswahl der bevorzugten Untertitelsprache.
Systemeinstellungen
Betätigen die MENU-Taste, um das Menü aufzurufen und wählen
Sie [System]. Dieses Menü bietet Ihnen Optionen zum Einstellen
der Systemeinstellungen.
Benutzen Sie die Navigationstasten OBEN / UNTEN, um eine
Option auszuwählen und dann die Navigationstasten RECHTS /
LINKS, um die Einstellung anzupassen.
Betätigen Sie die EXIT-Taste zum Verlassen des Menüs.
OK
ConfirmReturn
Set Password
Restore Factory Default
Information
Software update
EXIT
Passwort setzen
Festlegen oder Ändern des Kennworts für gesperrte Programme.
Geben Sie Ihr altes Passwort oder das Standardpasswort
"000000" ein. Sie werden dann aufgefordert, Ihr neues Passwort
einzugeben. Geben Sie Ihr neues Passwort zur Bestätigung
erneut ein.
Sobald es bestätigt wird, betätigen Sie die EXIT-Taste zum
Verlassen des Menüs.
Wer ks ei ns te ll un ge n wi ed er he rstellen
Zurücksetzen Ihrer Set-Top-Box auf die ursprünglichen
Wer ks ei ns te ll ungen.
Wählen Sie im Hauptmenü [Werkeinstellungen] und betätigen Sie
die OK-Taste oder die Navigationstaste RECHTS zur Bestätigung.
Geben Sie Ihr Passwort bzw. das Standardpasswort "000000" ein
und bestätigen Sie mit OK. Diese Option löscht alle eingestellten
Kanäle und Einstellungen.
Informationen
Anzeige von Modell-, Hardware- und Software-Informationen.
Software-Update
Software-Update
OK
ConfirmReturn
13
System
Page 31

Systemeinrichtung
FEHLERBEHEBUNG
USB
Betätigen die MENU-Taste, um das Menü aufzurufen und wählen Sie USB.
USB
Multimedia
Photo Configure
Movie Configure
EXIT
OK
ConfirmReturn
Multimedia
Wechseln Sie in den USB-Modus und schließen Sie ein USBSpeichermedium an, um Ihre Dateien anzuzeigen.
Technische Daten
Bezeichnung
Funktion
Eingangsfrequenz
Tuner
RF-Eingangspegel
IF-Bandbreite
Modulation
Formatdekodierung
Video
Ausgabeformat
Videoausgang
Parameter
170~230MHz
470~860MHz
-25~-82dBm
7MHz und 8MHz
QPSK,16QAM,64QAM
MPEG4 AVC/H.264 HP@L4
MPEG2 MP@ML.HL
576P , 720P, 1080i, 4:3 and 16:9
HDMI
Problem
Mögliche Ursache
Kein Bild.
Bildschirm zeigt
kein Signal
Kein Ton über die
Lautsprecher
Nur Ton, kein Bild
Fernbedienung
reagiert nicht
Das Bild friert
plötzlich ein oder
wird verzerrt
Behebung
Nicht am Strom
angeschlossen
Das Gerät wurde nicht
eingeschaltet
DVB-T-Kabel nicht
angeschlossen
Falsche Einstellung
Keine oder fehlerhafte
Verbindung der Audiokabel
Tonausgabe wurde
unterbunden
Falsche Tonspur
Keine oder fehlerhafte
Verbindung der AV-Kabel
Das Programm ist ein
Radioprogramm
Die Batterie ist leer
Fernbedienung zeigt
nicht auf oder ist nicht
nahe genug an der
Set-Top-Box
Das Signal ist zu
schwach
Schließen Sie das Gerät
am Strom an
Schalten Sie die
Stromversorgung ein
Schließen Sie das
DVB-T-Kabel an
Einstellungen zurücksetzen
Schließen Sie die
Audiokabel korrekt an
Schalten Sie die
Tonausgabe wieder
Probieren Sie eine
andere Tonspur
Stellen Sie sicher, dass die
Kabel richtig angeschlossen
sind
Betätigen Sie die TV/RADIOTaste, um in den TV-Modus
zu wechseln
Wechseln Sie die Batterie
Richten Sie die
Fernbedienung neu aus und
gehen Sie damit näher an
das Gerät heran
Verstärken Sie das Signal
14
Page 32

Service und Hilfe
Für Informationen: www.lenco.com
Lenco bietet Leistungen und Garantien im Einklang mit Europäischem
Recht. Im Falle von Reparaturen (sowohl während als auch nach
Ablauf der Garantiezeit) sollten Sie deshalb Ihren Einzelhändler
kontaktieren.
Beachten Sie: Es ist nicht möglich, Geräte für Reparaturen direkt an
Lenco zu schicken.
Wichtiger Hinweis:
Falls dieses Gerät von einem nicht autorisierten Kundendienst
geöff ne t od er d ar auf zugegriffen wird, erlischt die Garantie.
Dieses Gerät ist nicht für professionelle Zwecke geeignet. Falls das
Gerät für professionelle Zwecke eingesetzt wird, erlöschen alle
Garantieverpflichtungen seitens des Herstellers.
WARNUNG: Längere Aussetzung lauter Geräusche von
tragbaren Musikgeräten kann zu vorübergehenden oder
dauerhaften Hörschäden führen.
Produkte mit der CE Kennzeichnung entsprechen der
EMC-Richtlinie (2004/108/EC) und der
Niederspannungsrichtlinie (2006/95/EC),
herausgegeben von der Kommission der Europäischen
Gemeinschaft.
Die Konformitätserklärung kann unter folgendem Link
abgerufen werden:
https://lencosupport.zendesk.com/forums/22413161CE-Documents
Dieses Symbol zeigt an, dass das entsprechende
Produkt oder dessen Batterie in Europa nicht mit dem
normalen Hausmüll entsorgt werden darf. Um die
ordnungsgemäße Abfallbehandlung des Produkts und
dessen Batterie zu gewährleisten, müssen diese im
Einklang mit allen anwendbaren örtlichen Vorschriften
zur Entsorgung von Elektrogeräten und Batterien
entsorgt werden. Dabei helfen Sie natürliche
Ressourcen zu schonen und Umweltschutzstandards zur
Verwertung und Entsorgung von Altgeräten aufrecht zu
halten (Waste Electrical and Electronic Equipment
Directive).
15
Page 33

PHDVT-12309C MTK-1389Q+MASTAR7801方案 前屏无按键 二合一 模拟屏 低成本 ERP2 ENGLISH MANUAL
HANDLEIDING
DVP-9412
WWW.LENCO.COM
DRAAGBARE DVD-SPELER
Lees deze handleiding zorgvuldig en volledig door voordat u dit product aansluit,
gebruikt of instelt.
Page 34

Belangrijke veiligheidsinstructies
Waarschuwing: Verwijder de behuizing of de achterkant niet om
het risico van elektrische schokken te verminderen. Er zitten
geen door de gebruiker te onderhouden onderdelen in dit
apparaat. Laat onderhoud over aan gekwalificeerd personeel.
Waarschuwing: Stel het apparaat niet bloot aan regen of vocht
om brandgevaar of elektrisch schokgevaar te voorkomen.
Stel de adapter en de draagbare DVD-speler niet bloot aan water
(druppend en spattend) en plaats geen voorwerpen gevuld met
water, zoals vazen, op het apparaat.
Houd de draagbare DVD-speler uit de buurt van direct zonlicht
en warmtebronnen, zoals radiatoren of kachels.
Blokkeer de ventilatieopeningen niet. Er zitten sleuven en
openingen in het apparaat voor ventilatie. Deze openingen
dienen nooit geblokkeerd te worden door uw DVD-speler op een
kussen, sofa of andere soortgelijke ondergrond te zetten.
Plaats de draagbare DVD-speler niet op een onstabiel wagentje,
standaard, driepoot, beugel of tafel. Het apparaat kan vallen en
beschadigd raken of mensen verwonden.
Plaats nooit zware of scherpe voorwerpen op het LCD-paneel of
frame.
Gebruik alleen de meegeleverde AC-adapter met de draagbare
DVD-speler. Het gebruik van andere adapters zal uw garantie
ongeldig maken.
De stekker van de AC-adapter wordt gebruikt om het apparaat
van het lichtnet te ontkoppelen, zorg ervoor dat de stekker goed
bereikbaar blijft.
Haal de stekker uit het stopcontact als het apparaat niet wordt
gebruikt.
Denk bij het weggooien van batterijen aan het milieu.
LET OP: E xp lo si eg ev aar als de batterij onjuist wordt geplaatst.
Vervang de batterij alleen door een batterij van hetzelfde of
een soortgelijk type.
WAARSCHUWING: De batterij (batterij, batterijen of accu)
moet niet worden blootgesteld aan extreme warmte zoals
zonlicht, vuur of dergelijke.
WAARSCHUWING: Overmatige geluidsdruk van
hoofdtelefoons of oortelefoons kan leiden tot gehoorverlies.
WAARSCHUWING: Gebruik alleen
koppelstukken/accessoires die worden gespecificeerd door de
fabrikant. De draagbare DVD-speler wordt geleverd met een
AC-adapter, deze AC-adapter kan worden gebruikt om het
apparaat te ontkoppelen van het lichtnet, zorg ervoor dat de
adapter eenvoudig bereikbaar blijft.
Let op: Explosiegevaar als de batterij onjuist is vervangen,
alleen vervangen door een batterij van hetzelfde of soortgelijk
type (Lithium batterij)
Deze markering geeft aan dat dit product niet
mag worden weggegooid met het overige
huisvuil in de gehele EU. Om schade aan het
milieu en de menselijke gezondheid door
ongecontroleerde afvalverwijdering te
voorkomen, moet u op een verantwoorde
manier recyclen en zo duurzaam hergebruik
van grondstoffe n te b evorderen. Breng uw
gebruikte product terug naar een inzamelpunt
of neem contact op met de dealer waar u het
product heeft gekocht. Zij kunnen dit product
aannemen voor milieuvriendelijke recycling.
Netadapter (Alleen voor de EU)
Fabrikant:Shenzhen Mass Power Electronics Limited
Modelnummer: EFF0900150E1BA
Gebruik uitsluitend de netadapter die in de handleiding is vermeld.
1
Page 35

Veiligheidsmaatregelen
Waarschuwing
RISICO VAN ELEKTRISCHE
SCHOK NIET OPENEN
Waarschuwing: Deze dvd-speler maakt gebruik van een
lasersysteem. Gebruik van bediening, aanpassingen, of het
uitvoeren van procedures anders dan die vermeld in deze
handleiding kunnen resulteren in blootstelling aan gevaarlijke
straling.
Waarschuwing: Open de behuizing niet om directe blootstelling
aan de laserstraal te voorkomen. Zichtbare laserstraling
wanneer geopend.
Waarschuwing: Kijk nooit rechtstreeks in de laserstraal.
Let op: Installeer dit product niet in een afgesloten ruimte, zoals
een boekenkast of soortgelijke plek.
Waarschuwing: als het apparaat wordt gebruikt door een kind,
dan moeten ouders ervoor zorgen dat het kind alle inhoud van
de handleiding kent. Het kind moet begrijpen hoe met batterijen
om te gaan om te garanderen dat de batterijen te allen tijde
correct worden gebruikt.
Waarschuwing: als de batterijen oververhitten, uitzetten of
geuren, stop dan het gebruik van batterijen en neem contact op
met het service center voor vervanging.
Waarschuwing: Laad de batterij niet op, op plaatsen met
onvoldoende ventilatie, zoals op een matras, kussen, zachte
map, etc.
Waarschuwing: we zullen geen verantwoordelijkheid
aanvaarden als de gebruiker de batterij onjuist gebruikt en onze
waarschuwingslabel op de batterijbehuizing niet volgt.
Waarschuwing: zorg ervoor dat een eventueel USBverlengsnoer niet langer is dan 250mm bij gebruik van de USBpoort
N
N
Opmerkingen over copyright:
Het is bij wet verboden om auteursrechtelijk beschermd materiaal
zonder toestemming te kopiëren, tonen, uit te zenden, uit te
zenden via kabel, af te spelen in publiek of te verhuren.
Dit product beschikt over een kopieerbeveiligingstechnologie
ontwikkeld door Macrovision. Op sommige disks zijn
kopieerbeschermingssignalen opgenomen. Bij het opnemen en
afspelen van beelden op deze disks zal er beeldruis verschijnen.
Dit product bevat copyrighttechnologie die wordt beschermd door
claims van bepaalde Amerikaanse patenten en andere
intellectuele-eigendomsrechten van Macrovision Corporation en
andere eigenaren van rechten. Gebruik van deze
kopieerbeveiliging technologie moet worden geautoriseerd door
Macrovision Corporation, en is bedoeld voor thuisgebruik en ander
beperkt gebruik, tenzij anders geautoriseerd door Macrovision
Corporation. Reverse engineering of demontage is niet
toegestaan.
SERIENUMMER:
U kunt het serienummer op de achterkant van het apparaat vinden.
Dit nummer is uniek en niet beschikbaar voor anderen. U moet de
benodigde informatie hier invullen en deze handleiding bewaren als
permanent bewijs van uw aanschaf.
Modelnummer ______________________________
Serienummer______________________________
Datum van aanschaf__________________________
charge
strong
impact
over
heat
40 C
2
Page 36

Identificatie bedieningselementen
Hoofdapparaat
180°
SOURCE
VOL- VOL+ MENU
SETUP
1
2
3
6
5
4
7
8
10
9
1. PLAY/ PAUSE
2. STOP
3. SOURCE
4. VOL-
5. VOL+
6. MENU
7.▲/▼/◄/► (omhoog/omlaag/rechts/links)
Selecteer een item in het menu. OK is voor het bevestigen van een
menuselectie.
Tijdens het afspelen van VCD, DVD, indien beschikbaar:
rechts: vooruitspoelen
links: terugspoelen
omhoog: vorige track
omlaag: volgende track
8.ENTER
9.OPEN
10. SETUP
11. SD /M MC
12. USB
13. AV-UIT GA NG
14. Oortelefoonaansluiting
15. COAX
16. AAN/UIT
17. DC-INGANG 9-12V
18. ANT
19. HDMI
11
13
14
18
15 17
16
19
12
3
Page 37

Identificatie bedieningselementen
Afstandsbediening
17
14
5
7
10
12
9
2
1
3
4
6
8
11
13
16
SOUR CE
MUTE
3
10+
/RECA LL
AUDI O
4
7
8
INFO
PBC
/FAV
STEP /
TV/R ADIO
VOL +VOL -
20
26
19
18
21
23
25
24
22
1 2
5
9 0
SUBT ITLE
TITL E
REPEAT
SETU P
PROG RAM
ANGL E
SLOW
/EXI T
ZOOM
6
OK
27
15
1. SOURCE
Selecteer de bron: DVD/CARD/USB.
2. MUTE
Geluid uitschakelen.
3.0-9 NUMERIEKE TOE TS EN
Voor het selecteren van genummerde items in het menu.
4.INFO
Druk op deze toets om de afspeeltijd en statusinformatie weer te
geven.
5.10+ RECALL
Om een track met tracknummer hoger dan 10 te selecteren, druk
eerst op 10+, Bijvoorbeeld; selecteer track 12, druk eerst op 10+,
en daarna op de numerieke toets 2.
6. PBC/FAV
PBC in-/uitschakelen (VCD) .
7. AUDIO
:Druk tijdens het afspelen herhaaldelijk op AUDIO om een
DVD
andere audiotaal of audiotrack te beluisteren indien beschikbaar.
:Druk herhaaldelijk op AUDIO tijdens het afspelen
om een ander audiokanaal te beluisteren (links, rechts, mix,
stereo).
VCDCD
8.PLAY/PAUSE
Druk één keer op PLAY/ PAUSE om het afspelen te pauzeren, druk
nogmaals op PLAY/PAUSE om het afspelen te hervatten.
9.STO P
Wanneer er één keer op deze knop wordt gedrukt, dan stopt het
apparaat met afspelen en wordt het punt waarop gestopt wordt
opgeslagen. Druk daarna op PLAY( ) om het afspelen te
hervatten vanaf het opgeslagen punt. Als er nogmaals op STOP
wordt gedrukt, dan zal het opgeslagen punt worden gewist en kan
de hervatfunctie niet meer worden gebruikt.
10.STEP/TV/RADIO
Speel stap voor stap af in de DVD-modus.
11.VOL+
Instellen volume
12.Vol ge nd e
Ga naar volgende hoofdstuk / track.
13.Vor ig e
Ga naar het begin van het vorige hoofdstuk / track.
14.
Druk op om vooruit te spoelen met de gewenste snelheid (X2>X4->X8->X16->X32->AFSPELEN). Druk op PLAY om het normale
afspelen te hervatten.
4
Page 38

Identificatie bedieningselementen
Afstandsbediening
15.
Druk op om terug te spoelen met de gewenste snelheid (X2->X4-
>X8->X16->X32->AFSPELEN). Druk op PLAY om het normale
afspelen te hervatten.
16.
Apparaat in-/uitschakelen.
17.SEARCH
Gebruik deze toets in DVD-modus om naar een specifieke tijd, titel of
hoofdstuk te gaan.
18.SUBTITLE
Druk herhaaldelijk op SUBTITLE om de ondertiteltaal in te stellen.
19.ANGLE
:Druk op ANGLE om de kijkhoek te veranderen bij DVD’s die
DVD
deze functie ondersteunen.
20.TITLE
Keer terug naar het titelmenu van de DVD.
21.ENTER
Voor het bevestigen van de selectie.
22.SETUP
Het instellingenmenu openen of sluiten.
23.VOL-
Voor het instellen van het volume.
24.REPEAT
Druk tijdens het afspelen op REPEAT om de gewenste herhaalmodus
te selecteren.
: u kunt het herhalen instellen op herhaal hoofdstuk/titel/alle.
DVD
VCDCD
: u kunt het herhalen instellen op herhaal track/alle.
: u kunt een keuze maken uit herhalen in willekeurige
MP3
volgorde/afspelen in willekeurige volgorde/enkele track
afspelen/herhaal één/herhaal map/map afspelen.
25.SLOW
Druk herhaaldelijk op Slow om in slow motion af te spelen met een
van de volgende snelheden: 1/2,1/4,1/8,1/16 en normaal.
26.PROGRAM
DVD VCD
: U kunt met de programmafunctie uw favoriete
tracks opslaan in een programma. Druk op PROGRAM het
programmamenu verschijnt op het scherm. U kunt nu de numerieke
toetsen gebruiken om rechtstreeks titels, hoofdstukken of
tracksnummers in te voeren en de PLAY-optie te selecteren. Druk op
PROGRAM en selecteer de optie voor het wissen van het programma
in het programmamenu om het normale afspelen te hervatten. Druk
nogmaals op PROGRAM om het programmamenu te verlaten. In de
mp3-modus kunt u met deze knop de map-/bestandslijst openen.
27.ZOOM
DVD VCD
:Gebruik ZOOM om het videobeeld te vergroten of
verkleinen.
1.Druk tijdens het afspelen of als het afspelen is gepauzeerd op
ZOOM om de zoomfunctie te gebruiken. Er verschijnt in de
rechteronderhoek van het beeld voor korte tijd een vierkantje.
2. Elke druk op ZOOM verandert het beeld in de volgende volgorde:
JPEG
: Gebruik ZOOM om de afbeelding te vergroten of verkleinen.
1.Druk op 'ZOOM' .
2.Gebruik " " om de afbeelding te vergroten of " " verkleinen.
Gebruik om door het vergrootte of verkleinde beeld te
bewegen.
CD
5
Page 39

Instellingen in instellingenmenu
Pagina algemene instellingen
Druk op SETUP om he t in st el lingenmenu te openen. Gebruik de
navigatietoetsen om het gewenste item te selecteren. Druk
na het voltooien van het instellen nogmaals op SETUP om terug te
gaan naar de normale weergave.
U kunt de volgende menu-items selecteren:
GENERAL: ga naar de pagina met algemene instellingen.
AUDIO: ga naar de pagina met audio-instellingen.
VIDEO: ga naar de pagina met video-instellingen.
PREFERENCE : ga naar de voorkeurspagina.
Pagina algemene instellingen
- - GENERALSETUP PAGE - -
TV DISPLAY WIDE
TFT DISPLAY 16:9
ANGLE MARK ON
OSD LANGUAGE ENG
CLOSED CAPTIONS ON
SCREEN SAVER ON
AUTO STANDBY 3H
GOTO GENERAL SETUP PAGE
TV DISPLAY: selecteer de beeldverhouding van het afspeelbeeld.
4:3 PANS CA N: s el ec te er d eze optie als u een normale TV heeft en
het beeld op volledig scherm wilt bekijken, de zijkanten worden
van het beeld afgesneden om het op het scherm van uw TV te laten
passen.
4:3 LETTERBOX: selecteer deze optie als u een normale TV heeft.
In dit geval wordt het gehele beeld op het scherm getoond, maar er
verschijnen twee zwarte balken aan de boven- en onderkant van
het TV-s ch er m
16:9: breedbeeldweergave.
oFF
3 HOU R
4 HOU R
ON
OFF
ON
OFF
ENGLISH
FRENCH
GERMAN
SPANISH
DUTCH
HUNGARIAN
POLISH
TFT 16:9
TFT 4:3
4:3 PANSCAN
4:3 LETTERBOX
16:9
TFT-DISPLAY
Selecteer de beeldverhouding tijdens het afspelen.
Angle Mark
Toont de huidige instelling van de hoek in de rechterbovenhoek
van het beeld indien beschikbaar op de disc.
OSD Language
Hier kunt u de menutaal instellen.
Closed Captions
Closed captions zijn gegevens die zijn verborgen in het
videosignaal van sommige discs. Zorg er voordat u deze functie
selecteert voor dat de disc closed captions bevat en uw TV deze
functie ook ondersteunt.
Screen Saver
Deze functie wordt gebruikt voor het in-/uitschakelen van de
schermbeveiliging.
Auto Standby
Deze functie wordt gebruikt om het apparaat automatisch naar de
standbymodus te laten schakelen.
Pagina audio-instellingen
Pagina audio-instellingen
-- --
- - - -AUDIO SETUP PAGE
DOWNMINX
DIGITAL OUTPUT
DOLBY DIGITAL
GO TO AUDIO SETUP PAGE
6
STR
RAW
DUAL MONO
DYNAMIC
SPDIF/OFF
STR
STR
L-MONO
R-MONO
FULL
-
-
-
-
-
-
-
-
-
-
MIX-MONO
-
-
-
-
-
-
-
-
OFF
-
SPDIF/RAW
SPDIF/PCM
LT/RT
STEREO
Page 40

Instellingen in instellingenmenu
Pagina algemene instellingen
Downmix
Met deze optie kunt u het signaal uit de analoge stereo-uitgang van
uw DVD-speler instellen.
LT/R T : Se le ct ee r de ze o pt ie a ls u w DV D- sp eler is aangesloten
op een Dolby Pro Logic decoder.
Stereo : Selecteer deze optie om alleen de twee luidsprekers op
de voorkant te gebruiken voor geluidsweergave.
Digital Output
Deze functie wordt gebruikt om de SPDIF-uitvoer te selecteren:
SPDIF Off ,S PD IF /R AW,SPDIF/PCM.
SPDIF Off: Schakelt de SPDIF-uitvoer uit.
SPDIF/RAW: G eb ru ik d ez e op ti e als u uw DIGITALE AUDIO
UITGANG heeft aangesloten op een multi-channel
decoder/ontvanger.
SPDIF/PCM: Gebruik deze optie alleen als uw ontvanger niet in
staat is om multi-channel audio te decoderen.
Dolby digital
U kunt Dolby digital instellen op: 'Dual Mono' of 'Dynamic'.
Dual Mono
Stereo: Het linker monogeluid wordt naar de linker luidspreker
gestuurd en het rechter monogeluid wordt naar de rechter
luidspreker gestuurd.
L-Mono: Het linker monogeluid wordt naar de linker en rechter
luidspreker gestuurd.
R-Mono: Het rechter monogeluid wordt naar de linker en rechter
luidspreker gestuurd.
Mix-Mono: Een mix van het linker en rechter monogeluid wordt
naar de linker en rechter luidspreker gestuurd.
Dynamic
Compressie dynamisch bereik.
Pagina video-instellingen
Pagina video-instellingen
- - VIDEO SETUP PAGE - -
SHARPNESS MID
BRIGHTNESS 00
CONTRAST 00
HUE 00
SATURATION 00
GOTO VIDEO SETUP PAGE
HIGH
MEDIUM
LOW
Scherpte, helderheid, contrast, tint, verzadiging: instellen van de
videokwaliteit.
Voorkeurspagina
Voorkeurspagina
- - PREFERENCE SETUP PAGE - -
TV TYPE PAL
AUDIO ENG
SUBTITLE ENG
DISC MENU ENG
DEFAULT
GOTO PREFERENCE PAGE
TV Typ e
Selecteer het kleurensysteem van uw TV. Deze DVD-speler is
compatibel met zowel NTSC als PAL.
RESET
ENGLISH
FRENCH
GERMAN
SPANISH
DUTCH
POLISH
HUNGARIAN
OTHERS
ENGLISH
FRENCH
GERMAN
SPANISH
DUTCH
POLISH
HUNGARIAN
OFF
OTHERS
ENGLISH
FRENCH
GERMAN
SPANISH
DUTCH
POLISH
HUNGARIAN
OTHERS
PAL
AUTO
NTSC
7
Page 41

Instellingen in instellingenmenu
Pagina algemene instellingen
PAL - Selecteer deze optie als de aangesloten TV een PAL-
kleurensysteem heeft. Dit zal het videosignaal van een NTSC-disc
omzetten en als PAL- fo rm aa t na ar de TV sturen.
NTSC- Selecteer deze optie als de aangesloten TV een NTSCkleurensysteem heeft. Dit zal het videosignaal van een PAL-disc
omzetten en als NTSC-formaat naar de TV sturen.
Auto:Chang Verander het videosignaal automatisch aan de hand van het
formaat op de gebruikte disc.
Audio: Selecteer een audiotaal (indien beschikbaar).
Subtitle: Selecteer een ondertiteltaal (indien beschikbaar).
Disc Menu: Selecteer een menutaal voor de disc (indien beschikbaar).
Parameters en specificaties
Elektronische parameters
Item
Voeding
Stroomverbruik
Bedrijfsvochtigheid
VIDEO OUT
AUDIO OUT
Uitvoer
Audio
Systeem
Laser
Signaalsysteem
Frequentierespons
Signaal-ruisverhouding
Dynamisch bereik
: AC 100-240 V , 50/60 Hz
: <10W
: 5 % tot 90 %
:1.4 Vrms (1 KHz, 0 dB)
: Luidspreker: 1W x 2, hoofdtelefoonuitgang
:Semiconductor laser, golflengte 650 nm
: NTSC / PAL
: 20Hz tot 20 kHz(1dB)
:Meer dan 80 dB (ANALOGE UITGANGEN)
:Meer dan 85 dB (DVD/CD)
Standaardeis
Parameters van batterij
Specificaties batterij:
Uitvoer:7.4V
Oplaad- / ontlaadtijd:
Standaard oplaadtijd: 3u ~ 4u
Opberg- en werkomstandigheden
1. Opbergomstandigheden Temperatuur Vochtigheid
6 maanden -20°C ~ +45°C 65±20%
1 week -20°C ~ +65°C 65±20%
2.Wer ko ms ta nd ig heden Temperatuur Vochtigheid
Standaard opladen 0°C ~ +45°C 65±20%
Standaard ontladen -20°C ~ +65°C 65±20%
Opladen batterij
Sluit de DVD-speler aan op de meegeleverde netadapter, de
LED-indicator licht ROOD op tijdens het opladen van de batterij en
wordt groen als de batterij volledig is opgeladen. De LED is UIT als
de batterij geen stroom heeft.
Opmerking: Ontwerp en specificaties zijn onderhevig aan
N
verandering zonder voorafgaande berichtgeving.
8
Page 42

Het apparaat voor het eerst gebruiken
Schakel de TV, nadat alle aansluitingen juist zijn gemaakt, in en
zorg ervoor dat de ontvanger is aangesloten op het lichtnet. Druk
op de AAN/UIT-knop om de ontvanger in te schakelen. Als u de
ontvanger voor het eerst gebruikt of de fabrieksinstellingen heeft
hersteld, dan zal het hoofdmenu op uw TV-scherm verschijnen.
Installation Guide
OSD Language English
Country Germany
Channel Search
Exit
(1) Selecteer [OSD Language] en druk op de toets RECHTS/LINKS
om een menutaal te selecteren.
(2) Selecteer [Country] en druk op de toets RECHTS/LINKS om het
land waar u verblijft te selecteren.
(3) Selecteer [Channel Search] en druk op de toets RECHTS of OK
om automatisch naar zenders te zoeken.
(4) Zodra het zoeken naar zenders is voltooid kunt u beginnen met
TV kijken
OK
ConfirmExit
Basisbediening
Het zenderbeheermenu
Druk om het menu te openen op MENU en selecteer [Program]. Het
Menu biedt opties om de zenders te beheren. Selecteer een optie
en druk op OK of RECHTS om de instelling aan te passen.
Druk op EXIT om h et m en u te v er la te n.
Program
Program Edit
Sort By LCN
LCN On
Exit
OK
ConfirmReturn
Zender bewerken
Voor het bewerken van uw zendervoorkeuren (vergrendelen,
overslaan, favorieten, verplaatsen of verwijderen) moet u het
menu “Program Edit” openen. Het openen van dit menu vereist een
wachtwoord. Voor het standaardwachtwoord '000000' in.
Program Edit
ALL TV
003 ITV1
004 Channel 4
006 ITV2
010 ITV3
013 More 4
014 E4
030 ITV4
037 Quiz Call
LockMove
21:00-22:30 Secret Smile
22:30-22:50 ITV News
GOTO
FAV
DeleteSkip RenameFAV
9
Page 43

Het apparaat voor het eerst gebruiken
Uw favoriete zenders instellen
U kunt een lijst met favoriete zenders maken die u eenvoudig kunt
openen.Favoriete TV- of radiozenders instellen:
1.Selecteer de gewenste zender en druk daarna op FAVOURITE.
Er zal een hartvormig symbool verschijnen en de zender is
toegevoegd als favoriete zender.
2.Herhaal de voorgaande stap om meerdere favoriete zenders te
selecteren.
3.Druk op EXIT om d e in st el lingen te bevestigen en het menu te
verlaten.
Favoriete TV- of radiozenders verwijderen:
Druk op FAV op de a fs ta nd sb ediening om zenders met een
hartvormig symbool niet langer als favoriet te markeren.
Favoriete zenders bekijken.
1.Druk op Fav, het f av or ie te nm enu verschijnt.
2.Druk op OMHOOG/OMLAAG om uw favoriete zender te selecteren.
3.Druk op OK om het selecteren van de zender te bevestigen.
Een TV- of radiozender verwijderen
1.Selecteer de zender en druk daarna op de BLAUWE toets.
Er verschijnt een melding. Druk op OK om de zender te verwijderen.
2.Herhaal de voorgaande stap voor het verwijderen van meerdere
zenders.
Een TV- of radiozender overslaan
1.Selecteer de zender die u wilt overslaan en druk op de GROENE
toets. Er wordt een overslaan-symbool getoond. De zender wordt nu
overgeslagen.
2.Herhaal de voorgaande stap om meerdere zenders te selecteren.
3.Druk op EXIT om d e in st el lingen op te slaan en het menu te
verlaten.
Het overslaan van een TV- of radiozender uitschakelen:
Druk op de GROENE toets om het overslaan van zenders met een
overslaan-symbool uit te schakelen.
Een TV- of radiozender verplaatsen
1. Selecteer de gewenste zender en druk daarna op de RODE
toets. Er verschijnt een verplaatssymbool.
2. Druk op OMHOOG/OMLAAG om de zender te verplaatsen.
3. Druk ter bevestiging op OK.
4. Herhaal de bovenstaande stappen om meerdere zenders te
verplaatsen.
Een zender vergrendelen
U kunt zenders vergrendelen zodat deze alleen na het invoeren
van een wachtwoord bekeken kunnen worden.
Het vergrendelen van een TV- of radiozender:
1. Selecteer de gewenste zender en druk daarna op de GELE
toets. Er verschijnt een slotje. De zender is nu vergrendeld.
2. Herhaal de voorgaande stap om meerdere zenders te
selecteren.
3. Druk op EXIT om de i ns te ll ingen te bevestigen en het menu te
verlaten.
4. Druk op de GELE toets om vergrendelde zenders te
ontgrendelen.
5. Als u vergrendelde zenders wilt bekijken, dan moet u het
standaard.
10
Page 44

Het apparaat voor het eerst gebruiken
Sorteren
Sorteer uw zenders met een van de volgende opties:
[LCN] – Sorteer de zenders in oplopende volgorde
[Name] – Sorteer de zenders in alfabetische volgorde
[Service ID] – Sorteer de zenders op basis van de zender
LCN (Logisch kanaalnummer)
Schakel LCN in of uit.
Resolution (Resolutie)
Als het beeld niet correct wordt getoond, verander dan deze
instelling. Deze instelling komt overeen met de meest gebruikte
instellingen voor HDMI.
[576i] voor PAL- TV ’s.
[576P]: voor PAL -T V’s.
[720P]: voor NTSC- of PAL- TV ’s.
[1080I]: voor NTSC- of PAL -T V’s.
Video-instellingen
Druk om het menu te openen op MENU en selecteer daarna [Picture].
Dit menu biedt opties voor het instellingen van de video-instellingen.
Druk op OMHOOG/OMLAAG om een optie te selecteren en druk
daarna op RECHTS/LINKS om de gekozen optie in te stellen.
Druk op EXIT om h et m en u te v er la te n.
Picture
HDMI Aspect Ratio 16:9 Wide Screen
HDMI Resolution 1080i
TV Format PAL
EXIT
Aspect Ratio (Beeldverhouding)
U kunt de beeldverhouding instellen op 4:3 PanScan, 4:3 Letter
Box, 16:9 Full Screen of Auto om video optimaal te tonen tijdens
het TV ki jk en .
OK
ConfirmReturn
TV format (TV-formaat)
Als het beeld niet correct verschijnt, dan moet u deze instelling
veranderen.
De instelling moet overeenkomen met de meest gebruikte
instelling voor TV’s in uw land.
[NTSC]: voor NTSC-TV’s.
[PAL ]: v oo r PAL-TV’s.
Zenders zoeken
Druk om het menu te openen op MENU en selecteer daarna
[Search Channel]. Dit menu biedt opties voor zoeken naar zenders.
Druk op OMHOOG/OMLAAG om een optie te selecteren en druk
daarna op RECHTS/LINKS om de gekozen optie in te stellen.
Druk op EXIT om h et m en u te v er la te n.
Channel Search
Auto Search
Manual Search
Country Germany
EXIT
OK
ConfirmReturn
11
Page 45

Het apparaat voor het eerst gebruiken
Automatisch zoeken
Deze optie zoekt en installeert zelf alle zenders. De optie
overschrijft alle eerder ingestelde zenders.
1. Selecteer [Auto Search] en druk op OK of RECHTS om het
zoeken naar zenders te starten.
2. Druk om het zoeken naar zenders te annuleren op EXIT.
2. Druk op RECHTS/LINKS om de zenderfrequentie te selecteren.
3. Druk op OK om het zoeken naar zenders te starten.
Als er een zender wordt gevonden, dan wordt deze opgeslagen en
toegevoegd aan de zenderlijst.
Als er geen zenders worden gevonden, verlaat dan het menu.
Land
Ga naar de optie [Country] en selecteer het land waar u verblijft.
Tijdinstellingen
Channel Search
506.0MHz/8MHZ
DTV:009 Radio: 000
001 ITV1
002 ITV2
003 ITV3
004 ITV News
005 Channel 4
006 Quiz Call
007 E4
008 More 4
009 ITV4
Progress
EXIT
Handmatig zoeken
Met deze optie kunt u handmatig naar nieuwe zenders zoeken. De
optie voegt zenders toe aan de zenderlijst zonder de huidige
zenders te verwijderen.
1. Selecteer [Manual Search] en druk daarna op OK of RECHTS.
Het scherm voor het zoeken naar zenders verschijnt.
MENU
SkipExit
Manual Search
Frequency channel 5
Frequency(MHZ) 177.5
Bandwidth: 7M
Quality
EXIT
EXIT
OK
Confirm
Druk op MENU om het menu te openen en selecteer daarna [Time].
Het menu biedt opties voor het instellen van de tijdinstellingen.
Druk op OMHOOG/OMLAAG om een optie te selecteren en druk
daarna op RECHTS/LINKS om deze optie in te stellen. Druk op
EXIT om h et m en u te v er la te n.
Time
Time Offset Auto
Country Region Berlin
Time Zore GMT +1
EXIT
Tim e of fs et ( Tijdsverschil)
Selecteer automatisch of handmatig voor het instellen van het
verschil met GMT.
Land regio
Het land en de regio worden automatisch ingesteld als u het land
instelt in het menu voor het zoeken van kanalen.
Tim e Zo ne ( Tijdzone)
Selecteer de juiste tijdzone wanneer [Time Offset] is ingesteld op
“Manual”.
OK
ConfirmReturn
12
Page 46

Het apparaat voor het eerst gebruiken
Opties
Druk op MENU op het menu te openen en selecteer daarna [Option]. Dit
menu biedt opties voor het instellen van de menutaal, de ondertiteltaal en
de audiotaal.
Selecteer een optie en druk op RECHTS/LINKS om de optie aan te
passen.
Druk op EXIT om h et m en u te v er la te n.
Option
OSD Language English
Subtitle Language Off
Audio Language English
Digital Audio PCM
EXIT
OSD Language (Menutaal)
Selecteer een menutaal.
Audio Language (Audiotaal)
Selecteer de gewenste audiotaal voor het kijken naar TV-zenders.
Als de taal niet beschikbaar is, dan zal de standaardtaal voor de
zender worden gebruikt.
Subtitle Language (Ondertiteltaal)
Selecteer de gewenste ondertiteltaal.
Systeeminstellingen
Druk op MENU om het menu te openen en selecteer daarna
[System].Het menu biedt opties voor het instellen van de
systeeminstellingen.
Druk op OMHOOG/OMLAAG om een optie te selecteren en daarna
op RECHTS/LINKS om de waarde van de optie aan te passen.
Druk op EXIT om h et m en u te v er la ten.
OK
ConfirmReturn
Set Password
System
Restore Factory Default
Information
Software update
EXIT
Set Password (Wachtwoord instellen)
Voor het instellen of veranderen van het wachtwoord voor
vergrendelde zenders. Voer uw oude wachtwoord of het
standaardwachtwoord “000000” in. U wordt daarna gevraagd om
uw nieuwe wachtwoord in te voeren. Voer uw nieuwe wachtwoord
ter bevestiging opnieuw in. Zodra dit is bevestigd, druk op EXIT
om het menu te verlaten.
Restore Factory Default (Fabrieksinstellingen herstellen)
Reset uw TV n aa r de s ta nd aard fabrieksinstellingen.
In het hoofdmenu, selecteer [Restore Factory Default] en druk op
OK of RECHTS om de optie te selecteren. Voer uw wachtwoord of
het standaardwachtwoord “000000” in en druk ter bevestiging op
OK. Deze optie zal alle zenders en instellingen verwijderen.
Information (Informatie)
Bekijk het model en informatie over de hardware- en
softwareversie.
Software update (Software-update)
Software update
OK
ConfirmReturn
13
Page 47

Het apparaat voor het eerst gebruiken
PROBLEMEN OPLOSSEN
USB
Druk op Menu om het menu te openen en selecteer daarna USB.
USB
Multimedia
Photo Configure
Movie Configure
EXIT
OK
ConfirmReturn
Multi-Media
Schakel naar de USB-modus en steek uw USB-apparaat in de USB-poort
om bestanden te bekijken.
Technische specificaties
Item
Sub-item
Invoerfrequentie
Tuner
RF-invoerniveau
IF-bandbreedte
Modulatie
Decodeerformaat
Video
Uitvoerformaat
Uitvoerpoort
Parameter
170~230MHz
470~860MHz
-25~-82dBm
7MHz en 8MHz
QPSK,16QAM,64QAM
MPEG4 AVC/H.264 HP@L4
MPEG2 MP@ML.HL
576P , 720P, 1080i, 4:3 and 16:9
HDMI
Probleem
Mogelijke oorzaken
Geen beeld
Beeld toont:
No signal
Geen geluid uit
luidspreker
Alleen geluid,
beeld op het scherm
De
afstandsbediening
werkt niet
Het beeld stopt
plotseling
of u ziet mozaïek.
Geen stroom
Het apparaat is niet
ingeschakeld
De DVB-T kabel is
niet aangesloten
Instellingen onjuist
Audiokabel niet of
onjuist aangesloten
Het geluid is uitgeschakeld
Onjuiste track
Geen of onjuiste
aansluiting met AV-kabel
De zender is een
radiozender
De batterij is leeg
De afstandsbediening
wordt niet onder juiste
hoek van het voorpaneel
of te ver van het
apparaat af gebruikt
Het signaal is te zwak
Wat te doen
Sluit de netadapter aan
Zet het apparaat aan
Sluit de DVB-T kabel aan
Stel de juiste parameters in
Sluit de audiokabel
goed aan
Schakel het geluid in met
behulp van de
volumeregeling
Probeer een andere
track af te spelen
Sluit de audiokabel goed aan
Druk op de toets TV/RADIO
om naar de TV-modus te
schakelen
Installeer een
nieuwe batterij
Zorg ervoor dat u de
afstandsbediening onder
een juiste hoek en in de
buurt van het voorpaneel
gebruikt
Versterk het signaal
14
Page 48

Service en ondersteuning
Voor informatie: www.lenco.com
Lenco biedt service en garantie aan overeenkomstig met de Europese
wetgeving. Dit houdt in dat in het geval van reparaties (zowel tijdens
en na de garantieperiode), u uw lokale handelaar moet contacteren.
Belangrijke opmerking: Het is niet mogelijk om producten die
gerepareerd moeten worden direct naar Lenco te sturen.
Belangrijke opmerking:
De garantie verloopt als een onofficieel servicecenter het apparaat op
wat voor manier dan ook heeft geopend, of er toegang toe heeft
gekregen.
Het apparaat is niet geschikt voor professioneel gebruik. In het geval
van professioneel gebruik worden alle garantieverplichtingen van de
fabrikant nietig verklaard.
Producten met een CE keurmerk houden zich aan de
EMC richtlijn (2004/108/EC) en de Richtlijn voor
Lage Voltage (2006/95/EC) uitgegeven door de
Europese Commissie.
De verklaring van overeenstemming kan worden
geraadpleegd op
https://lencosupport.zendesk.com/forums/22413161
-CE-Documents
Dit symbool geeft aan dat het betreffende elektrische
product of de batterij niet moet worden verwijderd als
algemeen huishoudelijk afval in Europa. Zorg voor
een juiste afvalverwerking door het product en de
batterij in overeenstemming met alle van toepassing
zijnde lokale wetten voor het verwijderen van
elektrische apparatuur of batterijen te verwijderen.
Als u dit doet, helpt u de natuurlijke hulpbronnen te
behouden en de standaard van milieubescherming te
verbeteren bij de behandeling en verwijdering van
elektrisch afval (Afgedankte Elektrische en
Elektronische Apparatuur).
®Alle rechten voorbehouden
15
Page 49

PHDVT-12309C MTK-1389Q+MASTAR7801方案 前屏无按键 二合一 模拟屏 低成本 ERP2 ENGLISH MANUAL
MANUEL DE L’UTILISATEUR
DVP-9412
WWW.LENCO.COM
DVD PORTABLE
Avant de connecter, utiliser ou régler ce produit, veuillez lire ce manuel de
l’utilisateur soigneusement et jusqu'au bout.
Page 50

Consignes de sécurité importantes
Attention : Pour réduire les risques d'électrocution, ne retirez
pas le couvercle (ou panneau arrière) de l’unité. Aucune pièce à
l'intérieur n'est réparable par l’utilisateur. Confiez toute
réparation à du personnel spécialisé seulement.
Attention : Afin de prévenir tout risque d'incendie ou
d'électrocution, n'exposez pas cet appareil à la pluie ou à
l’humidité.
L’adaptateur de courant et le lecteur DVD portable ne doivent
pas être exposés aux égouttements et éclaboussures et aucun
objet rempli de liquide, tel qu’un vase, ne doit être posé sur
l’unité.
N’exposez pas le lecteur DVD portable au soleil et aux sources
de chaleur (telles qu’un radiateur ou une poêle).
N’obstruez pas les ouvertures d’aération. Les orifices du lecteur
DVD permettent la ventilation de l’unité. Les ouvertures ne
doivent pas être bloquées en installant le lecteur DVD portable
sur un coussin, canapé ou autres surfaces similaires.
N’installez pas le lecteur DVD portable sur un chariot, une table,
trépied ou support instable. L’unité peut subir une chute,
s’endommager ou blesser quelqu’un.
Ne posez aucun objet tranchant ou lourd sur le boîtier de l'unité
ou son écran LCD.
Utilisez seulement l’adaptateur de courant CA livré avec le
lecteur DVD portable. Utiliser un autre adaptateur de courant
annulera votre garantie.
Utilisez l’adaptateur de courant CA pour mettre l’unité hors
tension, celui-ci doit être rapidement accessible.
Débranchez l’appareil du secteur lorsque vous ne l’utilisez pas.
Votre attention devrait se porter sur l’aspect écologique de
l’élimination des piles.
ATTE NT IO N : Un d an ge r d’ ex pl os ion est présent lorsque les
piles sont remplacées de manière incorrecte. Remplacez
seulement les piles des piles de type identique ou équivalent.
AVERTISSEMENT : Les piles (batterie ou piles) ne doivent pas
être exposées à une chaleur excessive telle que les rayons de
soleil, flammes ou autre source de chaleur similaire.
AVERTISSEMENT : Une pression sonore excessive et
continue provenant d’une paire d’écouteurs ou d’un casque
d’écoute peut entraîner la perte de l’ouïe.
AVERTISSEMENT : Utilisez seulement des
pièces/accessoires recommandés par le fabricant, le lecteur
DVD portable est livré avec un adaptateur de courant CA,
l’adaptateur de courant CA permet de mettre l’unité hors
tension et doit donc rester facilement accessible en cours
d’utilisation.
Attention : Toute b at te ri e installée de manière incorrecte
présente un risque d’explosion, remplacez seulement la
batterie par une batterie de modèle identique (batterie
Lithium)
Ce symbole indique que ce produit ne doit pas
être déposé avec vos déchets ménagers au
sein de l’UE. Afin de prévenir toute nuisance
possible à l’environnement et la santé humaine
causée par des dispositions de déchets
incontrôlées, recyclez l’unité afin d’assurer la
promotion de la réutilisation de ressources
matérielles. Pour mettre au rebut votre unité,
déposez celle-ci dans un point de collecte ou
contactez votre revendeur. Ceux-ci peuvent
procéder au recyclage du produit en toute
sécurité
Adaptateur d'alimentation(Pour l’union européenne uniquement)
Fabricant:Shenzhen Mass Power Electronics Limited
Numéro de modèle:EFF0900150E1BA
N'utilisez que l'alimentation listée dans les instructions d'utilisation
1
Page 51

Consignes de sécurité
ATTENTION
RISQUE D'ELECTROCHOCNE
PAS OUVRIR
Attention : Ce lecteur de disques vidéo numérique emploie un
émetteur laser. L’utilisation de commandes ou d’optimisations
autres que celles spécifiées dans ce manuel peut causer une
dangereuse exposition aux radiations.
Attention : Afin de prévenir toute exposition au rayon laser,
n’ouvrez pas le boîtier de l’unité. Une radiation laser invisible
est émise lorsque le boîtier est ouvert.
Attention : Ne regardez pas le rayon laser.
Attention : N'installez pas cet équipement dans un espace
confiné tel qu'une bibliothèque ou endroit similaire.
Attention : Lorsque cette unité est utilisée par un enfant, les
parents doivent s’assurer de préalablement expliquer le mode
opératoire de la batterie à l’enfant afin de garantir une
utilisation appropriée de celle-ci.
Attention : Lorsque la batterie surchauffe, émet une odeur ou
une fumée étrange, cessez toute utilisation de la batterie puis
contactez notre centre d’assistance client pour obtenir une
batterie de rechange.
Attention : Lors de la charge de la batterie, ne posez pas celleci dans les endroits suivants : matelas, canapé, coussin , tapis
épais......
Attention : Nous ne serons en aucun cas tenus responsables de
toute utilisation inappropriée de la batterie ou du non-respect
des instructions apposées sur la batterie.
Ave rt is se me nt : L’utilisation d’un câble de raccord USB de plus
de 250mm est interdite avec le port USB.
N
N
Remarques liées aux copyrights :
Toute copie, diff us ion, affichage, diffusion par câble, lecture en
public ou location de contenu protégé par copyright est interdit
sans avoir obtenu la permission préalable du détenteur.
Ce produit intègre un dispositif de protection contre la copie
développé par Macrovision. Ces signaux de protection sont
enregistrés sur les disques. Des parasites peuvent être présents
lors de l’enregistrement et de la lecture de ces disques. Ce produit
intègre une technologie de protection des droits d'auteur qui est
protégée par des documents de méthode de certains brevets
américains et d'autres droits de propriété intellectuelle détenus
par Macrovision Corporation ainsi que par d'autres détenteurs de
droits. L'utilisation de cette technologie de protection des droits
d'auteur est soumise à l'autorisation de Macrovision ; elle est
destinée exclusivement à une utilisation domestique et à des
opérations limitées de visualisation. L’ingénierie inverse et le
désassemblage sont interdits.
NUMÉRO DE SÉRIE :
Vous pouvez trouver le numéro de série à l’arrière de l’appareil. Ce
numéro est unique et n'est pas disponible pour les autres. Nous vous
conseillons de noter les informations requises ici et de garder ce
guide comme une preuve permanente de votre achat.
Modèle numéro : ______________________________
Numéro de série ______________________________
Date d’achat __________________________
charge
strong
impact
over
heat
40 C
2
Page 52

Identifications des commandes
Unité principale
180°
SOURCE
VOL- VOL+ MENU
SETUP
1
2
3
6
5
4
7
8
10
9
1. LECTURE/PAU SE
2. ARRÊT
3. SOURCE
4. VOL-
5. VOL+
6. MENU
7.▲/▼/◄/► (haut/bas/gauche/droite)
Choisir un élément dans le menu. La touche OK confirme la
sélection du menu.
Lors de la lecture, VCD,DVD, si disponible :
Droite : Ava nc e ra pi de
Gauche : retour rapide
Haut : piste précédente
Bas : piste suivante
8. ENTRÉE
9.OUVRIR
10. RÉGLAGE
11. SD /M MC
12. USB
13. Sortie AV
14. Prise casque
15. COAXIAL
16. M/A
17. DC IN 9-12V
18. ANTENNE
19. HDMI
11
13
14
18
15 17
16
19
12
3
Page 53

Identifications des commandes
Télécommande
16
SOUR CE
MUTE
3
10+
/RECA LL
AUDI O
4
7
8
INFO
PBC
/FAV
STEP /
TV/R ADIO
VOL +VOL -
20
26
19
18
21
23
25
24
22
1 2
5
9 0
SUBT ITLE
TITL E
REPEAT
SETU P
PROG RAM
ANGL E
SLOW
/EXI T
ZOOM
6
OK
27
15
1. SOURCE
DVD/CARTE /U SB .
2. MUET
Désactive la sortie audio.
3. BOUTON S NU MÉ RI QU ES 0 -9
Sélectionne les éléments numérotés dans un menu.
4. INFO
Pour affi ch er l e te mp s de l ecture et les informations de statut.
5. RAPPELER 10+
Permet de sauter de 10 pistes en avant ou en arrière, appuyez
d'abord sur 10+, par exemple: choisissez la piste 12,
commencez par appuyer sur 10+, et appuyez sur la touche 2.
17
5
7
10
12
14
9
3
11
6. PBC/FAV
Interrupteur PBC m/a (VCD).
7. AUDIO
Appuyez sur AUDIO à plusieurs reprises durant la lecture
DVD
2
1
4
6
8
13
pour changer de langage audio ou de piste audio si disponible.
Appuyez sur AUDIO à plusieurs reprises pendant la
lecture pour écouter une chaine diffé rente (Gauche, droite,
mélange, stéréo).
VCDCD
8. LECTURE/PAU SE
Appuyez sur LECTURE/PAUS E un e fois pour mettre la lecture en
pause, appuyez de nouveau pour reprendre la lecture.
9. STOP
Lorsque vous appuyez sur cette touche, l'unité enregistre le point
d'arrêt, et reprend la lecture depuis ce point lorsque vous appuyez
sur Lecture ( ). Mais si vous appuyez sur la touche STOP au lieu
de Lecture ( ) , il n'y aura pas de fonction de récupération de
lecture.
10.STEP/TV/RADIO
Arrête le mouvement en mode DVD
11.VOLUME+
Réglage du volume
12. Saut avant
Aller au chapitre/ à la piste suivante.
13. Retour
Aller au début du chapitre / de la piste précédente.
14. TOU CH E
Appuyez sur la touche pour avancer rapidement avec 5
vitesses (X2->X4->X8->X16->X32->Lecture), appuyez sur la
touche Lecture pour retourner à la lecture normale.
4
Page 54

Identifications des commandes
Télécommande
15. TOU CH E
Appuyez sur la touche pour reculer rapidement avec 5 vitesses
(X2->X4->X8->X16->X32->Lecture), appuyez sur la touche Lecture
pour retourner à la lecture normale.
16.
Allume/éteint l’appareil
17. RECHERCHE
Aller a un moment précis, un titre ou un chapitre que vous désirez en
mode DVD.
18. SOUS-TITRE
Appuyez sur SOUS-TITRE à plusieurs reprises durant la lecture pour
changer le langage des sous-titres.
19.ANGLE
DVD
:Appuyez sur ANGLE pour changer l’angle de vue, sur les DVD
qui prennent en charge cette fonction.
20. TITRE
Retourne au menu titre du DVD.
21. ENTRÉE
Confirme la sélection dans un menu
22. PARA MÈ TR ES ( SE TU P)
Accède ou sort du menu de paramètres.
23.VOL : ré gl ag e du v ol ume
volume.
24. RÉPÉTER
Appuyez sur RÉPÉTER durant la lecture pour choisir le mode de
répétition de votre choix.
DVD
: vous pouvez choisir la répétition du chapitre/titre/tous
VCD
CD
vous pouvez choisir la répétition de la piste/tous
MP3
: vous pouvez choisir de répéter
aléatoire/hasard/unique/répéter un/ répéter dossier/dossier.
:
25. LENT
Appuyez sur la touche Lent à plusieurs reprises pour entrer dans la
lecture ralentie et et circuler entre les différentes vitesses. Les
vitesses sont 1/2,1/4,1/8,1/16,et normal.
26. PROGRAMME
: La fonction programme vous permet de mettre
DVD VCD
en mémoire vos pistes favorites sur le disque. Appuyez sur le bouton
PROGRAMME, puis le MENU PROGRAMME apparaitra sur l’écran,
vous pouvez à présent utiliser les touches numériques pour entrer
directement les titres, chapitres ou numéro de piste et choisir l’option
LECTURE. Pour reprendre la lecture normale, appuyez sur
PROGRAMME et sélectionnez l’option Effacer le programme dans le
menu de programmation, appuyez sur Programme de nouveau pour
quitter le menu du programme, Mp3 a une liste de fonction
dossier/fichier.
27.ZOOM
DVD VCD
: Utilisez ZOOM pour agrandir ou rétrécir l'image
vidéo.
1. Appuyez sur ZOOM pendant la lecture ou en pause pour activer la
fonction d'agrandissement. Un cadre carré apparait rapidement dans
le coin inférieur droit de l'image.
2. Chaque pression sur la touche ZOOM changera l'écran du
téléviseur dans l'ordre suivant :
JPEG
: Utilisez ZOOM pour agrandir ou rétrécir l'image vidéo.
1.Appuyez sur 'ZOOM'
2.Utilisez pour agrandir ou pour rétrécir l'image.
Utilisez la touche pour vous déplacer dans l'image
agrandie.
CD
5
Page 55

Réglage du Menu PARAMÈTRES
Page de paramètres généraux
Appuyez sur le bouton PARA MÈTRES pour aller au menu de
paramétrage. Utilisez les boutons directionnels pour
sélectionner les éléments de votre choix. Après avoir fini le réglage,
appuyez de nouveau sur PARAMÈTRES pour revenir à l’affichage
normal.
Les éléments de menu suivant peuvent être changés :
GÉNÉRAL : Sélectionne la page du menu général.
AUDIO: Sélectionne la page du menu audio.
VIDÉO : Sélectionne la page du menu vidéo.
PREFERENCE: Sélectionne la page du menu de préférence.
Page de paramètres généraux
- - GENERALSETUP PAGE - -
TV DISPLAY WIDE
TFT DISPLAY 16:9
ANGLE MARK ON
OSD LANGUAGE ENG
CLOSED CAPTIONS ON
SCREEN SAVER ON
AUTO STANDBY 3H
GOTO GENERAL SETUP PAGE
Affichage TV : Sélectionne le ratio d’aspect de l’image en cours
de lecture.
4:3 PANS CA N: S i vo us a ve z un t él éviseur normal et que vous
voulez réduire chaque coté de l’image ou la formater pour rentrer
dans votre écran TV.
4:3 LETTERBOX: Si vous avez un téléviseur normal Dans ce cas,
une image large avec des bandes noires dans les portions
supérieures et inférieures de l’écran TV s’affichera.
oFF
3 HOU R
4 HOU R
ON
OFF
ON
OFF
ENGLISH
FRENCH
GERMAN
SPANISH
DUTCH
HUNGARIAN
POLISH
TFT 16:9
TFT 4:3
4:3 PANSCAN
4:3 LETTERBOX
16:9
ECRAN TFT
Sélectionne le ratio d’aspect de l’image en cours de lecture.
Marque d’angle
Aff ic he l 'i nf or ma ti on de réglage de l'angle en cours dans le coin
droit de l'écran TF T si disponible sur le disque.
Langage de l’OSD
Vous pouvez choisir de configurer votre langue préférée.
Sous-titrage fermés
Les sous-titres fermés sont les données cachées dans le signal
vidéo de certains disques. Avant de choisir cette fonction, veuillez
vous assurer que le disque contient des informations de soustitres fermées et que votre téléviseur a également cette fonction.
Économiseur d’écran
Cette fonction sert à activer ou désactiver l’économiseur d’écran.
Mise en veille automatique
Cette fonction sert à la mise en veille.
Page de paramètres audio
Page de paramètres audio
-- --
- - - -AUDIO SETUP PAGE
DOWNMINX
DIGITAL OUTPUT
DOLBY DIGITAL
GO TO AUDIO SETUP PAGE
STR
RAW
DUAL MONO
DYNAMIC
SPDIF/OFF
STR
STR
L-MONO
R-MONO
FULL
-
-
-
-
-
-
-
-
-
-
MIX-MONO
-
-
-
-
-
-
-
-
OFF
-
SPDIF/RAW
SPDIF/PCM
LT/RT
STEREO
16:9 : Mode écran large
6
Page 56

Réglage du Menu PARAMÈTRES
Page de paramètres généraux
Downmix
Cette option vous permet de régler la sortie analogique stéréo de
votre lecteur DVD.
LT/R T :C ho is is se z ce tt e op ti on s i vo tr e le ct eur DVD est
connecté sur un décodeur Dolby Pro Logic.
Stereo :Choisissez cette option lorsque la sortie émet du son
seulement depuis les deux enceintes avant.
Sortie digitale
La fonction sert à choisir la sortie SPDIF : SPDIF Off,SPDIF
/RAW,SPDIF/PCM.
SPDIF Off: Éteint la sortie SPDIF.
SPDIF/RAW: Si vous avez connecté votre sortie AUDIO DIGITAL à
un décodeur/récepteur multicanal.
SPDIF/PCM: Seulement si votre récepteur n'est pas capable de
décoder du son sur plusieurs canaux.
Dolby digital
Les options inclues dans le réglage Dolby Digital sont : 'Dual Mono
' et 'Dynamic '.
Dual Mono
Stéréo:Le son mono gauche enverra des signaux de sortie sur
le haut-parleur gauche et le son mono droite enverra des signaux
de sortie sur le haut parleur droite.
L-Mono: Le son mono gauche enverra des signaux de sortie sur
le haut-parleur gauche et le haut-parleur droit.
R-Mono: Le son mono droite enverra des signaux de sortie sur
le haut-parleur gauche et le haut-parleur droit.
Mix-Mono: Le son mono droite et gauche enverra des signaux
de sortie sur le haut-parleur gauche et le haut-parleur droit.
Dynamique
Compression de portée dynamique
Page de paramètres vidéo
Page de paramètres vidéo
- - VIDEO SETUP PAGE - -
SHARPNESS MID
BRIGHTNESS 00
CONTRAST 00
HUE 00
SATURATION 00
GOTO VIDEO SETUP PAGE
HIGH
MEDIUM
LOW
Netteté, Luminosité, Contraste, Teinte, Saturation : réglage de la
qualité vidéo.
Page de préférence
Page de préférence
- - PREFERENCE SETUP PAGE - -
TV TYPE PAL
AUDIO ENG
SUBTITLE ENG
DISC MENU ENG
DEFAULT
GOTO PREFERENCE PAGE
Type d e TV
Sélectionnez la couleur du système qui correspond à votre TV
lorsque vous utilisez la sortie AV. Ce lecteur DVD est compatible
aussi bien avec NTSC qu’avec PAL.
RESET
ENGLISH
FRENCH
GERMAN
SPANISH
DUTCH
POLISH
HUNGARIAN
OTHERS
ENGLISH
FRENCH
GERMAN
SPANISH
DUTCH
POLISH
HUNGARIAN
OFF
OTHERS
ENGLISH
FRENCH
GERMAN
SPANISH
DUTCH
POLISH
HUNGARIAN
OTHERS
PAL
AUTO
NTSC
7
Page 57

Réglage du Menu PARAMÈTRES
Page de préférence
PAL - Choisissez cette option si vous êtes connecté à un système
PAL, l e si gn al v id éo d 'u n disque NTSC sera changé en format de
sortie PAL .
NTSC - Choisissez cette option si vous êtes connecté à un système
NTSC, le signal vidéo d'un disque PAL sera changé en format de
sortie NTSC.
Auto:Change le signal vidéo en sortie automatique en fonction du
format du disque en cours de lecture.
Audio:Choisit la langue audio (si disponible).
Sous-titre:Choisit la langue des sous-titres (si disponible).
Disc Menu:Choisit la langue du menu du disque (si disponible)..
Paramètres et spécifications
Paramètres électroniques
Élément
Besoins d’alimentation
Consommation énergétique
Taux d’humidité d’utilisation
SORTIE VIDÉO
SORTIE AUDIO
Sortie
Audio
Système
Laser
Système signal
Fréquence
Rapport signal sur bruit
Portée dynamique
: AC 100-240 V , 50/60 Hz
: <10W
: 5 % à 90 %
:1.4 Vrms (1 KHz, 0 dB)
: Enceinte : 1W x 2, sortie écouteurs
: laser semi-conducteur, longueur d’onde 650 nm
: NTSC / PAL
: 20Hz to 20 kHz(1dB)
: Plus de 80 dB (connecteurs ANALOG OUT seulement)
: Plus de 85 dB (DVD/CD)
Besoin standard
Paramètres de batterie
Caractéristiques de la batterie :
Sortie : 7,4 V
Temps de chargement/déchargement :
Temps de chargement standard : 3h, 4h
Condition de rangement et de fonctionnement :
1. Condition de rangement Température Humidité
6 mois -20°C ~ +45°C 65±20%
1 semaines -20°C ~ +65°C 65±20%
2. Conditions de fonctionnement Température Humidité
Chargement standard 0°C ~ +45°C 65±20%
Déchargement standard -20°C ~ +65°C 65±20%
Chargement de la batterie
Connectez le lecteur DVD sur l'adaptateur d'alimentation fourni,
l'indicateur DEL sera en rouge lorsque la batterie sera en cours
de chargement et passera au vert lorsque la batterie sera
complètement chargée. Lorsque la batterie n'a pas d'alimentation,
la DEL est éteinte.
Remarque: Ce modèle et ses spécifications peuvent faire l’objet de
N
changement sans notification.
8
Page 58

Première installation
Une fois que toutes les connexions sont faites correctement,
allumez le téléviseur et assurez-vous que le récepteur est
connecté au secteur. Appuyez sur le bouton d’alimentation pour
allumer le récepteur. Si vous utilisez le récepteur pour la première
fois, ou que vous avez réinstallé les paramètres par défaut, le
menu principal apparaitra sur l’écran de votre téléviseur.
Installation Guide
OSD Language English
Country Germany
Channel Search
Exit
(1) Sélectionnez [OSD Language] et appuyez sur les touches
GAUCHE/DROITE pour choisir un langage.
(2) Sélectionnez [Country] et appuyez sur les touches
GAUCHE/DROITE pour sélectionner votre pays de résidence.
(3) Sélectionnez [Channel Search] et appuyez sur la touche
DROITE ou OK pour commencer la recherche automatique de
chaines.
(4) Une fois que le réglage des chaines est terminé, vous pouvez
regarder la télévision.
OK
ConfirmExit
Fonctionnement basique
Paramètres de gestion des programmes
Pour accéder au menu, appuyez sur le bouton MENU et
sélectionnez [Program]. Le menu propose des options pour régler
les paramètres de gestion des programmes. Sélectionnez une
option et appuyez sur OK ou DROITE pour régler ce paramètre.
Appuyez sur la touche EXIT pour quitter le menu.
Program
Program Edit
Sort By LCN
LCN On
Exit
OK
ConfirmReturn
Modification de programme
Pour modifier vos préférences de programmes (verrouiller, sauter,
favoris, déplacer ou effacer), vous devrez entrer dans ce menu de
modification de programme. L’accès à ce menu nécessite un mot
de passe. Saisissez le mot de passe par défaut ‘000000’
Program Edit
ALL TV
003 ITV1
004 Channel 4
006 ITV2
010 ITV3
013 More 4
014 E4
030 ITV4
037 Quiz Call
LockMove
21:00-22:30 Secret Smile
22:30-22:50 ITV News
GOTO
FAV
DeleteSkip RenameFAV
9
Page 59

Réglage du Menu PARAMÈTRES
Régler vos programmes favoris
Vous pouvez créer une liste de programmes favoris auxquels vous
aurez accès facilement.
Définir un programme TV ou Radio comme favori :
1.Sélectionnez le programme préféré, puis appuyez sur le bouton
FAV.
Un symbole en forme de cœur apparaitra et le programme sera
marqué comme favori.
2.Répétez l’étape précédente pour sélectionner plus de programmes
favoris.
3.Pour confirmer et sortir du menu, appuyez sur la touche EXIT.
Désactiver un programme TV ou Radio comme favori :
Appuyez sur le bouton FAV sur la télécommande avec le symbole en
forme de cœur.
Voir d es p ro gr am me s fa vo ri s.
1.Appuyez sur le bouton Fav et le menu des favoris apparaitra.
2.Appuyez sur HAUT/BAS pour sélectionner vos programmes
favoris.
3.Appuyez sur OK pour sélectionner votre programme favoris.
Effacer des programmes TV ou radio.
1.Sélectionnez le programme, puis appuyez sur le bouton Bleu.
Un message apparaitra. Appuyez sur OK pour effacer le programme.
2.Répétez l’étape précédente pour sélectionner plus de programmes
à eff ac er.
Sauter des programmes TV ou radio
1.Sélectionnez le programme que vous voulez sauter et appuyez sur
le bouton vert.
Un symbole de saut s’affiche. Le programme est marqué comme
sauté.
2.Répétez l’étape précédente pour sélectionner plus de
programmes.
3.Pour confirmer et sortir du menu, appuyez sur la touche EXIT.
Désactiver un programme TV ou Radio comme sauté :
Appuyez sur le bouton VERT sur le programme sauté avec le
symbole sauté.
Déplacer des programmes TV ou radio.
1. Sélectionnez votre programme préféré, puis appuyez sur le
bouton ROUGE. Un symbole de déplacement apparaitra.
2. Appuyez sur HAUT/BAS pour déplacer le programme.
3. appuyez sur OK pour confirmer.
4. Répétez les étapes ci-dessus pour déplacer d’autres chaines.
Verrouiller un programme
Vous pouvez verrouiller des programmes de votre choix pour un
visionnage restreint.
Verrouiller un programme TV ou radio :
1. Sélectionnez le programme préféré, puis appuyez sur le bouton
JAUNE. Un symbole en forme de verrou s’affiche. Le programme
est à présent marqué comme verrouillé.
2. Répétez l’étape précédente pour sélectionner plus de
programmes.
3. Pour confirmer et sortir du menu, appuyez sur la touche EXIT.
4. Appuyez sur le bouton JAUNE pour désactiver le verrou du
programme.
5. Pour visionner le programme verrouillé, vous devrez entrer soit
le par défaut.
10
Page 60

Réglage du Menu PARAMÈTRES
Trier
Triez vos chaines en fonction des options suivantes :
[LCN] Trie les chaines par ordre ascendant.
[Name] Trie les chaines par ordre alphabétique.
[ID service] Trie les chaines en fonction de la station.
LCN (logical channel number)
Active ou désactive le LCN.
Résolution
Si la vidéo n’apparait pas correctement, changez le paramètre. Ce
paramètre permet de correspondre à la plupart des réglages pour
le HDMI.
[576i] : Pour les systèmes TV PAL.
[576P] : Pour les systèmes TV PAL.
[720P]: Pour les systèmes TV NT SC o u PAL
[1080I]: Pour les systèmes TV N TS C ou PAL
Paramètres vidéo
Pour accéder au menu, appuyez sur MENU puis sélectionnez
[Picture]. Le menu propose des options pour régler les paramètres
vidéo. Appuyez sur HAUT/BAS pour sélectionner une option et
appuyez sur GAUCHE/DROITE pour régler le paramètre. Appuyez
sur EXIT po ur s or ti r du m en u.
Picture
HDMI Aspect Ratio 16:9 Wide Screen
HDMI Resolution 1080i
TV Format PAL
EXIT
Ratio d’aspect
Vous devez régler le format d’affichage soit sur 4 :3 Panscan, 4 :3
letter Box, 16 :9 Full Screen ou 4 :3 Full 16 :9 Pillar Box, 16 :9
Panscan Auto pour obtenir l'affichage optimal lorsque vous
regarder la télévision.
OK
ConfirmReturn
Format TV
Si la vidéo n’apparait pas correctement, vous devez changez le
paramètre.
Cela devrait correspondre à la plupart des paramètres TV
communs dans votre pays.
[NTSC]: Pour les systèmes TV NT SC .
[PAL ] : Po ur l es s ys tè me s TV PAL.
Recherche de chaine
Pour accéder au menu, appuyez sur MENU puis sélectionnez
[Search Channel]. Le menu propose des options pour régler les
paramètres de recherche de chaines. Sélectionnez une option et
appuyez sur DROITE/GAUCHE pour régler ce paramètre. Appuyez
sur EXIT po ur s or ti r du m en u.
Channel Search
Auto Search
Manual Search
Country Germany
EXIT
OK
ConfirmReturn
11
Page 61

Réglage du Menu PARAMÈTRES
Recherche automatique
Recherche et installe toutes les chaines automatiquement. Cette
option écrit par dessus toutes les chaines présélectionnées.
1. Sélectionnez [Auto Search] et appuyez sur OK ou DROITE pour
commencer la recherche de chaine.
2. Pour annuler la recherche ce chaine, appuyez sur EXIT.
Channel Search
506.0MHz/8MHZ
DTV:009 Radio: 000
001 ITV1
002 ITV2
003 ITV3
004 ITV News
005 Channel 4
006 Quiz Call
007 E4
008 More 4
009 ITV4
Progress
EXIT
Recherche manuelle
Installez de nouvelles chaines manuellement. Cette option ajoute
de nouvelles chaines sans changer l’ordre actuel de la liste de
chaine.
1. Sélectionnez [Manual Search], puis appuyez sur OK ou RIGHT.
L'écran de recherche manuelle apparaitra.
Frequency channel 5
Frequency(MHZ) 177.5
Bandwidth: 7M
Quality
EXIT
EXIT
MENU
SkipExit
Manual Search
OK
Confirm
2. Appuyez sur la touche DROITE/GAUCHE pour sélectionner la
fréquence de chaine.
3. Appuyez sur OK pour commencer la recherche de chaines
Lorsqu’une chaine est trouvée, elle est enregistrée et ajoutée à la
liste des chaines.
Si aucune chaine n’est trouvée, alors quittez le menu.
Pays
Sélectionnez votre pays de résidence.
Réglage de l’heure
Pour accéder au menu, appuyez sur MENU puis sélectionnez
[Time]. Le menu propose des options pour régler les paramètres
d'heure et date.
Appuyez sur HAUT/BAS pour sélectionner une option et appuyez
sur GAUCHE/DROITE pour régler le paramètre. Appuyez sur EXIT
pour sortir du menu.
Time
Time Offset Auto
Country Region Berlin
Time Zore GMT +1
EXIT
Décalage du temps
Sélectionnez automatique ou manuel pour les paramètres de
décalage GMT.
Région du pays
La région du pays est réglée automatiquement lorsque vous
réglez le pays dans le menu de recherche de chaine.
Zone géographique
Sélectionne la zone géographique lorsque [Time Offset] est réglé
sur Manuel.
OK
ConfirmReturn
12
Page 62

Réglage du Menu PARAMÈTRES
Option
Pour accéder au menu, appuyez sur MENU puis sélectionnez [Option].
Le menu propose des options pour régler la langue de l’OSD, la langue
des sous-titres et la langue audio
Sélectionnez une option et appuyez sur DROITE/GAUCHE pour régler ce
paramètre.
Appuyez sur EXIT po ur s or ti r du menu.
Option
OSD Language English
Subtitle Language Off
Audio Language English
Digital Audio PCM
EXIT
Langage de l’OSD
Sélectionne une langue pour l’OSD
Langage de l’audio
Sélectionne la langue de l’audio préférée pour regarder des
chaines de TV.
Si la langue n’est pas disponible, la langue par défaut du
programme sera utilisée.
Langage des sous-titres
Sélectionne la langue préférée pour les sous-titres.
Paramétrage du système
Pour accéder au menu, appuyez sur MENU puis sélectionnez
[System], le menu propose des options pour régler les paramètres
du système.
Appuyez sur HAUT/BAS pour sélectionner une option et appuyez
sur GAUCHE/DROITE pour régler le paramètre.
Appuyez sur EXIT po ur s or ti r du menu.
OK
ConfirmReturn
Set Password
System
Restore Factory Default
Information
Software update
EXIT
Régler le mot de passe
Définissez ou changez le mot de passe pour les programmes
verrouillés. Saisissez votre ancien mot de passe ou le mot de
passe par défaut 000000. On vous demandera alors de saisir votre
nouveau mot de passe. Pour confirmer, entrer encore votre
nouveau mot de passe.
Une fois confirmé, appuyez sur EXIT pour sortir du menu.
Restauration des paramètres d’usine
Restaurez les paramètres d’usine de votre téléviseur portable.
Dans le menu principal, sélectionnez [Restore Factory Default] et
appuyez sur OK ou DROITE pour confirmer. Entrez votre mot de
passe ou le mot de passe par défaut 000000 et appuyez sur OK
pour confirmer. Cette option effacera toutes les chaines
présélectionnées et tous les paramètres.
Information
Voir des informations sur le modèle, le matériel, et les logiciels.
Mise à jour du logiciel
Mise à jour du logiciel
OK
ConfirmReturn
13
Page 63

Réglage du Menu PARAMÈTRES
RÉSOLUTION DES PROBLÈMES
USB
Pour accéder au menu, appuyez sur le bouton MENU et sélectionnez USB.
USB
Multimedia
Photo Configure
Movie Configure
EXIT
OK
ConfirmReturn
Multimédia
Passez en mode USB et branchez une clé USB pour voir les fichiers.
Spécifications techniques
Objet
Sous-éléments
Fréquence d’entrée
Tuner
Niveau d’entrée RF
Bande passante IF
Modulation
Format de décodeur
Vidéo
Formats de sortie
Port de sortie
Paramètre
170~230MHz
470~860MHz
-25~-82dBm
7MHz et 8MHz
QPSK,16QAM,64QAM
MPEG4 AVC/H.264 HP@L4
MPEG2 MP@ML.HL
576P , 720P, 1080i, 4:3 and 16:9
HDMI
14
Problème
Cause probable
Pas d’image
Aucun signal
n’apparait sur
l’écran
Pas de son du
haut parleur
Seul du son et pas
d’image apparait à
l’écran
La télécommande
ne répond pas
L’image s’arrête
soudainement ou
fait des mosaïques
L’alimentation est
désactivée
L’interrupteur est éteint
Le câble DVB-T n’est
pas connecté
Paramètre incorrect
Pas de connexion ou
connexion incorrecte
avec le câble audio
Le son est coupé
Piste son incorrecte
Pas de connexion ou
connexion incorrecte
avec le câble AV
Le programme est un
programme radio
La pile est vide
La télécommande n’est
pas en face ou pas
suffisamment proche du
boitier de TV numérique.
Le signal est trop faible
Que faire
Alimentez l’appareil
Allumez l’interrupteur.
Branchez le câble DVB-T
Réinitialiser les paramètres
Connectez le câble
audio correctement
Désactivez la fonction Muet
Essayez une autre piste son
Assurez-vous que les câbles
sont correctement connectés.
Appuyez sur la touche <
TV/RADIO> pour passer en
mode TV
Changez de pile
Réglez la position de la
télécommande et
rapprochez-vous de votre
boitier numérique
Renforcez le signal
Page 64

Service et support
Pour plus d'informations : www.lenco.com
Lenco propose un service et une garantie conformément aux lois
européenne, ce qui signifie qu’en besoin de réparation (aussi bien
pendant et après la période de garantie), vous pouvez contacter votre
revendeur le plus proche.
Remarque importante : Il n’est pas possible de renvoyer l’appareil
pour réparation directement à Lenco.
Remarque importante :
Si l’unité est ouverte ou modifiée de quelque manière par un centre de
service non agréé, cela mettra fin à la garantie.
Cet appareil ne convient pas pour une utilisation professionnelle. En
cas d’utilisation professionnelle, les obligations de garantie du
fabricant seront annulées.
AVER TI SS EM EN T: Une e xp os it ion prolongée à de
forts volumes sonores provenant de baladeurs peut
causer des pertes d’audition temporaires ou
permanentes.
Les produits avec la marque CE sont conformes à la
directive CEM (2004/108/CE) et à la directive basse
tension (2006/95/EC) émises par la commission de la
communauté européenne.
La déclaration de conformité peut être consultée via
le lien suivant :
https://lencosupport.zendesk.com/forums/22413161
-CE-Documents
Ce symbole indique que le produit électrique
concerné ou la batterie ne doit pas être jeté parmi les
autres déchets ménagers en Europe. Pour garantir
un traitement correct du déchet de la batterie ou de
l'appareil, veuillez vous en débarrasser en vous
conformant aux règlements en vigueur dans votre
secteur en ce qui concerne le des appareils
électriques et autres batteries. En agissant de la
sorte, vous contribuerez à la préservation des
ressources naturelles et à l'amélioration des niveaux
de protection environnementale concernant le
traitement et la destruction des déchets électriques.
(Directive sur les Déchets des Equipements
Electriques et Electroniques).
15
Page 65

PHDVT-12309C MTK-1389Q+MASTAR7801方案 前屏无按键 二合一 模拟屏 低成本 ERP2 ENGLISH MANUAL
MANUAL DEL USUARIO
DVP-9412
WWW.LENCO.COM
DVD PORTÁTIL
Antes de conectar utilizar o ajustar este producto, por favor,
lea atentamente y entero este manual del usuario.
Page 66

Importantes instrucciones de seguridad
Advertencia: Para reducir el riesgo de descarga eléctrica, no quite la
cubierta ni parte trasera. No hay partes reparables por el usuario
dentro. Refiera los trabajos de servicio a personal calificado.
Advertencia: Para prevenir riesgos de incendios y descargas
eléctricas, no exponga la unidad a lluvia ni humedad.
No exponga el adaptador y el DVD portátil a agua (goteos o
salpicaduras) y no coloque ningún objeto con líquido, como un jarrón,
sobre la unidad.
Mantenga el DVD portátil alejado de la luz solar directa y de fuentes
de calor como radiadores y hornos.
No bloquee las aberturas de ventilación. Las ranuras y aberturas de
la unidad se ofrecen para la ventilación. Las aberturas nunca
deberán bloquearse colocando su DVD portátil en un colchón, sofá u
otra superficie similar.
No coloque el DVD portátil en una mesa móvil, un soporte, un trípode,
una repisa o una mes inestables. La unidad podría caerse,
resultando en posibles daños o lesiones.
Nunca coloque objetos pesados ni puntiagudos en el panel o el
marco LCD.
Solo use el adaptador AC incluido con su DVD portátil. El uso de
cualquier otro adaptador anulará la garantía.
La clavija del adaptador AC se usa como mecanismo de
desconexión, el mecanismo de desconexión debe permanecer
fácilmente utilizable.
Desenchufe la corriente de la toma cuando la unidad no esté en uso.
Preste atención a los aspectos medioambientales de la eliminación
de la batería.
PRECAUCIÓN: Riesgo de explosión si la batería se cambia
incorrectamente. Cambie únicamente por una del mismo tipo o de
tipo equivalente.
ADVERTENCIA: La batería (pila, pilas o paquete de pilas) no debe
exponerse a calor excesivo como el de la luz solar, el fuego o de
elementos semejantes.
ADVERTENCIA: La presión acústica excesiva de auriculares y
cascos puede ocasionar sordera.
ADVERTENCIA: Solo use accesorios/acoples especificados por el
fabricantes; el DVD portátil viene con adaptador AC, el adaptador
AC se usa como mecanismo de desconexión, el mecanismo de
desconexión deberá permanecer fácilmente utilizable.
Precaución: Riesgo de explosión si la batería se cambia
incorrectamente, cambie únicamente por una batería igual o de tipo
equivalente (batería de litio).
Esta marca indica que este producto no debe
desecharse con otros residuos domésticos en la U. E.
Para prevenir daños potenciales al ambiente o la
salud humana debido a la eliminación de residuos
incontrolada, recíclelo responsablemente para
promover la reutilización sustentable de recursos
materiales. Para devolver su dispositivo usado, por
favor use los sistemas de devolución y recogida o
contacte con el minorista donde compró el producto.
Ellos podrán aceptar este producto para su reciclaje
ecológico.
Adaptador de fuente de alimentación(Para UE sólo)
Fabricante:Shenzhen Mass Power Electronics Limited
Número de modelo:EFF0900150E1BA
Utilice solo la fuente de alimentación que se indica que el manual del usuario
1
Page 67

Precauciones de seguridad
ADVERTENCIA
RIESGO DE DESCARGA
ELÉCTRICA NO ABRIR
Advertencia: Este reproductor DVD utiliza un sistema láser. El uso de
controles, ajustes o la realización de procedimientos distintos a los
especificados aquí podría resultar en exposición a radiación peligrosa.
Advertencia: Para prevenir exposición directa al rayo láser, no abra la
carcasa. Hay radiación láser visible cuando está abierta.
Advertencia: Nunca mire directamente al rayo láser.
Precaución: No instale este producto en un lugar encerrado como
una estantería o un lugar semejante.
Advertencia: Cuando la unidad se utilice por un niño, los padres
deberán asegurarse de hacer comprender al niño todo el contenido
del instructivo y sobre el uso de la batería para garantizar que se use
correctamente en todo momento.
Advertencia: Cuando la batería se sobrecaliente o dilate, por favor
deje de usar la batería y contacte con el centro de servicio para
cambiarla.
Advertencia: No recargue la batería en lugares con ventilación
insuficiente como: colchones, sofás, alfombras suaves, etc.
Advertencia: No nos haremos responsables si el usuario usa
incorrectamente la batería, sin seguir nuestra etiqueta de advertencia
en la batería.
Advertencia: no se podrá conectar un cable de extensión USB de
más de 250mm al puerto USB.
N
N
Notas sobre derechos de autor:
Esta prohibido por la ley copiar, transmitir, mostrar, transmitir vía cable,
reproducir en público y rentar material protegido por derechos de autor
sin permiso.
Este producto utiliza la función de protección de derechos de autor
desarrollada por Macrovision. Algunos discos tienen señales de
protección de copyright. Cuando se graben y reproduzcan las imágenes
de estos discos, aparecerá ruido visual.
Este producto utiliza una tecnología de protección de derechos de autor
protegida por reclamos de método de ciertas patentes de EE. UU. y
otros derechos de propiedad intelectual de Macrovision Corporation y
otros propietarios de derechos. El uso de esta tecnología de protección
de derechos de autor debe estar autorizado por Macrovision
Corporation, y está concebida únicamente para uso doméstico y otros
usos limitados a menos que Macrovision Corporation haya autorizado
lo contrario. Está prohibido desmontar el producto y la aplicación de
ingeniería inversa.
NÚMERO DE SERIE:
Hallará el número de serie en la parte posterior de la unidad. Este
número es exclusivo de esta unidad y no está disponible en otras.
Anote la información necesaria aquí y consérvela como prueba
permanente de su compra. You can find the serial number on the back
of the unit.
No. de Modelo ______________________________
No. de Serie ________________________________
Fecha de compra ____________________________
charge
strong
impact
over
heat
40 C
2
Page 68

Identificación de los controles
Unidad principal
180°
SOURCE
VOL- VOL+ MENU
SETUP
1
2
3
6
5
4
7
8
10
9
1. REPRODUCCIÓN/PAUSA
2. DETENER
3. SOURCE
4. VOL-
5. VOL+
6. MENU
7.▲/▼/◄/►(arriba/abajo/izquierda/derecha)
Seleccione un elemento del menú. El botón OK confirma la selección del
menú.
durante la reproducción, VCD, DVD, si estuviera disponible:
derecha: avance rápido
izquierda: retroceso rápido
arriba: pista anterior
abajo: pista siguiente
8.ENTER
9.ABRIR
10. SETUP
11. SD/MMC
12. USB
13. AV OUT
14. Toma para auriculares
15. COAXIAL
16. ENCNEDIDO/APAGADO
17. DC IN 9-12V
18. ANT
19. HDMI
11
13
14
18
15 17
16
19
12
3
Page 69

Identificación de los controles
Unidad del mando a distancia
16
SOUR CE
MUTE
3
10+
/RECA LL
AUDI O
4
7
8
INFO
PBC
/FAV
STEP /
TV/R ADIO
VOL +VOL -
20
26
19
18
21
23
25
24
22
1 2
5
9 0
SUBT ITLE
TITL E
REPEAT
SETU P
PROG RAM
ANGL E
SLOW
/EXI T
ZOOM
6
OK
27
15
1. SOURCE
DVD/TARJ ETA/USB.
2. MUTE
Desactivación de la salida de audio.
3.BOTON ES N UM ÉR IC OS 0 -9
Selección de los elementos numerados de un menú.
4.INFO
Para mostrar el tiempo de reproducción e información sobre el
estado.
17
5
10
12
14
5. RECALL 10+
Para seleccionar una pista superior a 10, primero pulse 10+.
Por ejemplo: para seleccionar la pista 12, primero pulse 10+ y
después el botón 2.
2
1
3
4
6
7
8
9
6. PBC/FAV
Activación/desactivación de PBC (VCD) .
7.AUDIO
Pulse AUDIO repetidamente durante la reproducción para
DVD
escuchar un idioma o pista de audio distintos, si los hubiera.
Pulse AUDIO repetidamente durante la reproducción
VCDCD
para escuchar un canal de audio distinto (izquierdo, derecho,
mezcla, estéreo).
8.REPRODUCCIÓN/PAU SA
Pulse REPRODUCCIÓN/PAU SA una vez para dejar la reproducción
en pausa. Púlselo de nuevo para reanudar la reproducción.
11
9. DETENCIÓN
Cuando se pulse una vez este botón, la unidad "recordará" el punto
13
donde se haya detenido, desde donde se reanudará la reproducción
si REPRODUCCIÓN ( ) se pulsa después. Pero si se pulsa de
nuevo el botón DETENCIÓN en lugar de REPRODUCCIÓN( ), se
eliminará el punto de reanudación de la reproducción.
10.STEP/TV/RADIO
Reproducción fotograma a fotograma en el modo DVD.
11.VOL+
Ajuste del volumen
12.Saltar hacia delante
Para pasar al capítulo/pista siguiente.
13.Saltar hacia atrás
Para regresar al comienzo del capítulo/pista.
14. BOTÓN
Pulse el botón para avanzar a 5 velocidades distintas
(X2->X4->X8->X16->X32->REPRODUCCIÓN). Pulse el botón
REPRODUCCIÓN para retomar la reproducción a velocidad normal.
4
Page 70

Identificación de los controles
Unidad del mando a distancia
15. BOTÓN
Pulse el botón para retroceder a 5 velocidades distintas
(X2->X4->X8->X16->X32->REPRODUCCIÓN). Pulse el botón
REPRODUCCIÓN para retomar la reproducción a velocidad normal.
16.
Encendido/apagado de la unidad.
17. SEARCH
Pase directamente al punto, título o capítulo que desee en el modo DVD.
18. SUBTITLE
Pulse SUBTITLE repetidamente durante la reproducción para ver los
diferentes idiomas de subtítulos.
19.ANGLE
:Si pulsa ANGLE podrá variar el ángulo de visionado, siempre
DVD
y cuando el DVD que reproduzca contenga esta función.
20.TITLE
Regreso al menú de títulos.
21.OK
Confirmación de la selección del menú.
22.SETUP
Acceso o cierre del menú de configuración.
23.VOL
Ajuste del volumen.
24.REPEAT
Pulse REPEAT durante la reproducción para seleccionar el modo de
repetición que desee.
: podrá seleccionar la repetición de un capítulo/título/todo.
DVD
: podrá seleccionar la repetición de una pista/todas.
VCDCD
: podrá seleccionar la repetición mezclada/aleatoria/única/
MP3
repetición de una/repetición de la carpeta/carpeta.
25.SLOW
Pulse el botón SLOW repetidamente para entrar en la reproducción
ralentizada, pasando de forma cíclica por las distintas velocidades de
reproducción. Las velocidades serán 1/2,1/4,1/8,1/16 y normal.
26.PROGRAM
:La función de programación le permitirá
DVD VCD
guardar su pistas favoritas del disco. Pulse el botón PROGRAM y el
MENÚ DE PROGRAMACIÓN aparecerá en la pantalla, entonces
podrá usar los botones numéricos para introducir directamente los
números de los títulos, capítulos o pistas y seleccione la opción
REPRODUCCIÓN. Para reanudar la reproducción normal, pulse el
botón PROGRAM y seleccione la opción de eliminación de la
programación en el menú de programación, después pulse de nuevo
el botón PROGRAM para salir del menú de programación. MP3
incluye la función Carpeta/Lista de archivos.
27.ZOOM
Use ZOOM para aumentar o reducir la imagen de vídeo.
DVD VCD
1.Pulse ZOOM durante la reproducción o con la imagen congelada
para activar la función de zoom. El marco rectangular aparecerá
brevemente en la esquina inferior derecha de la imagen.
2. Cada vez que pulse el botón ZOOM, la pantalla de TV cambiará con
la siguiente frecuencia:
2X si ze → 3 X size → 4X s iz e → 1/2 size → 1/ 3 size → 1/4 si ze→ normal s ize
JPEG
: Use ZOOM aumentar o reducir la imagen.
1.Pulse 'ZOOM'.
2,Use " " para aumentar o " " para reducir la imagen.
Use el botón para desplazarse por la imagen aumentada.
CD
5
Page 71

Ajustes del menú de configuración
Página de configuración general
Pulse el botón SETUP para entrar en el menú de configuración. Use los
botones direccionales para seleccionar el elemento que desee.
Una vez haya finalizado los ajustes, pulse de nuevo SETUP para retomar
la visualización normal.
Podrá modificarse los siguientes elementos del menú:
GENERAL: selección del menú de la PÁGINA DE CONFIGURACIÓN
GENERAL
AUDIO: selección del menú de la PÁGINA DE AUDIO.
VIDEO: selección del menú de PÁGINA DE VÍDEO.
PREFERENCE: selección del menú de la PÁGINA DE PREFERENCIAS.
Página de configuración general
- - GENERALSETUP PAGE - -
TV DISPLAY WIDE
TFT DISPLAY 16:9
ANGLE MARK ON
OSD LANGUAGE ENG
CLOSED CAPTIONS ON
SCREEN SAVER ON
AUTO STANDBY 3H
GOTO GENERAL SETUP PAGE
VISUALIZACIÓN DE TV: selección de la proporción de aspecto de la
imagen de reproducción.
4:3 PANSCAN: si tuviera un TV estándar y deseara que ambos lados
de la imagen sea recortados o formateados para que se ajusten a la
pantalla de su TV.
4:3 LETTERBOX: si tuviera un TV estándar. En este caso, se mostrará
una imagen más ancha con unas bandas negras en la parte superior e
inferior de la pantalla.
16:9: pantalla panorámica.
oFF
3 HOU R
4 HOU R
ON
OFF
ON
OFF
ENGLISH
FRENCH
GERMAN
SPANISH
DUTCH
HUNGARIAN
POLISH
TFT 16:9
TFT 4:3
4:3 PANSCAN
4:3 LETTERBOX
16:9
VISUALIZACIÓN TFT
selecciona la proporción de aspecto durante la reproducción.
Marca de ángulo
Muestra la información del ajuste de ángulo seleccionado en la esquina
derecha de la pantalla TFT para aquellos discos que incluyan esta
función.
Idioma OSD
Podrá seleccionar la opción de idioma que desee.
Subtítulos
Los subtítulos son datos ocultos en la señal de vídeo de algunos discos.
Antes de seleccionar esta función, por favor, asegúrese de que el disco
contiene información de subtítulos y de que su aparato de TV también
incluye eta función.
Salvapantallas
Esta función se utiliza para activar o desactivar el salvapantallas.
Modo de espera automático
Esta función se usar para pasar al modo de espera.
Página de configuración de audio
Página de configuración de audio
-- --
- - - -AUDIO SETUP PAGE
DOWNMINX
DIGITAL OUTPUT
DOLBY DIGITAL
GO TO AUDIO SETUP PAGE
STR
RAW
DUAL MONO
DYNAMIC
SPDIF/OFF
STR
STR
L-MONO
R-MONO
FULL
-
-
-
-
-
-
-
-
-
-
MIX-MONO
-
-
-
-
-
-
-
-
OFF
-
SPDIF/RAW
SPDIF/PCM
6
LT/RT
STEREO
Page 72

Ajustes del menú de CONFIGURACIÓN
Página de configuración de audio
Downmix
Esta opción le permitirá seleccionar la salida analógica estéreo de su
reproductor de DVD.
LT/RT :Seleccione esta opción si su reproductor de DVD está conectado
a un descodificador Dolby Pro Logic.
Estéreo :Seleccione esta opción cuando la salida proporcione sonido
solo de los dos altavoces frontales.
Salida digital
La función se emplea para seleccionar la salida SPDIF: SPDIF apagada,
SPDIF /RAW, SPDIF/PCM.
SPDIF Off: Desactiva la salida SPDIF.
SPDIF/RAW: Si ha conectado su SALIDA DE AUDIO DIGITAL a un
descodificador/receptor multicanal.
SPDIF/PCM: Solo si su receptor no es capaz de descodificar audio
multicanal.
Dolby digital
Las opciones incluidas en la configuración Dolby Digital son:
'Mono Dual' y 'Dinámico '.
Mono Dual
Estéreo: El sonido mono izquierdo enviará señales de salida al altavoz
izquierdo y el sonido mono derecho enviará señales de salida al altavoz
derecho.
L-Mono: El sonido mono izquierdo enviará señales de salida al altavoz
izquierdo y al derecho.
R-Mono: El sonido mono derecho enviará señales de salida al altavoz
izquierdo y al derecho.
Mix-Mono: El sonido mono izquierdo y derecho mezclados enviarán
señales de salida a los altavoces izquierdo y derecho.
Dinámico
Compresión de gama dinámica.
Página de configuración de vídeo
Página de configuración de vídeo
- - VIDEO SETUP PAGE - -
SHARPNESS MID
BRIGHTNESS 00
CONTRAST 00
HUE 00
SATURATION 00
GOTO VIDEO SETUP PAGE
HIGH
MEDIUM
LOW
Nitidez, Brillo, Contraste, Tono, Saturación: ajuste de la calidad de vídeo.
Página de preferencias
Página de preferencias
- - PREFERENCE SETUP PAGE - -
TV TYPE PAL
AUDIO ENG
SUBTITLE ENG
DISC MENU ENG
DEFAULT
GOTO PREFERENCE PAGE
RESET
ENGLISH
FRENCH
GERMAN
SPANISH
DUTCH
POLISH
HUNGARIAN
OTHERS
ENGLISH
FRENCH
GERMAN
SPANISH
DUTCH
POLISH
HUNGARIAN
OFF
OTHERS
ENGLISH
FRENCH
GERMAN
SPANISH
DUTCH
POLISH
HUNGARIAN
OTHERS
Tipo de TV
Selección del sistema de color que corresponde con su TV con salida
AV. Este reproductor de DVD es compatible con NTSC y con PAL.
PAL
AUTO
NTSC
7
Page 73

Ajustes del menú de CONFIGURACIÓN
Página de configuración de audio
PAL - Seleccione esta opción si el TV conectado presenta el sistema
PAL. Cambiará la señal de vídeo de un disco NTSC mostrándola en
formato PAL.
NTSC-Seleccione esta opción si el TV conectado presenta el sistema
NTSC. Cambiará la señal de vídeo de un disco PAL mostrándola en
formato NTSC.
Auto: Cambio automático de la salida de señal de vídeo según sea el
formato del disco en reproducción.
Audio: Selección del idioma de audio (si estuviera disponible).
Subtítulos: Selección de un idioma de subtítulos (si estuviera disponible).
Menú del disco: Selección de un idioma del menú del disco (si estuviera
disponible).
Parámetros y especificaciones
Parámetros electrónicos
Elemento
Alimentación
Consumo
Humedad operativa
SALIDA DE VIDEO
SALIDA DE AUDIO
Salida
Audio
Sistema
Láser
Sistema de señal
Respuesta de
frecuencia
Proporción señal a ruido
Rango dinámico
: AC 100-240 V , 50/60 Hz
: <10W
: de 5 % a 90 %
:1.4 Vrms (1 KHz, 0 dB)
:Altavoz:1WX2, salidas para auriculares
: láser semiconductor, longitud de onda 650 nm
: NTSC / PAL
: de 20Hz a 20 kHz(1dB)
: más de 80 dB (solo conectores ANALOG OUT)
: superior a 85 dB (DVD/CD)
Requisitos típicos
Parámetros de la pila recargable
Especificaciones de la pila:
Salida:7.4V
Tiempo de carga / descarga:
Tiempo estándar de carga:
Condiciones de almacenamiento y funcionamiento:
1. Condiciones de almacenamiento Temperatura Humedad
2.Condiciones de funcionamiento Temperatura Humedad
6 months
1 week
Standard charge
Standard discharge
-20°C +45°C~
-20°C +65°C~
0°C +45°C~
-20°C +65°C~
65±20%
65±20%
65±20%
65±20%
Carga de la batería
Conecte el reproductor de DVD al adaptador de corriente que se le
proporciona. El indicador LED se iluminará en ROJO durante la
carga de la batería, pasando a ser verde cuando la carga de la
batería se haya completado. Cuando la batería no tenga potencia,
el LED se apagará.
Nota: El diseño u las especificaciones están sujetos a cambios sin
N
notificación previa.
8
Page 74

Primera instalación
Una vez se hayan realizado correctamente todas las conexiones,
encienda el TV y asegúrese de que el receptor está conectado a la toma
de corriente. Pulse el botón Power para encender el receptor. Si se
tratara de la primera vez que usa el receptor o después de la
recuperación de la configuración de fábrica, el menú principal aparecerá
en la pantalla de su TV.
Installation Guide
OSD Language English
Country Germany
Channel Search
Exit
OK
ConfirmExit
(1) Seleccione [OSD Language] y pulse el botón DERECHA/IZQUIERDA
para seleccionar un idioma.
(2) Seleccione [Country] y pulse el botón DERECHA/IZQUIERDA para
seleccionar su país de residencia.
(3) Seleccione [Channel Search] y pulse DERECHA u OK para comenzar
la búsqueda automática de canales.
(4) Una vez se haya completado la sintonización de canales, ya podrá
empezar a ver la televisión.
Funcionamiento básico
Ajustes de Administración de Programas
Para acceder al menú, pulse el botón MENU y seleccione [Program]. El
menú le proporciona opciones de selección de Ajustes de Administración
de Programas. Seleccione una opción y pulse OK o DERECHA para
ajustar la opción seleccionada. Pulse EXIT para salir del menú.
Program
Program Edit
Sort By LCN
LCN On
Exit
OK
ConfirmReturn
Edición de programas
Para editar sus preferencias de programa (bloqueo, salto,
favoritos, desplazar o eliminar), va a necesitar entrar en el
Menú de Edición de Programas. Para acceder a este menú es
necesario introducir una contraseña. Introduzca la contraseña
predeterminada '000000'.
Program Edit
ALL TV
003 ITV1
004 Channel 4
006 ITV2
010 ITV3
013 More 4
014 E4
030 ITV4
037 Quiz Call
LockMove
21:00-22:30 Secret Smile
22:30-22:50 ITV News
GOTO
FAV
DeleteSkip RenameFAV
9
Page 75

Primera instalación
Selección de su(s) programa(s) favorito(s)
Podrá crear una lista con sus programas favoritos a la que acceder
fácilmente.
Selección de sus programas de radio o TV favoritos:
1.Seleccione su programa preferido y después pulse el botón
FAVOURITE.
Aparecerá entonces un símbolo en forma de corazón y el programa
quedará marcado como favorito.
2.Repita el paso anterior para seleccionar más programas favoritos.
3.Para confirmar y salir del menú, pulse el botón EXIT.
Desactivación de los programas de radio o TV favoritos:
Pulse el botón FAV del mando a distancia con el símbolo en forma de
corazón.
Para ver programas favoritos.
1.Pulse el botón Fav y entonces aparecerá el menú de favoritos.
2.Pulse ARRIBA/ABAJO para seleccionar sus programas favoritos.
3.Pulse OK para seleccionar su programa favorito.
Para eliminar un programa(s) de radio o TV.
1.Seleccione el programa y después pulse el botón AZUL.
Se mostrará un mensaje. Pulse OK para eliminar el programa.
2.Repita los pasos anteriores para seleccionar más programas y
eliminarlos.
Salto de programa(s) de radio o TV
1.Seleccione el programa que desee saltar y pulse el botón VERDE.
Se mostrará un símbolo de salto. El programa quedará marcado como
saltado.
2.Repita el paso anterior para saltar más programas.
3.Para confirmar y salir del menú, pulse el botón EXIT.
Desactivación de programas de radio o TV saltados:
Pulse el botón VERDE sobre el canal saltado con el símbolo de salto.
Para desplazar un programa(s) de radio o TV
1. Seleccione el programa que desee y después pulse el botón ROJO.
Entonces aparecerá un símbolo de desplazamiento.
2. Pulse ARRIBA/ABAJO para desplazar el programa.
3. Pulse OK para confirmar.
4. Repita los pasos anteriores para desplazar más canales.
Bloqueo de programa(s)
Podrá bloquear programas seleccionados para un visionado restringido.
Bloqueo de un programa de radio o TV:
1. Seleccione el programa que desee y después pulse el botón
AMARILLO. Se mostrará un símbolo en forma de candado. El programa
quedará marcado como bloqueado.
2. Repita el paso anterior para seleccionar más programas.
3. Para confirmar y salir del menú, pulse el botón EXIT.
4. Pulse el botón AMARILLO para desbloquear el programa.
5. Para poder ver el programa bloqueado, se le pedirá que introduzca la
predeterminada.
Clasificación
Clasifique sus canales según las siguientes opciones disponibles:
[LCN] - Clasifica los canales en orden ascendente
[Name] - Clasifica los canales en orden alfabético
[Service ID] - Clasifica los canales según la estación
LCN (Número lógico de canal)
Activación o desactivación de LCN.
10
Page 76

Primera instalación
Ajuste de vídeo
Para acceder al menú, pulse MENU y después seleccione [Picture].
El menú le ofrecerá opciones para ajustar las opciones de vídeo. Pulse
ARRIBA/ABAJO para seleccionar una opción y después
DERECHA/IZQUIERDA para ajustar la opción elegida.
Pulse EXIT para salir del menú.
Picture
HDMI Aspect Ratio 16:9 Wide Screen
HDMI Resolution 1080i
TV Format PAL
EXIT
Proporción de aspecto
Deberá seleccionar el formato de pantalla como 4:3 PanScan,
4:3 Letter Box, 16:9 Full Screen o Auto para conseguir la mejor opción
de pantalla cuando vea la TV.
Resolución
Si el vídeo no se mostrara correctamente, modifique el ajuste. Este
ajuste se emplea para la combinación más adecuada con HDMI.
[576i] para el sistema de TV PAL.
[576P]: para el sistema de TV PAL.
[720P]: para los sistemas de TV NTSC o PAL.
[1080I]: para los sitemas de TV NTSC o PAL.
OK
ConfirmReturn
Formato de TV
Si el vídeo no apareciera correctamente, será necesario cambiar los
ajustes.
Estos deberían coincidir con las mayoría de ajustes de TV de su país.
[NTSC]: para el sistema de TV NTSC.
[PAL]: para el sistema de TV PAL.
Búsqueda de canales
Para acceder al menú, pulse el botón MENU y seleccione [Search
Channel]. El menú ofrecerá opciones para ajustar la opción de búsqueda
de canales. Seleccione una opción y pulse DERECHA/IZQUIERDA para
ajustarla. Pulse EXIT para salir del menú.
Channel Search
Auto Search
Manual Search
Country Germany
EXIT
Búsqueda automática
Busque y guarde todos los canales automáticamente. Esta opción
eliminará todos los canales que haya presintonizados.
1. Seleccione [Auto Search] y pulse OK o DERECHA para iniciar la
búsqueda de canales.
2. Para cancelar la búsqueda de canales, pulse EXIT.
OK
ConfirmReturn
11
Page 77

Primera instalación
Búsqueda automática
Busque y guarde todos los canales automáticamente. Esta opción
eliminará todos los canales que haya presintonizados.
1. Seleccione [Auto Search] y pulse OK o DERECHA para iniciar la
búsqueda de canales.
2. Para cancelar la búsqueda de canales, pulse EXIT.
Channel Search
506.0MHz/8MHZ
DTV:009 Radio: 000
001 ITV1
002 ITV2
003 ITV3
004 ITV News
005 Channel 4
006 Quiz Call
007 E4
008 More 4
009 ITV4
Progress
EXIT
Búsqueda manual
Instalación manual de nuevos canales. Esta opción agregar nuevos
MENU
SkipExit
canales sin variar la lista de canales existente.
1. Seleccione [Manual Search], después pulse OK o DERECHA.
Después aparecerá la pantalla de búsqueda de canales.
Manual Search
Frequency channel 5
Frequency(MHZ) 177.5
Bandwidth: 7M
Quality
EXIT
EXIT
OK
Confirm
2. Pulse el botón DERECHA/IZQUIERDA para seleccionar la frecuencia
del canal.
3. Pulse OK para comenzar la búsqueda de canales.
Si se encuentra un canal, este se guardará y agregará a la lista.
Si no se pudiera encontrar ningún canal, entonces saldrá del menú.
País
Seleccione su país de residencia.
Ajuste de la hora
Para acceder al menú, pulse MENU, después seleccione [Time]. El
menú ofrece opciones para ajustar las opciones de hora.
Pulse ARRIBA/ABAJO para seleccionar una opción y pulse
DERECHA/IZQUIERDA para ajustar las opciones.
Time
Time Offset Auto
Country Region Berlin
Time Zore GMT +1
EXIT
OK
ConfirmReturn
Desfase (Time Offset)
Seleccione auto a manual para los ajustes de desfase GMT.
Región del país
La Región del país se ajustará automáticamente cuando seleccione el
país en el menú de búsqueda de canales.
Zona horaria
Seleccione el desfase horario cuando [Time Offset] se encuentre en
Manual.
12
Page 78

Primera instalación
Opción
Para acceder al menú, pulse MENU y seleccione [Option]. El menú
proporciona opciones para ajustar el Idioma OSD, Idioma de subtítulos e
Idioma de Audio.
Seleccione una opción y pulse DERECHA/IZQUIERDA para ajustar la
opción elegida. Pulse EXIT para salir del menú.
Option
OSD Language English
Subtitle Language Off
Audio Language English
Digital Audio PCM
EXIT
Idioma OSD
Selección de un idioma OSD
Idioma de audio
Seleccione el idioma de audio que desee para ver canales de TV.
Si el idioma no estuviera disponible, se usará el idioma predeterminado
del programa.
Idioma de subtítulos
Selección del idioma de subtítulos que desee.
Ajustes del sistema
Para acceder al menú, pulse MENU y seleccione [System].El menú
ofrece opciones de ajuste del sistema.
Pulse el botón ARRIBA/ABAJO para seleccionar una opción y pulse
DERECHA/IZQUIERDA para ajustar la selección.
Pulse EXIT para salir del menú .
OK
ConfirmReturn
Set Password
System
Restore Factory Default
Information
Software update
EXIT
Selección de contraseña
Establezca o modifique la contraseña para los programas bloqueados.
Introduzca su contraseña antigua o la contraseña predeterminada
'000000'. Entonces se le pedirá que introduzca la contraseña nueva.
Para confirmar, vuelva a introducir la contraseña nueva.
Una vez la haya confirmado, pulse EXIT para salir del menú.
Restablecimiento de la configuración de fábrica
Restablezca la configuración de fábrica de su descodificador.
En el menú principal, seleccione [Restore Factory Default] y pulse OK o
DERECHA para seleccionar. Introduzca su contraseña o la contraseña
predeterminada '000000' y pulse OK para confirmar. Esta opción
eliminará todos lo canales preseleccionados y los ajustes.
Información
Vea información sobre el modelo, hardware y el software.
Actualización del software
Actualización del software
OK
ConfirmReturn
13
Page 79

Primera instalación
USB
Para acceder al menú, pulse el botón Menu y seleccione USB.
LOCALIZACIÓN Y RESOLUCIÓN DE PROBLEMAS
Problema Posibles motivos Qué hacer
USB
Multimedia
Photo Configure
Movie Configure
EXIT
Multimedia
Pase al modo USB y conecte el dispositivo USB para ver archivos.
OK
ConfirmReturn
Especificación de los controles
Elemento Sub Subelemento Parámetro
Sintonizador
Vídeo
Frecuencia de
entrada
Nivel de entrada RF
Ancho de banda IF
Modulación
Formato de
descodificador
Formato de salida
Puerto de salida
170~230MHz
470~860MHz
-25~-82dBm
7MHz y 8MHz
QPSK,16QAM,64QAM
MPEG4 AVC/H.264 HP@L4
MPEG2 MP@ML.HL
576P , 720P, 1080i, 4:3 and 16:9
HDMI
No hay imagen
La pantalla no
muestra señal
No hay sonido
desde los
altavoces
Hay audio pero
no imagen en
la pantalla
El mando a
distancia no
responde
La imagen se
detiene de golpe
o se muestra
como un mosaico
No se ha enchufado el
aparato
No se ha encendido el
aparato
Cable DVB-T no conectado
Ajuste incorrecto
No hay conexión con cable
de audio o esta se ha
realizado incorrectamente
Se ha suprimido el audio
Pista sonora incorrecta Pruebe otra pista sonora
No hay conexión con
cable de AV o esta se ha
realizado incorrectamente
Se trata de un
programa de radio
Las pilas están agotadas
El mando a distancia no
apunta al descodificador
o no se encuentra lo
bastante cerca
La señal es demasiado
débil
Enchúfelo
Encienda el aparato
Conecte el cable DVB-T
Reajuste
Conecte el cable de
audio correctamente
Desactive la función de
supresión de audio
Asegúrese de conectar
los cables
correctamente
Pulse <TV/RADIO>
para pasar al modo TV
Sustituya las pilas
Ajuste la posición del
mando a distancia y
acérquelo a la unidad
Refuerce la señal
14
Page 80

Servicio y asistencia
Para información: www.lenco.com
Lenco ofrece servicio y garantía en cumplimiento de la ley de la Unión
Europea, lo cual implica que, en caso de que su producto precise ser
reparado (tanto durante como después del periodo de garantía),
deberá contactar directamente con su distribuidor.
Nota importante: No es posible enviar sus reparaciones
directamente a Lenco
Nota importante: Si la unidad es abierta por un centro de servicio no
oficial, la garantía quedará anulada. Este aparato no es adecuado
para el uso profesional. En caso de darle un uso profesional, todas las
obligaciones de garantía del fabricante quedarán anuladas.
ADVERTENCIA: Una exposición prolongada a
sonidos elevados de reproductores de música
personales podría conllevar la pérdida temporal o
permanente de oído.
Los productos con la marca CE cumplen con la
Directiva EMC (2004/108/EC) y con la Directiva de
Bajas Tensiones (2006/95/EC) emitida por la Comisión
de la Unión Europea.
La declaración de conformidad puede ser consultada
en:
https://lencosupport.zendesk.com/forums/22413161CE-Documents
Este símbolo indica que no deberá deshacerse del
producto eléctrico o batería en cuestión tratándolo
como desecho del hogar en el ámbito de la UE. Para
garantizar un tratamiento residual correcto del
producto y su batería, por favor, elimínelos
cumpliendo con las leyes locales aplicables sobre
requisitos para el desechado de equipos eléctricos y
baterías. De hacerlo, ayudará a conservar recursos
naturales y mejorar los estándares de protección
medioambiental en el tratamiento y eliminación de
residuos eléctricos (Directiva sobre la Eliminación de
Equipos Eléctricos y Electrónicos).
®Reservados todos los derechos
15
 Loading...