

Page 1
Internet Radio with FM
CR-2003
User Manual
www.lenco.com
Page 2

Table of Contents
Before Started
Safety Precautions
Network Requirements
Appearance and Key Descriptions
Getting Started
About Music Streaming
UPnP
DLNA Function
CR-2003 Functions
Overview
Main Menu
Configuration
My mediaU
Internet Radio
Local Radio
Media Center
FM
Information Center
AUX IN
LINE OUT
3
3
3
5
10
16
16
18
22
22
23
23
37
38
41
42
43
44
45
46
Remote control via APP
Troubleshooting
Specifications
46
47
49
Page 3

1. Before Started
1.1 Network Requirement
Before using the CR-2003, the following requirements are
needed:
A broadband connection in combination with a
wired/wireless access point, router or similar network
device.
The network device needs to support WiFi (802.11b/g/n)
wireless connection.
A PC or smart phone with a network ready. This network
has to be the same one as the CR-2003 equipped with.
1.2 Safety Precautions
Do not drop the CR-2003 and do not expose it to liquid,
moisture or humidity. These might lead to damage to the
device.
If the CR-2003 is moved from a cold environment into a
warmer one, do let it adapt to the new temperature before
operate the device. Otherwise, it might lead to
condensation and cause malfunctions in the device.
Do not use the CR-2003 in the dust environment as dust
can damage the interior electronic components and lead
to malfunctions in the device.
Protect the CR-2003 from strong vibrations and place it
on stable surfaces.
Do not attempt to disassembly the CR-2003.
Only use the power adaptor delivered with the CR-2003.
The socket outlet should be installed near the CR-2003
and should be easily accessible.
Never touch the power adaptor with wet hands and never
pull on the power cable when pulling the plug out of the
power socket.
Make sure the electrical voltage specified on the CR-
3
Page 4

2003 and its power plug is corresponding to the voltage of
the power socket. Incorrect voltage will destroy the
device.
If the CR-2003 is not using for a long period of time,
disconnect it from the power supply by unplugging the
power plug. This is to avoid the risk of fire.
It is not recommended to listening the CR-2003 with
headphone via LINE OUT, because power output is too
high and sound will be distorted.
Always power off the CR-2003 when cleaning it.
Never use any harsh or strong solvents to clean the CR-
2003 since these may damage the surface of the device.
Dry, soft cloth is appropriate, however, if the CR-2003 is
extremely dirty, it may be wiped off with a slightly moist
cloth. Make sure the device is dried off after cleaning.
When you are necessary to ship the CR-2003, store it in
its original package. Save the package for this purpose.
4
Page 5
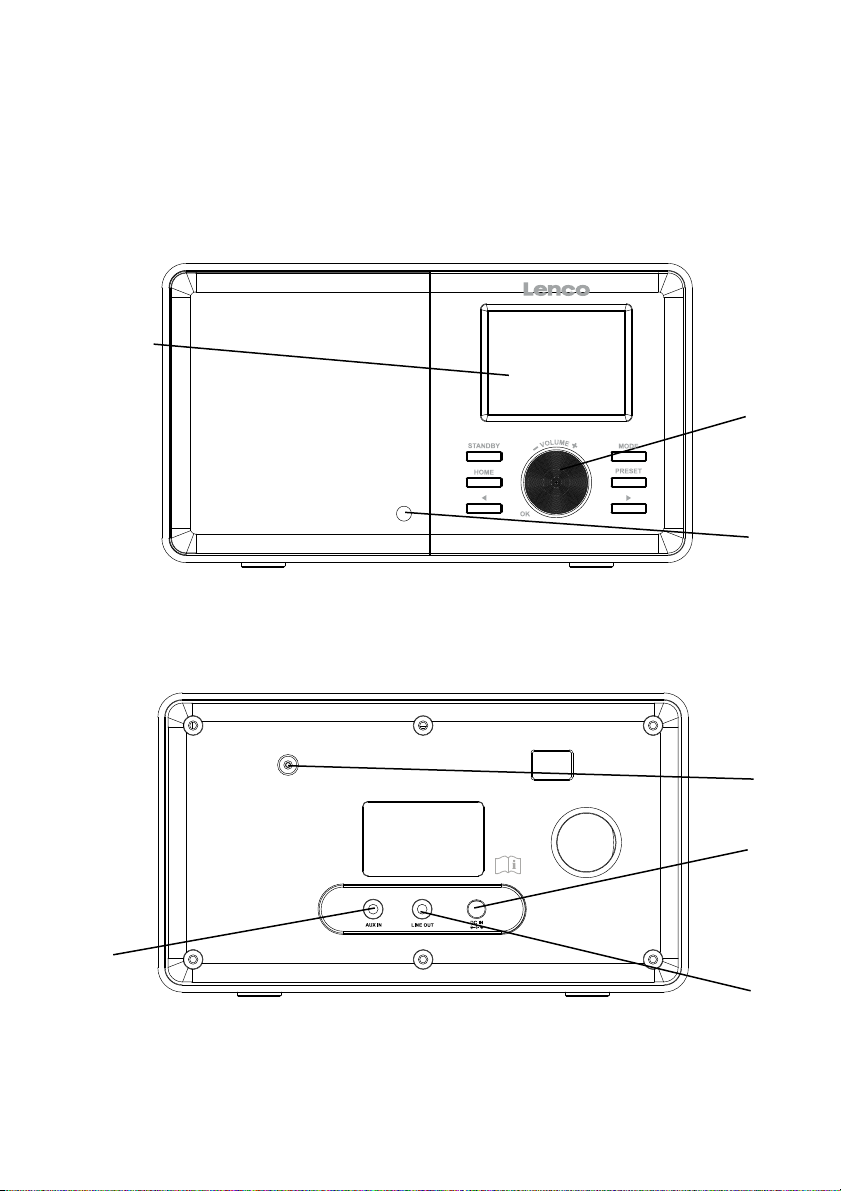
2. Appearance and Key
Descriptions
Front View
1
Back View
2
3
7
4
5
6
5
Page 6
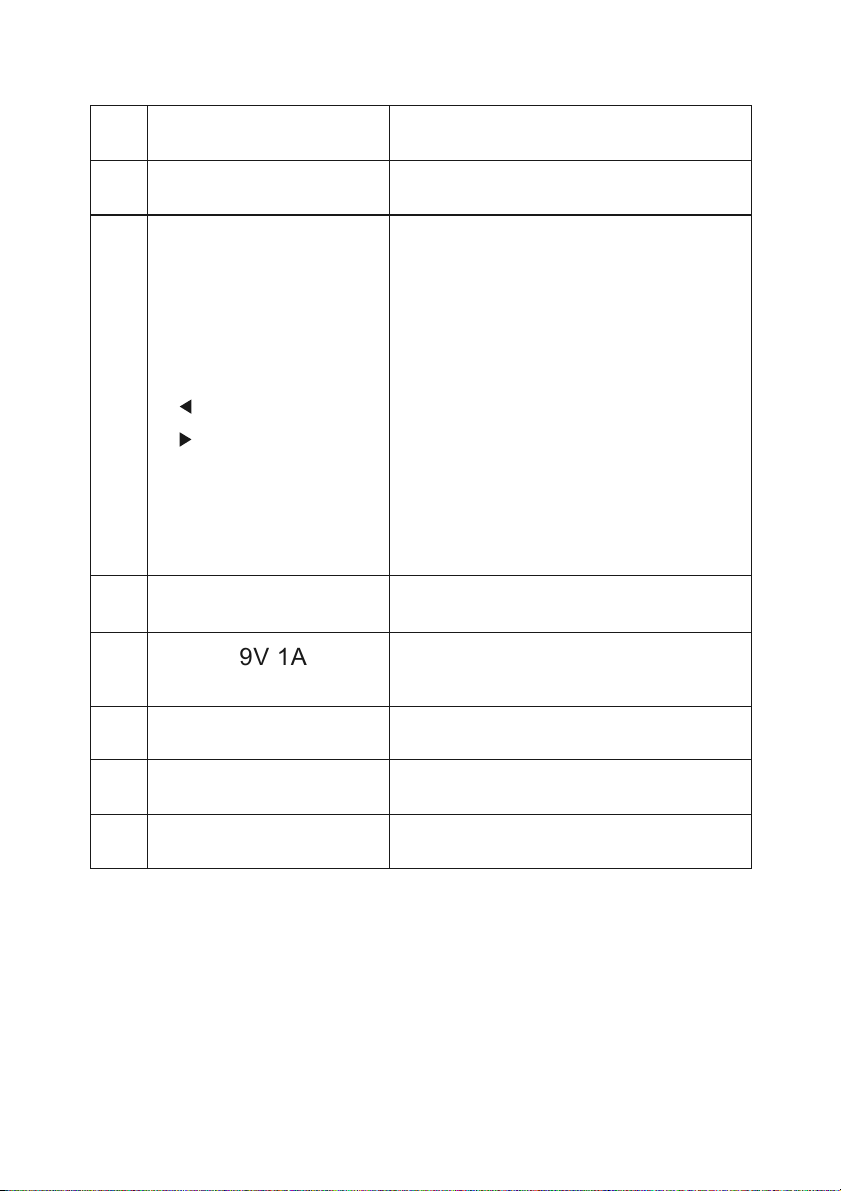
No . Description
Fu nctions
1
2.4" TFT Screen
Buttons and Reel
-Standby
-Mode
2
-Home
-Preset
-
-
-Volume+ OK dial
Display
Control panel
-Switch on/off
-Switch between audio
sources
-Go to main menu
-Save station
-Left cursor button
-Right cursor button
-Adjust volume; Cursor
up/down; Confirm
selection
3
Infrared receiver Reception of remote control
4
DC IN 9V 1A
Connection socket for mains
adapter
5
Aux in
3.5 mm audio in socket
6
Line out
7
Antenna
6
3.5mm audio out socket
FM Reception
Page 7
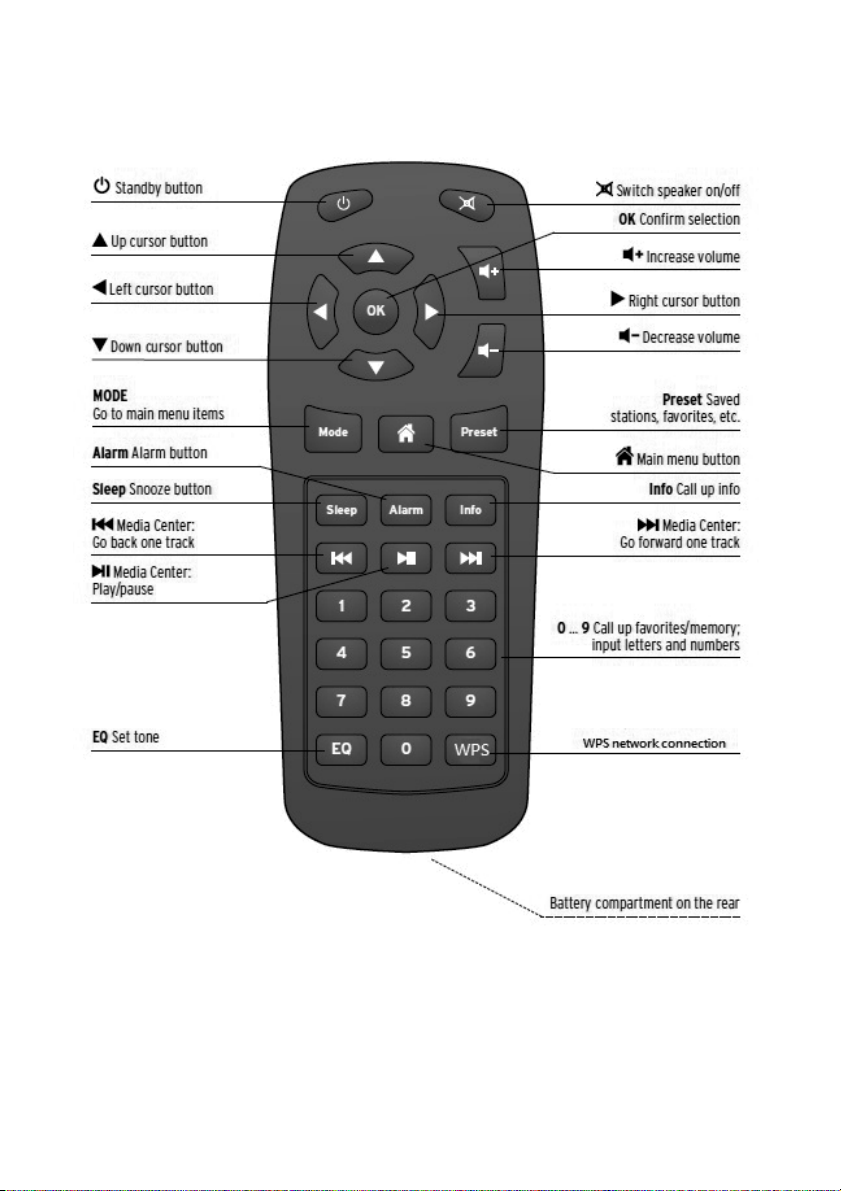
Remote Control
7
Page 8

Remember to pull out the
clear plastic tab from the
battery compartment before
using the remote.
To remove the battery from
the remote, use your thumb
to pull out the battery tray.
Replace it with a CR2025
type 3V battery, taking care
to insert it with the positive
(+) side up.
Caution: Risk of
explosion of battery is
replaced by an incorrect
type.
Dispose of used batteries
according to the instructions
8
Page 9
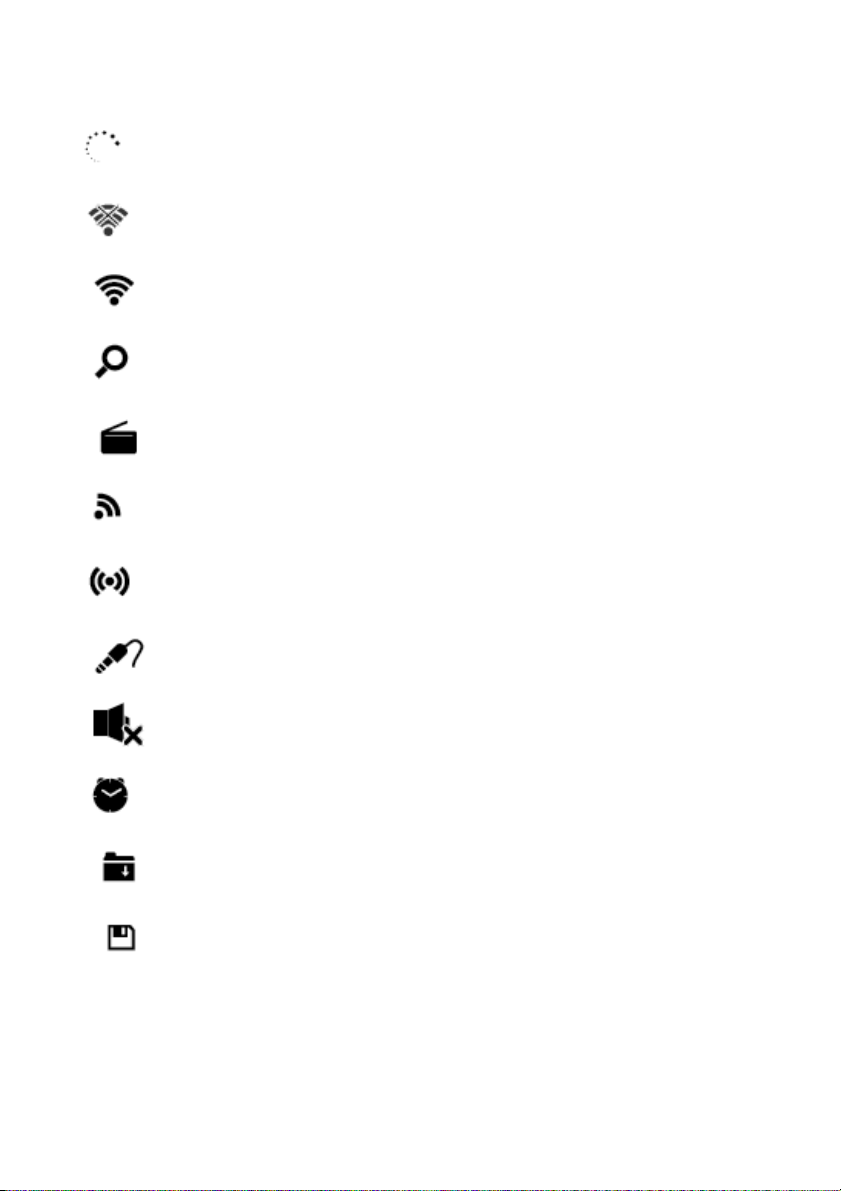
Symbols on the display
Connection is being established, device functioning
No wireless connection
Wireless connection established
Search
VHF radio function selected
VHF radio reception: Mono
VHF radio reception: Stereo
AUX function selected
Speaker off
Alarm on
Internet radio station saved as favorite
FM radio station saved
9
Page 10

3. Getting Started
The packaging box contains the following items:
CR-2003 Internet Radio
Remote Control
Power adaptor
User Manual
Get the network ready
For wireless LAN (WLAN) network connection:
Check if WLAN LINK/ACT light of the wired/wireless
access point or router is illuminated. Consult the
user guide of that for any questions.
Note: WiFi allows data transfer over short distances
within 20 meters without the need of cabling between
the devices. Any walls or ceilings may reduce the
strength of the WiFi connectivity.
Therefore try to locate the CR-2003 and/or the access
point within the distance mentioned above, and
avoid any obstacles between two devices.
Connect the power adaptor to the back of the CR-2003
and plug into power socket.
10
Page 11
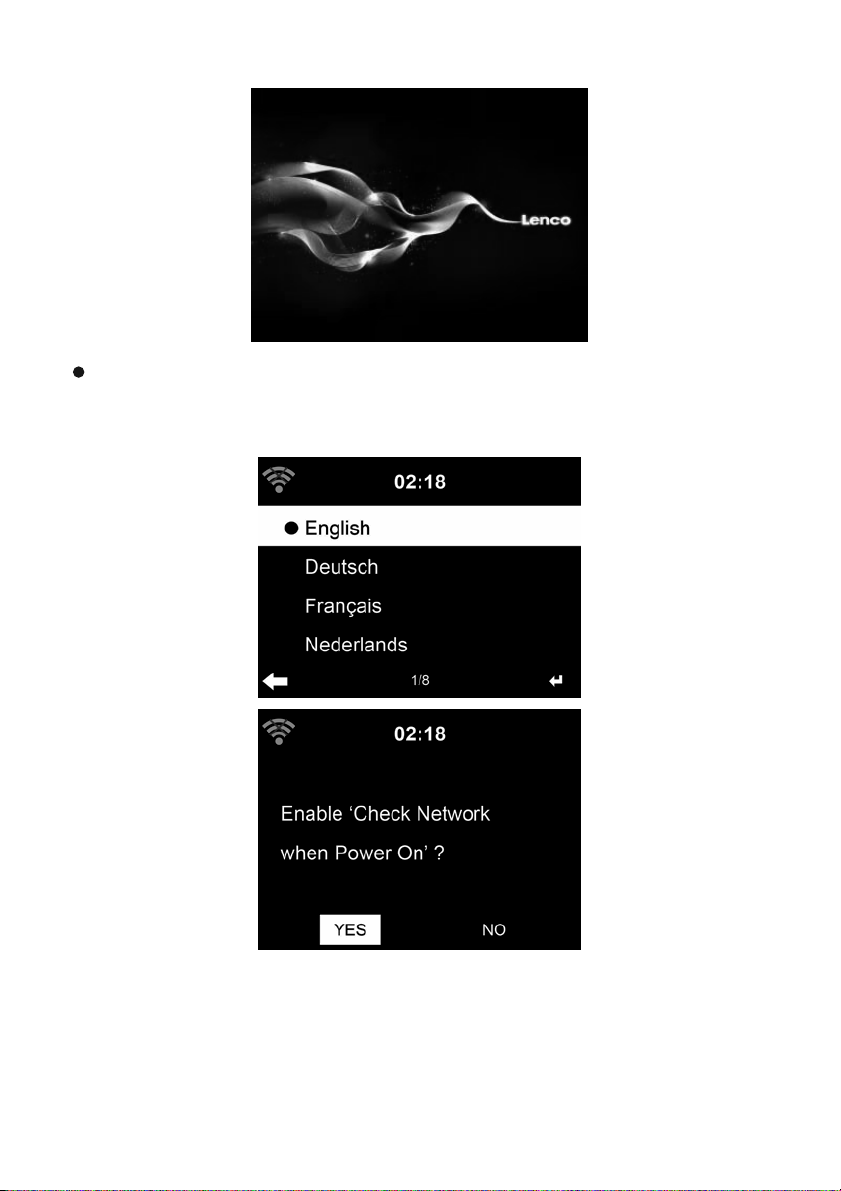
When it is the first time running the device, the system will
ask you to set Language and Network Configurations.
11
Page 12
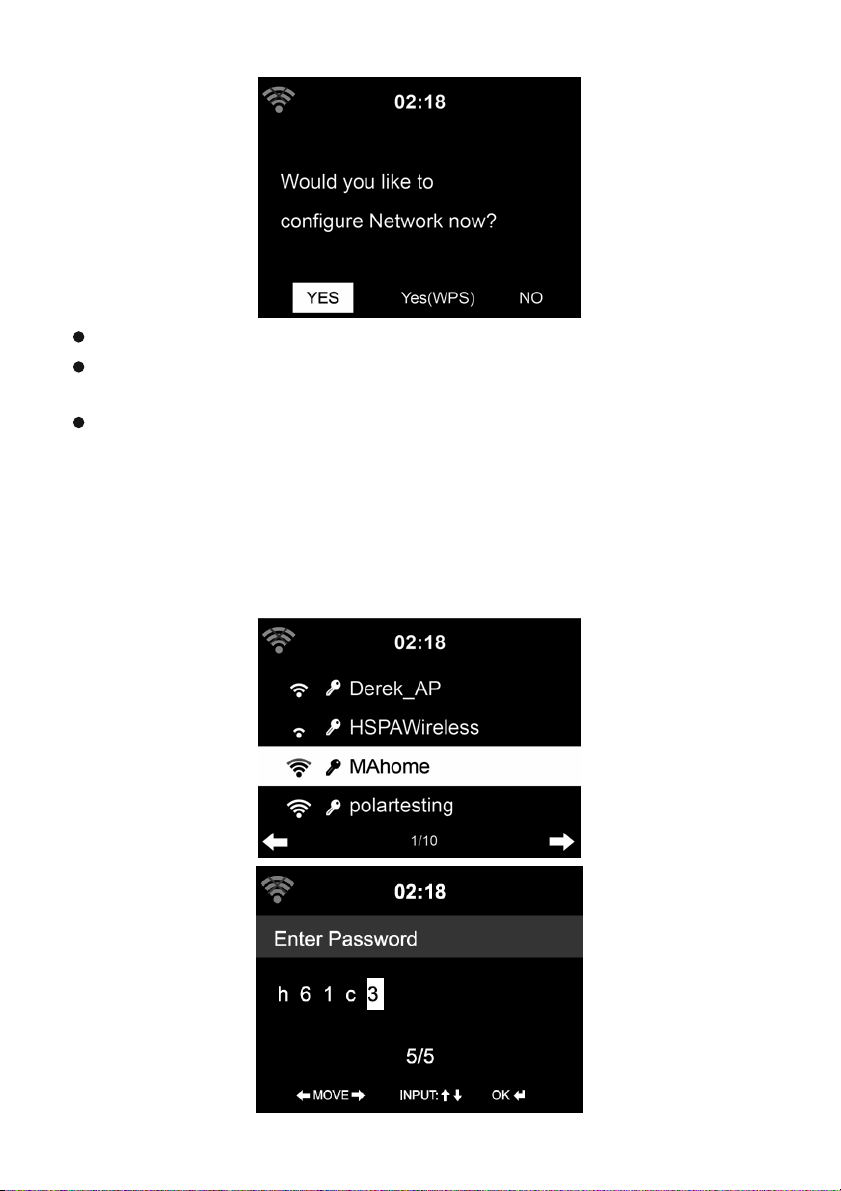
Select Yes to establish connection to the network
Select Yes(WPS) (only for WPS routers). Then press the
WPS butto on your router.
Select No if you would prefer to listen to a terrestrial station
or to use the speaker with an external playback device.
If you answer “Yes”, the display goes to scanning for
Wireless Network and shortly afterwards a list of available
wireless networks will appear.
12
Page 13

The number of bars in the wireless symbol in front of the network
name (SSID) shows the relative signal strength of the network.
The key symbol indicates that the network is password-protected.
If the device does not find any wireless networks, No wireless
Networks Found appears on the display. Change your location, if
necessary, and check your WLAN router.
You can find the SSID of your Access Point in the configuration of
the Access Point (router).
Select your network and confirm with OK. If your WLAN is
password-protected, you will be prompted to enter your
password.
Enter the password using the number and letter buttons of the
remote control or enter it directly on the device.
Note the use of upper and lower case when entering the
password.
You can rotate reel to choose the code. If it is accidentally
pressed to move a redundant entry, press to
correct.
With Remote control:
The cursor indicates the current entry space.
Press the corresponding number button repeatedly:
0 0 (delete entry)
1 1 (space) @ ! “ # $ % & ‘ ( ) * + , - . / : ; < = > ? [ \ ] ^ _ ` { |
} ~
2 2 A B C a b c
3 3 D E F d e f
4 4 G H I g h i
5 5 J K L j k l
6 6 M N O m n o
7 P Q R S p q r s
13
Page 14
8 T U V t u v
9 W X Y Z w x y z
Alternatively, you can enter the numbers and letter using only
the cursor buttons:
Go to previous entry space, entry can beoverwritten
Go to next entry space, the last entry is saved
/ Select number/letter
OK Confirm entire entry
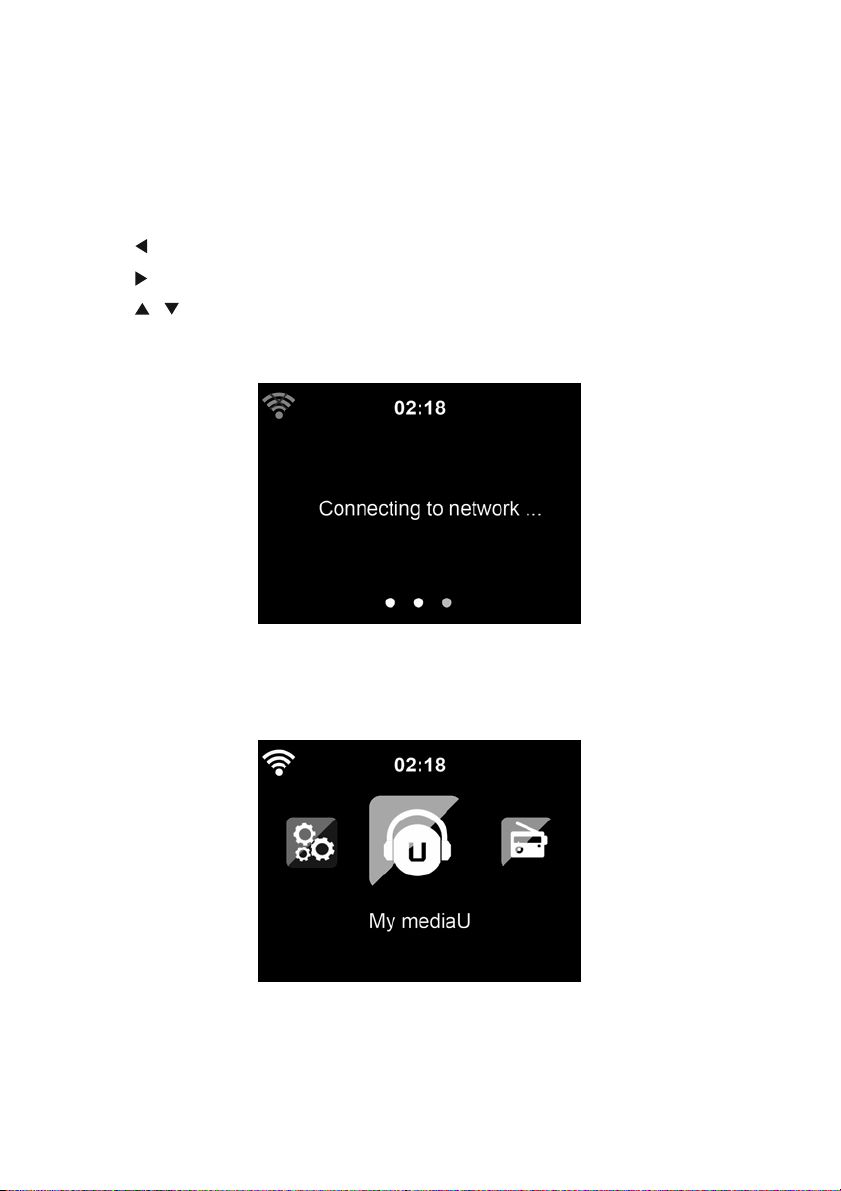
It may take a few seconds to establish the connection to the
network.
Once the connection is established, the main menu appears
with the main menu items:
- Internet Radio : Access to worldwide radio stations
14
Page 15
- Media Centre : Access to your UPnP devices via
software with streaming capability
- FM : Terrestrial VHF radio stations, WLAN not
necessary
- Information Center: Access to weather, financial
and system information
- AUX : Access to all devices connected via the
AUX IN socket
- Configuration : various system settings, alarm
- Local Radio : Access to radio stations in a
particular region (e.g. only German stations)
- My mediaU : Access to an online media library.
This menu item only appears if the function has
already been enabled under Configuration > Manage
my mediaU.
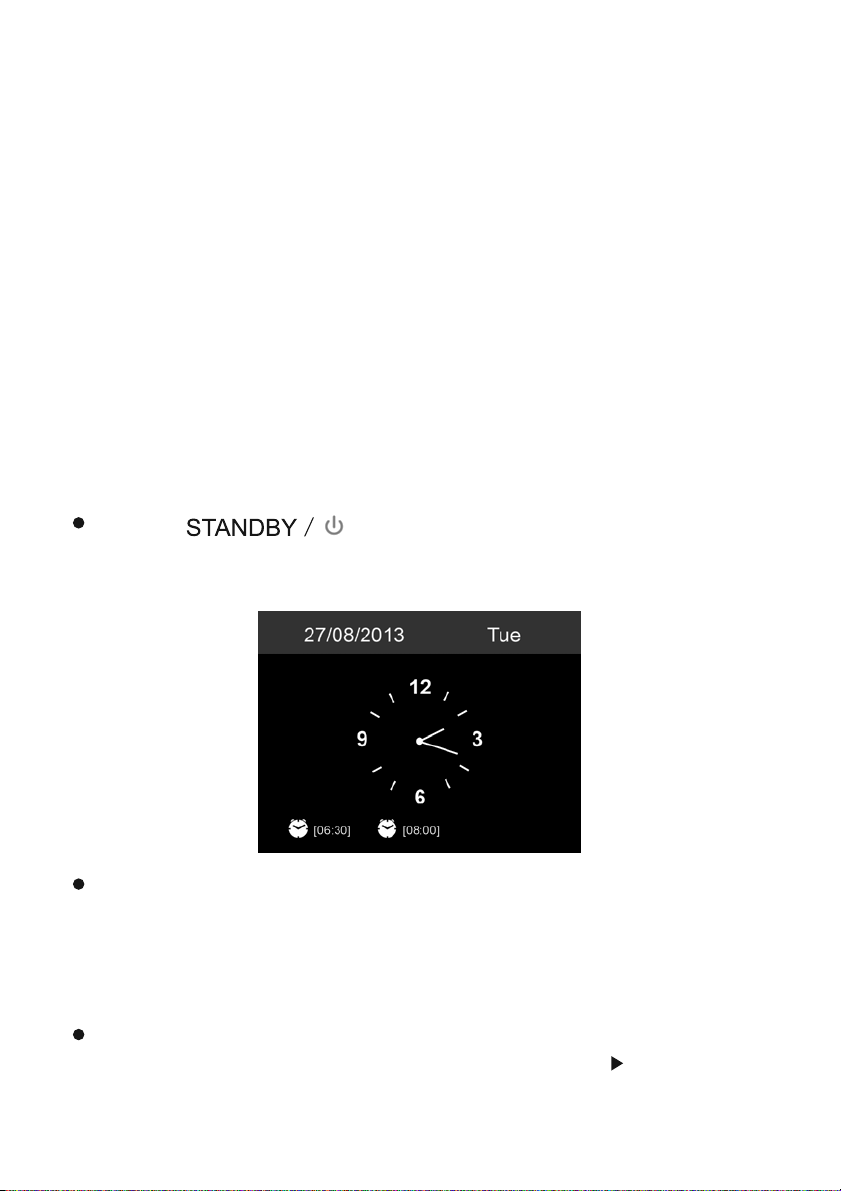
Press to enter standby mode. The time,
date and any active alarm times display on the
screen.
If you have setup a network connection, and use CR-2003
again within the network, CR-2003 will automatically
make the connection. In case you desire to change
the network, enter configuration to setup the
corresponding connection.
Use the letter keys to input numbers/letters.
Once you are on the letter you want, press to move to
the next entry. When you are at the end the input, press
15
Page 16

OK to confirm. You may press to move to previous
entry.
Press or rotate the volume reel to adjust the volume.
Rotate the volume reel or press until volume level
becomes 0, or direct press to mute the sound.
/
4. About Music streaming
Lenco CR-2003 is the default device name for DLNA, and you
may rename it as you like. (See section 5.3)
The information below is the introduction of how to setup up
media streaming from PC or other media server. Study the own
instruction of the software or apps you use to enjoy music
streaming if necessary.
Make sure the music files are in the format of MP3, WMA, WAV
or AAC for music streaming to CR-2003.
Refer to section 5.7 for the details of the control on CR-2003
for music streaming playback.
4.1 UPnP
To enjoy the streaming music from PC, the following steps
are to be done on the PC:
- Connect the PC to the network.
- Ensure the CR-2003 is powered on and connected to
the same network.
- Open the UPnP platform Windows Media Player (11 or
later). Alternatively, other platforms or server such as
Windows Media Connection may be used.
Below set up example is under Windows XP and Windows
Medio Player 11 version.
16
Page 17

- Allow to share your media to Lenco CR-2003.
- Add the audio files and folders you want to share with
CR-2003 to the media library.
You may also enjoy the streaming music from other music
server, such as smart phone (Android platform):
- Connect the mobile to the network
- Search and install media sharing apps from Google
Play.
- Add the audio files from your mobile you want to share.
17
Page 18

After setup the shared server, choose the music and control
playback on the CR-2003. (See section 5.7)
4.2 DLNA Function
Besides UPnP, CR-2003 supports DLNA function, you share
the music files from PC or Android mobile, and you use
your PC, Android mobile or iPhone / iPad to control music
playback on the CR-2003. (It is not required to control each
playback on the CR-2003.)
The PC system requirement for DLNA is Windows 7 and
Windows Media Player 12. Setup as below:
Firstly, share the media on your PC to CR-2003.
Control Panel > Network and Internet > Network and
Sharing Center > Media streaming options
Open Windows Media Player to enable Allow remote
control of my Player.
18
Page 19

Right click any music in the library and choose Play to
Lenco CR-2003.
There will be a window for controlling music playback on
CR-2003.
19
Page 20

You may search and install any free or commercial DLNA
apps from Google Play or Apple Store if you are using
Android mobile, tablet or iPhone / iPad. It is suggested to
use bubbleUPnP, MediaShare on Android mobile, tablet or
iPhone/iPad.
Some apps may not support streaming music from
iPhone/iPod but iPhone/iPod could still be used to control
streaming music from other servers.
Procedures for playing shared music on the app are as
follows:
Select Lenco CR-2003 as the player. S
ome apps may allow
to play the music to multi players at the same time.
Select music server and choose the music. Some app can
create a playlist if you choose several music.
20
Page 21

Select server and
Select music
player
When using DLNA music streaming function on Music
Link, you can only control the volume and standby via
the unit. It is restricted to control the other functions.
Stop DLNA on PC, mobile or tablet before you resume
Music Link’s own control.
21
Page 22

5. CR-2003 Functions
5.1 Overview
22
Page 23

5.2 Main Menu
Under the main menu, you can select the following modes:
My mediaU, Internet Radio, Local Radio, Configuration,
AUX, Information Center, FM, Media Center.
5.3 Configuration
5.3.1 Manage my mediaU
My mediaU media library – managing radio stations via
lnternet
In order to access your favourite radio stations worldwide, at
any time and using any device with streaming capability, you
can create a free account for a media library at
www.mediayou.net and add as many devices as you like.
You can access the service with a username and password of
your choice.
23
Page 24

You must also know the MAC address of your device (called a
serial number on MediaYou) in order to register this device
under “Personalize Your Internet Radio”.
You can find the AC address of the Internet radio under
Information Center > System information > Wireless Info >
MAC Address.
After registering the device, you must enable this function
under Configuration > Manage my mediaU, so that the
Internet radio can access the media library.
24
Page 25

The device automatically connects to your account and
displays what has been saved there:
- Favorite Station
- Favorite Location/Genre
- My Local Station
- Manually Add
Depending on your personal My mediaU settings, the
display on the Internet radio may look different.
If the device has not yet been registered with MediaYou,
a corresponding message appears when you wish to
enable My mediaU.
If you have registered a device with multiple accounts,
these will be displayed after the activation and you can
select the account you wish to use. It is not necessary
to enter a password.
The menu Item My mediaU also appears in the main menu.
You can find the selection again here:
- Favorite Station
- Favorite Location/Genre
- My Local Station
- Manually Add
You can also find this selection in the media library, where
you can assign and manage the radio stations accordingly.
25
Page 26

Under Add Manually, you can link the device to podcasts, for
example.
You must know the URL of the podcast for this purpose.
1. Fill in the highlighted fields in your MediaYou account
under “Add Manually”.
2. On the Internet radio, go to Configuration> Manage
my mediaU and enable once again.
3. Under My mediaU > Manually Add, you can find all
manually added folders and addresses and can select the
podcast.
The following podcast formats are supported:
- asx
- m3u
- pls
- pure streaming with HTTP, RTSP, MMS protocol
26
Page 27

5.3.2 Network
Wireless Network Configuration
Enable / disable WiFi network. When you enable the WiFi
network, the system will automatically
Select you required router.
You may refer to the section 3, Getting Started for the
network setting.
Wireless Network (WPS PBC)
If you are using a router with WPS/QSS button, you may
set up the network connection simple via WPS function.
27
Page 28

Press WPS key on the remote control or select the WPS
network connection mode. Enter it go to press the
WPS/QSS button on your router within 120 seconds. The
connection between the router and Lenco CR-2003 will
then be configured automatically.
Manual Configuration
You can choose DHPC (which IP assigned automatically) or
manually input IP address for wireless network connection.
When you select manual setting for wired connection, the
followings have to be entered:
28
1. SSID (the name of Access Point);
2. IP Address;
3. Subnet Mask;
4. Default Gateway;
5. Preferred DNS Server;
6. Alternate DNS Server.
You may choose (Manage) specific network if you have
setup more than one network connection within an area.
Check Network when Power On
Enable / disable WiFi network.
When you enable the WiFi network, the system will
automatically search the available AP. Select you required
AP.
Page 29

Enter WEP or WPA code to connect the WiFi.
If the wireless network connection is not existed or failed,
the icon at the top left corner will have a cross on it.
5.3.3 Date&Time
The date and time settings can only be made if the lnternet
radio is connected to a wireless network.
Setup the date and time: The internet radio takes the date
and time automatically from a central server once a network
connection has been established. However, you will need to
change the time manually to account for the change from
winter time to summer time.
Set time format display as 12 Hour or 24 Hour;
Set date format in the positions of YY (year), MM (month) and
DD (day) – YY/MM/DD, DD/MM/YY or MM/DD/YY.
Turn on/off the Daylight Saving Time (DST).
Confirm with OK or by pressing the reel.
With a wireless network connected, GMT (+01:00) time is a
time reference of time setting. Add or deduce the hour
according to your time zone when you set the time.
29
Page 30

5.3.4 Alarm
There are three independent alarms - 2 alarms of absolute
time setting (Alarm 1 and Alarm 2) and 1 alarm for relative
time setting (NAP Alarm ). Press Alarm on the remote control
to enter this menu directly.
30
Page 31

The first two alarms are similar to the normal alarm, turn on
then set the time and set it alarms Everyday, Once or every
specific day of week.
Select Alarm time. Set the respective values using / on
the remote control or the reel on the device and switch to the
next entry field using Confirm with OK or by pressing the
reel.
Choose Sound to set the sound to Beep, Melody or Radio
(Internet Radio or FM). An alarm symbol will appear on
the top of the display next to the time.
Note that the alarm source is from the preset Internet radio or
FM if Alarm Sound is set to be Radio. It can only set one same
IR/FM station for Alarm 1 and Alarm 2. When it reaches the
alarm time, the unit connects to the Internet if the set network
is available. Therefore there may be some delay from the
alarm to the radio play. If no network is connection in one
minute, the alarm will change to Melody automatically.
After NAP Alarm is set, it alarms once in 5/10/20/30/60/90/120
minutes depending on which one you have set.
You may choose Alarm Volume to configure the volume of the
alarms.
When the alarm(s) is/are set, there will be a clock icon at the
bottom of the display. The clock icon with alarm time will also
clearly display on the standby mode screen.
31
Page 32

During alarm, press any keys (except press on the remote
or press Standby on the device to stop the alarm) to enter to
snooze mode. It will alarm again in 5 minutes. Press on
the remote or press Standby on the device to stop the alarm.
5.3.5 Language
Select the OSD language: English/ German/ French/
Hungarian/ Czech/ Slovakian/ Polish
5.3.6 Dimmer
Configure the brightness of backlight on the display.
Select “Power Saving” to set the brightness of backlight in
32
Page 33

standby mode, and select “Turn On” to set that in operation
mode.
Choose Dimmer Timer to set the duration of the radio changing
backlight when you are not controlling it.
5.3.7 Power Management
Configure to go to standby mode automatically during in the
menu or/and without Wifi signal.
Choose the power management timer (5/15/30mins) to set the
duration of the radio to switch standby mode automatically
when you are not controlling it.
Choose “Turn off” to ignore the power management function.
5.3.8 Sleep Timer
Turn off or set the sleep time of 15/30/60/90/120/150/180
minutes. Once the time is set, there will be a bed icon with
remaining minutes at the top right corner and CR-2003 will turn
to standby then. Press Sleep on the remote control for the
shortcut of this function.
33
Page 34

5.3.9 Buffer
Configure the buffer time of the music playback, 2/4/8 seconds.
5.3.10 Weather
CR-2003 is able to display the current weather information
(refer to 5.9.1) under standby mode. Turn on Standby Display
and set Temperature Unit (℃ or ℉) to get the weather
displayed at the standby mode.
When it is turned on, the current time and the current weather
will display in alternative 10 seconds.
34
Page 35

5.3.11 FM Setup
Choose Mono/Stereo mode when listening to FM station.
5.3.12 Local Radio Setup
There is a shortcut Local Radio under Internet Radio so that
you can easily go to the station list of your location.
You may Manual Setup your location, or let the system Auto
Detect your current location. The system detects the location
according to the IP address of your connected network.
5.3.13 Playback Setup
Select the playback mode of media center – Off (no repeat or
shuffle), Repeat all, Repeat one, or Shuffle.
35
Page 36

5.3.14 DLNA Setup
Default device name for DLNA is Lenco CR-2003. You may
rename it for DLNA setup on the PC or mobile. (see section
4.2)
5.3.15 Equalizer
Default equalizer is Normal, you may change to Normal, Flat,
Jazz, Rock, Soundtrack, Classical, Pop, or News.
Press EQ on the remote control to swap among the EQ mode
for shortcut.
36
Page 37

5.3.16 Resume When Power On
The system is default to resume the main menu when
switching on the unit. If turn this setting on, the system will
remain in the internet radio playback. If you were listening to
internet radio or media center before switch off the unit.
5.3.17 Software Update
Update software. If there is an updated software version on the
server, the system will notify you when you return to the main
menu.
5.3.18 Reset
Restore the default settings.
After CR-2003 is reset, the system will move to Language
setting menu. And it will automatically turn to Network setting
menu once the OSD language is elected
5.4 My mediaU
Display and playback your own mediaU station list on the
mediaU server. Set your account first (see the section 5.3.1).
37
Page 38

5.5 Internet Radio
After the connection of any station is succeeded, the bit rate
and the format of the station will display on the playing screen.
5.5.1 My Favorite
List of my favorite preset stations. It supports 250 favorite
entries including station and folder.
During the station playing screen, press and hold Preset to
save the station as my favorite. You may replace the previous
saved station to the new one. The symbol appears in the
top line of the display while the device is saving.
If the Selected station have been saved, you cannot save it
again.
The saved stations are showed under this menu. You may also
press Preset to enter the saved station list.
38
Page 39

Under the preset station list, move to your station, press OK to
listen. You may also press to enter its submenu to Delete
(deletes a radio station from the favourites list), Shift Up/Down
along the list, Rename (you can give the radio station a name
of your choice), Play, or Use as Alarm Sound (if you chose
internet as alarm sound in alarm configuration).
250 storage spaces are available for your favorites.
39
Page 40

5.5.2 Radio Station/Music
Stations are categorized into Global Top 20, Genre,
Country/Location and Highlight.
Enter to continue the subcategories and choose the station to
listen.
For each station, press OK to play directly. You may press
to enter its submenu – you can Add to Favorite, Auto Scan,
Play or Use as Alarm Sound (if you chose internet as alarm
sound in alarm configuration).
When you choose Auto Scan, it becomes the playback of
marquee for each station in the subcategory. Each station
plays 30 seconds until all have played or you press OK to stop
the marquee listening.
Press Info to view the display information of the station.
5.5.3 History
A list of last listened stations. It can save up to 10 history
stations.
For each station, press OK to play directly. You may press
40
Page 41

to enter its submenu – you can Add to Favorite, Auto Scan,
Play or Use as Alarm Sound (if you chose internet as alarm
sound in alarm configuration).
When you choose Auto Scan, it becomes the playback of
marquee for each station in the History. Each station plays 30
seconds until all have played or you press OK to stop the
marquee listening.
5.5.4 Service
Search radio station - Enter your keyword to search radio
station from the list.
Add new radio station - The added stations will be stored in
My Favorite. Note that the maximum character of the station
name is 250.
5.6 Local Radio
There is a shortcut Local Radio under Internet Radio so that
you can easily go to the station list of your location.
The device can use the IP address to detect its current location
and can then automatically generate a list of local radio
stations. However, you can also enter a different country.
(Refer to Local Radio setup section 5.3.12)
41
Page 42

5.7 Media Center
5.7.1 UPnP
If you have set up shared media, you should see the shared
media from UPnP. If you have more than one computer
sharing media, the alternatives are listed. SELECT the shared
media you want to play.
(see section 4.1)
Press / on the remote control to play previous/next
music track, press to stop or play.
Press Info to view the display information of the playing track.
Tips: The radio can only read the track with the file name less
than 40 characters. And the characters should be in European
language. If you encounter failure of reading the track under
UPnP mode, you may try to rename the file.
However, if the track is still unable to play, you can try
converting the file to different formats.
42
Page 43

5.7.2 My Playlist
You can create a playlist of favourious music from UPnP.
When you playing the music, press and hold OK to save it into
My Playlist.
5.7.3 Clear My Playlist
You can remove all the saved music under My Playlist.
5.8 FM
FM radio mode receives analogue radio from the FM band.
(Refer to 5.3.11 for the setting of FM band)
Press / to search FM station. The frequency display
starts to run up as CR-2003 scans the FM band. It stops when
it has received a station.
You may press / on the remote control to tune station
manually. Each step moves 0.05MHz.
Press and hold the PRESET on the remote control to save the
station.
You can save up to 20 stations. Press PRESET, then press
43
Page 44

/ on the remote control to choose the saved station.
Alternatively, you can let the system scan ALL stations for you
by pressing OK, The searched stations will automatically be
stored in preset station list.
5.9 Information Center
5.9.1 Weather Information
There are weather information and forecasts for 2000 cities.
Select the country and then the city for the weather details.
Rotate the reel to see the weather forecasts.
It is able to display the weather information on the standby
mode. On the weather information page, press , then
show “Add to Standby”. If you want the weather of the city you
selected displaying on the Standby, press OK to set the
44
Page 45

city to displaying on the standby mode. Then turn on the
weather display as mentioned in 5.3.10.
5.9.2 Financial Service
View the stock index from around the world.
5.9.3 System Information
Check out the version of the system, and the details of
connected network. The information includes MAC address
which you are required to fill in when registration of my
mediaU membership.
5.10 AUX IN
Aux in mode plays audio from an external source such as an
MP3 player.
To play audio with Aux in mode:
Turn the volume low on both CR-2003 and, if adjustable,
the audio source device.
Connect the external audio source to the Aux in 3.5mm
stereo socket.
Either press MODE until the display shows AUX IN or
select AUX in under Main menu.
45
Page 46

Adjust the volume of CR-2003 (and, if necessary, the audio
source device) as required.
5.11 LINE OUT
Internet radio playback via an external device
You can connect an external device such as a stereo system
to the LINE OUT output socket.
You will require an audio cable with 3.5mm jack.
- Select the corresponding input on your stereo system.
The music from the Internet radio will be played via the stereo
system.
- The LINE OUT output socket is not suitable for
connecting standard/in-ear headphones.
6. Remote Control via Apps
Some apps for Android, e.g. AirMusic Control, let you control
the internet radio from your smartphone or tablet.
As soon as the devices are connected, the same menu
structure shown on the Internet radio will appear on the
smartphone/tablet. You can select all functions just like on
the radio. The selected functions / menu items shown on the
radio will change according to the actions taken on your
mobile device.
If you are controlling the Internet Radio via app, a UPnP
connection to Windows Media Player may not be possible.
46
Page 47

7. Troubleshooting
Error Remedy
The device does
not switch on.
No sound.
No network
connection can be
established.
1. Check it the power adaptor is
connected properly.
2. The device may malfunction
when used in areas with strong
radio interference. The device will
work properly again once there is
no more interference.
1. Turn on the sound as it may be
muted
2. Increase the volume.
1. Check the WLAN function.
2. Try to set an IP address at the
device.
3. Activate the DHCP function on
the router and make the connection
again at the device.
4. A firewall is activated on the
network – set the respective
program in such a way that access
is possible.
5. Reboot the unit to try.
WLAN connection
cannot be
established.
No station is found.
1. Check the availability of WLAN
network on the access point.
2. Place the device closer to the
router.
3. Make sure the WEP/WPA
password is correct.
1. Check the network as well as the
access point and firewall.
2. The station may not be available
currently, try it again later or Select
47
Page 48

another station.
3. The link of the station is changed
or the station no longer transmits –
ask the provider for information.
4. The link of manual added station
is not correct, make sure it is
correct and re-enter.
Hiss in FM mode.
Alarm does not
work.
Unable to do DLNA
streaming.
Electro-Magnetic
Interference.
1. Check/move the FM antenna.
2. Move the radio.
1. Switch on the alarm.
2. Due to the volume setting, refer
to the solutions of “No sound”.
3. The source of alarm was set to
be station but there is no network
connection. Change the source of
alarm or reconfigure the
connection.
1. Check the connection of the
network, CR-2003 and your device
need to be in the same network;
and test if the network in good
condition.
2. Make sure the settings on your
device are correct.
1.The normal function of the
product may be disturbed by strong
Electro-Magnetic Interference. If so,
simply reset the product to resume
normal operation by following the
instruction manual. In case the
function could not resume, please
use the product in other location.
System freezes
suddenly.
48
1. The radio is overloaded, reboot
the unit.
Page 49

8. Specifications
Model number CR-2003
Description Internet Radio
Display 320 x 240 TFT colour display
Network supported 802.11b/g/n (WLAN)
WLAN key WEP, WPA, WPA2 (PSK) and
WPS
Streaming UPnP, DLNA
Supported playback formats WMA, MP3, WAV, AAC
FM 87.5 – 108.0 MHz
Speaker power output 5W
Power adaptor Input: 100-240V ~ 50/60Hz
Output: 9V 01 00 mA
Standby mode power
consumption
Operating temperature
Connections
Dimensions
Weight 800g
<1W
o o
0 C - 35 C
DC IN power supply socket
3.5mm aux in
3.5m
201mm(L) x 116mm(H) x
118mm(D)
m line out
49
Page 50

Power supply adaptor (For EU only) :
Manufacturer: DongGuan Yingna Electronic Technology Co.
Ltd.
Model number: YN12W-0900100VZ
Adapter type
Use only original AC adaptor
Use only the power supply listed in the user instructions
Products with the CE marking comply with the EMC Directive
(2004/108/EC) and the Low Voltage Directive (2006/95/EC)
issued by the Commission of the European Community.
The declaration of conformity may be consulted at
https://lencosupport.zendesk.com/forums/22413161-CE-
Documents
This symbol indicates that the relevant
electrical product or battery should not be
disposed of as general household waste in
Europe. To ensure the correct waste treatment of
the product and battery, please dispose them in
accordance to any applicable local laws of requirement for
disposal of electrical equipment or batteries. In so doing, you
will help to conserve natural resources and improve
standards of environmental protection in treatment and
disposal of el
ectrical waste (Waste Electrical and Electronic
Equipment Directive).
50
Page 51

Service and support
For information: www.lenco.com
For support: http://lencosupport.zendesk.com
Lenco helpdesk:
Germany 0900-1520530 (Local charges)
The Netherlands 0900-23553626 (Local charges + 1ct
p/min)
Belgium 02-6200115 (Local charges)
France 03-81484280 (Local charges)
The helpdesk is accessible from Monday till Friday from 9 AM
till 6 PM.
When contacting Lenco, you will always be asked for the
model and serial number of your product. The serial number
can be found on the back of the device. Please write down
the serial number below:
Model: CR-2003
Serial number:
Lenco offers service and warranty in accordance to European
law, which means that in case of repairs (both during and
after the warranty period) you should contact your local
dealer.
Important note: It is not possible to send products that need
repairs to Lenco directly.
Important note: If this unit is opened or accessed by a nonofficial service center in any way, the warranty expires.
This device is not suitable for professional use. In case of
professional use, all warranty obligations of the manufacturer
will be voided.
®All rights reserved
51
Page 52

 Loading...