

Page 1

BTT-2
SPEAKER TOWER WITH
BLUETOOTH®, FM RADIO, USB AND
SD CARD READER
User Manual
www.lenco.com
20130103 v1.0
Page 2

IMPORTANT INFORMATION:
Checking the model number
Before you get stared, please make sure the right user manual is included and it
belongs to your device. This user manual is only intended for the Lenco BTT-2. You
can find the model number on the packaging or on the specification plate on the back
of the device.
2
Page 3

Table of contents
Checking the model number ....................................................................................... 2
Table of contents ........................................................................................................ 3
What’s in the box? ...................................................................................................... 6
Explanation of the symbols ......................................................................................... 6
Important information before using the device ............................................................ 7
Unpacking the device ................................................................................................. 8
What to do with the packaging material.............................................................................. 8
Mounting the base ...................................................................................................... 9
Exploring the device ................................................................................................. 10
Exploring the remote control ..................................................................................... 12
Where to install ......................................................................................................... 13
Mounting the FM wire antenna ................................................................................. 14
Connecting the device to a power supply ................................................................. 15
Stopping the device in an emergency ...............................................................................15
Connecting the device to the mains ..................................................................................16
General information about the energy saving mode ................................................. 17
Basic control ............................................................................................................. 17
General operation .............................................................................................................17
Turning the power on or off on the device .................................................................................... 17
Turning the device on from standby mode ................................................................................... 17
Putting the device in standby mode .............................................................................................. 17
Adjusting the speaker volume ....................................................................................................... 17
Muting the speakers ...................................................................................................................... 17
Selecting the input source ............................................................................................................ 17
Bluetooth® mode ..............................................................................................................18
Connecting with a Bluetooth® device ........................................................................................... 18
Playing an audio file ...................................................................................................................... 18
Pausing playback .......................................................................................................................... 18
Skipping to the next track ............................................................................................................. 18
Searching forward ......................................................................................................................... 18
Skipping to the previous track ....................................................................................................... 18
Searching backward ..................................................................................................................... 18
Stop playback ............................................................................................................................... 18
AUX Mode ........................................................................................................................19
3
Page 4

Connecting an AUX device ........................................................................................................... 19
FM Radio mode ................................................................................................................19
Manual tuning ............................................................................................................................... 19
Automatic tuning ........................................................................................................................... 19
Searching for a radio station by program type .............................................................................. 20
Saving a radio frequency .............................................................................................................. 20
Recalling a preset station ............................................................................................................. 20
Switching between mono and stereo ............................................................................................ 20
SD Card mode ..................................................................................................................20
Pausing playback .......................................................................................................................... 21
Skipping to the next track ............................................................................................................. 21
Searching forward ......................................................................................................................... 21
Skipping to the previous track ....................................................................................................... 21
Searching backward ..................................................................................................................... 21
Stopping playback ......................................................................................................................... 21
Playing the content on the storage media in random order .......................................................... 21
Repeating the content on the storage media ................................................................................ 21
USB Mode ........................................................................................................................22
Pausing playback .......................................................................................................................... 22
Skipping to the next track ............................................................................................................. 22
Searching forward ......................................................................................................................... 22
Skipping to the previous track ....................................................................................................... 22
Searching forward ......................................................................................................................... 22
Stopping playback ......................................................................................................................... 23
Playing the content on the storage media in random order .......................................................... 23
Repeating the content on the storage media ................................................................................ 23
Advanced .................................................................................................................. 23
Display information ...........................................................................................................23
Sleep timer .......................................................................................................................23
Adjusting the audio settings ..............................................................................................24
Resetting the device .........................................................................................................24
Maintenance ............................................................................................................. 24
Breaking down the device ......................................................................................... 25
Storing and transporting the device .......................................................................... 28
Reorder accessories ................................................................................................. 29
Glossary ................................................................................................................... 29
4
Page 5

Bluetooth® ................................................................................................................................... 29
Open standard ............................................................................................................................. 29
LED ............................................................................................................................................... 29
Sensor .......................................................................................................................................... 29
LCD ............................................................................................................................................... 29
USB stick ..................................................................................................................................... 29
USB port ...................................................................................................................................... 30
Flash memory .............................................................................................................................. 30
SD Card ........................................................................................................................................ 30
AUX in .......................................................................................................................................... 30
Fail situation ................................................................................................................................ 30
Mono............................................................................................................................................. 30
Stereo ........................................................................................................................................... 30
Troubleshooting ........................................................................................................ 31
Specifications ........................................................................................................... 32
Safety Precautions ................................................................................................... 33
Notice, statements and information .......................................................................... 35
Declaration of Conformity............................................ Fout! Bladwijzer niet gedefinieerd.
Service and support ..........................................................................................................36
Do not distribute copyrighted material ...............................................................................37
Trademarks ......................................................................................................................37
Disclaimer .........................................................................................................................38
5
Page 6

Dear customer,
This device allows you to listen to radio, stream Bluetooth® audio to this device and
playback audio from a USB storage device, SD card or via the AUX input.
Thank you for choosing for Lenco. At Lenco, we are convinced that everyone should
enjoy life as much as possible. Our products are meant to support, improve and
create joyful moments for everyone. For this reason, we offer user-friendly, highquality and well-designed consumer electronics for an excellent price. This user
manual is designed to help you with the features of this device. Please keep this
manual for future reference.
This user manual was written during the development of the product, based on the
factory settings. If the product would need improvement, priority is given to the
product and therefore, in these cases, the quick start guide, user manual, illustrations
in the user manual and/or packaging may differ from the actual product.
What’s in the box?
The content of the box is assembled with the utmost care. In the unfortunate case
that anything is missing, please contact your dealer.
Content of the box:
1 Speaker tower
1 Remote control
1 Power cord
1 Aux in cable (for RCA) 1 User manual
1 Base
4 Mounting screws
1 Quick start guide
Explanation of the symbols :
This symbol indicates that there are important operating maintenance
instructions in the user manual accompanying the device.
This symbol indicates that dangerous voltage is present within this device,
constituting a risk of electronic shock or personal injury.
This symbol indicates that the action in question may not be performed by a
child because there is a risk of personal injury.
6
Page 7

Important information before using the device
Use the device only as described in the user manual.
Read the safety precautions carefully before use. The safety precautions can
be found in the back of the user manual.
If certain functions or instructions are unclear, always contact our helpdesk
or the dealer where the device was bought. Information about our helpdesk
can be found in the back of the manual.
This device is only intended for private use. Information about the use and
warranty can be found at the safety precautions and the information about
service and support.
Never use this device in an explosive atmosphere.
7
Page 8

Unpacking the device
The operations in this chapter should not be performed by children.
Get ready: a knife* or a pair of scissors *
1 Cut the tape 2 Open the box
3 Lift the device from the box and remove the foam
What to do with the packaging material
Lenco recommends to keep the box and foam in case the product needs transporting
in the future or to store the device when it’s not being used for a long time. The other
packaging materials can be disposed of according to the local regulations. Please
contact your local authorities.
Legend:
* = not included
8
Page 9

Mounting the base
The operations in this chapter should not be performed by children.
Get ready: Phillips screwdriver*
Put the device on a flat, stable surface that is slightly elevated (for instance on a
table) so that the base can easily be mounted. Place the base against the bottom of
the device and secure it with the 4 included screws.
Legend:
* = not included
9
Page 10

Exploring the device
45679
10
131415
16
17
18
8
The instructions below will briefly explain the functionality of the buttons and controls.
A detailed instruction can be found
in the various chapters of this
manual.
1. Play / pause button, press this
button to pause or resume
playback.
2. Previous / rewind button,
press this button to skip to the
previous song, hold the button
to search backward in the track.
3. Next / fast forward button,
press this button to skip to the
next track or, hold the button to
search forward in the track.
4. Bluetooth® status LED, this
LED will flash when the device
is trying to setup a Bluetooth®
connection. If a Bluetooth®
connection is active, the LED is
lit continuously. If no
Bluetooth® connection is active,
the LED will not be lit.
5. Remote control sensor, this sensor receives remote control signals.
6. Stop button, press this button to stop playback.
7. Volume knob, turn this knob clockwise to increase the volume or
counterclockwise to decrease the volume.
8. LCD display, the LCD display displays the most important information.
9. Mode button, press this button to switch between the Bluetooth®, AUX, FM, SD
and USB mode.
10. Standby button, press this button to turn the device on or press the button to
switch to standby mode.
11. Pair button, when the device is in Bluetooth® mode, press this button to
reconnect with another device.
12. Mute button, press this button to mute the speakers. Press this button again to
unmute the speakers.
13. SD card slot, insert an SD card in this slot.
1
2
3
11
12
10
Page 11

14. USB port, insert a USB storage device in this port.
WARNING: Do not use a USB extension cable to
connect a USB device. The use of a USB
extension cable can cause malfunction or loss of
data.
15. AUX INPUT, connect a device that is equipped with an
AUX output or headphones output to this input.
16. Wire antenna, the antenna receives the FM radio
signals.
17. Power on / off switch, set the switch in the OFF
position to switch off the device. Set the switch in the ON
position to put the device in standby mode.
18. AC connection, connect the power cord to this
connection.
11
Page 12

Exploring the remote control
1. Function button, press this button to switch
1
12
between the Bluetooth®, AUX, FM, SD and
USB mode.
2. Info button, in the FM mode RDS
information is shown on the display. Press
this button to show the frequency and PTY
information on the display.
3. Sleep button, press this button to display
sleep timer information, set the sleep timer or
turn off the sleep timer.
4. Previous / rewind button, press this button
to skip to the previous song, hold the button
to search backward in the track.
2
3
4
5
6
7
8
9
10
11
13
14
15
16
17
18
19
20
21
22
23
5. Next / fast forward button, press this
button to skip to the next track or, hold the
button to search forward in the track.
6. M+ button, only works in radio mode. Use this button to select a preset station or
recall a preset station.
7. Tune- button, only works in radio mode. Use this button to change the radio
frequency.
8. Store button, only works in radio mode. Use this button to save a station.
9. Numeric buttons, use these buttons to input digits.
10. Repeat button, only works in SD & USB mode. Press this button to repeat a
track, folder or all tracks on the media.
11. Volume- button, press this button to decrease the volume.
12. Standby button, press this button to turn on the device or put the device in
standby mode.
13. Mute button, press this button to mute the speakers. Press this button again to
unmute the speakers.
14. Play / pause button, press this button to pause or resume playback.
15. Stop button, press this button to stop playback.
16. Tune+ button, only works in radio mode. Use this button to change the radio
frequency.
17. M- button, only works in radio mode. Use this button to select a preset station or
recall a preset station.
18. Pair button, if the device is in Bluetooth® mode, press this button to reconnect
to another device.
12
Page 13

19. PTY button, only works in radio mode.
Press this button to select the desired
1
12
program type.
20. Ran button, only works in SD & USB mode.
Press this button to play tracks in a random
order.
21. MO / ST button, only works in radio mode.
Press this button to switch between FM
mono and stereo audio.
22. Tone button, press this button to adjust the
high and low tones.
23. Volume+ button, press this button to
increase the volume.
2
3
4
5
6
7
8
9
10
11
13
14
15
16
17
18
19
20
21
22
23
Where to install
Never place the device in direct sunlight. Place it on a sturdy platform of which the
surface should be flat and steady, so the product can’t fall or hit by any objects. Make
sure the product is placed in such a manner that nothing can fall on top of it, as
pressure will damage or break the product. Prevent insertion of objects into the
ventilation slots, or openings in the cabinet at all time.
13
Page 14
Mounting the FM wire antenna
The operations in this chapter should not be performed by children.
The wire antenna can be found on the back of the device. If you cannot find the wire
antenna, please check the section Exploring the device (number 16) to see where
the wire antenna can be found exactly. Extend the wire antenna, for the best results
we recommend hanging the wire antenna as high and as close as possible near a
window.
14
Page 15

Connecting the device to a power supply
The operations in this chapter should not be performed by children.
Before connecting the device to the mains, make sure that the mains voltage
corresponds to the voltage that is suitable for the device. The information
about a suitable mains voltage can be found in the specification table. If you
are unsure about the mains voltage at your current location, please contact
the utility company.
Make sure the outlet to which the device is connected is easily accessible.
Before connecting the device, please make sure that the main power switch
on the back of the device is in the OFF position. If you cannot find the switch,
please check the section Exploring the device (number 17) to see where this
switch can be found.
Do not touch the metal parts of the power cable, because there is a risk of
shocks with personal injury.
Stopping the device in an emergency
In “fail situations” it might be needed to have the device make an emergency
stop. For instance when smoke or a strange smell is coming out of the
device, when the device is making a strange noise, etc. You can stop the
device in emergencies by:
Disconnecting the power cord from the outlet.
Always pull the plug of the power cord, never the
cord itself.
If the outlet is not accessible, go to the meter
cupboard and switch off the corresponding group or
the ground fault circuit breaker.
When a fail situation has occurred, make sure to
contact your dealer or the Lenco helpdesk before using the device again. Explain to
the employee what happened, the employee will then advise you whether it’s wise to
start using the device again.
15
Page 16

Connecting the device to the mains
Fully extend the power cord and connect the narrow end to
the back of the device and connect the wide end of the
power cord to the power outlet.
Preparing the remote control
Remove the battery cover and insert 2 A-brand AAA UM4
1,5V batteries. Make sure that the batteries are placed in the
right direction into the remote control (the + and the – side).
After the batteries are placed, place the battery cover back.
Please remove the batteries from the remote control when it’s not being used for a
long time.
16
Page 17

General information about the energy saving mode
This device is equipped with an energy saving mode. During playback, if not any
operation in about 4 hours, the unit will switch to standby mode automatically.
Basic operation
General operation
Turning the power on or off on the device
To power the device, put the switch on the back of the device in the ON position. The
device will now switch to the standby mode.
To turn off the power, put the switch on the back of the device in the OFF position.
Turning the device on from standby mode
When the device is in standby mode, press the standby button on the device or the
remote control to turn the device on.
Putting the device in standby mode
When the device is turned on, press the standby button on the device or the remote
control to put the device in the standby mode.
Adjusting the speaker volume
Turn the volume knob to adjust the speaker volume. Turn
counterclockwise to decrease the speaker volume or turn
clockwise to increase the speaker volume.
When using the remote control, press the VOL- button to
decrease the speaker volume or press VOL+ to increase the
speaker volume.
Muting the speakers
Press the mute button on the device or the remote control to mute the speakers.
Press the mute button again to unmute the speakers. MUTE will appear on the
display when the speakers are muted.
Selecting the input source
Press the mode button on the device or the function button on the remote control to
select the desired input source. The order of the input sources is: Bluetooth®, AUX,
FM Radio, SD Card & USB.
17
Page 18

Bluetooth® mode
Connecting with a Bluetooth® device
Put the device in Bluetooth® mode. If the device is in Bluetooth®
mode, press the pair button on the device or remote control. When
the device is ready to pair with an external Bluetooth® device, the
Bluetooth® LED will flash. Find "BTT-2" on the external device and
connect with it. Thanks to Pair & Play™ there is no need to enter a password. Pair &
Play™ allows you to pair a Bluetooth® device with a single press of a button and
enjoy your favorite music right away.
Important note: Depending on the external Bluetooth® device, the instructions
below might not work or might not work correctly. This is not a malfunction of the
Lenco device or the external Bluetooth® device.
Playing an audio file
Choose your favorite audio file on the external Bluetooth® device and play it on the
device. You can press play on the device or the remote control to start playback of
the audio file.
Pausing playback
During playback, press the play / pause button on the device or the remote control to
pause playback, press the button again to resume playback.
Skipping to the next track
During playback of an audio file, press the next button on the device or the remote
control to skip to the next track.
Searching forward
During the playback of an audio file, hold the next button on the device or the remote
control. The device will search forward in the track until the button is released.
Skipping to the previous track
During playback of an audio file, press the previous button on the device or the
remote control to skip to the previous track.
Searching backward
During the playback of an audio file, hold the previous button on the device or the
remote control. The device will search backward in the track until the button is
released.
Stop playback
Press the stop button on the device or the remote control to stop playback.
18
Page 19

AUX Mode
Put the device in AUX mode. When the device is in the AUX mode, the volume can
only be controlled via the tower speaker. All other controls should be used on the
external device.
Connecting an AUX device
The AUX input allows you to connect any device that is equipped with an AUX output
or a headphones output. The AUX IN cable (for RCA) that is required to connect the
external devices is included with this product. The AUX input can be found on the
back of the device.
FM Radio mode
Put the device in radio mode.
Manual tuning
The display shows the current frequency. You can search for the desired frequency
in 2 ways:
1. Increase the frequency with steps of 0.05 MHz by pressing the next button on the
device or the tune+ on the remote control.
2. Lower the frequency with steps of 0.05 MHz by pressing the previous button on
the device or the tune- on the remote control.
Automatic tuning
The display shows the current frequency. When the device finds a station with
sufficient signal strength, the device will automatically stop searching. You can
automatically search for a station in 2 ways:
1. Search for stations with a higher frequency by holding the next button on the
device or the tune+ on the remote control for 3 seconds.
2. Search for stations with a lower frequency by holding the previous button on the
device or the tune- on the remote control for 3 seconds.
If needed, manual tuning can be used to fine tune to a station.
19
Page 20

Searching for a radio station by program type
The Program Type function (abbreviated PTY function) allows you to search for a
station that is broadcasting a specific genre, for instance classical music. When the
PTY function is activated, the search function will stop only at stations that belong to
the set category of the PTY function. If, for instance, classical music has been set,
then the search function will not stop at a station that only plays rock music. Activate
the PTY function by holding the PTY button on the remote control until a genre
appears on the display. Then repeatedly press the PTY button until the desired genre
is shown on the display. Then press the tune+ button on the remote control to search
for this genre. If needed, manual tuning can be used to fine tune to a station.
Saving a radio frequency
You can save up to 20 preset stations in the memory of this device. Tune to the
frequency that you would like to save and follow the steps below to save the
frequency:
1. Press the store button on the remote control, the preset number appears on
the display.
2. The preset number can be increased by pressing M+ on the remote control
and decreased by pressing M- on the remote control.
3. Press the store button on the remote control to save the frequency.
Recalling a preset station
Press the M+ and M- buttons on the remote control to tune to a desired preset
station. Alternatively, you can also enter the number by using the numeric buttons on
the remote control.
Switching between mono and stereo
Press the MO/ST button to switch between mono and stereo FM reception. If the
station being listened to has a weak signal, some hiss may be audible. It is possible
to reduce this hiss by forcing the radio to play the station in mono rather than stereo.
SD Card mode
Put the device in SD Card mode and insert the SD memory card.
20
Page 21

The device will start reading the SD card. Once the SD card is read, the device will
automatically start playing the files on the card.
Pausing playback
During playback, press the play / pause knop on the device or the remote control to
pause playback, press the button once more to resume playback.
Skipping to the next track
During playback of an audio file, press the next button on the device or the remote
control to skip to the next track.
Searching forward
During the playback of an audio file, hold the next button on the device or the remote
control. The device will search forward in the track until the button is released.
Skipping to the next track
During playback of an audio file, press the previous button on the device or the
remote control to skip to the previous track.
Searching backward
During the playback of an audio file, hold the previous button on the device or the
remote control. The device will search backward in the track until the button is
released.
Stopping playback
Press the stop button on the device or the remote control to stop playback.
Playing the content on the storage media in random order
Press the RAN button on the remote control to enable or disable the random mode.
When the random mode is active, tracks will be played in random order. When the
display shows RAN OFF, the random mode is switched off. When the display shows
RAN ON, the random mode is switched on.
Repeating the content on the storage media
Press the REPEAT button on the remote control to enable or disable the repeat
function. This device has various repeat functions:
REP ONE, when this is shown on the display, the current track will be
repeated continuously.
REP DIR, this is shown on the display when all tracks in the current folder are
repeated. This function can only be used when the tracks are stored into 1 or
multiple folders.
REP ALL, if this is shown on the display, all tracks on the storage media will
be repeated.
21
Page 22

REP OFF, when this is shown on the display, the repeat function is disabled
and all tracks will be played normally.
USB Mode
Put the device in USB mode and insert the USB storage device.
The device will start reading the USB storage device. Once the USB storage device
is read, the device will automatically start playing the files on the card.
Pausing playback
During playback, press the play / pause knop on the device or the remote control to
pause playback, press the button once more to resume playback..
Skipping to the next track
During playback of an audio file, press the next button on the device or the remote
control to skip to the next track.
Searching forward
During the playback of an audio file, hold the next button on the device or the remote
control. The device will search forward in the track until the button is released.
Skipping to the previous track
During playback of an audio file, press the previous button on the device or the
remote control to skip to the previous track.
Searching backward
During the playback of an audio file, hold the previous button on the device or the
remote control. The device will search backward in the track until the button is
released.
22
Page 23

Stopping playback
Press the stop button on the device or the remote control to stop playback.
Playing the content on the storage media in random order
Press the RAN button on the remote control to enable or disable the random mode.
When the random mode is active, tracks will be played in random order. When the
display shows RAN OFF, the random mode is switched off. When the display shows
RAN ON, the random mode is switched on.
Repeating the content on the storage media
Press the REPEAT button on the remote control to enable or disable the repeat
function. This device has various repeat functions:
REP ONE, when this is shown on the display, the current track will be
repeated continuously.
REP DIR, this is shown on the display when all tracks in the current folder are
repeated. This function can only be used when the tracks are stored into 1 or
multiple folders.
REP ALL, if this is shown on the display, all tracks on the storage media will
be repeated.
REP OFF, when this is shown on the display, the repeat function is disabled
and all tracks will be played normally.
Advanced
Display information
Press the info button on the remote control to display extra information. The
information that is shown on the display depends on the mode and media that is
being played.
Sleep timer
This device is equipped with a sleep timer that can be used to turn off the device after
a preset amount of time has elapsed.
Press the SLEEP button on the remote control to set the sleep timer. Once the button
is pressed, the display will show the sleep time (the time in minutes after which the
device will be turned off). When the sleep timer is already active, the remaining sleep
time is shown on the display. Repeatedly press the SLEEP button on the remote
control to adjust the sleep time. You can also do this when the sleep timer is already
activated and you want to adjust or disable the sleep timer. The sleep timer is
disabled when the display shows OFF.
23
Page 24

Adjusting the audio setting
Via the audio settings, it is possible to adjust the high and low tones. Press the TONE
button on the remote control to adjust the audio settings.
Ater pressing once, BASS will appear on the display. Bass are the low tones.
Press the vol+ button on the remote control to enhance the bass tones. Press
the vol- button on the remote control to reduce the bass tones.
Press the TONE button on the remote control to confirm the bass settings.
Now TREB appears on the display. Treble are the high tones. Press the vol+
button on the remote control to enhance the treble tones. Press the vol- button
on the remote control to reduce the high tones.
Press the TONE button on the remote control to confirm the treble settings.
Resetting the device
When the device is not responding or is not responding correctly, reset the device by
putting the power switch on the back of the device in the off position. Then wait at
least 5 minutes before switching on the device again. If the device still does not work
properly after the reset, please consult the section troubleshooting, contact your
dealer or contact the Lenco helpdesk.
Maintenance
1. Clean the device only with a soft damp cloth.
2. No part of this product requires maintenance.
24
Page 25

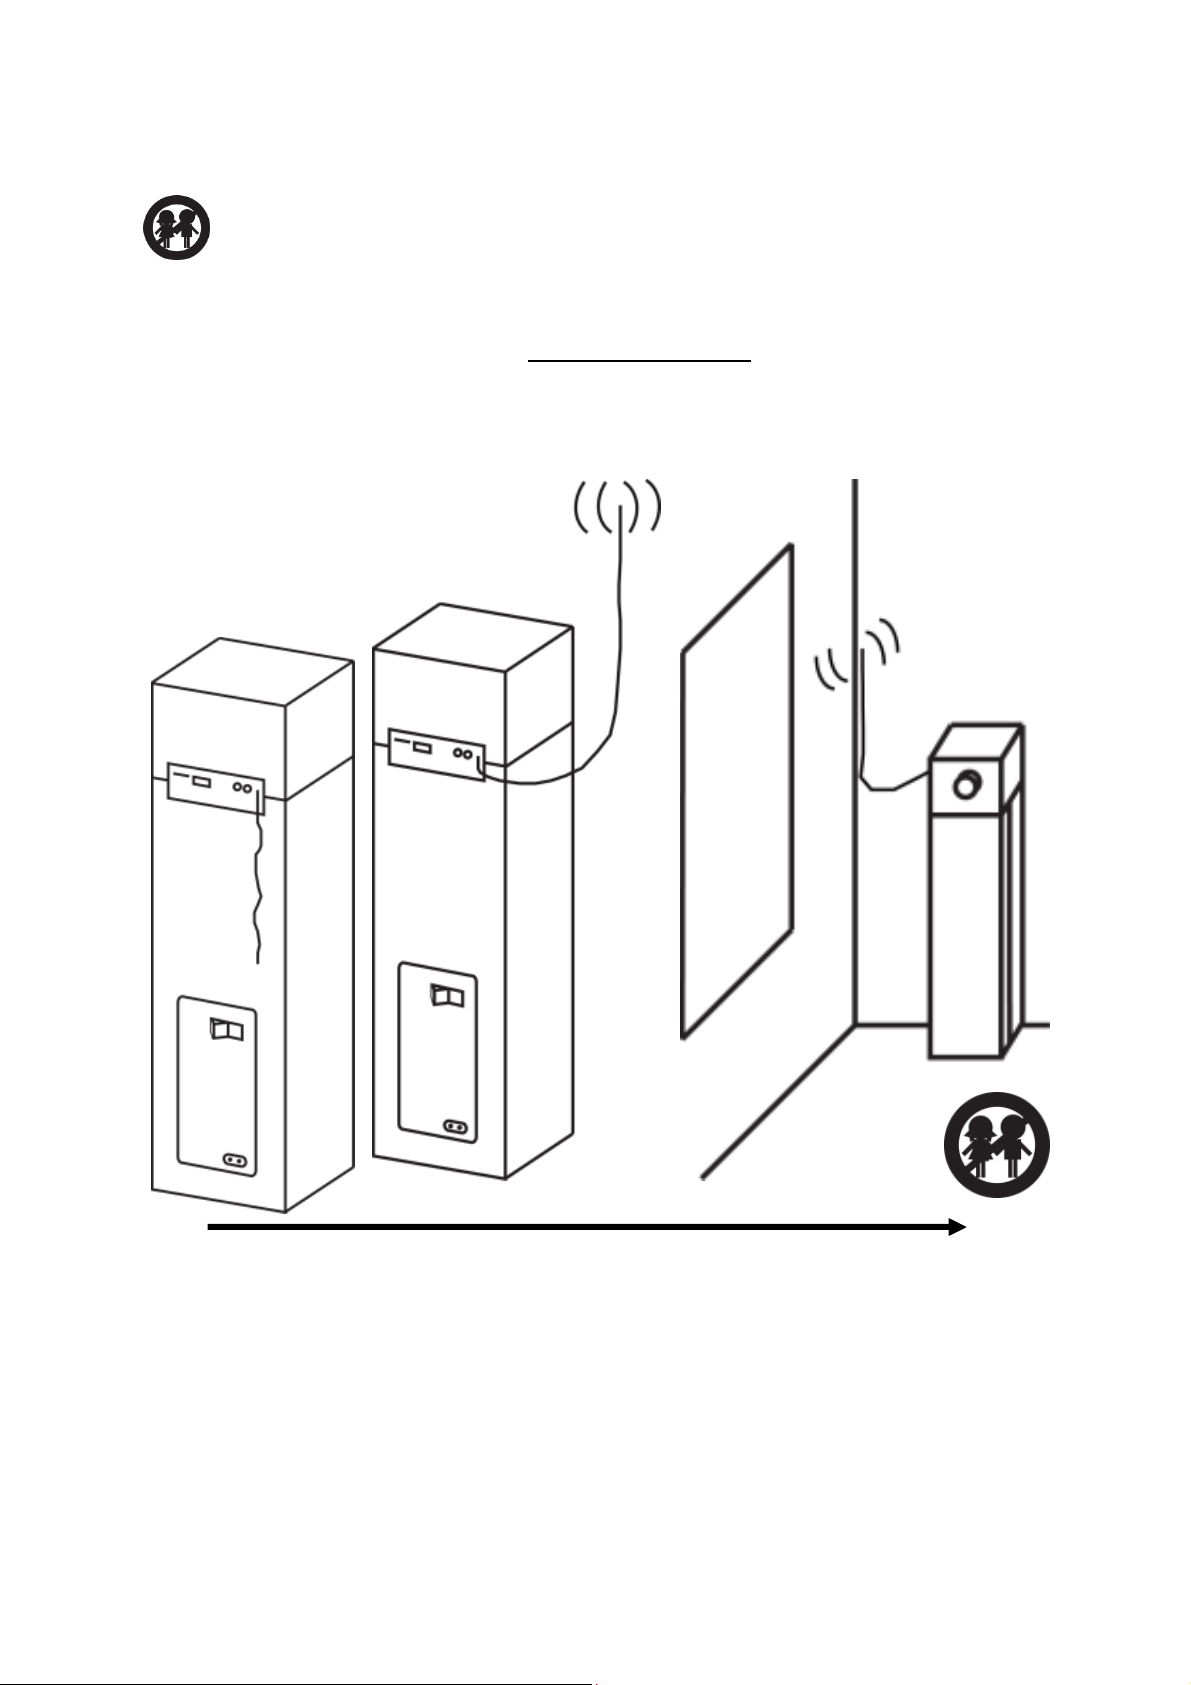
Breaking down the device
The operations in this chapter should not be performed by children.
Before breaking down the device, make sure the main power switch on the
back of the device is in the OFF position. If you have trouble locating this
switch, please consult the section Exploring the device (number 17) to see
where this switch can be found.
Do not touch the metal parts of the power cable, because there is a risk of
shocks with personal injury.
Get ready: Phillips screwdriver*
1. Disconnect the equipment that is connected to the AUX input and remove any
USB devices and SD cards.
2. Turn the main power switch on the back of the device in the off position.
3. Remove the plug from the outlet and disconnect the power cord from the device.
Legend:
* = not included
25
Page 26
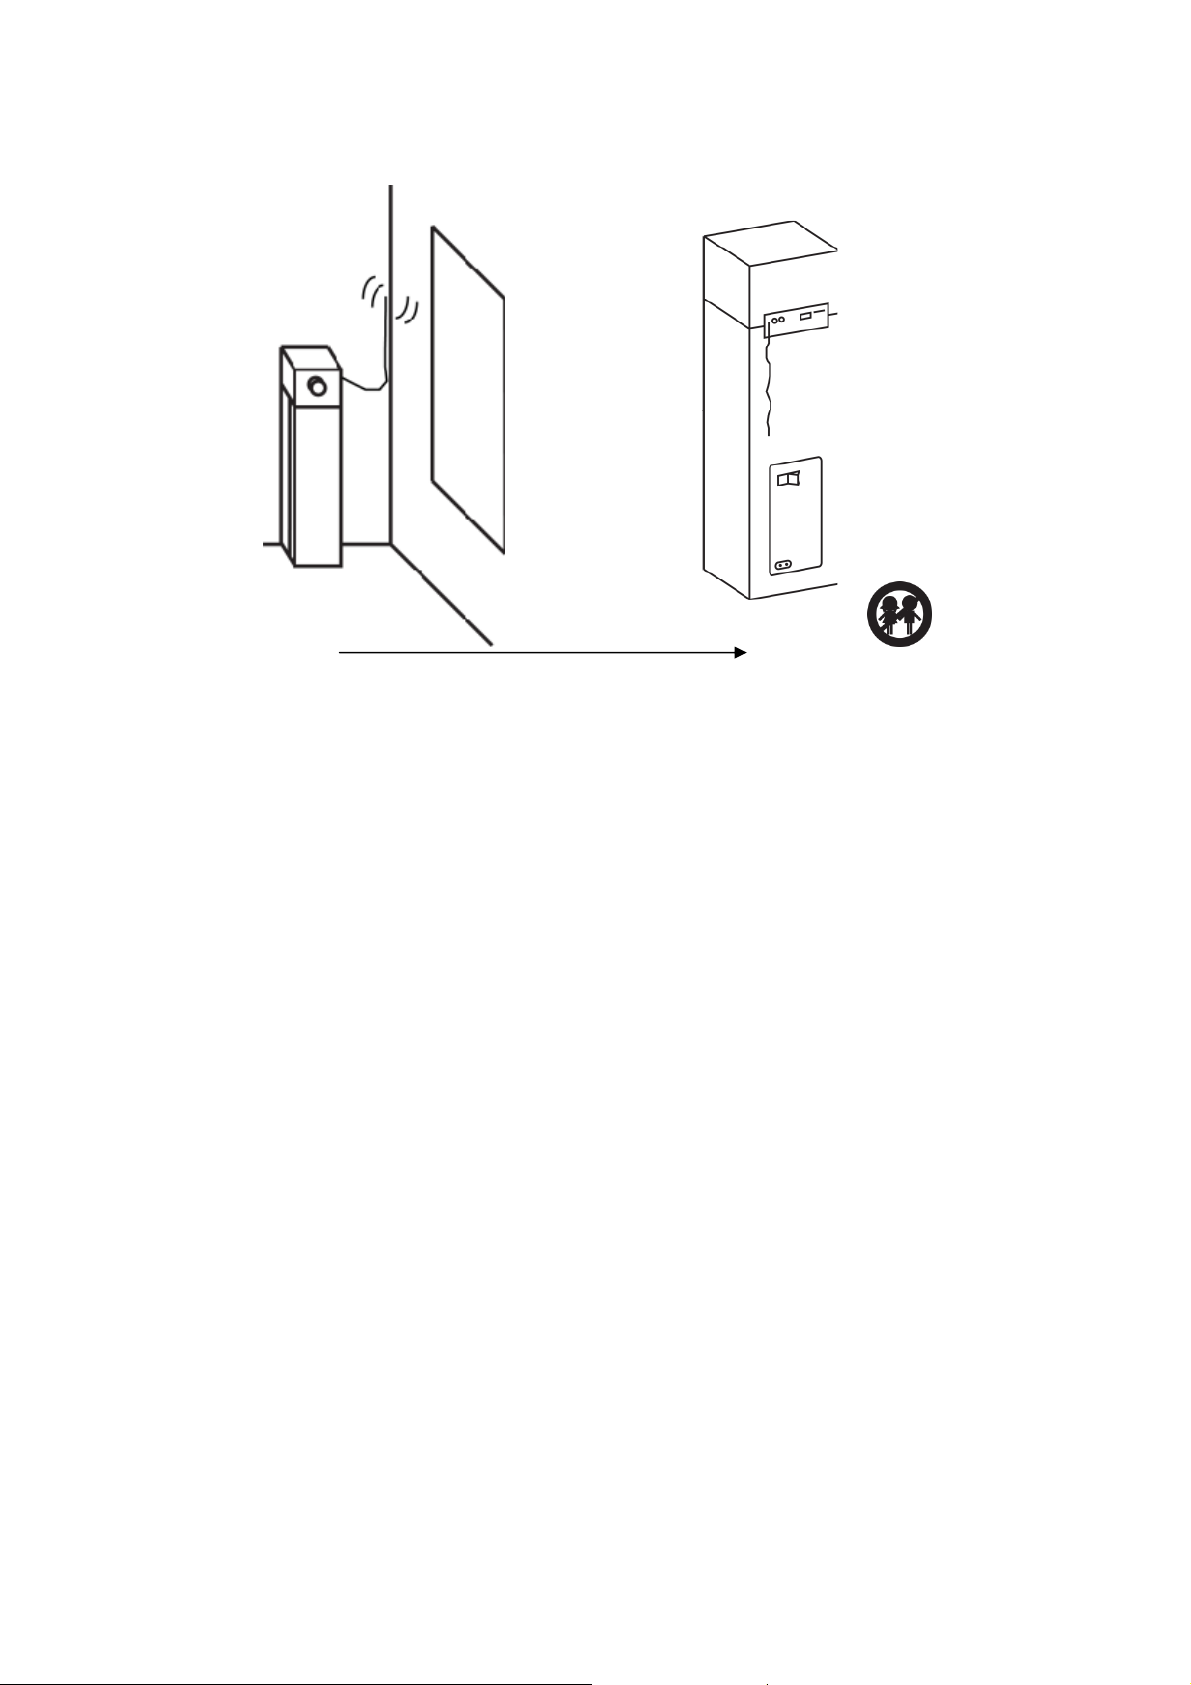
4. Disconnect the wire antenna.
26
Page 27

5. Put the device on a flat, stable surface that is slightly elevated (for instance on
a table) so that the base can easily be removed. Loosen the 4 screws and
don’t forget to hold the base, so it can’t fall down.
27
Page 28

Storing and transporting the device
The operations in this chapter should not be performed by children.
Get ready: Wide sturdy tape * and the packaging material as saved according to the
unpacking instructions.
1. Insert the foam and lower the device into the box.
2. Close the box shut. 3. Tape the box shut.
The device is now ready to be stored or transported. Try to limit the number of
shocks as much as possible during transport.
Legend:
* = not included
28
Page 29
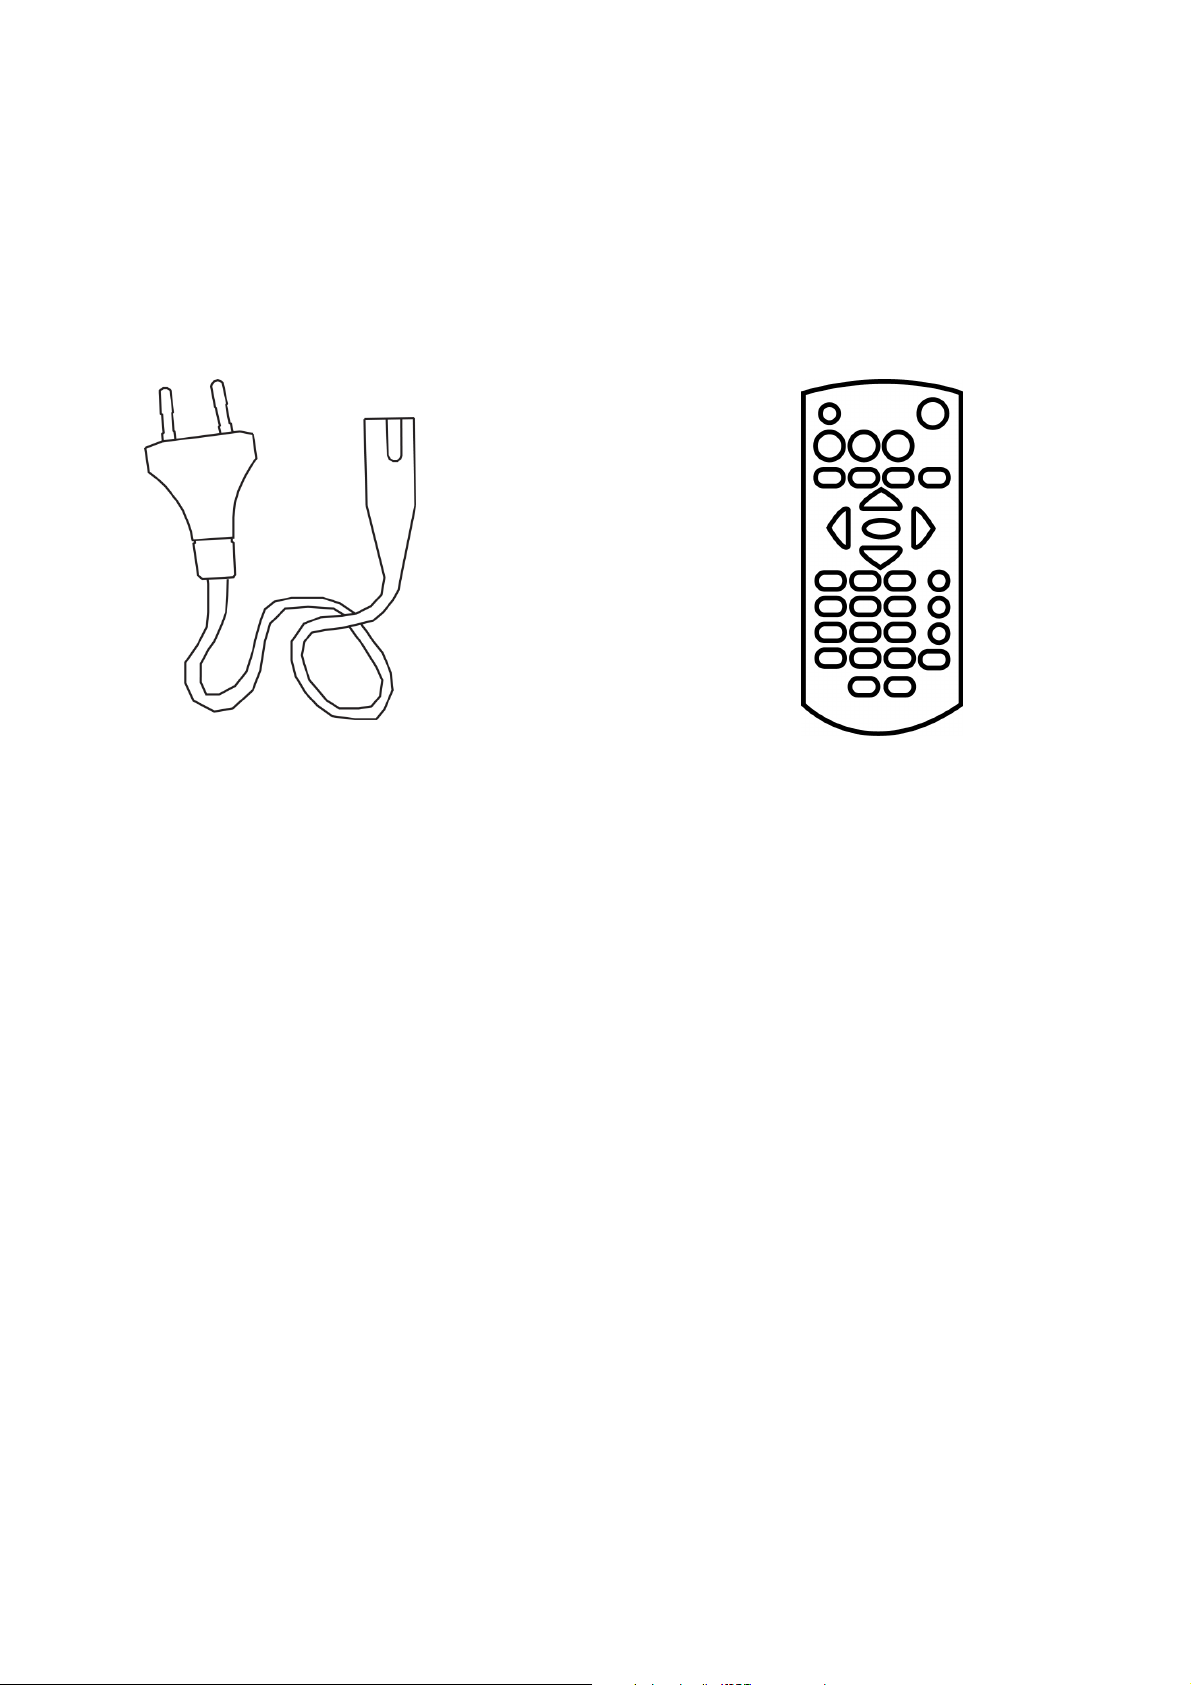
Reorder accessories
Spare parts and accessories for this product can be ordered via your dealer or
http://lencosupport.zendesk.com. The warranty terms on reordered accessories differ
from our general warranty terms. Always inform about the warranty terms before
buying accessories to avoid future complications.
Available accessories:
Euro plug Remote control
Glossary
Bluetooth®: Bluetooth® is an open standard for short-distance wireless connections
between devices.
Open standard: an open norm (or standard) that is publicly available.
LED: The word led was originally an acronym for light-emitting diode. A led is an
electronic component, a semiconductor that emits light when electric power is sent
through in the forward direction.
Sensor: Machines use sensors to observe the surroundings or gather information to
control processes.
LCD: A liquid crystal display is a flat screen with low energy consumption.
USB stick: A USB stick (also: memory stick or plugin memory) is an external storage
media that can be connected to a computer by means of a USB port. A USB stick
uses flash memory to store information.
29
Page 30

USB port: USB (Universal Serial Bus) is a standard for connecting peripherals to
computers or other equipment.
Flash memory: Flash memory is a non-volatile form of external memory. This
technique makes It possible to write or erase in several parts of the memory using a
single programming operation. Flash memory is non-volatile memory: it retains data
when power is turned off.
SD Card: A Secure Digital card (SD Card) is a memory card that is built from flash
memory.
AUX in: Auxiliary in. An input on an audio device that allows connecting an external
device.
Fail situation: A situation in which the device does not respond or operate as
intended. For instance when buttons do not respond or smoke starts coming out of
the device.
Mono: Mono means one and in sound engineering the term is used to indicate that
all sound is distributed and output through a single channel.
Stereo: Stereo generally refers to two-channel sound recording and/or output: a
recording that contains a simultaneous signal for two speakers, as opposed to
monaural sound which one contains one channel. Humans naturally hear stereo
sound. With two ears humans can process two different signals (left and right) and
because of this, the human brain can get a certain degree of spaciousness in the
sound perception. This is stereo.
Input source: These are the various connectivity options that the device offers for
external equipment.
30
Page 31

Troubleshooting
Proble
m Solution
No power.
No sound or poor sound.
Check if the plug is inserted firmly into the
outlet.
Put the main switch on the back of the
device in the on position.
Make sure the power outlet is powered.
To save energy, during playback, if not any
operation in about 4 hours, the unit will
switch to standby mode automatically.
Adjust the volume or disable the mute
function.
Check the input source.
The device does not respond or responds
poorly.
Settings or selections are suddenly
cancelled.
Radio stations cannot be received or can
barely be heard because of hiss.
Bluetooth® music stutters.
The remote control does not work.
The SD/USB media does not play.
Remove the plug from the outlet for at least
5 minutes.
There is a time limit for settings and
selections. Repeat the steps.
Fully extend the wire antenna.
Re-position the wire antenna.
Increase the distance between the device
and other equipment.
Place the Bluetooth® device closer to the
radio.
Check the input source.
Keep the remote control closer to the device.
Check the batteries and replace if needed.
Aim the remote control directly on the remote
control sensor on the front of the device.
The format of the files is not supported.
The SD card or the USB device is not
compatible with the device, try using a
different SD card or USB device.
31
Page 32

Specifications
Power Supply
Power Connection 1,5M euro plug
Power Consumption
Operation
During storage
AC ~ 110-240V, 50/60Hz
Standby <1W
During use 85W
Temperature -10~+35°C
Humidity 10%~75%
Temperature -10~+50°C
Humidity 5%~90%
Output
Dimensions, WxDxH
Weight
Display
Remote Control
Connections
Output Speaker (max) +
Subwoofer
90 Watt (Max)
Frequency Response 35Hz ~ 16KHz
Adjustable Bass + Treble
Yes
FM band 87.5MHz - 108MHz
Speaker Tower (incl. base) 28,4 x 29,5 x 90,7 cm
Remote Control 11 x 5 x2 cm
Main device (incl. base) 7,5 KG
Remote Control 40 Gram (ex. battery)
Color Information Display Light Blue
5M (max)
Operating Range
Angle of 30°
Battery 2x AAA 1,5V
USB 2.0, 5V, 500mA
USB slot
Tot 32GB
FAT16/32
999 files, 99 folders
External Audio Input Line in RCA (cinch)
Up to 32GB
SD Memory Card
999 Files, 99 folders
FAT16/32
Bluetooth®
A2DP / AVRCP
Sleep timer Yes
Others
Repeat function Yes (SD & USB)
Random function
Yes (SD & USB)
Housing Wood
Materials
Control Panel Plastic
Base Plastic
Product specifications may change without prior notice.
32
Page 33

Safety Precautions
Explanation of the symbols:
This symbol indicates that there are important operating maintenance
instructions in the user manual accompanying the device
This symbol indicates that dangerous voltage is present within this device,
constituting a risk of electronic shock or personal injury
This symbol indicates that the action in question may not be performed by a
child because there is a risk of personal injury.
CAREFULLY READ THE FOLLOWING SAFETY PRECAUTIONS BEFORE USE.
WARNING
RISK OF ELECTRIC SHOCK
DO NOT OPEN THIS DEVICE
WARNING: DO REMOVE ANY SCREWS OR OTHER COMPONENTS OF
THE DEVICE TO PREVENT THE RISK OF ELECTRIC SHOCK.
Install and use the device only as described in the user manual.
Never remove the housing of this device.
Never place this device on top of other devices.
Use only the specified accessories and attachments specified by the
manufacturer.
This device must be used in combination with a power supply as specified in the
specification table. If you are not sure of the type of power supply used in your
home, consult your power company.
Do not use loose or damaged cords and/or plugs.
This device has a Class II construction. Devices with a Class II construction can
be connected to an unearthed power outlet.
The power outlet must be located close the device and must be easily accessible.
Make sure that power outlets or extension cables are not over overloaded.
Overloading can cause short-circuits or fire.
Always pull the plug when removing it from the power outlet.
Do not pull the power cord. This may cause a short-circuit.
If you notice smoke, an excessive build-up of heat or any other unexpected
phenomena, you should disconnect the plug from the power outlet immediately.
Disconnect the plug from the power outlet during lightning storms.
Disconnect the plug from the outlet when the device will not be used for a long
time.
Do not step on the power cord and don’t pinch the power cord.
33
Page 34

Do not place heavy objects on the power cord or any other cables as this may
damage the cord or cables.
Keep the device away from children! When they play with the power cord, they
can seriously injure themselves.
Keep the power cable away from rodents and rabbits. These animals like biting in
cables.
Make sure all ventilation openings are clear at all times, do not cover or block
them.
Leave 5 cm (2”) free space around the device.
Always make sure the device is well ventilated.
Keep the device away from heat sources such as radiators, heaters, stoves,
candles and other heat-generating products.
Avoid using the device near strong magnetic fields.
Do not use this device when condensation may occur.
Do not use this device near water or other liquids.
Do not use this device in a damp room.
Do not use this device near a swimming pool.
Do not place objects that can create danger, such as a candle or a glass of water,
on top of the device.
The display is made of plastic and might break when it’s damaged. Beware of
sharp plastic splinters when the screen breaks to avoid injury.
Should the unit become wet, immediately remove the plug from the power outlet
and let the appliance fry for 72 hours before trying to use it again.
Remove the batteries from the device and/or remote control if they will not be
used for a long time.
This device and the supplied accessories contain sensitive components. Never
drop them, put them in a microwave, burn them or paint them.
Do not bite or suck on the device and/or supplied accessories.
Do not insert the device or the supplied accessories in your ears, mouth or other
body orifices.
This device and/or accessories contain small parts that may lead to a choking
hazard. Therefore, keep it away from children.
When connecting the device, if a connector does not seem to fit, do not force it.
Lenco recommends using A-brand batteries.
Never expose the batteries to direct sunlight or extreme heat.
WARNING: Prolonged exposure to loud sounds may lead to temporary or
permanent hearing loss.
34
Page 35

WARNING: Do not use a USB extension cable to connect a USB device.
The use of a USB extension cable can cause malfunction or loss of data.
Notice, statements and information
Lenco is not liable for printing errors in the manual.
35
Page 36

Service and support
For information: www.lenco.com
For support: http://lencosupport.zendesk.com
Lenco helpdesk:
Germany 0900-1520530 (Local charges)
The Netherlands 0900-23553626 (Local charges + 1ct p/min)
Belgium 02-6200115 (Local charges)
France 0333-81484280 (Local charges)
France (email) sav@logydis.com
The helpdesk is accessible from Monday till Friday from 9 AM till 6 PM.
When contacting Lenco, you will always be asked for the model and serial number of
your product. The serial number can be found on the back of the device. Please write
down the serial number below:
Model: BTT-2
Serial number:_________________________________
Lenco offers service and warranty in accordance to European law, which means that
in case of repairs (both during and after the warranty period) you should contact your
local dealer.
Important note: It is not possible to send products that need repairs to Lenco
directly.
Important note:
If this unit is opened or accessed by a non-official service center in any way, the
warranty expires.
This device is not suitable for professional use. In case of professional use, all
warranty obligations of the manufacturer will be voided.
36
Page 37

Do not distribute copyrighted material
Do not distribute copyrighted material without the permission of the owners. By doing
this you risk violation of copyright laws. The manufacturer is not liable for any legal
issues caused by illegal use of copyrighted material by the user.
Trademarks
Lenco and the Lenco logo are trademarks of STL Group BV
Pair & Play™ is a trademark of STL Group BV
logo is a trademark of STL Group BV
Bluetooth® and the Bluetooth® logo are trademarks of Bluetooth SIG, Inc.
37
Page 38

Disclaimer
Some content and services accessible through this device belong to third parties and
are protected by copyright, patent-, trademark- and/or other intellectual property laws.
Such content and services are solely provided for your personal and non-commercial
use. You may not use any content or services in a manner that has not been
authorized by the content owner or service provider. Without limiting the foregoing,
unless expressly authorized by the applicable content owner or service provider, you
may not modify, copy, republish, upload, post, transmit, translate, sell, or create
derivative works, exploit, or distribute in any manner or medium any content or
services displayed through this device.
“THIRD PARTY CONTENT AND SERVICES ARE PROVIDED ‘AS IS.’ LENCO
DOES NOT WARRANT CONTENT OR SERVICES SO PROVIDED, NEITHER
EXPRESSLY NOR IMPLIED, FOR ANY PURPOSE. LENCO EXPRESSLY
DISCLAIMS ANY IMPLIED WARRANTIES, INCLUDING BUT NOT LIMITED TO,
WARRANTIES OF MERCHANTABILITY OR FITNESS FOR A PARTICULAR
PURPOSE. LENCO DOES NOT GUARANTEE THE ACCURACY, VALIDITY,
TIMELINESS, LEGALITY, OR COMPLETENESS OF ANY CONTENT OR SERVICE
MADE AVAILABLE THROUGH THIS DEVICE. UNDER NO CIRCUMSTANCES,
INCLUDING NEGLIGENCE, SHALL LENCO BE LIABLE. NEITHER IN CONTRACT,
NOR TORT, FOR ANY DIRECT, INDIRECT, INCIDENTAL, SPECIAL OR
CONSEQUENTIAL DAMAGES, ATTORNEY FEES, EXPENSES, OR ANY OTHER
DAMAGES ARISING OUT OF, OR IN CONNECTION WITH, ANY INFORMATION
CONTAINED IN, OR AS A RESULT OF THE USE OF ANY CONTENT OR
SERVICE BY YOU OR ANY THIRD PARTY, EVEN IF ADVISED OF THE
POSSIBILITY OF SUCH DAMAGES.”
Third party services may be terminated or interrupted at any time, and Lenco makes
no representation or warranty that any content or service will remain available for any
period. Content and services are transmitted by third parties by means of networks
and transmission facilities over which Lenco has no control. Without limiting the
generality of this disclaimer, Lenco expressly disclaims any responsibility or liability
for any interruption or suspension of any content or service made available through
this device. Lenco is neither responsible nor liable for customer service related to the
content and services. Any question or request for service relating to the content or
services should be made directly to the respective content and service providers.
38
Page 39

Declaration of Conformity
This symbol indicates that the relevant electrical product or battery
should not be disposed of as general household waste in Europe. To
ensure the correct waste treatment of the product and battery, please
dispose them in accordance to any applicable local laws of
requirement for disposal of electrical equipment or batteries. In so
doing, you will help to conserve natural resources and improve
standards of environmental protection in treatment and disposal of
electrical waste (Waste Electrical and Electronic Equipment Directive).
Products with the CE marking comply with the EMC Directive
(2004/108/EC) and the Low Voltage Directive (2006/95/EC) issued by
the Commission of the European Community.
Hereby, STL Group BV, Ankerkade 20 NL 5928 PL Venlo, declares that this product
is in compliance with the essential requirements and other relevant provisions of
Directive 1999/5/EC.
The declaration of conformity may be consulted at
https://lencosupport.zendesk.com/forums/22413161-CE-Documents
This product operates at 2400 - 2483.5 MHz and is designated only to be used inside
a normal household environment. This product is suited for this purpose within all EU
countries.
0700
®All rights reserved
2012 STL Group B.V. all rights reserved, Lenco is a trademark of STL Group B.V.
STL Group B.V. is not responsible for any printing errors in this manual. Products of
other manufacturers are only mentioned for information. This does not mean that
these products are recommended by STL Group B.V.. STL Group B.V. accepts no
liability for the reliability or compatibility of these products.
39
 Loading...