

Leica Zeno 5
User Manual
Version 1.0
English
2
Zeno 5, Introduction
Introduction
Purchase Congratulations on the purchase of a Leica Zeno 5.
This manual contains important safety directions as well as instructions for setting
up the product and operating it. Refer to "7 Safety Directions" for further information.
Read carefully through the User Manual before you switch on the product.
Product identification
The type and serial number of your product are indicated on the type plate.
Enter the type and serial number in your manual and always refer to this information
when you need to contact your agency or Leica Geosystems authorised service workshop.
Type: _______________
Serial No.: _______________
Zeno 5, Introduction 3
Symbols The symbols used in this manual have the following meanings:
Type Description
DANGER Indicates an imminently hazardous situation which, if not
avoided, will result in death or serious injury.
WARNING Indicates a potentially hazardous situation or an unintended
use which, if not avoided, could result in death or serious
injury.
CAUTION Indicates a potentially hazardous situation or an unintended
use which, if not avoided, may result in minor or moderate
injury.
NOTICE Indicates a potentially hazardous situation or an unintended
use which, if not avoided, may result in appreciable material,
financial and environmental damage.
)
Important paragraphs which must be adhered to in practice as
they enable the product to be used in a technically correct and
efficient manner.

4
Zeno 5, Introduction
Trademarks • Windows is a registered trademark of Microsoft Corporation in the United States
and other countries
• Bluetooth is a registered trademark of Bluetooth SIG, Inc.
• SD is a trademark of the SD Card Association
All other trademarks are the property of their respective owners.
Validity of this
manual
This manual applies to the Zeno 5 handheld.
Available
documentation
Name Description/Format
Zeno 5 User
Manual
All instructions required in order to operate the product
to a basic level are contained in the User Manual.
Provides an overview of the product together with technical data and safety directions.
99
Name Description/Format
Zeno GIS
Quick Start
Tutorial
Describes the general working of the product in
standard use. Intended as a quick reference field guide.
9
Zeno 5, Introduction 5
* only available as Online Help
Refer to the following resources for all Zeno 5 documentation/software:
• the Leica Zeno GIS DVD
• https://myworld.leica-geosystems.com
myWorld@Leica Geosystems (https://myworld.leica-geosystems.com) offers a
wide range of services, information and training material.
With direct access to myWorld, you are able to access all relevant services whenever
it is convenient for you, 24 hours a day, 7 days per week. This increases your efficiency and keeps you and your equipment instantly updated with the latest information from Leica Geosystems.
Zeno Field
Help
*
Overall comprehensive help to the product and application functions. Included are detailed descriptions of
special software settings and software functions.
Name Description/Format
6
Zeno 5, Introduction
Service Description
myProducts Simply add all Leica Geosystems products that you and your
company own. View detailed information on your products, buy
additional options or Customer Care Packages (CCPs), update your
products with the latest software and keep up-to-date with the
latest documentation.
myService View the service history of your products in Leica Geosystems
Service Centers and detailed information on the services performed
on your products. For your products that are currently in Leica
Geosystems Service Centers view the current service status and the
expected end date of service.
mySupport Create new support requests for your products that will be
answered by your local Leica Geosystems Support Team. View the
complete history of your Support and view detailed information on
each request in case you want to refer to previous support
requests.
myTraining Enhance your product knowledge with the Leica Geosystems
Campus - Information, Knowledge, Training. Study the latest online
training material or download training material on your products.
Keep up-to-date with the latest News on your products and
register for Seminars or Courses in your country.

Zeno 5, Table of Contents 7
Table of Contents
In this manual Chapter Page
1 Description of the System
12
1.1 Overview 12
1.2 Terminology 13
1.3 System Concept 14
1.3.1 Software Concept 14
1.3.2 Power Concept 16
1.3.3 Data Storage Concept 18
1.4 Zeno 5 Components 19
1.5 Docking Station Components 21
1.6 USB SnapOn Modul Components 22
2 User Interface
23
2.1 Keyboard 23
2.2 Today Screen 28
2.3 Operating Principles 31
3Operation
34
3.1 Power Functions 34

8
Zeno 5, Table of Contents
3.2 Batteries 35
3.2.1 Operating Principles 35
3.2.2 Changing the Battery 38
3.2.3 Charging the Battery 40
3.3 Inserting and Removing a microSD/SIM Card step-by-step 48
3.4 LED Indicators on Zeno 5 52
3.5 LED Indicators on Docking Station 55
3.6 Connecting to a Personal Computer 58
3.7 Connecting to a Wireless Network 61
3.8 Phones 62
3.8.1 Description of the Phone 62
3.8.2 Calls 63
3.8.3 Settings 64
3.9 Adjusting Speaker Volume 68
3.10 Resetting Zeno 5 69
4 Using Windows Embedded Handheld 6.5 or higher
71
4.1 Pictures & Videos 71
4.2 Time, Date and Alarms 76
4.3 Text Messages 80
4.4 Contacts 81
4.5 Internet Explorer 82

Zeno 5, Table of Contents 9
4.6 Windows Media 83
4.7 Task Notification 83
4.8 File Explorer 85
4.9 Internet Sharing 86
4.10 Task Manager 86
4.11 Search Phone 87
4.12 Office Mobile 88
4.13 Settings 90
4.13.1 Lock 90
4.13.2 Home 92
4.13.3 Power 93
4.13.4 Sounds & Notifications 98
4.13.5 Connections 100
4.13.6 System Folder 106
5 Wireless Wide Area Network (WWAN)
122
6 Care and Transport
127
6.1 Transport 127
6.2 Storage 128
6.3 Cleaning and Drying 129

10
Zeno 5, Table of Contents
7 Safety Directions
131
7.1 General Introduction 131
7.2 Definition of Use 132
7.3 Limits of Use 134
7.4 Responsibilities 135
7.5 Hazards of Use 136
7.6 Laser Classification 141
7.6.1 General 141
7.6.2 Imager 142
7.7 Electromagnetic Compatibility EMC 143
7.8 FCC Statement, Applicable in U.S. 146
7.9 ICES-003 Statement, Applicable in Canada 150
8 Technical Data
151
8.1 Zeno 5 Technical Data 151
8.2 Radios Technical Data 155
8.2.1 Murata 802.11 a/b/g/n Direct Sequence Spread Spectrum Radio 155
8.2.2 Murata Bluetooth Radio 156
8.2.3 Sierra Wireless MC5728V 157

Zeno 5, Table of Contents 11
8.2.4 Cinterion PH8 GSM/GPRS/EDGE Radio 158
8.3 Conformity to National Regulations 162
9 International Limited Warranty, Software Licence Agreement
164
Index
166
12
Zeno 5, Description of the System
1 Description of the System
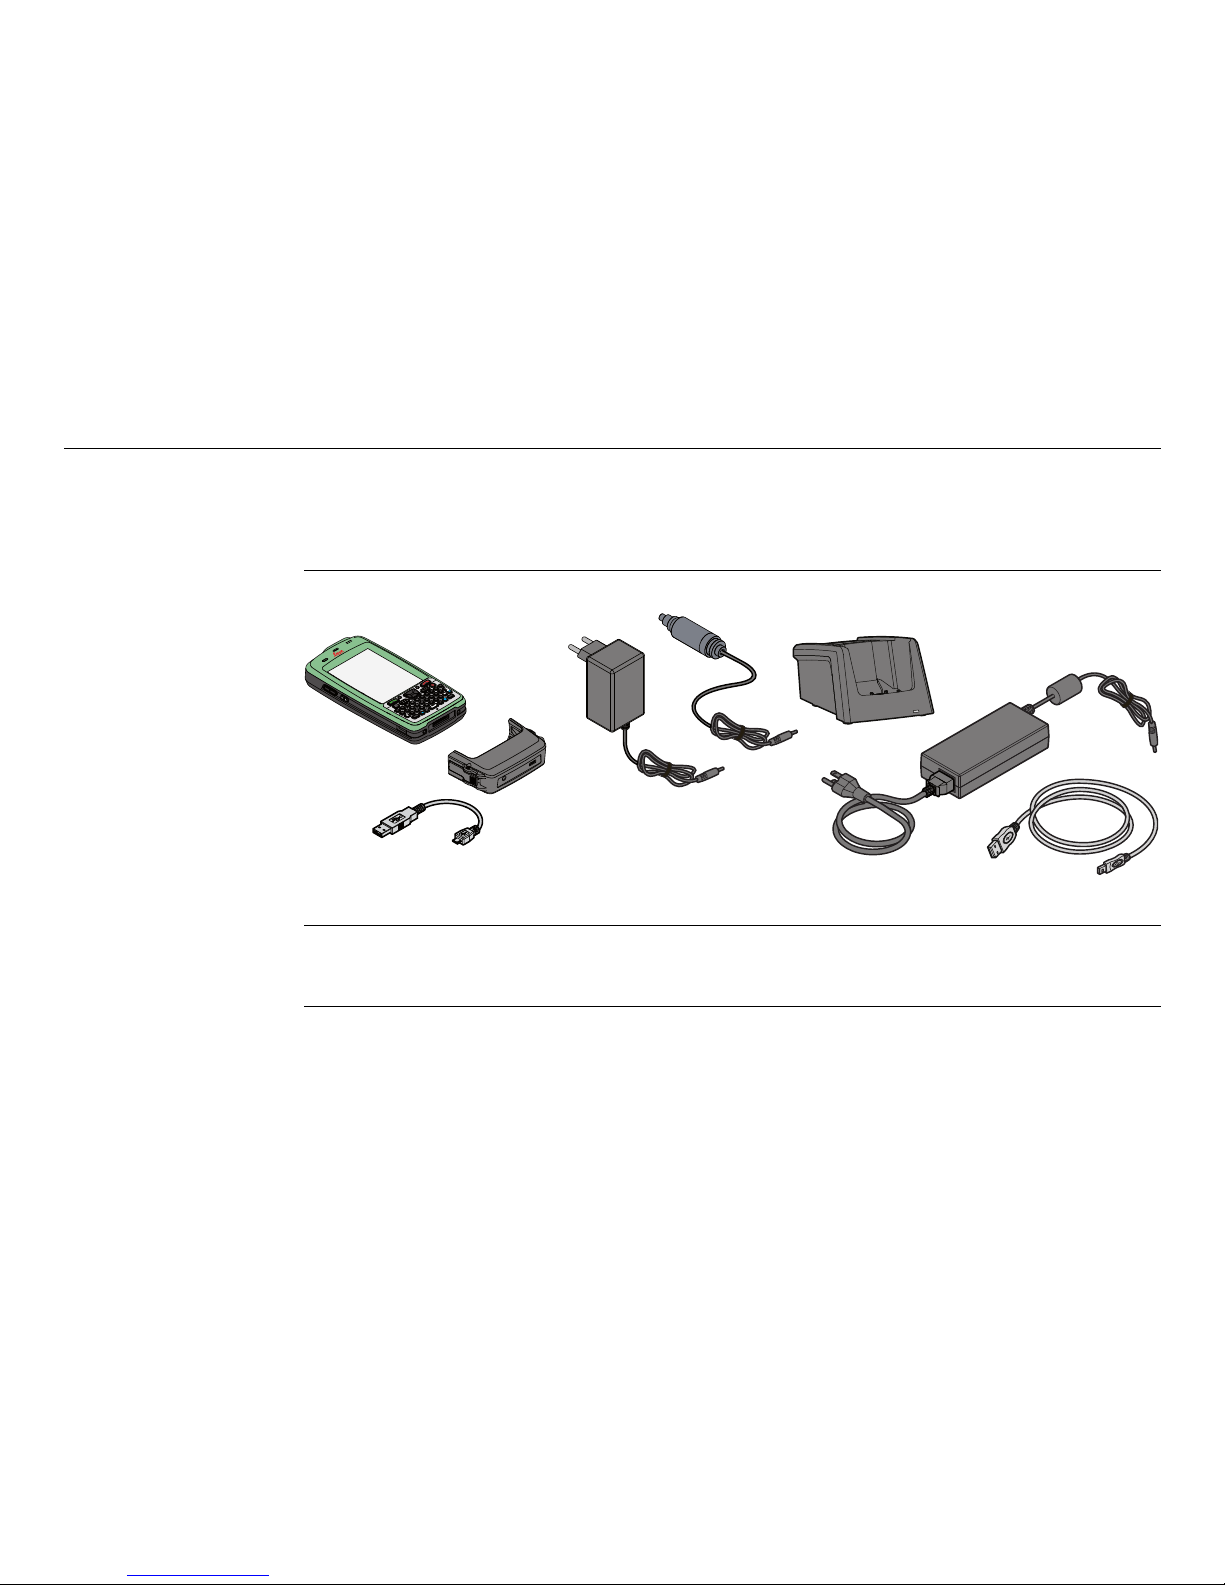
1.1 Overview
System components
)
Do not use adhesives to secure screws on carrying accessories as these chemicals
may damage the plastic casing.
Y
U
I
O
P
L
K
J
H
G
F
D
S
A
Z
X
C
V B
N
M
.
Q
W
E
R
T
ESC
,
SYM
TAB
<
<
<
<
2
3
1
5
4
6
8
9
7
0
F1
F2
F7
F8
F9
F10
F3
F4
F5
F6
CTRL
#
ALT
àü
?
DEL
OK
:
=
+
_
@
/
Zeno 5
003896_001
Zeno 5, Description of the System 13
1.2 Terminology
Zeno 5 general
description
The Zeno 5 is a small and durable handheld PDA device. The Zeno 5 can withstand
challenging weather and environmental conditions.
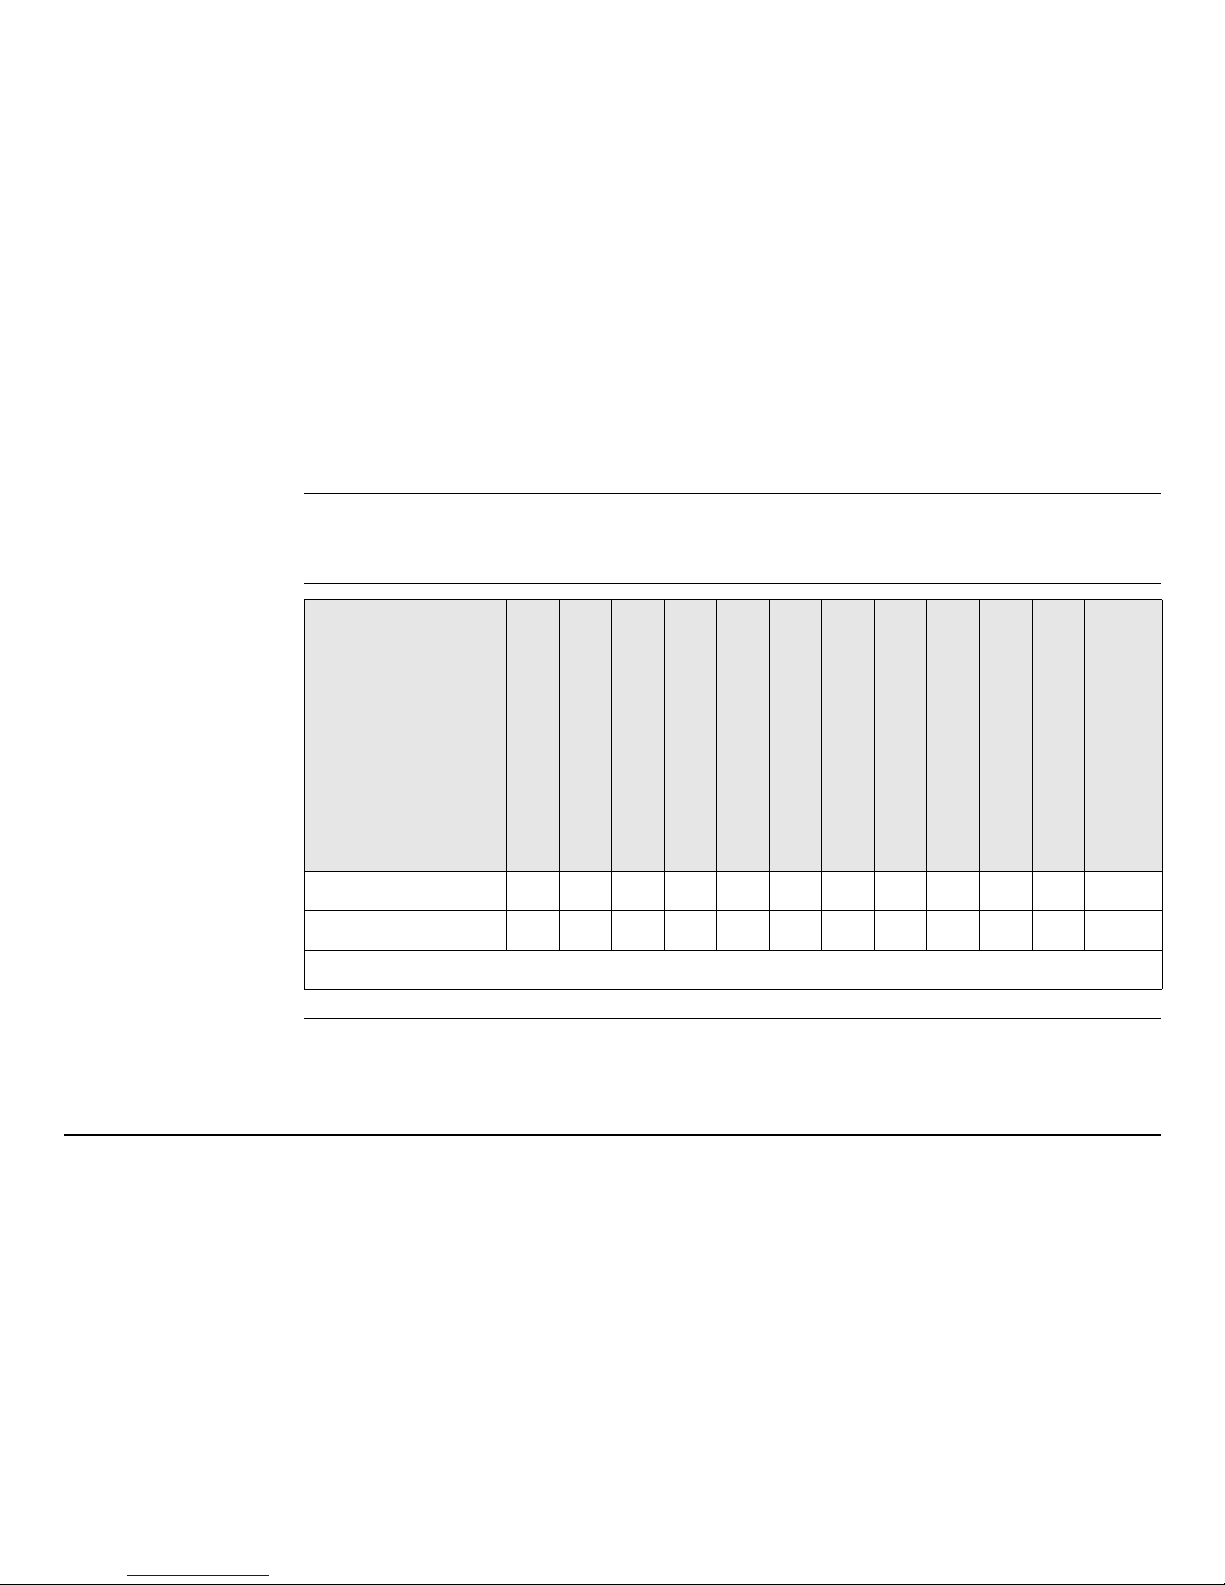
Zeno 5 available
models
Model
Touch screen
Colour display
Internal UMTS 3.8 G
Internal CDMA
GPS
Internal battery
microSD card
Bluetooth
Interactive sensors
Wireless WAN
Wi-Fi
Windows Embedded
Handheld 6.5 or higher
Zeno 5 UMTS 999- 99999999
Zeno 5 CDMA 99- 999999999
)
Use the supplied stylus on the screens of the touch screen.
14
Zeno 5, Description of the System
1.3 System Concept
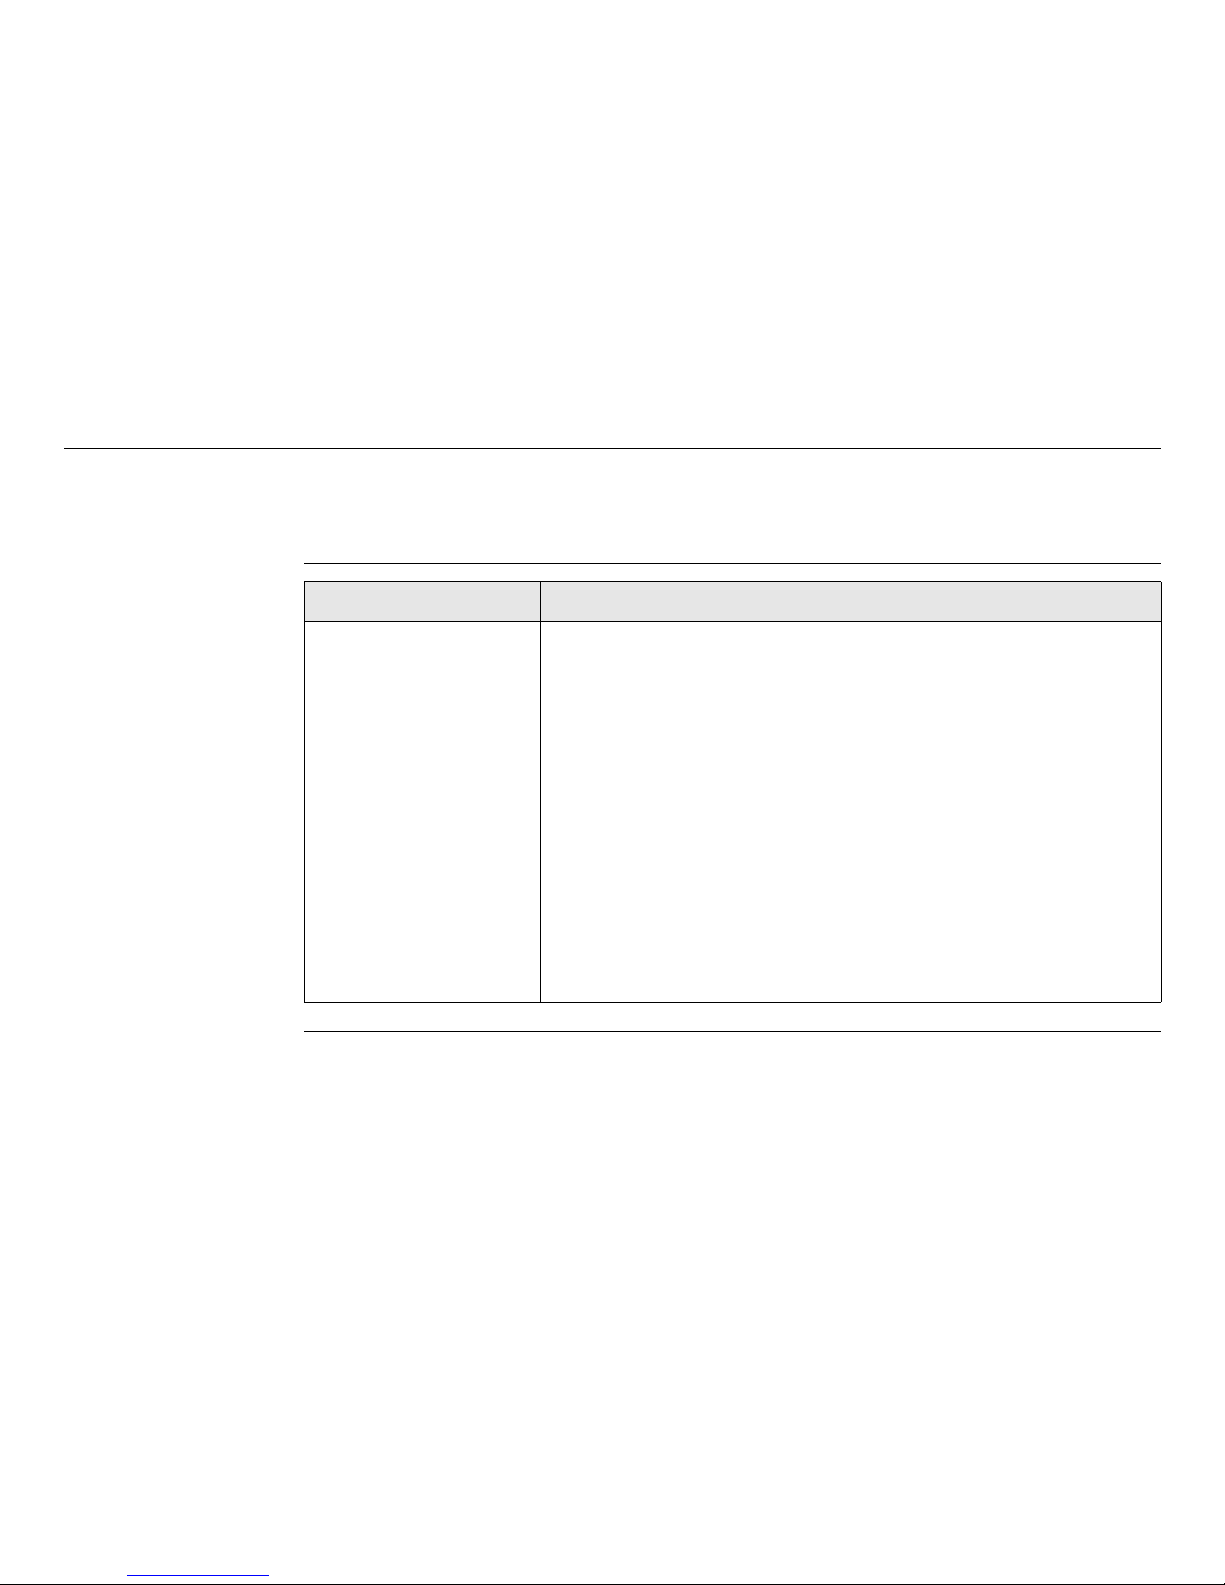
1.3.1 Software Concept
Software for
Zeno 5
Software type Description
Microsoft Windows
Embedded Handheld
6.5 or higher
This software includes:
- The language-specific version of Windows
- The basic functionality of the Zeno 5
- Programming environment (HTML, XML, Mobile Devices
SDK, JavaTM, Visual Studio® 2008, Standard protocol APIs -
Windows® sockets
- Application Software (Internet Explorer®, Mobile included
with Windows® Mobile® 6, WordPad, ActiveSync, Mobile
Control Center (MCC) device management

Zeno 5, Description of the System 15
Software upload
)
Uploading firmware can take some time. Ensure that the battery is at least
75% full before beginning the upload, and do not remove the battery during
the upload process.
Software for Description
GG02 plus The software is stored in the flash RAM of the GG02 plus.
GG firmware update instructions
• Download the most recent GG firmware file from
https://myworld.leica-geosystems.com. Refer to "Introduction".
• Copy GG firmware file onto a PC with Leica Zeno Field
installed.
• Connect the GG02 plus with the GEV234 cable to the PC.
Refer to "3.6 Connecting to a Personal Computer".
• Click on Start > All Programs > Leica Geosystems > Leica
Zeno Tools > Firmware Loader GG0X, to run the
Firmware loader application.
• Browse to the directory into which you copied GG
firmware file, select it and start the upload.

16
Zeno 5, Description of the System
1.3.2 Power Concept
General Use the Leica Geosystems batteries, chargers and accessories or accessories recom-
mended by Leica Geosystems to ensure the correct functionality of the instrument.
Power options Battery packs shipped from the factory are charged to approximately 40% and must
be fully charged prior to use. Batteries can be charged using a variety of chargers and
docking stations along with a Zeno 5 internal charger. When using the internal
charger, a suitable power source is required. All chargers and docking stations are
described in Chapter: “Peripheral Devices & Accessories”.
Model Power supply
Zeno 5 Internally by a high capacity 3600 mAh Lithium Ion battery pack,
OR
Externally by docking station RV4000, OR
Externally by RV4001 charger USB SnapOn module with DC, OR
Externally by RV3050 vehicle power outlet adaptor, OR
Externally by PS1050 - G1 AC wall adaptor to power both snap
module variants, OR
Externally by RV3055 AC vehicle power outlet adaptor to power
the docking station, quad docking station and quad charger.
Zeno 5, Description of the System 17
If an external power supply is connected and the internal battery
is inserted, then the external power is used.
Model Power supply

18
Zeno 5, Description of the System
1.3.3 Data Storage Concept
Description Data is stored on a data storage device. The data storage device can be a microSD
card or internal memory.
An USB stick can be used with the SnapOn module and the microUSB to USB adaptor.
Data storage
device
)
Removing the microSD card or USB stick while the Zeno 5 is turned on can cause loss
of data. Only remove the microSD card or USB stick or unplug connecting cables when
the Zeno 5 CS field controller is switched off.
Transfer data Data can be transferred in various ways. Refer to "3.6 Connecting to a Personal
Computer".
microSD card: The Zeno 5 has an microSD card slot fitted as standard. A
microSD card can be inserted and removed.
USB stick: The Zeno 5 has a USB SnapOn module and adaptor cable
as standard.
Internal memory: The Zeno 5 has an internal memory fitted as standard.
Available capacity: 2 GB.
Zeno 5, Description of the System 19
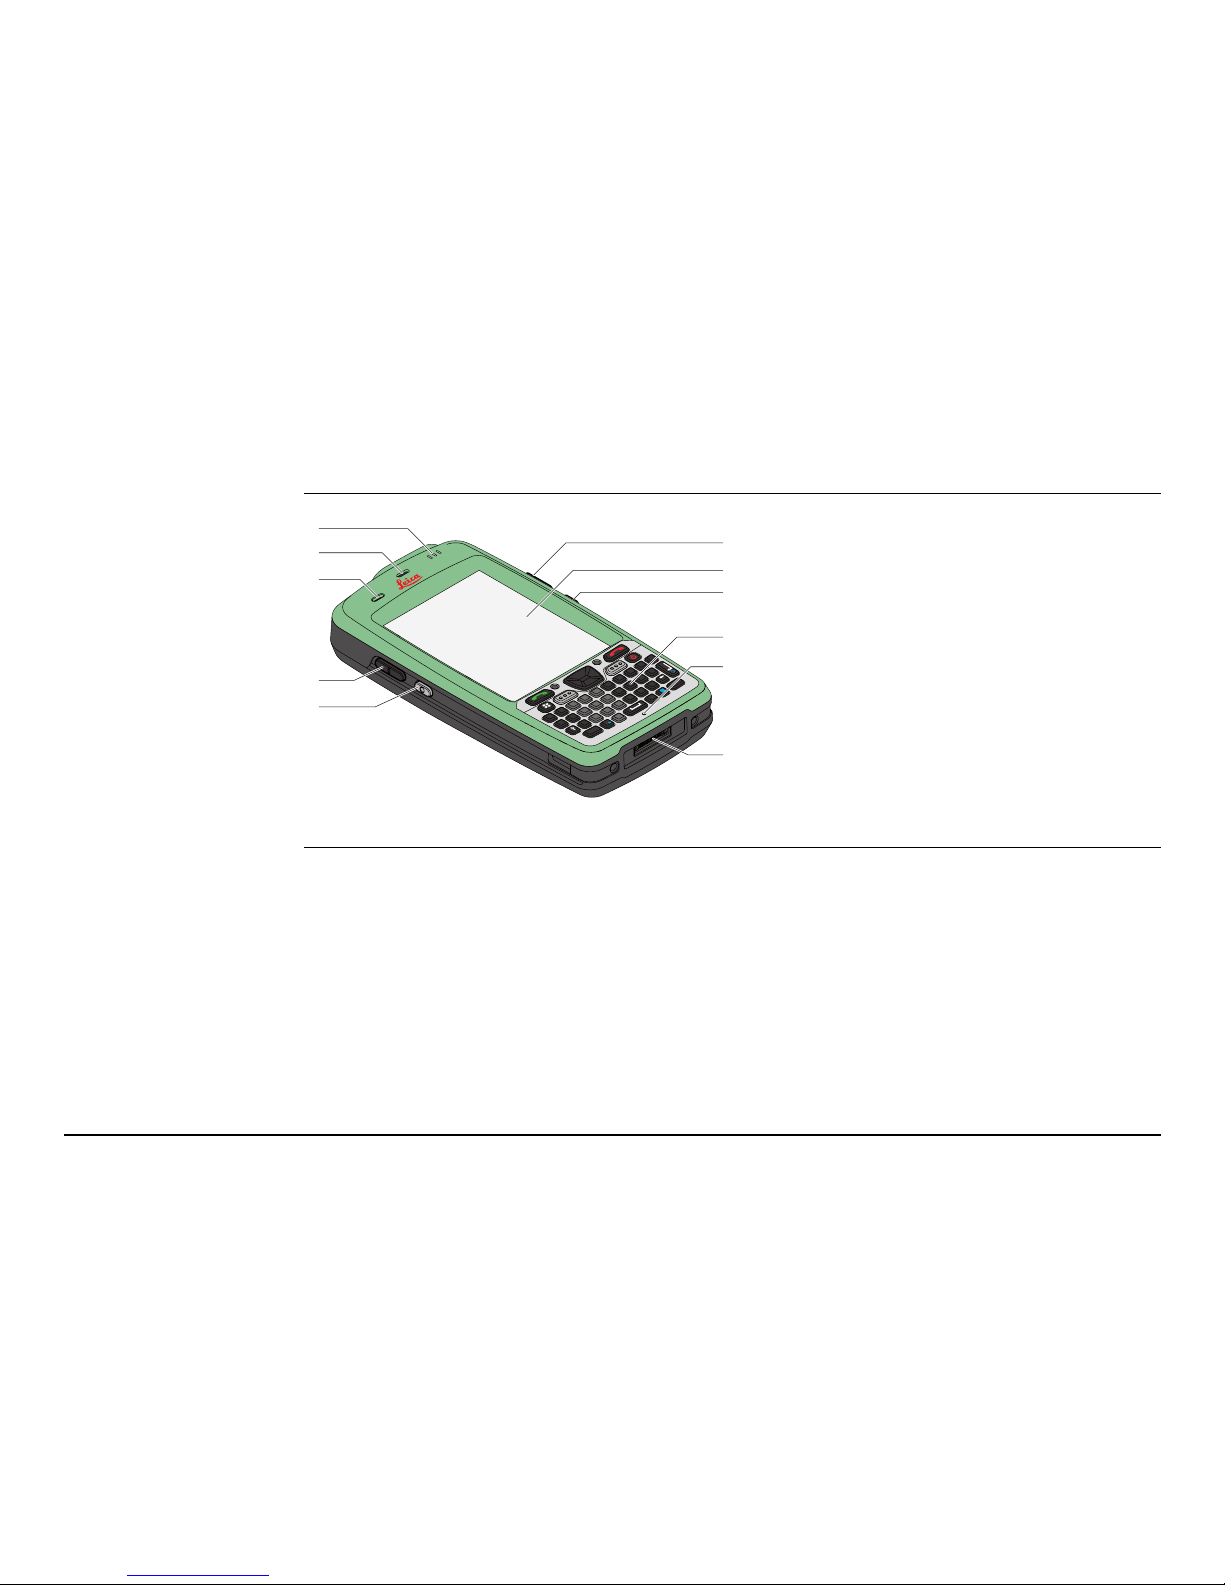
1.4 Zeno 5 Components
Upside of Zeno 5
a) Light Emitting Diode (LED)
b) Receiver
c) Light sensor
d) Volume key
e) Scan key
f) Vertical scroll button
g) Screen
h) Keyboard
i) Microphone
j) Docking station contacts / USB-
On-The-Go
Y
U
I
O
P
L
K
J
H
G
F
D
S
A
Z
X
C
V
B
N
M
.
Q
W
E
R
T
ESC
,
SYM
TAB
<
<
<
<
2
3
1
5
4
6
8
9
7
0
F1
F2
F7
F8
F9
F10
F3
F4
F5
F6
CTRL
#
ALT
àü
?
DEL
OK
:
=
+
_
@
/
003897_001
a
b
c
d
e
e
f
g
h
i
j
20
Zeno 5, Description of the System
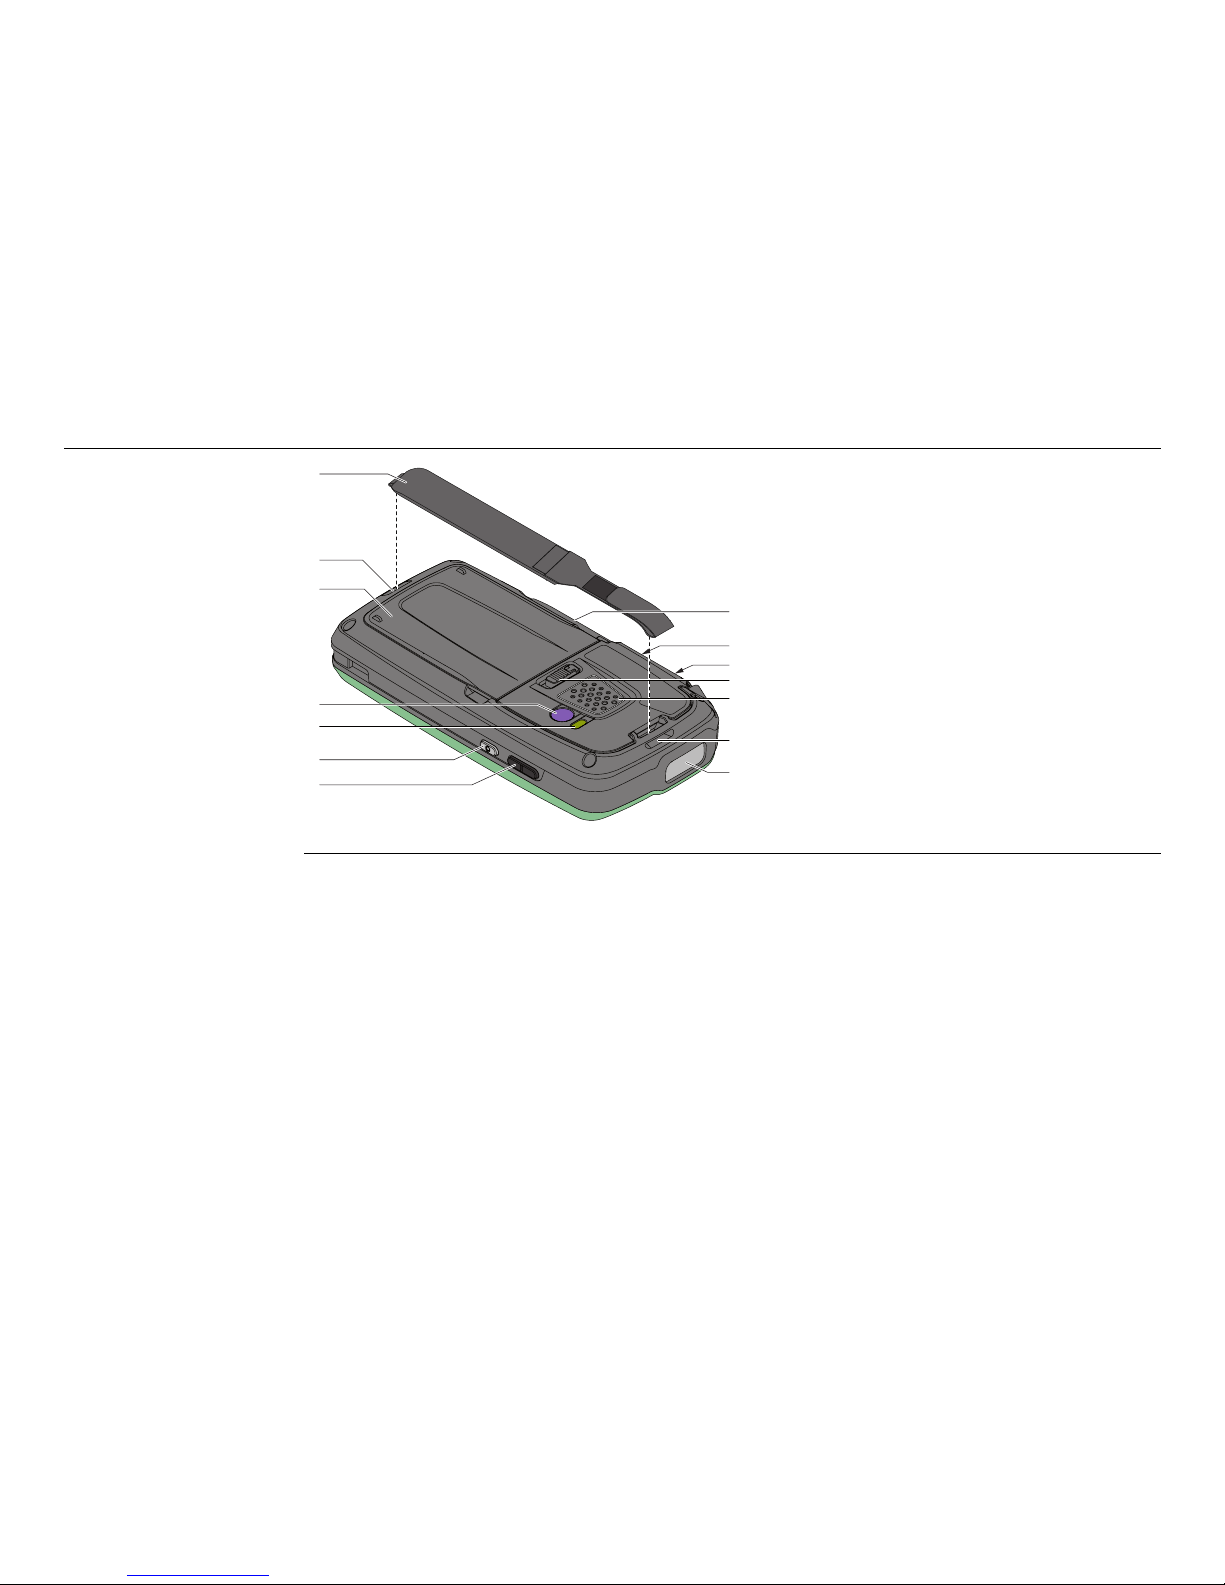
Underside of
Zeno 5
a) Hand strap
b) Hand strap clip
c) Battery and SIM/microSD card
compartments
d) Camera
e) Flash
f) Scan key
g) Volume key
h) Stylus
i) Vertical scroll button
j) Battery latch
k) Speaker
l) EA11 Imager, optional
003898_001
a
b
b
c
d
e
f
f
g
h
i
j
k
l

Zeno 5, Description of the System 21
1.5 Docking Station Components
Docking station The RV4000 docking station is a desktop model designed to fast charge of the
internal and spare battery pack and to supply microUSB connection.
)
The docking station can only be used to charge Leica Geosystems approved
Lithium-Ion batteries.
a) Dock/charge well
b) Docking station
c) Spare battery charge LED
d) microUSB to USB A Host
e) Spare battery well
f) DC socket, DC plug to power
source
g) Micro USB port
h) Power cable
003899_001
a
c
e
b
b
d
f
g
h

22
Zeno 5, Description of the System
1.6 USB SnapOn Modul Components
USB SnapOn
module
a) microUSB connector
b) Vehicle power outlet adaptor
c) Universal AC Power Supply
d) USB and charge SnapOn module
e) Clip arms
f) microUSB port
g) Connection for power supply
003927_001
a
b
c
d
e
e
f
g
Zeno 5, User Interface 23
2 User Interface
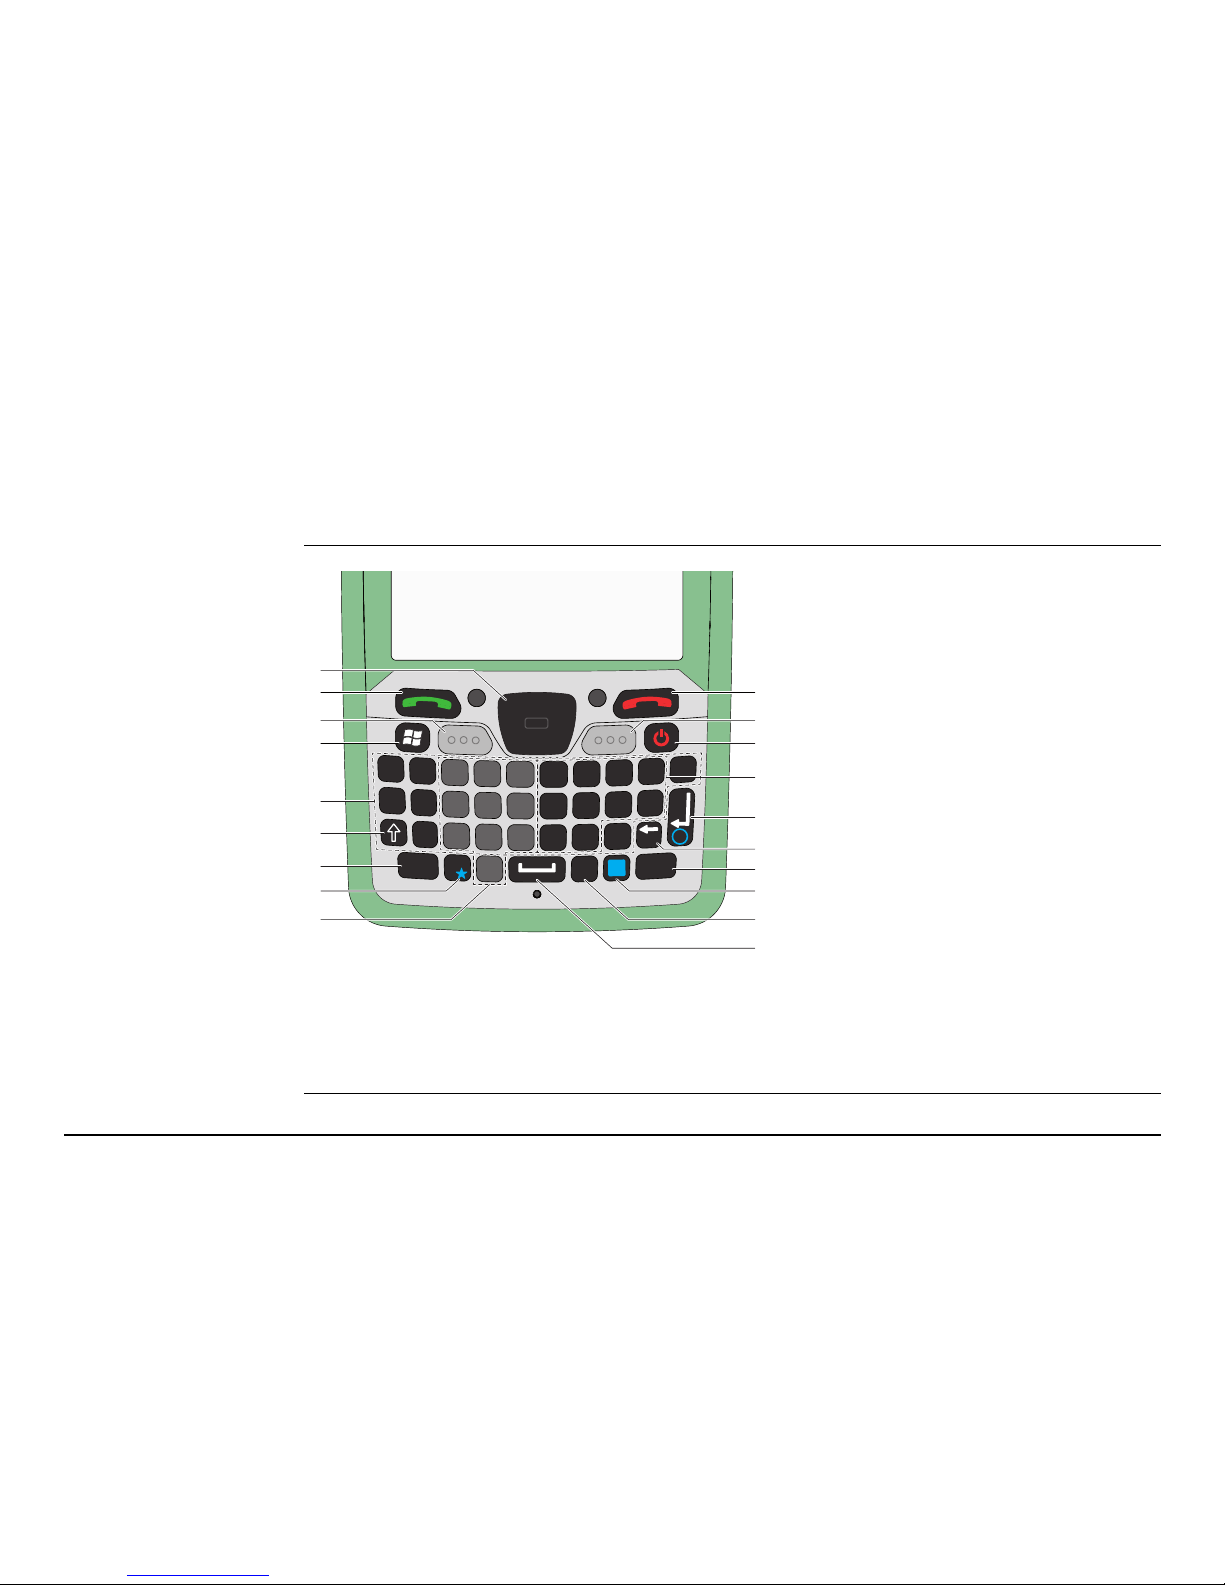
2.1 Keyboard
Keyboard display
a) Arrow keys
b) Talk key
c) Scan keys
d) Windows key
e) Alpha keys/special characters
f) SHIFT
g) ESC/CTRL
h) Asterisk
i) Numeric keys
j) End key
k) Power key
l) Function keys
m) ENTER
n) Backspace/DEL
o) TAB/ALT
p) BLUE/FN modifier
q) SYM
r) Space
Y U
I
O
P
L
K
J
H
G
F
D
S
A
Z
X
C
V
B
N
M
.
Q
W
E
R
T
ESC
,
SYM
TAB
<
<
<
<
2
3
1
546
8
9
7
0
F1
F2
F7
F8
F9
F10
F3
F4
F5
F6
CTRL
#
ALT
àü
?
DEL
OK
:
=
+
_
@
/
003900_001
a
b
c
c
d
e
f
g
h
i
j
k
l
m
n
o
p
q
r
24
Zeno 5, User Interface
Keys
)
Almost all keys can be reprogrammed to suit your requirements.
)
Most of the keys on the keyboard operate much like a desktop computer.
Where a key or key function is not consistent with the computer keyboard,
the differences are marked and described.
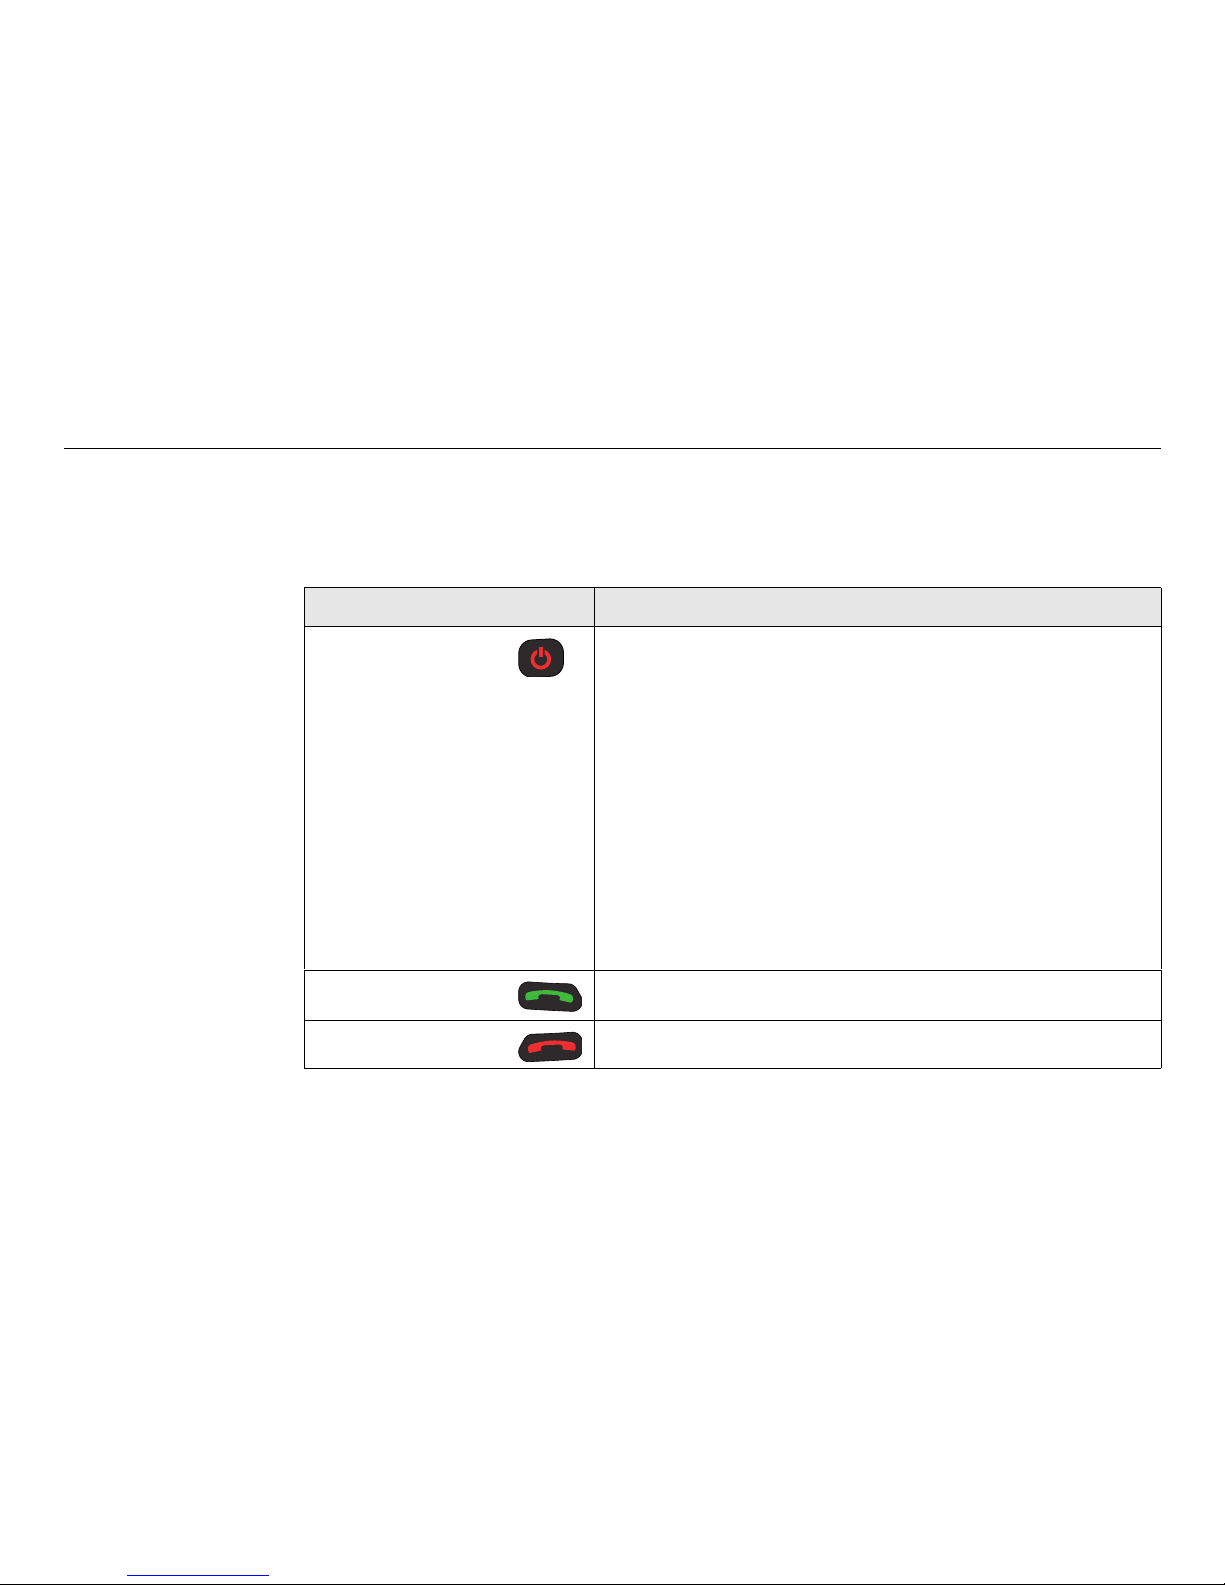
Key Function
Power key If Zeno 5 is off: Pressing and releasing the key turns
Zeno 5 on. The centre LED flashes yellow and the
desktop Today screen is displayed.
If Zeno 5 is on:
• Pressing and releasing the key turns Zeno 5
off.
• Pressing the key for 6 s and selecting the
desired option puts Zeno 5 in stand-by mode.
If Zeno 5 is in stand-by mode: Pressing the key wakes
Zeno 5 from stand-by mode. The screen in which you
were working prior to the stand-by mode is displayed.
Talk key To make a call or to receive an incoming call.
End key To end a call.
Zeno 5, User Interface 25
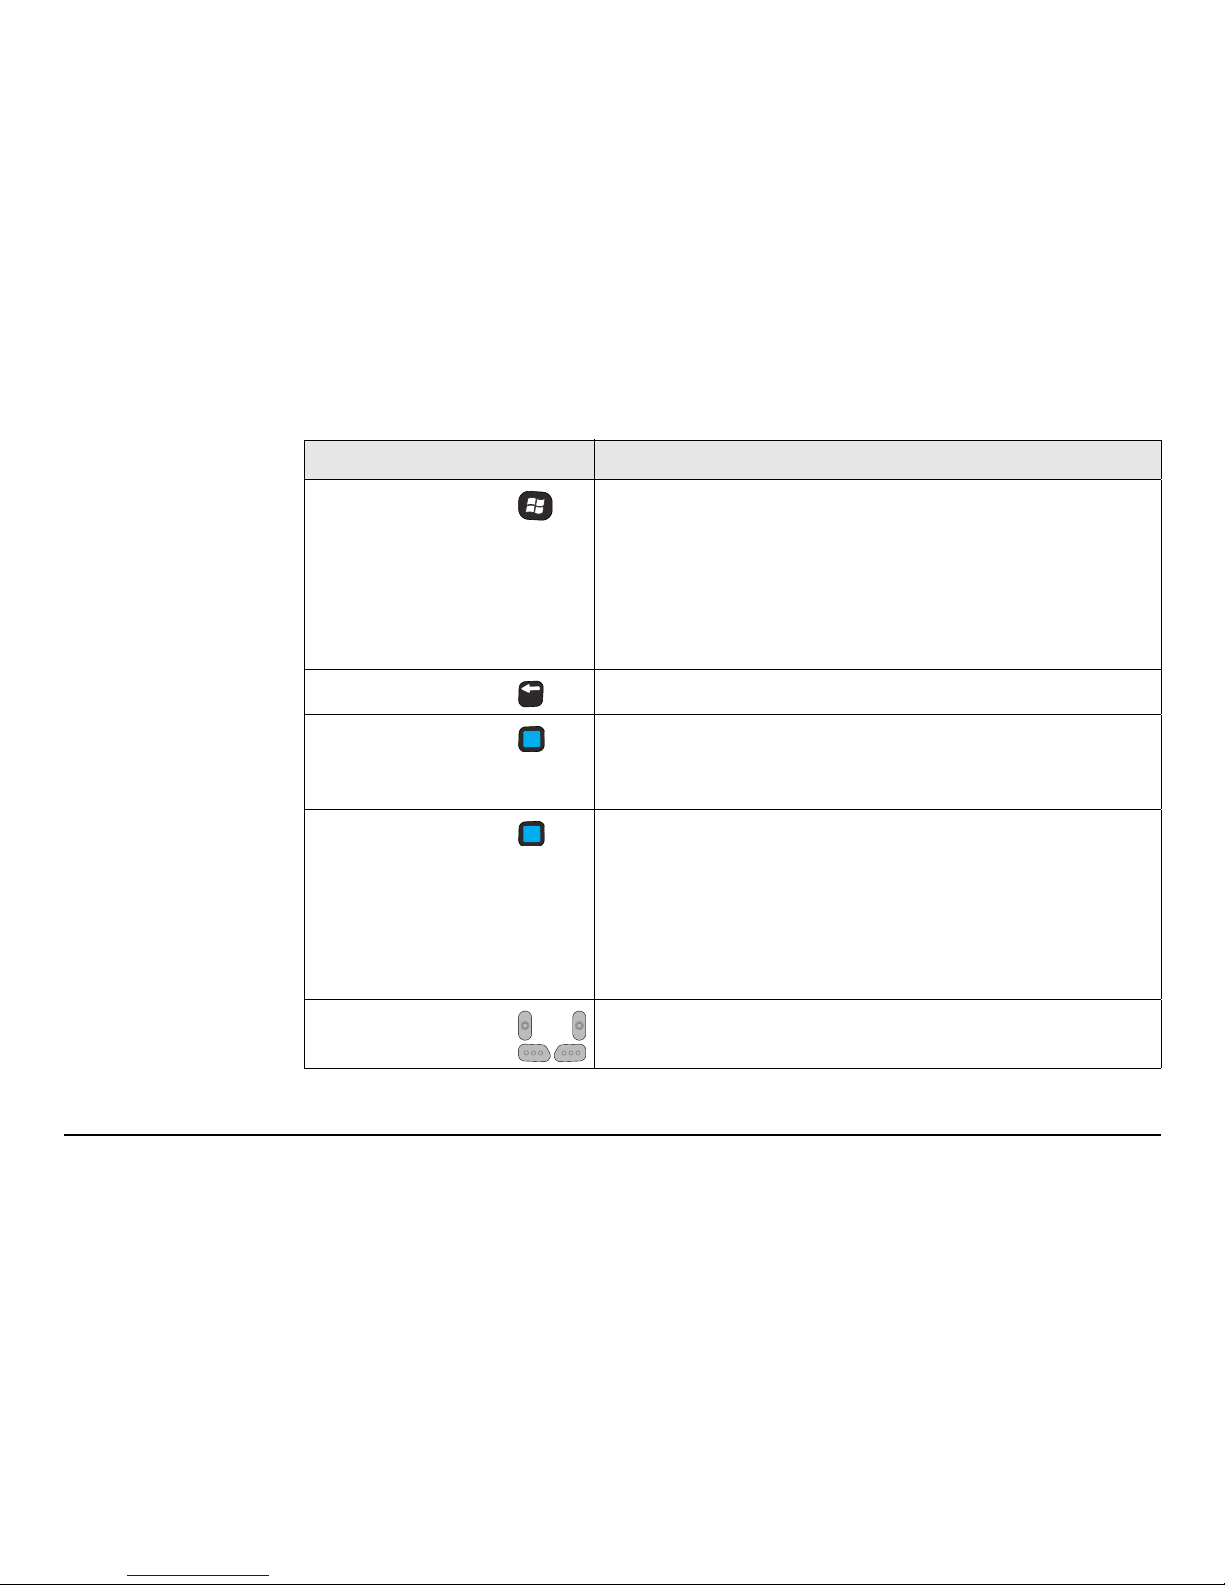
Windows If one presses the Windows Key, any open computer
games, or other similar programs where the taskbar is
not shown, will minimise without exiting the program.
Pressing the key in combination with other keys allows
invoking many common functions through the
keyboard.
Backspace Clears the last character during user input.
Blue Provides access to additional keys and system func-
tions. These functions are colour coded in blue print
above the keyboard keys.
Fn To type one upper case letter, press the Fn key
followed by the letter you want to appear in uppercase.
To type several upper case letters, press the Fn key
twice. Upper case letters are created until Fn is pressed
again.
Scan The four Scan keys can be remapped to serve user-
defined functions.
Key Function
DEL
26
Zeno 5, User Interface
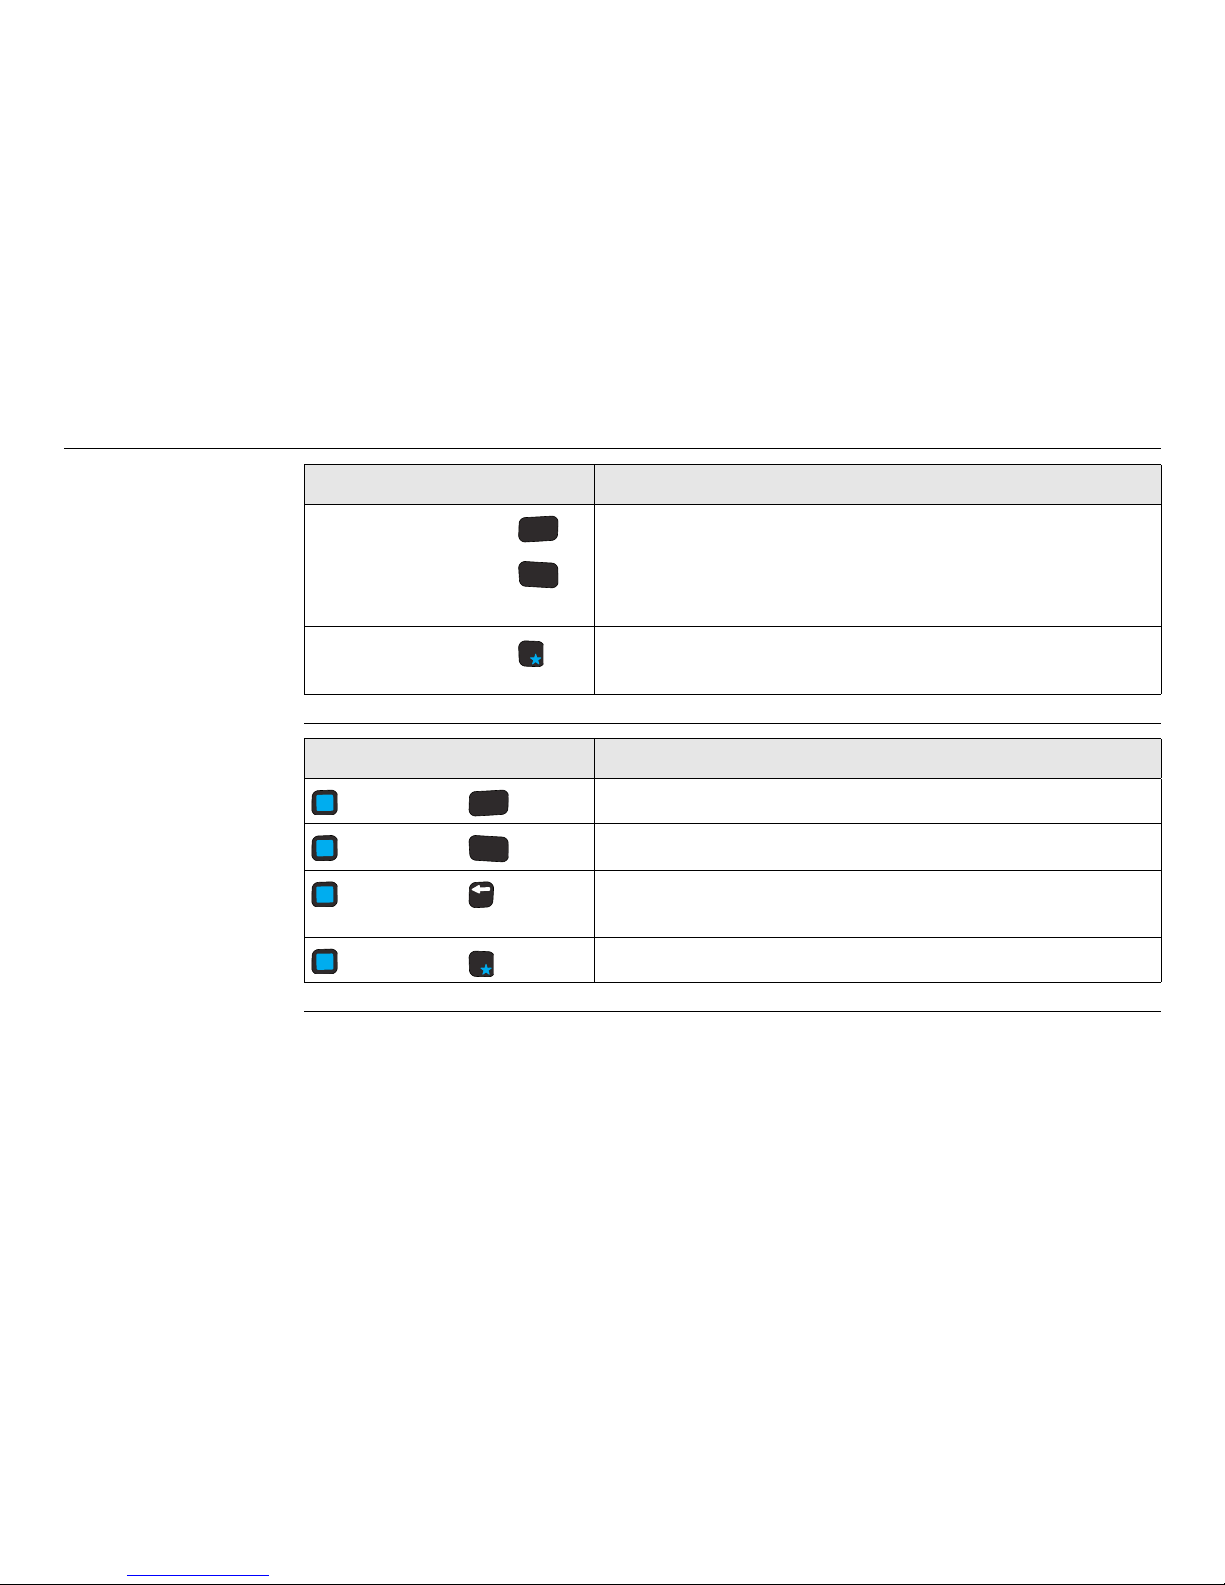
Key combinations
ALT The keys modify the function of the next key pressed
and are application-dependent. A key combination is
required to access these keys. Refer to "Key combinations".
CTRL
Asterisk In Windows Explorer this expands everything under the
current selection.
Key Function
TAB
ALT
ESC
CTRL
.
Key Function
+ To access the ALT key.
+ To access the CTRL key.
+ To access the DELkey. Clears the character at the
cursor position.
+ To expand everything under the current selection.
TAB
ALT
ESC
CTRL
DEL
.

Zeno 5, User Interface 27
Lock/Unlock
keyboard
You can lock the keyboard to prevent accidental key presses.
Key illumination The key illumination allows a more convenient working with the instrument when the
lighting conditions are not ideal.
To configure the intensity of the key illumination tap on Start⇒Settings⇒Sys-
tem⇒Backlight.
Step Description
1. To lock the keyboard tap on Start⇒Settings⇒Personal⇒Buttons icon.
2. Tap and swipe on the scrolling tab bar at the top of the screen to display
the Lock Sequence tab.
28
Zeno 5, User Interface
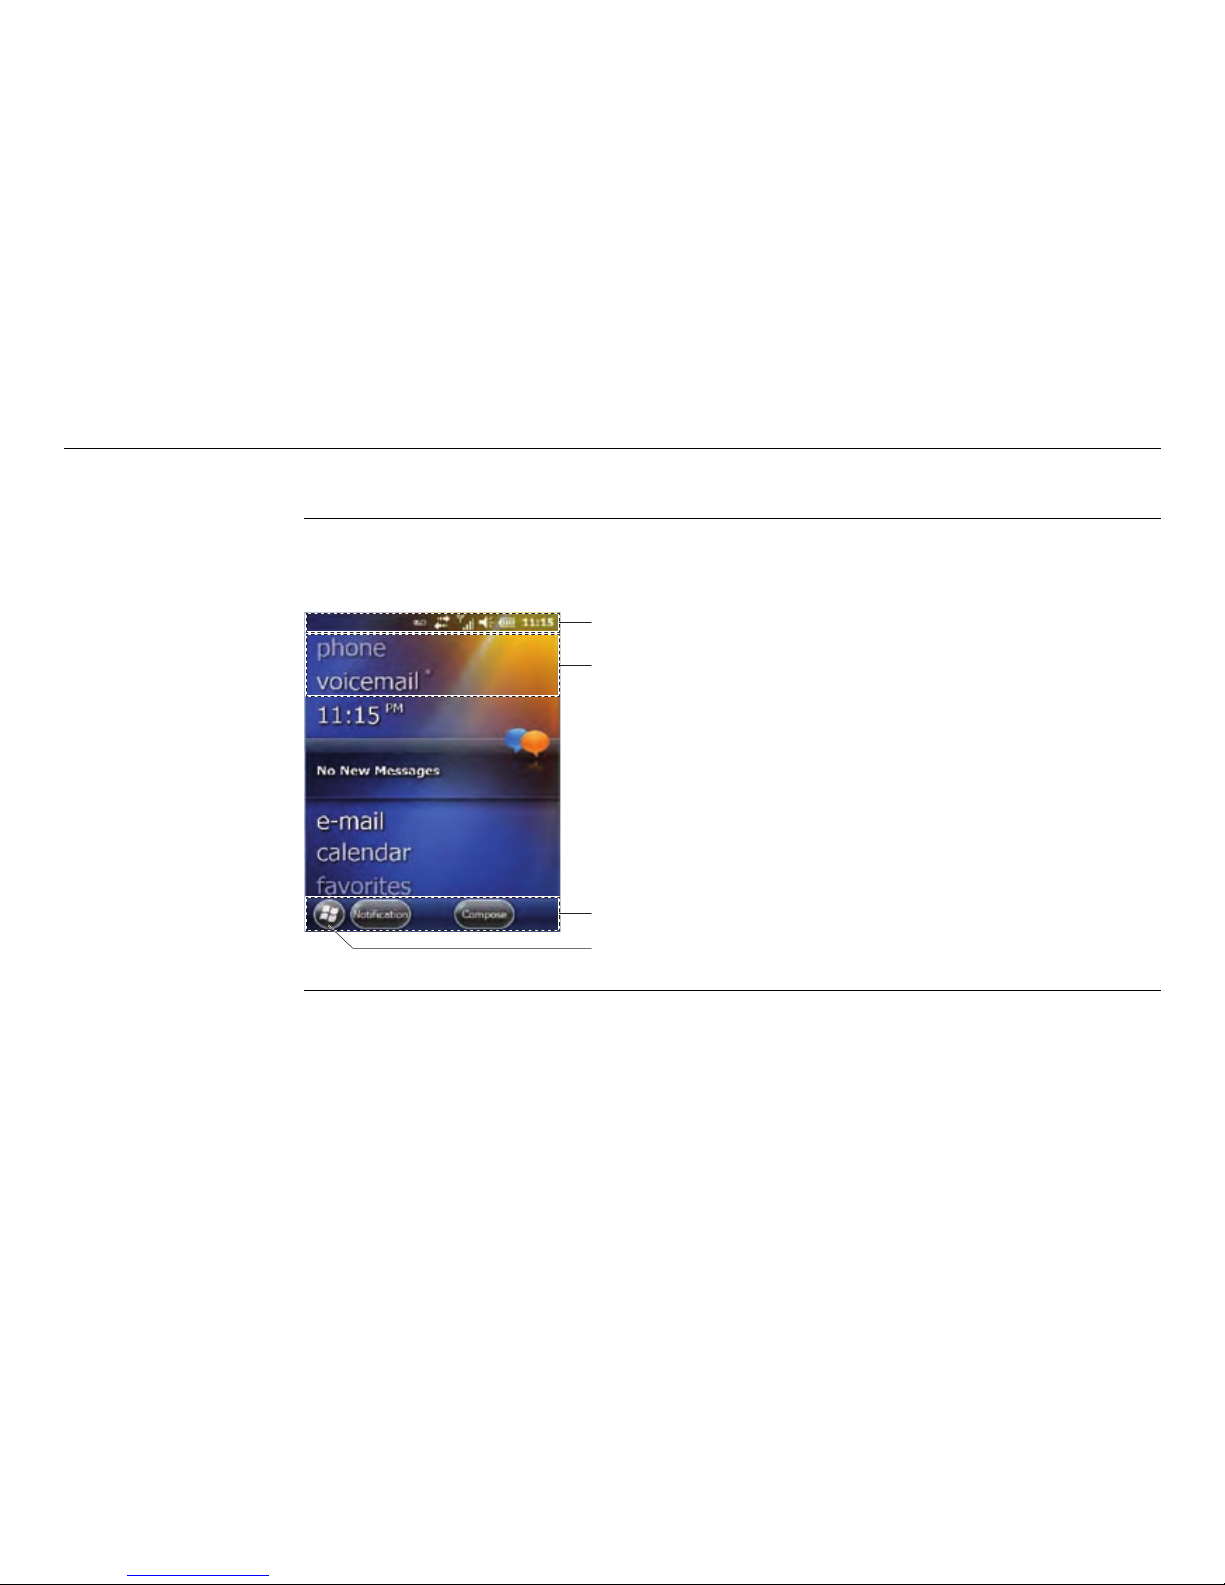
2.2 Today Screen
Today screen The Today screen is the starting place for accessing all functionality of the instru-
ment. It is displayed immediately after switching on the instrument.
a) Navigation bar
b) Default list of applets such as phone
and voicemail
c) Softkeys
d) Start key = Windows key
003767_001
a
b
c
d
Zeno 5, User Interface 29
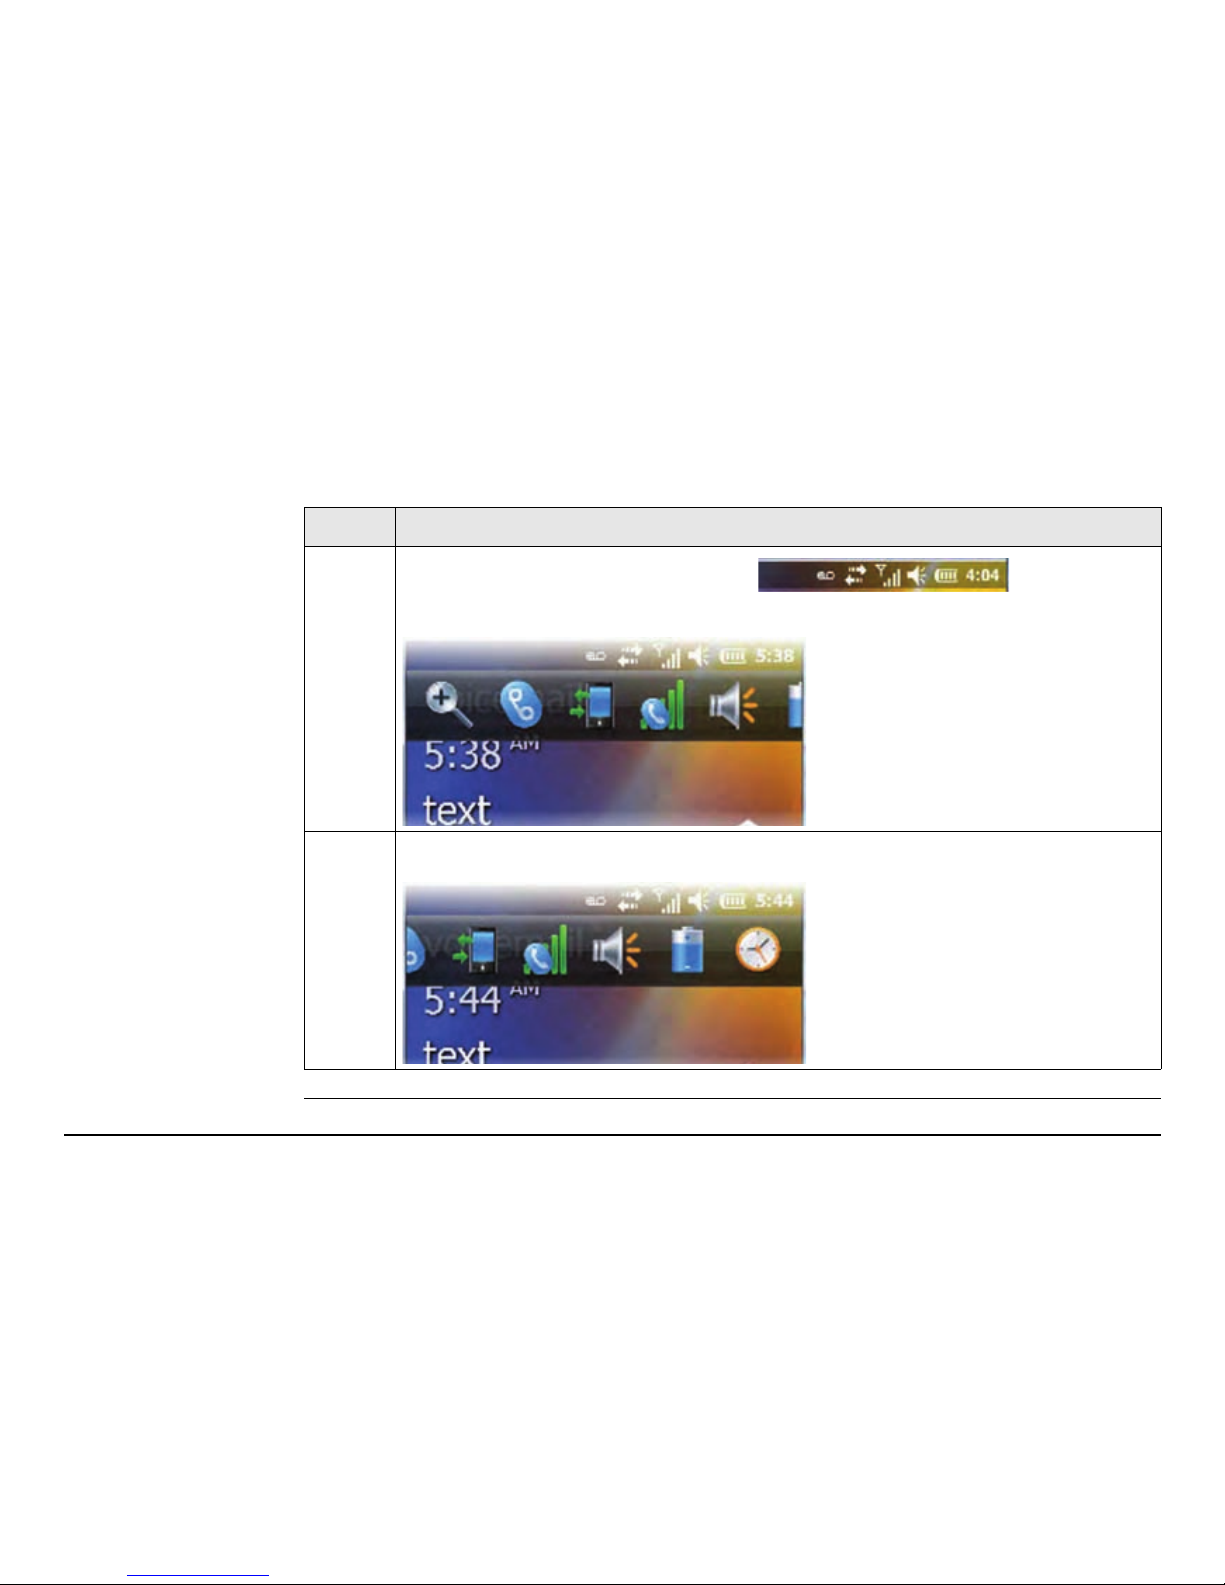
Navigation bar and
hot keys
The navigation bar at the top of the Today screen provides access to hot keys.
Hot keys are shortcuts to applications.
Step Description
1.
Tap anywhere in the navigation bar to display the
hot keys.
2. Tap and drag the stylus to the left to display additional hot keys.

30
Zeno 5, User Interface
Softkeys The softkeys at the bottom of the Today screen are for navigation. For example, the
Start key provides access to everything you need to work within Windows
Embedded Handheld 6.5 or higher.
Screen illumination The display illumination improves character visibility in low light conditions. The
display illumination switches on when a key is pressed or the screen is tapped.
To configure the illumination intensity and the duration the illumination remains on
tap on Start⇒Settings⇒System⇒Backlight.

Zeno 5, User Interface 31
2.3 Operating Principles
Touch screen The touch screen is a standard feature on Zeno 5. Each is equipped with a stylus – a
pointing tool – stored in a slot at the top-right side of the unit.
Graphic user interfaces like Windows Embedded Handheld 6.5 or higher for portable
devices or desktop Windows (2000, XP, etc.) utilise ‘point and click’ navigation. On
the Zeno 5, this is accomplished using a touch screen and stylus or finger.
Operation by touch screen
Information is selected and entered on the screen using the supplied stylus or finger.
Operation Description
To select an item, open files/folders,
start applications
Tap on the icon.
To scroll through options on the screen Tap and drag on the screen.
To display additional items Tap on the navigation bar.
To display a screen associated with an
option
Tap on any highlighted option
OR
Double-tap on an option.

32
Zeno 5, User Interface
)
If the touch screen is not registering the screen taps accurately, it may need
recalibration.
)
If the touch screen is used in harsh environments, consider applying a
disposable screen protector ST6112. A screen protector reduces the clarity
of the display slightly but extends the life of the touch screen. When a screen
protector becomes scratched and abraded, remove and replace it.
Lock/Unlock touch
screen
You can lock the touch screen to prevent accidental actions.
Step Description
1. On the Today screen, tap on Start.
2. Tap on the Lock icon in the taskbar at the bottom of the screen.
A sliding lock is displayed on the screen.
3. Tap and hold the stylus on the sliding lock. Flick the stylus to the right and
release to unlock the touch screen. Or tap on the sliding lock.
a) Lock icon a) Sliding icon
003761_001
a
a

Zeno 5, User Interface 33
Calibrate the touch
screen step-bystep
To calibrate the touch screen or to re-calibrate the touch screen if the stylus pointer
is not working accurately.
Step Description
1. Turn on the Zeno 5.
2. Tap on Start⇒Settings⇒System⇒Screen.
3. On General tab, click Align screen.
4. Follow the instructions on the screen.
003760_001

34
Zeno 5, Operation
3 Operation
3.1 Power Functions
Turning Zeno 5 on Press and release Power key ( ). Release the power key when the application LED
flashes.
)
Zeno 5 must have a power supply.
)
If the Zeno 5 does not to power up, consider:
• The battery capacity may be lower than the suspend threshold.
• It may be overheated (>60° C).
• The battery may have fallen below the configured suspend threshold.
Turning Zeno 5 off Press and release power key ( ).
Putting Zeno 5 into
suspend mode
Press and hold power key ( ) for 6 s. Select the required option.

Zeno 5, Operation 35
3.2 Batteries
)
Before attempting to install, use or charge the battery pack, it is critical that you
review and follow the important safety guidelines, described in the following chapters.
3.2.1 Operating Principles
Charging / firsttime use
• The battery must be charged prior to using it for the first time because it is delivered with an energy content as low as possible.
• The permissible temperature range for charging is between 0°C to +40°C/ +32°F
to +104°F. For optimal charging, we recommend charging the batteries at a low
ambient temperature of +10°C to +20°C/+50°F to +68°F if possible.
• It is normal for the battery to become warm during charging. Using the chargers
recommended by Leica Geosystems, it is not possible to charge the battery if the
temperature is too high.
• For new batteries or batteries that have been stored for a long time (> three
months), it is effectual to make only one charge/discharge cycle.
• For Li-Ion batteries, a single discharging and charging cycle is sufficient. We
recommend carrying out the process when the battery capacity indicated on the

36
Zeno 5, Operation
charger or on a Leica Geosystems product deviates significantly from the actual
battery capacity available.
Operation /
Discharging
• The batteries can be operated from -20°C to +55°C/-4°F to +131°F.
• Low operating temperatures reduce the capacity that can be drawn; high operating temperatures reduce the service life of the battery.
Monitoring the
battery
When the battery is at 50% capacity, a low battery warning is displayed on the
Zeno 5 display. When the battery is at about 10% capacity, a very low battery warning
is displayed.
As Lithium-Ion batteries age, their capacity decreases gradually. Lithium-Ion batteries
are considered depleted with less than 60% of original capacity remaining after
approximately 2 years of use. Keep in mind that heavy usage or operating the
Zeno 5 at temperature extremes shortens the battery life.
Lithium-Ion batteries do not require conditioning cycles and the Zeno 5 battery
system (including chargers) requires no user interaction to maintain peak performance.

Zeno 5, Operation 37
Storing Long-term battery storage is not recommended. If storage is necessary:
• Always try to use a ‘first-in first-out’ approach to minimise storage time.
• Lithium-Ion batteries age much faster at elevated temperatures. Store batteries
at temperatures between 0° C and 20° C.
• Always charge batteries to at least 40 to 60% before storing them. An overdischarge phenomenon damages the batteries. An over-discharge phenomenon
occurs when an empty battery is stored for a long time such that the cell voltage
drops below a lower limit.
• To minimise storage degradation, recharge stored batteries to 40 to 60% every
four or six months to prevent over-damage.
• A never used Lithium-Ion battery that has been stored for three years may have
limited or no useful life remaining once put into service.
Maximise battery
runtime
To maximise the runtime of your batteries, consider:
• The display backlight is a large drain on the battery. Try to keep its brightness
as low as possible.
•Tap Start⇒Settings⇒Power to display a screen that provides detailed
information about the battery status of the battery installed in the Zeno 5.
• When the Zeno 5 is switched off, it goes into a low-power, suspend state but
continues to draw a small amount of power from the battery.
Do not leave the Zeno 5 in suspend state for more than a week.
For long-term storage, remove the battery from the Zeno 5.

38
Zeno 5, Operation
3.2.2 Changing the Battery
Insert and remove
the battery stepby-step
Step Description
)
Turn Zeno 5 field controller over to gain access to the battery compartment.
1.
Press the power key ( ) to shut down the Zeno 5.
)
Always switch the Zeno 5 off before changing or removing the battery. If
you do not turn the Zeno 5 off before removing the battery, it may be
necessary to reboot the unit. Any active sessions may be lost.
003939_001
2
4
3
5
6

Zeno 5, Operation 39
)
Assuming the default power-saving parameters and battery reserve level
have not been altered, battery swap time is approximately two minutes.
You will not lose data if the battery is replaced within this time frame. The
Zeno 5 has internal super-capacitors that save the current data for up to
5 min while the battery is swapped.
)
To protect data, the safest place to store data is on a microSD card or
externally to the device on a USB memory stick or on a computer.
2. Slide the battery release key located just above the battery to the right to
release.
3. Pull the battery from the Zeno 5.
4. Match the contacts at the bottom of the battery with those in the battery
well of the Zeno 5, and gently snap into place.
5. Close the battery compartment.
Step Description

40
Zeno 5, Operation
3.2.3 Charging the Battery
Charge internal
battery in docking
station step-bystep
The docking station operates as both a charger and a docking station. The Zeno 5
and a spare battery can be charged simultaneously.
The docking station supplies DC power to enable the Zeno 5 internal fast charger. It
takes between 3 to 4 hours to charge the battery installed in the Zeno 5.
Step Description
)
When ordering a charger or docking station, you must also order the
country-compatible power cord separately.
Y
U
I
O
P
L
K
J
H
G
F
D
S
A
Z
X
C
V
B
N
M
.
Q
W
E
R
T
ESC
,
SYM
TAB
<
<
<
<
2
3
1
5
4
6
8
9
7
0
F1
F2
F7
F8
F9
F10
F3
F4
F5
F6
CTRL
#
ALT
àü
?
DEL
OK
:
=
+
_
@
/
003940_001
1
2
4
3
5

Zeno 5, Operation 41
)
Only Zeno 5 can be charged in the docking station. Other PDAs with the
same battery terminating connector can NOT be charged.
1. Insert the DC plug from the power supply into the socket on the back of
the desktop charger.
2. Insert the country-compatible power coord into the power supply.
3. Plug the power cord into an external power supply.
4. Slide the Zeno 5 into the charger.
Press down to firmly seat the Zeno 5.
)
Do not place batteries in the docking stations if they are colder than 0°C
(32°F). Allow them to warm up to room temperature for at least 30 min.
5. The charge LED on the Zeno 5 (the left-most LED) lights up to indicate that
the unit has external power and may charge the internal battery. When the
Zeno 5 battery capacity reaches 95%, the LED turns solid green and
remains in this state once the battery is completely charged.
)
Refer to "3.5 LED Indicators on Docking Station" for information
about the charge LED.
6. Allow the battery to charge for at least 4 hours before use.
)
Full battery performance is only reached after the first few
charge/discharge cycles
Step Description

42
Zeno 5, Operation
Charge internal
battery with USB
SnapOn module
step-by-step
The USB SnapOn module
• powers the Zeno 5.
• charges the Zeno 5.
• provides a USB connection.
The USB SnapOn module is compatible with AC power adaptor PS1050 - G1 and with
the Vehicle Power Outlet adaptor.
)
To preserve battery integrity, the docking station proceeds with a charge
only when the battery temperature falls between 0° C and 40° C (32° F to
104° F).
Step Description
Y
U
I
O
P
L
K
J
H
G
F
D
S
A
Z
X
C
V B
N
M
.
Q
W
E
R
T
ESC
,
SYM
TAB
<
<
<
<
2
3
1
5
4
6
8
9
7
0
F1
F
2
F7
F8
F9
F10
F
3
F
4
F5
F6
CTRL
#
ALT
àü
?
DEL
OK
:
=
+
_
@
/
003941_001
1
2
3
5
5
4

Zeno 5, Operation 43
Step Description
)
When ordering USB SnapOn module, you must also order the countryspecific cable to be plugged into the wall/mains.
)
Make sure that the adaptor connector and Zeno 5 docking connector are
free of dust or any other debris before connecting them.
)
A slot in the side rail on each side of the Zeno 5 accommodates the locking
clips of the USB SnapOn module.
1. To attach the USB SnapOn module:
Align the USB SnapOn module with the base of the Zeno 5 and gently slide
up until the locking clips snap into place.
2. Insert the USB plug from the power supply/vehicle power outlet adaptor
into the USB serial port of the Zeno 5.
3. Plug the power cord into an external power supply.
OR
Insert the vehicle power outlet adaptor plug into the power outlet in the
vehicle.

44
Zeno 5, Operation
4. The charge LED on the USB SnapOn module switches on.
The charge LED on the Zeno 5 (the left-most LED) lights up to indicate that
the unit has external power and may charge the internal battery. When the
Zeno 5 battery is fully charged the LED switches off again.
)
Refer to "3.5 LED Indicators on Docking Station" for information
about the charge LED.
Allow the battery to charge for at least 4 hours before use.
5. To remove the USB SnapOn module:
Press down on the base of the clip arms to release them from the Zeno 5
side rails and slide the USB SnapOn module off.
Step Description

Zeno 5, Operation 45
Charge spare
battery in docking
station step-bystep
Step Description
)
You can charge a spare battery while the Zeno 5 is docked and charging in
the docking station.
)
Only Zeno 5 batteries can be charged in the docking station.
1. Insert the DC plug from the power supply into the socket on the back of
the desktop charger.
2. Insert the country-compatible power coord into the power supply.
3. Plug the power cord into an external power supply.
003943_001
1
2
4
3
5

46
Zeno 5, Operation
)
If the battery is overheated (> 60° C), if the battery capacity is lower than 100 mAh
or if the battery may have fallen below the configured suspend threshold then the
Zeno 5 will not switch on
• when the power key is pressed.
• when A/C power is applied.
4. Aligning the contacts on the battery with the contacts in the spare battery
charge well at the back of the docking station.
Slide the spare battery in the charge well.
Press down firmly. Make sure that the contacts on the spare battery and
hose in the charge well meet.
5. The charge LED on the docking station switches on.
When the battery capacity reaches 95%, the LED turns solid green and
remains in this state once the battery is completely charged.
)
Refer to "3.5 LED Indicators on Docking Station" for information
about the charge LED.
6. Charge the battery for at least four hours before use.
)
Do not leave a spare battery in a charger for more than 72 hours. Doing
so may damage the battery or reduce its charge capacity.
Step Description

Zeno 5, Operation 47
If the battery is overheated, the charge LED blinks yellow until the battery is replaced.
If the battery capacity is very lower, charge the battery to an acceptable level.
)
Do not use a docking station/charger if
• After an overnight charge, the battery feels warmer than the docking
station/charger housing. The docking station/charger must be inspected by
qualified service personnel.
• The battery, while charging, becomes more than lukewarm.
)
Avoid using an extension cord. Use of an improper extension cord could result in fire
or electric shock. If an extension cord must be used, make sure:
• The plug pins on the extension cord are the same number, size, and shape
as those on the adaptor.
• The extension cord is properly wired and in good electrical condition, and
that the wire size is larger than 18 AWG.

48
Zeno 5, Operation
3.3 Inserting and Removing a microSD/SIM Card step-by-step
)
• Keep the card dry.
• Use it only within the specified temperature range.
• Do not bend the card.
• Protect the card from direct impacts.
)
Failure to follow these instructions could result in data loss and/or permanent
damage to the card.
Availability of
microSD and SIM
card holder
Zeno 5 with microSD card SIM card
For additional memory To access voice option
and Internet
UMTS radio 99
CDMA radio 9 -

Zeno 5, Operation 49
Insert and remove
a microSD/SIM card
on Zeno 5 with
UMTS radio stepby-step
Step Description
)
Two card holders are available in the battery compartment:
• The lower holder is for the microSD card.
• The upper holder is for the SIM card.
1. Press and release the power key to turn the Zeno 5 off.
2. Slide the battery latch to the right to unlock the battery.
3. Remove the battery.
4. Slide the SIM card door up to unlock it and flip it open.
NEPO
KCOL
003947_001
6
7
4
5

50
Zeno 5, Operation
5. Slide the SIM card onto the guides on the SIM card holder. Position the card
with the connector pad visible. When the door is closed, the connector pad
must make contact with the connectors on the unit.
)
The SIM card door must remain open to insert the microSD card.
6. Flip up the left side of the microSD door. The microSD door is hinged on
the right.
)
A label in the shape of a microSD card is affixed to the card door. Do not
mistake the label for a microSD card.
7. Slide the microSD card onto the guides on the card door with the
connector pads at the bottom.
8. Gently snap the microSD door closed.
9. Close the SIM card door, and slide it down to lock it in place.
10. Insert the battery.
Step Description

Zeno 5, Operation 51
Insert and remove
a microSD/SIM card
on Zeno 5 with
CDMA radio stepby-step
Step Description
)
One card holder for the microSD card is available in the battery compartment.
1. Press and release the power key to turn the Zeno 5 off.
2. Slide the battery latch to the right to unlock the battery.
3. Remove the battery.
4. Slide the card door up to unlock it and flip it open.
5. Slide the microSD card onto the guides on the SD card holder. Position the
card with the connector pads at the bottom. When the door is closed, the
connector pads must make contact with the connectors on the unit.
6. Close the card door and slide it down to lock it in place.
NE
PO
KCOL
NE
P
O
KCOL
003948_001
4
5
6

52
Zeno 5, Operation
3.4 LED Indicators on Zeno 5
LED indicators Description
The Zeno 5 has Light Emitting Diode indicators. They indicate the basic controller
status.
Diagram
a) Charge LED
b) Application LED
c) Radio power LED
003949_001
a
bc

Zeno 5, Operation 53
Description of the LEDs
IF the is THEN
Charge LED Reflects the battery charge status if the Zeno 5 is attached to an
external power supply.
off No external power was detected.
)
When a Zeno 5 is docked into a powered
docking station and the charge LED on the
Zeno 5 stays off, there may be a problem
with the Zeno 5 or with the docking
station. Use a Zeno 5 with a properly functioning charge LED to isolate the problem.
green Battery charging is completed.
flashing green Battery is charging.
flashing yellow Battery is not charging because battery tempera-
ture is outside the allowable range of 0° C to 40° C
(32° F to 104° F).
)
Allow the battery to come to an acceptable range before reinserting the Zeno 5 in
the docking station.

54
Zeno 5, Operation
red Battery charge failure. Unable to read battery or a
non-Leica Geosystems battery is used.
Application
LED
flashing yellow The Zeno 5 has been powered up after the power
key was pressed.
)
The behaviour of this LED is applicationdependent.
Radio power
LED
off Radio power is off.
blue Radio power is on.
IF the is THEN

Zeno 5, Operation 55
3.5 LED Indicators on Docking Station
LED indicators Description
The desktop docking station has a Light Emitting Diode indicator. It indicates the
battery charge status.
Diagram
a) Charge LED
003950_001
a

56
Zeno 5, Operation
Description of the LEDs
IF the is THEN
Charge
LED
on for 3 s the docking station is first connected to the DC
power supply.
)
If the charge LED does not turn on or does
not stay on for 3 s, the docking station is
defective and requires service.
off No battery is detected.
)
Inspect the charge slot contacts for damage.
Are they bent, flattened, twisted or broken?
)
Reinstall the battery and check that it is fully
seated in the slot.
)
Try inserting a battery that you know to be
working in the charger slot.
)
Disconnect and reconnect the DC adaptor,
and check that the spare battery LED indicator flashes at power-up.
)
If the charge slot does not charge the known
working battery, the docking station is
defective and requires service.

Zeno 5, Operation 57
)
The Zeno 5 is also equipped with a charge LED, the left most LED. This LED
monitors the charging process of the battery in the Zeno 5. The behaviour of
the charge LED on the Zeno 5 and on the docking station is identical.
green Charging is completed.
flashing green Charging is in progress.
flashing yellow The battery is not charging. Temperature out off
range.
red • the battery or docking station are not Leica
Geosystems approved products.
OR
• the safety mechanism is faulty.
)
Insert a battery that has been tested in
another charger and is known to work.
)
If the LED continues to flash red with the
known working battery, the docking station
is defective and requires service.
IF the is THEN

58
Zeno 5, Operation
3.6 Connecting to a Personal Computer
)
Microsoft ActiveSync (for PCs with Windows XP operating system) or Windows Mobile
Device Center (for PCs with Windows Vista or Windows 7 operating system) is the
synchronisation software for Windows mobile-based pocket PCs. Microsoft ActiveSync or Windows Mobile Device Center enables a PC and a Windows mobile-based
pocket PC to communicate.
)
If Microsoft ActiveSync or Windows Mobile Device Center is not installed on your PC,
download it from
http://www.microsoft.com/download/en/windows.aspx?q=windows.
Connect a Zeno 5
to a PC step-bystep
Using docking station Using USB SnapOn modul
Y
U
I
O
P
L
K
J
H
G
F
D
S
A
Z
X
C
V
B
N
M
.
Q
W
E
R
T
ESC
,
SYM
TAB
<
<
<
<
2
3
1
5
4
6
8
9
7
0
F1
F2
F7
F8
F9
F10
F3
F4
F5
F6
CTRL
#
ALT
àü
?
DEL
OK
:
=
+
_
@
/
O
P
F3
F4
:
003951_001
2
4
3
5
Y
U
I
O
P
L
K
J
H
G
F
D
S
A
Z
X
C
V B
N
M
.
Q
W
E
R
T
ESC
,
SYM
TAB
<
<
<
<
2
3
1
5
4
6
8
9
7
0
F1
F
2
F7
F8
F9
F10
F
3
F
4
F5
F6
CTRL
#
ALT
àü
?
DEL
OK
:
=
+
_
@
/
O
P
F4
:
003952_001
2
4
3
5

Zeno 5, Operation 59
Step Description
Using docking station Using USB SnapOn modul
1. Start the PC. Start the PC.
2. Insert the Zeno 5 in the docking
station.
Connect the USB SnapOn module to
the Zeno 5.
3. Plug the microUSB cable into the
microUSB port on the docking
station.
Plug the microUSB cable into the
microUSB port on the USB SnapOn.
4. Turn the Zeno 5 on. Turn the Zeno 5 on.
5. Plug the other end of the microUSB
cable to a USB port on the PC.
Plug the other end of the microUSB
cable to a USB port on the PC.
For PCs with Windows XP operating system:
)
ActiveSync starts up automatically. If does not start automatically,
start ActiveSync. If not already installed, run the ActiveSync installation program.
6. Allow USB connections inside the Connection Settings window of ActiveSync.
7. Click Explore in ActiveSync.

60
Zeno 5, Operation
)
The folders on the Zeno 5 are displayed under Mobile Devices.
The folders of the data storage device can be found in Storage-
Card.
For PCs with Windows Vista or Windows 7 operating system:
)
Windows Mobile Device Center starts up automatically. If does not
start automatically, start Windows Mobile Device Center.
8. You can:
• View Zeno 5 files from Windows Explorer.
• Drag and drop files between the Zeno 5 and the PC in the same
way that you would between PC drives.
• Back up Zeno 5 files to the PC, then restore them from the PC to
the Zeno 5 again.
Step Description
Using docking station Using USB SnapOn modul

Zeno 5, Operation 61
3.7 Connecting to a Wireless Network
Configuring a wireless network stepby-step
The Zeno 5 contains an integrated 802.11a/b/g/n radio. The radio can be configured
for one or more wireless network profiles.
Step Description
1. On the Today screen, tap on
Start⇒Settings⇒Connections
⇒Wi-Fi.
2. On the Wireless tab ...
• To configure a new network
profile, tap on Add New....
• To connect to an existing
network profile, tap on the
name of the defined
network profile.
003755_001

62
Zeno 5, Operation
3.8 Phones
3.8.1 Description of the Phone
Description The Zeno 5 contains phone capabilities as a standard option.
The phone keypad provides phone services known from conventional cellular phones.
Use the phone keypad on the Zeno 5 to, for example:
• Send and receive phone calls.
• Make conference calls.
• View a call history.
• Set up speed dial numbers.

Zeno 5, Operation 63
3.8.2 Calls
Making, receiving
and ending calls
• To make a call or to receive an incoming call, press the Talk key ( ).
• To end a call, press the End key ( ).
Making a conference call
To set up a conference call between yourself and two or more other parties:
Step Description
1. Type the first phone number on the phone keypad.
2.
Press the Talk key ( ).
3. While you are connected to the first number, tap on Menu⇒Hold.
4. Type the second number.
5.
Press the Talk key ( ).
6. Tap on Menu⇒Conference.
7. To add another party, tap on Menu⇒Hold, type the number, and then tap
Menu⇒Conference.
8.
Press the End key ( ) to disconnect all calls.

64
Zeno 5, Operation
3.8.3 Settings
Accessing the
phone settings
Use the phone settings to define the ring type and tone, to choose phone services
such as barring calls, and to determine network selections.
Step Description
1. Tap on the Phone Settings hot key
in the navigation bar.
)
The phone bubble is popping-up. a) Navigation bar
2. Tap on the Settings link. b) Phone settings hot key
a
b

Zeno 5, Operation 65
3. Sounds tab
Number
The phone number belonging to the
SIM card inserted.
Ring type
To define if the phone rings or
vibrates.
Ring tone
To configure the ring tone of
incoming phone calls.
Step Description
003757_001
66
Zeno 5, Operation
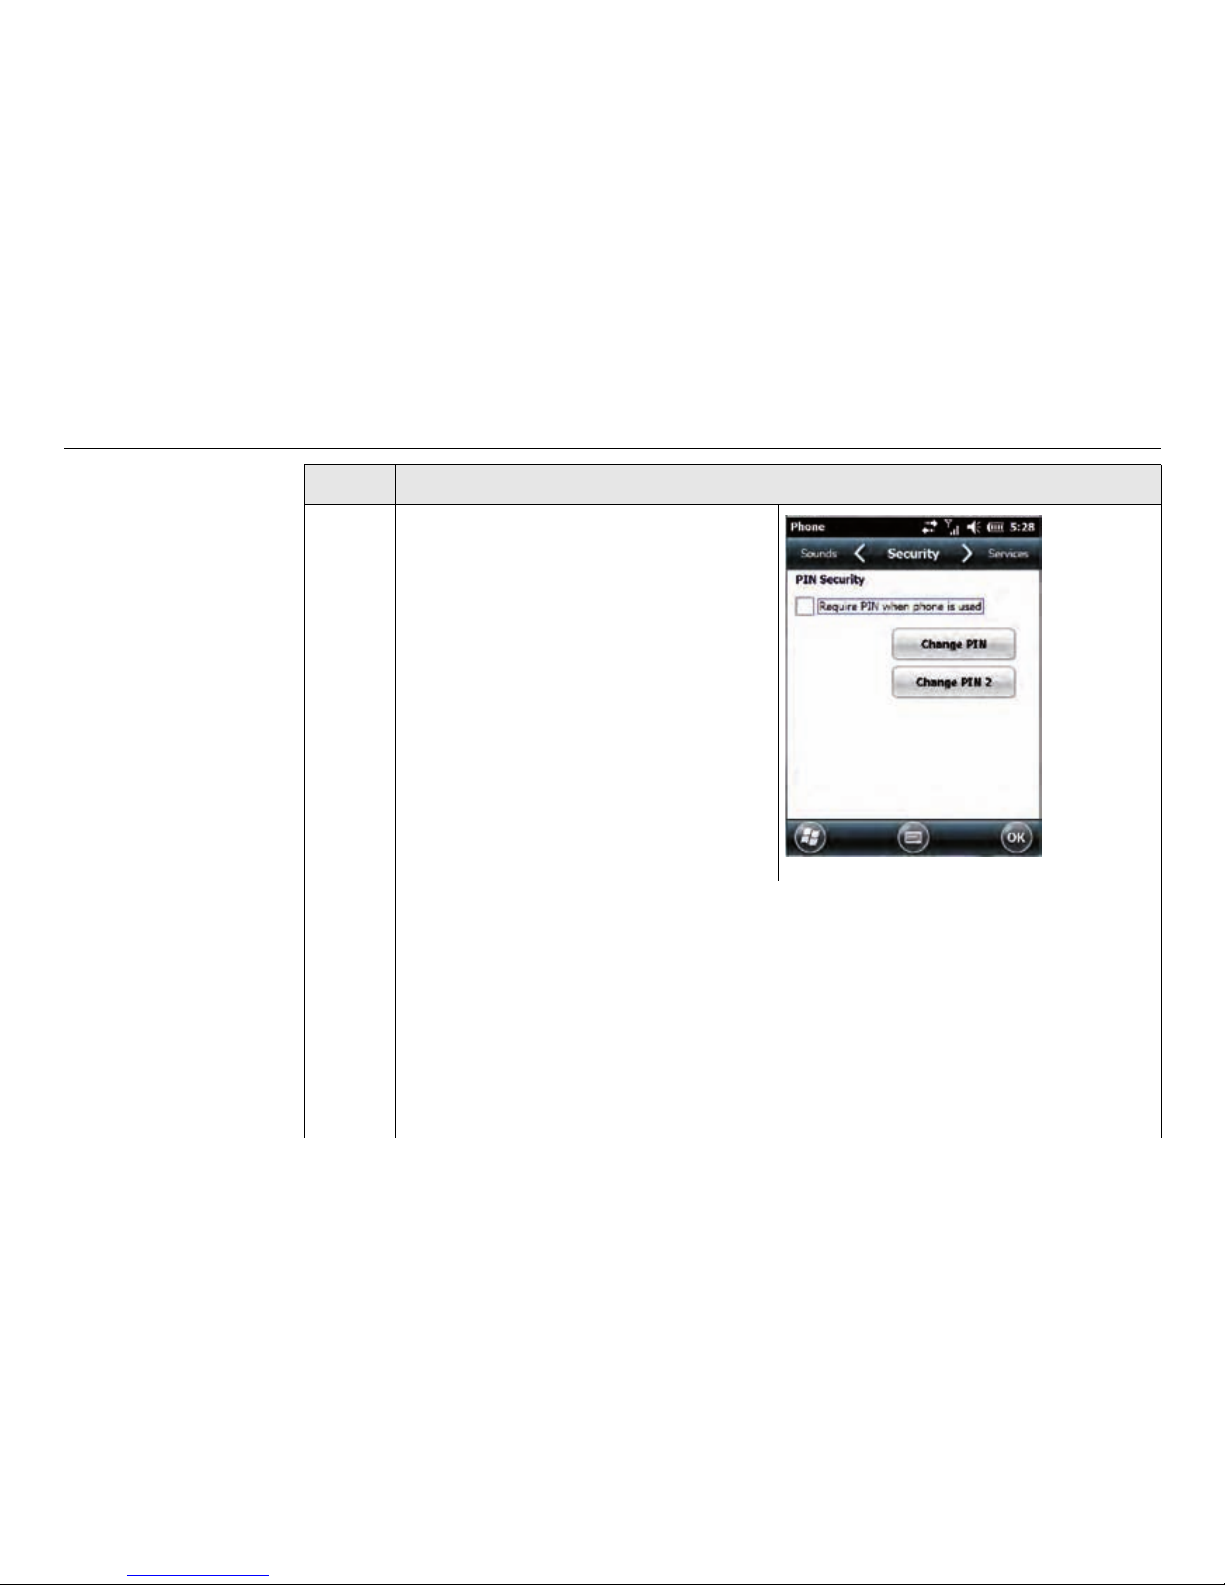
4. Security tab
To protect the phone functions from
unauthorised use by enabling or
change a Personal Identification
Number.
Tick PIN Security.
Tap on Change PIN and type in the
SIM card PIN.
Tap on Enter in the phone keypad.
)
The number of trials is limited. If the PIN is locked for any reason,
for example the wrong PIN was entered, input the Personal
UnblocKing code for access to the PIN.
Type in the new PIN code that will be required at startup. PIN codes must
be numerical only and 4 to 6 digits in length.
Tap on Enter. Confirm the new PIN. Retype the new PIN. Tap Enter.
Tick the checkbox Require PIN when phone is used to activate PIN secu-
rity.
Step Description

Zeno 5, Operation 67
If Require PIN when phone is used is checked, then, after turning on the
instrument, a PIN code must be entered.
5. Service tab
• To customise the behaviour of the phone.
• To block all incoming calls
• To tailor to whom your caller ID is transmitted.
• To set up call forwarding.
Step Description

68
Zeno 5, Operation
3.9 Adjusting Speaker Volume
Adjusting speaker
volume
The Volume key is located on the left side of the Zeno 5, just above the Scan key.
Press the top half of the key to increase volume. Press the bottom half of the key to
decrease volume.

Zeno 5, Operation 69
3.10 Resetting Zeno 5
Warm reset During a warm reset, running programs are halted. The contents of the flash memory
and the registry are preserved.
)
RAM content is not preserved.
)
You do not need to reset the Zeno 5 after configuring the radio.
Press and hold down the Blue/Fn key ( ) and the Power key ( ) simultaneously for
a minimum of 6 s.
Starting the operating system
If you choose Boot to BooSt, the BooSt menu is loaded.
Step Description
1.
Press and hold down the Blue/Fn key ( ), the Power key ( ) and the left
Scan key ( ) simultaneously for a minimum of 6 s.
2. Press 1 to start the operating system.

70
Zeno 5, Operation
Clean start A clean start returns the Zeno 5 to default settings, flushes the registry keys and
deletes volatile storage. On an alpha keyboard, type .clean.
Hardware reset A hardware reset reinitialises all hardware. All RAM including the RAM disk is erased.
Non-volatile storage such as the flash disk is preserved.
Press and hold down the Blue/Fn key ( ), the Sym key ( ) and the Power key ( )
simultaneously for a minimum of 6 s.
Step Description
1.
Press and hold down the Blue/Fn key ( ), the Power key ( ) and the left
Scan key ( ) simultaneously for a minimum of 6 s.
2. Type .clean on the alpha keyboard.
SYM
àü

Zeno 5, Using Windows Embedded Handheld 6.5 or higher 71
4 Using Windows Embedded Handheld 6.5
or higher
4.1 Pictures & Videos
Description The Pictures & Videos applet allows
• Snapping photographs.
• Recording video footage.
• Viewing photos and videos.
)
The Pictures & Videos program can only display *.bmp or *.jpg formats. Convert
photos in other formats on your PC before transferring them to the Zeno 5.
Using the camera
Step Description
1.
Tap on Start⇒Pictures & Video .
)
If no pictures are stored on the Zeno 5, then only the Camera icon is
displayed on this screen.

72
Zeno 5, Using Windows Embedded Handheld 6.5 or higher
2. Tap on the Camera icon to activate
the camera.
The screen displays the image the
camera is pointed at. The camera is
built into the back of the Zeno 5.
a) Photo Film icon, indicating an active camera
b) Tap to display thumbnails of photos stored on the Zeno 5
3. Frame the image in the Zeno 5 screen.
4. Press Enter to take a photo.
)
When the camera is activated, tapping on Menu displays a set of
commands to help modifying the camera operation or the quality of the
photos it takes. You can also use this menu to activate the video recorder
rather than the still camera.
Step Description
003769_001
a

Zeno 5, Using Windows Embedded Handheld 6.5 or higher 73
Deleting a photo
Using the video
recorder
Step Description
1. Press and hold the stylus on the thumbnail photo you want to delete. A
pop-up menu comes up.
2. Tap on Delete.
3. Confirm your choice when prompted.
Step Description
1.
Tap on Start⇒Pictures & Video .
2. Tap on the Camera icon to activate the camera.
74
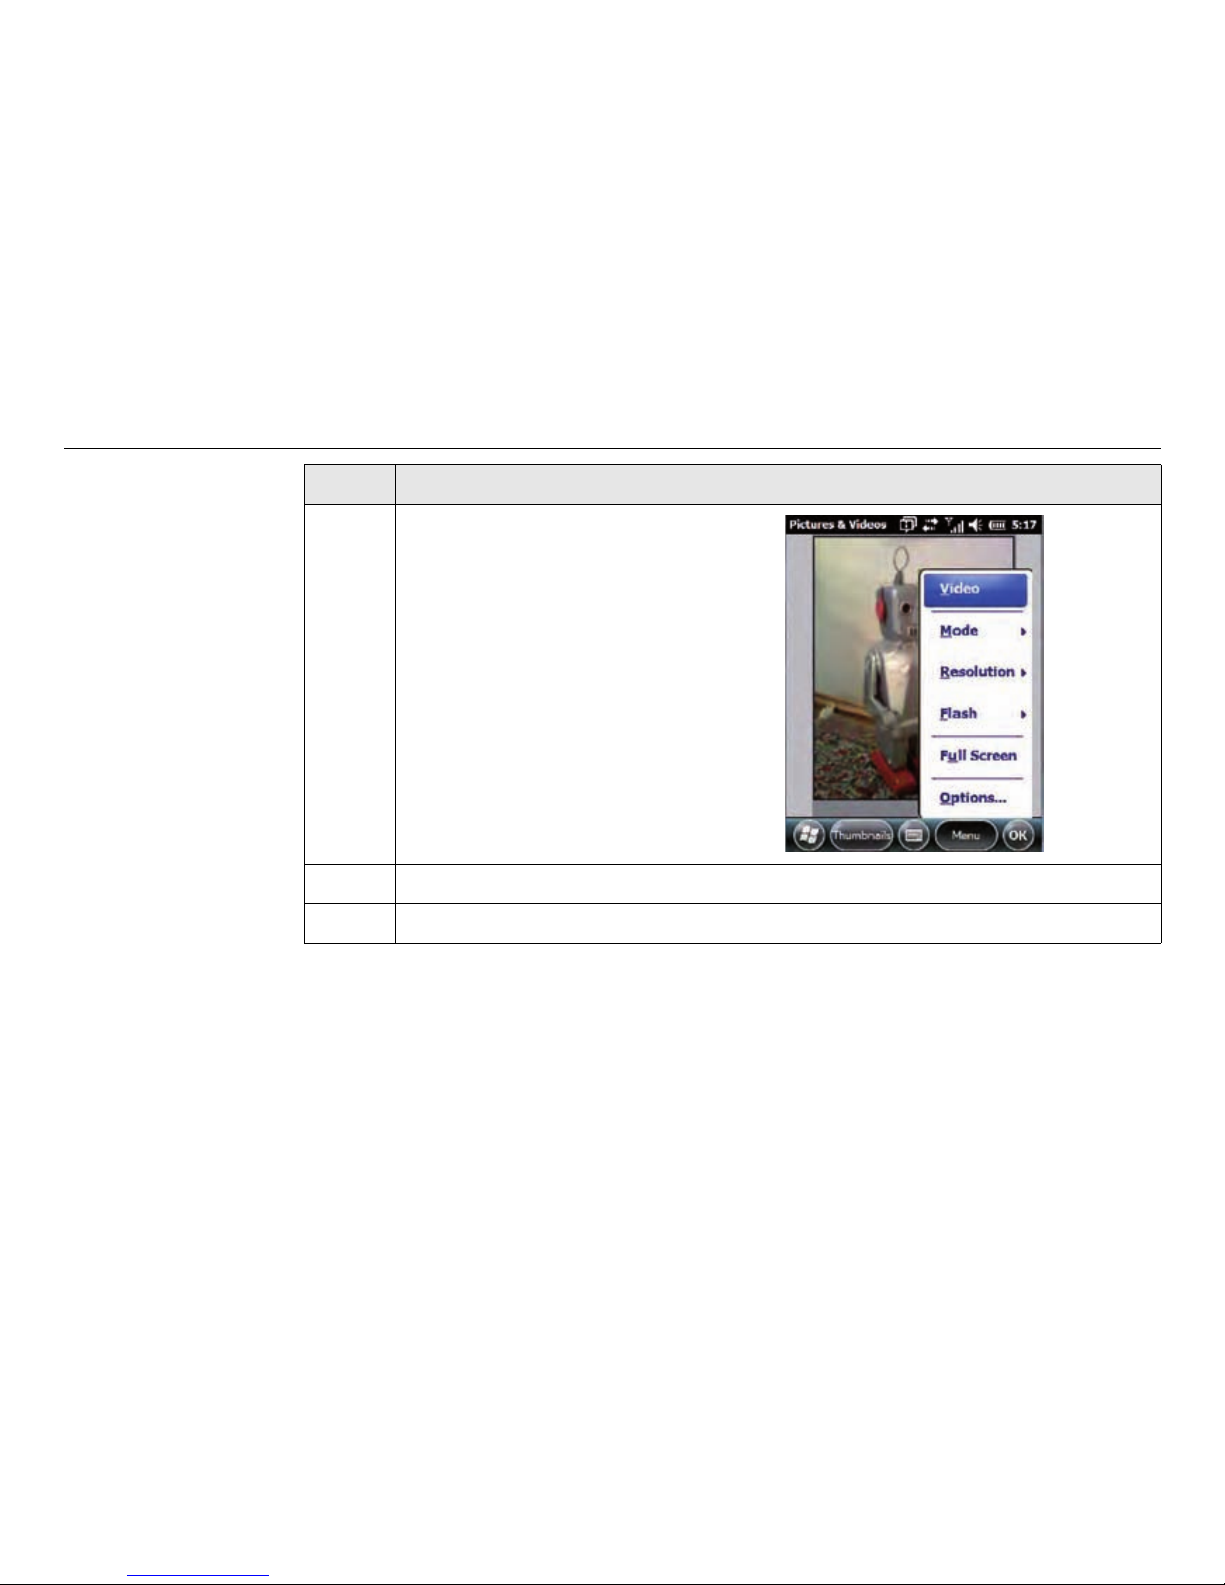
Zeno 5, Using Windows Embedded Handheld 6.5 or higher
3. Tap on Menu⇒Video in the
bottom-right corner of the camera
screen.
4. Press Enter to begin recording.
)
The Video Recorder icon indicates, that video is active.
Step Description
003771_001

Zeno 5, Using Windows Embedded Handheld 6.5 or higher 75
a) Video Recorder icon
5. To end the video:
• Press Enter again or
• Tap on the Stop softkey.
)
When the video recorder is activated, a menu is available to tailor, for
example, the operation of the recorder or the quality of the recording.
Step Description
003772_001
a

76
Zeno 5, Using Windows Embedded Handheld 6.5 or higher
4.2 Time, Date and Alarms
Displaying current
time and date
Highlight today’s time in the Today screen.
Setting time and
date
Step Description
1. Tap on today’s time in the
Today screen.
OR
Tap on the navigation bar and
then on the Alarm hot key.
The Clock & Alarms screen opens.

Zeno 5, Using Windows Embedded Handheld 6.5 or higher 77
2. Tap in the scrolling tab bar at the top
of the screen to display the Time
tab.
Choose the appropriate Time Zone,
set the Date, and the current Time.
Tab OK.
Step Description
003774_001

78
Zeno 5, Using Windows Embedded Handheld 6.5 or higher
Setting alarm
Step Description
1. Tap on today’s time in the
Today screen.
OR
Tap on the navigation bar and
then on the Alarm hot key.
The Clock & Alarms screen opens.
2. Tap in the scrolling tab bar at the top of the screen to display the Alarm
tab.
3. Tap on the time or day in the Alarm
tab. An Alarm Settings screen is
displayed.
4. Highlight the hours or minutes in the
clock.
Use the arrow keys to increase or
decrease the numbers. Or type the
hours and minutes directly from the
keyboard or soft keyboard.
5. Type a description in the Description field.

Zeno 5, Using Windows Embedded Handheld 6.5 or higher 79
6. Tap on the day on which you want the alarm to go off.
7. Choose the sound or No Sound. Tap on Play to experiment with the
sounds.
8. In the drop-down menu below Play, choose the alarm behaviour.
9. Tab OK.
Step Description

80
Zeno 5, Using Windows Embedded Handheld 6.5 or higher
4.3 Text Messages
Checking for new
text messages
Highlight Text in the Today screen.
Composing and
sending text
messages
Step Description
1. Tap on Text in the Today screen. The Text Messages screen opens.
2. Tap on the Menu softkey at the
bottom of the Text Messages
screen. Select New from the menu.
3. Type the name of the person to
whom you want to send a text
message to in the To field.
OR
Tap on Menu⇒Add Recipient
and choose a name to insert a
number from your contacts list.
Tap in the message area and type
your message.
4. Tap on the Send softkey to deliver
your message.
a) Menu softkey
b) Send softkey
003777_001
b
a

Zeno 5, Using Windows Embedded Handheld 6.5 or higher 81
4.4 Contacts
Displaying contacts Contacts are available with e-mail, text messages, voice messages and the phone.
Tap on Start⇒Contacts to display the contacts.
5. Once you send the message, your message is displayed in the Inbox and a
conversation icon is displayed in the softkey bar.
Step Description

82
Zeno 5, Using Windows Embedded Handheld 6.5 or higher
4.5 Internet Explorer
Description The Zeno 5 can link directly to the Internet. The Internet Explorer on the Zeno 5 works
similar to the one on a PC. You can, for example
• Enter URLs,
• Set a home page
• Turn images on and off
• E-mail links to friends
Browsing websites
Step Description
1. Connect your Zeno 5 to the Internet.
2. Tap on Start⇒Internet Explorer to open Internet Explorer.
3. Tap on the address bar to highlight the current URL. The address bar is the
field near the top of the screen where URLs are entered.
4. Type a new URL in the address bar.

Zeno 5, Using Windows Embedded Handheld 6.5 or higher 83
4.6 Windows Media
Working with
Windows Media
Use Windows Media to play digital audio and video files that are stored on the
Zeno 5 or on the World Wide Web.
Tap on Start⇒Windows Media to work with Windows Media.
For details about using this applet, refer to
http://www.microsoft.com/windowsphone/en-us/howto/wp6/music/windowsmedia-player-mobile.aspx
4.7 Task Notification
Description Using the Tasks option create lists of responsibilities or upcoming projects.
If you have assigned any tasks, the Tasks option shows how many active tasks you
have.
Creating tasks
Step Description
1. Tap on Start⇒Tasks to display the Tasks screen.

84
Zeno 5, Using Windows Embedded Handheld 6.5 or higher
Marking a task as
complete
In the tasks list, tap the checkbox next to the items that are completed.
2. Tap in the field Tab here to add a
new task.
Type your task description.
Press Enter to add the task to your
list.
Step Description
003779_001

Zeno 5, Using Windows Embedded Handheld 6.5 or higher 85
4.8 File Explorer
Description Files are stored in folders and sub-folders that are accessible through File Explorer.
You can open, save, rename, copy and paste files in the same manner as you would
on any desktop PC.
Creating a folder
Step Description
1. Tap on Start⇒File Explorer.
2. Tap the Menu softkey. Choose New
Folder in the pop-up menu.
Use the Zeno 5 keyboard or the soft
keyboard to assign a name to the
folder.
003781_001

86
Zeno 5, Using Windows Embedded Handheld 6.5 or higher
4.9 Internet Sharing
Description Internet Sharing allows you to use Zeno 5 to connect your PC to the Internet. Before
you can use Internet Sharing, you must make certain that you have established a data
connection on the Zeno 5.
4.10 Task Manager
Description The Task Manager screen lists all running tasks/processes and provides a number of
options to manage the tasks/processes.

Zeno 5, Using Windows Embedded Handheld 6.5 or higher 87
4.11 Search Phone
Description Search Phone allows a search through the data stored on your phone.
Searching the
phone
Step Description
1. Tap on Start⇒Search Phone.
2. Tap in the Search For field, and type the information or a fragment of the
information you are searching for.
3. Tap on the Search softkey.
The results of your search are displayed in the Search screen.

88
Zeno 5, Using Windows Embedded Handheld 6.5 or higher
4.12 Office Mobile
Description Office Mobile contains the listed abridged Microsoft programs.
Program Description
Excel Mobil Works similar to the desktop version that may be
installed on your PC. Excel Mobile allows you to copy
Excel workbooks from a PC onto the Zeno 5 and
update them while being away from your desk.
OneNote Mobile To take notes wherever you are and then synchro-
nise your notes with a notebook section in the
OneNote version on your PC.
)
You must have Microsoft Office OneNote
2010 and the latest version of ActiveSync
or Windows Mobile Device Center installed
on your PC before you can set up a partnership between the Zeno 5 and your PC.
Word Mobile Works similar to Microsoft Word on your PC.
)
A Word document created on a PC can lose
key formatting features such as styles and
tables if changes are made on the Zeno 5.

Zeno 5, Using Windows Embedded Handheld 6.5 or higher 89
Starting an Office
Mobile application
PowerPoint Mobile Works similar to the desktop version that may be
installed on your PC.
SharePoint Workspace Mobile Allows the use of the GPRS connectivity on the
phone to connect the laptop or PC to the Internet.
Program Description
Step Description
1. Tap on Start⇒Office Mobile.
2. Tap on the icon of an Office Mobile
application.
003780_001

90
Zeno 5, Using Windows Embedded Handheld 6.5 or higher
4.13 Settings
4.13.1 Lock
Description To assign a password to protect access to the phone service.
Assigning a password for the phone
Step Description
1. Tap on Start⇒Settings.
2.
Tap on Lock .
3. Tick the checkbox Prompt if phone
unused for to turn the password
protection on.
4. Choose the amount of time that the
unit can remain idle before you are
prompted to enter your password.
5. Choose the type of password you
prefer to assign in Password type.
• Simple PIN to enter a
minimum of four numeric
characters.
003787_001

Zeno 5, Using Windows Embedded Handheld 6.5 or higher 91
• Strong alphanumeric requires a minimum of 7 characters and
must contain at least three uppercase/lowercase alpha characters,
numbers or punctuation.
6. Type in the password in the Password field.
7. Retype your password in the Confirm field.
8. Tap on OK. A screen asks whether or not you want to save your password
settings. Tap on YES to save your password assignment.
)
Store the password in a safe place. If you forget the password, a clean
start must be performed by certified Leica Geosystems personnel. A clean
start returns the Zeno 5 to default settings. Only the data stored in a
memory card are preserved.
Step Description

92
Zeno 5, Using Windows Embedded Handheld 6.5 or higher
4.13.2 Home
Description To customise the Today screen.
Accessing the
Home screen
Step Description
1. Tap on Start⇒Settings.
2.
Tap on Home .
3. Change the background appearance
of the Today screen on the Appear-
ance tab.
Customise the screen to suit your
purposes on the Items tab.

Zeno 5, Using Windows Embedded Handheld 6.5 or higher 93
4.13.3 Power
Description • Provides information about the battery installed in the Zeno 5.
• Defines the behaviour of the Zeno 5 to minimise power consumption.
Accessing the
Power screen
Step Description
1. Tap on Start⇒Settings.
2.
Tap on Power .
3. Battery tab
To monitor and display the current
battery capacity of the battery used
in the Zeno 5.

94
Zeno 5, Using Windows Embedded Handheld 6.5 or higher
4. Advanced tab
To tailor how long the Zeno 5 can
remain idle before the screen is
turned off while running on
(external) battery power.
)
The options in the screen behave like suspend mode. If the screen
turns off, the unit is in suspend mode. Tapping on the touch
screen or pressing a key opens the screen in which you were
working before Zeno 5 turned off.
On battery power: Tick the checkbox to define after which time the
Zeno 5 turns off when not being used and when running on battery power.
Choose a value in the drop-down list.
On external power: Tick the checkbox to define after which time the
Zeno 5 turns off when not being used and when running on external
power. Choose a value in the drop-down list.
Step Description

Zeno 5, Using Windows Embedded Handheld 6.5 or higher 95
5. Battery Health tab
Current Battery Health:
Provides an estimate of battery
health based on a number of
different measurements, beyond
battery capacity.
*****: Excellent
***: Use
*: Replace battery
)
Battery health is an estimate and should not be depended on to
provide a 100% account of battery condition.
Wakeup device on battery insert:
When this box is ticked, whenever the battery is replaced, the Zeno 5 is
powered up from a suspend state and the current health of the battery is
displayed.
Show popup UI on device-resume:
To determine when the battery status pop-up User Interface will appear
based on the battery health.
Step Description

96
Zeno 5, Using Windows Embedded Handheld 6.5 or higher
)
To quickly access battery
health information, tap on
the navigation bar, scroll to
and click on the battery hot
key.
6. Suspend Threshold tab
Estimated Battery Backup Time:
The amount of battery power that
has been reserved or set aside to
protect data until a fully charged
battery can be installed in the
Zeno 5. When the battery capacity is
depleted up to the estimated
battery backup reserve specified in
the Suspend Threshold tab,
the Zeno 5 shuts off automatically and uses the reserve power to preserve
the data stored on the Zeno 5.
Step Description

Zeno 5, Using Windows Embedded Handheld 6.5 or higher 97
Once the Zeno 5 shuts down, it cannot be switched on until a fresh battery
is installed, or the unit is inserted in a docking station or cradle.
)
Once the battery is removed, the super-capacitor will preserve the
data stored on the Zeno 5 for approximately 5 min. It is critical that
you install a charged battery before this time elapses.
Step Description

98
Zeno 5, Using Windows Embedded Handheld 6.5 or higher
4.13.4 Sounds & Notifications
Description To specify when the Zeno 5 will emit sounds.
Accessing the
Sounds & Notifications screen
Step Description
1. Tap on Start⇒Settings.
2.
Tap on Sounds & Notifications .
3. Sounds tab
Tick the checkboxes and option
buttons to enable the event that will
cause your unit to emit a sound.

Zeno 5, Using Windows Embedded Handheld 6.5 or higher 99
4. Notifications tab
Choose an event, and for each
event, choose the audio notification
or sound that the Zeno 5 will emit
for that event.
To test the choices, tap on the arrow
below Ring tone. The small square
stops the ring test.
a) Start ring test
b) Stop ring test
Step Description
a
b

100
Zeno 5, Using Windows Embedded Handheld 6.5 or higher
4.13.5 Connections
Description Enabling the Beam applet makes the Zeno 5 visible and available to others wanting
to beam information to the Zeno 5.
Tap on Start⇒Settings⇒Connections⇒Beam to start the Beam applet.
Bluetooth The Zeno 5 Bluetooth radio
• Enables short range data communication between devices.
• Provides the capability to use a Bluetooth-enabled cellular phone as a data
modem, exchanging information with other Bluetooth devices.
When two Bluetooth-equipped devices come within a 10 m range of each other, they
can establish a connection.
Step Description
1. Tap on Start⇒Settings⇒Connections.
2.
Tap on Bluetooth .
 Loading...