

Page 1
Leica EG 1160
Paraffin Embedding Center
Instruction manual
Leica EG1160 V4.1 English – 05/2001
Always keep this manual near the instrument!
Read carefully prior to operating the instrument!
Page 2

Page 3

1. Important information
Serial No. .................................................
Year of manufacture .................................................
Manufactured in: Federal Republic of Germany
The information, numerical data, notes and value judgments contained in this manual represent the current
state of scientific knowledge and state-of-the-art technology as we understand it following thorough investigation in this field. We are under no obligation to update the present manual periodically and on an ongoing basis according to the latest technical developments, nor to provide our customers with additional
copies, updates etc. of this manual.
For erroneous statements, drawings, technical illustrations etc. contained in this manual we exclude liability as far as permissible according to the national
legal system applicable in each individual case. In particular, no liability whatsoever is accepted for any financial loss or consequential damage caused by or
related to compliance with statements or other information in this manual.
Statements, drawings, illustrations and other information as regards contents or technical details of the
present manual are not to be considered as warranted
characteristics of our products. These are determined
only by the contract provisions agreed between ourselves and our customers.
Leica Microsystems Nussloch GmbH
Heidelberger Strasse 17-19
D-69226 Nussloch
Germany
Leica reserves the right to change technical specifications as well as manufacturing processes without
prior notice. Only in this way is it possible to continuously improve the technology and manufacturing techniques used in our products.
This document is protected under copyright laws. Any
copyrights of this document are retained by Leica
Microsystems Nussloch GmbH.
Any reproduction of text and illustrations (or of any
parts thereof) by means of print, photocopy, microfiche,
web cam or other methods – including any electronic
systems and media – requires express prior permission in writing by Leica Microsystems Nussloch GmbH.
For the instrument serial number and year of manufacture, please refer to the name plate at the back of
the instrument.
Telephone 0 62 24/143 - 0
Telefax 0 62 24/143 - 200
eMail: histo_info@leica-microsystems.com
Internet: http://www.histo-solutions.com
Leica EG 1160 – Paraffin Embedding Center 3
© Leica Microsystems Nussloch GmbH
Page 4

2. Table of contents
1. Important information..................................................................................................................................... 3
2. Table of contents............................................................................................................................................. 4
3. Installation........................................................................................................................................................ 5
4. Technical data ................................................................................................................................................. 6
5. General description ........................................................................................................................................ 7
6. Safety precautions .......................................................................................................................................... 8
7. Leica EG 1160 – Overview............................................................................................................................ 10
8. Components and features ............................................................................................................................ 12
9. Controls / Display .......................................................................................................................................... 16
10. Operation ........................................................................................................................................................ 17
11. Tissue embedding ......................................................................................................................................... 24
12. Cleaning, maintenance, service................................................................................................................. 26
13. Troubleshooting ............................................................................................................................................ 28
14. Ordering information .................................................................................................................................... 31
15. Warrenty and service ................................................................................................................................... 32
4
Instruction manual V 4.1 – 05/2001
Page 5
The Leica EG 1160 is a compact bench-top unit and can be set up easily. All
components come in a cardboard box. The components that are packed
separately can be attached to the instrument easily (see page 5 "Part list").
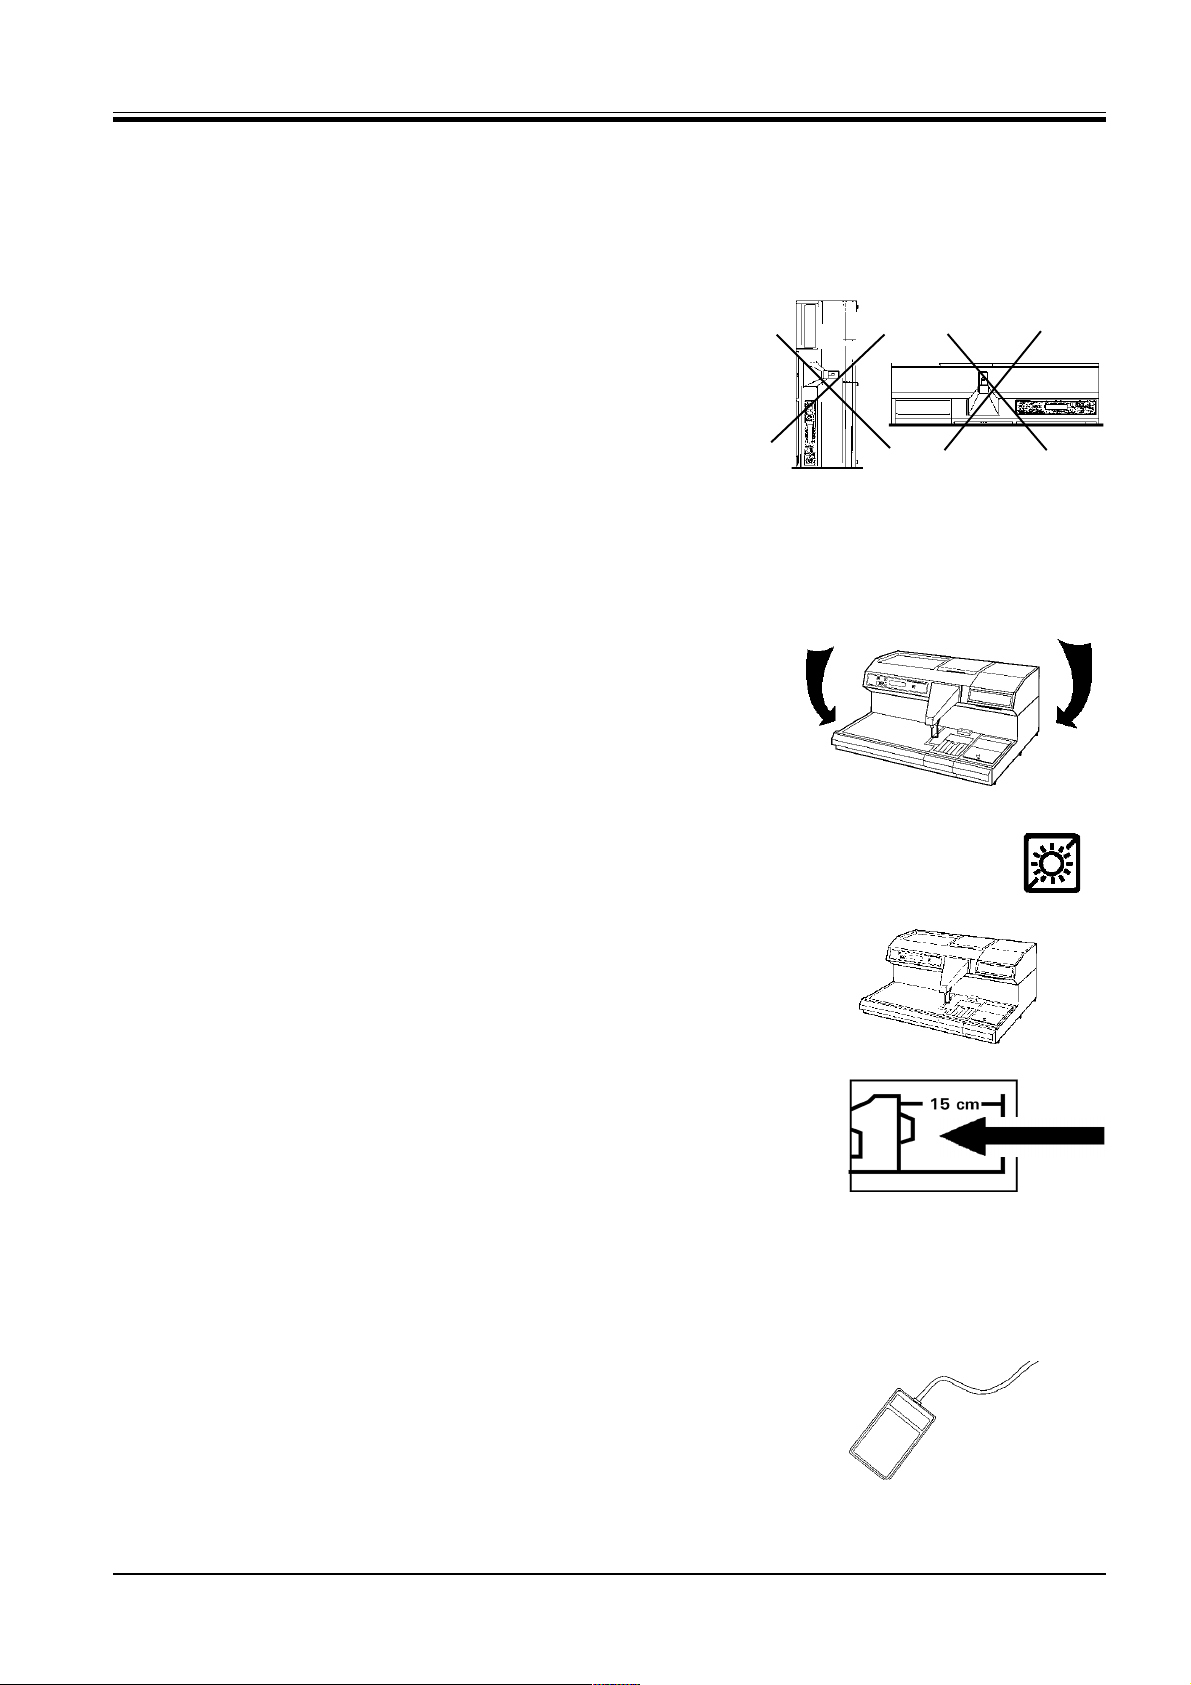
1. Transport and assembly position
The Leica EG 1160 must never - not even for a short while - be positioned as
shown. These positions will inevitably cause damage to the condenser.
Therefore, please check the Tip-N-Tell indicators which are attached to the
package upon receipt.
Should it become necessary to bring the instrument in a position other than
normal, lay the instrument on its back turning it slowly and carefully.
3. Installation
2. Unpacking
The instrument may o n l y be lifted holding it at the sides of the base plate
of the housing. Dot not carry the instrument holding it at the top cover, at the
front handholds of the removable trays or the dispenser. Risk of fracture!
3. Place of installation
The instrument should be set up on a stable, plane laboratory table. Please
ensure that there is no air condition vent nearby.
The location must fulfil the following conditions to ensure that air circulation
is not affected. The back of the instrument must be at least 15 cm away from
the wall. The shipment includes two spacers which must be attached to the
back. Non-compliance with this minimum distance can cause substantial
damage to the instrument and will invalidate the warranty.
4. Power supply
Prior to connecting the instrument to the mains outlet, please ensure that
the power supply specified on the nameplate complies with the local mains
conditions.
5. Foot pedal
The foot pedal is connected to the socket in the right-hand bottom corner on
the back.
Leica EG1160 – Paraffin Embedding Center 5
Page 6

4. Technical data
Power supply: 115 V / 60 Hz
230 V / 50 Hz
Fuses:
115V/60Hz F1, F2 = T5.0 A
230V/50Hz acc. to IEC 127-2
Power consumption: 800 VA
Operating
temperature range: 18°C - 35°C
Cooling system:
Refrigerant: 140 g ±5g R134A
Compressor oil: 150 ccm
EMKARATE RL15S
Temperature control
Dimensions:
(LxDxH) 910 x 575 x 320 mm
Weight: 50 kg
Capacities:
Paraffin reservoir: 3 l
Cassette bath: approx.100 cass.
Heated
recessed area: 8 cassettes
Cold plate: approx. 60 blocks
Programmable parameters:
Temperature
Paraffin reservoir
Mold warmer
Cassette bath
Work surface
Cold plate
Workdays
Daily work times (beginning, end)
Weekday
Time
Operation either manual or via the
foot pedal.
Functional unit Temperature Heated Separate Warm-up time
range separately temperature prior to operation
control
Paraffin reservoir 45 - 70°C, + + 4 h
± 1°C increments
Mold warmer 35 - 70°C + + 1 h
± 1°C increments
Cassette bath 45 - 70°C + + 1.5 h
± 1°C increments
Work area 45 - 70°C + + 1 h
± 1°C increments
Cold plate - 5°C - - 1 h
Forceps holder right 70°C + -
Forceps holder left 70°C + (not basic instrument)
Paraffin dispenser 45 - 70°C + + pump
* at an ambient temperature of 22°C and at an air humidity of 60%
All heated components include overheat protection.
6 Instruction manual V4.0 – 4/98
Page 7

5. General description
Features
1. Paraffin flow rate is pump con
trolled.
2. Paraffin flow rate adjustable in 10
increments
3. Paraffin quantity level indicated
in the display
4. Separate paraffin collecting tray
5. Removable cassette bath
6. Forceps holder on the right (ba
sic instrument) or on the right and
left (not basic instrument)
7. Paraffin dispenser with inte
grated illumination
8. User menu available in 5 lan
guages
9. Fault detection by error
codes in the display
10. Optional accessories: Magni
fier, vacuum attachment, fiber
optical light guide (for connec
tion to the coldlight souces of the
Leica CLS series)
The Leica EG 1160 is a modern tissue embedding center providing all
features required for rapid, convenient and efficient paraffin embedding of tissue including a separately
heated 3-liter capacity paraffin reservoir. Paraffin quantity level shown
on LCD display in two steps. Separately heated paraffin delivery system with integrated filter and pump
ensure a smooth, consistent paraffin flow. The paraffin flow rate is adjustable in 10 increments.
The paraffin outlet nozzle can be operated either manually or via foot
pedal. A non-glare illumination is integrated at the paraffin dispenser
outlet to provide a well lighted work
area.
The separately heated mold warmer
to the right of the paraffin reservoir
is designed to store and heat the
molds prior to embedding.
The work area is divided into three
parts: Cassette storage, working and
embedding area and cold plate. The
cassettes containing the tissue are
stored in a separately heated, removable tray with a capacity of
approx. 100 specimen capsules.
The large work area ensures convenient block removal and easy access
to the cassettes. The forceps holder(s) is/are designed to accommodate three forceps and is/are integrated in the instrument. The heated
recessed area behind the dispenser
handle is designed to keep the par-
affin in the cassette molten. Excess
paraffin can be drained through an
outlet after the removing the stopper.
In front of the paraffin dispenser outlet a refrigeration spot is integrated
in the cold plate ensuring optimal
cooling. The large cold plate provides space for more than 60 embedding molds. A removable tray is located under the work area to collect
excess paraffin drained from the
work area.
The Leica EG 1160 is operated and
programmed via a menu-driven control board. The menu is displayed in
German, English, French, Spanish or
Italian as selected. All operations are
microprocessor-controlled.
Malfunctions are indicated by a numerical error code in the display. A
battery backup prevents loss of all
programmed parameters if a power
failure occurs.
The individual functional units of the
Leica EG 1160 are ergonomically positioned to enable rapid and convenient operation. The instrument may
be operated by qualified personnel
only in accordance with this operating instruction manual.
If used in accordance with the operating instructions and appropriate
maintenance is ensured, the tissue
embedding center will operate
trouble-free and give perfect embedding results for many years.
7Leica EG1160 – Paraffin Embedding Center
Page 8
6. Safety precautions
- The instrument may be used by qualified personnel only.
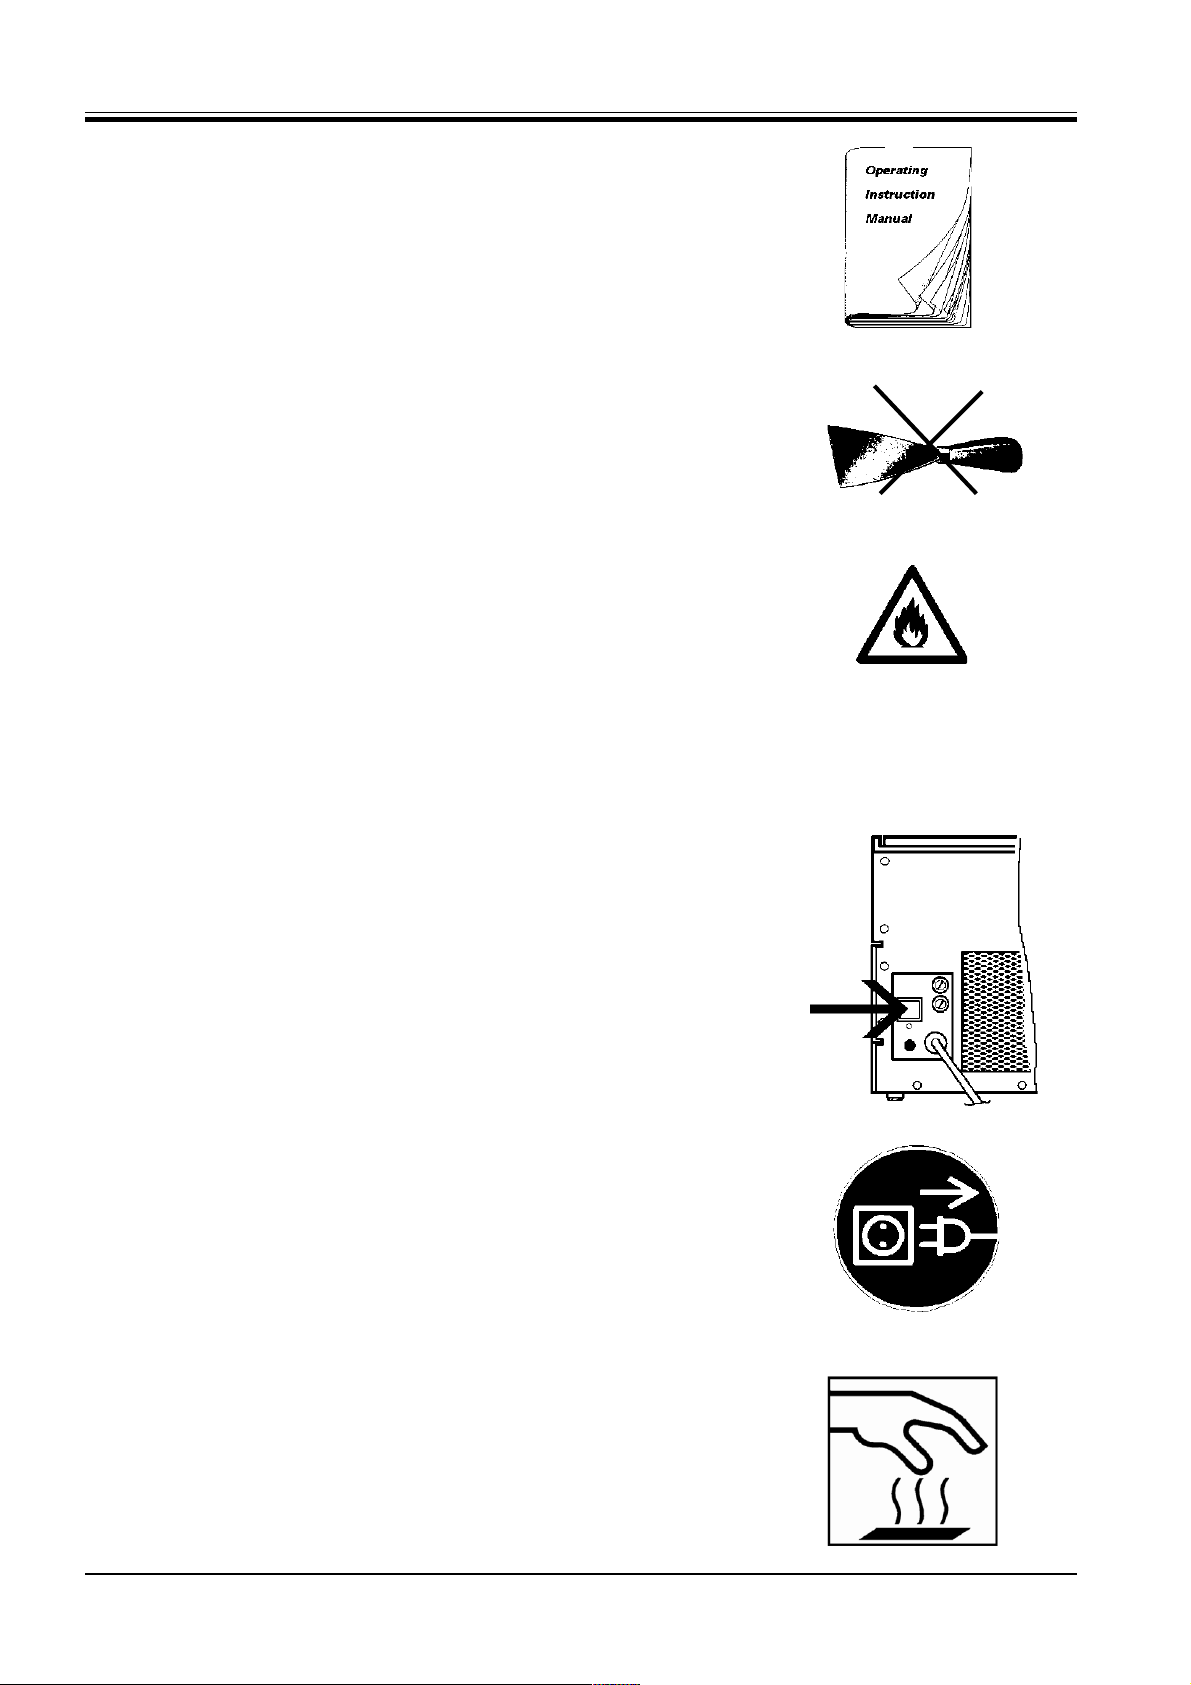
- To avoid any operating mistakes from the beginning, it is necessary to
read the operating instructions to familiarize oneself with the technical
details.
- Paraffin is flammable and should be handled with care. Spillage should
be avoided. Paraffin on the surfaces must not be removed with sharp
tools as it would ruin the coating. It should be avoided to allow xylene to
react on all surfaces.
Caution:
Xylene is a flammable organic solvent. Its flash point is between 27 and
32°C. Xylene vapours are heavier than air and can easily catch fire on
hot surfaces or sparks even over a greater distance.
- Illumination: Before replacing the lamp, the tissue embedding center must
be turned off with the main switch.
- To clean the condenser fins, switch the instrument off with the main
switch and disconnect it from mains.
- To replace the fuses, the power cord must be disconnected from the
power supply. Only fuses that are accessible from outside can be replaced. If you need further information, please contact your local Leica
sales office or dealer.
- When operating, the paraffin reservoir, mold warmer, cassette bath, work
area and forceps holder are all hot.
Caution: Risk of burning!
Note: Combustible and flammable substances must not be stored near
the instrument!
8
Instruction manual V 4.1 – 05/2001
Page 9
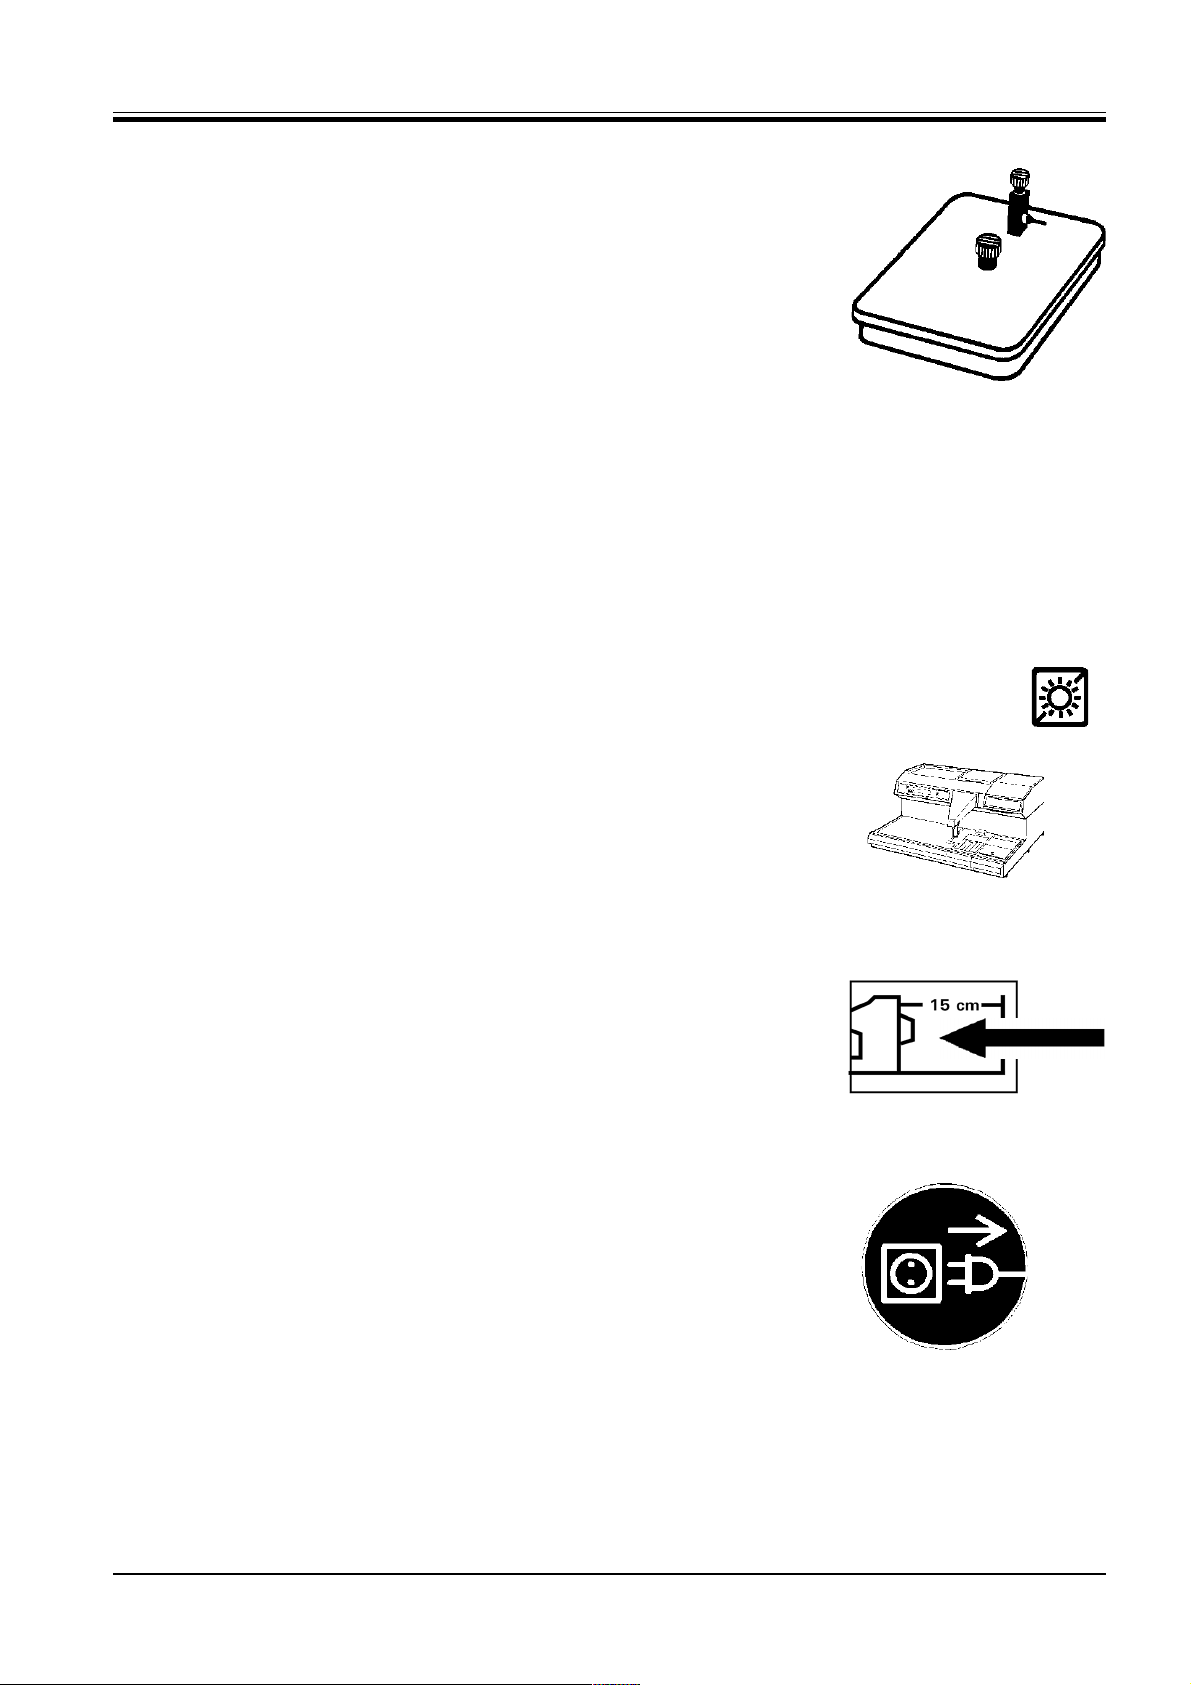
- When using the optional vacuum attachment, please ensure that, af-
ter infiltration, the vacuum is neutralised very slowly. Therefore, open
the aeration knob very cautiously. Air entering too rapidly could cause
hot paraffin to splash and should therefore be avoided.
- Prior to connecting the instrument to the power supply in the labora-
tory, please make sure that the power supply complies with the values specified on the nameplate. The tissue embedding center should
be connected to a grounded socket only.
6. Safety precautions
- The equipment must not be set up near an air condition vent or should
not be exposed to direct sunlight!
- Full refrigeration capacity is ensured only if the clearance on the back
of the instrument is not less than 15 cm. Therefore, it is necessary to
mount the spacers provided.
- Prior to any maintenance and service action, the tissue embedding
center must be disconnected from the power supply.
Leica EG1160 – Paraffin Embedding Center 9
Page 10

7. Leica EG 1160 – Overview
Illumination button (3) LCD display (2)
Leica EG1160
Menu button (4) Arrow UP/DOWN
buttons (6)
SET/ACT button (5)
Forceps holder (11a)*
(only on model with
additional forceps
holder on the left)
Cover cap for
illumination (23)
ON/OFF button (7)
Contol panel (1)
Dispenser
with integrated illumination (8)
Paraffin reservoir (13)
Mold warmer (14)
Cold plate (17)
Dispenser handle
extension clip (29)
Dispenser handle (9)
10
Refrigeration spot (16)
Paraffin collecting tray (18)
Work area (20)
Cassette bath (15)
Heated area for
cassettes (10)
Forceps holder (11)
Instruction manual V 4.1 – 05/2001
Page 11

Fuses
Main switch (21)
Socket for foot
pedal
7. Leica EG 1160 – Overview
Condenser fins
Conection branch (27)
Magnifier (24)
Power
cord
Vacuum attachment (25)
Lid (26)
Spacers
Areation knob (28)
The Leica EG 1160 is a compact benchtop unit. It is available in two different configurations: basic instrument and
model with an additional forceps holders on the left. Both models are shipped in a wooden crate. Please check if
the following accessories are included in the shipment and if they are in perfect condition.
NOTE: If equipment or accessories are found to be damaged, please keep the original packing material and contact
your local sales office immediately.
Piecs Accessory/Component Catalog Number
1 Cassette bath ..................................................................................................................................... 0386 19544
1 Foot pedal ........................................................................................................................................... 0356 08793
2 Spacers ............................................................................................................................................... 0386 24590
1 Set of stoppers (10 pcs.)................................................................................................................... 0386 24782
1 Replacement bulb.............................................................................................................................. 0187 21220
Optional accessories:
1 Magnifier ............................................................................................. 0386 21462
1 Vacuum attachment ..............................................................................................0356 21980
1 Fiber optical light guide ..............................................................................................0386 31352
1 Coldlight source Leica CLS 100 - 100 V, 50/60Hz.....................................................................0502 30213
120 V, 50/60Hz .....................................................................0502 30214
230 V, 50/60Hz .....................................................................0502 30215
240 V, 50/60Hz .....................................................................0502 30216
If you need further accessories, please contact your Leica sales office or dealer using above ordering information.
Leica EG 1160 – Paraffin Embedding Center 11
Page 12

8. Components and features
Paraffin reservoir (13)
The paraffin reservoir can hold up to 3 liters. The paraffin temperature can
be adjusted in a range from 45 to 70°C. The reservoir has an overheat protection in case of a temperature control failure. The paraffin quantity level is
indicated in the display graphically both in the standby and operating condition. The display indicates two levels:
1. Reservoir filling quantity: 1 l - 3 l
2. Reserve: max. 1 l
When the "reserve" diagram is indicated, there is still approximately 1 liter in
the reservoir, so it is not necessary to interrupt work immediately. Nevertheless, it is necessary to refill the paraffin reservoir as soon as possible.
A grid inside the paraffin reservoir provides that only molten paraffin flows
through the dispenser outlet nozzle to ensure troublefree embedding. An
integrated filter at the junction point of dispenser and reservoir prevents
any contamination of molten paraffin.
Each refill of the reservoir can cause the formation of air bubbles that impede a smooth paraffin flow. This can be overcome by pushing the paraffin
dispenser handle until a smooth flow is achieved..
The paraffin flow rate is adjustable in 10 increments (see "Initial operation",
"Controls").
A pump ensures a smooth and precisely controlled paraffin flow. Due to its
special design, the pump is protected against damage by solid or semiliquid
paraffin.
Paraffin dispenser with illumination (8)
The dispenser is separately heated and always has the same temperature
as the paraffin reservoir. The dispenser handle (9) is used for manually operating the paraffin flow and is provided with a dispenser handle extension
clip (29). The paraffin flow is released by lightly pushing the mold backward
against the extension clip of the dispenser handle, thus opening the dispenser valve and activating the pump. Releasing the handle, a spring causes
it to return to the start position. Thus, the valve is shut and the pump operation is stopped. When dispensing is controlled with the foot pedal, the dispenser handle is not needed and can be flipped back out of the way. This
provides ample space allowing convenient filling of larger molds.
The homogeneous, diffuse illumination of the embedding area and refrigeration spot provides an optimal view of the embedding process and specimen orientation. The light bulb can be removed after removing the cap (23).
23
9
29
12
Instruction manual V 4.1 – 05/2001
Page 13

Mold warmer (14)
The temperature of the mold warmer is adjustable from 35 to 70°C. The
hinged lid can be locked in position while open.
Cassette bath (15)
The cassette bath temperature is adjustable from 45 to 70°C. The cas–
sette bath can hold more than 100 cassettes. It can be easily removed.
An integrated lid protects against thermal loss and contamination.
Refrigeration spot (16)
The refrigeration spot is integrated in the cold plate thus ensuring consistent, low temperatures. Positioned directly in front of the embedding
area it ensures convenient filling of the molds in optimal ergonomic conditions. The mold containing the sample is filled approximately one third
and placed on the refrigeration spot, where the paraffin starts to solidify
rapidly. In the semiliquid paraffin the sample can be oriented as required.
After orientation, the mold is filled up with paraffin. Note: Care should be
taken that the paraffin does not become too solid during orientation, as
this could cause an inhomogeneous block which would make sectioning
more difficult.
8. Components and features
Cold plate (17)
The cold plate is turned on and off via the menu. The temperature is -5°C.
The rate of cooling at -5°C ensures optimal consistency of the blocks
and minimises the risk of brittleness as a result of too rapid cooling, and
a high level of productivity. The cold plate provides ample space for approximately 60 paraffin blocks. Controlled cooling ensures that the
preselected temperature is accurately maintained. Before starting to
work, the cold plate should be free of paraffin and dry to prevent frost
buildup.
Paraffin collecting tray (18)
A large removable tray is located under the heated work area to collect
excess paraffin drained from the surface. The paraffin that collects in
the tray should not be reused. The tray should be emptied every day.
Leica EG1160 – Paraffin Embedding Center 13
Page 14

8. Components and features
Work area (20)
The temperature of the work area is adjustable from 45°C to 70°C. It includes
the embedding area, forceps holder (11), recessed area for cassettes (10)
and space to remove the lids. The forceps holder (11) is separately heated.
The heated recessed area is designed for approximately eight cassettes.
By closing the drain hole with the stopper provided, it can be utilised as a
paraffin tray. Several grooves and drain holes in the area where the lids are
removed provide that molten paraffin drains rapidly.
Main switch (21)
The main switch - a green toggle switch - is located on the back of the instrument. It is not necessary, however, to turn the instrument off with the
main switch after daily operation.
In daily routine, the tissue embedding center should be switched on and off
with the ON/OFF button on the control panel.
10
11
Note:
If the Leica EG 1160's automatic turn-on feature is used, i. e. if it is programmed to turn on automatically to be ready to operate when the user
arrives, the main switch must be in the ON condition.
Note:
After a power failure, the Leica EG 1160 will not switch on automatically. At
that stage, it is in the standby condition, just like after turning it on with the
main switch, i.e. you have to set it going pushing the ON/OFF switch.
Cooling
Whenever the instrument was disconnected from mains, for example after
a power failure or when it had been turned off with the main switch, it will
take 10 minutes until the condenser of the cooling system is ready to operate.
21
23
Cover cap for illumination (23)
The cover cap for the light bulb is inserted at the front of the paraffin dispenser. For light bulb replacement, the cap is pulled towards the operator.
14
Instruction manual V 4.1 – 05/2001
Page 15

Instrument with additional forceps holder on the left
Forceps holder left (11a)
The instrument configuration with an addional forcesp holder on the left
covers the needs of left-handers in particular. This forceps holder also is
separately heated.
Optional accessories
Magnifier (24)
When correctly mounted, the magnifier can be swung horizontally and
vertically. When correctly adjusted, both the paraffin dispenser outlet
and the refrigeration spot are in focus, thus avoiding frequent readjustment to orient small and delicate biopsies.
8. Components and features
Vacuum attachment (25)
The optional vacuum attachment can be used instead of the cassette
bath, which is a standard accessory. The vacuum lid allows for vacuum
infiltration of the tissue while stored in the wax bath - that means complete infiltration of the tissue in less time.
The vacuum pump (not included) is connected to the connecting branch
(27). Care should be taken that the lid (26) is seated flat on the cassette
bath. The seal of the lid must be free of paraffin to ensure tightness so
that a vacuum can build up. To improve the tightness, the lid should be
pushed on to the cassette bath when the vacuum pump starts to operate.
A vacuum can be generated only if the aeration knob (28) is shut. After
infiltration, the lid cannot be opened immediately. First, the knob (28) has
to be opened slowly to allow normal pressure to establish inside.
Note:
After infiltration, the vacuum should be neutralised very slowly, as air
entering too rapidly could cause hot paraffin to splash and therefore
should be avoided.
28
26
27
Fiber optical light guide
for connection to the coldlight sources of Leica CLS series
To optimally illuminate the dispensing area, a fiber optical light guide
with a cold light source can be used.
Leica EG1160 – Paraffin Embedding Center 15
Page 16

9. Controls / Display
Control panel (1)
The control panel with push buttons and the 2-line display (2) is protected with a PE foil.
Leica EG1160
Push button functions
Depending on the mode of operation - initialisation, programming, operation - some of the push buttons have multiple functions:
Initialisation ACT Mode SET Mode
(Operation) (Programming)
Standby a) Deactivation or reactiv-
ation of the previously
selected temperature
To turn instrument ON: To turn instrument
ACT mode ON/OFF
status line
(= default reading) b) Programming of the
workdays
Language selection Adjustment of the Setting of variable
(only after turning on paraffin flow rate parameters (temperature,
with the main switch day, time)
on the back)
ACT mode SET mode
Illumination Illumination
ON/OFF ON/OFF
Scrolling through Scrolling through
the menu the menu
For details on operation and programming please refer to chapter 10 "Operation".
16
Instruction manual V 4.1 – 05/2001
Page 17

Please ensure that all preparatory steps described in chapter 11 have
6
been completed:
1. Putting the instrument into operation after delivery
Turn the instrument on with the main switch (green toggle switch in
the lower right corner on the back of the instrument) while pushing
the ARROW UP button on the control panel for approx. 2 seconds.
Then push the ON/OFF button. The instrument will then be initialised.
The main switch should always remain in ON position even after daily
work. In daily routine, the tissue embedding center is turned on/off by
pushing the ON/OFF button on the control panel.
Turning on again after several weeks
When the instrument had been switched off with the main switch and
was out of use for several weeks, please pursue the same procedure
as described above.
10. Operation
2. After initialisation, the language selection reads in the display. The
desired language (E, G, F, I, S) can be selected within 10-15 seconds
pushing the ARROW UP/ARROW DOWN buttons. Once the button is
relased the selected language is stored automatically.
3. Approximately 10 seconds after releasing the ARROW button the instrument automatically switches over to the standby. In the standby
condition, the display is not illuminated.
In the lower line of the display reads actual day and actual time as
well as the current paraffin quantity level. The upper line remains
empty.
4. The Leica EG 1160 is put into operation by pushing the ON/OFF button. This button must be held down for approx. 10 seconds. This feature protects against unintended setting into operation. The instrument will then be ready for operation in the ACT mode.
Default reading
I SPEAK ..
ENGLISH
ICH SPRECHE ..
DEUTSCH
23456789012345
TU 13:09
Day Time Quantity
PAR TANK + 58°C
TU 13:11
Push one of the ARROW buttons to display the FLOW RATE reading.
In order to obtain a smooth, bubble-free paraffin flow, the flow rate
should first be set to 100% pushing one of the ARROW buttons. Push
FLOW RATE 100%
TU 13:18
the dispenser handle backward or press the foot pedal until the paraffin flow is smooth and free of bubbles.
The Leica EG 1160 has two modes of operation: the actual operating
mode (ACT) and the programming mode (SET). To change from one
mode to the other, push the ACT/SET button.
Leica EG1160 – Paraffin Embedding Center 17
Page 18

10. Operation
ACT Mode (Operation)
5. Normal operation of the Leica EG 1160 takes place in the ACT mode. In
this mode, all display readings are actual values.
Starting from the default reading (PAR TANK +XX°C), each step of the 5step menu of the temperature controllable functional units can be displayed to review the actual temperature by scrolling the menu with the
MENU button:
The status line always is the same.
PAR TANK +XX°C
TU 13:11
COLD PLAT +XX°C
TU 13:11
CASS BATH +XX°C
TU 13:12
MOLD TRAY +XX°C
TU 13:12
All display readings both in the ACT and SET (programming) mode auto-
matically return to the ACT default reading after approximately 10 seconds:
5.1 The ILLUMINATION of the work area is switched ON/OFF with the LAMP
button.
5.2The PARAFFIN FLOW RATE is individually adjustable and can be
preselected in the ACT mode with the ARROW buttons in 10% increments.
5.3 Adjustment of the FLOW QUANTITY
The flow quantity for the lowest flow rate (10%) can be adjusted as required. All other flow rate increments will then be recalculated on this
basic adjustment and stored automatically.
1. Set the flow rate to 10% by pushing the ARROW buttons in the ACT mode.
2. On pushing the SET/ACT button the display reads:
3. Operate the pump manually or with the foot pedal and push the ARROW
buttons to readjust the flow quantity for the 10% flow rate. The new values will be stored automatically.
WORK SURF +XX°C
TU 13:12
PAR TANK +XX°C
TU 13:15
FLOW RATE 100%
TU 13:18
FLOW RATE 10%
TU 13:19
Decrease the flow rate
to 10%
ADJUST
FLOW RATE 10%
18
Increase/decrease
the flow rate
Instruction manual V 4.1 – 05/2001
Page 19

ACT Mode (Operation)
5.4 The paraffin flow rate is selectable in 10% incre-
ments:
10 %, 20 %, 30 %, 40 %, 50 %, 60 %, 70 %, 80 %,
90 %, 100 %
The display reading will change with the selected
flow rate. It always reads the percentage flow rate
selected.
10. Operation
Increase/decrease
of the flow rate
FLOW RATE 80%
TU 13:15
How to quit the display reading "FLOW RATE":
1. Approximately 10 seconds after having selected the
flow rate, the display will automatically return to the
ACT default reading.
2. Pushing the MENU button will also lead to the ACT
default reading.
3. Pushing the SET/ACT button will lead to the pro-
gramming mode (SET mode).
Note: If a flow rate of 10% is selected, the SET/ACT
button will lead to the programming mode "ADJUST
FLOW RATE" (see 5.3).
5.5 SWITCHING OFF with the ON/OFF button
By pushing the ON/OFF button, the instrument automatically returns to the standby condition.
FLOW RATE 80%
TU 13:15
FLOW RATE 80 %
TU 13:15
FLOW RATE 80 %
TU 13:15
PAR TANK +XX°C
TU 13:15
10 sec
10 sec
PAR-TANK +XX°C
DI 13:15
PAR-TANK +XX°C
DI 13:15
TEMPERATURWAHL
DI 13:15
TU 13:15
It is not necessary to switch the tissue embedding
center off with the main switch. If switched off with
the main switch, all programmed parameters are
maintained. In this case, however, the program will
not be activated.
In the SET mode, the ON/OFF button has an additional function for the programming of temp–
eratures and workdays (see 6.1, 6.4).
Leica EG 1160 – Paraffin Embedding Center 19
Page 20

10. Operation
SET Mode (Programming)
6. The SET mode is activated by pushing the SET/ACT button. The SET mode
is used for programming only. The programmable parameters are as fol-
lows:
- Paraffin reservoir temperature
- Cold plate temperature
- Cassette bath temperature
- Mold warmer temperature
- Work area temperature
- Actual day
- Actual time
- Planned start time
- Planned finishing time
- Workdays
The instrument is programmed to have all functional units ready to operate at the preselected time on the preselected workdays, i.e. all heated
and refrigerated components are turned on automatically so that they
will have reached the preselected temperatures when the operator starts
working (see chapter 4 "Technical data").
The MENU button is used to scroll through the individual items of the
menu.
Once the last item of the menu ("WORKDAYS ARE .. ") is reached, the first
item ("SET TEMPERATURES: PAR TANK") will be indicated again after
pressing the MENU button.
SET TEMPERATURES
PAR-TANK XX°C
SET TEMPERATURES
COLD PLAT XX°C
SET TEMPERATURES
CASS BATH XX°C
SET TEMPERATURES
MOLD TRAY XX°C
SET TEMPERATURES
WORK SURF XX°C
TODAY IS ...
MO
THE TIME IS ...
10:00 HRS
START WORK AT ...
10:00 HRS
STOP WORK AT ...
16:00 HRS
WORKDAYS
MO YES
20
SET TEMPERATURES
PAR TANK XX°C
etc. ...
Instruction manual V 4.1 – 05/2001
Page 21

SET Mode (Programming)
The ARROW buttons are used to preselect the temperature, time and
days. The speed of the display increases (1-2 step mechanism), the
longer the button is held down.
6.1 TEMPERATURE SETTING
The temperature is preselected with the ARROW buttons. Once the
minimum or maximum value is reached, the indication will stop. The
value displayed when releasing the ARROW button will be stored
automatically, and heating and cooling will be activated accordingly.
The individual temperature settings can be activated or deactivated
with the ON/OFF button.
ON:
The previously entered temperature reads in the display. If the current value is not changed, the microprocessor will adjust the temperature to the displayed value.
OFF:
The temperature control function can be switched off if no specific
temperature is required. The previously entered temperature remains
in the memory but will not be activated.
10. Operation
SET TEMPERATURES
PAR TANK 58°C
SET TEMPERATURES
PAR TANK 58°C
The display reads:
In this case, the default reading is as follows:
6.2 ACTUAL TIME / DAY
Actual time and day are set with the ARROW buttons. An endless
search mechanism provides that the search run restarts from the
beginning automatically after attaining 23:59 or SUN.
The time/day indicated on releasing the ARROW buttons will be stored
automatically.
6.3 BEGINNING AND END OF WORK
The time when you start and stop work is selected with the ARROW
buttons. The endless search mechanism provides that the search run
automatically restarts from the beginning after attaining 23:59. Thus
the instrument will be operational on all days of the week defined as
workdays (see 6.4) at the previously selected time. The time indicated
on releasing the ARROW buttons will be stored automatically.
SET TEMPERATURES
PAR TANK - - - -
PAR TANK - - - FR 11:10
TODAY IS ...
MO
THE TIME IS ...
12:30 HRS
START WORK AT ...
10:00 HRS
STOP WORK AT ...
16:00 HRS
Leica EG1160 – Paraffin Embedding Center 21
Page 22

10. Operation
SET Mode (Programming)
6.4 WORKDAYS
The workdays are selected with the ARROW buttons. Releasing the button, the indicated day will be put in the memory automatically. The ON/
OFF button is used to confirm if the program shall be activated (YES) or
not (NO) the day indicated in the display.
WORKDAYS
MO YES
If the programming of workdays is not desired, i.e. if the user can do
entirely without the automatic turn-on function of the tissue embedding
center, "NO" must be entered for each day of the week.
6.5 How to quit the programming (SET) mode
1. 10 seconds after activation of any of the buttons, the instrument will automatically return to the ACT mode (de-
SET TEMPERATURES
PAR TANK +XX°C
fault reading).
This feature is a protection against unintended programming.
2. Pushing the SET/ACT button will also lead to the ACT
SET TEMPERATURES
PAR TANK +XX°C
mode.
WORKDAYS
MONO
10 sec
PAR TANK +XX°C
TU 15:11
PAR TANK +XX°C
TU 15:11
The flow rate cannot be selected in the SET mode. It can only be
selected in the ACT mode.
AUTOMATIC TURN-ON FEATURE
If this feature is not used, it should be ensured that the tissue embedding center is turned on early enough to allow all components to
reach the appropriate temperatures to avoid unnecessary delays.
Especially the paraffin reservoir heater should be turned on early
enough, as it can take some hours until the wax is molten. The individual warmup times are listed in chapter 4 "Technical data".
22
Instruction manual V 4.1 – 05/2001
Page 23

Main switch + 2 sec
▼
Self test
▼
I SPEAK..
ENGLISH
▼
MO 12:30
Flow chart
Select the desired language within 10-15 seconds
Standby
Status line
ACT
▼▼ ▼
10 sec PAR TANK XX°C
▲
10 sec
▲
10 sec
▲
10 sec MOLD TRAY XX°C
10 sec WORK SURF XX°C
▲ ▲
Status line
COLD PLAT XX°C
Status line
CASS BATH XX°C
Status line
Status line
Status line
▼
▼
SET
SET TEMPERATURES 10 sec
▼
PAR TANK XX°C
▼
SET TEMPERATURES 10 sec
COLD PLAT XX°C
▼
SET TEMPERATURES 10 sec
CASS BATH XX°C
▼
SET TEMPERATURES 10 sec
MOLD TRAY XX°C
▼
SET TEMPERATURES 10 sec
WORK SURF XX°C
▼
TODAY IS ... 10 sec
MO
▲ ▲ ▲ ▲ ▲ ▲▲ ▲ ▲
▼
▼
THE TIME IS ... 10 sec
Illumination ON/OFF
ON/OFF (Standby)
10 ... 100%
FLOW RATE 10%
Status line
▲
START WORK AT ... 10 sec
STOP WORK AT ... 10 sec
WORKDAYS 10 sec
MO YES
AJUST
FLOW RATE 10%
12:30 HRS
10:00 HRS
▲
16:00 HRS
10 sec
Illumination ON/OFF
Activation of temperature control
Activation of workdays
Leica EG 1160 – Paraffin Embedding Center 23
▼
Page 24

11. Tissue embedding
The paraffin reservoir is filled with
wax pellets (e.g. Leica HISTO–WAX).
The level of the molten wax should
reach up to 2-3 cm under the upper
edge of the reservoir.
When the symbol for "paraffin tank
on reserve" is displayed, there is still
approximately 1 litre left. However,
the paraffin reservoir should be refilled immediately at that stage.
The set temperature for the paraffin
reservoir should be set to a value
between the melting point and the
maximum value indicated by the
manufacturer of the paraffin that is
used.
Once all functional units have
reached the preselected temperatures and the wax in the paraffin reservoir is completely molten, tissue
embedding can begin.
Note:
Overheating of the molten wax must
be avoided as important components
can be damaged resulting in damage
to the sample.
1. The embedding cassettes containing the dehydrated and infiltrated tissue sample are transferred to the
cassette bath ( approx. 100 cassettes), which is filled with molten
wax to prevent the solidification of
the wax.
The cassette bath temperature is
optimally maintained constant when
it is filled with molten paraffin.
If the cassette bath is not filled with
wax, it should not be filled with cassettes up to the top edge, as a film
could form on the cassettes at the
top reducing the quality of the embedding.
By use of the optional vacuum attachment for the cassette bath, the
tissue can be infiltrated under
vacuum. The vacuum is generated
by a vacuum pump that is connected
to the connecting branch on top of
the vacuum lid. The seal of the lid
must be free of paraffin to be seated
flat on the cassette bath to allow for
the vacuum to build up. To improve
the tightness, the lid should briefly be
pushed on to the cassette bath when
the vacuum pump is turned on. After
infiltration, the lid cannot be opened
immediately. The aeration knob has
first to be opened slowly (!) to allow
for pressure equalisation inside.
2. The embedding molds are placed
in the mold warmer.
Note:
Overheating of the molds must be
avoided as this could cause problems when removing the block from
the mold.
The molds should be clean and dry.
First, the molds should be treated
with xylene, then with soap solution
and finally rinsed with distilled water and dried.
3. Take three to four cassettes out of
the cassette bath and, depending on
the work method, either place them
on the work area to allow liquid paraffin to drop and immediately remove
them from the mold, or transfer them
to the heated recessed area filled
with molten wax for intermediate
storage to prevent immediate solidification of the infiltrated specimen.
This applies in particular to small biopsies. If the heated recessed area
is not filled with wax, it provides additional space on the work area.
4. Select an appropriate embedding
mold, place it under the dispenser
outlet nozzle and fill it with paraffin
as required:
a. using the foot pedal
b. manually, by pushing the paraf-
fin dispenser handle
c. when filling larger molds, the dis-
penser handle can be retracted,
thus providing enough clearance
under the paraffin outlet nozzle.
The flow is adjustable in 10 increments.
24 Instruction manual V4.0 – 4/98
Page 25

11. Tissue embedding
5. Open the cassette and transfer the
sample to the mold using warm forceps.
6. The mold is placed on the refrigeration spot for a moment. The tissue is oriented with forceps as required. Within a few seconds, the
clear consistency of the wax will
change.
Small tissue specimens can be oriented by slowly pushing the mold
from the embedding spot to the refrigeration spot. As the wax solidifies
very slowly in the transition area, the
tissue can be removed from the forceps without any risk that the sample
sticks to the tip of forceps. (If the wax
becomes solid too rapidly, the forceps will stick to the tissue).
Note: Please avoid a film to form on
the surface of the paraffin. This
would create two phases in the finished block which could cause fissures inside as a result of which the
block could break during sectioning.
7. After orientation of the specimen,
the half filled mold is retrans–ferred
to the embedding spot. After positioning a cassette base or an embedding ring, the mold is filled up with
paraffin.
When not using cassettes or embedding rings, the mold should be filled
up to the top edge.
Note: Do not overfill the mold to avoid
contaminating the cassette base or
embedding ring outside as this could
result in the insufficient clamping in
the specimen holder of the microtome.
8. Place the mold on the cold plate.
The wax will become entirely solid
within a short time. Finally, the paraffin block including the specimen
can be easily removed from the
mold.
All steps should be performed without delays to ensure that the wax
homogeneously solidifies in the mold
to prevent the formation of layers,
which could affect the sectioning
results.
Please note that the removable tray
where excess paraffin is drained
should be emptied at regular intervals to ensure that liquid paraffin
drains easily and the removable tray
does not stick to the guides.
Caution! The tray can be hot!
Excess paraffin collected in the removable tray should not be reused,
as it would be contaminated.
9. On termination of embedding, the
Leica EG 1160 should be turned off
pushing the ON/OFF button. Condensation water on the cold plate should
be wiped off and liquid paraffin removed from the work area with soaking paper. For further information on
cleaning and maintenance, please
refer to chapter 12.
Note: The tissue embedding center
need not be turned off with the green
main switch on the back. If it is programmed to automatically turn on in
advance, it must not be switched off
with the main switch.
When the automatic turn-on feature
is not used, please make sure that
the instrument is turned on early
enough to allow the individual components to reach the required temperatures. This applies particularly
to the heater of the paraffin reservoir, as it can take several hours until the solid wax is entirely molten.
The warmup times of the indivi–dual
components are listed in chapter 4
"Technical data".
25Leica EG1160 – Paraffin Embedding Center
Page 26

12. Cleaning, maintenance, service
Regular cleaning and maintenance will keep your Leica EG 1160 in good
operating condition for many years.
1. General instructions: Paraffin
- Paraffin is flammable and therefore must be handled with care. Avoid
spillage of liquid paraffin.
- All Leica EG 1160 components that come into contact with paraffin and
the interior of the instrument are carefully sealed to prevent wax from
entering. Nevertheless, if paraffin is spilled, it should always be removed
carefully.
- The paraffin reservoir and cassette bath, if required, should be filled with
care. Avoid overfilling!
- The wax in the cassette bath and heated recessed area must be exchanged every day to avoid contamination.
- Solid wax particles on the surface of the work area must not be removed
with sharp tools, as this could damage the finish. A soft plastic spatula is
ideal for wax removal. Alternatively, solid paraffin can be lifted off easily
by lightly warming it.
- The surfaces of the work area of the Leica EG 1160 are made of aluminium with polyester epoxy finish. The control board is covered with a
PE film. The base of the housing is a polyester epoxy coated steel plate.
All seams are sealed with a specific fungicidal silicone.
All materials are easy to clean with common laboratory detergents, which
are appropriate for paraffin removal. Do not allow organic solvents to
react for a longer period. Apply varnish protection occasionally.
Caution:
Xylene must not be used for cleaning. Although xylene is an ideal wax solvent, its flash point ranges between 27 and 32°C. Xylene vapours are heavier
than air and can catch fire even if the source of heat is at a larger distance.
Therefore, it is not appropriate for cleaning hot or potentially hot surfaces.
Risk of fire!
26
Instruction manual V 4.1 – 05/2001
Page 27

12. Cleaning, maintenance, service
2. Cleaning of paraffin reservoir, filter and dispenser outlet
The grid separating solid from liquid wax and the filter can be removed
from the paraffin reservoir for cleaning. The reservoir is cleaned inside
with a paper tissue.
Care should be taken that the reservoir is contaminated. Any dirt inside
should be removed prior to removing the grid and the filter.
3. Cleaning the forceps holder
The forceps holder, in particular, is frequently a source of contamination
and is susceptible to dirt. Therefore it should be cleaned thoroughly.
Caution:
The forceps holder is heated separately and thus very hot (approx. 70°C
or 80°C) during operation.
4. The paraffin drained to the paraffin collection tray should be emptied
regularly to ensure that excess paraffin can drain to the tray and prevent
the removable tray from sticking to guide.
5. Illumination of the dispenser outlet
Prior to exchanging the light bulb, the Leica EG 1160 must be turned off
with the green main switch on the back. Remove the cap at the front end
of the dispenser. The light bulb can be removed pulling it toward the user.
The replacement bulb is inserted by lightly pushing it between the contacts.
6. Fuses
See "Technical data". Replacement fuses must meet the specifications
of the manufacturer. Otherwise, this could invalidate the warranty!
Leica EG1160 – Paraffin Embedding Center 27
Page 28

13. Troubleshooting
Whenever a malfunction occurs, please ensure that it is not the result of an operating mistake.
The list below includes the most frequent operating errors.
Equipment malfunctions are indicated as error messages (error codes 1 to 13) in the LCD display. If such an error
code is displayed, please contact your local Leica service center.
FUNCTIONAL UNIT SYMPTOM CAUSE ACTION
Initial operation Instrument does not turn Main switch (on the back) Turn on main switch
on not in ON position
ON/OFF button pushed Hold down ON/OFF
not long enough button for some
seconds
Paraffin reservoir Paraffin quantity level indic- Paraffin not entirely Wait until the wax is
ation does not correspond molten molten completely;
to the actual quantity then check again.
Paraffin does not melt Selected temperature Increase temperature
too low? of paraffin reservoir
Heater not activated? Check if paraffin
reservoir heater is
activated
Temperature readout Wrong temperature Check temperature
incorrect selected? setting and
or activation
no heating
Instrument failure Technical service
Paraffin dispenser No paraffin flow Paraffin not entirely Check the consistency
molten of the wax in the reser
voir
and wait for some time
if necessary
28
Foot pedal not properly Check foot pedal
connected connection
Instruction manual V 4.1 – 05/2001
Page 29

13. Troubleshooting
FUNCTIONAL UNIT SYMPTOM CAUSE ACTION
Paraffin dispenser No paraffin flow Foot pedal / dispenser Technical service
valve switch failure
Paraffin drops when valve Valve / pump failures Technical service
closed
No heating Heater (paraffin reservoir) Activate heater (paraffin
not activated reservoir)
Heater failure Technical service
No illumination Lamp defective Replace lamp
Inhomogeneous paraffin Air bubbles in dispenser Push dispenser handle
flow (e.g. air bubbles) at the start for a while until flow is
homogeneous
Pump failure Technical service
Mold warmer Wrong temperature Wrong temperature Check temperature
Cassette bath indication selected setting
Work area
No heating Heater not activated Activate heater
Heater failure Technical service
Vacuum attachment No vacuum buildup. Lid not properly Check if lid is properly
tional accessory) Vacuum deteriorates too positioned (oppositioned
rapidly
Seal of lid contaminated Check seal
Aeration knob open Check knob
adjustment
Seal untight Technical service
Forceps holder No heating Heater failure Technical service
Leica EG 1160 – Paraffin Embedding Center 29
Page 30

13. Troubleshooting
FUNCTIONAL UNIT SYMPTOM CAUSE ACTION
Cold plate Insufficient cooling Ambient temperature too Check temperature
high? at lower ambient
temperature
Leak in cooling system? Technical service
Air supply to compressor Clean condenser fins
insufficient? (Technical service)
Compressor does not Compressor failure Technical service
start
Compressor stops after Compressor failure Technical service
short operation
Compressor stops after Compressor failure Technical service
short operation and
restarts after a short while
Telephone number of your local sales office:
30
Instruction manual V 4.1 – 05/2001
Page 31

14. Ordering information
Catalog Number
Leica EG 1160 Paraffin embedding center
Basic instrument 115 V/60 Hz........................................................................0386 30527
230 V/50 Hz........................................................................0386 30528
Model with additional forceps holder on the left 115 V/60 Hz ........................................................................0386 30351
230 V/50 Hz........................................................................0386 30352
Additional cassette bath ............................................................................................0386 19544
Magnifier ............................................................................................0386 21462
Replacement bulb ............................................................................................0187 21220
Vacuum attachment ............................................................................................0386 21980
Stoppers (pack of 10) ............................................................................................0386 24782
Fiber optical light guide without coldlight source ............................................................................................0386 31352
Coldlight source Leica CLS 100 - 100 V, 50/60Hz...................................................................0502 30213
120 V, 50/60Hz...................................................................0502 30214
230 V, 50/60Hz...................................................................0502 30215
240 V, 50/60Hz...................................................................0502 30216
Embedding cassettes without lid, 250 pcs, white ............................................................................................0394 12312
" grey....................................................................................0394 08972
" yellow ................................................................................0394 08974
" red......................................................................................0394 08976
" green .................................................................................0394 08978
" blue ....................................................................................0394 08980
Lids for cassettes, 250 pcs, white .................................................................................0394 12315
" grey....................................................................................0394 08982
" red......................................................................................0394 08986
" green .................................................................................0394 08988
" blue ....................................................................................0394 08990
Biopsy cassettes, 250 pcs, white .................................................................................0394 08966
Lids for biopsy cassettes, 250 pcs, white .................................................................................0394 08970
Deep lids for cassettes for samples up to 12 mm high, 250 pcs, white .............................................................0394 12767
Embedding rings, 1000 pcs, white..................................................................................0386 12392
Embedding molds for samples up to 7 x 7 x 5 mm ......................................................................0386 12302
" 15 x 15 x 5 mm .................................................................. 0386 12303
" 24 x 24 x 5 mm .................................................................. 0386 12304
" 30 x 24 x 5 mm .................................................................. 0386 12305
" 37 x 24 x 5 mm .................................................................. 0386 12306
Embedding molds, deep version, for samples up to 24 x 24 x 12 mm ................................................................ 0386 12860
" 37 x 24 x 12 mm ................................................................0386 12861
Marker pencil for marking of cassettes and embedding rings ..........................................................................0386 12300
Filing box for convenient storage of cassettes, lids, molds and embedding rings .........................................0394 12398
Plastic storage cabinet with 4 drawers for cassettes or rings ......................................................................... 0386 12393
Embedding frames, size 1, 56 x 40 x 26 mm (adjustable) .....................................................................................0339 06427
Embedding frames, size 2, 34 x 26 x 18 mm (adjustable) .....................................................................................0339 06432
Base plate for Catalog No. 0339 06427 or Catalog No. 0339 06432.....................................................................0339 06438
Paraflex embedding mold for 8 samples 25 x 25 x 25 mm each .........................................................................0339 10963
Paraflex embedding mold for 4 samples 40 x 40 x 30 mm each .........................................................................0339 10961
Embedding mold for plastics, flexible but stable in form, 8 recesses 25 mm ø,
4 of which with gate for specimen orientation, 19 mm deep ..............................................................................0379 12698
Embedding medium JUNG-Histowax, 1 bag = 2.5 kg ...........................................................................................0374 08585
Large bag (25 kg) ............................................................................................0374 14374
Leica EG 1160 – Paraffin Embedding Center 31
Page 32

15. Warrenty and service
Warranty
Leica Microsystems Nussloch GmbH guarantees that the contractual product delivered
has been subjected to a comprehensive quality control procedure based on the Leica inhouse testing standards, and that the product is faultless and complies with all technical
specifications and/or agreed characteristics warranted.
The scope of the warranty is based on the content of the concluded agreement. The
warranty terms of your Leica sales organization or the organization from which you have
purchased the contractual product shall apply exclusively.
Technical service information
If you require technical service or replacement parts, please contact your Leica sales
representative or dealer who sold the product.
Please provide the following information:
• Model name and serial number of the instrument.
• Location of the instrument and name of the person to contact.
• Reason for the service call.
• Date of delivery.
Decommissioning and disposal
The instrument or parts of the instrument must be disposed of in compliance with the
local laws.
32
Instruction manual V 4.1 – 05/2001
 Loading...