

LBC Bakery Equipment BRD-36-3 Installation Manual

BRD 36 Part Bun and Roll Divider Rounder
Model BRD-36-3, 36 part ¾ - 3 oz
Model BRD-36-4, 36 part 1 ½ - 4 oz
Installation and Operations Manual
Rev 001 07/08
Model BRD-36-3 Shown

Table of Contents
Page 3 Warnings
Page 4 Initial Inspection and Overview
Page 5 Installation
Electrical Connections
Install Press Handle
Page 6 Adjust Knives
Page 7 Lubrication
Installers Certificate
Page 8 Blank
Page 9 - 10 Operations
Page 11 – 13 Cleaning
LBC Bakery Equipment, Inc.
1410 80 Street SW, Suite C, Everett WA 98203 Ph: 888-722-5686 www.lbcbakery.com
Page 2 of 14

DO NOT OPERATE, CLEAN OR SERVICE THIS MACHINE BEFORE
READING THIS MANUAL AND UNDERSTANDING COMPLETELY THE
SAFETY INSTRUCTIONS FOUND IN THIS MANUAL AND ON THE
CAUTION!
MACHINES LABELS
ALL OPERATORS OF THIS OVEN MUST BE OF LEGAL AGE TO
OPERATE SUCH EQUIPMENT AND MUST BE FAMILIAR WITH AND
UNDERSTAND ALL CAUTION LABELS.
IMORTANT!
DISCONNECT FROM POWER SOURCE WHEN CLEANING AND/OR
SERVICING THIS MACHINE
NEVER ATTEMPT TO CLEAN THIS MACHINE WHILE IT IS IN MOTION,
SERIOUS INJURY COULD RESULT
NEVER OPERATE THIS MACHINE WITH SAFETY COVERS OR
INSPECTION PLATES REMOVED OR WITH SAFETY SWITCHES
INOPERATIVE
The BRD Divider Rounder has been packaged to withstand rough handling; however, it
is important that you inspect the shipment for damages, concealed or otherwise and
that you sign the bill of lading to note any such damages. These damages are the
responsibility of the consignee and must be reported to the carrier within 10 days in
order to file for a claim.
Please consult our warranty at the end of this document.
LBC Bakery Equipment, Inc.
1410 80 Street SW, Suite C, Everett WA 98203 Ph: 888-722-5686 www.lbcbakery.com
Page 3 of 14
Installers Section
I:
Initial Inspection
Open the shipping crate, and locate the following items:
1. Three (3) Molding Plates
2. One (1) Pressing Handle
3. One (1) plastic bottle of hydraulic fluid (located inside the base).
NEVER operate the machine without oil in the transmission.
NEVER spray down the machine as it will result in removal of important grease
and oil.
Note the electrical ratings on the data plate; ensure the supply voltage matched
these rating.
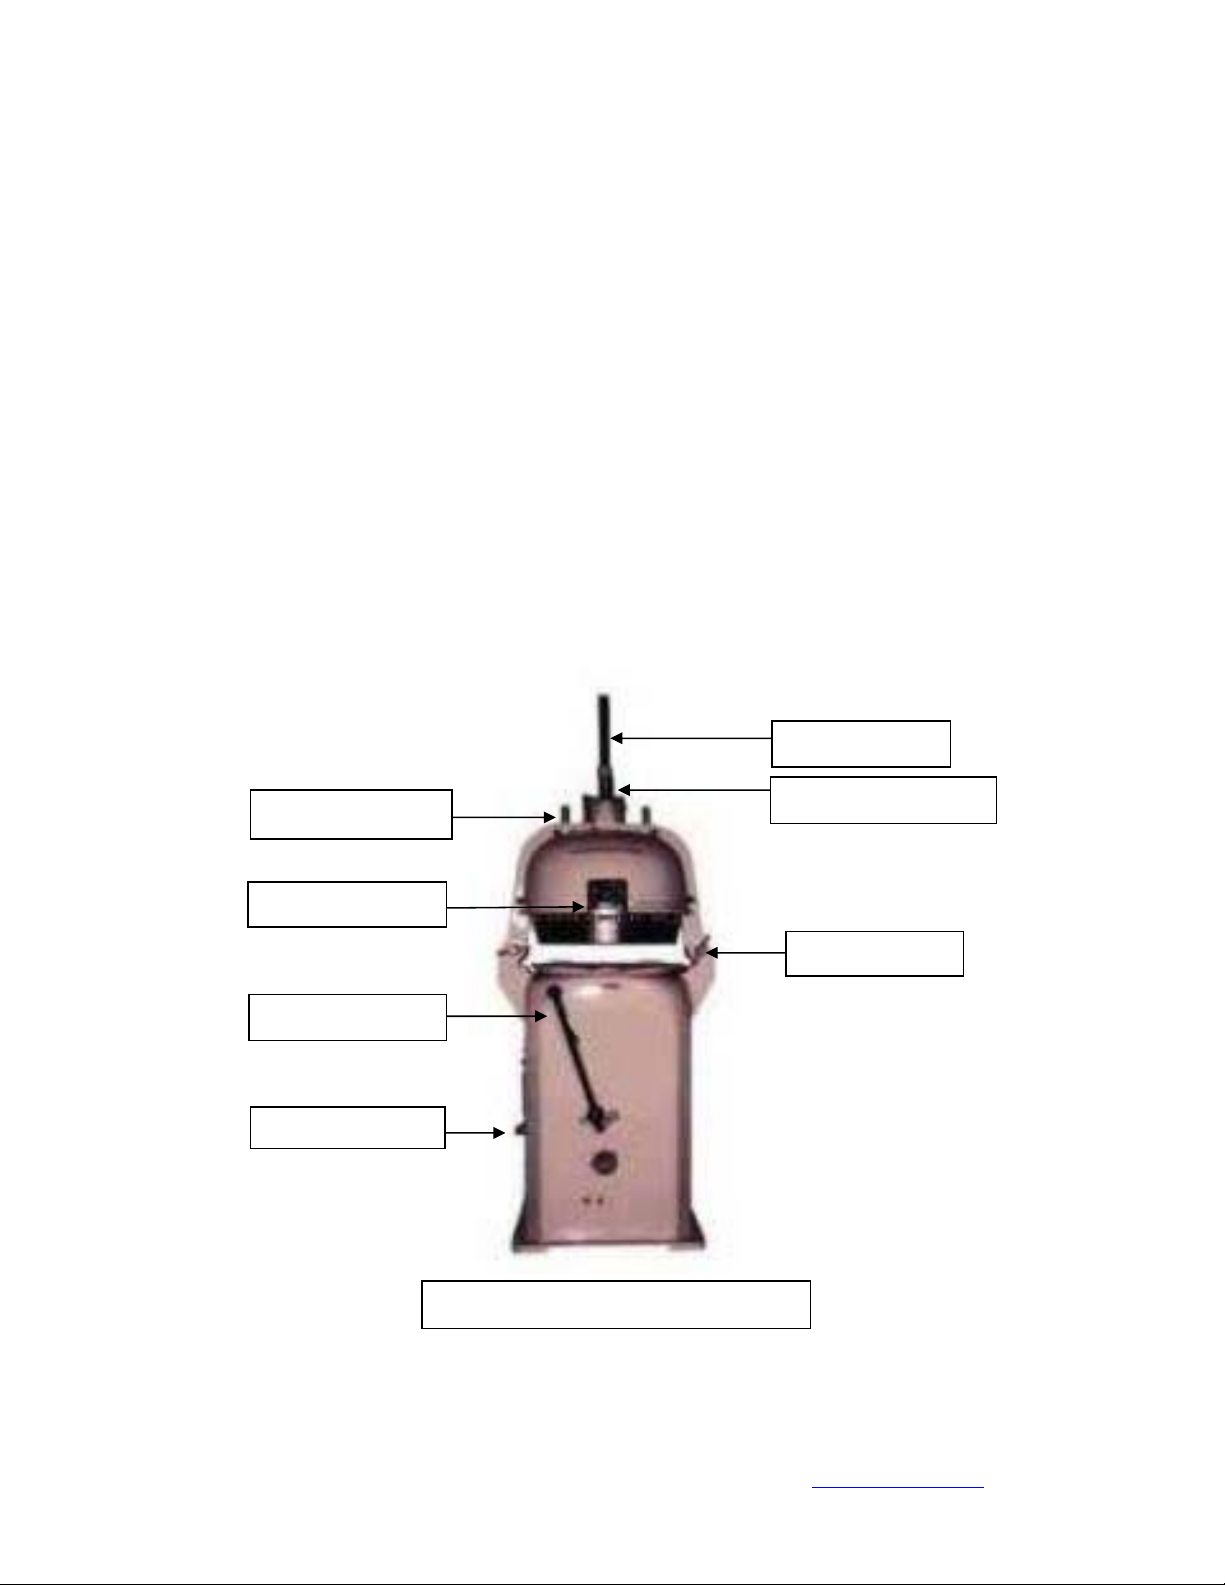
Pressing Handle
Weight Gauge
Dividing Handle
Rounding Handle
On /Off Switch
Handle Stop Bolt
Head Pin
Model BRD Over-View
LBC Bakery Equipment, Inc.
1410 80 Street SW, Suite C, Everett WA 98203 Ph: 888-722-5686 www.lbcbakery.com
Page 4 of 14
II:
Installation Section
A: Selecting an Installation Location
Installation of the BRD should be made in accordance with all applicable
local codes.
The installation location should be free and clear of all obstruction.
The floor should be smooth and level and must be capable of supporting
the weight of the appliance.
Allow adequate clearance at the sides of the appliance for serviceability.
Allow adequate clearance on the right and left side for tilting of the head.
The BRD must
moving during operation.
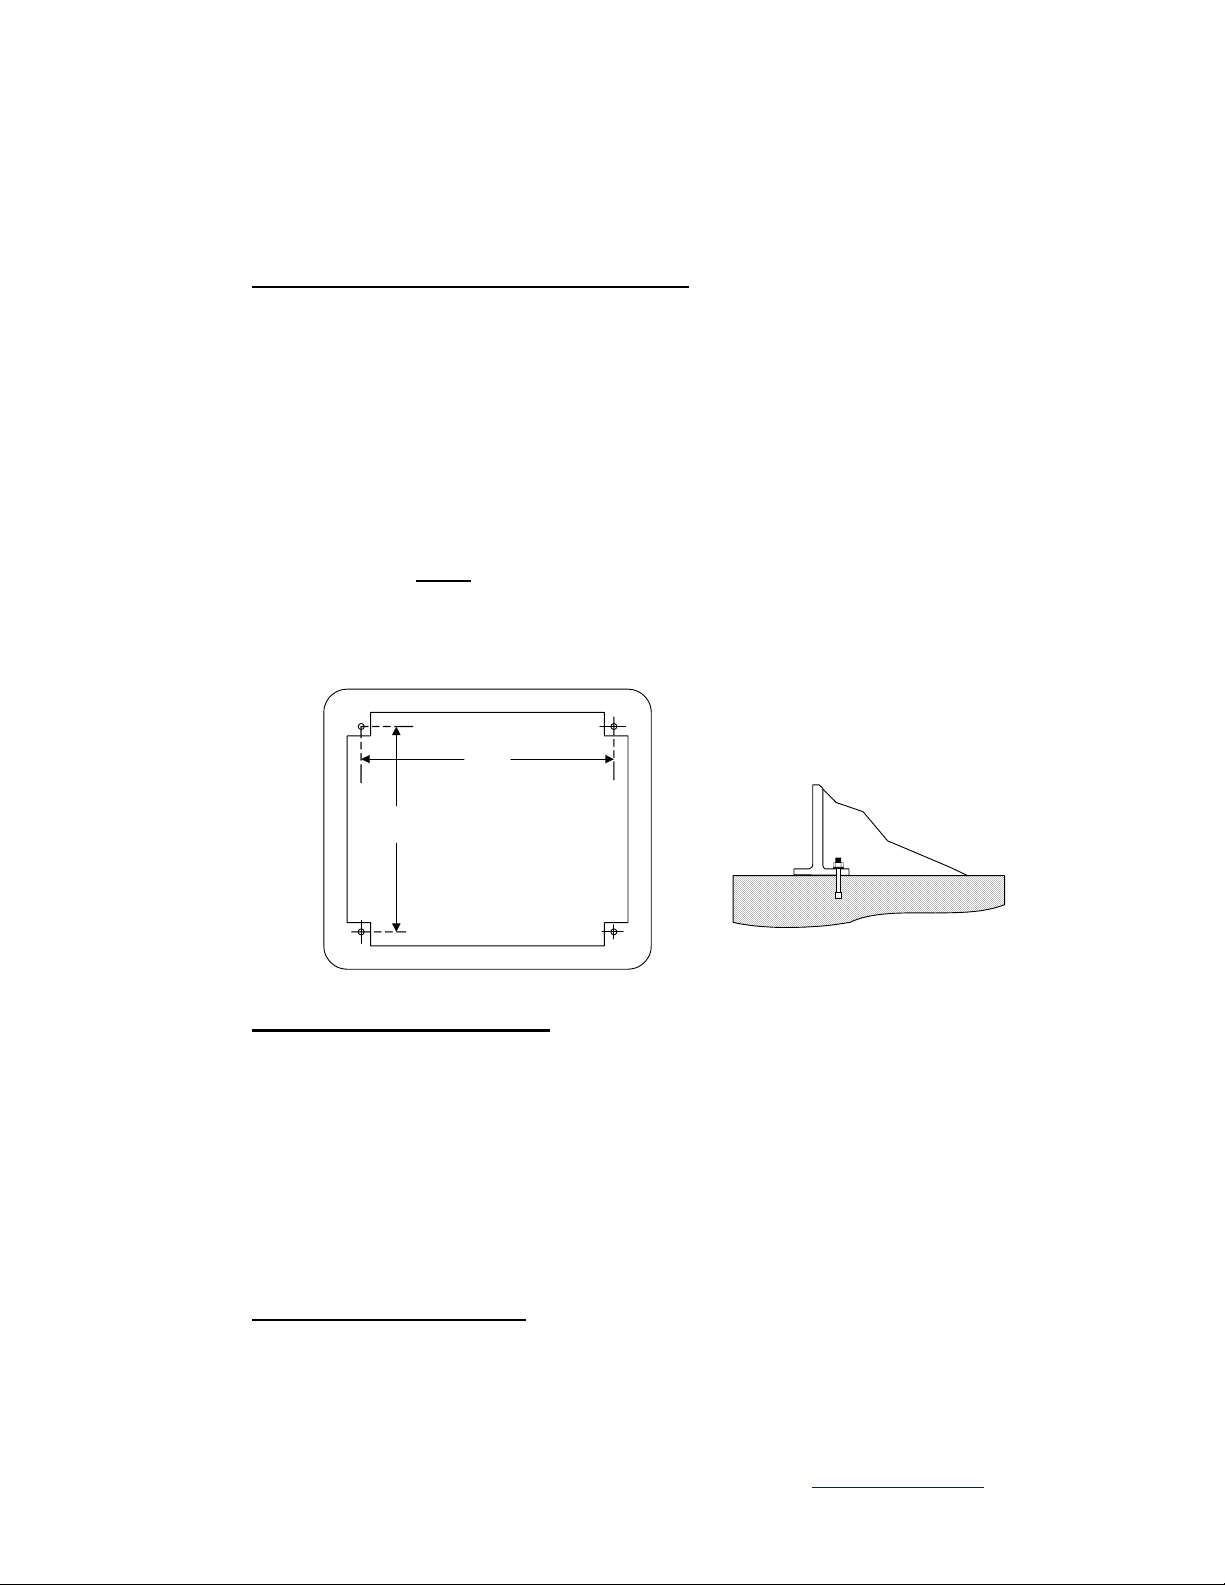
Located on the base of the appliance are four (4) mounting holes use
appropriately sized bolts and anchors to secure the BRD to the floor.
14.5"
B: Electrical Connections
Electrical connection must comply with all applicable State and local
codes and in accordance with the NEC and NFPA.
The BRD comes from the factory with a six foot (6’) power supply cord
and plug, the plug configuration is a NEMA P15-20.
If the appliance is to be hard wired, electrical connections MUST be made
by a licensed electrician.
The BRD is rated at 208 Volts Three Phase at 15 Amps. A suitable circuit
is required.
C: Install Press Handle
Install the press handle into its slot at the top of the dividing head.
Secure it into place using the two set screws.
be anchored to the floor to prevent the appliance from
14.5"
Mounting Pattern
Cross Section View
Typical Mounting
LBC Bakery Equipment, Inc.
1410 80 Street SW, Suite C, Everett WA 98203 Ph: 888-722-5686 www.lbcbakery.com
Page 5 of 14
 Loading...