


NAVCAM-818SHD |
USER MANUAL |
|||||||
|
|
|
|
|
|
|
|
|
|
|
|
|
|
|
|
|
|
|
|
|
|
|
|
|
|
|
|
|
|
|
|
|
|
|
|
|
|
|
|
|
|
|
|
|
|
|
|
|
|
|
|
|
|
1

NAVCAM-818SHD |
USER MANUAL |
TABLE OF CONTENTS
Important safety instructions and precautions |
3 |
What’s in the box |
3 |
Micro SD card requirements |
3 |
Camera button and hardware overview |
4 |
What do the buttons do? |
5 |
On screen display |
6 |
What do the led indictors mean? |
7 |
Quick reference guide |
8 |
Operating the NAVCAM-818SHD for the first time |
9 |
Power ON/OFF (Auto ON/OFF) |
9 |
About GPS signal reception |
9 |
Auto record when turned on |
9 |
Recording files |
9 |
Playing back a recorded file |
10 |
Deleting a file |
10 |
Auto bump file record (g sensor) - saving recording video files |
10 |
Taking a still picture |
10 |
Other shortcuts from the main screen |
10 |
Playback on TV (With HDMI) |
11 |
USB Connection |
11 |
User settings |
11 |
Tracking software – quick guide |
13 |
The GPS software - overview |
14 |
FAQ |
15 |
Product specifications |
16 |
Feature explanations |
17 |
2

NAVCAM-818SHD |
USER MANUAL |
IMPORTANT SAFETY INSTRUCTIONS AND PRECAUTIONS
-Read all instructions carefully before use.
-Retain manuals for future reference.
-Use this product only in the manner described.
-Only use a water-dampened soft-cloth to clean the surface of this product.
-The following will damage this product: any liquid such as water or moisture, extreme heat; cold; humidity, dusty or sandy environments.
-The NAVCAM-818SHD is designed to be mounted on a vehicle windscreen, as high as possible, to ensure a maximum viewpoint. Please ensure that any attached cables are secured and will not cause the device to fall.
-There are no user serviceable parts in this product.
-Un-authorized attempts to dismantle or repair this product will void product warranty
WHAT’S IN THE BOX
1)NAVCAM-818SHD
2)This user manual
3)Micro USB Charge and data transfer cable
4)CD disc to install the tracking and review software on a Windows® PC
MICRO SD CARD REQUIREMENTS
The NAVCAM-818SHD requires a Micro SD card (not included) to record video/image content. For optimal performance, we recommend using a Class 10 micro SD card UHS 3 (minimum) to ensure fast data transfer rates
Note: Some “Extreme Speed” class 10 UHS 2 cards will not work correctly with the NAVCAM-818SHD. Other low speed cards are not recommended and the user many experience constant intermittent faults.
3
NAVCAM-818SHD |
USER MANUAL |
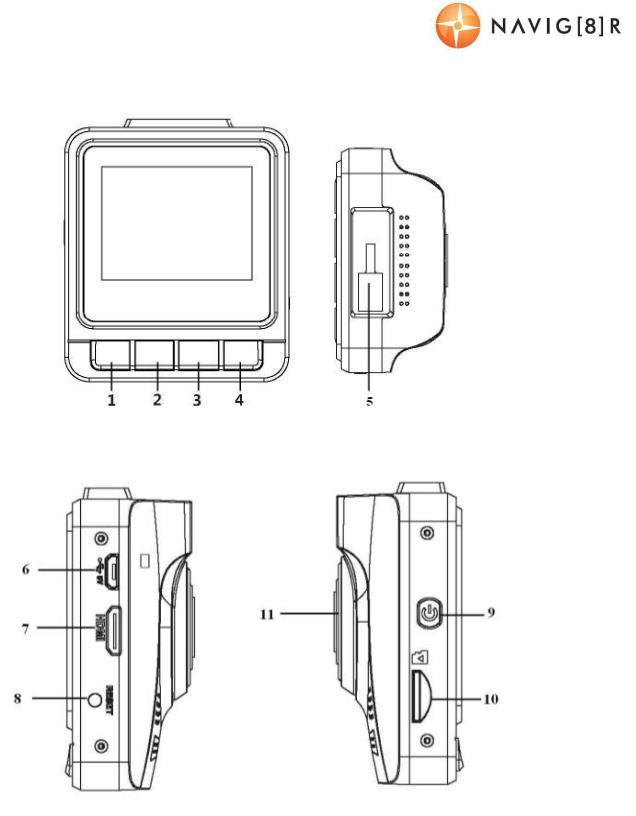
CAMERA BUTTON AND HARDWARE OVERVIEW
1 |
Menu / Return |
7 |
Mini HDMI Out |
2 |
Playback / UP / Map shortcut button |
8 |
Reset button |
3 |
Snap / Down / Preserve fil button |
9 |
Power ON / OFF button |
4 |
Record / OK |
10 |
Micro SD slot |
5 |
Mount Socket |
11 |
Lens |
6 |
Micro USB Charging Port |
|
|
4
NAVCAM-818SHD |
|
USER MANUAL |
|
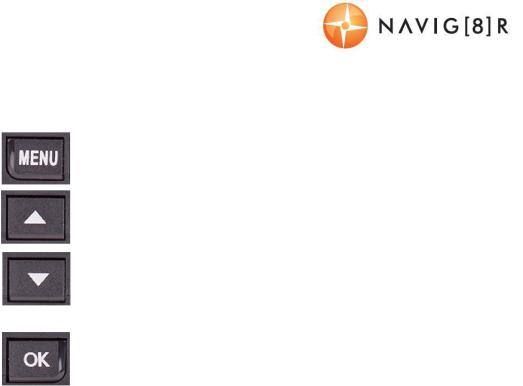
WHAT DO THE BUTTONS DO? |
|||
|
|
|
|
Function |
Button |
|
What does it do? |
Menu and Settings |
|
|
When recording, press to enter settings |
|
|
When video preview, press to enter/exit settings |
|
options |
|
|
|
|
|
When video playback, press to return to preview interface. |
|
|
|
|
|
Press for Map (GPS |
|
|
When recording with GPS connection, press to show the map |
connection |
|
|
|
|
|
Press to select next menu/video/image |
|
required) |
|
|
|
|
|
|
|
|
|
|
When recording, press to preserve the video recording file. |
SOS / DOWN: |
|
|
Press to select next menu/video/image |
|
|
|
In video preview, press to take a shooting. |
|
|
|
Press to start/stop recording. |
|
|
|
In Setting Menu, press to confirm settings |
Recording/OK: |
|
|
When video preview, press to confirm playing selected |
|
|
|
video/images |
|
|
|
When video playback, press to stop playback. |
Power Switch |
Press and hold to turn the unit ON and OFF. |
||
Reset |
Press and hold to reset the device. |
||
5

NAVCAM-818SHD |
USER MANUAL |
|
|
|
|
||
|
|
1 2 |
3 4 |
|
|
|
|
ON SCREEN DISPLAY |
|
5 |
|
||||
|
|
|
|
|
|
|
|
|
HOME SCREEN (IN RECORD MODE) |
|
|
|
|
|
|
1 |
Resolution |
|
|
|
|
|
|
2 |
Power/Battery/Charging |
|
|
|
|
|
|
3 |
Micro SD Card Inserted |
|
|
|
|
|
|
4 |
GPS Signal Status |
|
|
|
|
|
|
5 |
Current Date and Time |
|
|
|
|
|
|
6 |
Menu Settings |
|
|
|
|
|
|
7 |
Navigation Map |
|
|
|
|
|
|
8 |
Emergency file save |
|
|
|
|
|
|
9 |
Record |
|
6 |
7 |
8 |
9 |
|
|
|
|
|||||
PLAYBACK SCREEN (RECORDING STOPPED)
1Menu Settings (Press to Toggle thru)
2Playback recorded files
3Take Photo (DSC)
4Take Video (Crashcam)
1 |
2 |
3 |
4 |
|
|
1 |
2 |
MENU SCREEN
(PRESS MENU FROM PLAYBACK SCREEN)
1User Settings
2File Edit options (Delete)
3Menu Settings (Press to Toggle thru)
4Scroll up through options
5Scroll down through options
6Confirm selection
3 |
4 |
5 |
6 |
6
 Loading...