

Page 1

QUICK USER MANUAL MMC-X40
4K SMART MEDIA PLAYER
1
Page 2
QUICK USER MANUAL MMC-X40
Index
The Remote control 3
Wireless Screen Pointer 4
Player outputs 5
Connecting to TV 6
Connecting to the Internet 7
Cable connection to the internet using a Modem/Router 8
Wi-Fi connection to the internet using a Modem/Router 8
The home Screen 11
The apps Centre 12
Smart Apps 13
Settings 14
Feature overview 15
FAQ 16
Calibrating the Air Mouse 16
Specifications 17
IMPORTANT SAFETY INSTRUCTIONS AND PRECAUTIONS
- Read all instructions carefully before use.
- Retain manuals for future reference.
- Use this product only in the manner described.
- Only use a water-dampened soft-cloth to clean the surface of this product.
- The following will damage this product: any liquid such as water or moisture, extreme heat;
cold; humidity, dusty or sandy environments.
- Only place this device on stable surfaces and ensure that any attached cables are secure and
will not cause the device to fall.
- If charging is required, it is recommended to thoroughly charge electronic devices for the first
time overnight. Subsequent charges can be as needed. During charging, or extended use, the
product may become warm.
- There are no user serviceable parts in this product.
- Un-authorized attempts to dismantle or repair this product will void product warranty
- Using this device near other electronic devices may cause interference.
PRODUCT INCLUDES
Remote control with built-in compact keyboard, Remote Control Dongle, HDMI Cable,
RCA to 3.5mm Audio Visual Cable, 240v External Power Supply.
2
Page 3

QUICK USER MANUAL MMC-X40
9 8 1 14 2 4 5 6 7
Not available
10 11 3 13 12
THE REMOTE CONTROL
1 Power ON, Power OFF
2
3 Search / Play Pause / Zoom In and Out
4 Menu, Home, back page
5
6 Volume UP or DOWN
7 Mute
8 Numerical keys
9
10
11
12
13
14
Navigate UP, DOWN, LEFT, RIGHT
TV Navigation Type (Standard via remote
buttons or control pointer using remote buttons)
Air Mouse Calibration (See FAQ page)
Stop / Start / Apps screen shortcut
Rewind, Fast forward
Previous, Next
ENTER or CONFIRM (OK)
LED Indicator
Channel UP or DOWN
Internet Browser (shortcut)
Note: Key functions may change in
alternate modes or have no function at all.
with this model
Tip. Some subscription
based Apps may require a
mouse or keyboard for easy
setup and operation. You
can connect a wired mouse
and keyboard if this is more
comfortable for you.
3
Page 4

QUICK USER MANUAL MMC-X40
Note: Press and hold the ALT key to operate the dual function
keys which are marked with BLUE markings.
For example: To enter the “@” symbol hold the ALT button and
press the down arrow button. +
WIRELESS SCREEN POINTER
Connect the USB dongle to operate the on screen
pointer, a virtual mouse, which you can use to
navigate by simply pointing your remote at your TV
screen. Please remember to press the TV
NAVIGATION TYPE and or CALIBRATION button on
your remote control to swap between remote control and screen
pointer modes.
Tip. Some subscription
based Apps may require a
mouse or keyboard for easy
setup and operation. You
can connect a wired mouse
and keyboard if this is more
comfortable for you.
4
Page 5
QUICK USER MANUAL MMC-X40
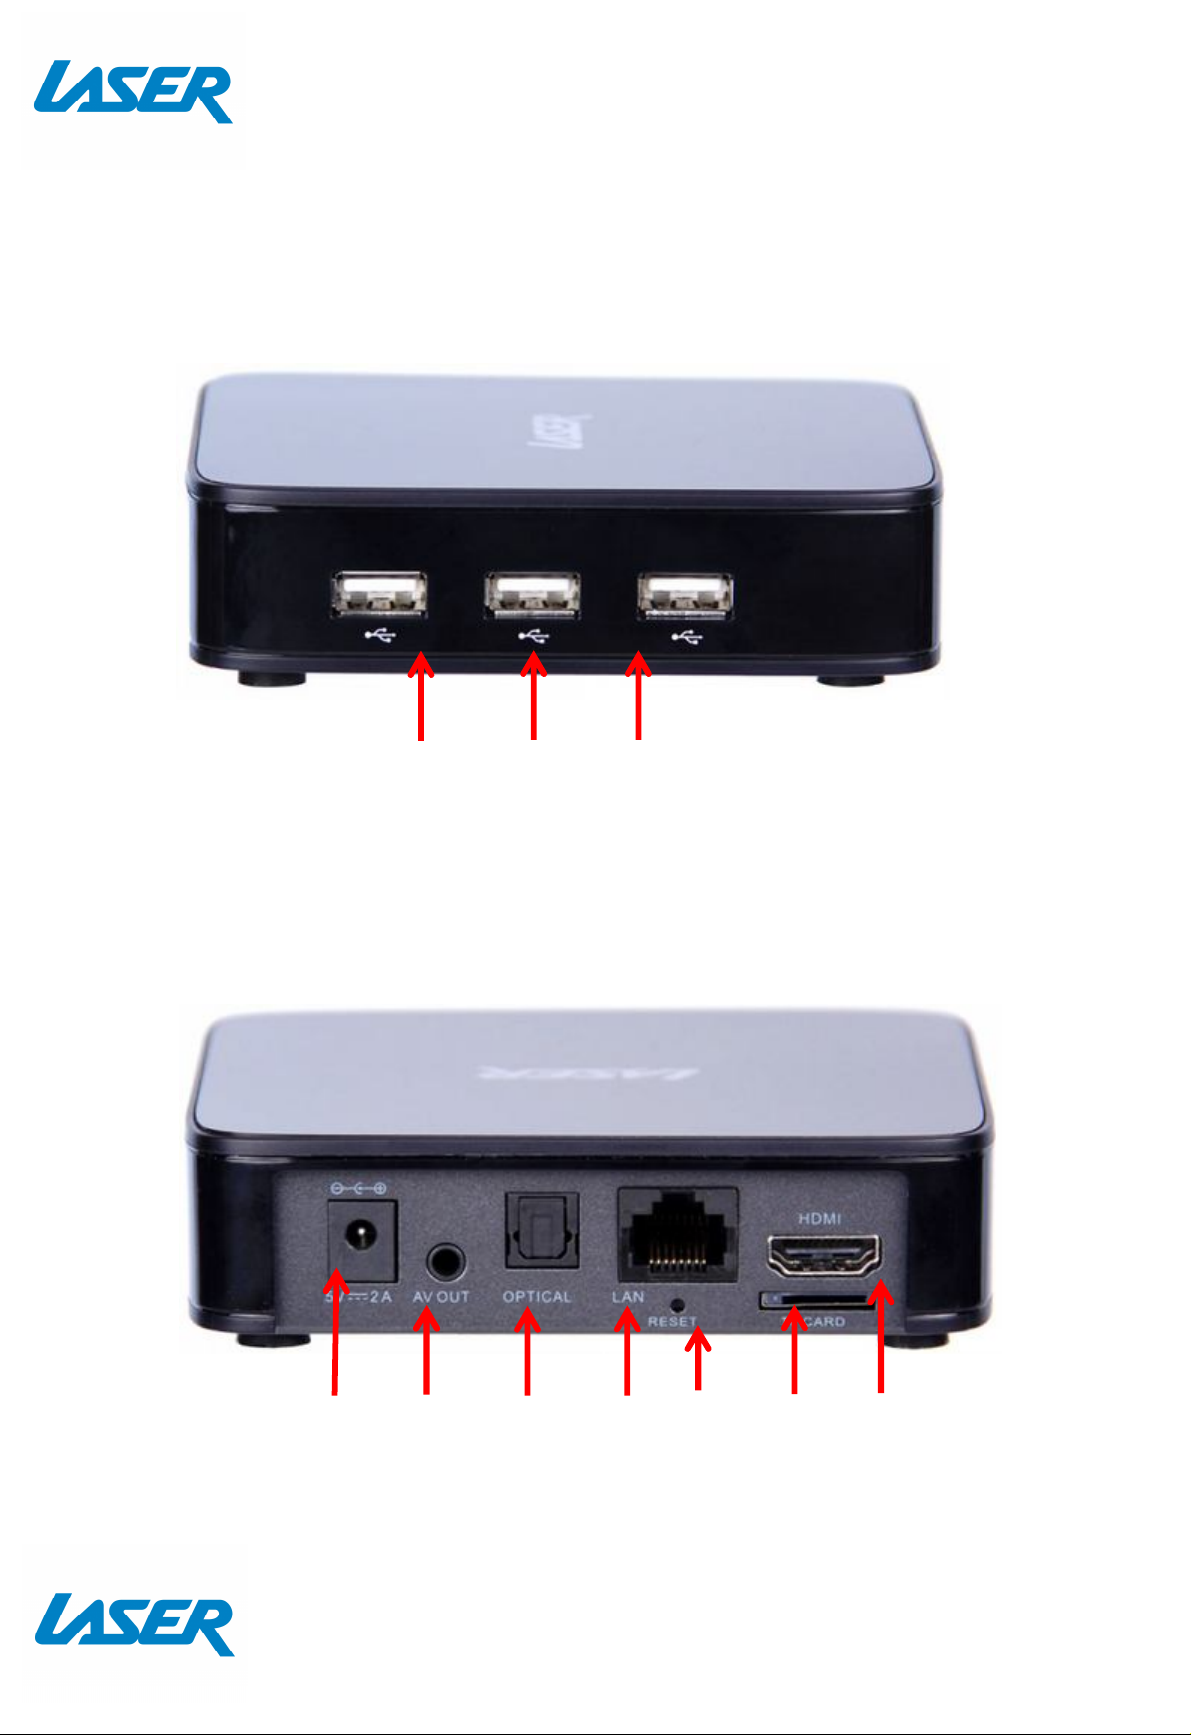
USB PORTS
THE PLAYER OUTPUTS
FRONT PANEL
REAR PANEL
Power
Connector
3.5mm AV
Connector
Optical
Audio
Output
(SPDIF)
Rj45
Network
Ethernet
Port
Factory
Reset
Micro
SD
card
slot
HDMI
Output
for
Audio &
Video
5
Page 6

QUICK USER MANUAL MMC-X40
Note: RCA A/V Cable not supplied
Note: HDMI A/V Cable not supplied
CONNECTING TO TV
GOOD – via RCA Cables
BEST – via HDMI Cable
6
Page 7

QUICK USER MANUAL MMC-X40
CONNECTION TO INTERNET
GOOD – Wi-Fi
WIRELESS MODEM
BEST – Direct Connection (to a Modem/Router)
MODEM
Note: Network cables not supplied
Note: An Ethernet cable internet connection is recommended for streaming HD and FHD
video.
7
Page 8

QUICK USER MANUAL MMC-X40
Cable connection to the internet using a Modem/Router
- Connect the network cable to the Media Player and your Modem/Router.
- In most cases your Modem/Router will automatically assign network settings to your
media player and display the screen below. Then click OK. If not, you may have to:
-Turn on and login into your Modem/Router to ensure an IP address can be
automatically assigned to your Media Player (DHCP (Dynamic Host Configuration
Protocol must be enabled)
- After connection has been successful the below screen will be displayed, showing IP,
Netmask, Gateway and DNS. Then click OK.
Wi-Fi connection to the internet using a Modem/Router
ADVANCE ICON
1) Go to the advance icon and press settings.
2) Goto Wireless and networks, then Wi-Fi to setup up your Wi-Fi
8
Page 9

QUICK USER MANUAL MMC-X40
WIFI ICON (ALTERNATIVE)
- From the home screen press "Wi-Fi".
- A list of available Wi-Fi connections will be displayed. See the example screen below.
Note: The Ethernet cable musts be unplugged.
Note: If the wireless network is not encrypted, you can connect to it directly. If the
network is encrypted, select the Wi-Fi name to pop up the window for password, press
OK on the remote control and call out the soft keypad on the screen, enter the password,
select “Next” on the keypad or press the Return key on the remote control to hide the
keypad, and then select “Connect” to connect to it. (Note: to hide the keypad on the TV
box, press the Return key on the remote control.)
9
Page 10

QUICK USER MANUAL MMC-X40
- To forget a WIFI connection, select it and press the Right button on the remote control.
Then the interface shows up as below picture. Choose Forget button to forget this WIFI
information.
10
Page 11

QUICK USER MANUAL MMC-X40
APP OVERVIEW
The Home screen
Note. Some subscription based Apps
may require a mouse or keyboard for
setup and operation. You can connect a
wired mouse and keyboard if this is
more comfortable for you.
Weather
Use this handy
app to monitor
the weather
and to check
forecasts.
YouTube Stream
Youtube Videos
Music Player
Play Music
through the
device
Photo Viewer
View photos
on the device
Media Centre
Connect to
DLNA Server to
play Media
Netflix Stream
Movies and TV
for a Monthly
price.(Account is
required)
Please note: A mouse
may be required for
use with this app
11
Page 12

QUICK USER MANUAL MMC-X40
The Apps Centre
FileBrowser
Browse your
files
Media Player
Play Media
through the
device
My APPs View
app the installed
apps
+ Add apps to
the Apps Centre
screen
12
Page 13

QUICK USER MANUAL MMC-X40
Smart Apps
Play Store
Access the Google Play Store.
Purchase and Download
apps, music, movies and
more
ABC iView
Let’s you catch up on the best of
ABC TV
Please note: A mouse may be
required for use with this app
FaceBookFaceBook
Let’s you catch up on your
Facebook pages and posts.
Please note: A mouse may be
required for use with this app
SBS on Demand
let’s you catch up on the best
of SBS TV
Please note: A mouse may be
required for use with this app
Stan
Stan is an Australian
streaming company which
offers subscription to
selected movies and TV
shows. Please note: A mouse
may be required for use with
this app
Web Browse
Browse the Web
Miracast
Wirelessly display that allows you to
Mirror your Smartphone or tablet
XBMC (Kodi) is a free and opensource media player software. It
allows users to play and view most
videos, music, such as podcasts from
the internet, and all common digital
media files from local and network
storage media. For more information
please visit:
kodi.wiki/view/Quick_start_guide
13
Page 14
QUICK USER MANUAL MMC-X40
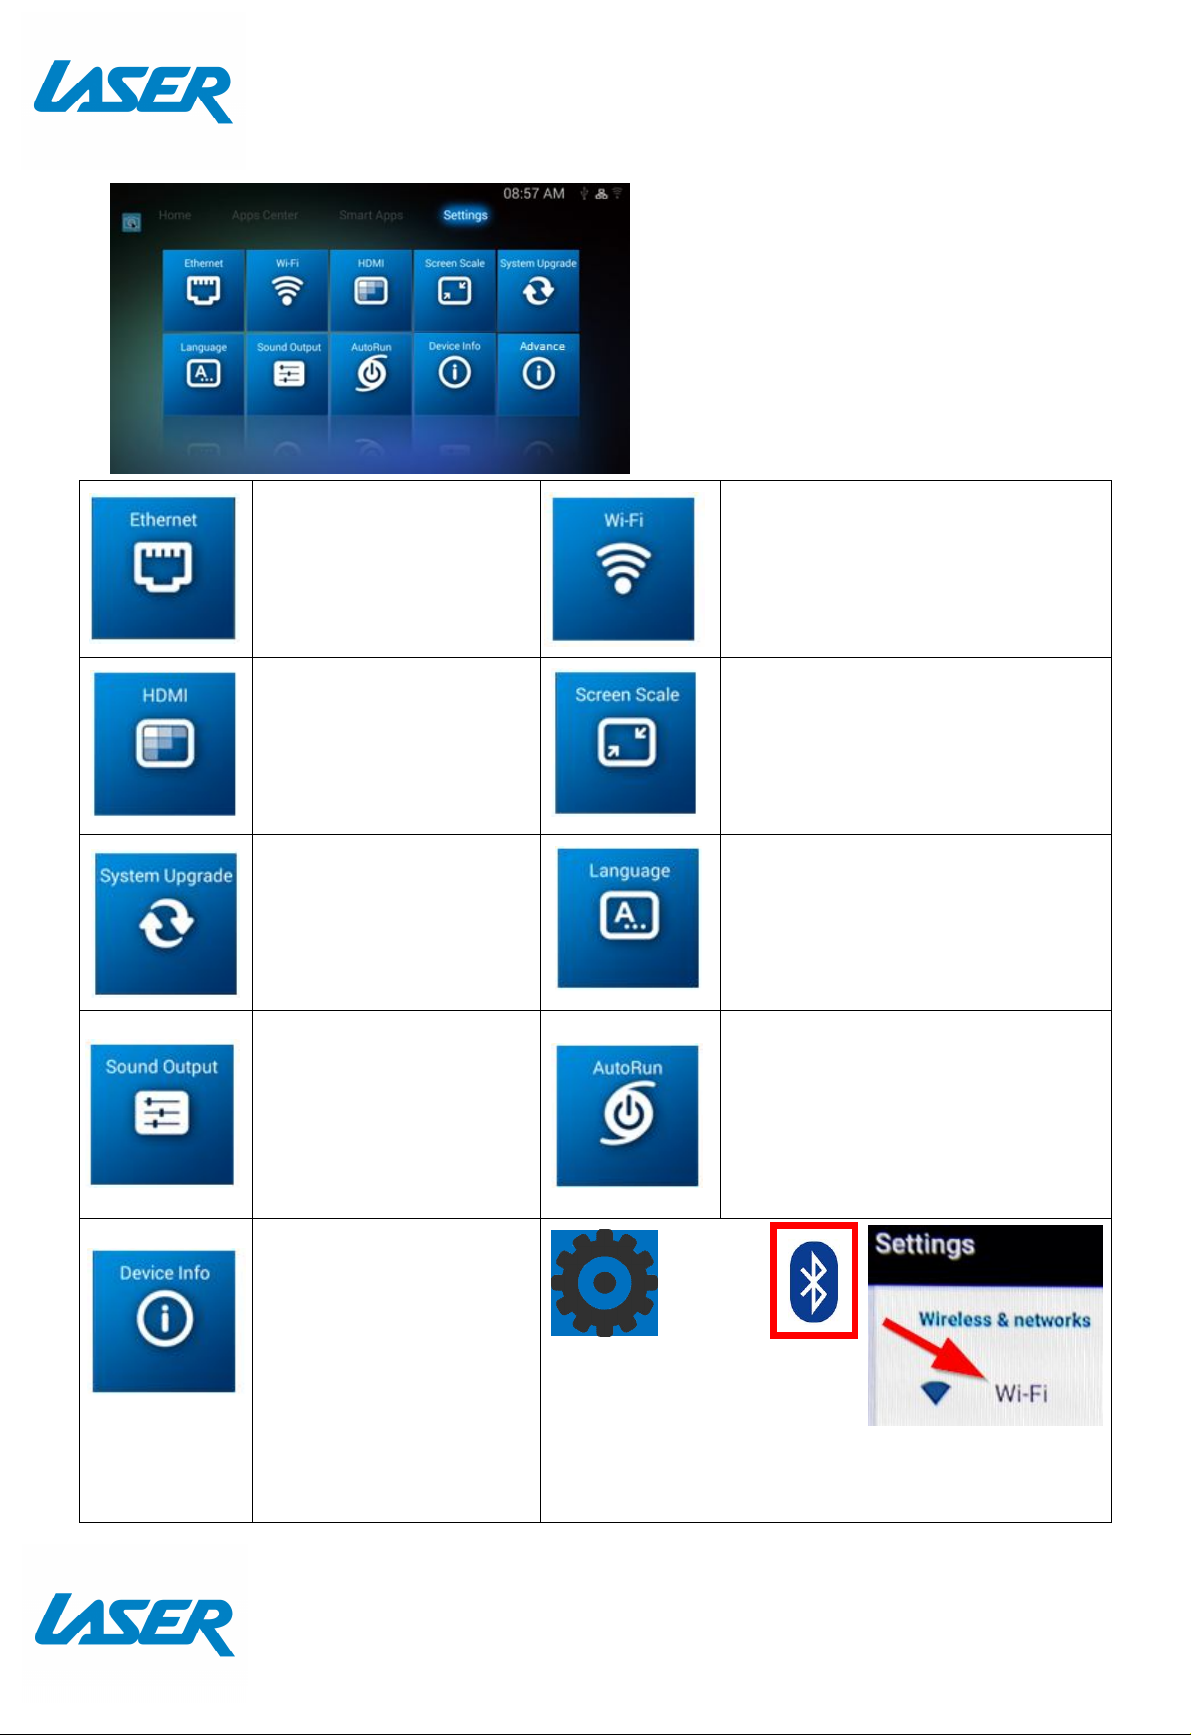
Settings
Note: To set up a new Wi-Fi or
BLUETOOTH connection, please select
the ADVANCE icon, followed by
SETTINGS then WIFI.
Reviewing a previous connection can
be accessed directly via the WIFI icon.
Ethernet
Wi-Fi
Check the Ethernet
Setup a Wi-Fi connection
Settings and IP
information
Change the screen
HDMI
Adjust the screen scale to fit on
resolution
Screen Scale
screen properly
System Upgrade
Upgrade the System
either via Storage or
OTA (Over the Air)
Sound Output
Change the sound
Language
Change Language
AutoRun
Allow apps to auto run
output
Device Info
View the device
information.
Advance
Press ADVANCE then
SETTINGS to turn on
Bluetooth and Wi-Fi if required. This button
will take you to the Android Settings page.
14
Page 15
QUICK USER MANUAL MMC-X40
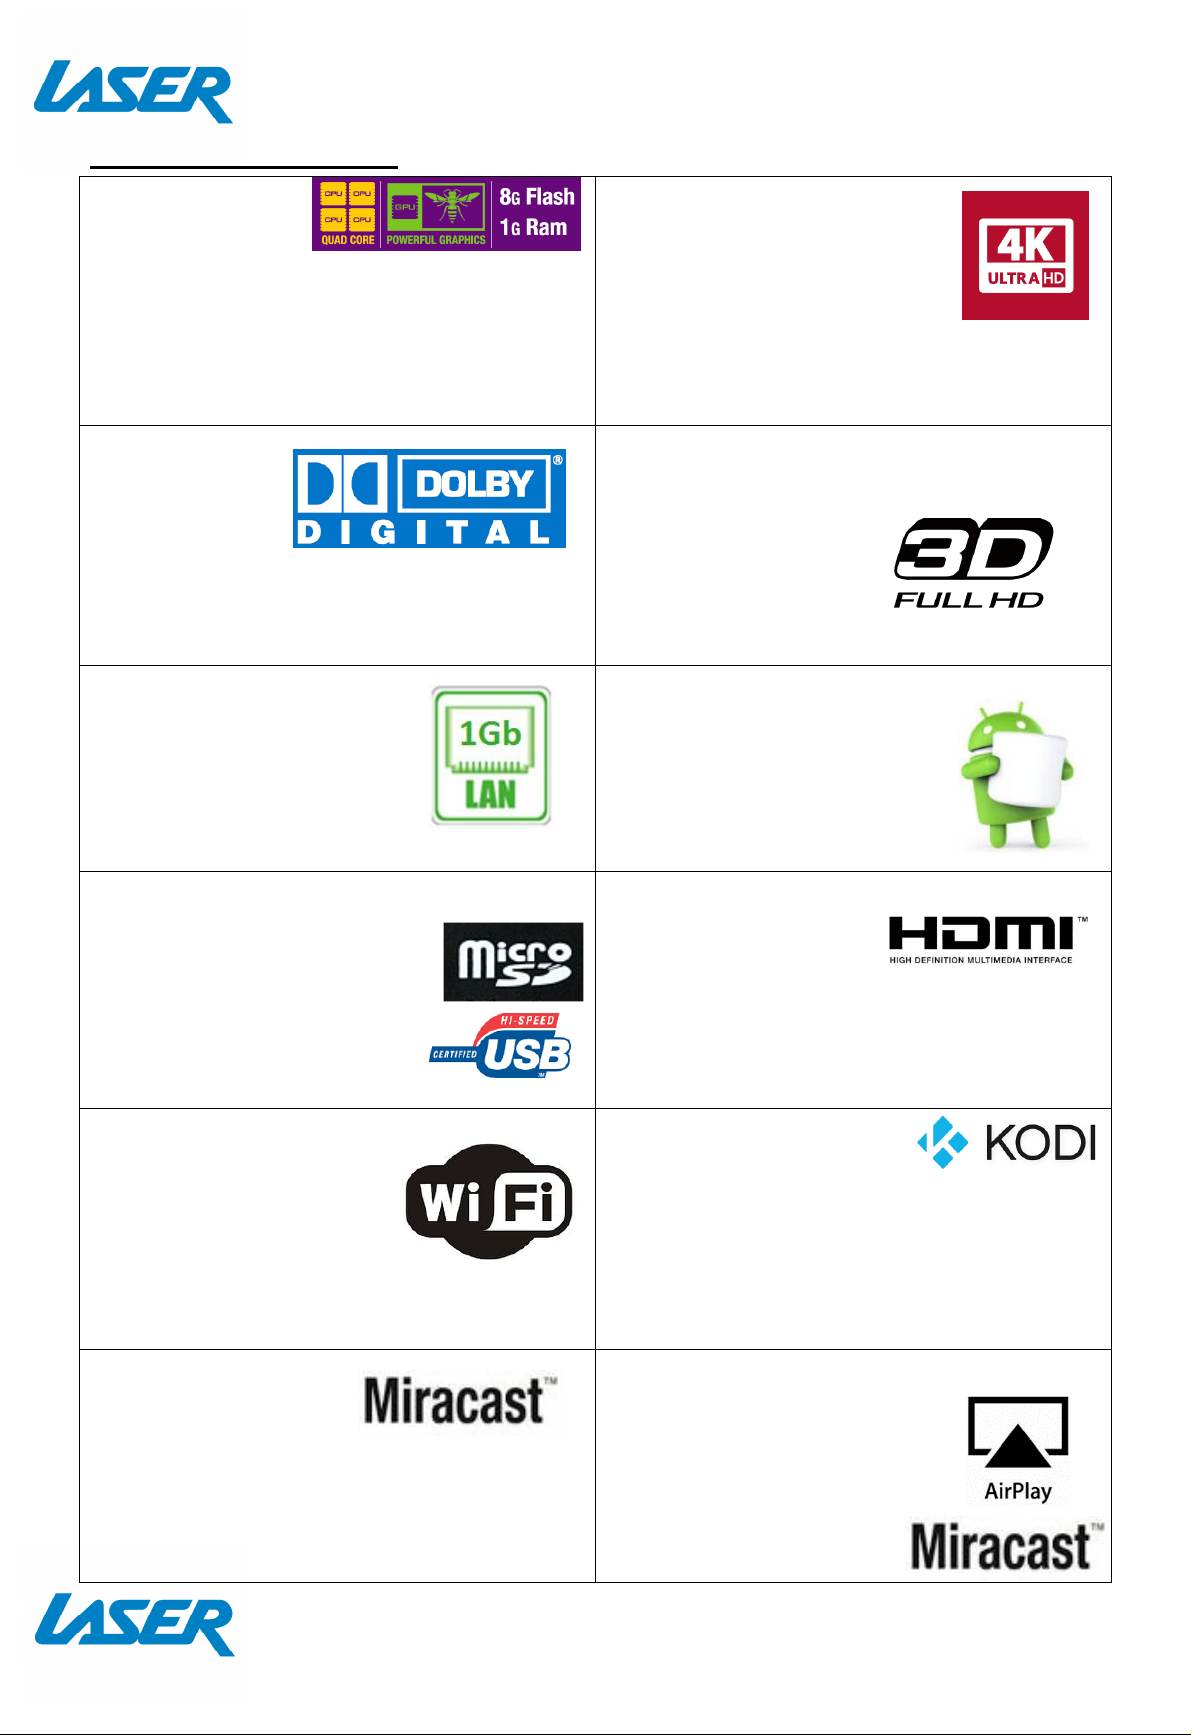
FEATURE OVERVIEW
8Core GPU &
QUAD Core CPU
Fast Processor &
memory designed for video
With a Quad core 2Ghz processor & 8GB
storage/1GB flash of processor memory,
movies will play smoothly & load faster
Digital
Surround
Sound
All sound
formats from 2 channel stereo to 7.1 Dolby
and DTS. Also Flac lossless HD audio is
supported.
High Speed LAN
With up to 1Gb LAN fast
data transfer, wait times for
4k Ultra HDR resolution
ready
Stunning clarity, vivid colour
and sharp detail will make
the best of new generation
UHD TV’s, Full HD 1080p also looks great.
3D ready*
Watch eye popping 3D
content from files (like
BDMV / 3D BD-ISO or
streamed 3D movies)
Android OS Smarts
Android opens a world of
possibilities through the
movie buffering are a thing
of the past
USB Ports & Micro SD input
Connect USB flash drives,
hard drives or input devices
like mice, keyboards or
web cams or read content
from a Micro SD card.
Wireless Connectivity
Wifi and Bluetooth on
board means that you
can connect to wireless
networks or connect
wireless products to the media player
Google Play store. Games,
video players, apps, utilities
and lots more.
HDMI or Analogue AV output
Connect to older TV’s
via Composite video
and L/R stereo (cable included) or connect
to new TV’s with HDMI for the ultimate in
sound and vision.
Play it all -Multi source,
Multi Format ready.
Whether it’s 4K movies from Netflix®,
Youtube® videos online or movies/music
from your home network or USB storage
drive, with KODI and other media players
file playback is assured*
Miracast ready
Share your tablet or
smartphone screen onto your TV for
everyone to see. (it’s like HDMI only
wireless)
AirPlay: Developed by Apple, this app
allows wireless streaming
between devices of audio,
video, device screens, and
photos, together with
related metadata.
15
Page 16

QUICK USER MANUAL MMC-X40
Note: Although this android Media Player can support all the above features, you must
have the correct hardware and compatible video files. For example, if you would like to
playback a 3D movie you must have a 3D TV and a 3D movie file first, in order for this
feature to work correctly.
CALIBRATING THE AIR MOUSE
If your screen air moue pointer does not line up accurately on your TV screen you may
need to calibrate your air mouse. In this case, center the air mouse pointer (cursor) in
the middle of your screen as best you can. Press the calibration button which will turn
the pointer off and stop it from moving. Align your air mouse (remote) to the center on
the screen again, then press the calibration button again to turn your air mouse pointer
back on again. Repeat the process as required.
FAQ
Some apps I downloaded are not working
properly. Why?
My remote control is not working. Why?
The new app I installed takes a long time to
open. Is this normal?
They may have not installed correctly.
Please uninstall the apps and reinstall
them again.
Make sure the batteries are installed
correctly. Try a different set of batteries.
Please note: Some apps will not work
correctly with a remote. A mouse may be
required for use.
News Apps may need a little more time to
set up when first installed. If your app
takes a little longer than usual to start, try
closing the app and reopening it in a few
mins. In most cases this will allow the app
to setup in the background and to open
correctly.
First go to the Advance settings and ensure
Wifi is turned on. Then check available
I cannot connect with my WiFi network
Why can’t I see my screen pointer?
WiFi networks. You can also click the WiFi
icon from the main screen if you have
already turned on your Wi-Fi.
Please ensure that you have 1) plugged in
your screen pointer dongle, 2) adjust the
screen pointer location by using the
calibration button, 3) check that you have
selected RF from your remote control
16
Page 17
QUICK USER MANUAL MMC-X40
SPECIFICATIONS
Composite AV Out (Jack to RCA)
HDMI
Interface
USB x 3
LAN
Micro SD Card
Power Supply 5V
Dimensions 110 x 110 x 27mm
Warranty Against Defects
Laser Corporation Pty Ltd (“Laser”) warrants your new product to be free from defects in materials and
workmanship for 12 months, from the date of purchase, provided that the product is used in
accordance with accompanying recommendations or instructions where provided. The benefit of this
warranty is in addition to your rights under the Australian Consumer Law and to other rights and
remedies of the consumer under a law in relation to the goods or services to which the warranty
relates.
Through a network of retailers and resellers, Laser will provide you with your choice of a repair,
exchange (where possible) or refund (within Dead on Arrival period) for this product if it becomes
defective within the warranty period.
This warranty will no longer apply where the defect is a result of alteration, accident, misuse, abuse,
normal wear and tear, neglect or improper storage. Please retain your receipt as proof of purchase
How to make a product warranty claim:
Step 1: Find your receipt which proves the date of purchase. Where the date of purchase cannot be
verified, your place of purchase or Laser will make an assessment based on the date of manufacture,
the condition of the Laser Product and the type of defect.
Step 2a): Contact your place of purchase. They will assess the nature of the fault and repair, replace or
fund the product as per their store refund or warranty policy.
Step 2b): If your place of purchase cannot be contacted, then you can contact Laser. Customer Service
with details of your defective Laser Product: Phone: (02) 9870 3388; or Email: support@laserco.com.au
or online www.laserco.com.au/warranty (click on “Consumers (End Users)”). Our business address is at
1/6-8 Byfield Street, North Ryde, NSW 2113
Step 3: Laser will issue you with a Return Authorisation (RA) number within 48 hours. When
requested, send us the defective Product and a copy of your receipt. Laser will cover the cost of the
return delivery.
Step 4: Wait for us to contact you. Once we have received your defective Laser Product for
inspection, we will inform you of our assessment of your claim within 7 days. When we contact you, we
will firstly let you know whether you have a valid claim under this Warranty, and if so, we will inform
you whether your defective Laser Product will be replaced or repaired, together with the number of
days you can expect to wait to receive your replaced or repaired Laser Product.
Step 5: For further details on warranty cover and returns, please check Terms and Conditions for
Warranty Returns section on http://www.laserco.com.au/warranty
Our goods come with guarantees that cannot be excluded under the Australian Consumer Law. You
are entitled to a replacement or refund for a major failure and compensation for any other reasonably
foreseeable loss or damage. You are also entitled to have the goods repaired or replaced if the goods
fail to be of acceptable quality and the failure does not amount to a major failure.
17
 Loading...