

Land Rover Sport User Manual
02 VEHICLE ACCESS
04 COMFORT AND SAFETY
08 CLIMATE CONTROL
09 EXTERIOR LIGHTING
10 FACIA OVERVIEW
11 WIPERS AND WASHERS
12 ON-ROAD AND OFF-ROAD
16 AUDIO SYSTEM
18 NAVIGATION AND TELEPHONE SYSTEMS
20 GAS STATION INFORMATION
Some of the information in this guide may not
apply to your vehicle.
You must refer to your Owner's Handbook for
full operating instructions.
Vehicle access
Remote control
Two remote controls, with integral keys are
supplied with your vehicle.
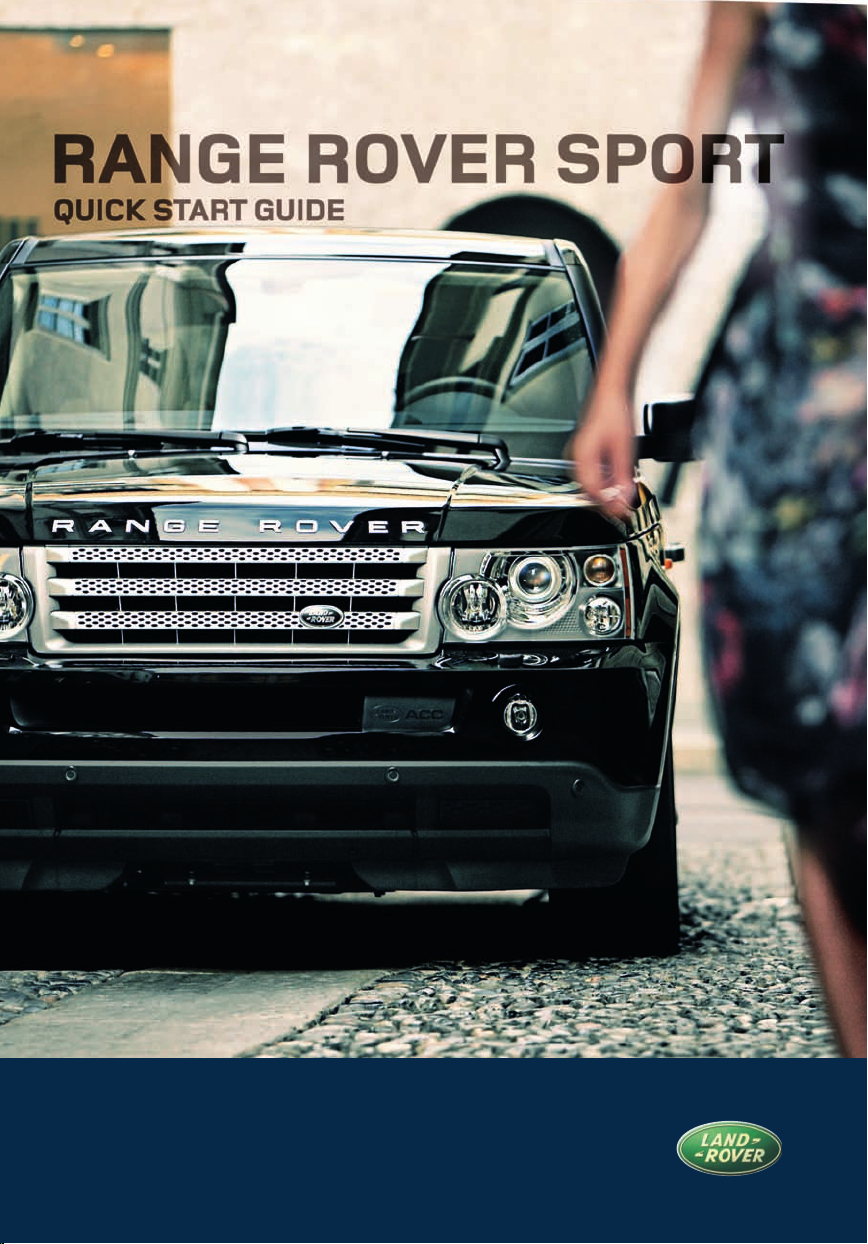
Key blade
Press button (arrowed in illustration) to release
the key blade.
Automatic relock
If the vehicle is unlocked with the remote
control, it will automatically relock and arm the
alarm if a door or the tailgate is not opened
within one minute.
Central locking
• Press once to lock the vehicle and
arm the alarm.
• Press once to disarm the alarm and
unlock the driver’s door (Single
point entry).
• A second press will unlock all other
doors.
Customer configurable button. Can be
programmed to remotely operate one
of the following functions:
• Headlamp courtesy delay.
• Panic alarm.
• Air suspension.
• Tailgate release.
• Tailglass release.
Refer to Remote control
programming in the Owner’s
Handbook.
Single point entry
This is a security feature that unlocks only the
driver’s door. It can be disabled on individual
remote controls by simultaneously pressing
and holding the lock and unlock buttons for
three seconds. The vehicle will lock and then
unlock in the currently selected mode to
confirm the change.
Master lock and unlock switches
1. Press to unlock all doors and tailgate.
2. Press to lock all doors and tailgate.
Press both buttons 1 and 2 simultaneously for
three seconds to release the tailgate.
Speed-related locking
If enabled, the doors and tailgate will
automatically lock when the vehicle's speed
exceeds 8 km/h (5mph).
This feature can be disabled or enabled in the
Settings option accessed via the trip computer.
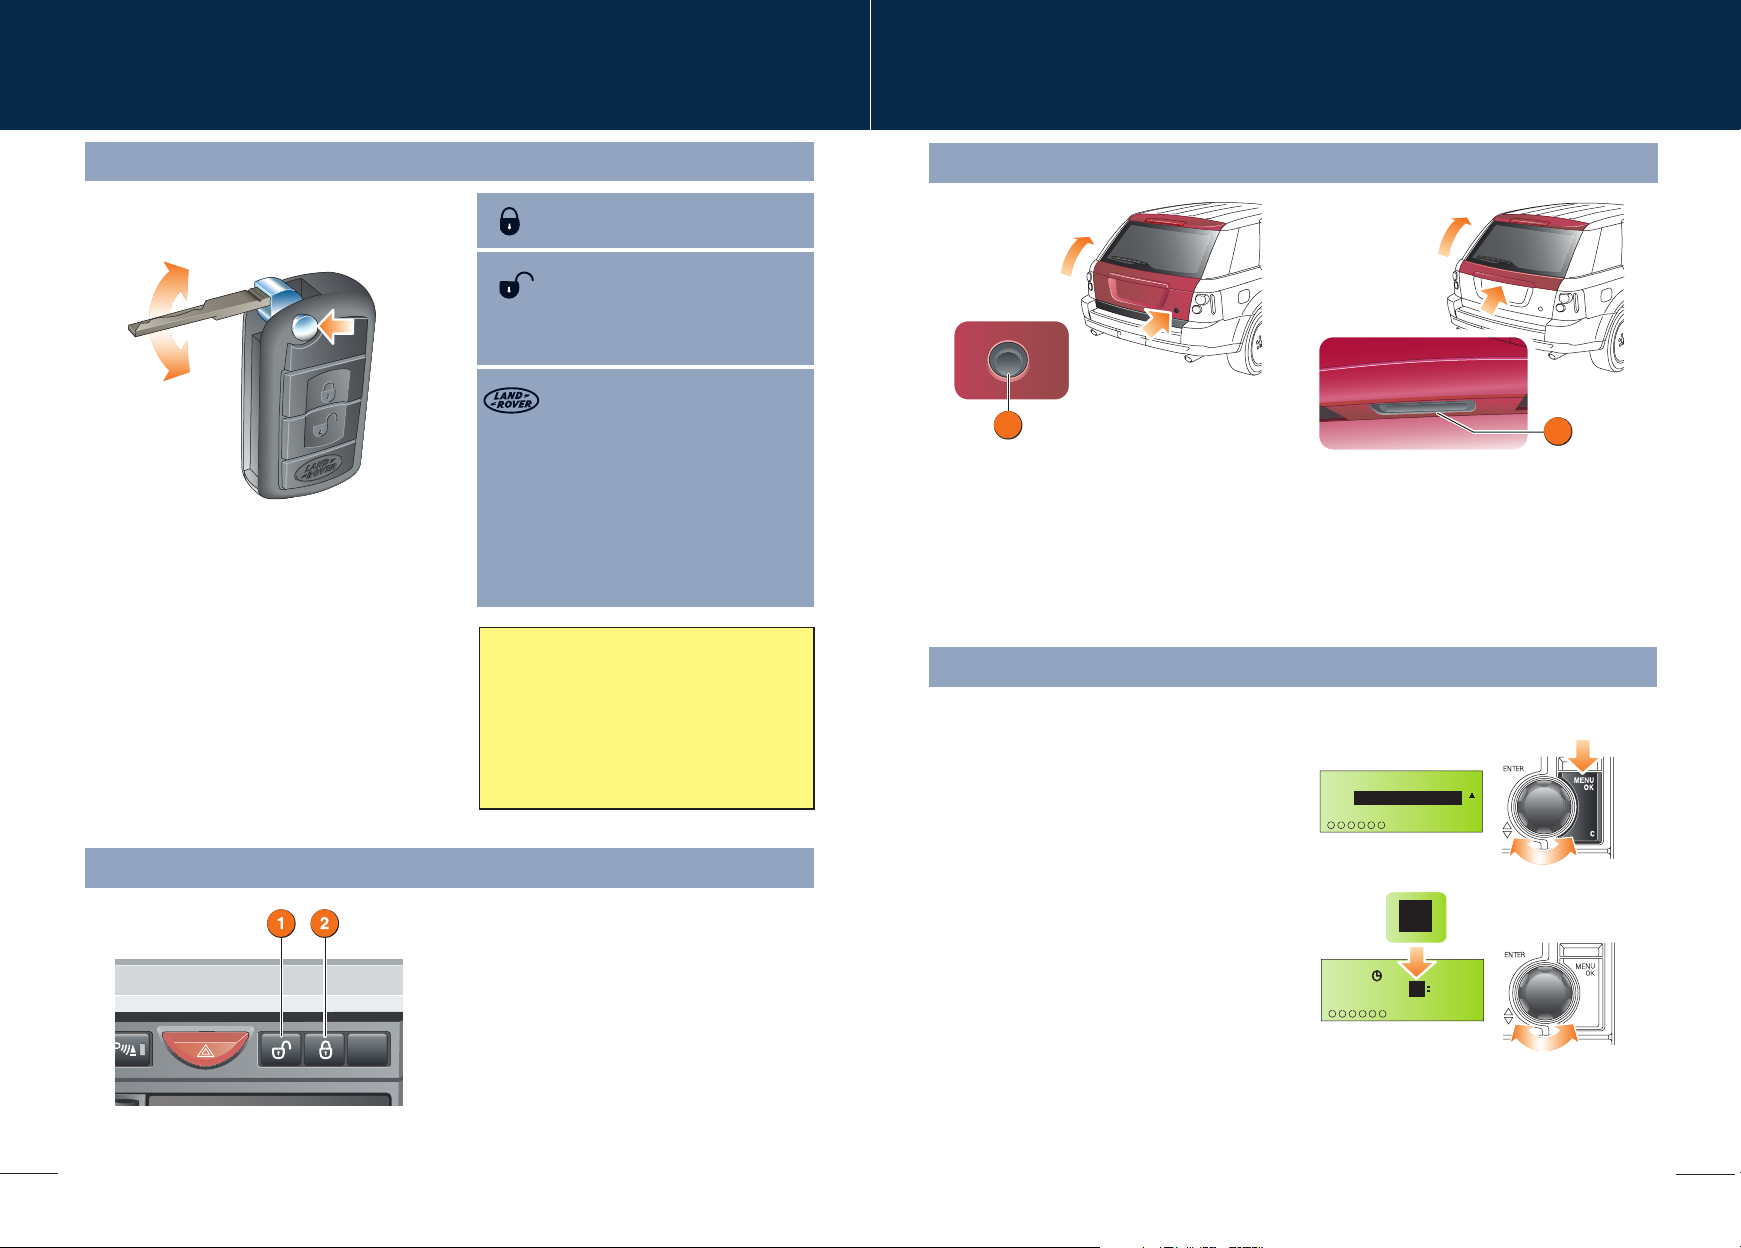
Tailgate
1
Opening the tailgate
With all the doors unlocked, press the release
button 1 on the tailgate to release.
Clock setting
The clock displayed on the audio unit and in the
message centre is set via the audio unit menu.
To adjust the time:
1. Press the MENU OK button.
2. Rotate the rotary control clockwise until
Clock is displayed and highlighted.
3. Press the control to select and enter the
clock setting mode.
4. Dependent upon specification of audio unit,
the time display may be changed between
12 and 24 hour modes.
5. Select Set to display the hour setting. Rotate
the control to adjust and press to confirm.
6. The display then shows the minute setting.
Rotate the control to adjust and press to
confirm.
2
Opening the tailglass
With all the doors unlocked, press the touch
pad 2 on the exterior handle and pull to open.
Power Closure
The tailgate latch has a power closure feature
which operates when the tailgate is lowered,
removing the need to slam the tailgate.
News
Clock
123456
09
Time
Set
123456
AM
09
2
3
Comfort and safety
3
1 2
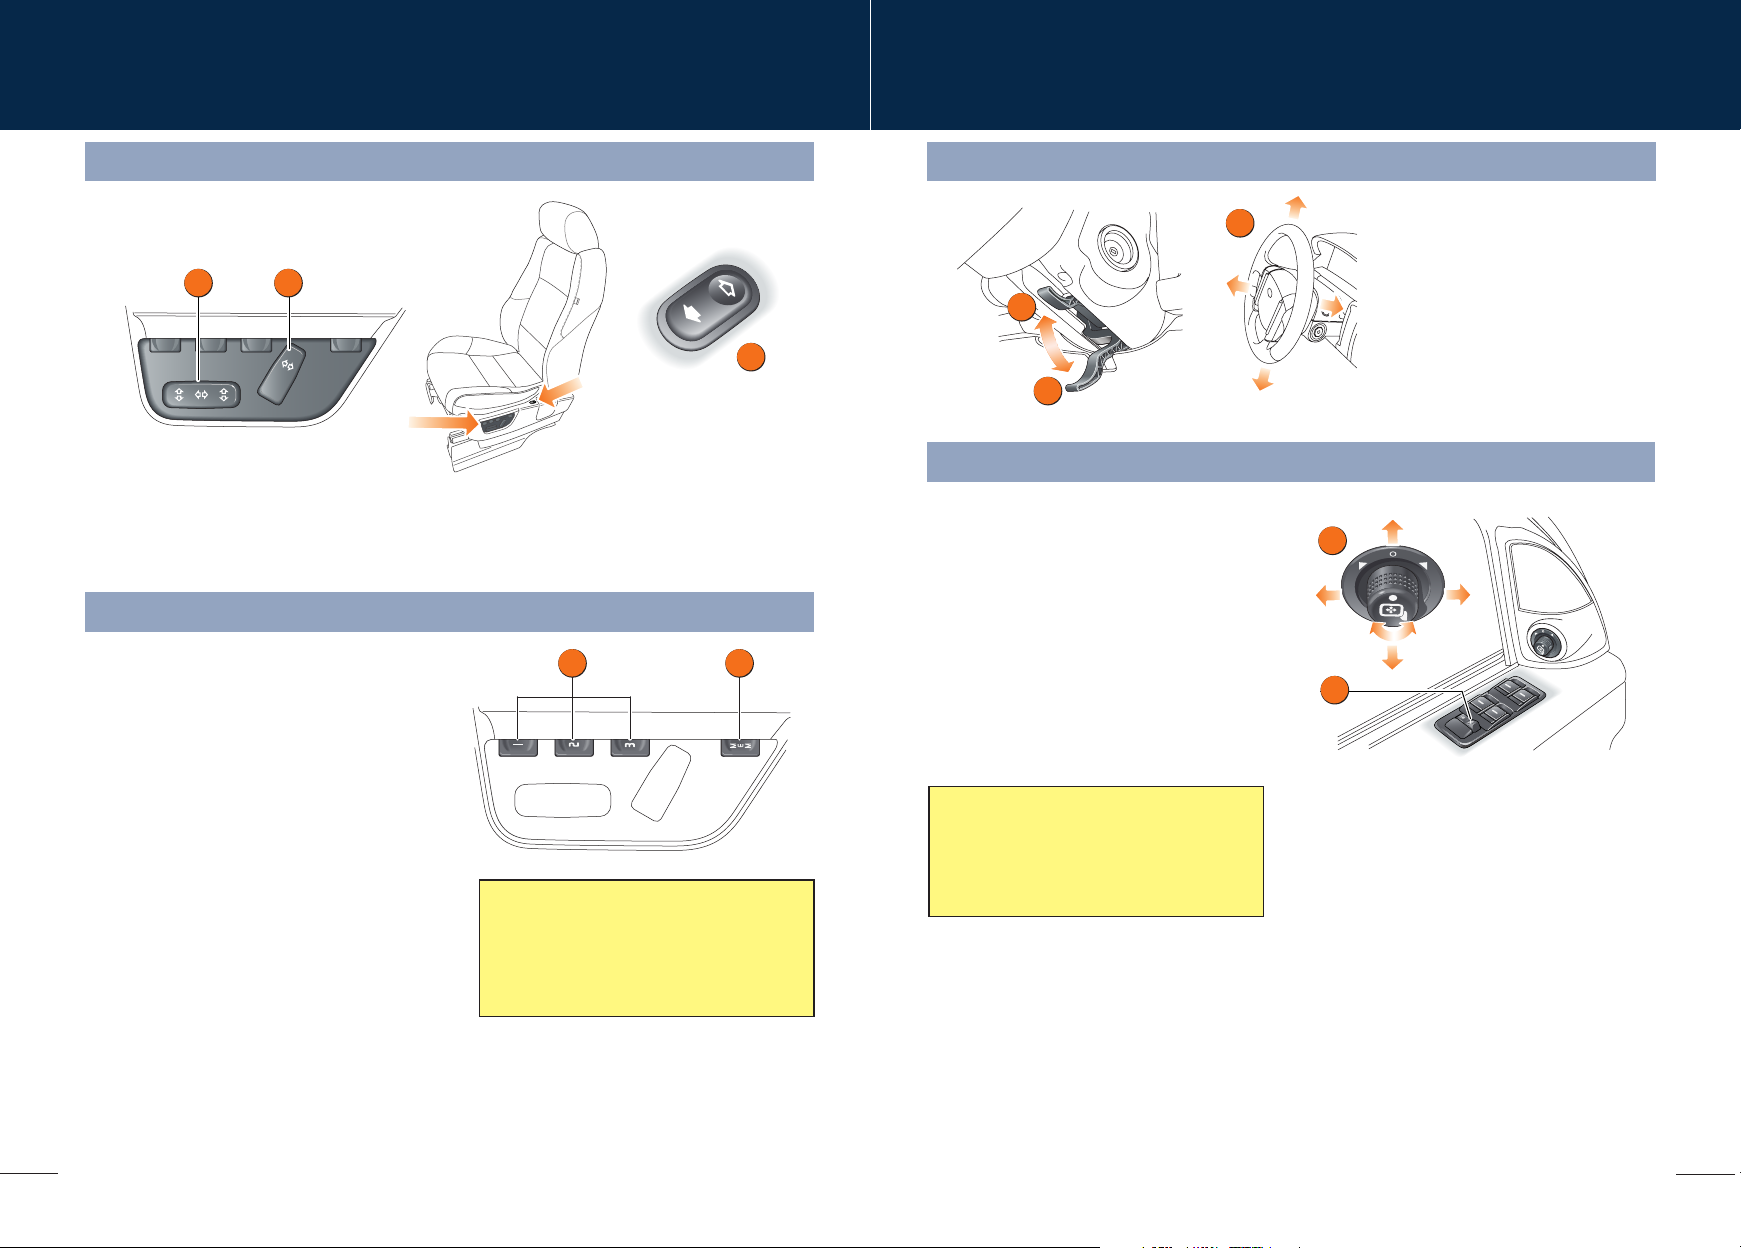
Driver’s seat adjustment Steering column adjustment
1. Seat fore/aft, cushion height and front tilt control switch.
2. Seat recline adjustment switch.
3. Lower backrest lumbar support switch.
Driving position memory
Once you have adjusted the driver's seat and
exterior mirrors for your ideal driving position,
the vehicle can memorise these settings for
future use.
1. Press the memory store button to
activate the memory function for five
seconds.
2. Press one of the preset buttons within five
seconds to memorise the current settings.
MEMORY STORED will be displayed on the
message centre accompanied by an audible
chime to confirm the settings have been
memorised.
To recall a stored driving position, press the
appropriate preset button 2.
12
Operating note
A seat position will only be memorised
during the five second active period.
Any existing settings will be over-written
when programming a memory position.
2
3
1
Windows and door mirrors
Windows
• To open a window, press and hold the
respective switch.
• To close the window, pull and hold the switch.
Window movement can be stopped at any time
by releasing the switch.
The front windows have a one touch facility that
allows them to be fully opened or closed with a
single operation of the switch. Firmly press the
switch and release. Movement can be stopped
by briefly pressing the switch again.
Press the right-hand side of switch 1 to inhibit
the operation of the rear window switches.
Resonance with lowered windows
If a resonance/booming sound occurs when
a rear window is open, lowering an adjacent
front window about 25 mm (1 inch) will
eliminate the condition.
1. Move the lever located under the
steering wheel fully downward.
2. Adjust the height and reach of the
steering wheel to the desired
position.
3. Move the lever fully up to lock the
position of the wheel.
2
1
Door mirror adjustment
To adjust the mirrors, rotate the mirror
adjustment knob 2 left or right to select the
appropriate mirror. Move the knob in any
direction to adjust the position of the mirror
glass.
4
5
Comfort and safety
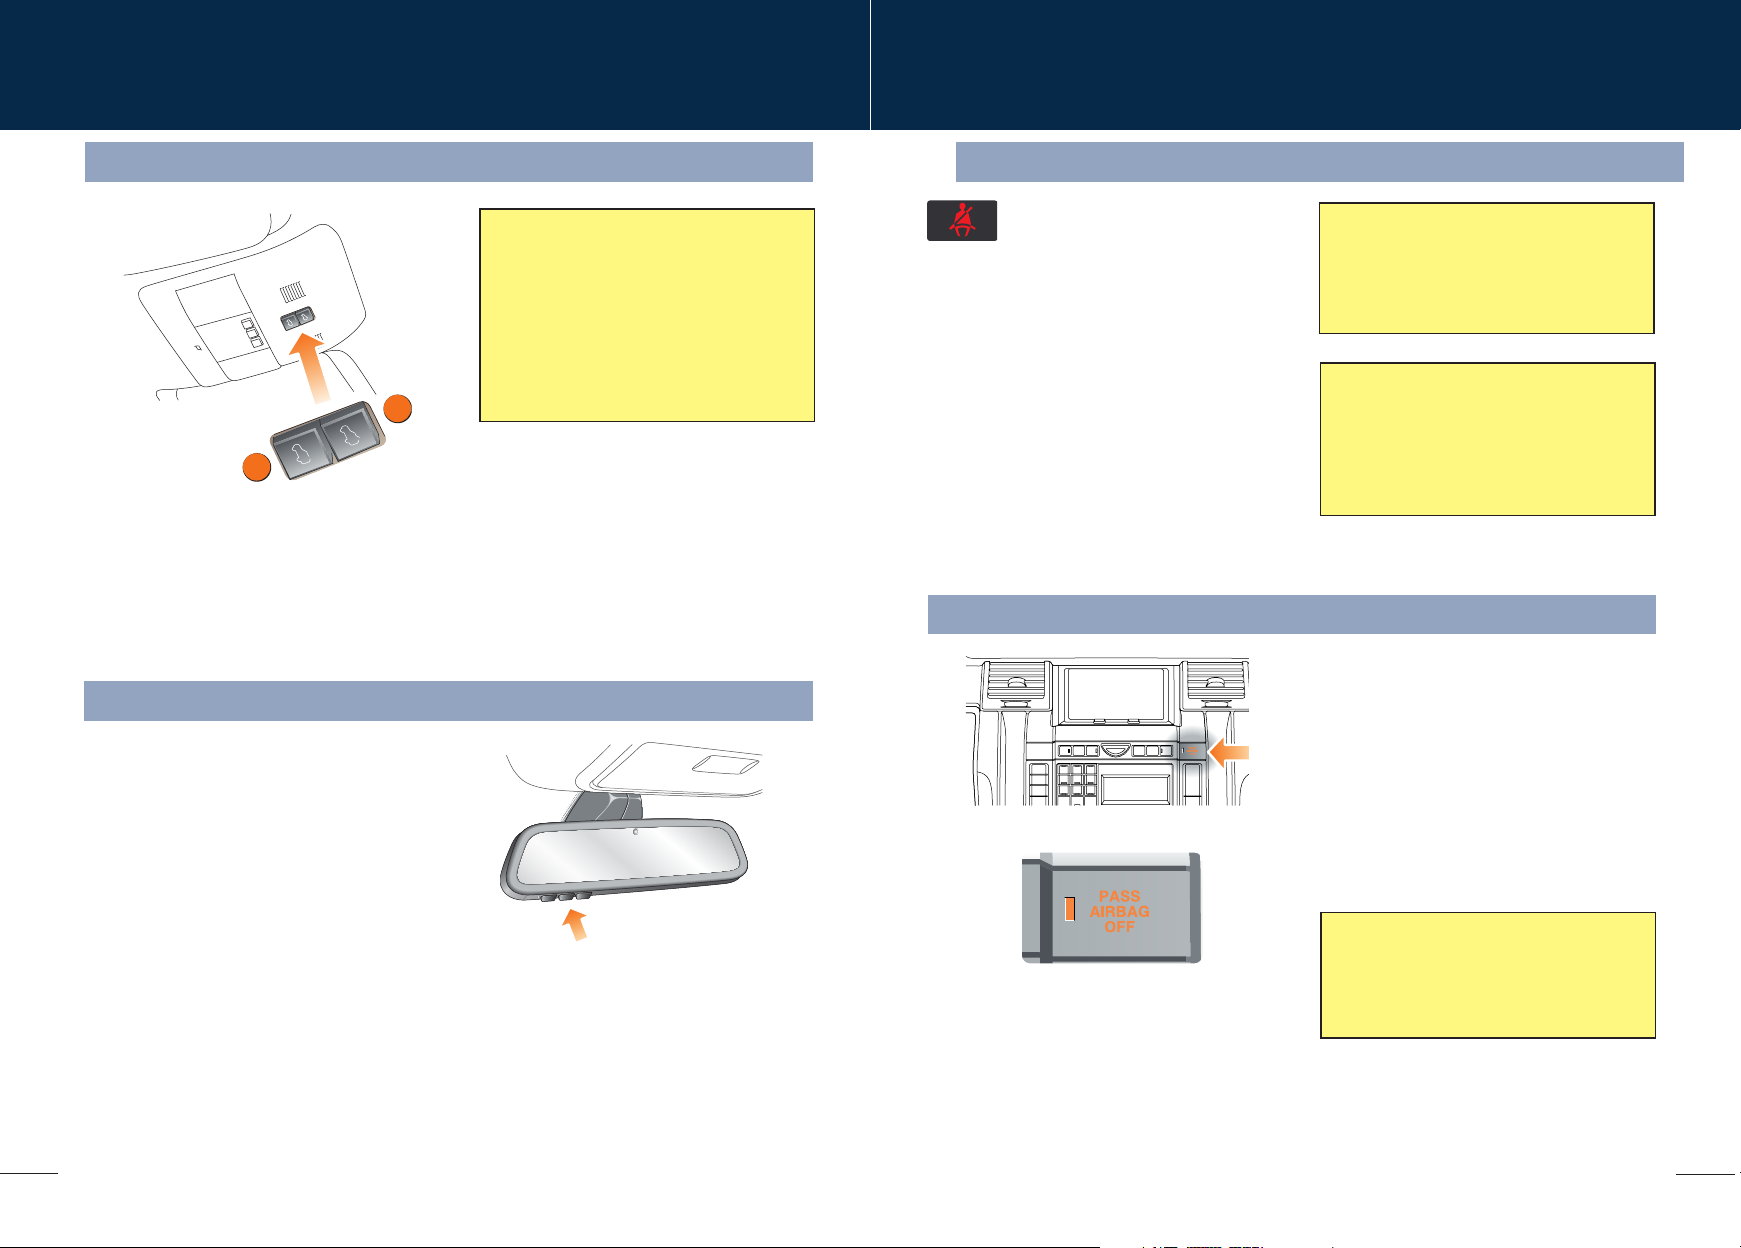
Sunroof
2
Open/close sunroof:
• Press and release the switch 1 to open the
sunroof fully.
• Press the switch 2 to close.
Homelink®transmitter
The buttons (arrowed) can be programmed to
transmit radio frequencies that can operate
external devices i.e. garage doors, entry gates,
security systems, etc....
For more information, refer to Garage
transceiver in the Owner's Handbook.
Seat belts and child restraints
A warning indicator on the instrument
Operating note
The sunroof can be operated with the
starter switch in position I or II and for 40
seconds after position 0 has been selected,
pack will illuminate to alert you that the
driver's and/or front passenger's seat
belt is unbuckled. Dependent upon
specification this may be accompanied
by an intermittent chime.
providing that neither front door has been
opened.
With the starter switch in position I or 0, the
switch will need to be pressed and held
until the roof reaches the desired position.
1
Automatic Locking Reels (ALR)
All passenger seat belts have ALR fitted for use
with child seats or securing large items.
• To engage: extend belt to maximum length
to enable locking mechanism.
• Allow seat belt to retract onto the child
seat/item (a clicking sound will be heard as
the belt retracts). Ensure there is no slack by
pressing the seat/item firmly into the vehicle
Tilt sunroof:
• Press and release the switch 2 to open the
roof to the tilt position.
seat.
• To disengage: unbuckle the belt and allow
the belt to fully retract.
• Press and hold the switch 1 to close.
If the sunroof is moving, it can be stopped by
pressing the switch again.
Passenger air bag
123
ABC DEF
456
JKL MNOGHI
789
TUV WXYZPQRS
0
6CD-465
With ALR enabled, as the seat belt retracts, it
will automatically lock preventing re-extension.
Ensure passengers do not fully extend the
restraints and inadvertently engage this
feature during normal use.
Recommended child seat
Land Rover strongly recommends the use
of LATCH (Lower Anchors and Tethers for
CHildren) child seats.
LATCH child seats can only be fitted in the
rear, outer seating positions.
The front passenger seat is fitted with an
occupancy sensor system that determines the
state of seat occupancy and sets the air bag
status to suit;
• Seat unoccupied - air bag deactivated and
indicator off.
• Seat occupied - air bag activated and
indicator off.
• Seat occupied by a child seat or low weight
object - air bag deactivated and indicator
on.
For further information, refer to Occupant
detection in the Owner’s Handbook.
Operating note
If the indicator becomes permanently
illuminated when the seat is definitely
empty, please contact your Land Rover
Dealer immediately.
6
7
 Loading...