

Page 1
LandAirSea Tracking Key
READ THIS BEFORE USING THE LANDAIRSEA TRACKING KEY
1. KNOW HOW GPS WORKS. The LandAirSea Tracking Key uses GPS to find
its location. In order to lock onto the location, the GPS should have a direct line of sight
to 3 locations in the sky and these locations are changing constantly throughout the day.
Make sure that there isn’t any metal completely blocking this upward / outward line of
sight. GPS signals will go through plastic, glass, rubber, fiberglass, cloth material, or
anything else not made of metal. The more metal obstructions that are above and around
the GPS sensor the longer it will take to lock onto the location (GPS sensor is inside the
Tracking Key). Make sure you choose an optimal location to place the unit for good
tracking results. An example of placement for the Tracking Key is the glove box but
depending on the design of the vehicle, it may take longer to lock onto the location. If
the glove box is very low inside the vehicle with a lot of obstructions, it may not be able
to track. In this case you will have to find a better location to place the GPS unit.
2. TAKE A TEST DRIVE (VERY IMPORTANT). Place the Tracking
Key outside with new batteries. Make sure the unit has a clear view of the open sky.
Wait a minute or 2 for the device light to start flashing. Once it starts flashing, take the
unit on a test drive for at least a few miles. Now download your test data by following
the Quick Start Guide for Software Installation and Downloading Data.
Unit Placement
Location of the GPS Unit Effectiveness Comments
On the front or rear dash board 99% Probably one of the best locations to keep your unit
if you do not need to conceal the device. You can
place the unit in a box of tissues or in something on
the dash.
Under the Front or Rear Dash
Board
In the Glove Box 80-95% This is good location to keep your unit.
Under or on the Seat. 70% Placement under the seat will vary from vehicle to
Under the Vehicle 70% Placement under the vehicle will vary from vehicle
95% It is important to remember that the unit must be
high enough up in the dash board to make an
effective lock. Spotty data will indicate that your
placement may need to be adjusted.
Effectiveness may vary from one vehicle to
another, but if placed properly it should work in the
glove box of almost any vehicle.
vehicle. If you must place the unit under the seat,
make sure you test it for a day or two to make sure
it will work in your vehicle.
to vehicle. If you must place the unit under the
seat, make sure you test it for a day or two to make
sure it will work in your vehicle. LandAirSea does
not guarantee that the Tracking Key will work in
this location. If the unit is not properly gathering
data you may have to adjust your location.
Page 2
Software Installation
Install the Past-Track 8.0 software BEFORE connecting your Tracking Key
device to you computer. See below.
Installing the Past-Track 8.0 Software
Place your Past-Track version 8.0 installation CD into your computer’s CD
drive tray. Follow the prompts. For a normal installation, click Next through
most of the prompts. After installation, LEAVE the CD in your CD Drive.
Software Installation
Connecting the LandAirSea Tracking Key to Your Computer
Step 1
Step 2
You must go through these steps to successfully download data from your
LandAirSea Tracking Key.
Preparing to Install
Ensure that you have your Past-Track version 8.0 disk in your CD drive.
Place fresh AAA batteries in your tracking key, and plug it in to your
computer’s USB port.
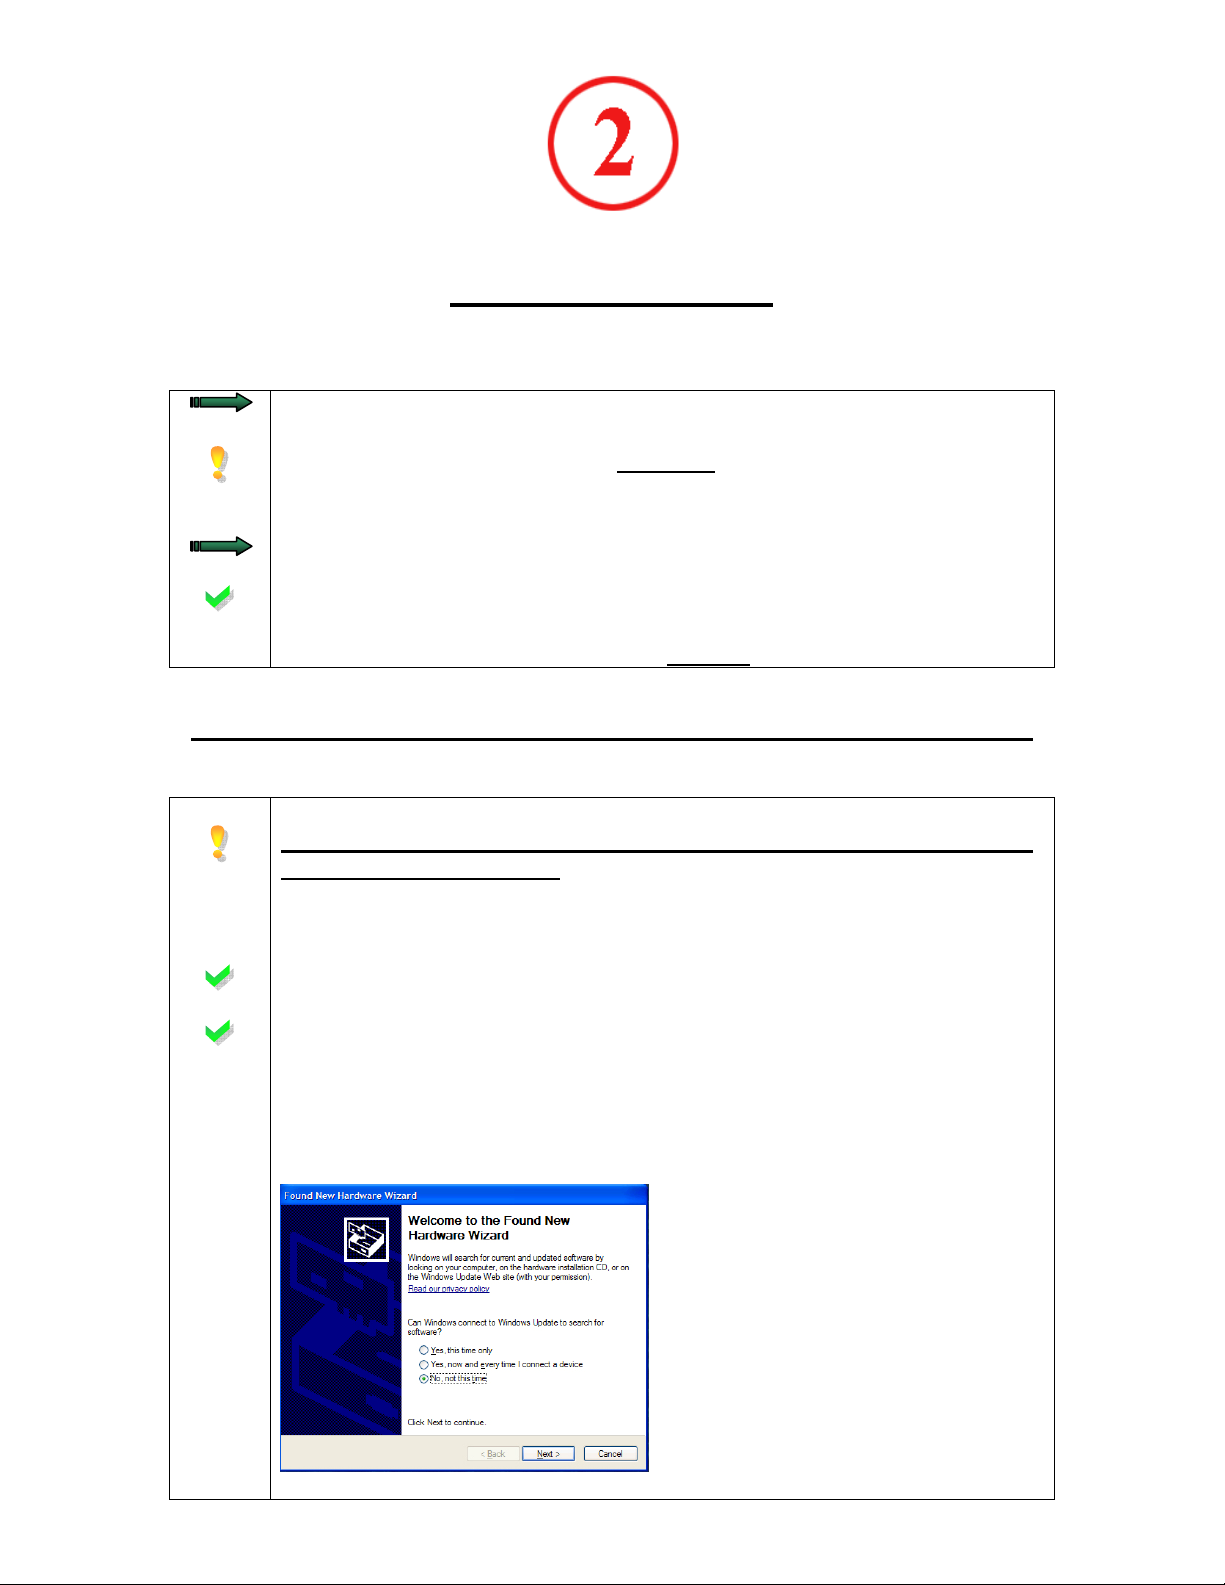
New Hardware Found
Page 3

Select “No, not at this time” and hit Next.
(If your computer does not automatically find your device, reboot your computer with the
Tracking Key connected to your PC).
Step 3
Driver Installation
Select “Install software automatically” and hit Next.
Step 4
Finish Installation
Select Finish.
You are now ready to download tracking data by running the Past-Track software.
Page 4

QUICK START GUIDE - Downloading Data
Preparing to download.
Remove the protective cover from the front of the unit. This will expose the
USB plug.
Check your batteries
Ensure that you have fresh batteries in your unit. After long tracking sessions
the batteries in your unit may be worn down.
As your batteries approach low levels, the GPS performance may decrease and
the battery indicator will turn red. At this point you may not be able to
download your information off of your unit. If you are having difficulty
downloading your unit always change the batteries out before you do
anything else.
Step 1
Step 2
Plug the Tracking Key into your computers USB port.
Be sure that you have completed all of the steps on the “Software
Installation” before proceeding any further.
Remove the protective cap from your Tracking Key and plug it into your
computers USB port. Give your computer about 10 seconds or so to properly
detect. If you have sound on your computer, you will hear a tone.
Finding your device.
Run Past-Track by double clicking on the Past-Track icon which you should be
able to find on your Desktop.
Click on the in the Icon Bar.
A new screen will appear. Now click the button called Find Port
You should get the message saying “Device Found”. Hit OK
If you receive the message “Device Not Found” please refer to the trouble
shooting guide for corrective actions.
.
.
Page 5

Step 3
Step 4
Step 5
Download your unit.
To erase existing data on your unit place a check mark in the box labeled
“Erase data log after download”. If there is a check mark in that box the system
will erase any stored data off of its internal memory after it is done
downloading.
Click the Download button on your screen.
If you receive an error message please refer to the trouble shooting guide.
Save your data.
Once your unit is completely done downloading you will be prompted to save.
The standard(default) format for any file after its downloaded is:
mmddyy.las
mm = month of the last time the unit tracked
dd = day of the last time the unit tracked
yy = of the last time the unit tracked
If you do not rename the data, this is the name that will be given to your data
once it is saved. Never change the .las extension.
Remember where you save your data, it is important to always look at where
your file is being saved. It is a good practice to use the default folder
location: “My Tracking Data”.
Viewing your data
At this point you will be prompted on how you would like to open your data.
There will be three options:
Google Earth (You must have this installed before you are able to
Once you have made your selection it will be displayed for you.
* Do not select the Street Maps option if the data was not recorded in the U.S.
select this option. See Quick Start Guide- Satellite Images)
Street Maps ( U.S. Only ) *
Activity Report
Page 6

QUICK START GUIDE - Satellite Images
1. You must install Google’s Earth Software
If your computer is more than 2 years old, then Google Earth may run slow or not at all on your computer. Go to
www.landairsea.com/earth.html
Step 1
Step 2
Go to http://earth.google.com/download-earth.html
Save the File to your desktop.
Double click the file that you just downloaded and follow the on screen steps to begin the installation of Google Earth.
2. Viewing Tracking Data in Google Earth
Step 1
Step 2
Step 3
Open or download tracking data from your LandAirSea Tracking Key using the Past-Track software Version 8.0
You will be prompted to open your data in 3 different formats, select Google Earth. If you have already opened your
data in the U.S. Street Mapping, in the icon bar at the top of the screen, click the icon denoted with a globe (Third
button from the left).
Google Earth will now automatically launch and your tracking information will be displayed. HINT: MAKE SURE
YOU PUT A CHECKBOX NEXT TO “ROADS” IN THE LAYERS WINDOW.
for more information on running Google’s Earth software.
and click on the “Download GoogleEarth.exe” button.
Basic Google Earth Controls
Double Click on the Stop # to zoom in to that location
 Loading...