

Page 1
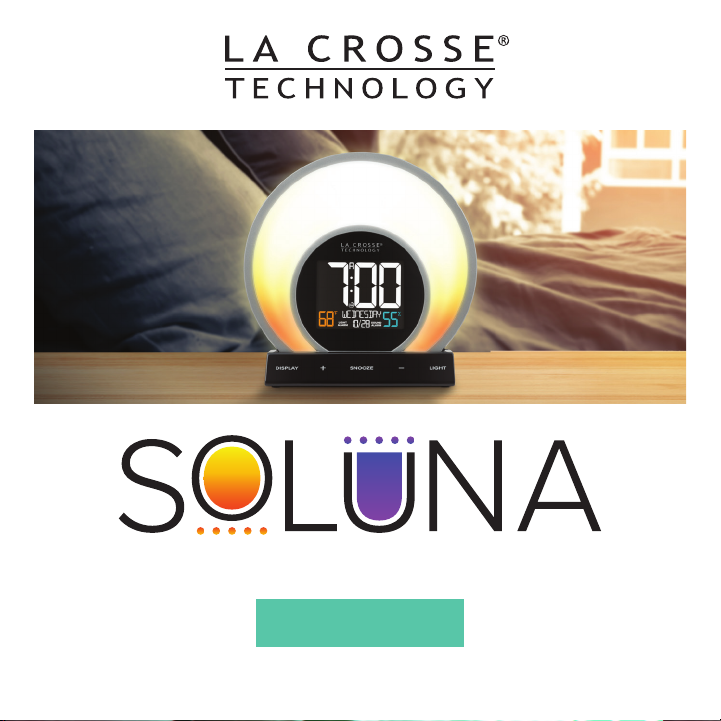
LIGHT ALARM CLOCK
SET UP GUIDE
MODEL NUMBER C80994
Page 2
BASICS
Table of Contents
Initial Setup
Buttons & Ports
LCD Display
LCD Display Brightness
Auto-Dim Settings
USB Charging Port
Temperature & Humidity
APPENDIX SUPPORT
Specifications
Warranty
Recycling & Disposal
Cautions/Statements
Natural Light Alarm
02
Setting the Light Alarm
03
Setting the Sound Alarm
04
Snoozing the Sound Alarm
05
05
06
06
Support Information
17
Factory Reset
18
Stay in Touch
18
18-19
LIGHT MODESBASICS ALARMS
07
Selecting Your Light Mode
08
Evening Mode
09
Guided Breathing Mode
10
Comfort Meter Mode
Color Select Mode
Glow Color Options
Color Cycle Mode
20
20
20
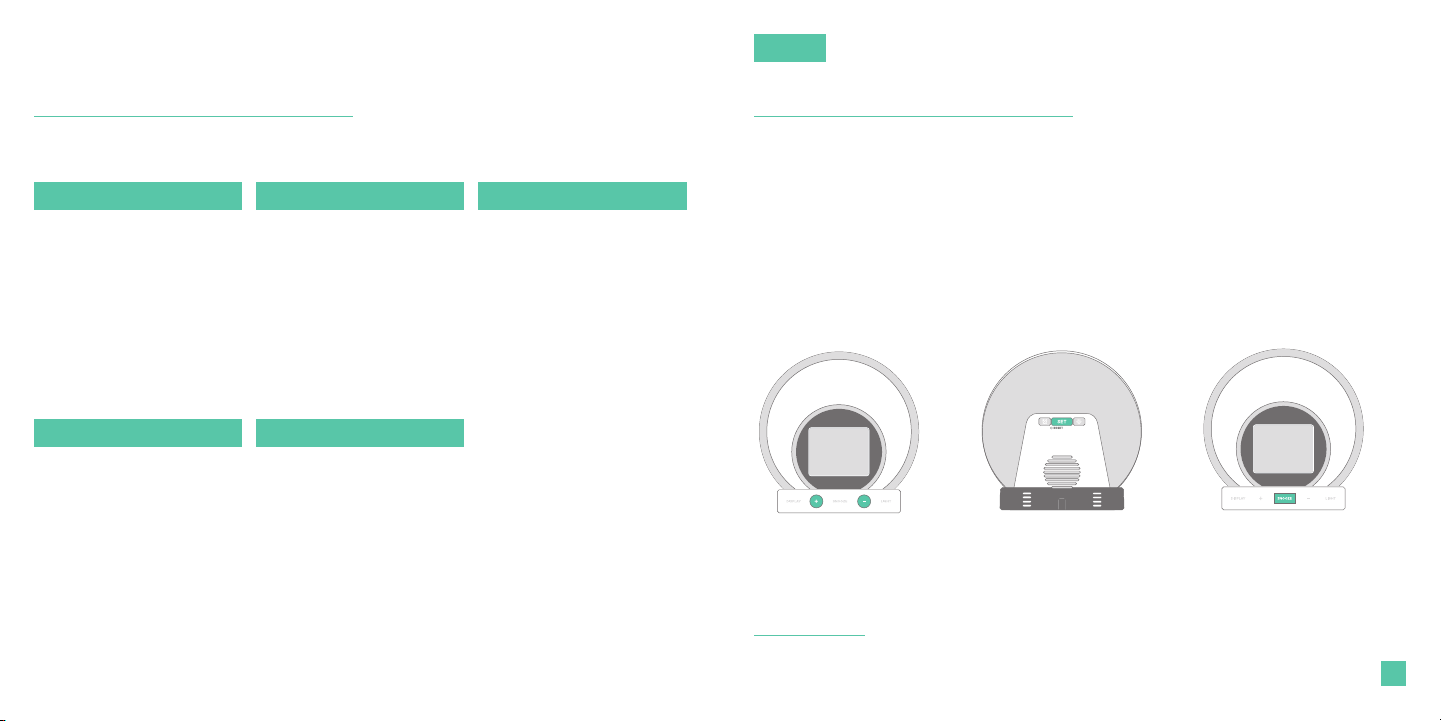
Initial Setup
Power Up
Insert the 5V Power Adapter into an outlet, and then plug it into the AC Jack on
the bottom of the alarm clock.
11
12
13
14
15
15
16
A greeting will appear on the LCD display and then your clock will move into the
Settings Menu. The Color Cycle Light Mode will also begin.
Settings Menu Order
Language • Hour • Minutes • Year • Month • Date • Fahrenheit/Celsius
Use the +/- buttons on
the front of the clock to
adjust the values.
Note: To enter the Settings Menu after the initial setup, hold the SET button on the
back of the clock.
Press the SET button on
the back of the clock to
confirm selection and
move to next step.
You may exit the Settings
Menu at any time by tapping
the SNOOZE button.
02
Page 3
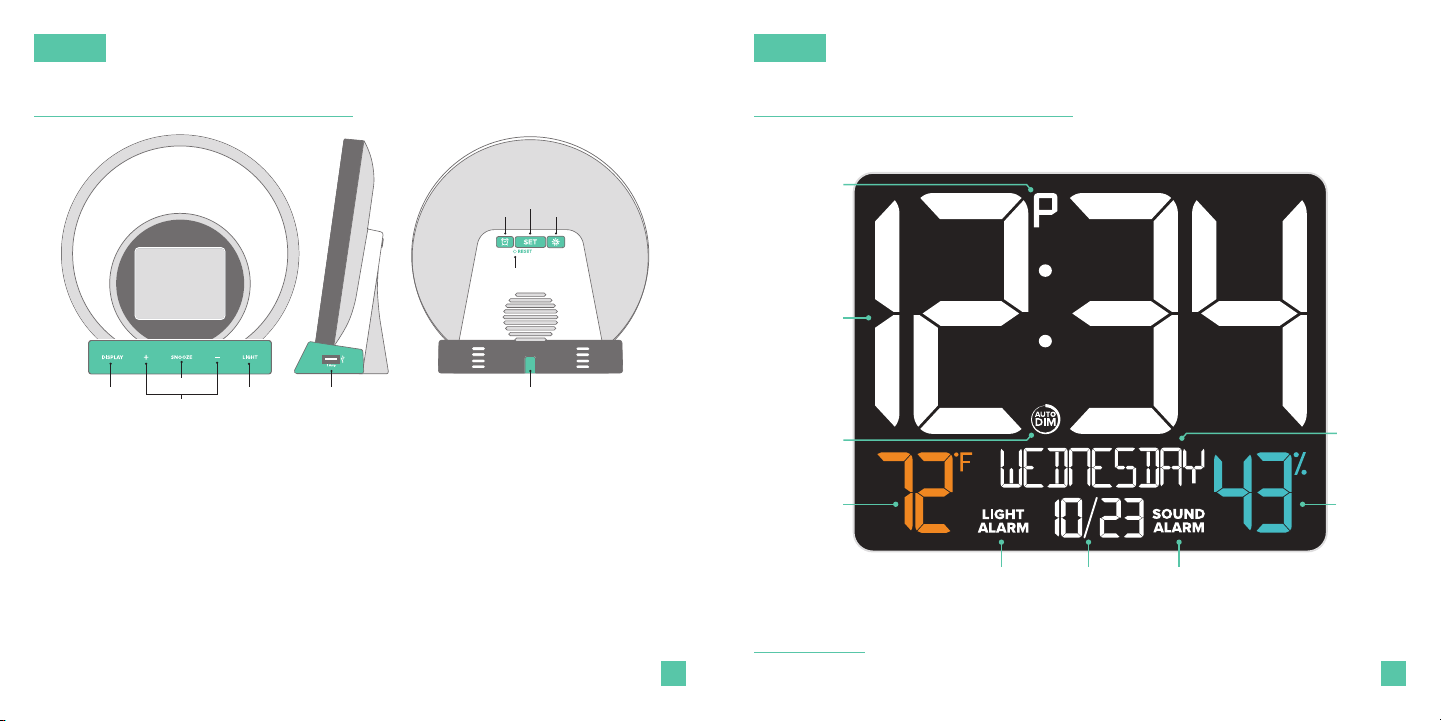
AM/PM
Weekday
Temperature
Humidity
2
BASICS BASICS
Buttons & Ports LCD Display
1. DISPLAY
Tap to adjust backlight
intensity or hold for
Auto-Dim settings
2. PLUS/MINUS (+/-)
Tap to control glow light
intensity or hold to
adjust quickly
3. SNOOZE
Tap to snooze the sound
alarm, exit menus, or to
turn the light o
6
9
1 4 5 10
3
4. LIGHT
Tap to toggle through
light modes & double-tap
to confirm selection
5. USB CHARGING PORT
Connect USB charging
cable (not included)
7. SET
Hold to enter Settings
Menu
8. LIGHT ALARM
Press to activate or hold
to enter alarm settings
9. FACTORY RESET
Press to restore factory
6. SOUND ALARM
Press to activate or hold
to enter alarm settings
settings
AC JACK
10.
Connect AC adapter
7
8
03 04
Indicator
1.3-Inch
Time Digits
Auto-Dim
Indicator
Indoor
(°F/°C)
Light Alarm
Indicator
Month &
Date
Sound Alarm
Indicator
Note: Weekday will set automatically after year, month, & date settings are adjusted.
Indoor
Page 4

BASICS BASICS
LCD Display Brightness USB Charging Port
Adjusting the LCD Display Brightness
Tap the DISPLAY button to adjust the backlight intensity.
There are 4 brightness levels, plus an o option.
Auto-Dim Settings
Program your LCD display to automatically dim during preselected times.
1.
Hold the DISPLAY button
to enter the Auto-Dim
Settings Menu.
2.
Tap the +/- buttons to turn
the Auto-Dim feature on or
o . Tap DISPLAY to confi rm.
3.
Tap the +/- buttons to adjust
the start time. Tap DISPLAY
to confi rm.
4.
Tap the +/- buttons to adjust
the stop time. Tap DISPLAY
to confi rm and exit.
The icon will appear on the LCD when activated.
There is a 1 Amp USB Charging Port located on
the right side of your alarm clock.
Connect your external device’s USB charging
cable (not included) into the USB Charging Port.
Charging times will vary.
USB Power Output: 1 Amp maximum current
Temperature & Humidity
View real-time indoor temperature & humidity data on your alarm clock.
CelsiusFahrenheit
05 06
You can select from Fahrenheit or Celsius in the main Settings Menu.
Page 5

ALARMS ALARMS
6:30 7:307:00
Natural Light Alarm Setting the Light Alarm
The Soluna Light Alarm Clock is
equipped with a glowing Light Alarm
that simulates the sunrise. Use the
Light Alarm to wake up peacefully
and help reset your circadian rhythm.
Gradual Wake Up
The Light Alarm will begin 30 minutes before your set alarm time. The light will
gradually increase in intensity until reaching full brightness at your set alarm time.
The light will remain on and at full power until a button is pressed.
Setting the Light Alarm
1. Hold the button on the back of the clock
2. Use the +/- buttons to set your desired time.
3. Your Light Alarm is now activated, indicated
to enter the Light Alarm Settings Menu.
Press to confi rm.
by the words LIGHT ALARM on the LCD.
Example:
Based on 7:00am alarm time
Note: If you set an alarm for less than 30 minutes from the current time, the Light
Alarm will accelerate the brightness accordingly.
Activating & Deactivating the Light Alarm
1.2.Press the button to view your Light Alarm
time and activate/deactivate the alarm.
The words LIGHT ALARM appear on the
LCD when the alarm is active.
Note: There is no sound with the Light Alarm. If a sound alarm is wanted, you will
07 08
need to activate the Melody Sound Alarm. You can use the light and sound alarms
together or at separate times.
Page 6

7:15 7:16 7:17 7:207:18 7:19
ALARMS ALARMS
Melody Sound Alarm
Setting the Melody Sound Alarm
1. Hold the button on the back of the clock
to enter the Sound Alarm Settings Menu.
2. Use the +/- buttons to set your desired time.
Press to confi rm.
3. Next, use the +/- buttons to set your desired
snooze duration (5 to 120 minutes).
Press to confi rm and to exit the Sound
Alarm Settings Menu.
4. Your sound alarm is now activated, indicated
by the words SOUND ALARM on the LCD.
Activating & Deactivating the Sound Alarm
1.2.Press the button to view your sound alarm
time and activate/deactivate the alarm.
The words SOUND ALARM will appear on the
LCD when the alarm is active.
Melody Sound Alarm
Gradual Wake Up
The gentle Melody Sound Alarm will increase in volume over a 5-minute period.
After the 5-minute time frame, the alarm will stop if not snoozed or turned o .
To turn o a sounding alarm, press any button besides SNOOZE.
Example:
Based on 7:15am alarm time
Snooze Duration Countdown
After the snooze button is pressed, the snooze
duration countdown will appear on the LCD.
Note: You can use the light and sound alarms together or at separate times.
09
10
Page 7

LIGHT MODES
LIGHT MODES
Evening Mode
The Soluna Light Alarm Clock features 5 light modes with 20 unique color
options, ensuring there’s a glow for every day and mood.
Selecting Your Light Mode
1.
Tap the LIGHT button to toggle through the
di erent light modes.
2.
Use the +/- buttons to adjust any additional glow
color options within the Guided Breathing and
Color Select modes.
There are 3 ways to confi rm your selection and
3.
start the light mode. Either tap SNOOZE,
double-tap the LIGHT button, or simply wait 5
seconds. The selected light mode will then begin.
Light Mode Options:
• Evening
• Guided Breathing
• Comfort Meter
Use the +/- buttons
to adjust the light’s
brightness level.
To shut o the current
light mode, tap the
SNOOZE button.
• Color Select
• Color Cycle
The Evening Mode is a 30-minute cycle designed to simulate the setting of the
sun. Simply start the mode before bed and the light will gradually dim and shift
in color while you fall asleep.
How to Activate Evening Mode
1.2.Tap the LIGHT button to toggle through the
light modes. EVENING will appear on the LCD.
There are 3 ways to confi rm your selection
and start the light mode. Either tap SNOOZE,
double-tap the LIGHT button, or simply wait 5
seconds. The Evening Mode will now begin.
9:40PM 9:50PM 10:00PM
11
The evening mode will last a total of 30 minutes. Press the SNOOZE button
at any time to end the light mode.
12
Page 8

LIGHT MODES
LIGHT MODES
Guided Breathing Mode
The Guided Breathing Mode will walk you through a 10-minute deep breathing
exercise. Simply inhale and exhale as the colors change. To further assist you,
the LCD will also display your inhale and exhale times.
How to Activate Guided Breathing Mode
Tap the LIGHT button to toggle through the light modes. BREATHING will
1.
appear on the LCD.
Use the +/- buttons to choose the glow color. Select from three options:
2.
Energy, Warmth, or Calm.
There are 3 ways to confirm your selection and start the light mode. Either tap
3.
SNOOZE, double-tap the LIGHT button, or simply wait 5 seconds. The Guided
Breathing Mode will now begin.
Energy Warmth Calm
Use the +/- buttons to adjust the light’s brightness level.
The breathing exercise will last a total of 10 minutes. Press the SNOOZE
button at any time to end the exercise.
Comfort Meter Mode
In the Comfort Meter Mode, the color changes according to the current indoor
humidity level, so you can monitor the comfort of your home at a quick glance.
How to Activate Comfort Meter Mode
1.2.Tap the LIGHT button to toggle through the light modes. COMFORT will
appear on the LCD.
There are 3 ways to confirm your selection and start the light mode. Either tap
SNOOZE, double-tap the LIGHT button, or simply wait 5 seconds. The Comfort
Meter Mode will now begin.
1% to 25% RH 26% to 39% RH 40% to 75% RH
Use the +/- buttons
to adjust the light’s
brightness level.
To shut o the
light mode, tap the
13
76% to 83% RH 84% to 99% RH
SNOOZE button.
14
Page 9

LIGHT MODES
LIGHT MODES
Color Select Mode
Use the Color Select Mode to choose your favorite glow color.
How to Activate the Color Select Mode
1.
Tap the LIGHT button to toggle through the light
modes. PICK COLOR will appear on the LCD.
2.
Use the +/- buttons to choose your glow color.
3.
There are 3 ways to confirm your selection
and start the light mode. Either tap SNOOZE,
double-tap the LIGHT button, or simply wait 5
Glow Color Options
Red
Forest
Cyan
Use the +/- buttons to adjust the light’s brightness level.
To shut o the light mode, tap the SNOOZE button.
seconds. The Color Select Mode will now begin.
OrangeFire
Sun
Dark Blue
Yellow Garden Green
Color Cycle Mode
When using the Color Cycle Mode, the
light will gradually shift through all of the
glow color options.
How to Activate Color Cycle Mode
1.2.Tap the LIGHT button to toggle through
the light modes. CYCLE will appear on
the LCD.
There are 3 ways to confirm your
selection and start the light mode.
Either tap SNOOZE, double-tap the
LIGHT button, or simply wait 5 seconds.
The Color Cycle Mode will now begin.
Color Cycle Examples
WhitePurpleOcean Night
15
Use the +/- buttons to adjust the light’s brightness level.
To shut o the light mode, tap the SNOOZE button.
Color Cycle Example
16
Page 10

APPENDIX
6.81-in. (17.30 cm)
6.71-in. (17.04 cm)
2.69-in. (6.84 cm)
APPENDIX
Specifications
Power Requirements: 5.0V Power Adapter
(Included) AC6: HX12H-0501500-AU-001
LCD Brightness: 4 Intensity Levels + OFF
(Programmable Auto-Dim Backlight Option)
Glow Light Brightness: 5 Intensity Levels + OFF
The Evening Mode is preprogrammed and the
brightness is not adjustable
Language Options:
English, Spanish, French, and German
(Translation Available for Menus & Calendar)
USB Charging Port: 1 Amp Maximum
Current (Charging Cord Not Included)
Programmable Snooze Duration:
5 to 120 Minutes
Indoor Temperature Range:
32°F to 99°F (0°C to 37°C)
Indoor Humidity Range: 1% to 99% RH
Settings Backup: The alarm clock
will keep its settings for 6 minutes
in the event it loses power.
Warranty
La Crosse Technology, Ltd. provides a 1-year limited time warranty (from date of purchase) on
this product, relating to manufacturing defects in materials and workmanship.
For full warranty details, you can visit: www.lacrossetechnology.com/support
th
La Crosse Technology, Ltd 2830 S. 26
Street La Crosse, WI 54601
Recycling & Disposal Caution!
Please consider the environment when
deciding to dispose of this product.
Although household electronics are
generally safe to use on a daily basis,
incorrect disposal can cause negative
and potentially irreversible impacts on
our environment.
Check with local donation centers to
see if your product can be donated for
future use. If disposal is the only option,
federal agencies, local governments, and
certified retailers may have electronic
recycling programs in place. Programs
may vary based on location.
Please Recycle
17
The manufacturer is not responsible for
any radio or TV interference caused by
unauthorized changes or modifications
to this equipment. Such changes or
modifications could void the user authority
to operate the equipment.
All rights reserved. This manual may not
be reproduced in any form, even in part, or
duplicated or processed using electronic,
mechanical or chemical process without the
written permission of the publisher.
This booklet may contain errors or misprints.
The information it contains is regularly
checked and corrections are included
in subsequent editions. We disclaim any
responsibility for any technical error or
printing error, or their consequences. All
trademarks and patents are recognized.
18
Page 11

APPENDIX
SUPPORT
FCC Statement
This equipment has been tested and found to comply with the limits for a Class B digital device, pursuant to part
15 of the FCC Rules. These limits are designed to provide reasonable protection against harmful interference in a
residential installation. This equipment generates, uses and can radiate radio frequency energy and, if not installed
and used in accordance with the instructions, may cause harmful interference to radio communications. However,
there is no guarantee that interference will not occur in a particular installation. If this equipment does cause
harmful interference to radio or television reception, which can be determined by turning the equipment o and
on, the user is encouraged to try to correct the interference by one or more of the following measures:
• Reorient or relocate the receiving antenna.
• Connect the equipment into an outlet on a circuit dierent from that to which the receiver is connected.
• Increase separation between equipment & receiver.
• Consult the dealer or an experienced radio/TV technician for help.
This device must not be co-located or operating in conjunction with any other antenna or transmitter.
Operation is subject to the following two conditions:
(1) This device may not cause harmful interference, and (2) This device must accept any interference received,
including interference that may cause undesired operation.
Canada Statement California Residents
This device complies with CNR Industry Canada
license-exempt devices.
Operation is subject to the following two conditions:
(1) This device may not cause interference; and
(2) This device must accept any interference,
including interference that may cause undesired
operation of the device.
WARNING:
This product can expose you to chemicals including
styrene, which is known in the State of California to
cause cancer.
For more information, go to: www.P65Warnings.ca.gov
Having Trouble? We’re here to help.
For detailed product videos, manuals, and more, visit our support website:
www.lacrossetechnology.com/support
Make sure you have your product’s model number handy (C80994)
Need Additional Support? Call our Friendly Customer Support Representatives
Phone Number: 1.877.408.2678
Representatives are available Monday-Friday, 8:00am to 6:00pm CST
Factory Reset Stay in Touch
Ask questions, watch set up videos, and
provide feedback on our social media outlets.
Follow La Crosse Technology on Youtube,
If you’re still experiencing issues, use a pen
or paper clip to press the factory RESET
button on the back of the clock.
Facebook, Twitter, and Instagram.
Designed in La Crosse, Wisconsin Made in China Printed in China DC 042619
19
20
Page 12

PURPLE
WHITE
WHAT’S YOUR GLOW?
COLOR CYCLE
EVENING
ENERGY
GARDEN
PURPLE
WHITE
WHAT’S YOUR GLOW?
COLOR CYCLE
EVENING
GARDEN
WARMTH
CALM
COMFORT
METER
YELLOW
GREEN
OCEAN
FIRE
NIGHT
MORNING
ENERGY
WARMTH
CALM
COMFORT
METER
MORNING
RED
ORANGE
SUN
YELLOW
GREEN
FIRE
RED
ORANGE
SUN
CYAN
FOREST
OCEAN
CYAN
FOREST
BLUE
DARK
NIGHT
BLUE
DARK
 Loading...