

La Crosse 513-1211, 513-1211A Instruction Manual
Model: 513-1211/513-1211A www.lacrossetechnology.com/support Page | 1
Model: 513-1211.513-1211A
Instruction Manual
DC: 081815
ATOMIC DIGITAL CLOCK
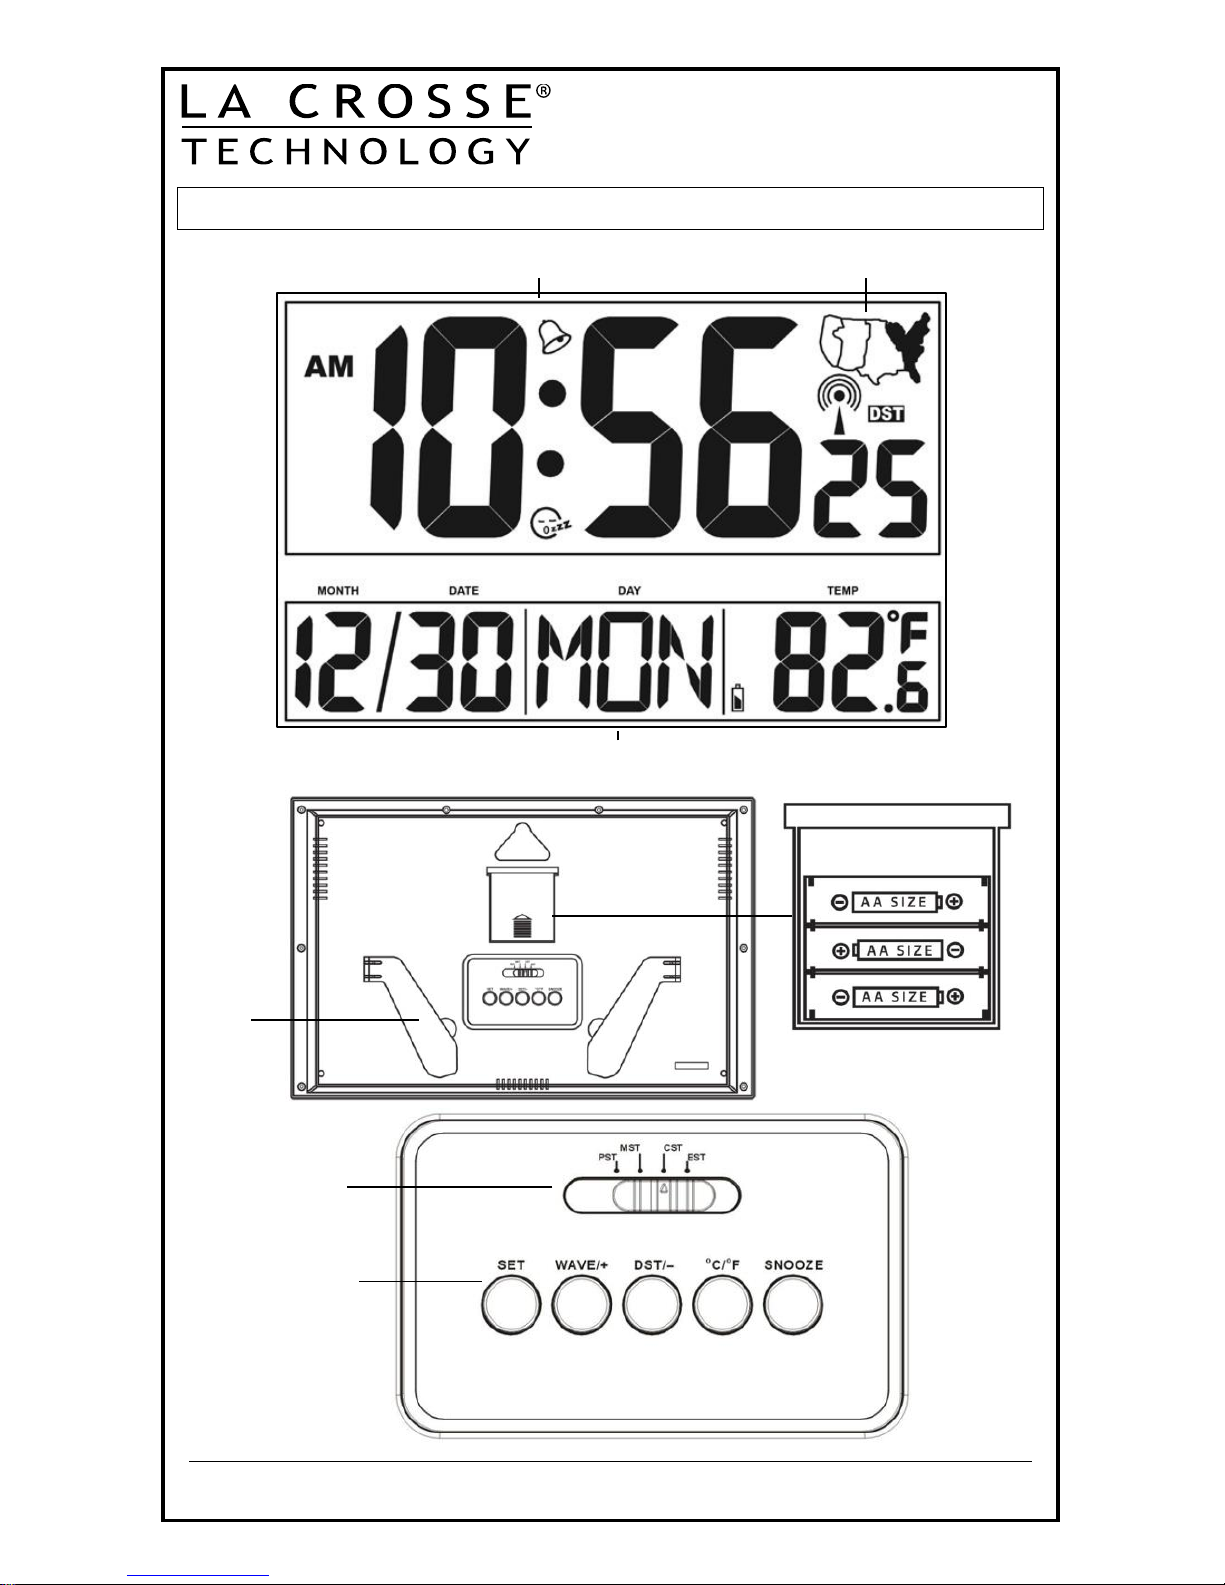
FRONT
VIEW
FOLDOUT
LEG
STAND
Battery
Compartment
3 “AA”
Time + Alarm
Calendar + Indoor Temperature
BACK
VIEW
TIME ZONE
SELECTOR
BUTTONS
Time Zone Indicator
Model: 513-1211/513-1211A www.lacrossetechnology.com/support Page | 2
TIME ZONES
PST Pacific
MST Mountain
CST Central
EST Eastern
GET STARTED
Step 1: Use the time zone selector (on back) to choose your time zone.
Step 2: Insert 3 new AA batteries (not included) into the clock. Observe the
correct polarity.
Restart: If there is no indoor temperature data after 60 seconds, remove
batteries from the clock and press a button 20 times. After 5 minutes,
return to Step 1 above.
SET TIME, DATE AND TEMPERATURE
1. Hold the SET button to enter time set mode.
2. Press the WAVE/+ or DST/- buttons to adjust values.
3. Press the SET button to confirm and move to the next item.
TIME SET ORDER:
1. 12/24 hour time format
2. Hour
3. Minutes
4. Year
5. Month
6. Date
Press the SET button to exit, or wait 20 seconds without pressing buttons to
return to the normal time display.
DAYLIGHT SAVING TIME SETTING
Hold the DST button for 3 seconds to select DST on or off.
The DST icon DST appears in above the seconds when DST is on.
TIME ZONE SELECTION
Slide the time zone selector bar on the back of the clock to
choose the time zone for your area.
FAHRENHEIT/CELSIUS
Hold the °C/°F button for 3 seconds to select Fahrenheit or Celsius temperature
readings.
SET TIME ALARM
Press the SET button once to enter Alarm Mode. The letters AL will show in the
seconds display.
1. Hold the SET button for 3 seconds to enter alarm time set mode.
2. Press the WAVE/+ or DST/- buttons to adjust values.
3. Press the SET button to confirm and move to the next item.
Alarm Time setting order: 1. Hours, 2. Minutes
 Loading...