

Page 1
Page 2

User Guide for the Kyocera S14 Phone
This manual is based on the production version of the Kyocera S14
phone. Soft w are changes may have occurred after this pr inting. Kyocera
reserves the right to make changes in technical and product
specificati ons without prior notice. The product s and equipment described
in this document ati on are manufa ctur ed under l icense f rom QUALCOMM
Incorporated under one or more of the following U.S. patents:
4,901,307 5,056,109 5,099,204 5,101,501 5,103,459 5,107,225
5,109,390 5,193,094 5,228,054 5,257,283 5,265,119 5,267,261
5,267,262 5,280,472 5,283,536 5,289,527 5,307,405 5,309,474
5,337,338 5,339,046 5,341,456 5,383,219 5,392,287 5,396,516
D356,560 5,408,697 5,414,728 5,414,796 5,416,797 5,426,392
5,437,055 D361,065 5,442,322 5,442,627 5,452,473 5,461,639
5,469,115 5,469,471 5,471,497 5,475,870 5,479,475 5,483,696
5,485,486 5,487,175 5,490,165 5,497,395 5,499,280 5,504,773
5,506,865 5,509,015 5,509,035 5,511,067 5,511,073 5,513,176
5,515,177 5,517,323 5,519,761 5,528,593 5,530,928 5,533,011
5,535,239 5,539,531 5,544,196 5,544,223 5,546,459 5,548,812
5,559,881 5,559,865 5,561,618 5,564,083 5,566,000 5,566,206
5,566,357 5,568,483 5,574,773 5,574,987 D375,740 5,576,662
5,577,022 5,577,265 D375,937 5,588,043 D376,804 5,589,756
5,590,069 5,590,406 5,590,408 5,592,548 5,594,718 5,596,570
ii
Page 3

5,600,754 5,602,834 5,602,833 5,603,096 5,604,459 5,604,730
5,608,722 5,614,806 5,617,060 5,621,752 5,621,784 5,621,853
5,625,876 5,627,857 5,629,955 5,629,975 5,638,412 5,640,414
5,642,398 5,644,591 5,644,596 5,646,991 5,652,814 5,654,979
5,655,220 5,657,420 5,659,569 5,663,807 5,666,122 5,673,259
5,675,581 5,675,644 5,680,395 5,687,229 D386,186 5,689,557
5,691,974 5,692,006 5,696,468 5,697,055 5,703,902 5,704,001
5,708,448 5,710,521 5,710,758 5,710,768 5,710,784 5,715,236
5,715,526 5,722,044 5,722,053 5,722,061 5,722,063 5,724,385
5,727,123 5,729,540 5,732,134 5,732,341 5,734,716 5,737,687
5,737,708 5,742,734 D393,856 5,748,104 5,751,725 5,751,761
5,751,901 5,754,533 5,754,542 5,754,733 5,757,767 5,757,858
5,758,266 5,761,204 5,764,687 5,774,496 5,777,990 5,778,024
5,778,338 5,781,543 5,781,856 5,781,867 5,784,406 5,784,532
5,790,589 5,790,632 5,793,338 D397,110 5,799,005 5,799,254
5,802,105 5,805,648 5,805,843 5,812,036 5,812,094 5,812,097
5,812,538 5,812,607 5,812,651 5,812,938 5,818,871 5,822,318
5,825,253 5,828,348 5,828,661 5,835,065 5,835,847 5,839,052
5,841,806 5,842,124 5,844,784 5,844,885 5,844,899 5,844,985
5,848,063 5,848,099 5,850,612 5,852,421 5,854,565 5,854,786
5,857,147 5,859,612 5,859,838 5,859,840 5,861,844 5,862,471
5,862,474 5,864,760 5,864,763 5,867,527 5,867,763 5,870,427
5,870,431 5,870,674 5,872,481 5,872,774 5,872,775 5,872,823
5,877,942 5,878,036 5,870,631 5,881,053 5,881,368 5,884,157
5,884,193 5,884,196 5,892,178 5,892,758 5,892,774 5,892,816
5,892,916 5,893,035 D407,701 5,898,920 5,903,554 5,903,862
User Guide for the Kyocera S14 Opal phone iii
Page 4

D409,561 5,907,167 5,909,434 5,910,752 5,911,128 5,912,882
D410,893 5,914,950 5,915,235 5,917,708 5,917,811 5,917,812
5,917,837 5,920,284 D411,823 5,923,650 5,923,705 5,926,143
5,926,470 5,926,500 5,926,786 5,930,230 5,930,692
Other patents pending.
T9 Text Input is covered by U.S. Pat. 5,818,437, U.S. Pat. 5,953, 541, U.S.
Pat. 6,011,554, Canadi an Pat. 1, 331,057 and pate nts pend ing wor ldwide.
Kyocera is a registered trademark of Kyocera Corporation. Space Dudes
and Brick Attack are trademarks of Kyocera Wireless Corp. Mystic I
Ching and Cavern Crawl are trademarks of DragonLord Enterprises, Inc.
Openwave is a registered trademark of Openwave Systems
Incorporated. T9 is a registered trade mark of Tegic Communications, Inc.
Other product and brand names may be trademarks or registered
trademarks of their re spective owners.
Copyright © 2004 Kyocera Wireless Corp. All rights reserved.
Ringer Tones Copyright © 2000–2002 Kyocera Wirele ss Corp.
82-K5463-1EN, Rev. 001
iv
Page 5

FCC/IC Notice
This device complies with part 15 of the FCC rules. Operation is subject
to the following two conditions:
(1) This device may not cause harmful interference, and
(2) this device must accept any interference received, including
interference that may cause undesired operation.
To comply with FCC radiation exposure requirements, use of this device
for body-worn operational configurations is limited to accessories tested
and approved by Kyocera Wireless Corp. Other accessories used with
this device for body-worn operations must not contain any metallic
components and must provide at least 13.5 mm separation distance
including the antenna and the user ’s body. Other accessories that have
not been tested for body-worn SAR may not comply with FCC radiation
exposure limits and should be avoided.
qefp=jlabi=melkb=jbbqp=qeb=dlsbokjbkqÛp=obnrfobjbkqp=clo=
bumlprob=ql=o^afl=t^sbpK
User Guide for the Kyocera S14 Opal phone v
Page 6

Your wireless phone is a radio t ransmitter and receiver. It is desi gned and
manufactured not to exceed the emission li mits for exposure to
radiofrequency (RF) energy set by the Federal Communications
Commission of the U.S. Government. These limits are part of
comprehensive guideli nes and establish permitted level s of RF energy for
the general population. The guidelines are based on standards that were
developed by independent scient ific organizations through periodic and
thorough evaluation of scientific studies. The standards include a
substantial safety margin designed to assure the safety of all persons,
regardless of age and health.
The exposure st andard for wireless mobile phones employs a unit of
measurement known as the Specific Absorption Rate, or SAR. The SAR
limit set by the FCC is 1.6W/kg.* Tests for SAR are conducted using
standard operating positions specified by the FCC with the phone
transmitting at its highest cert ified power level in all tested frequency
bands. Although the SAR is determined at the highest certified power
level, the actual SAR level of t he phone while operati ng can be well belo w
the maximum value.
vi
Page 7

This is b ecause the phone is desi gned to opera te at multiple power levels s o
as to use only the power required to reach the network. In general, the closer
you are to a wireless base stat ion antenna, the lower the power output.
Before a phone model is available for sale to the public, it must be test ed
and certified to the FCC that it does not exceed the limit established by
the government-adopted requirement for safe exposure. The test s are
performed in positions and locations (e.g., at the ear and worn on the
body) as required by the FCC for each model. The highest SAR value for
this model phone when tested for use at the ear is 1.31 W/kg. and when
worn on the body, as described in this user guide, is 0.648 W/kg. (Body-
worn measurements differ among phone models, depending upon
available accessori es and FCC requirements). While there may be
differences between the SAR levels of various phones and at various
positions, they all meet the government requirement for safe exposure.
User Guide for the Kyocera S14 Opal phone vii
Page 8

The body-worn measurements were performed on the following Kyocera
accessories:
Holster CV90-B1680
Leather Case CA90-B1691M
Leather Case CA90-B1691S
SAR testing was performed with production battery CV90-G8196, Model
# TXBAT10003.
The FCC has granted an Equipment Authorization for this model phone
with all reported SAR level s evaluated as in compliance wi th the FCC RF
emission guidelines. SAR information on this model phone is on file with
the FCC and can be found under the Display Grant section
ЬннйWLLпппKСЕЕKЦзоLзЙнLСЕЕбЗ
after searching on FCC ID OVFKWC-5135.
Additional information on Specific Absorption Rates (SAR) can be found
on the Cellular Telecommunicati ons and I nternet Associati on (CTIA) website at http://www.wow-com.com.
viii
Page 9

* In the United States and Canada, the SAR limit for mobile phones used
by the public is 1.6 watt s/kg (W/kg) averaged over one gram of ti ssue. The
standard incorporates a substantial margin of safety to give additional
protection for t he public and to ac count for any variations in measurement s.
Caution
The user is cautioned that changes or modifications not expressly
approved by the party r esponsible f or compli ance could voi d the warrant y
and user’s authority to operate the equipment.
Warning
Use only Kyocera approved accessories with Kyocera phones. Use of
any unauthorized accessories may be dangerous and will invalidate the
phone warranty if said accessories cause damage or a defect to the
phone.
Optimize your phone’s performance
Use the guidelines on see page 3 to learn how to optimize the
performance and life of your phone, ant enna, and battery.
User Guide for the Kyocera S14 Opal phone ix
Page 10

Air bags
If you have an air bag, DO NOT place installed or portable phone
equipment or other objects over the air bag or in the air bag deployment
area. If equipment is not properly installed, you and your passengers risk
serious in ju r y.
Potentially unsafe areas
Posted facilit ies–Turn your phone off i n any f acili ty when post ed notices
require you to do so.
Aircraft–FCC regulations prohi bit using your phone on a plane that is in
the air. Turn your phone off before boarding aircraft .
Vehicles–RF signals may affect improperl y installed or inadequately
shielded electronic systems in motor vehicles. Check with the
manufacturer of the device to determine if it is adequately shielded from
external RF energy. Your physician may be able to help you obtain this
information.
Blasting areas–Turn off your phone where blast ing is in progress.
Observe restrict ions, and follow any regulations or rules.
x
Page 11

Potentially explosive atmospher es–Turn off your phone when you are
in any area with a potentially explosive atmosphere. Obey all signs and
instructions. Sparks in such areas could cause an explosion or fir e,
resulting in bodily injury or death.
Areas with a potentially explosive atmosphere are often, but not always,
clearly marked. They include:
• fueling areas such as gas stati ons
• below deck on boats
• transfer or storage facilities for fuel or chemicals
• vehicles using liquefied petroleum gas, such as propane or butane
• areas where the air contains chemicals or particles such as grain,
dust, or metal powd e rs
• any other area where you would normally be advised to turn off your
vehicle engine
User Guide for the Kyocera S14 Opal phone xi
Page 12

Use with care
Use only in normal position ( to ear) . Don’t bend the ant enna or touch it
unnecessarily. Pull out the ant enna when on a call and push it i n when the
phone is not in use. A voi d dropping, hitting, bending, or sit ti ng on the phone.
Keep phone dry
If the phone gets wet, turn the power off immediately and contact your
dealer. Water damage may not be covered under warranty.
Resetting the phone
If the screen seems frozen and the keypad does no t respond to
keypresses, re set the phone by completing the following step s:
1. Push the battery release butt on toward the top of the phone.
2. Remove the battery.
3. Replace the battery.
If the problem persists, return the phone to the dealer for service.
xii
Page 13

Qualified service
If you are experiencing problems with your phone, see “Getting Help” on
page 99. If you have addit ional questions, contact your service provider
for technical support. If the problem persists, return the phone with all
accessories and pa ckaging to the dealer for qualified service.
Accessories
Use only Kyocera-approved accessories with Kyocera phones. Use of
any unauthorized accessories (includes faceplates/front housings) may
be dangerous and will invalidate the phone warranty if said accessories
cause damage or a defect to the phone.
To shop online for a Hands-free Car Kit and other phone accessories,
visit www.kyocera-wireless.com/store.
To order by phone, call (800) 349-4188 (U.S.A. onl y) or (858) 882-1410.
User Guide for the Kyocera S14 Opal phone xiii
Page 14

Radio Frequency (RF) energy
Your telephone is a radio transmit ter and receiver. When it is on, it rec eives
and sends out RF energy. Your servic e provider’s network controls the
power of the RF signal. This power level can range from 0.006 to 0.6 watt s.
In August 1996, the U.S. Federal Communications Commission (FCC)
adopted RF exposure guidelines with safety levels f or hand-hel d wireless
phones. These guidelines are consistent with the safety st andards previously
set by both U.S. and internati onal st andards bodies i n the foll owing r eports:
• ANSI C95.1 (American National Standards Institute, 1992)
• NCRP Report 86 (National Council on Radiation Protection and
Measurements, 1986)
• ICNIRP (International Commission on Non-Ionizing Radiation Protection, 1996)
Your phone complies with the standards set by these repor ts and the
FCC guidelines.
xiv
Page 15

E911 Mandates
Where service is available, this handset complies with the Phase I E911
Mandate issued by the FCC.
093 453 037
Kyocera Wireless CorpK
NMPMM=`~ãéìë=mçáåí=aêáîÉI=p~å=aáÉÖçI=`^=VONON=rKpK^K
sáëáí=ìë=~í=www.kyocera-wireless.com
qз=ймкЕЬ~лЙ=~ЕЕЙллзкбЙлI=облбн=
www.kyocera-wireless.com/store
User Guide for the Kyocera S14 Opal phone xv
Page 16

CONTENTS
1 Getting Started. . . . . . . . . . . . . . . . . . . . . . . . . . . . . . . . . . . . . . . . . . . 1
Installing the battery . . . . . . . . . . . . . . . . . . . . . . . . . . . . . . . . . . . . . . . 1
Getting to know your phone . . . . . . . . . . . . . . . . . . . . . . . . . . . . . . . . . 5
Understanding screen icons . . . . . . . . . . . . . . . . . . . . . . . . . . . . . . . . . 7
Performing basic functions . . . . . . . . . . . . . . . . . . . . . . . . . . . . . . . . . . 9
2 Making and Answering Calls . . . . . . . . . . . . . . . . . . . . . . . . . . . . . . 12
Making a call . . . . . . . . . . . . . . . . . . . . . . . . . . . . . . . . . . . . . . . . . . . . 12
Answering a call . . . . . . . . . . . . . . . . . . . . . . . . . . . . . . . . . . . . . . . . . 13
Dealing with missed calls . . . . . . . . . . . . . . . . . . . . . . . . . . . . . . . . . . 15
Viewing recent call details . . . . . . . . . . . . . . . . . . . . . . . . . . . . . . . . . . 16
Setting up speed dialing . . . . . . . . . . . . . . . . . . . . . . . . . . . . . . . . . . . 18
Finding a phone number . . . . . . . . . . . . . . . . . . . . . . . . . . . . . . . . . . . 20
Setting up voicemail . . . . . . . . . . . . . . . . . . . . . . . . . . . . . . . . . . . . . . 21
Silencing an incoming call . . . . . . . . . . . . . . . . . . . . . . . . . . . . . . . . . . 24
Adjusting the volume during a call . . . . . . . . . . . . . . . . . . . . . . . . . . . 24
Receiving data or faxes . . . . . . . . . . . . . . . . . . . . . . . . . . . . . . . . . . . 26
Calling 911 . . . . . . . . . . . . . . . . . . . . . . . . . . . . . . . . . . . . . . . . . . . . . 30
3 Entering Letters, Numbers, and Symbols . . . . . . . . . . . . . . . . . . . . 31
Understanding text entry screens . . . . . . . . . . . . . . . . . . . . . . . . . . . . 31
xvi Contents
Page 17

Text entry modes . . . . . . . . . . . . . . . . . . . . . . . . . . . . . . . . . . . . . . . . . 32
Capitalization settings . . . . . . . . . . . . . . . . . . . . . . . . . . . . . . . . . . . . . 36
Quick reference to text entry . . . . . . . . . . . . . . . . . . . . . . . . . . . . . . . . 37
4 Storing Contacts . . . . . . . . . . . . . . . . . . . . . . . . . . . . . . . . . . . . . . . . 39
Saving a new contact . . . . . . . . . . . . . . . . . . . . . . . . . . . . . . . . . . . . . 39
Editing or erasing a contact . . . . . . . . . . . . . . . . . . . . . . . . . . . . . . . . . 42
Editing a number . . . . . . . . . . . . . . . . . . . . . . . . . . . . . . . . . . . . . . . . . 42
Finding contact information . . . . . . . . . . . . . . . . . . . . . . . . . . . . . . . . . 43
5 Sending and Receiving Text Messages . . . . . . . . . . . . . . . . . . . . . . 46
Retrieving text messages . . . . . . . . . . . . . . . . . . . . . . . . . . . . . . . . . . 53
Erasing text messages . . . . . . . . . . . . . . . . . . . . . . . . . . . . . . . . . . . . 55
6 Customizing Your Phone. . . . . . . . . . . . . . . . . . . . . . . . . . . . . . . . . . 57
Setting vibrate mode . . . . . . . . . . . . . . . . . . . . . . . . . . . . . . . . . . . . . . 58
Silencing all sounds . . . . . . . . . . . . . . . . . . . . . . . . . . . . . . . . . . . . . . . 58
Choosing a different ringer . . . . . . . . . . . . . . . . . . . . . . . . . . . . . . . . . 59
Adjusting volume . . . . . . . . . . . . . . . . . . . . . . . . . . . . . . . . . . . . . . . . . 61
Using shortcuts . . . . . . . . . . . . . . . . . . . . . . . . . . . . . . . . . . . . . . . . . . 62
Personalizing the screen . . . . . . . . . . . . . . . . . . . . . . . . . . . . . . . . . . . 64
Choosing a different language . . . . . . . . . . . . . . . . . . . . . . . . . . . . . . 68
Creating a secure environment . . . . . . . . . . . . . . . . . . . . . . . . . . . . . . 68
Setting message alerts . . . . . . . . . . . . . . . . . . . . . . . . . . . . . . . . . . . . 71
User Guide for the Kyocera S14 Opal Phone xvii
Page 18

Connecting to a laptop or a PC . . . . . . . . . . . . . . . . . . . . . . . . . . . . . . 73
7 Using Voice Recognition. . . . . . . . . . . . . . . . . . . . . . . . . . . . . . . . . . 75
Recording voice tags . . . . . . . . . . . . . . . . . . . . . . . . . . . . . . . . . . . . . 76
Calling using voice tags . . . . . . . . . . . . . . . . . . . . . . . . . . . . . . . . . . . 79
Using voice shortcuts . . . . . . . . . . . . . . . . . . . . . . . . . . . . . . . . . . . . . 81
Recording a voice memo . . . . . . . . . . . . . . . . . . . . . . . . . . . . . . . . . . 83
8 Connecting to the Internet . . . . . . . . . . . . . . . . . . . . . . . . . . . . . . . . 86
9 Using Tools and Playing Games . . . . . . . . . . . . . . . . . . . . . . . . . . . 91
10 Getting Help . . . . . . . . . . . . . . . . . . . . . . . . . . . . . . . . . . . . . . . . . . . . 99
Index . . . . . . . . . . . . . . . . . . . . . . . . . . . . . . . . . . . . . . . . . . . 1
xviii Contents
Page 19
1GETTING STARTED
This doc um e nt describes th e K yo ce r a 22 35 trim o de ph on e, with CD M A
digital service at 800 MHz and 1900 MHz, and analog service at 800 MHz.
Your phone c o me s with a rem ov a ble li thi um io n (LiIon) ba tte ry.
Installing the battery
1. Hold the phone face down.
2. Place the battery in the phone casing, with the metal contacts facing
down and toward the bottom of the phone.
3. Push the battery until it clicks into place.
4. Fully charge the battery before using the pho ne.
User Guide for the Kyocera S14 Opal phone 1
Page 20
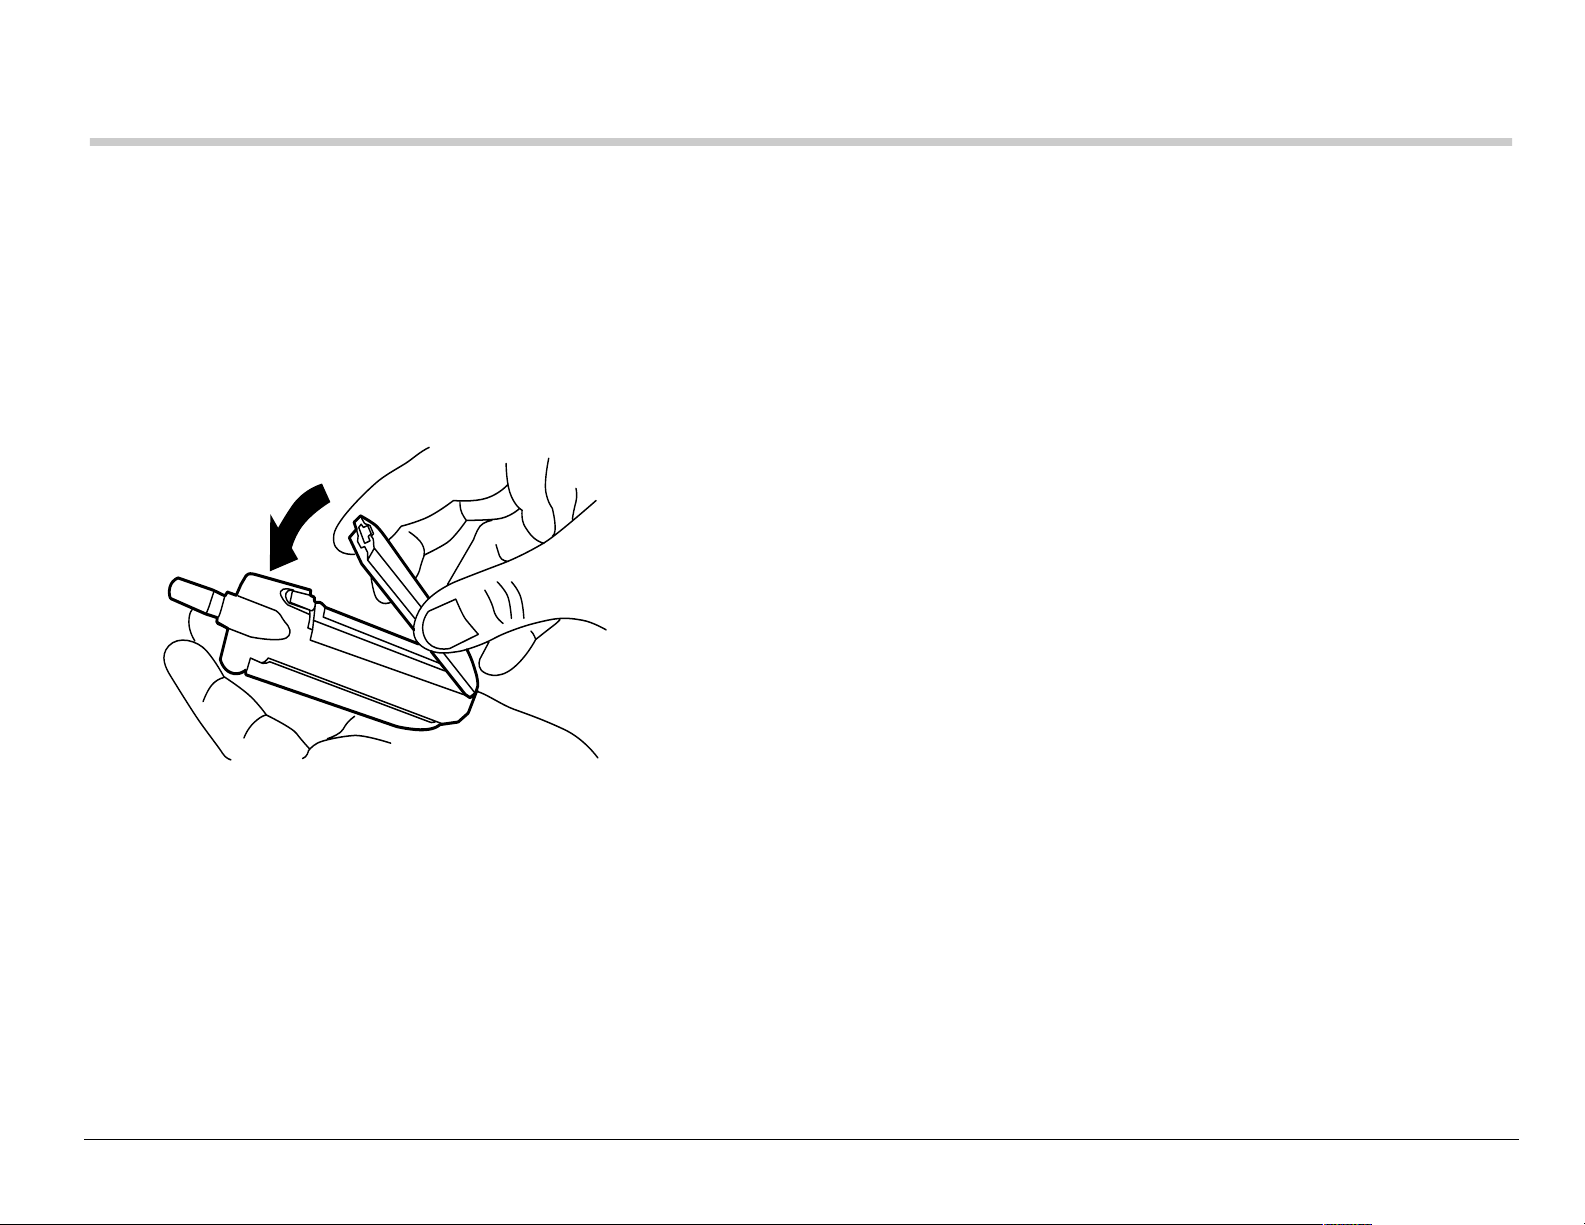
Charging the battery
The batt ery is parti ally char ged when you receiv e your pho ne. You must ha ve
at least a partial charge in the battery to make or receive call s, regardless of
whether or not the cha rger or adapter is connect ed to the phone.
To charge the battery, connect the charger or adapter to t he jack
on the bott om of the phone , then connect th e plug to a wal l outlet.
The battery ic on in th e up per-right co rne r of the s cre en te lls
you whethe r the phon e is:
• Chargi ng (the icon is animated)
• Partia lly charged
• Fully charged
Recharging the battery
You can safely recharge the batt ery at any ti me, even if it has a p art ial charge.
2 Getting Started
Page 21

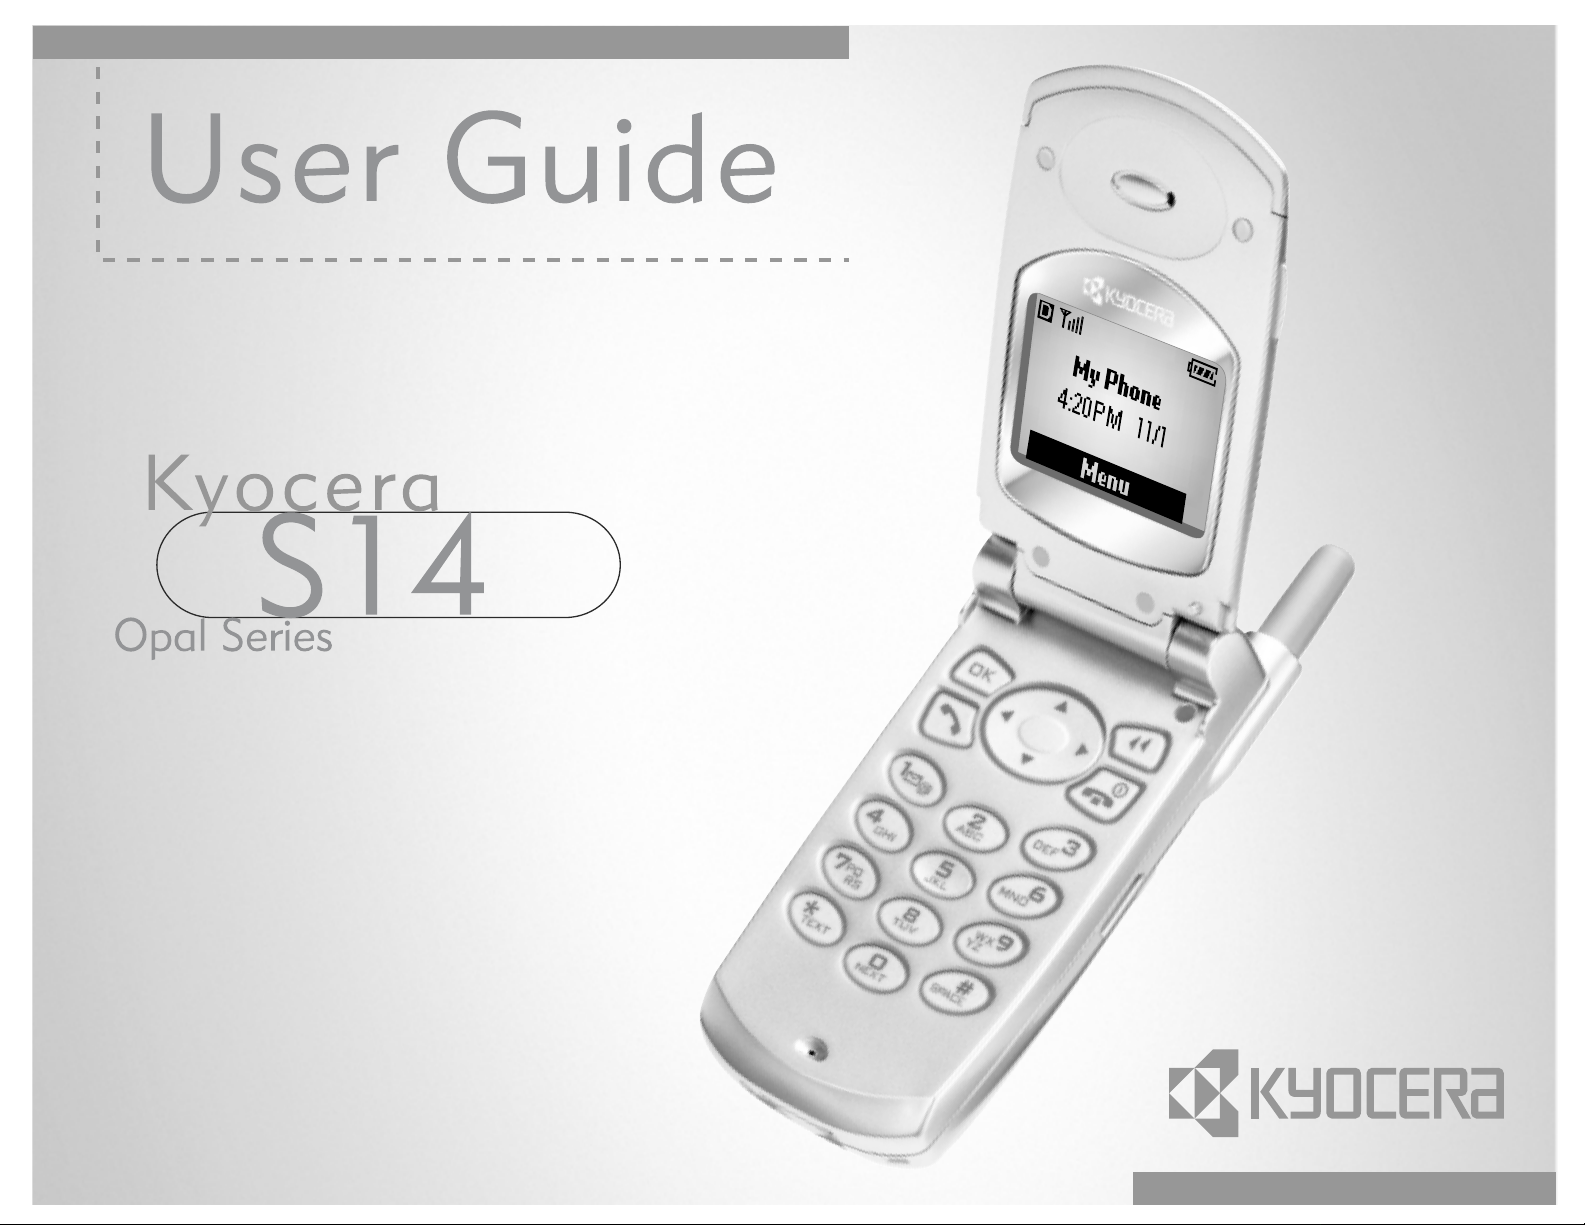
Removing the battery
1. Turn off the phone by opening the flip and holding
down until “Powering off” appears.
2. Close th e flip and hold the phone face down.
3. Push the batter y release button toward the top of the
phone (a).
4. Grasp the sides of the batt ery and pull it away from
a
the phone (b).
b
Caring for the battery
This sect ion describ es important safety information and
tips for improving battery performance.
General safety guidelines
• Do no t take apart, puncture , or sh o rt-c i rcu it the bat te r y.
• If you have not use d the battery for mor e than a month, rech arge it before
using your phone.
• Avoid exposing the battery to extreme temperatures , direct sunlight, or
high humidity.
• Never dispose of any battery in or near a fire. It could explod e.
User Guide for the Kyocera S14 Opal phone 3
Page 22

Common causes of battery drain
The foll owin g functions dra in th e b attery more q uic k ly an d ad ve rsely affect
talk and standby times:
• You are often playing games or using the Web.
• Backlighting is frequently on. (To adjust backlighting, see page 66.)
• The phon e is frequently used in analog mode. If you do not see a on
the home screen, the phone is in analog mode. To set you r phone to
operate in different modes, select jÉåì=→=pЙннбеЦл=→=kЙнпзкв=→=aáÖáí~ä=çê=
^å~äçÖ=and choose from the options available.
• You are far away from a base station or cell site when in digital mode.
• Data cables or accessories, such as the Hands-f ree headset, are
connect ed to the phone.
• No service is availabl e, or servic e is avai labl e int ermit te ntl y. The phone
requires more po wer to acquir e service than to mai ntain consi stent servi ce.
• The ea rpiece and ringer volume sett ings are high. To adj ust volume, see
page 61.
• Review how ofte n voicemail notifications, pages, and text messages are
recei ved, and how quickly they are acknowledged. To use power most
efficiently, acknowledge notificat ions and message s immediately.
4 Getting Started
Page 23
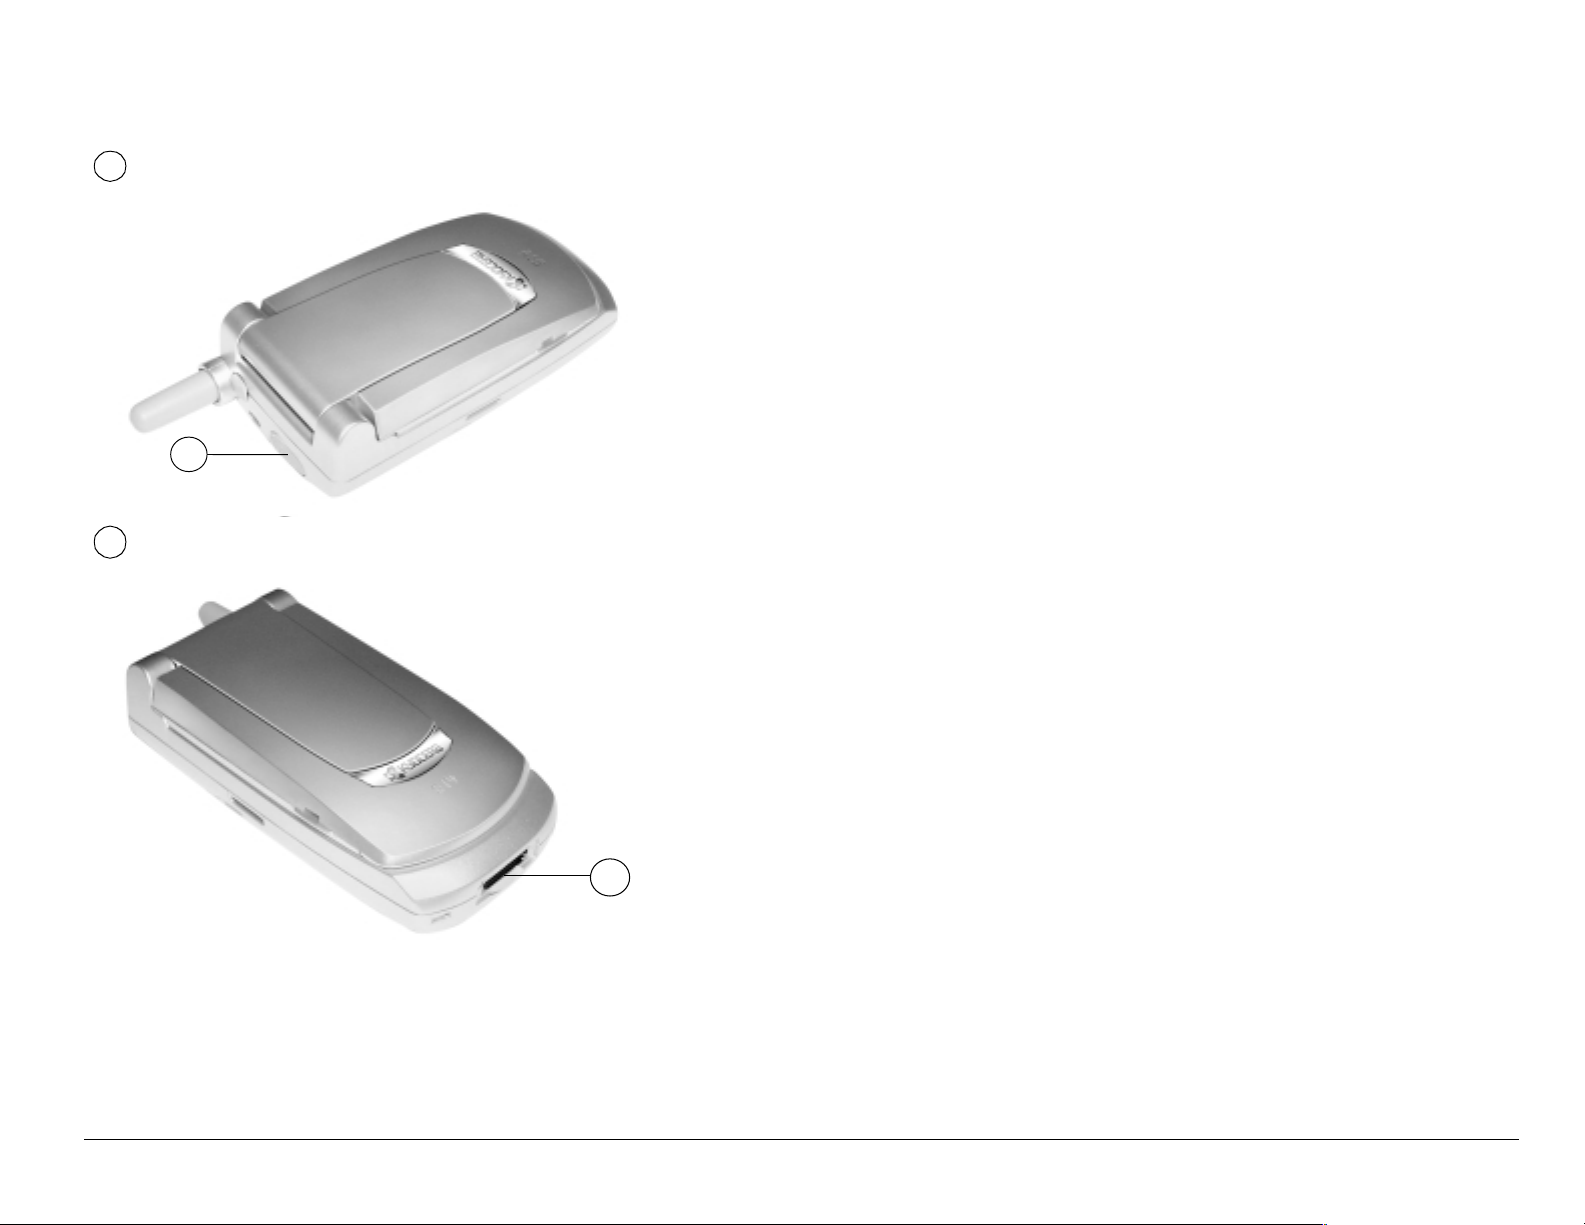
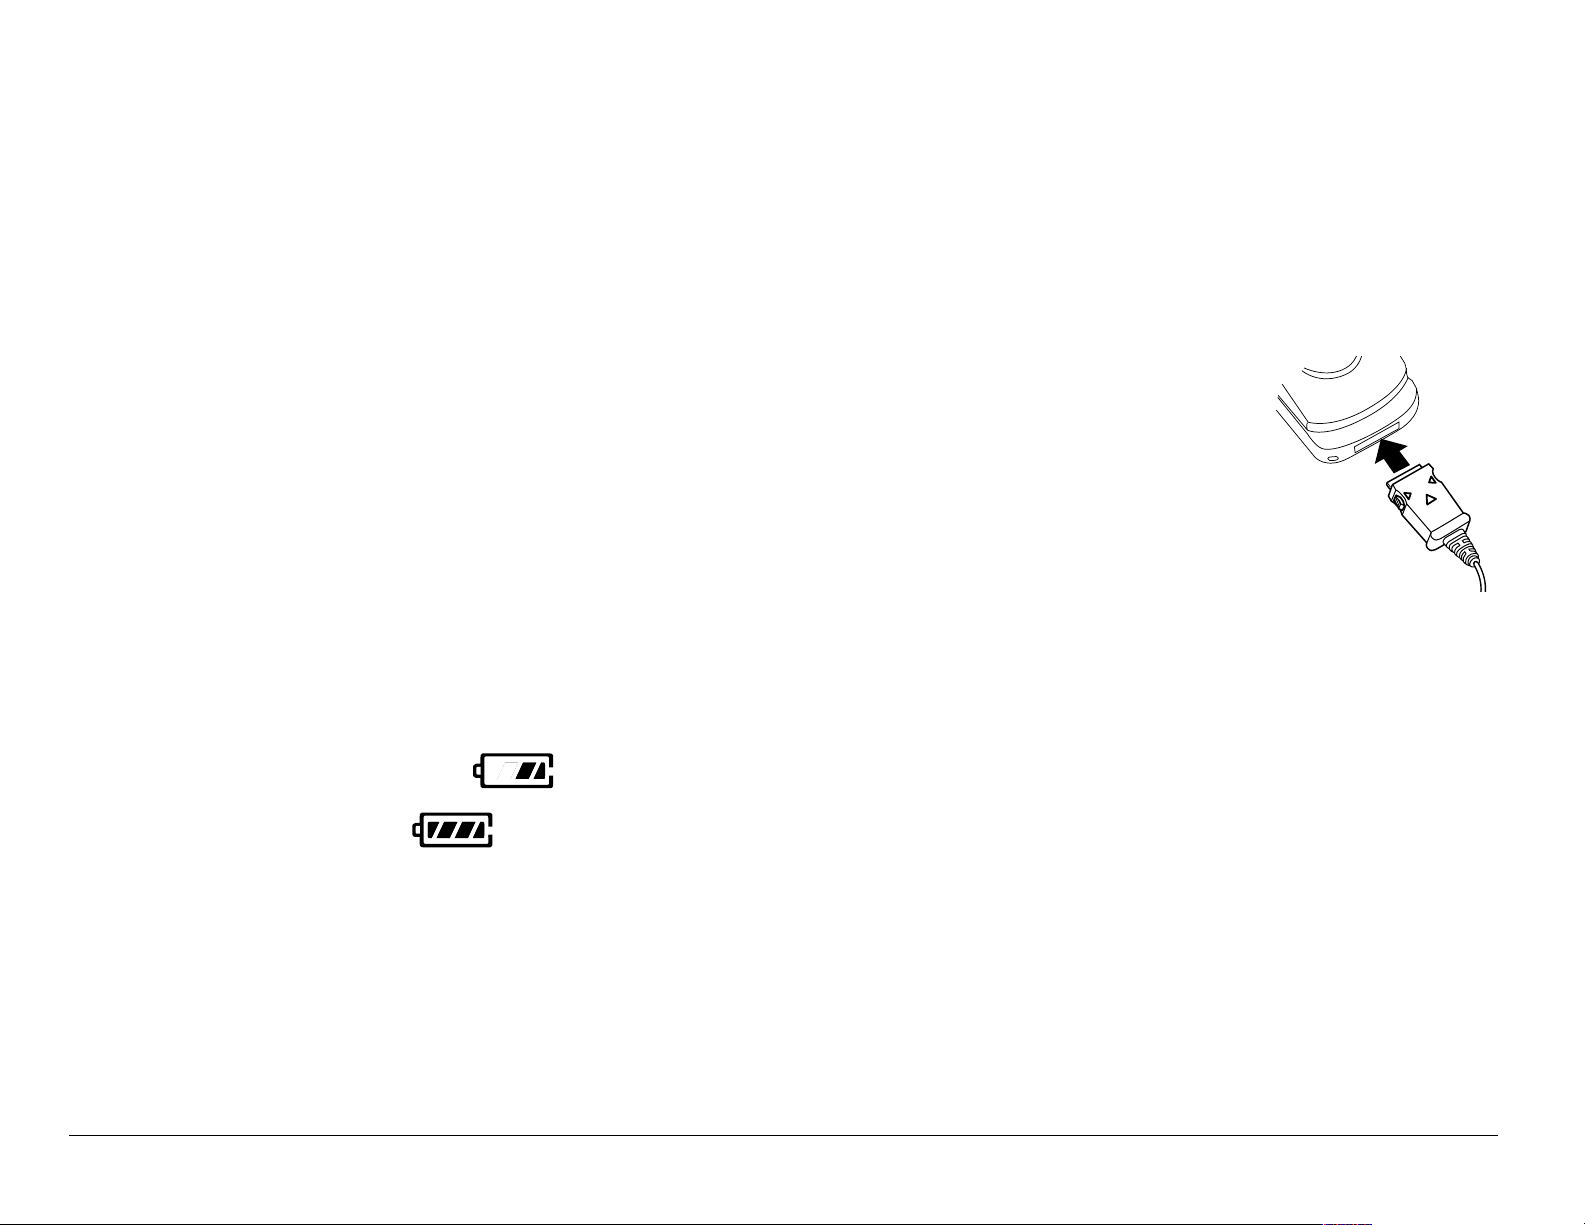
Getting to know your phone
1
2
Jack for e~åÇëJÑêÉÉ=eÉ~ÇëÉí (sold separately) on ly.
1
Jack for ^`=^Ç~éíÉê=(include d) a nd Ç~í~=Å~ÄäÉ=(so ld s eparat ely) .
2
User Guide for the Kyocera S14 Opal phone 5
Page 24
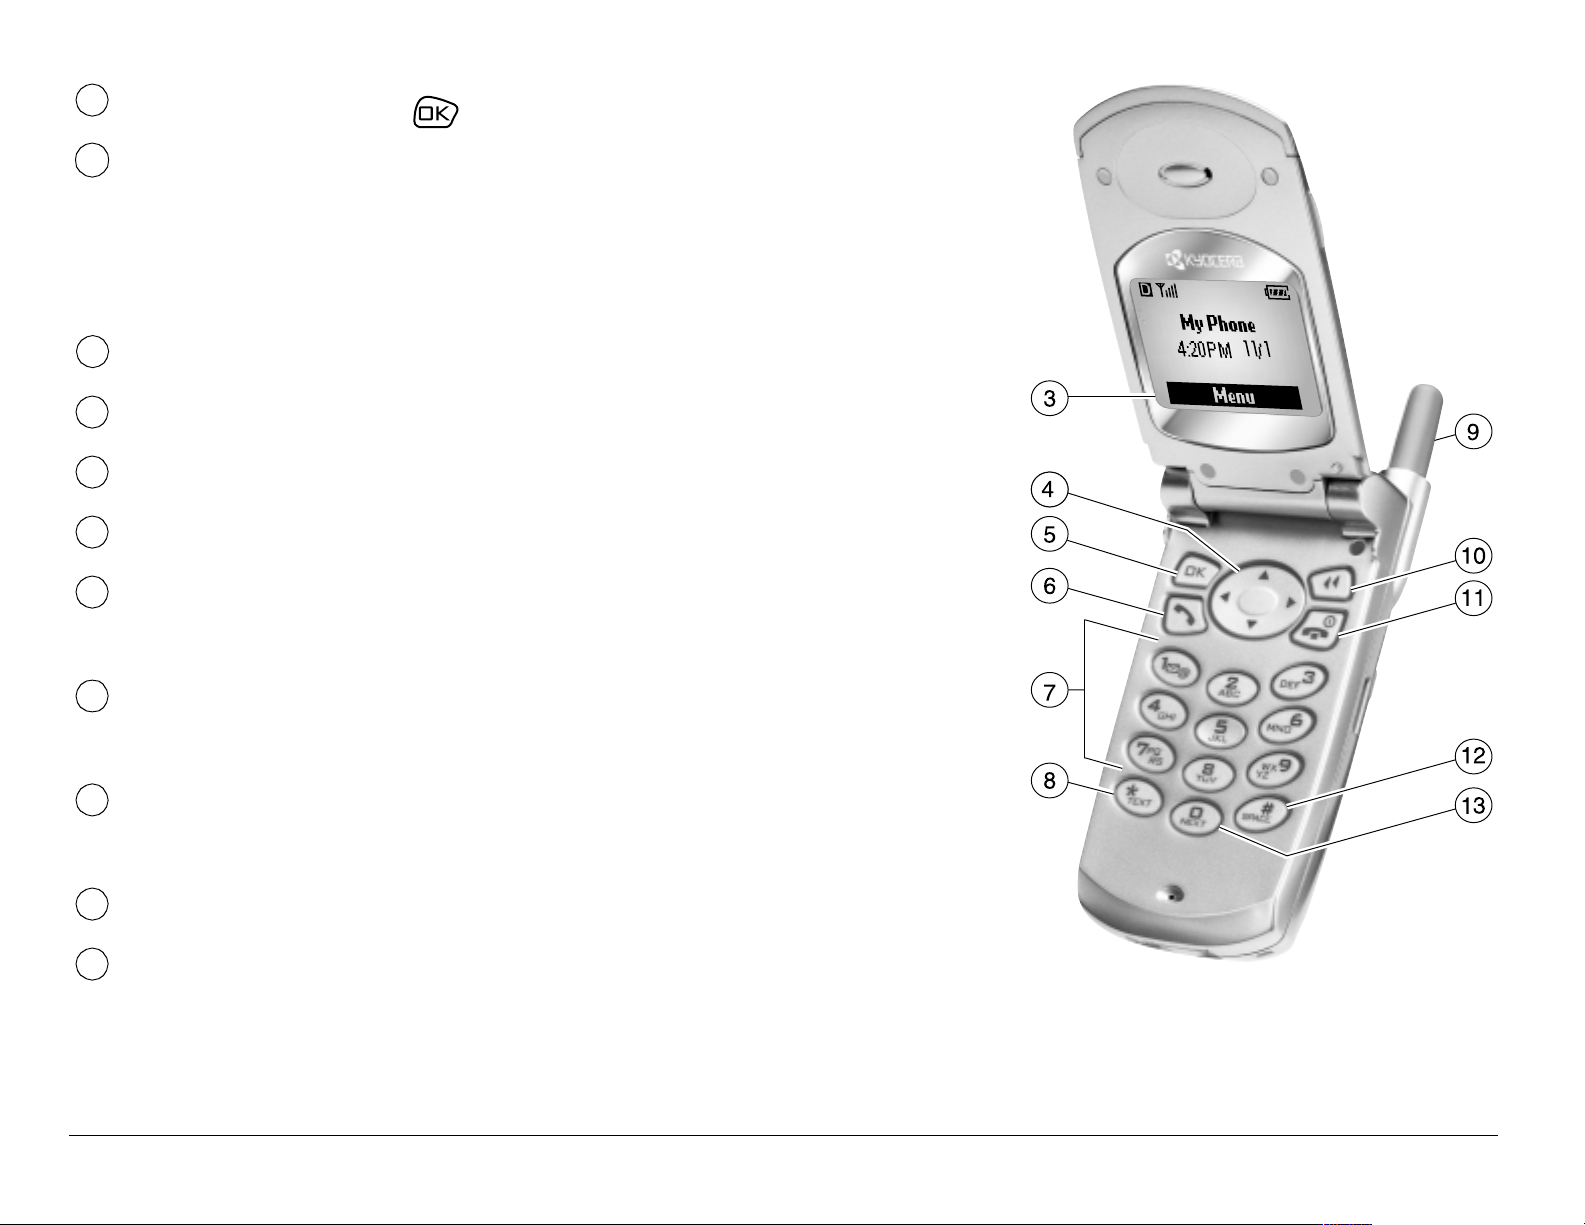
eзгЙ=лЕкЙЙеK=Press (item 5) to select jÉåìK
3
k~îáÖ~íáçå=âÉó (all directions) scrolls through lists and
4
positions cursor . Also accesses shortcuts from the home
screen: (up) lists recent calls; (right) turns off ringers; (down)
lists contacts; (left) defines and accesses a personal shortcut.
lh=âÉó select s a menu it em or opti on.
5
pÉåÇLq~äâ=âÉó starts or answers a call.
6
Use the âÉóé~Ç to enter numbe rs, lett ers, or symbols .
7
G=qÉñí=âÉó changes the text mode in text entry.
8
Fully extend the ~енЙее~ to make or answer a call. Push in
9
the ~енЙее~ complete ly when th e phone is not in us e.
`äÉ~ê=âÉó erases the la st char acter in tex t entry, or returns to
10
the previous menu.
båÇLmçïÉê=âÉó turns on and turns off the phone, ends a call,
11
or returns to the home screen.
@=pé~ÅÉ=key enters a space during text entry.
12
®
M=kÉñí=âÉó cycles through word choices during T9
13
Text Input
rapid text entry.
6 Getting Started
Page 25
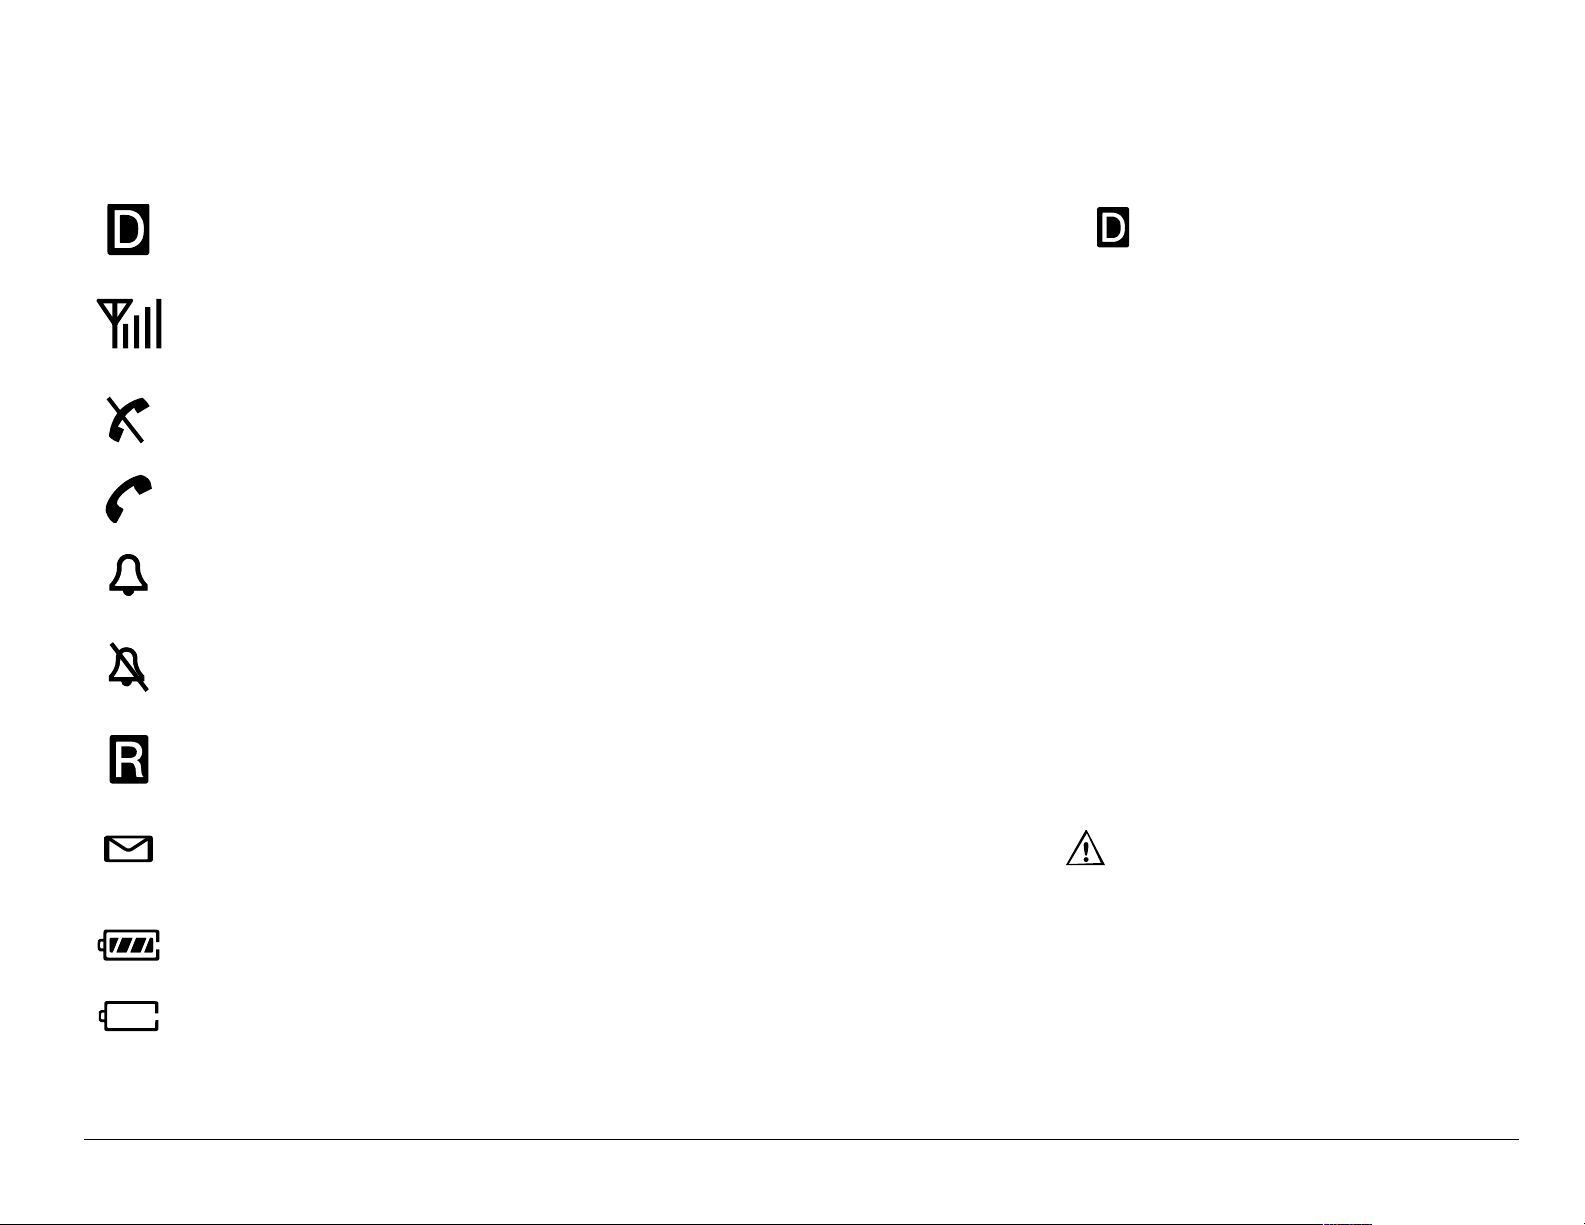
Understanding screen icons
These ic on s ma y ap pe ar on your phone s c r ee n:
The ph on e is op era tin g in CDMA digital mo de . If does not ap pear,
the ph on e is operating i n a nalog mo de .
The pho ne is rece iving a signal. You c an make an d receiv e calls . Fewer
bars indicate a weaker signal.
The ph on e is no t re ceiving a s ign al . You cannot ma k e o r re ce iv e c al ls .
A call is in pro gre s s.
The alarm clock is set.
The ph on e vi bra tes instead of ringing.
The phone is roaming outside of its home service area.
You have a text message, voicemail, or page. ( indicates an urgent
text mes s ag e, vo ic em ail, or page.)
The bat tery is f ully ch arged. T he more bl ack bars , the g reater the char ge.
The batt ery cha rg e i s e xtre mel y l ow. Whe n t his ic on bli nk s, powe r wi ll be
lost soon.
User Guide for the Kyocera S14 Opal phone 7
Page 26

Enhanced CDMA voice privacy is on, if available from your service
provider, or you are in a secure web browser session.
Press up.
Press down.
Press t o g o ba ck o r cl ea r an item.
®
Enter text using Tegic
TM
T9® Text Input rapid text entry
Enter text u si ng no rm al alpha te xt en try.
Enter symbols.
Enter numbers .
Capitalize the n ex t le tte r wh en en te ring text.
Capitalize ev ery letter wh en en te ring te xt .
Capitalize the fi rst letter of eac h word wh en en te ring te xt , o r the fi rst
letter of ea ch s en ten c e i n a te xt me s sa ge .
8 Getting Started
Page 27
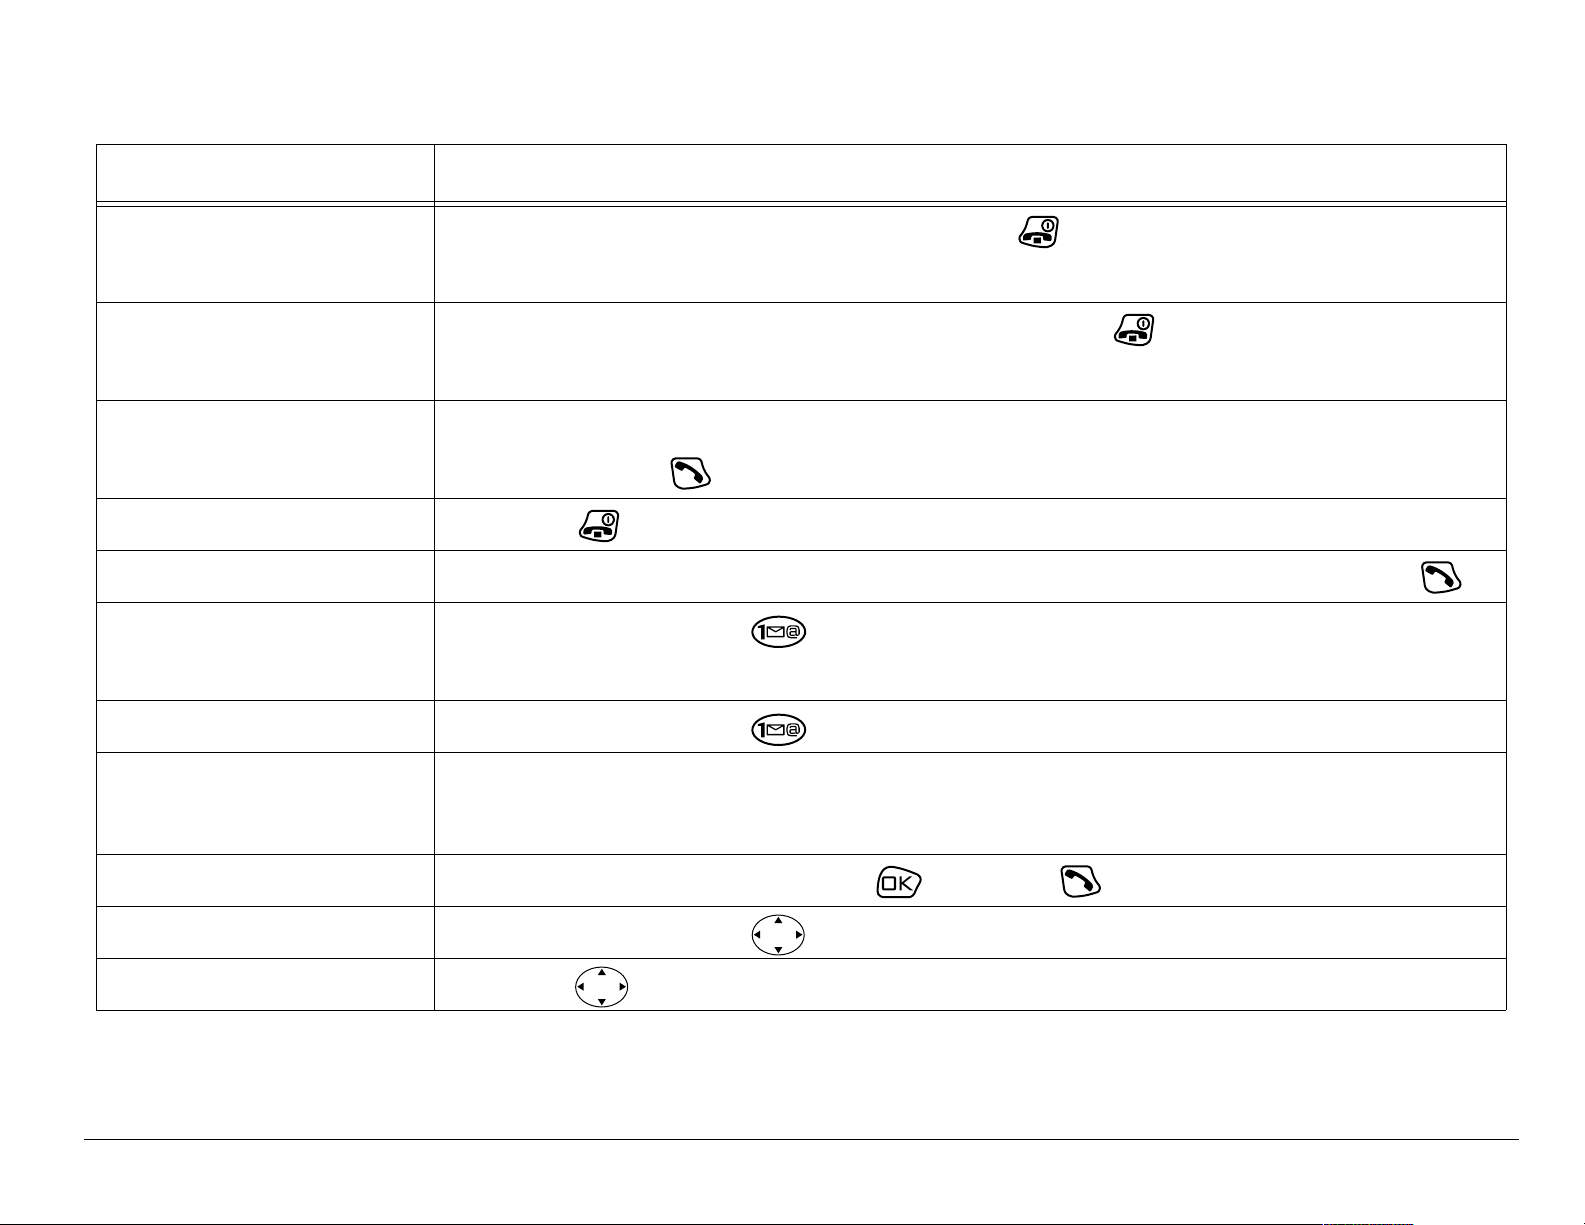
Performing basic functions
qçKKK cкзг=нЬЙ=ЬзгЙ=лЕкЙЙеKKK
qмке=нЬЙ=йЬзеЙ=зе Open the flip, p r es s an d h ol d . The ph on e re m ai ns
on when the flip is closed.
qмке=нЬЙ=йЬзеЙ=зСС Open th e flip, then p r es s an d h ol d until yo u see
“Powerin g Off.”
j~âÉ=~=Å~ää Open the flip, extend the antenna, enter the number,
then press .
båÇ=~=Å~ää Press .
^елпЙк=~=Е~дд Open th e flip . If the pho ne c on tin ues to ring , p r es s .
Press and hold and fo llo w the system pr om pts.
pЙн=мй=озбЕЙг~бд
Contact your service provider for details.
^ЕЕЙлл=озбЕЙг~бд Press an d hol d .
sЙкбСу=узмк=йЬзеЙ=
Select jÉåì → mÜçåÉ=fåÑçK=
емгДЙк
pбдЙеЕЙ=нЬЙ=кбеЦЙк Open the flip or press , t he n to answer.
pбдЙеЕЙ=~дд=лзмеЗл Press and hold right.
^ЕЕЙлл=Езен~Енл Press down.
User Guide for the Kyocera S14 Opal phone 9
Page 28
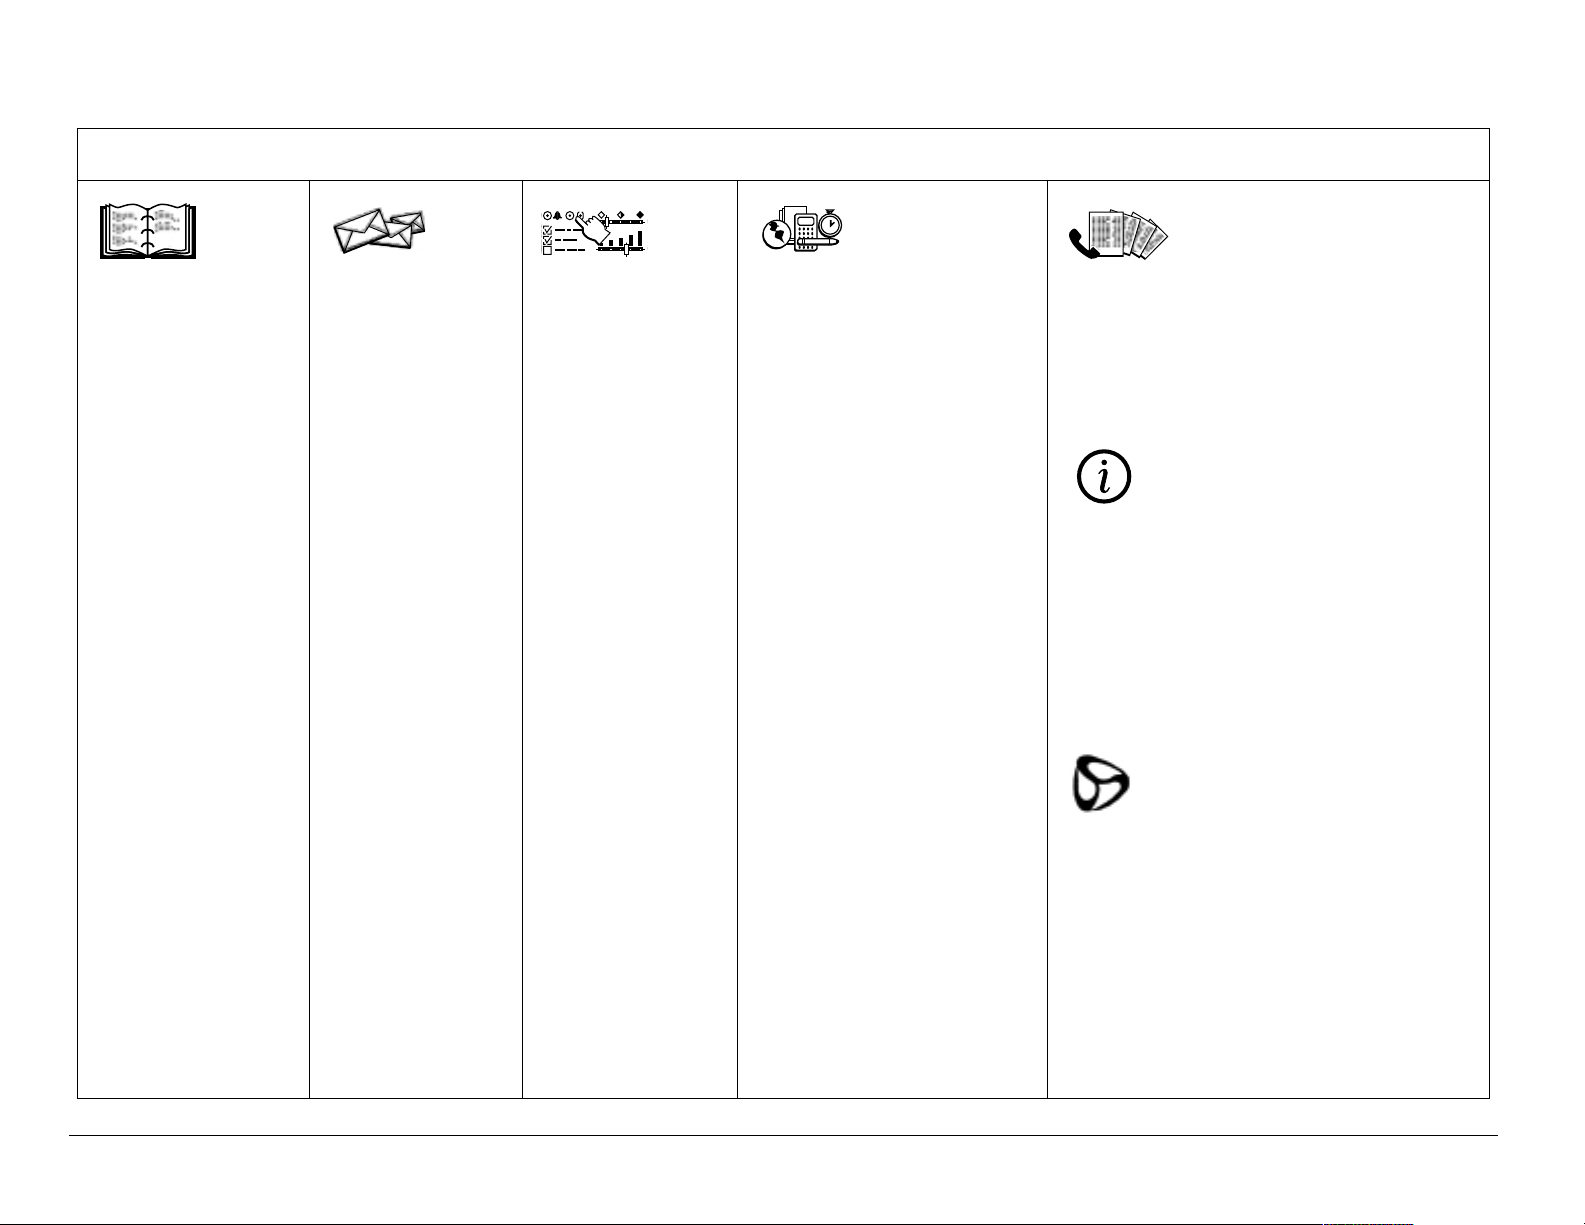
Using menus
The contents of the main menu are as follows:
Contacts
View All
Add New
Find Name
Add V oi ce
Dial
Speed Dial
List
Voice Dial
List
Business List
Personal List
jÉëë~ÖÉë
Voicemail
Send New
Text InBox
Net Alerts
Text OutBox
Filed
Erase Msgs
Msg Settings
Settings
Silence All
Sounds
Display
Voice
Services
Security
Call
Information
Network
Extras
Messaging
Tools &
Games
Alarm Clock
Tip Calculator
Calculator
Countdown
Stopwatch
Mystic I Ching
Cavern Crawl
TM
Space Dudes
TM
Brick Attack
Recent Calls
(Lists 15 recent calls)
Phone Info
(Displays your phone
TM
number for reference)
TM
Web Browse r
Information
Accessories
(Prompts connection to the
Internet)
10 Getting Started
Page 29
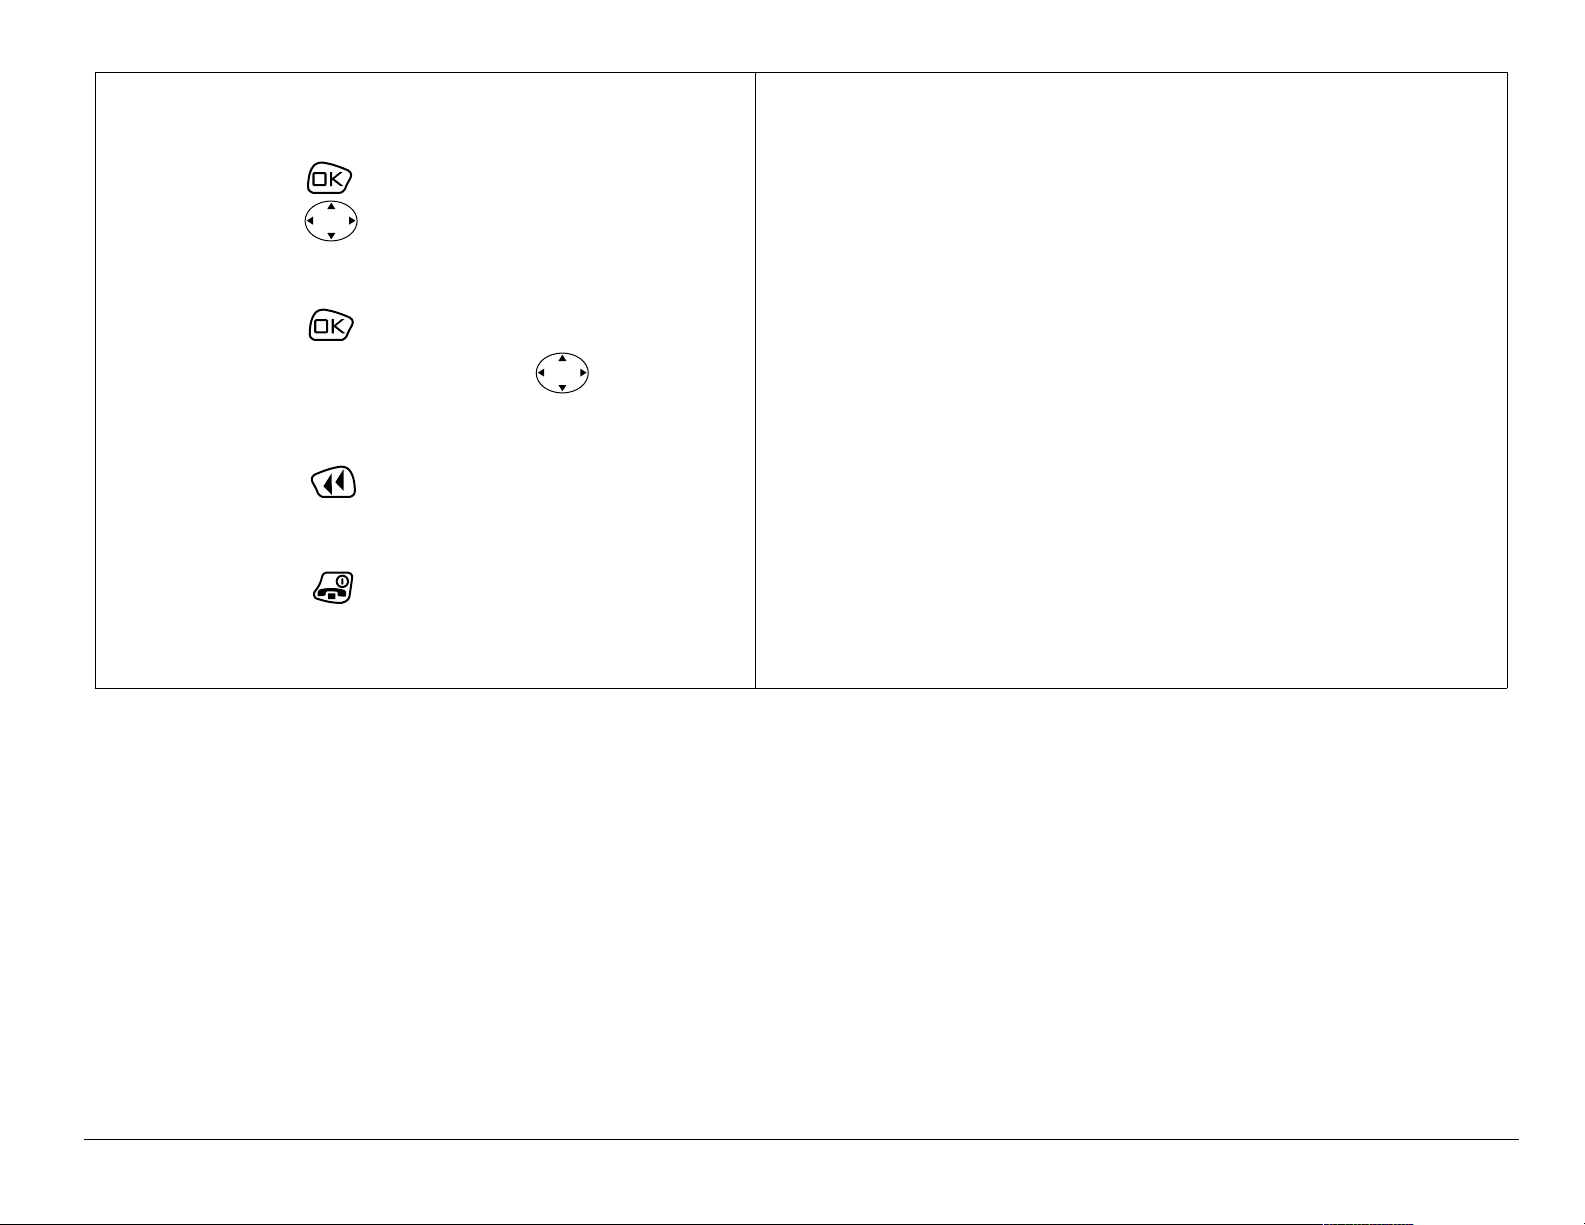
To use menus:
* These instructions assu me your
• Press to select jÉåìX then
press left or right to see
menu options.*
• Press to selec t a menu
option; then press up or
down to see menu contents.
• Press to go up a menu
level.
• Press to return to the
home screen.
menu appears in icons.
To make it ap pear as a list, select jÉåì
→ pЙннбеЦл → aáëéä~ó → j~áå=jÉåì=sáÉï.
In this guide, an arrow → tells yo u to
select an option from a menu.
For example, jÉåì → pЙннбеЦл means
select jÉåì, then select pЙннбеЦл.
User Guide for the Kyocera S14 Opal phone 11
Page 30
2MAKING AND ANSWERING CALLS
Making a call
1. Make sure you are in an area where the signal can be received. Open
the flip and look for the symbol on the home screen.
Note: The more b ars you see i n th is sy mbol, t he cl earer t he r ecepti on wil l be.
If there are no bars, try to move to where the reception is better. In some
cases, this can be as simple as turning to face a different direction.
2. Fully extend the antenna.
3. Enter the phone number.
4. Press .
kçíÉW If your phone cannot locat e a signal for 15 minutes, it changes to
power- s ave mode. If y ou see the message “Power Save Mode” and a
on the screen, press any key to return to normal operating mode and try
your call again.
5. When you are done , close the flip or press to end the call.
bсЕЙйнбзеW=You must press to end the call if an acces sory such as a
headset or portab le hands-free car kit is attached.
12 Making and Answering Calls
Page 31

Redialing a number
To redial the last number called, press twice.
If you see or hear a mes sage pr ompting you to spea k a name, press again.
Answering a call
When a call comes in, the phone will ring or vibrate.
• To answer t he c al l, op en th e f lip . I f the pho ne con ti nues t o rin g, pr es s .
You can se t the phon e to a ns w er in tw o w ays: (1) Answ er au tom a tic al ly
when y ou op en th e flip , o r (2 ) do n’ t an s wer u ntil you h av e op en ed th e flip
and pressed . With this setting, the caller’s phone number appears on
the screen as the phone rings or vibrates. If the number is saved in your
contacts direc tory, the co ntact na me a pp ea rs on the s cre en .
To change th e s e ttin g, see “Ans w eri ng c all s us ing th e flip” on pag e 1 4.
To change th e ri ng er, see “Choos in g a d ifferent rin ger” on page 59.
User Guide for the Kyocera S14 Opal phone 13
Page 32

Answering calls using the flip
You can set the phone to answer immediately when you open the flip, or to
continu e ringin g until yo u pres s .
1. Select jÉåì → pЙннбеЦл → bñíê~ë → ^елпЙк=пбнЬ=cдбйK
2. Highlight an option and press to select it:
– bå~ÄäÉÇ causes the phone to answer when you open the flip.
The ph one numbe r o f th e calle r ap pears o n th e scr een. If t he num ber
is stored in your contact s directory, the contact name appears.
– aáë~ÄäÉÇ causes the ph one to continue ringing when you open the flip.
– A dancing phone icon appears on the scr een along with the phone
number of the caller. If the number is stored in your contacts
directory, the contact name appears. To answer the call, press .
Answering calls hands-free
If your pho ne is a ttached to a portable han ds -fre e c a r ki t (s ol d s epara tel y),
you ca n s e t it to an swe r an incom in g c a ll a fter fiv e se conds.
• Select jÉåì → pЙннбеЦл → ^ЕЕЙллзкбЙл → ^мнзJ^елпЙк → ^СнЙк=R=лЙЕзеЗл.
14 Making and Answering Calls
Page 33

Dealing with missed calls
When yo u have mi ssed a call , a “M isse d” mess age ap pears on you r sc reen
and the phone may beep (see “S etting missed call alerts”below). The
messag e remains on th e screen un til the call er l ea ve s a v o ic em ail or un til
you open and close the flip.
• Press or to clear the screen.
• To view the ca ller’s numb er o r name, select `~ääë. In the Recent Calls list,
the missed call is indicated with a flashing .
• If the calle r lef t a voice mail mes sage, sele ct sçáÅÉ. If you hav e not y et s et
up your voic email, t he caller ca nnot lea ve a message . For help s etting up
voicemai l, see page 21.
Setting missed call alerts
You can set an alert to beep every five minutes after you have missed a call.
• Select jÉåì → pЙннбеЦл → pзмеЗл → jбллЙЗ=`~дд=^дЙкн=→ bå~ÄäÉÇ.
• To turn off the alert when it rings, press or .
• To cancel the al ert option, select jÉåì → pЙннбеЦл → pзмеЗл → jбллЙЗ=`~дд=
^äÉêí=→ aáë~ÄäÉÇ.
User Guide for the Kyocera S14 Opal phone 15
Page 34

Viewing recent call details
Details on t he la st 15 c all s y o u m ade or rec eiv e d a r e sto red in th e Recent
Calls list. You can get details on the caller’s name and phone number,
along with t he time and le ngth of th e cal l. Icon s indi cat e the types of call s in
the list. (Your network may not support all call types listed. Check with your
service provider.)
Call to
Call from
Three-way call
Forwarded call
Missed call (flashing)
16 Making and Answering Calls
Page 35

To view call details:
1. Select jÉåì → oЙЕЙен=`~ддл.
2. Select a recent call item.
3. Select an option:
– qáãÉÔView the time of the call.
– kмгДЙкФView the caller’s number (for an incoming call), or the
number you called (for an outgoing call).
– p~îÉ=kÉïÔSave the number in your Contacts directory. (Option not
available if number has been saved already.)
– ^ÇÇ=íçÔAdd the number to an existing contact. (Option not avail able
if number has been saved already.)
– sáÉï=`çåí~ÅíÔView de tails on the c ont a ct if the ca ll er’s i nfor ma ti on i s
already in your Contacts directory.
kçíÉW=If th e n um b er has bee n s a ve d a s “se cret,” you m u st enter yo ur fou rdigit l ock co de to vie w or ed i t th e n umber. For infor mati on on the lo ck c od e,
see p age 68. Detai ls a bout ma king a phon e num ber se cret a re de scrib ed in
“Saving a new contact” on page 39.
User Guide for the Kyocera S14 Opal phone 17
Page 36

Erasing calls from the list
To erase all calls from the Recent Calls list, see page 71.
Setting up speed dialing
Speed dialing allows you t o quickly dial a store d phone n umber by entering
a one- or two-digit speed dialing location.
1. Open a saved cont act. (See page 39.)
2. Highlight the phone number and press .
3. Select péÉÉÇ=aá~äáåÖ.
4. Select a speed dialing location. (Location “1” is r eserved for your
voice m ai l nu mber.)
5. Press to select ^ллбЦе.
To speed dial
From the home screen, enter the one- or two-digit speed dialing location
and pre ss .
18 Making and Answering Calls
Page 37

Setting up 1-Touch Dialing
1-Touch Dial i ng is a f orm of sp ee d dia li ng that al l ows you t o pre ss and hol d
a speed dial location to make a call. It is the fastest way to speed dial.
1. Select jÉåì → pЙннбеЦл → bñíê~ë → NJqçìÅÜ=aá~äáåÖ → bå~ÄäÉÇ.
2. Press .
Using 1-Touch Dialing
To dial a phone number, simply press and hold the assigned speed dialing
location fo r th e p ho ne n um ber. If it is a two-dig it n um b er, press the firs t
number, then press and hold the second. For example, if the speed dialing
number i s 1 5, press , then pres s an d hold .
User Guide for the Kyocera S14 Opal phone 19
Page 38

Removing a speed dialing location
1. From the home screen, select jÉåì → `çåí~Åíë → péÉÉÇ=aá~ä=iáëí.
2. Select a speed dialing location.
3. Highlight the phone number and press .
4. Select péÉÉÇ=aá~äáåÖ.
5. Press right to highlight oЙгзоЙ.
6. Press .
Finding a phone number
If you have already saved a phone number, you can find it quickly by
pressi ng down. This br ings up a list of Freque nt Cont act s, fo llowed by a
complete lis t of all saved co ntacts. Scroll do wn t he list, fin d the one y o u
want, and press to dial the number. For more information on finding
contact in form a tio n, see page 4 3 .
20 Making and Answering Calls
Page 39

Setting up voicemail
Before your phone can record voicemail messages, you must set up a
password an d record a p ers o na l g r ee tin g. Wh en yo u have s et up your
voicema il, a ll unan swe r ed cal l s t o y our pho ne ar e au toma t ic ally t ran sf err ed
to voice ma il , e ve n if you r ph on e is in us e or t urn ed off.
(Check with your service provider for availability.)
1. From the home screen, press and hold .
2. Enter y our passc ode, which you obtain from your ser v ice provider.
3. Follow the system prompts to create a password and record a greeting.
kçíÉW=If you are having trouble accessing your voicemail, contact your
service pro vide r.
Checking voicemail messages
When a voice message is received, your screen will display text similar to:
“New Mes s ag e 1 Voicemail,” an d t he ph one may be ep or vibrate (se e
“Setting v oic em a il ale rts” on th is page ).
The te xt will remain o n the s cre en fo r a bo ut fiv e m in ut es or until yo u close
the phone flip. After th at, the symbo l a ppea r s a t t he top o f y ou r screen.
The symbol flashes if the message is Urgent.
User Guide for the Kyocera S14 Opal phone 21
Page 40

If you see “New Message” on your screen
1. Press to select sçáÅÉK This initiates a call to your voicemail number .
2. Follow the prompts to retrieve the message. For specific information on
getting voicemail messages, contact your service provider.
If you see the symbol
1. Select jÉåì=→ jÉëë~ÖÉë.
2. Select your sзбЕЙг~бд box. A message tells you there is a new message
at your voicemail numb er.
3. Press to select `~ää. This initiates a call to your voicemail number.
4. Follow the prompts to retrieve the message. For specific information on
getting voicemail messages, contact your service provider.
22 Making and Answering Calls
Page 41

Setting voicemail alerts
You can set an ale rt to beep or vibrate once or every five minutes after you
have received a voicemail message.
1. Select jÉåì → jÉëë~ÖÉë →jлЦ=pЙннбеЦл → sзбЕЙг~бд=^дЙкнK
2. Press to select an option:
– aбл~ДдЙЗФTurn alert off.
– sбДк~нЙ=зеЕЙФVibrate once when messa ge is received.
– sбДЙ=C=кЙгбеЗФVibrate when message is received, and every five
minutes un til you open and close the flip or press .
– pçÑí=ÄÉÉé=çåÅÉ—Beep sof tly once when message is received.
– pзСн=ДЙЙйлФBeep soft ly when message is received, and every fiv e
minutes un til you open an d close the flip or press .
– içìÇ=ÄÉÉé=çåÅÉ—Beep loudly once w hen message is r eceived.
– iзмЗ=ДЙЙйл—Beep loudly when message is recei ved, and every five
minutes un til you open and close the flip or press .
User Guide for the Kyocera S14 Opal phone 23
Page 42

Silencing an incoming call
1. Open the flip.
2. Press to silence the ringer.
3. Press to answer the call, if desired.
– This action silen ce s the in comin g call o nly. The next c all will ring
as normal.
If your pho ne is s et to an swe r when you op en th e flip, and if t he fli p is
closed wh en the cal l c om es in, yo u c annot silence th e call wi tho u t
answering it. To change th e setting, see “Answ e ring c al ls us in g th e flip” on
page 14. To set the phone to vibrate, see “Silencing all sounds” on page 58.
Adjusting the volume during a call
To adjust the earpiece volume manually during a call, press up or down.
kçíÉW To set the ph one to ad jus t the earpi ec e v o lume auto ma tic a lly based
on the am ount of no ise around y ou or the othe r person’s voice v olu m e
level, se e “Adjusting the earpie c e v ol um e ” on page 61.
24 Making and Answering Calls
Page 43

Keeping track of your calls
Your phone h as t w o ti m ers th at c o un t th e a m ount of ca lls y ou ha v e m a de
and received.
All Calls
This t ime r dis play s th e to t al num ber and durat ion of all cal ls yo u ha ve made
and received. You c a nn ot r es et this timer.
• Select jÉåì → pЙннбеЦл →=`~дд=fеСзкг~нбзе=→ ^ää=`~ääë=qáãÉê.
Recent C alls
This timer displays the total number and duration of recent calls you have
made an d receive d s in ce th e las t t im e y ou re se t th e timer.
1. Select jÉåì → pЙннбеЦл →=`~дд=fеСзкг~нбзе=→ oЙЕЙен=`~ддл=qбгЙк.
2. Press to select oÉëÉí. This resets the timer to zero.
Timing your ca ll s
If you want to kno w ho w l on g y ou a r e s p en din g on a call, you can s et up
your phone to beep 10 seconds before each minute.
• Select jÉåì → pЙннбеЦл → pзмеЗл=→ jбемнЙ=^дЙкн=→ bå~ÄäÉÇK
User Guide for the Kyocera S14 Opal phone 25
Page 44

Receiving data or faxes
Your phone can receive certain data or faxes, depending on the system
sendin g t he in form a tion.
However, to receive data or faxes, you must switch from voice mode to
data/fax mod e.
(Your network may not support these call types. Check with your service
provider.)
kçíÉW=You cannot receive voice calls while the phone is in data/fax mode.
1. Select jÉåì → pЙннбеЦл → kЙнпзкв → a~í~Lc~ñ=`~ääë=få.
2. Press to select an option:
– sçáÅÉ=låäóÔAllow only voice calls.
– c~ñI=åÉñí=Å~ääÔSet th e phone t o fax mode fo r the ne xt incomi ng call or
the next 10 minutes.
– a~í~I=åÉñí=Å~ää—Set the ph one t o dat a mo de fo r the next inco ming c all
or the next 10 minutes.
– c~сI=менбд=зССФForce the phone into fax mode until the phone is turned off.
– a~н~I=менбд=зСС—Force the p hone int o data mode unt il the phone is turned o ff.
26 Making and Answering Calls
Page 45

Understanding roaming
Selecting digital or analog mode
This setting allows you to force the phone into either digital or analog mode.
This is useful if you are in an area that borders on digital service and the
automatic featu re is caus ing th e phone to k ee p switch in g b etween m o de s.
1. Select jÉåì=→ pЙннбеЦл=→ kЙнпзкв → aáÖáí~ä=çê=^å~äçÖK
1. Select a n option and press .
– ^ìíçã~íáÅ automatically switches the phone between digital and analog.
– ^å~äçÖ=çåäó sets the phone to work in analog mode only.
– ^å~äçÖ=Å~ää forces a call into analog mode for the durat ion of the next cal l.
– aáÖáí~ä=çåäó sets the phone to work in digital mode only.
User Guide for the Kyocera S14 Opal phone 27
Page 46

Setting an alert for roaming
Use this s etti ng if you w an t th e p ho ne to a lert you if y o u ro am o utsid e o f
your ho me s erv ic e a re a.
1. Select jÉåì → pЙннбеЦл=→ kЙнпзкв=→ oç~ãLpêîÅ=^äÉêíK
2. Select an option and press .
– aáë~ÄäÉÇ will not alert you if you ro am out s ide your home ser vice area.
– tЬЙе=ез=лЙкобЕЙ aler ts you wi th thre e to ne s , de cr ea s in g in inte n si ty,
when service is lost . When servic e is acquired again, you will hear
three tones increase in intensity.
– lå=êç~ã=ÅÜ~åÖÉ alerts you with two tones, decr easing in intensity,
when roaming service is acquired. When home area service is
acquired again, you hear three tones, increasing in intensity.
– lå=~åó=ÅÜ~åÖÉ alerts you with three increasi ng tones if there is a
change in roaming service or three decreasing tones if the phone
loses servi ce.
28 Making and Answering Calls
Page 47

Setting the roam ringer
You can se t a ringer to in dic at e wh en an inc om in g ca ll will be s ub jec t to
roaming ch arges .
1. Select jÉåì=→ pЙннбеЦл=→ pзмеЗл → oз~г oбеЦЙк
2. Highlight bå~ÄäÉÇ and press . You will hear a sample of the ringer.
3. Press to set the rin ger.
Controlling network roaming
This se tting allo ws yo u to con tro l the ph one’ s roam ing fea ture by spec ify ing
which signals the phone will accept.
1. Select jÉåì=→ pЙннбеЦл=→ kЙнпзкв → oз~г=lйнбзеK
2. Select an option and press .
– ^ìíçã~íáÅ=(recommended setting) accepts any system the phone
service provides.
– kç=êç~ãáåÖ prevents you from making or receiving calls outside of
your home service area.
kçíÉW If yo ur p h on e h as m ore th an o ne se tti ng fo r Au tom a tic , c on tact you r
service provider to determine which one to use.
User Guide for the Kyocera S14 Opal phone 29
Page 48
Calling 911
kçíÉW Regardless of your 3-digit emergency code (911, 111, 999, etc.), your
phone will op erate as descri bed bel ow.
• Dial and then press .
You can call 911 even if your phone is locked or your account is restricted.
However, when you call, your phone enters bгЙкЦЙеЕу=гзЗЙK This enables
the emer genc y servi ce ex clusi ve acce ss to y our pho ne so th ey can call you
back if ne cessa ry. In orde r to make or rec eive regu lar call s af te r d iali ng 9 11,
you must exit this mo de.
Exiting emergency mode
When you have com p leted the 9 11 call:
1. Press to select=bñáíK
2. Press again to confirm your choice.
The phone returns to the home screen and you are ready to make and
receive re gu lar calls.
30 Making and Answering Calls
Page 49

3ENTERING LETTERS, NUMBERS, AND SYMBOLS
You may en te r le tters , n um b ers , a nd s ymbols in c on tacts, text messages,
and other functions; for example, when you create a personal banner for
your phone’s home screen.
For a quick reference to text entry, see page 37.
Understanding text entry screens
The te xt en try are a i s a la rg e field in th e ce nter of the screen. Th e c urre n t
text entry mode (and capitalization setting, when applicable) are indicated
by icon s a t the botto m of the s cre en .
text
capitalization
Note:Capitalization settings are discussed on page 36.
User Guide for the Kyocera S14 Opal phone 31
text
Page 50

Text entry modes
There are fo ur t ex t e ntry m o de s:
Number mode
Normal text mode
Rapid text en try m od e
®
Symbol mo de
Note: The mode you sta rt in depends on the tas k you are doing. For example,
when entering a phone number, you’re in number mode. When entering
a name for a contact, you’re in normal text mode.
Entering numbers
You can enter numbers in several modes.
• To enter a number while in mode, press a number key once.
• To enter a numb er w hile in or mode, press and hol d a numb er key
until the number appears on the screen.
32 Entering Letters, Numbers, and Symbols
®
Page 51

Entering words letter by letter
Use norma l text mode to en ter letters .
1. Press a key once for the first letter, twice for the second letter, and so on.
2. W ait for the cursor to move right and enter the next letter.
Entering special charac te rs
If your ph on e is set to Spanish or Frenc h, ac ce nt ed charac ters a r e
available in normal text mode:
Spanish French
aábc2 aàâbcç2
deéf 3 deëèéêf 3
ghií4 ghiïî4
mnñoó6 mnoôœ6
t uüú v 8 t uüú v 8
User Guide for the Kyocera S14 Opal phone 33
Page 52

Entering words quickly
®
When you press a series of keys using T9 rapid text mode, Tegic
TM
T9®
Text Input checks its dictionary of common words and guesses at the word
you are trying to spe ll.
1. For each letter o f the word you wan t, press th e key once. For example, to
enter the word “any” press:
→ → .
2. If t he word d oe sn’t m a tch wh at you wan t, p res s to look at ot he r
word matches.
3. When you see the word you want, press .
Entering symbols
While entering text, you can also enter symbols by pressing until you
see the s ymbol you w a nt . U s in g th is m ethod, yo u h av e ac ce s s to the
following symbols:
.&@,-‘:;?/“()_
34 Entering Letters, Numbers, and Symbols
Page 53

To ac ce ss th e full set of sy mbols:
1. Press right to high li gh t th e cu rrent mode and press to enter the
menu.
2. Select =pугДздл.
3. Press down to view the list of symbols.
4. Press the number key corresponding t o the symbol you want .
Changing modes
To enter characters that belong to a mode other than the one you’re in,
you’ll need to change modes. For example, to enter numbers in an email
address while in mode, change to mode, enter the number, and
then cha ng e back to m od e t o c o mp le te the addr es s.
qз=ЕЬ~еЦЙ=нЙсн=Йенку=гзЗЙл:
• Press right to highlight the current text mode, press to enter the
menu, then select a different mode.
User Guide for the Kyocera S14 Opal phone 35
Page 54

Capitalization settings
Three ca pi taliza tion settings ar e av ai lab le in and modes:
®
Capitalize ne xt letter
Capitalize ever y l ett er
Capitalize firs t l ett er o f e ver y word (in a contact) or sentence (in a text
message)
If no icon appears , all letters will be in lower cas e.
To change capitalization settings:
• Press unti l the icon for the setting you want app ears.
36 Entering Letters, Numbers, and Symbols
Page 55

Quick reference to text entry
This table inclu des basic instructions for enter ing letters, numbers, and symbols.
To... Do this...
Enter a letter Use mode and press a key until you see
the letter you want.
Enter a number Use mode and press a key once to enter
its number.
Enter a symb ol Press unti l you find the symbol you want.
There are more symbols unde r the symbol text
mode. See page 34.
Enter a space Press .
Erase a character Press .
Erase all characters Press and hold .
Move the cursor right or
left
Change text entry modes Press .
User Guide for the Kyocera S14 Opal phone 37
Press right or left.
Page 56

Capitalize the next lette r P ress and hold . Choose .
Capitalize every letter Press and hold . Choose .
Capitalize th e first le tter of
each word
Highlight an option at the
bottom of the screen
Press and hold . Choose .
Press down, then press left or right.
38 Entering Letters, Numbers, and Symbols
Page 57
4STORING CONTACTS
Use your ph one’ s Cont acts direct ory like a set of ph one index c ards to st ore
information abou t a pe rs on or compan y. Your ph on e ca n h old, on av e r ag e,
about 20 0 c ontacts.
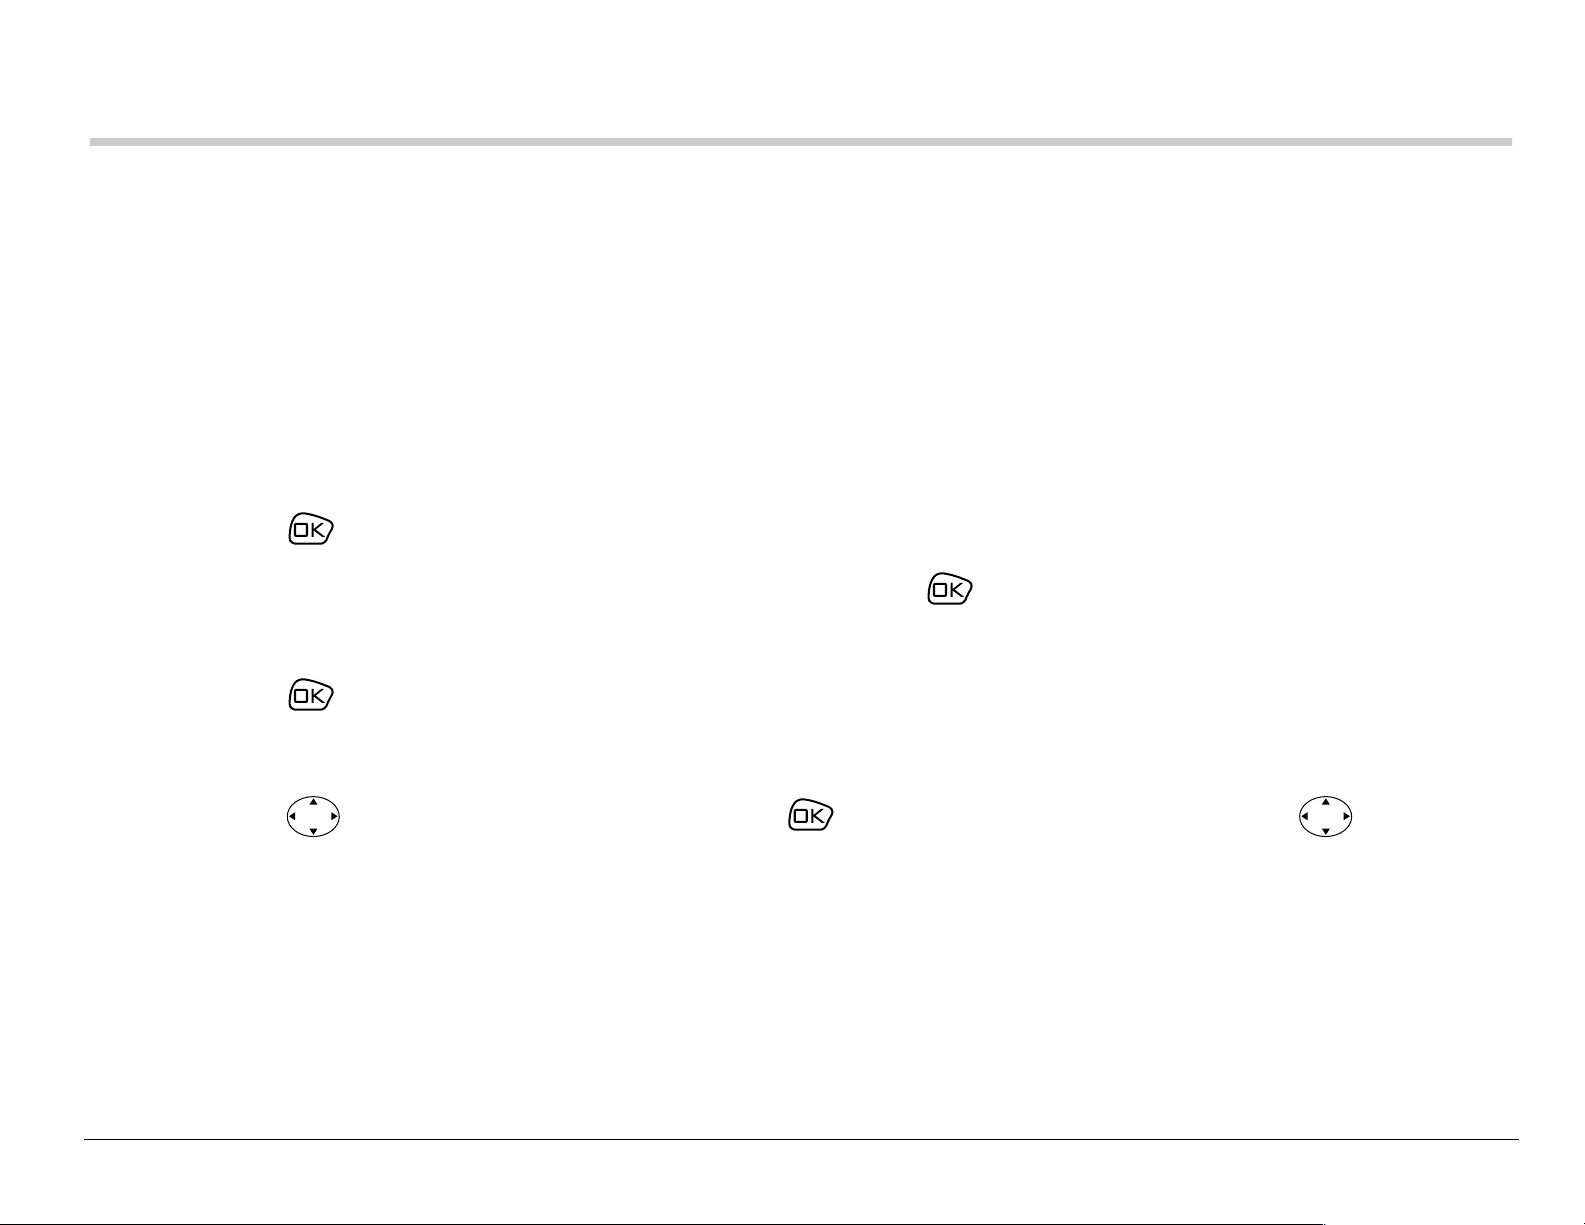
Saving a new contact
1. From the home screen, enter the phone number you want to save.
2. Press to select p~îÉ=kÉï.
3. Enter a name for the contact, then press . If you need to know how to
enter letters, see page 37.
4. Press to select p~îÉ.
-orPress right twice, then press to select lйнбзел. Press up or
down to select an option from the list:
– p~îÉÔSave information and return to the home screen.
– kмгДЙк=qуйЙФSelect ïçêâ, ÜçãÉ, гзДбдЙ, й~ЦЙк, or Ñ~ñ.
User Guide for the Kyocera S14 Opal phone 39
Page 58

– ^ÇÇ=sçáÅÉ=aá~äÔSpeak the name of th e contact person for this
number. This is so that you can dial this number using voice
recognition (VR). For more information, see page 79.
– pйЙЙЗ=aб~дбеЦФSelect a speed dialing locat ion from the list.
– pЙЕкЙнФSelect vÉë to lock the phone number. If a phone number is
locked, you must enter your four-digit lock code (see page 68) to
view or edit the number.
– mкбг~ку=kмгДЙкФClassify this numb er as the primary number for the
contact.
– `д~ллбСу=`зен~ЕнФClassify the contact as mЙклзе~д=or _млбеЙллK (To set
up business or person al ringers, see ”Specifying ringers for different
calls” on page 60.)
5. Press to select p~îÉ. A message appears: “Contact Successfully
Saved!”
40 Storing Contacts
Page 59
Adding a code or extension
When you save the phone number of an automated service, you may
include a p ause where you woul d se lect a n opt ion o r ent er a p as sword. You
can ente r m ul tiple pauses in a ph on e n um b er.
1. Enter the first portion of the phone number.
2. Press rig ht to scroll through the options a t the bottom o f the screen.
3. Press to select a type of pause.
A qáãÉ=m~ìëÉ=causes the phone
to stop dialing for two se conds.
A e~êÇ=m~ìëÉ causes the phone
to stop dialing until you select
oÉäÉ~ëÉ.
4. Enter the remaining numbers.
User Guide for the Kyocera S14 Opal phone 41
Page 60

Editing or erasing a contact
1. Select jÉåì → `çåí~Åíë.
2. To find the contact you want to edit, select either sáÉï=^ää or cáåÇ=k~ãÉ.
3. Press to select the co ntact to edit.
4. Select lйнбзел.
5. Press to select ^ÇÇ=kÉï,=bê~ëÉ=`çåí~Åí,=(erases the entire contact),
bÇáí=k~ãÉ, or `д~ллбСу=`зен~ЕнK
6. Enter the new information.
7. If finished, press to select p~îÉ.
Editing a number
1. Select jÉåì → `çåí~Åíë.
2. Select sáÉï=^ää or cáåÇ=k~ãÉ=to=locate the contact you want to edit.
3. Press to select the co ntact to edit.
4. Select the=йЬзеЙ=емгДЙк.
5. Press to select sбЙп=kмгДЙк, ^ЗЗ=sзбЕЙ=aб~д,=péÉÉÇ=aá~äáåÖ,=bÇáí=qóéÉ,=bê~ëÉ=
kмгДЙк,=bк~лЙ=sзбЕЙ=aб~д,=bЗбн=kмгДЙк, bЗбн=sзбЕЙ=aб~д, pЙЕкЙн, or=mкбг~ку=kмгДЙк.
6. Enter the new inf ormation or f ollow the voice prompt s.
42 Storing Contacts
Page 61

Finding contact information
There are three main methods for finding a phone number or contact
details: (1) checking the Frequent Contacts list, (2) searching the Contacts
directory, and (3) using Fast Find.
Searching the Contacts directory
1. Select jÉåì → `çåí~Åíë.
2. Select a search method:
– sáÉï=^ääÔLists all of your contacts.
– cáåÇ=k~ãÉÔLoc a tes a speci f ic na m e.
3. Scroll down until you find the na me you want.
– To call the co ntact, select th e nu m b er an d pr es s .
– To display the full contact, pres s .
User Guide for the Kyocera S14 Opal phone 43
Page 62

Checking the Frequent Contacts list
From the ho m e s c ree n, pre ss down to se e up to 15 of the mos t
frequently ca lled contac ts, in ord er f r om mos t fre qu ent to lea st freq ue nt .
You also see the full Contacts List if you scroll down past the double line.
Tip: You can enter the f irst le tter of th e name you ar e looking for to skip down
the list .
Setting up Fast Find
With Fast Find, you press one or two keys to view close matches of the
number yo u are looking f or.
1. From the home screen, select jÉåì → pЙннбеЦл=→=bñíê~ë=→=c~ëí=cáåÇ.
2. Select bå~ÄäÉÇ.
44 Storing Contacts
Page 63
Using Fast Find
1. Press the k eys cor resp ond in g t o the l et ter s of the n ame you w a nt to fi nd.
The matchi ng contacts appear on the screen.
Note:Speed dial locations appear before names if they use the same keys.
For example, to look for Abe’s contact entry, you press for “A”.
However, th ere is a speed di al loc ation asso ciated with 2, so the sp eed
dial contact appears first. To fi nd Abe’s number, you w ould then press
the key that corresponds to the next letter of his name.
2. When you see the nam e y ou want , you can p r ess to ca ll the nu mber,
or press to view cont act details.
3. If you do not see the name you want, pre ss up or d own to searc h
the possib ilitie s.
User Guide for the Kyocera S14 Opal phone 45
Page 64

5SENDING AND RECEIVING TEXT MESSAGES
This ch ap te r de sc rib es h ow t o s e nd , rec e iv e, a nd e r as e tex t m e ss ag es
from your phone. For information on voicemail messages, see page 21.
Important: The features described in this chapter may vary depending on
servic es available in your area. In addition, usage char ges may
apply to each message. For clarification on these issues, check
with you r ser vi c e pro v id er.
Sending a new text message
Check with y o ur s erv ic e pro vi de r to fin d out if yo u are able to se nd te xt
messages from your phone. You can only send text messages to phones
that are capable of receiving them, or to email addresses.
Your Kyocer a S 14 ph one can p r o vid e se ve ral sendin g op tions. For
exampl e, yo u may:
• Choose from standard pre-written messages
• Add emoticons (“smiley faces”) to messages
• Includ e a callback number
46 Sending and Receiving Text Messages
Page 65

• Label messages as “Urgent”
• Set delivery time
• Save messages in memory.
Creating a new message
1. Select jÉåì=→ jÉëë~ÖÉë=→ pÉåÇ=kÉï.
2. Enter th e phone number or emai l addr ess of the per son t o whom you are
sending the message, or select `çåí~Åíë to choose a saved phone
number or email address.
Note:If you wish to enter an email address, y ou need to switch text entry
modes: To enter letters, press right, then press to switch to
mode. To enter “@” from mode, press repeatedly until the
symbol appears. For more informat ion on text entry, see page 37.
3. Press to select kÉñíK
4. Enter y our text message. You can enter text manu ally, insert a pre-
writte n message, and add emoticons (“smiley faces”).
User Guide for the Kyocera S14 Opal phone 47
Page 66
To enter text manually:
Use the key pad to ent er le tte rs.
– To switch from mode to
then press .
– For more information on text entry, see page 37.
To insert a pre-written message:
a. Press right twice to highlight ^ìíçjëÖI=the n press .
b. Press up or down to scroll through the messages and press
to select one.
c. Continue to enter text or add another pre-written message.
rapid text entry mode, press right,
®
48 Sending and Receiving Text Messages
Page 67

To add an emo ticon (smiley face ):
a. Press right three times to highlight bгзнбзеI then press .
b. Press up or down to scro ll throu gh the fac es, and p ress a n umber
key to sele ct one. (If your recipient’s phone does not su pport the
same technology as your phone, emoticons appear in a simplisti c
form on the recipien t’s phone.)
When you have completed the message, you can send it
immediat ely or set sending options.
– To send it immediately, press right or lef t to highlight kÉñí, then
press =twiceK
– To set sending options, see the following procedure.
User Guide for the Kyocera S14 Opal phone 49
Page 68

Setting sending options
When you are ready to send a message, you have several options for how
and when you want the message to be received.
1. Once you have entered the message , press left or right to highlight
lйнбзел and press . Then choose from the list:
– pÉåÇ=jÉëë~ÖÉÔSend your mes sage immediately.
– `~ддД~Ев=kмгДЙкФInclude a callback number with the message to let the
recipient know at what number they can call you back. Select vÉë to
include your own number, or bÇáí to enter a di fferent callba ck num ber.
– mкбзкбнуФLabel the message as rкЦЙен or kçêã~ä.
– pÉåÇ=i~íÉêÔSchedule when to send the message: in PM гбемнЙлI=
N ЬзмкI=O ЬзмклI=NO ЬзмклI=N=З~уI=O З~улI or PÇ~óë.
– p~îÉ=jÉëë~ÖÉÔSave the message in your cáäÉÇ fold er. (This pre vent s
the message from being deleted when you clean out your
TextOutBox and enables you to send the message to others.)
– bñáíÔReturn to the jÉëë~ÖÉë menu without saving the message.
2. When you have finished setting options, press up to highlight pÉåÇ=
jÉëë~ÖÉK
3. Press .
50 Sending and Receiving Text Messages
Page 69

Sending a message you have saved
You can reuse a message you have saved in your cáäÉÇ folder. (To save
messages in your Filed folder, see “Setting sending options” on page 50.)
1. Select jÉåì=→ jÉëë~ÖÉë=→ cáäÉÇ.
2. Press up or down through the list of messages and press to
select one.
3. Highlight an option and press :
– oЙлмгЙФModify or send the message.
– pÉåÇ=qçÔAdd another recipient.
– bê~ëÉÔErase th e sa v e d me s sa g e.
– açåÉÔReturn to the Filed folder.
To set sending options for this message, see page 50.
If you cannot send messages
You may not be able to send or receive messages if your phone’s memory
is nearly fu ll, or if digi tal se rv ice is n ot av ai lab le at the tim e. To free u p
memory, erase ol d m e ss ag es . See “Erasin g tex t m e ss ages” on page 55 .
User Guide for the Kyocera S14 Opal phone 51
Page 70

Receiving incoming calls while creating messages
• If you do n’t wish to answer the call, select fЦезкЙ.
• To answer the call, press . The message you were working on will be
saved in the Text OutBox. To return to the message, select jÉåì=→
jÉëë~ÖÉë → qÉñí=lìí_çñ=and select it.
Viewing the Text OutBox
You can check the stat us of messag es you have sent by vie wing the Text OutBox.
1. Select jÉåì=→=jÉëë~ÖÉë=→=qÉñí=lìí_çñ.
2. Press up or down through the list of messages. One of the following
symbols appears next to each message:
The message is pending and will be sent when possible. You can cancel
delivery of the message.
3 The scheduled message will be sent at the scheduled time. Y ou cannot cancel
delivery of the message.
X The message cannot be sent because service is not available. An alert
appears on your phone if the message cannot be sent.
The scheduled message has been sent and will be delivered as scheduled.
You cannot cancel delivery of the message.
The message has never been sent, or has not been sent since it was last
modified. You can cancel delivery of the message.
52 Sending and Receiving Text Messages
Page 71

Retrieving text messages
When a text message is received, it is sent to your Text InBox and your
screen wi ll d is pl ay te xt similar to: “New mess a ge s: 1 Text”. This tex t wi ll
remain for about five minutes. After that, look for the sym bol at th e top o f
your screen. The symbol flashes if the message is urgent.
If you see the “New Message” note
You can choo se to:
• sáÉï the messageÔPress .
• fЦезкЙ=the messageÔPress right and press .
• Clea r th e sc re enÔPress .
If you see the symbol
If the sy m bo l is fl as hi ng , th e messa ge is urg e nt.
1. Select jÉåì=→ jÉëë~ÖÉë=→ qÉñí få_çñ. A list of all your received messages
appears. New, unread mess ages appear in ÄçäÇ. indicates an
“Urgent” message.
2. Press up or down to scroll through the list of messages.
3. Press to select a message.
User Guide for the Kyocera S14 Opal phone 53
Page 72

Reading the message
The options available to you may vary. Check with your service provider.
1. If the text message is long, press down to view the entire message.
2. When you are finished, highlight an option and press :
– oÉéäó to the sender.
– bê~ëÉ the message.
– p~îÉ the message to your Filed f o lder.
–View pЙеЗЙк informat ion and save it to your Cont acts directory.
– cçêï~êÇ the message.
– Select açåÉ to return to the Text InBox.
3. Press to see informat i on su ch a s callb ack numb er, emai l a ddres s, or
URL. (If a callback number is includ ed with the message, press again
to call the nu m be r.)
Setting message alerts
You can set your phone to alert you of incoming text messages or pages.
For more information, see “Setting message alerts” on page 71.
54 Sending and Receiving Text Messages
Page 73

Erasing text messages
You have th e o ption of e r asing text m es s ag es as y ou re ad th em , e ras in g
them on e-at-a- time fr om the lis t in th e Text InBo x or Text Out Box, or e rasin g
them all at once. It is a good id ea to era s e o ld message s, as y ou h av e
limite d m e mo ry on y ou r ph on e.
Erasing single messages
1. Select jÉåì=→ jÉëë~ÖÉë.
2. Press down and pre ss to select the type of text message you
want to erase (qÉñí få_çñI qÉñí=lìí_çñI or cáäÉÇ).
3. Press to select the message to erase.
4. Select bê~ëÉ to erase the message. A notification appears: “Erase this
message?”
5. Select vÉë to erase the message.
Note:You can erase a sc heduled message from the Text OutBox, but you
cannot can cel delivery of the message .
User Guide for the Kyocera S14 Opal phone 55
Page 74

Erasing all messages
1. Select jÉåì=→ jÉëë~ÖÉë=→ bê~ëÉ=jëÖë.
2. Press up or down and press to select an option:
– kçÔCancel the erase request.
– bенбкЙ=fеДзсФErase all messages in your Text InBox.
– lдЗ=fеДзсФErase all read messages in your Text InBox.
– bенбкЙ=lмнДзсФErase all messages in your Text OutBox.
– cбдЙЗ=cздЗЙкФEras e all m es sag es in your Fi le d fo ld er.
3. A message appears: “Erase ALL?” Select vÉë to erase messages or kç
to cancel.
Erasing messages automatically (Auto-E rase Text)
Use this s etti ng to ha v e o ld m es sa ge s au tom a tic al ly era se d from th e Text
InBox when m em ory is l ow.
1. Select jÉåì=→ jÉëë~ÖÉë=→ jлЦ=pЙннбеЦл=→ ^ìíçJbê~ëÉ=qÉñí.
2. Press to select läÇ=fåÄçñ=qÉñí.
56 Sending and Receiving Text Messages
Page 75

6CUSTOMIZING YOUR PHONE
Settings menu options
pбдЙеЕЙ=^дд
pзмеЗл
Call Ring/Vibe
Ringer Volume
Ringer Type
Business Call Ring
Person al Call Ring
Roam Ringer
Earpiece Volume
Key Beep Volume
Key Beep Length
Key Beep So und
Missed Call Aler t
aáëéä~ó
Backlighting
My Banner
Shortcut Key
Main Menu View
Auto -Hyphenation
Language
Time/Date Form at
Display Contras t
sзбЕЙ=pЙкобЕЙл
Voice Memo
Voice Shortcuts
Add Voice Dial
pЙЕмкбну
Lock Phone U se
Limit Calls Out
Change Lock Code
Erase All Contacts
Erase Calls Li st
Phone Rese t
`~дд=fеСзкг~нбзе
Recent Calls Timer
All Calls Timer
Browser Timer
kЙнпзкв
Data/Fax Calls In
bñíê~ë
Fast Find
1-Touch Dialing
Browser Prompt
Answer with Flip
jÉëë~ÖáåÖ
Voicemail Number
Auto -Erase Text
Message Aler t
Net Alert
Page Alert
Voice mai l Al ert
^ЕЕЙллзкбЙл
Smart Sound
Minute Alert
User Guide for the Kyocera S14 Opal phone 57
Voice Training
Voice Wake-Up
Voice Answer
Set Phone Line
Privacy Alert
Roam/Srvc Aler t
Roam Option
Digital or Analog
Pwr Backlighting
Headset Ringing
Auto-Answer
TTY Device
Com Port Speed
Page 76

Setting vibrate mode
You can set the phone to vibrate or to vibrate and then ring when you
receive an incoming call.
1. Select jÉåì → pЙннбеЦл → pзмеЗл → `~ää=oáåÖLsáÄÉ.
2. Select oáåÖ=çåäóI=sáÄê~íÉ=çåäóI or sáÄê~íÉ=íÜÉå=êáåÖK
Silencing all sounds
There is a quick a nd e as y w ay to s ilence all so un ds (i nc luding ale rt b ee ps,
rings, and keypress beeps) and to set your phone to vibrate for incoming
calls, alerts, and menu navigation.
• From the home screen, press right and hold. Notice that a
appears on the screen, indicating the phone has silenced all sounds.
Specifying just vibration
1. Select jÉåì → pЙннбеЦл → pбдЙеЕЙ=^дд.
2. Select vÉëI=îáÄÉ=çåäóK
3. Press to save your s election.
Note: The phone will ring when it is attached to an external power source
(such as a charger), even if the Silence All s etting is selected.
58 Customizi ng Your Phone
Page 77
Turning sounds back on
The quic ke s t way to tu rn sounds b ac k on is to pre s s right a nd ho ld .
You can also us e menu s:
1. Select jÉåì → pЙннбеЦл → pбдЙеЕЙ=^дд.
2. Select kçI=åçêã~ä.
3. Press to save your selection.
Choosing a different ringer
Your Kyocera S14 phone h as several ringers you can choose from for your
incoming calls.
1. Select jÉåì → pЙннбеЦл → pзмеЗл → oбеЦЙк=qуйЙ.
2. Scroll down the lis t to hear the different rings.
3. Press to select a ringer from the list.
Note:Use caution in bringin g the phone close to your ear while sample
ringers are playing.
User Guide for the Kyocera S14 Opal phone 59
Page 78

Specifying ringers for different calls
You can set up yo ur ph one to ring differentl y d ep en di ng on th e type of call
you get.
1. If you have not already done so, save the contact in your Contacts
directory and specify it as pers onal or business. For help, see page 40.
2. Select jÉåì → pЙннбеЦл → pзмеЗл → _млбеЙлл=`~дд=oбеЦ=or mЙклзе~д=`~дд=oбеЦ.
3. Select a ringer from the list.
Importing additional ringers
You can import additional ringers into your Kyocera S14 phone using the
Kyocera Ph on e De s ktop so ftware (s ol d s e parately ). To purchase th is
software and other accessories, visit пппKвузЕЙк~JпбкЙдЙллKЕзгLлнзкЙK
You may be able to do wnl oa d ring ers ov er-t he -air. Check with yo ur serv ic e
provider fo r av ailability.
60 Customizi ng Your Phone
Page 79

Adjusting volume
Adjusting the earpiece volume
To adjust th e ear pie ce volu me manu all y duri ng a ca ll, press up or do wn
to find a co mf ortable level.
Setting automatic volume adjustment
You can set your phone to automatically adjust the earpiece vol ume during
a call, based on the surrounding noise level.
1. Place a call from a quiet environmen t and set the vo lume to a
comfortable level.
2. When you are finished with the call, select jÉåì → pЙннбеЦл → pзмеЗл →
pã~êí=pçìåÇ.
3. Select bå~ÄäÉÇK=The volume you have just set is now used as a baseline.
You can still manually adjust the volume during a call.
4. Press to save the setting.
Adjusting the ringer volume
1. Select jÉåì → pЙннбеЦл → pзмеЗл →=oбеЦЙк=sздмгЙ.
2. Press right to increase the volume, or left to decrease the volume.
User Guide for the Kyocera S14 Opal phone 61
Page 80

Changing the key beep
The key beep is the sound made when you press the keys on the keypad.
You can change the sound (tones or clicks), length (normal or long), and
volume of the key beep.To change the various elements of the key beep,
select=jÉåì → pЙннбеЦл → pзмеЗл and ch oo se either hЙу=_ЙЙй=sздмгЙ, hÉó=
_ЙЙй=iЙеЦнЬ, or hÉó=_ÉÉé=pçìåÇ.
Using shortcuts
From the ho m e s c ree n, yo u c an acce ss fo ur s h ortc uts b y pre ss in g t he
navigation key in any one of four directions:
Access your recent calls.
Press and hold
to define or use
Left
a shortcut.
Access your saved contacts.
Three shortcuts are automatically programmed into your phone (up, right,
and dow n). F or the fo urth (le ft), yo u c an a ssig n a s ho rtc ut to o n e o f th e
various features of your phone. See “Setting a feature shortcut. ”
62 Customizi ng Your Phone
* Up Press and
Right
Down +
hold to set
the phon e
to vibrate.
Page 81

Setting a feature shortcut
1. Select jÉåì → pЙннбеЦл → aáëéä~ó=→=pЬзкнЕмн=hЙу.
2. Highlight the feature you want se t as a shortcut , and press to select
it. Note th at you can set only on e fe at ure at a tim e as a shor tc u t.
– Choose=sзбЕЙ=pЬзкнЕмнл=to quickly access a menu option by sayi ng it s
name. To learn how to record voice shortcuts, see page 81.
– Choose=få_çñ, pÉåÇ=kÉï=jÉëë~ÖÉ,=sзбЕЙ=pЬзкнЕмнI=oбеЦЙк=sздмгЙ,
_млбеЙлл=iблн, mЙклзе~д=iблн, tЙД=_кзплЙк, pнзйп~нЕЬ, `~дЕмд~нзк, sзбЕЙ=
jЙгз to launch the respective screen of each of these functions.
– Choose=kçåÉ=to disable these shortcuts.
Accessing a feature shortcut
From th e h o me s cre en , p r ess left and f oll ow t he pro m pts.
Changing a feature shortcut
To ch an ge th e s h ortc ut you have ass ig ne d:
1. Select jÉåì → pЙннбеЦл → aáëéä~ó=→=pЬзкнЕмн=hЙу.
2. Highlight the new feature and pr ess to select it.
User Guide for the Kyocera S14 Opal phone 63
Page 82

Personalizing the screen
Changing your banner
The banner is the personal label for your phone. It appears on the home
screen above th e time and da te. The banner can b e up to 12 cha racter s lon g.
Note: On certain networks you may see a network message in place of your
banner for a short period of time. This will be cleared on its own.
1. Select jÉåì → pЙннбеЦл → aáëéä~ó=→ jó=_~ååÉê.
2. Select bÇáí.
3. Press to clear the screen.
4. Enter your new text.(For help, see “Quick ref erence to text entry” on
page 37.)
5. Press to save.
64 Customizi ng Your Phone
Page 83

Choosing a different time/date format
1. Select jÉåì → pЙннбеЦл → aáëéä~ó=→=qáãÉLa~íÉ=cçêã~í.
2. Highlight the format you want and press .
Note:The time and date are not cor rect in th is menu.
Choosing a different menu view
You can ch an ge th e a ppearan c e o f th e menus yo u see w he n y ou s elect
jÉåì from the home screen.
To ch an ge th e m e nu view:
• Select jÉåì → pЙннбеЦл → aáëéä~ó=→=j~áå=jÉåì=sáÉï, then the option you
want: pã~ää=fÅçåëI=i~êÖÉ=fÅçåëI or=iáëí=jÉåìëK
Small Icons Large Icons= List Menus
Main Menu
Contacts
Contacts
Contacts
Messages
Web Browser
Note:If you change to iáëí=jÉåìë, you will need to press up or down to see menus.
User Guide for the Kyocera S14 Opal phone 65
Page 84

Adjusting the backlighting
Your screen ligh ts up while you ar e in a cal l or whe n you pr e ss a k ey on t he
keypad. Ho w ev er, you can ch an ge when an d how bac kl igh tin g lights up.
1. Select jÉåì → pЙннбеЦл →=aáëéä~ó=→ _~ЕвдбЦЬнбеЦ.
2. Se le c t an option from th e lis t:
– aбл~ДдЙЗФturns backlighting off comple tely.
– NM=лЙЕзеЗлФturns backlighting on for 10 seconds af ter your last keypr ess.
– PM=лЙЕзеЗлФturns backlighting on for 30 seconds af ter your last keypr ess.
– NM=ëÉÅK=C=áå=Å~ääÔturns backlight ing on during a call, and f or
10 seconds after your last k eypress.
– PM=ëÉÅK=C=áå=Å~ääÔturns backlight ing on during a call, and f or
30 seconds after your last k eypress.
Note: Keeping backlighting on during a call drains the bat tery more quickly
and reduces talk and stand by times.
66 Customizi ng Your Phone
Page 85

Setting Power Backlighting
You can set backli ghting t o remain on when an exte rnal power source, such
as the AC a d ap ter, is us ed w it h t he ph on e.
Note:Power backlig hting may not be available with some accessories. Check
with your s ervice provider.
1. Select jÉåì → pЙннбеЦл → ^ЕЕЙллзкбЙл → mпк=_~ЕвдбЦЬнбеЦ.
2. Select ^äï~óë=çå to keep backlighting on. (The battery charges more
slowly when power backlighting is on.)
Changing the display contrast
1. Select jÉåì → pЙннбеЦл → aáëéä~ó=→=aáëéä~ó=`çåíê~ëíK
2. Select the level of contrast you want (eбЦЬЙлнI=eбЦЬI=jЙЗбмгI=iзпI=and=iзпЙлн).
Setting numbers to auto-hyphenate
Auto-hyph en ation auto m ati ca lly i ns erts hy p he ns in to yo ur ph on e numbers
to be consistent with the U.S. dialing plan. For example, 1-222-333-4444.
1. Select jÉåì → pЙннбеЦл → aáëéä~ó=→=^мнзJeуйЬЙе~нбзе.
2. Select bå~ÄäÉÇ to turn this feature on.
User Guide for the Kyocera S14 Opal phone 67
Page 86

Choosing a different language
Your phone may support alternate languages.
1. Select jÉåì → pЙннбеЦл → aáëéä~ó → i~åÖì~ÖÉ.
2. Select the language and press .
Creating a secure environment
This section describes the features involved in securing your phone and
preventing access to personal information. All security features are
shielded by a fou r-d igi t lo ck c od e.
Changing your lock code
The lock cod e is ty pi call y 0 00 0 or t he las t fo ur di gi t s of yo ur phon e n umb er.
1. Select jÉåì → pЙннбеЦл → pЙЕмкбну.
2. Enter your four-digit lock code and select `Ü~åÖÉ=içÅâ=`çÇÉ. A message
appears: “Change Lock Code?”
3. Select vÉë and ente r a new four-digit code, then press . Enter your
new lock code again.
68 Customizi ng Your Phone
Page 87

Locking your phone
When your ph one is loc ked, you can call on ly emergen cy number s, such as
911, or a service provider number, such as *611. You can receive incoming
calls, but you cannot use the phone’s menus.
1. Select jÉåì → pЙннбеЦл → pЙЕмкбну.
2. Enter your four-digi t lock code and select içÅâ mÜçåÉK A message appears.
3. Select vÉëK=Then select an option:
– kЙоЙкФdoes not lock the phone.
– lе=йзпЙк=мйФlocks the phone every time you turn it on.
– kçïÔlocks the phone immediately.
4. Press .
Unlocking the phone
1. From th e ho m e sc re en, selec t rедзЕв.
2. Enter your four-digit lock code.
User Guide for the Kyocera S14 Opal phone 69
Page 88

Restricting calls
You can restrict the calls that can be made from your phone to only those
that have been saved in your Contacts Directory.
Note: Restricting calls blocks the Phone Info menu from displaying your
mobile phone number.
1. Select jÉåì → pЙннбеЦл → pЙЕмкбнуK
2. Enter your four-digit lock code and select iáãáí `~ääë=lìí.
3. Select vÉëK=Then select vÉëI=íç=`çåí~ÅíëK
Clearing personal information
To clear all personal information from your phone, you can erase all
contacts from th e C o ntac ts directo ry and/or er as e the Recent C al ls lis t.
Erasing all contacts
1. Select jÉåì → pЙннбеЦл → pЙЕмкбну.
2. Enter your four-digit lock code and select bê~ëÉ=^ää=`çåí~Åíë.
3. Select vÉë to erase all contact s. A message appears: “Erase ALL cont act s?”
4. Select vÉë to erase all contacts.
70 Customizi ng Your Phone
Page 89

Erasing the recent calls list
1. Select jÉåì → pЙннбеЦл → pЙЕмкбну.
2. Enter your four-digit lock code and select bê~ëÉ `~ääë=iáëí.
3. Select vÉë t o erase all recent ca lls. A messa ge appear s: “Erase al l recen t
calls lis t en tries? ”
4. Select vÉë to erase all recent calls.
Setting message alerts
You can choose h ow y ou w a nt be alerted of inc oming vo ic em ail, pages, o r
text messages.
1. Select jÉåì → pЙннбеЦл → jÉëë~ÖáåÖ=→ the type of alert (sзбЕЙг~бд=^дЙкн,=
m~ÖÉ=^äÉêí,=jÉëë~ÖÉ=^äÉêí, or=kЙн=^дЙкнл).
2. Press to select an option:
– aбл~ДдЙЗФdoes not aler t you when a message is received.
– sбДк~нЙ=зеЕЙФsets the phone to vibrate once when a new message
is received.
– sбДЙ=C=кЙгбеЗФsets the phone to vibrate once when a new message
is first received, and once every five minutes. To stop the reminder,
press to select fЦезкЙ.
User Guide for the Kyocera S14 Opal phone 71
Page 90

– pзСн=ДЙЙй=зеЕЙФsets the phone to beep once softly when a message
is received.
– pзСн=ДЙЙйлФsets the phone to beep softly approximately every five
minutes. To stop this reminder, press to select fЦезкЙ.
– iзмЗ=ДЙЙй=зеЕЙФset s the phone to beep once loudly when a message
is received.
– iзмЗ=ДЙЙйлФsets the phone to beep loudly approxi mately every five
minutes. To stop this reminder, press to select fЦезкЙ.
Setting the headset to ring
You can set th e ph o ne to rin g or al ert y o u from a head s et (s ol d s epara tel y).
1. Select jÉåì → pЙннбеЦл → ^ЕЕЙллзкбЙл → eЙ~ЗлЙн=oбеЦбеЦ.
2. Select lìí=çÑ=ÜÉ~ÇëÉí to set the phone to ring or alert you from the headset .
Switching between phone lines
If you have two phone numbers set in your phone (for example, if you have
service in two different countries), you can switch between phone lines.
Each phone line h as its own ph on e n um b er. When you are u si ng on e line,
you ca nn ot rec ei ve calls f r om th e other.
72 Customizi ng Your Phone
Page 91

It would be a s i f th e phone we re “off” for th at nu m be r. Your vo ic em ai l,
howeve r, will still take m e ss ag es . All contacts a nd setting s are sh are d for
both li ne s.
Note:Not all service providers support this feature. Check with your service
provider for availability.
1. Select jÉåì → pЙннбеЦл → kЙнпзкв=→=pÉí mÜçåÉ=iáåÉK
2. Select the other phone line and press .
Note:Once a second phone line is established by your service provider, the
second phone number becomes available for selecti on in this menu.
Connecting to a laptop or a PC
The Com P ort s p ee d s ets th e da ta rate at which y ou r ph on e co nn ec ts to a
laptop or PC.
1. Select jÉåì → pЙннбеЦл → ^ЕЕЙллзкбЙл=→ `çã=mçêí=péÉÉÇK
User Guide for the Kyocera S14 Opal phone 73
Page 92

2. Select the speed. The options are: NVKO=âÄéë, NNRKO=âÄéë (default), OPMKQ=
âÄéë, and=líÜÉê.
Note: The líÜÉê option cannot be selected manually. Contact your serv ice
provider for more information.
Connecting to a TTY/TDD device
You can conne ct yo ur ph on e to a TTY d ev ic e f or th e he aring impaired if
your service provider supports the service.
Note: This ph on e re q uire s an ad apter with a 2. 5-m m ja ck to c on ne ct to a
TTY adap te r.
1. Co nn ect the TTY devi c e to th e ph o ne first.
2. Select jÉåì → pЙннбеЦл → ^ЕЕЙллзкбЙл → qqv=aЙобЕЙK
3. Select bå~ÄäÉÇK
Note: Set this option to=aáë~ÄäÉÇ=wh en the phone is no t being used wit h a TTY
deviceK
74 Customizi ng Your Phone
Page 93
7USING VOICE RECOGNITION
Voice recognition is a unique feature on your Kyocera S14 phone that
allows yo u to make a nd an s w er cal ls by s pe ak in g c o mm a nd s i nto th e
phone’s microphone.
Note:You cannot use v oice recogni tion to end a call; you must pr ess .
Tips for successful voice training
• Train commands in a quiet environment.
• Follow the voice prompts.
• Do not speak a command until the prompt ends.
• Speak clearly into the microphone.
User Guide for the Kyocera S14 Opal phone 75
Page 94

Training Voice Recognition
Use this feature to train standard “yes,” “no,” and “wake up” commands.
1. Select jÉåì=→=pЙннбеЦл=→ sзбЕЙ=pЙкобЕЙл=→=sзбЕЙ=qк~бебеЦ=→ qê~áå=^ää.
2. Follow the pro m pts for each word un til training is complete.
Note: The Wake up command can be used only with an external power
source such a s a Hands -fr ee Car Kit or Heads et (bot h sol d sepa rate ly)
to initiate voice recognition services. “U sing voice f eatures wit h
accessories” on page 85.
Recording voice tags
To mak e or receive ca lls u si ng vo ic e recogni tio n, contacts mus t b e sa ved
and ha ve as s oc ia ted voice tags.
76 Using Voice Recognition
Page 95

Recording a voice tag for a new contact
1. From the h ome screen, enter the phone number of the new contact.
2. Press to select p~îÉ=kÉï.
3. Enter t he co nt act’ s name an d pr ess to sav e. For hel p ent ering let ters,
see page 37 .
4. Press right and select lйнбзел.
5. Select ^ÇÇ=sçáÅÉ=aá~ä.
6. At the tone or prompt , say a name, the n repeat the name as instructed.
You hear “(Name) added” or, if the name was not saved, you are
instru cted to try again.
7. Scroll to p~îÉ and press . A message appears: “Contact
Successfully Saved!”
8. Press to return to t h e h ome scre en. Voice di alin g i s now ava il abl e for
this number. See “Calling using voice tags” bel ow.
User Guide for the Kyocera S14 Opal phone 77
Page 96

Recording a voice tag for an existing contact
1. From the home screen, select jÉåì → `çåí~Åíë=→ sáÉï=^ää.
2. Highlight the contact you want to add voice dial to and press .
3. Highlight the phone number and press .
4. Select ^ÇÇ=sçáÅÉ=aá~ä.
5. Follow the prompts to record a name.
6. Press to select p~îÉ. You are now ready to make a call using this
voice tag.
Viewing entries with voice tags
• Select jÉåì=→=`çåí~Åíë=→=sçáÅÉ=aá~ä=iáëí. A list of all contacts with
assigne d voice tags appears.
Editing a voice tag
1. Select jÉåì → `çåí~Åíë=→ sçáÅÉ=aá~ä=iáëí.
2. Highlight the contact you want to ed it, and pres s to select it.
3. Select the phone number and press .
4. Select ^ÇÇ=sçáÅÉ=aá~ä, bÇáí=sçáÅÉ=aá~ä, or bê~ëÉ=sçáÅÉ=aá~ä.
5. Fo ll ow the prom p ts.
78 Using Voice Recognition
Page 97

Calling using voice tags
1. Make sure th ere is a vo ice t ag rec orde d for th e person you want to call. If
there is n’t, see “Recording voice tags” on page 76.
2. From the h ome screen, press . The phone responds: “Say a name.”
3. Say the name of the person you want to call.
4. If the na me you said matche s a contact in the Voice Dial List, the phone
responds: “Calling (Name).” Remain silent to make the call, or say kçÒ
to cancel.
Note:If there are multiple names saved in the Voice Dial List that match the
name you said , you will be asked to ver ify which name you wa nt to call.
Say vÉëÒ when y ou hear the co rrect name. Say kçÒ when you hear an
incorrect name.
5. When you are finished, press . You cannot end the call with a voice
command.
Note:You can set the phone to prompt you to “say a name” as soon as you
open the flip:
• Select jÉåì=→=pЙннбеЦл=→=sзбЕЙ=pЙкобЕЙл=→=^Åíáî~íÉ=ïáíÜ=cäáé=→ bå~ÄäÉÇK
User Guide for the Kyocera S14 Opal phone 79
Page 98

Answering calls using voice commands
You can use voice command s to ans wer a n i ncomi ng call onl y if your phon e i s
connected to an accessory such as a Hands-free Car Kit or Headset with external
power (both sold separately). See “Answering calls hands-free” on page 14.
1. Select jÉåì=→=pЙннбеЦл=→=sзбЕЙ=pЙкобЕЙл=→=sзбЕЙ=^елпЙк=→=bå~ÄäÉ.
2. When you receiv e an incoming call, VR responds: “Incoming call ,
answer?” or “Incoming roam cal l, answer?” If th e caller is reco gnized as a
contact entry in your phone, then the phone will say “Incoming call from
(Name), answer?”
3. Say “Yes” or press any key except .
Ignoring an incoming call
To igno re an inco m ing c al l, d o o ne o f th e following :
• Say “No” and press to silence the alert.
• Remain silent. The voice alert repeats tw ice and the ph one rings once,
then returns to the home screen.
80 Using Voice Recognition
Page 99

Using voice shortcuts
You can us e v oice com m an ds to q uic k ly ac ce s s f ea t ure s of yo ur p h one.
These features include:
• Recording a
• Writing a
=new text message
=voice memo
• Changing the ringer volume
• Opening the Calculator
• Viewing the Recent Calls
=list
• Starting the Web Browse r
• Opening web bookmarks
Recording voice shortcuts
oЙЕзкЗ=нЬЙ=лЬзкнЕмн=е~гЙлW
1. Select jÉåì=→=pЙннбеЦл=→=sзбЕЙ=pЙкобЕЙл=→=sзбЕЙ=pЬзкнЕмнл.
2. Press to select th e item for which you wan t to record a voice sho rtcut.
The phone says: “Speak a shortcut name.”
User Guide for the Kyocera S14 Opal phone 81
Page 100

3. Sa y th e sh o rtc u t you want to record . You can re co rd any w ord you wis h .
It is recommended you reco rd a word you will easily remember.
The phon e says: “Again.”
4. Say the shortcut again. If the words you said match, the phone says:
“Shortcu t saved.” If the words you said do not mat ch, the phone asks you
to record the shortcut again.
Set voice shortcuts as your shortcut key:
1. Select jÉåì=→=pЙннбеЦл=→=aáëéä~ó=→=pЬзкнЕмн=hЙуK
2. Select sзбЕЙ=pЬзкнЕмн.
Use the voice shortcuts you created:
1. Press and hold left.
2. Speak the shortcut you want after the prompt. You will be taken directly to
that menu option.
82 Using Voice Recognition
 Loading...