

Page 1

User Guide
Page 2
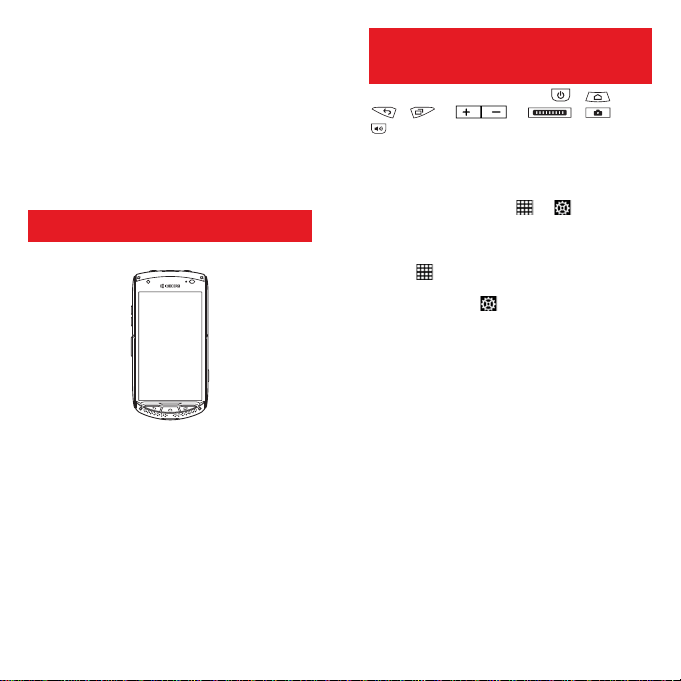
Getting Started
Thank you for purchasing a KYOCERA
smartphone.
Before use, please read the User Guide and the
supplied Quick Reference Guide for proper
usage.
Choose the model you are using from the list at
the URL below to view the USB driver.
http://global.kyocera.com/ruggedphone/
List of Packaged Items
• KC-S701 main unit
• Power adapter
• Micro USB cable
• Headset with microphone
• Warranty
• Quick Reference Guide
✎Notes
• The battery is built into the product.
• MicroSD card and wireless charger are not
included.
Notations Used in This
Document
In this document, the symbols , ,
, , , , , and
are used to represent key operation. Also,
the notations used for selecting icons and items
visible on the display are as follows.
Example :
On the Home screen tap ► ► [About
phone].
Explanation :
Tap the icon at the bottom of the Home
screen. On the Apps list that is displayed, swipe
right or left and tap . Then swipe up and down
on the Settings menu screen that is displayed,
and tap [About phone].
✎Notes
• This manual describes operations from the
Home screen at factory settings. It you change
things like the settings, then operation
procedures, icons, etc. may differ from those
described. Also, operations are described
based on a vertical display. If using a
horizontal display, things like menu items may
differ.
• The screens and illustrations used in this
manual are representations and may differ
from the actual product and screens. In
addition, a portion of the screen may be
omitted.
GB 1
Page 3

Table of Contents
List of Packaged Items .............................1
Notations Used in This Document........... 1
Disclaimers................................................3
Safety Precautions (Observe Strictly).....4
Product Disposal.....................................12
Handling Precautions .............................13
Notes on Waterproof, Dustproof and
Shock-Resistant Properties ...................20
Using Apps ..............................................29
Things to Check and Setup
Before Use 30
Names and Functions of Parts ....... ......... 30
Inserting/Removing a Nano SIM Card .... 32
Inserting/Removing a MicroSD Card....... 33
Charging.................................................. 35
Turning the Power On/Off .......................36
Initial Settings..........................................38
How to Use the Touch Panel ..................38
Home Screen..........................................39
Status Bar ...............................................40
Notification Panel ....................................41
Using the Apps List .................................42
Applications 42
Phone......................................................42
People..................................................... 43
Messaging...............................................44
Email.......................................................45
Gmail.......................................................46
Chrome ...................................................47
Camera ...................................................48
Gallery.....................................................49
Play Store................................................50
Eco Mode ................................................50
Product settings 51
Displaying the Settings Menu..................51
WIRELESS & NETWORKS.....................51
DEVICE...................................................54
PERSONAL.............................................56
ACCOUNTS ............................................57
SYSTEM..................................................57
Appendix 58
Main Specifications..................................58
Specific Absorption Rate of Mobile Phone
.................................................................58
OpenSSL License....................................60
FCC Notice..............................................61
European RF Exposure Information........63
Declaration of Conformity........................63
Intellectual Property Rights......................64
Open Source Software............................66
GB 2
Page 4

Table of Contents/Important Points
Disclaimers
• The Company is not liable for any
damages arising from earthquakes,
lightning, storms, floods, or other natural
disasters, nor from fires, actions by third
parties, other accidents, intentional or
mistaken misoperation by the customer,
or use under other unusual conditions
outside the responsibility of the
Company.
• The Company is not liable for any
incidental damages (change/
disappearance of described content,
loss of business income, disruption of
business, etc.) arising from the use or
inability to use this product.
• The Company is not liable for any
damages arising from failure to observe
the described content of this manual.
• The Company is not liable for any
damages arising, for example, from a
malfunction caused in conjunction with
connected devices or software not
related to the Company .
• Shot image data or downloaded data
may sometimes be altered or lost due to
faults, repair, or other handling of this
product. The Company is not liable for
any damage or lost income that results
from recovering this data.
Table of Contents/Important Points
• It is recommended you keep a copy of
important data on your PC’s hard disk,
etc. Whatever the cause of the defect or
malfunction may be, the Company
assumes no responsibility for the
alteration or loss of saved data.
✎Notes
• Reproduction of the content of this manual in
part or in whole is prohibited.
• The content of this manual is subject to
change without notice.
GB 3
Page 5
Safety Precautions
(Observe Strictly)
■ Before using this product, thoroughly read
the Safety Precautions for proper use.
After reading, store the precautions in a
safe place.
■ These precautions contain instructions
that should be observed to prevent
damage to property and/or injury to the
user and other people.
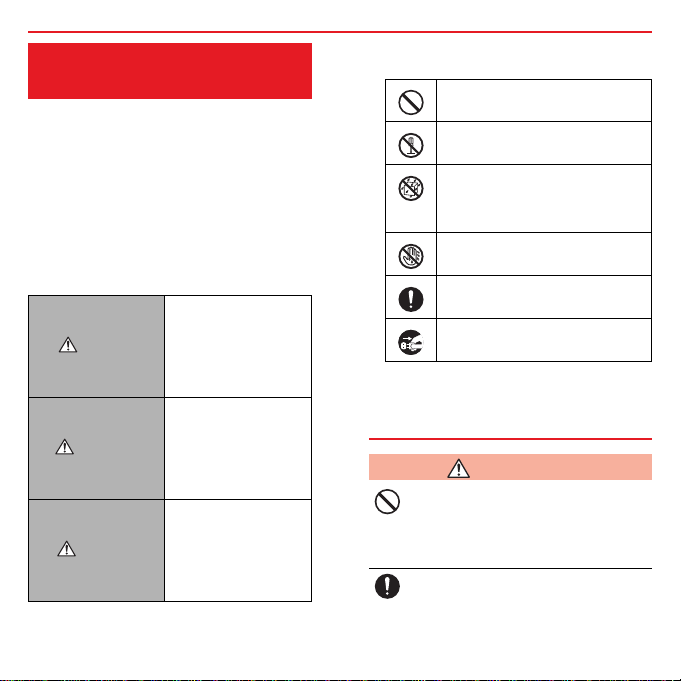
■ These precautions are divided into the
following categories according to the
severity of the damage that could occur if
the instructions are not followed.
This symbol indicates
the “imminent danger
DANGER
WARNING
CAUTION
of death or serious
injury” if the
instructions are not
followed.
This symbol indicates
the “possibility of
death or serious
injury” if the
instructions are not
followed.
This symbol indicates
the “risk of minor
injury or physical
damage” if the
instructions are not
followed.
Table of Contents/Important Points
■ Explanation of graphics used in these
precautions
Indicates an action that is not
allowed.
Indicates that disassembly is not
allowed.
Indicates that use in a place
where the product is likely to get
wet or allowing the product to get
wet is not allowed.
Indicates that handling with wet
hands is not allowed.
Indicates an action that must be
taken.
Indicates that the power plug must
be disconnected from the mains.
Precautions common to the main
unit, internal battery, power
adapter, and pe ripheral devices
DANGER
Do not use, store, or leave the product in
hot places (e.g. by fire, near a heater, in
direct sunlight, in a car in the hot sun).
Doing so might cause ignition, rupture,
fault, fire, or injury.
Before entering an area where flammable gas is generated, such as a petrol
station, be sure to turn off the product.
GB 4
Page 6
Table of Contents/Important Points
Do not put the product in a cooking
apparatus such as microwave oven or a
pressure vessel. Doing so might cause
ignition, rupture, fault, fire, or injury.
Do not throw the product into a fire or
heat it. Doing so might cause ignition,
rupture, or fire.
Do not short-circuit the external connection terminal, earphone microphone terminal, etc. Also, do not allow conductive
foreign objects (metal fragments, pencil
leads, etc.) to come into contact with or
get inside the external connection terminal, earphone microphone terminal, etc.
Doing so might cause a fire, burns, or a
fault due to heat generation.
When using metal accessories, etc., be
sure not to allow the metal part to come
in contact with the external connection
terminal, earphone microphone terminal, or power outlet. Doing so might
cause electric shock, ignition, injury, or a
fault.
Do not expose the camera lens to direct
sunlight for an extended period. Doing
so might cause ignition, rupture, or fire
by the light-collecting mechanism of the
lens.
You are not allowed to disassemble,
modify, or repair the product. Doing so
might cause a fault, ignition, electric
shock, or injury. The Company is not liable in the event that any nonconformities
arise on this product or peripheral
devices as a result of modification, etc.
WARNING
Do not drop the product or subject it to
strong impact, such as throwing. Doing
so might cause rupture, overheating,
ignition, or a fault.
Do not use outside when you can hear
thunder. Doing so puts you at risk of
lightning strikes and electric shock.
Do not let your hands, fingers, and other
parts of the body touch the external connection terminal. Doing so might cause
electric shock, injury, or a fault.
If the product is damaged from being
dropped, etc., and its display is cracked
or internal parts are exposed, do not
touch the cracked display or exposed
parts with your hands. Doing so might
cause electric shock or injury from damaged parts.
If the product is charged while wet, electric shock, a short circuit, or corrosion
might occur, and overheating might
cause fire, malfunction, or burns.
Although this product model has waterproof properties, stop use if water or
another liquid gets inside the product
from the external connection terminal
cover, card slot cover, earphone microphone terminal cover, etc. Continued use
of the product in this state might cause
overheating, fire, or a fault.
GB 5
Page 7
Table of Contents/Important Points
Do not operate the product while driving
a vehicle, riding a motorized bicycle or
bicycle, or walking. Doing so might compromise traffic safety and cause an accident.
If charging is not completed after the
specified charging time, stop charging.
Failure to do so might cause leakage of
liquid, overheating, rupture, or ignition.
Do not leave in places within the reach of
small children. Small children might mistakenly swallow small parts, etc. and
choke on them, or might drop the product and cause an accident or injury.
CAUTION
Do not store the product in places subject to direct sunlight (e.g. in vehicles),
places that get hot, places that get
extremely cold, or in humid or dusty
places. Doing so might cause overheating, fire, deformation, or a fault.
Do not leave in unstable locations such
as unsteady stands or tilting surfaces.
Dropping the product might cause injury
or damage. Pay extra attention while the
vibration is set. Also, pay sufficient attention to impact, etc.
Do not cover or wrap up the product in
bedding, etc. while using or charging the
product. Doing so might cause fire, fault,
or injury.
Do not touch the product or power
adapter for extended periods while
power is being supplied from an external
source. Doing so might cause low-temperature burns.
The product may become hot from prolonged use, especially in a high-temperature environment. Be careful about
prolonged skin contact when using the
product, as it might cause low-temperature burns.
Do not use power outlets or wiring apparatus beyond their ratings. Also, exceeding the rating by, for example, connecting
multiple devices to a single power strip
might cause overheating and fire.
GB 6
Page 8
Do not place near corrosive chemicals or
in places where corrosive gas is generated. Doing so might cause a fault or
loss of internal data.
Do not use if there is smoke, abnormal
odour or noise, excessive overheating,
or other abnormalities. If you are charging, unplug the power adapter from the
mains, confirm that the product is not too
hot, and turn of the power.
When plugging earphones, etc. into the
product, adjust the volume to the proper
level. Setting the volume too loud or
using earphones continuously for an
extended time period might adversely
affect your ears. Also, raising the volume
too high might prevent you from hearing
sounds around you, which might in turn
lead to a traffic accident at a railway
crossing or pedestrian crossing.
When adjusting the volume with earphones, etc. plugged into the product,
raise the volume a little at a time. If you
raise the volume too much from the outset, a sudden loud noise from the earphones, etc. might adversely affect your
ears.
When using the power adapter or an
external device, insert/remove the connector straight to/from the terminal.
Check the orientation of the connector. If
not correct, it may cause damage or a
fault.
Table of Contents/Important Points
Main unit
DANGER
Do not puncture the product with a nail,
hit it with a hammer, or step on the product. Doing so might cause fire or damage.
Be careful that the product is not bitten
by your pet. It might cause leakage,
overheating, rupture, ignition of the internal battery, fire, or injury.
WARNING
Do not use the product while you are
aboard an aeroplane. Although, some
airline companies do allow their passengers to use cell phones. For details, contact the airline company you use.
Turn the product off near high precision
electronic devices. Failure to do so might
affect the electronic devices. (Examples
of electronic devices that might be
affected by the product include cardiac
pacemakers, hearing aids, other electronic medical devices, fire alarms, and
automatic doors. If you are using an
electronic medical device, contact the
device manufacturer or retailer for information about the possible affects of radio
waves.)
GB 7
Page 9
When using the product near an
implanted pacemaker, implanted cardioverter-defibrillator, or other electronic
medical device, radio waves might affect
these units and devices. So, please
observe the following.
・Those with an implanted pacemaker or
implanted cardioverter-defibrillator
should carry or use the product at least
15 cm away from the pacemaker or
cardioverter-defibrillator.
・Turn the product off or set it to “Aero-
plane mode” when it may be difficult to
keep at least 15 cm away, such as in
situations where you cannot move
freely, because there may be people
with a cardiac pacemaker or implanted
cardioverter-defibrillator nearby.
・Pay attention to the following points
when using the product inside medical
institutions.
- Do not bring the product into operating rooms, intensive-care units (ICU),
and coronary care units (CCU).
- Turn the product off in hospital wards.
- Even if you are in a lobby, etc., be
sure to turn the product off when ther e
are electronic medical devices
nearby.
- When a medical institution has laid
down designated areas where use of
the product is prohibited or is not
allowed to be brought in, abide by the
instructions of that medical institution.
Table of Contents/Important Points
・When using electronic medical devices
other than an implanted pacemaker or
implanted cardioverter-defibrillator outside a medical institution (e.g. home
medical treatment), check with the individual manufacturers of the electronic
medical devices regarding the influence of radio waves.
Stay alert to your surroundings when
calling, messaging, browsing the Internet, shooting photos, playing games, or
listening to music. Failure to do so might
cause a fall or traffic accident.
Do not use the light in front of a person’s
eyes. Do not stare into the light when it is
illuminated. Doing so might cause
impairment of eyesight, etc. Be especially careful not to photograph small
children from a very close distance.
Do not turn the light on toward a driver of
a car, motorbike, bicycle, etc. If disoriented by the light, the driver might
become unable to drive and cause an
accident.
On rare occasions, some people demonstrate symptoms such as temporary
muscle spasms, loss of consciousness,
etc. from watching repeatedly flickering
screens. Those with a past history of this
should consult with a physician beforehand.
Chemically hardened glass is used for
the product’s display. If it is broken, do
not touch the broken part. The broken
part might cause injury.
GB 8
Page 10
Table of Contents/Important Points
Do not hold the speaker close to your
ear. Loud volume might affect hearing.
CAUTION
Although it is rare, use of the main unit in
a vehicle sometimes affects on-board
electronic devices. If this happens, stop
use, since this may impair safe travel.
If you feel any skin abnormalities, immediately stop use and consult a dermatologist. Itching, rashes, eczema, etc.
sometimes occur, depending on your
physical constitution and condition. The
materials of parts used on the product
are as follows.
Part Material
Outer case (display
side)
Outer case (displayside top), outer case
(display-side bottom),
volume up/down key,
direct button
(circumference),
speaker panel,
camera lens ring,
flash ring, decorative
screws (rear side)
PA resin Acrylic UV-
PC resin Acrylic UV-
Surface
treatment
cured
coating,
urethane
heat-cured
coating
cured
coating
Part Material
Outer case (rear
side), earphone
microphone terminal
cover, card slot cover
Direct button (inside),
camera lens, flash
lens
Display Chemically
Back key, home key,
recent apps key,
external connection
terminal cover
Power key,
speakerphone key,
camera key
Decorative screws
(display side)
Do not bring the product close to magnetized objects such as cash cards,
floppy disks, credit cards, and prepaid
cards. Doing so might result in a loss of
recorded information.
Do not allow liquids, metal objects, burnable items, and other foreign matter to
get inside the earphone microphone terminal, the external connection terminal,
the microSD card slot, or the nano SIM
card slot. Doing so might cause fire,
electric shock, injury, or a fault.
PC resin/
urethane
resin
PMMA
resin
hardened
glass
PC resin/
urethane
resin
Urethane
resin
SWCH Trivalent
Surface
treatment
Acrylic UVcured
coating
Hard coat
treatment
Antifouling
treatment
None
None
black
plating
GB 9
Page 11
Do not swing the product from a grip on
the earphones, a phone strap, etc. Doing
so might cause an accident or damage.
Use the product with the external connection terminal cover, card slot cover,
and earphone microphone terminal
cover closed. If the covers are open, dirt
or water might get inside and cause a
fault.
People with weak hearts should be careful when setting the incoming vibration
and ringtone volume. Not doing so can
cause adverse effects on your heart.
Do not place the product directly on the
sand at a beach, etc. Sand or other small
particles might get inside the microphone, speaker, noise cancelling microphone, etc. causing the volume to drop.
If sand gets inside the product, it might
cause overheating or a fault.
When using the product for calling or
data communications, be careful not to
keep the product in direct contact with
your skin for an extended period, and do
not cover the product with paper, cloth,
bedding, etc. The main unit might get
hot, causing a fire, injury, burns, or a
fault.
Table of Contents/Important Points
Internal battery
The internal battery of this product is
a lithium-ion battery. The internal
Li-ion 00
battery is not fully charged at the time
of purchase. Charge the battery
before using the product.
DANGER
If the leaked liquid gets on your skin or
clothes, immediately rinse it off with
water to avoid the risk of injury. If the liquid gets into your eyes, do not rub them.
Wash your eyes with water, and then
immediately consult a doctor to avoid the
risk of losing your eyesight. If the liquid
gets on a device, wipe it off without
touching it.
The internal battery is a consumable
item. If the performance of the internal
battery has depleted (e.g. the usable
time after each charge has become
extremely short), the battery is at the end
of service life, so stop use. Failure to do
so might cause overheating, fire, rupture,
or leakage. The life span of the internal
battery depends on the usage, etc.
GB 10
Page 12
Power adapter
WARNING
Do not use any voltages other than the
specified power supply voltage. Doing so
might cause ignition, fire, overheating,
electric shock, or injury.
Fully insert the power plug of the power
adapter into the mains. Incomplete insertion of the power plug might result in
electric shock, overheating, ignition, fire,
or injury. Do not use when the power
adapter is damaged, or a power outlet is
loose.
Do not damage, modify, twist, pull, or
place a heavy object on the cable of the
power adapter. Do not use a damaged
cable. Doing so might cause an electric
shock, short circuit, fire, or injury.
Do not let your hands, fingers, or other
parts of your body touch the external
connection terminal or the earphone
microphone terminal. Doing so might
cause electric shock, injury, or a fault.
If you hear thunder, do not touch the
power plug. Doing so might cause an
electric shock as a result of a lightning
strike.
When cleaning the power adapter,
unplug it from the mains. If the equipment remains plugged in while you clean
it, it might cause a short circuit.
GB 11
Table of Contents/Important Points
Wipe off dust on the power plug. Failure
to do so might cause fire, burns, or electric shock.
Situate and install in-car devices in
places where they do not hinder driving
or safety equipment such as air bags.
Failure to do so might cause a traffic
accident. Install in-car devices by following the instructions in their manuals.
When the power adapter will not be used
for a long time, unplug it from the mains.
Failure to do so might cause fire or a
fault.
Do not use in places subject to direct
splashing with water, pet urine, or other
liquids. Doing so might result in faults
and injury from overheating, fire, electric
shock, or short-circuiting of electronic circuits. In the event that the product is
splashed with liquid, immediately unplug
the power adapter.
CAUTION
Do not use in humid places, such as
bath areas, or connect/disconnect the
power adapter with wet hands. Doing so
might cause electric shock, injury, or a
fault.
Charge the battery in a stable place. If
placed on an inclined surface or wobbly
stand, the product might fall and cause
injury or damage. Pay extra attention
while the vibration is set. In addition, do
not cover or wrap the product with a
cloth or bedding. Doing so might cause a
fire, injury, or a fault.
Page 13
When unplugging the power adapter
from the mains, grip the power adapter
and remove it. If you pull the cable, the
cable might be damaged.
Product Disposal
Battery:
This product is a unibody (one-piece)
device, so the back cover and battery
cannot be removed. Please be careful.
Observe the following precautions.
• Do not attempt to open the back cover.
• Do not take out the battery , replace it, or
dismantle it.
• D o not damag e the back cover of the
product.
• Do not incinerate the product or dispose
of it like you would household rubbish.
Dispose of the product (including the
internal battery) in accordance with the
environmental regulations of your region.
• The waste collection box for each part,
located at the waste treatment facility in
your area
When cellular devices and
accessories bearing this mark
have reached the end of their
product lives, it is necessary
to bring them to a given waste
collection point.
Table of Contents/Important Points
• The waste collection box at the retail
store
To prevent these waste products from
polluting the environment, they are
recycled.
European countries:
Waste collection points are free to use.
It is necessary to bring all products
bearing this mark to a collection point.
Non-European countries:
If your area lacks suitable waste
collection or if it has a recycling facility for
the parts of devices bearing this mark, it is
necessary to take them to the collection
point for recyclables. Do not throw them
out with normal rubbish.
GB 12
Page 14

Handling Precautions
These precautions are provided to ensure
full performance. Thoroughly read these
precautions to ensure correct use.
■ Precautions common to the main
unit, internal battery, power ad apter,
and peripheral devices
• D o not apply excessive force to the
product during use. Be sure not to
place the product into a tightly
packed bag or to put it beneath a
heavy object in the bag. Sitting with
the product in your pocket might
damage the display or intern al circuit
board, resulting in a malfunction.
Keeping an external device
connected to the external connection
terminal or earphone microphone
terminal might damage the
connector, resulting in a malfunction.
Such damage and malfunctions are
not covered by the warranty, even if
there is no external damage.
• To ensure the waterproof properties
(equivalent to IPX5 and IPX8) of this
product, use the product with the
external connection terminal cover,
card slot cover, and earphone
microphone terminal cover securely
closed. Note that the waterproof
Table of Contents/Important Points
properties are not guaranteed in
every usage condition. Do not allow
water to get inside the product or
splash water onto the power adapter.
Do not open/close the external
connection terminal cover, card slot
cover, or earphone microphone
terminal cover in the rain or with
water drops on the surface of the
product. Doing so might cause water
intrusion resulting in internal
corrosion. Malfunctions determined
to be caused by water intrusion are
not covered by the warranty.
• D o not use these items in extremely
hot, cold, or humid places. (Use
within an ambient temperature range
of 5°C to 35°C and humidity range of
35% to 85%.)
- Power adapter
- Peripheral devices
• D o not use these items in extremely
hot, cold, or humid places. (Use
within an ambient temperature range
of 5°C to 35°C and humidity range of
35% to 90%. Temporary use at -21°C
to 50°C is acceptable.)
- Main unit
• Do not use in places subject to lots of
dust or vibration.
GB 13
Page 15

• Periodically clean the external
connection terminal and earphone
microphone terminal with dry cotton
swabs, etc. Soiled terminals might
cause poor connections. Do not exert
strong force when cleaning the
external connection terminal or
earphone microphone terminal, to
avoid deformation.
• C lean the product with a soft, dry
cloth (such as the type used for
glasses). Do not rub roughly with the
dry cloth, or the display may be
damaged. Leaving drops of water or
dirt on the display may cause stains.
Wiping the product using alcohol,
thinner, benzine, detergent, etc.
might remove the printing on the
outer casing or cause discolouration.
• U se as far away as po ssible from
land-line phones, TVs, and radios, as
nearby use might affect them.
• The product may become warm
while charging or during other
operations, depending on the
situation, but this is not abnormal.
• When a child will be using the
product, parents or guardians should
thoroughly read these materials and
teach the child how to use it.
Table of Contents/Important Points
• Do not put stickers on the product.
Sound may not be emitted or your
voice may not reach the other party.
■ Main unit
• D o not forcefully press, tap, or
intentionally subject the display to
strong impact. Doing so might cause
scratching or damage.
• D o not forcefully press your
fingernails, sharp objects, or hard
objects against the keys or display
surface. Doing so might cause
scratching or damage. The touch
panel is designed to be lightly
touched by your fingers. Do not press
hard with your fingers or push sharp
objects (fingernails, ballpoint pens,
pins, etc.) against it.
• If you do the following things, the
touch panel may become
unresponsive to touch. Note that
these may even cause a malfunction.
- Operation with fingernails
- Operation with a foreign substance
still on the display
- Operation with a protective sheet or
sticker on the screen
- Operation underwater
• To prevent unlawful modification, the
product has been designed so that it
cannot be easily disassembled.
GB 14
Page 16

• Contents saved on the product, such
as contacts and emails, might be
altered or lost in an accident, fault,
repair, or mishandling. Be sure to
keep a copy of important contents.
Note that the Company assumes no
responsibility for any damages or lost
profits resulting from alter ed or lo s t
contents.
• The product uses liquid crystal in its
display. The response speed of the
display may slow down when the
ambient temperature is low, which is
due to the properties of liquid crystal
and is not a malfunction. Display
response speed will return to normal
at room temperature.
• A ltho ugh the display on this product
was made using high-precision
technology, some pixels might be lit
or out at all times. This is not a
malfunction.
• Take care not to inconvenience
people around you when you use the
product in a public place.
• It is rec omme nded that you store
copies of your data, such as photos
you took, videos, and music, on your
PC by sending each file as an email
attachment, etc. Note, however, that
you may not be able to make copies
Table of Contents/Important Points
of copyrighted data, even by the
above-mentioned means.
• Take care not to place magnetized
items such as magnetic cards,
speakers, and TV sets near the
product, as it might cause
malfunction. Putting a strong magnet
close to the product might cause
false operation.
• When you put the product in your
pocket or bag, take care so that the
display does not come in contact with
metal objects or other hard objects.
Doing so might cause scratching or
damage. Also, be careful not to
scratch or damage the display by
using a strap with metal or another
hard part that comes in contact with
the display.
• When suddenly brought into a warm
place from a cold place, when in a
humid location, or when used where
the temperature suddenly changes
(e.g. near the air discharge port of an
air conditioner), water droplets (i.e.
condensation) sometimes form
inside the product. Note that when
used under such conditions, the
humidity might cause corrosion or a
fault.
GB 15
Page 17

• When wiping the display, wipe with a
soft, dry cloth. Use of a moistened
cloth, glass cleaner, or other similar
liquid might cause a fault.
• When connecting/disconnecting an
external device to/from the external
connection terminal or the earphone
microphone terminal, be sure that the
connector or plug of the external
device is straight with the terminal.
• Note that applying unnecessary
force to the external connection
terminal or the earphone microphone
terminal when connected to an
external device might cause
damage.
• Do not discard the product together
with normal rubbish.
• Insert only a microSD card into the
card slot on the product.
• D o not use excessive force when
inserting/removing a microSD card.
Doing so might injure your hands or
fingers.
• While writing/reading data to/from a
microSD card, do not subject the
product to vibration or impact, or turn
off the power. Doing so might cause
loss of data or a fault.
• Take care not to cover the
microphone with your fingers during
Table of Contents/Important Points
a call. The other party may not be
able to hear your voice clearly.
• When doing a handsfree call, note
that the speaker might emit loud
sounds. Take care to keep the
speaker a safe distance from your
ears.
• Do not cover the sensor with your
finger or put a sticker over it. Doing
so may prevent the sensor from
detecting ambient light levels and
functioning correctly.
• Do not put a sticker, etc. on the
proximity sensor. Doing so may
cause the sensor to malfunction,
making the display turn off and
remain off whenever you’re receiving
or taking a call.
■ Touch panel
• Use your fingers to operate the touch
panel. Do not use ballpoint pens,
pencils, or other sharp-pointed
objects. Using such objects does not
only hinder correct operation of the
touch panel, but might also cause
scratching or damage to the display.
• Do not put stickers or sheets (e.g.
commercially available protective
films, peep prevention sheets) on the
display. Doing so might hinder
correct operation of the touch panel.
GB 16
Page 18

• D o not operate the touch panel with
your fingernails. Doing so might
result in split nails or jammed fingers.
• If the display surface is dirty, it may
not function correctly. In such cases,
wipe the display surface with a soft,
dry cloth.
• When carrying the product in your
pocket or bag, take care not to put
the touch panel close to metals or
other conductive materials, as it
might cause false operation of the
touch panel.
• Gloves can be worn while operating
the touch panel. However, operation
may not be optimal, depending on
the thickness and material of the
gloves.
- If water on the gloves prevent s
operation of the touch panel, wipe
the water off.
- If touch operation with gloves is not
possible immediately after
operating with no gloves,
temporarily put the product in Sleep
mode and reawaken it.
- If touch operation is not possible
with gloves that are not snug on the
fingertips, use the pads of your
fingers.
Table of Contents/Important Points
■ Internal battery
• Using the product in very hot or cold
environments, like being left in a
vehicle with the windows closed, will
cause the internal battery capacity to
drop and will shorten the potential
battery usage time. This will also
shorten the internal battery’s service
life. Whenever possible, try to use
the product at room temperature.
• A fter the internal battery is charg ed,
battery power decreases bit by bit,
even if the product is not used. The
internal battery may be discharged if
the product is not used for a long
time. We recommend charging the
product before use.
• To avoid lowering the battery
performance or decreasing battery
life, do not store the product in the
following conditions:
- When fully charged (right after
charging)
- When the battery is empty (too low
to turn the product on)
- In hot and humid places
• Charge the battery before using the
product for the first time after
purchase, or if you have not used the
product for a long time.
GB 17
Page 19

• The internal battery is a consumable
item. If the performance of the
internal battery does not recover
when charged, the battery is at the
end of service life, so stop use.
■ Power adapter
• When not using the power adapter,
unplug it from the mains.
• D o not forcibly bend the power
adapter’s plug or the connection area
of the micro USB cable. Doing so
might cause electric shock, fault,
injury, overheating, or fire.
■ Camera function
• When using the camera, follow
common rules of etiquette regarding
camera use.
• P icture/vi deo data might be altered
or lost due to a malfunction, repairs,
or mishandling of the product. The
Company takes no responsibility for
the recovery of altered or lost data ,
damages resulting from altered or
lost data, or for lost profits.
• When photographing important
occasions (such as a wedding), take
a trial shot and check the shot image
to make sure it is correctly shot.
Table of Contents/Important Points
• D o not use the camera to make a
record of commercially available
books or information of which
photography is not allowed.
• Do not leave the camera lens
exposed to direct sunlight. Imaging
elements might be discoloured or
burnt.
■ Music and videos
• D o not listen to music or watch
videos while driving a car or
motorbike, or riding a bicycle. In
addition, stay alert to the traffic
around you even when walking.
Surrounding sounds may not be
heard clearly, and gazing at the
screen might distract your attention
and cause a traffic accident. Be
especially careful at railway
crossings, on station platforms, and
at pedestrian crossings.
• Take care not to listen at
resoundingly loud volumes for
extended periods, as it might affect
hearing.
• Be careful of sound leakage from
earphones when on trains and at
other places with many surrounding
people.
GB 18
Page 20

■ Copyrights and rights of portrait
• Without the consent of the copyright
holder, you are not allowed to copy,
distribute, publish, modify, or edit the
data that you shot, recorded, or
downloaded using this product,
unless for personal use or uses
under copyright law. In addition, do
not use or modify the portraits or
names of other individuals without
their consent, as it might infringe on
their rights of portrait. Note that
shooting and recording may be
restricted at some live performances,
shows, and exhibitions, even for
personal use.
• Be careful about copyrights and
portrait rights when posting pictures
you shot, etc. on Internet web pages.
■ Back up content on the product
• Please back up important content
registered on the product or
downloaded to the product from an
outside source. Conte nt saved to the
product’s memory sometimes
disappears or is altered by
unexpected factors, such as static
electricity or a fault, repair,
mishandling, etc.
Table of Contents/Important Points
• Store important data such as contact
data, music, and shot pictures and
videos on microSD cards. You can
also send files as email attachments
or transfer them to your PC.
Although, some data cannot be
copied using these means. Please
be aware.
PIN Code
■ PIN code
To prevent unauthorized use of the
Nano SIM Card by a third party, you
can set the product to require PIN code
entry every time the power is turned
on. You also need to enter the PIN
code when setting whether the PIN
code entry is required. If the PIN code
is incorrectly entered a certain number
of times, the PIN code will be locked.
You can unlock the PIN code using the
PUK code.
■ PUK code
If the PIN code is locked, you can
unlock it by entering the PUK code.
• After entering the PUK code, you
need to set a new PIN code.
• The PIN code is not reset by
initializing the product.
GB 19
Page 21

Notes on Waterproof,
Dustproof and ShockResistant Properties
This product has waterproof properties
equivalent to IPX5
as a dustproof property equivalent to
*3
IP6X
, provided that the external
connection terminal cover, card slot
cover, and earphone microphon e terminal
cover are securely closed.
*1 IPX5 equivalent means that the prod-
uct will maintain its operability as a
phone even if it is sprayed with water
from a 6.3 mm diameter nozzle at a
distance of about 3 meters for more
than 3 minutes at a rate of about 12.5
litres per minute from any direction.
*2 IPX8 equivalent means that the prod-
uct will maintain its operability as a
phone with no water getting inside the
main unit, even if it is gently submerged in a tank of still tap water at
room temperature to a depth of 1.5
meters for about 30 minutes.
*3 IP6X equivalent means that the prod-
uct will not allow the intrusion of grit or
dust even when it is placed in an
apparatus with grit and dust of diameters of 75 μm or less and shaken for 8
hours.
*1
and IPX8*2, as well
Table of Contents/Important Points
Testing has also been carried out that
conforms to the procurement standards
(MIL-STD-810G) of the US Dept. of
Defense, which carries out rigid testing
(by our testing method).
• Water resistance: 30 straight minutes of
water resistance in falling rain and
immersion, and IPX5/IPX8 water
resistance
• Dust resistance: Tested in dusty
conditions for 6 straight hours (8.9 ± 1.3
m/sec, 10.6 ± 7 g/m³), and IP6X dust
resistance
• S hock resi stance: Tested by dropping
from a height of approximately 1.22 m
onto plywood (lauan) in 26 directions
• Vibration resistance: Tested with
vibration for 1 straight hour (3 directions
for 1 hour each, 20 to 2,000 Hz)
• Sunlight resistance: Tested in sunlight
for 24 straight hours (totalling 1,120 W/
m²)
• Humidity resistance: Tested at high
humidity for 10 consecutive days (for 16
hours at 45% and for 8 hours at 95% per
day)
• Temperature endurance: Operating
environment: -21°C to 50°C (3 straight
hours each), Storage environment: 30°C to 60°C (4 straight hours each)
GB 20
Page 22

• Low-pressure capability: Tested at low
pressure for 2 straight hours (57.11 kPa:
approx. 4,572 m)
• Salt-fog resistance: Tested at 5% sa lt fog
for 24 straight hours, then dried for 24
hours
* Before using the product, thoroughly
read “Important Items to Remember
before Use” and “Tips for Comfortable
Use” to ensure correct use. Failure to
follow the content described in these
sections may cause the intrusion of
water, sand, or other foreign materials,
resulting in overheating, ignition, electric
shock, injury, or a fault.
* Because operation of the product in var-
ious usage scenes was confirmed
based on the above criteria, proper
operation of the product in every possible condition during actual use is not
guaranteed. Malfunctions determined to
be caused by mishandling by the customer are not covered by the warranty.
Table of Contents/Important Points
Important Items to
Remember before Use
• Make sure that the external connection
terminal cover, card slot cover, and
earphone microphone terminal cover
are firmly closed.
- Waterproofness is only effective when
the covers are securely closed.
- Just a small particle (a hair, a grain of
sand, etc.) on the seals can cause a
water leak.
- Do not open/close the external
connection terminal cover, card slot
cover, or earphone microphone
terminal cover if the product or your
hands are wet.
GB 21
Page 23

■ How to close the external connec-
tion terminal cover, card slot cover,
and earphone microphone terminal
cover
After stowing the cover hinge, press on
the cover evenly with your finger pad.
Rub your finger over the cover in the
direction of arrows to ensure that the
cover is not partially open.
• Do not immerse the product in water
with soap, detergent, or bath salts in
it.
• D o not immerse the product in
seawater, a swimming pool, or a hot
spring.
• D o not immerse the product in any
liquid (alcohol, etc.) besides wa ter.
Table of Contents/Important Points
• Do not place the product directly on
the sand at a beach, etc. Sand or
other small particles might get inside
the microphone, speaker, noise
cancelling microphone, etc. causing
the volume to drop. If sand gets
inside the product, it might cause
overheating or a fault.
• D o not use the product underwater.
• The product does not float in water.
• Do not leave the product in a
bathroom, kitchen, or other humid
place for an extended period of time.
GB 22
Page 24

Tips for Comfortable Use
• Once the product gets wet, water may
remain in gaps on the product. Shake
the product well to the drain water.
Especially make sure to drain water
remaining in the microphone, speaker,
and noise canceller microphone.
• Even after the water is drained, the inner
parts might be still wet. Although the
product can still be used, do not place it
near things that must not get wet. Take
care not to let it dampen your clothes,
bag, or the contents of a bag.
• If it becomes temporarily hard to hear
sound due to water remaining in the
microphone, drain the water.
Notes on various usage scenes
<In the rain>
You can make calls while holding the
product with wet hands in the rain without
an umbrella (101.6 mm per hour, wind
speed 17.8 m/s, for 30 minutes).
• Never open/close the external
connection terminal cover, card slot
cover, or earphone microphone terminal
cover if the product is exposed to rain, or
your hands are wet.
Table of Contents/Important Points
<In the shower>
You can make calls holding the product
with wet hands after a shower.
• Avoid spraying the product with high-
pressure water.
<Washing>
You can wash the product under a mild
flow (up to 6 litres per minute) of tap water
at room temperature (5°C to 35°C) at a
distance of about 10 cm from the tap or
showerhead.
• Do not spray the product with high-
pressure water or submerge it in water
for extended periods of time.
• Make sure to hold down the external
connection terminal cover, card slot
cover, and earphone microphone
terminal cover so that they will not open,
and wash the product with your hands.
Do not use a brush or sponge.
• Do not wash the product in a washing
machine or ultrasound bath.
• Do not splash the product with or
immerse it in soap water, detergent
water, or anything besides tap water.
<In the bath>
You can use the product in a bathroom.
• Although you can make calls with wet
hands, do not immerse the product in a
bathtub.
GB 23
Page 25

• Do not use the product in a bathroom for
an extended period of time.
• Do not immerse the product in hot spring
water, soap water, detergent water, or
water with bath salts in it. Also, do not
use the product underwater. Doing so
might cause a fault.
• Extreme changes in temperature cause
condensation. Wait until the product
reaches room temperature before you
bring the product from a cold place into
a warm bathroom.
• If condensation occurs inside the
display, leave the product at room
temperature for a while until the
condensation is cleared.
• Do not splash the product with hot water.
Also, do not use the product in a sauna.
<At a poolside>
• Do not immerse or drop the product in
pool water. Also, do not use the product
underwater.
• If the product gets splashed with pool
water, immediately rinse it off with tap
*
water
at room temperature, because
pool water contains chlorine for
disinfection. Do not use a br us h, etc. to
wash the product.
* Mild flow (6 litres per minute or less)
Table of Contents/Important Points
<In a kitchen>
You can use the product in the kitchen
and other places where water is used.
• Do not splash the product with or
immerse it in soap water, detergent
water, flavouring, juice, or anything
besides tap water.
• Do not immerse the product in or splash
it with boiling water.
• Do not put the product in a place that
gets extremely hot or cold, such as near
a stove or in a refrigerator.
GB 24
Page 26

Common precautions
■ External connection terminal cover,
card slot cover, and earphone
microphone terminal cover
• Make sure that the external
connection terminal cover, card slot
cover, and earphone microphone
terminal cover are firmly closed. Just
a small particle (a hair, a grain of
sand, etc.) on the seals can cause a
water leak.
• D o not open/close the external
connection terminal cover, card slot
cover, or earphone microphone
terminal cover with gloved hands.
Just a small particle (a hair, a grain of
sand, etc.) on the seals can cause a
water leak. Wipe off any minuscule
droplets of water or dirt with a clean,
dry cloth before closing the covers.
• If the external connection terminal
cover, card slot cover, or earphone
microphone terminal cover is
deteriorated or damaged, the
waterproof property becomes
ineffective.
Table of Contents/Important Points
■ If any liquid other than plain water
gets on the product
• If any liquid other than plain water
(e.g. seawater, detergent, alcohol)
gets on the product, immediately
rinse it with plain water.
• You can wash the product under a
mild flow (up to 6 litres per minute) of
tap water at room temperature (5°C
to 35°C) at a distance of about 10 cm
from the tap or showerhead.
• If the product gets dirty, do not use a
brush as you hand-wash it, holding
down the external connection
terminal cover, card slot cover, and
earphone microphone terminal cover
so that they do not open.
■ After the product gets wet
• After the product gets wet, drain the
water, and wipe the main unit with a
clean, dry cloth. Do not blow hot air
(e.g. hairdryer) on the product.
• In cold climates, water on the product
might freeze. Using a frozen product
might cause a fault. Do not leave the
product without first wiping off the
water. (No special measures against
condensation have been
implemented on this product.)
GB 25
Page 27

■ Rubber seals
• The rubber seals around the external
connection terminal cover, card slot
cover, and earphone microphone
terminal cover are important to
maintaining the waterproof
properties. Do not damage or
remove the rubber seals.
• When closing the external
connection terminal cover, card slot
cover, or earphone microphone
terminal cover, take care not to snag
the rubber seals. Forcibly closing the
covers when the rubber seals are
snagged might damage them,
resulting in loss of the waterproof
properties. Just a small particle (a
hair, a grain of sand, etc.) on the
seals can cause a water leak.
• If any liquid other than plain water
(e.g. alcohol) gets on the rubber
seals, it may cause deterioration in
durability.
• D o not insert sharp objects into the
gaps around the external connection
terminal cover, card slot cover, or
earphone microphone terminal
cover. Doing so might damage or
deform the product or damage the
rubber seals, causing a water leak.
Table of Contents/Important Points
■ Impact
The product might break if it is
intentionally subjected to extreme
impact, such as being thrown or
dropped forcibly. The product can also
be damaged, etc. from a normal drop.
Do not poke the microphone, speaker,
noise cancelling microphone, etc. with
a cotton swab or sharp object. Doing
so may damage/deform the product or
allow the intrusion of water.
GB 26
Page 28

Draining water after wetting the
product
If the product has gotten wet, there are
some non-waterproof areas. If you use
the product in this state, water remaining
in those parts might dampen your clothes
or bag, or the sound might become hard
to hear.
• Follow these steps to drain the water.
1 Thoroughly wipe away water
from the surface of the product
with a clean, dry cloth that
doesn’t shed fibres.
Table of Contents/Important Points
2 Grasp the product firmly, and
shake it in the direction of the
arrows until water no longer
comes out (Noise cancelling
microphone side: at least 20
times each direction, Speaker/
microphone side: at least 20
times each direction)
• When shaking the product, stay
alert to your surroundings.
• Be careful that the product does not
slip from your hand, but hold it
firmly to drain water.
3 Wipe off the water that came
out, and place the product on
top of a clean, dry towel or cloth
at room temperature.
• The microphone, the speaker, and
the noise cancelling microphone
are particularly hard to drain. Place
those parts face down and press
each area to wipe them.
GB 27
Page 29

4 Press the product gently into a
clean, dry cloth that doesn’t
shed, and wipe off the water that
remains in the gaps in the
microphone, speaker, noise
cancelling microphone, etc.
5 After thoroughly draining the
water, leave the product to dry
for an hour or more at room
temperature.
Even after you do these steps, water
may remain on the product. Do not
place the product near things that you
do not want to get wet. Also, take
care not to let it dampen your clothes,
bag, etc.
Table of Contents/Important Points
Precautions on charging
Accessories do not have waterproof/
dustproof properties. Be sure to check the
following points before and after charging.
• N ever charge the battery while the
product is wet. Doing so might cause
electric shock or a short circuit, resulting
in fire, burns, or a fault.
• Check that the product is not wet. If you
are charging the battery just after the
product gets wet, thoroughly drain the
water and wipe the remaining water off
with a clean, dry cloth before opening
the external connection terminal cover.
• If you charge the battery with the
external connection terminal cover
open, be sure to tightly close the cover
when charging is finished.
• D o not touch the AC adapter with wet
hands. Doing so might cause electric
shock.
• D o not splash water over the specified
charging equipment. Do not use it near
water, such as in a bathroom, shower
room, kitchen, or toilet. Doing so might
cause fire, electric shock, injury, or a
fault. Do not bring it into a bathroom, etc.
even when you are not charging. Doing
so might cause fire, electric shock,
injury, or a fault.
GB 28
Page 30

Using Apps
• Be sure to check the security of the app,
then install it at your own risk. Some
apps might contain viruses, damage
various data, or transmit your location
information, usage history, or the
personal information stored in the
product via the Internet.
• If an app you install causes some sort of
malfunction, the Company will not be
held responsible. Repair costs in this
case may be charged, even during the
warranty period.
• The Company assumes no
responsibility for any disadvantages
brought upon you or any third party by
the apps you have installed.
• Inserting a microSD card is necessary to
use some apps.
• S ome apps prohibit the product from
entering sleep mode while they are
active, or rapidly drain the battery while
running in the background.
Table of Contents/Important Points
• Operational procedures and the on-
screen appearance of apps that were
preinstalled on this product or installed
by you are subject to change without
notice as a result of version upgrades. In
addition, operating procedures
described in this manual may differ from
the actual procedures.
GB 29
Page 31

Names and Functions of Parts
Things to Check and Setup Before Use
b
a
c
d
e
f
g
h
i
a Front-facing camera (lens)
b Receiver: Hear the voice of the other party
during a phone call. This product is equipped
with a SMART SONIC RECEIVER, which
vibrates the display to relay sounds. The
receiver section does not have holes, but can
still be used normally.
c Incoming (charging) light
Illuminates red while charging. Flashes green
when you have an incoming call, e-mail, etc.
d Proximity sensor/Light sensor: The proximity
sensor prevents erroneous operation of the
touch panel during a call. The light sensor
detects ambient brightness to adjust the
display brightness. Do not put things like
stickers over the proximity sensor/light
sensor.
e Display (touch panel)
j
k
l
m
n
o
p
s
t
v
w
q
r
u
f Back key: Return to the previous
screen.
g Home key: Display the Home screen or
cancel Sleep mode. Press and hold for at
least 1 second to activate Google Now.
h Recent apps key: Display and activate
recently-used applications, or remove them
from the list to close them.
i Speaker: Hear notification and alarm noises.
j GPS aerial
k Sub aerial
l Bluetooth
m Flash/Torch
n Rear-facing camera (lens)
o mark
When charging wirelessly, place the area with
the mark on top of the marked area of
x
y
®
aerial/Wi-Fi aerial
the wireless charging device.
GB 30
z
ABC D
E
G
F
Page 32

p NFC mark
q NFC aerial
r Main aerial
s Volume UP/DOWN key: Adjust the
volume. Press and hold for at least 1
second to set/cancel Silent mode.
t Direct button: Press and hold for at
least 1 second to activate a set function or
application. Change the function from the
Settings menu.
u Strap eyelet
v Card slot cover
w MicroSD card slot
x Nano SIM card slot
y Camera key: Press and hold for at least
1 second to activate the camera. Also used
as the shutter for taking pictures.
z Earphone microphone terminal
A Speakerphone key: Switch speakerphone
on/off during a call.
B Noise cancelling microphone: Automatically
filters out ambient noise to make it easier for
the other party to hear your voice. Do not
cover it with your finger during phone calls.
C Earphone microphone terminal cover
D Power key: Turn the power on/off, set/
cancel Sleep mode, etc.
E External connection terminal cover
F Microphone: Transmits your voice to the other
party during a call. Also used for voice
recording. Do not cover it with your finger
during phone calls or video shooting.
G External connection terminal: Used for
connecting a micro USB cable, etc.
Things to Check and Setup Before Use
✎Notes
• Aerials are built into the main unit. Do not
cover the aerials with your hand or put things
like stickers over the areas. Doing so can
adversely affect calling/transmission quality.
• The battery is built into the product, so you
cannot remove it. Forcibly removing the back
cover causes damage or faults.
• The product contains a barometer. Using an
app that displays the atmospheric pressure,
you can view the atmospheric pressure and
altitude, but these values are not absolute. A
variety of factors can cause fluctuations, so
these values are merely guidelines.
About the SMART SONIC
RECEIVER
This product is equipped with a SMART
SONIC RECEIVER, which vibrates the
display to relay sounds. The receiver
section does not have holes, but can still
be used normally.
■ Touching to your ear
When you touch the product to your
ear in the vicinity of the receiver,
covering your ear to shut out ambient
noise makes it easier to hear vocal
sounds. Make adjustments, moving
the product up/down/left/right
according to your hearing conditions
and the surrounding environment.
GB 31
Page 33

✎Notes
• While calling, be careful not to cover the
microphone or noise cancelling microphone of
the product with your finger, etc.
• When earphones are connected, so und comes
from the earphones and not from the SMART
SONIC RECEIVER.
• Do not put any stickers or clear film on the
display. Sounds from the receiver can become
harder to hear.
• The ease of hearing depends on the person.
• A person’s ability to hear varies depending on
the surrounding environment.
Inserting/Removing a
Nano SIM Card
• Unplug the power adapter or other micro
USB plug from the product when
inserting/removing a nano SIM card.
✎Notes
• If a nano SIM card is inserted, the product can
make phone calls and transfer data. Available
mobile networks are different depending on
the country and the region. Connecting to the
network may require configuration of the
product. If you are unable to connect the
product to a network, please contact your
service provider.
• Depending on the nano SIM card, there is a
chance that inserting the nano SIM card might
damage the product or the card, itself.
Things to Check and Setup Before Use
KYOCERA does not cover damage caused by
those or any modified nano SIM cards in the
warranty, and assumes no such responsibility.
Inserting a nano SIM card
1 Turn off the product, and open
the card slot cover.
2 Check the alignment of the nano
SIM card, and slowly insert it
straight until you hear it click.
When inserting, make sure there is a
click to signify it locking. If you
remove your finger before the nano
SIM card is locked in place, it may
come flying out.
• The nano SIM card slot is on the left
side, while the microSD card slot is
on the right, as illustrated below.
3 Close the card slot cover.
GB 32
Page 34

Removing a nano SIM card
1 Turn off the product, and open
the card slot cover.
2 Slowly press in the nano SIM
card until it clicks.
Once it clicks, pull your finger back
slightly, along with the nano SIM
card. If you release your finger after
pushing hard, the card may come
flying out.
3 Slowly pull the nano SIM card
straight out.
Some nano SIM cards cannot be
unlocked and do not eject. In this
case, remove the card by pulling
lightly with your fingers.
4 Close the card slot cover.
Things to Check and Setup Before Use
✎Note
• Do not forcefully remove the nano SIM card.
Doing so might cause a fault, damage, or loss
of data.
Inserting/Removing a
MicroSD Card
This product is compatible with microSD
cards, microSDHC cards, and
microSDXC cards.
• C ontact the microSD card maker about
compatible microSD cards.
✎Notes
• Do not touch the microSD card terminal
section.
• A microSD card that was initialized on another
device may not function properly in the
product, so use the product to initialize.
• MicroSDXC cards can only be used by devices
compatible with SDXC.
GB 33
Page 35

Things to Check and Setup Before Use
Inserting a microSD card Removing a microSD card
1 Open the card slot cover.
2 Check the alignment of the
microSD card, and slowly insert
it straight until you hear it click.
When inserting, make sure there is a
click to signify it locking. If you
remove your finger before the
microSD card is locked in place, it
may come flying out.
• The nano SIM card slot is on the lef t
side, while the microSD card slot is
on the right, as illustrated below.
1 On the Home screen t ap ►
► [Storage] ► [Unmount SD
card] ► [OK].
2 Open the card slot cover.
3 Slowly press in the microSD
card until it clicks.
Once it clicks, pull your finger back
slightly, along with the microSD card.
If you release your finger after
pushing hard, the card may come
flying out.
3 Close the card slot cover.
✎Note
• The front/back and top/bottom of a microSD
card are distinct. Forcing the card into the slot
can cause an inability to remove the card or
damage to the data.
4 Slowly pull the microS D card
straight out.
Some microSD cards cannot be
unlocked and do not eject. In this
case, remove the card by pulling
lightly with your fingers.
5 Close the card slot cover.
GB 34
Page 36

✎Notes
• Do not forcefully remove the microSD card.
Doing so might cause a fault, damage, or loss
of data.
• After being used for a long period, the microSD
card that you removed may be hot, but this is
not a problem.
Charging
The internal battery is not fully charged at
the time of purchase. Be sure to charge
the battery before using the product.
When the illuminated red chargi ng light
turns off, charging is complete.
✎Notes
• While charging, the product becomes hot, but
this is not abnormal.
• If you use the camera or other functions while
charging, the time it takes to charge might
lengthen.
• Turning on the torch while charging causes
charging to stop. Turn off the torch to resume
charging.
• Doing various operations while the product is
connected to a power adapter may cause you
to repeatedly charge and discharge the battery
in short intervals, and the duration of a single
use will shorten.
• If the ambient temperature or the temperature
of the product becomes too hot or too cold,
charging may stop. Whenever possible, try to
charge at room temperature.
Things to Check and Setup Before Use
• If the product’s charging light begins flashing
red, check whether it is connected properly . If it
continues flashing, stop charging.
• T o keep w ater and dust from entering, se curely
close the external connection terminal cover
after charging is complete. Do not strongly pull
or twist the cover.
• If you stop charging when the charging light is
still illuminated, the product may not be fully
charged, even if the icon is displayed. In
this case the usage life will be shorter.
• Do not charge wirelessly while a power
adapter or microUSB cable is connected. This
can not only prevent proper charging, it might
cause a fault.
• While charging the electric current can affect
magnetism, so the geomagnetic sensor might
not function properly.
GB 35
Page 37

Using the power adapter to
charge
• Usable adapters are different depending
on the country or region.
1 Open the product’s external
connection terminal cover.
2 Insert th e micro USB plug of t he
micro USB cable straight into
the external connection
terminal, with the protrusions
pointing down.
Things to Check and Setup Before Use
4 When charging is complete,
remove the micro USB plug
straight from the external
connection terminal.
5 Close the external connection
terminal cover.
6 Unplug the adapter from the
mains.
✎Notes
• The mains should be a short distance from the
product and easily accessible.
• Applying unnecessary force to the external
connection terminal when it’s connected to an
external device might cause damage.
• If you charge the device when the battery is
empty, the charging light may not turn on
immediately, but charging has begun.
Turning the Power On/Off
3 Insert th e US B plug of the micro
USB cable straight into the
adapter’s USB port, and insert
the adapter into the mains.
Check that the product’s red charging
light turns on. When charging is
complete, the charging light turns off.
Turning on the power
1 Press until the product
vibrates.
When the Start screen appears, tap
and then tap to cancel the
security. After tapping , tap to
activate the camera, or to activate
the phone.
GB 36
Page 38

✎Note
• While the various logos are being displayed
after turning on the power, do not touch the
screen, because the touch panel’s initial
settings are being processed. If you do, the
touch panel may not function normally.
■ Start screen
Swipe right and left to switch between
the Compass, Barometer, and other
widgets that are displayed on the Start
screen.
• C hange the Start screen from the
Settings menu.
a
b
a Widget
b Indicator
Tap to switch widgets, and tap to add
widgets from a list.
Things to Check and Setup Before Use
■ Sleep mode
If the product is not operated for a set
amount of time, the screen darkens to
curb battery consumption, and the
product enters Sleep mode.
• P re ss to enter Sleep mode.
• Press or to cancel Sleep
mode.
• The time it takes to enter Sleep mode
can be changed in the Settings
menu.
✎Note
• While in Sleep mode, when you press or
to display the screen, do not touch the
screen. If you do, the touch panel may not
function normally.
Turning off the power
1 Hold down for at least 1
second.
2 [Power off] ► [OK]
✎Note
• If the screen is not responding and you cannot
turn off the power, hold down for at least
11 seconds to force the product to turn off and
restart. If you force the product to restart,
unsaved data will be lost. Do not do so unless
the product is inoperable.
GB 37
Page 39

Things to Check and Setup Before Use
Initial Settings How to Use the Touch
After turning on the power, if a language
selection screen is displayed, follow the
on-screen instructions to choose your
initial settings.
1 Confirm each setting
• Language settings
• Nano SIM card insertion
• Wi-Fi function settings
• Google account settings
✎Notes
• If the screen operations guide is displayed,
confirm the contents, and proceed.
• If you did not set up the Wi-Fi function in step
1, date and time settings, Google services,
and other screens will appear.
• You can change the settings later from the
Settings menu.
Panel
Touch panel precautions
• The touch panel is designed to be lightly
touched by your fingers. Do not apply
strong pressure to the touch panel with
your fingers or sharp-pointed objects
(such as fingernails, ballpoint pens, and
pins).
• If you do the following things, the touch
panel may become unresponsive to
touch. Note that these may even cause
a malfunction.
- Operation with fingernails
- Operation with a foreign substance still
on the display
- Operation with a protective sheet or
sticker on the screen
- Operation underwater
• If touch operation with gloves is not
possible immediately after operating
with no gloves, temporarily put the
product in Sleep mode and reawaken it.
Please read the precautions regarding
the “Touch panel” as well (P. 16).
GB 38
Page 40

Things to Check and Setup Before Use
f
Operating the touch panel
■ Tap
Lightly touch an icon, menu item, etc.
with your finger, and release quickly.
■ Double-tap
Quickly tap twice in the same location.
■ Touch and hold
Touch an icon, menu item, etc. with
your finger for an extended time.
■ Swipe (flick)
Touch the screen and move your
finger up/down/left/right as if sweeping
something aside.
■ Drag
Trace your finger across the screen
until reaching your desired position,
then release.
■ Scroll
When a screen’s contents are not all
displayed, move the contents up/
down/left/right to move the display
position.
■ Spread/pinch with 2 fingers
Touch the screen with 2 fingers, and
widen the space between your fingers
to enlarge the display, or close the
space to shrink the display.
Home Screen
The Home screen is configured across
multiple parts. Swipe right and left to
switch parts.
a
b
c
d
e
a Status Bar
The left side of the status bar displays missed
calls, new e-mails, and other notification icons,
while the right side displays the product’s
current conditions as status icons.
b Google Search widget
You can enter characters into the search box
to search for information on the product or by
using the Internet.
c Customizable area
Arrange apps, widgets, and folders here.
d Indicator
Displays your current position on the Home
screen.
e Quick launch area
Displays on all parts of the Home screen.
f
Displays the Apps list.
GB 39
Page 41

✎Notes
• To relocate an app or widget on the Home
screen, touch and hold, then drag it. To
remove it, touch and hold the item, then drag it
to at the top of the screen.
• To arrange the apps on the Home screen into
folders, touch and hold, then drag an app to
where it overlaps with another app to create a
folder.
• If you touch and hold on an area of the Home
screen without any apps or widgets, you can
change the wallpaper, add widgets and Home
screen pages, etc.
Status Bar
The status bar is disp layed at the top of
the screen. The left side of the status bar
displays missed calls, new e-mails, and
other notification icons, while the right
side displays the product’s current
conditions as status icons.
Status icons
The main status icons displayed on the
status bar are as follows.
: Signal strength
: Out of range
: 3G available
: 3G in communications
: LTE available
: LTE in communications
Things to Check and Setup Before Use
: GSM available
: GSM in communications
: Battery level
: Charging
: Low battery
: Nano SIM card uninserted
: Wi-Fi connected
: Wi-Fi in communications
: Mobile data unavailable
: Bluetooth function turned on
: Bluetooth device connected
: Aeroplane mode set
: Silent mode (vibration) set
: Silent mode (mute) set
: Alarm set
: GPS positioning on
Notification icons
The main notification icons displayed on
the status bar are as follows.
: New e-mail message
: New Gmail message
: New SMS message
: New MMS message
: Screenshot
: Data download completed
: Data upload completed
: Data received via Bluetooth
connection
: MicroSD card dismounted
: Update available
GB 40
Page 42

: Installation completed
: Call arriving
: Missed call
: Calendar event notification
: Stopwatch in use
: Timer in use
: Alarm advance notice
: Playing music with Play Music
*
*
*
: Wi-Fi function is on and Wi-Fi
network available
: Error message/warning message
: Connected by Wi-Fi tethering
: Connected by USB tethering
: Connected to 2 or more tethers
: Connected by Bluetooth tethering
: Eco mode activated
: Diminished free space in internal
memory
: Notifications that cannot be
displayed
* Appears when you switch to the Home
screen and some other screens.
Things to Check and Setup Before Use
Notification Panel
Swipe down on the stat us bar to display
the Notification panel, check the contents
of notification icons, and run applications.
Swipe down on the stat us bar with 2
fingers to display the Quick settings
screen, set functions on/off, etc.
b
a Quick settings icon
Displays the Quick settings screen.
b Clear all
Delete all content displayed in the notification
panel. Depending on the notification content,
sometimes it cannot be deleted.
c Notification panel icon
Displays the Notification panel.
✎Notes
• To close the notification panel, press .
• Swipe a notification to the right or left to clear it
from the list on the Notification panel.
• T ouch and ho ld a notification on the no tification
panel to check the application information.
ca
GB 41
Page 43

Using the Apps List Phone
Applications
• Display a screen menu either by tapping
or by touching and holding an input
field or item.
1 On the Home screen tap .
A list of installed apps is displayed.
Tap to open.
✎Note
• To add an app from the Apps list to the Home
screen, touch and hold, then drag the app to
wherever you want it.
The nano SIM card is necessary for
making calls.
Making a phone call
1 On the Home screen tap ►
2 Enter phone number ► tap .
• Tap to erase the number.
3 When you’ve finished a call tap
✎Notes
• To adjust the call volume (the volume of the
other party’s voice), press during a
call.
• To switch speakerphone on/off during a call,
tap . To switch call holding on/off tap .
• Be careful, as even if you cover the
microphone, your voice will reach the other
party. To prevent the other party from hearing
your voice during a call, mute yourself from
.
• When you hold the phone to your ear, etc.
while calling, the screen turns off to prevent
malfunction.
• In step 1 tap to display the outgoing call
log, or tap to display the incoming call log.
You can make a call using the call log.
• In step 1 tap to display a list of your
contacts and make a call from your contacts.
Applications
.
.
GB 42
Page 44

Applications
Receiving a call
1 When a call is arriving, drag
to on the right.
2 When you’ve finished a call tap
.
✎Notes
• To turn off the ringtone and vibration when
receiving a call, press .
• Tap while receiving a call to end the call
with a message or reject the call.
Displaying your own phone
number
1 On the Home screen t ap ►
► [About phone].
2 [Status] ► [My phone number]
✎Note
• You can also check your phone number from
your profile in the People app.
People
People displays various information for
each of your contacts.
✎Note
• The names, numbers, etc. that are registered
in People can disappear due to an accident or
fault. We recommend making copies of phone
numbers, etc. Note that the Company
assumes no responsibility for any damages or
lost profits resulting from altered or lost
contacts caused by an accident or failure.
Displaying contacts
1 On the Home screen tap ►
.
Displays your contacts list.
Registering contacts
1 On the Home screen tap ►
.
2 Tap .
• If the account selection screen is
displayed, follow the on-screen
instructions.
3 Enter the necessary items.
GB 43
Page 45

4 [DONE]
• If you tap a registered contact, the
details are displayed, and you can
check the registered content.
✎Notes
• If your contacts are not registered at step 1, a
selection screen for creating a new contact,
setting up an account, or importing contacts is
displayed.
• You can manage your own profile from the
contacts list.
• After setting up an account, on the contacts list
tap to create and manage groups. Also,
contacts that are saved on the server can be
synced with those in People on the product. To
set up an account, something like Wi-Fi or a
nano SIM card that can connect to the network
is necessary.
• You can import and export contacts from the
internal storage, a microSD card, etc.
Editing contacts
1 On th e Home scr een t ap ►
► choose a contact.
2 ► [Edit]
3 Choose and edit items.
4 [DONE]
✎Note
• After tapping in step 2, you can delete a
contact, share it via another application, etc.
Applications
Messaging
A nano SIM card that can connect to the
network is necessary.
• The number of characters and amount
of data that you can send varies
depending on the transmission method.
Depending on your service provider, you
might not be able to use this feature.
Sending a message.
1 On the Home screen tap ►
.
2 Enter the recipient’s phone
number or e-mail address.
3 Enter the main text.
4 Tap / .
✎Note
• Depending on your contract and service
provider, you can tap while creating a
message to attach and send files.
GB 44
Page 46

Reading a message
Received messages are displayed by
their participants.
1 On the Home screen tap .
2 Choose the message you want
to check.
✎Notes
• To reply, enter a message into the message
field and send.
• Touch and hold a message to do things like
forward or delete it.
Email
Something like Wi-Fi or a nano SIM card
that can connect to the network is
necessary. You can send and receive
emails as if on a computer.
• To use Email it is necessary to set up an
email account beforehand (P. 57). You
can even set up multiple email accounts.
Creating and sending an
email
1 On the Home screen t ap ►
► .
2 Enter the recipient’s emai l
address.
Applications
3 Input the subject and body.
4 Tap .
✎Note
• Tap while creating an email to attach a file,
add an address, etc.
Receiving and reading an
email
1 On the Home screen tap ►
.
• If multiple email accounts are set
up, tap an account at the top of the
screen to choose which email
account is displayed.
2 On t he Inbox or other scre en t ap
► [Refresh] .
3 Tap an email.
✎Notes
• Tap to reply, or tap to forward or reply
all. Then create an email and send.
• To delete an email, in the Inbox or individual
folder screen touch and hold the email and tap
, or choose the email and then tap .
GB 45
Page 47

Applications
Gmail
Something like Wi-Fi or a nano SIM card
that can connect to the network is
necessary. You can check, send, and
receive Gmail messages from this
product.
• To use Gmail it is necessary to set up a
Google account beforehand (P. 57). You
can even set up multiple Google
accounts.
✎Note
• For more details on things like usage, please
refer to the Google home page.
Creating and sending a
Gmail
1 On the Home screen t ap ►
► .
2 Enter the recipient’s emai l
address.
3 Input the subject and body.
4 Tap .
✎Note
• Tap while creating a Gmail to attach a file,
add an address, etc.
Receiving and reading a
Gmail
1 On the Home screen tap ►
.
• If multiple Google accounts are set
up, tap an account at the top of the
screen to choose which Google
account is displayed.
2 On t he Inbox or other scre en t ap
► [Refresh] .
3 Tap Gmail.
✎Notes
• Tap to reply, or tap to forward or reply
all. Then create a Gmail and send.
• To delete a Gmail, in the Inbox or individual
folder screen touch and hold the Gmail and tap
, or choose the Gmail and then tap .
GB 46
Page 48

Applications
Chrome
Something like Wi-Fi or a nano SIM card
that can connect to the network is
necessary.
• If the Google Chrome Terms of Service
are displayed, confirm the contents, and
follow the on-screen instructions.
Connecting to the Internet
1 On the Home screen tap .
2 Enter search terms or a URL in
the URL entry field at the top of
the screen.
3 Tap one of the search
suggestions or .
✎Note
• If you touch and hold a link or image, a menu
is displayed, from which you can save, copy,
etc.
Registering a bookmark
You can register frequently viewed web
pages as bookmarks, so they’re easy to
display.
1 On the Home screen tap .
2 Display a web page you want to
register.
3 Tap ► .
4 Set the name and save folder ►
[Save].
✎Note
• On a web page tap to display your
registered bookmarks and history, change your
Chrome settings, etc.
GB 47
Page 49

Camera
You can take pictures and video.
✎Note
• If the remaining battery is low or if the product
becomes too hot, you cannot use the camera.
Also, if the battery is depleted or the
temperature rises during use, the brightness of
the display might dim.
Activating the camera
1 On the Home screen tap .
• You can also hold down for at
least 1 second to activate the
camera.
✎Note
• Press to close the camera.
Shooting screen icons
The main icons displayed on the Shooting
screen are as follows.
• Displayed items will vary depending on
the camera settings.
: Remaining battery
: Save location
: Store position/location information
: Scene-specific shooting/Focus
• If the scene is set to , the focus
settings icon is displayed.
: Continuous shooting mode
Applications
: Self-timer
: Effect
• Is displayed if the shooting mode is
set to .
: Mute
: Remaining number of pictures
possible
: Length of video recording possible
: Take picture (Shutter)
: Record video
: Stop
: Switch between front-facing and rear-
facing cameras
: Settings
• Set Continuous shooting,
Panorama, and other shooting
modes; set Portrait, Landscape,
and other scene-specific shooting;
and control the Timer, the Flash,
and other settings.
Taking pictures
1 On the Home screen tap .
• You can also hold down for at
least 1 second to activate the
camera.
2 Tap .
• You can also press to shoot.
GB 48
Page 50

✎Notes
• You can adjust the focal point by tapping the
screen.
• The zoom bar is displayed when you tap the
screen or press . Drag your finger
across the screen to adjust the zoom.
• Hold down and simultaneously for at
least 1 second to save a screenshot of the
screen that is being displayed.
Taking videos
1 On the Home screen tap .
• You can also hold down for at
least 1 second to activate the
camera.
2 Tap .
Recording begins.
3 When you’ve finished recording
tap .
• You can also press to finish
recording.
✎Note
• When taking videos, do not cover the
microphone with your finger, etc.
Applications
Gallery
You can edit, view, and playback the
pictures, videos, and so forth that are
saved to internal storage or a microSD
card.
• The first time you activate the Gallery,
the Google usage screen is displayed.
1 On the Home screen tap ►
.
2 Tap a folder.
3 Tap a picture or video.
• For videos, continue by tapping
and choosing an app.
✎Notes
• Pictures and videos can also be displayed in
the app and from the thumbnails visible
when the camera is open.
• On the playback screen for pictures and
videos tap to do things like delete, edit, and
crop them.
GB 49
Page 51

Play Store Eco Mode
To install an app from Google Play,
something like Wi-Fi or a nano SIM card
that can connect to the network is
necessary.
• S etting up a Google account is
necessary to use Google Play.
1 On the Home screen tap .
2 Se arch for the a pp ► choose the
app.
• After looking over the displayed
content, follow the on-screen
instructions.
✎Notes
• For paid apps, follow the purchasing
procedure before downloading.
• You can remove apps that were installed via
Google Play, as well as reference the help
page.
• Depending on the app, it may perform
automatic updates.
• Operational procedures and the on-screen
appearance of apps are subject to change
without notice as a result of version upgrades.
Be aware that they may differ from the
descriptions in this manual.
Battery consumption is reduced by
changing the screen’s Sleep time or
brightness and by disabling the Wi-Fi and
Bluetooth functions.
1 On the Home screen tap ►
.
2 Tap [ECO MODE].
3 [On]/[Auto On]
4 Set each item.
✎Notes
• When setting Eco Mode to Auto On, set the
battery level where the product switches into
Eco Mode.
• You can also set restrictions on background
mobile data transmissions.
Applications
GB 50
Page 52

Product settings
Displaying the Settings
Menu
Change various settings from the Settings
menu.
1 On the Home screen tap ►
.
WIRELESS & NETWORKS
1 On the Home screen tap ►
.
2 Choose item operation.
[Aeroplane mode] : Set Aeroplane
mode.
[Wi-Fi] : Set Wi-Fi function.
[Bluetooth] : Set Bluetooth function.
[Data usage] : Set whether mobile
data transmissions are enabled/
disabled, and set an upper limit on
data usage.
[More...] : Tap to display the following
items.
[Default SMS app] : Set up the
message application used on the
product.
[NFC] : Enable/disable NFC function.
Product settings
[Android Beam] : Use the Android
Beam function to exchange data with
cellular phones and other devices
equipped with an NFC function.
[Tethering & portable hotspot] : Use
the product as a modem and connect
other USB-compatible devices, Wi-Fi
devices, and Bluetooth devices to the
Internet.
[VPN] : Use a virtual private network
for outside connection to information
that is saved within the local network
of a business, school, etc.
[Mobile networks] : Set whether
mobile data transmissions are
enabled/disabled, and setup an
access point for connecting to the
Internet.
[Mobile broadcast s] : Cont rol setti ngs
related to emergency alerts.
Setting Aeroplane mode
Calling, Internet connections, email
correspondence, and all other functions
that transmit radio waves are disabled.
1 On the Home screen tap ►
.
GB 51
Page 53

2 Tap for Aeroplane mode or
drag it to the right.
• When on, is displayed in the
status bar.
✎Note
• You can also hold down for at least 1
second to set Aeroplane mode.
Wi-Fi
You can use Wi-Fi to connect to home
networks, work networks, public wireless
LAN services, and other wireless access
points.
• You can still use the mobile netw ork
when the Wi-Fi function is turned on.
However, the Wi-Fi fu nction get s priority
when connected to a Wi-Fi network.
Connecting to a Wi-Fi network
1 On the Home screen tap ►
.
2 Tap for Wi-Fi or drag it to
the right.
3 [Wi-Fi]
• A list of available Wi-Fi networks is
displayed.
Product settings
4 Choose a Wi-Fi network.
• If you are connecting to a Wi-Fi
network with security protection,
password entry is necessary.
✎Note
• T o disconnect from a Wi-Fi network, select the
Wi-Fi network you are currently connected to.
Easily setting up a Wi-Fi
network
You can easily connect using WPS
features.
• Turn on the Wi-Fi function before
starting.
1 On the Home screen t ap ►
► [Wi-Fi].
2 Manipulate as intended.
• If connecting by the WPS button
method, operate from . If
connecting by the WPS PIN entry
method, operate from . Follow
the onscreen instructions to
operate.
GB 52
Page 54

Bluetooth Function
Connect the product to a Bluetooth
device to do things like wireless
transmissions and music playback.
• We do not gu arantee a wireless
connection with all Bluetooth devices.
• C on nect with other Bluetooth devices
within about a 10 m radius,
unobstructed. Depending on if there are
any obstacles between the product and
a Bluetooth device, the general
surroundings (walls, furniture, etc.), and
the structure of the building, the
connection range may be shorter.
• The supported profiles and features
are as follows:
- SPP: Serial Port Profile
- A2DP: Advanced Audio Distribution
Profile
- AVRCP: Audio/Video Remote Control
Profile
- HSP: Headset Profile
- HFP: Hands-Free Profile
- OPP: Object Push Profile
- PBAP: Phone Book Access Profile
- HID: Human Interface Device Profile
- PAN: Personal Area Networking Profile
- PAN NAP: Personal Area NetworkingNetwork Access Point
Product settings
- PAN USER: Personal Area
Networking-User
- HOGP: HID over GATT Profile
- MAP: Message Access Profile
- DUN: Dial-Up Networking Profile
*1 Specifications provided in Bluetooth
standards for communications
between Bluetooth-compatible
devices in accordance with their
intended use.
*2 Compatible with only a portion of car
navigation systems.
*2
Registering and connecting to a
*1
Bluetooth device
• While registering a device, it may be
necessary to enter a PIN. The product’s
PIN is “0000”. If product registration
does not work when you enter “0000”,
refer to the Bluetooth device’s operating
instructions.
1 On the Home screen tap ►
.
2 Tap for Bluetooth or drag it
to the right.
• When on, is displayed in the
status bar.
3 Tap [Bluetooth] ► the name of
the product.
GB 53
Page 55

4 [SEARCH FOR DEVICES]
5 Choose a Bluetooth device.
6 Follow the on-screen
instructions.
■ If receiving a connection request
from another Bluetooth device
1 Confirm the pass code on the
Pair settings request screen ►
[Pair].
Setting up an access point
You can set up an access point for
connecting to the Internet. They can be
added and changed as needed.
• Contact your service provider regarding
the information necessary to set up an
access point.
1 On the Home screen t ap ►
► [More...] ► [Mobile networks]
► [Access Point Names].
2 Tap .
3 [Name] ► enter name ► [OK].
4 [APN] ► enter access point
name ► [OK].
5 Set the items required by your
service provider.
Product settings
6 ► [Save]
DEVICE
1 On the Home screen tap ►
.
2 Choose item operation.
[Sound/Vibration/LED] : Set Silent
mode or Vibrate, ringtones,
notification sounds, operation
sounds, and other things related to
the sound and Incoming light.
[Display] : Set screen brightness,
wallpaper, auto-rotate screen, Sleep
mode, font size, and other things
related to the screen display.
[Direct button] : Choose which
function or application activates with
you hold down for 1 second
or more.
[Storage] : Confirm the capacity of
the product or a microSD card, or
initialize a microSD card.
[Battery] : Check the remaining
battery level, charging status, battery
usage time, and the battery use of
each function.
[Apps] : Manage and delete
applications that you installed, view
their memory usage, change the
settings, etc.
GB 54
Page 56

Product settings
Setting Silent mode
Set the product to not release ringtones
and notification sounds from the speaker.
1 On the Home screen t ap ►
► [Sound/Vibration/LED].
2 Put a tick by [Silent mode].
3 [OK]
✎Note
• You can also hold down for at least 1
second to set Silent mode.
Changing the Silent mode type
1 On the Home screen t ap ►
► [Sound/Vibration/LED] ►
[Silent mode type].
2 [Vibrate]/[Silent]
✎Note
• Hold down for at least one second, and
then tap / to switch between Silent/
Vibrate. Tap to turn off Silent mode.
Setting a ringtone
1 On the Home screen t ap ►
► [Sound/Vibration/LED] ►
[Phone ringtone].
2 Choose a ringtone ► [OK].
Setting a wallpaper
1 On the Home screen t ap ►
► [Display] ► [Wallpaper].
2 Choose an item.
3 Follow the on-screen
instructions.
Automatically switching
between a vertical and
horizontal screen display
Set the screen to automatically switch
between a vertical display and a
horizontal display, depending on how the
product is oriented.
1 On the Home screen t ap ►
► [Display].
2 Put a tick by [Auto-rotate
screen].
Setting a screen off time
After a set amount of time passes, the
screen automatically goes dark and
enters Sleep mode.
1 On the Home screen t ap ►
► [Display] ► [Sleep].
2 Choose a time.
GB 55
Page 57

PERSONAL
1 On the Home screen tap ►
.
2 Choose item operation.
[Location] : Control settings related
to location information from usin g th e
Wi-Fi function, GPS, etc.
[Start screen] : Control settings
related to the Start screen.
[Security] : Control settings related
to security.
[Language & input] : Set the display
language and things related to
character input.
[Backup & reset] : Back up data,
restore settings, or reset the product.
Setting the security release
method for the Start screen
1 On the Home screen t ap ►
► [Start screen] ► [Security
type].
2 [None]/[Swipe]/[Face Unlock]/
[Pattern]/[PIN]/[Password]
3 Follow the on-screen
instructions.
Product settings
✎Note
• If you set a password or other release method,
be careful not to forget it.
Resetting the product
When you reset the product, all of the
data and applications stored on the
product are erased.
• Be sure to backup your data before
resetting.
1 On the Home screen t ap ►
► [Backup & reset] ► [Factory
data reset] ► [Reset phone].
• Depending on the security release
method you have set for the Start
screen, it may be necessary to
unlock it.
2 [Erase everything]
GB 56
Page 58

Product settings
ACCOUNTS
Adding an account
1 On the Home screen t ap ►
► [Add account].
2 Choose an account type.
3 Follow the on-screen
instructions.
✎Note
• Even if you do not have a Google account, you
can use the product, but you cannot use
Google services like Gmail, Google Play, etc.
SYSTEM
1 On the Home screen tap ►
.
2 Choose item operation.
[Date & time] : Control settings
related to date and time.
[Accessibility] : Control settings
related to accessibility.
[Printing] : Control settings for a
printer using Google Cloud print.
[About phone] : Check information
such as your phone number and
remaining battery life.
Setting the date and time
1 On the Home screen t ap ►
► [Date & time].
2 Set each item.
[Automatic date & time] :
Automatically use network
information to revise the date and
time.
• Remove the tick to manually set the
date and time.
[Automatic time zone] :
Automatically use network
information to revise the time zone.
• Remove the tick to manually set the
time zone.
[Set date] : Manually set the date.
[Set time] : Manually set the time.
[Select time zone] : Manually set the
time zone.
[Use 24-hour format] : Enter a tick
to display the time in 24-hour format.
Remove the tick for 12-hour format.
[Choose date format] : Choose a
format for displaying the date.
GB 57
Page 59

Appendix
Main Specifications
Display Approx. 4.5 inches
Weight Approx. 182 g
Size (W × H × D) Approx. 68 mm × 136
Internal memory
*1
capacity
Effective pixels in
rear-facing camera
Effective pixels in
front-facing camera
Wi-Fi Function IEEE802.11a/b/g/n/ac
Bluetooth
Function
*1 Because data and applications are saved in
*2 All of the Bluetooth equipment built into the
Version Bluetooth standard Ver.
Output Bluetooth standard
Frequency
bands
a shared region, the internal saving capacity
shrinks with how much your use
applications.
product is confirmed and certified as being
compliant with the Bluetooth standards put in
place by Bluetooth SIG. However , depend ing
Approx. 16,770,000
colours
1,280 × 720 pixels (HD)
mm × 13.5 mm
Approx. 15.4 mm at
thickest point
ROM: Approx. 16 GB
RAM: Approx. 2 GB
Approx. 8,000,000
pixels
Approx. 2,000,000
pixels
compatible
4.0 compatible
Class 1
2.4 GHz band
*2
on the characteristics and specifications of
the connected device, the operation method
may be different, or it may not be possible to
send and receive data over the connection.
Specific Absorption Rate
of Mobile Phone
This model KC-S701 mobile phone
complies with Japanese technical
regulations and international guidelines
regarding exposure to radio waves. This
mobile phone has been designed in
observance of the Japanese technical
regulations regarding exposure to radio
waves* and limits to exposure to radio
waves recommended by equivalent
international guidelines.
These international guidelines were set
out by the International Commission on
Non-Ionizing Radiation Protection
(ICNIRP), which is in collaboration with
the World Health Organization (WHO),
and the permissible limits include a
substantial safety margin designed to
assure the safety of all persons,
regardless of age and health condition.
The Japanese technical regulations and
international guidelines define the limits
using a unit of measurement known as
the Specific Absorption Rate (SAR),
GB 58
Appendix
Page 60

which represents the average amount of
radio frequency energy absorbed by the
human. The SAR limit for mobile phones
is 2.0 W/kg. The highest SAR value for
this mobile phone when tested for use at
the ear is 0.490 W/kg. The highest SAR
value for this mobile phone when tested
for use on the body is 0.381 W/kg. The
actual SAR of this mobile phone while
talking on the phone can be well below
that indicated above. This is due to
automatic changes in the power level of
the mobile phone to ensure it only outputs
the minimum power required to
communicate with a base station.
Therefore in general, the closer you are to
a base station, the lower the power output
of the mobile phone.
This mobile phone can be used in
positions other than against your ear.
Use an accessory such as a carrying
case, etc. so that you can hold the
product at least 1.5 cm away from your
body and also do not contain metal parts
between the product and your body. By
doing this, this mobile phone complies
with Japanese technical regulations and
international guidelines regarding
exposure to radio waves. The World
Health Organization has stated that
present scientific information does not
Appendix
indicate the use of mobile devices has
any harmful effects on the human body.
They recommend that if you are still
worried about your exposure then you
can limit your talk time or use a handsfree
kit to keep the mobile phone away from
your head and body. If you would like to
know more detailed information, please
refer to the WHO website.
http://www.who.int/docstore/peh-emf/
publications/facts_press/
fact_english.htm
Please refer to the websites listed below if
you would like to know more detailed
information regarding SAR.
• Ministry of Internal Affairs and
Communications website
http://www.tele.soumu.go.jp/j/ele/
index.htm
• Association of Radio Industries and
Businesses website
http://www.arib-emf.org/index02.html
(in Japanese only)
* Technical regulations are defined by
the Ministerial Ordinance Related to
Radio Law (Article 14-2 of Radio
Equipment Regulations).
GB 59
Page 61

OpenSSL License
[OpenSSL License]
Copyright © 1998-2011 The OpenSSL
Project. All rights reserved.
This product includes software developed
by the OpenSSL Project for use in the
OpenSSL Toolkit. (http://
www.openssl.org/)
THIS SOFTWARE IS PROVIDED BY
THE OpenSSL PROJECT “AS IS” AND
ANY EXPRESSED OR IMPLIED
WARRANTIES, INCL UDING, BUT NOT
LIMITED TO, THE IMPLIED
WARRANTIES OF MERCHANTABILITY
AND FITNESS FOR A PARTICULAR
PURPOSE ARE DISCLAIMED. IN NO
EVENT SHALL THE OpenSSL
PROJECT OR ITS CONTRIBUTORS BE
LIABLE FOR ANY DIRECT, INDIRECT,
INCIDENTAL, SPECIAL, EXEMPLARY,
OR CONSEQUENTIAL DAMAGES
(INCLUDING, BUT NOT LIMITED TO,
PROCUREMENT OF SUBSTITUTE
GOODS OR SERVICES;
LOSS OF USE, DATA, OR PROFITS; OR
BUSINESS INTERRUPTION)
HOWEVER CAUSED AND ON ANY
Appendix
THEORY OF LIABILITY, WHETHER IN
CONTRACT, STRICT LIABILITY, OR
TORT (INCLUDING NEGLIGENCE OR
OTHERWISE) ARISING IN ANY WAY
OUT OF THE USE OF THIS
SOFTWARE, EVEN IF ADVISED OF
THE POSSIBILITY OF SUCH DAMAGE.
[Original SSLeay License]
Copyright © 1995-1998 Eric Young
(eay@cryptsoft.com) All rights reserved.
This product includes cryptographic
software written by Eric Young
(eay@cryptsoft.com)
THIS SOFTWARE IS PROVIDED BY
ERIC YOUNG “AS IS” AND ANY
EXPRESS OR IMPLIED WARRANTIES,
INCLUDING, BUT NOT LIMITED TO,
THE IMPLIED WARRANTIES OF
MERCHANTABILITY AND FITNESS
FOR A PARTICULAR PURPOSE ARE
DISCLAIMED. IN NO EVENT SHALL
THE AUTHOR OR CONTRIBUTORS BE
LIABLE FOR ANY DIRECT, INDIRECT,
INCIDENTAL, SPECIAL, EXEMPLARY,
OR CONSEQUENTIAL DAMAGES
(INCLUDING, BUT NOT LIMITED TO,
PROCUREMENT OF SUBSTITUTE
GOODS OR SERVICES; LOSS OF USE ,
GB 60
Page 62

DATA, OR PROFITS; OR BUSINESS
INTERRUPTION)
HOWEVER CAUSED AND ON ANY
THEORY OF LIABILITY, WHETHER IN
CONTRACT, STRICT LIABILITY, OR
TORT (INCLUDING NEGL IGENCE OR
OTHERWISE) ARISING IN ANY WAY
OUT OF THE USE OF THIS
SOFTWARE, EVEN IF ADVISED OF
THE POSSIBILITY OF SUCH DAMAGE.
FCC Notice
This device complies with part 15 of the
FCC Rules. Operation is subject to the
following two conditions:
a This device may not cause harmful
interference, and
b This device must accept any
interference received, including
interference that may cause undesired
operation.
Note:
This equipment has been tested and
found to comply with the limits for a Class
B digital device, pursuant to part 15 of the
FCC Rules. These limits are designed to
provide reasonable protection against
harmful interference in a residential
installation. This equipment generates,
Appendix
uses, and can radiate radio frequency
energy and, if not installed and used in
accordance with the instructions, may
cause harmful interference to ra dio
communications.
However, there is no guarantee that
interference will not occur in a particular
installation. If this equipment does cause
harmful interference to radio or television
reception, which can be determined by
turning the equipment off and on, the user
is encouraged to try to correct the
interference by one or more of the
following measures:
- Reorient or relocate the receiving
antenna.
- Increase the separation between the
equipment and receiver.
- Connect the equipment into an outlet on
circuit different from that to which the
receiver is connected.
- Consult the dealer or an experienced
radio/TV technician for help and for
additional suggestions.
Warning
The user is cautioned that changes or
modifications not expressly approved by
the manufacturer could void the user’s
authority to operate the equipment.
GB 61
Page 63

FCC RF EXPOSURE
INFORMATION
Warning! Read this information before
using your phone.
Warning! Read this information before
using your phone. In August 1996, the
Federal Communications Commission
(FCC) of the United States, with its action
in Report and Order FCC 96-326,
adopted an updated safety standard for
human to radio frequency
electromagnetic energy emitted by FCC
regulated transmitters. Those guidelines
are consistent with the safety standard
previously set by both U.S. and
international standards bodies.
The design of this phone complies with
the FCC guidelines and these
international standards.
Body-worn Operation
This device was tested for typical bodyworn operations with the back of the
phone kept 0.39 inches (1.0 cm) from the
body. To comply with FCC RF exposure
requirements, a minimum separation
distance of 0.39 inches (1.0 cm) must be
maintained between the user’s body and
the back of the phone, including the
Appendix
antenna. All beltclips, holsters and similar
accessories used by this device must not
contain any metallic components. Bodyworn accessories that do not meet these
requirements may not comply with FCC
RF exposure limits and should be
avoided.This device is not intended to be
used with a lanyard or strap on the
body.The device contains a mounting
point that may be used to attach the
device to equipment, a backpack or tool
belt, etc.
Turn off your phone before flying.
You should turn off your phone when
boarding any aircraft. T o prevent possible
interference with aircraft systems, U.S.
Federal Aviation Administration (FAA)
regulations require you to have
permission from a crew member to use
your phone while the plane is on the
ground. To prevent any risk of
interference, FCC regulations prohibit
using your phone while the plane is in the
air.
GB 62
Page 64

European RF Exposure
Information
Your mobile device is both a radio
transmitter and receiver, and is designed
not to exceed limits for exposure to radio
waves recommended by international
guidelines. These guidelines were
produced by independent scientific
organization, ICNIRP, and inclu de safety
margins designed to protect all persons,
regardless of age and condition of health.
The guidelines apply a unit of
measurement known as the Specific
Absorption Rate (SAR). The SAR limit for
mobile devices is 2W/kg, and the highest
SAR value for this device was 0.556 W/
*
kg
.
As testing measures SAR at the highest
transmitting power of a device, actual
SAR tends to be lower during ordinary
operation. Lower SAR levels are typical
during ordinary operation as automatic
changes are made within the device to
ensure the network can be reached with
minimal power.
The World Health Organization (WHO)
has stated that present scientific
information does not indicate the need for
any special precautions to be adopted
when using mobile devices. WHO also
Appendix
notes that those wishing to reduce
exposure may do so by limiting call length
and by using a ‘hands-free’ device to
distance the phone from the head and
body. For further information, please see
the WHO website: http://www.who.i nt /
peh-emf/en/
* Note that tests are also carried out in
accordance with international testing
guidelines.
Declaration of Conformity
Product is declared to conform with the
essential requirements of European
Union Directive 1999/5/EC Radio and
Telecommunications Terminal Equipment
Directive 3.1 (a), 3.1 (b) and 3.2.
-NoteThe following frequency bands are
restricted to indoor use only:
5150 - 5250 MHz (802.11a/n/ac) in US
5150 - 5350 MHz (802.11a/n/ac) in EU
Safety Information
To prevent possible hearing damage, do
not listen at high volume levels for long
periods.
GB 63
Page 65

Intellectual Property
Rights
Trademarks
© 2015 Kyocera Corporation. All rights
reserved. KYOCERA is a registered
trademark of Kyocera Corporation. All
other trademarks are the property of their
respective owners.
• Google and Google logo, Android and
Android logo, Google Play and Google
Play logo, Play Music and Play Music
logo, Play Movies & TV and Play Movies
& TV logo, Gmail and Gmail logo,
Google Maps and Google Maps logo,
Google Drive and Google Drive logo,
Hangouts and Hangouts logo, Google+
and Google+ logo, Google Now and
Google Now logo, Google Voice Search
and Google Voice Search logo, Chrome
and Chrome logo, and YouTube and
YouTube logo are trademarks or
registered trademarks of Google Inc.
• The microSD logo, microSDHC logo,
and microSDXC logo are trademarks of
SD-3C, LLC.
Appendix
• The Bluetooth word mark and logos are
registered trademarks owned by
Bluetooth SIG, Inc., and any use of such
marks by Kyocera Corporation is under
license. Other trademarks and trade
names are those of their respective
owners.
• Wi-Fi, WP A, Wi-Fi CERTIFIED logo, and
Wi-Fi Protected Setup logo are
registered trademarks of Wi-Fi Alliance.
Wi-Fi CERTIFIED and Wi-Fi Protected
Setup are trademarks of Wi-Fi Alliance.
• The “Qi” symbol is a trademark of the
Wireless Power Consortium.
• THIS PRODUCT IS LICENSED UNDER
THE MPEG-4 VISUAL PATENT
PORTFOLIO LICENSE FOR THE
PERSONAL AND NON-COMMERCIAL
USE OF A CONSUMER FOR (i)
ENCODING VIDEO IN COMPLIA NCE
WITH THE MPEG-4 VISUAL
STANDARD (“MPEG-4 VIDEO”) AND/
OR (ii) DECODING MPEG-4 VIDEO
THAT WAS ENCODED BY A
CONSUMER ENGAGED IN A
GB 64
Page 66

PERSONAL AND NONCOMMERCIAL
ACTIVITY AND/OR WAS OBTAINED
FROM A VIDEO PROVIDER
LICENSED BY MPEG LA TO PR OVIDE
MPEG-4 VIDEO. NO LICENSE IS
GRANTED OR SHALL BE IMPLIED
FOR ANY OTHER USE. ADDITIONAL
INFORMATION INCLUDING THAT
RELATING TO PROMOTIONAL,
INTERNAL AND COMMERCIAL USES
AND LICENSING MAY BE OBTAINED
FROM MPEG LA, LLC. SEE HTTP://
WWW.MPEGLA.COM.
a ACCESS, the ACCESS logo, and
NetFront are registered trademarks or
trademarks of ACCESS CO., LTD. in
the United States, Japan and/or other
countries.
b This software is based in part on the
work of the Independent JPEG
Group.
• is a trademark or registered
trademark of NFC Forum, Inc. in the
United States and other countries.
• “SMART SONIC RECEIVER” is a
registered trademark of KYOCERA
Corporation.
• “PhotoSolid”, the image stabilization
technology, is a product of Morpho, Inc.
“PhotoSolid” is a registered trademark of
Morpho, Inc.
Appendix
• “MovieSolid”, the motion video
stabilizing technology, is a product of
Morpho, Inc. “MovieSolid” is a registered
trademark of Morpho, Inc.
• “Morpho D efocus”, the background
defocus generation technology, is a
product of Morpho, Inc. “Morpho
Defocus” is a trademark of Morpho, Inc.
• “Morpho Effect Library”, the visual effect
technology, is a product of Morpho, Inc.
“Morpho Effect Library” is a trademark of
Morpho, Inc.
• “Morpho HDR”, the high dynamic range
technology, is a product of Morpho, Inc.
“Morpho HDR” is a trademark of
Morpho, Inc.
• “QuickPanorama”, the panoramic image
generation technology, is a product of
Morpho, Inc. “QuickPanorama” is a
registered trademark of Morpho, Inc.
• “TrackSolid”, the automatic object
tracking technology, is a product of
Morpho, Inc. “TrackSolid” is a registered
trademark of Morpho, Inc.
• A ll other company names and product
names are trademarks or registered
trademarks of the respective companies
referred to in this manual.
Still, TM and the ® mark do not appear
in this text.
GB 65
Page 67

• U s ers of the product are auth ori z ed to
use software installed on this product as
described in this instruction manual. Pay
attention to the followin g points when
using the software.
a The software installed on this product
or part of it may not be altered,
delivered, modified, analysed,
reverse-engineered, or derived, and
any such actions are prohibited.
b Illegally exporting the software or a
part of it is prohibited.
c This Software is provided without
implied warranties of merchantability,
fitness for a particular purpose, and
noninfringement of third party rights.
Note that the existing license agreement
takes priority for usage of GNU General
Public License (GPL), GNU Library/
Lesser General Public License (LGPL)
included in software, software ba sed on
other open source software license, and
software that KYOCERA Corporation is
licensed.
For information on the open source
software, see the following “Open
Source Software” section.
Appendix
Open Source Software
This product includes software that falls
under the conditions of the GNU General
Public License (GPL), GNU Library/
Lesser General Public License (LGPL),
and other open source software licenses.
For more information on the specific
conditions of the GPL, LGPL, and other
licenses, refer to the “About phone”
section of the settings menu on the
product. For details, refer to the
KYOCERA Corporation website.
This product incorporates software
copyrighted to the KYOCERA
Corporation and software for which
KYOCERA holds a license.
The KYOCERA Corporation designed
this product to comply with the open
source software standards and license.
The software that was developed belongs
to the KYOCERA Corporation and
relevant third parties. With the exception
of usage that is allowed by Copyright Law
and that which the KYOCERA
Corporation has specially granted, you
cannot distribute, copy, modify, publicly
transmit, etc. this software without
permission from the KYOCERA
Corporation.
GB 66
Page 68

 Loading...