

Page 1

Basic Manual
Contents
Safety Precautions
Basic Operations
Character Input
Phone
Phone Book
Mail
LINE
Internet
Camera
Useful Functions
Settings
Appendix
Page 2
Preface
Thank you for buying the "GRATINA" (simply
called the "product" or "main unit" from here on).
Before using the product, be sure to read the
supplied "Basic Manual" (this manual) and
"Setting Guide" to ensure correct use.
ii
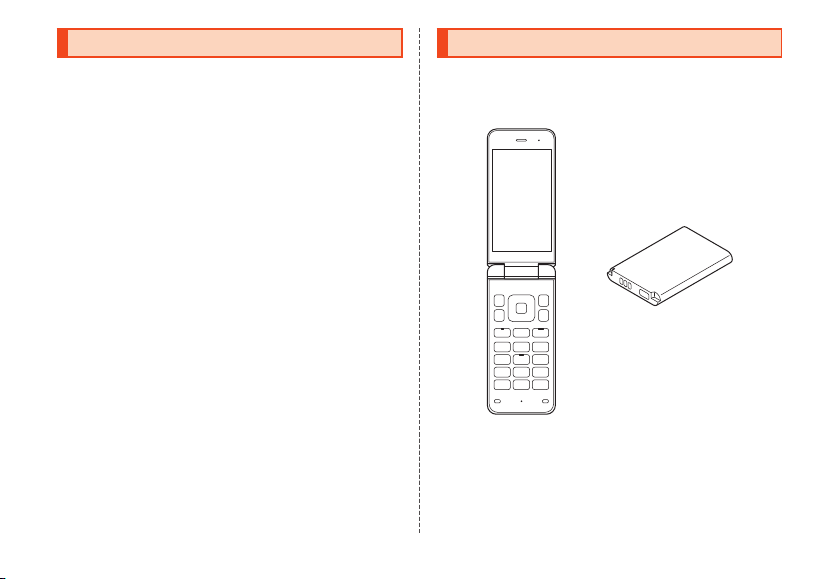
List of Packaged Items
Before you start using the product, make sure
that you have all the following packaged items
with the product.
Battery Pack
(KYF36UAA)
Main unit
•取扱説明書 (Basic Manual) (Japanese)
•設定ガイド (Setting Guide) (Japanese)
Page 3
The following items are not included in the
package.
•Desktop holder (KYF39PUA)
•microSD memory card
•AC adapter
•Earphone
•USB Type-C™ cable
•KYOCERA 3.5ΦType-C conversion cable
(0401QNA)
◎ Purchase a specified charger (sold separately).
◎ Illustrations of cell phones in this manual are only
for reference. They may look different from the
actual product.
Operating Instructions
■ "Setting Guide" and "Basic
Manual" (This manual)
Handles only basic operations for main
features.
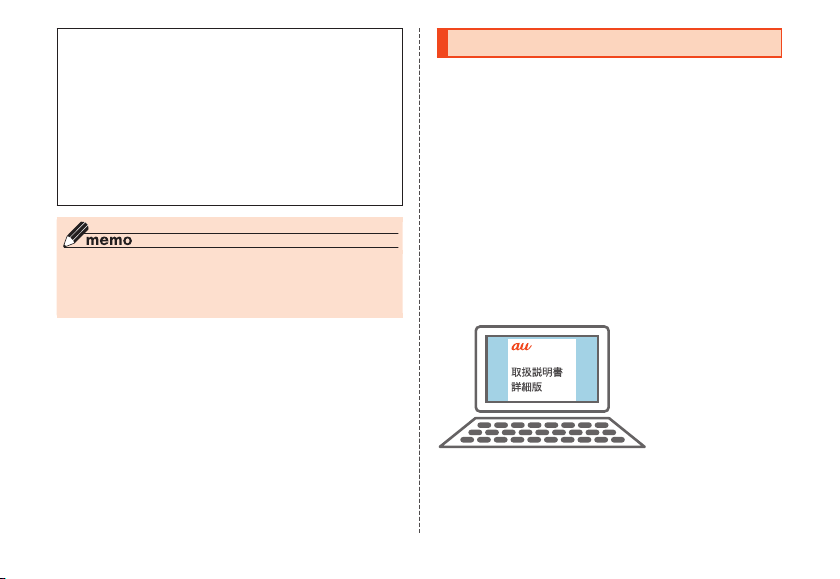
■ "取扱説明書 詳細版 (Full Instruction
Manual)"
For detailed descriptions of various functions,
refer to the "取扱説明書 詳細版 (Full Instruction
Manual)" (Japanese) available on the au
homepage:
https://www.au.com/support/service/mobile/
guide/manual/
1
Page 4
■ GRATINA Guide
In the following step, you can find detailed
usage of the product via images.
From the standby screen, press l →
[GRATINA guide]
Illustrations and Descriptions in This Manual
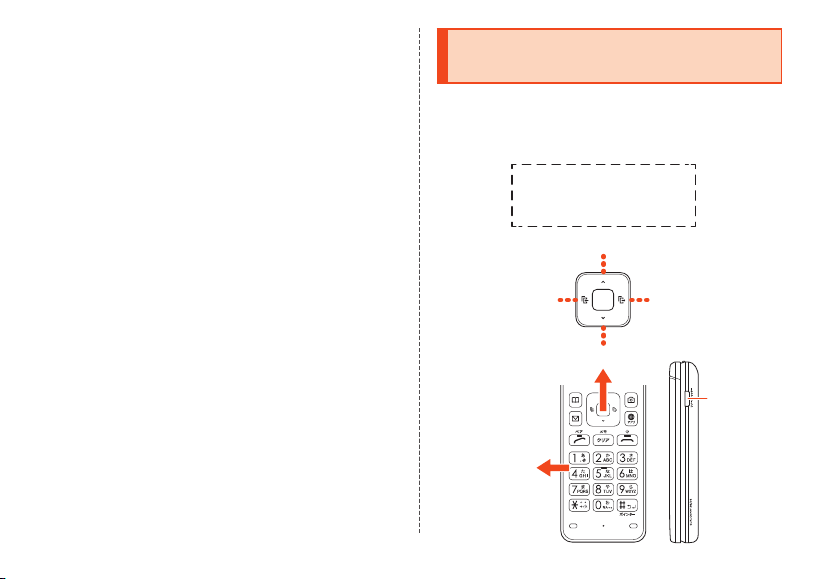
■ Note on Key Illustrations
In this manual, the key illustrations are
simplified as shown below.
Pressing e or c............
Pressing s or f............
Pressing e, c, s, f...
w
x
d
e
s f
c
uo
k
jl
v
m,.
123
456
789
-0^
2
Page 5
■ Description of Operations for
Notations used
In this manual, part of the
screen such as icons are
omitted.
Selecting Item/Icon/Button, etc.
In this manual, step descriptions for selecting a
menu item/icon/on-screen button, etc. with w
or d and then pressing k (OK/Check/Set/
Commit/Done) are abbreviated as [Operation].
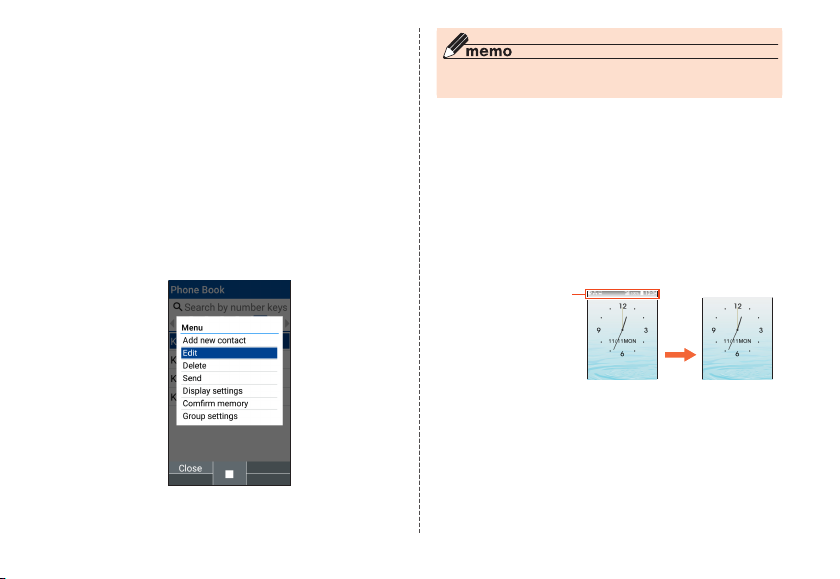
Example: To edit phone book contacts
When the standby screen is
1
displayed, press u → u (Menu) →
[Edit]
Indicates to select "Edit" with w and commit
with k.
◎ For details on key operations, refer to "Learn Basic
Key Operations" (▶P. 87).
■ Notes on Illustrations/Screenshots
Screenshots and operation instructions in this
manual are based on the product with the au
Nano IC Card 04 LE is inserted.
The illustrations and screenshots in this
manual may look different from the actual
product or screens. Also, please note that the
contents of the screen may be partially omitted.
Actual screen
in this manual
3
Page 6

◎ In this manual, keys, screenshots and icons are
described based on default settings (color: pale
water color) of the product. However, actual keys,
screenshots and icons may differ or be partially
omitted.
◎ Contents at the bottom of the screen that can be
operated by pressing k/u/o/j/l are indicated
in parentheses, such as u (Menu).
* However, k (OK)/k (Check)/k (Set)/k (Commit)/k (Done)
are abbreviated as k only.
◎ Menu items, layers and icons described in this
manual may be different according to functions and
conditions to use.
◎ In this manual, "au Nano IC Card 04 LE" is
abbreviated as "au IC card".
◎ In this manual, "microSD™ memory card (sold
separately)" and "microSDHC™ memory card (sold
separately)" are abbreviated as "microSD memory
card" or "microSD".
◎ All of the indicated amounts exclude tax unless
otherwise specified.
Company names and product names referred to in
◎
this manual are trademarks or registered trademarks
of the respective companies. TM or ® may be omitted
in this manual.
4
Page 7
Contents
Preface ........................................................................................ii
List of Packaged Items ......................................................... ii
Operating Instructions .........................................................1
Illustrations and Descriptions in This Manual .............2
Contents ...................................................5
Safety Precautions ...............................9
Safety Precautions............................................................ 9
When Using the Product ......................................................9
Safety Precautions (Observe Strictly) ....................... 12
Material List ...........................................................................28
Handling Precautions ......................................................... 29
Notes on Waterproof/Dustproof/Shockproof
Properties ...............................................................................37
Important Items to Remember before Use ................. 38
Precautions on Charging...................................................41
Draining the Product...........................................................41
Notes on Using Bluetooth
Function ...................................................................................43
Cautions on Using 2.4 GHz Band .................................. 43
Security Code/PIN Code ..................................................45
Notes on Security Code ....................................................45
Notes on PIN Code .............................................................. 46
Notes on Data Communication Charges ....................47
®
/Wireless LAN (Wi-Fi®)
Notes on Applications........................................................47
Cell Phone Etiquette ...........................................................48
Basic Operations ................................ 50
Basic Operations ............................................................. 50
Names and Functions of Parts .......................................50
Charging/Notification Indicator ......................................54
Attaching a Strap ................................................................54
Installing/Removing the Battery Pack ........................ 55
Installing the Battery Pack ...............................................55
Removing the Battery Pack .............................................57
au IC Card ..............................................................................57
When au IC Card is Not Inserted .................................... 58
Inserting/Removing the au IC Card .............................58
Inserting the au IC Card .....................................................58
Removing the au IC Card ...................................................60
Inserting/Removing the microSD Memory Card ..... 62
Inserting the microSD Memory Card ............................. 62
Removing the microSD Memory Card ...........................63
Charging..................................................................................64
Charging with the AC Adapter ........................................65
Charging with the Desktop Holder and the Specified
AC Adapter ............................................................................. 66
Turning the Power On/Off ................................................ 68
Turning the Power On .........................................................68
Turning the Power Off ........................................................68
Forcing the Product to Shut Down and Restart .......68
Using the Pointer.................................................................69
Pointer Operation ................................................................. 69
Contents
5
Page 8

Switching to English Display ...........................................71
Using the Standby Screen ...............................................71
Using Widgets and Indicators ......................................... 72
Contents
Editing Widgets in the Standby Screen .......................72
Monitoring the Product's Status ................................... 73
Viewing Icons ........................................................................73
Notification/Settings Panel ............................................. 74
Setting Manner Mode.........................................................75
Setting Airplane Mode ....................................................... 76
Checking Your Phone Number .......................................77
Checking Your Profile ......................................................... 77
Editing Your Profile ..............................................................77
Using the Sub-display ........................................................ 77
Using the Main Menu .........................................................79
Using Applications/Services ...........................................85
Changing the Main Menu ..................................................85
Updating LINE .......................................................................85
Using the Custom Menu ...................................................86
Registering Applications to the Custom Menu.........86
Using the Custom Menu to Activate Applications . . 86
Rearranging Applications .................................................. 86
Deleting Applications .........................................................86
Learn Common Operations .............................................. 87
Learn Basic Key Operations ............................................87
Using Checkboxes ............................................................... 88
Disabling Manner/Shutter Key Operation when the
Product is Folded (Key Lock) .........................................88
Character Input ...................................89
Character Input ................................................................ 89
6
Learn How to Enter Characters.....................................89
Enter a Character Quickly in the Standby
Screen ......................................................................................93
Phone ...................................................... 95
Phone ................................................................................... 95
Making a Call ......................................................................... 95
Entering a Phone Number and Making a Call ............95
Using Call Histories and Making a Call ........................ 98
Using Speed Dial..................................................................99
Calling Overseas from au Phones (au International
Call Service) ........................................................................100
Receiving a Call .................................................................101
Answering an Incoming Call .......................................... 101
Rejecting an Incoming Call ............................................ 101
Settings for Step-Up Ring Volume ............................. 102
Settings for Snooze of Missed Call ............................ 102
Using Auto Answering ...................................................102
Settings for Auto Answering ........................................102
Playing Back Auto Answering ......................................103
Phone Book ........................................104
Phone Book .................................................................... 104
Registering to the Phone Book ................................... 104
Using the Phone Book List ...........................................105
Displaying the Phone Book List ..................................105
Using Time-reduction Search (Phone Book
Search) .................................................................................106
Using Information in Phone Book ............................... 106
Page 9

Registering the Frequently Used Address to Pair
Function ................................................................................107
Using the Pair Function..................................................108
Mail ........................................................109
E-mail ................................................................................. 109
Checking E-mail ................................................................. 109
Sending E-mail ...................................................................112
Adding/Deleting Recipients .......................................... 113
Receiving E-mail ................................................................ 114
Inquiring for and Receiving New Mail ........................ 115
+Message (SMS) ......................................................... 115
Using +Message ...............................................................115
The Usages of +Message ............................................. 116
How to Use +Message ................................................... 116
Registering Recipients ................................................... 117
Registering Recipients via QR Code .......................... 117
Registering a New Recipient ........................................ 117
Sending a Message .........................................................117
PC Mail ............................................................................. 118
Adding an Account of PC Mail ..................................... 118
Sending PC Mail ................................................................ 119
Receiving PC Mail.............................................................119
Replying/Forwarding PC Mail ......................................119
LINE ......................................................120
LINE ................................................................................... 120
Internet ................................................121
Internet Access ............................................................ 121
Accessing the Internet ..................................................121
Using Data Communication .......................................... 121
Browser............................................................................ 122
Displaying the Browser Menu ...................................... 122
Using the Pointer..............................................................122
Camera ................................................123
Camera ............................................................................. 123
Viewfinder Layout .............................................................124
Capturing Still Pictures/Video .....................................125
Useful Functions .............................. 127
テレビde写真 (Photos on TV) ..................................... 127
Alarm ................................................................................. 128
Using the Menu in the Alarm List ............................... 129
Using the Weather Forecast Alarm ........................... 129
Flashlight ......................................................................... 130
Kanji Check .................................................................... 131
Screenshot ..................................................................... 131
Battery Care Mode ...................................................... 131
Settings ...............................................132
Settings ........................................................................... 132
Contents
7
Page 10

Displaying the Settings Menu .....................................132
Wireless LAN (Wi-Fi®) Function .............................. 133
Wireless LAN (Wi-Fi®) Function ..................................133
Contents
Using the Wireless LAN (Wi-Fi
Enabling the Wireless LAN (Wi-Fi
Connecting to a Wi-Fi
Disconnecting from an Access Point .......................134
®
) Function..............134
®
®
Network .................................. 134
) Function .........134
Appendix ............................................. 135
Appendix .......................................................................... 135
Updating Software ........................................................... 135
Downloading and Updating Software ........................135
Troubleshooting ................................................................136
位置検索サポート (Find Missing Device Service) .....139
After-Sales Service .........................................................140
SIM Unlock .......................................................................... 143
Related Accessories ....................................................... 143
Using an Earphone ........................................................... 144
Main Specifications .......................................................... 145
Specific Absorption Rate (SAR) of Cell Phones...148
FCC Notice .......................................................................... 149
Export Administration Regulations ............................ 151
Intellectual Property Right ............................................ 151
Trademarks..........................................................................151
License ................................................................................. 155
8
Page 11
Safety Precautions
When Using the Product
•Before you start using the product, be sure to
read "Safety Precautions" in this manual to
ensure correct use.
•Before you assume that the product is
malfunctioning, check "Troubleshooting" in this
manual.
Or, check for possible remedies in "トラブル診断
(trouble-check)" (Japanese) of au homepage:
https://www.au.com/trouble-check/
•Communication is not possible even inside the
service area in places where the signal does
not reach (e.g. tunnels and basements). Also,
communication may not be possible in poor
reception areas. Communication may be
interrupted if you move into poor reception
areas during communications.
•Since this product uses radio waves, the
possibility of communication intercepts by
third parties cannot be eliminated (though the
LTE/UMTS/GSM system has highly secure
confidential communication features).
•VoLTE (LTE network) by au is used when
connecting with emergency call receiving
agencies within Japan. You cannot connect
using 3G (circuit-switched network).
•The product is compatible with au World
Service. Each network service described in
this manual varies depending on the area and
service content.
•Since the product is a radio station under the
Radio Law, you may be asked to temporarily
submit the product for inspection in
accordance with the Radio Law.
•The IMEI information of your cell phone is
automatically sent to KDDI CORPORATION for
maintenance and monitoring operational
status of your cell phone.
•If you are using the product overseas, check
the relevant laws and regulations of the
country/region you visit beforehand.
•The Company is not liable for any damages
arising from earthquakes, lightning, storms,
floods or other natural disasters, as well as
fires, actions by third parties, other accidents,
intentional or mistaken operation by the
customer, or use under other unusual
conditions outside the responsibility of the
Company.
Safety Precautions
9
Page 12

•The Company is not liable for any incidental
damages (change/disappearance of saved
content, loss of business income, disruption
of business, etc.) arising from use of or
inability to use the product.
Safety Precautions
•The Company is not liable for any damages
arising from failure to observe the described
content of this manual.
•The Company is not liable for any damages
arising, for example, from malfunction caused
by combination with connected devices or
software not related to the Company.
•Captured image data or downloaded data may
sometimes be altered or lost due to faults,
repair or other handling of the product. The
Company is not liable for any damage or lost
income resulting from recovery of these data.
•It is recommended you keep a copy of
important data on your PC's hard disk, etc.
Whatever the cause of the defect or
malfunction may be, the Company assumes
no responsibility for alteration or loss of saved
data.
•Contents saved in the product, such as
contacts, mails and favorites might be altered
or lost by an accident, fault, repair or
mishandling. Be sure to keep a copy of
important contents. Note that the Company
10
assumes no responsibility for any damages or
lost profits resulting from altered or lost
contents.
•Note that content data (both charged or free
of charge) saved on the product cannot be
returned to the customer when the product is
replaced for repair of a fault, for example.
•The product uses liquid crystal for its main
display. The main display response speed may
become slow when the ambient temperature
is low, which is due to the characteristics of
liquid crystal and is not a malfunction. The
main display response speed will return to
normal at room temperature.
•Although the display used on the product is
made using high-precision technology, some
pixels (dots) might be lit or out at all times.
This is not a malfunction.
•You are recommended to store copies of
individual data such as photos/movies you
took and music in your PC by sending each file
as mail attachment, etc. Note, however, that
you may not be able to make copies of some
copyrighted data even by the above-mentioned
means.
•Do not discard the old product together with
regular trash. Please cooperate in the
Page 13
collection of the product (including optional
parts) when it is no longer needed to protect
the environment and effectively use resources.
Old products are collected at au shops and
other places.
•If the confirmation screen such as terms and
conditions, etc. appears when you use
applications and functions of the product,
follow the on-screen instructions.
•If the confirmation screen of communication
charge appears when you use applications
and functions of the product, follow the
on-screen instructions.
* "The Company" as appears in this manual
refers to the following companies:
Sold by: KDDI CORPORATION, OKINAWA
CELLULAR TELEPHONE COMPANY
Manufactured by: KYOCERA Corporation
◎ Reproduction of the content of this manual in part
or in whole is prohibited.
◎ The content of this manual is subject to change
without notice.
◎ Due to the specification changes of the operating
system or termination of the services, some
features become unavailable.
◎ Every effort has been made in the preparation of
this manual. Should you notice any unclear points,
omissions, etc., feel free to contact us.
Safety Precautions
11
Page 14

Safety Precautions (Observe Strictly)
■Before using the product, thoroughly read
Safety Precautions
this "Safety Precautions" for proper use.
■These precautions describe instructions that
should be observed to prevent injury to the
customer and others, or damage to property
using the product.
■The signs below differentiate between the
levels of danger that can occur if the product
is not used within the specified guidelines.
This sign denotes that
"death or serious injury*1
may directly result from
improper use".
This sign denotes that
"death or serious injury*1
may result from improper
use".
This sign denotes that
"minor injury*2 or damage
to property*3 may result
from improper use".
12
DANGER
WARNING
CAUTION
*1 Serious injury: This refers to loss of sight, injury,
*2 Minor injury: This refers to injuries, burns (high- and
*3 Physical damage: This refers to extended damage
burns (high- and low-temperature),
electric shock, broken bones, injuries
with residual aftereffects from
poisoning, etc., and injuries requiring
hospital admission for treatment or
long-term hospital attendance as an
outpatient.
low-temperature), electric shock, etc.
that do not require hospital admission
for treatment or long-term hospital
attendance as an outpatient.
to buildings, furniture, livestock
or pets.
■ Explanation of Graphic Symbols
Used in This Manual
Indicates an
action that is
not allowed.
Indicates that
disassembly
is not allowed.
Indicates that
handling with
wet hands is
not allowed.
Indicates an
action based
on
instructions
that must be
done.
Page 15

Indicates that
use in a place
where the
product is
likely to get
wet or
allowing the
product to get
wet is not
allowed.
Indicates that
the power
plug must be
disconnected
from the
power outlet.
■ Precautions Common to the Main
Unit, Battery Pack, Back Cover,
Charger, au IC Card, Peripheral
Devices
DANGER
Do not use, store or leave the product
in hot places (e.g. by the fire, near a
heater, under a kotatsu or futon, in
direct sunlight, in a car in the hot sun).
Doing so may cause fire, burns, injuries,
or electric shock.
Do not put the product into or near a
heating cooking device such as a
microwave oven or IH cooker, or
high-pressure container such as a
pressure cooker.
Doing so may cause fire, burns, injuries,
or electric shock.
Safety Precautions
13
Page 16
Do not put sand, dirt, or mud on the
product or put it on them directly. Do
not touch the product with hands to
which sand or others adhere.
Safety Precautions
Doing so may cause fire, burns, injuries,
or electric shock.
For details on water/dust resistance,
refer to the following.
▶P. 37 "Notes on Waterproof/Dustproof/
Shockproof Properties"
Do not charge when the product is wet
with water (drinking water, perspiration,
seawater, urine of pet animals, etc.).
Do not use it near water, such as in a
bathroom.
Doing so may cause fire, burns, injuries,
or electric shock.
For details on water resistance, refer to
the following.
▶P. 37 "Notes on Waterproof/Dustproof/
Shockproof Properties"
14
Do not subject the product to strong
pressure or break the product.
Especially when bringing the product
putting in a pocket of clothes, do not let
the product hit against surroundings or
being put between the objects.
Doing so may cause fire, burns, or injury
due to battery damage.
* Examples to avoid
•Sitting or squatting with the product
put in a pocket of trousers or skirt
•Putting the product in a pocket of
outer wear and catching them in a door
or a door of car
•Stepping on the product on a soft
object such as a sofa, bed, or bedding,
or on a floor
Do not attempt to disassemble or
modify the equipment.
Doing so may cause fire, burns, injuries,
or electric shock.
Page 17
Do not let the product get wet with
water (drinking water, perspiration,
seawater, urine of pet animals, etc.).
Doing so may cause fire, burns, injuries,
or electric shock.
For details on water resistance, refer to
the following.
▶P. 37 "Notes on Waterproof/Dustproof/
Shockproof Properties"
Do not put water (drinking water,
perspiration, seawater, urine of pet
animals, etc.) into the external
connection terminal.
Doing so may cause fire, burns, injuries,
or electric shock.
For details on water resistance, refer to
the following.
▶P. 37 "Notes on Waterproof/Dustproof/
Shockproof Properties"
Use the optional products specified by
au.
Not doing so may cause fire, burns,
injuries, or electric shock.
WARNING
Do not drop, trample, or throw the
product or give a strong force or
vibration to it.
Doing so may cause fire, burns, injuries,
or electric shock.
Do not allow conductive materials
(metal pieces, pencil lead, etc.) to come
in contact with the external connection
terminal, and do not allow dust to get
inside.
Doing so may cause fire, burns, injuries,
or electric shock.
Do not cover or wrap the product with
bedding, etc. while using or charging
the product.
Doing so may cause fire or burns.
If charging is not completed after the
specified charging time, stop charging.
Overcharging may cause fire, burns, or
injuries.
Safety Precautions
15
Page 18
Make sure to turn off or stop charging
the product before you get close to
places where a flammable gas or dust
Safety Precautions
16
can be generated.
Using the product in places where a
flammable gas can be generated may
cause an explosion or fire.
Follow the instructions given by the
respective institution regarding the use
of the product in a gas station.
Do not charge the product in a gas
station.
Be careful not to drop the product in a
place like a gas station, especially when
you put gas into a vehicle.
Using the product in places where a
flammable gas can be generated may
cause an explosion or fire.
Perform the following operations while
using, charging, or keeping the product
if there are odors, noise, smoke,
overheating, discoloring, deformation,
or other abnormalities.
•Remove the power plug from the wall
outlet.
•Turn the product off.
•Remove the battery pack from the
product.
Not doing so may cause fires, burns,
bodily injury, electric shock, etc.
CAUTION
Do not use the damaged product.
Doing so may cause fire, burns, or
injuries.
Do not leave the product on unstable or
sloping surfaces. Be careful especially
when the product is set to vibrate.
The product may fall and cause injuries.
Page 19
Do not use or store the product in
humid or dusty places, or places that
get hot.
Doing so may cause fire, burns, or
electric shock.
For details on water/dust resistance,
refer to the following.
▶P. 37 "Notes on Waterproof/Dustproof/
Shockproof Properties"
When children use the product, do not
let them use incorrectly without
instruction by an adult for proper use.
Doing so may cause injuries.
Do not store the product within the
reach of small children.
Doing so may cause accidental swallow,
injuries, or electric shock.
Be careful when using the product
continuously for a long time or charging
as it gets hot. Be careful of contacting
with the product continuously by
putting the product in a pocket of
clothes or falling asleep etc.
The product, battery pack, or specified
charger (sold separately) may become
hot when using for a long time such as
applications, calling, data
communication, watching TV or videos,
or while charging. Depending on your
physical predisposition and physical
condition, contacting with a high
temperature part may cause skin
redness, itching, rash, or lowtemperature burns.
■ Main Unit
DANGER
Do not throw the main unit into fire or
apply heat.
Doing so may cause fire, burns, or
injuries.
Safety Precautions
17
Page 20
Do not apply excessive force such as
sticking a sharp-edged tool (nail, etc.)
into the product, hitting it with a hard
Safety Precautions
18
tool (hammer, etc.), or stepping on it.
Doing so may cause fire, burns, or
injuries.
If the substance inside the product
comes into contact with your eyes or
mouth, immediately rinse the area with
clean water, and then see a doctor
right away.
Not doing so may cause loss of sight or
poor physical condition due to the
influence of the substance, etc. inside
the product.
Do not lighten or flash the lighting part
of the light close to person's eye. Be
especially careful to keep a sufficient
distance from small children.
Not doing so may cause vision
disturbance. Also, it may cause an
accident such as injuries due to
dizziness or shocks.
WARNING
Do not lighten or flash the light to point
at the eyes of someone driving a car,
etc.
Doing so may interfere with driving and
cause an accident.
Do not watch a repeatedly flickering
screen for a long time.
Doing so may cause muscle spasms or
loss of consciousness, etc.
Do not allow water or other liquids
(drinking water, perspiration, seawater,
urine of pet animals, etc.), metal pieces,
flammable material or foreign object
into the au IC card slot or the microSD
memory card slot on the product. Do
not mistake the place and direction of
the au IC card or the microSD memory
card.
Doing so may cause fire, burns, injuries,
or electric shock.
Do not expose the camera lens to
direct sunlight for an extended period.
Doing so may cause fire, burns, or
injuries by the light-collecting
mechanism of the lens.
Page 21
Turn off the product or set it to Airplane
mode before going aboard an airplane.
Since using the product on airplanes is
restricted, follow the instructions given
by the respective airlines.
If any functions that power on the
product automatically are activated,
deactivate them.
The product's signals may adversely
affect on-board electronic equipment.
If you commit a prohibited act while
using the product on an airplane, you
might be punished by law.
Follow the instructions given by the
respective medical institution regarding
the use of the product in a hospital.
Turn off the product in areas where the
use of the product is prohibited.
If any functions that power on the
product automatically are activated,
deactivate them.
The product's signals may affect
electronic equipment and electronic
medical equipment.
When using the handsfree call, loud
ringtone is ringing, or in the standby
mode, be sure to keep the product off
of the ears. Also, when playing games,
video, or music with an earphone
microphone connected to the product,
adjust the volume to the proper level.
When using the handsfree call, note
that the speaker may emit loud sound.
Ringtone or alarm sound can be heard
even in the standby mode.
Turning the sound on with the volume
set too loud or using the product
continuously for a long time may
adversely affect your ears.
Doing so may prevent surrounding
sound from being heard, causing an
accident.
If you have a weak heart, be careful
when setting the ringtone vibration and
incoming volume.
Sudden ringtone vibration and ringtone
surprise you, it may cause harmful
effect on heart.
Safety Precautions
19
Page 22
To use electronic medical equipment,
check with electronic medical
equipment manufacturer or vendor to
determine how devices are affected by
Safety Precautions
radio waves before using.
Radio waves may affect the
performance of electronic medical
equipment.
Turn the product off near high-precision
electronic control equipment or
electronic equipment using low-power
signals.
Not doing so may cause the equipment
to fail or malfunction due to the
product's signals.
* Examples of electronic equipment to avoid a
hearing aid, an implanted pacemaker, an
implanted cardioverter-defibrillator, other
electronic medical equipment, or other
automatic control devices, etc. To use an
implanted pacemaker, an implanted
cardioverter-defibrillator, or other electronic
medical equipment, check with electronic
medical equipment manufacturer or vendor
to determine how devices are affected by
radio waves before using.
20
When the display or camera lens is
accidentally broken, be careful of
broken glass or exposed internal parts
of the product.
Not doing so may cause burns, injuries,
or electric shock with damaged parts or
exposed parts.
Prevent a pet from biting the product.
Not doing so may cause fire, burns, or
injuries due to battery pack ignition,
rupture, overheat, or leak.
Page 23
CAUTION
Do not swing the product around by
holding strap, etc.
Doing so may cause an accident.
If the display breaks and the fluid, etc.
leaks out from inside, do not let the
fluid contact with the skin on your face
or hands or clothes.
Doing so may cause eye or skin
problems. If the substance inside the
display comes into contact with your
eyes or mouth, immediately rinse the
area with clean water. Also, if it comes
into contact with your eyes or mouth,
seek medical treatment immediately
after rinsing the contacted area.
Do not forcibly remove the back cover.
This can damage the back cover and
may cause injuries.
Be careful not to get your finger or a
part of your body caught when
installing the back cover.
Doing so may cause injuries.
Do not use the product without the
back cover.
Doing so may cause burns, injuries, or
electric shock.
To use the product in car, check with
automobile manufacturer or dealer to
determine how vehicle devices are
affected by radio waves before using.
In rare cases, using the phone in some
vehicle models can cause the vehicles
electronic equipment to malfunction. In
that case, stop using the product
immediately.
If you develop skin problems, stop using
the product immediately, and see a
doctor.
Itching, rashes, eczema, etc. sometimes
occurs depending on your physical
constitution and condition.
For material of each part ▶P. 28
"Material List"
Be careful not to get your finger or a
part of your body caught when
opening/closing the product.
Catching your finger in the gap between
the main unit may cause injuries.
Safety Precautions
21
Page 24
Make sure that there is no adhered
metal pieces (cutter blade, staples,
etc.) as the speaker (including the
Safety Precautions
outer case side) or camera key part of
this product generates magnetism.
Not doing so may cause injuries with
adhered metal pieces.
Use the product in a well-lighted area
and put some distance between you
and the display when watching the
display.
Using the product in dark places or near
eyes may affect your vision.
■ Battery Pack
Do not allow metal fragments
(necklace, hairpin) or conductive
materials to come into contact with the
battery pack. Do not bring or store the
battery pack either with these
materials.
Doing so may cause fire, burns, or
injuries.
22
DANGER
Do not forcibly install the battery pack
when attaching the battery pack. Do
not forcibly remove the battery pack
when removing the battery pack.
Doing so may cause fire, burns, or
injuries.
For details on installing/removing the
battery pack, refer to the following.
▶P. 55 "Installing the Battery Pack"
▶P. 57 "Removing the Battery Pack"
Do not throw the battery pack into fire
or apply heat.
Doing so may cause fire, burns, or
injuries.
Do not apply excessive force such as
sticking a sharp-edged tool (nail, etc.)
into the product, hitting it with a hard
tool (hammer, etc.), or stepping on it.
Doing so may cause fire, burns, or
injuries.
Page 25

Check the orientation of the battery
pack when installing the battery pack
into the product.
Not doing so may cause fire, burns, or
injuries due to battery pack ignition,
rupture, overheat, or leak.
For details on installing the battery
pack, refer to the following.
▶P. 55 "Installing the Battery Pack"
If the substance inside the battery pack
comes into contact with your eyes or
mouth, immediately rinse the area with
clean water, and then see a doctor
right away.
Not doing so may cause loss of sight or
poor physical condition due to the
influence of the substance, etc. inside
the battery pack.
WARNING
Do not use the product if there are
odors, noise, smoke, overheating,
discoloring, deformation, or other
abnormalities.
Doing so may cause fire, burns, or
injuries.
Stop using the product immediately and
move the battery pack away from fire if
you notice unusual odor or leakage of
fluids inside the battery pack.
The battery fluid is flammable and could
ignite, causing a fire, explosion, etc.
Prevent a pet from biting the battery
pack.
Not doing so may cause fire, burns, or
injuries due to battery pack ignition,
rupture, overheat, or leak.
Safety Precautions
23
Page 26
If fluid, etc. leaks out from the battery
Safety Precautions
24
pack, do not let the fluid contact with
the skin on your face or hands or
clothes.
Doing so may cause eye or skin
problems.
If the internal matter comes into
contact with your eyes, mouth, skin or
clothes, immediately rinse the
contacted area with clean water. If the
fluid enters your eyes, mouth etc.,
immediately see a doctor after rinsing.
Do not discard the old battery pack
together with regular trash.
Doing so may cause fire, burns, or
injuries. May damage the environment.
After insulating the battery pack no
longer needed with tapes, etc. on
terminals of the battery pack, and bring
the battery pack to a sales outlet such
as au Shop. Alternatively, if your local
municipality has a battery recycling
program, dispose of it as provided for.
CAUTION
Do not use or charge the product with
the battery pack is wet.
Doing so may cause fire, burns, or
injuries.
■ Charger
WARNING
Do not use if the cord of the specified
charger (sold separately) is damaged.
Doing so may cause fire, burns, or
electric shock.
Do not touch the specified charger
(sold separately) if you hear thunder.
Doing so may cause electric shock.
Do not short the charging terminal
while it is connected to an outlet. Do
not allow any part of your body such as
your hands or fingers to come into
contact with the charging terminal.
Doing so may cause fire, burns, or
electric shock.
Page 27
Do not place heavy objects on the cord
of the specified charger (sold
separately), or do not pull the cord with
excessive force.
Doing so may cause fire, burns, or
electric shock.
When you plug/unplug the specified
charger (sold separately) into/from the
outlet, do not contact metal straps or
other metal objects with the jack.
Doing so may cause fire, burns, or
electric shock.
Do not connect a transformer for
overseas travel (travel converter) to
the specified charger (sold separately).
Doing so may cause ignition,
overheating, or electric shock.
Do not apply excessive force on the
connection part with the specified
charger (sold separately) connected to
the product.
Doing so may cause fire, burns, injuries,
or electric shock.
Do not touch the cord, charging
terminal or power plug of the specified
charger (sold separately) with wet
hands.
Doing so may cause fire, burns, or
electric shock.
Use the product at the specified power
supply voltage. When charging the
product overseas, use the specified
charger (sold separately) for global
use.
Incorrect power supply voltage may
cause fire, burns, or electric shock.
AC adapter: 100 VAC (Connect to an
AC outlet for internal household use)
AC adapter for global use: 100 VAC to
240 VAC (Connect to an AC outlet for
internal household use)
Wipe off dust on the power plug.
Not doing so may cause fire, burns, or
electric shock.
Fully plug the specified charger (sold
separately) into the outlet.
Not doing so may cause fire, burns, or
electric shock.
Safety Precautions
25
Page 28
When you disconnect the power plug
from an outlet, do not pull the cord of
the specified charger (sold separately)
Safety Precautions
26
with excessive force. Instead, grasp
the adapter to disconnect.
Pulling the cord of the specified charger
(sold separately) may damage the cord
and cause fires, burns, electric shock,
etc.
When plugging/unplugging the specified
charger (sold separately) into/from the
product, do not pull the cord with
excessive force. Instead, plug/unplug it
straightly toward the jack to connect.
Not doing so may cause fire, burns,
injuries, or electric shock.
Stop using the charger immediately if
you notice deformation of the charging
terminal. Also, stop using the charger
after recovering the original form of the
terminal.
Short-circuiting of the charging terminal
may cause fire, burns, injuries, or
electric shock.
When the charger is not to be used for
a long time, disconnect the power plug
from the outlet.
Leaving it plugged in may cause fires,
burns, or electric shock, etc.
Immediately remove the power plug
from the outlet if water or other fluids
(drinking water, perspiration, seawater,
urine of pet animals, etc.) get on the
adapter.
Not doing so may cause fire, burns,
injuries, or electric shock.
Always remove the power plug from an
outlet when cleaning the equipment.
Not doing so may cause fire, burns, or
electric shock.
CAUTION
Do not keep touching continuously the
specified charger (sold separately)
when it is connected to an outlet.
Doing so may cause burns.
Page 29
■ au IC Card
CAUTION
Be careful of the cut surface when
handling the au IC card as it may
damage a part of your body such as
fingers, etc.
The cut surface may cause injuries with
adhered metal pieces.
■ Use near Medical Instruments and
Inside Medical Facilities
WARNING
Wearers of medical equipment such as
implanted pacemakers or defibrillators
must carry and use the product at least
15 cm away from the implanted device.
Radio waves may affect the
performance of electronic medical
equipment.
When using electronic medical devices
as home medical treatment other than
an implanted pacemaker and an
implanted cardioverter-defibrillator
outside medical facilities, check
individually with the manufacturer of
the electronic medical equipment
regarding the influence of radio waves.
Radio waves may affect the
performance of electronic medical
equipment.
Make sure that the product will not
emit any signals (turn off power, put it
in Airplane mode, etc.) if within 15 cm
of those around you, such as where
crowded and you cannot move freely.
Since there may be people with an
implanted pacemaker or an implanted
cardioverter-defibrillator nearby. Radio
waves may affect the performance of
electronic medical equipment.
Safety Precautions
27
Page 30
When using the product in medical
facilities, be sure to observe the
regulations of the facility.
Safety Precautions
Radio waves may affect the
performance of electronic medical
equipment.
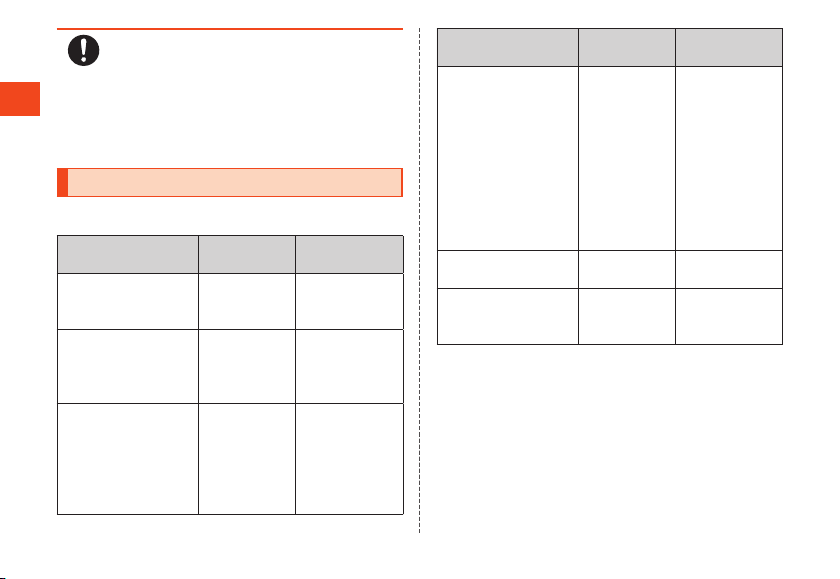
Material List
■GRATINA KYF39 main unit
Part Material Surface
Outer case (LCD
case, KEY case)
Outer case (hinge
cover), back
cover, manner/
shutter key
Outer case (LCD
rear plate),
window panel
(sub), notification
(charging)
indicator window
28
PC + GF
resin
PC resin Acrylic UV
PMMA
resin
(molded-in)
Treatment
Acrylic UV
hardening
coating
hardening
coating
Acrylic UV
hardening
coating
Part Material Surface
Phone book key,
camera key,
browser key, mail
key, cursor key,
center key, dial/
pair key, clear/
memo key, power/
end call key, dial
key, cushion
(under dial keys)
Key sheet PET resin UV hardening
Window panel
part (main),
camera plate
UV
hardening
resin
PMMA +
PC resin
Treatment
-
coating
Hard coating
Page 31

■Battery pack (KYF36UAA)
Part Material Surface
Exterior PC resin -
Seal PET (base
material) +
PP
(surface)
Terminal Copper
Treatment
-
Gold-plated
(Ni-plated
undercoating)
Handling Precautions
These precautions are provided to prevent
product faults and to ensure that performance
can be fully demonstrated.
Thoroughly read these precautions to ensure
correct use.
■Precautions common to the main unit,
battery pack, back cover, charger, au IC
card, peripheral devices
●Do not apply excessive force to the product
during use. Be sure not to put the product
into a tightly packed bag or place a heavy
object on the product in a bag. Sitting on the
product in your pocket might damage the
display or internal circuit board resulting in a
damage or malfunction.
Keeping an external connection device
connected to the external connection
terminal might damage the connector
resulting in a malfunction. Such damage and
malfunction are not covered by the warranty,
even if there is no external damage.
Safety Precautions
29
Page 32

●To ensure the waterproof property (equivalent
to IPX5 and IPX7) of the product, use the
product with the back cover attached.
Note that the waterproof property is not
guaranteed in every usage condition. Do not
Safety Precautions
allow water to get inside the product, or
splash water on a specified charger (sold
separately) or optional accessories. Do not
attach/remove the back cover in the rain or
with any water on the surface of the product.
Doing so may cause water intrusion resulting
in internal corrosion.
Malfunctions determined to be caused by
such water intrusion are not covered by the
warranty.
●Do not use the product in extremely hot, cold
or humid places.
(Use within an ambient temperature range of
5℃ to 35℃ and humidity range of 35% to
85%. Temporary use at 36℃ to 40℃ is
allowed.)
•Main unit
•Battery pack, au IC card (attached to the
main unit)
30
●Do not use the product in extremely hot, cold
or humid places.
(Use within an ambient temperature range of
5℃ to 35℃ and humidity range of 35% to
85%.)
•Charging equipment
•Related accessories
●Do not use in places subject to lots of dust
or vibration. Doing so may cause malfunction.
●Clean the external connection terminal now
and then with a dry cotton swab. Soiling may
result in a poor connection. Avoid using
excessive force, which can bend the external
connection terminal.
●Clean the product with a soft dry cloth (such
as the type used for eyeglasses). Forcefully
rubbing with a dry cloth may scratch the
display. The display may be stained if splash
or smear is left attached to the surface.
Wiping the product using alcohol, thinner,
benzene, detergent, etc. might erase the
printing on the outer cover or cause
malfunction.
●Use as far away as possible from fixed-line
phones, TVs and radios. Use nearby might
affect them.
Page 33

●The product may become warm while
charging, depending on the situation, but this
is not abnormal.
●Remove the battery pack after turning off the
product. Data stored in the product may
sometimes be altered or lost by removing the
battery pack before turning off the product.
●Do not place near corrosive chemicals or in
places where corrosive gas is generated.
Doing so may cause malfunction.
●Do not use outside when you can hear
thunder. Doing so might risk lightning strikes
and electric shock.
●Be sure to use only the specified peripheral
devices. Use of other peripheral devices
might cause malfunction.
●Do not put the product in a cooking
apparatus such as microwave oven or a
pressure vessel. Doing so may cause
malfunction.
●The customer is not allowed to disassemble,
modify or repair the product. Doing so may
cause malfunction. Modification of the
product is in violation of the Radio Law and
Telecommunications Business Law.
●To prevent short-circuiting of the connection
terminal, do not allow your fingers or any
other part of your body or conductive
materials (metal, pencil lead, etc.) to come in
contact with or enter these areas. Doing so
may cause malfunction.
●In the event that the product gets wet while
charging, immediately disconnect the power
plug of the specified charger (sold
separately).
●Do not use the product while driving a car or
riding a motorbike or bicycle or while walking.
Use of a mobile device while driving a car or
motorbike is prohibited by law. Use of a cell
phone while riding a bicycle may be
punishable by some regulations.
●Using or charging the product in a bag or
while it is covered with bedding might cause
malfunction.
●When using a specified charger (sold
separately) or external device, insert/remove
the connector straight to/from the terminal.
Improper connection may cause a fault.
●Do not expose the camera lens to direct
sunlight for an extended period. Doing so may
cause malfunction.
Safety Precautions
31
Page 34

●Do not store the product in places subject to
direct sunlight (e.g. in a car), places that get
hot, places that get extremely cold, and in
humid or dusty places. Doing so may cause
malfunction.
Safety Precautions
●Do not leave the product on unstable or
sloping surfaces. Be careful especially when
the product is charging or set to vibrate. The
product may fall and cause malfunction.
●For charging the product, do not exceed the
rating of an outlet or wiring device by
overloading an electrical circuit, etc.
■Main unit
●Do not forcefully press, tap or intentionally
subject the display to strong impact. Doing
so may cause scratching or damage.
●Do not forcefully press your fingernails, sharp
objects, or hard objects against keys or
display surface. Doing so may cause
scratching or damage.
32
●Never use the modified product. Use of a
modified device violates the Radio Law and
Telecommunications Business Law.
The product has acquired such certification
as conformity with technical regulations for a
specified radio station based on the Radio
Law and conformity with technical regulations
for a terminal device based on the
Telecommunications Business Law, and the
"Technical Conformity Mark " can be
confirmed internally in the product.
From the standby screen, press k →
[Settings] → [More settings] → [About
phone] → [Compliance information]
If modifications are made to the internal
components by removing the screws of the
product, the certifications of conformity with
technical regulations will become invalid.
Never use the product without these
certifications valid. Doing so violates the
Radio Law and Telecommunications Business
Law.
Page 35

●Take care not to place magnetized items
such as magnetic cards, speakers and TV
sets near the product, as it might cause
malfunction.
Putting strong magnetism close to the
product might cause false operation.
●Do not bring magnetized cards such as cash
cards, credit cards and prepaid cards closer
to the product. Doing so may result in loss of
recorded information.
●When you put the product in your pocket or
bag, take care so that the display does not
come in contact with metal objects or other
hard objects. Not doing so may cause
scratching or damage. Be aware that any
metal or other hard cell phone strap that
comes into contact with the display may
scratch or damage them.
●When suddenly brought into a warm place
from a cold place, or when in a humid location,
or when used where temperature suddenly
changes (e.g. near the air discharge port of
an air conditioner), water drops (i.e.
condensation) sometimes are formed inside
the product. Note that when used under
conditions such as this, humidity might cause
corrosion or a fault.
●While writing/reading data to/from a microSD
memory card, do not subject the product to
vibration or impact, removing the battery
pack, or turn off the power. Doing so may
cause data loss or malfunction.
●Do not use the product without the back
cover. Do not leave or store the product
without the back cover either. Allowing dust
or foreign objects to get inside the product
may cause malfunction. (▶P. 39 "Attaching
the back cover")
●Do not allow liquids, metal pieces, or other
foreign matter into the au IC card slot or the
microSD memory card slot on the product.
Doing so may cause malfunction.
●Do not give strong impact on the product
such as dropping, throwing, stomping. Doing
so may cause malfunction.
●Do not place the product directly on sand at
a beach, etc. If sand or other small particles
might get inside the mouthpiece
(microphone) or speaker, etc., it may cause
the volume to drop or malfunction.
●Take care not to cover the mouthpiece
(microphone) with your fingers during a call. It
prevents your voice from being heard by the
other party.
Safety Precautions
33
Page 36

■Battery pack
(The battery pack of the
product is a lithium-ion
battery.)
Safety Precautions
The battery pack is not fully
charged at the time of purchase.
Charge the battery before using
the product. Also charge the
battery after long periods of
disuse before using the product.
●Use in very hot or cold environments, for
example, when left in an automobile with the
windows closed in summer, will cause the
battery capacity to drop and shorten the
available battery usage time. This will also
shorten the battery pack's service life. Try to
use the battery as much as possible at room
temperature.
●When the battery pack is not to be used for a
long time, remove the battery pack from the
main unit, and store it away from hot and
humid places.
34
●The battery pack is a consumable item. If the
performance of a battery pack does not
recover (e.g. the usable time after each
charge has become extremely short), the
battery is at the end of service life, so stop
use and buy a new one of the specified type.
Note that the length of service life varies
depending on the usage condition, etc.
●Battery packs sometimes swell up as they
approach the end of their service life
depending on the usage condition. This is
due to the properties of lithium-ion batteries,
and is not a problem in terms of safety.
●Do not use a battery pack that has been
damaged or that is leaking battery fluid.
Doing so may cause malfunction.
●Do not wet the battery pack with water, etc.
A wet battery pack may cause malfunction. If
you drop the product into water by mistake,
immediately turn off the power, remove the
battery pack, and contact an au shop or
Repair and Delivery Support Center. Never
charge a wet battery pack.
Page 37

■Charger
●Do not wrap power cords of the specified
charger (sold separately) around the charger.
Do not forcibly bend the specified charger's
(sold separately) plug or the connection
between the connector and power cord. Do
not place heavy objects on the cord of the
specified charger (sold separately), or do not
pull the cord with excessive force. Doing so
may cause malfunction.
●When unplugging the power plug of the
specified charger (sold separately) from the
outlet, hold the power plug to do so. If you
pull the cable, it might be damaged.
■au IC Card
●Do not forcibly remove or insert the au IC
card. Be careful not to exert excessive force
when inserting the card into your au cell
phone.
●You are responsible for any damage caused
by inserting your au IC card into some other
IC card reader/writer, etc.
●Do not put stickers, etc. on the au IC card.
●Do not insert your au IC card with a
conversion adapter attached. Doing so may
cause malfunction.
●Do not damage the card (use in a hot place,
throw into fire, contact the metal part with
foreign object, give an impact, bend, apply a
load, moisten, etc.). Doing so may cause data
loss or malfunction.
■Camera
●When photographing important occasions,
take a trial shot and check the shot image to
make sure it is correctly shot.
●Do not shoot in areas where shooting is
prohibited.
■Copyrights and rights of portrait
●If the data you shot or recorded using the
product or the data you downloaded from the
Internet, etc. is in part or in whole protected
by the third party's copyright, you are not
allowed to copy, distribute, publicly send,
modify the data without consent of the
copyright holder, except for personal use,
under the copyright law.
In addition, do not use or modify portraits or
names of other individuals without their
consent, as it may infringe on rights of
portrait.
Note that shooting and recording might be
restricted at some live performances, shows
and exhibitions even for personal use.
Safety Precautions
35
Page 38

●Be careful about the copyright and portrait
right when posting photos you shot, etc. on
Internet homepages.
■Back up content on the product
Safety Precautions
●Please back up important content recorded
or downloaded to the product to an outside
source. Content recorded to memory on the
product sometimes disappears or is altered
by unexpected factors, such as static
electricity or a fault, or by repair, mishandling,
etc.
■FCC certification information
●This product is certified by the Federal
Communications Commission (FCC).
The product's FCC ID is JOYJA53.
You can view this certification in the following
way.
How to confirm:
From the standby screen, press k →
[Settings] → [More settings] → [About
phone] → [Compliance information]
36
Page 39

Notes on Waterproof/ Dustproof/Shockproof Properties
The product has the protection rating (JIS C
0920) for water resistance equivalent to
IPX5*1 and IPX8*2 as well as dust resistance
equivalent to IP5X*3 on the condition that the
back cover is completely attached (based on inhouse testing).
And the product has shock resistance that
meet the MIL-SPEC*4 (based on in-house
testing).
Before using the product, thoroughly read
"Important Items to Remember before Use" to
ensure correct use. Failure to follow the
contents described in these sections may
cause the intrusion of water, sand or other
foreign material, resulting in overheating,
ignition, electric shock, injury or a fault.
*1 IPX5 equivalent means that the product will
maintain its operability as a phone even if it is
sprayed with water from a 6.3 mm diameter nozzle
at a distance of about 3 meters for more than 3
minutes at a rate of about 12.5 liters per minute
from any direction.
*2 IPX8 equivalent means that the product will
maintain its operability as a phone with no water
getting inside the main unit even if it is gently
submerged in a tank of still tap water at room
temperature to a depth of 1.5 meter for about 30
minutes.
*3 IP5X equivalent means protection level that the
product will securely maintain its operability as a
communication device even after it has been placed
in an apparatus with grit and dust of diameters of
75 μm or less and shaken for 8 hours. (Invasion of
grit and dust cannot be prevented completely.)
*4 MIL-SPEC
Drop testing (in which the product is dropped in 26
directions from a height of 1.22 m) was conducted
in accordance with MIL-STD-810G Method
516.7:Shock-Procedure IV formulated by the U.S.
Department of Defense.
The product shock resistance assumes usage in
daily situations; subjecting the product to excessive
shock such as by throwing or causing/letting the
product fall forcefully may break the product. Note
also that the product gets scratches, etc. by falling
impact even though its functionality of the product
remains intact.
Operation of the product in every possible
condition during actual use is not guaranteed.
Malfunctions determined to be caused by
mishandling by the customer are not covered
by the warranty.
Safety Precautions
37
Page 40

Important Items to Remember
before Use
● Make sure the back cover is completely
attached. Water resistance is effective when
Safety Precautions
completely sealed.
● Never open/close the back cover when the
product or your hands are wet.
● Do not let the product submerged into or get
wet with the liquids (seawater, water from a
swimming pool, hot water of hot spring, water
containing soap, detergent, bath powder,
alcohol, soft drink, seasoning, etc.) other than
tap water. Do not use it in a place where it
gets wet with pet urine either.
If the product gets splashed, immediately
rinse it off with tap water.
● Do not place the product directly on sand at
a beach, etc. Sand or other small particles
might get inside the earpiece/speaker or
mouthpiece (microphone), causing the volume
to drop. If sand gets inside the product from
hinges, it might cause overheating or a fault.
● Do not use the product underwater.
● Do not use or leave the product in a humid
place such as a bathroom or kitchen for an
extended period of time.
● Moisture may still remain after draining. While
38
this will not affect use, you should not leave
the product next to items you do not want to
get wet. The product may wet clothing, inside
of carry bag, etc.
● Drain any water in the earpiece/speaker or
mouthpiece (microphone) that may be
affecting audibility.
● The product is not designed to resist water
pressure. Avoid exposing to high water
pressure or submersing in water for a long
period.
● Do not wash the product in a washing
machine or ultrasonic bath.
● Do not immerse the product into a bathtub.
The product is not designed to be heat
resistant.
● The rapid changes of temperature may cause
condensation, resulting in malfunction. Wait
until the product reaches room temperature
before you bring the product from a cold
place into a warm bathroom.
● The product does not float on water.
■Back cover
●Make sure the back cover is completely
attached. Any minute particles becoming
lodged between contact surfaces (a single
hair, etc.), no matter how small, can cause
seepage.
Page 41

●Do not wear gloves while removing/attaching
the back cover. Any minute particles
becoming lodged between contact surfaces
(a single hair, etc.), no matter how small, can
cause seepage. Before closing the cover,
wipe any water, soiling, etc. with a dry, clean
cloth, no matter how small.
●Any deterioration or damage with the back
cover will affect water resistance.
Attaching the back cover
Note the orientation of the back cover and
place it on the main unit with the main unit
closed, and attach the back cover.
After attaching the back cover, trace the
circumference of the back cover in direction
① with fingers and press in direction ② to
install the back cover completely.
②
①
■If any liquid other than water gets on the
product
●If anything other than water (seawater,
washing detergent, alcohol, etc.) gets on the
product, immediately rinse with water.
●You can wash the product under a mild flow
(up to 6 liters per minute) of tap water at
room temperature (5℃ to 35℃) at a distance
of about 10 cm from the faucet or
showerhead.
●If soiled, wash by hand without using a brush,
etc., holding the product so that the back
cover does not open.
■After the product gets wet
●After becoming wet, drain water, and then
without removing the back cover, wipe both
the product and back cover with a dry, clean
cloth.
●In cold regions, any water on the product may
freeze. Using the product with frozen water
may cause malfunction. Do not leave water
drop on the product.
■Rubber seal
●The rubber seal on the back of the back cover
is important in maintaining water resistance.
Do not scratch or remove it.
Safety Precautions
39
Page 42

●Be careful not to pinch the rubber seal when
closing the back cover. Trying to close the
cover with a seal pinched can scratch the
seal and affect water resistance. Any minute
particles becoming lodged between contact
Safety Precautions
surfaces (a single hair, etc.), no matter how
small, can cause seepage.
●Any liquid other than water (alcohol, etc.) on
the product can affect product durability.
●Do not insert pointed objects in the back
cover. Doing so may damage/deform the
product or scratch the seal, allowing water
seepage.
●Parts used for maintaining water resistance
should be replaced every 2 years regardless
of their appearance. Contact your nearest au
shop for replacement.
■Heat resistance
●Do not submerge the product in hot water or
get it wet with hot water. Do not use the
product in saunas or expose it to hot air from
hair dryer, etc. The product is not designed to
be heat resistant.
40
■Shock
●The product shock resistance assumes
usage in daily situations; subjecting the
product to excessive shock such as by
throwing or causing/letting the product fall
forcefully may break the product.
Page 43

Precautions on Charging
●Accessories and optional accessories are not
water/dust resistant. Note the following
before and after charging.
●Never charge the battery if the product is
wet. Doing so may cause fire, burns, injuries,
or electric shock.
●Make sure the product is not wet. If charging
after the product has gotten wet, first drain
water well and wipe with a dry, clean cloth,
etc., before placing in the desktop holder
(KYF39PUA) (sold separately).
●Do not touch the specified charger (sold
separately), desktop holder (KYF39PUA) (sold
separately) with wet hands. Doing so may
cause electric shock.
●Do not expose the specified charger (sold
separately) and desktop holder (KYF39PUA)
(sold separately) to water. Do not use it near
water, such as in a bathroom, shower room,
kitchen, or washroom. Doing so may cause
fire, burns, or electric shock. Do not bring it
into a bathroom, etc. even when you are not
charging with it. Doing so may cause fire,
burns, or electric shock.
●Make sure that any water drop or foreign
object is not in the external connection
terminal.
Draining the Product
If you use the product after it gets wet, be sure to
drain water from the earpiece/speaker,
mouthpiece (microphone), and external connection
terminal. Water remaining in those parts might
wet your clothes or bag, or the sound might
become hard to hear.
Follow the steps below to drain water.
Wipe water thoroughly on the
1
surface of the product with a clean
dry lint-free cloth
Safety Precautions
41
Page 44

Shake the product
2
① Hold the product firmly and shake it in the
direction of arrows until water does not
come out.
* When shaking the product, stay alert to your
Safety Precautions
42
surroundings.
* Be careful not to have the product pop out, and
hold it firmly to drain water.
② Wipe drained water.
*
The earpiece/speaker, mouthpiece (microphone),
and external connection terminal are particularly
hard to drain water from. With those parts facing
down, press them against the cloth to wipe off any
water.
③ Place the product on a dry towel or cloth,
then leave it at room temperature for a
while.
Press the product gently against a
3
clean dry lint-free cloth, and wipe
off water remained in the gaps such
as in the earpiece/speaker,
mouthpiece (microphone), hinges,
external connection terminal, etc.
Leave the product for 1 hour or
4
more at room temperature to dry
after removing drained water
thoroughly
Even after you take these procedures, water
may remain on the product. Do not place the
product near things that you do not want to
wet.
Also, take care not to wet your clothes, bag,
etc.
Page 45

Notes on Using Bluetooth®/
Wireless LAN (Wi-Fi®)
Function
•The Bluetooth® and wireless LAN (Wi-Fi®)
functions of the product confirm to domestic
standards of Japan, FCC standards, and have
been certified.
•In some countries/regions, the use of the
Bluetooth® and wireless LAN (Wi-Fi®)
functions may be restricted. If you are using
the product overseas, check the relevant laws
and regulations of the country/region you visit.
•The 2.4 GHz band used by wireless LAN
(Wi-Fi®) and Bluetooth® devices is operated by
various other devices. For this reason, the
communication speed and connectable range
may be decreased, or disconnection may
occur, due to interference from other devices.
•Do not use this product in places where
electromagnetic waves are generated or near
electric products, AV and OA equipment, or
other magnetized devices.
•Subjecting this product to magnetic or
electrical noise might increase noise and
prevent it from performing communications.
(This product is particularly susceptible to
noise when used near a microwave oven.)
•Using this product near a TV, radio or similar
appliance might cause reception interference
and disrupt TV images.
•Searching might not be successful if there are
multiple wireless LAN (Wi-Fi
near the product or the same channel is being
used.
•Since using the product on airplanes is
restricted, follow the instructions given by the
respective airlines.
•The communication speed and connectable
range vary depending on the distance between
communication devices, obstacles and the
devices used.
®
) access points
Cautions on Using 2.4 GHz
Band
•The frequencies used by the Bluetooth® and/
or wireless LAN (Wi-Fi®) functions of the
product are in the 2.4 GHz band. In this
frequency band, other similar wireless
stations, in-plant wireless stations for mobile
unit identification that require a license to use,
such as factory production lines, specific
small power wireless stations that do not
require licenses, amateur wireless stations
Safety Precautions
43
Page 46

(collectively called "other wireless stations"
from here on) are operated in addition to home
electrical appliances such as microwave
ovens, devices for industrial, scientific and
medical devices.
Safety Precautions
1. Before using the product, make sure that
"other wireless stations" are not in operation
nearby.
2. In the event that instances of radio wave
interference have occurred between the
product and "other wireless stations",
immediately either relocate the product or
stop operation of the device (stop the
emission of radio waves).
3. If unsure or require assistance, contact an
au shop or Customer Service Center.
44
◎ The connections between this product and all other
Bluetooth® and wireless LAN (Wi-Fi®) devices have
not been confirmed. Therefore, connections with all
Bluetooth® and wireless LAN (Wi-Fi®) devices are
not guaranteed.
◎ This product supports security features for wireless
communications that are compliant with the
Bluetooth
specifications, but the security may not be
sufficient depending on the usage environment and
configuration. Be careful when making data
communication using Bluetooth® or wireless LAN
(Wi-Fi®) function.
◎ Wireless LAN (Wi-Fi
can be freely connected anywhere within the radio
wave range, as it uses radio waves for exchanging
information. At the same time, there is a risk that a
malicious third party may obtain unauthorized
access if security settings have not been
configured. You are recommended to configure
security settings before use at your decision and
responsibility.
◎ The Company assumes no responsibility for
leakage of data or information that may occur
during Bluetooth
communication.
®
and wireless LAN (Wi-Fi®) standard
®
) has the advantage that it
®
/wireless LAN (Wi-Fi®)
Page 47

◎ Since Bluetooth® and wireless LAN (Wi-Fi®)
2.4FH1/XX1
functions use the same frequency band, using the
both functions at the same may cause radio wave
interference resulting in decreased communication
speed or disconnection from the network. If
connection fails, stop using either of the
Bluetooth® and Wireless LAN (Wi-Fi®) functions.
Bluetooth® and wireless LAN (Wi-Fi®) functions
of the product use frequencies in the 2.4 GHz
band.
–Bluetooth® function: 2.4FH1/XX1
This product uses the 2.4 GHz band. FH-SS
is used as the modulation scheme. The
interference distance is about 10 m or less.
The band of mobile unit identification devices
cannot be avoided.
–Wireless LAN (Wi-Fi®) Function: 2.4DS4/OF4
This product uses the 2.4 GHz band. DS-SS
and OFDM are used as the modulation
schemes. The interference distance is about
40 m or less.
This means that all bandwidths are used,
and that band of mobile unit identification
devices can be avoided.
•Available channels vary depending on
countries.
•For use in an airplane, check with the airline
company in advance.
Safety Precautions
Security Code/PIN Code
Notes on Security Code
The product has various security codes that
you can use.
The available security codes are as follows. Do
not forget the various security codes that are
set as they are necessary for various
operations and contracts.
Be sure to change initial codes to your own
codes before using the product.
45
Page 48

■Security code
Example
usage
Safety Precautions
Initial
value
■Auto lock
Example
usage
Initial
value
■Application lock number
Example
usage
Initial
value
46
① To do remote operation of voice
of
② To use Customer Service Center
A four-digit number chosen by the
customer and noted on the
application form
To set/cancel the auto lock setting
of
None
To use "Contacts lock"/"Email
of
lock"/"+Message lock"/"All reset"
etc.
1234
mail and call forwarding services
from a fixed-line phone
and to do various inquiries,
applications, and modifications on
the au homepage
Notes on PIN Code
■ PIN Code
To prevent unauthorized use of the au IC card
by a third party, you can set the product to
require PIN code entry every time the power is
turned on. You also need to enter PIN code
when setting whether PIN code entry is
required.
If PIN code is incorrectly entered three times
consecutively, the PIN code will be locked. You
can unlock the PIN code using PUK code.
•At the time of purchase, the PIN code is
"1234", and entry is not required. You can
change the PIN code to any 4- to 8-digit
number and the product to require entry if
necessary.
•To use the product with a PIN code required,
be sure to change the PIN code to your own
number you have chosen.
Page 49

■ PUK Code
In case PIN code is locked, you can unlock it by
entering PUK code.
•PUK code is an 8-digit number given at the
time of purchase, which is printed on the back
side of the plastic card on which your au IC
card is attached.
•After entering PUK code, you need to set a
new PIN code.
•If PUK code is incorrectly entered ten times
consecutively, contact an au shop, TOYOTA's
shop dealing in au or Customer Service
Center.
•PIN code is not reset by initializing the
product.
<Please copy this section and use>
【Password entry field】
au ID
Auto Lock: Lock No.
Notes on Data Communication Charges
•Since constant Internet connection is possible
with the product, data communication may be
performed automatically by some applications,
resulting in high data communication charges.
Therefore, subscription to a data flat-rate
service/data communication charge discount
service is recommended.
•Connection for browsing homepages,
downloading applications, communication
using applications, sending/receiving e-mails
and configuring various settings is by the
Internet, and data communication charge
applies.
* Data communication charge does not apply to
wireless LAN (Wi-Fi®) connection.
Safety Precautions
au ID password
* Strictly manage your account and password to
prevent a third party from obtaining them.
Auto Lock: Password
Notes on Applications
•To download applications, first set an au ID
and download from au Smart Pass. For details
on setting an au ID, refer to the "Setting
Guide".
This product does not permit use of Google
Play™ or EZweb.
47
Page 50

•Be sure to check the security of the
application, then install it at your own risk.
Some applications might cause virus infection,
damage various data, and send out your
location information, usage history or personal
Safety Precautions
information stored in your cell phone via the
Internet.
•The Company assumes no responsibility for
any problems that might be caused by
applications you have installed. In such case,
you may be charged a repair fee even during
the warranty period.
•The Company assumes no responsibility for
any disadvantage brought to you or any third
party by applications you have installed.
•Some applications require that a microSD
memory card be inserted.
•Some applications keep the screen turned on
while they are active, or rapidly drain the
battery while running in the background.
•Changes to method of operation or to screen
display may occur without notice due to
version upgrades of applications installed on
the product. Note that there may be
differences with descriptions in this manual.
48
Cell Phone Etiquette
■ Use of Cell Phones is Not Allowed
in the Following Places!
•Do not listen to music, watch videos while
driving a car or motorbike, or riding a bicycle.
Use of cell phones while driving a car or
motorbike is prohibited by law. (Use of cell
phones while riding a bicycle may also be
punishable by law.) In addition, stay alert to
the traffic around you even when walking.
Surrounding sounds might not be heard
clearly, and gazing at the screen may distract
your attention causing a traffic accident. Be
especially careful at railroad crossings, station
platforms and pedestrian crossings.
•Since using the product on airplanes is
restricted, follow the instructions given by the
respective airlines.
■ Be Considerate of People Around
You
•Do not make calls in theaters, museums,
libraries, and other similar places. Turn power
off or turn on manner mode so as not to
disturb others around you with your ringtones.
•Do not use the cell phone outside in town
Page 51

where you might hinder other pedestrians.
•Viewing a cell phone screen while walking is a
serious hazard. Do not suddenly stop to talk
on/operate the cell phone or do so while
walking.
•Move to areas where you will not
inconvenience others on bullet trains, in hotel
lobbies, etc.
•Refrain from talking in a loud voice.
•Be careful of sound leakage from earphones in
trains or other places with many people around
you.
•Obtain the permission of other people before
you take their photos with the cell phone's
camera.
•When using the camera, follow common rules
of etiquette regarding camera use.
•Some people close to you in crowded places
such as packed trains may be using a cardiac
pacemaker. Turn on "Airplane mode" or turn
the cell phone off in such places.
How to set Airplane mode:
From the standby screen, press k →
[Settings] → [Wireless/Network] → [Airplane
mode]
•Abide by the rules of hospitals and other
medical institutions where it is forbidden to
use or carry cell phones.
Safety Precautions
49
Page 52

③
⑬
⑭
⑫④
⑪
⑦
⑥
②
⑧
⑨
⑯
⑮
⑤
⑰
㉖
㉕
㉗
㉔
㉘
㉙
microSD
memory card
au Nano IC
Card 04 LE
Do not mistake the place and
direction of the au IC card or
the microSD memory card.
⑰
Names and Functions of Parts
①
Basic Operations
②
③
⑤
⑥
⑦
⑧
⑨
50
Basic Operations
⑩
⑪
⑯
⑫④
⑬
⑭
⑮
⑳
⑱
⑲
⑰
㉔
㉕
㉑
㉒
㉓
microSD
memory card
au Nano IC
Card 04 LE
㉖
㉗
㉘
㉙
Do not mistake the place and
direction of the au IC card or
the microSD memory card.
Page 53

① Earpiece/Speaker
Hear the other party's voice on call, playing
sound of the auto answering, ringtone, alarm
sound, etc.
② Display (main display)
③ k Center key
Decides the menu or items to select.
From the standby screen, press the key to
display the main menu. Holding down for at
least 1 second in the standby screen
disables the long-pressing operation of
manner/shutter key when the product is
folded (▶P. 88).
④ u Phone book key
In the standby screen, press to activate the
phone book menu. Holding down for at least
1 second in the standby screen displays the
phone book edit screen.
⑤ j Mail key
In the standby screen, press to activate
e-mail. Holding down for at least 1 second in
the standby screen activates +Message
(SMS).
⑥ , Clear/Memo key
While using the product, return to the
previous screen.
From the standby screen, press the key to
display the answer memo list screen. Holding
down for at least 1 second in the standby
screen sets/cancels the auto answering
function.
⑦ m Call/Pair key
From the standby screen, press m without
entering a phone number to display the
confirmation screen of pair registering. And
register a person to pair to use the pair
function (▶P. 108).
Holding down for at least 1 second in the
standby screen activates the fake incoming
call function to use.
⑧ 0-9,-,^ Number keys
Enters phone numbers or characters.
Holding down ^ for at least 1 second
toggles the pointer ON/OFF while the pointercapable function/application is activated (▶
P. 69).
⑨ Mouthpiece (microphone)
Relays your voice to the other party. Or used
for recording the voice sound. Take care not
to cover with your fingers, etc.
Basic Operations
51
Page 54

⑩ Air vent
Since the product is water/dust resistant,
the sealing performance is high. Therefore, an
air vent (hole to ventilate) is equipped.
•The air vent does not affect water/dust
resistance.
•Do not cover the air vent with a protective
Basic Operations
sheet or sticker.
⑪ d Cursor key
Moves the cursor up/down/left/right, or
activates functions.
s Left key/incoming call history
Holding down for at least 1 second in the
standby screen activates the "ココセコム
(COCO-SECOM)" application (▶P. 83).
f Right key/outgoing history
e Up key
Holding down for at least 1 second in the
standby screen displays the Notification/
Settings screen (▶P. 74).
c Down key
Holding down for at least 1 second in the
standby screen displays the recently used
application list.
52
⑫ o Camera key
In the standby screen, press to activate the
camera function. Holding down for at least 1
second in the standby screen displays the
folder list of data folder.
⑬ l Browser key
In the standby screen, press to display the
browser menu.
Holding down for at least 1 second in the
standby screen displays the Application
screen (▶P. 85).
⑭ . Power/End call key
While using the product, end call or exit
functions. Holding down for at least 1 second
turns the product on or off.
⑮ External connection terminal
Used to connect Type-C Common AC Adapter
01 (sold separately) or desktop holder
(KYF39PUA) (sold separately).
v
⑯
Manner/Shutter key
In the standby screen, press to display the
manner menu. In the standby screen or with
the product closed, hold down to enter/exit
the manner mode.
Press to light or switch the sub-display with
the product closed.
While the camera is activated, capture/save
a photo.
Page 55

⑰ Strap eyelet
⑱ Charging/Notification indicator
Lights red during charging. Flashes according
to settings for new call or new mail. Flashes
yellow when 位置検索サポート (Find Missing
Device Service) (▶P. 139) is determining
location.
For details, refer to "Charging/Notification
indicator" (▶P. 54).
⑲ Sub-display
Notifies you with information when a call is
received, new mail is received, an alarm
sounds, etc.
⑳ Camera (lens)
Shooting/Flash light
Lights when using the shooting light/flash
light.
Battery pack
Back cover
Built-in main antenna
au IC card slot
*1
*2
Stopper
microSD memory card slot
Built-in GPS/Wi-Fi®/Bluetooth® antenna
Built-in sub antenna
*2
*1
*1
*1 The antenna is built into the product. Covering the
antenna with your hand might affect communication
quality.
*2 For details on inserting/removing the au IC card and
the microSD memory card, refer to "Inserting/
Removing the au IC Card" (▶P. 58) and "Inserting/
Removing the microSD Memory Card" (▶P. 62).
Basic Operations
53
Page 56

Charging/Notification
Indicator
Lighting/Blinking the charging/notification
indicator notifies you the timing for charging,
charging status, missed calls, or new mail, etc.
Basic Operations
LED Color
and
Functioning
Light-up in
red
Flashing in
blue
Flashing in
white
Flashing in
red
* These are default settings. You can change the LED
setting in "Sound/Notification" (▶P. 132) of the settings
menu.
54
Notification Contents
Indicates that the product is in
charging.
Indicates missed calls,
notification messages, or sound
recording when receiving a call
Indicates new +Message (SMS).
Indicates the impossible for
power-on caused by shortage of
battery level and a charging
abnormality.
Attaching a Strap
Remove the back cover of the
1
product
For details on removing the back cover, refer to
"Installing the Battery Pack" (▶P. 55).
Thread a strap through the strap
2
eyelet
Hook a strap on the strap pin
3
completely and pull it outwards
*
.
Attach the back cover
4
Strap pin
Strap eyelet
Page 57

◎ Confirm the strap is properly hooked on the strap
pin. If a strap is placed between the product and
back cover, you cannot attach the back cover
completely. This may affect water/dust resistance.
If a strap is off the eyelet, it might cause damage
or injury.
Basic Operations
Installing/Removing the Battery Pack
Attach/remove the battery pack and back cover
after turning off the product.
•Use the specified battery pack of the product.
Installing the Battery Pack
Remove the back cover of the
1
product
Lift the cover by the notch of the product using
fingertips (fingernail, etc.) in the direction shown
below to remove.
Notch
Install the battery pack
2
Confirm the position of connection, and then
slide the battery pack in and press it firmly into
place.
Battery pack
Connection
55
Page 58

Attach the back cover
3
Note the orientation of the back cover and
place it on the main unit with the main unit
closed, and attach the back cover.
Basic Operations
56
Press firmly to make sure there are
4
no gaps around the back cover
Trace the circumference of the back cover in
direction ① with fingers and press in direction
② to install the back cover completely.
②
①
◎ Install the battery pack after confirming the au IC
card or microSD memory card is properly inserted.
◎ Close the back cover firmly and make sure there
are no gaps around the back cover to maintain
water resistance.
◎ Attaching the back cover incorrectly may cause
damage.
Page 59

Removing the Battery Pack
Remove the back cover of the
1
product
(▶P. 55 "Installing the Battery Pack")
Removing the battery pack
2
Lift the battery pack by the notch of the
product using fingertips (fingernail, etc.) in the
direction shown below to remove.
Notch
au IC Card
The au IC card contains phone number and
other information.
The product is compatible with au Nano IC Card
04 LE.
au Nano IC Card 04 LE
(Back) (Front)
IC (metal) part
Basic Operations
Battery pack
Attach the back cover
3
(▶P. 55 "Installing the Battery Pack")
◎ Note that mishandling the au IC card might cause
malfunction or damage. Remember the following
points.
•Do not touch the IC (metal) part of the au IC card.
•Check the correct insert direction.
•Do not forcefully attach/remove the card.
◎ If the au IC card is not attached correctly or the au
IC cad has any abnormality, the error message is
displayed.
◎ Do not lose the removed au IC card.
◎ Do not insert your au IC card with a conversion
adapter attached. Doing so may cause malfunction.
57
Page 60

When au IC Card is Not
Inserted
When au IC Card is not inserted, the following
operations are not available. " " appears on the
status bar.
•Making*/Receiving a call
Basic Operations
•Sending/receiving SMS
•Sending/receiving +Message
•Initial settings and sending/receiving of e-mail
(@au.com/@ezweb.ne.jp)
•PIN code setting
•Checking your phone number and e-mail
address of the product
Besides the items above, functions that require
your phone number may also be unavailable.
* Emergency calls such as 110 (Police), 119 (Fire/
Ambulance), 118 (Maritime rescue) are also
unavailable. However, only emergency calls may be
available in overseas. (Emergency call numbers differ
depending on the countries/regions.)
■ PIN Code Limit Settings
To protect your personal information, you can
limit unauthorized use of the au IC card by a
third party by changing PIN code or locking SIM
card (▶P. 46 "PIN Code")
58
Inserting/Removing the au IC Card
Attach/Remove the au IC card after turning off
the product and removing the battery pack.
Inserting the au IC Card
Turn the power off and remove the
1
battery pack
(▶P. 57 "Removing the Battery Pack")
Raise the tab in the direction shown
2
below
Tab
Page 61

Pull the tab and raise the stopper in
3
the direction shown below
Be careful not to raise the stopper forcefully.
May cause damage.
Stopper
Slide the au IC card in the direction
4
shown below with the terminal
(metal) part downwards until it
clicks
Check the correct direction of the notch.
Notch
Basic Operations
59
Page 62

Lower the stopper until it clicks
5
locked
If the stopper is difficult to close, raise the
stopper again and make sure the au IC card is
installed all the way.
Basic Operations
Stopper
Install the battery pack and back
6
cover
(▶P. 55 "Installing the Battery Pack")
60
Removing the au IC Card
Turn the power off and remove the
1
battery pack
(▶P. 57 "Removing the Battery Pack")
Raise the tab in the direction shown
2
below
Tab
Page 63

Pull the tab and raise the stopper in
3
the direction shown below
Be careful not to raise the stopper forcefully.
May cause damage.
Stopper
Push the au IC card until it clicks
4
(①), slide the card to remove (②)
②①
Basic Operations
61
Page 64

Lower the stopper until it clicks
5
locked
Basic Operations
Install the battery pack and back
6
cover
(▶P. 55 "Installing the Battery Pack")
62
Stopper
Inserting/Removing the microSD Memory Card
Inserting the microSD Memory
Card
Attach the microSD memory card after turning
off the product and removing the battery pack.
Turn the power off and remove the
1
battery pack
(▶P. 57 "Removing the Battery Pack")
Raise the tab (▶P. 58)
2
Pull the tab and raise the stopper (▶
3
P. 59)
Be careful not to raise the stopper forcefully.
May cause damage.
Slide the microSD memory card in
4
the direction shown below with the
terminal (metal) part downwards,
and insert the card in the microSD
memory card slot
Note the orientation of the microSD memory
card.
Page 65

Lower the stopper until it clicks
5
locked (▶P. 60)
If the stopper is difficult to close, raise the
stopper again and make sure the microSD
memory card is installed all the way.
Install the battery pack and back
6
cover
(▶P. 55 "Installing the Battery Pack")
◎ Make sure that the top/bottom and front/rear of
the microSD memory card are facing correctly.
Trying to force a wrongly oriented card into the slot
could make it impossible to remove the card or
result in damage.
◎ Do not touch the terminal part of a microSD
memory card.
Removing the microSD Memory
Card
Remove the microSD memory card after turning
off the product and removing the battery pack.
Turn the power off and remove the
1
battery pack
(▶P. 57 "Removing the Battery Pack")
Raise the tab (▶P. 58)
2
Pull the tab and raise the stopper (▶
3
P. 59)
Be careful not to raise the stopper forcefully.
May cause damage.
Slide the microSD memory card in
4
the direction shown below, and
remove the card from the microSD
memory card slot
Basic Operations
63
Page 66

Basic Operations
Lower the stopper until it clicks
5
locked (▶P. 60)
Install the battery pack and back
6
cover
(▶P. 55 "Installing the Battery Pack")
◎ Be careful not to pull out the microSD memory card
forcefully. Doing so may cause malfunction or data
erasure.
◎ After using the product for a long time, the removed
microSD memory card may become warm. This is
not a malfunction.
64
Charging
The battery pack is not fully charged at the
time of purchase. Charge the battery
sufficiently before use.
•While charging, the charging indicator
illuminates in red. When charging is finished,
the charging indicator goes out.
◎ The product may become warm while charging,
depending on the situation, but this is not
abnormal.
◎ Charging the product while using the camera
function, the charging time may take longer than
usual.
◎ When you operate the product with the specified
charger (sold separately) connected, the product
may repeat short-time charging/discharging
resulting in short battery life.
◎ When temperature of environment or the product is
extremely high or low, charging may be stopped.
Charge the battery at room temperature as much
as possible.
◎ Make sure the connection is correct if the charging
indicator of the product blinks in red. If the indicator
keeps blinking, stop charging and then contact an
au shop or Repair and Delivery Support Center.
Page 67

◎ Right after " " is displayed while charging, the
charging indicator may not turn off, but the
indicator will turn off soon and the charging will be
completed.
◎ Keep a metal accessory or conductive materials
(metal pieces, pencil lead, etc.) from coming in
contact with the connection terminal and prevent
them from getting inside.
Charging with the AC Adapter
How to charge the product using Type-C
Common AC Adapter 01 (sold separately) is
described here. For details on the specified AC
adapter (sold separately), see "Related
Accessories" (▶P. 143).
Insert the power plug of Type-C
1
Common AC Adapter 01 (sold
separately) into an outlet (100 to
240 VAC)
Type-C Common
AC Adapter 01 (sold separately)
Basic Operations
65
Page 68

Insert the USB Type-C plug of
2
Type-C Common AC Adapter 01
(sold separately) straight into the
external connection terminal
The USB Type-C plug is reversible and can be
inserted to the terminal which side is up.
Basic Operations
Make sure that the charging light lights up in
red. When the battery power turns on, " "
appears on the status bar.
When charging is finished, the charging
indicator goes out.
Unplug the power plug of Type-C
4
Common AC Adapter 01 (sold
separately) from the outlet
◎ Note that applying unnecessary force with an
external device connected to the external
connection terminal may cause damage.
◎ When the battery is charged in the case that the
batteries run out, charging indicator may not turn
on soon, but charging is started.
Charging
indicator
Type-C Common AC Adapter 01 (sold separately)
When charging is complete, pull out
3
the USB Type-C plug of Type-C
Common AC Adapter 01 (sold
separately) straight from the
external connection terminal
66
Charging with the Desktop
Holder and the Specified AC
Adapter
How to charge the product using the desktop
holder (KYF39PUA) and Type-C Common AC
Adapter 01 (sold separately) is described here.
For details on the specified AC adapter (sold
separately), see "Related Accessories" (▶P. 143).
Insert the USB Type-C plug of
1
Type-C Common AC Adapter 01
(sold separately) to the connection
terminal of the desktop holder
(KYF39PUA)
Page 69

Type-C Common AC Adapter 01 (sold separately)
Insert the power plug of Type-C
2
Common AC Adapter 01 (sold
separately) into an outlet (100 to
240 VAC)
Type-C Common
AC Adapter 01 (sold separately)
Mount the closed product in the
3
desktop holder (KYF39PUA)
Put the product in the direction shown below.
Note the orientation of the product and desktop
holder (KYF39PUA) (sold separately), and insert
the product straight into the external
connection terminal.
Make sure the charging light of the product
blinks in red.
When charging is finished, the charging
indicator goes out.
Charging
indicator
Basic Operations
67
Page 70

When the charging is complete, pull
4
the product out from the desktop
holder (KYF39PUA) (sold
separately)
Unplug the power plug of Type-C
5
Common AC Adapter 01 (sold
Basic Operations
separately) from the outlet
Turning the Power On/Off
Turning the Power On
Press and hold . for at least 2
1
seconds.
•For the first time you turn on the product, the
initial setting activates. You need to set as
required.
◎ It may take longer for the product to display the
standby screen when you turn the power on
because the loading time of the au IC card takes
long. The keys may become invalid while activating
depending on the situation, but this is not
abnormal.
68
Turning the Power Off
Press and hold . for at least 1
1
seconds.
[Yes]
2
Forcing the Product to Shut
Down and Restart
You can force the product to power off and
reboot when the screen does not respond, or
the power cannot be turned off.
Press and hold
1
.
at least 11 seconds
◎ If you turn off the product forcibly and restart, an
unsaved data will be lost. Do not perform except
when the product does not respond.
and
v
for
Page 71

Using the Pointer
The product uses e/c/s/f to operate the
pointer. Activate a Pointer-capable function/
application and turn the Pointer ON to use the
on-screen pointer.
Activate a pointer-capable function/
1
application
" " (OFF)/" " (ON) is displayed in the status
bar, and " " (pointer) is displayed when the
pointer is ON.
•If the Pointer is OFF, refer to "Turn ON the
Pointer" (▶P. 69).
•If a confirmation screen is displayed, confirm
the content and select "Close this screen".
Checkmark "Don't ask again" to no longer
display the confirmation screen when next
activating the Pointer.
Pointer Operation
Move the pointer on the screen up/down/left/
right to operate the browser, etc.
■ Turn ON the Pointer
Activate a pointer-capable function/
1
application and hold down ^ for at
least 1 second
Toggle the pointer ON/OFF.
•Key operation (except e/c/s/f/k) is still
possible when the pointer is ON (except some
applications).
■ Move
By pressing e/c/s/f,
and you can move the
pointer up/down/left/right.
Also, by pressing e and c,
s
and f same time, you
can move the pointer
diagonally.
Basic Operations
69
Page 72

■ Select
With the pointer at buttons
or items to select, the
buttons or items are
confirmed (action) by
pressing k.
Basic Operations
70
■ Scroll
With the pointer at the up/
down/left/right edge of the
screen, move toward off the
screen using e/c/s/f.
•By long-pressing k for more 2 seconds, the
Pointer changes to " ", and you can scroll the
screen using e/c/s/f.
Page 73

Switching to English Display
You can switch the display from Japanese to
English.
From the standby screen, press
1
The main menu is displayed.
[設定 (Settings)] → [その他の設定 (More
2
settings)] → [言語と入力 (Language &
input)] → [言語 (Language)] →
[English] →
* The message "起動中のアプリ、メール送受信、ダウンロー
ドなどが終了される場合があります。変更しますか? "
(Applications, mail transmission/reception, and
downloads may be terminated. Change the
language?) appears, confirm the content and then
[はい (Yes)].
k
k
Using the Standby Screen
Check the status of the product in the standby
screen.
■ Viewing the Standby Screen
①
②
③
Basic Operations
《Standby screen》 《Standby screen
① Status bar
Notification and status icons are displayed (▶
P. 73).
② Widget area
Use widgets and applications.
•"Widget" is an indicator by which you can
easily check information in the standby
screen such as clock, calendar, etc.
(indicators exist)》
71
Page 74

③ Indicators
Notifications for missed calls, new
e-mail/+Message (SMS), etc. are displayed.
You can hide indicators by pressing ./,.
•Select a notification → Press k or activate
an application and confirm the contents to
erase the indicator.
Basic Operations
Using Widgets and Indicators
You can use the widgets and indicators in the
standby screen.
■ Using Widgets
From the standby screen, press w
1
→ Select a widget →
•You can also select a widget with d from the
widget selection screen.
■ Selecting Indicators
Select an option →
1
•When the indicators are not displayed, close
the product and open it again to display the
indicators.
72
k
k
Editing Widgets in the Standby
Screen
Edit widgets displayed in the standby screen.
From the standby screen, press w
1
→ u (Edit)
Select a widget to edit or an open
2
space →
Add Add a widget to the selected
3
Sort Sort selected widgets.
Delete Delete a selected widget.
Change
clock
color
k
open space. Select the widget
you want to add from "Widget"
or "Application".
To sort, move a widget you
want to move to a new position
→k.
Widgets are deleted only from
the screen, not from the main
unit completely. Therefore, you
can add deleted widgets again.
Change the color of the
selected clock widget.
Page 75

Monitoring the Product's Status
Viewing Icons
Notification icons for missed calls, new mail,
and running operations are displayed on the left
of the status bar, and status icons for product
status are displayed on the right.
■ Main Notification Icons
Icon Description
Missed call
/ Message of new e-mail/E-mail on
mail server
New +Message/New SMS
Call in progress, call arriving
VoLTE call in progress
Auto answering exists
Internal memory low
Screenshot exists
Software update available
Icons collected
•It is displayed when all of the icons
cannot be displayed on the status
bar.
■ Main Status Icons
Icon Description
Time
Battery level
: 100% : Empty : Charging
:
Battery care mode is set
Airplane mode is set
Signal strength (Receiving electric
field)
: Level 4 : Out of service area
: In communication
•An icon for the network is displayed.
: 4G (LTE) available : Roaming
(communication mode according to
the network is also shown)
au IC card uninserted
Manner mode status
: Manner mode : Drive mode
: Silent mode : Original mode
During a call using hands-free
Ringtone volume at "0"
In-call microphone is "OFF"
- Wi-Fi® signal strength
- : Level display
: In communication
Basic Operations
73
Page 76

Icon Description
Bluetooth® in use
: Standby : Connected
Auto answering set
: Set
Basic Operations
Notification/Settings Panel
: Full
In the notification panel, you can check
notifications and activate applications.
In the settings panel, you can quickly toggle WiFi®, Bluetooth®, and other applications ON/OFF.
Press and hold e for at least 1
1
seconds.
The notification/settings panel is displayed.
•From the standby screen, you can also press
w
→ select the status bar → k to display the
notification/settings panel.
74
■ Viewing the Notification/Settings
Panel
Press s/f to toggle between the notification
panel and settings panel.
①
《Notification panel》 《Settings panel》
f
s
① Notification area
Check the product status and notification
content.
② Settings menu
Set frequently-used functions to ON/OFF.
②
Page 77

■ Using the Notification Panel
Select notification you want to use
1
in the notification panel →
You can activate the application corresponding
to a notification.
■Deleting notifications
Select notification you want to
1
k
delete in the notification panel → u
(Menu) → [Delete one] → [Yes] →
[OK]
Select "Delete all" to delete all notifications.
Some notifications for battery level, etc. cannot
be deleted.
■ Using the Settings Panel
Example: To toggle Wi-Fi® ON/OFF
In the settings panel, press [Wi-Fi]
1
Press to toggle Wi-Fi® ON/OFF.
◎ Press ./, while the notification/settings panel
is displayed to hide the notification/settings panel.
Setting Manner Mode
Select the manner mode so as not to disturb
others around you in public places.
From the standby screen, press k
1
→ [Settings] → [Sound/Notification]
→ [Manner mode]
The manner mode setting menu is displayed.
Manner mode Does not sound ringtone
2
Silent mode Does not sound ringtone,
Drive mode Does not sound ringtone,
from the speaker of the
product. And turns the
vibration ON.
and turns the vibration
OFF.
and turns the vibration
OFF. Plays a guidance and
notifies the caller that you
are driving a car when
receiving a call.
•You can change the
settings of auto
answering. For details,
refer to "Settings for Auto
Answering" (▶P. 102).
Basic Operations
75
Page 78

Original mode Edit the manner mode
according to your
preference such as setting
the ringtone volume for
each incoming call type.
Basic Operations
◎ Use of cell phones while driving a car may cause
traffic accidents, and is prohibited by law. Set the
manner mode to "Drive mode" while driving a car.
◎ From the standby screen, press
the manner mode setting menu and set the manner
mode.
◎ In the standby screen or with the product closed,
hold down
to the manner mode that you previously set. Hold
down
the manner mode.
◎ Even in the manner mode, the shutter clicks for
photos. Also during movie shooting, start and stop
beeps sound. And the alarm may sound according
to the alarm setting (except the drive mode).
◎ While data is played in the muting state in the
manner mode, press w to adjust the volume.
v
for at least 1 second to return
v
for at least 1 second again to exit
v
76
to display
Setting Airplane Mode
When airplane mode is set, all the wireless
functions (telephone, data communication,
wireless LAN (Wi-Fi®) function, and Bluetooth®
function) are disabled.
From the standby screen, press k
1
→ [Settings] → [Wireless/Network]
→ Checkmark "Airplane mode"
When the airplane mode is set, " " appears on
the status bar.
◎ When the airplane mode is set to ON, the telephone
function (calling) is disabled. Even if the airplane
mode is set, you can call 110 (Police), 119 (Fire/
Ambulance), 118 (Maritime rescue). After making a
call, the airplane mode is automatically set to OFF.
◎ When the airplane mode is set to ON, the telephone
function (receiving) is disabled. The wireless
functions, mail, wireless LAN (Wi-Fi
Bluetooth®, are disabled.
◎ Even if the airplane mode is set to ON, the wireless
LAN (Wi-Fi
Using the product on airplanes or in hospitals may
be restricted, follow the instructions given by the
respective airlines and institutions.
®
)/Bluetooth® function can be set to ON.
®
), and
Page 79

Checking Your Phone Number
Checking Your Profile
From the standby screen, press k
1
→ [Profile]
The profile screen is displayed.
•From the standby screen, you can also press
k
→ 0 to check.
Editing Your Profile
From the profile screen, press u
1
(Menu) → [Edit]
The profile edit screen is displayed.
Enter the required items
2
•During editing, you can add items by pressing
u
(Menu) → [Add another field] → Checkmark
the item to add → o (Add).
o
(Set) → [OK]
3
◎ Items to note for editing your profile are the same
as for editing the phone book. For details, refer to
"Registering to the Phone Book" (▶P. 104).
◎ From the profile screen, you can reset your profile
by pressing u (Menu) → [Reset] → [Yes] → [OK].
Using the Sub-display
The sub-display displays a date and time,
device status such as the manner mode and
battery level, and caller name, etc.
The sub-display lights when you press
while the product is closed or after you close
the product.
■ Viewing the Sub-display
v
《Status icons》《Clock/Notification icons》
Basic Operations
77
Page 80

■ Main Icons
Icon Description
Basic Operations
/ Message of new e-mail/E-mail
78
Signal strength (Receiving
electric field)
: Strong : Fair : Weak
: Weak
: Out of service area
: Airplane mode is set
•An icon for the network is
displayed.
: 4G (LTE) available
: Roaming (communication
mode according to the network
is also shown)
Battery level
: 100% : Empty : Charging
: Battery care mode ON
Manner mode status
: Manner mode
: Drive mode
: Silent mode
: Original mode
Missed call
Auto answering exists
on mail server
Icon Description
New +Message/New SMS
/ Wi-Fi® connected/Wi-Fi®
connected (Open)
Page 81

Using the Main Menu
From the standby screen, press
1
The main menu is displayed.
Select menu →
2
Menus have correspondence with the dial keys
(0 - 9, -, ^). Press any key to select a
menu.
■ Viewing the Main Menu
k
《Main menu》
k
■ Main Menu Application List
Menu Description
au Smart Pass This is a portal application
to maximize "au Smart
Pass" as well as daily tools
such as the latest news
and transfer information.
Also coupons, presents,
data storage and security
apps are available. Please
enjoy your safety and
comfortable cell phone life.
You can download
applications that support
"Free" of au Smart Pass
you can download.
Basic Operations
79
Page 82

Menu Description
Security/Safety
My au You can check your daily
usage, points and monthly
billing of au services with
Basic Operations
this application. You can
also change your rate plan,
apply for optional services
and so on.
au災害対策
(au Disaster
Countermeasure)
This is an application in
which you can use Disaster
Message Board, Emergency
Rapid Mail (Earthquake
Early Warning and Disaster
and Evacuation Information
(including J-Alert) and
Tsunami Warning and
Emergency Warning) and
Disaster Voice Messaging
Service.
80
Menu Description
Security/Safety
Data Storage
App
You can back up various
data in your smartphone to
cloud storage or microSD
memory card. You can also
migrate your data between
your phones with this app.
遠隔操作サポー
ト (Remote
Operation
Service)
Call for technical supports
on the device operations by
sharing the screen that you
are watching with au
operators.
AnshinFilter
for au
Parental control application
for kids.
Anshin Filter for au is a
Pointer-capable application.
安心ナビ(探さ
れる) (Security
Navi (device
being
searched
for))
You can confirm the
position of the child in this
application.
It is available by performing
partner registration from a
terminal of the protector.
Page 83

Menu Description
Security/Safety
mamorino
Watchナビ
(mamorino
Watch Navi)
Connecting (pairing) with
mamorino Watch via
Bluetooth
dial and send SMS
(messaging) from the
application, make
mamorino Watch settings,
etc.
ウイルスバス
ター for au
(VirusBuster
for au)
トビ ラフォン モ
バイル for au
(Tobilaphone
Mobile for au)
Blocks improper
applications and sites in
order to protect young
people.
When you receive phone
calls from public
institutions or stores, this
application shows the
name of the place
automatically based on the
information in Hello Page
and other sources. This
application also blocks
scam and spam calls or
gives you warnings when
your phone receives any.
®
allows you to
Menu Description
au WALLET "au WALLET App" is useful
for the user of au. When
you use it, you can do the
following things.
○ au WALLET points you
have
○ information of "au Easy
Payment"
In addition, when you use
au WALLET Prepaid card
and Credit card, you can do
the following things.
○ benefits of au WALLET
cards [au WALLET Prepaid
card]
○ charging the card
○ checking its inquiry [au
WALLET Credit card]
○ checking billing
statements
○ purchase history, and so
on
Camera Capture photos/movies (▶
P. 123).
Basic Operations
81
Page 84

Menu Description
Data Folder View captured photos/
movies, downloaded files,
etc.
Browser View webpages in the
Basic Operations
App Service
same way as with a PC.
The browser is a Pointer-
capable application.
*
Player Player is music player. It
can play the music files on
the device and also you
can buy a song from Music
Store.
Music Store Music Store has lots of
latest songs, popular
songs, albums and video
clips. You can preview and
buy them easily.
Wowma! On Wowma Mobile App, you
can enjoy the online
shopping and find many
products from apparel,
electronics, housewares,
furniture and grocery &
gourmet food.
82
Menu Description
App Service
au助手席ナビ
(au
Passenger
seat
navigation)
au ナビウォーク
(au Navi for
walkers)
モバオク
(Mobaoku)
テレビde写真
(Photos on
TV)
*
Joshuseki-Navi (Passenger
seat navigation) is a car
navigation service to be
used by those sitting in the
passenger seat.
Helps you navigate route
combining public
transportation and walk.
Connect to the Mobaoku
auction site.
Display photos, etc. saved
to the product wirelessly on
TV by connecting a テレビ
de写真 (Photos on TV)
receiver (sold separately) to
a TV.
au Wi-Fi接続
ツール (au
Wi-Fi
connection
tool)
It is an application to
conveniently assist
connection to au's publicly
available wireless LAN
service, "au Wi-Fi SPOT"
and au's indoor Wi-Fi router,
"Wi-Fi HOME SPOT".
Page 85

Menu Description
App Service
*
Weather Check weather information
for the current location and
area that you set.
ココセコム申込
用アプリ
(COCOSECOM
application for
subscription)
ココセコム
(COCOSECOM)
This is an application to
subscribe the COCO-
SECOM service (location
information feature,
security buzzer, emergency
dispatch service).
This is an application to
utilize the COCO-SECOM
service (location
information feature,
security buzzer, emergency
dispatch service).
Subscription with SECOM
Co., Ltd. is required to use
this application.
•
For inquiries about COCOSECOM
Toll free number:
0120-855-756
From 9:00 to 18:00
(Every day except the New
Year holidays)
Menu Description
Tool
Alarm Use the alarm. (▶P. 128).
Calendar Use the calendar.
Countdown
Use the countdown timer.
Timer
Stopwatch Use the stopwatch.
World clock Register the time in cities
around the world to check.
Notepad Use the notepad.
Calculator Use the calculator.
Kanji Check Use the kanji checker (▶
P. 131).
Flashlight Use the flash light (▶P. 130).
Sound
Use the sound recorder.
Recorder
QRcode
Use the QR code reader.
Reader
Eco Mode Use Eco Mode.
Basic Operations
83
Page 86

Menu Description
LINE LINE is a communication
application which allows
you to make free voice calls
and send free messages
anytime and anywhere (▶
Basic Operations
P. 120).
LINE is a Pointer-capable
application.
Phone/Mail
Call Log View incoming and
outgoing histories as well
as call frequency.
Phone Book Register contact
information in Contacts (▶
P. 104).
Auto
answering
When you cannot answer
the phone, it plays a
response message and
records a caller's message.
Voice memo Record a conversation
between the other party
and you during a call.
Call Settings Make call settings.
84
Menu Description
Phone/Mail
Speed dial Display the speed dial list
(▶P. 99).
E-mail Use an E-mail (@au.com/@
ezweb.ne.jp) address to
send/receive e-mails (▶
P. 109).
+ メッセ ー ジ
(SMS)
Send and receive
+Message (SMS) using a
phone number as the
recipient (▶P. 115).
PC Mail Send and receive a PC mail
(POP3/IMAP) used on the
network of a household PC
or in an office, etc.
Profile Check and edit your profile
(▶P. 77).
Settings Set and manage various
functions from the setting
menu (▶P. 132).
* Downloaded and added applications appear in "Free"
(▶P. 85).
Page 87

◎ Some functions used by activating applications
may incur communication charges.
◎ After application version upgrades, etc., the
appearance of applications and icons on the
product may differ from as shown in this manual.
◎ Preinstalled applications are not deleted even after
performing an all reset.
Using Applications/Services
Use installed applications and download
additional applications with "Application".
From the standby screen, press k
1
→ [App Service]
The Application screen is displayed.
•You can also display the Application screen by
holding down l for at least 1 second in the
standby screen.
•Press x to toggle tabs.
Select an application →
2
k
■ Getting Applications
From the standby screen, press k
1
→ [App Service] →
•Display the Free tab.
o
(Get app)
2
The au Smart Pass site is displayed. Follow the
on-screen instructions to search for and
download the application.
Downloaded and added applications appear in
"Free".
x
Changing the Main Menu
From the standby screen, press k
1
→ u (Menu)
[Layout] → x to select a menu →
2
Updating LINE
Update the LINE application.
From the standby screen, press k
1
→ Select "LINE"
u
(Menu) → [Update]
2
From here on, follow the on-screen instructions.
Basic Operations
k
85
Page 88

Using the Custom Menu
Register preferred applications to the custom
menu for quick access.
Registering Applications to the
Basic Operations
Custom Menu
From the standby screen, press k
1
→ o (Custom)
The custom menu screen is displayed.
Select "Add application" where you
2
want to register an application →
Select an application to register →
3
k
Using the Custom Menu to
Activate Applications
From the standby screen, press k
1
→ o (Custom)
Select an application →
2
86
k
k
Rearranging Applications
In the custom menu, select the
1
application you want to rearrange
→ u (Menu)
[Sort] → Select the location where
2
you want to rearrange the
application →
k
Deleting Applications
In the custom menu, select the
1
application you want to delete → u
(Menu)
[Delete] → Checkmark the
2
application you want to delete → o
(Delete)
•The checkmarked application is deleted.
•You can select all with l, and deselect all
with j.
Page 89

Learn Common Operations
Learn Basic Key Operations
■ Using Functions that Appear at the
Bottom of the Screen
Press the key corresponding to a function that
appears at the bottom of the screen.
①
②
③
① For "HF ON", press k.
② For "Menu", press u.
③ For "Mic OFF", press j.
④ For "Setting", press o.
⑤ For "Profile", press l.
④
⑤
•When an image is displayed and functions are
not displayed at the bottom of the screen,
press u, j, l, etc. to display them.
■ Selecting Items
To select a displayed item, select the item
using w or d and press k.
■ Returning to the Previous Screen
You can press , to go back one screen.
■ Returning to the Standby Screen
To return to the standby screen from any
function, press ..
•After a certain period of no key operation, the
product may return to the standby screen
automatically.
•If activating a function while in a call, the call
may be interrupted.
•The function or application being used is
ended.
■ Entering Numbers
You can press 0 to 9 to enter numbers.
If "▲" and "▼" are displayed above and below
the number entry field, you can press w to
increase or decrease the number.
Basic Operations
87
Page 90

■ Moving to Previous or Next Data
While displaying mail, etc., you can press l to
move to the next data or j to move to the
previous data.
■ Scrolling the Page
When browsing a webpage or displaying a mail
Basic Operations
list, message, data list, etc., you can press j
to scroll up or l to scroll down.
Using Checkboxes
If a checkbox is displayed next to a setting
item, you can select the item or checkbox to
enable or disable the item.
When performing operations on data such as
"Copy multiple" or "Delete multiple", you can
select checkboxes to select or deselect items.
Icon
example
Setting is enabled or item is
selected.
Setting is disabled or item is not
selected.
88
Description
Disabling Manner/Shutter Key Operation when the Product is Folded (Key Lock)
From the standby screen, hold down
1
k
for at least 1 second → [OK]
After closing the product, setting/canceling the
manner mode by holding down
disabled.
Hold down k for at least 1 second again →
press [OK] to enable.
◎ Even if you disable and close the product, you can
v
press
switch the sub-display contents.
to stop alarm, mail ringtone, and
v
is
Page 91

Character Input
Learn How to Enter Characters
■ Key Assignments for Character
Entry
Character
Hiragana/Kanji 2-byte alphabet
type
あ いう え おぁ ぃぅぇぉ
1
Character
2
Katakana
(2-byte/1-byte)
ア イウ エオ ァィゥェ ォ .@- _/:~? , ’! 1
Hiragana/Kanji 2-byte alphabet
type
か きくけこ abcA B C2
Katakana
(2-byte/1-byte)
カキクケコ abcABC2
.@ ―_/:~? ,’! 1
1-byte alphabet
1-byte alphabet
Character
3
Character
Numbers
(2-byte/1-byte)
1
Dial entry
1
4
Character
Numbers
(2-byte/1-byte)
2
Dial entry
2
5
Character
6
Hiragana/Kanji 2-byte alphabet
type
type
type
type
さし す せ そ d efD E F3
Katakana
(2-byte/1-byte)
サシスセソ defDEF3
1-byte alphabet
Hiragana/Kanji 2-byte alphabet
たち つてとっ ghiG HI4
Katakana
(2-byte/1-byte)
タ チ ツテト ッ ghiGHI4
1-byte alphabet
Hiragana/Kanji 2-byte alphabet
なにぬねの jklJ KL 5
Katakana
(2-byte/1-byte)
ナ ニヌネノ jklJKL5
1-byte alphabet
Hiragana/Kanji 2-byte alphabet
はひふへほ mno M NO 6
Katakana
(2-byte/1-byte)
ハヒフ ヘ ホ mnoMNO6
1-byte alphabet
Numbers
(2-byte/1-byte)
3
Dial entry
3
Numbers
(2-byte/1-byte)
Character Input
4
Dial entry
4
Numbers
(2-byte/1-byte)
5
Dial entry
5
Numbers
(2-byte/1-byte)
6
Dial entry
6
89
Page 92

Character
Hiragana/Kanji 2-byte alphabet
type
7
(2-byte/1-byte)
Character
Character Input
Hiragana/Kanji 2-byte alphabet
type
8
(2-byte/1-byte)
Character
Hiragana/Kanji 2-byte alphabet
type
9
(2-byte/1-byte)
90
まみむ めも pqrsPQRS7
Katakana
マミムメモ pqrsPQRS7
や ゆよ ゃゅょ tuv T U V 8
Katakana
ヤ ユヨ ャュョ tuvTUV8
らりるれ ろ w xyz W XY Z9
Katakana
ラリルレ ロ wxyzWXYZ9
1-byte alphabet
1-byte alphabet
1-byte alphabet
Numbers
Character
(2-byte/1-byte)
7
Dial entry
7
0
Numbers
(2-byte/1-byte)
8
Character
Dial entry
8
Numbers
(2-byte/1-byte)
9
Dial entry
9
-
Hiragana/Kanji 2-byte alphabet
type
わ を ん ゎ 、 。 - ・ ~ !?
. space
Katakana
(2-byte/1-byte)
ワ ヲ ン ヮ 、 。 - ・ ~!? .
space
Hiragana/
type
Kanji
Toggle large/
small (where
characters
allow)
Add゛(ten-ten)
or゜(maru)
(where
characters
allow)
、。 ― ・~!?
space
Katakana
(2-byte/1-
byte)
0 space!?・ ,’ ”
_ . -
1-byte alphabet
0 space ! "# $ % & ’ (
) *+ , - . / : ; < = > ?@
[ ¥ ] ^ _ ` { ¦ }
Alphabet
(2-byte/1-
byte)
Toggle
large/
small
(where
characters
allow)
When
characters
finalized,
. ,- !?
~
Numbers
(2-byte/1-
byte)
*
Numbers
(2-byte/1-byte)
0
Dial entry
0
Dial
entry
Short
press....
:
Hold
down....
+(plus)
Page 93

Character
Hiragana/
type
Kanji
Katakana
(2-byte/1-
byte)
Alphabet
(2-byte/1-
byte)
When entering text,
display one character
before (back function)
^
When characters finalized,
linebreak
Character
Hiragana/
type
Kanji
Katakana
(2-byte/1-
byte)
Alphabet
(2-byte/1-
byte)
Display function quoting, useful
phrases, etc. from menu
u
Toggle normal conversion and
prediction conversion (when
character type is "漢")
Numbers
(2-byte/1-
byte)
#
Numbers
(2-byte/1-
byte)
Dial
entry
Short
press....
#
Hold
down....
; (pause)
Dial
entry
-
Character
Hiragana/
type
Kanji
Katakana
(2-byte/1-
byte)
Alphabet
(2-byte/1-
byte)
When entering text, display list of
Emoji, DEmoji, (^_^)(facemarks),
or symbol
Toggle Emoji, DEmoji, (^_^)
o
(facemarks), and symbol lists
When entering text (while
displaying conversion candidate),
toggle input mode and prediction
conversion
Character
Hiragana/
type
Kanji
Katakana
(2-byte/1-
byte)
Alphabet
(2-byte/1-
byte)
Toggle character type
Toggle previous category/page
j
(when Emoji, DEmoji, (^_^)
(facemarks), symbol, or conversion
candidates selected)
Character
Hiragana/
type
Kanji
Katakana
(2-byte/1-
byte)
Alphabet
(2-byte/1-
byte)
Undo finalized characters
Toggle next category/page (when
l
Emoji, DEmoji, (^_^)(facemarks),
symbol, or conversion candidates
selected)
Numbers
(2-byte/1-
byte)
Numbers
(2-byte/1-
byte)
Numbers
(2-byte/1-
byte)
Dial
entry
-
Dial
entry
-
Dial
entry
-
Character Input
91
Page 94

Character
Hiragana/
type
Kanji
Move cursor left
Select conversion candidate
s
During prediction conversion,
shorten selected range
Character
Character Input
Hiragana/
type
Kanji
Move cursor right
Select conversion candidate
During prediction conversion,
broaden selected range (When the
f
specified prediction for number of
characters)
When cursor at end of text string,
enter 1-byte/2-byte space
Character
Hiragana/
type
Kanji
Move cursor up a line
e
Select conversion candidate
92
Katakana
(2-byte/1-
byte)
Katakana
(2-byte/1-
byte)
Katakana
(2-byte/1-
byte)
Alphabet
(2-byte/1-
byte)
Alphabet
(2-byte/1-
byte)
Alphabet
(2-byte/1-
byte)
Numbers
(2-byte/1-
byte)
Numbers
(2-byte/1-
byte)
Numbers
(2-byte/1-
byte)
Dial
entry
-
Dial
entry
-
Dial
entry
-
Character
Hiragana/
type
Kanji
Katakana
(2-byte/1-
byte)
Alphabet
(2-byte/1-
byte)
Numbers
(2-byte/1-
Move cursor down a line
Select conversion candidate
c
When cursor at end of text string,
linebreak
Character
type
m
Character
type
Katakana
Hiragana/
(2-byte/1-
Kanji
byte)
Toggle 2-byte/1-byte -
Katakana
Hiragana/
(2-byte/1-
Kanji
byte)
Alphabet
(2-byte/1-
byte)
Alphabet
(2-byte/1-
byte)
Numbers
(2-byte/1-
Numbers
(2-byte/1-
Short press.... Delete 1 character
on cursor
If no character on
cursor, delete 1
character to left
When selecting conversion
candidate, stop conversion and
,
delete 1 character
(For at least 1 second) Hold
down.... Delete all characters to
right of cursor
When cursor is at start or
end of text string, delete
all characters
byte)
byte)
byte)
Dial
entry
-
Dial
entry
Dial
entry
Short
press....
Delete
1 place
Hold
down....
Delete
all
Page 95

■ Changing the Character Type to
Enter
Pressing j (Char.) on the character entry
screen changes the character type. Press m
to toggle 2-byte/1-byte.
:
Hiragana/Kanji
: 1-byte Alphabet
: 1-byte Numbers
:
Katakana (1-byte)
: 2-byte Alphabet
: 2-byte Numbers
:
Katakana (2-byte)
Enter a Character Quickly in the Standby Screen
Set the "Write now" setting to ON and you can
enter characters quickly from the standby
screen (up to 1,000 2-byte/2,000 1-byte
characters). Phone number is also entered at
the same time. Entered characters or numbers
are used in various functions.
From the standby screen, press k
1
→ [Settings] → [More settings] →
[Language & input] → Checkmark
"Write now"
■ Using the Entered Characters
from the Standby Screen
Enter characters in the standby
1
screen → k (Done)
Character Input
93
Page 96

Internet Connect to the Internet and
2
search with entered
characters.
Search Map Activate a map application
set with entered characters.
By entering a shop name/
address/station etc., you
Character Input
Search
Transfer
can easily find a nationwide
spot.
Connect to the Internet and
activate an application for
transfer place information
set with entered characters
as the departure station.
You can also enter a
departure station and an
arrival station ("Tokyo
Station Osaka Station" or
"From Tokyo to Osaka
Station", etc.).
Add mail Create an e-mail with the
entered characters as the
body.
▶P. 112 "Sending E-mail"
94
Add
phonebook
Register new contacts with
the entered characters as
name.
▶P. 104 "Registering to the
Phone Book"
Add
schedule
Activate the Calendar
application with the entered
characters as Subject.
Add
notepad
Activate the Notepad
application with the entered
characters as text.
Search Kanji
Check
Activate the Kanji Check
application to check the
entered characters.
▶P. 131 "Kanji Check"
◎ In the standby screen, enter a phone number → m
→ m / k (Call) to call the phone number displayed
at the bottom of the screen.
◎ In the Write Now menu screen, press o (Sort) to
sort out the menu contents.
Page 97

Phone
Making a Call
Entering a Phone Number and
Making a Call
From the standby screen, enter
1
phone number
The dial screen is displayed and the number is
entered.
When calling to fixed-line phones, enter the area
code first even if the recipient is in the same
city.
x
: Move cursor position
,
: Delete one number place
Hold down , for at least 1 second: Return to
the standby screen
o
(Register): Register an entered number to
the phone book (▶P. 104)
m
→Talk
2
•You can also press k (Call) → [Call] to make
a call.
Operations during a call:
k
(HF ON/HF OFF): Hands-free call ON/OFF
u
(Menu): Display menu
o
(Setting): Heard effect adjustment
j
(Mic OFF/Mic ON): Mute ON/OFF
l
(Profile): Display profile
w
: Adjust call volume (volume of other party's
voice)
m
: Place call on hold
,
: Record a voice memo
.
3
•You can also fold the product to end a call.
◎ With the Write now setting set to ON, a character
input screen is displayed right after entering a
phone number in the standby screen (▶P. 93). m →
m/k
◎ Note that even if you cover the microphone, the
sound can be conveyed to the other party.
◎ Even if "Airplane mode" is set, you can call
emergency numbers (110, 119, 118).
◎ To operate on the screen with the screen turned
off during a call, press any key other than . /
v
◎ If the confirmation screen for Record later appears,
select "Yes(Right now)" → k to set the Record
later function.
* Record later functions from next calling.
Adjust how the other party sounds.
(Call) to make a call.
to turn on the screen.
Phone
95
Page 98

■ Using Voice Memo/Record Later
■Using a voice memo function
Record a conversation between the other party
and you during a call.
From the call screen, press
1
•If the "Record later" function is set to ON, you
cannot operate it by pressing ,.
■Starting automatically for the recording of
voice memo (Record later)
Phone
You need to set the settings of the voice
memo if you start recording automatically.
From the standby screen, press k →
1
,
[Phone Mail] → [Voice memo]
Checkmark "Record later"
2
To save the contents of Record later
The confirmation screen of the voice memo to
save the recorded content appears after
calling.
•Press [Yes] → [OK] to save the voice memo
recorded content.
•Note that if you select "No" to delete the voice
memo recorded content.
96
■Playing back a voice memo
From the standby screen, press k
1
→ [Phone Mail] → [Voice memo] →
[Voice Memo List]
The voice memo list screen is displayed.
Select a voice memo to play back
2
k
→
The selected voice memo is played.
•Press k (
it is playing
◎ The maximum recording time is 60 minutes per
memo, and the maximum number to record is 50.
When 50 voice memos are recorded, an
unprotected voice memo will be deleted from the
oldest memo in order. When all of the voice memos
are protected, the voice memo recording is
unavailable.
Pause) to stop the voice memo while
.
Page 99

■ Emergency Call Location
Notification
The product supports "Emergency call location
notification" so that if you make an emergency
call to Police, Fire and Ambulance or Regional
Coast Guard Headquarters, your current
location (GPS information) will be transmitted
to the agency receiving the emergency call.
◎ In this section, Police (110), Fire and Ambulance
(119) and Regional Coast Guard Headquarters
(118) are collectively referred to as the emergency
call receiving agency.
◎ VoLTE (LTE network) by au is used when
connecting with emergency call receiving agencies
within Japan. You cannot connect using 3G
(circuit-switched network).
◎ This feature may not yet be available at some
emergency call receiving agencies.
◎ If you add "184" before the Japan emergency call
number 110/119/118, the emergency call
responding agency will not be notified of your
location, the same as your phone number.
◎ In places where signal reception from GPS
satellites or a base station is relatively poor, such
as in an underground mall, inside a building or
behind a tall building, the emergency call receiving
agency may be notified of some other place
different from your actual location.
◎ When GPS cannot be used to notify of your
location, base station signal is used instead.
◎ When making an emergency call to Police, Fire and
Ambulance or Regional Coast Guard Headquarters,
always confirm where you are, and tell them your
exact location on the phone. Note that depending
on the area where you are calling, your call may not
be connected to the agency having jurisdiction
over that area.
◎ If the emergency call receiving agency determines
that human lives and health are in danger, they will
be able to acquire the caller's location information
during the call or within a certain period of time
after the call.
◎ When incoming reject is set and you make an
emergency call, the incoming reject setting will be
automatically disabled for 5 minutes in order to
receive calls from the emergency call receiving
agency.
Phone
97
Page 100

■ Using ; (Pause) / , (Auto Pause)
Dialing and Making a Call
Enter the push signals to send beforehand and
send the push signals during the call. This is a
convenient feature when using information
services and automatic reservation services.
Example: Using ; (Pause) to dial "03-0001-
Phone
1
2
3
98
XXXX (bank phone number)" and send
the branch "22X" and the account
"123XX"
Enter phone number → Hold down
^
for at least 1 second
The first ; (pause) is entered.
Enter push signals to send
Branch
number
22X
The second ; (pause) is entered.
* Enter a ; (pause) between several push signals to send
them linked together.
; (pause)
➡
Hold down ^
for at least 1
second
➡
m
After dialing, a confirmation screen is displayed.
Confirm that the destination has answered the
call and then select "Yes". A push signal is sent
each time you select "Yes" and press k.
Account
number
123XX
◎ When you use, (Auto Pause) dialing and make a
call, enter the phone number → u (Menu) →
[Pause] → Enter the push signals to send → m.
◎ Pause dialing may not be sent correctly if
transmission signal is poor.
Using Call Histories and
Making a Call
From the standby screen, press s
1
(Incoming history) / f (Outgoing
history)
The incoming history/outgoing history screen is
displayed.
In addition to incoming and outgoing histories,
you can also check outgoing call frequency.
•Press x to toggle the outgoing history,
incoming history, and call frequency screens.
: Incoming call
: Missed call
: Missed call (one-ring phone scam*)
: Call rejected
: Outgoing call
: Auto answering/Voice memo
: Voice memo service message
* Missed calls of less than 3 seconds are deemed to be
one-ring phone scam calls. These may be calls to get the
customer to call back and connect them to a malicious
pay-for program. Use caution.
 Loading...