

Kyocera KWC KPC650 User Manual
DRAFT COPY -X2
Verizon Wireless
VZAccess
SM
Manager User Gui de
for the
Kyocera KPC650 PC Card

Trademarks and Service Marks
Veriz on Wireless is a trademark of Verizon Trademark Services LLC, and the other trademarks, logos, and service
marks (collectively the "Trademarks") used in this help file a re the property of Verizon Wir eless or their respective
owners. Nothing contained in this help file should be construed as granting by implication, estoppel, or otherwise,
a license or right of use of Verizon Wireless or any other Trademark displayed in this help file without the written
permission of Verizon Wireless or its respective owner.
SM
VZAccess
Quick 2 Net
Venturi
QuickLink® is a registered trademark of Smith Micro Software, Inc.
Microsoft®, Hotmail, MSN®, ActiveSync®, Outlook®, Outlook Express® and Windows® are either registered
trademarks or trademarks of Microsoft® Corporation in the United Sta tes and/or other countries.
Netscape and the Netscape N and Ship's Wheel logos are registered trademarks of Netscape Communications Cor-
poration in the U.S. and other countries.
AOL® is a registered trademark of America Online, Inc.
Aironet®, Cisco®, Cisco Syste ms® are registered trademarks of Cisco Systems, Inc. a nd/or its affiliates in the
U.S. and certain other count ries.
is a service mark of Verizon Wireless
SM
is a service mark of Verizon Wireless.
TM
is a trademark o f Venturi Wireless.
HotSync® is a registered trademark of Palm, Inc.
Kyocera® is a regis tered tr ademark of Kyocera Co r por at ion.
The names of actual companies and products mentioned in this user guide may be the trademarks of their respec -
tive owners.
Copyright 2004 Verizon Wireless. All rights reserved.
Copyright 2004, Kyocera Wireless Corp. All rights reserved
82-M8831-1, Rev X2

Table of Contents
KPC650 PC Card Introduction ....................................................................... ..... ........ ..... ..... ..... ............................................ 1
Checklist .......................................................................................................................................................................................... 1
About this guide ...............................................................................................................................................................................1
About your Kyocera KPC650 PC Card ............................................................................................................................................ 2
Power Management ................................................................................................................................................................. 2
Other Features and Benefits .................................................................................................................................................... 2
Stora ge .... .............. .............. ........... .............. .............. ............. ............ ............. ........................................................................ 2
Installation and Configuration ..............................................................................................................................................3
Notebook PC Installati on Precautions ............................................. ............ ............. ............ ........................................................... 3
System Requirements ............................. .......................................................................... .. .............................................................3
Setup Instructions ............................................................................................................................................................................3
Step 1: Install PC Card Drivers ................................................................................................................................................. 3
Step 2: Install VZAccess Manager ........................................................................................................................................... 4
Step 3: Run the VZAccess Manager Setup Wizard .................................................................................................................. 6
Step 4: In st a ll Y o u r K P C6 50 P C Card. .. .. ......... ... ......... .. .. .......... .. ......... .. ... ......... .. ......... .. .......... .. ............................................ 8
Ejecti n g th e K P C 6 50 .... .. .. .......... .. .. ......... ... ......... .. ......... .. ... ......... .. ......... ... .. ......... .. ......... ... ...................................................11
VZAccess Manager from Ver izon Wireless .............................. .... . ............................ .........................................................12
Supported Services ........................................................................................................................................................................ 12
NationalAccess and Bro adbandAccess defined ............................ ....................... ............. ..................................................... 12
VZAccess Manager Tools ................. ............. ............ ............. ....................... ....................... .. ....................................................... 13
WWAN (Wireless Wide Area Network, 1xEV-DO/1xRTT/CDMA) Features ...........................................................................13
Wi-Fi F e a tu re s ................ .. .......... .. ......... .. ... ......... .. ......... .. ... ......... .. ......... ... ......... .. .. ............................................................... 13
Other Features ....................................................................................................................................................................... 13
Getting Started with VZAccess Manager ....................................................................................................................................... 14
About the Connect View ............ ............... ............ ..................................... ............... ............ .................................................. 14
Connecting ............................................................................................................................................................................. 15
Warning Messages ................................................................................................................................................................. 17
Setting Dial Up Connections ................................................................................................................................................... 18
VZAccess Manager Settings .......... ................................... ............. ............ ....................................................................................19
General Preferences .............................................................................................................................................................. 19
WWAN Preferences ............................................................................................................................................................... 22
Wi-Fi P re f e re n c es ........... .. .......... .. .. ......... ... ......... .. .. ......... ... ......... .. ......... ... .. ......... .. ......... ...................................................... 25
Additional VZAcce ss Manager Features ............... .. .......... ............. ....................... ......................................................................... 30
The Status Bar ........................................................................................................................................................................30
The Toolbar Buttons ............................................................................................................................................................... 31
Minim iz in g th e In te rf a ce ....... .. .. ......... ... ......... .. .. .......... .. ......... .. ......... ... .. ......... .. .......... .. .. ........................................................ 32
The Tools Menu ........................ ............ ............. ............ ....................... .................................................................................. 32
The Options Menu .............................. .. ..................................... .. ........................................................................................... 32
The Help Menu .................. ............ ............ .. ........................................................................................................................... 33
Text messaging ..............................................................................................................................................................................33
User Guide for the Kyocera KPC650 iii

Sending a text message ........................................... ....................... .......... ............. ................................................................34
Settin g TXT pr e fe rences . .. .......... .. ......... .. ... ......... .. ......... .. .......... .. .. ......... ... ......... .. .. ......... ... . .................................................. 35
Venturi Compression Software ..................... ..... ............................ .... . ............................ ....................................................36
Supported Protocols ......................................................................................................................................................................36
Using Venturi ................................................................................................................................................................................. 36
Venturi Icons ........................................................................................................................................................................... 36
Venturi Options ....................................................................................................................................................................... 37
Using Venturi .......................................................................................................................................................................... 37
Downloading Venturi ................................. ............... ............ ......................... ............ ............................................................. 38
Settings in other Applications ......................................................................................................................................................... 38
Sync Ap p lic a tions .... ... .. ......... .. ......... ... ......... .. .. .......... .. ......... .. ... ......... .. ......... .. .......... .. .. ........................................................ 38
Proxy Settings ........................................................................................................................................................................ 39
Instructions for AOL Users ..................................................................................................................................................... 42
Using E-mail with VZAccess ................................................................................................................................................... 47
Troubleshooting ...................................................................................................................................................................50
WWAN (CDMA/1xRTT/1xEVDO) ...................................................................................................................................................50
Wi-Fi ... ...... ....... ..... ....... ....... ...... ..... ....... ....... .... ....... ....... ....... .... ....... ....... ....... ..... ...... ...................................................................... 53
Ventu ri .. .... ..... .. ..... .... ..... .. ..... .... ..... .. ..... .... ..... .. ..... .... ... .... ..... .... ... .... ..... .... ... .... ..... .... ......................................................................56
Glossary ... ............. ............... ............ ................ ............... ............. ............... ............ ..............................................................59
Kyocera W ir e le s s Cons u m e r Lim in t e d Warra n t y ........ .......... ... .......... .......... .. ........... .......... .. .......... ..................................61
Regulatory and Safety Information .....................................................................................................................................63
Regul a to r y N o tic e s ........ .. ... ......... .. ......... .. ... ......... .. ......... ... ......... .. .. ......... ... ......... .. .. ......................................................................63
Safety In fo r m a ti o n ......... .. ......... ... .. ......... .. .......... .. ......... .. ... ......... .. ......... .. ... ......... .. ......... ...............................................................64
iv User Guide for the Kyocera KPC650

KPC650 PC Card Introduction Checklist
KPC650 PC Card Introduction
Congratulation s and thank you for purchasing the Kyoc era KPC650 PC Card. The KPC650 is a dual-band 1X EVDO
PC card that enables you to communicate wirele ssly from your laptop at high speeds. Using the Kyocera KPC650
together with Verizon Wireless’ Broadband Access and NationalAccess provides you with a nationwide, mobile
wireless data solution that gives you the coverage and speed you need.
Broadband Access is Verizon’s premi er data service, offering you one of the fastest, fully mobile wireless Inte rn et
data solutions available today. This ultra-high-speed wireless service provides you with typical speeds of 500 kbps
with bursts up to 2.4 Mbps.
NationalAccess is the name for Verizon’s national wireless Internet service. This 3rd generation data servic e, also
referred to as 1XRTT, or 1X, enables you to access the Internet, email and attachments, as well as business
applications at spee ds bursting up to 144 kbps. The average speed is 40
Note: Before using the KPC650, please be sure you review the ”Safety Information” on page 64.
Checklist
The following items are inclu ded in your kit:
• The KPC650 Wireless PC Card Modem
• Quick Reference Guide
• KWC installation CD, which contains the software and the user guide
• Verizon Welc ome CD, which contains pert ine nt Verizon Wireless information, along with an interactive user guide.
−60 kbps.
About this guide
This user guide c ontains all the information you need to properly install and use yo ur KPC6 50. B efore you can begin
using the KPC650, it is essential that you follow the proper instructions for installation. You must first load the
software provided on the CD-ROM included in the kit before you insert the KPC650 into your notebook PC. This
initial setup proc ess takes just a few minutes and you’ll soon be on your way to wireless freed om. An overview of the
steps detailed in the ”Setup Instructions” on page 3 follow:
• Load the drivers and software, located on the Installation CD and follow the setup instruct ions.
• Insert the KPC650 into your notebook’s PC Card slot when prompted.
• Activate your account when prompted by the Activat ion Wizard.
• Connect to the Verizon Wireless NationalAccess/BroadbandAccess network.
User Guide for the Kyocera KPC650 1

About your Kyocera KPC650 PC Card KPC650 PC Card Introduction
About your Kyocera KPC650 PC Card
The KPC650 is a dual- band 1X EVDO PC card modem designed to fit into a Type II
PCMCIA card slot available on most noteboo k PCs. This unique ly de signed card
allows you to connect to the Internet, send and receive email efficiently, connect to
your company’s network, and maximize productivity when away from the office.
Note that the KPC supports SMS, but does not support voice services.
Power Management
The KPC650 is designed to take advantage of the power management and system
overhead benefits of fered by the standard 32-bit CardBus elec trical interface that
minimizes power consumptio n.
Other Features and Benefits
• A Type II PCMCIA format supporting the CardBus I/O interface
• Supports North American PCS (1900 MHz) and Cellular (800 MHz) bands
• Based on the QUALCOMM MSM6500 chipset
• Supports 3G network technologies
• Optimized data rates of up to 2 Mbps in receive mode and up to 144 kbps in transmit mode
• Equipped with all necessary host software and drivers for various operating syste ms
• Works at lower battery voltage and operates at a greater speed than standard PC Card interface .
• Verizon Wireless BroadbandAccess compatible (download speeds 2.4 Mb/sec max, 300
• Verizon Wireless NationalAccess compatible (40
• VZ Access Manager compatible
• Memory (FLASH/RAM): 128/64 MB
• 32-bit Cardbus interface
• Integrated dual band main antenna and a dial-band chip-based diversity antenna
• Supports external accessory antenna for enhanced diversity performance
• LED service indicator
• Supports 2-way Short Message Service (SMS)
• External accessory antenna for enhanced performance
−60 kbps)
−500 kbps typical)
Storage
• When not in use, fold the antenna down and store in a compartment where the card can be prote cted from being
crushed or broken.
• Store your KPC650 in a dry and clean place. S torage temperature:
• Do not apply adhesive labels to the KPC650. This may cause the card to jam inside the PC Card slot of your
notebook PC.
• The antenna extends freely. Do not force or hyper-e xtend the antenna. This may cause it to break.
• The KPC650 easily fits into the PC Card slot. Forcing the KPC650 into the PC Card slot may cause considerable
damage.
• Protect your card from liquids, dust and excessive heat.
2 User Guide for the Kyocera KPC650
−30° to 65°C [86° to 149°F].

Installation and Configur at ion Noteboo k PC I ns tal lat ion Precauti ons
Installati on a nd Conf iguration
Notebook PC Installation Precautions
Warning: DO NOT in sert the KPC650 P C card be fore you i nstall the sof twar e onto you r note book PC. Onc e you ins tall
the software, and drivers you will be prompted to insert the KPC650 into the Type II PC Card slot
Once the card is inserted, do not physically remove the KPC650 from the PC Card slot until you have
completed the
System Requirements
Unplug/Eject process. Removing the card improperly may cause a fatal error to your PC.
Your KPC650 functions in notebook PCs with these Windows
®
Windows
Windows
Windows
Windows
98 SE: Note that you may need the original Microsoft W indows 98 installation CD.
®
Me
®
XP
®
2000
®
operating systems:
To install the KPC650 and the softwa re, thes e mi ni mum system resourc es are req ui red :
Card slots: Type II PC Card slot (CardBus)
Disk Drive: CD-ROM
Memory: 32 MB
Disk Space: 14 MB
Processor: Pentium 166 MHz or higher
Dial Up Network in g : DUN bound to TCP/IP
For VZW Access Manager , you al so need
Optional Wi-F i adapter for Wi-Fi access
Internet browser sof tware for Internet access or the software use d by your company for network access
Verizon Wireless wireless data service
Setup Instructions
Important: VZAccess Manager software must be installed before you insert the KPC650 PC Card in to the
computer for the first time. Only after the software has been installed can Windows successfully detect a nd
configure the PC Card.
Step 1: Install PC Card Drivers
1. Insert the Inst alla tion CD int o your note book PC’s CD-ROM drive. If set up doe s not automa tical ly start, clic k the
Start button on the taskbar and choose Run. Type D:\Start (where D is the letter of your CD-ROM drive) and click
OK.
2. Select Install KP650 Drivers option install the drivers onto your computer.
Important: Do not insert the PC Card until Step 4.
User Guide for the Kyocera KPC650 3
Setup Inst ructions Installatio n and Configu ration
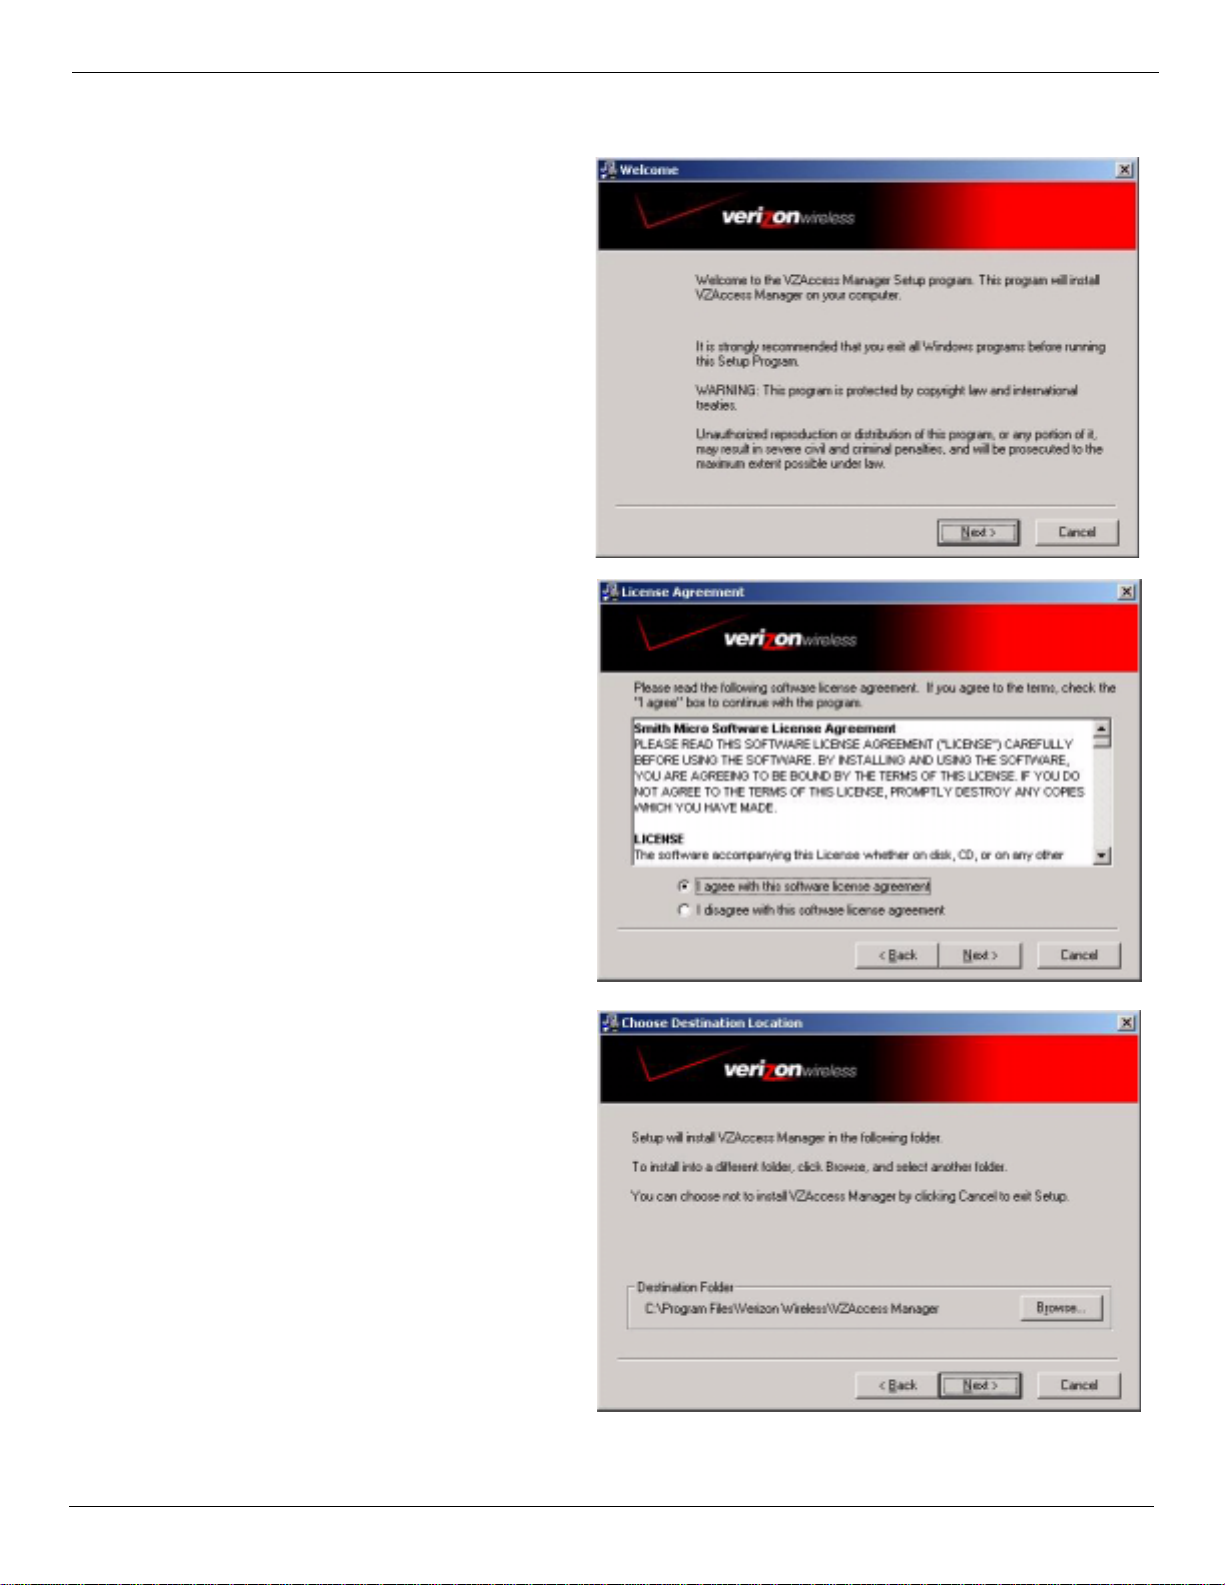
Step 2: Install VZAccess Manager
1. From the CD-ROM, choose Install VZAccess
Manager to begin the installation process.
The VZAcces s Manager install ation
program opens. Click Next.
2. The VZAccess Manager License Agreement
appears. To install and use this product you
must agree with the terms of the VZAccess
Manager License Agreement. Select I agree
with this software license agr eeme nt.
Click Next to continue.
3. Choose a destination fold er for your files, or
use the default location.
4. Click Next to continue.
4 User Guide for the Kyocera KPC650
Installation and Configur at ion Setup Instruc ti ons
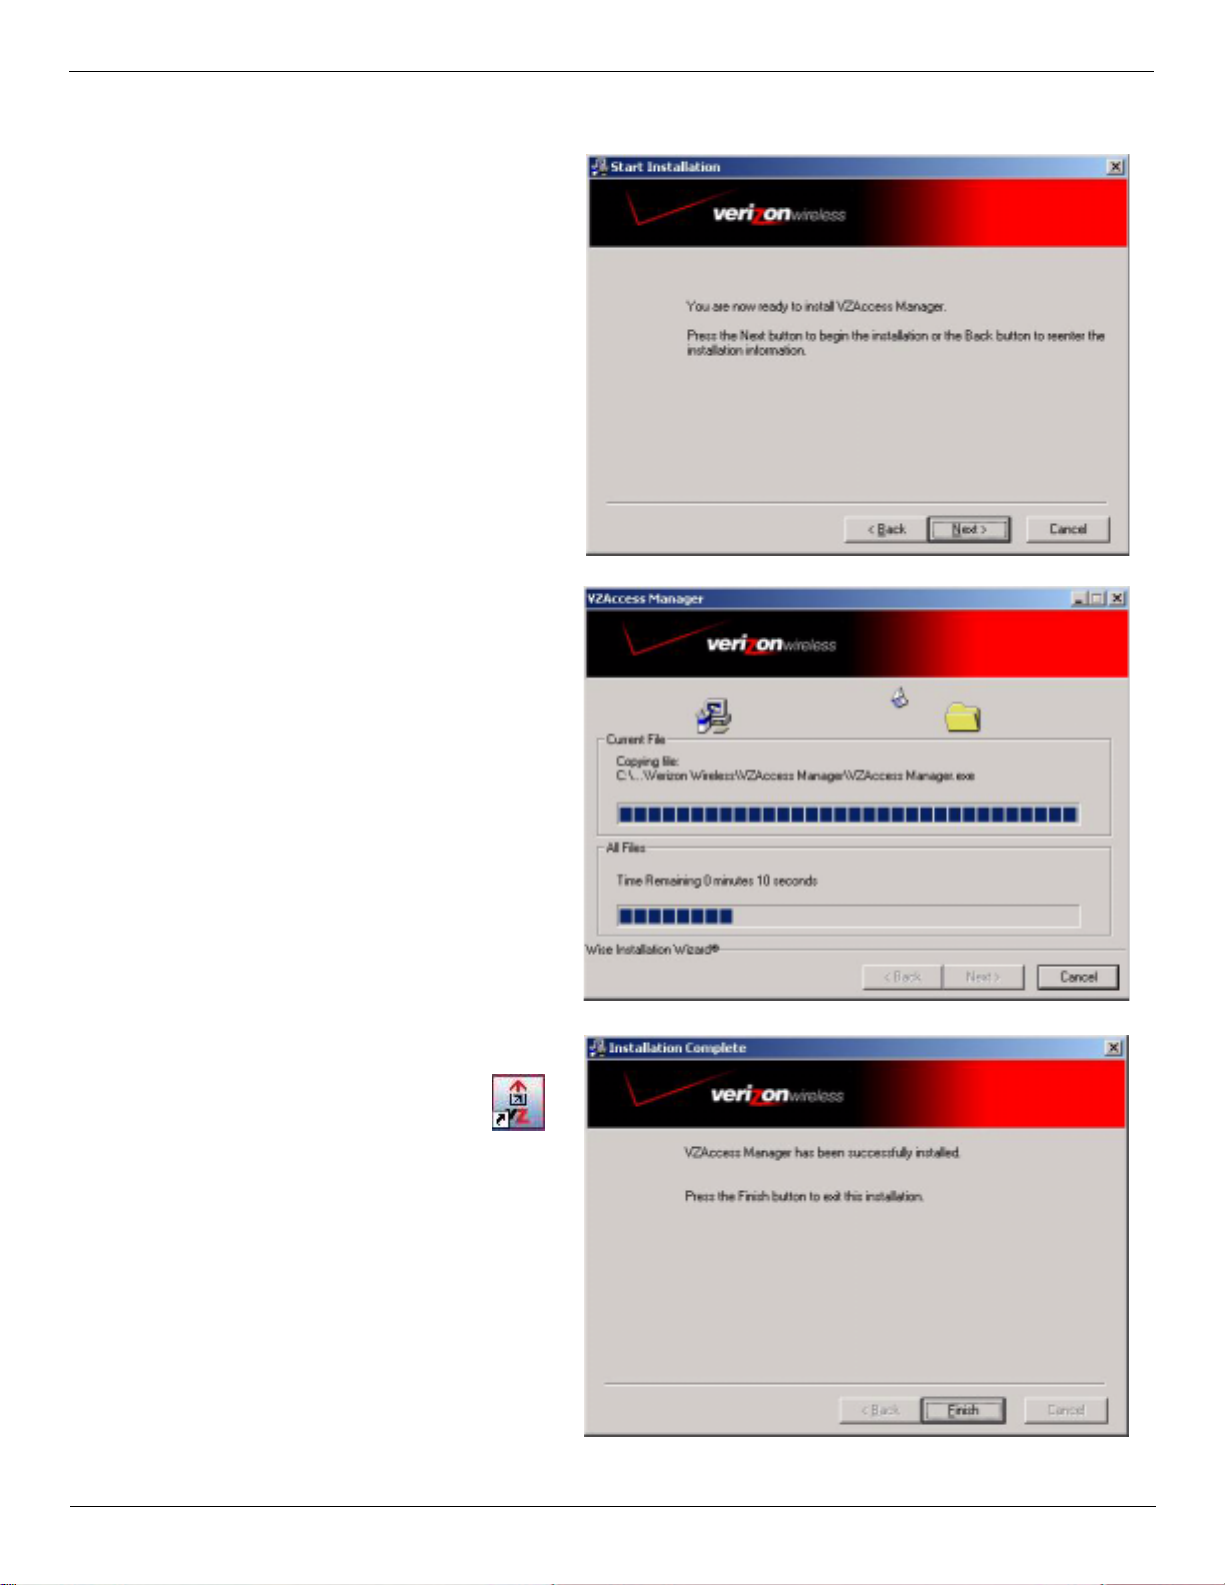
5. Click Next to begin installing VZAccess
Manager components onto your computer.
6. During this step the VZAccess Manager
components product are being installed
onto your computer. Installed files will be
placed within the destination folder
specified in Step 3 above.
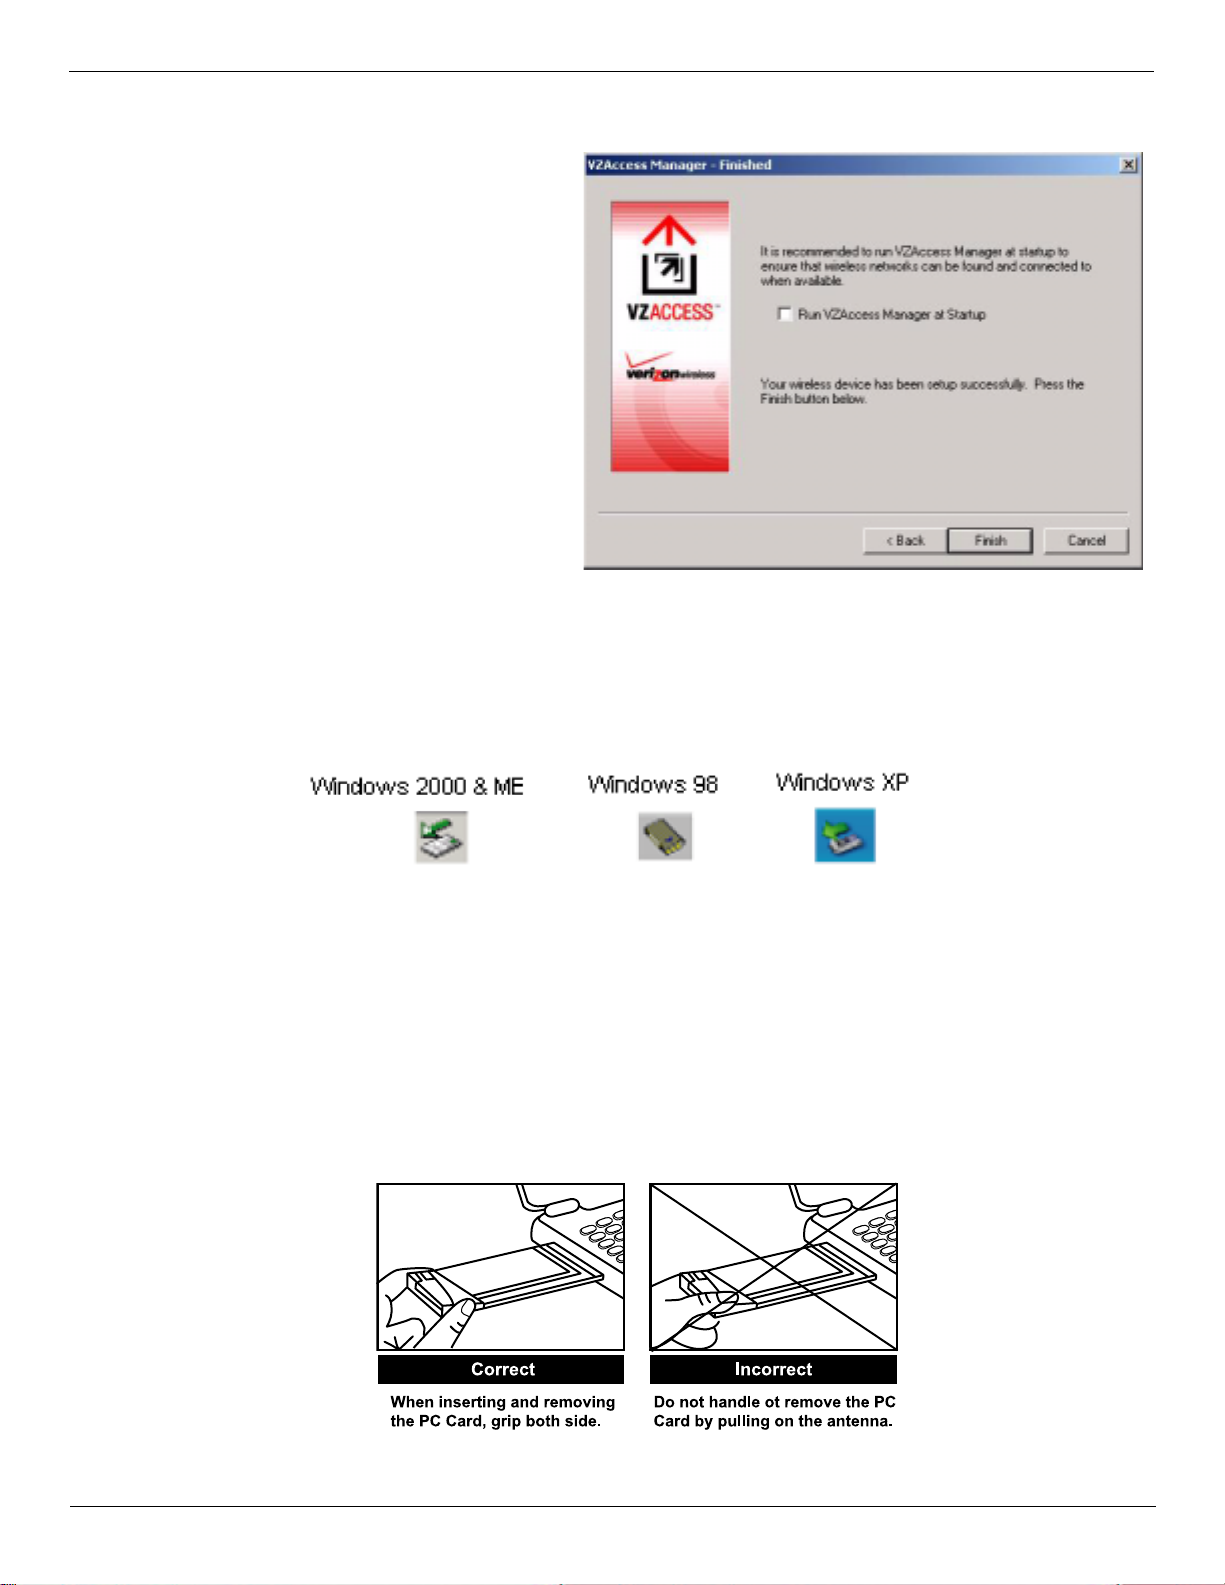
7. Installation is now comple te. Click Finish.
The setup program will automatically create a VZAccess Manager
shortcut on your desktop.
Proceed to the continued inst ructions on
page 6.
User Guide for the Kyocera KPC650 5
Setup Inst ructions Installatio n and Configu ration
Step 3: Run the VZAccess Manager Setup Wizard
After you have successfully completed the installation process of VZAccess Manager, you are ready to install the
VZAccess Manager p rogram. The steps in the Setup Wi zar d are crit ical to t he proper o peration of VZAc cess Manager
when using your WWAN or Wi-Fi device to connect to the Internet wirelessly.
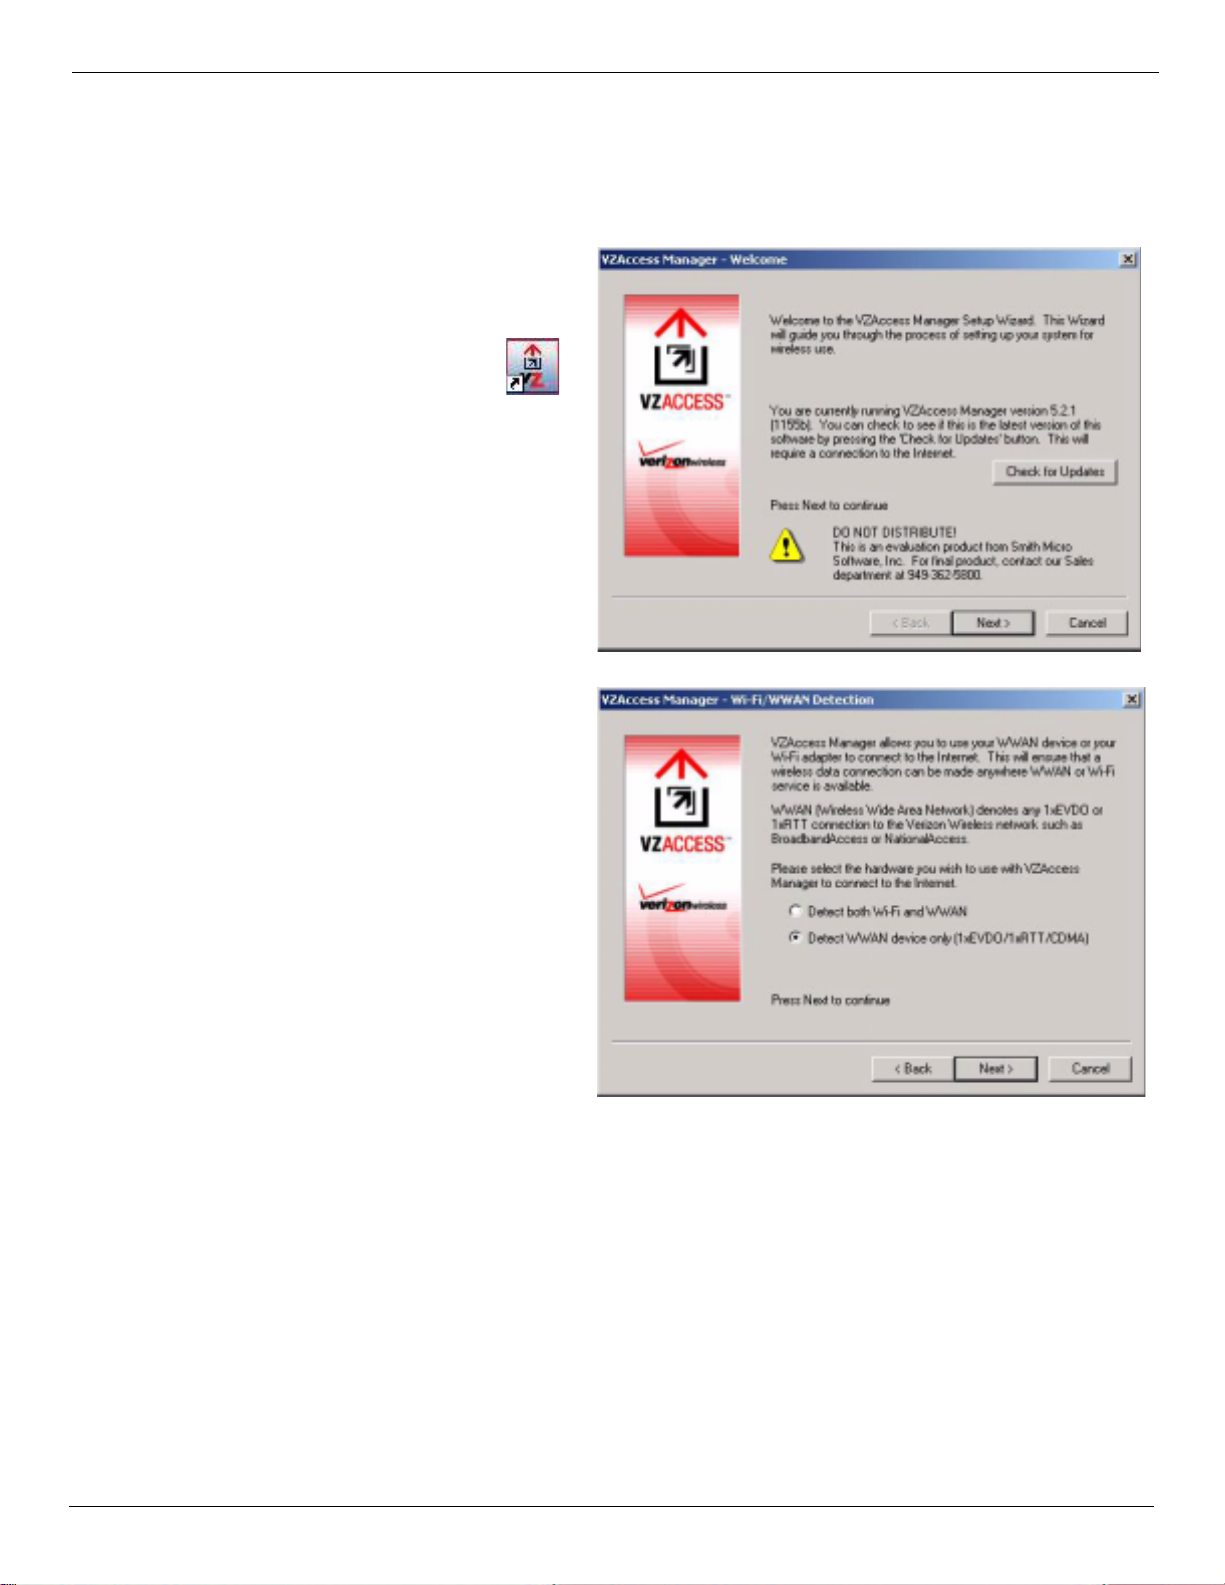
1. The VZAccess Manager software set up
automatically launch when you complete
initial setup.
If setup did not automatically initiate, double-click on the
VZAccess Manager icon to begin
the installation pr ocess, if t.
2. Click Next at the Welcome screen to
continue the install ation process.
3. Specify the type of wireless device that you
intend to use with VZAccess Manager by
selecting either
Detect both Wi-Fi and WWAN
or
Detect WWAN device only (1xEV-DO/1xRTT/
CDMA).
For the purposes of this guide, Detect
WWAN device only (1xEV-DO/1xRTT/
CDMA).. Please note that your experience
may be different if you use a dif ferent
selection.
4. Click Next to continue.
6 User Guide for the Kyocera KPC650
Installation and Configur at ion Setup Instruc ti ons
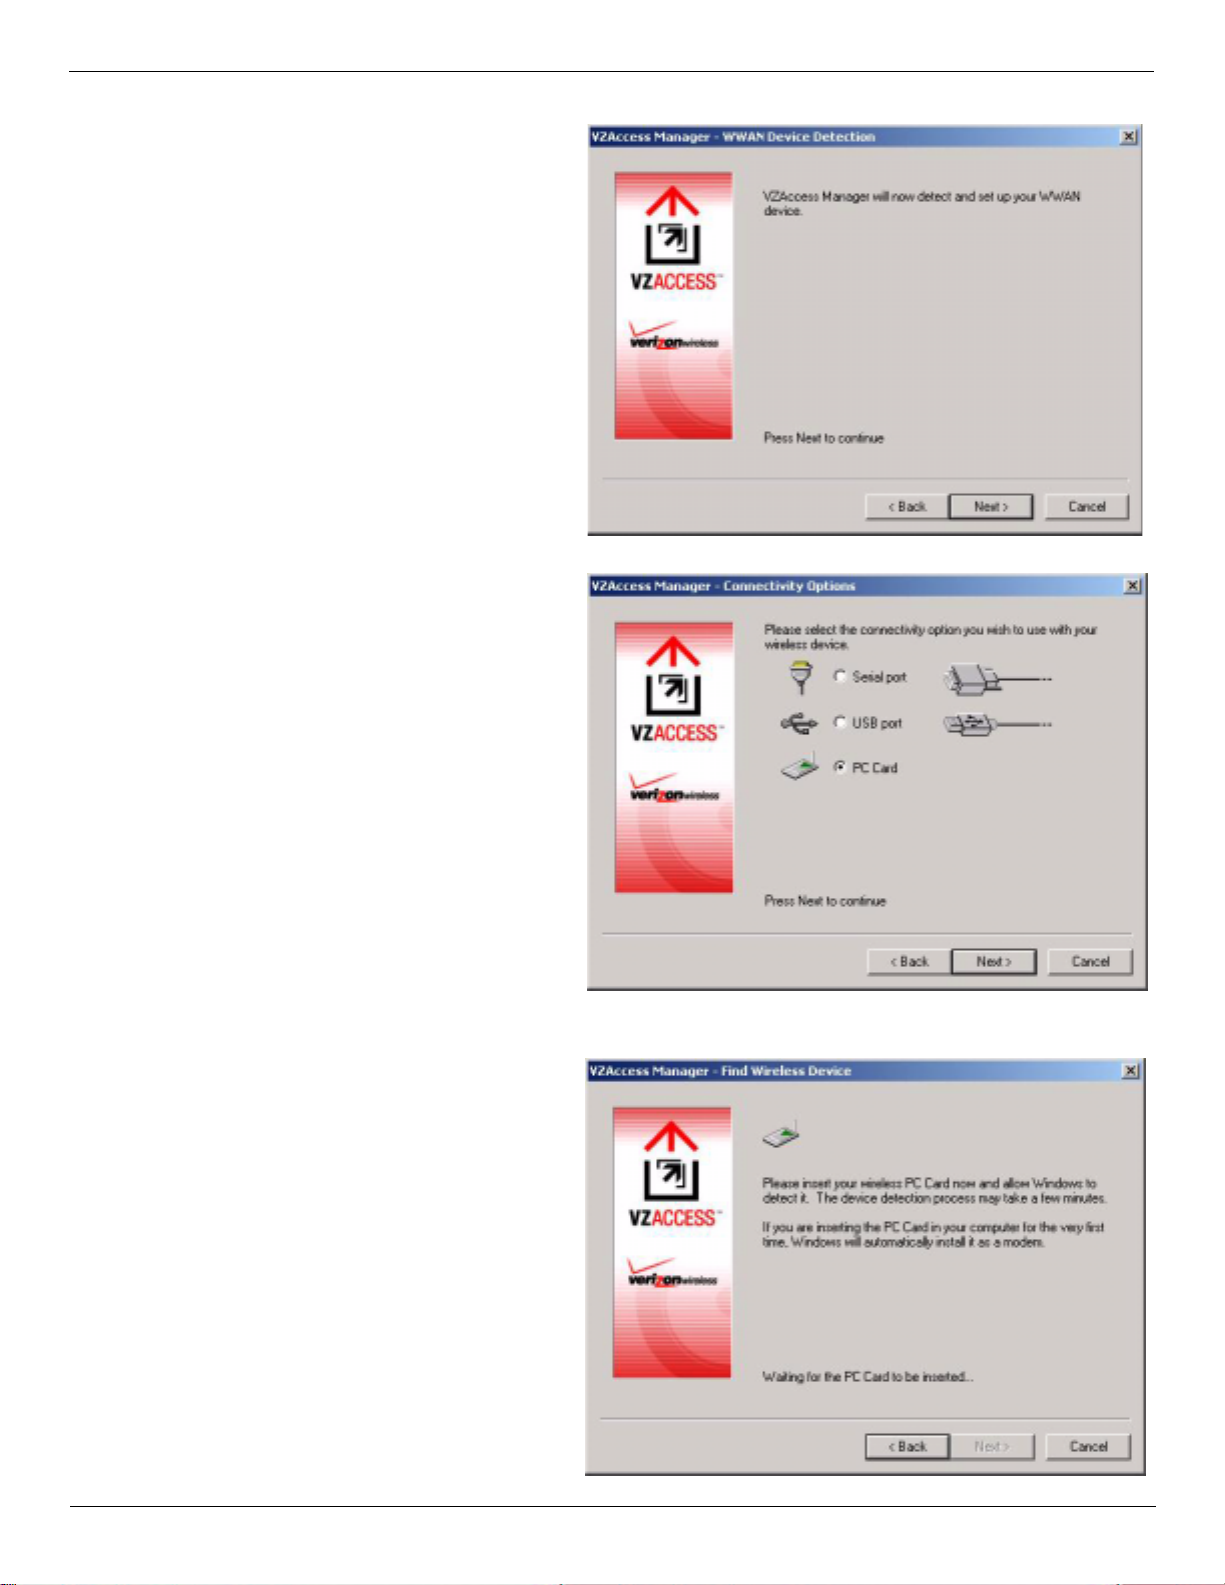
5. VZAccess Manager now detects and sets
up your WWAN adadevice on your
computer. WWAN (Wireless Wide Area
Network) denotes any 1xEVDO, 1xR TT or
CDMA connection to the Verizon Wireless
network such as BroadbandAccess,
NationalAccess or Quick 2 Net.
Note: If you selected Wi-Fi and your com-
puter has a built-in Wi-Fi adapter, you do
not need to do anything and can proceed to
the next step. Otherwise, inse rt your Wi-Fi
PC Card now. Y ou will need the drivers for
the card if not a lready installed on the computer.
6. Click Next to continue...
7. Select the type of connecti vity you wish to
use with your wireless device . For the
purposes of this guide, we use PC Card.
Please note that this sele ction may not be
appropriate for your type of wireles s device.
8. Click Next to continue after you have
selected your connectivity option
Note: If you selected USB and have not
already installed the data cable drivers supplied with the cable, you must install them
now . To install the data cable drivers cli ck
the
Cancel button to exit the Setup Wizard
and refer to the documentation included
with the cable. Plug the data cable into your
wireless phone and then plug the cable into
your computer . If your wireles s phone is not
turned on, do so now.
9. You are now prompted to insert your PC
card. Proceed to the steps below.
User Guide for the Kyocera KPC650 7
Setup Inst ructions Installatio n and Configu ration
Step 4: Install Your KPC650 PC Card.
1. Remove the installation CD from your CD-ROM drive.
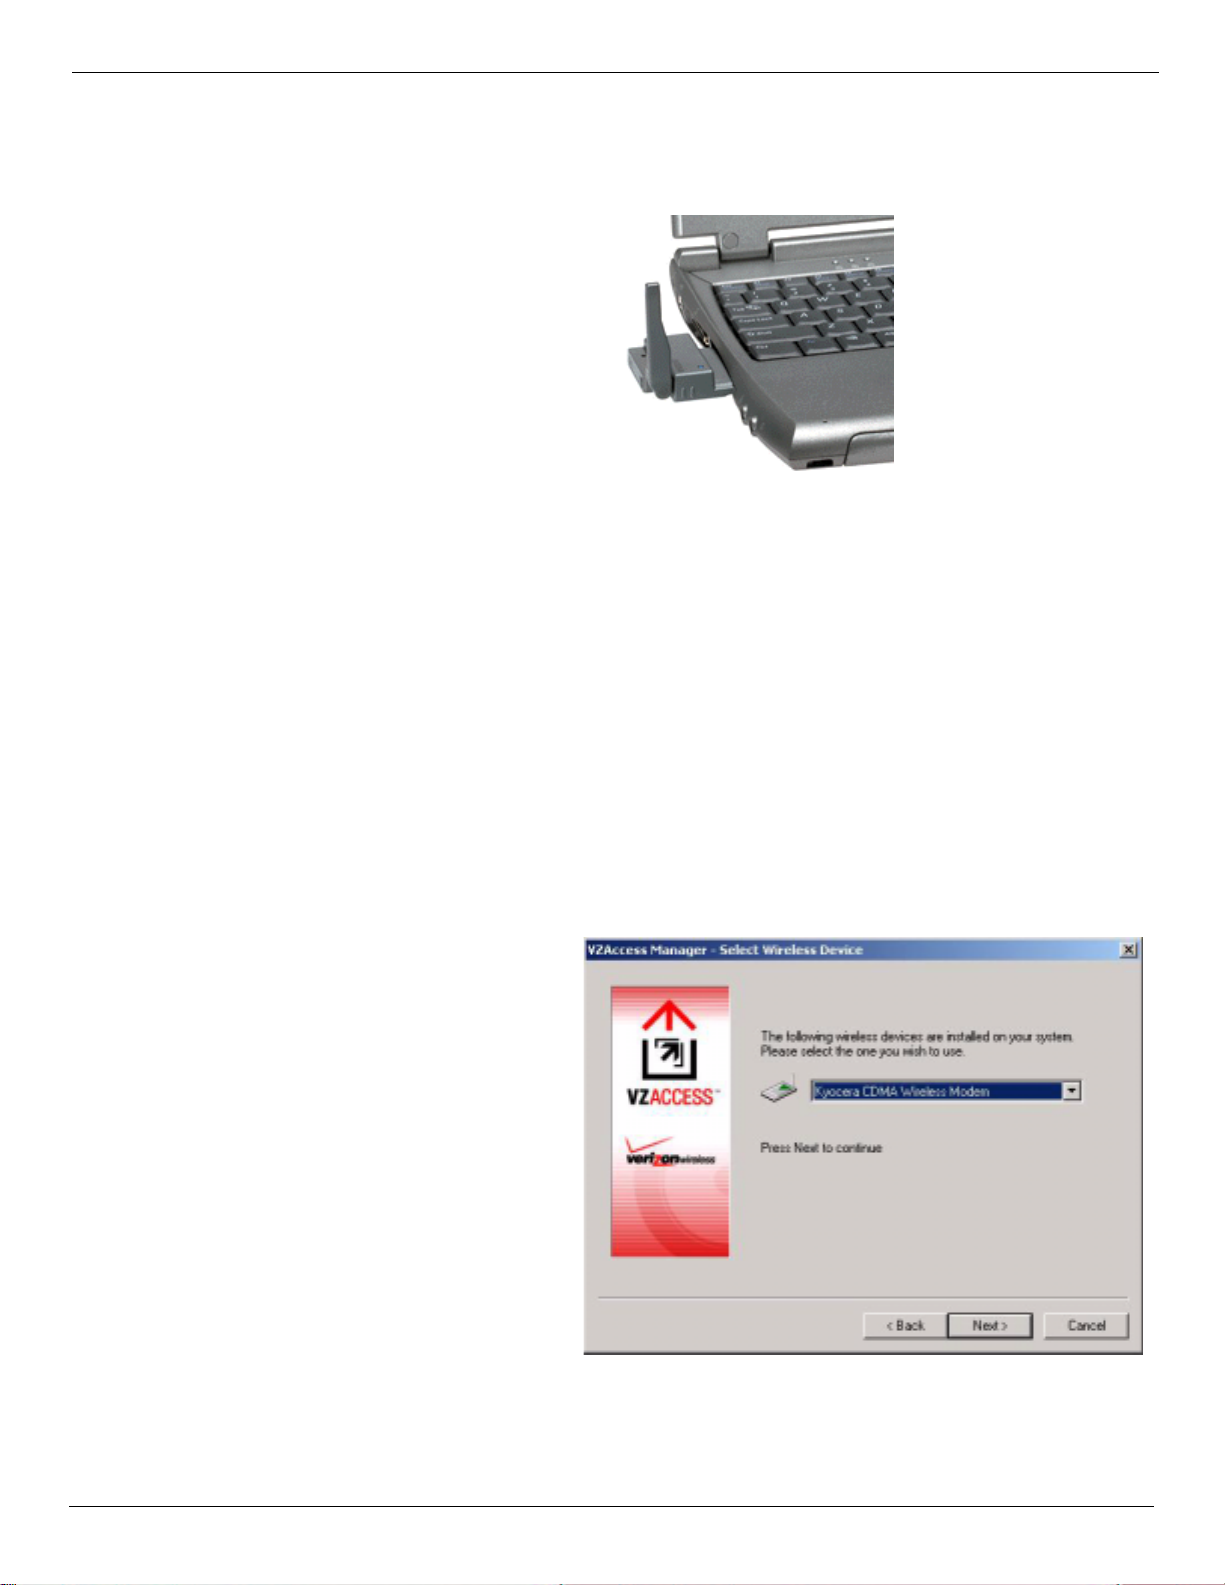
2. Insert the KPC650 into your notebook ’s
PC Card Slot with the label facing up.
Raise the antenna so that it is fully
extended and pointed up at a 90° angle.
Use in any other configura tion may exceed
FCC RF exposure limits.
3. When you insert the PC card, the Found New Hardware wizard appear s and installs the drive r s placed on your
computer system in the last set of steps.
Windows 98 SE/2000/Me ONLY: Once you have inserted the card properly, your W ind ows operati ng syst em notifies
you that new hardware has been detected. Please wait a moment for the Found New Hardware f unction to complete the au tomated t asks. Multi ple windows sim ilar to the Found New Hardware window bri efly appear a nd close
automatically. Once complete you are prompted to begin Activation.
Windows XP ONLY: Once you have inserted the card prope rly , your Windows operating system notifies you that
new hardware has been detected. Ple ase wait momentarily for the “Found New Hardware” function to complete the automated task s. Mult iple Tool Tips similar to the “Found New Hardware ” function will appear
briefly in the system tray and will c lose automatically. Once complete you will be prompted to begin Activ ation (step 4).
Note: You may hear a short beep each time the KPC650 is inserted and removed from your notebook PC. This
is normal. It is an audible notification from your notebook PC communicating that it recognizes new hardware
Click Next to continue.
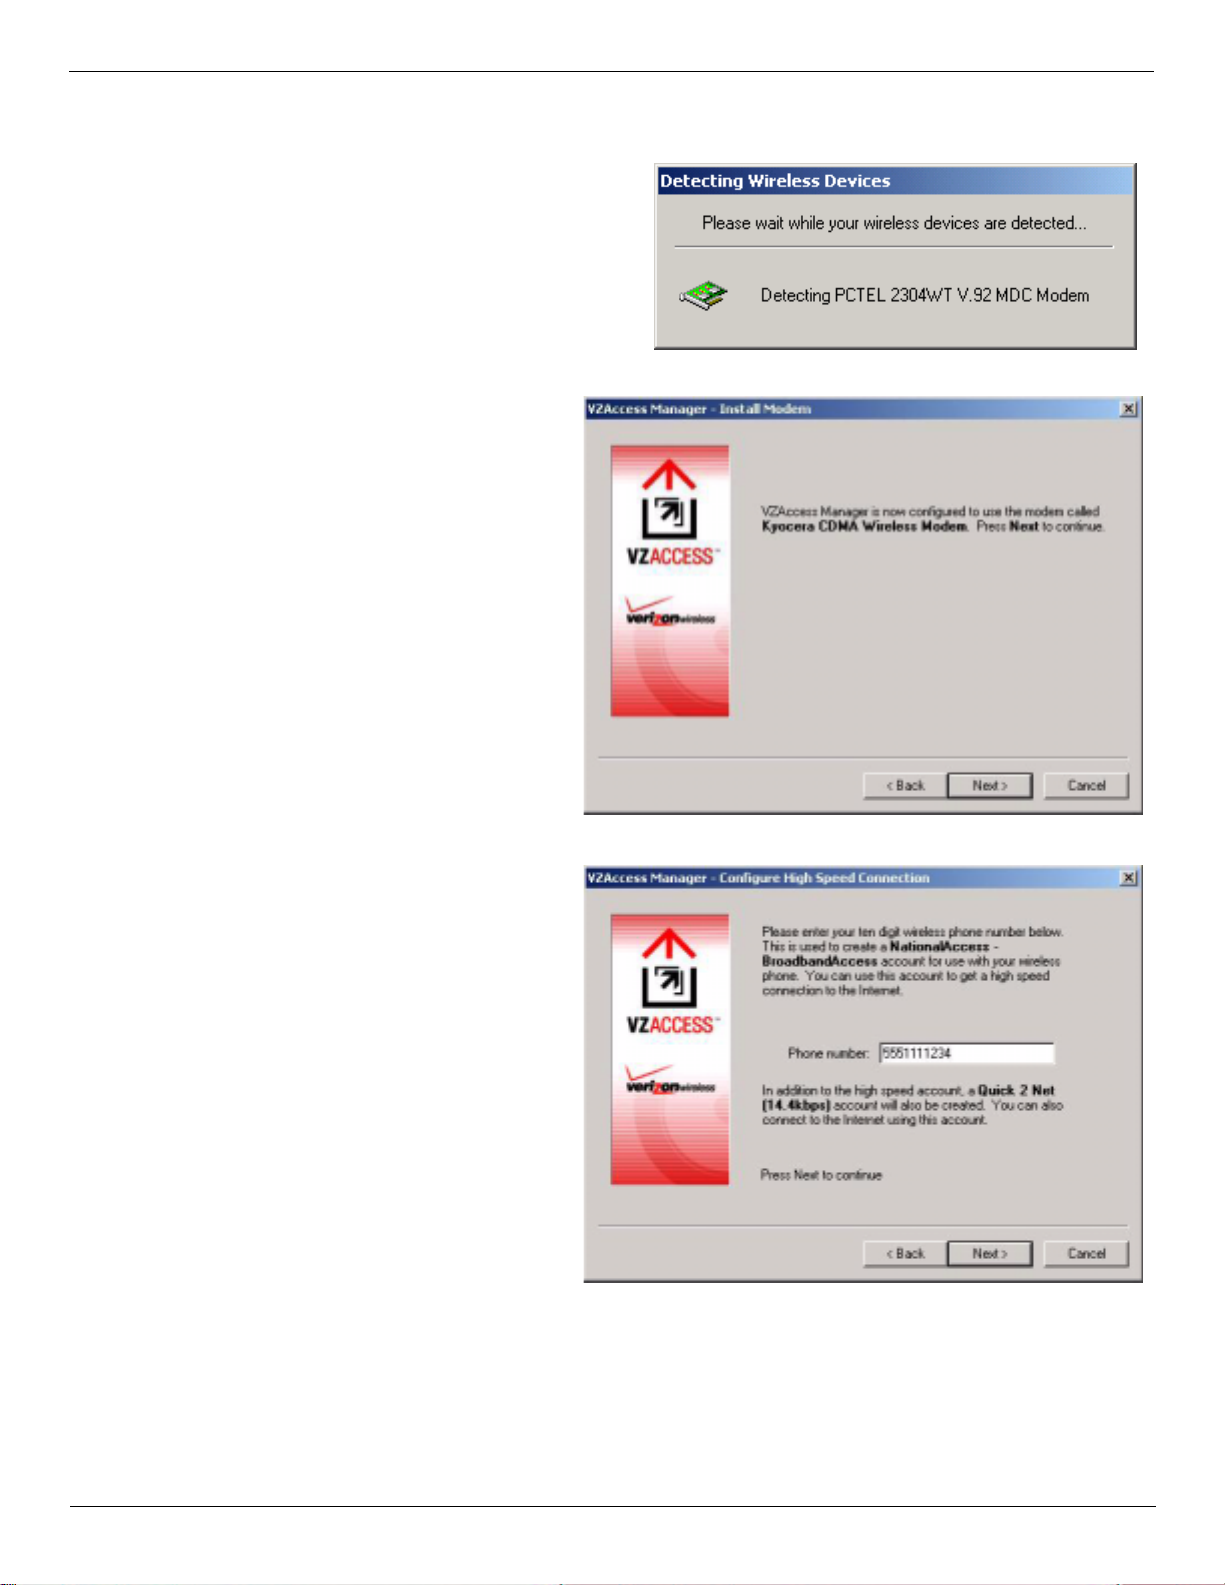
4. Select the wireless device you are using
with VZAccess Manager.
5. Click Next to continue.
8 User Guide for the Kyocera KPC650
Installation and Configur at ion Setup Instruc ti ons
.
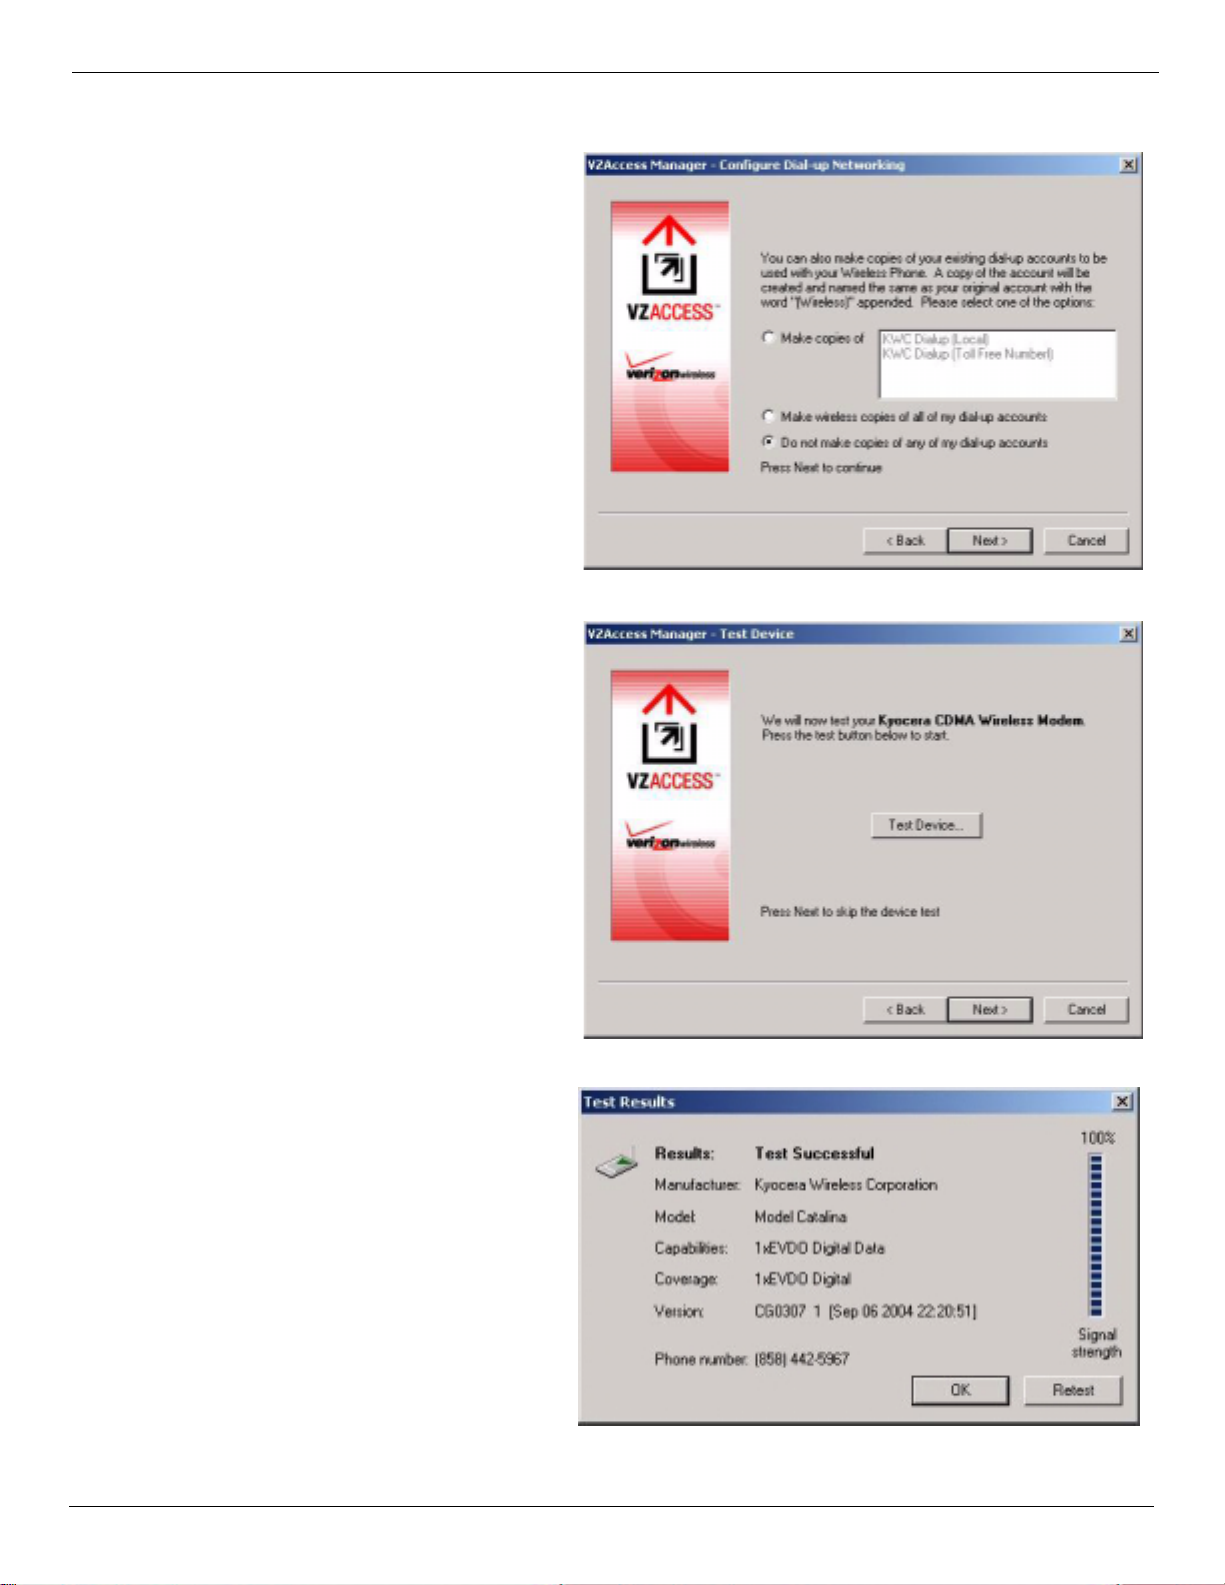
6. Your wireless device will now be detected.
7. After detecting the devi ce, you are notified
that the VZAccess Manager is configured
to use the modem you selected.
8. Press Next to continue.
9. Enter your 10-digit phone number.
10. Press Next to continue.
User Guide for the Kyocera KPC650 9
Setup Inst ructions Installatio n and Configu ration
11. Select whether or not you would like like
to make copies of your dialup accounts if
you wish. These accounts will appear as
dialup options on the VZAccess Manager
Connect view.
12. Click Next to contin ue.
13. Click the Test Device button to see detail
on your PC Card and to verify that all
components are wo rking. The Test Device
screen shows your device manufactur e r,
model, signal strength and other details.
14. Click the Test Device button to see detail
on your PC Card and to verify that all
components are wo rking. The Test Device
screen shows your device manufactur e r,
model, signal strength and other details.
10 User Guide for the Kyocera KPC650
Installation and Configur at ion Setup Instruc ti ons
15. Click Finish to exit the Setup.
VZAcess Manager launches. For more
information on how VZAccess Manager
works, refer to “V Z Access Manager from
Verizon Wireless” on page 12.
Ejecting the KPC650
Warning: Do not eject the KPC650 from your noteb ook until you ha ve followed the Unplug/Eject Hardware
instructions for proper removal. Removing the card improperly may cause a fatal error on your PC.
1. Double-click on the Unplug/Eject Hardware icon in the system tray.
2. Select the correct opti on for your operating system from the Unplug or Eject Hardware window and click OK.
Windows 98 SE and Me: Select Wireless PC Card Open Host Controller.
Windows 2000: Select
Windows XP: Select Lucent USB Open Host Controller.
3. Confirm the device to be stopped and click OK.
4. A Safe to Remove Hardware message appears, clic k OK.
5. Remove the KPC650 from your notebook. When removing the KPC650, alwa ys grip it by the sides of the card
rather than from the top. Pulli ng on the antenna ov er tim e may damage the card. If avail abl e, use the Card Eject or
tool on your laptop.
NEC PCI to USB Open Host Controller.
User Guide for the Kyocera KPC650 11

Supported Services VZAcces s M anager from Verizon Wireless
VZAccess Manager from Verizon Wireless
Welcome to the Verizon Wireless VZAccess Manager. The VZAccess Manager provides a one-touch connection to
the wireless Internet. It has built-in support for WWAN and Wi-Fi devices to give you the flexibility you need while
you are mobile to connect your laptop to the Internet wirelessly.
Supported Services
VZAccess Manager supports the following services from Verizon Wireless:
Quick 2 NetSM (14.4 kbps): Requires a CDMA data-capable phone and Mobile Office Kit or IS95A-capable PC Card.
•
This connection operates at 14.4 kbps and provides a connection to the Internet. Additional per-minute changes
apply.
Dial-Up-Data Service: Requires a CDMA data-capabl e phone a nd Mobile Office Kit or IS95A-capable PC Card. This
•
allows you to use your wireless device to dial int o your corporate networ k, or other servic es you normally dial into,
over a regular phone line. This connection ope rates at 14.4 kbps. Additional per-minute changes apply.
NationalAccess: Requires a NationalAccess-capable wireless phone and Mobile Office Kit or NationalAccess PC
•
Card. NationalAccess delivers typical speeds of 40 to 60 kbps, bursting up to 144 kbps (speed claim based on our
network tests with 101 Kilobyte FTP data files). Actual throughput speed and coverage vary.. This service requires
subscription to a NationalAccess plan. Additional information is available at
www.verizonwireless.com/b2c/mobileoptions/nationalaccess/index.jsp
•
BroadbandAccess: Requires a BroadbandAccess-capable PC Card and provides a wireless broadband connecti on to
the Internet. Verizon Wireless BroadbandAccess is one of the fastest, fully mobile wireless Internet data solutions
available. Quickly download complex files and view email attachments at broadband-like speeds (typical speeds of
300
−500 kbps, capable of reaching speeds up to 2 Mbps). Today this subscription service is available in the
W ashington, D.C., San Diego and Las Vegas areas.
Visit www.verizonwireless.com/b2c/mobileoptions/broadband/index.jsp
details.
Net or Dial-Up-Data Service.
Note: Pre sent B roadbandAcc ess Equi pment d evices also sup port Na tion alAccess, but do not suppor t Qui ck 2
.
for service availability and additional
You do not need a separate Internet service provider (ISP) to access the Internet when using Quick 2 Net,
NationalAccess, or BroadbandAccess.
NationalAccess and BroadbandAccess defined
The KPC650 operates on Verizon Wireless NationalAccess and BroadbandAccess technologies that leverage a
wireless cellula r network called Code Division Multiple Access (CDMA). CDMA is a digital spread- spectrum
wireless technology tha t offers reliable, high- speed bi-directional throughput at speeds ranging from 144 kbps or 2
Mbps for email, corporate databases, and all the services of the Internet. The high-performance KPC650, designed to
leverage CDMA 1xEVDO and 1xRTT network technologies, enables you to both send and receive data/email at
maximum network rates.
Often times when using a dial-up connection, a network busy signal appears. That's be cause there are bottlenecks
slowing down the network. With the spread spectrum technology of CDMA these frustrating bottlenecks are
eliminated. In fact, CDMA technology allows a network to handle more calls than competing digital technologies.
BroadbandAccess is Verizon W ireless' premier data service, off ering one of the fastest, fully mobile wi reless Internet
data solutions avail able today. This ultra-high-speed wireless service, provides users with typical speeds of 300
kbps with bursts up to 2 Mbps. BroadbandAccess is also known as CDMA 1xEVDO, a 3G (third generation)
technology. National Access is the na me for Verizon Wireless' nationa l wirele ss Int ernet se rvice. This is a ls o known as
CDMA 1xRTT, another variant of 3G technology, and delivers bi-directional peak packet data speeds of up to 144
kbps. Together, Verizon Wireless NationalAccess/BroadbandAccess offers a national mobile wireless data soluti on.
−500
12 User Guide for the Kyocera KPC650

VZAccess Manager from Ve rizon Wireless VZAccess Manager Tools
Maximum possible speed varies upon location and availability. Visit the Verizon Wireless website for up-to-date
coverage information: www.verizonwireless.com
What about privacy?
The secure CDMA network is designed with digital coding that is recognized only by the base station and
unintelligible to eavesdroppers.
.
VZAcce ss Ma nager Tools
T oday's online world of fers more services everyday and Verizon Wireless gives you the tools you need to ta ke
advantage of the best in connect ivity solutions. W ith VZAccess Manager, enjoy the fre edom and convenience of
wireless Internet c onnectivity from your notebook computer!
WWAN (Wireless Wide Area Network, 1xEV-DO/1xRTT/CDMA) Features
• Configures your PC to use your wireless phone and cable or wireless CDMA PC Card as a modem.
• Creates a Quick 2 Net (14.4 kbps) connection if supported by your device.
• Creates a NationalAccess connection if using a NationalAccess capable wire less phone and cable or PC Card,
which does not support BroadbandAccess.
• Creates a NationalAccess - BroadbandAccess connection if using a BroadbandAccess capable device. This
connection will a utomatically fall back and attempt connecting via NationalAccess if the Broadba ndAccess service
is unavailable.
• Copy utility to create wireless copies of your dial-up connections, if supported by your device.
• Controls the Venturi compression softwa re when using your NationalAccess - BroadbandAccess, National Access,
or Quick 2 Net (14.4 kbps) connections.
• Signal strength and battery level display for most wireless phones.
• Te st function for WWAN device.
Wi-Fi Features
• Configures Wi-Fi Adapter to work with VZAccess Manager.
• Displays Wi-Fi connections and signal strength when in a Wi-Fi coverage area. Supports connecting to Wi-Fi
networks such as ones used at home or work.
• Supports built-in Wi-Fi adapters or PC cards.
WWAN capable device is require d to use the WWAN features. Individual WWAN features are also device
dependent as described in the WWAN section above.
Other Features
• Launch all of your dial-up networking connections, if desired.
• Launch your browser, e-mail client, VPN or a program of your choice upon connection.
• Lo connections used, duration and bytes sent and received.
• TXT messaging
• For more information about VZAccess Manager featur es, refer to “Additional VZAccess Manager Features” on
page 30.
User Guide for the Kyocera KPC650 13
Getting Started with VZAccess Manager VZAccess Manager from Verizon Wireless
Getting Started with VZAccess Manager
Double-click on the VZAccess Manager icon on your desktop or click on the Windows Start menu and go to
Programs → VZAccess Manager.
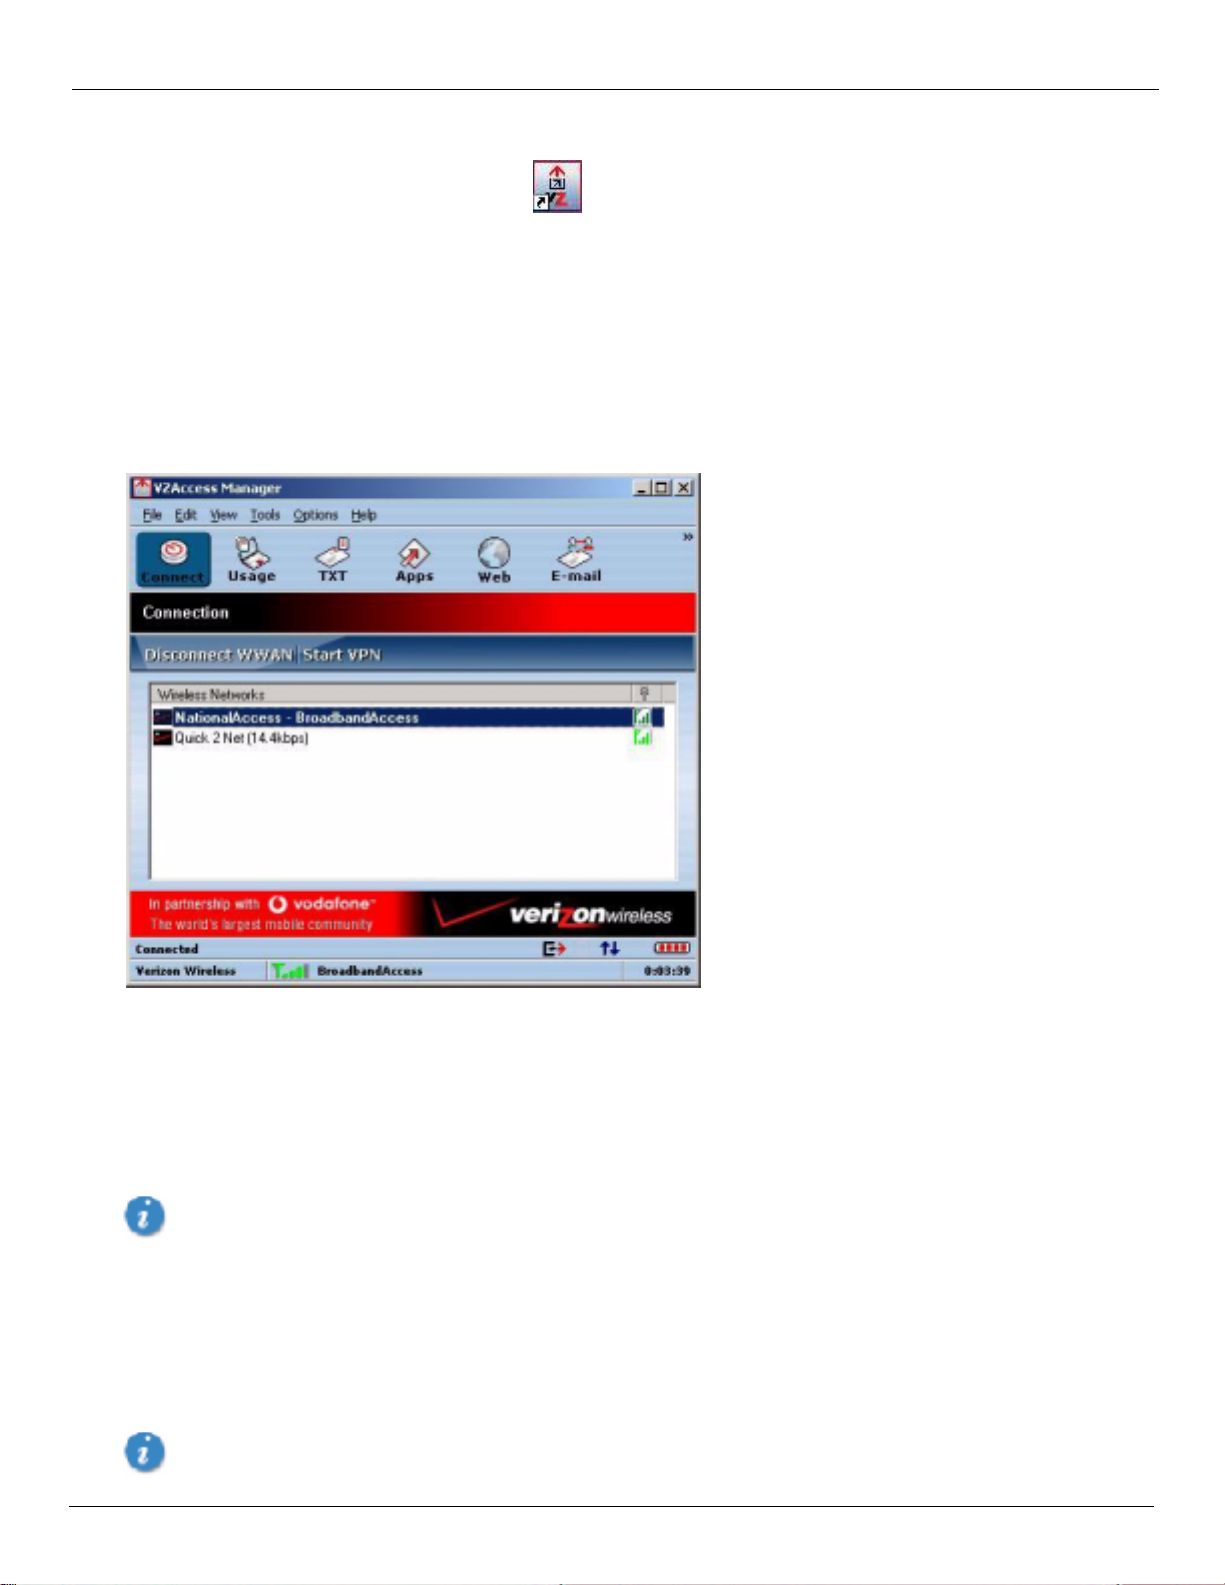
About the Connect View
VZAccess Manager will open to the Connect view by default. This view is where you manage your wireless
connections. The Connect view displays all currently available network connections.
At a glance you can see the signal strength and battery level (if applicable) of your WWAN or Wi-Fi network. To
update the informatio n on this pane l, selec t
connection state and the el apsed time of the connection are displayed along the bott om of the status bar.
Options → Refresh Netwo rks or Options → Refresh Signal Levels. Your current
If your expected connecti on does not appear or if you connected your wireless phone and cable, or inser ted your
wireless CDMA PC Card or Wi-Fi Card afte r starting VZAccess Manager, select
Options → Refresh Networks to have
VZAccess Manager look for your wireless device(s) a nd verify network availability . If you have any Wi-Fi networks
you manually added because they do not broad cast the ir SSID, they will always be displayed, and you will have to
refer to the signal strength displayed to know when you are in range. Refer to “Wi-Fi Preferences” on page 25 fo r
additional detai ls.
Note that with certain W i-Fi adapters the signal streng th for Wi-Fi networks is not accurate until you connect
to the network.
Note: The Quick 2 Net (14.4 kbps) connection is only created when the WWAN option is selected during setup and if
your wireless device suppor ts it. The NationalAccess connection is only created when the WWAN option is selected
during setup and if you are using a NationalAccess capable device that does not support the Verizon Wireless
BroadbandAccess service. If you are using a BroadbandAc cess capable device a NationalAccess - BroadbandAccess
connection will be creat ed. This con nection will use BroadbandAccess if availa ble and will automatically attempt a
NationalAccess connec tion when BroadbandAccess is not available.
If you change phones or PC cards, you wil l need t o run the S etup W i zard agai n. To do this make sure that your
phone and cable are connected, then select
14 User Guide for the Kyocera KPC650
Options → Run Wizard from the VZAccess Manager contact view.
VZAccess Manager from Ve rizon Wireless Getting Started with VZAccess Manager
Connecting
Once your Wi-Fi or WWAN device is properly configured, connecting to the Internet is as simple as selecting the
network connection type shown in the list and clicking the
above the list changes to Connect WWAN or Connect Wi-Fi as appropriate bas ed on the current selection in the
networks list.
1. Select one of the following conne ctions: NationalAccess, NationalAccess - BroadbandAccess, or Quick 2 Net (14.4kbps).
2. Click the Connect WWAN button when it becomes enable d.
Connect button. Note that the Conne ct button immediately
Once connected, the Connect WWAN button changes to
connection. To connect to any other network shown, select it, and then select
Disconnect WWAN. Simply click this to end your current
Connect.
Status Bar
Information regarding your current network connection can be seen in the stat us bar along the bottom of the
VZAccess Manager interface.
Note: If you are using a WWAN (1xEV-DO/1xRTT/CDMA) device that supports the Verizon Wireless Dial-Up-Data
service and you made wireless copi es of your dial-up accounts, they will also appear. If you are in the presence of a
private Wi-Fi network (such as one at work or at home) it will also appear if you selected the Wi-Fi option during
setup. If the number of connections exceeds wha t can be displayed, a verti cal scroll bar will appear to the right of the
connections. Scroll down to see them all.
The first time you connect with the NationalAccess - BroadbandAccess, NationalAccess, or
Quick 2 Net (14.4 kbps) connections, or a private Wi-Fi connection, a connectivity warni ng message appears.
These messages will appear each time you connect, unless you suppress them. For more information, refer to
“Warning Messages” on page 17.
Status information appears the bottom of the VZAccess Manager window. When not connected, the status text in the
lower left corner will dis play "Not connected" for the currently sele cted network. The timer will display "00:00:00".
Once connected, the status text will display "Connected" and the elapsed timer will begin to run. When a connection
is active, its name will appear as bol d text.
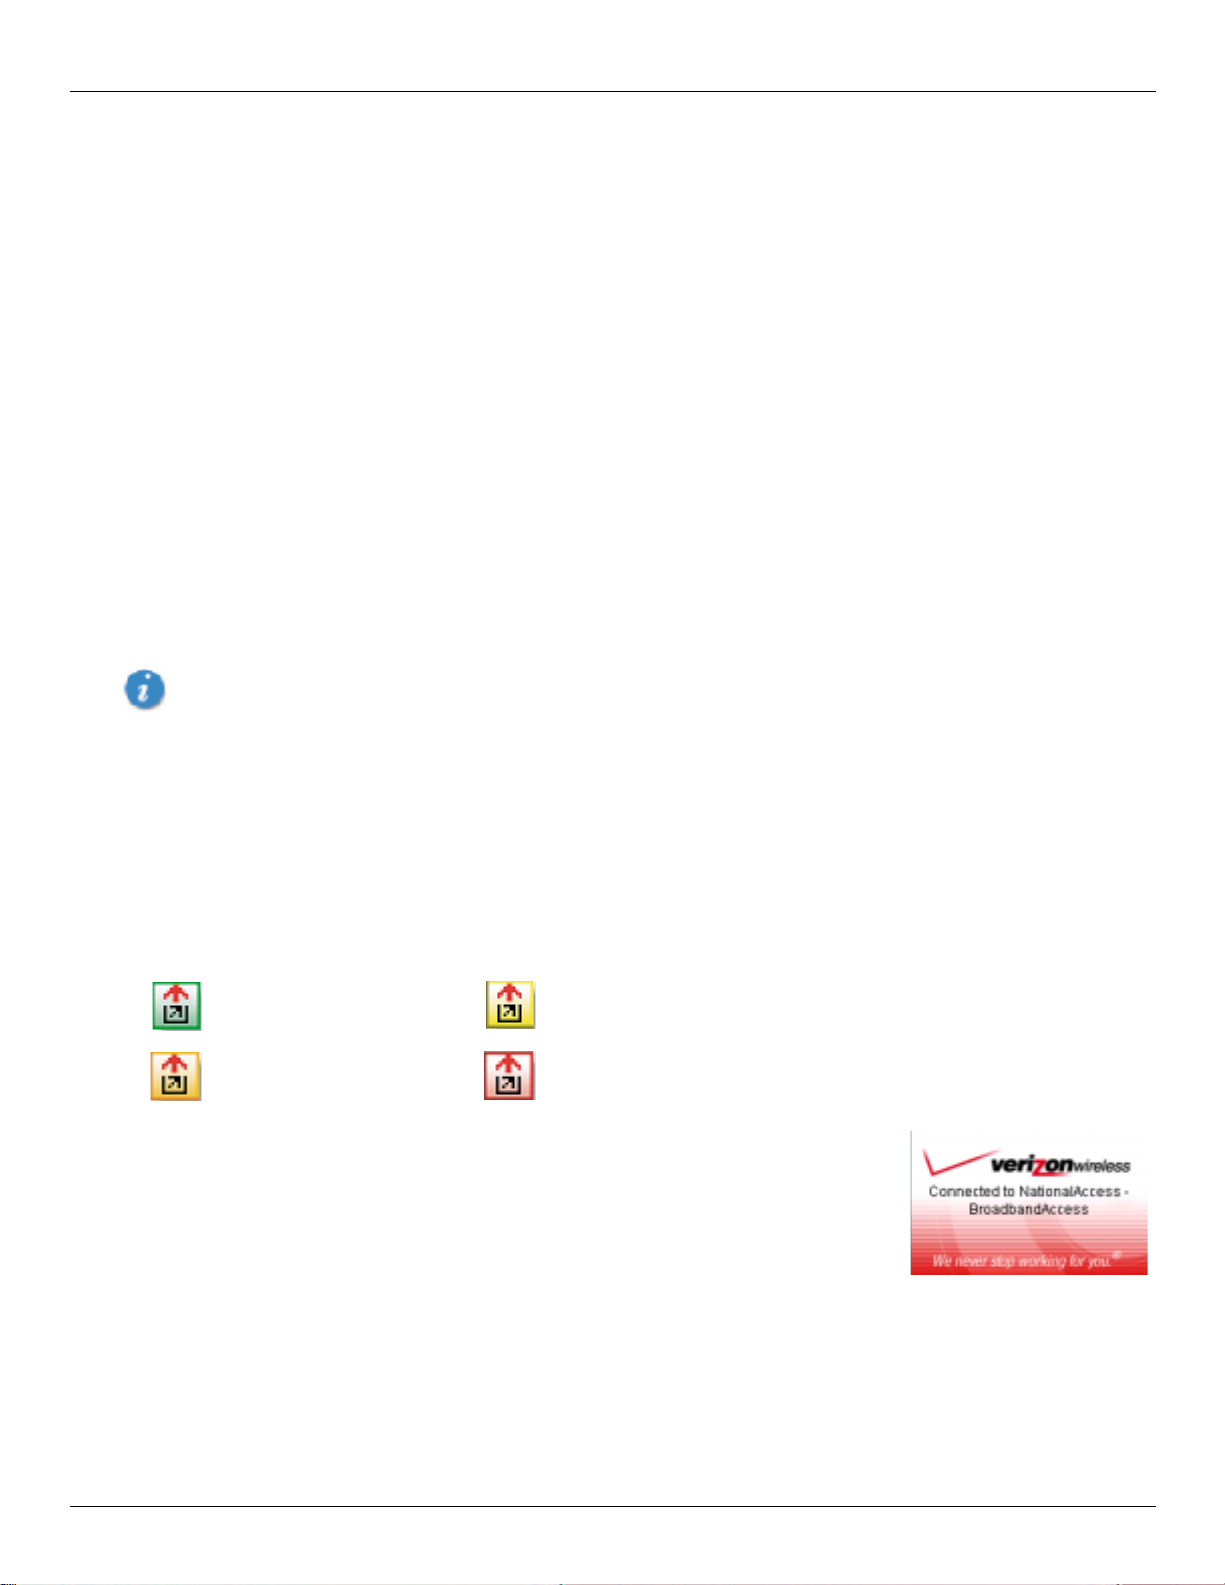
The status i s also reflected in the Task Tray icon. Right-c licking on the tr ay icon provides various options and doubl eclicking on it will always show the application. Placing your cursor on it will display the current connection status.
Connected Connecting
Idle - Not Connected Disconnecting
When you connect and disconnect from VZAccess Manager an alert window slides out
of the task tray showing the status from networks.
The pop up status can be turned of f, by selectin g
unchecking
Show popup status windows by tray.
Tools → Preferences → Options tab, and
Based on your preferences, your browser or e-mail or VPN program can be launched
automatically, or you can launch whatever software you want to use. You can also determine if all connections show
in the drop down list or only your wireless ones, see “VZAccess Manager Settings” on page 19.
Note: Always use VZAccess Manager when connecting via the NationalAccess - BroadbandAccess, NationalAccess,
or Quick 2 Net (14.4 kbps) connection. This will ensure that the Venturi compression software is enabled and the
wireless device is conf igured properly before connecting. Refer to “Using Venturi” on page 36 fo r mo re information
on how Venturi works.
User Guide for the Kyocera KPC650 15
Getting Started with VZAccess Manager VZAccess Manager from Verizon Wireless
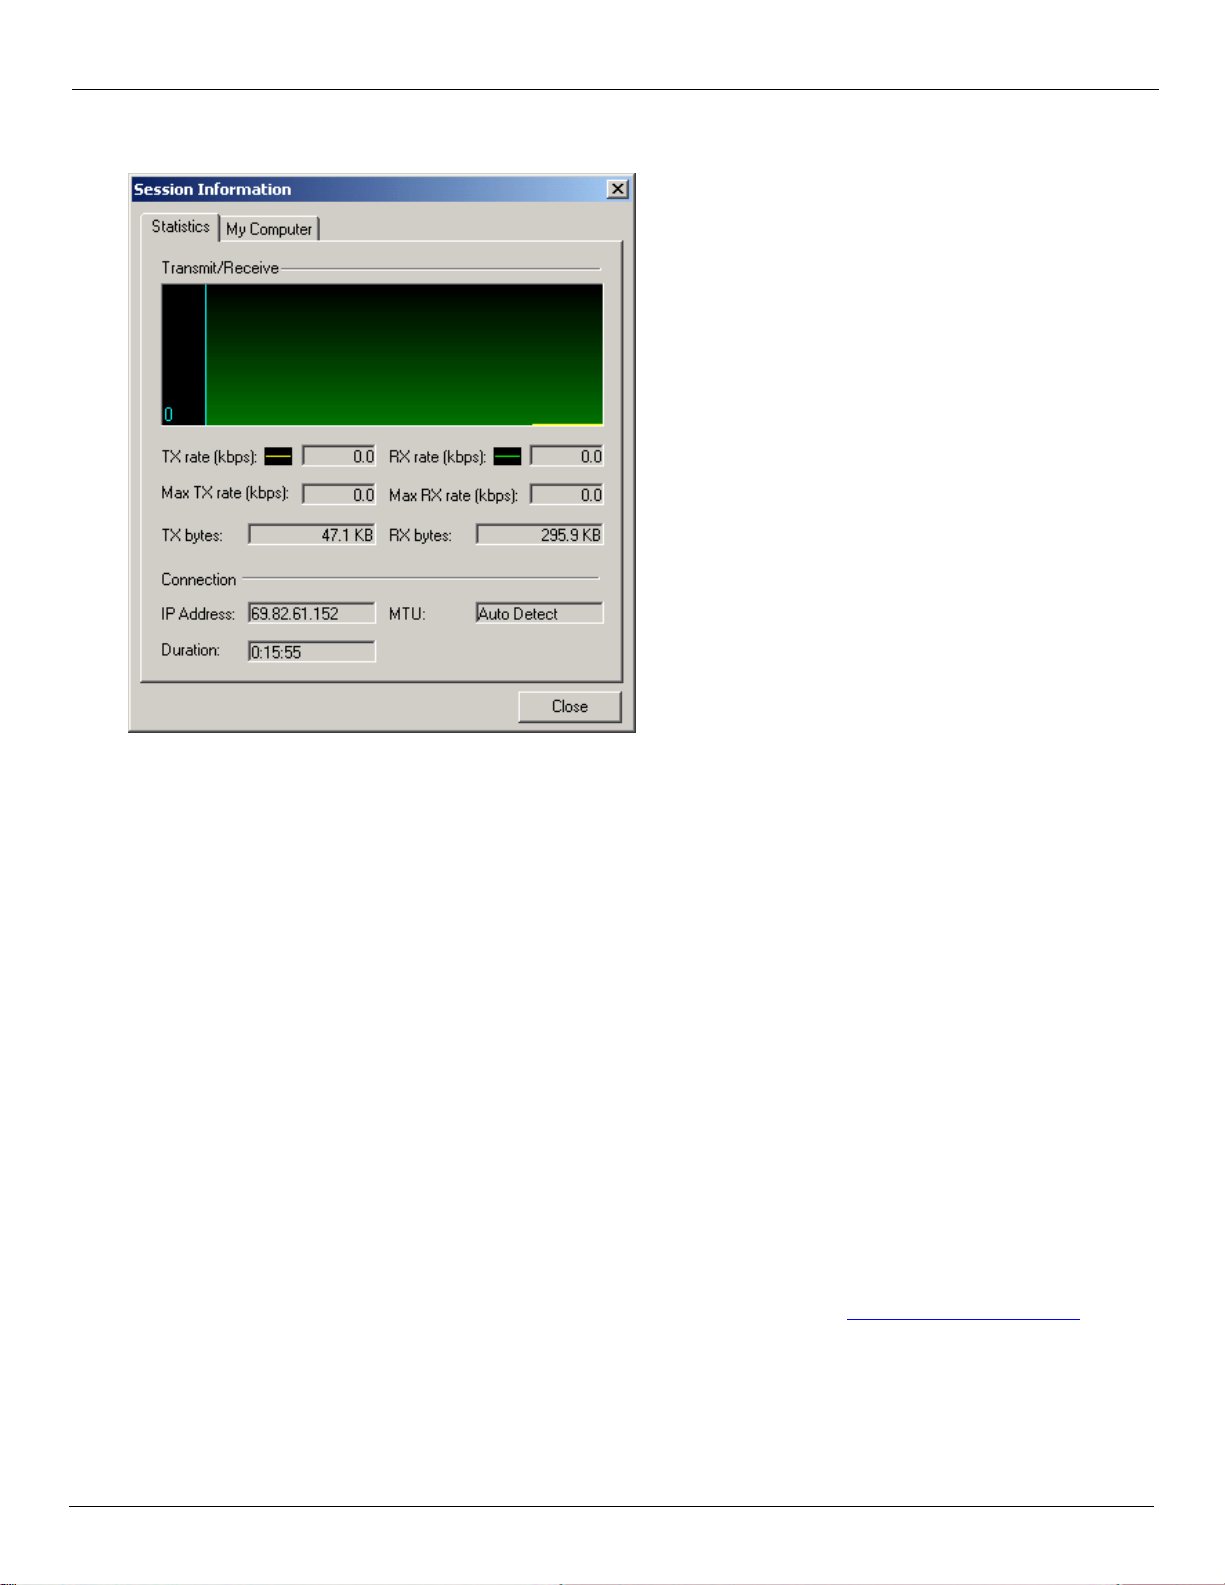
At any time during your connection you can check your curr ent connection speed and throughput stats in the
Statist ics tab of the Session Information window. To see this window, select
Options → Statistics.
The Session Information window also contains a My Computer tab and a Wi-Fi tab if applicable. The My Computer
tab contains detaile d information about your computer. This information is helpful when troubleshooting a problem.
Additional information when using the Quick 2 Net (14.4 kbps) connection:
When using the Quick 2 Net (14.4 kbps) connection, VZAccess Manager enables the Venturi compression software
to roughly double your performance. For additional details refer to “Using Venturi” on page 36.
Additional information when using the NationalAccess connection:
By default VZAccess Manager enables the Venturi compression software for the BroadbandAccess and
NationalAccess connections.
If you are using the NationalAccess - BroadbandAcce ss or NationalAc cess connect ion and the call fails when you try
to connect, with VZAccess Manager returning to i ts idle state, you should try to connect again. If you are still having
trouble, try the Quick 2 Net (14.4 kbps) co nnection, if your device supports it. If you feel you may have incorrectly
entered your wireles s telephone number during initial setup, select
Dormancy:
Options → Run Wiza r d.
NationalAccess an d BroadbandAcce ss data sess ions beco me dormant if you are not sending or r eceiving any data. As
soon as you resume sending or receiving data, the data session will return to an active state.
Depending on your device and your Nationa lAcce ss or BroadbandAccess
during a dormant state. See your Verizon Calling Plan brochure for details or visit www.verizonwireless.com
happens select
Disconnect, and then connect agai n .
plan, your data session may disconnect
. If this
While dormant your wireless phone/device may be able to receive a voice call. If you leave your wireless phone
connected to your PC, after you finish your voice call you may be able to resume your data session as you normally
would.
16 User Guide for the Kyocera KPC650
VZAccess Manager from Ve rizon Wireless Getting Started with VZAccess Manager
Warning Messages
NationalAccess
The first time you connect via the Nationa lAccess connection, the follo wing warning messa ge appears:
ATTENTION
You are about to establish a NationalAccess (1xRTT)
connection. Charges apply in accordance with your
subscription to Verizon Wireless' NationalAccess.
T o see our current pricing for NationalAccess, please visit
http://www.verizonwireless.com/b2c/mobileoptions
Do not show this warning again to suppress the message. Otherwise, each time you connect via the
Select
NationalAccess connection this message will appear.
NationalAccess - BroadbandAccess
The first time you connect via the NationalAccess - BroadbandAccess connection, the following warning message
appears:
ATTENTION
You are about to establish a BroadbandAccess or
NationalAccess connection. Charges apply in accordance
with your subscription to Verizon Wireless'
NationalAccess/BroadbandAccess.
To see our current pricing for BroadbandAccess, please
visit http://www.verizonwireless.com/b2c/mobileoptions
Do not show this warning again to suppress the message. Otherwise, each time you connect via the
Select
.
NationalAccess - Broadba ndAccess connection this message will appear.
Quick 2 Net (14.4 kbps)
The first time you connect via the Quick 2 Net (14.4 kbps) con nection, the following warning message appears:
ATTENTION
Quick 2 Net(sm) may be charged diff erently than
NationalAccess sessions.
Please check your Calling Plan for details.
Do not show this warning again to suppress the message. Otherwise, each time you connect via the
Select
Quick 2 Net (14.4 kbps) connection this message will appear.
Dial-Up
The first time you connect via a wireless Dia l-Up connection, the following warning message appears:
ATTENTION
Dial Up connections may be charged differently than
NationalAccess sessions.
Please check your Calling Plan for details.
Do not show this warning again to suppress the message. Otherwise, each time you connect via the
Select
Dial-Up connection this messa ge will appear.
User Guide for the Kyocera KPC650 17
 Loading...