

Page 1

2540
3040
Advanced Operation Guide
Please read the Operation Guide before using this machine. Keep it close to the machine for easy reference.
Page 2

This Advanced Operation Guide is for models 2540 and 3040. In this
guide, 2540 refers to the 25 cpm (copies per minute) model and 3040 to
the 30 cpm model.
Note This Advanced Operation Guide contains information that
corresponds to using both the inch and metric versions of these
machines.
The inch versions of these machines are shown in the screens in
this guide. If you are using the metric version, use the messages
provided for the inch version as reference only. In the body text,
only the inch messages are given if these versions differ only in
capitalization. When there is even a slight difference in the
message, we have listed the information for the inch version
followed, in brackets, by the corresponding information for the
metric version.
Included Guides
The following guides are included with this machine. Refer to the proper
guide based on your requirements.
Operation Guide
Describes how to load paper, basic copy operations, and
troubleshooting.
Advanced Operation Guide (This Guide)
Explains copying features in depth, as well as default settings.
Quick Start Guide
Lists and briefly describes the copy functions of the machine.
Page 3

Contents
Legal Information and Conventions ............................................iii
1 Copy Functions .......................................................................... 1-1
Selecting Paper Source ............................................................ 1-2
Selecting Original Size ............................................................... 1-3
Copy Quantity ............................................................................. 1-5
Orientation of Original Document ............................................. 1-6
Offset Mode ................................................................................. 1-7
Stapling ....................................................................................... 1-8
Combine Mode ............................................................................ 1-9
Margin Mode ............................................................................. 1-12
Centering Originals .................................................................. 1-13
Border Erase ............................................................................. 1-14
Page Numbering ....................................................................... 1-16
Cover Mode ............................................................................... 1-18
Booklet from Sheets ................................................................. 1-19
Booklets from Facing Pages ................................................... 1-21
Memo Mode ............................................................................... 1-22
Continuous Scan ...................................................................... 1-24
Proof Copy ................................................................................ 1-24
Repeat Copy .............................................................................. 1-25
Auto Image Rotation ............................................................... 1-27
Selecting Output Destination .................................................. 1-28
EcoPrint ..................................................................................... 1-28
Negative Image Copying ......................................................... 1-29
Mirror Copying .......................................................................... 1-29
Mixed Size Originals Mode ...................................................... 1-30
Programmed Copying .............................................................. 1-31
Assigning Register Keys ......................................................... 1-33
Job Build ................................................................................... 1-34
2 Output Management Functions ................................................. 2-1
Overview of Output Management Functions ........................... 2-2
Using the Output Management Functions ............................... 2-2
3 System Menu .............................................................................. 3-1
Default Settings .......................................................................... 3-2
Setting MP Tray ........................................................................ 3-23
Registering Non-standard Sizes for Originals ....................... 3-24
Drum Refresh ............................................................................ 3-25
Printing Reports ....................................................................... 3-26
Checking Total Copy Count .................................................... 3-28
4 Job Accounting .......................................................................... 4-1
Overview of Job Accounting ..................................................... 4-2
Managing Accounts ................................................................... 4-4
Copy Count per Department .................................................... 4-10
Activating and Deactivating Job Accounting ........................ 4-12
Job Accounting Default Settings ............................................ 4-13
Using Job Accounting ............................................................. 4-18
5 Troubleshooting ......................................................................... 5-1
Solving Malfunctions ................................................................. 5-2
i
Page 4

Responding to Error Messages ................................................. 5-4
6 Appendix ..................................................................................... 6-1
Paper ............................................................................................ 6-2
Intercompatibility of Functions ............................................... 6-10
Glossary .................................................................................... 6-15
Index ....................................................................................Index-1
ii
Page 5

Legal Information and Conventions
Please read this information before using your machine.
Regarding Tradenames
• PRESCRIBE and ECOSYS are registered trademarks of Kyocera
Corporation.
• KPDL is trademark of Kyocera Corporation.
• Windows and Windows Server are registered trademarks of
Microsoft Corporation.
• Windows NT is a trademark of Microsoft Corporation.
• PCL and PJL are registered trademarks of Hewlett-Packard
Company.
• Adobe, Adobe Acrobat and Adobe Reader are registered
trademarks of Adobe Systems Inc.
• PowerPC is a trademark of International Business Machines
Corporation.
• CompactFlash is a trademark of SanDisk Corporation.
• This product was developed using the Tornado™ Real Time
Operating System and Tools from Wind River Systems.
• This product uses PeerlessPrintXL to provide the HP LaserJet
compatible PCL 6 language emulation. PeerlessPrintXL is a
trademark of Peerless Systems Corporation, 2381 Rosecrans Ave.
El Segundo, CA 90245, U.S.A.
• TrueType is a registered trademark of Apple Computer Inc.
• All resident fonts in this printer are licensed from Monotype Imaging
Inc.
• Helvetica, Palatino and Times are registered trademarks of
Linotype-Hell AG.
• ITC Avant Garde Gothic, ITC Bookman, ITC ZapfChancery and ITC
Zapf Dingbats are registered trademarks of International Typeface
Corporation.
• This product contains UFST™ and MicroType
Imaging Inc.
All other brand and product names are registered trademarks or
trademarks of their respective companies. The designations ™ and ®
will not be used in this Operation Guide.
®
from Monotype
IBM PROGRAM LICENSE AGREEMENT
THE DEVICE YOU HAVE PURCHASED CONTAINS ONE OR MORE
SOFTWARE PROGRAMS (“PROGRAMS”) WHICH BELONG TO
INTERNATIONAL BUSINESS MACHINES CORPORATION (“IBM”).
THIS DOCUMENT DEFINES THE TERMS AND CONDITIONS UNDER
WHICH THE SOFTWARE IS BEING LICENSED TO YOU BY IBM. IF
YOU DO NOT AGREE WITH THE TERMS AND CONDITIONS OF THIS
LICENSE, THEN WITHIN 14 DAYS AFTER YOUR ACQUISITION OF
THE DEVICE YOU MAY RETURN THE DEVICE FOR A FULL
REFUND. IF YOU DO NOT SO RETURN THE DEVICE WITHIN THE 14
DAYS, THEN YOU WILL BE ASSUMED TO HAVE AGREED TO THESE
TERMS AND CONDITIONS.
iii
Page 6

The Programs are licensed not sold. IBM, or the applicable IBM country
organization, grants you a license for the Programs only in the country
where you acquired the Programs. You obtain no rights other than those
granted you under this license.
The term “Programs” means the original and all whole or partial copies of
it, including modified copies or portions merged into other programs. IBM
retains title to the Programs. IBM owns, or has licensed from the owner,
copyrights in the Programs.
1. License
Under this license, you may use the Programs only with the device on
which they are installed and transfer possession of the Programs and
the device to another party. If you transfer the Programs, you must
transfer a copy of this license and any other documentation to the other
party. Your license is then terminated. The other party agrees to these
terms and conditions by its first use of the Program.
You may not:
1) use, copy, modify, merge, or transfer copies of the Program
except as provided in this license;
2) reverse assemble or reverse compile the Program; or
3) sublicense, rent, lease, or assign the Program.
2. Limited Warranty
The Programs are provided “AS IS.”
THERE ARE NO OTHER WARRANTIES COVERING THE
PROGRAMS (OR CONDITIONS), EXPRESS OR IMPLIED,
INCLUDING, BUT NOT LIMITED TO, THE IMPLIED WARRANTIES OF
MERCHANTABILITY AND FITNESS FOR A PARTICULAR PURPOSE.
Some jurisdictions do not allow the exclusion of implied warranties, so
the above exclusion may not apply to you.
SUPPLEMENT TO AGREEMENT FOR SOFTWARE BUNDLING AND
DISTRIBUTION FOR ALDC
3. Limitation of Remedies
IBM's entire liability under this license is the following;
1) For any claim (including fundamental breach), in any form, related
in any way to this license, IBM’s liability will be for actual damages
only and will be limited to the greater of;
a) the equivalent of U.S.$25,000 in your local currency; or
b) IBM's then generally available license fee for the Program
This limitation will not apply to claims for bodily injury or damages to real
or tangible personal property for which IBM is legally liable. IBM will not
be liable for any lost profits, lost savings, or any incidental damages or
other economic consequential damages, even if IBM, or its authorized
supplier, has been advised of the possibility of such damages. IBM will
not be liable for any damages claimed by you based on any third party
claim. This limitation of remedies also applies to any developer of
Programs supplied to IBM. IBM’s and the developer’s limitations of
remedies are not cumulative. Such developer is an intended beneficiary
of this Section. Some jurisdictions do not allow these limitations or
exclusions, so they may not apply to you.
4. General
iv
Page 7

You may terminate your license at any time. IBM may terminate your
license if you fail to comply with the terms and conditions of this license.
In either event, you must destroy all your copies of the Program. You are
responsible for payment of any taxes, including personal property taxes,
resulting from this license. Neither party may bring an action, regardless
of form, more than two years after the cause of action arose. If you
acquired the Program in the United States, this license is governed by
the laws of the State of New York. If you acquired the Program in
Canada, this license is governed by the laws of the Province of Ontario.
Otherwise, this license is governed by the laws of the country in which
you acquired the Program.
Monotype Imaging License Agreement
1. “Software” shall mean the digitally encoded, machine readable,
scalable outline data as encoded in a special format as well as the
UFST Software.
2. You agree to accept a non-exclusive license to use the Software to
reproduce and display weights, styles and versions of letters,
numerals, characters and symbols (“Typefaces”) solely for your own
customary business or personal purposes at the address stated on
the registration card you return to Monotype Imaging. Under the
terms of this License Agreement, you have the right to use the Fonts
on up to three printers. If you need to have access to the fonts on
more than three printers, you need to acquire a multi-user license
agreement which can be obtained from Monotype Imaging.
Monotype Imaging retains all rights, title and interest to the Software
and Typefaces and no rights are granted to you other than a License
to use the Software on the terms expressly set forth in this
Agreement.
3. To protect proprietary rights of Monotype Imaging, you agree to
maintain the Software and other proprietary information concerning
the Typefaces in strict confidence and to establish reasonable
procedures regulating access to and use of the Software and
Typefaces.
4. You agree not to duplicate or copy the Software or Typefaces, except
that you may make one backup copy. You agree that any such copy
shall contain the same proprietary notices as those appearing on the
original.
5. This License shall continue until the last use of the Software and
Typefaces, unless sooner terminated. This License may be
terminated by Monotype Imaging if you fail to comply with the terms
of this License and such failure is not remedied within thirty (30) days
after notice from Monotype Imaging. When this License expires or is
terminated, you shall either return to Monotype Imaging or destroy all
copies of the Software and Typefaces and documentation as
requested.
6. You agree that you will not modify, alter, disassemble, decrypt,
reverse engineer or decompile the Software.
7. Monotype Imaging warrants that for ninety (90) days after delivery,
the Software will perform in accordance with Monotype Imagingpublished specifications, and the diskette will be free from defects in
material and workmanship. Monotype Imaging does not warrant that
the Software is free from all bugs, errors and omissions.
The parties agree that all other warranties, expressed or implied,
including warranties of fitness for a particular purpose and
merchantability, are excluded.
v
Page 8

8. Your exclusive remedy and the sole liability of Monotype Imaging in
connection with the Software and Typefaces is repair or replacement
of defective parts, upon their return to Monotype Imaging.
In no event will Monotype Imaging be liable for lost profits, lost data,
or any other incidental or consequential damages, or any damages
caused by abuse or misapplication of the Software and Typefaces.
9. Massachusetts U.S.A. law governs this Agreement.
10.You shall not sublicense, sell, lease, or otherwise transfer the
Software and/or Typefaces without the prior written consent of
Monotype Imaging.
11. Use, duplication or disclosure by the Government is subject to
restrictions as set forth in the Rights in Technical Data and Computer
Software clause at FAR 252-227-7013, subdivision (b)(3)(ii) or
subparagraph (c)(1)(ii), as appropriate. Further use, duplication or
disclosure is subject to restrictions applicable to restricted rights
software as set forth in FAR 52.227-19 (c)(2).
12.You acknowledge that you have read this Agreement, understand it,
and agree to be bound by its terms and conditions. Neither party shall
be bound by any statement or representation not contained in this
Agreement. No change in this Agreement is effective unless written
and signed by properly authorized representatives of each party. By
opening this diskette package, you agree to accept the terms and
conditions of this Agreement.
vi
Page 9
About this Operation Guide
This Operation Guide contains the following chapters:
1 Copy Functions
Describes the full-featured copying functions of the machine.
2 Output Management Functions
Explains the output management functions.
3 System Menu
Covers general default settings.
4 Job Accounting
Explains how to manage job accounting to share usage among various
departments.
5 Troubleshooting
Explains how to handle error messages and other problems.
Appendix
Lists supported paper and intercompatible functions. Includes a glossary.
Conventions in This Guide
The following conventions are used depending on the nature of the
description.
Convention
Bold Indicates operation panel
[Regular] Indicates touch panel
Italic Indicates touch panel
Note Indicates supplemental
IMPORTANT Indicates items that are
Description Example
Press the Start key.
keys.
Press [Basic].
keys.
Ready to copy is
messages.
information or operations
for reference.
displayed.
IMPORTANT -
required or prohibited so
as to avoid problems.
Note -
vii
Page 10
Originals and Paper Sizes
This section explains the notation used in this guide when referring to
sizes of originals or paper sizes.
As in A4 and B5, which may be used either in the horizontal or vertical
direction, in order to indicate the orientation of the original/paper,
horizontal orientation is indicated by an additional R character.
Set direction Indicated size
Vertical direction
B B
A4, B5, A5, B6,
A6, 16K
A A
Original Size
For original/paper, dimension A is longer than B.
Horizontal direction
B B
A
Original Size
For original/paper, dimension A is shorter than B.
a. The size of original/paper that can be used depends on the
function and source tray. For further details, refer to the page
detailing that function or source tray.
A
A4R, B5R, A5R,
B6R, A6R, 16KR
a
viii
Page 11

1 Copy Functions
This chapter covers the following topics.
Selecting Paper Source 1-2
Selecting Original Size 1-3
Standard Sizes ........................................................................ 1-3
Other Standard Sizes .............................................................. 1-3
Size Entry ................................................................................ 1-4
Custom Size ............................................................................ 1-4
Copy Quantity 1-5
Orientation of Original Document 1-6
Offset Mode 1-7
Stapling 1-8
Combine Mode 1-9
Margin Mode 1-12
Centering Originals 1-13
Border Erase 1-14
Sheet Border Erase............................................................... 1-14
Book Border Erase ................................................................ 1-14
Separate Border Erase.......................................................... 1-15
Page Numbering 1-16
Cover Mode 1-18
Booklet from Sheets 1-19
Booklets from Facing Pages 1-21
Memo Mode 1-22
Continuous Scan 1-24
Proof Copy 1-24
Repeat Copy 1-25
Preparing a Job for Repeat Copy .......................................... 1-25
Repeat Copy Output.............................................................. 1-25
Auto Image Rotation 1-27
Selecting Output Destination 1-28
EcoPrint 1-28
Negative Image Copying 1-29
Mirror Copying 1-29
Mixed Size Originals Mode 1-30
Programmed Copying 1-31
Using Programs to Copy ....................................................... 1-31
Editing Program Names ........................................................ 1-31
Deleting programs ................................................................. 1-32
Assigning Register Keys 1-33
Assigning Register Keys........................................................ 1-33
Deleting Register Keys.......................................................... 1-33
Job Build 1-34
Job Build Procedure .............................................................. 1-34
Setting Functions................................................................... 1-37
Copy Functions 1-1
Page 12
p
p
t
Ready to copy.
11×8½"
Plain
11×17"
Color
11×8½"
Plain
8½×11"
Plain
APS
MP Tr ay
Plain
Auto %
100%
Zoom
Auto
Density
Density
ProgramFunctionUser c h o iceBasic
Selecting Paper Source
To select paper of different sizes, change the cassette or MP tray paper
source.
Follow the steps as below to select the paper source.
1 Place the original.
When [APS] is selected, paper matching the size of the original will
be selected automatically.
Off
Sta
Lef
Sta
2 To change the paper size, press the button corresponding to the
3 Press the Start key. Copying begins.
Note You may override the automatic paper selection default.
For further details, refer to Setting Auto Paper Selection on
page 3-5.
desired paper size to select that paper source.
When using the MP tray, refer to Chapter 2 of Operation Guide:
Setting Media Type and Paper Size for the Cassettes and MP Tray
to set the paper size and media type.
1-2 Copy Functions
Page 13
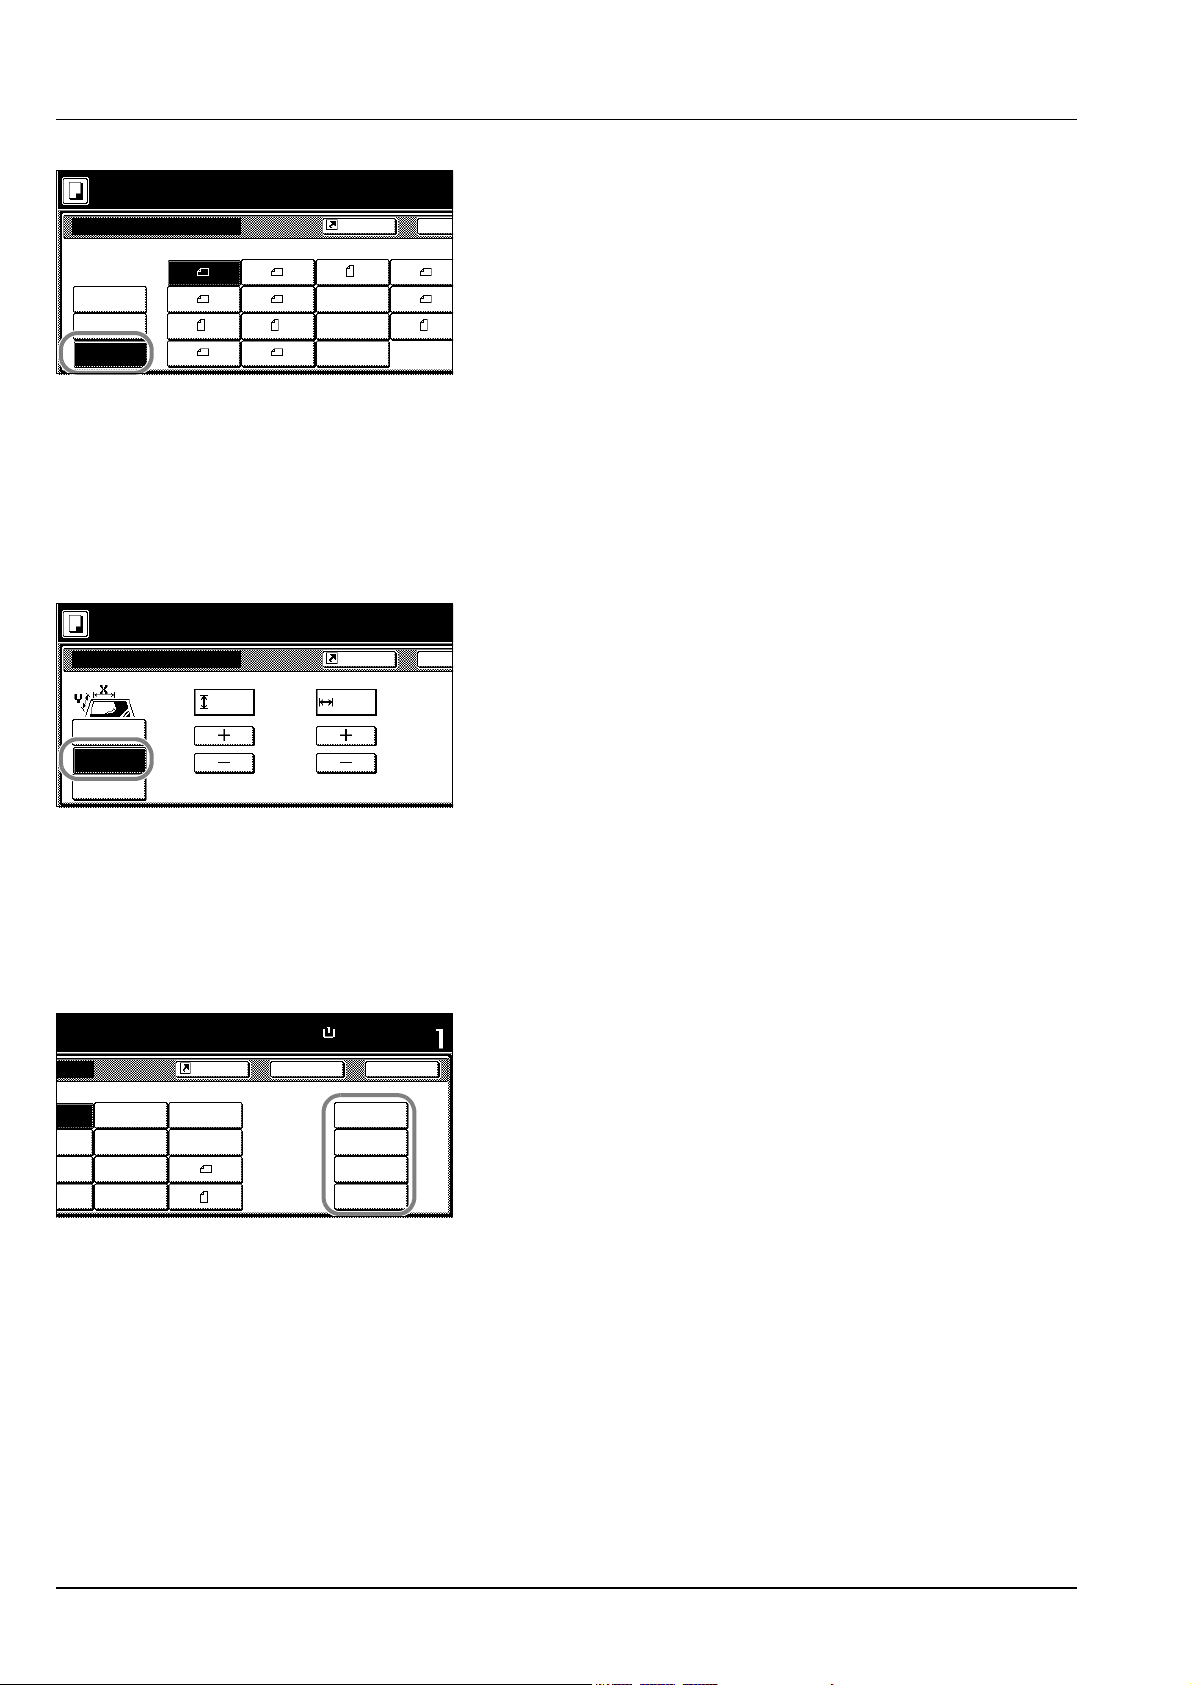
Selecting Original Size
Specify the size of originals that will serve as the basis for scanning. Be
sure to specify the original size when copying originals of nonstandard
sizes.
Select the original size from the following groups of original size.
• Standard Sizes – Select from commonly used standard sizes.
Inch models: 11 × 17", 8 1/2 × 14", 11 × 8 1/2", 8 1/2 × 11",
5 1/2 × 8 1/2", 8 1/2 × 5 1/2", 8 1/2 × 13 1/2", 8 1/2 × 13" (Oficio II),
11 × 15", A4 and A4R
Metric models: A3, B4, A4, A4R, B5, B5R, A5, A5R, B6, B6R, A6R,
Folio, 11 × 15", 11 × 8 1/2" and 8 1/2 × 11"
• Other Standard Sizes – Select from special-purpose standard
sizes.
Inch models: A3, B4, B5, B5R, A5, A5R, B6, B6R, A6R, Folio, P.
Card, OUFUKU HAGAKI, 8K, 16K and 16KR
Metric models: 11 × 17", 8 1/2 × 14", 5 1/2 × 8 1/2", 8 1/2 × 5 1/2",
8 1/2 × 13 1/2", 8 1/2 × 13" (Oficio II), Pstcard, OUFUKU HAGAKI,
8K, 16K and 16KR
•Size Entry – Enter the size for when not shown in the list of standard
sizes.
Inch models
Vertical: 2 - 11 5/8" (1/8" increments), Horizontal: 2 - 17" (1/8"
increments)
Metric models
Vertical: 50 - 297 mm (1 mm increments), Horizontal: 50 - 432 mm
(1 mm increments)
•Custom Size – Select entered and registered original sizes. For
setting custom original sizes, refer to Registering Non-standard
Sizes for Originals on page 3-24.
Ready to copy.
Origin a l S ize
Select
size
Size Entry
Other
stand.Size
Auto 8½×14"
5½×8½"11×17"
8½×11"
11×8½"
8½×5½"
11×15"
Shortcut
8½×13½"
8½×13"
A4
A4
Standard Sizes
Follow the steps as below to specify the standard size.
1 Place the original.
2 Press [Function].
3 Press [Original Size].
4 Select the original size.
Ba
Choose [Auto] to match the size of placed originals automatically.
5 Press the Start key. Copying begins.
Other Standard Sizes
Follow the steps as below to specify the other standard sizes.
1 Place the original.
2 Press [Function].
3 Press [Original Size].
Copy Functions 1-3
Page 14
e
Ready to copy.
n
Origin a l S ize
Select
size
Size Entry A5
Other
stand.Size
Ready to copy.
Origin a l S ize
Select
size
Size Entry
Other
stand.Size
4 Press [Other stand.Size] ([Others stand.Size]).
Pap
5 Select the original size.
Shortcut
Ba
6 Press the Start key. Copying begins.
A3
A5
A6
B4
B5
B5
B6
B6
Folio
P.Card
OUFUKU
HAGAKI
8K
16K
16K
Size Entry
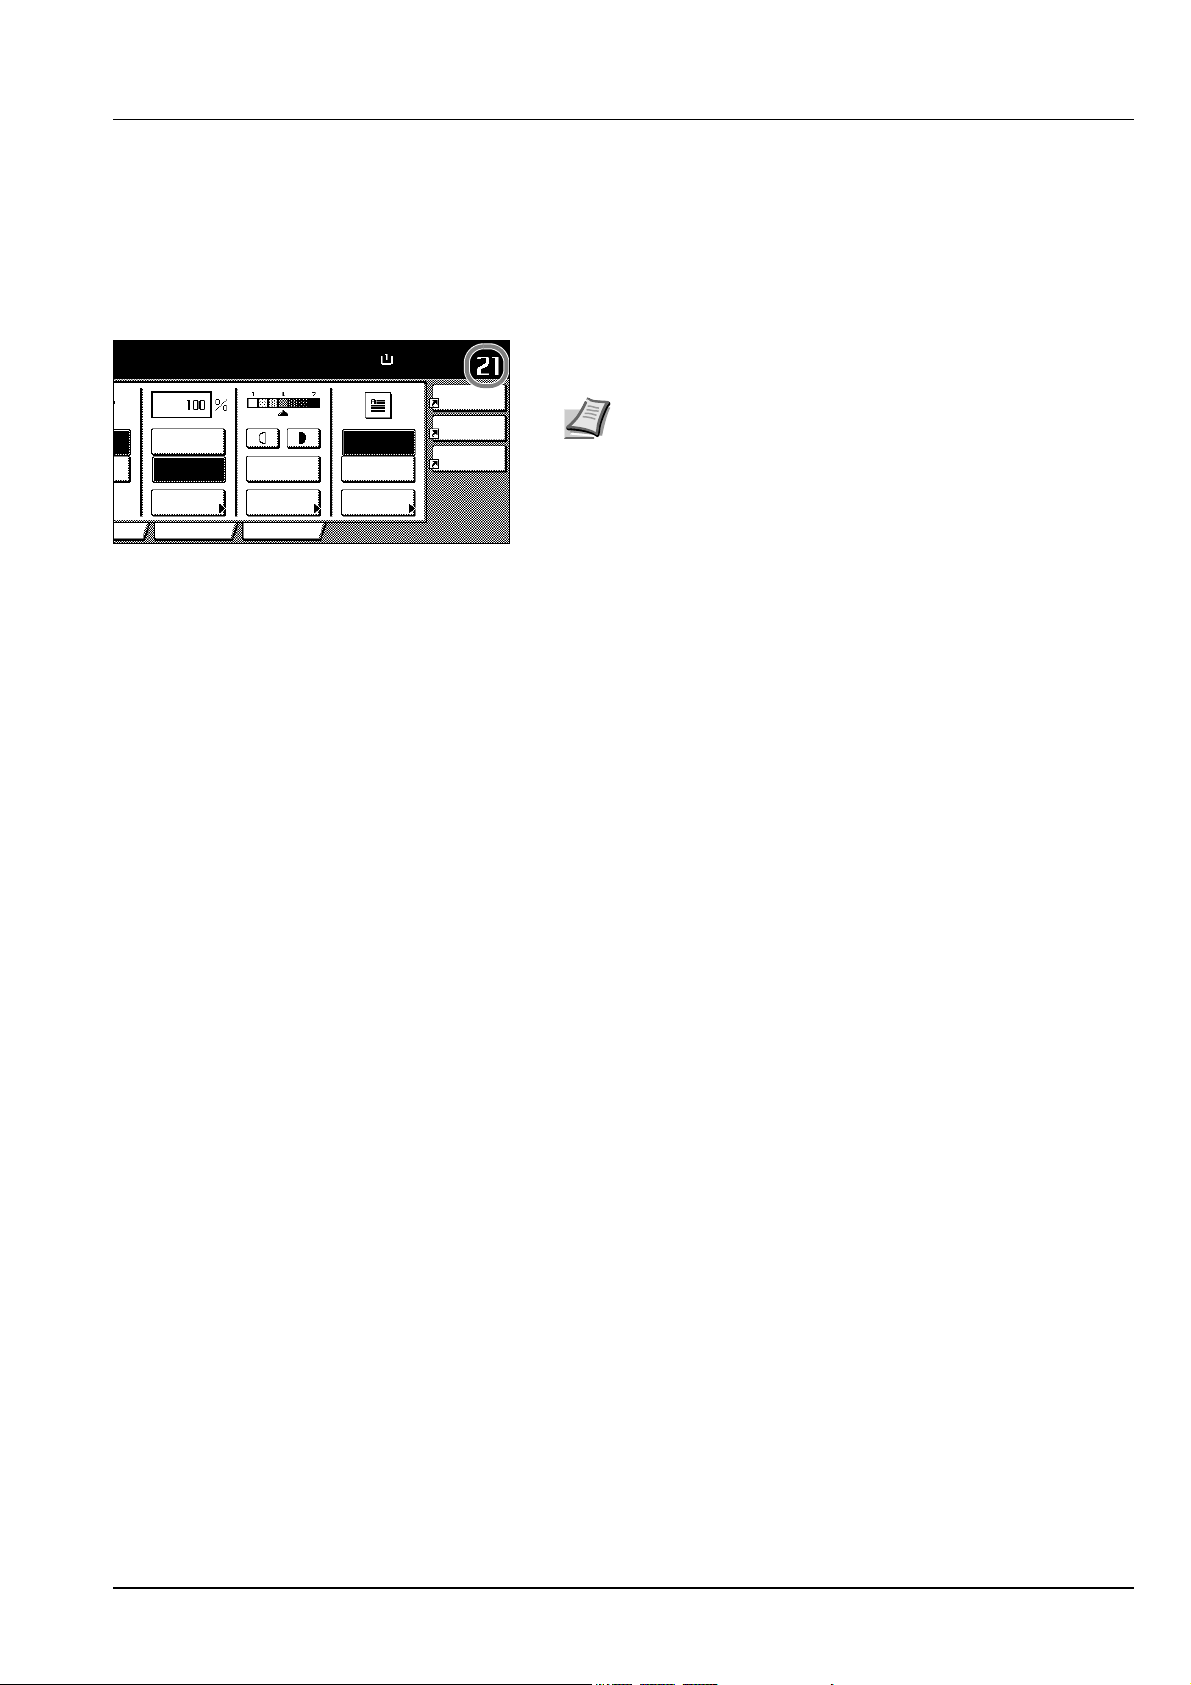
Follow the steps as below to enter the original size when not listed in the
standard sizes.
1 Place the original.
2 Press [Function].
3 Press [Original Size].
4 Press [Size Entry].
5 Press [+] or [–] to set the Y (height) and X (width) sizes.
Ba
With the metric models, you may enter the size directly using the
numeric keys by pressing [#-Keys].
6 Press the Start key. Copying begins.
( 2~11
5/8
) ( 2~17)
.2 .2
Shortcut
XY" "
Set original
scanning ra
Custom Size
Follow the steps as below to specify one of the custom sizes.
1 Place the original.
2 Press [Function].
3 Press [Original Size].
Paper Size
.
Shortcut
8½×14"
5½×8½""
8½×5½"
"
"
11×15"
8½×13½"
8½×13"
A4
A4
Back
100%
Set
11×8½"
Custom Size
11
11/16
×16
11/16
×16
11
11/16
×16
11
11/16
×16
11
9/16
9/16
9/16
9/16
Close
"
"
"
"
4 Select the original size from Custom Size (Use regist).
5 Press the Start key. Copying begins.
1-4 Copy Functions
Page 15
Copy Quantity
Sets the number of sheets to copy. You may specify up to 999 sheets for
a single copy job.
Follow the steps as below to specify the copy quantity.
1 Place the original.
.
Auto %
100%
Zoom
Auto
Density
Density
Progra mFunctionoice
Paper Size Set
100%
Off
Staple
Left Top
Staple
11×8½"
4 in 1
Mar gin
Left
Bord Erase
Sheet
2 Use the numeric keys on the operation panel to enter the desired
copy quantity.
Note To clear the copy quantity, press the Stop/Clear key.
Copy quantity will be reset to 1.
3 Press the Start key. Copying begins.
Copy Functions 1-5
Page 16
Orientation of Original Document
Orientation of the original must be specified to use the following
functions.
• Duplex Mode
• Split Mode (separate copies from two-sided originals)
• Margin Mode
• Centering Originals
• Border Erase
• Combine Mode
• Memo Pages
• Page Numbering
• Booklet
• Stapling (optional feature)
Placing originals on the platen
.
k Origina l Orientat ion. can
own at right side of display.
w the steps. If setting mode is
g, incorrect copy will result .
Shortcut
Paper Size
11×8½"
100%
Back
Select Origin a l
Orie ntation.
Top Edge
Top
Set
Close
Top Edge
Left
Original [Top Edge Top] [Top Edge Left]
Placing originals in the optional document processor
Original [Top Edge Top] [Top Edge Left]
Note The default setting for the original orientation may be
changed. For further details, refer to Orientation of Original
Document on page 3-17.
Follow the steps as below to specify the original orientation.
1 Place the original.
2 Press [Function] and then press [T Down].
3 Press [Original Orient.].
4 According to the placed orientation of the original, press [Top Edge
Top] or [Top Edge Left].
5 Press [Close].
6 Configure the functions which require specification of the original
orientation, such as Duplex mode.
7 Press the Start key. Copying begins.
1-6 Copy Functions
Page 17
Offset Mode
3
3
2
1
2
1
Original Copy
Ready to copy.
Collate/Offset
Collate Offset
Collate
Off
Collate:On
Off
On
Outputs printed copies such that each set is stacked perpendicular
(rotated 90 degrees) to the previous set.
3
2
1
3
2
1
Note Use of this feature requires paper of the same size must be
loaded in the different cassettes with portrait and landscape
orientations.
Only 11 × 8 1/2", A4, B5 and 16K paper sizes may be used with
Offset mode.
Follow the steps as below for using Offset mode.
1 Press [Function].
2 Press [Collate/Offset].
3 Press [On].
4 Use the numeric keys to enter the copy quantity.
Shortcut
Ba
5 Place the original and press the Start key. Copying begins.
If the original has been placed on the optional document processor,
copying begins automatically.
If the original is placed on the platen, Scan next original(s) is
displayed. Place the next original and press the Start key.
If all original pages have been scanned, press [Scanning finished].
Copying begins.
Copied pages are output to the top tray offset per each set.
Copy Functions 1-7
Page 18
Stapling
Staples sets of copies.
Note Requires the optional document finisher or built-in finisher.
The orientations of the original and corresponding staple positions are as
follows.
Copy Original Orientation of Original
Platen
Document
processor
Staple Mode.
Turn over paper in the cassette if output does not align .
Staple Mode
Off
1 staple
PositionStaple
Upper
Left
Upper
Right
Shortcut
Follow the steps as below for stapling.
1 Press [Function] and then press [T Down].
2 Press [Staple].
P
3 Press [1 staple].
4 Select the staple position.
Ba
5 Place the original and press the Start key.
If the original has been placed on the optional document processor,
copying begins automatically.
If the original is placed on the platen, Scan next original(s) is
displayed. Place the next original and press the Start key.
If all original pages have been scanned, press [Scanning finished].
Copying begins.
1-8 Copy Functions
Page 19
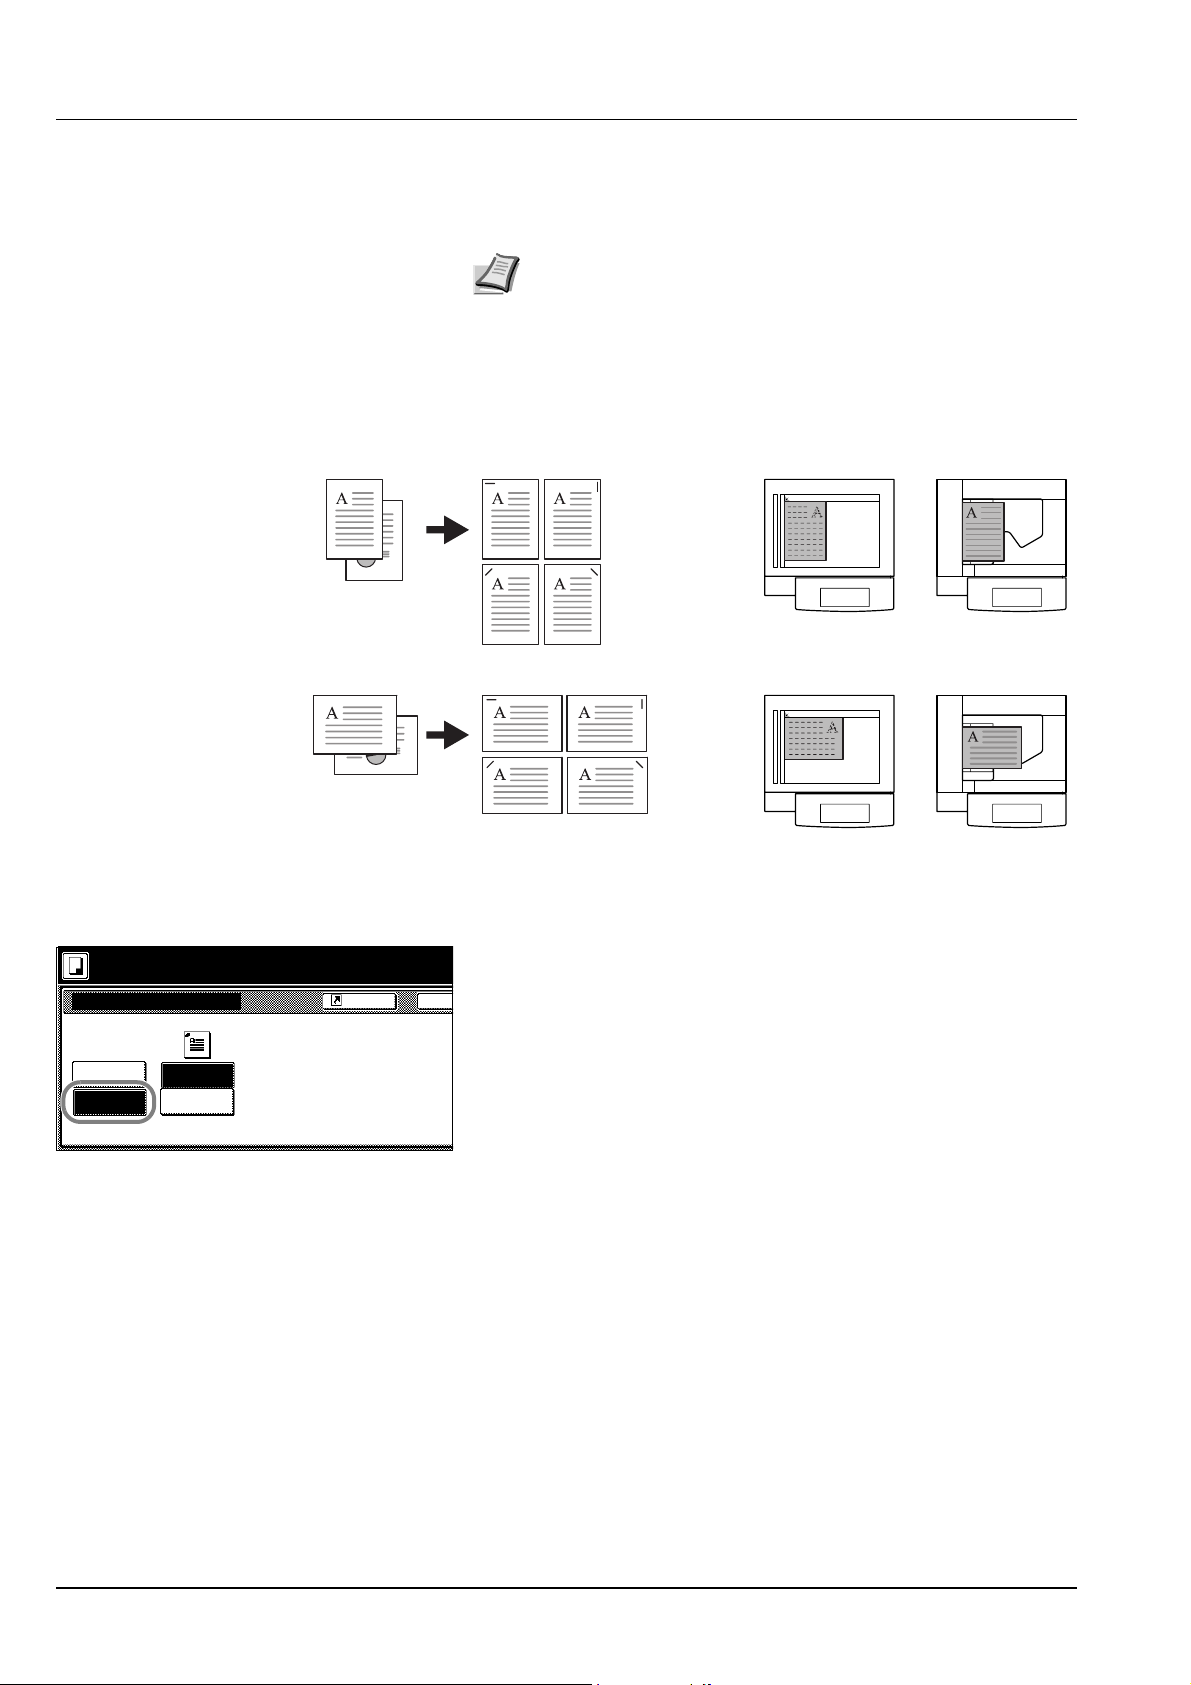
Combine Mode
Images from either two or four originals are reduced and combined onto
a single copy. The page boundary of each original can be indicated by a
solid or dotted line.
Note Combine mode supports 11 × 17", 11 × 8 1/2", 8 1/2 × 11",
A3, B4, A4, A4R, B5, B5R, 8K, 16K and 16KR paper sizes.
2-in-1 Mode
Copy two originals onto a single sheet. This mode can be used with
Duplex mode to copy four originals onto one sheet.
The orientations of the original and corresponding output are as follows.
Copy Original Orientation of Original
Platen
Document
processor
Note When placing the original on the platen, copy originals in the
page order.
Copy Functions 1-9
Page 20
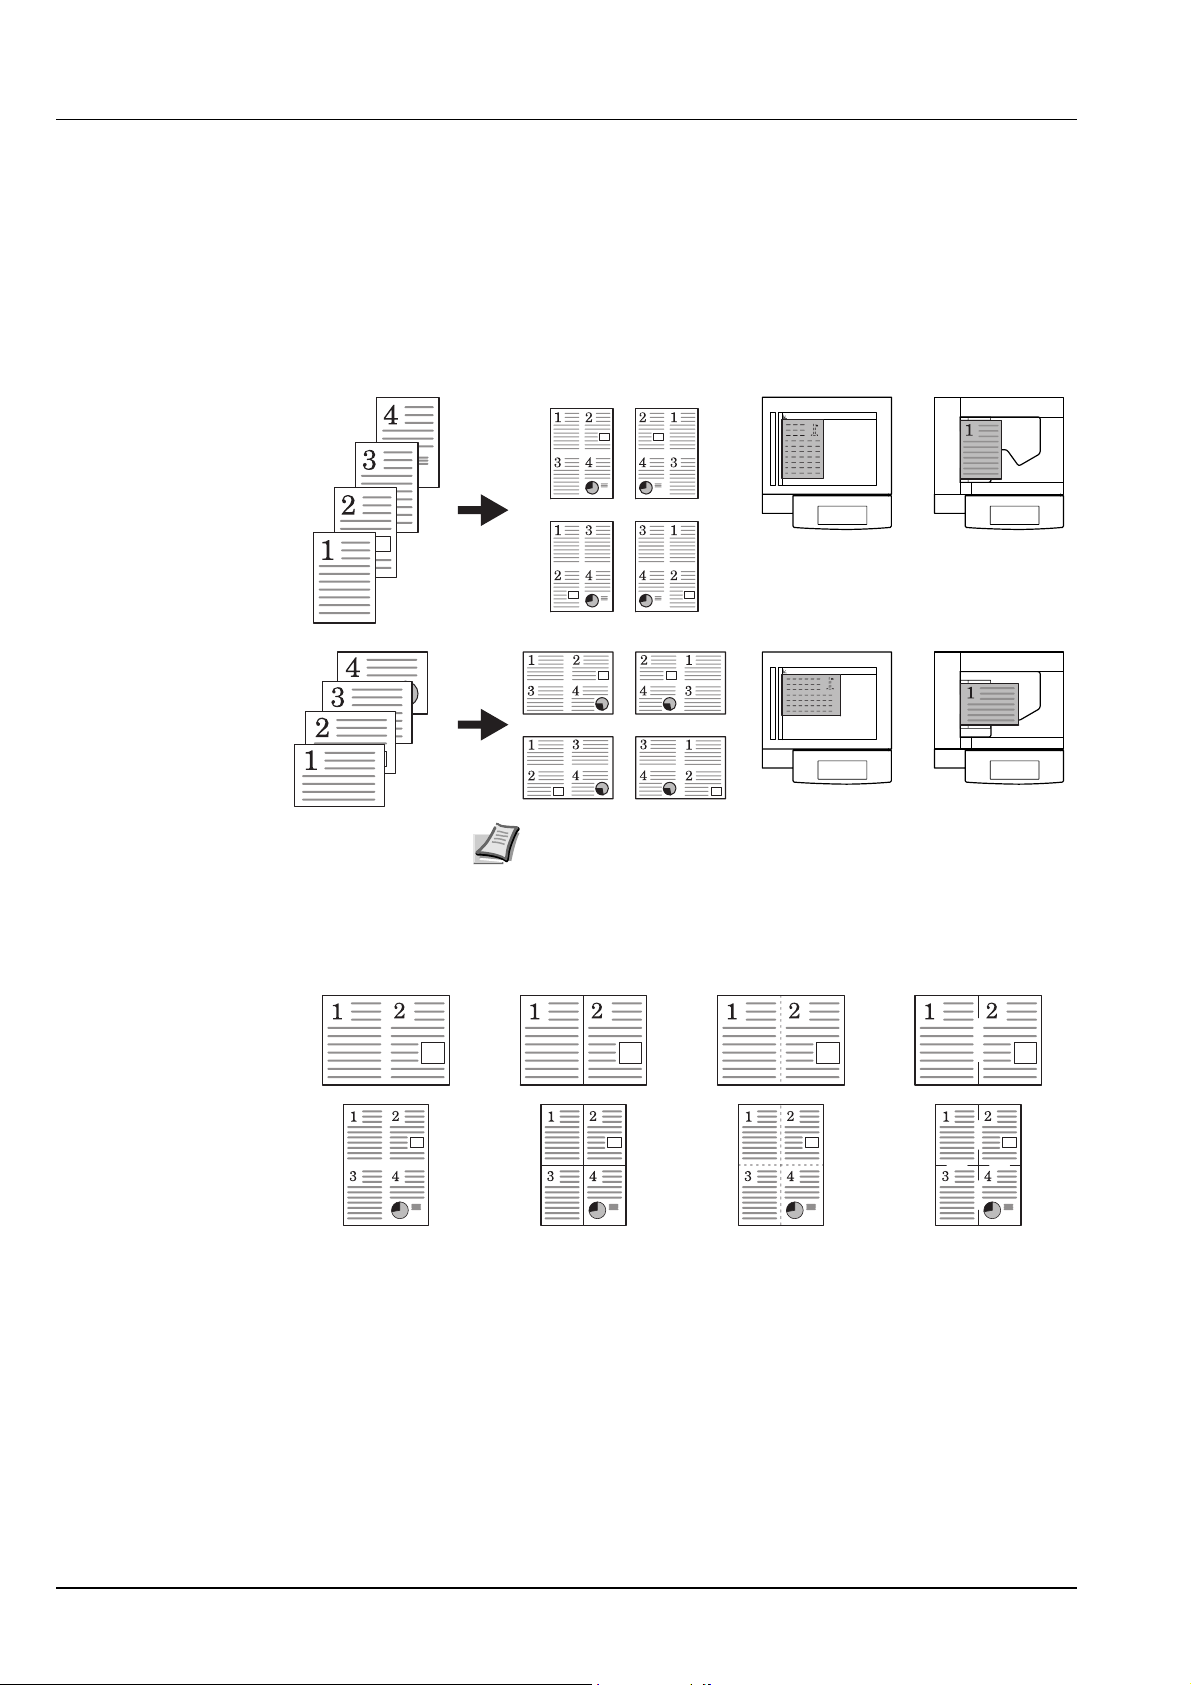
4-in-1 Mode
For copying four originals onto a single sheet. This mode can be used
with Duplex mode to copy eight originals onto one sheet.
The orientations of the original and corresponding output are as follows.
Copy Original Orientation of Original
Platen
Note When placing the original on the platen, copy originals in the
page order.
Types of Page Boundary Lines
Document
processor
Choose from the following options for lines to indicate page boundaries.
None DottedSolid Position
Mark
Follow the steps as below to combine originals.
1 Press [Function].
2 Press [Combine].
1-10 Copy Functions
Page 21

e
e
o
Ready to copy.
o
Combine
Off
2 in 1
4 in 1
Layout
Shortcut
Border line
None
Solid
Dotted
Position
Mar k
3 Press either [2 in 1] ([2-in-1]) or [4 in 1] ([4-in-1]).
4 Select desired page sequence from Layout.
Ba
5 Select the page boundary line from Border line.
Sel
Ori
6 Place the original and press the Start key.
If the original has been placed on the optional document processor,
T
T
copying begins automatically.
If the original is placed on the platen, Scan next original(s) is
displayed. Place the next original and press the Start key.
If all original pages have been scanned, press [Scanning finished].
Copying begins.
Copy Functions 1-11
Page 22
e
e
o
Ready to copy.
o
c
e
e
o
o
Mar gin/Centering
Off
Mar gin
Centering
Front page
(0~¾)
Left
Margin Mode
You can shift the original image to make space on the copy for binding
on the left (right) or top (bottom) side. Margin widths are as follows.
Model Type Range
Inch models 0 - 3/4" (1/8" increments)
Metric models 0 - 18 mm (1 mm increments)
Margin on the Back Side
When duplexing, you can also specify the margin on the back side.
Auto – Automatically sets margins to match the front side setting. When
[Auto] is specified, the left and right margins on the front are reversed on
the back. In other words, when the left margin of the front side is set to
1/2" (10 mm), the back side right margin is set to 1/2" (10 mm). The top
and bottom margin widths on the back will match those on the front.
Separate Front/Back Margins – Enables you to specify the front and
back settings separately.
Note You can set the default margin width. For further details,
refer to Setting Margin Defaults on page 3-8.
Follow the steps as below to use the Margin mode.
1 Place the original so the top edge is aligned with the back or left of
the platen.
2 Press [Function].
3 Press [Margin/Centering].
4 Press [Margin].
5 Press [S], [T], [W] or [X] to adjust the top, bottom, left and right
Shortcut
(0~¾)
"
.0
¼
"
Auto
Back page
margin
Ba
Sel
Ori
margins.
6 For duplex copying, press [Back page margin].
T
T
Ready to copy.
Back page margin
Auto
Front/Back
margin
Back page
(0~¾)
(0~¾)
"
"
7 Press [Auto] or [Front/Back margin].
Ba
Sel
Ori
[Auto] specifies the margin on the back side automatically based on
the front margin.
For [Front/Back margin], press [S], [T], [W] or [X] to adjust the top,
bottom, left and right margins.
8 Depending on the placed original, select [Top Edge Top] or [Top
T
T
Edge Left] from Select Original Orientation.
9 Press the Start key. Copying begins.
1-12 Copy Functions
Page 23
e
e
Ready to copy.
o
o
Mar gin/Centering
Off
Mar gin
Centering
Able to center scanned image on paper.
Shortcut
Centering Originals
When copying onto paper larger than the original size, centers the
original image on the paper.
Follow the steps as below for centering.
1 Place the original so the top edge is aligned with the back or left of
the platen.
2 Press [Function].
3 Press [Margin/Centering].
4 Press [Centering].
5 Depending on the placed original, select [Top Edge Top] or [Top
Ba
Sel
Ori
Edge Left] from Select Original Orientation.
6 Press the Start key. Copying begins.
T
T
Copy Functions 1-13
Page 24
Original Copy
Original Copy
Border Erase
Prevents the appearance of shadows from around the edges of originals.
Choose from the following Border Erase modes.
Sheet Border Erase – Use this mode to erase black borders around the
single sheet original.
Book Border Erase – Use this mode to erase black borders around the
edges and in the middle of the original such as a thick books. You can
specify the widths individually to erase the borders around the edges
and in the center of the book.
Separate Border Erase – Use this mode to specify border widths
individually on all sides to erase.
The border widths that can be set for each mode are as follows.
Ready to copy.
Border Erase
Off
Bord Erase
Sheet
Book
Erase
Individual
BordrErase
Original Copy
Shortcut
(0~2)
Border "
¼
Model Type Range
Inch models 0 - 2" (1/8" increments)
Metric models 0 - 50 mm (1 mm increments)
Note You can set the default width for erasing borders. For further
details, refer to Erasing Borders on page 3-9.
Sheet Border Erase
Follow the steps as below to erase the black borders from around the
edges of the single sheet original.
1 Place the original.
2 Press [Function].
3 Press [Border Erase].
4 Press [Bord Erase Sheet].
5 Press [+] or [–] to set the border erase width.
Ba
With metric models, you can enter the border width directly using the
numeric keys by pressing [#-Keys].
6 Press the Start key. Copying begins.
Book Border Erase
Follow the steps as below to erase the black borders around the edges
of original such as a book.
1 Place the original.
2 Press [Function].
1-14 Copy Functions
Page 25
Ready to copy.
e
e
o
o
e
e
o
o
Border Erase
Off
Bord Erase
Sheet
Book
Erase
Individual
BordrErase
Ready to copy.
Border Erase
Off
Bord Erase
Sheet
Book
Erase
Individual
BordrErase
Border
(0~2)
Ba
Ba
Sel
Ori
T
T
(0~2)
¼ " ¼ "
Top
¼ " ¼ "
Left
Shortcut
¼½
Gutter
""
Shortcut
Bottom
Right
3 Press [Border Erase].
4 Press [Book Erase].
5 Press [+] or [–] to set the Border (outer edges) and Gutter (middle)
border widths.
With metric models, you can enter the border width directly using the
numeric keys by pressing [#-Keys].
6 Press the Start key. Copying begins.
Separate Border Erase
Follow the steps as below to erase the black borders specifying the width
of the borders individually.
1 Place the original so the top edge is aligned with the back or left of
the platen.
2 Press [Function].
3 Press [Border Erase].
4 Press [Individual BordrErase].
5 Depending on orientation of the placed original, select [Top Edge
Top] or [Top Edge Left] from Select Original Orientation.
6 From [Top], [Bottom], [Left] and [Right], select the desired border to
adjust the border width.
Ready to copy.
Individual Border Erase
Top
(0~2)
7 Press [+] or [–] to set the border erase width.
Ba
"
¼
Sel
Ori
With metric models, you can enter the border width directly using the
numeric keys by pressing [#-Keys].
8 Press [Close]. To specify widths of other borders to erase, repeat
steps 6 - 8.
9 Press the Start key. Copying begins.
T
T
Copy Functions 1-15
Page 26
e
e
Ready to copy.
o
o
e
e
o
o
e
e
o
o
Page #
Off
-1-
P.1
1/n
Start Page # Start #
Select
1st page
Finish P ag e #
Last page
Select
last page
Shortcut
Select
start #
Denominator #
Auto
Sel denominat or #
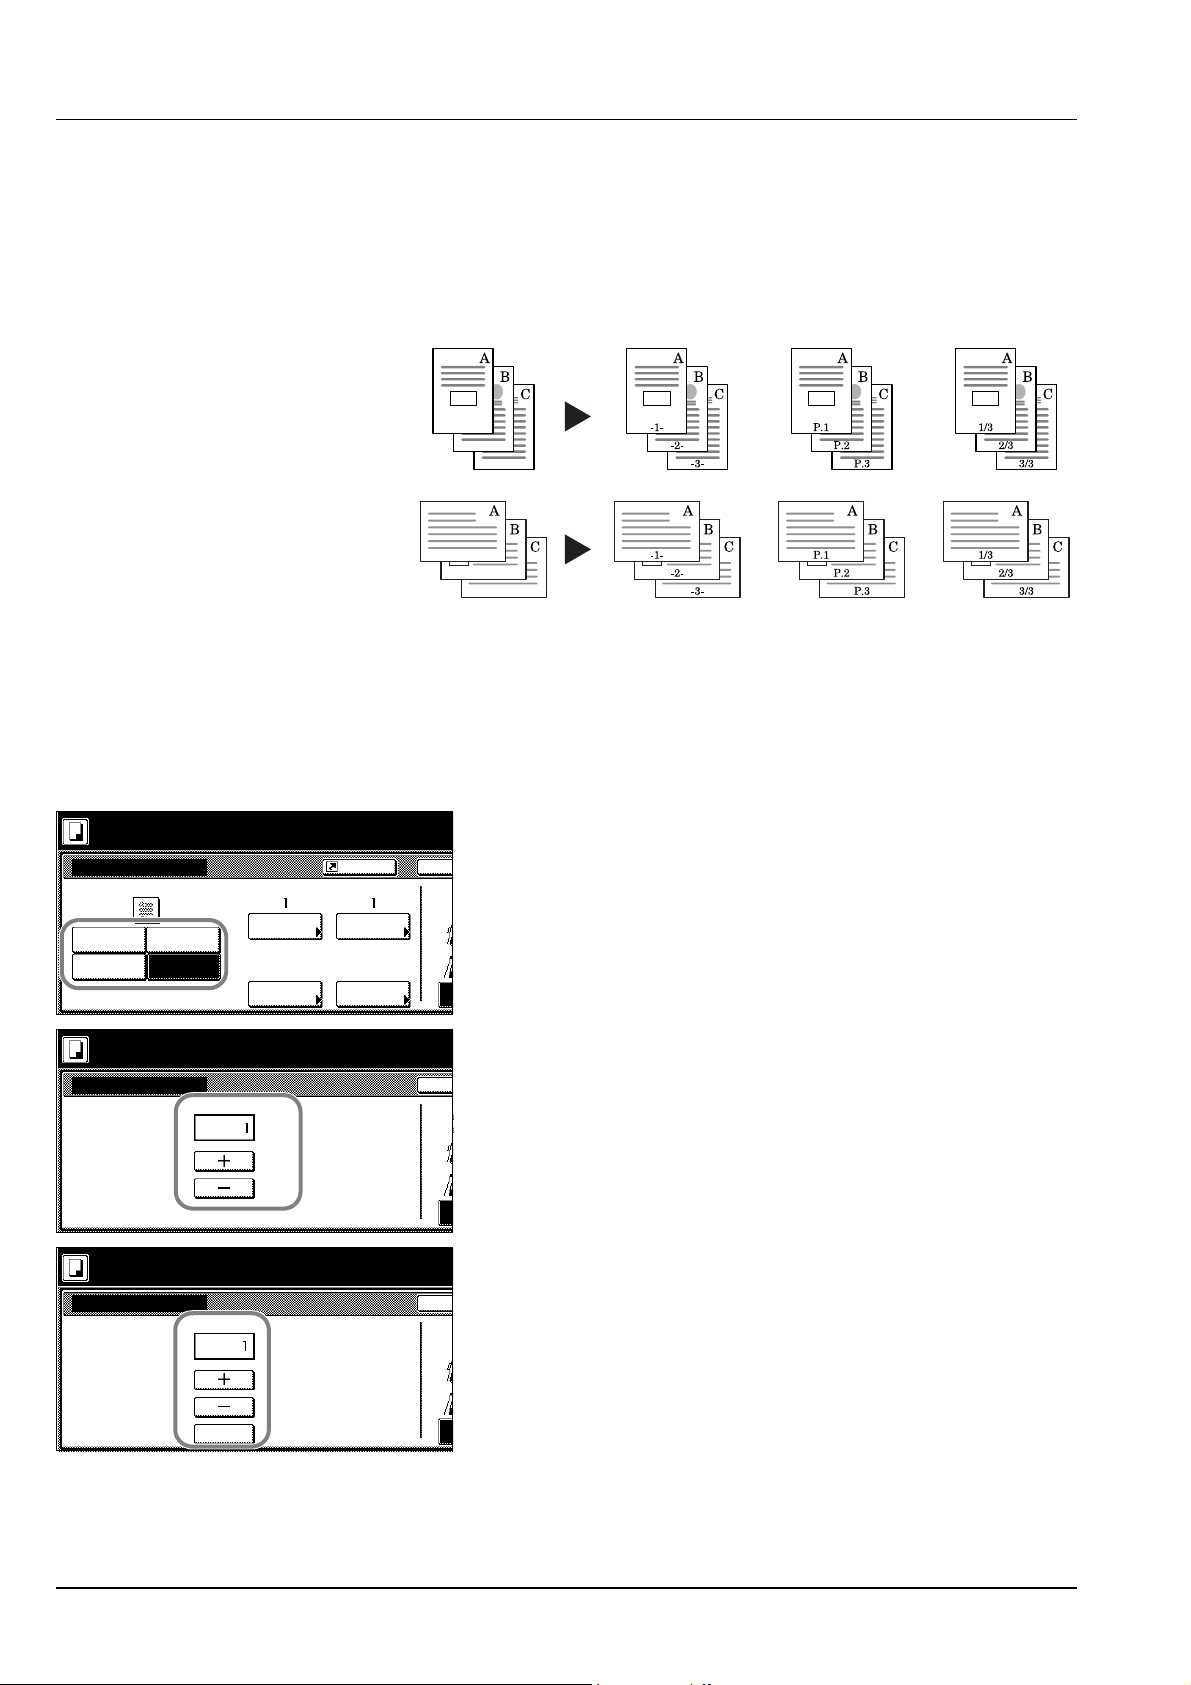
Page Numbering
Numbers multi-page originals in sequential order. The formats of
numbering include: [- 1 -], [P. 1], or [1/n]. [1/n] prints the total number of
pages in the place of ‘n’.
The page number will be centered at the bottom of the page.
Original [- 1 -] [P. 1] [1/n]
Follow the steps as below for page numbering.
1 Place the original so the top edge is aligned with the back or left of
the platen.
2 Press [Function].
3 Press [Page #] ([Page numbering]).
4 Select the page stile from [- 1 -], [P. 1], or [1/n].
5 To start page numbering from the page other than the first page,
Ba
Sel
Ori
T
T
press [Select 1st page] ([Setting 1st page]).
Ready to copy.
Select 1st page
Ready to copy.
Select start #
( 1~10)
( 1~999)
# keys
Page
6 Press [+] or [–] to select the starting page and press [Close].
7 To specify the starting a number other than 1, press [Select start #]
Ba
Sel
Ori
T
T
([Setting Start page]).
8 Press [+] or [–] to select the starting page and press [Close].
Ba
Sel
Ori
T
T
Press [# keys] ([#-Keys]) to enter with numeric keys.
9 To specify the page to end numbering, press [Select last page]
([Setting last page]).
1-16 Copy Functions
Page 27
e
e
Ready to copy.
o
o
e
e
o
o
Select last page
Auto
Manual
( 0~-10)
Page
10Press [Manual].
11Press [+] or [–] to select the starting page and press [Close].
Ba
12For [1/n], to manually set the number for ‘n’, press [Sel denominator
Sel
Ori
T
T
#] ([Set Denomin. #]).
Ready to copy.
Select denominator #
Auto
Manual
( 1~999)
# keys
13Press [Manual].
14Press [+] or [–] to select the number for ‘n’ and press [Close].
Ba
Sel
Ori
Press [# keys] ([#-Keys]) to enter with numeric keys.
15Depending on the placed original, select [Top Edge Top] or [Top
Edge Left] from Select Original Orientation.
16Press the Start key.
T
T
If the original has been placed on the optional document processor,
copying begins automatically.
If the original is placed on the platen, Scan next original(s) is
displayed. Place the next original and press the Start key.
If all original pages have been scanned, press [Scanning finished].
Copying begins.
Copy Functions 1-17
Page 28
r
Ready to copy.
Cover
No cover
Front
cover
Front Cvr
+ Back Cvr
Shortcut
Automatically adds co
set using paper (colo
from a di fferent casse
Load the pap e r for
specified cassette.
Cover Mode
Use a distinctive front and/or back cover. Change the paper source and
copy the first and last page of the original onto colored or thick paper.
Cover sheet types Description
Front cover Copies the first page of the original onto
cover sheet specified paper as the cover
page.
Front Cvr + Back Cvr Copies the first page and last page of the
original onto cover sheet paper as back and
front covers.
Paper for the cover page is fed from the MP tray. To supply cover paper
from a cassette, refer to Specifying Paper Source for Cover on page 3-6.
For duplex copying, The cover page is also printed on both sides.
Follow the steps as below for adding covers.
1 Place the original.
2 Press [Function].
3 Press [Cover].
4 Press [Front cover] or [Front Cvr + Back Cvr].
5 Press the Start key.
Ba
If the original has been placed on the optional document processor,
copying begins automatically.
If the original is placed on the platen, Scan next original(s) is
displayed. Place the next original and press the Start key.
If all original pages have been scanned, press [Scanning finished].
Copying begins.
1-18 Copy Functions
Page 29
Original Copy
e
e
o
o
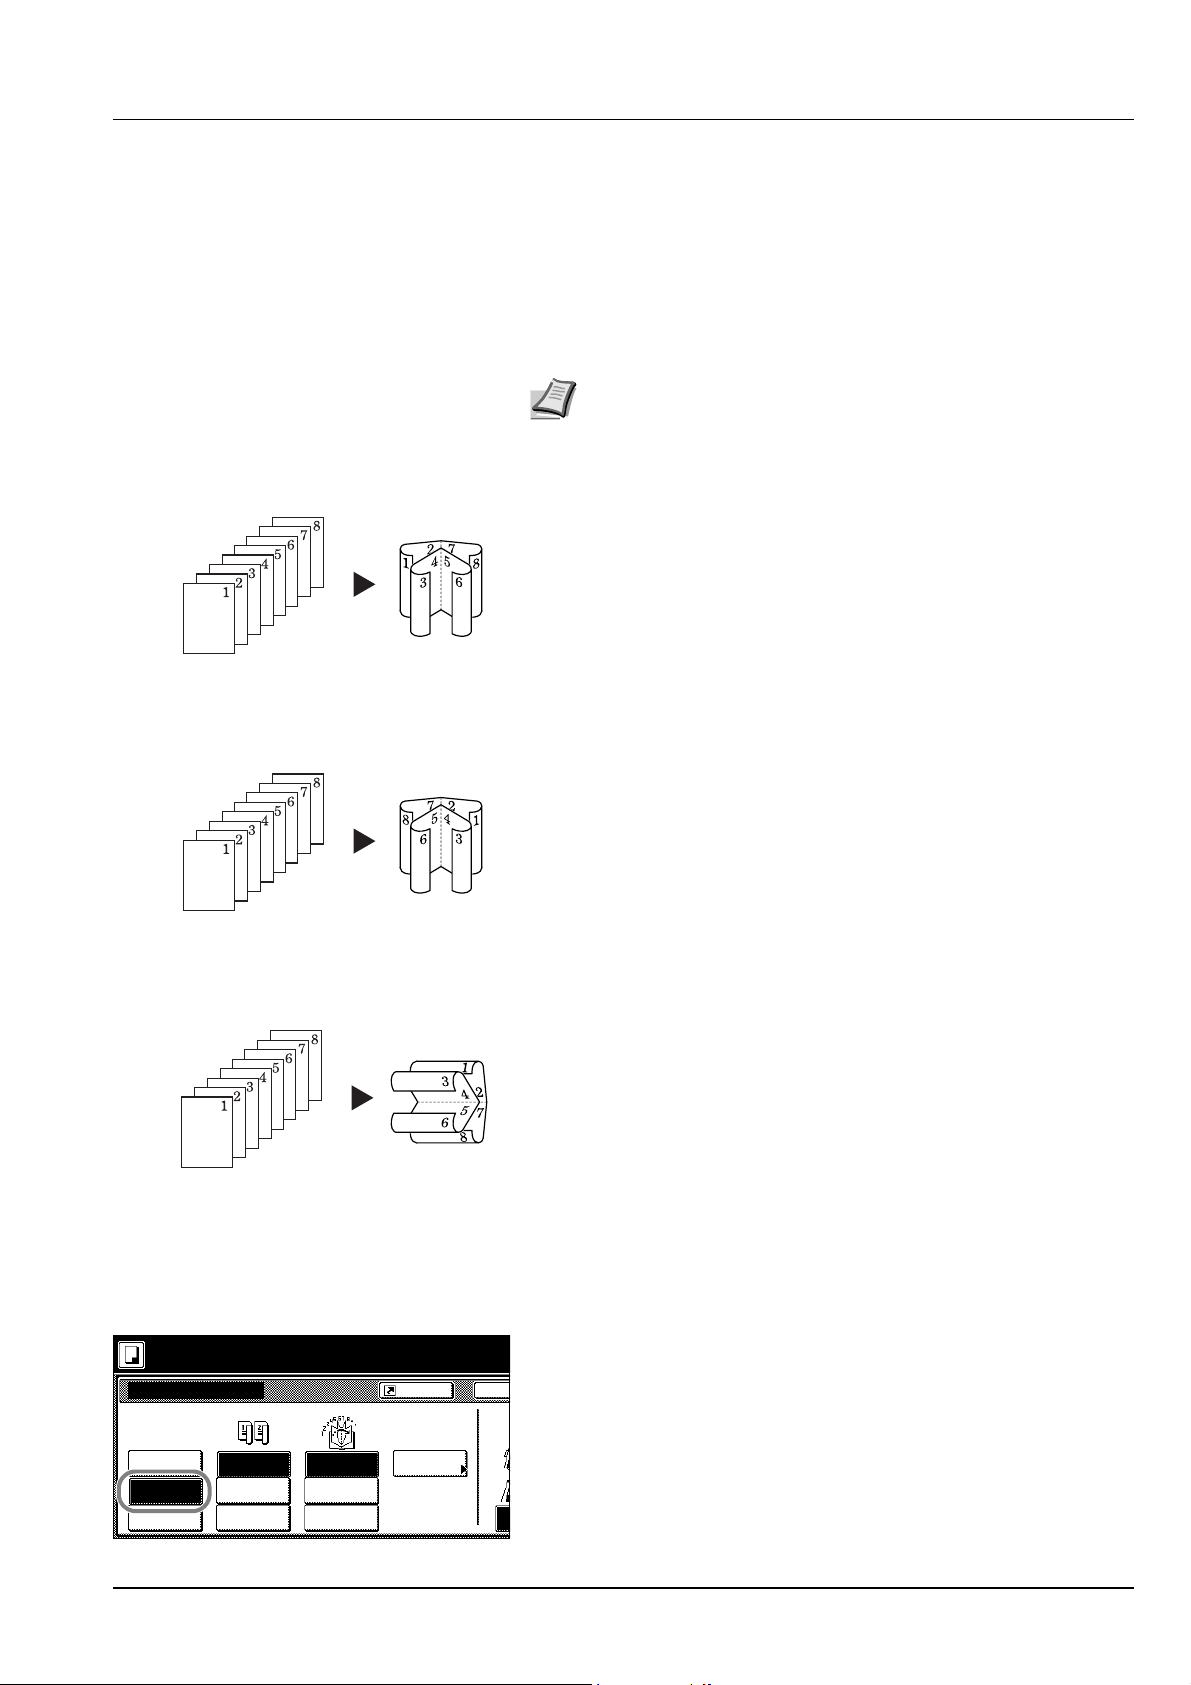
Booklet from Sheets
Delivers booklet of two-sided copies with facing pages from one-sided or
two-sided originals. Booklets such as magazines can be created by
folding at the center. Also, thick paper or colored paper may be inserted
as a cover page.
Paper for the cover page is fed from the MP tray. To supply cover paper
from a cassette, refer to Specifying Paper Source for Cover on page 3-6.
Note Paper sizes available for booklet (sheet original) are limited
to 11 × 17", 8 1/2 × 14", 11 × 8 1/2", 8 1/2 × 11", A3, B4, A4, A4R,
B5 and B5R.
For binding on the left side
The folded copies can be read from left to right.
For binding on the right side
2 sided mode.
Booklet
Off
Booklet
Book
J
Booklet
Original Copy
Original Copy
Original
1 sided
2-sided
Left/Right
2-sided
Top/Bottom
Finishing Stitching
Binding
Left
Binding
Right
Binding
Top
Shortcut
Off
Stitching
Front cvr
The folded copies can be read from right to left.
For top binding
The folded copies can be read from top to bottom.
Follow the steps as below for these booklet types.
1 Press [Function].
2 Press [Booklet].
3 Press [Booklet].
4 Select binding orientation for Original and Finishing.
Ba
Sel
Ori
If the message Cannot copy with these settings. Modify settings
according to the original and finishing is displayed, verify that you
are selecting the correct original orientation (shown at the right of the
touch panel) and the correct settings for the original and finished
copies.
T
T
Copy Functions 1-19
Page 30

2 sided mode.
Stitching Front Cvr
Off
On
Automatically adds co
binding mode using p
thick) fed from a diffe
Load the paper for
specified cassette.
5 To insert a cover page, press [Stitching Front cvr] ([Stitching Front
cov.]).
Ba
Press [On] and press [Close].
6 Place the original and press the Start key.
Note When using the platen, be sure to place the originals in
page order.
If the original has been placed on the optional document processor,
copying begins automatically.
If the original is placed on the platen, Scan next original(s) is
displayed. Place the next original and press the Start key.
If all original pages have been scanned, press [Scanning finished].
Copying begins.
1-20 Copy Functions
Page 31

e
p
Set first page.
e
p
Press Start key.
Booklet
Off
Booklet
Book
J
Booklet
Origin a l Finis hing Copy fro nt
Book
Left
Book Binding
Right
Binding
Left
Right
Shortcut
Copy on
front cvr
Booklets from Facing Pages
Copies book originals to booklets consisting of two-sided copies with
facing pages. Booklets such as magazines can be created by folding at
the center. Also, thick paper or colored paper may be inserted as a cover
page.
You can change the cassette set as the paper to be used for the cover
page. For further details, refer to Specifying Paper Source for Cover on
page 3-6.
Note Original sizes that can be used with Booklets from Facing
Pages are limited to 11 × 17", 8 1/2 × 11", A3, B4, A4R, B5R, A5R,
8K, and output paper size is limited to 11 × 17", 8 1/2 × 14",
11 × 8 1/2", 8 1/2 × 11", A3, B4, A4, A4R, B5 and B5R.
Follow the steps as below for these booklet types.
1 Place the book original and press [Function].
2 Press [Booklet].
3 Press [BookJBooklet].
4 Select the original and finished types.
Ba
S
Off
to
Set cover page.
Press St a rt key.
Copy on front cover
Off
On
Wh e n selecting ON for copying on the
front cover, follow the instruction.
1.Scan f ront cover book original.
2.Start s can book originals.
5 To insert a cover page, press [Copy on front cvr] ([Copy on front
cov.]).
Ba
S
to
Press [On] and press [Close].
6 Press the Start key. Scanning of the original begins.
Scan next original(s) is displayed. Place the next original and press
the Start key.
If all original pages have been scanned, press [Scanning finished].
Copying begins.
Copy Functions 1-21
Page 32

Original Copy
Memo Mode
Makes copies with a space for adding notes. You can also copy two
originals onto the same sheet with a space for notes.
Note Memo page mode supports 11 × 17", 11 × 8 1/2",
8 1/2 × 11", A3, B4, A4, A4R, B5, B5R, 8K, 16K and 16KR page
sizes.
Layout A
Reduces images of one original page for copying onto half of a single
page, leaving the other half blank for notes.
Layout B
Reduces images of two original pages for copying onto half of a single
page, leaving the other half blank for notes.
Original Copy
Types of Page Boundary Lines
Choose from the following options for lines to indicate page boundaries.
None DottedSolid
Follow the steps as below for Memo mode.
1 Press [Function] and then press [T Down].
2 Press [Memo Pages].
Position
Mark
1-22 Copy Functions
Page 33

e
e
Ready to copy.
o
o
Memo Pages
Off
Layout A
Layout B
Layout
Shortcut
Border line
None
Solid
Dotted
Position
Mar k
3 Press [Layout A] or [Layout B].
4 Select desired page sequence from Layout.
Ba
5 Select the page boundary line from Border line.
Sel
Ori
6 Place the original and press the Start key.
If the original has been placed on the optional document processor,
T
T
copying begins automatically.
If the original is placed on the platen, Scan next original(s) is
displayed. Place the next original and press the Start key.
If all original pages have been scanned, press [Scanning finished].
Copying begins.
Copy Functions 1-23
Page 34

n
Place originals then press S tart key.
u
e
Continuous Scan
Off
On
Ready to Proof Copy.
Proof Copy
Shortcut
Copy images from Do
platen for output as o
Shortcut
Continuous Scan
Scans multiple originals for a single copy job without using the optional
document processor. Divide the original into smaller sets and scan each
set with the document processor. In Continuous Scan mode, you can
continue scanning originals until you press [Scanning finished].
Follow the steps as below to use continuous scan.
1 Press [Function].
2 Press [Continuous Scan].
3 Press [On].
4 Place the original and press the Start key.
Ba
Place the next original and press the Start key. Scan the remaining
original pages in the same manner.
When done, press [Scanning finished]. Copying begins.
Proof Copy
Make a test copy of a single set to verify settings before printing the
remaining sets. If a problem is found, avoid wasting paper canceling the
remaining copy job.
Follow the steps below to do a Proof copy job.
1 Press [Function] and then press [T Down].
2 Press [Proof Copy].
3 Press [On].
4 Place the original and press the Start key. The proof copy begins.
Ba
Off
On
Check pr oof copy.
To stop and retry, press Cancel key.
To continue to print, press Start k ey.
Orig. Page
11×8½"
Job
1 sided
Top Edge
APS
Count/Set
11×8½" Plain
Monochrome, 1 side
Collate
Proof copy outp uts on
Outp
Top
Chang
Preset
5 After printing a single test copy, a confirmation screen will be
displayed, and the copier will remain in standby mode until the job is
approved or cancelled. Check the proof copy.
If it is acceptable, press the Start key. The remaining sets will be
printed.
To change the copy quantity, press [Change Preset] and change the
copy count.
If there is a problem with the copy, press [Cancel] to redo the copy
settings.
1-24 Copy Functions
Page 35

-
Ready to copy.
Repea t Copy
Shortcut
Repeat Copy
Set Repeat Copy to enable printing additional sets if required after copy
completion.
Note Only one job can be stored for repeat copying. If you store a
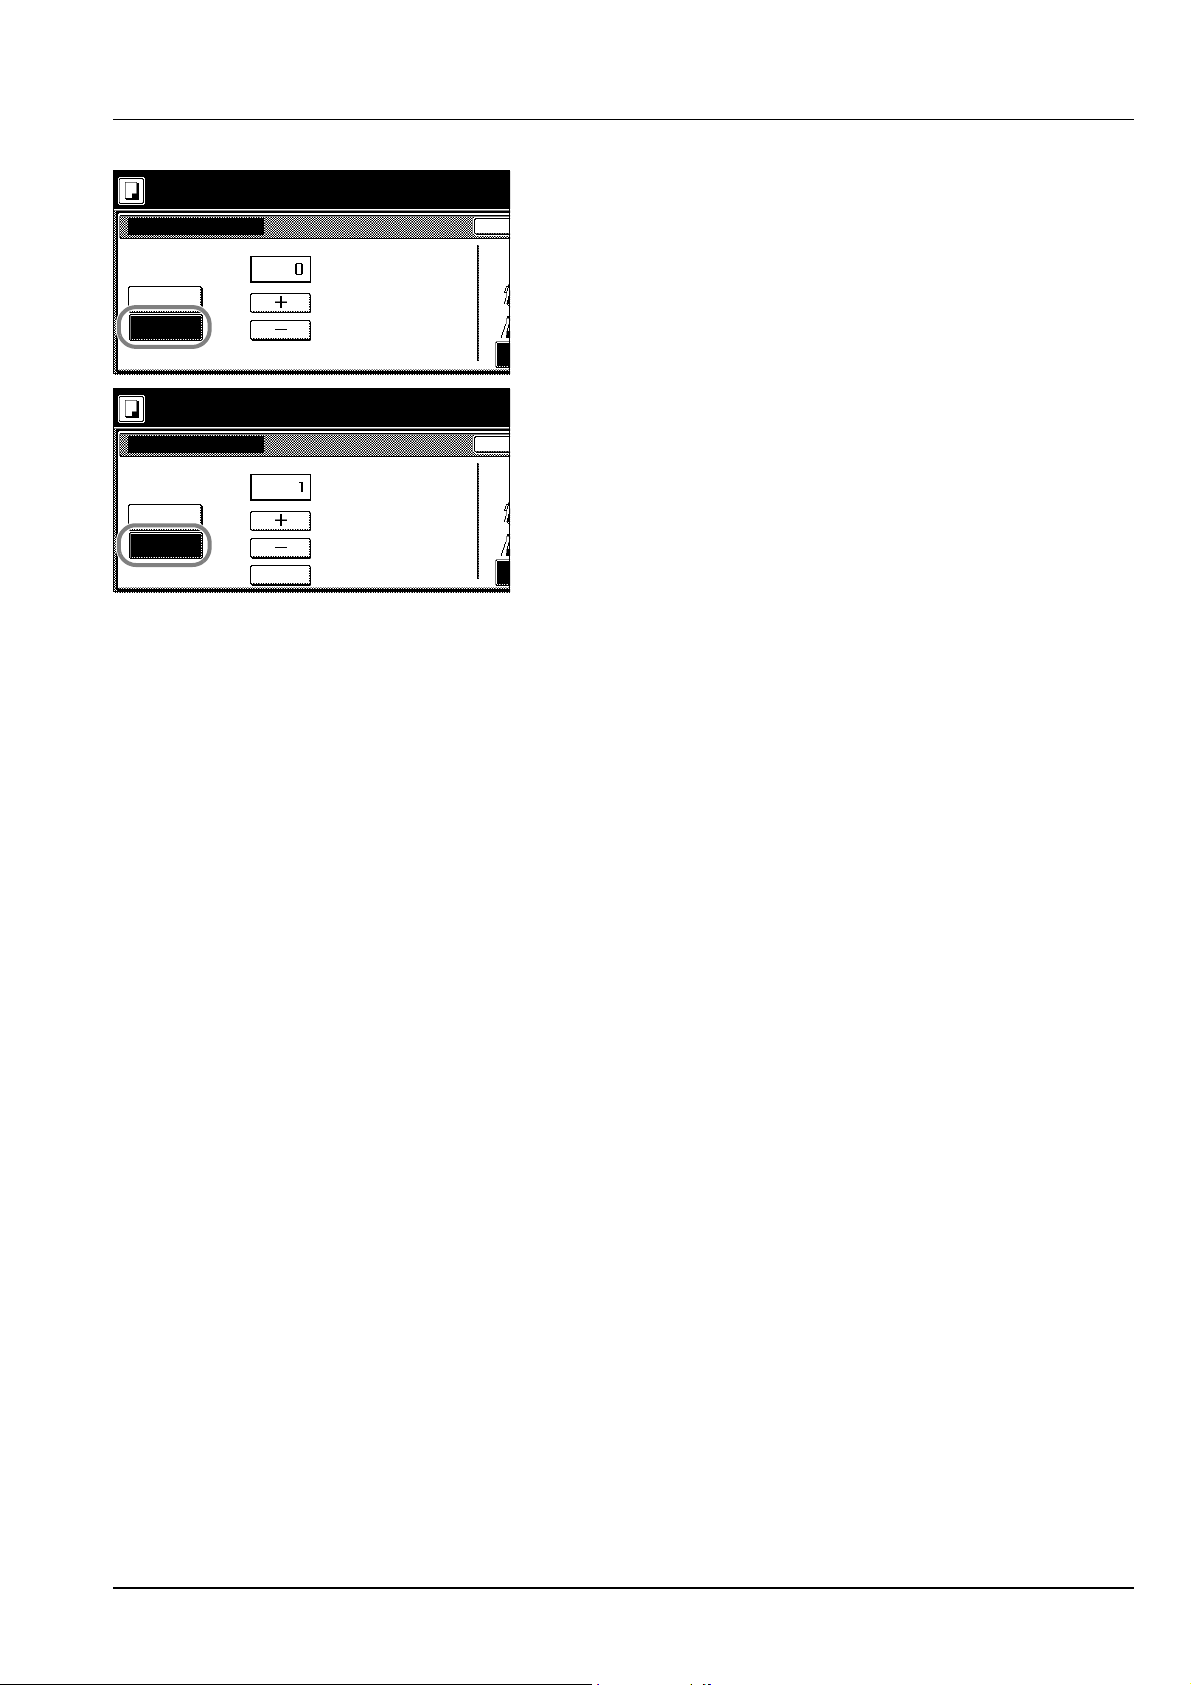
new Repeat Copy job, the data for the previous job is deleted.
Repeat Copy job is deleted when the main power is switched off.
It is also possible to disable Repeat Copy or configure Repeat
Copy in default settings mode. For further details, refer to
Enabling Repeat Copy on page 3-9.
Preparing a Job for Repeat Copy
Configure Repeat Copy as shown below.
1 Press [Function] and then press [T Down].
2 Press [Repeat Copy].
3 Press [On].
4 Place the original and press the Start key. Copying begins and the
Ba
job is stored as a Repeat Copy job.
Off
On
When sele ct [On], job
You can recall and re
Repeat Copy Output
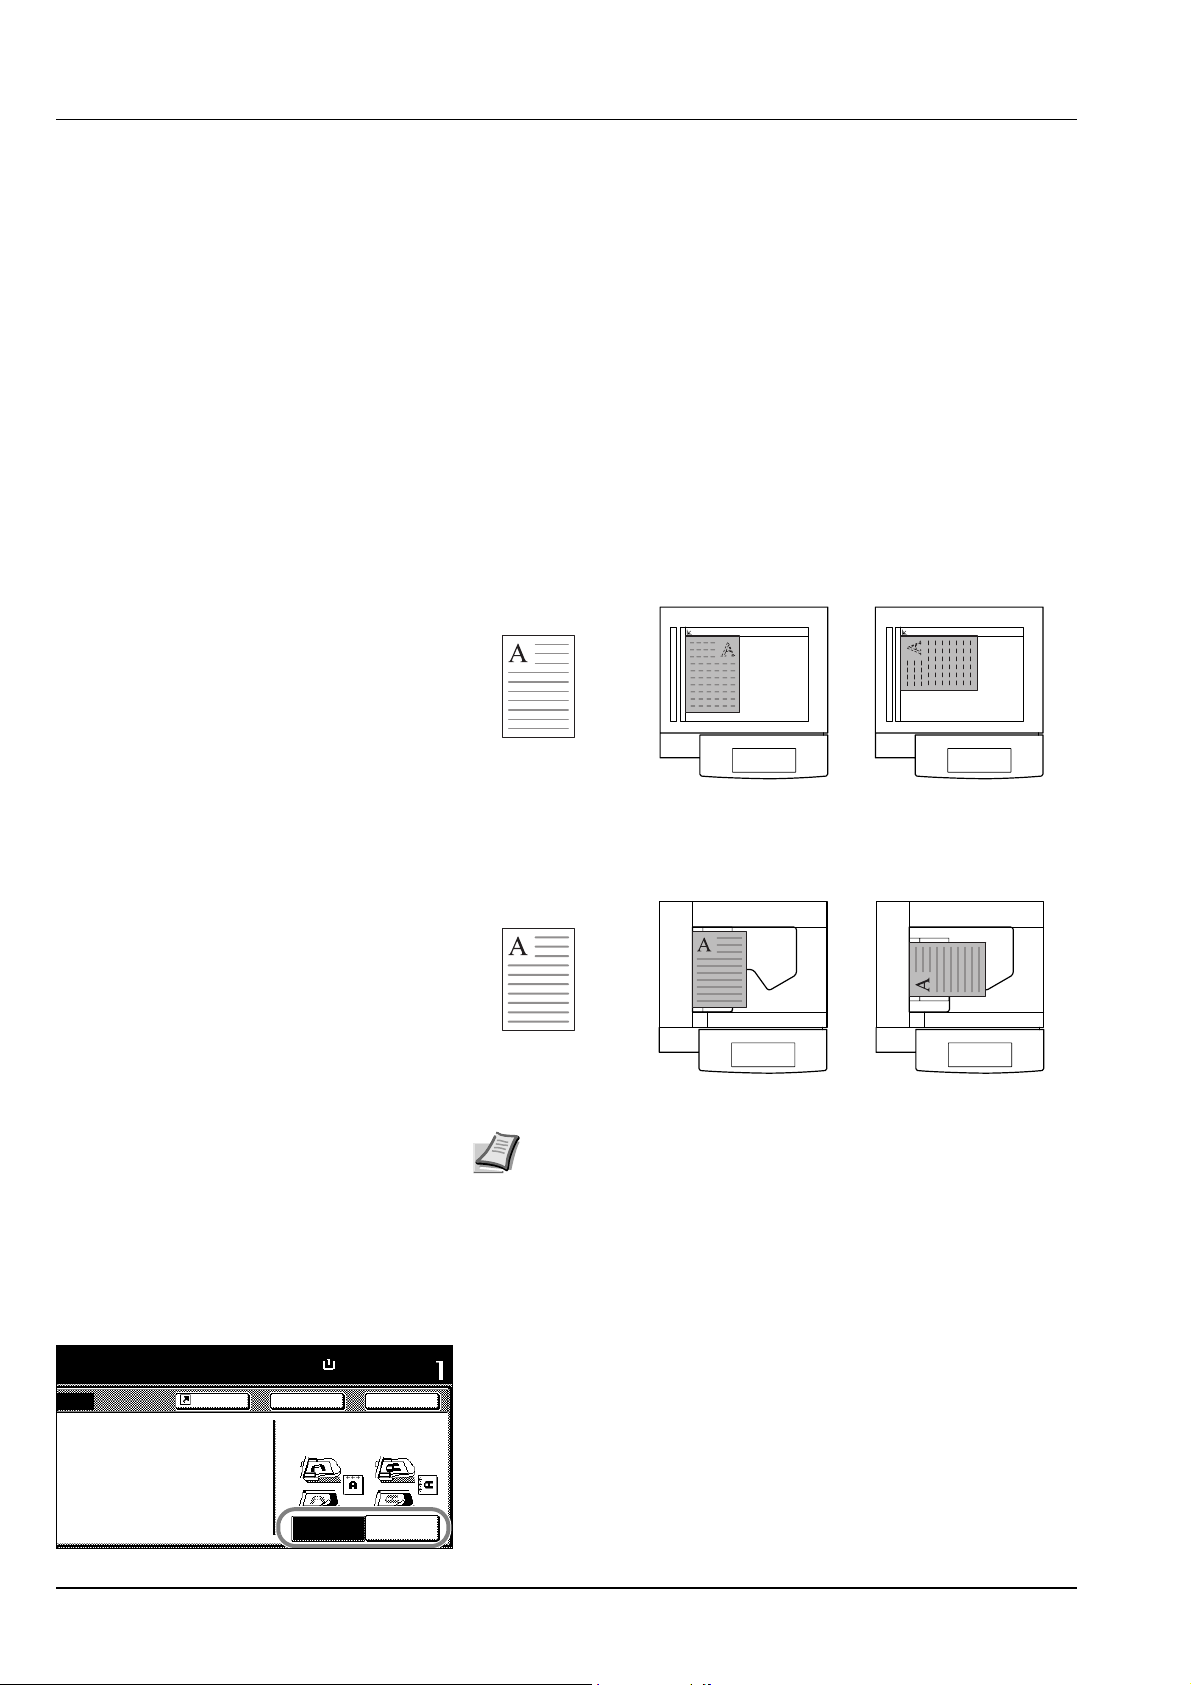
Press the Repeat Copy key to display the Check Details/Reprint screen
and review the details of stored job. You can then reprint stored job
entirely, print just the first page or delete the job.
Re-Printing Jobs
Follow the steps as below to reprint a Repeat Copy job.
1 Press the Repeat Copy key.
2 Press [Reprint].
11×8½"
Top tray
Details
Print
from 1st
Close
Delete
Reprint
Copy Functions 1-25
Page 36

11×8½"
Top tray
Details
Stop
3 Press [+] or [–], or use the numeric keys to set the number of copies.
4 Press [Printing]. Printing begins.
Set
Printing
Printing the First Page
This function allows you to check Repeat Copy job by printing just the
first page.
1 Press the Repeat Copy key.
2 Press [Print from 1st] ([Head Print]). The first page of the Repeat
Copy job is printed.
Print
from 1st
Close
Delete
Reprint
11×8½"
Top tray
Details
Print
from 1st
Delete
Reprint
Close
Deleting Repeat Copy Job
Follow the steps as below to delete stored Repeat Copy job.
1 Press the Repeat Copy key.
2 Press [Delete].
3 Press [Yes] to delete the job.
1-26 Copy Functions
Page 37

b
Ready to copy.
Auto I mage Rotation
Shortcut
Auto Image Rotation
Copies the original image rotated clockwise 90 digress if set original and
the paper loaded into the cassette are the same size but different
orientations.
Note Set whether to enable or disable Auto Image Rotation mode
in default settings mode. For further details, refer to Selecting Auto
Image Rotation on page 3-8.
Auto Image Rotation mode supports 11 × 8 1/2", 8 1/2 × 11",
5 1/2 × 8 1/2", A4, A4R, A5R, B5, B5R, B6R, 16K and 16KR
paper sizes only.
Follow the steps as below to use Auto Image Rotation.
1 Press [Function] and then press [T Down].
2 Press [Auto Image Rotation].
3 Press [On].
Ba
Auto Image Rotation is enabled.
Off
On
Wh e n original and pa
direc tion, ima g e will
Copy Functions 1-27
Page 38

c
Ready to copy.
t
a
Output Tray
Shortcut
Selecting Output Destination
The optional job separator, document finisher or built-in finisher can be
specified as copy output destinations.
Paper Output Description
Top tray Outputs to the top tray of the machine.
Job Sep. Tray Outputs to the optional job separator.
Finisher tray Outputs to the optional document finisher tray or
built-in finisher tray.
Note Requires the optional job separator, document finisher or
built-in finisher.
Change the default destination for copies in default settings
mode. For further details, refer to Selecting Output Destination on
page 3-18.
Follow the steps as below to select the output destination.
1 Press [Function] and then press [T Down].
2 Press [Output Tray].
3 Select the output destination.
4 Place the original and press the Start key. Copying begins.
Ba
.
e saves toner.
lighter.
Job Sep.
Tray
Top tray
Finisher
tra y
Shortcut
Paper Size
100%
Back
EcoPrint
Conserve toner
consumption.
Image i s light.
Select proper output tray
mixing jobs.
You can confirm output tr
management.
Set
11×8½"
Close
EcoPrint
Set EcoPrint mode to save toner consumption. Use this mode when
high-quality copying is not required (e.g., when making test copies).
Note The image may appear lighter.
Follow the below steps to configure EcoPrint.
1 Press [Function] and then press [T Down].
2 Press [EcoPrint].
3 Press [On]. EcoPrint is enabled.
Off
1-28 Copy Functions
On
Page 39

a
.
Ready to copy.
Negative Image Copying
Copies the black and white negative (reversed) images of black and
white originals.
Follow the steps as below for negative image copying.
1 Press [Function] and then press [T Down].
2 Press [Negative Image].
3 Press [On]. Negative image copying is enabled.
Negative Imag e
Off
On
Ready to copy.
Mirro r I mage
Off
On
Shortcut
Copy the scanned im
black and white parts
Shortcut
Creates Mirror Image
Ba
Mirror Copying
Copies mirrored images of the original.
Follow the steps as below for Mirror Copying.
1 Press [Function] and then press [T Down].
2 Press [Mirror Image].
3 Press [On]. Mirror copying is enabled.
Ba
Copy Functions 1-29
Page 40

Original Copy
o
m
f
Mixed Size Originals Mode
Using the optional document processor, the originals of different sizes
can be loaded in a batch and copied. The size of each original page is
automatically detected and each original is automatically printed to the
matching paper size or all originals printed are on the same size output
paper.
Note This operation requires the optional document processor.
Up to 30 sheets can be loaded in to the document processor at
once for Mixed Size Originals mode.
The following paper sizes can be used.
Inch models: 11 × 8 1/2" and 11 × 17", 8 1/2 × 14" and 8 1/2 × 11"
Metric models: A3 and A4, B4 and B5
Mixed Size Copies
Each copy is the same size as the original.
Original Copy
Ready to copy.
Mixed Size Or igi nals
Off
Mixed Size
Copies
Same Sized
Copies
1st pg. Orig
8½×11"/
11×8½"
8½×14"/
11×17"
Shortcut
Able to scan mix size
one time using Doc u
and copy them in uni
Same Sized Copies
All originals are output on a single size copy.
Follow the steps as below for Mixed Size Originals mode.
1 Place originals in document processor.
2 Press the Mixed Sized Originals key.
3 Press [Mixed Size Copies] or [Same Sized Copies].
Ba
For [Same Sized Copies], select the size of the first original page
and press [Close]. Select the paper tray from the [Basic] screen.
Note In order to correctly set the finished bind direction, set
the size of the first page of the original.
4 Press the Start key. Copying begins.
1-30 Copy Functions
Page 41

Regis ter present setting
e
g
m
Select program number.
Programmed Copying
Press the program number (1 to 8) to recall the program. After
registering sets of frequently used functions as a single program, you
can simply press the program number as needed to recall those
functions. You can also name the programs to identify them.
Registering Programs
Follow the steps as below to register a program.
1 Access the copy mode you would like to register and press
[Program].
2 Press [Register].
3 Press the number (1 to 8) of the program to register.
4 Enter the program name and press [End].
No registration
No registration
No registration
No registration
Ready to copy.
Recall
abc
list a
list b
list c
Registration name change
Select the number for changing name.
No registration
No registration
No registration
No registration
list d
file 1
file 2
Note Refer to the Operation Guide for how to enter text
characters.
5 Press [Yes]. The program is registered.
Using Programs to Copy
Press the number (1 to 8) of the program to use for copying.
1 Press [Program].
2 Press the button for the desired program number (1 to 8).
3 Place the original and press the Start key. Copying begins using the
Re
Reg
Del
Cha
Na
Progra mFunctionUser ch o iceBasic
configured program.
Editing Program Names
Follow the steps as below to edit the names assigned to registered
programs.
1 Press [Program].
2 Press [Change Name].
3 Press the number (1 to 8) of the program to rename.
4 Re-enter the program name and press [End].
abc
list a
list b
list c
list d
No registration
file 1
file 2
5 Press [Yes]. The modified program name is saved.
Note Refer to the Operation Guide for how to enter text
characters.
Copy Functions 1-31
Page 42

Delete registrat i o n
Select the number of program to delete.
Deleting programs
Follow the steps below to delete saved programs.
1 Press [Program].
2 Press [Delete].
3 Press the number (1 to 8) of the program to delete.
4 Press [Yes]. The program is deleted.
abc
list a
list b
list c
list d
No regist ration
file 1
file 2
1-32 Copy Functions
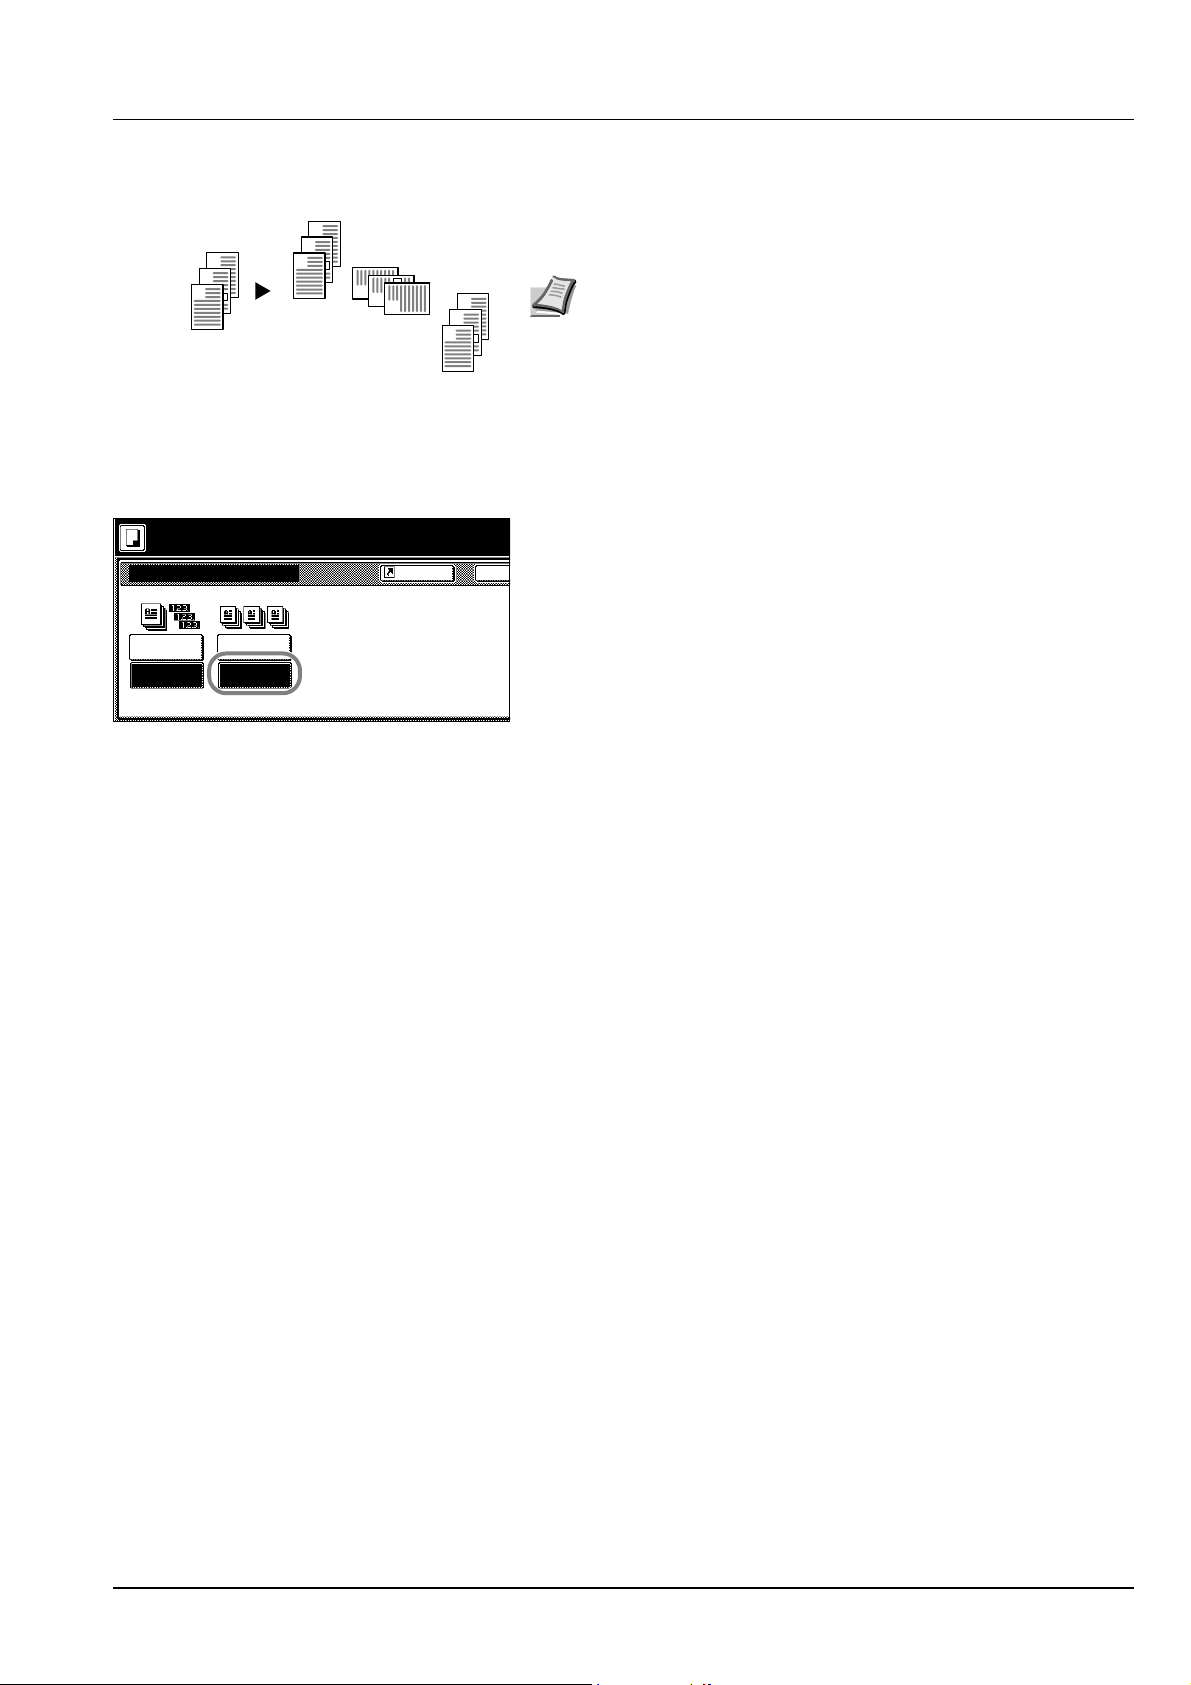
Page 43

e
e
o
Ready to copy.
o
Combine
Off
2 in 1
4 in 1
Layout
Shortcut
Border line
None
Solid
Dotted
Position
Mar k
Assigning Register Keys
Assigns three frequently used functions listed on the [Function] screen to
assign keys. Functions may also be assigned from the [Basic] screen or
[User choice] screen.
Assigning Register Keys
Follow the steps as below to assign register keys.
Note To assign a register key, first set Showing the Register Key
on page 3-10 to [On].
1 Open the function you would like to assign.
2 Press [Shortcut] ([Register]).
Ba
Sel
Ori
3 Press [Register].
T
T
Note Functions in which [Shortcut] ([Register]) is displayed
may be assigned register keys.
Regis ter present setting
Select the number of program to registered.
No
registrat.
No
registrat.
No
registrat.
Delete registrat ion
Select the number of pro gram to dele te.
4 in 1
Mar gin
Left
Bord Erase
Sheet
4 Press the number (1 to 3) to be assigned.
5 Press [Yes]. The registered register keys will be displayed at the
right of the [Basic] screen.
Deleting Register Keys
Follow the steps as below to delete Register keys.
1 Press the Register key display the assigned function.
2 Press [Shortcut] ([Register]) to display Create Shortcut (Register).
3 Press [Delete].
4 Press the number (1 to 3) you would like to delete.
5 Press [Yes]. The register key is deleted.
Copy Functions 1-33
Page 44

Job Build
Job Build allows you to scan originals in several separate steps and copy
at once. In each step of the scanning process you can specify different
settings (such as zooming and border erase) and you can specify
different types of originals. Other examples include inserting a blank
sheet between sets of copies from each step and specifying a front cover
page during a duplexing step.
Job Build Procedure
This procedure describes how to use a job build for the following
example.
Example
<Finished Copies>
Pages marked with * are blank, pages shown in gray are colored paper.
<Originals>
Ready to Job build.
Place originals then press S tart key.
Job Build
11×8½"
Paper
Selection Type
Offset
Finished
Basic Quality
Step
-
1 sided
Original
Auto %
Zoom
1 sided Copy
1 sided/
2 sided
Top Edge Top
Original
Orient.
Edit
1 sided copy-Left
Finished p ag e #:
Note In this example, color paper to be used for the cover page is
set in the MP tray and regular paper is loaded in Cassette 1.
Open the Job Build Screen. Step 1:
1 Press the Job Build key.
Settings Common to All Steps
Sets Duplexing and Repeat Copy.
Note Set Repeat Copy to increase number of sets later as
needed.
Other settings not used in this example may also be configured
here. For further details, refer to Setting Functions on page 1-37.
2 Press [1 sided/2 sided] ([1-sided/2-sided]).
1-34 Copy Functions
Page 45

e
e
Ready to Job build.
o
o
b
e
Place originals then press Start key.
1 sided/2 sided Copy
1 sided
Copy
2 sided
Copy
Finishing
Binding
Left
Binding
Right
Binding
Top
3 Press [2 sided Copy] ([2-sided Copy]), and from Finishing select
[Binding Left] and press [Close].
Ba
Sel
Ori
T
T
Ready to Job build.
Place originals then press Start key.
Job Build
Border
Erase Copy
Centering
Repea t Copy
Off
On
-
Step
Off
Basic Quality
Ready to Job build.
Place originals then press Start key.
Auto
Original
Size
Page #
OffOff
Repeat
Top tray
OutputMar gin/
Tray
Edit
4 Press [Edit] and on the next screen press [Repeat Copy].
Off
2 sided copy-Left
Finished page #:
5 Press [On] and press [Close].
Ba
When sele ct [On], jo
You can recall and r
Original A Settings
For paper selection, set MP tray (color paper).
Ready to Job build.
Place originals then press Start key.
Job Build
11×8½"
Paper
Selection Type
Offset
Finished
Basic Quality
Ready to Job build.
Place originals then press Start key.
Paper Selectio n
Copy Functions 1-35
Step
-
1 sided
Original
Auto %
Zoom
11×8½"
Plain
11×11"
Color
11×8½"
Plain
8½×11"
Plain
2 sided Copy
1 sided/
2 sided
Top Edge Top
Original
Orient.
Edit
11×8½"
Color
2 sided copy-Left
Finished page #:
6 Press [Basic]. On the next screen, press [Paper Selection].
7 Select the MP tray and press the [Close].
8 Place the Original A and press the Start key. Scanning of the original
Ba
begins.
Page 46

Step 2: Set Original A Back Side to Blank
g
g
ress sta rt key.
key when startin
ed
2 sided Copy
l
1 sided/
2 sided
Top Edge Top
%
Original
Orient.
lity
copy.
Edit
2 sided copy-Left
Finished p ag e #:
Next copy page: Rear
Set
Cancel
Insert
page
Print from
Front page
Scanning
finished
9 Press [Print from Front page].
The back side of the page will be left blank and copying will continue
from the next page.
Step 3: Complete the Settings for Original B.
Select Cassette 1 (plain paper) for paper setting.
10Press [Paper Selection].
11Select Cassette 1 and press [Close].
12Place Original B and press the Start key. Scanning of the original
begins.
ress sta rt key.
key when startin
ed
2 sided Copy
1 sided/
l
2 sided
Top Edge Top
%
Original
Orient.
lity
copy.
Edit
2 sided copy-Left
Finished p ag e #:
Next copy page: Rear
Set
Cancel
Insert
page
Print from
Front page
Scanning
finished
Step 4: Complete the Settings for Original C
For paper selection, set MP tray (color paper).
13Press [Paper Selection].
14Select the MP tray and press [Close].
15Place Original C and press the Start key. Scanning of the original
begins.
Step 5: Leave Back Side of Original C Blank
16Press [Print from Front page].
The back side of the page will be left blank and copying will continue
from the next page.
1-36 Copy Functions
Page 47

ress sta rt key.
key when starting copy.
ed
2 sided Copy
1 sided/
l
2 sided
Top Edge Top
%
Original
Orient.
lity
Edit
2 sided copy-Left
Finished page #:
Next copy page: Front
Set
Cancel
Insert
page
Print from
Rear page
Scanning
fini shed
Step 6: Complete the Settings for Original D
Select Cassette 1 (plain paper) for paper setting.
17Press [Paper Selection].
18Select Cassette 1 and press [Close].
19Place the Original D and press the Start key. Scanning of the
original begins.
Step 7: Specify Blank Colored Paper for the Back Cover
For paper selection, set MP tray (color paper).
20Press [Paper Selection].
21Select the MP tray and press [Close].
22Press [Insert page] ([Insert blank page]).
23All originals have been scanned. Press [Scanning finished]. Printing
begins.
24If there are no problems with the output, use Repeat Copy to
produce additional copies as necessary. For further details, refer to
Repeat Copy on page 1-25.
This completes the steps for the above operation.
Setting Functions
This section explains the copying functions available when using Job
Build.
Paper Selection
Select the paper size.
Ready to Job build.
Place originals then press Start key.
Job Build
11×8½"
Paper
Selection Type
Offset
Finished
Basic Quality
Step
-
1 sided
Original
Auto %
Zoom
1 sided Copy
1 sided/
2 sided
Top Edge Top
Original
Orient.
Edit
1 sided copy-Left
Finished page #:
Copy Functions 1-37
1 Press [Basic]. On the next screen, press [Paper Selection].
2 Select the MP tray or a cassette and press [Close].
Page 48

Original Type
Select the original type according to type of original being scanned. The
following original types are available.
Original Type Description
1 sided (1-sided) Single sided sheet original.
2 sided (2-sided) 2-sided sheet original.
Book Magazine or book originals with facing
pages.
1 Press [Basic]. On the next screen, press [Original Type].
2 Select [1 sided] ([1-sided]), [2 sided] ([2-sided]) or [Book].
When selecting [2 sided], check the binding direction and be sure
that the originals are placed in the correct orientation.
When selecting [Book], be sure that the binding direction is correct.
Note [2 sided] ([2-sided]) is displayed when the optional
document processor is installed.
3 Press [Close].
1 sided/2 sided Copying
Select either [1 sided Copy] ([1-sided Copy]) or [2 sided Copy] ([2-sided
Copy]) for the finish type.
1 Press [Basic]. On the next screen, press [1 sided/2 sided] ([1-
sided/2-sided]).
Note 1 sided/2 sided copy selection is common to all steps. It
may only be configured as the first step.
2 Press [1 sided Copy] ([1-sided Copy]) or [2 sided Copy] ([2-sided
Copy]) and from Finishing select the binding direction.
3 Check the orientation of the original.
Note Incorrect copying may occur if the original is not placed
correctly.
4 Press [Close].
Finish
Set the Finish options. The following settings are available.
Offset (Group) – Each completed set is rotated 90 degrees to the next
before stacking.
Stapling – Use the optional document finisher or built-in finisher to
staple the completed copies.
1 Press [Basic]. On the next screen, press [Finished].
Note Finish settings are common for all steps. It may only be
configured as the first step.
2 For finishing, press [On] ([1 set]). For further details, refer to Offset
Mode on page 1-7.
For stapling, press [Staple Mode] and complete the settings. For
further details, refer to Stapling on page 1-8.
1-38 Copy Functions
Page 49

3 Check the orientation of the original.
Note Incorrect copying may occur if the original is not placed
correctly.
4 Press [Close].
Zoom
Select the desired magnification.
1 Press [Basic]. On the next screen, press [Zoom].
2 Select the desired magnification.
For instructions on reducing/enlarging, refer to Zoom in Chapter 3 of
Operation Guide.
3 Press [Close].
Original Orientation
Check the orientation of the original.
1 Press [Basic]. On the next screen, press [Original Orient.].
2 Select [Top Edge Top] or [Top Edge Left].
Note Incorrect copying may occur if the original is not placed
correctly.
Ready to Job build.
Place originals then press Start key.
Job Build
Density 4
Density
Basic
Step-
Text
Original
Image
Quality
EcoPrint
Off
Edit
1 sided copy-Left
Finished page #:
3 Press [Close].
Density
Set the copy density. The setting items are as follows.
Item Description
Auto Automatically adjusts copy contrast.
Manual Manually adjust the copy contrast.
1 Press [Quality] and on the next screen press [Density].
2 Select [Auto] or [Manual].
If [Manual] is selected, press [Lighter] or [Darker] to adjust the
contrast.
3 Press [Close].
Original Image Quality
Specify the Image Quality based on the original type.
1 Press [Quality] and on the next screen, press [Original Image].
2 Select the image quality. For further details on image quality, refer to
Selecting Image Quality in Chapter 3 of Operation Guide.
3 Press [Close].
Copy Functions 1-39
Page 50

EcoPrint
Set EcoPrint to save toner consumption.
1 Press [Quality] and on the next screen press [EcoPrint].
Note EcoPrint is a common setting to all steps. It may only be
configured as the first step.
2 Press [On]. EcoPrint is enabled.
3 Press [Close].
Border Erase
Prevents the appearance of shadows from around the edges of originals.
The setting items are as follows.
Item Description
Bord Erase Sheet Erase black borders around the single
sheet original.
Individual BordrErase Specify border widths individually on all
sides to erase.
Ready to Job build.
Place originals then press S tart key.
Job Build
Off
Border
Erase Copy
Centering
Basic Quality
Step
-
Auto
Original
Size
OffOff
Page #
Repea t
Top tray
OutputMar gin/
Tray
Edit
1 Press [Edit] and on the next screen press [Border Erase].
2 Press [Bord Erase Sheet] or [Individual BordrErase] and specify the
Off
2 sided copy-Left
Finished p ag e #:
border width to erase. For further details, refer to Border Erase on
page 1-14.
3 Press [Close].
Selecting original size
Specify the size of the original.
1 Press [Edit] and on the next screen press [Original Size].
2 Set the original size. For further details, refer to Selecting Original
Size on page 1-3.
3 Press [Close].
Repeat Copy
Specify Repeat Copy as follows. Use Repeat Copy to enable the
production of additional copies as needed after a copy job is completed.
1 Press [Edit] and on the next screen press [Repeat Copy].
Note Repeat Copy setting is common to all steps. It may only
be configured as the first step.
2 Press [On] to activate Repeat Copy. For further details, refer to
Repeat Copy on page 1-25.
3 Press [Close].
1-40 Copy Functions
Page 51

Margin/Centering
Set margin (blank borders) and centering options.
1 Press [Edit] and on the next screen press [Margin/Centering].
Note Margin/Centering setting is common to all steps. It may
only be configured as the first step.
2 Press [Margin] or [Centering]. For further details, refer to Margin
Mode on page 1-12 and Centering Originals on page 1-13.
3 Press [Close].
Page Numbering
Specify page numbering in the sequence of originals as follows.
1 Press [Edit] and on the next screen press [Page #] ([Page
numbering]).
Note Page numbering configuration is common to all steps. It
may only be configured as the first step.
2 For further details about page numbering, refer to Page Numbering
on page 1-16.
3 Press [Close].
Selecting Output Destination
The optional job separator, document finisher or built-in finisher can be
specified as copy output destinations.
1 Press [Edit] and on the next screen press [Output Tray].
Note Output destination is displayed with the optional job
separator, document finisher or built-in finisher is installed.
The output destination setting applies to all other steps. It may
only be configured as the first step.
2 Specify the output destination. For further details, refer to Selecting
Output Destination on page 1-28.
3 Press [Close].
Copy Functions 1-41
Page 52

1-42 Copy Functions
Page 53

2 Output Management
Functions
This chapter explains the machine’s output management functions.
Overview of Output Management Functions 2-2
Using the Output Management Functions 2-2
[Prt Status] Screen................................................................... 2-3
Output Management Functions 2-1
Page 54

Overview of Output Management Functions
The output management functions manage jobs that are queued for
printing. For example, if the machine receives a print job or a fax while it
is copying, the incoming job is placed in the print queue until it can be
printed. The output management functions allow you to review the job
currently being printed as well as any queued jobs.
Output management functions are useful in the following situations.
Purpose Method
To find out the position of
your job in the queue
To find out whether your
job has been printed
To move a job up in the
print queue
You can check the status of currently
queued jobs in the [Print Management]
screen. Jobs are listed in order from the top
down, allowing you to see at a glance how
far down the queue your job is. (In the list,
[ ] indicates a copy job, [ ] indicates a
print job and [ ] indicates a fax.)
Check the [Print Management] screen. If
your job is listed in the [Print Management]
screen, it has not yet been printed.
Select the job you want to print sooner in
the [Print Management] screen and press
[Move ahead] ([Move up]). The job moves
up in the queue. You can also pause the job
currently being printed and print the
selected job immediately by pressing
[Interrupt Print].
Note To use the machine as a printer or fax, you must install the
optional printer kit or fax kit.
Using the Output Management Functions
Manage jobs using the [Prt Status] ([Prnt Status]) screen for output
management function.
Press the Print Management key. [Prt Status] ([Prnt Status]) screen is
displayed.
2-2 Output Management Functions
Page 55

[Prt Status] Screen
Displays information about current printing status and queued jobs.
Print Management
Job Input Source Original Set State
Copy
.8
Printer
1
2
.9
Fax Waiting
.10
MoveMov e
BehindAhead
Prt Status
.1 .50
--- ---
--- ---
Interrupt
Print
Printing
Waiting
End
3 4
1 Job List – Shows job information. The job currently in progress is
listed on top, with subsequent jobs listed below in the order they will
be finished. In the list, copy jobs are designated by , print jobs by
, and fax jobs by .
2 [Move Ahead] ([Move up]) – Increases the print priority of the
selected job.
3 [Move Behind] ([Move down]) – Decreases the print priority of the
selected job.
4 [Interrupt Print] – Cancels the current print operation and begins
printing the selected job. The job is moved to the top of the list.
5[S]/[T] – Use to select the desired job.
6 [End] – Close the Output Management Function. Pressing this key
displays the [Basic] screen or shows the current progress.
6
5
Output Management Functions 2-3
Page 56

2-4 Output Management Functions
Page 57

3System Menu
This chapter explains how to configure various settings using the
menus on the machine’s operation panel.
The main configurable settings are as follows.
Default Settings 3-2
Default Settings for Copying.................................................... 3-2
Machine Default......................................................................3-11
Setting MP Tray 3-23
Specifying the Paper Size for the MP Tray............................ 3-23
Specifying the Media Type for the MP Tray........................... 3-23
Registering Non-standard Sizes for Originals 3-24
Drum Refresh 3-25
Printing Reports 3-26
Checking Total Copy Count 3-28
System Menu 3-1
Page 58

Default Settings
t
n
This section explains how to change default settings which are applied
when the machine is powered up or the Reset key is pressed.
Automatically configured details set in default setting mode are called
default settings. Default settings are divided between Default Settings for
Copying and Machine Default. These settings may be freely modified to
suit your usage patterns.
Default Settings for Copying
Set the following default copy settings.
• Density...3-3
• Density Steps...3-3
• Original Image Quality...3-3
• Setting EcoPrint...3-4
• Adjusting Background Density...3-4
• Correcting Black Lines...3-4
• Paper Selection...3-5
• Setting Auto Paper Selection...3-5
• Selecting Media Types for Automatic Paper Selection...3-5
• Selecting Default Paper Source...3-6
• Specifying Paper Source for Cover...3-6
• Setting Auto % Priority...3-6
• Adjusting Auto Density...3-7
• Adjusting Manual Density...3-7
• Selecting Default Zoom...3-7
• Selecting Collating and Offsetting Output...3-8
• Selecting Auto Image Rotation...3-8
• Setting Margin Defaults...3-8
• Erasing Borders...3-9
• Selecting Maximum Number of Copies...3-9
• Enabling Repeat Copy...3-9
• Showing the Register Key...3-10
• Customize (Basic Screen)...3-10
• Customize (User Choice)...3-10
Accessing the Copy Default screen
Follow the procedures below to access the Copy Default screen.
1 Press the System Menu/Counter key.
System Menu / Counter
System Menu
Copy
Default
Machine
Default
Language
MP Tr ay
Setting
Register
Orig. Size
2 Press [Copy Default].
3 Use the numeric keys to enter the 4 digit management code. The
Job
Accou
Print
Repor
default setting is 2500 for the 25 cpm model and 3000 for the 30 cpm
model.
If the correct management code has been entered, the Copy Default
screen will be displayed.
Note For security, it is recommended to change the
management code. For further details, refer to Changing
Management Code on page 3-20.
4 Refer to the following configuration items to configure the default
settings.
3-2 System Menu
Page 59

Density
Set the density for default settings mode. The setting items are as
follows.
Item Description
Manual Sets manual copy density.
Auto Sets automatic copy density.
For further information regarding density, refer to the Operation Guide.
1 Referring to Accessing the Copy Default screen on page 3-2, access
the Copy Default screen.
2 Press [S] or [T] to select Density Mode and press [Change #].
3 Select [Manual] or [Auto].
4 Press [Close] to save settings or [Back] to cancel settings. The
display returns to the Copy Default screen.
Density Steps
Change the density adjustment step amount. The setting items are as
follows.
Item Description
1 step 7 density adjustment steps are available.
0.5 step 13 more accurate density adjustment steps are
available.
1 Referring to Accessing the Copy Default screen on page 3-2, access
the Copy Default screen.
2 Press [S] or [T] to select Density Steps and press [Change #].
3 Select [1 step] or [0.5 step].
4 Press [Close] to save settings or [Back] to cancel settings. The
display returns to the Copy Default screen.
Original Image Quality
Set the original image quality for default settings mode. The setting items
are as follows.
Item Description
Text+Photo Appropriate for mixed text and photo originals.
Photo Appropriate for photo originals.
Text Appropriate for document originals with large
amounts of text.
1 Referring to Accessing the Copy Default screen on page 3-2, access
the Copy Default screen.
2 Press [S] or [T] to select Original Image and press [Change #].
3 Select [Text+Photo], [Photo] or [Text].
4 Press [Close] to save settings or [Back] to cancel settings. The
display returns to the Copy Default screen.
System Menu 3-3
Page 60

Setting EcoPrint
Set EcoPrint for default settings mode. The setting items are as follows.
Item Description
Off Do not enable EcoPrint.
On Enable EcoPrint.
For more information on EcoPrint, refer to page 1-28.
1 Referring to Accessing the Copy Default screen on page 3-2, access
the Copy Default screen.
2 Press [S] or [T] to select EcoPrint and press [Change #].
3 Select [Off] or [On].
4 Press [Close] to save settings or [Back] to cancel settings. The
display returns to the Copy Default screen.
Adjusting Background Density
If the background on copies appears too dark, you can lighten it. The
setting items are as follows.
Item Description
Lighter Lightens the background color in copies.
Darker Darkens the background color in copies.
1 Referring to Accessing the Copy Default screen on page 3-2, access
the Copy Default screen.
2 Press [S] or [T] to select Background Density Adj and press
[Change #].
3 Press [Lighter] or [Darker] to adjust the density.
4 Press [Close] to save settings or [Back] to cancel settings. The
display returns to the Copy Default screen.
Correcting Black Lines
Set Black Line correction to reduce the black lines (dragged stains not
appearing on the original) that may occur when copying using the
optional document processor. The setting items are as follows.
Item Description
Off Disables Black Line correction.
On (Low) Suppress black streaks moderately.
On (High) Suppress black streaks strongly.
Note When suppressing black streaks, select [On (Low)]. Select
[On (High)] only when the black streaks are not suppressed with
the Low setting.
When black line correction is enabled, the ability to reproduce fine
text characters is reduced. For normal usage, the default setting
([Off]) is recommended.
1 Referring to Accessing the Copy Default screen on page 3-2, access
the Copy Default screen.
2 Press [S] or [T] to select Correcting Black Line and press [Change
#].
3-4 System Menu
Page 61

3 Select [Off], [On (Low)] or [On (High)].
4 Press [Close] to save settings or [Back] to cancel settings. The
display returns to the Copy Default screen.
Paper Selection
In default settings mode, set the paper selection method for when an
original is set. The setting items are as follows.
Item Description
APS Selects the cassette loaded with the same size
paper as the original.
Default cassette Selects the cassette configured as the default
paper source (refer to page 3-6).
1 Referring to Accessing the Copy Default screen on page 3-2, access
the Copy Default screen.
2 Press [S] or [T] to select Paper Selection and press [Change #].
3 Select [APS] or [Default cassette].
4 Press [Close] to save settings or [Back] to cancel settings. The
display returns to the Copy Default screen.
Setting Auto Paper Selection
Set the paper selection method for Auto Paper Selection mode when
changing the zoom ratio. The setting items are as follows.
Item Description
Most Suit Size Changes the paper size to match the size after
zooming.
Same as Orig.
Size
Leaves the paper size the same size as the
original, even after zooming.
1 Referring to Accessing the Copy Default screen on page 3-2, access
the Copy Default screen.
2 Press [S] or [T] to select APS Setting and press [Change #].
3 Select [Most Suit Size] or [Same as Orig. Size].
4 Press [Close] to save settings or [Back] to cancel settings. The
display returns to the Copy Default screen.
Selecting Media Types for Automatic Paper Selection
Select Automatic Paper Selection mode to limit the available media
types. For example, set to [Plain] to select the cassette set the same size
paper and set to plain paper for the media type. Set to [Off] to select the
cassette with the same size paper regardless of media type.
The following media types are available.
Plain, Rough, Vellum, Recycled, Preprinted, Bond, Color (Colour),
Prepunched, Letterhead, Thick paper, High Quality, Custom 1 - 8
Note Select the media type set for the current cassette. For
further details, refer to Specifying the Media Type on page 3-13.
1 Referring to Accessing the Copy Default screen on page 3-2, access
the Copy Default screen.
System Menu 3-5
Page 62

2 Press [S] or [T] to select Select media type (APS) and press
[Change #].
3 Select [Off] or [On].
If [On] is selected, select the media type.
4 Press [Close] to save settings or [Back] to cancel settings. The
display returns to the Copy Default screen.
Selecting Default Paper Source
Automatically selects the default cassette (1 - 4).
Note The MP tray may not be set as the default paper source.
Cassette 3 and Cassette 4 are shown when the optional paper
feeder have been installed.
1 Referring to Accessing the Copy Default screen on page 3-2, access
the Copy Default screen.
2 Press [S] or [T] to select Default Paper Source and press [Change
#].
3 Select the cassette to use as the default.
4 Press [Close] to save settings or [Back] to cancel settings. The
display returns to the Copy Default screen.
Specifying Paper Source for Cover
Specify the paper source cassette (1 - 4) or MP tray which is loaded with
cover paper. Cover paper is used in cover mode (refer to page 1-18) and
booklet mode (refer to page 1-19, page 1-21).
Note Cassette 3 and Cassette 4 are shown when the optional
paper feeder have been installed.
1 Referring to Accessing the Copy Default screen on page 3-2, access
the Copy Default screen.
2 Press [S] or [T] to select Paper Source for Cover and press
[Change #].
3 Select the paper source containing the cover paper.
4 Press [Close] to save settings or [Back] to cancel settings. The
display returns to the Copy Default screen.
Setting Auto % Priority
Specify whether to set auto zoom when the paper in the selected
cassette is different from the size of the original. The setting items are as
follows.
Item Description
Off Sets zoom to equal (100%).
On Automatically sets zoom to fit the paper size.
1 Referring to Accessing the Copy Default screen on page 3-2, access
the Copy Default screen.
2 Press [S] or [T] to select Auto % Priority Setting and press [Change
#].
3 Select [Off] or [On].
3-6 System Menu
Page 63

4 Press [Close] to save settings or [Back] to cancel settings. The
display returns to the Copy Default screen.
Adjusting Auto Density
Adjusts the overall lightness or darkness when copying with auto
density. The setting items are as follows.
Item Description
Lighter Lightens the overall density when copying with
auto density.
Darker Darkens the overall density when copying with
auto density.
1 Referring to Accessing the Copy Default screen on page 3-2, access
the Copy Default screen.
2 Press [S] or [T] to select Density Adjustment (Auto) and press
[Change #].
3 Press [Lighter] or [Darker] to adjust the density.
4 Press [Close] to save settings or [Back] to cancel settings. The
display returns to the Copy Default screen.
Adjusting Manual Density
Adjusts the overall lightness or darkness when copying with manual
density. The setting items are as follows.
Item Description
Lighter Lightens the overall density when copying with
manual density.
Darker Darkens the overall density when copying with
manual density.
1 Referring to Accessing the Copy Default screen on page 3-2, access
the Copy Default screen.
2 Press [S] or [T] to select Density Adjust. (Manual) and press
[Change #].
3 Press [Lighter] or [Darker] to adjust the density.
4 Press [Close] to save settings or [Back] to cancel settings. The
display returns to the Copy Default screen.
Selecting Default Zoom
Set the reduce/enlarge setting in default settings mode. The setting
items are as follows.
Item Description
Auto % Automatically sets zoom to fit the paper size.
100% Sets zoom to equal (100%).
1 Referring to Accessing the Copy Default screen on page 3-2, access
the Copy Default screen.
2 Press [S] or [T] to select Zoom and press [Change #].
3 Select [Auto %] or [100%].
System Menu 3-7
Page 64

4 Press [Close] to save settings or [Back] to cancel settings. The
display returns to the Copy Default screen.
Selecting Collating and Offsetting Output
Set collating and offsetting output options in default settings mode. The
setting items are as follows.
Item Description
Collate Off Do not enable collate mode.
On Enable collate mode.
Offset Off Do not enable offset mode.
On Enable offset mode.
For further details about collate mode, refer to Operation Guide; for
further details about offset mode, refer to page 1-7.
1 Referring to Accessing the Copy Default screen on page 3-2, access
the Copy Default screen.
2 Press [S] or [T] to select Collate/Offset and press [Change #].
3 Under Collate, select [Off] or [On].
4 Under Offset, select [Off] or [On].
5 Press [Close] to save settings or [Back] to cancel settings. The
display returns to the Copy Default screen.
Selecting Auto Image Rotation
Set auto image rotation in default settings mode. The setting items are
as follows.
Item Description
Off Do not enable auto image rotation.
On Enable auto image rotation.
For further details about auto image rotation, refer to page 1-27.
1 Referring to Accessing the Copy Default screen on page 3-2, access
the Copy Default screen.
2 Press [S] or [T] to select Auto Image Rotation and press [Change
#].
3 Select [Off] or [On].
4 Press [Close] to save settings or [Back] to cancel settings. The
display returns to the Copy Default screen.
Setting Margin Defaults
Set the margin width default values. The setting ranges are as follows.
Model Type Range
Inch models 0
Metric models 0 - 18 mm (1 mm increments)
- 3/4" (1/8" increments)
For further details about margin mode, refer to page 1-12.
1 Referring to Accessing the Copy Default screen on page 3-2, access
the Copy Default screen.
3-8 System Menu
Page 65

2 Press [S] or [T] to select Default margin width and press [Change
#].
3 Press [S], [T], [W] or [X] to set the margin width.
4 Press [Close] to save settings or [Back] to cancel settings. The
display returns to the Copy Default screen.
Erasing Borders
Set the border erase default values. The setting ranges are as follows.
Model Type Range
Inch models 0
Metric models 0 - 50 mm (1 mm increments)
For further details about border erase, refer to page 1-14.
- 2" (1/8" increments)
1 Referring to Accessing the Copy Default screen on page 3-2, access
the Copy Default screen.
2 Press [S] or [T] to select Default erase width and press [Change #].
3 Press [+] or [–] to set the Border (outer edges) and Gutter (middle)
border widths.
4 Press [Close] to save settings or [Back] to cancel settings. The
display returns to the Copy Default screen.
Selecting Maximum Number of Copies
Limits the number of sets that can be specified for a single copy. Set to
between 1 - 999 sets.
1 Referring to Accessing the Copy Default screen on page 3-2, access
the Copy Default screen.
2 Press [S] or [T] to select Preset limit and press [Change #].
3 Use the numeric keys to specify the preset limit value.
4 Press [Close] to save settings or [Back] to cancel settings. The
display returns to the Copy Default screen.
Enabling Repeat Copy
Disable repeat copy or configure repeat copy in the default settings
mode. The setting items are as follows.
Item Description
Function Off Prevents the use of repeat copy.
On Allows the use of repeat copy.
Default Off Do not enable repeat copy.
On Enable repeat copy.
For further details about repeat copy, refer to page 1-25.
1 Referring to Accessing the Copy Default screen on page 3-2, access
the Copy Default screen.
2 Press [S] or [T] to select Repeat Copy and press [Change #].
3 Under Function, select [Off] or [On].
4 Under Default, select [Off] or [On].
System Menu 3-9
Page 66

Customize(Basic Scree n)
Basic
User choice
System Menu Copy Default
-
Register Mode
Zoom
Density
Staple
Duplex
Original Image
Collate/Offset
Mov e
Ahead
Mov e
Behind
5 Press [Close] to save settings or [Back] to cancel settings. The
display returns to the Copy Default screen.
Showing the Register Key
Sets whether to show or hide [Shortcut] ([Register]) used to
register/delete register keys. For further details about register keys, refer
to page 1-33.
1 Referring to Accessing the Copy Default screen on page 3-2, access
the Copy Default screen.
2 Press [S] or [T] to select Display register key (Display “Register”
key) and press [Change #].
3 Select [Off] or [On].
4 Press [Close] to save settings or [Back] to cancel settings. The
display returns to the Copy Default screen.
Customize (Basic Screen)
Rearrange the basic screen layout for maximum ease of use. You can
rearrange 3 [Basic] screen functions and 3 [User choice] screen
functions.
1 Referring to Accessing the Copy Default screen on page 3-2, access
the Copy Default screen.
2 Press [S] or [T] to select Customize (Basic Screen) (Customize
(Main function)) and press [Change #].
3 The current functions are shown in Register Mode.
Ba
Press [S] or [T] to select the function to rearrange. Press [Move
Ahead] or [Move Behind] ([Move Backward]) to change the Register
Mode order.
The number in Register Mode corresponds to the display position
number (left side of the screen).
4 Press [Close] to save settings or [Back] to cancel settings. The
display returns to the Copy Default screen.
Customize (User Choice)
Rearrange the screen to easily access frequently used functions. You
can change 6 frequently used features on the [User choice] screen.
1 Referring to Accessing the Copy Default screen on page 3-2, access
the Copy Default screen.
2 Press [S] or [T] to select Customize (User Choice) (Customize
(Add function)) and press [Change #].
CloseBack
3 Current functions are shown in Register Mode and Addition Mode
shows available functions that can be substituted for the current
Register Mo de
Mar gin
Border Erase
Combine
Page #
Booklet
Cover
Addition Mode
Off
PaperSe lection
Origin a l size
Combine
Mix Size Orig.
ContinuousScan
functions.
Under Addition Mode, press [S] or [T] to select the function to
change. Under Register Mode, press [S] or [T] to select the
function that is to be added and press [] to move the function.
The number in Register Mode corresponds to the display position
efault
number (left side of the screen).
4 Press [Close] to save settings or [Back] to cancel settings. The
display returns to the Copy Default screen.
3-10 System Menu
Page 67

Machine Default
t
n
The following items can be set for machine default.
• Enabling Auto Cassette Switching...3-12
• Specifying the Paper Size...3-12
• Specifying the Media Type...3-13
• Registering MP Tray Paper Size...3-13
• Enabling Quick Access to MP Tray Settings...3-14
• Setting Media Type Properties (Paper Weight)...3-14
• Setting Media Type Properties (Duplex Mode)...3-15
• Setting Handling for Special Media Types...3-16
• Auto Detect Originals...3-17
• Orientation of Original Document...3-17
• Setting Sleep Timer Timeout...3-18
• Setting Low-Power Timer Timeout...3-18
• Setting Auto Clear Timeout Time...3-18
• Selecting Output Destination...3-18
• Selecting FAX Output Mode...3-19
• Select the Main Mode...3-19
• Setting Notification Sounds...3-20
• Silent Mode...3-20
• Changing Management Code...3-20
• Activating Auto Sleep...3-21
• Activating Auto Clear...3-21
• Auto Drum Refresh...3-22
System Menu / Counter
System Menu
Copy
Default
Machine
Default
Language
MP Tray
Setting
Register
Orig. Size
Accessing the Machine Default Screen
Follow the steps as below to access the Machine Default screen.
1 Press the System Menu/Counter key.
2 Press [Machine Default].
3 Use the numeric keys to enter the 4 digit management code. The
Job
Accou
Print
Repor
default setting is 2500 for the 25 cpm model and 3000 for the 30 cpm
model.
If the correct management code has been entered, the Machine
Default screen will be displayed.
Note For security, it is recommended to change the
management code. For further details, refer to Changing
Management Code on page 3-20.
4 Refer to the following configuration items to configure the default
settings.
System Menu 3-11
Page 68

Enabling Auto Cassette Switching
Use auto cassette switching to automatically switch the paper source to
another cassette loaded with the same size and orientation paper when
the current cassette runs out of paper. You can also switch to a cassette
with a different media type.
The setting items are as follows.
Item Description
Function Off Do not enable auto cassette switching.
On Enable auto cassette switching.
Paper Type All types of
paper
Feed same
paper type
Automatically switches a cassette even with
different media type if the paper is the same
size and direction.
Do not switch to a cassette with different
media type.
1 Referring to Accessing the Machine Default Screen on page 3-11,
access the Machine Default screen.
2 Press [S] or [T] to select Auto cassette switching and press
[Change #].
3 Under Function, select [Off] or [On].
4 Under Paper Type, select [All types of paper] or [Feed same paper
type].
5 Press [Close] to save settings or [Back] to cancel settings. The
display returns to the Machine Default screen.
Specifying the Paper Size
Specify the paper sizes for Cassettes 1 - 4. The setting items are as
follows.
Item Description
Auto Detection The paper size is automatically detected.
[Centimeter] ([Centimetre]) or [Inch] selection is
required.
Standard sizes Specify a standard size. The following paper sizes:
11 × 17", 8 1/2 × 14", 11 × 8 1/2", 8 1/2 × 11",
5 1/2 × 8 1/2", 8 1/2 × 13 1/2", 8 1/2 × 13"
(Oficio II), A3, B4, A4, A4R, B5, B5R, A5R, Folio,
8K, 16K, 16KR are available.
Note Cassette 3 and Cassette 4 are shown when the optional
paper feeder is installed.
1 Referring to Accessing the Machine Default Screen on page 3-11,
access the Machine Default screen.
2 Press [S] or [T] to select the cassette to configure from Paper size
(Cassette 1 - Cassette 4) and press [Change #].
3 Select [Auto Detection] or [Standard sizes].
If [Auto Detection] is selected, choose the unit type.
If [Standard sizes] is selected, choose the paper size.
4 Press [Close] to save settings or [Back] to cancel settings. The
display returns to the Machine Default screen.
3-12 System Menu
Page 69

Specifying the Media Type
Specify the media type for Cassettes 1 - 4.
The available media types are Plain, Vellum, Rough, Recycled,
Preprinted, Bond, Color (Colour), Prepunched, Letterhead, Thick paper,
High Quality, and Custom 1 - 8.
Note Cassette 3 and Cassette 4 are shown when the optional
paper feeder have been installed.
Media types in Setting Media Type Properties (Paper Weight)
(refer to page 3-14) with weight (thickness) that cannot be
inserted in the Cassette are not available.
1 Referring to Accessing the Machine Default Screen on page 3-11,
access the Machine Default screen.
2 Press [S] or [T] to select the cassette to specify media type from
Media Type (Cassette 1 - Cassette 4) and press [Change #].
3 Select the media type.
4 Press [Close] to save settings or [Back] to cancel settings. The
display returns to the Machine Default screen.
Registering MP Tray Paper Size
Up to 4 custom paper sizes can be pre-registered for use with the MP
tray. Registered sizes are shown as custom sizes when selecting paper
size. The media type can also be specified for each registered size. The
setting items are as follows.
Setting Detail Setting Item
Paper size Inch models
Height: 3 7/8 - 11 5/8" (1/8" increments)
Width: 5 7/8 - 17" (1/8" increments)
Metric models
Height: 98 - 297 mm (1 mm increments)
Width: 148 - 432 mm (1 mm increments)
Media type Plain, Transparency, Rough, Vellum, Labels,
Recycled, Preprinted, Bond, Cardstock, Color
(Colour), Prepunched, Letterhead, Thick paper,
Envelope, High Quality, Custom 1 - 8
1 Referring to Accessing the Machine Default Screen on page 3-11,
access the Machine Default screen.
2 Press [S] or [T] to select Store Paper Size for MPT and press
[Change #].
3 Press [S] or [T] to select the number to register from Paper size
(User reg. 1 - 4) and press [Change #].
4 Press [On] and press [+] or [–] to set the Y (height) and X (width).
With the metric models, you may enter the size directly using the
numeric keys by pressing [#-Keys].
To specify a media type, press [Select Media Type]. Select the
media type and press [Close].
5 Press [Close] to save settings or [Back] to cancel settings.
6 Press [Close]. The display returns to the Machine Default screen.
System Menu 3-13
Page 70

Enabling Quick Access to MP Tray Settings
Set whether to show the MP tray Settings screen when the MP tray is
selected from the [Basic] screen. The setting items are as follows.
Item Description
Off Do not show MP tray Settings when MP tray is
selected.
On Show MP tray Settings when MP tray is selected.
1 Referring to Accessing the Machine Default Screen on page 3-11,
access the Machine Default screen.
2 Press [S] or [T] to select Check MP Tray sizing and press [Change
#].
3 Select [Off] or [On].
4 Press [Close] to save settings or [Back] to cancel settings. The
display returns to the Machine Default screen.
Setting Media Type Properties (Paper Weight)
Set the weight (paper thickness) for each type of paper. The weights that
can be configured for media type are as follows.
Media type to be placed in the Cassette.
Media Type
Plain YYYYNNNN
PreprintedYYYYNNNN
Bond YYYYYYYN
RecycledYYYYNNNN
Vellum YYYYNNNN
Rough Y YYYYYYN
Letterhead Y YYYNNNN
Color (Colour)YYYYNNNN
Prepunched Y YYYNNNN
Thick paper N NNNYYYY
High QualityYYYYNNNN
Custom 1 - 8YYYYYYYY
Light
(thin)
Normal 1 Normal 2 Normal 3 Heavy 1 Heavy 2 Heavy 3
Y: Available.
N: Not Available.
Extra
Heavy
3-14 System Menu
Page 71

Media type to be placed in the MP tray.
Media Type
Plain YYYYNNNN
TransparencyNNNNYYYY
PreprintedYYYYNNNN
Labels YYYYYYYY
Bond YYYYYYYN
Recycled YYYYNNNN
Vellum YYYYNNNN
Rough YYYYYYYN
Letterhead YYYYNNNN
Color (Colour)YYYYNNNN
Prepunched YYYYNNNN
EnvelopeNNNNYYYY
CardstockNNNNYYYY
Thick paper NNNNYYYY
High QualityYYYYNNNN
Custom 1 - 8YYYYYYYY
Light
(thin)
Normal 1 Normal 2 Normal 3 Heavy 1 Heavy 2 Heavy 3
Y: Available.
N: Not Available.
Set paper weight according to the following media types and weights
(g/m²).
• Light (Thin): 64 g/m² or less
• Normal 1: From 60 g/m² to 75 g/m² or less
• Normal 2: From 76 g/m² to 90 g/m² or less
• Normal 3: From 91 g/m² to 105 g/m² or less
• Heavy 1: From 106 g/m² to 135 g/m² or less
• Heavy 2: From 136 g/m² to 170 g/m² or less
• Heavy 3: 171 g/m² or more
• Extra Heavy: OHP transparencies
Extra
Heavy
1 Referring to Accessing the Machine Default Screen on page 3-11,
access the Machine Default screen.
2 Press [S] or [T] to select Media Type (paper weight) and press
[Change #].
3 Press [S] or [T] to select the media type to set the weight and press
[Change #].
4 Select the weight. Press [Close] to save settings or [Back] to cancel
settings.
5 Press [Close]. The display returns to the Machine Default screen.
Setting Media Type Properties (Duplex Mode)
Specify whether to allow duplex printing for each of custom media types
1 - 8. The setting items are as follows.
Item Description
Off Do not use duplex mode.
On Use duplex mode.
System Menu 3-15
Page 72

1 Referring to Accessing the Machine Default Screen on page 3-11,
access the Machine Default screen.
2 Press [S] or [T] to select Select media type (2sided) and press
[Change #].
3 Press [S] or [T] to select the media type to adjust from Custom 1 -
Custom 8 and press [Change #].
4 Select [Off] or [On]. Press [Close] to save settings or [Back] to
cancel settings.
5 Press [Close]. The display returns to the Machine Default screen.
Setting Handling for Special Media Types
When printing on prepunched, preprinted, or letterhead paper,
depending on the original placement method or combination of copier
functions, the hole positions may not align or images may be printed
upside-down. Use this setting to change the direction of the finished
output. The setting items are as follows.
Item Description
Adj. Print Direction Print with aligned finish direction.
Speed Priority Releases the [Adj. Print Direction] setting.
When [Adj. Print Direction] is enabled, load paper according to the
following method.
Example: Copying on letterhead paper
Original
Original
Paper
Paper
Note When loading paper into the cassette and MP tray, place the
surface to be printed facing up.
When [Adj. Print Direction] is enabled, the printing speed
decreases slightly.
Finished
Finished
Cassette
Cassette
MP tray
MP tray
1 Referring to Accessing the Machine Default Screen on page 3-11,
access the Machine Default screen.
2 Press [S] or [T] to select Special paper action mode (Specif. paper
action mode) and press [Change #].
3 Select [Adj. Print Direction] or [Speed Priority].
4 Press [Close] to save settings or [Back] to cancel settings. The
display returns to the Machine Default screen.
3-16 System Menu
Page 73

Auto Detect Originals
Specify the paper size to select when an original with a similar size is
automatically detected. The setting items are as follows.
Item Description
Cardstock/A6 Select whether to detect the size as Postcard or
A6R.
B4/Folio Select whether to detect the size as B4 or Folio.
11 × 15" Select whether to automatically detect as 11 × 15".
Note This setting is displayed only for metric models.
1 Referring to Accessing the Machine Default Screen on page 3-11,
access the Machine Default screen.
2 Press [S] or [T] to select Org. Auto Detect Setting and press
[Change #].
3 Press [S] or [T] to select the paper size to specify and press
[Change #].
4 For Cardstock/A6, select [Cardstock] or [A6].
For B4/Folio, select [B4] or [Folio].
For 11 × 15", select [On] or [Off].
5 Press [Close] to save settings or [Back] to cancel settings.
6 Press [Close]. The display returns to the Machine Default screen.
Orientation of Original Document
Set the original orientation in default settings mode. The setting items
are as follows.
Item Description
Top Edge Top Sets the top edge as the original’s upper
edge.
Top Edge Left Sets the left edge as the original’s upper
edge.
For further details about original orientation, refer to page 1-6.
1 Referring to Accessing the Machine Default Screen on page 3-11,
access the Machine Default screen.
2 Press [S] or [T] to select Orig. Orient and press [Change #].
3 Select [Top Edge Top] or [Top Edge Left].
4 Press [Close] to save settings or [Back] to cancel settings. The
display returns to the Machine Default screen.
System Menu 3-17
Page 74

Setting Sleep Timer Timeout
Set the time until Auto Sleep mode is activated when [On] is selected in
Activating Auto Sleep on page 3-21. Specify a value from 1 - 240
minutes (1 minute increments). For further details on Auto Sleep mode,
refer to Sleep Mode in Chapter 3 of Operation Guide.
Note If the device is used frequently, it is recommended to set
Auto Sleep mode to a larger time delay, and to a shorter time delay
if the periods of non-use are longer.
1 Referring to Accessing the Machine Default Screen on page 3-11,
access the Machine Default screen.
2 Press [S] or [T] to select Sleep mode changing time and press
[Change #].
3 Press [+] or [–] to set the time until Auto Sleep mode is activated.
4 Press [Close] to save settings or [Back] to cancel settings. The
display returns to the Machine Default screen.
Setting Low-Power Timer Timeout
Set the time until Auto Low-Power mode is activated. Specify a value
from 1 - 240 minutes (1 minute increments). For further details on Auto
Low-Power mode, refer to Low-Power Mode in Chapter 3 of Operation
Guide.
1 Referring to Accessing the Machine Default Screen on page 3-11,
access the Machine Default screen.
2 Press [S] or [T] to select Low power mode chng. time and press
[Change #].
3 Press [+] or [–] to set the time until Auto Low-Power mode is
activated.
4 Press [Close] to save settings or [Back] to cancel settings. The
display returns to the Machine Default screen.
Setting Auto Clear Timeout Time
Set the time until Auto Clear is activated after the last operation when
[On] is selected in Activating Auto Clear on page 3-21. Specify a value
from 10 - 270 minutes (10 minute increments).
1 Referring to Accessing the Machine Default Screen on page 3-11,
access the Machine Default screen.
2 Press [S] or [T] to select Auto Clear Time Setting and press
[Change #].
3 Press [+] or [–] to set the time until Auto Clear is activated.
4 Press [Close] to save settings or [Back] to cancel settings. The
display returns to the Machine Default screen.
Selecting Output Destination
Set the default copy output destination.
Paper Output Description
Top tray Outputs to the top tray of the machine.
Job Sep. Tray Outputs to the optional job separator.
Finisher tray Outputs to the optional document finisher tray or
built-in finisher tray.
3-18 System Menu
Page 75

Note This setting is displayed when the optional job separator,
document finisher or built-in finisher is installed.
1 Referring to Accessing the Machine Default Screen on page 3-11,
access the Machine Default screen.
2 Press [S] or [T] to select Select Copy output tray and press
[Change #].
3 Select the output destination.
4 Press [Close] to save settings or [Back] to cancel settings. The
display returns to the Machine Default screen.
Selecting FAX Output Mode
Set the default output destination for printing originals or reports received
by fax.
Paper Output Description
Top tray Outputs to the top tray of the machine.
Job Sep. Tray Outputs to the optional job separator.
Finisher tray Outputs to the optional document finisher tray or
built-in finisher tray.
Note This setting is displayed when the fax kit and optional job
separator, document finisher or built-in finisher is installed.
1 Referring to Accessing the Machine Default Screen on page 3-11,
access the Machine Default screen.
2 Press [S] or [T] to select Select FAX output tray and press [Change
#].
3 Select the output destination.
4 Press [Close] to save settings or [Back] to cancel settings. The
display returns to the Machine Default screen.
Select the Main Mode
Specify the screen to be first shown after power-on. The setting items
are as follows.
Item Description
Copy Mode Copy mode is set as the first screen to be shown
after the power is switched on (the screen shown
when the Copy key is pressed).
FAX Mode Fax mode is set as the first screen to be shown the
power is switched on (the screen shown when the
FAX key is pressed).
Note This setting is displayed when the optional fax kit is installed.
1 Referring to Accessing the Machine Default Screen on page 3-11,
access the Machine Default screen.
2 Press [S] or [T] to select Select the main mode (Select main mode)
and press [Change #].
3 Select [Copy Mode] or [FAX Mode].
System Menu 3-19
Page 76

4 Press [Close] to save settings or [Back] to cancel settings. The
display returns to the Machine Default screen.
Setting Notification Sounds
Set the notification sounds made by the machine during operation. The
setting items are as follows.
Item Description
Touch tone notification The beep sound made when a key on the
operation panel or touch panel is pressed.
Finish notification The sound made when a copy or print
operation finishes without error.
Ready notification The sound made when warm-up is
complete.
Attention notification The sound made when an error has
occurred.
Set each item to [On] to enable sound notification. Set each item to [Off]
to disable sound notification.
1 Referring to Accessing the Machine Default Screen on page 3-11,
access the Machine Default screen.
2 Press [S] or [T] to select Notify (Touch tone), Notify (Finish), Notify
(Ready) or Notify (Attention) and press [Change #].
3 Select [Off] or [On].
4 Press [Close] to save settings or [Back] to cancel settings. The
display returns to the Machine Default screen.
Silent Mode
Configures the machine to operate more quietly. To decrease the
operating noise level, set Silent Mode to [On]. The setting items are as
follows.
Item Description
Off Do not enable Silent Mode.
On Enable Silent Mode and reduce the operating
noise level.
1 Referring to Accessing the Machine Default Screen on page 3-11,
access the Machine Default screen.
2 Press [S] or [T] to select Silent Mode and press [Change #].
3 Select [Off] or [On].
4 Press [Close] to save settings or [Back] to cancel settings. The
display returns to the Machine Default screen.
Changing Management Code
Change the machine’s management code.
IMPORTANT Be sure to record the management code when
changing it. If forgotten, contact your Service Representative.
3-20 System Menu
Page 77

Note The default setting is 2500 for the 25 cpm model and 3000
for the 30 cpm model.
Change the management code to a value between 0000 - 9999.
Always set to 4 digits.
It is recommended to not set the management code to an easily
guessed number such as 1111 or 1234.
The following settings require the management code to be
entered.
• Default Settings for Copying
• Machine Default
• Printing Reports
• Job Accounting
1 Referring to Accessing the Machine Default Screen on page 3-11,
access the Machine Default screen.
2 Press [S] or [T] to select Management code change (Change
MGMT code with #) and press [Change #].
3 Use the numeric keys to enter the new management code.
4 Press [Close] to save settings or [Back] to cancel settings. The
display returns to the Machine Default screen.
Activating Auto Sleep
In Auto Sleep mode, the machine automatically switches to Sleep mode
if left idle for a preset period. Enable/disable the use of Auto Sleep mode
here. For further details on Sleep mode, refer to Sleep Mode in Chapter
3 of Operation Guide. The setting items are as follows.
Item Description
Off Do not use Auto Sleep mode.
On Use Auto Sleep mode.
Note If Auto Sleep mode interferes with normal operation, set to
disable Auto Sleep mode. Before disabling Auto Sleep mode, it is
first recommended to try extending the time until Auto Sleep mode
is activated (sleep mode change time).
1 Referring to Accessing the Machine Default Screen on page 3-11,
access the Machine Default screen.
2 Press [S] or [T] to select Auto sleep and press [Change #].
3 Select [Off] or [On].
4 Press [Close] to save settings or [Back] to cancel settings. The
display returns to the Machine Default screen.
Activating Auto Clear
Auto Clear automatically releases various specified setting and returns
to default settings mode after a specified period of time since the last
device operation. Enable/disable the use of Auto Clear here. The setting
items are as follows.
Item Description
Off Do not use Auto Clear.
On Use Auto Clear.
System Menu 3-21
Page 78

1 Referring to Accessing the Machine Default Screen on page 3-11,
access the Machine Default screen.
2 Press [S] or [T] to select Auto Clear and press [Change #].
3 Select [Off] or [On].
4 Press [Close] to save settings or [Back] to cancel settings. The
display returns to the Machine Default screen.
Auto Drum Refresh
When the machine is turned on or is woken up from Low-Power mode or
Sleep mode, the drum is sometimes automatically refreshed. Automatic
drum refreshing is carried out to maintain printing quality and allows for
the ambient temperature and humidity.
Use this setting to specify the duration of automatic drum refreshing. The
setting items are as follows.
Item Description
Off Disables automatic drum refreshing.
Standard Sets the standard duration for automatic drum
refreshing (maximum 140 sec.).
Long Sets a longer time for automatic drum refreshing
(maximum 180 sec.).
1 Referring to Accessing the Machine Default Screen on page 3-11,
access the Machine Default screen.
2 Press [S] or [T] to select Auto Drum Refresh and press [Change #].
3 Select [Off], [Standard] or [Long].
4 Press [Close] to save settings or [Back] to cancel settings. The
display returns to the Machine Default screen.
3-22 System Menu
Page 79

Setting MP Tray
Set the paper size and media type to match paper loaded in the MP tray.
Specifying the Paper Size for the MP Tray
The MP tray paper size setting method and available paper sizes are as
follows.
Setting
method
Auto Detect Inch 11 × 17", 8 1/2 × 14", 11 × 8 1/2",
Other Standard Sizes ISO B5, Envelope DL, Envelope C5,
Input Size Inch models
Custom Size Pre-assigned paper size 1-4
Unit Paper size
8 1/2 × 11", 5 1/2 × 8 1/2"
Centimeter A3, B4, A4, A4R, B5, B5R, A5R, B6R, A6R
Envelope C4, Comm. #10, Comm. #9,
Comm. #6-3/4, Monarch, Executive,
OUFUKU HAGAKI (return postcard),
YOUKEI 2, YOUKEI 4, 8 1/2 × 13 1/2",
8 1/2 × 13" (Oficio II), 8K, 16K, 16KR
Height: 3 7/8 - 11 5/8" (1/8" increments)
Width: 5 7/8 - 17" (1/8" increments)
Metric models
Height: 98 - 297 mm (1 mm increments)
Width: 148 - 432 mm (1 mm increments)
Assignable paper sizes
Inch models
Height: 3 7/8 - 11 5/8" (1/8" increments)
Width: 5 7/8 - 17" (1/8" increments)
Metric models
Height: 98 - 297 mm (1 mm increments)
Width: 148 - 432 mm (1 mm increments)
Note For further details on MP tray size setting, refer to Specifying
the Paper Size for the MP Tray in Chapter 2 of Operation Guide.
Specifying the Media Type for the MP Tray
The following media types can be specified for the MP tray.
Plain, Transparency, Rough, Vellum, Labels, Recycled, Preprinted,
Bond, Cardstock, Color (Colour), Prepunched, Letterhead, Thick paper,
Envelope, High Quality, Custom 1 - 8
Note For further details about MP tray media type setting, refer to
Specifying the Media Type for the MP Tray in Chapter 2 of
Operation Guide.
System Menu 3-23
Page 80

System Menu / Counter
t
n
System Menu
Copy
Default
Machine
Default
Language
MP Tr ay
Setting
Register
Orig. Size
Registering Non-standard Sizes for Originals
Pre-register 4 types of non-standard original sizes. Registered sizes are
shown as custom sizes when selecting the original size.
The size range that can be registered is as follows.
Model Type Range
Inch models Height: 2 - 11 5/8" (1/8" increments)
Width: 2 - 17" (1/8" increments)
Metric models Height: 50 - 297 mm (1 mm increments)
Width: 50 - 432 mm (1 mm increments)
1 Press the System Menu/Counter key.
2 Press [Register Orig. Size].
3 Select the number to register from Original Size (custom 1 - 4) and
Job
Accou
Print
Repor
press [Change #].
4 Press [On].
5 Press [+] or [–] to set the Y (height) and X (width) sizes.
6 Press [Close] to save settings or [Back] to cancel settings.
7 Press [Close]. The display is returned to the System Menu screen.
3-24 System Menu
Page 81

System Menu / Counter
User adjustme nt
Drum refresh
Char ger
Cleaning
Drum Refresh
Refresh the drum when image blur or white spots appear on images in
copies. There are 2 drum refresh modes.
Item Description
Drum Refresh 1 Use this mode when images are blurred or
smeared. Refreshing takes about 160 seconds.
Drum Refresh 2 Use this mode when white spots appear on
images. Refreshing takes about 90 seconds.
IMPORTANT To use [Drum Refresh 2], load 11 × 17" or A3 size
paper into the MP tray.
When you run [Drum Refresh 2], the machine makes a vibrating
sound for about 90 seconds until drum refreshing is completed. The
toner soiling on the ejected paper is normal and does not indicate a
fault.
1 Press the System Menu/Counter key.
2 Press [User Adjustment].
3 Press [Drum refresh].
System Menu
Drum refresh
Refresh the drum when image b lu r or white spots appear
on the image.
Drum
Refr esh 1
Drum
Refr esh 2
System Menu
Drum Refresh 1: Printed images are blurred.
Drum Refresh 2: Prin ted images show white spots .
* Pla ce A3/Le dger pape r o n the Multi Purpose tray
and th en execute Drum Refresh 2.
User ad jus tment-
4 Press [Drum Refresh 1] or [Drum Refresh 2]. Drum refresh begins.
5 Press [Close] after drum refresh is complete. The display is returned
to the System Menu screen.
System Menu 3-25
Page 82

Printing Reports
You can print the following reports from the operation panel.
Copy Status Report
Machine Status Report
3-26 System Menu
Page 83

Toner Coverage Report
The toner coverage report indicates the number of copying volume that
has been made. It also shows the black toner coverage in percentage for
individual paper sizes including the following.
• Total toner coverage report
• Copy toner coverage report
• Printer toner coverage report
• Fax toner coverage report
The copying volume as calculated from information indicated on toner
coverage reports will not match the guaranteed volume given on toner
containers exactly. The actual copying volume supported depends on
conditions of use (such as the content of copies and the frequency of
single or consecutive copies), as well as environmental factors
(temperature and humidity).
/ Counter
Language
MP Tray
Setting
Register
Orig. Size
Job
Accounting
Print
Repor t
End
Check the
counter
User
Adjustment
Note Before printing reports, verify that either 11 × 8 1/2" or A4
paper is loaded into a cassette.
1 Press the System Menu/Counter key.
2 Press [Print Report].
3 Use the numeric keys to enter the 4 digit management code. The
default setting is 2500 for the 25 cpm model and 3000 for the 30 cpm
model.
If the correct management code has been entered, the Print Report
Menu is displayed.
Note For security, it is recommended to change the
management code. For further details, refer to Changing
Management Code on page 3-20.
4 Press the key for the report you would like to print. Report printing
begins.
5 Press [Close]. The display is returned to the System Menu screen.
System Menu 3-27
Page 84

Checking Total Copy Count
Check the total copy count from the operation panel. You can check the
following values.
• Number of copies, number of prints, number of faxes, and total of all
of these
• Number of original pages scanned for copy mode and fax send
mode, and total of all of these
You can also print this information as a counter report.
Counter Report
/ Counter
Language
MP Tr ay
Setting
Register
Orig. Size
Job
Accounting
Print
Report
End
Check the
counter
User
Adjustment
Note Before printing reports, verify that either 11 × 8 1/2" or A4
paper is loaded into a cassette.
To use the machine as a printer or fax, you must install the
optional printer kit or fax kit.
1 Press the System Menu/Counter key.
2 Press [Check the counter].
3 The counts are displayed on the touch panel.
To print a counter report, press [Print Report].
To finish checking, press [Close]. The display is returned to the
System Menu screen.
3-28 System Menu
Page 85

4 Job Accounting
This chapter explains how to manage job accounting to share usage
among various departments.
Overview of Job Accounting 4-2
Managing Accounts 4-4
New Account ........................................................................... 4-4
Restricting Usage .................................................................... 4-5
Editing Department Information............................................... 4-8
Changing Restrictions on Usage ............................................. 4-9
Copy Count per Department 4-10
Total Job Accounting ............................................................. 4-10
Copy Count per Department...................................................4-11
Activating and Deactivating Job Accounting 4-12
Job Accounting Default Settings 4-13
Using Job Accounting 4-18
Copying ................................................................................. 4-18
Printing .................................................................................. 4-18
Faxing.................................................................................... 4-18
Job Accounting 4-1
Page 86

Overview of Job Accounting
You can manage accounting the copy count incurred by individual
departments by assigning a unique ID code to each department.
Job accounting helps the following activities in business organizations.
• Integrated management of copier and optional printer functions
using the same department ID code.
• Manageability of up to 500 individual departments.
• Availability for department ID codes with as many as eight digits
(between 0 and 99999999) for security.
• Tracking the copy volume for each department and for all
departments combined.
• Restricting the copy count per department in one-page increments
up to 999,999 copies.
• Resetting the copy counter for each department or for all
departments combined.
• Checking the total count for each department by entering the
department ID code.
IMPORTANT To restrict the number of copies using job accounting,
you must switch the Copy Job Accounting from [Off] to [On] as the
default. If the machine is equipped with the optional printer kit, also
activate Printer Job Accounting as the default. Refer to Job
Accounting Default Settings on page 4-13 for details.
Job accounting includes the following functions for managing printing
counts.
Setting Description
Management Edit New Account: Adds a new
department. Up to 500 departments
may be added.
Delete Account: Deletes the
registered departments.
Edit Department Information:
Changes the name and ID code for
the department.
Restricting Usage: Changes usage
restrictions for each department.
Copy Count per
Department
Activating and
Deactivating Job
Accounting
Job Accounting
Default Settings
Total Copy Volume: For reading the
total copy counts of all departments,
printing job accounting reports and
resetting the copy counter.
Copy count by department: Takes
totals for each department and clears
counters.
Set whether to use Job Accounting. page 4-12
Changes the defaults for Job
Accounting.
Reference
Page
page 4-4
page 4-10
page 4-13
4-2 Job Accounting
Page 87

/ Counter
Language
MP Tray
Setting
Register
Orig. Size
Job
Accounting
Print
Repor t
End
Check the
counter
User
Adjustment
Accessing the Job Accounting Screen
Set up Job Accounting from the Job Accounting screen. Follow the steps
below to access the Job Accounting screen.
1 Press the System Menu/Counter key.
2 Press [Job Accounting].
3 Use the numeric keys to enter the 4 digit management code. The
default setting is 2500 for the 25 cpm model and 3000 for the 30 cpm
model.
If the correct code has been entered, the Job Accounting screen will
be displayed.
Note For security, it is recommended to change the
management code. For further details, refer to Changing
Management Code on page 3-20.
4 Refer to the following configuration items to configure the default
settings.
Job Accounting 4-3
Page 88

Job Accounting
Job Accountg T Regist er/Sett.
Managing Accounts
You can add and delete departments and define restrictions to copy
count as needed.
New Account
Adds a new department. The following settings are required.
Setting Description
Department ID Code Set for department ID codes up to 8 digits
long (between 0 and 99999999) for security.
Name to display Set the department name using a maximum
of 32 alphanumeric characters.
Limit in use Set usage limitation for each of the
copier/printer functions. Refer to Restricting
Usage on page 4-5 for setting procedure.
1 Referring to Accessing the Job Accounting Screen on page 4-3,
access the Job Accounting screen.
2 Press [Management Edit].
Total Job Manag em ent Job Accntg
System Menu
divi sio n
division
Each Job
AccountingAccounting Edit
0001/0003
Up
Down
Order of
indication
Mgt. I nf.
Correction
Delete
Register
Def. S et.
Close
Limit
in us e
3 Press [Register].
4 Press [S] or [T] to select Account ID and press [Change #].
5 Use the numeric keys to enter the department ID code.
6 Press [Close].
7 Press [S] or [T] to select Name to Display and press [Change #].
8 Enter the department name and press [End].
Refer to the Operation Guide for how to enter text characters.
9 When all entries are complete, press [Next].
IMPORTANT An error will occur if you do not complete Account
ID and Name to display, and you will not be able to proceed to the
next screen. Be sure that you have completed the entries.
An error will occur if you attempt to enter an existing department
ID code. You will not be able to proceed to the next screen. Use
a different ID code.
10Specify restrictions on copying as desired.
Refer to Restricting Usage for how to set usage restrictions.
11Press [Registr.] to finalize settings.
To make settings on another department, press [Register] and
repeat steps 4 to 11.
12Press [Close]. The touch panel will return to the Job Accounting
screen.
4-4 Job Accounting
Page 89

Restricting Usage
Set usage restrictions to restrict copier/printer functions to specific
departments or set page count limitations.
For Copy/Printer Output Management under Job Accounting default
settings, select [All] or [Split] to change the setting items for usage
restriction. For further details, refer to Copy/Printer Output Management
on page 4-15.
When [All] is set under copier/printer output management (factory
default)
Manage copier and printer output count together. The items that may be
configured are as follows.
• Restricting Copying (All)
• Restricting Printing (All)
• Limitation
• Restricting FAX Usage
When [Split] is set under copier/printer output management
Manage copier and printer output count individually. The items that may
be configured are as follows.
• Restricting Copy Usage (Split)
• Restricting Printer Usage (Split)
• Restricting FAX Usage
Restricting Copying (All)
Specify whether to allow copying. The setting items are as follows.
Item Description
Permitted Allows copying.
Is not permitted (Is not
permited)
Note Turn Copy Job Accounting [On] in the job accounting default
settings to use this function.
Prevents copying.
1 Refer to steps 1 to 9 of New Account on page 4-4 to display the
usage restriction screen.
2 Press [S] or [T] to select Copy and press [Change #].
3 Select [Permitted] or [Is not permitted] ([Is not permited]).
4 Press [Close] to save settings or [Back] to cancel settings. The touch
panel will return to the usage restriction screen.
Restricting Printing (All)
Specify whether to allow printing. The setting items are as follows.
Item Description
Permitted Allows printing.
Is not permitted (Is not
permited)
Prevents printing.
Job Accounting 4-5
Page 90

Note This setting is displayed when the optional printer kit is
installed.
Turn Printer Job Accounting [On] in the job accounting default
settings to use this function.
1 Refer to steps 1 to 9 of New Account on page 4-4 to display the
usage restriction screen.
2 Press [S] or [T] to select Printer and press [Change #].
3 Select [Permitted] or [Is not permitted] ([Is not permited]).
4 Press [Close] to save settings or [Back] to cancel settings. The touch
panel will return to the usage restriction screen.
Limitation
Sets a limit on the number of copies printed. When the optional printer kit
is installed, this limit applies to the total number of pages, including both
printed and copied pages. The setting items are as follows.
Item Description
No limit Do not limit the number of pages used by the
copier and printer functions.
Counter limit Limit the total number of pages used by the copier
and printer functions to between 1-999,999 pages
(1 page increments).
Note This setting is not displayed in the following situations:
• When [Is not permitted] is selected in both Restricting
Copying (All) (refer to page 4-5) and Restricting Printing (All)
(refer to page 4-5)
• When [Is not permitted] is selected in Restricting Copying (All)
and the optional printer kit is not installed
1 Refer to steps 1 to 9 of New Account on page 4-4 to display the
usage restriction screen.
2 Press [S] or [T] to select Limitation (All) and press [Change #].
3 Select [No limit] or [Counter limit].
When [Counter limit] is selected, use the numeric keys to enter the
page limit.
4 Press [Close] to save settings or [Back] to cancel settings. The touch
panel will return to the usage restriction screen.
Restricting FAX Usage
Set limitations for sending faxes. The setting items are as follows.
Item Description
No limit Do not limit the number of pages
transmitted by fax
Counter limit Limit the total number of pages sent by fax
to between 1-999,999 pages (1 page
increments).
Is not permitted (Is not
permited)
Prevents fax transmission.
4-6 Job Accounting
Page 91

Note This setting is displayed when the optional fax kit is installed.
Turn Fax Job Accounting [On] in the job accounting default
settings to use this function.
1 Refer to steps 1 to 9 of New Account on page 4-4 to display the
usage restriction screen.
2 Press [S] or [T] to select FAX TX and press [Change #].
3 Select [No limit], [Counter limit] or [Is not permitted] ([Is not
permited]).
When [Counter limit] is selected, use the numeric keys to enter the
page limit.
4 Press [Close] to save settings or [Back] to cancel settings. The touch
panel will return to the usage restriction screen.
Restricting Copy Usage (Split)
Set the number of sheets to copy. The setting items are as follows.
Item Description
No limit Do not limit the number of pages copied
Counter limit Limit the total number of pages copied to
between 1-999,999 pages (1 page
increments).
Is not permitted (Is not
permited)
Prevents copying.
Note Turn Copy Job Accounting [On] in the job accounting default
settings to use this function.
1 Refer to steps 1 to 9 of New Account on page 4-4 to display the
usage restriction screen.
2 Press [S] or [T] to select Copy and press [Change #].
3 Select [No limit], [Counter limit] or [Is not permitted] ([Is not
permited]).
When [Counter limit] is selected, use the numeric keys to enter the
page limit.
4 Press [Close] to save settings or [Back] to cancel settings. The touch
panel will return to the usage restriction screen.
Restricting Printer Usage (Split)
Set printer usage restrictions. The setting items are as follows.
Item Description
No limit Do not limit the number of pages printed.
Counter limit Limit the total number of pages printed to
between 1-999,999 pages (1 page
increments).
Is not permitted (Is not
permited)
Prevents printing.
Job Accounting 4-7
Page 92

divi sio n
division
Note This setting is displayed when the optional printer kit is
installed.
Turn Printer Job Accounting [On] in the job accounting default
settings to use this function.
1 Refer to steps 1 to 9 of New Account on page 4-4 to display the
usage restriction screen.
2 Press [S] or [T] to select Printer and press [Change #].
3 Select [No limit], [Counter limit] or [Is not permitted] ([Is not
permited]).
When [Counter limit] is selected, use the numeric keys to enter the
page limit.
4 Press [Close] to save settings or [Back] to cancel settings. The touch
panel will return to the usage restriction screen.
Deleting Accounts
You can delete the department accounts registered.
1 Referring to Accessing the Job Accounting Screen on page 4-3,
access the Job Accounting screen.
2 Press [Management Edit].
Close
Up
Order of
indication
Mgt. I nf.
Correction
Limit
in us e
3 Select the department ID code to delete and press [Delete].
Note You can change the department display order. Press
[Order of indication] and select from [Sort by Code] ([1J9] and
[9J1]) and [Sort by Name] ([AJZ] and [ZJA]).
divi sio n
division
0001/0003
0001/0003
Down
Up
Down
Delete
Register
Order of
indication
Mgt. I nf.
Correction
Delete
Register
Limit
in us e
Close
4 Check the ID code to delete and press [Yes].
Note To delete other ID codes, repeat steps 3 and 4.
5 Press [Close]. The touch panel will return to the Job Accounting
screen.
Editing Department Information
Changes the name and ID code registered for the department.
1 Referring to Accessing the Job Accounting Screen on page 4-3,
access the Job Accounting screen.
2 Press [Management Edit].
3 Select the department ID code to modify and press [Mgt. Inf.
Correction].
Note You can change the department display order. Press
[Order of indication] and select from [Sort by Code] ([1J9] and
[9J1]) and [Sort by Name] ([AJZ] and [ZJA]).
4-8 Job Accounting
Page 93

Department inform. edit
n
a
Account ID
Name to display 1st sales division
System Menu Job Acc ount ing
divi si on
division
--
11111111.
Management Edit
Up
ValueSetting Item
Order of
indication
Mgt. I nf.
Corr ection
Limit
in use
Close
4 Press [S] or [T] to select Account ID and press [Change #].
B
5 Press [Clear] to blank the current entry. Use the numeric keys to
enter the new ID code (up to eight digits). Press [Close].
6 To change the department name, press [S] or [T] to select Name to
display and press [Change #].
Cha
7 Press [AllDel.] to clear the old department name. Enter the new
department name and press [End].
Refer to the Operation Guide for how to enter text characters.
8 Press [Close].
9 Press [Close] to save settings or [Back] to cancel settings. The touch
panel will return to the Job Accounting screen.
Changing Restrictions on Usage
You can change the restriction on usage per individual department.
IMPORTANT To restrict the number of copies using job accounting,
you must switch the Copy Job Accounting from [Off] to [On] as the
default. If the machine is equipped with the optional printer kit, also
activate Printer Job Accounting as the default. Refer to Job
Accounting Default Settings on page 4-13 for details.
1 Referring to Accessing the Job Accounting Screen on page 4-3,
access the Job Accounting screen.
2 Press [Management Edit].
3 Select the department ID code to modify and press [Limit in use].
Note You can change the department display order. Press
[Order of indication] and select from [Sort by Code] ([1J9] and
[9J1]) and [Sort by Name] ([AJZ] and [ZJA]).
0001/0003
Down
Delete
Register
4 Select the usage restriction as desired. Refer to Restricting Usage
on page 4-5 for how to set restrictions on usage.
5 Press [Close].
6 Press [Close]. The touch panel will return to the Job Accounting
screen.
Job Accounting 4-9
Page 94

Printer Total
,234 .1,234
FAX TX.
ounting
Fax
--------------
Fax
-------Trsm. # pages:
MinsCommun.Time: --Hrs---
Counter
clear
Print
Repor t
Close
Copy Count per Department
You can read the overall usage count or the usage per individual
department. You can also clear the usage count for a period of time and
begin again counting usage.
Total Job Accounting
Calculate the total usage count for all departments. You can print the
total in the form of Job Accounting reports. The total usage count can be
reset as necessary.
Note Before printing the Job Accounting report, verify that either
11 × 8 1/2" or A4 paper is loaded into a cassette.
1 Referring to Accessing the Job Accounting Screen on page 4-3,
access the Job Accounting screen.
2 Press [Total Job Accounting].
3 The total usage count is displayed for your reference.
Press [Print Report] and choose the report type to print this
information as a management report.
Press [Report by Function] to count a list of reports by function.
Press [Report by Size] in Total Count by Size, 1-5 (refer to page 4-
16) of the Job Accounting default settings for a list of reports by
paper size.
Sample: Job Accounting Reports
By function: copying and printing managed together ([All] is selected)
By function: copying and printing managed separately ([Split] is selected)
4-10 Job Accounting
Page 95

By paper size
2
-
Note Change the type of form to be printed from the Job
Accounting default settings in Copy/Printer Output Management
(refer to page 4-15).
4 To reset the usage count, press [Counter clear].
5 Press [Yes].
6 Press [Close]. The touch panel will return to the Job Accounting
screen.
Copy Count per Department
divi si on
division
division
Each Job Accounting
Print Pg Count
Monochr ome:
System Menu
0001/0003
Up
Down
Copy Printer Total
Job Accounting-
Order of
indication
.1,234 .1,
FAX TX.
Trsm. # pages:
Total
-------
Close
Fax
11111111
Tracks the copy count per individual department. The copy count per
department can be reset as necessary.
1 Referring to Accessing the Job Accounting Screen on page 4-3,
access the Job Accounting screen.
2 Press [Each Job Accounting].
3 Select the ID-code of the department and press [Total].
Note In the list, ---ETC indicates the number of printouts
delivered without entering an ID-code. The printouts include
the following documents:
• Various reports
• Reports for printing errors
• Printouts from computers of which the department ID-
codes are not specified (if Printing from Unregistered
Sources (Printer) is enabled in the job accounting default
settings)
You can change the department display order. Press [Order of
indication] and select from [Sort by Code] ([1J9] and [9J1])
and [Sort by Name] ([AJZ] and [ZJA]).
4 The usage count for the selected department is displayed for your
reference.
Note The copy limitation per department is given in
parentheses after the current volume, as in 1,234 (999,999).
5 To reset the usage count, press [Counter clear].
-MCommun.Time: --Hrs---
6 Press [Yes].
7 Press [Close].
8 Press [Close]. The touch panel will return to the Job Accounting
screen.
Job Accounting 4-11
Page 96

Activating and Deactivating Job Accounting
Turn job accounting on or off as necessary. The setting items are as
follows.
Setting Description
Off Job accounting is deactivated.
On Job accounting is activated.
1 Referring to Accessing the Job Accounting Screen on page 4-3,
access the Job Accounting screen.
Close
Register/ Sett. Job Accountg
b
Management Job Accnt g
Def. S et.ting Edi t
Off
On
2 Select [On] or [Off].
3 Press [Close].
4 Press [End].
When you select [On], the screen for the department ID-code entry
is displayed.
When you select [Off], the screen [Basic] screen is displayed.
4-12 Job Accounting
Page 97

Job Accounting Default Settings
Changes the defaults for Job Accounting.
The following items can be configured for Job Accounting default
settings.
• Copy Job Accounting...4-13
• Printer Job Accounting...4-13
• Printer Error Report...4-14
• Printing from Unregistered Sources (Printer)...4-14
• Copy/Printer Output Management...4-15
• Fax Job Accounting...4-15
• Response to Unauthorized Requests...4-16
• Default Counter Limit Value...4-16
• Total Count by Size, 1-5...4-16
Copy Job Accounting
Activate or deactivate Job Accounting for copy jobs. The setting items
are as follows.
Setting Description
Off Copy Job Accounting is deactivated.
On Copy Job Accounting is activated.
Job Accounting
Job Accountg T Register/Sett.
Total Job Management Job Accntg
System Menu
Each Job
AccountingAccounting Edit
Def. Set.
1 Referring to Accessing the Job Accounting Screen on page 4-3,
access the Job Accounting screen.
2 Press [Job Accntg Def. Set.].
3 Press [S] or [T] to select Copy Job Accounting and press [Change
#].
4 Select [On] or [Off].
5 Press [Close] to save settings or [Back] to cancel settings.
6 Press [Close]. The touch panel will return to the Job Accounting
screen.
Printer Job Accounting
Activate or deactivate Job Accounting when the device is used as a
printer. The setting items are as follows.
Setting Description
Off Printer Job Accounting is deactivated.
On Printer Job Accounting is activated.
Note This setting is displayed when the optional printer kit is
installed.
1 Referring to Accessing the Job Accounting Screen on page 4-3,
access the Job Accounting screen.
2 Press [Job Accntg Def. Set.].
3 Press [S] or [T] to select Print. Job Accounting and press [Change
#].
4 Select [On] or [Off].
Job Accounting 4-13
Page 98

5 Press [Close] to save settings or [Back] to cancel settings.
6 Press [Close]. The touch panel will return to the Job Accounting
screen.
Printer Error Report
When you use Job Accounting to manage printing, you can specify
whether an error report is printed in case that the user attempts to print
using the incorrect department code.
When the user attempts to print using the incorrect department ID code,
Account ID mismatch will be displayed and the job will not be printed.
Press [GO] to print the error report.
The setting items are as follows.
Setting Description
Off Do not print error report when there is an account
ID mismatch.
On Print error report even if there is an account ID
mismatch.
Note This item is displayed when Printer Job Accounting (refer to
page 4-13) is set to [On].
1 Referring to Accessing the Job Accounting Screen on page 4-3,
access the Job Accounting screen.
2 Press [Job Accntg Def. Set.].
3 Press [S] or [T] to select Printer error report and press [Change #].
4 Select [On] or [Off].
5 Press [Close] to save settings or [Back] to cancel settings.
6 Press [Close]. The touch panel will return to the Job Accounting
screen.
Printing from Unregistered Sources (Printer)
If you use Job Accounting to manage printing, you can authorize or
prohibit printing from computers with printer drivers that do not support
Job Accounting. The setting items are as follows.
Setting Description
Off Users cannot print unless their printer driver
supports Job Accounting.
On Users can print from computers with printer drivers
that do not support Job Accounting.
Note This item is displayed when Printer Job Accounting (refer to
page 4-13) is set to [On].
1 Referring to Accessing the Job Accounting Screen on page 4-3,
access the Job Accounting screen.
2 Press [Job Accntg Def. Set.].
3 Press [S] or [T] to select Other Mgt. reg. (print) and press [Change
#].
4 Select [On] or [Off].
4-14 Job Accounting
Page 99

5 Press [Close] to save settings or [Back] to cancel settings.
6 Press [Close]. The touch panel will return to the Job Accounting
screen.
Copy/Printer Output Management
You can choose whether copying and printing are managed together or
separately. The setting items are as follows.
Setting Description
All Manage copier and printer output count together.
Split Manage copier and printer output count
individually.
Note Changing this setting affects which setting items are
available in the usage restriction screen. For further details, refer
to Restricting Usage on page 4-5.
1 Referring to Accessing the Job Accounting Screen on page 4-3,
access the Job Accounting screen.
2 Press [Job Accntg Def. Set.].
3 Press [S] or [T] to select Copy/Printer output mgt and press
[Change #].
4 Select [All] or [Split].
5 Press [Close] to save settings or [Back] to cancel settings.
6 Press [Close]. The touch panel will return to the Job Accounting
screen.
Fax Job Accounting
Activate or deactivate job accounting when the optional fax function is
used. The setting items are as follows.
Setting Description
Off Fax Job Accounting is deactivated.
On Fax Job Accounting is activated.
Note This setting is displayed when the optional fax kit is installed.
1 Referring to Accessing the Job Accounting Screen on page 4-3,
access the Job Accounting screen.
2 Press [Job Accntg Def. Set.].
3 Press [S] or [T] to select Fax Job Accounting and press [Change
#].
4 Select [On] or [Off].
5 Press [Close] to save settings or [Back] to cancel settings.
6 Press [Close]. The touch panel will return to the Job Accounting
screen.
Job Accounting 4-15
Page 100

Response to Unauthorized Requests
Specify the actions when users attempt to copy in excess of the
specified copy limitation. The setting items are as follows.
Setting Restriction
Stop job immediately Restricts usage and stops output
immediately once the maximum usage has
been exceeded.
Sub-sequently Continues output or scanning of the current
job and restricts usage from the next job.
Alert Only Only a warning message is displayed.
1 Referring to Accessing the Job Accounting Screen on page 4-3,
access the Job Accounting screen.
2 Press [Job Accntg Def. Set.].
3 Press [S] or [T] to select Apply Limit and press [Change #].
4 Press [Stop job immediately], [Sub-sequently] or [Alert Only].
5 Press [Close] to save settings or [Back] to cancel settings.
6 Press [Close]. The touch panel will return to the Job Accounting
screen.
Default Counter Limit Value
Specify the default of usage limitation when registering a new
department. Specify between 1-999,999 sheets in 1 sheet increments.
1 Referring to Accessing the Job Accounting Screen on page 4-3,
access the Job Accounting screen.
2 Press [Job Accntg Def. Set.].
3 Press [S] or [T] to select Def. Val. of coun. Limit and press [Change
#].
4 Use the numeric keys to enter the counter limit default value.
5 Press [Close] to save settings or [Back] to cancel settings.
6 Press [Close]. The touch panel will return to the Job Accounting
screen.
Total Count by Size, 1-5
You can register specific paper sizes to monitor so that you can check
the copy count. You can also register types of paper.
Note Up to five different paper sizes can be registered for keeping
track of the copy count.
If you do not specify the media type, the registered paper size will
be counted regardless of the type. However, if you register a size
without specifying the type as the first entry and register the same
size with a type as the second entry, the usage count for the first
entry will not include the count of the second entry.
1 Referring to Accessing the Job Accounting Screen on page 4-3,
access the Job Accounting screen.
2 Press [Job Accntg Def. Set.].
3 Press [S] or [T] to select the number to configure from Total size 1-
5 and press [Change #].
4-16 Job Accounting
 Loading...