

Kramer VS-62HA Quick Start Manual And Manual
KRAMER
VS-62HA Quick Start Guide
This guide helps you install and use your VS-62HA for the first time. For more detailed information, g
http://www.kramerav.com/manual/VS-62HA to download the latest manual or scan the QR code on the left.
o to
Step 1: Check what’s in the box
1 Power cord
1 Quick Start Guide
1 Set of rack “ears”
4 Rubber feet
VS-62HA 6x2 HDMI/Audio Matrix Switcher
IR remote control transmitter with batteries
Step 2: Install the VS-62HA
To mount the VS-62HA in a rack, attach both “ear” brackets to the machine using the three screws on
each side of the machine. Alternatively, attach the rubber feet to the bottom of the machine and place
it on a table.
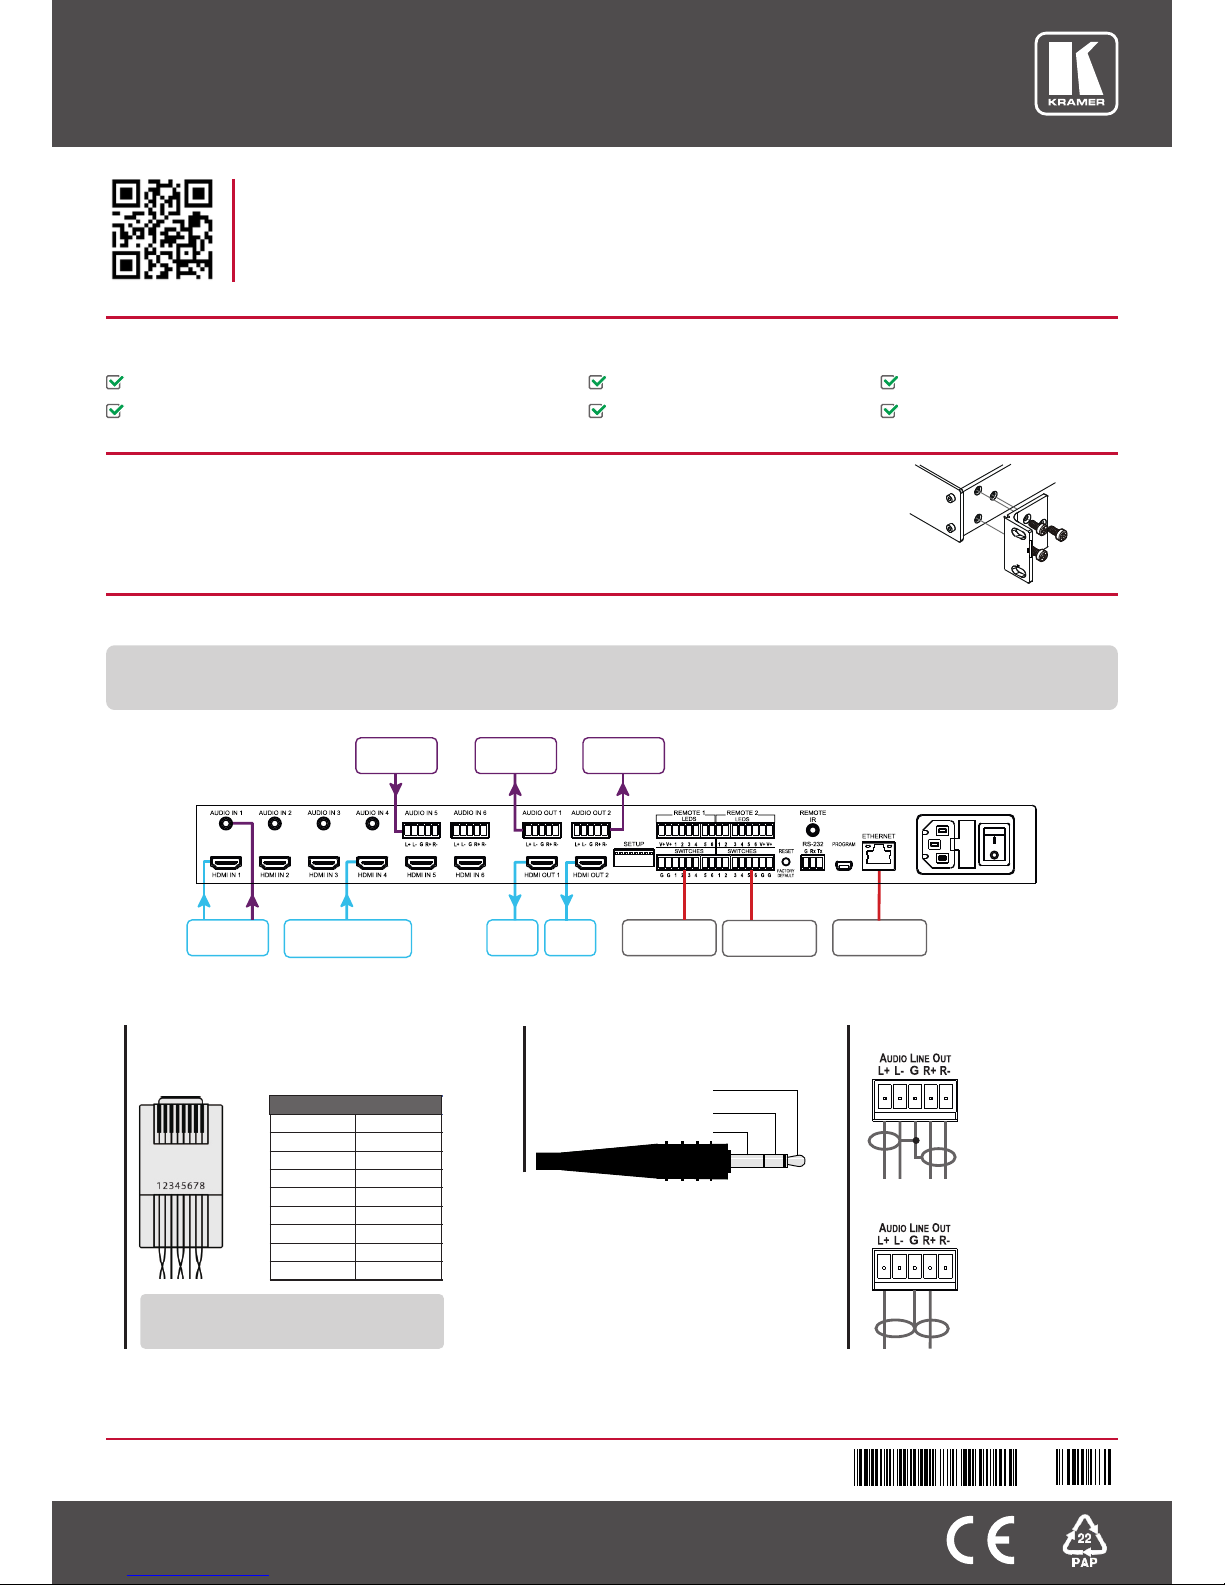
Step 3: Connect the inputs and outputs
Always switch OFF the power on each device before connecting it to your .
For best results, always use Kramer high-performance cables to connect your AV equipment to the .
VS-62HA
VS-62HA
WWW.KRAMERAV.COM
Laptop/
Desktop
VIA Connect PRO
Remote Input
Select Switch
Remote Input
Select Switch
Dante Audio
Source
Audio
Receiver
Audio
Receiver
Controller
LCDTVLCD
TV
VS-62HA Quick Start (P/N: 2900-300469QS REV 2)
2 9 00 - 3 00 46 9 QS
2
P/N:
Rev:
Left
Right
Ground
For the Ethernet and HDBaseT connectors,
see the proper wiring diagram below
1
2
3
4
5
6
7
8
Orange / White
Orange
Green / White
Blue
Blue / White
Green
Brown / White
Brown
PIN
Wire Color
EIA / TIA 568B
RJ-45 Pinout
Audio Input
Pinout
For optimum range and performance use
Kramer's
BC-HDKat6a cable. This specially built cable significantly
outperform regular CAT 5/CAT 6 cables.
Balanced
stereo audio output
Balanced
stereo audio output
to unbalanced
acceptor
Line Output Pinout
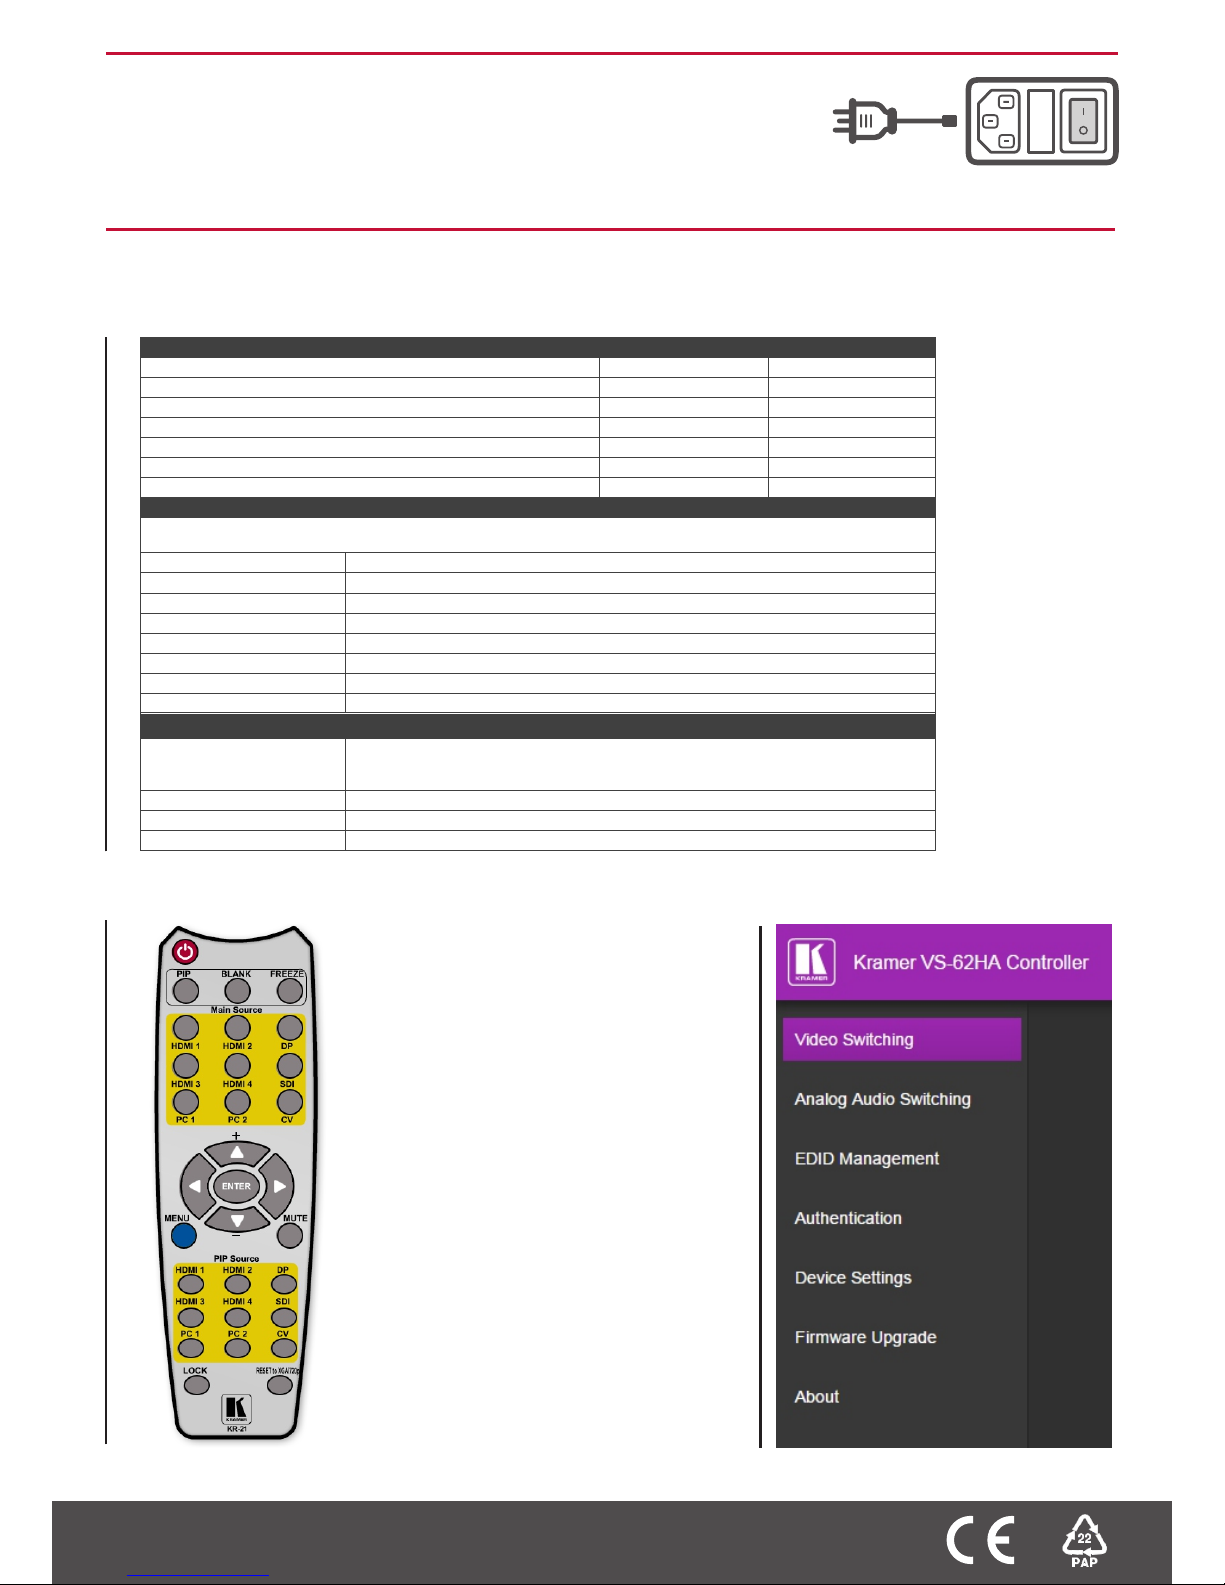
Step 5: Operate via the front panel buttons and via the:
WWW.KRAMERAV.COM
IR Remote Embedded Web Page
Step 4: Connect the power
Connect AC power to the rear of the switch on its power and then switch on
the power on each device.
VS-62HA,
RS-232 and Ethernet
RS-232
Protocol 3000 (Default) Legacy
Baud Rate: 115,200 9,600
Data Bits: 8 8
Stop Bits: 1 1
Parity: None None
Command Format: ASCII ASCII
Example (Set display mode to Picture in Picture): #Y 0,110,1<CR> >Y 0 110 1<CR>
Ethernet
To reset the IP settings to the factory reset values, power cycle the device while holding in the Ethernet Reset button, located on the
rear panel of the unit
IP Address: 192.168.1.39
Subnet mask: 255.255.000.000
Default gateway: 000.000.000.000
TCP Port #: 5000
UDP Port #: 50000
Maximum UDP Ports: 10
Maximum TCP Ports: 4
Web page password 1234
Full Factory Reset
Front panel buttons Turn power off. Turn power on again while holding the RESET TO XGA/720p front panel button.
The LEDs blink. Full factory reset is complete once the LEDs cease to blink and react normally.
Note that Full Factory reset includes Ethernet reset as well
OSD Factory Reset through the Misc menu item
Web pages Factory reset via the Device Settings embedded Web page
Protocol 3000 Use “Factory” command or #Y 0,771,1<CR>
 Loading...