

Page 1
Page 2
PRECAUTIONS
LOCATION
Using the unit in the following locations can result in a
malfunction.
• In direct sunlight
• Locations of extreme temperature or humidity
• Excessively dusty or dirty locations
• Locations of excessive vibration
• Close to magnetic fields
POWER SUPPLY
Please connect the designated AC adapter to an AC
outlet of the correct voltage. Do not connect it to an AC
outlet of voltage other than that for which your unit is
intended.
INTERFERENCE WITH OTHER ELECTRICAL
DEVICES
Radios and televisions placed nearby may experience
reception interference. Operate this unit at a suitable
distance from radios and televisions.
HANDLING
To avoid breakage, do not apply excessive force to the
switches or controls.
CARE
If the exterior becomes dirty, wipe it with a clean, dry
cloth. Do not use liquid cleaners such as benzene or
thinner, or cleaning compounds or flammable polishes.
KEEP THIS MANUAL
After reading this manual, please keep it for later reference.
KEEPING FOREIGN MATTER OUT OF YOUR
EQUIPMENT
Never set any container with liquid in it near this
equipment. If liquid gets into the equipment, it could
cause a breakdown, fire, or electrical shock.
Be careful not to let metal objects get into the equipment. If something does slip into the equipment,
unplug the AC adapter from the wall outlet.
Then contact your nearest Korg dealer or the store
where the equipment was purchased.
THE FCC REGULATION WARNING (FOR USA)
This equipment has been tested and found to comply with
the limits for a Class B digital device, pursuant to Part 15
of the FCC Rules. These limits are designed to provide reasonable protection against harmful interference in a residential installation. This equipment generates,
uses, and can radiate radio frequency energy and, if not
installed and used in accordance with the instructions,
may cause harmful interference to radio communications.
However, there is no guarantee that interference will not
occur in a particular installation. If this equipment does
cause harmful interference to radio or television reception,
which can be determined by turning the equipment off
and on, the user is encouraged to try to correct the interference by one or more of the following measures:
•Reorient or relocate the receiving antenna.
•Increase the separation between the equipment and
receiver.
•Connect the equipment into an outlet on a circuit different from that to which the receiver is connected.
•Consult the dealer or an experienced radio/TV technician for help.
Unauthorized changes or modification to this system can
void the user’s authority to operate this equipment.
NOTICE REGARDING DISPOSAL (EU ONLY)
When this “crossed-out wheeled bin” symbol is
displayed on the product, owner’s manual, battery, or battery package, it signifies that when you
wish to dispose of this product, manual, package
or battery you must do so in an approved manner.
Do not discard this product, manual, package or
battery along with ordinary household waste.
Disposing in the correct manner will prevent harm to
human health and potential damage to the environment.
Since the correct method of disposal will depend on the
applicable laws and regulations in your locality, please contact your local administrative body for details. If the battery
contains heavy metals in excess of the regulated amount, a
chemical symbol is displayed below the “crossed-out
wheeled bin” symbol on the battery or battery package.
IMPORTANT NOTICE TO CONSUMERS
This product has been manufactured according to strict
specifications and voltage requirements that are applicable
in the country in which it is intended that this product
should be used. If you have purchased this product via the
internet, through mail order, and/or via a telephone sale,
you must verify that this product is intended to be used in
the country in which you reside.
WARN I NG: U se o f th i s pr o d uc t in any country other than
that for which it is intended could be dangerous and could
invalidate the manufacturer’s or distributor’s warranty.
Please also retain your receipt as proof of purchase otherwise your product may be disqualified from the manufacturer’s or distributor’s warranty.
Page 3

DATA HANDLING
Data stored in memory may occasionally be lost due to
incorrect user action. Be sure to save your important
data to a memory card. KORG will not be responsible
for damages caused by data loss.
LCD DISPLAY
Some pages of the manuals show LCD screens along
with an explanation of operation and functionality. All
sound names, parameter names, and values are merely
examples and may not always match the actual display
that you are working on.
TRADEMARKS
Mac, the Mac logo and the Audio Units logo are trademarks of Apple Inc., registered in the U.S. and other
countries.
MS-DOS and Windows are registered trademarks of
Microsoft Corporation, registered in the U.S. and other
countries.
All product names and company names are the trademarks or registered trademarks of their respective
owners.
COPYRIGHT WARNING
This professional device is intended only for use with
works for which you yourself own the copyright, for
which you have received permission from the copyright holder to publicly perform, record, broadcast,
sell, and duplicate, or in connection with activities
which constitute “fair use” under copyright law. If you
are not the copyright holder, have not received permission from the copyright holder, or have not engaged in
fair use of the works, you may be violating copyright
law, and may be liable for damages and penalties. If
you are unsure about your rights to a work, please consult a copyright attorney.
KORG TAKES NO RESPONSIBILITY FOR ANY
INFRINGEMENT COMMITTED THROUGH USE OF
KORG PRODUCTS.
Page 4
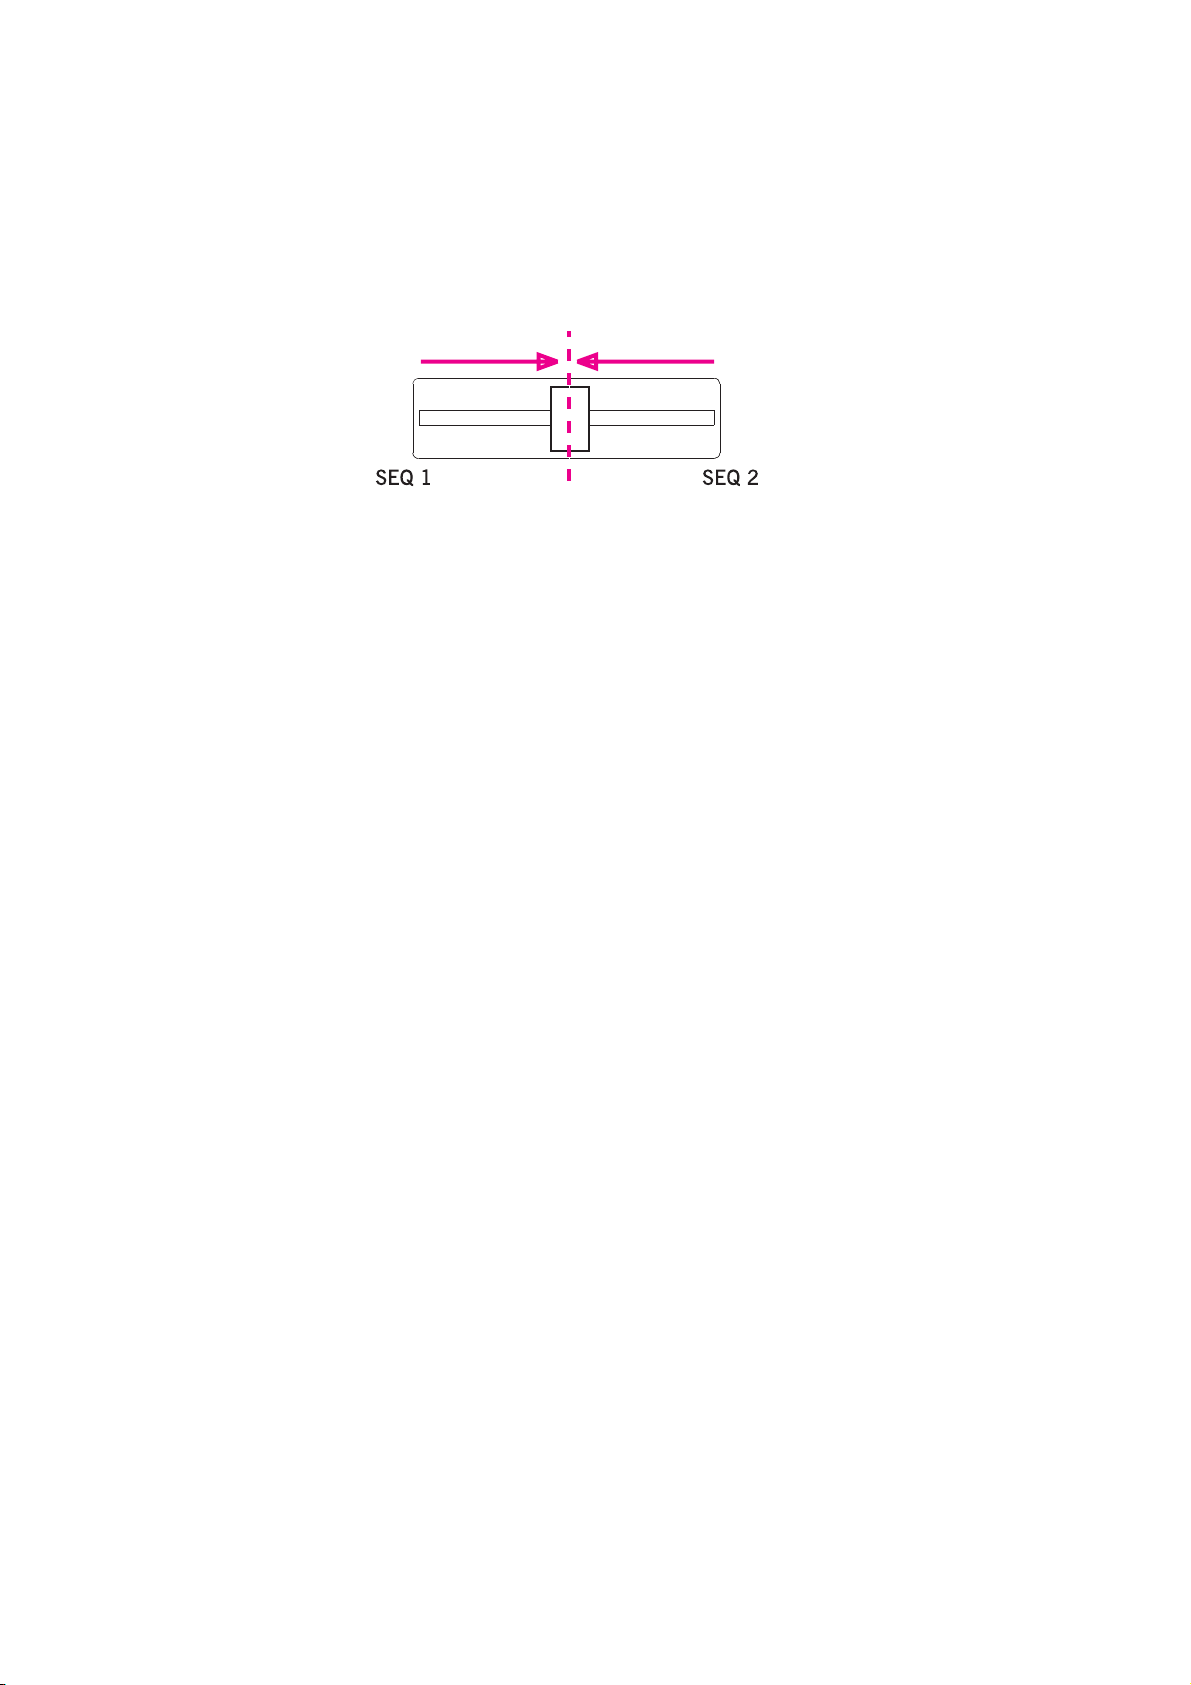
THE BALANCE SLIDER
When turning the instrument on, please be assured the BALANCE slider is set to the cen-
ter. This sets both Sequencer 1 (SEQ1) and Sequencer 2 (SEQ2) to their maximum level.
This will avoid you start a Song without hearing anything.
Page 5

HOW TO…
3
Keyboard
…select a Sound Program 25
…select a Performance 25
…play a Sound Program across the
whole keyboard, as with a piano 24
…split the keyboard in two 24
…add sounds to the right hand 24
…mute/unmute sounds 24
Style Play mode
…select a Style 26
…start/stop the Style 27
…select a Fill or a Break 27
…select a Style Variation 27
…see the Style tracks 41
…create a new Style 52
Song Play mode
…play a Song (Standard MIDI File) 31
…see the Lyrics 74
…see the Song tracks 73
…start both Sequencers at the same time 18, 80
Backing Sequence mode
…record a new Backing Sequence (Song) 82
Song mode
…record a new Song 91
…edit a Standard MIDI File 89
In general
…turn the speakers off 126
…change the Damper polarity 127
…select the Arabic Scale 34
Page 6

4
TABLE OF CONTENTS
Introduction
Welcome! . . . . . . . . . . . . . . . . . . . . . . . . . . . . . . . . . 8
Useful links . . . . . . . . . . . . . . . . . . . . . . . . . . . . . . . . . . . . 8
About this manual . . . . . . . . . . . . . . . . . . . . . . . . . . . . . . 9
Loading the operating system . . . . . . . . . . . . . . . . . . . . 9
Reloading the Factory Data . . . . . . . . . . . . . . . . . . . . . . 9
Start up . . . . . . . . . . . . . . . . . . . . . . . . . . . . . . . . . . 10
Connecting the AC power adapter . . . . . . . . . . . . . . . 10
Turning the instrument on and off . . . . . . . . . . . . . . . 10
Controlling the Volume . . . . . . . . . . . . . . . . . . . . . . . . 10
The BALANCE slider . . . . . . . . . . . . . . . . . . . . . . . . . . 10
Headphones . . . . . . . . . . . . . . . . . . . . . . . . . . . . . . . . . . 10
Audio Outputs . . . . . . . . . . . . . . . . . . . . . . . . . . . . . . . . 11
Audio Inputs . . . . . . . . . . . . . . . . . . . . . . . . . . . . . . . . . 11
MIDI connections . . . . . . . . . . . . . . . . . . . . . . . . . . . . . . 11
Damper Pedal . . . . . . . . . . . . . . . . . . . . . . . . . . . . . . . . . 11
Demo . . . . . . . . . . . . . . . . . . . . . . . . . . . . . . . . . . . . . . . . 11
The music stand . . . . . . . . . . . . . . . . . . . . . . . . . . . . . . . 11
Front panel . . . . . . . . . . . . . . . . . . . . . . . . . . . . . . . 12
Display and User Interface . . . . . . . . . . . . . . . . . . 19
Display controls . . . . . . . . . . . . . . . . . . . . . . . . . . . . . . . 19
Interface structure . . . . . . . . . . . . . . . . . . . . . . . . . . . . . 20
Message windows . . . . . . . . . . . . . . . . . . . . . . . . . . . . . 21
Symbols and Icons . . . . . . . . . . . . . . . . . . . . . . . . . . . . . 21
Grayed-out non-available parameters . . . . . . . . . . . . 21
Rear panel . . . . . . . . . . . . . . . . . . . . . . . . . . . . . . . . 22
Basic Guide
Basic operations . . . . . . . . . . . . . . . . . . . . . . . . . . 24
Playing on the keyboard . . . . . . . . . . . . . . . . . . . . . . . . 24
Selecting, muting/unmuting and soloing a track . . . 24
Selecting a Performance . . . . . . . . . . . . . . . . . . . . . . . . 25
Selecting a Program . . . . . . . . . . . . . . . . . . . . . . . . . . . . 25
Selecting a Style . . . . . . . . . . . . . . . . . . . . . . . . . . . . . . . 26
Selecting a Single Touch Setting (STS) . . . . . . . . . . . . 26
Changing all keyboard tracks at once . . . . . . . . . . . . . 26
Shortcut to see the original bank for a Style,
Performance or Program . . . . . . . . . . . . . . . . . . . . . . 26
Tutorial . . . . . . . . . . . . . . . . . . . . . . . . . . . . . . . . . . 27
Playing a Style (Automatic Accompaniment) . . . . . . 27
Playing in Realtime
(Without using Automatic Accompaniment) . . . . 28
Recording a Song (Simultaneously recording t
he Style and realtime performance) . . . . . . . . . . . . . 30
Playing a Song . . . . . . . . . . . . . . . . . . . . . . . . . . . . . . . . 31
Editing a Song . . . . . . . . . . . . . . . . . . . . . . . . . . . . . . . . 32
The Arabic Scale . . . . . . . . . . . . . . . . . . . . . . . . . . . . . . . 34
MIDI . . . . . . . . . . . . . . . . . . . . . . . . . . . . . . . . . . . . . 35
What is MIDI? . . . . . . . . . . . . . . . . . . . . . . . . . . . . . . . . .35
Midifiles . . . . . . . . . . . . . . . . . . . . . . . . . . . . . . . . . . . . . .35
The General MIDI standard . . . . . . . . . . . . . . . . . . . . .35
The Global channel . . . . . . . . . . . . . . . . . . . . . . . . . . . . .35
The Chord 1 and Chord 2 channels . . . . . . . . . . . . . . . 36
The Control channel . . . . . . . . . . . . . . . . . . . . . . . . . . . .36
MIDI Setup . . . . . . . . . . . . . . . . . . . . . . . . . . . . . . . . . . . .36
Connecting Liverpool to a Master keyboard . . . . . . . 36
Connecting the Liverpool to a MIDI accordion . . . . . 37
Connecting the Liverpool to an external sequencer .37
Playing another instrument with the Liverpool . . . . . 38
Reference Guide
Style Play operating mode . . . . . . . . . . . . . . . . . . 40
What’s a Style? . . . . . . . . . . . . . . . . . . . . . . . . . . . . . . . . .40
Styles and Performances . . . . . . . . . . . . . . . . . . . . . . . .40
Changing and resetting the Tempo . . . . . . . . . . . . . . .40
The DIRECT SD bank . . . . . . . . . . . . . . . . . . . . . . . . . . .40
Main page . . . . . . . . . . . . . . . . . . . . . . . . . . . . . . . . . . . . .41
Style tracks page . . . . . . . . . . . . . . . . . . . . . . . . . . . . . . .41
How to select Programs . . . . . . . . . . . . . . . . . . . . . . . . .41
The Write window . . . . . . . . . . . . . . . . . . . . . . . . . . . . . 42
Menu . . . . . . . . . . . . . . . . . . . . . . . . . . . . . . . . . . . . . . . . .42
Edit page structure . . . . . . . . . . . . . . . . . . . . . . . . . . . . .42
Page 1 - Mixer: Volume . . . . . . . . . . . . . . . . . . . . . . . . .43
Page 2 - Mixer: Pan . . . . . . . . . . . . . . . . . . . . . . . . . . . . .43
Page 3 - Mixer: FX Send . . . . . . . . . . . . . . . . . . . . . . . . .43
Page 4 - Tuning: Detune . . . . . . . . . . . . . . . . . . . . . . . . . 44
Page 5 - Tuning: Scale . . . . . . . . . . . . . . . . . . . . . . . . . . . 44
Page 6 - Tuning: PitchBend Sensitivity . . . . . . . . . . . .44
Page 7 - FX: A/B Select . . . . . . . . . . . . . . . . . . . . . . . . . .44
Page 8 - FX: C/D Select . . . . . . . . . . . . . . . . . . . . . . . . . . 45
Page 9 - FX: A editing . . . . . . . . . . . . . . . . . . . . . . . . . . . 45
Page 10 - FX: B editing . . . . . . . . . . . . . . . . . . . . . . . . . .45
Page 11 - FX: C editing . . . . . . . . . . . . . . . . . . . . . . . . . .45
Page 12 - FX: D editing . . . . . . . . . . . . . . . . . . . . . . . . . .45
Page 13 - Track: Easy edit . . . . . . . . . . . . . . . . . . . . . . . 45
Page 14 - Track: Mode . . . . . . . . . . . . . . . . . . . . . . . . . . 46
Page 15 - Track: Internal/External . . . . . . . . . . . . . . . . . 47
Page 16 - R.T. controls: Damper . . . . . . . . . . . . . . . . . .47
Page 17 - R.T. controls: Joystick . . . . . . . . . . . . . . . . . .47
Page 18 - R.T. controls: Dynamic range . . . . . . . . . . . . 48
Page 19 - R.T. controls: Ensemble . . . . . . . . . . . . . . . . .48
Page 20 - Style controls: Drum/Fill . . . . . . . . . . . . . . . .49
Page 21 - Style controls:
Wrap Around / Keyboard Range . . . . . . . . . . . . . . .49
Page 22 - Pads . . . . . . . . . . . . . . . . . . . . . . . . . . . . . . . . .50
Page 23 - Preferences: Lock . . . . . . . . . . . . . . . . . . . . . .50
Page 24 - Preferences: controls . . . . . . . . . . . . . . . . . . .51
Page 7

5
Style Record mode . . . . . . . . . . . . . . . . . . . . . . . . . 52
The Style’s structure . . . . . . . . . . . . . . . . . . . . . . . . . . . . 52
Style Import/Export . . . . . . . . . . . . . . . . . . . . . . . . . . . . 53
Entering the Record mode . . . . . . . . . . . . . . . . . . . . . . 53
Listening to the Style while in Record/Edit mode . . . 53
Exit and Save/Abort Style . . . . . . . . . . . . . . . . . . . . . . . 54
The Write window . . . . . . . . . . . . . . . . . . . . . . . . . . . . . 54
List of recorded events . . . . . . . . . . . . . . . . . . . . . . . . . 54
Fast Delete using the control panel buttons . . . . . . . . 54
Main page . . . . . . . . . . . . . . . . . . . . . . . . . . . . . . . . . . . . 55
Style Tracks page . . . . . . . . . . . . . . . . . . . . . . . . . . . . . . 56
Step Record page . . . . . . . . . . . . . . . . . . . . . . . . . . . . . . 57
Style Record procedure . . . . . . . . . . . . . . . . . . . . . . . . . 58
Menu . . . . . . . . . . . . . . . . . . . . . . . . . . . . . . . . . . . . . . . . 61
Edit page structure . . . . . . . . . . . . . . . . . . . . . . . . . . . . . 61
Page 1 - Edit: Quantize . . . . . . . . . . . . . . . . . . . . . . . . . 62
Page 2 - Edit: Transpose . . . . . . . . . . . . . . . . . . . . . . . . 62
Page 3 - Edit: Velocity . . . . . . . . . . . . . . . . . . . . . . . . . . 63
Page 4 - Event Edit . . . . . . . . . . . . . . . . . . . . . . . . . . . . . 63
Page 5 - Event Filter . . . . . . . . . . . . . . . . . . . . . . . . . . . . 64
Event Edit procedure . . . . . . . . . . . . . . . . . . . . . . . . . . . 65
Page 6 - Edit: Delete . . . . . . . . . . . . . . . . . . . . . . . . . . . . 66
Page 7 - Edit: Delete All . . . . . . . . . . . . . . . . . . . . . . . . . 67
Page 8 - Edit: Copy . . . . . . . . . . . . . . . . . . . . . . . . . . . . . 67
Page 9 - Style Element Controls: Programs . . . . . . . . 68
Page 10 - Style Element Controls: Expression . . . . . . 68
Page 11 - Style Element Controls: Keyboard Range . 68
Page 12 - Style Element Controls:
Chord Variation Table . . . . . . . . . . . . . . . . . . . . . . . . 69
Page 13 - Style Controls: Mode/Tension . . . . . . . . . . . 69
Song Play operating mode . . . . . . . . . . . . . . . . . . 70
The Songs and the Standard MIDI File format . . . . . 70
Transport controls . . . . . . . . . . . . . . . . . . . . . . . . . . . . . 70
MIDI Clock . . . . . . . . . . . . . . . . . . . . . . . . . . . . . . . . . . . 70
Switching between sequencers during editing . . . . . 70
Selecting a Song composing its progressive number 70
Realtime and sequencer tracks . . . . . . . . . . . . . . . . . . . 70
Master Volume, Sequencer Volume, BALANCE . . . 71
Effects in Song Play mode . . . . . . . . . . . . . . . . . . . . . . . 71
Groove Quantize window . . . . . . . . . . . . . . . . . . . . . . . 71
The Write window . . . . . . . . . . . . . . . . . . . . . . . . . . . . . 72
Main page . . . . . . . . . . . . . . . . . . . . . . . . . . . . . . . . . . . . 73
Tracks 1–8 page . . . . . . . . . . . . . . . . . . . . . . . . . . . . . . . . 73
Tracks 9–16 page . . . . . . . . . . . . . . . . . . . . . . . . . . . . . . . 74
Song Select page . . . . . . . . . . . . . . . . . . . . . . . . . . . . . . . 74
The Lyrics page . . . . . . . . . . . . . . . . . . . . . . . . . . . . . . . . 74
Playing a Jukebox file . . . . . . . . . . . . . . . . . . . . . . . . . . 74
Menu . . . . . . . . . . . . . . . . . . . . . . . . . . . . . . . . . . . . . . . . 75
Edit page structure . . . . . . . . . . . . . . . . . . . . . . . . . . . . . 75
Page 1 - Mixer: Volume . . . . . . . . . . . . . . . . . . . . . . . . . 76
Page 2 - Mixer: Pan . . . . . . . . . . . . . . . . . . . . . . . . . . . . . 76
Page 3 - Mixer: FX send A/B . . . . . . . . . . . . . . . . . . . . . 76
Page 3 - Mixer: FX send C/D . . . . . . . . . . . . . . . . . . . . . 77
Page 4 - FX: A/B Select . . . . . . . . . . . . . . . . . . . . . . . . . . 77
Page 4 - FX: C/D Select . . . . . . . . . . . . . . . . . . . . . . . . . . 77
Page 5 - FX: A editing . . . . . . . . . . . . . . . . . . . . . . . . . . 78
Page 6 - FX: B editing . . . . . . . . . . . . . . . . . . . . . . . . . . . 78
Page 5 - FX: C editing . . . . . . . . . . . . . . . . . . . . . . . . . . . 78
Page 6 - FX: D editing . . . . . . . . . . . . . . . . . . . . . . . . . . 78
Page 7 - Track: Mode . . . . . . . . . . . . . . . . . . . . . . . . . . . 78
Page 8 - Track: Internal/External . . . . . . . . . . . . . . . . . 79
Page 9 - Jukebox . . . . . . . . . . . . . . . . . . . . . . . . . . . . . . . 79
Page 10 - Preferences . . . . . . . . . . . . . . . . . . . . . . . . . . . 80
Saving a list of Songs . . . . . . . . . . . . . . . . . . . . . . . . . . . 81
Backing Sequence operating mode . . . . . . . . . . . 82
Transport controls . . . . . . . . . . . . . . . . . . . . . . . . . . . . . 82
The Backing Sequence, Song and Song Play modes . 82
How to playback a Song . . . . . . . . . . . . . . . . . . . . . . . . 82
Realtime Recording mode . . . . . . . . . . . . . . . . . . . . . . 82
Chord/Acc Step recording . . . . . . . . . . . . . . . . . . . . . . 83
Main Page (Backing Sequence Play) . . . . . . . . . . . . . . 83
Load Song page . . . . . . . . . . . . . . . . . . . . . . . . . . . . . . . 84
Save Song page . . . . . . . . . . . . . . . . . . . . . . . . . . . . . . . . 84
Realtime Recording page . . . . . . . . . . . . . . . . . . . . . . . 85
Chord/Acc Step Recording page . . . . . . . . . . . . . . . . . 86
How to delete a whole Song . . . . . . . . . . . . . . . . . . . . 88
Song operating mode . . . . . . . . . . . . . . . . . . . . . . 89
Transport controls . . . . . . . . . . . . . . . . . . . . . . . . . . . . . 89
Master Volume and Sequencer Volume . . . . . . . . . . . 89
The Songs and the Standard MIDI File format . . . . . 89
Fast track deletion . . . . . . . . . . . . . . . . . . . . . . . . . . . . . 89
How to delete a whole Song . . . . . . . . . . . . . . . . . . . . 89
Main page . . . . . . . . . . . . . . . . . . . . . . . . . . . . . . . . . . . . 89
Tracks 1–8 page . . . . . . . . . . . . . . . . . . . . . . . . . . . . . . . 90
Tracks 9–16 page . . . . . . . . . . . . . . . . . . . . . . . . . . . . . . 90
Load Song page . . . . . . . . . . . . . . . . . . . . . . . . . . . . . . . 90
Save Song page . . . . . . . . . . . . . . . . . . . . . . . . . . . . . . . . 91
Realtime Record procedure . . . . . . . . . . . . . . . . . . . . . 91
Step Record procedure . . . . . . . . . . . . . . . . . . . . . . . . . 92
Song Record page . . . . . . . . . . . . . . . . . . . . . . . . . . . . . 93
Step Record page . . . . . . . . . . . . . . . . . . . . . . . . . . . . . . 94
Menu . . . . . . . . . . . . . . . . . . . . . . . . . . . . . . . . . . . . . . . . 95
Edit page structure . . . . . . . . . . . . . . . . . . . . . . . . . . . . 95
Page 1 - Mixer: Volume . . . . . . . . . . . . . . . . . . . . . . . . . 96
Page 2 - Mixer: Pan . . . . . . . . . . . . . . . . . . . . . . . . . . . . 96
Page 3 - Mixer: FX Block . . . . . . . . . . . . . . . . . . . . . . . . 96
Page 4 - Mixer: FX Send A/B (or C/D) . . . . . . . . . . . . . 97
Page 5 - Tuning: Detune . . . . . . . . . . . . . . . . . . . . . . . . 97
Page 6 - Tuning: Scale . . . . . . . . . . . . . . . . . . . . . . . . . . 97
Page 7 - Tuning: PitchBend/Scale . . . . . . . . . . . . . . . . 98
Page 8 - FX: A/B Select . . . . . . . . . . . . . . . . . . . . . . . . . 98
Page 9 - FX: C/D Select . . . . . . . . . . . . . . . . . . . . . . . . . 98
Page 10 - FX: A editing . . . . . . . . . . . . . . . . . . . . . . . . . 99
Page 11 - FX: B editing . . . . . . . . . . . . . . . . . . . . . . . . . 99
Page 12 - FX: C editing . . . . . . . . . . . . . . . . . . . . . . . . . 99
Page 13 - FX: D editing . . . . . . . . . . . . . . . . . . . . . . . . . 99
Page 14 - Track: Easy edit . . . . . . . . . . . . . . . . . . . . . . . 99
Page 15 - Track: Mode . . . . . . . . . . . . . . . . . . . . . . . . . 100
Page 16 - Track: Internal/External . . . . . . . . . . . . . . . 100
Page 17 - Edit: Quantize . . . . . . . . . . . . . . . . . . . . . . . 101
Page 18 - Edit: Transpose . . . . . . . . . . . . . . . . . . . . . . 101
Page 19 - Edit: Velocity . . . . . . . . . . . . . . . . . . . . . . . . 101
Page 20 - Edit: Delete . . . . . . . . . . . . . . . . . . . . . . . . . . 102
Page 21 - Edit: Cut Measures . . . . . . . . . . . . . . . . . . . 102
Page 22 - Edit: Insert Measures . . . . . . . . . . . . . . . . . 102
Page 23 - Edit: Copy . . . . . . . . . . . . . . . . . . . . . . . . . . 103
Page 24 - Event Edit . . . . . . . . . . . . . . . . . . . . . . . . . . . 103
Page 25 - Event Filter . . . . . . . . . . . . . . . . . . . . . . . . . . 104
Event Edit procedure . . . . . . . . . . . . . . . . . . . . . . . . . 105
Page 8

6
Program operating mode . . . . . . . . . . . . . . . . . . . 106
Main page . . . . . . . . . . . . . . . . . . . . . . . . . . . . . . . . . . . 106
Sound Programs and Drum Programs . . . . . . . . . . . 106
Menu . . . . . . . . . . . . . . . . . . . . . . . . . . . . . . . . . . . . . . . 106
Edit page structure . . . . . . . . . . . . . . . . . . . . . . . . . . . 107
The Compare function . . . . . . . . . . . . . . . . . . . . . . . . 107
How to select oscillators . . . . . . . . . . . . . . . . . . . . . . . 107
Erase Program/Oscillator . . . . . . . . . . . . . . . . . . . . . . 107
The ‘Write’ window . . . . . . . . . . . . . . . . . . . . . . . . . . 107
Page 1 - Basic . . . . . . . . . . . . . . . . . . . . . . . . . . . . . . . . 108
Page 2 - Sample (Sound Programs) . . . . . . . . . . . . . . 108
Page 2 - DK Samples (Drum Programs) . . . . . . . . . . 109
Page 3 - Pitch . . . . . . . . . . . . . . . . . . . . . . . . . . . . . . . . 110
Page 4 - Pitch LFO1 . . . . . . . . . . . . . . . . . . . . . . . . . . . 111
Page 5 - Pitch LFO2 . . . . . . . . . . . . . . . . . . . . . . . . . . . 112
Page 6 - Pitch EG . . . . . . . . . . . . . . . . . . . . . . . . . . . . . 112
Page 7 - Filter . . . . . . . . . . . . . . . . . . . . . . . . . . . . . . . . 113
Page 8 - Filter Modulation . . . . . . . . . . . . . . . . . . . . . 114
Page 9 - Filter LFO1 . . . . . . . . . . . . . . . . . . . . . . . . . . . 115
Page 10 - Filter LFO2 . . . . . . . . . . . . . . . . . . . . . . . . . . 116
Page 11 - Filter EG . . . . . . . . . . . . . . . . . . . . . . . . . . . . 116
Page 12 - Amp . . . . . . . . . . . . . . . . . . . . . . . . . . . . . . . 118
Page 13 - Amp Modulation . . . . . . . . . . . . . . . . . . . . 118
Page 14 - Amp LFO1 . . . . . . . . . . . . . . . . . . . . . . . . . . 119
Page 15 - Amp LFO2 . . . . . . . . . . . . . . . . . . . . . . . . . . 119
Page 16 - Amp EG . . . . . . . . . . . . . . . . . . . . . . . . . . . . 119
Page 17 - LFO1 . . . . . . . . . . . . . . . . . . . . . . . . . . . . . . . 121
Page 18 - LFO2 . . . . . . . . . . . . . . . . . . . . . . . . . . . . . . . 123
Page 19 - Effects . . . . . . . . . . . . . . . . . . . . . . . . . . . . . . 123
Page 20 - FX1 editing . . . . . . . . . . . . . . . . . . . . . . . . . . 123
Page 21 - FX2 editing . . . . . . . . . . . . . . . . . . . . . . . . . . 123
AMS (Alternate Modulation Source) list . . . . . . . . . 124
Global edit environment . . . . . . . . . . . . . . . . . . . 126
The Write window . . . . . . . . . . . . . . . . . . . . . . . . . . . . 126
Menu . . . . . . . . . . . . . . . . . . . . . . . . . . . . . . . . . . . . . . . 126
Page 1 - General controls . . . . . . . . . . . . . . . . . . . . . . 126
Page 2 - Master Transpose . . . . . . . . . . . . . . . . . . . . . 127
Page 3 - Assignable Pedal/Footswitch,
Assignable Slider . . . . . . . . . . . . . . . . . . . . . . . . . . . 127
Page 4 - MIDI Setup . . . . . . . . . . . . . . . . . . . . . . . . . . . 127
Page 5 - MIDI Controls . . . . . . . . . . . . . . . . . . . . . . . . 128
Page 6 - MIDI IN Channels . . . . . . . . . . . . . . . . . . . . 128
Page 7 - MIDI IN Controls (1) . . . . . . . . . . . . . . . . . . 129
Page 8 - MIDI IN Controls (2) . . . . . . . . . . . . . . . . . . 129
Page 9 - MIDI IN Filters . . . . . . . . . . . . . . . . . . . . . . . 130
Page 10 - MIDI OUT Channels . . . . . . . . . . . . . . . . . 130
Page 11 - MIDI OUT Filters . . . . . . . . . . . . . . . . . . . . 130
Card Edit environment . . . . . . . . . . . . . . . . . . . . . 131
The WRITE/CARD IN USE LED . . . . . . . . . . . . . . . . 131
Supported cards . . . . . . . . . . . . . . . . . . . . . . . . . . . . . . 131
Loading data created with the Pa80/Pa60/Pa50 . . . 132
Card structure . . . . . . . . . . . . . . . . . . . . . . . . . . . . . . . 132
File types . . . . . . . . . . . . . . . . . . . . . . . . . . . . . . . . . . . . 132
File and folder size display . . . . . . . . . . . . . . . . . . . . 133
Page structure . . . . . . . . . . . . . . . . . . . . . . . . . . . . . . . . 133
Navigation tools . . . . . . . . . . . . . . . . . . . . . . . . . . . . . . 133
Menu . . . . . . . . . . . . . . . . . . . . . . . . . . . . . . . . . . . . . . . .134
Page 1 - Load . . . . . . . . . . . . . . . . . . . . . . . . . . . . . . . . . 134
Page 2 - Save . . . . . . . . . . . . . . . . . . . . . . . . . . . . . . . . .136
Page 3 - Copy . . . . . . . . . . . . . . . . . . . . . . . . . . . . . . . . .139
Page 4 - Erase . . . . . . . . . . . . . . . . . . . . . . . . . . . . . . . . .140
Page 5 - Format . . . . . . . . . . . . . . . . . . . . . . . . . . . . . . . 141
Page 6 - New Dir . . . . . . . . . . . . . . . . . . . . . . . . . . . . . .141
Page 7 - Rename . . . . . . . . . . . . . . . . . . . . . . . . . . . . . .141
Page 8 - Utilities 1 . . . . . . . . . . . . . . . . . . . . . . . . . . . . .142
Page 9 - Utilities 2 . . . . . . . . . . . . . . . . . . . . . . . . . . . . .143
Appendix
Factory Data . . . . . . . . . . . . . . . . . . . . . . . . . . . . . 146
Styles . . . . . . . . . . . . . . . . . . . . . . . . . . . . . . . . . . . . . . . .146
Style Elements . . . . . . . . . . . . . . . . . . . . . . . . . . . . . . . . 148
Single Touch Settings (STS) . . . . . . . . . . . . . . . . . . . . . 148
Internal Song . . . . . . . . . . . . . . . . . . . . . . . . . . . . . . . . .149
Programs (bank order) . . . . . . . . . . . . . . . . . . . . . . . . . 150
Programs (Program Change order) . . . . . . . . . . . . . . 157
Drum Kits . . . . . . . . . . . . . . . . . . . . . . . . . . . . . . . . . . . .163
Drum Kit instruments . . . . . . . . . . . . . . . . . . . . . . . . .164
Performances . . . . . . . . . . . . . . . . . . . . . . . . . . . . . . . . .176
MIDI Setup . . . . . . . . . . . . . . . . . . . . . . . . . . . . . . . . . . . 176
Effects . . . . . . . . . . . . . . . . . . . . . . . . . . . . . . . . . . 177
Diagrams . . . . . . . . . . . . . . . . . . . . . . . . . . . . . . . . . . . .177
Dynamic Modulation sources . . . . . . . . . . . . . . . . . . . 177
Filter/Dynamic . . . . . . . . . . . . . . . . . . . . . . . . . . . . . . . . 177
Pitch/Phase Mod. . . . . . . . . . . . . . . . . . . . . . . . . . . . . . 187
Mod./P.Shift . . . . . . . . . . . . . . . . . . . . . . . . . . . . . . . . . .197
ER/Delay . . . . . . . . . . . . . . . . . . . . . . . . . . . . . . . . . . . . .204
Reverb . . . . . . . . . . . . . . . . . . . . . . . . . . . . . . . . . . . . . . . 210
Mono – Mono Chain . . . . . . . . . . . . . . . . . . . . . . . . . . .211
Assignable parameters . . . . . . . . . . . . . . . . . . . . 227
List of functions assignable to the Footswitch . . . . . 227
List of functions assignable to the Pedal or Assignable
Slider . . . . . . . . . . . . . . . . . . . . . . . . . . . . . . . . . . . . . .228
List of sounds assignable to the Pads . . . . . . . . . . . . . 228
List of functions assignable to the Pads . . . . . . . . . . .229
Scales . . . . . . . . . . . . . . . . . . . . . . . . . . . . . . . . . . . . . . . .229
MIDI Controllers . . . . . . . . . . . . . . . . . . . . . . . . . . 230
MIDI Implementation Chart . . . . . . . . . . . . . . . . . . . .231
Parameters . . . . . . . . . . . . . . . . . . . . . . . . . . . . . . 232
Recognized chords . . . . . . . . . . . . . . . . . . . . . . . 235
Error messages & Troubleshooting . . . . . . . . . . 237
Error messages . . . . . . . . . . . . . . . . . . . . . . . . . . . . . . .237
Troubleshooting . . . . . . . . . . . . . . . . . . . . . . . . . . . . . .240
Technical specifications . . . . . . . . . . . . . . . . . . . 241
Alphabetical Index . . . . . . . . . . . . . . . . . . . . . . . . 242
Page 9

INTRODUCTION
Page 10

8
Welcome!
Useful links
1. WELCOME!
Thank you for purchasing the Korg Professional
Arranger Liverpool.
This instrument is an ideal keyboard for song produc-
— it lets you select a desired musical style and gen-
tion
erate a high-quality band accompaniment simply by
playing chords, and then you can play the melody
yourself to easily create an original song.
Here are some of the features of your new instrument:
• Powerful HI (Hyper Integrated) KORG sound generation system, as seen in our best professional
synthesizers.
• OPOS (Objective Portable Operating System) multitasking operating system, to let you load data
while playing your instrument.
• Operating System updates, to load new features
from card. Don’t let your instrument get old!
• Solid State Disk (SSD), for any system update–a
smart way to replace the usual ROM memory.
• SD card slot, capable of reading and writing on SD
and MMC memory types.
• Directly access Styles stored in internal memory
(SSD) or on an SD card.
• General MIDI Level 2 Sounds-compatible.
• More than 662 Sound Programs.
• 4 multieffect processor, each with 89 effect types.
• 160 Performances and 960 Single Touch Settings
(STS), for fast setting of keyboard sounds and
effects.
•240 Styles.
• XDS Double Sequencer with Crossfader.
• Style Record and Edit
•Full-featured sequencer (Song Record and Edit)
• Integrated speakers, for the most true sound
reproduction.
• Wide Custom Display.
USEFUL LINKS
Your preferred KORG dealer also carries a wide range
of Korg hardware and software accessories. Please ask
your dealer about additional Programs, Styles, and
other useful music materials.
Each KORG distributor can supply you with useful
information. Just give him a call for additional services.
In the English-speaking world, here are the relevant
addresses:
USA KORG USA, 316 South Service Road, Mel-
ville, New York, 11747, USA
Tel:1-516-333-9100, Fax:1-516-333-9108
UK KORG UK Ltd, 1 Harrison Close, Knowl-
hill, Milton Keynes, MK5, 8PA, UK
Tel: 01908 304600, Fax: 01908 304699
UK Technical Support
Tel: 01908 304637
E-mail: [email protected]
Many KORG distributors also have their own web
page on the internet, where you can find infos and software. Useful web pages in English are the following:
http://www.korg.com
A place to find operating system updates and various
system files (for example, a full backup of the factory
data) is at the following link:
http://www.korgpa.com/
/
Page 11

9
Welcome!
About this manual
ABOUT THIS MANUAL
This manual is divided in three sections:
•A Basic Guide, containing an overview of the
instrument, as well as a series of practical guides
(named “Tutorials”).
•A Reference Guide, with each page and parame-
ter described in detail.
•An Appendix, with a list of data and useful infor-
mation for the advanced user.
Within the manual, you will find the following abbreviations:
The parameter can be saved onto a Performance by pressing the WRITE button.
The parameter can be saved onto the current Style Performance by pressing the
WRITE button.
The parameter can be saved onto a Single
Touch Setting by pressing the WRITE button.
The parameter can be saved onto a Global
setting by going to the Global environment (see “Global edit environment” on
page 126) and pressing the WRITE button.
LOADING THE OPERATING SYSTEM
Your Liverpool can be constantly updated as new versions of the operating system are released by KORG.
You can download the operating system from http://
www.korgpa.com/. Please, read the Readme file
included with the operating system itself.
You can see which version of the operating systems is
installed in your Liverpool by keeping the SHIFT button pressed, and pressing the ENTER and EXIT buttons
together. The operating system version number will
appear in the display. Press EXIT to close the message
window.
To load a new system, follow these instructions:
1. Copy the three operating system’s files in the root
of an SD card. These are the needed files:
• BLIVR.SYS
• NBLIVR.SYS
•LIVR.LZX
2. Turn the instrument off, and insert the card containing the operating system into the card slot.
3. Turn the instrument on. A message appears in the
display, asking if you want to load the operating
system.
4. Press ENTER to load, or EXIT to cancel the loading
procedure. If you press ENTER, wait until the
loading is finished.
When the operating system is finished loading, a
message appears, asking you to remove the card
and press any button.
Hint: When done, delete the operating system files, to
avoid Liverpool starts the upgrade procedure each time
it is turned on with the same card in the drive.
5. Remove the card, and press any button.
RELOADING THE FACTORY DATA
Should the internal memory content get damaged, you
can reload the original Factory Data from the backup
card. See “Restore Data” on page 142.
Page 12
10
Start up
Connecting the AC power adapter
2. START UP
CONNECTING THE AC POWER ADAPTER
Connect the supplied AC power adapter to the dedicated socket on the rear of the instrument. Then, plug it
into a wall socket.
Warning: Use only the supplied adapter, or an adapter
suggested by Korg. Other adapters may look similar,
but they may damage your instrument!
TURNING THE INSTRUMENT ON AND OFF
Turning the power on
• Press the power button ( ) located on the upper right
side of the front panel.
The startup screen will appear in the LCD, and after a
time it will display the main page in Style Play mode
and the unit will be ready for sound output.
Turning the power off
• Press the power button ( ) located on the upper right
side of the front panel to turn off the power.
War ning:
ned in RAM (a volatile memory, used for Song editing) will be
lost. On the contrary, data contained in the SSD disk (a nonvolatile memory, used for Factory and User data) will be preserved.
Note:
being read or written.
ABOUT THE AUTO POWER-OFF FUNCTION
With the factory settings, this instrument will automatically power-off when four hours have passed since
you last played the keyboard or used the buttons. If
desired, you can turn off (disable) this function.
The power will also turn off automatically after four
hours pass with only songs or demo songs being
played.
To adjust power on/off settings, press the [GLOBAL]
button to enter the GLOBAL page, and adjust the settings on the Page1-Gen.Controls page. (“AutoOff” on
page 126)
When turning the instrument off, all data contai-
Never turn off the power while the SD card data is
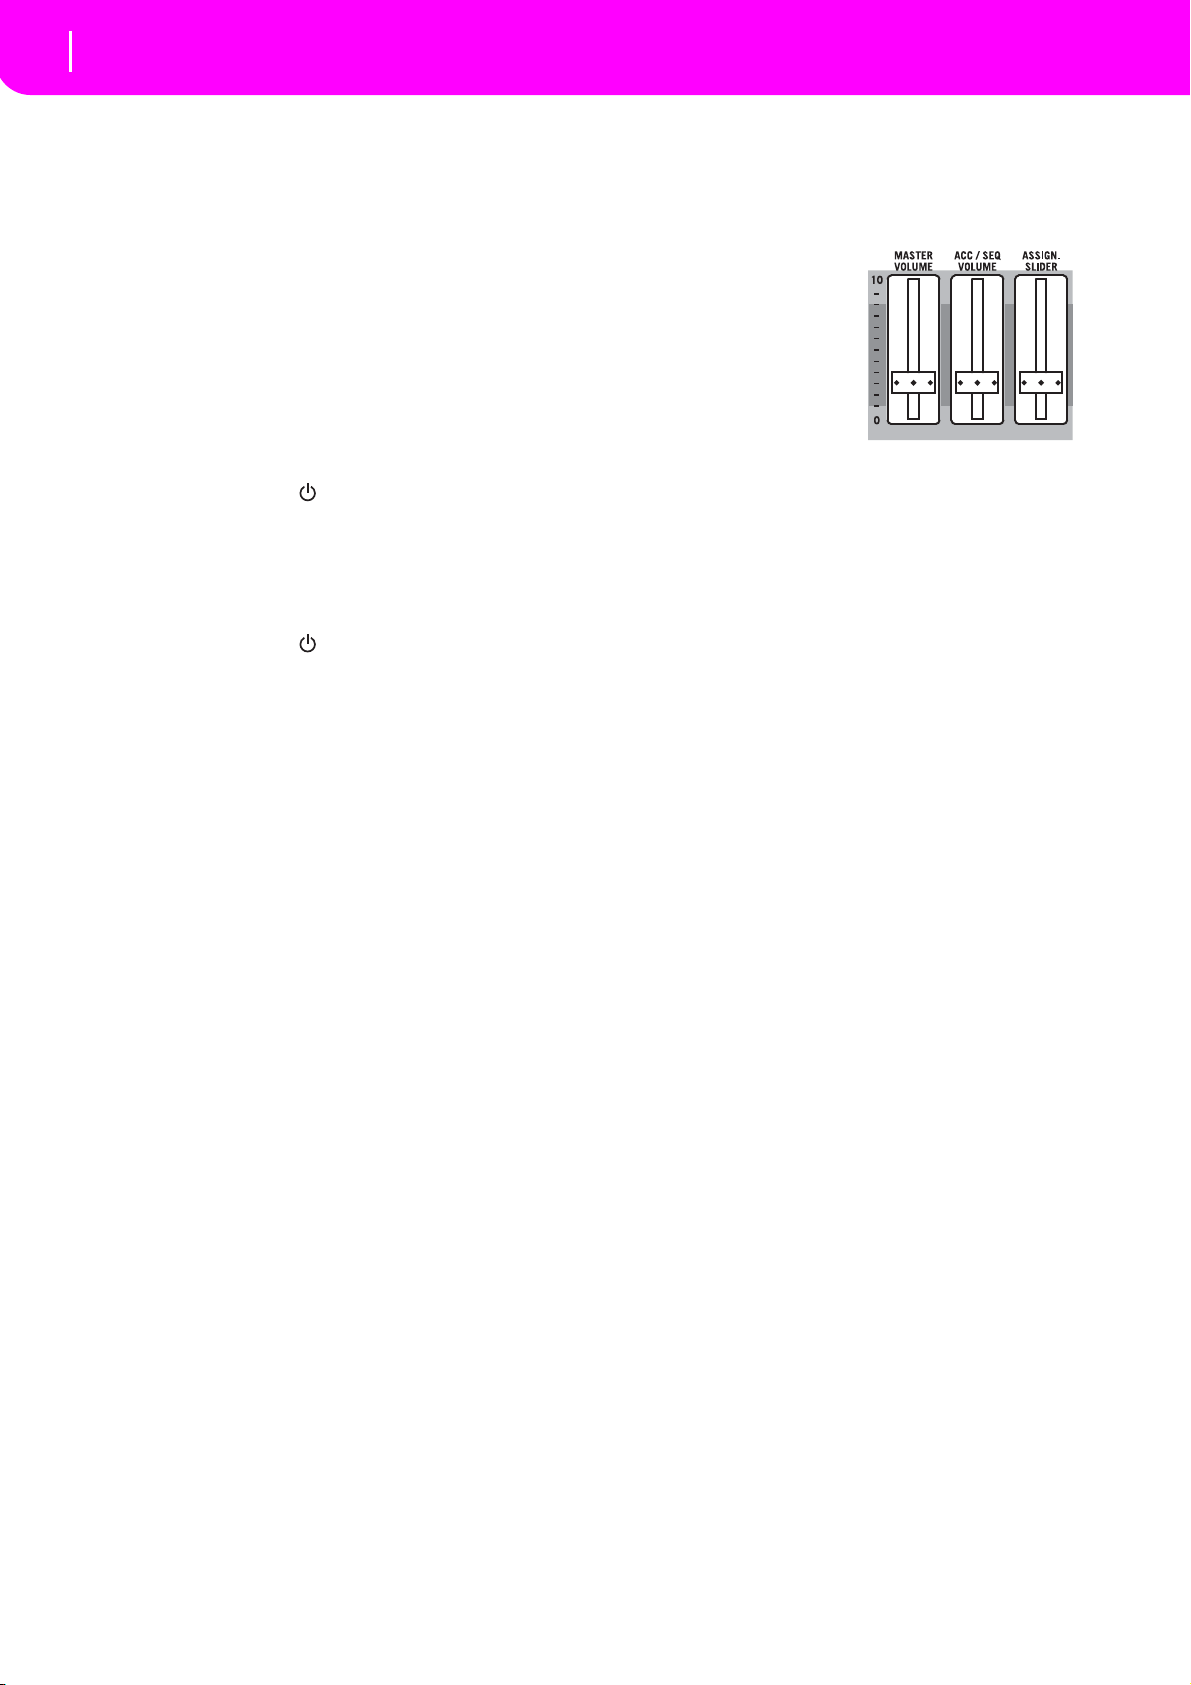
CONTROLLING THE VOLUME
• Use the MASTER
VOLUME slider to control
the overall volume of the
instrument. This slider
controls the volume of the
sound going to the internal
speakers, the L/MONO &
RIGHT OUTPUTS, and the
HEADPHONES connector.
Note:
Start at a moderate level, then raise the MASTER
VOLUME up. Don’t keep the volume at an uncomfortable
level for too long.
• Use the ACC/SEQ VOLUME slider to control the Style
tracks (drums, percussion, bass…) volume. This slider
also controls both of the Sequencers tracks, excluding
the Realtime (Keyboard) tracks.
• By default, you can use the ASSIGN.SLIDER to control
the keyboard tracks volume. This slider is user-assignable, but is set to the Keyboard Expression parameter by
default.
THE BALANCE SLIDER
The BALANCE slider sets the relative volume of the
two onboard sequencers (Sequencer1 and Sequencer 2).
• Move it fully left to set Sequencer 1 to the maximum
level and Sequencer 2 to zero.
• Move it fully right to set Sequencer 1 to zero and
Sequencer 2 to the maximum level.
• Move it to the center to set both Sequencers at the same
level.
Note: When turning the instrument on, move this slider to
the center, to avoid starting a Song at the minimum level.
HEADPHONES
You can connect a pair of headphones to the rear panel
headphone jack (PHONES: stereo mini-jack). You can
use headphones with an impedance of 16–200Ω (50Ω
recommended). Use a headphone distributor to connect more than one pair of headphones.
Page 13
11
Start up
Audio Outputs
AUDIO OUTPUTS
You can send the sound to an external amplification
system, instead of the internal speakers. This is useful
when recording, or when playing live.
Stereo. Connect two mono cables to the L/MONO &
RIGHT OUTPUTS. Connect the other end of the cables
to a stereo channel of your mixer, two mono channels,
two powered monitors, or the TAPE/AUX input of
your audio system. Don’t use the PHONO inputs of
your audio system!
Mono. Connect a mono cable to the L/MONO OUTPUT. Connect the other end of the cable to a mono
channel of your mixer, a powered monitor, or a channel
of your TAPE/AUX input of a hi-fi system (you will
hear that channel only, unless you can set the amplifier
to Mono mode).
AUDIO INPUTS
You can connect the output of another electronic musical instrument, an unpowered mixer, or any audio
device to the rear panel input jack (INPUT: stereo minijack). Since this is a line-level input, you'll need to use a
separately sold mic preamp or mixer if you're connecting a mic.
Use the connected device’s volume control to adjust the
input level. Be careful not to make it distort (or “clip”).
Here is how to set the volume of the connected device:
• if the sound heard on Liverpool’s outputs is too low, you
should increase the output level of the connected device.
• if it sounds fine, it’s ok.
• if it distorts, you should lower the level a little, until the
sounds is fine again.
DAMPER PEDAL
Connect a Damper (Sustain) pedal to the DAMPER
connector on the back panel. Use a KORG PS-1, PS-3 or
DS-1H footswitch pedal, or a compatible one. To switch
the Damper polarity, see “Damper Pol. (Damper Polarity)” on page 127.
DEMO
Listen to the built-in Demo Songs to appreciate the
power of the Liverpool.
1. Press the STYLE PLAY and SONG PLAY buttons
together. Their LEDs start blinking.
At this point, if you don’t press any other button, all the
Demo Songs will be played back.
2. Choose a page using the PAGE buttons.
3. Select a Demo Song by pressing the corresponding
VOLUME/VALUE button around the display. The Demo
will automatically start.
4. Stop the Demo by pressing START/STOP.
5. Exit the Demo mode by pressing one of the MODE buttons.
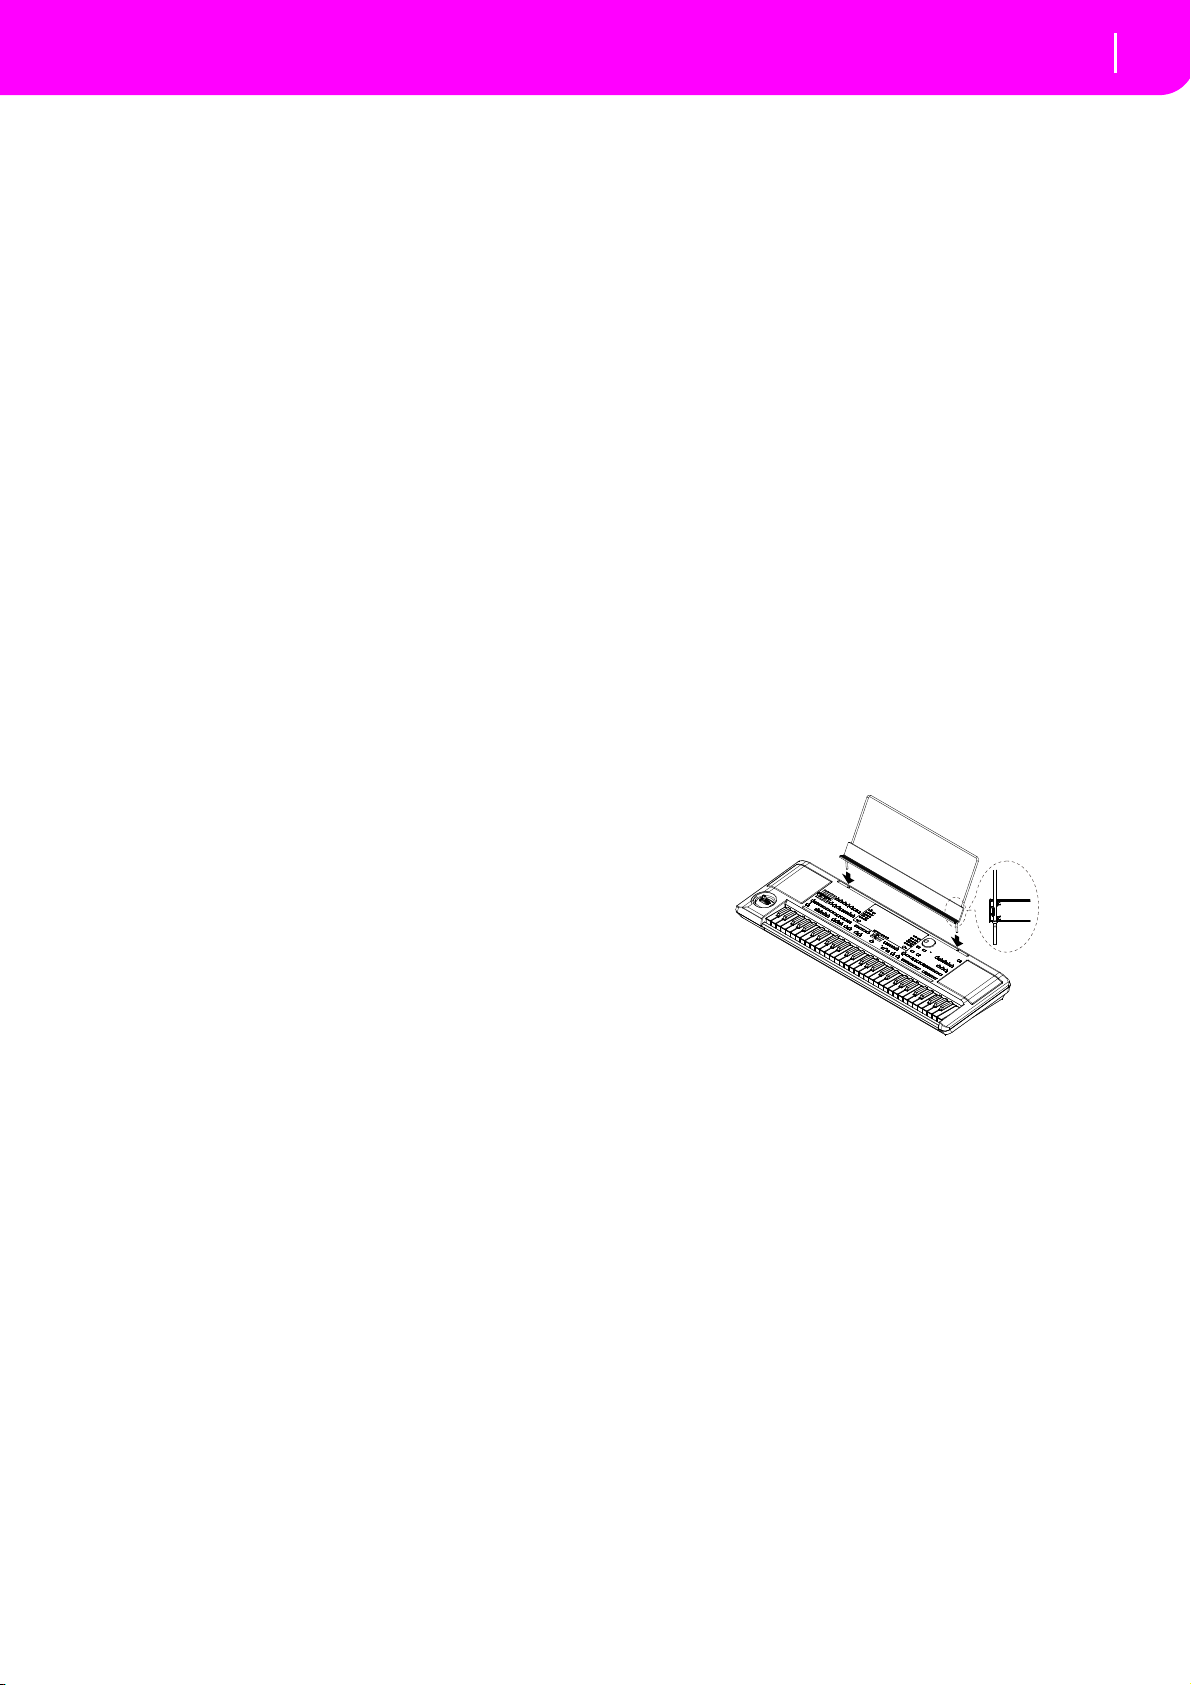
THE MUSIC STAND
A music stand comes standard with your Liverpool. Fit
it into the two dedicated holes in the back panel.
MIDI CONNECTIONS
You can play the internal sounds of your Liverpool
with an external controller, i.e. a master keyboard, a
MIDI guitar, a wind controller, a MIDI accordion, or a
digital piano.
1. Connect a standard MIDI cable from the MIDI OUT of
your controller to the MIDI IN connector on the Liverpool.
2. Select a transmission MIDI channel on your controller.
Some controllers, like the MIDI accordions, usually
transmit on more than one channel (see more information in the MIDI chapter).
3. On the Liverpool, select the MIDI Setup that best fits
your controllers type (see “Page 4 - MIDI Setup” on
page 127).
Page 14
12
Front panel
39
38
34
35
40
1
43
4746452625
242320
1916
15
1817
21 22
49
44
42413736
3331
29
30
28
30
32
2 53
6
7
4
8 9 10 11 12 13 14
27
48
DEMO
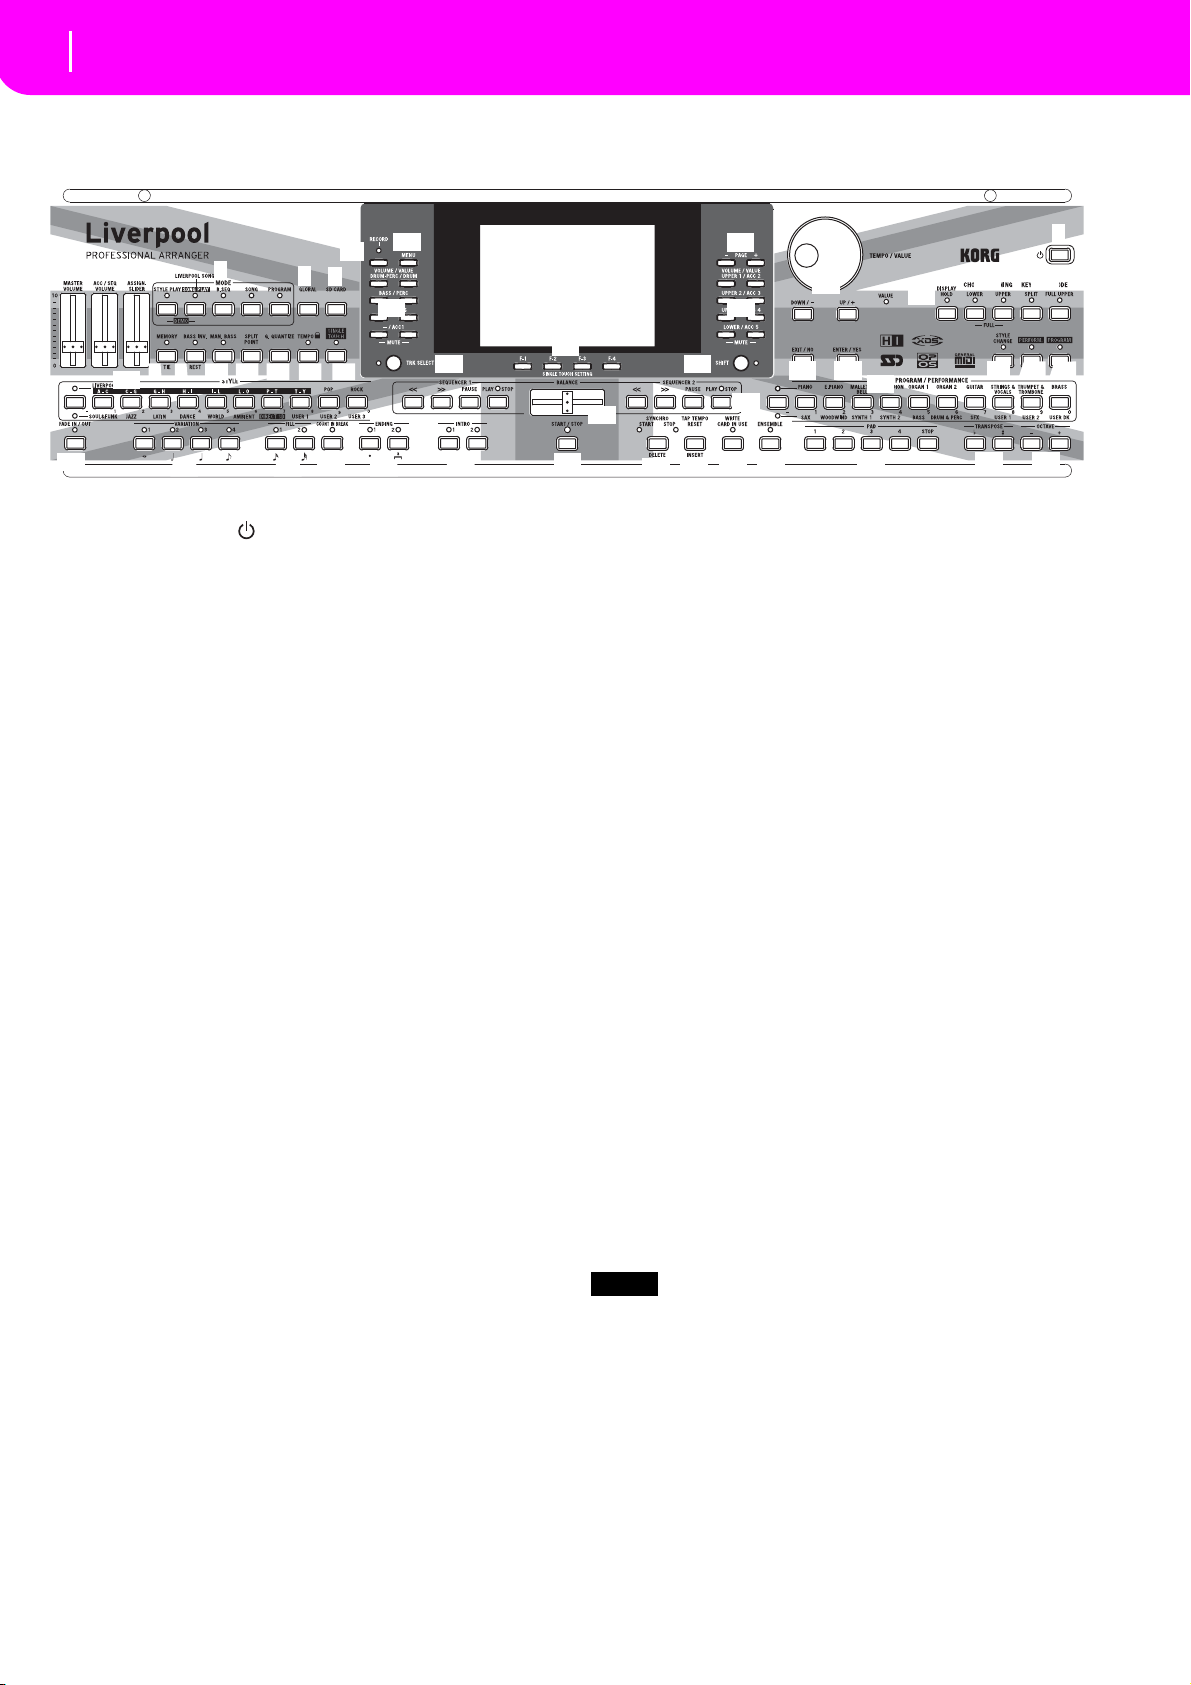
3. FRONT PANEL
1 Power switch ( )
This turns the Liverpool's power on or off.
2 MASTER VOLUME
This slider controls the overall volume of the instrument, both of the internal speakers, the L/MONO and
RIGHT outputs, and the HEADPHONES output.
Warni ng: At the maximum level, with rich-sounding Songs,
Styles or Programs, the internal speakers could distort during signal peaks. Should this happen, lower the Master Volume a little.
3 ACC/SEQ VOLUME
This slider controls the accompaniment tracks volume
(Style Play mode) or the Song tracks volume, excluding
the Realtime tracks (Song and Song Play modes). This
is a relative control, where the effective maximum
value is determined by the MASTER VOLUME slider
position.
4 ASSIGN.SLIDER
This is a freely programmable slider (see “Sld (Slider)”
on page 127). By default, it acts as the Keyboard
Expression control, to let you balance the relative volume of the Realtime (Keyboard) tracks.
5 MODE section
Each of these buttons recalls one of the operating modes
of the instrument. Each mode excludes the others.
STYLE PLAY
Style Play mode, where you can play
Styles (automatic accompaniments) and/
or play up to four Realtime tracks on the
keyboard.
In the main page, Realtime (Keyboard)
tracks are shown on the right half of the
display. You can reach the main page by
pressing EXIT from any of the Style Play
edit pages. If you are in a different operating mode, press STYLE PLAY to recall the
Style Play mode. If the TRACK SELECT
LED is on, press TRACK SELECT to turn
it off and see the Realtime tracks.
This operating mode is automatically
selected when the instrument is turned
on.
SONG PLAY
This button enters Song Play mode. Here
you can play back 16-track Standard MIDI
Files (SMF), ".MID," or ".KAR" files from
internal memory (SSD) or directly from an
SD card (without loading the file into
internal memory). Since the Liverpool is
equipped with two sequencers, you can
even play two Songs at the same time, and
mix them with the BALANCE slider.
In addition to the Song tracks, you can
play one to four Realtime (Keyboard)
tracks, along with the Song(s). In the main
page, Realtime (Keyboard) tracks are
shown on the right half of the display. You
can reach the main page by pressing EXIT
from any of the Song Play edit pages. If
you are in a different operating mode,
press SONG PLAY to recall the Song Play
mode. If the TRACK SELECT LED is on or
flashing, press TRK SELECT one or two
times to turn it off and see the Realtime
tracks.
B.SEQ Backing Sequence mode, where you can
record a new Song based on the Realtime
and Style tracks, and save it as a new Standard MIDI File.
SONG Song mode, where you can play, record, or
edit a Song.
PROGRAM Program mode, to play single Sound Pro-
grams on the keyboard, or edit them.
Press the STYLE PLAY and SONG PLAY
buttons together to select the Demo mode.
This mode lets you listen to some Demo
Songs, to let you hear the sonic power of
the Liverpool.
6GLOBAL
This button recalls the Global edit environment where
you can select various global settings. This edit environment overlaps any operating mode, which will still
remain active in the background. Press EXIT to go back
to the underlying operating mode.
Page 15

13
Front panel
SINGLE TOUCH
7 SD CARD
This button recalls the Card edit environment, where
you can execute various operations on files and cards
(Load, Save, Format, etc…). This edit environment
overlaps any operating mode, that still remains active
in the background. Press EXIT to go back to the underlying operating mode.
8 MEMORY (TIE)
This button turns the Lower and Chord Memory functions on or off. Go to the “Page 24 - Preferences: controls” edit page (Style Play mode, see page 51) to
decide if this button should be a Chord Memory only,
or a Lower/Chord Memory button. When it works as a
Lower/Chord Memory:
O N The sound to the left of the split point, and
the chord for the automatic accompaniment, are kept in memory even when you
raise your hand from the keyboard.
OFF The sound and chords are released as
soon as you raise your hand from the keyboard.
This button doubles as a TIE function for the Song
mode (see chapter 13).
9 BASS INV. (REST)
This button turns the Bass Inversion function on or off.
ON The lowest note of a chord played in
inverted form will always be detected as
the root note of the chord. Thus, you can
specify to the arranger composite chords
such as Am7/G or “F/C”.
OFF The lowest note is scanned together with
the other chord notes, and is not always
considered as the root note.
This button doubles as a REST function for the Song
mode (see chapter 13).
10 MAN. BASS
This button turns the Manual Bass function on or off.
Note: When you press the MAN. BASS button, the Bass
track volume is automatically set to the maximum value. The
volume is automatically set back to the original value when
the MAN. BASS button is deactivated.
ON The automatic accompaniment stops play-
ing (apart for the Drum and Percussion
tracks), and you can manually play the
Bass track on the Lower part of the keyboard. You can start the automatic accompaniment again by pressing one of the
CHORD SCANNING buttons.
OFF The bass track is automatically played by
the Style.
11 SPLIT POINT (<)
Keep this button pressed to open the Split Point window. While this window is open, you can set the split
point simply by playing the split point note on the keyboard. Then, release the SPLIT POINT button.
To memorize the selected split point note, press the
GLOBAL button, then press WRITE to save the Global
into memory (see “The Write window” on page 126).
This button doubles as a PREVIOUS EVENT func-
tion for the Backing Sequence and Song modes (see
chapters 12 and 13).
12 G.QUANTIZE (>)
Press this button to open the Groove Quantize window,
where you can select a realtime groove quantization to
be applied to the Song (only Sequencer 1). See “Groove
Quantize window” on page 71.
This button doubles as a NEXT EVENT function for
the Backing Sequence and Song modes (see chapters 12
and 13).
13 TEMPO (= LOCK)
This button turns the Tempo Lock function on or off.
ON When you select a different Style or Per-
formance, the tempo doesn’t change. You
can still change it using the DIAL or the
TEMPO buttons.
OFF When you select a different Style or Per-
formance, the memorized tempo value is
automatically selected.
14
This button turns the Single Touch function on or off.
ON When a different Style (or the same again)
is selected, a Single Touch Setting (STS1) is
automatically selected, meaning that the
Realtime tracks and effects will change,
together with the Style tracks and effects.
OFF When you select a different Style (or the
same again), the Style tracks and effects
are changed, while the Realtime tracks are
not changed.
15 STYLE section (NUMERIC KEYPAD)
Use these buttons to open the Style Select window and
select a Style. See “Selecting a Style” on page 26.
The leftmost button lets you select the upper or lower
row of Style banks. Press it until you’ve selected the
row you’re looking for. (After both LEDs have turned
on, press the button again to turn them off).
UPPER LED ON
Upper-row Styles selected.
LOWER LED ON
Lower-row Styles selected.
A word about Style banks and names. “DIRECT SD”
Styles are Styles directly accessed from the memory
card (no need to load from card). See “The DIRECT SD
bank” on page 40.
Styles from “USER1” to “USER3” are locations where
you can load new Styles from the memory card.
Each of the Style bank keys has one or two pages, with
up to eight Styles in each page. Browse through the
Styles using the PAGE buttons.
There is a shortcut to see the original bank for a Style.
You can see the original bank where a Style is contained. Just keep the SHIFT button pressed, and then
press the lefmost button of the STYLE section. A message window will appear, showing the name of the
original bank. Release the SHIFT button to exit the window.
Page 16
14
Front panel
There is a shortcut to see all pages of the selected
bank. To cycle all pages for a selected bank, press the
bank’s button until you see the page that you’re looking
for.
These buttons double as a numeric keypad on certain
pages (see “Selecting a Song composing its progressive
number” on page 70).
16 FADE IN/OUT
When the Style stoped, press this button to start it with
a volume fade-in (the volume goes from zero to the
maximum).
When the Style is playing, press this button to stop it
with a volume fade-out (the volume gradually
decreases).
You don’t need to press START/STOP to start or stop
the Style.
17 VARIATION 1–4 (NOTE LENGTH) buttons
Each of these buttons will select one of the four variations of the current Style. Each variation can vary in
patterns and sounds.
These buttons double as a NOTE LENGTH function
for the Song mode (see chapter 13).
18 FILL 1–2 (NOTE LENGTH) buttons
These two buttons trigger a fill-in. Press them twice (LED
blinking) to let them play in loop, and select any other
Style element (Fill, Intro, Variation…) to exit the loop.
They also double as a NOTE LENGTH function for
the Song mode (see chapter 13).
19 COUNT IN / BREAK
While the Style is not running, press this button, then
press START/STOP. This combination triggers a onebar initial count, then the Style starts playing.
While the Style is already in play, this button triggers a
break (an empty measure beginning with a kick + crash
shot). Press it twice to let it play in loop, and select any
other Style element (Fill, Intro, Variation…) to exit the
loop.
20 ENDING 1–2 (DOT, TRIPLET) buttons
While the Style is running, these two buttons trigger an
Ending, and stop the Style. Press one of them, and the
Style will stop running with an Ending. If pressed
while the Style is stopped, they act as an additional
couple of Intros.
Press them twice (LED blinking) to let them play in
loop, and select any other Style element (Fill, Intro,
Variation…) to exit the loop.
ENDING1 also doubles as a DOT function, and
ENDING2 doubles as a TRIPLET function, to be used
in Song mode (see chapter 13).
Note: Ending 1 plays a short sequence with different chords,
while Ending 2 plays on the last recognized chord.
21 INTRO 1–2 buttons
These two buttons set the arranger in Intro mode. After
pressing one of these buttons, start the Style, and it will
begin with the selected intro. The INTRO LED will
automatically go off at the end of the intro.
Press them twice (LED blinking) to let them play in a
loop, and select any other Style element (Fill, Intro,
Variation…) to exit the loop.
Note: Intro 1 plays a short sequence with different chords,
while Intro 2 plays on the last recognized chord.
22 START/STOP
Starts or stops the Style that’s running.
You can reset all ‘frozen’ notes and controllers
on the Liverpool and any instrument connected to its
MIDI OUT, by using the “Panic” key combination. Just
press SHIFT + START/STOP to stop all notes and reset
all controllers.
23 SYNCHRO START / STOP (DELETE)
This button turns the Synchro Start and Synchro Stop
functions on or off. Press it repeatedly to turn the functions on or off. The LEDs will cycle in this order:
START
START LED ON
→ START+STOP → OFF.
When this LED is lit-up, just play a chord
in the chord recognition area (usually
under the split point, see “CHORD
SCANNING section” on page 17) to automatically start the Style running. If you
like, you can turn one of the INTROs on
before starting the Style.
Page 17
15
Front panel
START+STOP LEDs ON
When both LEDs are lit-up, raising your
hand from the keyboard momentarily will
stop the Style from playing. If you play a
chord again, the Style starts again.
OFF All Synchro functions are turned off.
This button doubles as a DELETE function for the
Backing Sequence and Song modes (see chapters 12
and 13).
It is also used to delete the selected character, during
text editing.
24 TAP TEMPO/RESET (INSERT)
This is a double-function button, acting in a different
way depending on the Style status (stop/play).
Tap Te mp o : When the Style is not playing, you can
“beat” the tempo on this button. At the end, the accompaniment starts playing, using the “tapped in” tempo.
Reset: When you press this button while the Style is in
play, the Style pattern goes back to the previous strong
beat.
This button doubles as an INSERT function for the
Backing Sequence and Song modes (see chapters 12
and 13).
It is also used to insert a character at the cursor position, during text editing.
25 WRITE/CARD IN USE
In Style Play mode, this button opens the Write window, that lets you save all the tracks onto a Performance, the Realtime (Keyboard) tracks in a Single
Touch Setting (STS), or the accompaniment tracks onto
a Style Performance. (See “The Write window” on
page 42).
In the Global edit environment, press it to save Global
parameters in memory. (See “The Write window” on
page 126).
This button’s LED works as a CARD IN USE indica-
tor, and turns on when the card slot is in use.
See the relevant chapter devoted to each operating
mode or edit environment, to see their “maps” in detail.
29 PAGE -/+
After pressing MENU to open a menu, use these but-
tons to browse the edit pages of an operating mode or
editing environment. Press EXIT to go back from an
edit page to the main page of the current operating
mode, or to close the Global or Card Edit environment.
In addition, you can use these buttons to select a differ-
ent page in a Style Select or Program Select window.
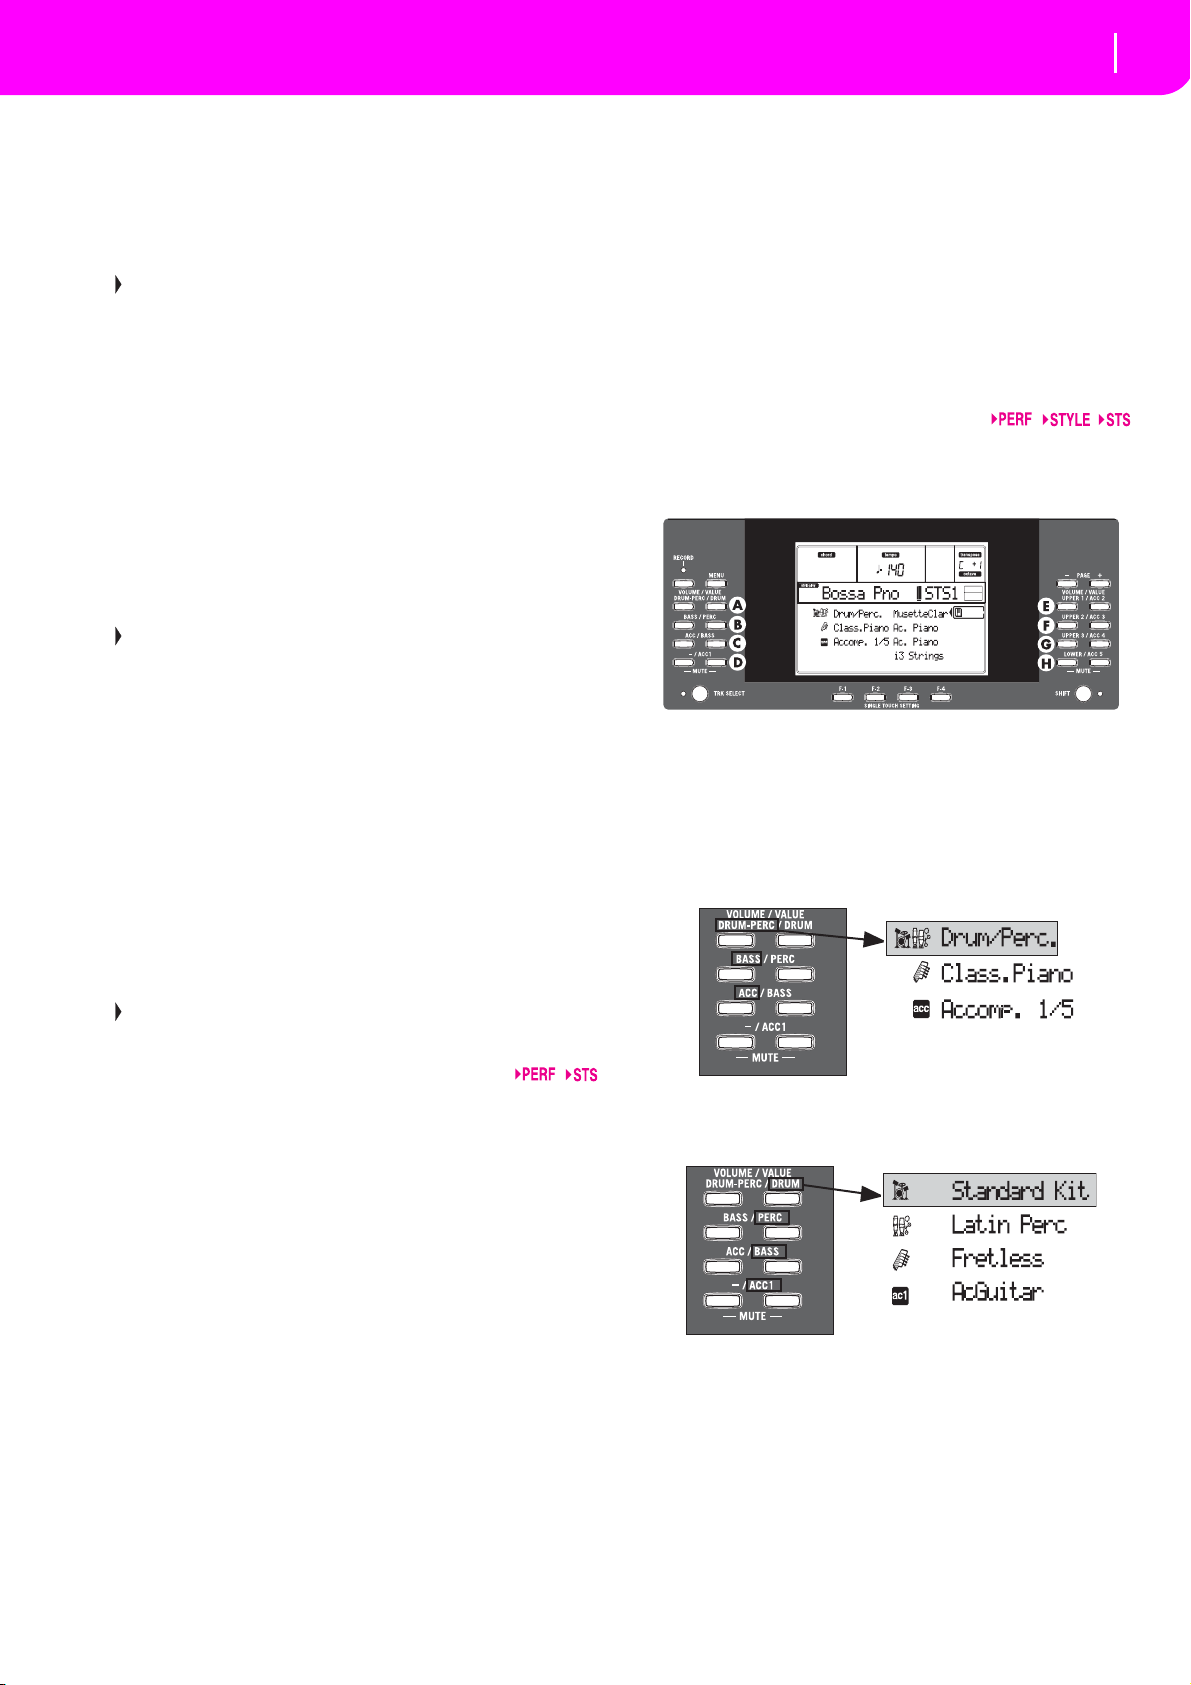
30 VOLUME/VALUE (MUTE) A–H buttons
Within this user’s manual, each button pair is marked
with an alphabetic letter (A–H). See “Display and User
Interface” on page 19 for more details.
A corresponding track name is printed over each but-
ton pair. These names show the corresponding track
the button pair affects in the main page of the Style
Play mode.
• The left half is for the main page, where you can
see the Realtime tracks, and the Style tracks
grouped together:
26 ENSEMBLE
This button turns the Ensemble function on or off.
When on, the right-hand melody is harmonized with
the left-hand chords.
Note: The Ensemble function works only when the keyboard
is in SPLIT mode, and the LOWER Chord Scanning mode
selected.
27 RECORD
This button sets the instrument in Record mode
(depending on the current operating mode).
28 MENU
This button opens the Menu page for the current operating mode or edit environment. After opening a
menu, you can jump to one of the edit pages by pressing the corresponding VOLUME/VALUE buttons; or
browse them using the PAGE buttons. Otherwise, go
back to the main page of the current operating mode,
or close the edit environment, by pressing the EXIT
button.
• The right half is for the Style tracks page, where
you can see each of the accompaniment tracks:
See “Symbols and Icons” on page 21.
Use these buttons to perform various operations on the
commands and functions appearing in the display.
SELECTING
Use each button pair to select the corresponding item in the display (i.e. a track, a
parameter or a command). Use either the
left or right button in a pair.
Page 18

16
Front panel
VOLUME While you are in the main pages of any
operating mode, select a track and use
these buttons to change the track’s volume. Use the left button to decrease it, or
the right button to increase it.
MUTE Press both buttons in a pair to mute the
corresponding track. Press both buttons
again to unmute the track.
SOLO While in the Style Play, Song Play
and Song modes, you can solo one of the
tracks. Just keep the SHIFT button
pressed, and press both of the VOLUME/
VALUE buttons corresponding with the
track you wish to solo.
To exit the solo mode, keep the SHIFT button pressed again, and press both the
VOLUME/VALUE buttons corresponding
to the soloed track.
VALUE Use each button pair to change the corre-
sponding parameter’s value. The left button decreases the value, the right button
increases it.
31 TRACK SELECT
Depending on the operating mode, this button
switches between the various tracks view.
STYLE PLAY MODE
Switches between the Realtime tracks and
the Style tracks.
SONG PLAY MODE
Switches between the main page (showing
the Realtime/Keyboard tracks), Song
tracks 1–8, and Song tracks 9–16.
SONG MODE
Switches between the main page, Song
tracks 1–8 and Song tracks 9–16.
The TRACK SELECT LED shows the current page
view:
Off Main page (Realtime tracks, or Song con-
trols)
On 2nd page (Style tracks, or Song tracks 1–8)
Flashing 3rd page (Song tracks 9–16)
32 SINGLE TOUCH SETTING
(F-1–F-4 FUNCTION KEYS) buttons
While in the main page of the Style Play or Backing
Sequence mode, these buttons select a Single Touch
Setting each. Each of the Styles includes a maximum of
four Single Touch Settings (STS), to automatically configure the Realtime tracks and effects at the touch of a
finger. When the SINGLE TOUCH LED is lit, an STS is
automatically selected when selecting a Style.
In Edit mode, these buttons double as function keys,
to select the corresponding items in the display.
33 SHIFT
With this button held down, pressing certain other buttons will access to a second function.
34 TEMPO/VALUE section
The DIAL and the DOWN/- and UP/+ buttons can be
used to control the Tempo, assign a different value to
the selected parameter in the display or scroll a list of
files in the Song Select and Card pages. The VALUE
LED shows the status of this section.
DIAL Turn the dial clockwise to increase the
value or tempo. Turn it counter-clockwise
to decrease the value or tempo.
When used while pressing the
SHIFT button, this control always acts as a
Tempo control.
DOWN/- and UP/+
DOWN/- decreases the value or tempo;
UP/+ increases the value or tempo.
Keep the SHIFT button pressed
down, and press either the DOWN/- or
UP/+ button to reset the Tempo to the
value that’s saved onto the selected Style.
35 VALUE LED
This LED shows the status of the DIAL and DOWN/and UP/+ buttons.
ON The DIAL and DOWN/- and UP/+ buttons
act as Value controls, to change the value
of the selected parameter in the display.
OFF The DIAL and DOWN/- and UP/+ buttons
control the Tempo.
36 EXIT/NO
Use this button to perform various actions, leaving
from the current status:
• exit a dialog box
• answer “No” to any question that appears in the
display
• exit the Menu window
• go back to the main page of the current operating
mode
• exit the Global or Card Edit environment, and go
back to the main page of the current operating
mode
• exit from a Style, Performance or Program Select
window
37 ENTER/YES
Use this button to perform various actions, agreeing
the current selected status:
• answer “Yes” to any question that appears in the
display
• confirm a command
38 DISPLAY HOLD
This button turns the Display Hold function on or off.
ON When you open a temporary window (like
the Program Select window), it remains in
the display until you press EXIT/NO, or
an operating mode button.
OFF Any temporary window closes after a cer-
tain time, or after selecting an item in the
window.
Page 19
17
Front panel
PERFORM.
PROGRAM
39 CHORD SCANNING section
In Style Play and Backing Sequence mode, use these
buttons to define the way chords are recognized by the
arranger.
LOWER Chords are detected below the split point.
The number of notes you should play to
form a chord is defined by the Chord
Scanning Mode parameter (see “Chord
Recognition Mode” on page 51).
UPPER Chords are detected above the split point.
You must always play three or more notes
to let the arranger recognize a chord.
FULL (both LEDs on)
Chords are detected on the full keyboard
range. You must always play three or
more notes to let the arranger recognize a
chord.
OFF No chords will be detected. After pressing
START/STOP, only the Drum and Percussion accompaniment tracks can play.
40 KEYBOARD MODE section
These buttons define how the four Keyboard (or Realtime) tracks are positioned on the keyboard.
SPLIT The Lower track plays below the split
point, while the Upper 1, Upper 2 and
Upper 3 tracks play above it. By default,
selecting this keyboard mode automatically selects the Lower chord scanning
mode (see “Chord Recognition Mode” on
page 51).
FULL UPPER
The Upper 1, Upper 2 and/or Upper 3
tracks play on the whole keyboard range.
The Lower track does not play. By default,
selecting this keyboard mode automatically selects the Full chord scanning mode
(see “Chord Recognition Mode” on
page 51).
41 STYLE CHANGE
This button turns the Style Change function on or off.
ON When you select a Performance, the Style
could change, according to which Style
number is memorized onto the Performance.
OFF When you select a Performance, the Style
and Style track settings remain
unchanged. Only Realtime (Keyboard)
tracks settings are changed.
42
Press this button to use the PROGRAM/PERFORMANCE section to select a Performance.
44 PROGRAM/PERFORMANCE section
Use these buttons to open the Program Select or Performance Select window, and select a Program or a Performance. See “Selecting a Program” on page 25, or
“Selecting a Performance” on page 25. For a list of
available Programs, see “Programs (Program Change
order)” on page 157.
The leftmost button selects the upper or lower row of
Program or Performance banks. Press it until you’ve
selected the row that you’re looking for. (After both
LEDs have consecutively turned on, press the button
again to turn them off).
UPPER LED ON
Upper row of Programs or Performances
selected.
LOWER LED ON
Lower row of Programs or Performances
selected.
On the front panel, Program banks are identified by
the instrument names, while Performance banks are
identified by numbers (1–10; 0=bank 10).
A note about Program banks and names. Programs
from “PIANO” to “SFX” are standard Programs, the
user can’t directly modify.
Programs “USER1” and “USER2” are locations where
you can load new Programs from the memory card.
“USER DK” is where you can load new drum kits.
Each Program bank contains various pages, each with
up to 8 Programs. You can browse them using the
PAGE buttons.
Shortcut to see the original bank for a Performance or
Program. You can see the original bank where a Perfor-
mance or Program is contained. Just keep the SHIFT
button pressed, and then press the lefmost button of
the PROGRAM/PERFORMANCE section. A message
window will appear, showing the name of the original
bank. Release the SHIFT button to exit the window.
Shortcut to see all pages of the selected bank. To cycle
all of the pages for a selected bank, press the bank’s
button.
45 PADS (1–4, STOP)
These programmable pads can be used to trigger a
sound effect. Use the STOP button to stop a cyclic
sound. (See “List of sounds assignable to the Pads” on
page 228).
Each Pad corresponds to a dedicated Pad track.
46 TRANSPOSE
These buttons transpose the whole instrument in semitone steps (Master Transpose). The transposition value
is shown (as a note name) on the top right of the display.
43
Press this button to use the PROGRAM/PERFORMANCE section to select a Program, and assign it to
the selected track.
Press both buttons together, to reset the Master Transpose to zero.
Page 20

18
Front panel
Note: The Master Transpose has no effect on tracks set to
Drum mode (and, even if set in a different status, on the
Drum and Percussion tracks). See “Page 14 - Track: Mode”
on page 46, and “Page 7 - Track: Mode” on page 78.
Lowers the Master Transpose a semitone.
Raises the Master Transpose a semitone.
47 OCTAVE
These buttons transpose the selected track in steps of a
whole octave (12 semitones; max ±2 octaves). The transposition value is shown (in octaves) on the top right
area of the display.
Press both buttons together, to reset the Octave Transpose to zero.
Note: The Octave Transpose has no effect on tracks set to
Drum mode (and, even if set in a different status, on the
Drum and Percussion tracks).
– Lowers the selected track an octave.
+ Raises the selected track an octave.
48 BALANCE slider
In Song Play mode, this slider balances the volume of
the two on-board sequencers. When fully on the left,
only Sequencer 1 can be heard. When fully on the right,
only Sequencer 2 can be heard. When in the middle,
both sequencers will play at full volume.
49 SEQUENCER TRANSPORT CONTROLS - SEQ1
and SEQ2
The instrument is equipped with two sequencers
(Sequencer 1 and Sequencer 2), each with its own set of
transport controls.
<< and >> Rewind and Fast Forward commands. If
you use them while the Song is in play,
they make it scroll back or forward.
When pressed once, these buttons move
the Song to the previous or following
measure. When kept pressed, they make
the Song scroll continuously, until you
release them.
In Jukebox mode (Sequencer 1),
keep the SHIFT button pressed, and press
these buttons to scroll to the previous or
next Song in the Jukebox list (see “Page 9 Jukebox” on page 79).
PAUSE Pauses the Song at the current position.
Press PAUSE or PLAY/STOP to start the
Song playing again.
PLAY/STOP Starts or stops the current Song. When
you stop the Song, the Song Position goes
back to measure 1.
In Song Play mode, pressing this
button while keeping SHIFT pressed,
starts both sequencers at the same time.
Page 21
Display and User Interface
Display controls
4. DISPLAY AND USER INTERFACE
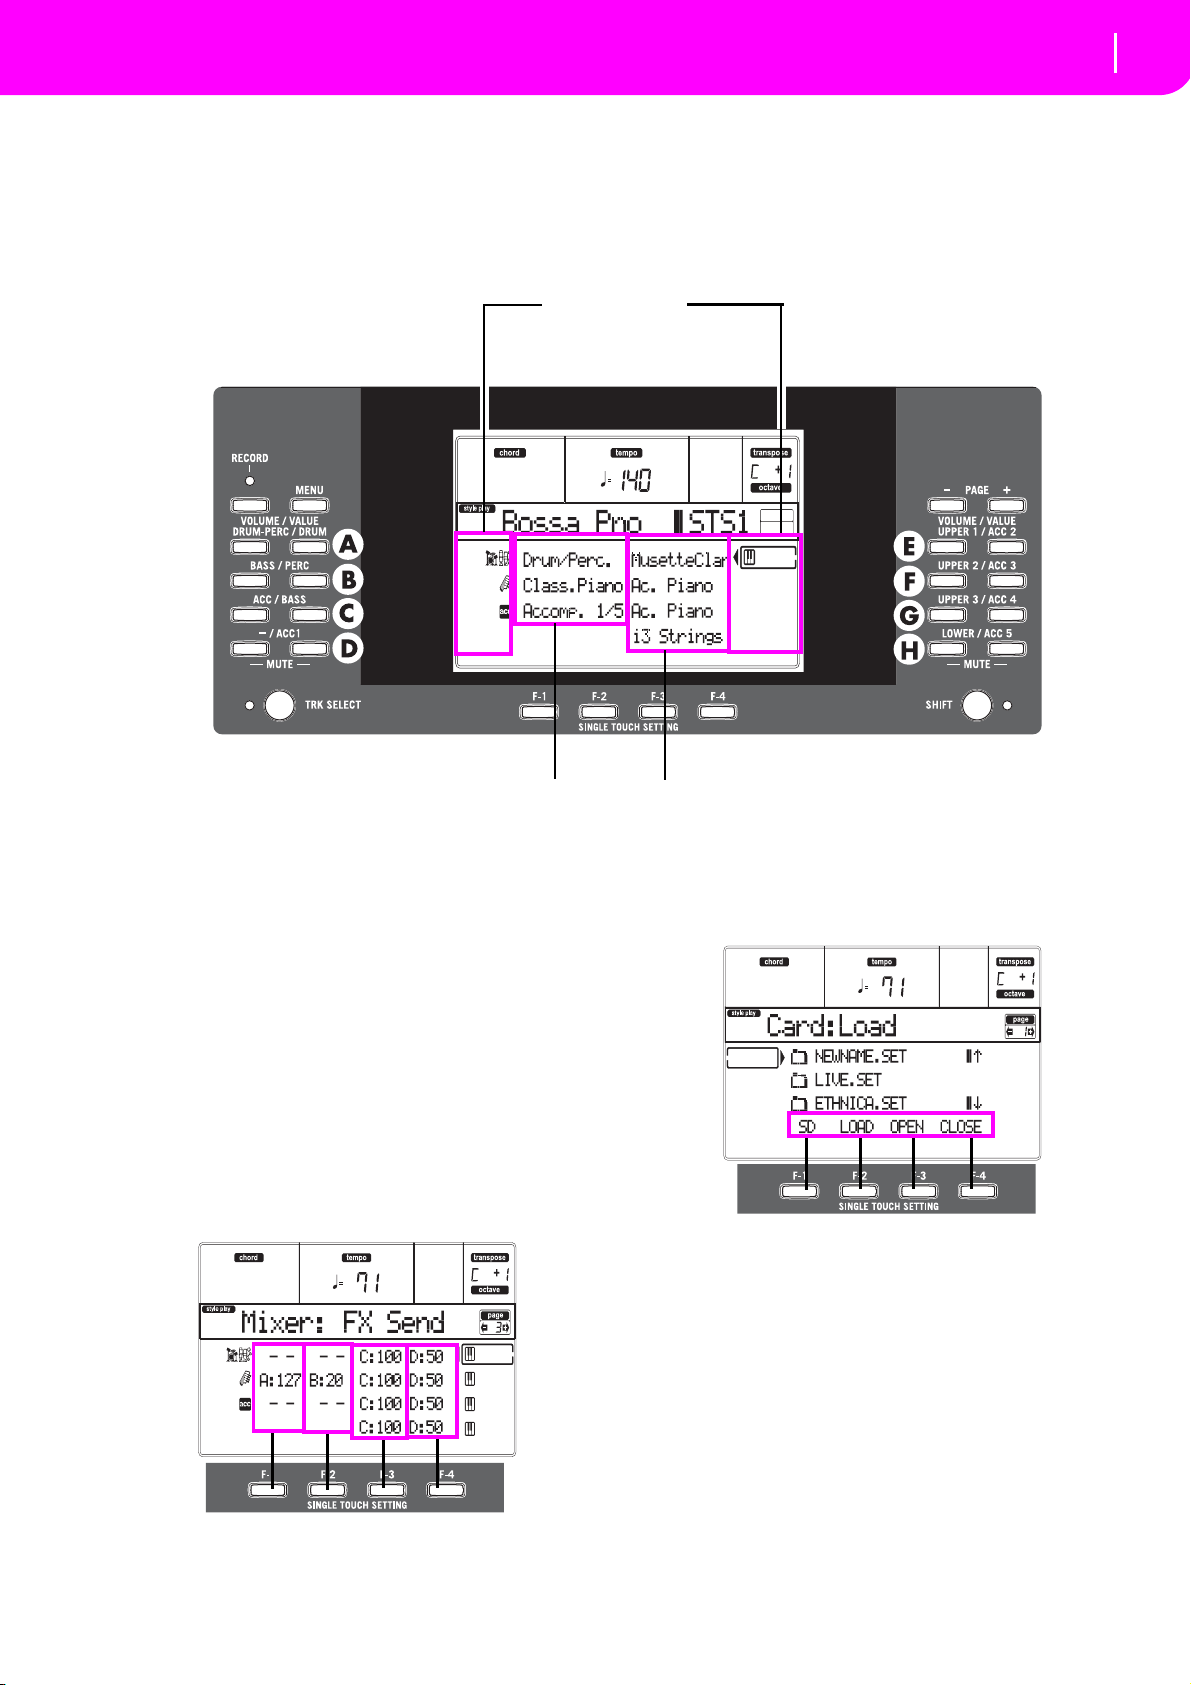
Realtime (Keyboard) tracks
Style (accompaniment/backing) tracks
Status icons area
19
The display shows the current status of the Liverpool
and its performance and editing parameters. You can
select each parameter by using the VOLUME/VALUE
(A–H) buttons on the side of the display, or each page
command appearing along the last line using the F-1–
F-4 buttons. You can vary many of the parameter’s values by pressing the left (-) or right (+) button of any
VOLUME/VALUE pair.
DISPLAY CONTROLS
VOLUME/VALUE (A–H) buttons and display parameters. These buttons are used to select the correspond-
ing parameter or command in the display, to change
the parameter’s value, or to change the volume of the
corresponding track.
While you are on the main page, these buttons can
select a track, change the track’s volume, or mute/
unmute a track.
See “VOLUME/VALUE (MUTE) A–H buttons” on
page 15 for more information.
F-1–F-4 buttons. When in an Edit page, these buttons
may be used when there are four parameters in a row,
as in the following example:
First, select the line using a VOLUME/VALUE (A–H)
button. Then, select a column using the F-1–F-4 function button.
In the Card Edit environment, the F-1–F-4 buttons can
be used also to select one of the page commands
appearing in the last line of the display.
See “SINGLE TOUCH SETTING (F-1–F-4 FUNCTION
KEYS) buttons” on page 16 for more information.
PAGE. The PAGE buttons select the previous or next
edit page. When selecting a Style or a Program, they
select a different page of Styles or Programs. See
“PAGE -/+” on page 15 for more information.
MENU. The MENU button opens the current operating
mode or edit environment’s Menu. When in a Menu,
you can use the VOLUME/VALUE buttons to select an
edit section to jump to.
TRACK SELECT. Each of the operating modes have a
different number of tracks:
Style Play 4 Realtime tracks, 8 Style tracks, 4 Pads.
Page 22

20
Display and User Interface
Interface structure
Operating modes
Main page Menu Edit pages
Song Play 4 Realtime tracks, 2 x 16 Song Tracks,
4 Pads.
Backing Sequence
4 Realtime tracks, 8 Style tracks, 4 Pads.
Song 16 Song tracks.
You can only see up to 8 tracks in the display. So, use
the TRACK SELECT button to switch to the other (hidden) tracks. For example, when in Style Play, you can
use this button to switch from the Realtime tracks and
the Style tracks.
INTERFACE STRUCTURE
Thanks to its multitasking operating system, the Liverpool user interface is structured in “overlapping”,
active layers. From the lower level:
• operating modes (Style Play, Backing Sequence,
Song Play, Song, Program)
• edit environments (Global, Card)
• selecting windows (Style Select, Song Select, Pro-
gram Select, Performance Select).
When opening an edit environment or a selecting page,
the current operating mode is still working in the background.
Operating modes. (See diagram at the bottom of this
page). At the lowest level, an operating mode is always
active. The current operating mode is indicated by the
lit LED on the STYLE PLAY, B.SEQ, SONG PLAY,
SONG or PROGRAM button in the MODE section. The
relevant icon lights up in the display.
An operating mode is divided into a main page (the
page where you usually play a Style, a Song or a Program), a menu, and a series of edit pages.
Press MENU to access the Menu. Use the MENU and
PAGE buttons to browse across the various edit pages.
Press EXIT to go back to the main page.
Page 23
21
Display and User Interface
Message windows
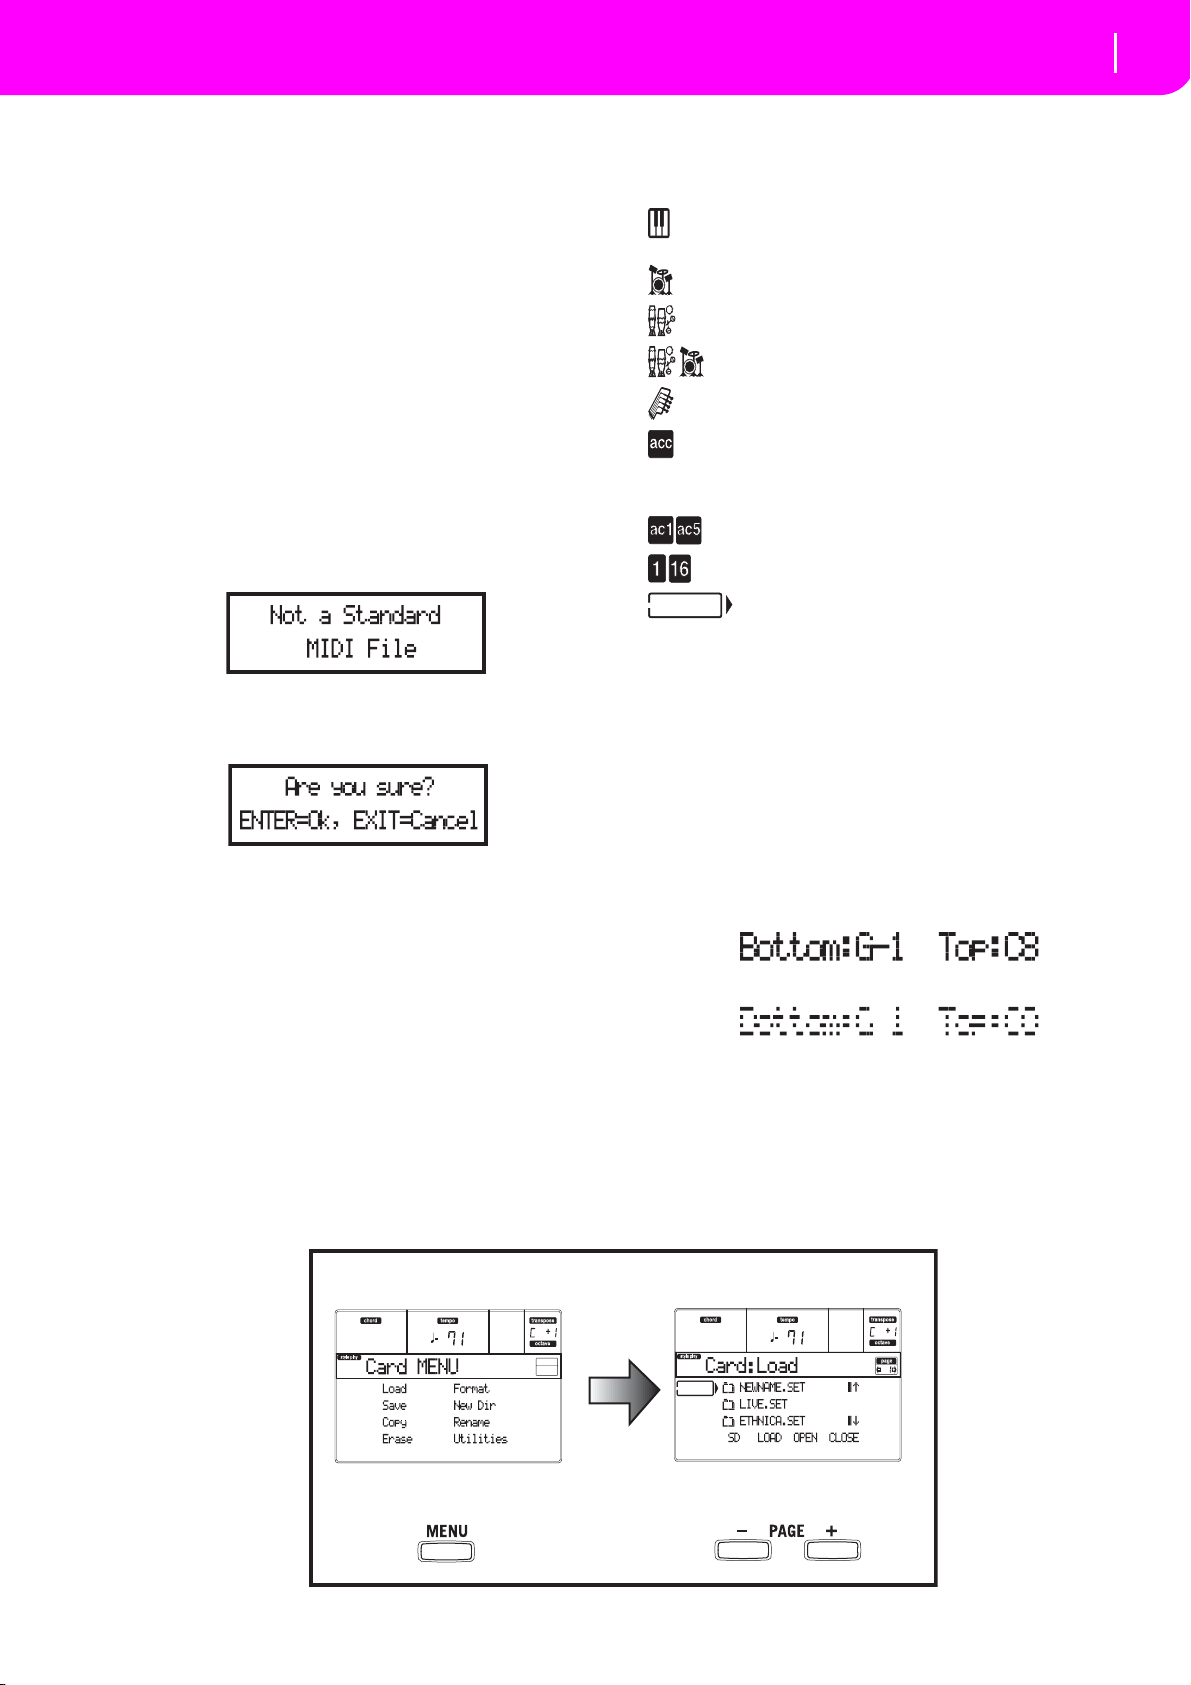
Text in solid black
Text in gra y
Edit environment. (See diagram at the bottom of this
page). When you press GLOBAL or SD CARD, an edit
environment overlaps the current operating mode.
Press EXIT to go back to the current operating mode.
An edit environment is made up of a menu and a series
of edit pages. Use the MENU and PAGE buttons to
browse across the various edit pages.
Selecting windows. When you press one of the
STYLE or PROGRAM/PERFORMANCE buttons, you
open a selecting window. This window closes after
selecting one of the items in it, or after pressing EXIT.
If the DISPLAY HOLD LED is light up, the window
doesn’t close after selecting an item. Press EXIT to close
the window, and go back to the underlying page.
MESSAGE WINDOWS
Sometimes, a message might appear in the display,
warning about an error or an incorrect operation:
Press ENTER or EXIT to exit one of these windows.
Other messages ask for an answer, as in the “Are you
sure” window below:
Press ENTER/YES for Yes, or EXIT/NO for No.
SYMBOLS AND ICONS
Many icons and symbols, on the custom display, show
the status of a parameter or the display content.
Realtime/Keyboard track
(Upper 1–3, Lower).
Drum track (Style track view).
Percussion track (Style track view).
Grouped Drum and Percussion tracks.
Bass track (Style track view).
Grouped accompaniment tracks. This
symbol indicates the five grouped accom-
paniment tracks (Acc1–5).
Accompaniment tracks (Style track view).
Sequencer tracks.
Selected track or parameter. When this
symbol appears, you can execute any
available operation on the selected item.
(no icon) The track is in mute, and can’t play on the
keyboard.
GRAYED-OUT NON-AVAILABLE PARAMETERS
Currently non-available parameters are now shown in
“gray” in the display, i.e. with a “ghost” texture. Here
is an example of a grayed-out parameter, compared to
a normal parameter:
Edit environment
Menu Edit pages
Page 24
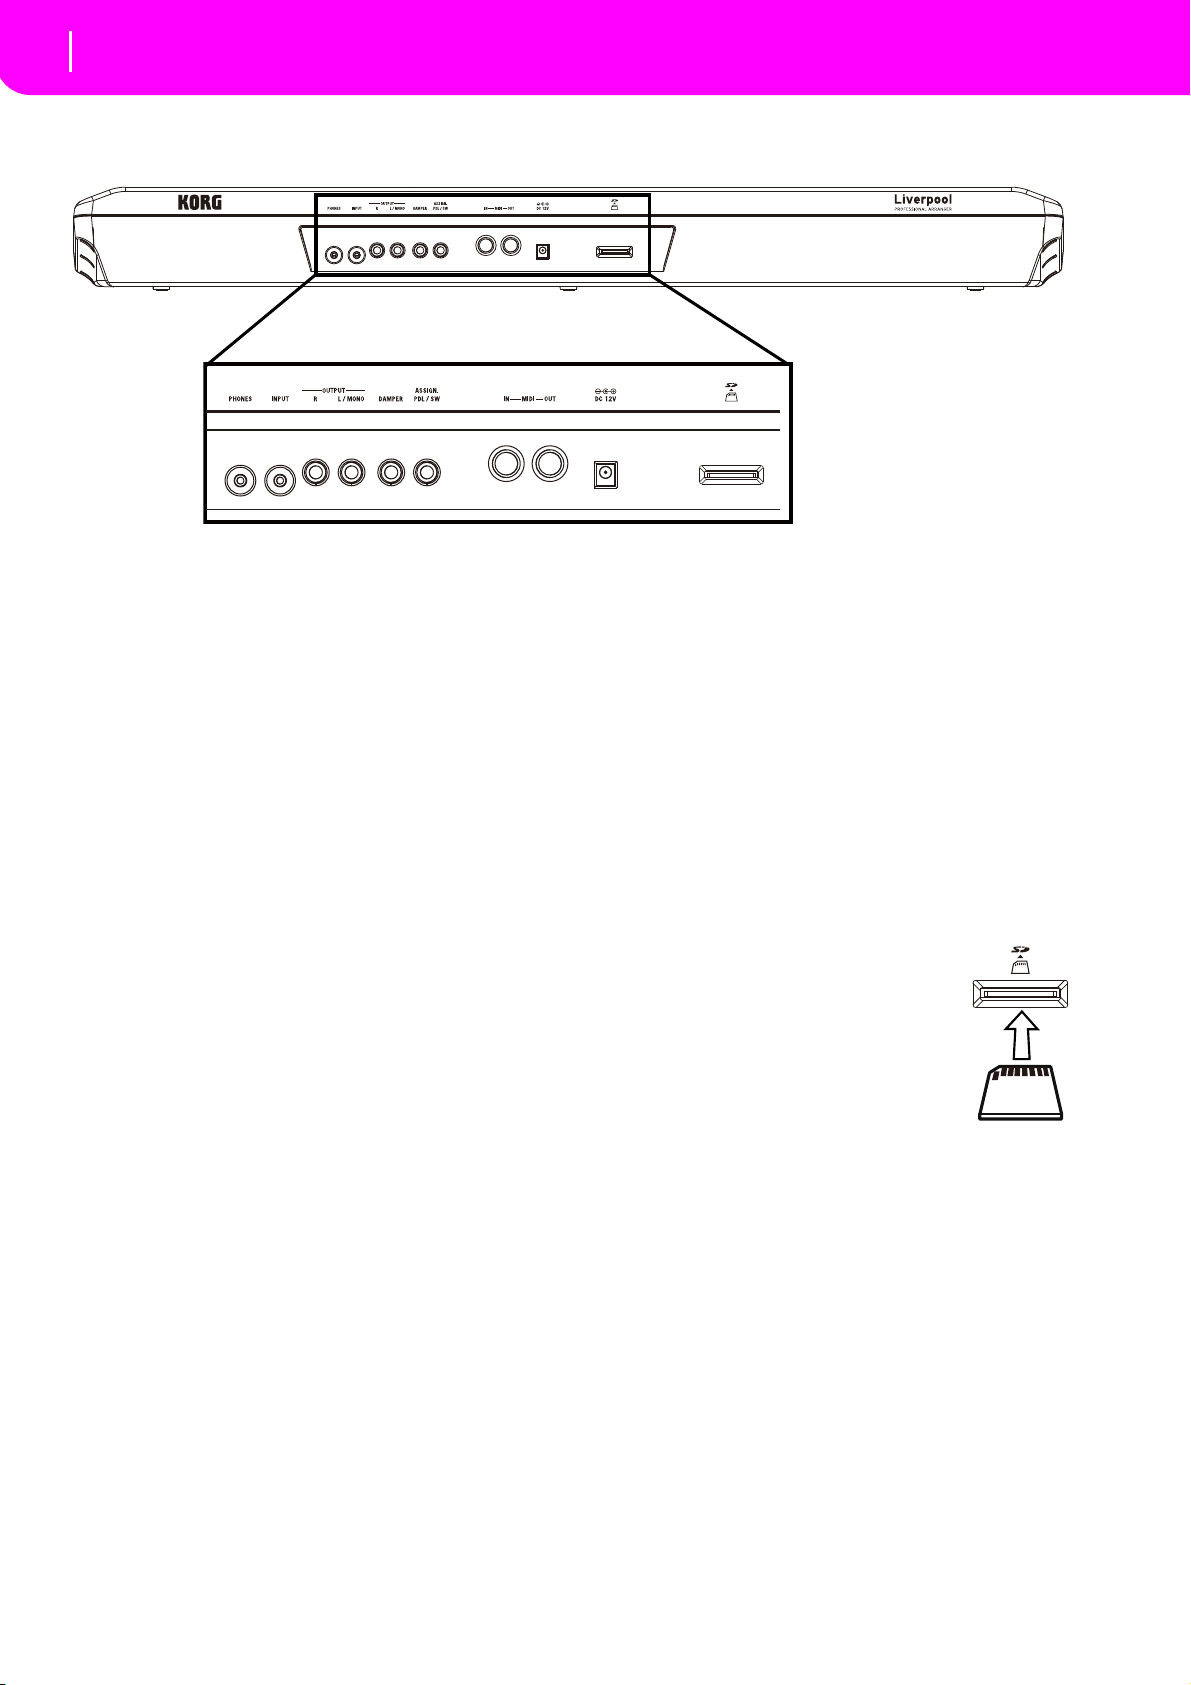
22
Rear panel
12 3 45 6 7 8
5. REAR PANEL
1 PHONES
Use this jack to connect a pair of headphones. You can
use headphones with an impedance of 16–200Ω (50Ω
suggested). Use a headphone distributor to connect
more than one pair of headphones.
2INPUT
Use these unbalanced connectors to input another keyboard/synthesizer, a (non-powered) mixer’s output, or
a CD/tape player (line impedance). The signal is automatically routed to the speakers, the Audio Outputs
and the Phones.
3OUTPUTS
Use these unbalanced connectors to send the audio signal (sound) to a mixer, a PA system, a set of powered
monitors, or your hi-fi system. Set the output level with
the MASTER VOLUME slider.
4 DAMPER
Use this to connect a Damper pedal, like the KORG
PS1, PS3 or DS1H. To change its polarity, see “Damper
Pol. (Damper Polarity)” on page 127.
5 ASSIGN. PDL/SW
Use this to connect a continuous or footswitch pedal,
like the KORG EXP2 or XVP10. To program it, see “P/S
(Pedal/Switch)” on page 127.
6 MIDI interface
The MIDI interface allows your Liverpool to be connected to an external controller (master keyboard,
MIDI guitar, wind controller, MIDI accordion…), to an
expander, or to a computer running a sequencer or an
editor. For more information on how to use the MIDI
interface, see the MIDI chapter.
IN This connector receives MIDI data from a
computer or a controller. Connect it to an
external controller’s or computer’s MIDI
OUT.
OUT This connector sends MIDI data generated
by the Liverpool’s keyboard, controllers,
and/or the internal sequencer. Connect it
to an expander’s or computer’s MIDI IN.
7 DC 12V (AC power adapter connector)
Plug the supplied power adapter into this connector.
8 SD Card Slot
To insert an SD card (or SDHC card),
push it into the slot until it clicks into
place. To remove the SD card, push it in;
the card will pop out slightly, allowing
you to pull it out.
Note: Carefully read the owner's manual
that came with your SD card, and observe
the instructions regarding care and handling.
Note: Take care to insert the SD card in the correct direction
and orientation, and be sure to press it all the way into the
slot. Do not use excessive force.
Connector
side
Page 25

BASIC GUIDE
Page 26
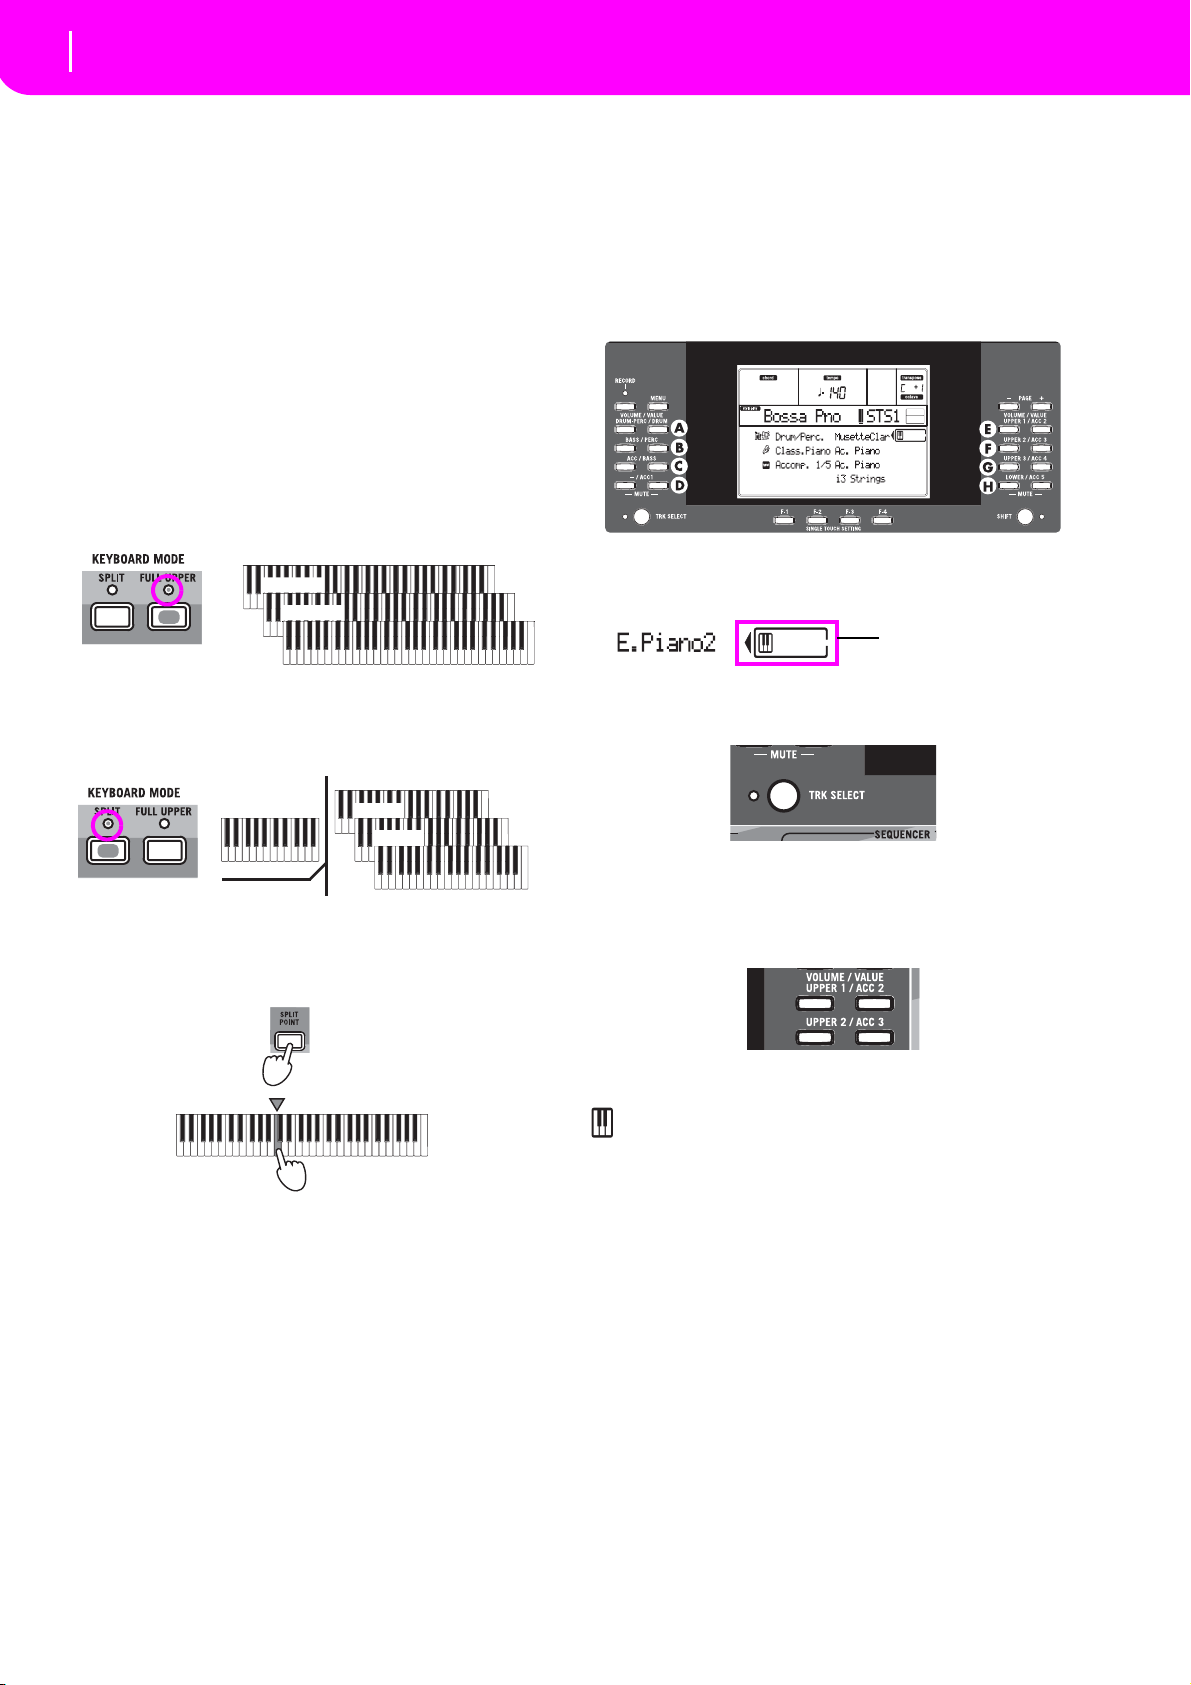
24
Basic operations
Playing on the keyboard
LOWER UPPER
Selected track
6. BASIC OPERATIONS
PLAYING ON THE KEYBOARD
Just play on the keyboard. You will hear the Realtime
tracks playing. There are four Realtime tracks: Upper
1–3 and Lower. They may play all at the same time, or
just one or a few of them, depending on their Mute status. If you cannot hear a track, check the mute status of
that part.
Tracks can be set in different ways: use the KEYBOARD MODE section to select the way they are configured on the keyboard.
• Press FULL UPPER to play the Upper 1–3 tracks
on the full range of the keyboard, just as you
would on a piano.
Upper 1
Upper 2
Upper 3
• Press SPLIT to let the Upper 1–3 tracks play on the
right of the Split Point, and the Lower track on the
left.
Upper 1
Lower
Split Point
• Keep the SPLIT POINT button pressed, and play a
note to change the point where the keyboard is
divided in an Upper and a Lower part.
Upper 2
Upper 3
SELECTING, MUTING/UNMUTING AND SOLOING A TRACK
Selecting. Use the VOLUME/VALUE (A–H) buttons to
select a track.
The selected track is shown with a solid square surrounding its status icons.
If you can’t see the track that you’re looking for, use the
TRACK SELECT button to scroll up or down the
tracks, and find the hidden ones.
Mute/unmute. Press both VOLUME/VALUE (A–H)
buttons to mute or unmute a track. For example, if you
are on the main page that appears after turning the
instrument on, and you want to mute the Upper 1
track, press the E (UPPER1/ACC2) buttons together.
To save the selected split point note, press the GLOBAL
button, then press WRITE to save the Global in memory (see “The Write window” on page 126).
The mute/play status is shown by the relevant icon in
the display:
Play status; the track plays on the keyboard.
(no icon) Mute status; the track doesn’t play on the
keyboard.
Solo. While in the Style Play, Song Play and Song
modes, you can solo one of the tracks. Just keep the
SHIFT button pressed, and press both VOLUME/
VALUE buttons corresponding to the track you wish to
solo.
To exit the solo mode, keep the SHIFT button pressed
again, and press both VOLUME/VALUE buttons corresponding to the soloed track.
Page 27

25
Basic operations
Selecting a Performance
Last selected Performance
SELECTING A PERFORMANCE
A Performance is a set of Programs and settings for the
Keyboard and Style tracks, that makes selecting complex combinations live fast and easy. When the STYLE
CHANGE LED is on, a Performance can also select a
different Style.
It is always advisable to use Performances, rather than
single Programs, when playing even a solo sound,
since a Performance lets you select the right effects,
transposition, plus many other parameters, together
with the Programs.
Data type Parameters
Realtime
Tracks
Style
Tracks
Other “performance” parameters are saved in the
Global.
Global Chord Recognition Mode, Memory Mode, Velocity
1. Press the PERFORM button. This changes the
PROGRAM/PERFORMANCE section into a Performance selector.
2. Use the leftmost button of the PROGRAM/PERFORMANCE section to select the first row of ten
banks (1–10, upper LED turned on), or the second
row of ten banks (11–20, lower LED turned on).
3. Press one of the 1–0 buttons to select the PROGRAM/PERFORMANCE bank containing the Performance you are looking for.
Upper 1, Upper 2,
Upper 3, Lower
Drum, Percussion,
Bass, Acc1, Acc2,
Acc3, Acc4, Acc5
Trigger, Lock
Master Transpose, Program,
Volume, Pan, Octave, Scale,
Detune, Pitch Bend,
Poly/Mono/Drum, Int/Ext,
Damper, Dynamic Range,
Joystick, C&D Effect Send
level, Type, Parameters,
Program parameters, Pads
Program, Volume, Pan,
Octave, Detune, Pitch Bend,
Poly/Mono/Drum, Int/Ext,
Wrap Around, Keyboard
Range, A&B Effect Send
level, Type, Parameters,
Program parameters,
Drum Mapping, Kick&Snare
Assignation
The Performance Select window appears. There
are 8 Performances for each bank.
4. Select a Performance using the VOLUME/VALUE
(A–H) buttons.
5. If the DISPLAY HOLD LED is on, press EXIT to
exit this window.
The STYLE CHANGE button
When you select a Performance, the Style may or may
not change, depending on the status of the STYLE
CHANGE button. (When you save a Performance, the
current Style number is always memorized).
• If the STYLE CHANGE LED is on, the Style saved
in the Performance will be selected.
• If the STYLE CHANGE LED is off, the Style
doesn’t change.
SELECTING A PROGRAM
You can select a different Program (i.e., sound) to be
played by a track. Before selecting a Program, you must
select the track that you want to assign the Program to.
Note:
To assign different Programs to the Style tracks, press
TRACK SELECT to see the Style tracks. If you select a Program while grouped tracks (Drum/Percussion or ACC) are
selected, the Program will be assigned to the last selected track.
Each Style Element (Variations, Fills…) can have different Programs, so your selection might be automatically reset when selecting a different Element. To avoid
this reset, see “Prog (Program)” on page 49.
1. Use the VOLUME/VALUE (E–H) buttons on the
right side of the display, to select the Realtime
(Keyboard) track you wish to assign a different
Program to.
2. Press the PROGRAM button. This changes the
PROGRAM/PERFORMANCE section into a Program selector.
Page 28
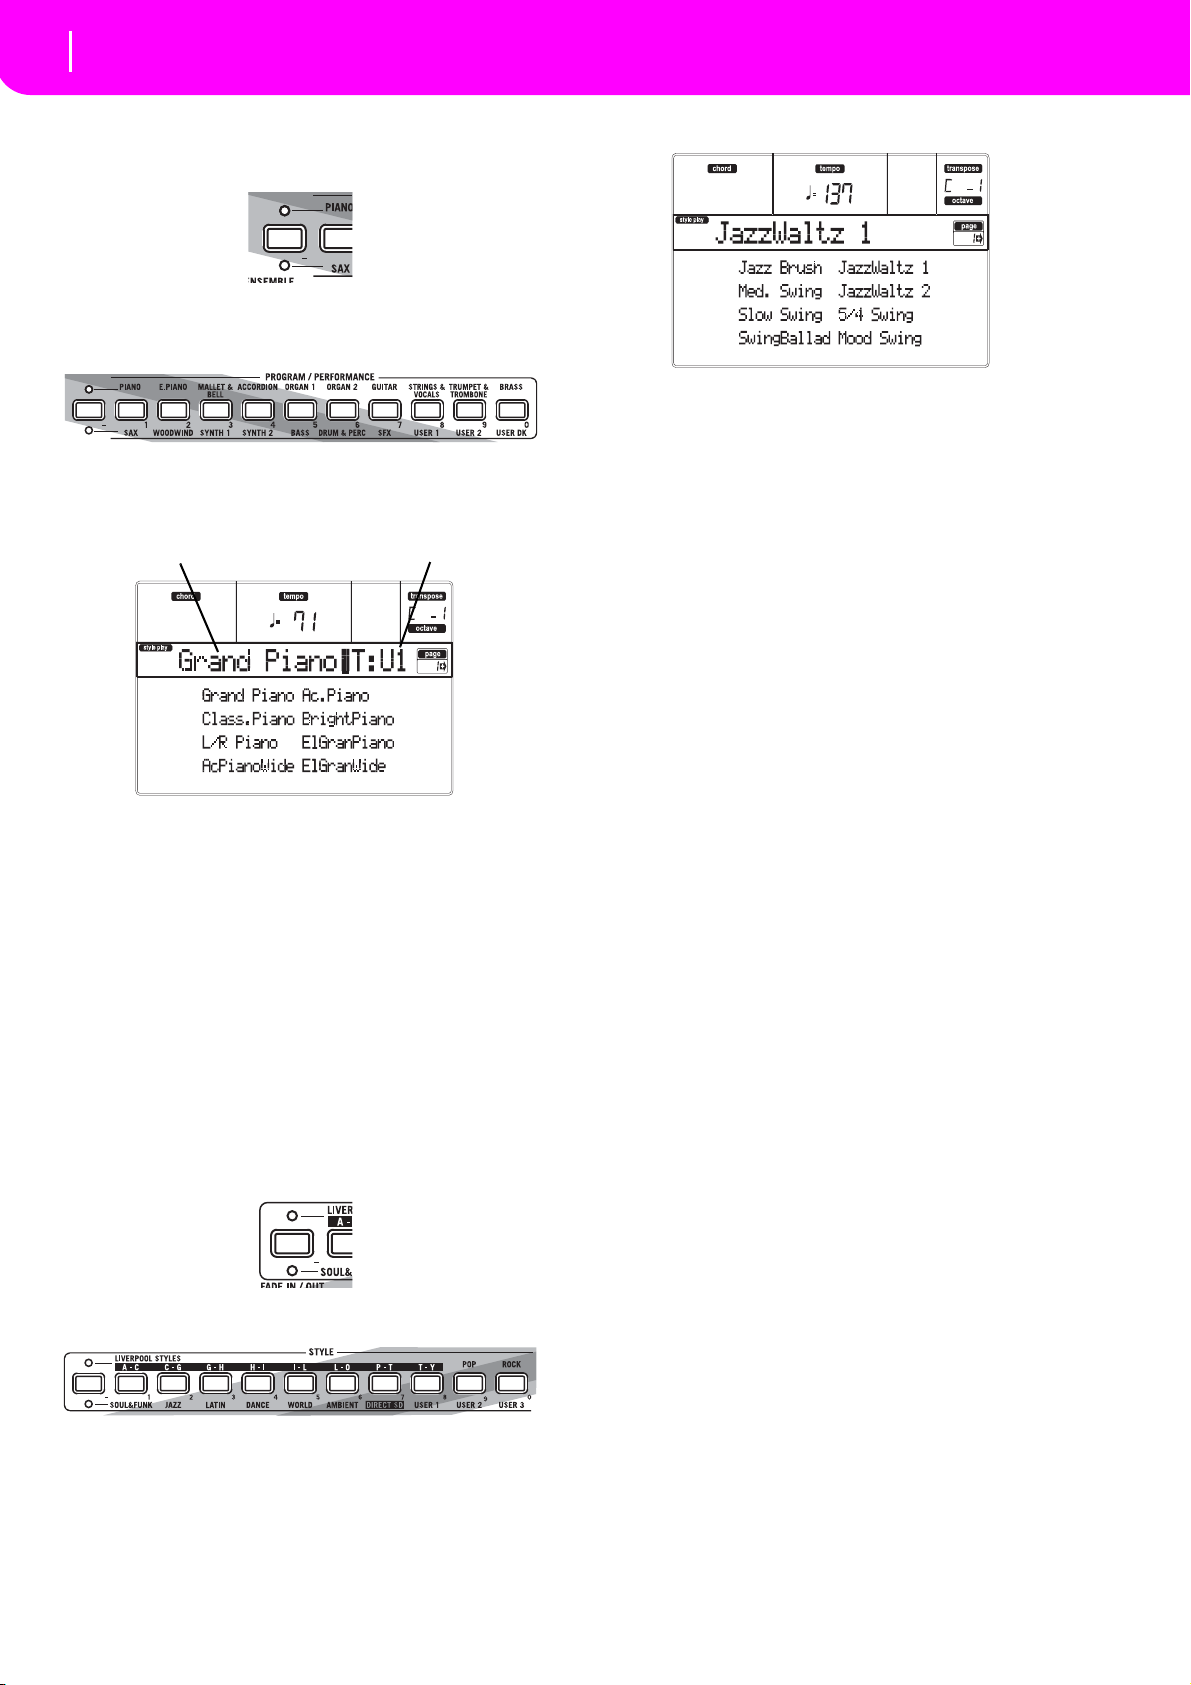
26
Basic operations
Selecting a Style
Last selected Program
Selected track
3. Use the leftmost PROGRAM/PERFORMANCE
button to select a row of Program banks (upper,
lower).
4. Select the PROGRAM/PERFORMANCE bank containing the Program you are looking for (Program
banks are identified by instrument names).
The Program Select window appears. See “Programs (Program Change order)” on page 157 for a
list of Factory Programs.
5. Browse all the Programs in the selected bank using
the PAGE buttons. There can be various pages for
each bank, containing up to 8 Programs each.
6. As you find the Program you are looking for, select
it using the VOLUME/VALUE (A–H) buttons.
7. If the DISPLAY HOLD LED is on, press EXIT to
exit this window.
SELECTING A STYLE
A Style is a set of rhythm and accompaniment patterns.
You can select a Style from the internal memory, or
from a memory card (see “The DIRECT SD bank” on
page 40).
1. Use the leftmost STYLE button to select a row of
Style banks (upper, lower).
The Style Select window appears.
3. Each bank has one or two pages, each page containing up to eight Styles. Select a page using the
PAGE buttons.
4. As you find the Style you are looking for, select it
using the VOLUME/VALUE (A–H) buttons.
Note: The new Style will enter at the next strong beat.
5. If the DISPLAY HOLD LED is on, press EXIT to
exit this window.
The SINGLE TOUCH button
When you select a Style, the Realtime (Keyboard)
tracks can be changed.
• If the SINGLE TOUCH LED is on, the Single Touch
Setting (STS) #1 is automatically selected, and the
Realtime tracks are changed. Programs, and the
Keyboard Mode, may change.
• If the SINGLE TOUCH LED is off, Realtime tracks
don’t change.
SELECTING A SINGLE TOUCH SETTING (STS)
A Single Touch Setting (STS) contains Realtime (Keyboard) tracks’ settings. Four STS are included in each
Style, and can be recalled by pressing the SINGLE
TOUCH SETTING (F-1–F-4) buttons under the display.
Note: You can select a STS only when you are in the main
page of the Style Play or Backing Sequence operating mode.
CHANGING ALL KEYBOARD TRACKS AT ONCE
Select a Performance or a Single Touch Setting (F-1–F-4
buttons, when you are in the Style Play main page) to
change keyboard Programs and effects at the touch of a
button.
2. Select the STYLE bank containing the Style that
you’re looking for.
SHORTCUT TO SEE THE ORIGINAL BANK FOR A STYLE, PERFORMANCE OR PROGRAM
You can see the original bank where your Style, Performance or Program came from. Just keep the SHIFT button pressed, and press the lefmost button of the STYLE
or PROGRAM/PERFORMANCE section. A message
window will appear, showing the name of the original
bank.
Release the SHIFT button to exit the window.
Page 29
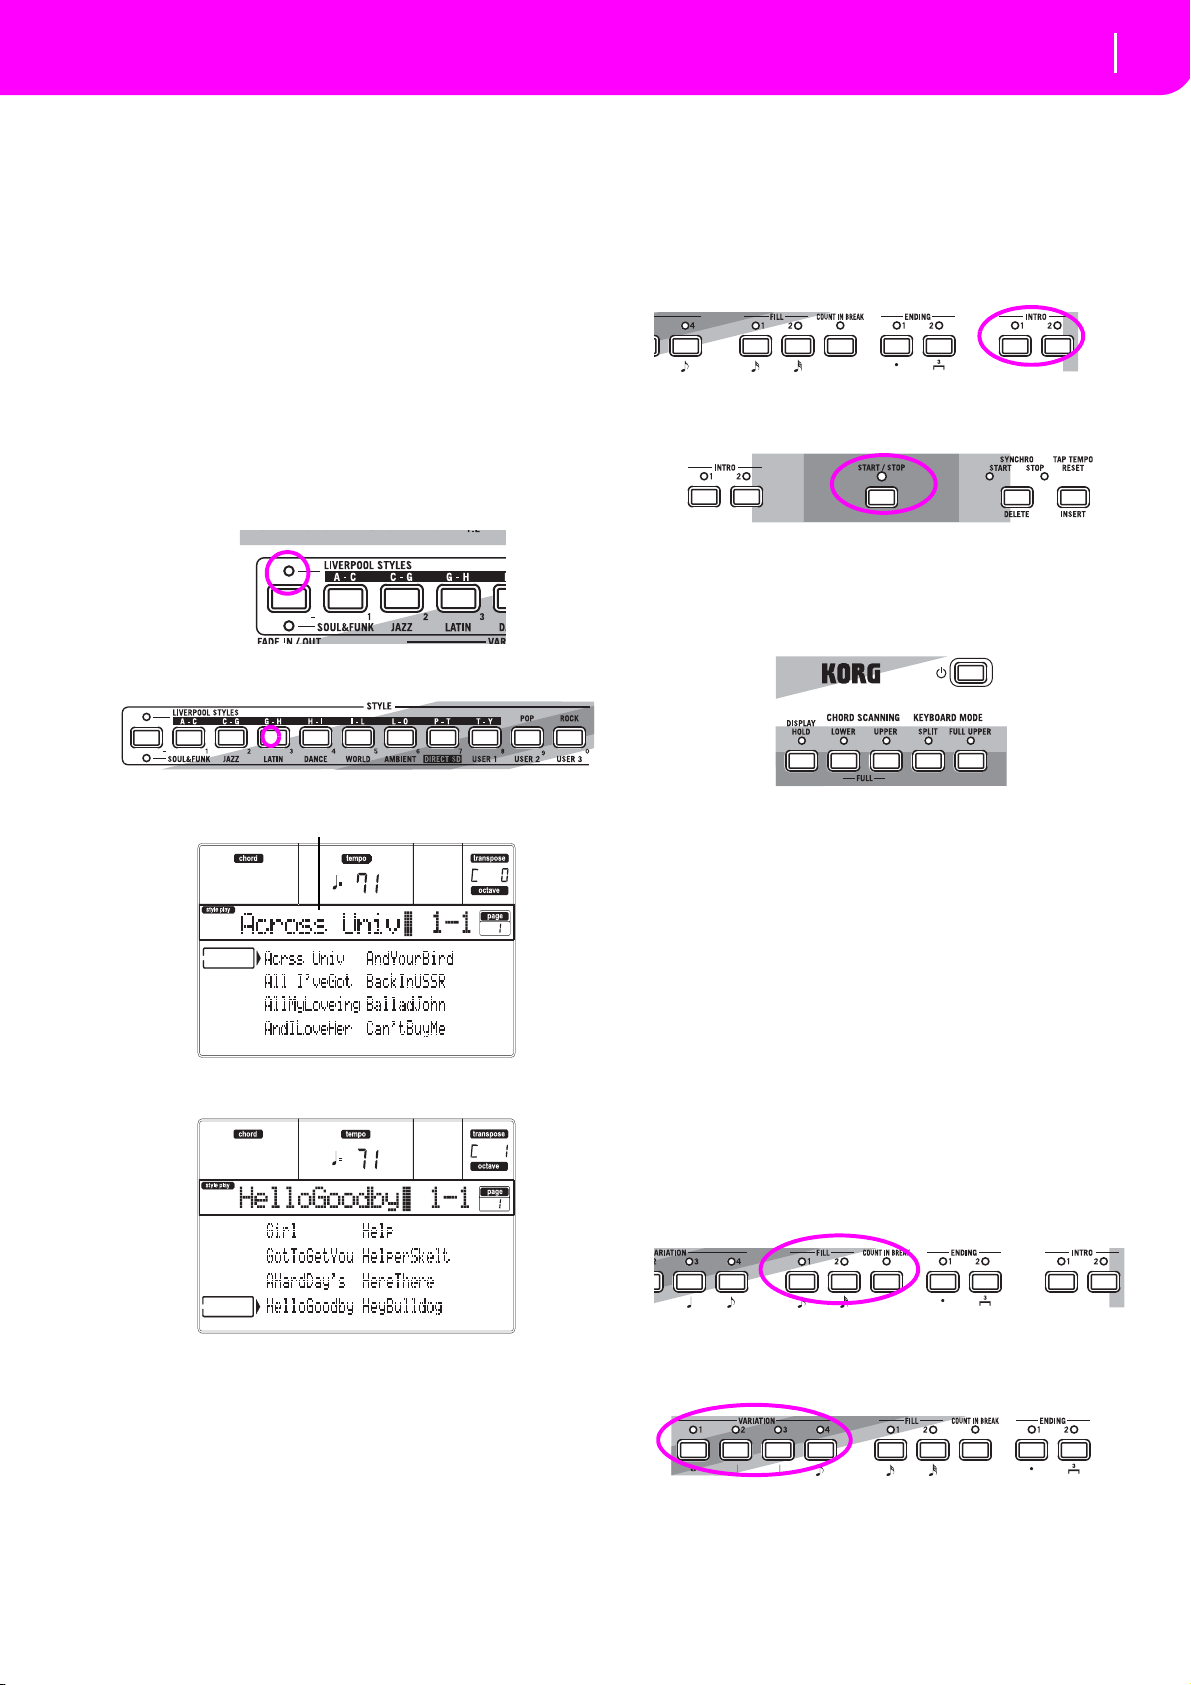
Tutorial
Playing a Style (Automatic Accompaniment)
7. TUTORIAL
The selected Style
27
This chapter is fully devoted to step-by-step instructions, that we hope may be useful to learn the basics—
in the field.
PLAYING A STYLE
(Automatic Accompaniment)
A Style will be your virtual band for your best solos.
Select one of the 240 Styles we fitted in this machine…
1 OK, select your favorite musical Style.
There are plenty of Styles to choose from. We will go
with a
1. Select the second row of Styles. Press the leftmost
2. Now, you are free to press button number 3, called
LIVERPOOL STYLES—the “HalloGoodby”.
STYLE button to switch the lower LED on.
“G - H”.
2 Call an Intro.
You can engage an Intro to be played before the Style.
Press INTRO1 or INTRO2. The former plays more
freely, without letting you decide the chords. The latter
lets you play a chord progression while it’s playing.
3 Start the Style!
Play a chord, and press the START/STOP button.
Then begin playing. Usually (when the SPLIT LED is
on) chords are recognized under the split point, i.e. on
the Lower part of the keyboard. With the UPPER or
FULL Chord Scanning mode, you must play three or
more notes to have a chord recognized.
The Style Select window appears.
3. Press one of the D VOLUME/VALUE buttons to
select “HalloGoodby”.
4 Play your chords and your melody.
Go on playing. As you may notice, the Liverpool features a very sophisticate chord recognition engine. Recognized chords are shown in the display.
5 Make a break—or should we say “a fill”?
During your playing, you are free to call a one-bar
break. Try it:
PRESS BREAK
Do you see? Music stopped for one bar. Then, it is back
again. After a while, let’s go for something different…
PRESS FILL1 OR FILL2
No silence, this time. Liverpool plays a complex passage to let you take a breath. FILL1 is the simpler one,
where FILL2 is more sophisticated. Usually, you will
use FILL1 when playing with Variations 1 and 2 (the
most easy), FILL2 when working with Variations 3 and
4 (more complex ones).
6 Select other Variations.
There are four VARIATION buttons. These are four different versions of the same Style. Try them all!
You can go to a Variation after a Fill. Just press a FILL
button, then, immediately after press a VARIATION
button.
Page 30
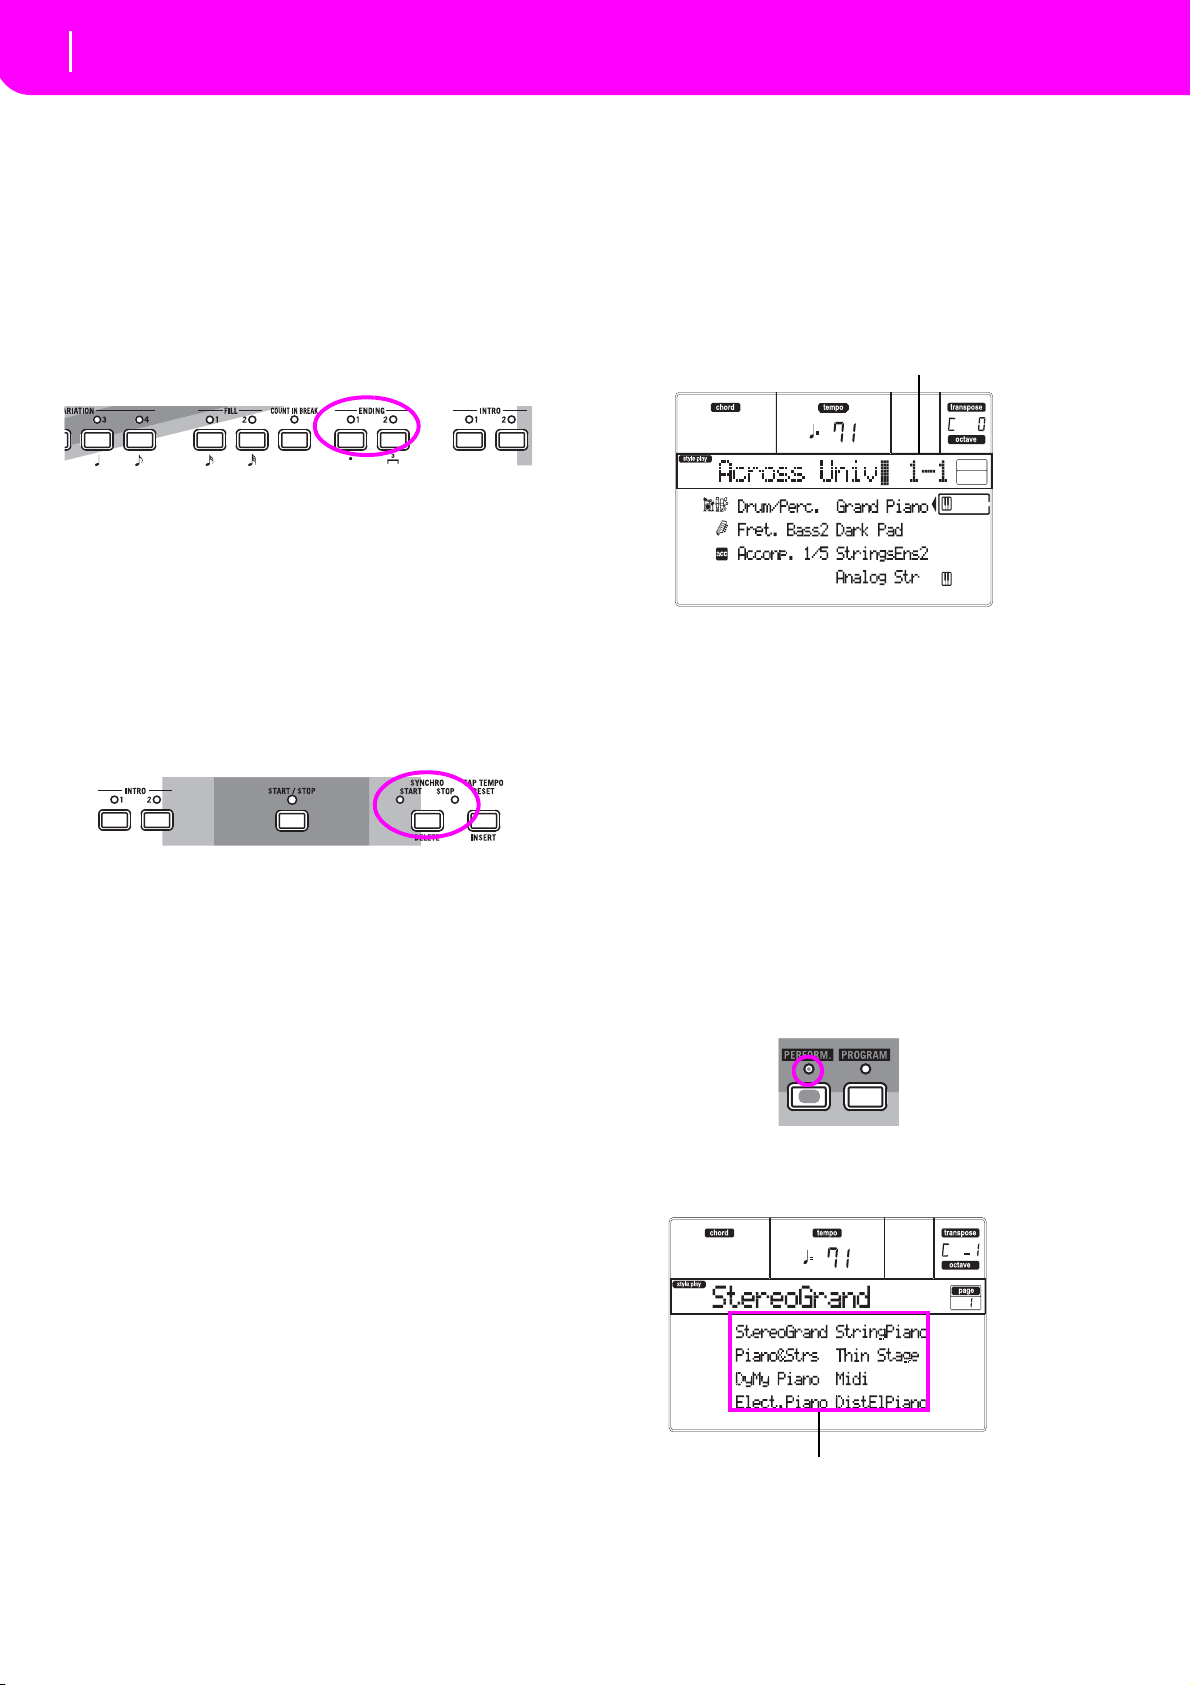
28
Tutorial
Playing in Realtime (Without using Automatic Accompaniment)
Performance bank-number
Select a Performance with the VOLUME/VALUE buttons
7Stop it!
OK, you could say: “Oh, that’s easy, I know how to do
it, I can just press that big red START/STOP button
again”.
Yes, you are perfectly right. But that’s the easy way. Let
us suggest a more colorful way:
PRESS ENDING1 OR ENDING2
An ending is instantaneously called, and will begin
playing, to lead the Style to a colorful end. As usual,
ENDING1 is pre-programmed, while ENDING2 asks
for your chord progression.
In Sync
“What if I want to avoid all that START/STOP stuff? I
mean, I prefer to have my hands free for playing
music!”
Good point. The SYNCHRO button is there right for
this purpose.
1 While the Style is stopped, press the SYN-
CHRO button.
The SYNCHRO-START LED begins blinking. The Synchro Start function is enabled.
2 Play a chord on the keyboard.
You must play a chord for the chord recognition
engine. Usually, it will be to the left of the split point,
but it depends on the CHORD SCANNING section (see
“CHORD SCANNING section” on page 17).
The Style starts.
3 Stop the Style using your chosen method.
PLAYING IN REALTIME
(Without using Automatic Accompaniment)
As soon as you turn your Liverpool on, it is in Style
Play mode, and you can play it in realtime. Please follow me…
1 Play on the keyboard.
When you turn the Liverpool on, Performance 1-1 is
automatically selected.
This sets the Realtime (Keyboard) tracks for you. In this
case you get the Upper 1 track playing on the full keyboard range, with the Grand Piano Program selected.
As you may know, there are four available Realtime
tracks: Upper 1–3 and Lower. Upper Realtime tracks
may play on the full range of the keyboard (the
selected KEYBOARD MODE shall be FULL UPPER).
Otherwise, the Lower track plays on the left of the Split
Point, and the Upper tracks on the right (KEYBOARD
MODE shall be SPLIT).
If you are not satisfied with this setting at startup, you
can simply select another Performance. Or change the
track’s settings—as you will see in this tutorial—and
save them into Performance 1-1. You’ll soon see how to
do it.
2 Select a different Performance.
Is the PERFORM. LED on?
Need more information?
Go to “Style Play operating mode” on page 40. The Reference Guide includes all the information you need.
If so, press one of the PROGRAM/PERFORMANCE
buttons, and select a Performance with the VOLUME/
VALUE buttons (on the side of the display).
Go ahead and try out the different Performances. We
provided 160 of them for you.
Page 31
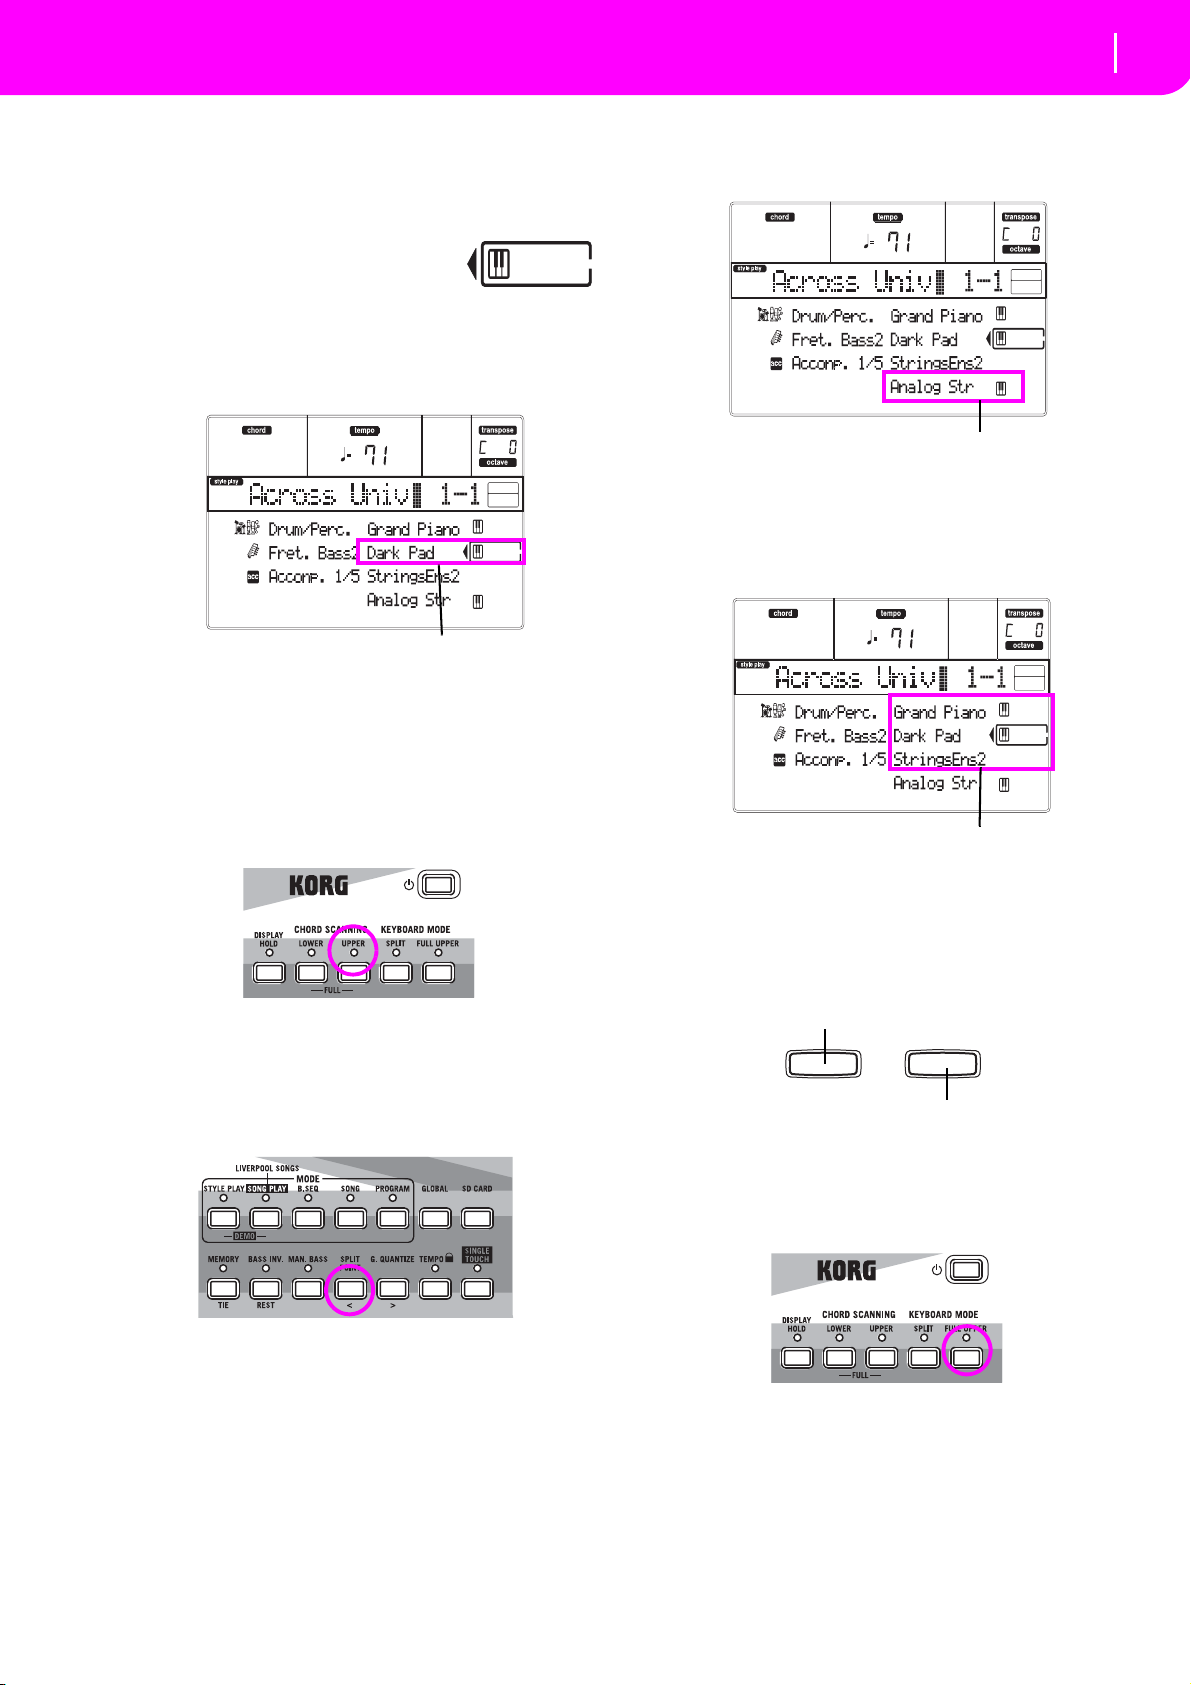
29
Tutorial
Playing in Realtime (Without using Automatic Accompaniment)
Press the F VOLUME/VALUE buttons
Press the H VOLUME/VALUE buttons
Press the E–G VOLUME/VALUE buttons
Press the left one to lower…
…and the right one to raise.
3 Select Performance 1-1 (“Grand Piano”) again.
As above: press Performance bank 1, and use the A
VOLUME/VALUE buttons to select Performance 1-1.
4 Unmute the Upper 2 track.
Press both F VOLUME/VALUE buttons. The Upper 2 track will be
selected and unmuted. The Play icon
will appear, surrounded by the “selected track” frame
and accompanied by the pointing arrow. You will hear
the Dark Pad Program play together with the Grand
Piano.
5 Press SPLIT on the KEYBOARD MODE section,
and play.
Now, the keyboard is split in two parts: the Lower part
on the left, and the Upper part on the right. The AnalogStr Program is playing on the Lower part, while the
Grand Piano and the Dark Pad are playing on the
Upper part.
7 Mute/unmute various tracks.
Press both H VOLUME/VALUE buttons. You will mute
the Lower track.
Press them again to unmute the Lower track.
Try also with the Upper tracks, using the E, F and G
VOLUME/VALUE buttons. You will notice the sound
becomes more or less fuller-sounding, depending on
the number of tracks muted or unmuted.
6 Set the split point.
Not happy with the current split point? Keep the SPLIT
POINT button held down, and play the new split point
on the keyboard. You can even save this setting in
memory (see “The Write window” on page 126).
8 Set the relative volume of the Realtime tracks.
Use each E–H VOLUME/VALUE button pair to set the
volume of the Realtime tracks. Press one of the VOLUME/VALUE button to select a track. Then press the
right one to increase the volume, the left one to lower it.
9 Press FULL UPPER on the KEYBOARD MODE
section, and play.
Again, the Upper tracks can play across the full keyboard range.
10 Save your track configuration in a Performance.
That’s all! When you find the right sound, you can
press the WRITE button to save the track configuration
into a Performance, a Single Touch Setting (STS), or a
Style Performance. The Performance is a handy way to
save Realtime tracks. See “The Write window” on
page 42 for more information.
Page 32
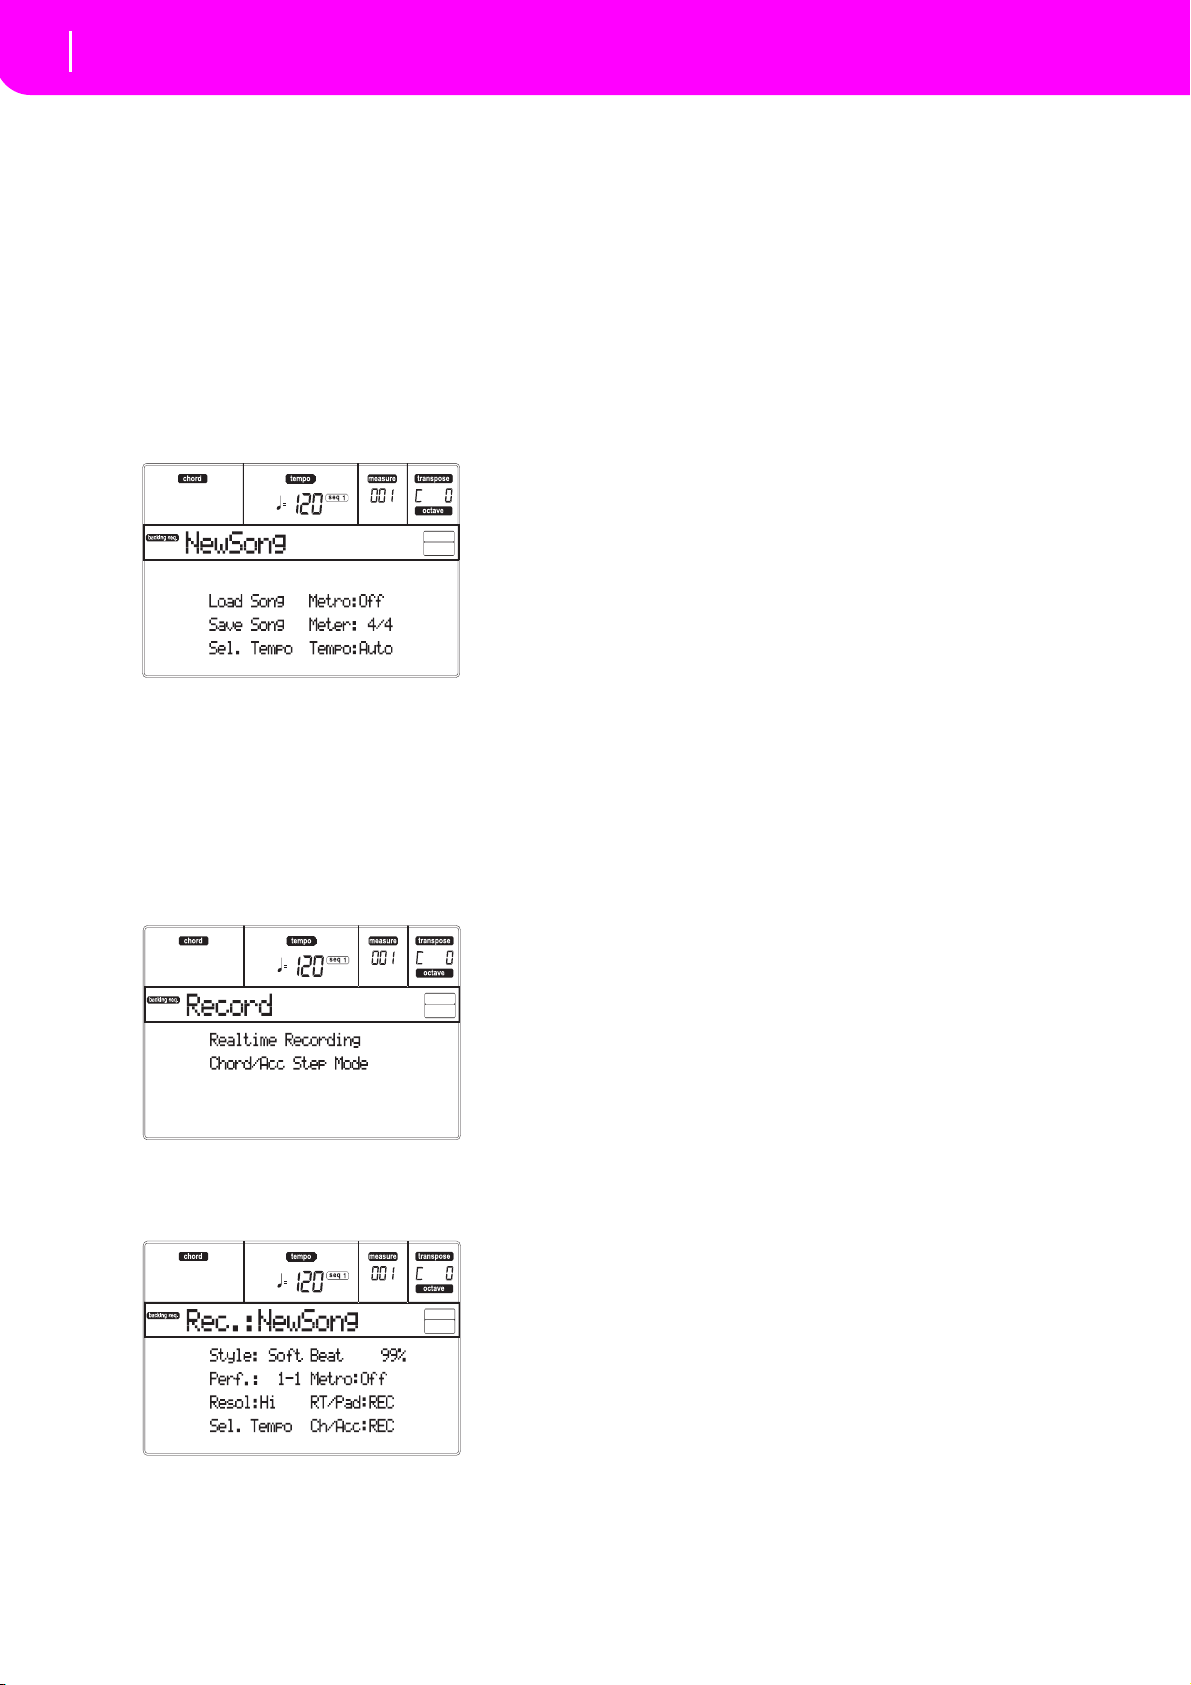
30
Tutorial
Recording a Song (Simultaneously recording the Style and realtime performance)
RECORDING A SONG
(Simultaneously recording the Style and
realtime performance)
The Backing Sequence mode is a fast and effective way
of recording a new Song, making full use of the features of the Style Play mode. So, arm your recorder,
and play live with the Styles—a song will be ready in
seconds!
1 First, enter Backing Sequence mode
Press B.SEQ to access the Backing Sequence mode. The
Realtime tracks, on the keyboard, will remain the same
as you selected in the Style Play mode.
Don’t worry about this display: it’s something you
don’t need to learn at this point. You may find more
information on it, going to the Reference Guide (see
“Backing Sequence operating mode” on page 82).
This is the Backing Sequence Play page, where you can
load, play or save a Song.
2 Now, press RECORD.
You are prompted to select either the Realtime recording mode, or the Chord/Acc Step recording mode.
3 Select the Realtime recording mode.
Simply press one of the A VOLUME/VALUE buttons.
The Record page appears.
4 If you think the selected Style is not what you
like for your backing tracks, select a different
one.
(see “Selecting a Style” on page 26). Here is a fast
reminder:
1. Select one of the Style rows in the STYLE section,
using the leftmost button.
2. Select one of the Style Banks, by pressing one of
the buttons of the STYLE section.
3. Select one of the pages, using the PAGE buttons.
4. Select a Style, using the VOLUME/VALUE (A–H)
buttons.
The Style Bank and number appear after the “Style”
parameter in the display.
5 And what about changing the Performance or
Single Touch Setting?
(see “Selecting a Performance” on page 25, or “Selecting a Single Touch Setting (STS)” on page 26). Here is a
short recap for the Performances:
1. Press the PERFORM button to set the PROGRAM/
PERFORMANCE section act as a Performance
selector.
2. Select one of the Performance Banks, by pressing
one of the buttons of the PROGRAM/PERFORMANCE section.
3. Select a Performance, using the VOLUME/VALUE
(A–H) buttons.
…and for the Single Touch Settings (STS):
• Press one of the SINGLE TOUCH SETTING buttons.
6 Ok, now we can go.
As you see, both the RT track and the Ch/Acc track are
in RECord mode. This means you can start recording
everything you play in a realtime performance with the
Styles.
PRESS START/STOP
WAIT FOR THE PRECOUNT TO REACH BAR 1
AND BEGIN PLAYING!
7 Play as if you were playing live.
You can do exactly what you do when playing with the
Styles: select a different Style, Performance, STS, different Variation, a Fill, and Ending…
You can even start your recording with an Intro: just
press one of the INTRO buttons before pressing
START/STOP to start recording.
8 Stop the Song.
To stop the Song, press either START/STOP or one of
the ENDING buttons. The Song will stop, but the
Recording will still be on. So, you can start with
another Song to be recorded in the same session (go
back to step 6, if you like).
Otherwise, finish the Recording. Now for going to the
next step.
Page 33
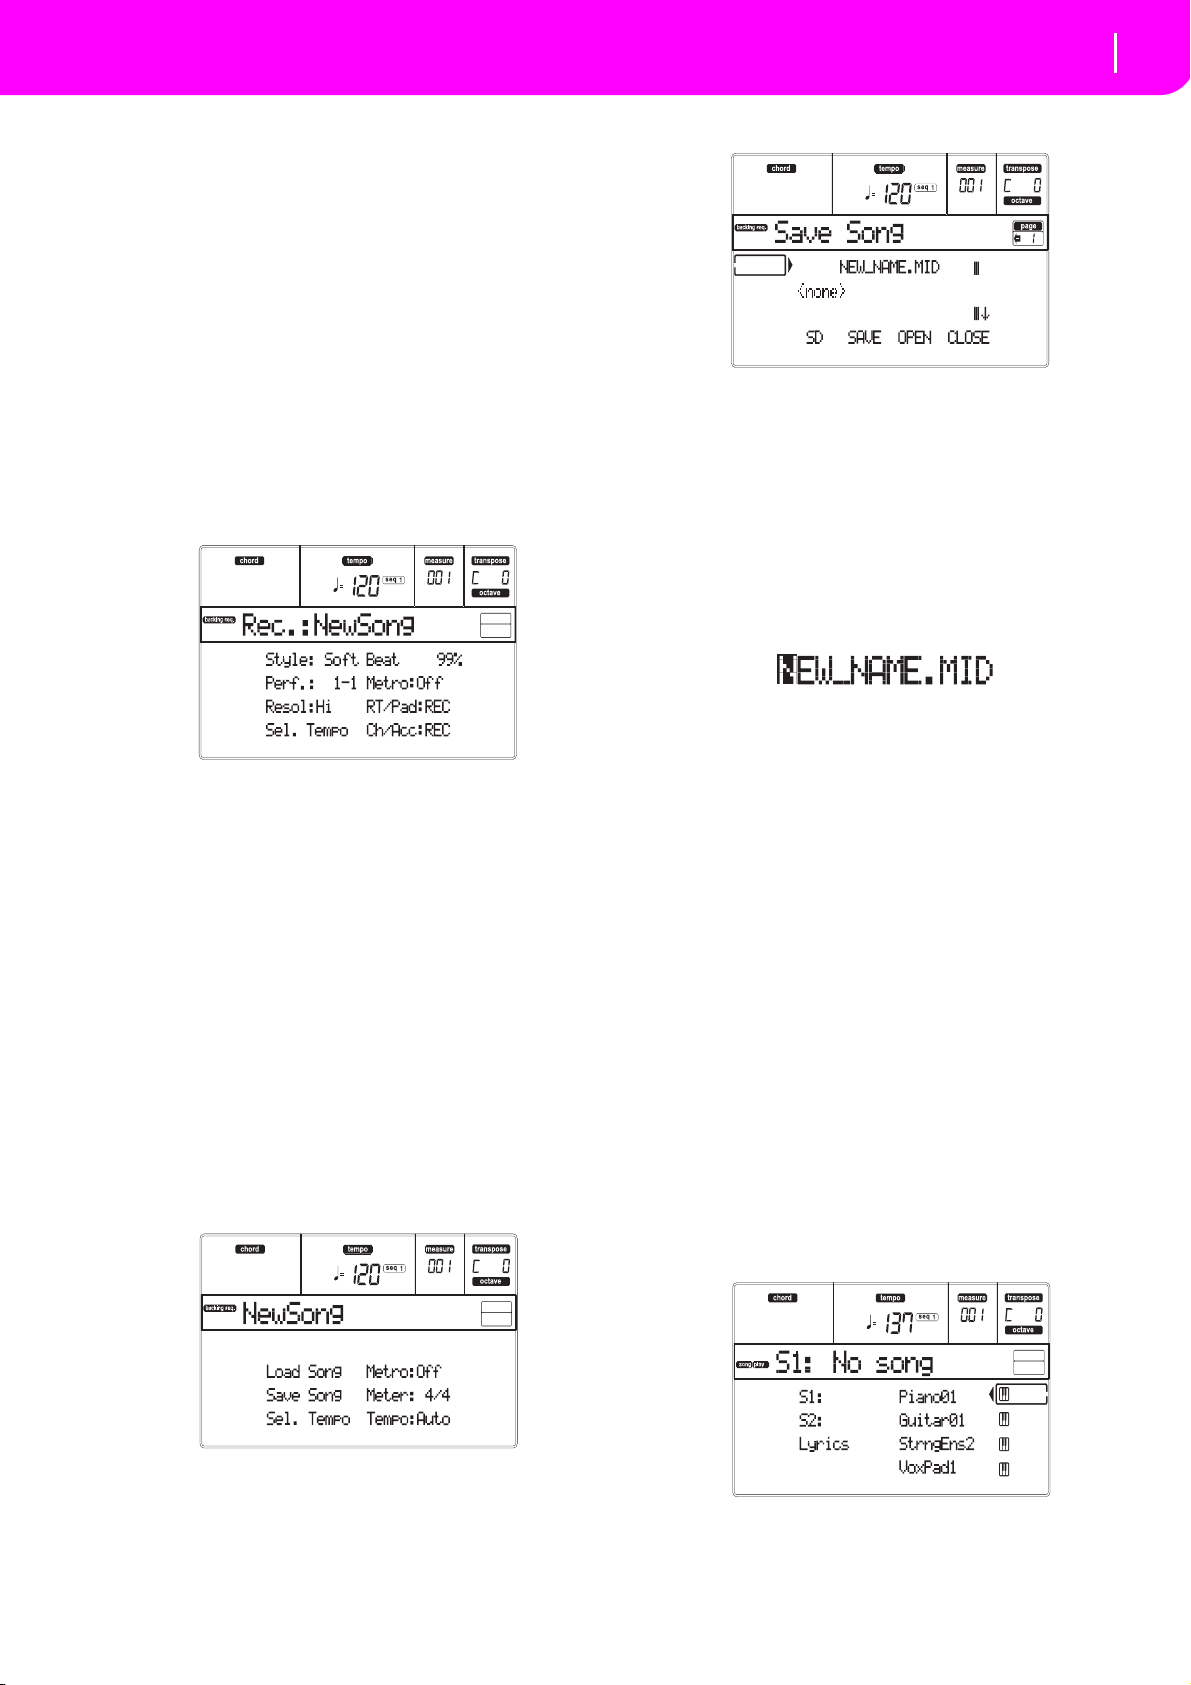
31
Tutorial
Playing a Song
9 Finish the recording.
PRESS PLAY/STOP (SEQ1)
and the Recording status will be gone. Both Backing
Sequence tracks (RT and Ch/Acc) will be set to the
PLAY status.
10 Listen to the Song.
When back in the Backing Sequence Play page, press
PLAY/STOP (SEQ1) to listen to the new Song. How
smart were you?
If the Song is fine, you can switch to the Song mode
and do some editing. Or you can save it (as seen
below), and play it in Song Play mode.
11 Deleting one of the tracks, or the whole Song
and record again.
That’s easy!
1. Press RECORD to enter Record mode.
2. Set the track to delete and set the REC status to
record.
3. Set the track you want to listen to during recording
to PLAY status. If you don’t want to delete it, but
you don’t want to listen to it, set the track to MUTE
status.
4. Start recording again. If you are recording the RT
track, you can’t use the Style controls.
5. Press PLAY/STOP (SEQ1) to finish the Song and
exit Recording mode.
12 Time to save your Song.
If you don’t save your Song, it will be lost when you
turn the instrument off, or switch to the Song Play
mode. You must save to a card any Song you wish to
preserve.
1. Insert your SD card into the card slot.
2. In the Backing Sequence Play page, select the "Save
Song" parameter.
3. Press the [F-1] button to select the SD card (SD).
4. Move the folder where you wish to save your Song
to the first line of the display, using the E–F (Scroll
Up) and G–H (Scroll Down) VOLUME/VALUE
buttons, or the TEMPO/VALUE controls. Press F-3
(OPEN) to open it. Close the current folder by
pressing F-4 (CLOSE).
To
create
5.
item to the first line of the display
6. When the “NEW_NAME.MID” item is selected,
press one of the A VOLUME/VALUE buttons. You
are prompted to assign a name to the new folder:
Move the cursor using the DOWN/- and UP/+ buttons. Select a character using the DIAL. Insert a
character at the cursor position by pressing the
INSERT button. Delete a character at the cursor
position by pressing the DELETE button.
7. When you have finished writing a name for the
new midifile, press F-2 (SAVE) to confirm. The
“Are you sure?” message will appear. Press
ENTER to confirm, or EXIT to abort.
a new file, move the “NEW_NAME.MID”
.
Need more information?
Go to “Backing Sequence operating mode” on page 82.
The Reference Guide includes all the information you
need.
PLAYING A SONG
1 If you want to select a song from internal mem-
ory (SSD), simply continue to the next step. If
you want to select a song from an SD card,
insert the SD card into the card slot.
2 Press the SONG PLAY button to access the
Song Play mode.
Page 34
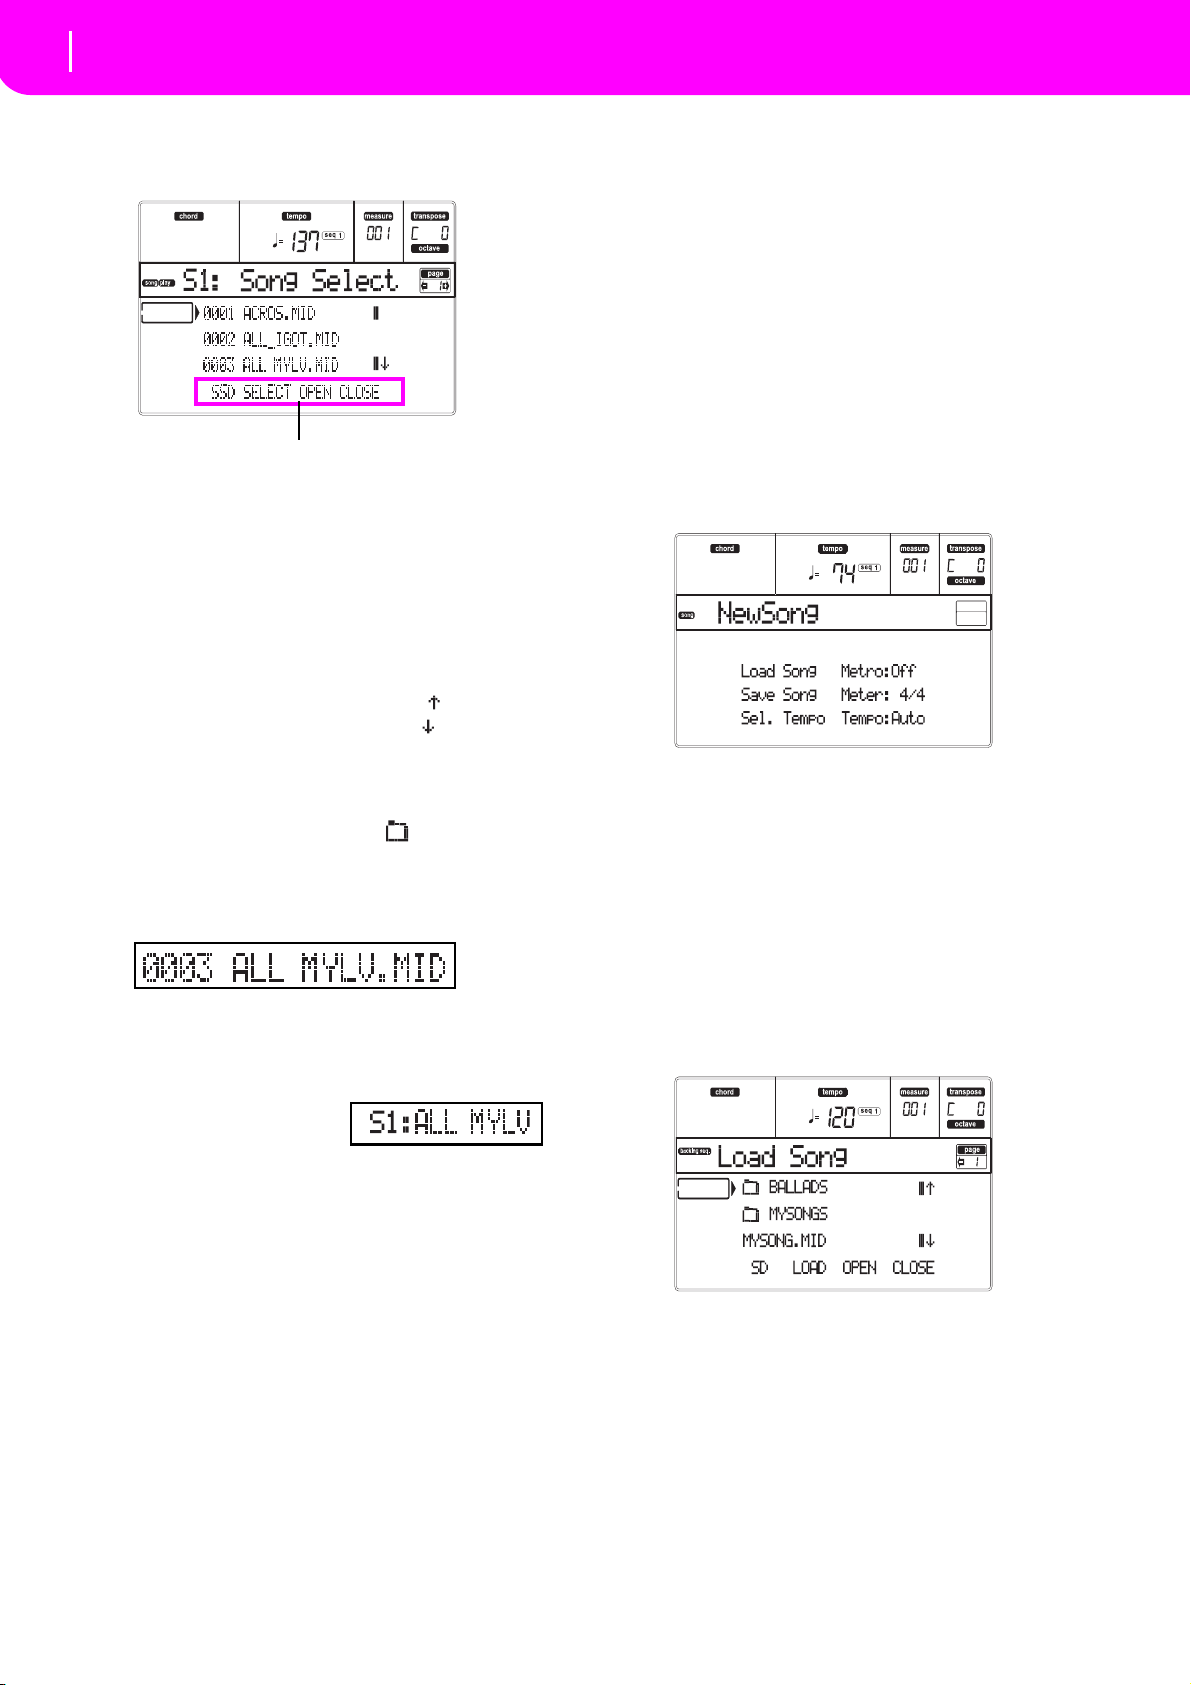
32
Tutorial
Editing a Song
Page commands
3 Press the A (S1:) VOLUME/VALUE button to
open the Song Select window.
The songs in internal memory (SSD) are displayed.
Note:
You can also access the Song Select window by
pressing the PAGE+ button from the main page. You can
exit this window either by pressing EXIT or PAGE-.
4 If you want to select a song from the SD card,
press the F-1 button to select the SD card (SD).
The card content appears.
5 Use the TEMPO/VALUE controls, or the VOL-
UME/VALUE (E–H) buttons to scroll the list.
The E–F buttons are the Scroll Up ( ), while the
G–H buttons are the Scroll Down ( ).
Move the file you are looking for to the first line of the
display.
6 If the file you are looking for is in a folder (a file
whose name begins with “ ”), move the
folder to the first line in the display, then select
the F-3 (OPEN) command. Select the F-4
(CLOSE) command to close a folder and go
back to the upper level.
Need more information?
Go to “Backing Sequence operating mode” on page 82. The
Reference Guide includes all the information you need.
EDITING A SONG
You can edit a Song, either a Standard MIDI File
bought at the shop, or one of your Songs made in Backing Sequence mode.
Note: Songs on the internal SSD cannot be edited.
What about changing those boring General MIDI
sounds with those gorgeous original KORG sounds?
You can do it—in Song mode.
1 Press SONG to go to the Song mode.
This is the Song garage, where you may find tools to
reshape your Song.
2 Insert in the card slot the card containing the
midifile you wish to edit.
Midifiles are files generated by a computer sequencer
or a musical instrument, usually after a conversion. For
example, if working with a computer, you should find
a command whose name could sound a little like “Convert to .MID”. A midifile has a “.MID” or “.KAR”
extension.
7 When the file you are looking for is in the first
line of the display, press the F-2 (SELECT) button.
8 When the Song appears
in the S1 line on the main
page of the Song Play
mode, press the left (SEQ 1) PLAY/STOP button
to start the playback.
Note: If the BALANCE slider is all the way to the
right, Sequencer 1 is at the minimum volume and
can’t be heard.
If you wish to play a different Song on Sequencer 2
at the same time, press the B (S2:) VOLUME/
VALUE button (press it twice if a Song is already
selected for Sequencer 2), and repeat the above
procedure to select a Song for Sequencer 2. Use the
right (SEQ 2) PLAY/STOP button to start/stop the
second Song. Use the BALANCE cursor to mix
between Sequencer 1 and Sequencer 2.
Stop the Song(s) using the PLAY/STOP button for the
corresponding Sequencer.
3 Load the Song.
Press one of the B VOLUME/VALUE buttons (corresponding to the Load Song command). As expected,
the Load page will appear.
If you replaced the card, press F-1 (SD) to read the SD
card again.
Move the midifile to load to the first line of the display.
Use the DIAL or the UP and DOWN buttons to scroll
the list; or use the E–F (Scroll Up) or G–H (Scroll down)
VOLUME/VALUE buttons.
When the midifile is on the first line of the display,
press F-2 (LOAD) to load it. The “Are you sure?” message will appear. Press ENTER to confirm.
Note: When loading a Standard MIDI File, the first MIDI
events are converted to the Song Performance events. You
Page 35
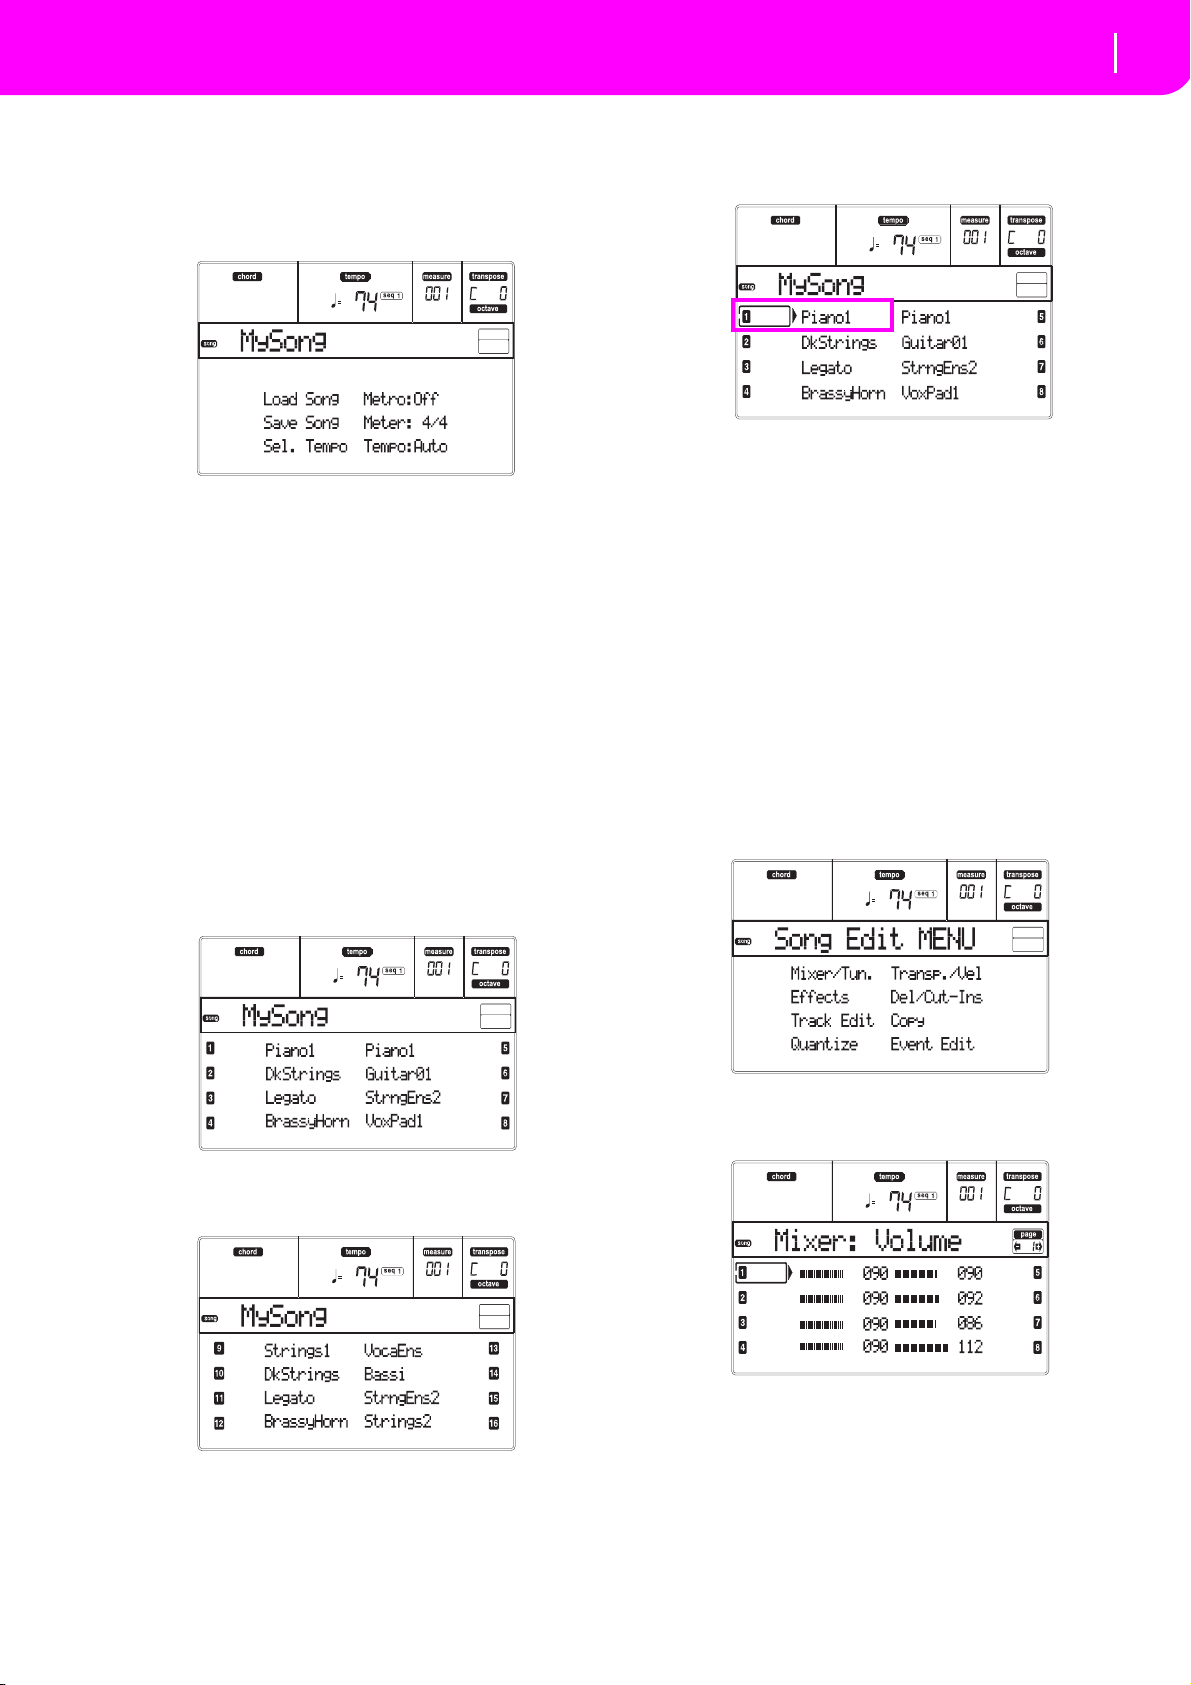
33
Tutorial
Editing a Song
will see them as the Programs, Volume, Pan, Effect settings
assigned to the tracks.
4 Listen to the Song.
After loading you are back to the main page of the
Song mode.
Press PLAY/STOP (SEQ1) to listen to the Song. The
LED on the button turns on.
Does it sound good? If it is a General MIDI-compatible
midifile, there is a good chance it does. But we can further improve on it.
5 Stop the Song.
This one is easy: press PLAY/STOP (SEQ1). The LED on
the PLAY/STOP button turns off.
Please, always remember: make any changes to the
Song when the sequencer is not playing. Otherwise, a
Stop command will reset all your changes.
(Not funny, huh?)
6 Select different Programs.
You can replace General MIDI Programs with KORG
Programs. It will sound more rich, more lively.
1. Press TRACK SELECT to see tracks 1–8. The LED
turns on.
one of the buttons corresponding to the track to
select. For example, one of the A buttons to select
track 1:
3. Select a Program. You should know how to do. If
not, what about going back for a little to the “Basic
operations” chapter, “Selecting a Program” section, page25? It will be of a great help in the
future…
Which Programs to choose? With >662 Programs,
you will for sure find your preferred sound. Just
browse any Program bank, and listen to them.
Turn on the DISPLAY HOLD LED, to stay in the
Selecting Window until you have found the right
Program. (Then, press EXIT or DISPLAY HOLD to
exit the window.)
4. Execute as many changes as you like to the other
tracks.
7 Change the volume.
Yes, this is another obvious change. Press MENU to
open the edit menu.
You are watching at tracks 1–8. You can switch to
tracks 9–16 by pressing the TRACK SELECT button again.
If you press TRACK SELECT again, you are back
to the main page. Press TRACK SELECT AGAIN
to go to tracks 1–8…
2. Select the track you wish to assign a different Program using the VOLUME/VALUE buttons. Press
Press one of the A VOLUME/VALUE buttons, to select
the Mixer/Tuning item. Suddenly, a Volume edit page
appears…
Select a track, and use the DIAL or the UP and DOWN
buttons, or the VOLUME/VALUE buttons, to change
the track’s volume.
Modify all tracks you think need to be modified.
8 Save the Song.
Your changes will be lost when you load a new Song,
switch to the Song Play mode, or turn the instrument
Page 36
34
Tutorial
The Arabic Scale
off. So, press EXIT to go back to the main page of the
Song mode.
Press one of the C VOLUME/VALUE buttons, to select
the Save Song command. Save your Song with a new
name. How to accomplish this simple operation is
described in great details on page 91 (“Save Song
page”).
Note: When saving a Song the Song Performance events
(initial Program, Volume, Pan, Effect Send settings) are
saved at the beginning of the Standard MIDI File. Effect settings are saved as Liverpool SysEx events, ignored by other
musical instruments.
Other editings
The Volume is not the only parameter you can edit. You
can edit a lot more things, like the Pan, the Effects, the
Tuning… you can even use up to 4 effects (A–D Internal FX Processors), but this will be useful only when
reading the Song back on the Liverpool only, since
other General MIDI-compliant instruments use only 2
effects.
Need more information?
Go to “Song operating mode” on page 89. The Reference Guide includes all the information you need.
THE ARABIC SCALE
You can program an Arabic scale in real time, by
assigning a footswitch or a pad the “Quarter Tone”
function.
Another way of changing the scale is assigning it to a
Performance or Single Touch Setting (STS), but this is
the most convenient way to change the pitch in real
time.
1 Program a footswitch to be the Quarter tone
switch.
Simply go to the Global environment, and reach “Page
3 - Assignable Pedal/Footswitch, Assignable Slider”.
There, you will find the “P/S (Pedal/Switch)” parameter, to which you can assign the Quarter tone function.
Press WRITE to save the Global status in memory (see
“The Write window” on page 126).
2 Lower some note pitches.
Keep the Quarter tone pedal pressed. The keyboard
will not play at this time. Press the notes you want to
lower a quarter of tone. Release the pedal.
3 Play with your new scale.
The notes you pressed are now lowered of a quarter of
tone.
4 Reset the original scale.
Press the Quarter tone pedal again. All pitches will be
reset, and the scale selected by the Performance, STS or
Style Performance will be recalled.
Need more information?
As stated, you can assign an alternative scale to a Performance or STS. Go to “Page 5 - Tuning: Scale” on
page 44, and give also a look to the “Scale Mode”
parameter (see page 51).
Page 37

MIDI
What is MIDI?
8. MIDI
35
WHAT IS MIDI?
Here is a brief overview of MIDI, as related to the Liverpool. If interested, you may find more information on
the general use of MIDI in the various specialized magazines and books.
In general
MIDI stands for Musical Instruments Digital Interface.
This interface lets you connect two musical instruments,
or a computer and various musical instruments.
Physically, MIDI is composed of three different connectors. The MIDI IN receives data from another device; the
MIDI OUT sends data to another device; the MIDI THRU
sends to another device exactly what was received on the
MIDI IN (this is useful to daisy-chain more instruments).
Channels and messages
Basically, a MIDI cable transmits 16 channels of data.
Think to each MIDI channel as a TV channel: the
receiver must be set on the same channel of the transmitter. The same happens with MIDI messages: when
you send a Note On message on channel 1, it will be
received on channel 1 only. This allows for multitimbricity: you can have more than one sound playing on
the same MIDI instrument.
There are various messages, but here are the most commonly used:
Note On – This message instructs an instrument to
play a note on a specific channel. Notes have both a
name (C4 standing for the center C) and a number (60
being the equivalent for C4). A Note Off message is
often used to say the note has been released. In some
case, a Note On with value “0” is used instead.
Together with the Note On message, a Velocity value is
always sent. This value tells the instrument how loud
the note must play.
Pitch Bend (PB) – You can generate this message acting
on the joystick (X movement). The pitch is translated
up or down.
Program Change (PC)– When you select a Program, a
Program Change message is generated on the channel.
Use this message, together with Control Change 00 and
32, to remotely select Liverpool data from a sequencer
or a master keyboard.
Control Change (CC) – This is a wide array of messages, controlling most of the instrument parameters.
Some examples:
CC00, or Bank Select MSB, and CC32, or Bank
•
Select LSB. This message pair is used, together with
the Program Change message, to select a Program.
• CC01, or Modulation. This is the equivalent of
pressing up the joystick. A vibrato effect is usually
triggered on.
• CC07, or Master Volume. Use this controller to set
the channel’s volume.
• CC10, or Pan. This one sets the channel’s position
on the stereo front.
• CC64, or Damper Pedal. Use this controller to simulate the Damper pedal.
Tempo
Tempo is a global MIDI message, that is not tied to a
particular channel. Each Song includes Tempo data.
Lyrics
Lyrics are non-standard MIDI events, made to display
text together with the music. Liverpool can read many
of the available Lyrics format on the market.
MIDIFILES
Midifiles, or Standard MIDI Files (SMF), are a practical
way of exchanging songs between different instruments and computers. Liverpool has the SMF format as
its default song format, so reading a song from a computer, or saving a song that a computer software can
read, is not a problem at all.
Liverpool sequencers are compatible with the SMF in
format 0 (all data in one track; it is the most common
format) and 1 (multitrack). It can read the SMF in Song
Play mode and modify/save them in Song mode. It can
save a Song in SMF 0 format in the Backing Sequence
or Song mode.
When in Song Play mode, the Liverpool can also display SMF lyrics in Solton, M-Live (Midisoft), Tune1000
and compatible (Edirol, GMX, HitBit, XF) formats, and
the chord abbreviations of SMF in Solton, M-live (Midisoft), GMX, and XF format.
THE GENERAL MIDI STANDARD
Some years ago, the musical instruments world felt a
need for some further standardization. Then, the General MIDI Standard (GM) was born. This extension of
the basic MIDI sets new rules for compatibility
between instruments:
• A minimum of 16 MIDI channels was required.
• A basic set of 128 Programs, correctly ordered, was
mandatory.
• The Drum Kit had a standard order.
• Channel 10 had to be devoted to the Drum Kit.
A most recent extension is the GM2, that further
expands the Programs database. The Liverpool is
soundwise-compatible with the GM2 standard
.
THE GLOBAL CHANNEL
Any channels with the Global option assigned (see
“Page 6 - MIDI IN Channels” on page 128) can simulate
the Liverpool integrated keyboard. When the Liverpool
is connected to a master keyboard, transmission should
take place over the Global channel of the Liverpool.
Page 38
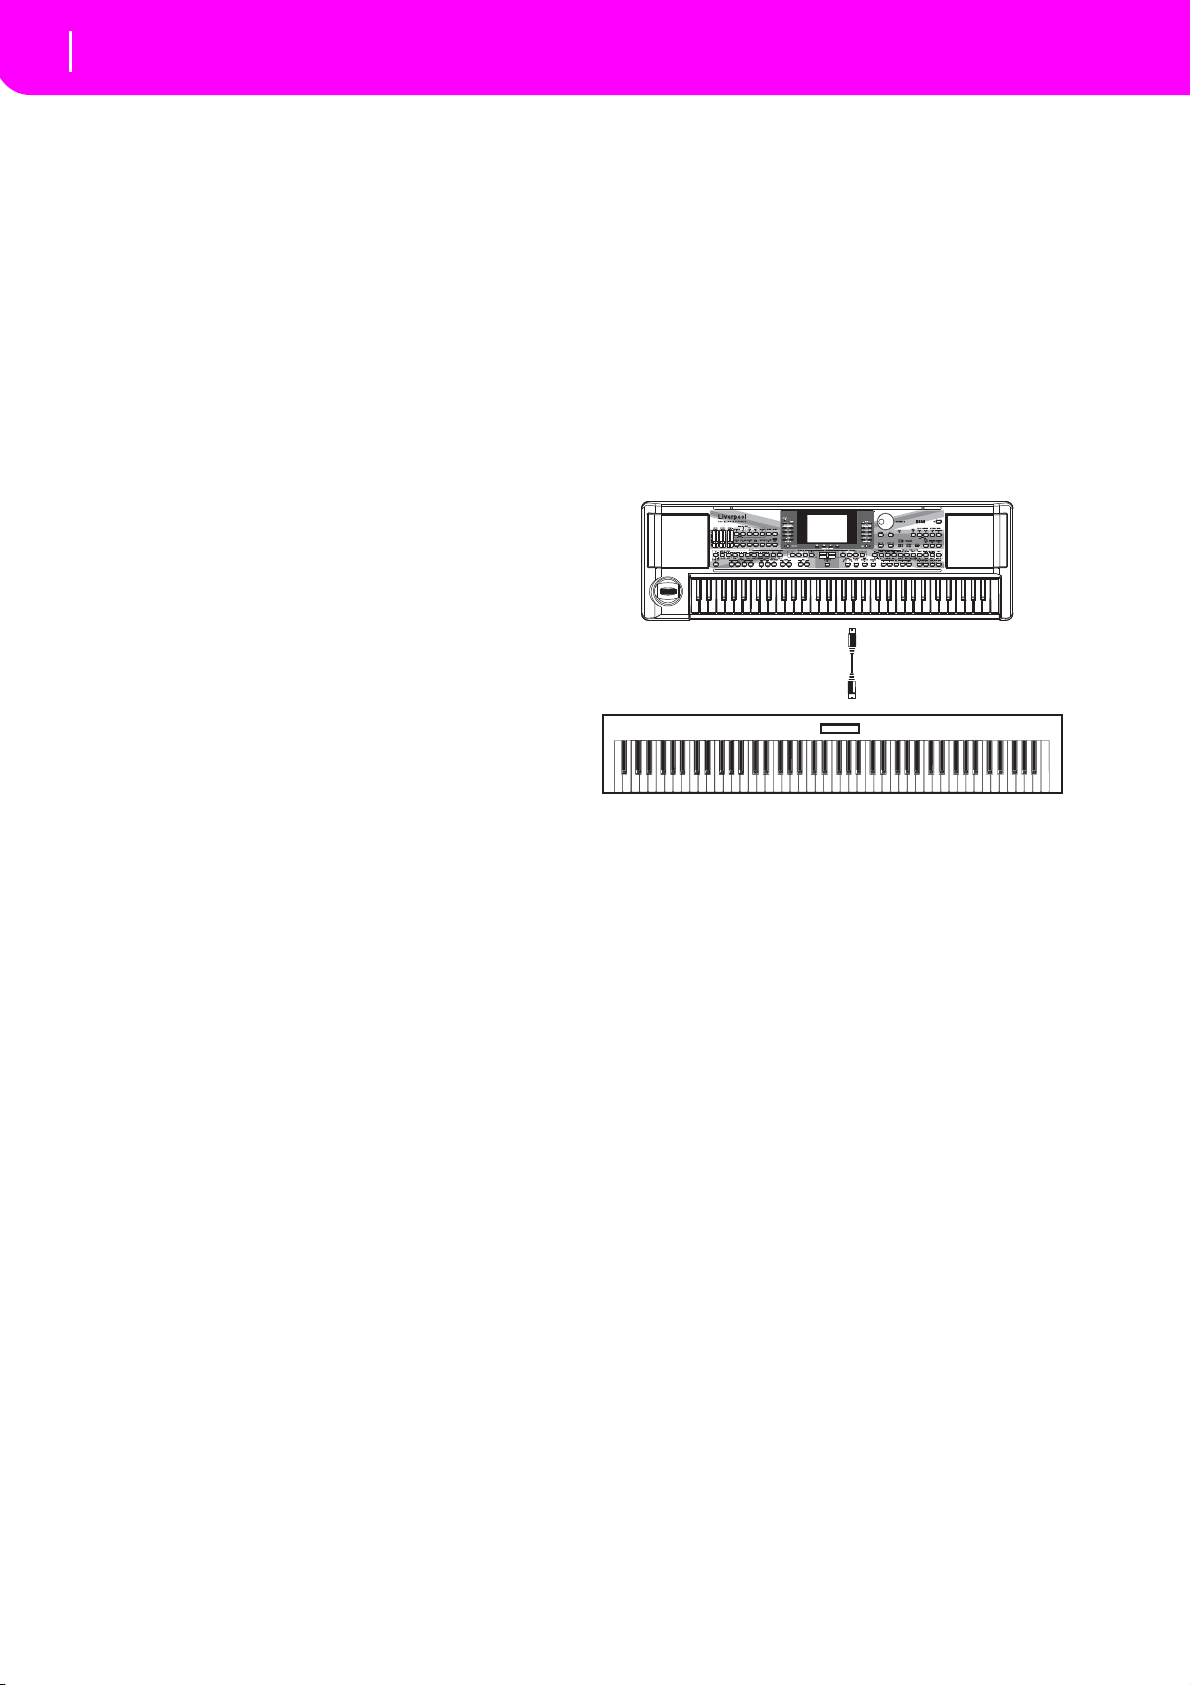
36
MIDI
The Chord 1 and Chord 2 channels
The MIDI messages received over a Global channel and
not over a standard channel are affected by the buttons of
the KEYBOARD MODE section, as well from the split
point. Therefore, if the SPLIT button LED is lit up, the
notes that arrive to the Liverpool over this channel will be
divided by the split point into the Upper (above the split
point) and Lower (below the split point) parts.
The notes that arrive to a Global channel are used for
the chord recognition of the automatic accompaniment.
If the KEYBOARD MODE is SPLIT, only the notes
below the split point will be used. These notes will be
combined with the ones of the special Chord 1 and
Chord 2 channels.
THE CHORD 1 AND CHORD 2 CHANNELS
You can set two special Chord channels (see page 129)
to send to the Liverpool notes for the chord recognition. The notes will be combined with the notes that go
through the channel set as Global (Global notes are recognized only under the split point, if the SPLIT LED is
lit up).
The Chord channels are not affected by the split point
and the KEYBOARD MODE section of the control
panel. All the notes – both above and below the split
point – will be sent to the chord recognition.
The buttons of the CHORD SCANNING section have a
particular effect on the Chord channels:
if you have selected LOWER, the chord recognition
•
mode will be set by the “Chord Recognition Mode”
parameter in the Style Play mode (see page 51);
• if you have selected UPPER or FULL, the chord
recognition mode will always be Fingered 2 (you
need to play at least three notes in order for the
chord to be detected).
These two channels are especially useful for accordion
players to assign a different Chord channel to the
chords and the bass played with the left hand. In this
way, chords and bass will participate to the creation of
chords for the chord recognition of the automatic
accompaniment.
THE CONTROL CHANNEL
You can set a MIDI IN channel as the Control channel
(see page 129), to select Styles and Performance from an
external device. See the Appendix for a list of messages
corresponding to Liverpool internal data.
MIDI SETUP
You can pla y Liverpool w i t h an external controller, and
use it simply as a gorgeous sound generator. To help
you configure the MIDI channels, we have provided a
set of MIDI Setups. Go to Global mode to select the one
that fits your MIDI needs. (See “Page 4 - MIDI Setup”
on page 127 for more information).
We recommend you to consider each MIDI Setup as a
starting point you can freely tweak. Once you have
selected the most appropriate MIDI Setup for the connection to be made, you can modify the parameters as
necessary and save the Global in the memory with the
Write function (see “The Write window” on page 126).
CONNECTING LIVERPOOL TO A MASTER KEYBOARD
You can control the Liverpool with a master keyboard
or any other MIDI keyboard. You only need to connect
the MIDI OUT connector of the master keyboard to the
MIDI IN connector of the Liverpool. The master keyboard will become the integrated keyboard of the Liverpool if it transmits over the same channel
programmed as Global in the Liverpool.
MIDI IN
MIDI OUT
If the master keyboard transmits over the Global channel
of the Liverpool, the split point and the status of the
KEYBOARD MODE section in the control panel will
affect the notes received from the master keyboard.
Connections and settings
To connect the master keyboard to the Liverpool follow
this procedure:
1. Connect the MIDI OUT connector of the master
keyboard to the MIDI IN connector of the Liverpool.
2. Program the master keyboard to transmit over the
Global channel of the Liverpool (see “Page 6 MIDI IN Channels” on page 128).
For information on the master keyboard programming, see the user’s manual of the master keyboard.
3. Press GLOBAL to enter the Global mode, then go
to “Page 4 - MIDI Setup” (see page 127).
4. Select the Master Keyboard Setup.
Note: The settings can change when new data is loaded
from a card. To protect the settings from loading, use the
Global Protect function (see “Global Protect” on
page 143).
5. Press WRITE, select Global, and press ENTER to
save the Global. The “Are you sure?” message will
appear. Press ENTER to confirm, or EXIT to abort.
6. Press one of the buttons in the MODE section to go
to the desired operative mode.
Page 39
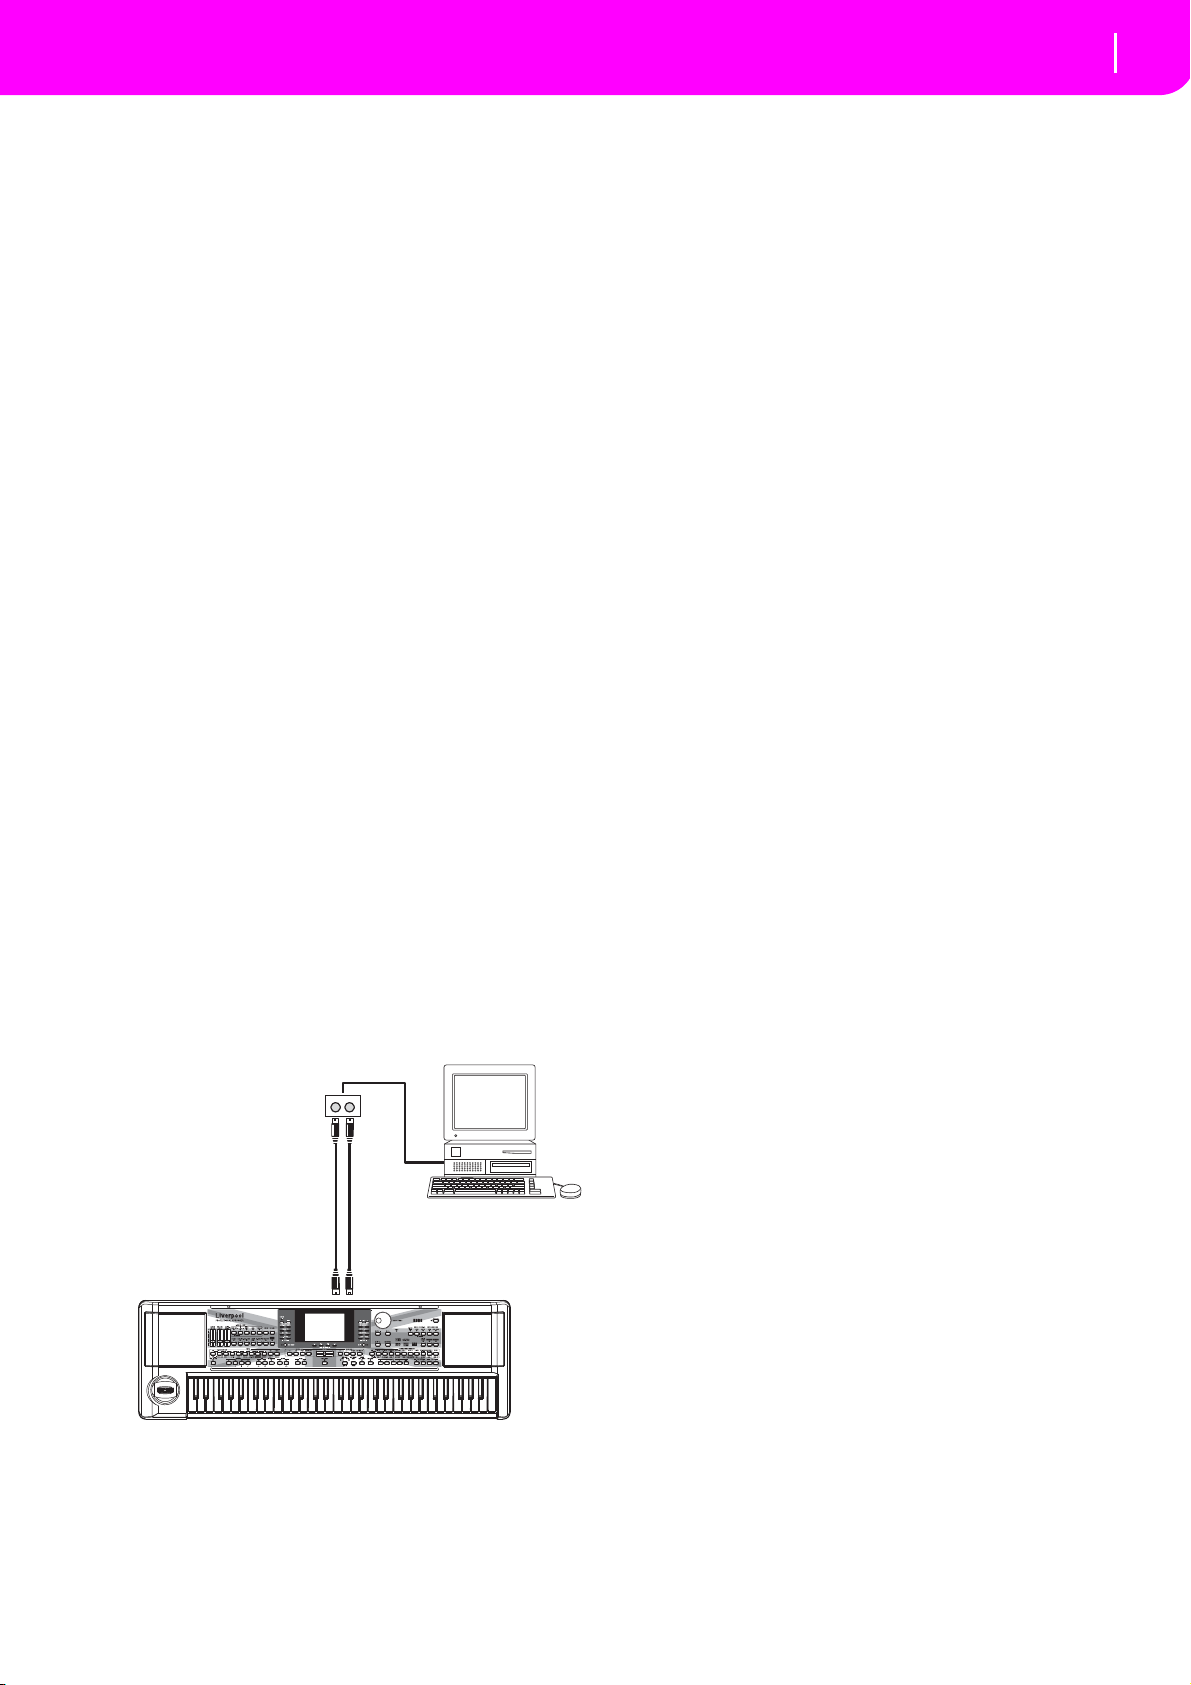
37
MIDI
Connecting the Liverpool to a MIDI accordion
MIDI OUT
MIDI IN
MIDI OUTMIDI IN
CONNECTING THE LIVERPOOL TO A MIDI
3. Go to “Page 4 - MIDI Setup” (see page 127). Select
ACCORDION
There are different types of MIDI accordion and each
type requires a different configuration of the Liverpool.
Select one of the MIDI “Accordion” Setups to configure
the module properly (see page 127).
Connection and settings
To connect the accordion to the Liverpool follow this
procedure:
1. Connect the MIDI OUT connector of the accordion
to the MIDI IN connector of the Liverpool.
2. Press GLOBAL to enter the Global mode, then go
to “Page 4 - MIDI Setup” (see page 127).
3. Select one of the Accordion Setups.
Note: The settings can change when new data is loaded
from a card. To protect the settings from loading, use the
Global Protect function (see “Global Protect” on
page 143).
4. Press WRITE, select Global, and press ENTER to
save the Global. The “Are you sure?” message will
appear. Press ENTER to confirm, or EXIT to abort.
5. Press one of the buttons in the MODE section to go
to the desired operative mode.
CONNECTING THE LIVERPOOL TO AN EXTERNAL SEQUENCER
You can program a new Song on an external sequencer,
using Liverpool as a multi-timbral expander.
Connections and settings
In order to connect the Liverpool to a computer, you
need to have a computer with the MIDI interface.
1. Connect the Liverpool and the computer as in the
following diagram.
4. Press WRITE, select Global, and press ENTER to
5. Set the Upper 1 track in play, and press FULL
6. At this point, the notes played on the Upper 1
The Local Off
When the Liverpool is connected to an external
sequencer, we recommend you to set the Liverpool in
Local Off mode (see “Local” on page 128) to avoid that
the notes are simultaneously played by the keyboard
and by the MIDI events sent by the external sequencer.
When the Liverpool is in Local Off, the Liverpool keyboard transmits data to the external sequencer, but not
to the internal sound generation. The sequencer will
receive the notes played on the Liverpool keyboard
(Upper 1) and send them to the selected track of the
song. The track will transmit the data to the internal
sound generation of the Liverpool.
Note: In order to send data to the Liverpool sound generation, the “MIDI Thru” function must be activated in the
external sequencer (normally active; the name may be different according to the type of sequencer). For more information
refer to the instructions manual of the sequencer.
the Ext.Seq Setup.
Note: The settings can change when new data is loaded
from a card. To protect the settings from loading, use the
Global Protect function (see “Global Protect” on
page 143).
save the Global. The “Are you sure?” message will
appear. Press ENTER to confirm, or EXIT to abort.
UPPER in the KEYBOARD MODE section. This
way, you can transmit to the external sequencer on
the full keyboard range.
track go from the MIDI OUT of the Liverpool to
the MIDI IN of the computer/MIDI interface.
The notes generated by the computer (i.e. a Song
played by its sequencer) are sent thru the MIDI
OUT of the MIDI interface to the MIDI IN connector of the Liverpool.
2. Press GLOBAL, and go to “Page 5 - MIDI Controls”. Set the Local parameter to Off (see
page 128).
The programs
The Song that is played back by the computer
sequencer can select the Liverpool Programs through
the MIDI messages
LSB (bank selection, two messages) and Program
Change (program selection). For a list of Programs and
MIDI values, see “Programs (Program Change order)”
on page 157.
A suggestion for those who program songs on computer: Even though it is not essential, you usually set
the bass on channel 2, melody on channel 4, drum kit
on channel 10, control for an external voice harmonizer
on channel 5.
Bank Select MSB and Bank Select
Page 40
38
MIDI
Playing another instrument with the Liverpool
PLAYING ANOTHER INSTRUMENT WITH THE
LIVERPOOL
You can use the Liverpool as the master controller for
your MIDI setup.
1. Connect Liverpool’s MIDI OUT to the other instrument’s MIDI IN.
2. Set-up the other instrument’s tracks to the same
channels you want to play from Liverpool. For
example, if you wish to play the Upper 1 and
Upper 2 tracks with the other instrument’s sound,
set the other instrument to receive on the same
channels of the Upper 1 and Upper 2 tracks (by
default, channels 1 and 2).
3. Set the general volume of the other instrument
with its own volume controls.
4. Mute/unmute any track right from the Liverpool
front panel. Set each track’s volume using Liverpool own VOLUME/VALUE controls.
5. Play on Liverpool’s keyboard.
The Keyboard
Liverpool’s physical keyboard can drive up to 4 tracks
via the MIDI OUT (Upper 1–3 and Lower). MIDI output channels are set in Global mode (see “Page 10 MIDI OUT Channels” on page 130).
As a default situation (Default Setup), each of Liverpool Realtime Tracks transmit on these channels:
Track Out Channel
Upper1 1
Upper2 2
Upper3 3
Lower 4
When a track is in mute, it can’t transmit any MIDI data
to an external expander or sequencer connected Liverpool’s MIDI OUT.
To hear only the expander’s sounds, you can lower the
MASTER VOLUME control on the Liverpool, or set the
Realtime Tracks to the External status (see “Page 15 Track: Internal/External” on page 47).
The Sequencer
Any Sequencer’s track can drive a channel on an external instrument. To set each track’s MIDI output channel, see “Page 10 - MIDI OUT Channels” on page 130.
To hear only the expander’s sounds, you can lower the
MASTER VOLUME control on the Liverpool, or set the
Song tracks to the External status (see “Page 8 - Track:
Internal/External” on page 79).
Select the Sequencer 1 or Sequencer 2 MIDI Setup
(depending on the Sequencer you are using on the Liverpool) to set the channels as follows.
Track Out Channel
Song 1…16 1…16
The Arranger
One of the most interesting aspect of MIDI, is that you
can use your Liverpool to play an external instrument
with its onboard arranger. Yes, it’s hard to beat the
audio quality of Liverpool, but you could wish to use
that old faithful synth you are still accustomed to…
To assign some of Liverpool Style tracks to an external
instrument, set them to the External status (see “Page
15 - Track: Internal/External” on page 47).
Select the Default MIDI Setup to set the channels as follows (this is the default status of Liverpool).
Track Out Channel
Bass 9
Drums 10
Percussion 11
Acc1…5 12…16
Page 41

REFERENCE GUIDE
Page 42
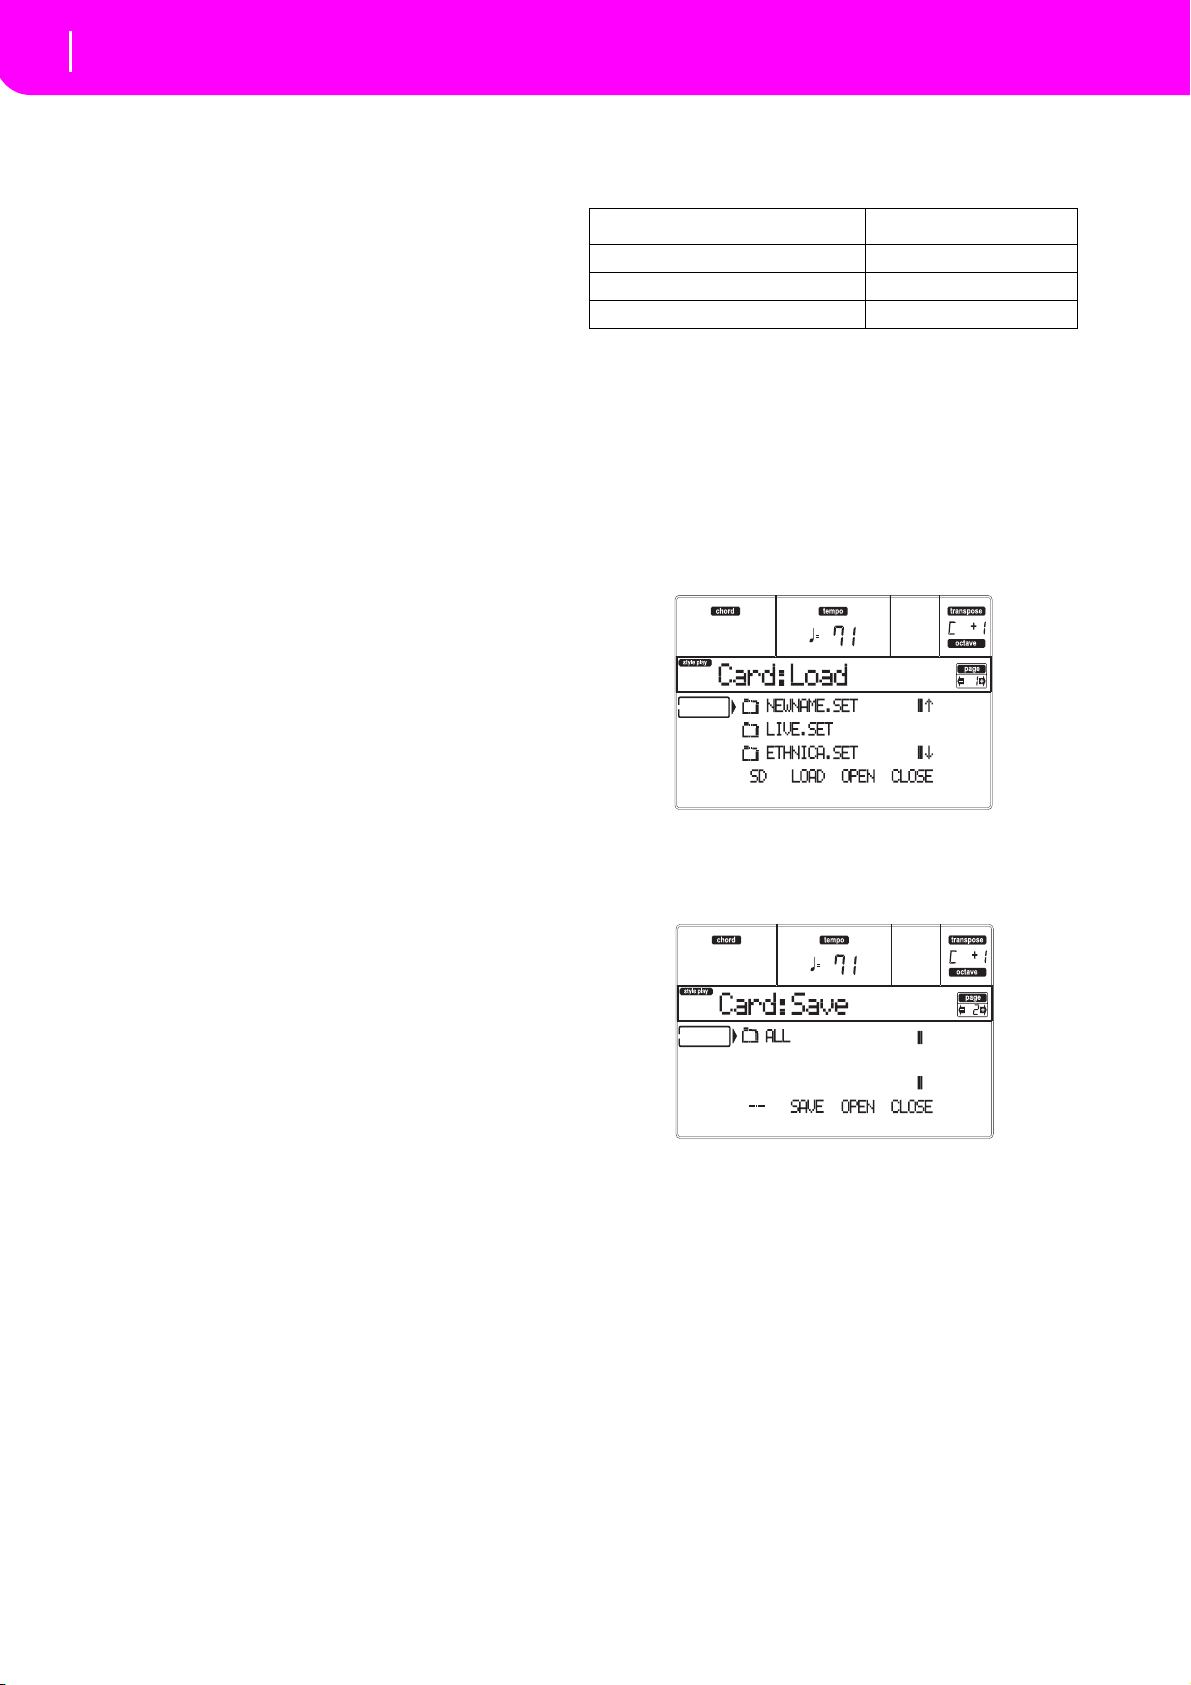
40
Style Play operating mode
What’s a Style?
9. STYLE PLAY OPERATING MODE
The Style Play mode is the boot-up operating mode.
When in this mode, you can play Styles (i.e. automatic
accompaniments), or just play with one to four Realtime tracks on the keyboard (Upper 1…3 and Lower).
WHAT’S A STYLE?
A Style is a rhythm/accompaniment structure, that simulates a band backing your solos.
In a vertical direction, it is composed of 8 different
tracks (Drums, Percussion, Bass, and 5 different harmonic or melodic instruments). You can play on the
keyboard with 4 more Realtime tracks (Upper 1–3 and
Lower).
In a horizontal direction, it is a series of Style Elements
(i.e., the various sets of patterns for each chord and
each of the Intros, Variations, Fills, Breaks and Endings).
Folder DIRECT SD pages
*.SET > ST-YLE > USER01 1, 2
*.SET > STYLE > USER02 3, 4
*.SET > STYLE > USER03 5, 6
How to make the DIRECT SD bank
To configure the DIRECT SD bank, save your Styles
into the first folder in the card. Folders are read in
alphabetical order.
Note: The following procedures requires you overwrite the
User Style banks. Save these banks before proceeding, to
avoid loosing important data.
1. Insert the card into the card slot.
2. Press SD CARD and go to the Load page.
STYLES AND PERFORMANCES
Styles and Performances are linked in many ways.
• When the SINGLE TOUCH LED is on, selecting a
Style also changes the Realtime (Keyboard) tracks
(a Single Touch Setting is selected). The Performance settings are overridden.
• When the STYLE CHANGE LED is on, selecting a
Performance also selects a Style (the one whose
number is memorized with the Performance).
• When pressing the WRITE button, you can save
the track’s settings either in a Performance, a Style
Performance, or a Single Touch Setting (STS).
CHANGING AND RESETTING THE TEMPO
While in the main page of the Style Play mode, you can
change the Tempo using the DIAL or the DOWN/- and
UP/+ buttons.
In any other page, keep the SHIFT button pressed, and
use the DIAL to change the Tempo.
To recall the Tempo stored in the current Style, keep the
SHIFT button pressed, and press one of the DOWN/- or
UP/+ buttons.
THE DIRECT SD BANK
In addition to the internal memory Styles, you can have
DIRECT SD Styles, directly accessed from the card.
Just insert a card, and press the DIRECT SD Style bank.
The card slot will read the first (in alphabetical order)
“.SET” folder in the card, and will give you direct
access to the Styles it contains (no loading required).
Browse through the DIRECT SD Styles using the PAGE
buttons. You can have up to 6 pages, and up to 48
DIRECT SD Styles in a card.
3. Use the F-1 (SD) button to rescan the SD card.
4. Load three banks of Styles, to be transformed into
the DIRECT SD bank.
5. Go to the Save page.
6. While the “ALL” item is selected, press F-3 (OPEN)
to open it.
7. Use the E–F (Scroll Up) and G–H (Scroll Down)
VOLUME/VALUE buttons (or the TEMPO/VALUE
section controls) to move the “STYLE” item to the
first line of the display, and press F-2 (SAVE).
8. Select the SD card (SD) as the target, using the F-1
button.
9. The card directory appears. Use the E–F (Scroll
Up) and G–H (Scroll Down) VOLUME/VALUE
buttons (or the TEMPO/VALUE section controls),
to scroll the card content. Move the first folder of
the directory to the first line of the display.
10. Press ENTER twice to save the banks.
Page 43
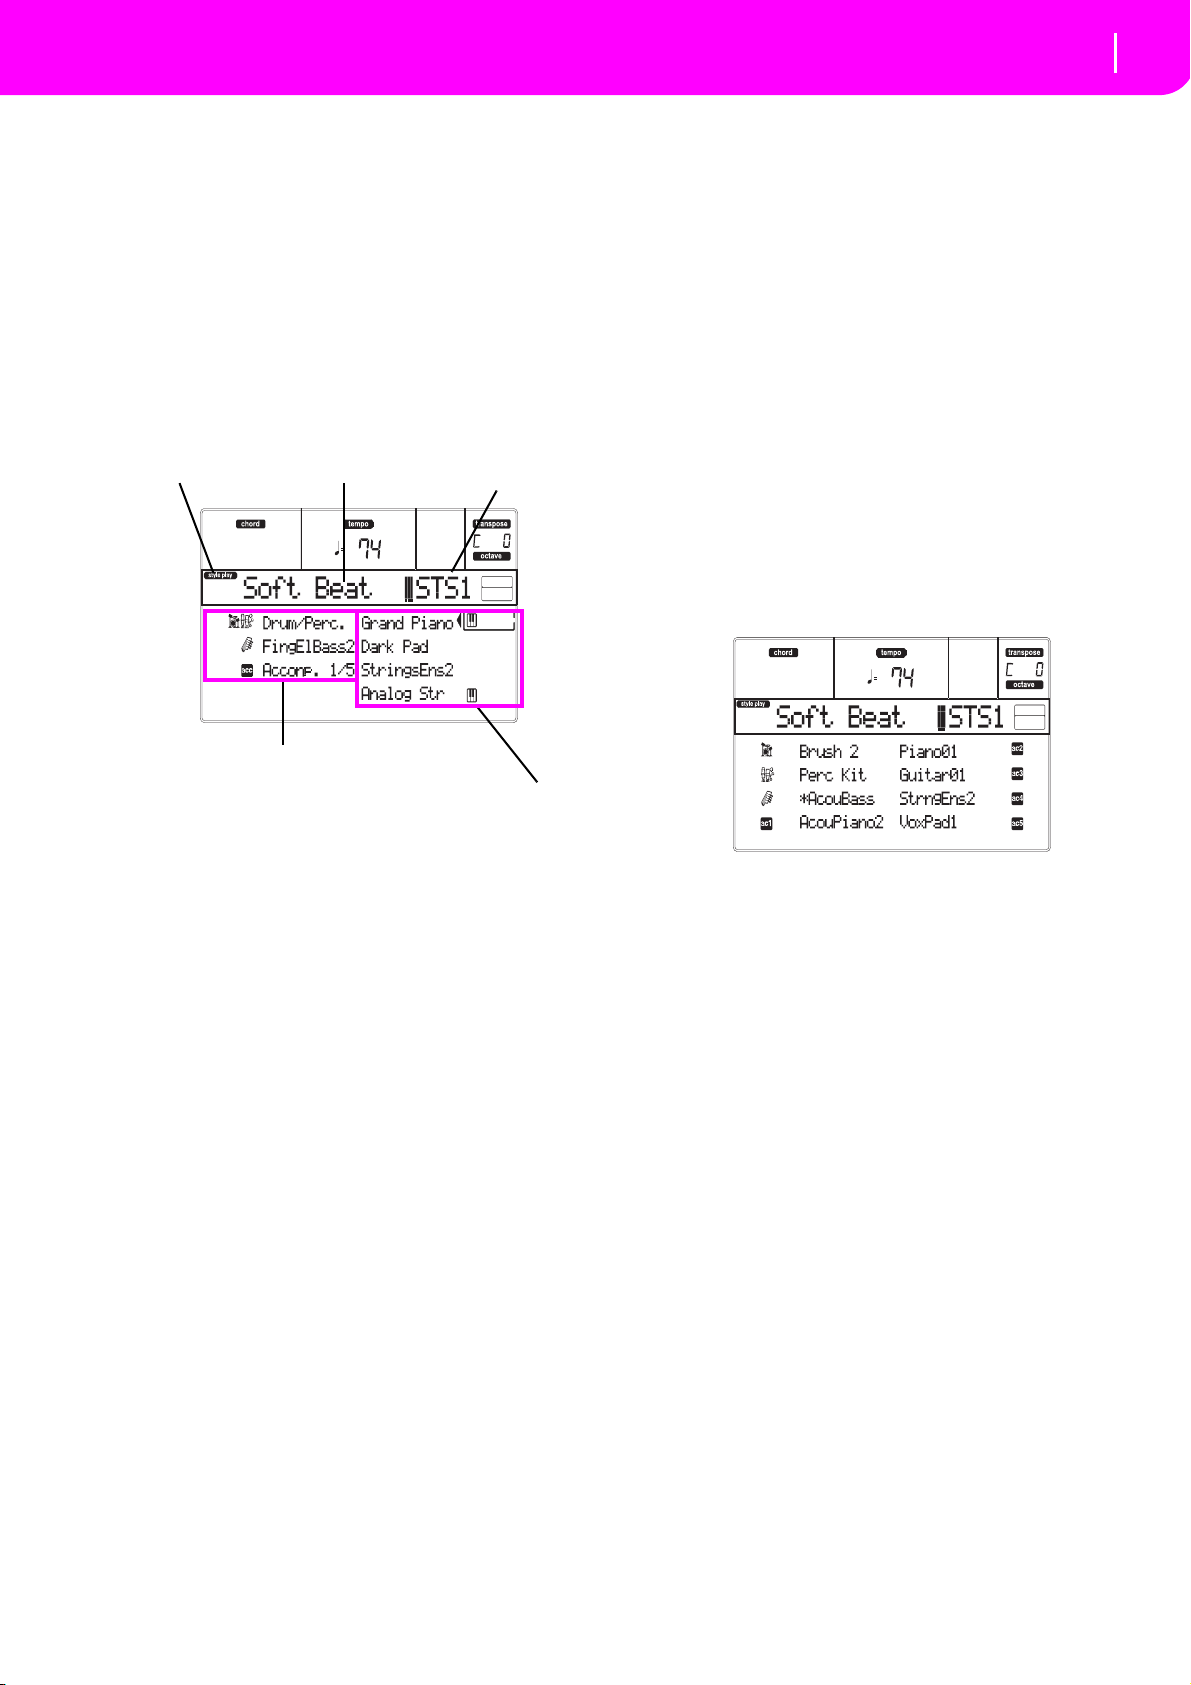
41
Style Play operating mode
Main page
Style Play icon
Selected Style
Selected STS or
Performance
Realtime (Keyboard) tracks
Accompaniment (backing) tracks (grouped)
MAIN PAGE
This is the page you see after you turn the instrument
on.
To access this page from another operating mode, press
the STYLE PLAY button.
Note: When switching from Song Play to Style Play, a Performance is automatically selected, and various track parameters may change.
To return to this page from one of the Style Play edit
pages, press the EXIT/NO button.
To switch between the Realtime (Keyboard) tracks and
the Style tracks, use the TRACK SELECT button.
press both VOLUME/VALUE buttons. To unmute,
press both buttons again. To change the volume, select
the track, then keep one of the buttons pressed.
C (Acc.1–5 grouped tracks)
Use these buttons to select, mute/unmute or change the
volume of the instrumental accompaniment tracks
(tracks 1–5, other than Bass, Drum and Percussion). To
mute these tracks, press both VOLUME/VALUE buttons. To unmute them, press both buttons again. To
change the volume, keep one of the buttons pressed.
E (Upper 1 Program), F (Upper 2 Program), G (Upper 3
Program), H (Lower Program)
Name of the Programs assigned to the Realtime (Keyboard) tracks. Use these buttons to select, mute/unmute
or change the volume of the corresponding tracks.
STYLE TRACKS PAGE
To see and edit the Style tracks, press TRACK SELECT
from the main page. The TRACK SELECT LED turns
on.
Style Play icon
When on, this icon indicates that the instrument is in
Style Play mode.
Selected Style
Currently selected Style.
Selected STS or Performance
The last selected Single Touch Setting (STS) or Performance.
A (Drum/Perc grouped tracks)
Use these buttons to select, mute/unmute or change the
volume of both Drum and Percussion tracks (grouped
together) at the same time. To mute these tracks, press
both VOLUME/VALUE buttons. To unmute, press both
buttons again. To change the volume, select the track,
then keep one of the buttons pressed.
B (Bass track Program name)
Name of the Program assigned to the Bass backing
track. Use these buttons to select, mute/unmute or
change the volume of the Bass track. To mute this track,
Press the TRACK SELECT button once again to go back
to the main page.
A–H (Style Track Programs)
Name of the Programs assigned to the Style tracks. Use
these buttons to select, mute/unmute or change the volume of the corresponding tracks.
HOW TO SELECT PROGRAMS
You can assign a different Program to each of the Realtime (Keyboard) and Style tracks. See “Selecting a Program” on page 25 for more information.
After selecting a new Program, save your changes into
a Performance, Style or STS (see below “The Write window” section).
Note: If you select a Program while grouped tracks (Drum/
Percussion or ACC) are selected, the Program will be
assigned to the last selected track.
Page 44
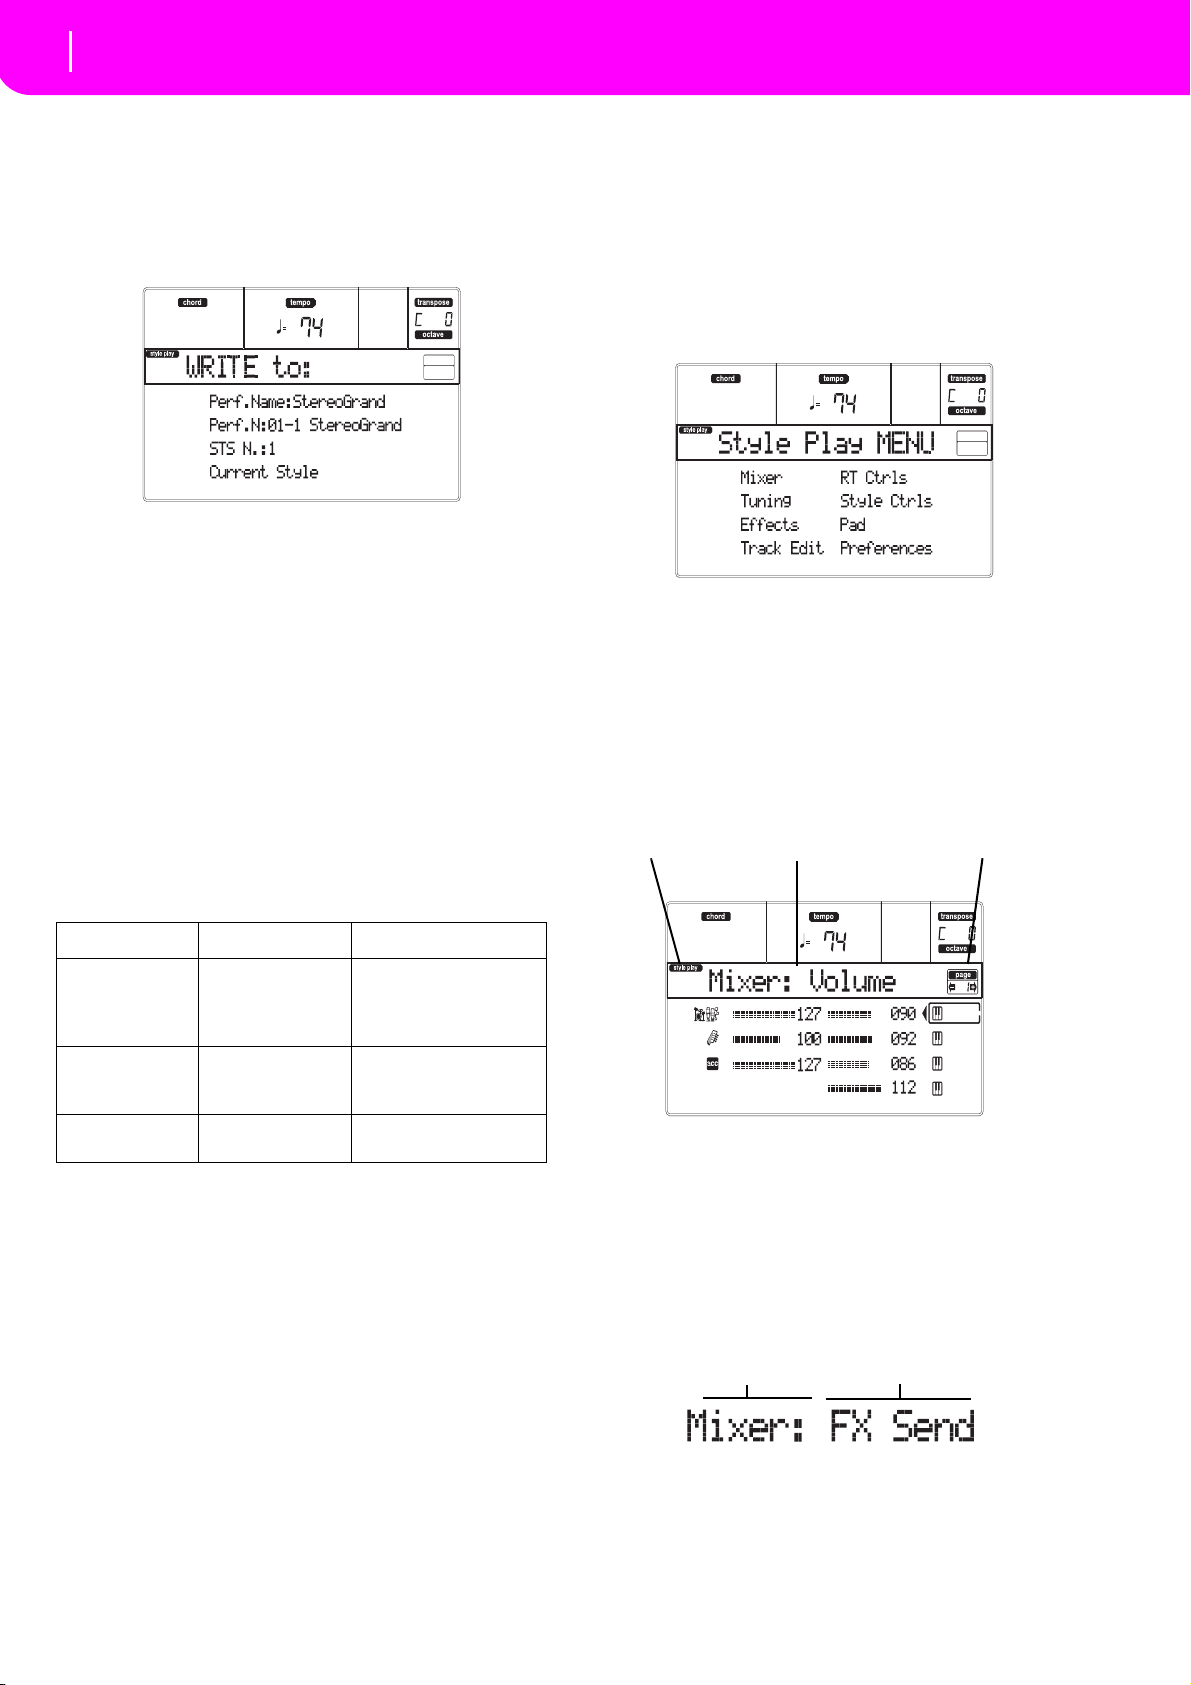
42
Style Play operating mode
The Write window
Style Play icon
Page header
Page number
Section name
Page name
THE WRITE WINDOW
Open this window by pressing the WRITE button.
Here, you can save all track settings into a Performance, the Realtime (Keyboard) track settings into a
Single Touch Setting, or the Style track settings into the
current Style Performance.
1. Select the kind of object you want to save your
tracks into.
• Select the “Perf No.” line to save all tracks (and
the current selected Style settings) into a Performance. Use the corresponding VOLUME/VALUE
buttons, or the TEMPO/VALUE section controls, to
select a Performance location in memory. The
name of the Performance already at the target destination will be shown.
• Select the “STS No.” line to save the Realtime
(Keyboard) tracks into a Single Touch Setting
(STS). Use the corresponding VOLUME/VALUE
buttons or the TEMPO/VALUE section controls, to
select a Single Touch Setting number.
• Select the Current Style line, to save the Style
tracks into the current Style Performance.
MENU
From any page, press MENU to open the Style Play
edit menu. This menu gives access to the various Style
Play edit sections.
When in the menu, select an edit section using the
VOLUME/VALUE (A–H) buttons, select an edit page
using PAGE +, or press EXIT to exit the menu.
When in an edit page, press EXIT to go back to the
main page of the Style Play operating mode.
Each item in this menu corresponds to an edit section.
Each edit section groups various edit pages.
EDIT PAGE STRUCTURE
Select an edit section from the Menu, and/or use the
PAGE buttons to reach the desired page.
Press EXIT to go back to the main page of the Style Play
mode.
All edit pages share the same structure.
If you select… …you save… …to this location…
Performance All track settings,
selected Style
number, Master
Transpose
STS Realtime (Key-
board) track settings
Current Style Style track settings,
Master Transpose
Selected Performance
Selected Single Touch
Setting (a part of the current Style)
Current Style Performance
2. If you are saving a Performance, you can change
its name. Select the “Perf name” line.
Move the cursor using the DOWN/- and UP/+ buttons. Select a character using the DIAL. Insert a
character at the cursor position by pressing the
INSERT button. Delete a character at the cursor
position by pressing the DELETE button.
3. Press ENTER to save the settings in memory. The
“Are you sure?” message appears. Press ENTER to
confirm, or EXIT to abort.
Style Play icon
When on, this icon indicates that the instrument is in
Style Play mode.
Page header
The header shows the name of the current edit page.
As a general rule, the header is divided into a first
word, identifying the section name (e.g., “Mixer:FX
Send” is a “Mixer” section page), and a second word,
referring to the page name (e.g. “FX Send”).
Page number
This area shows the current page number.
A–H
Each pair of VOLUME/VALUE (A–H) buttons selects a
different parameter of command, depending on the
Page 45
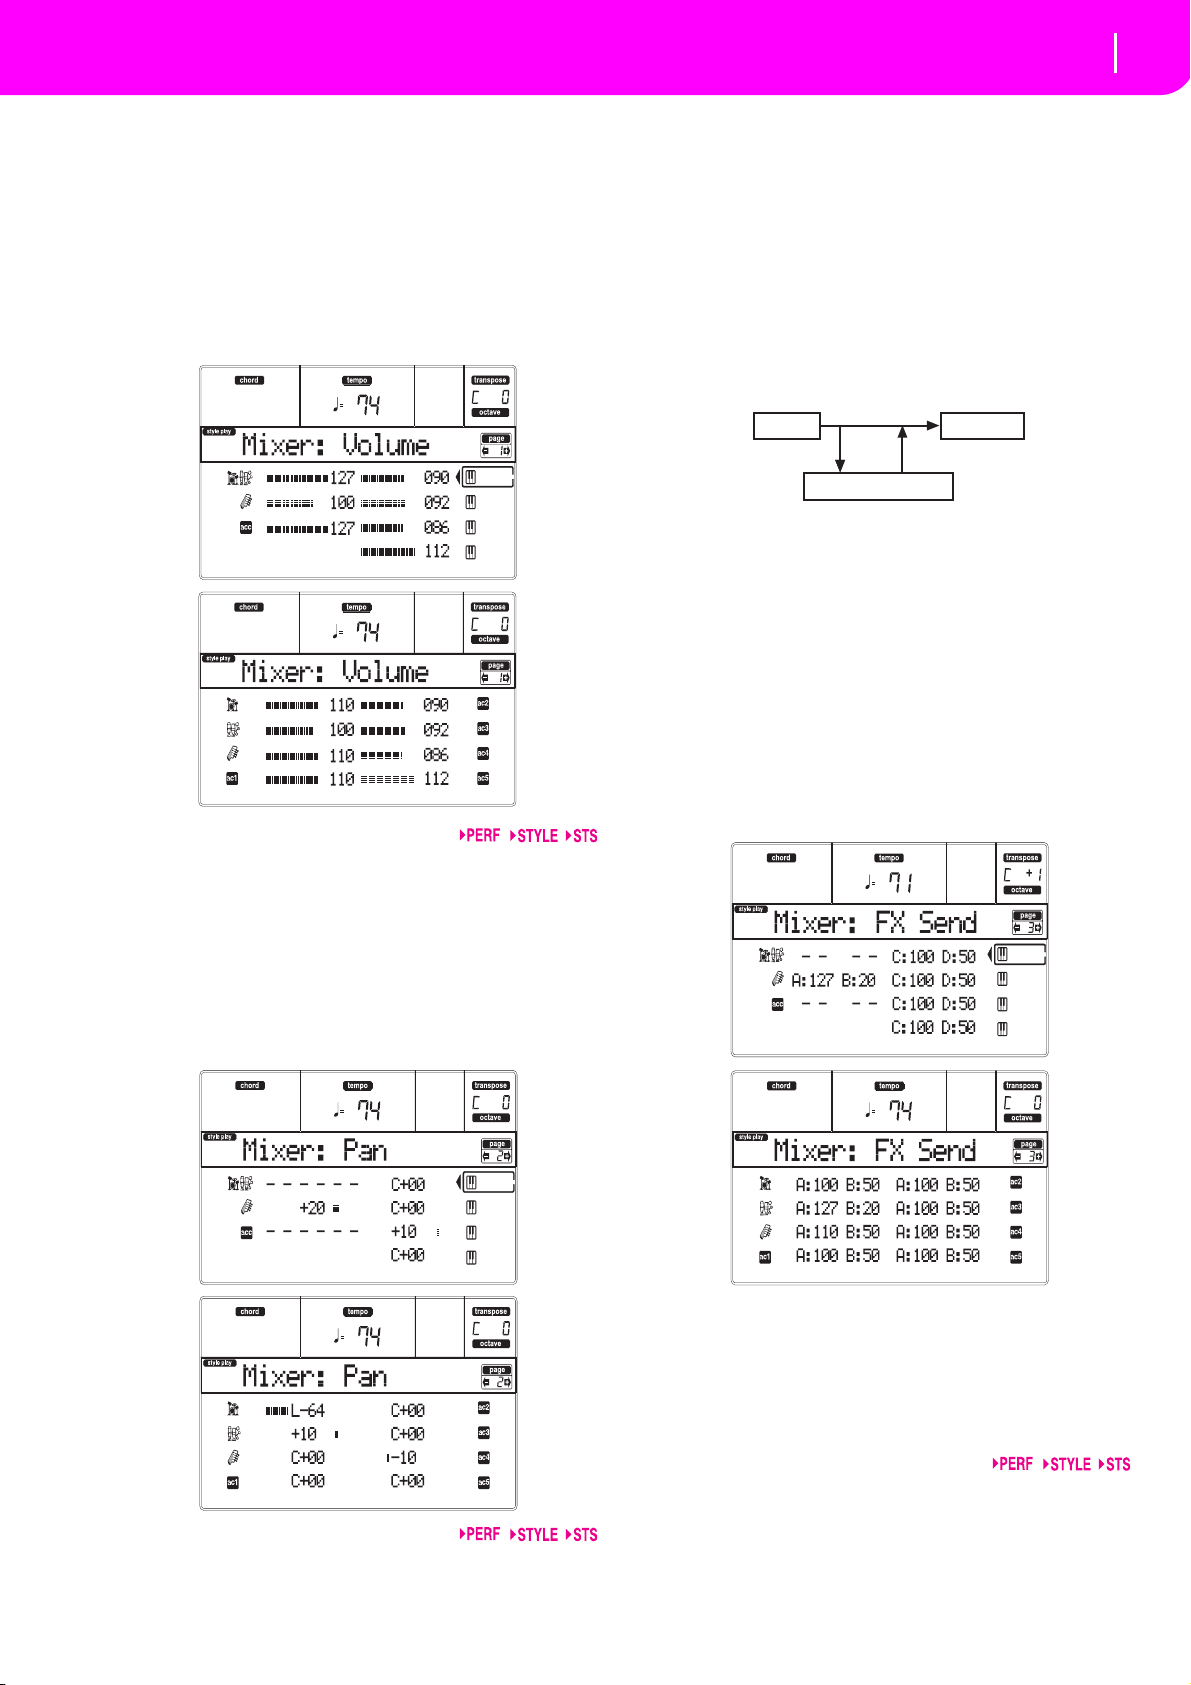
43
Style Play operating mode
Page 1 - Mixer: Volume
edit page. After selecting a parameter, you can change
its value by pressing one of the two buttons in a pair, or
using the TEMPO/VALUE controls.
PAGE 1 - MIXER: VOLUME
This page lets you set the volume for each of the Realtime (Keyboard) or Style tracks.
Use the TRACK SELECT button to switch from the Realtime (Keyboard) tracks to the Style tracks, and vice versa.
Volume
Track’s volume.
0…127 MIDI value of the track’s volume.
R+63 Hard Right.
Off The direct (uneffected) signal does not go
to the outputs; only the FX signal is heard
for this track.
PAGE 3 - MIXER: FX SEND
This page lets you set the level of the track’s direct
(uneffected) signal going to the Internal FX processors.
The effect processors included in Liverpool are connected in parallel, so you can decide which percentage
of the direct signal should be effected:
Track
FX Processor
There are four Internal FX processors in Style Play
mode. You can assign them any kind of available
effects, but we found it convenient to arrange them in
the following way, for all the Styles included with the
Liverpool:
A Reverb processor for the Style tracks.
B Modulating FX processor for the Style tracks.
C Reverb processor for the Realtime (Keyboard)
tracks.
D Modulating FX processor for the Realtime (Key-
board) tracks.
Use the TRACK SELECT button to switch from the Realtime (Keyboard) tracks to the Style tracks, and vice-versa.
Output
PAGE 2 - MIXER: PAN
This page lets you set the pan (position in the stereo
front) for each track.
Use the TRACK SELECT button to switch from the Realtime (Keyboard) tracks to the Style tracks, and vice-versa.
Pan
L-64 Hard Left.
C+00 Center.
To select a parameter and edit its value:
1. Use the VOLUME/VALUE (A–H) buttons to select
a track.
2. Use the F-1–F-4 buttons to select one of the effect
processors.
3. Use the TEMPO/VALUE controls to change the value.
Send level
000 No effect. Only the direct (uneffected) sig-
nal goes to the outputs.
127 100% effect. The direct (uneffected) and
effected signals go to the outputs with the
same level.
Page 46
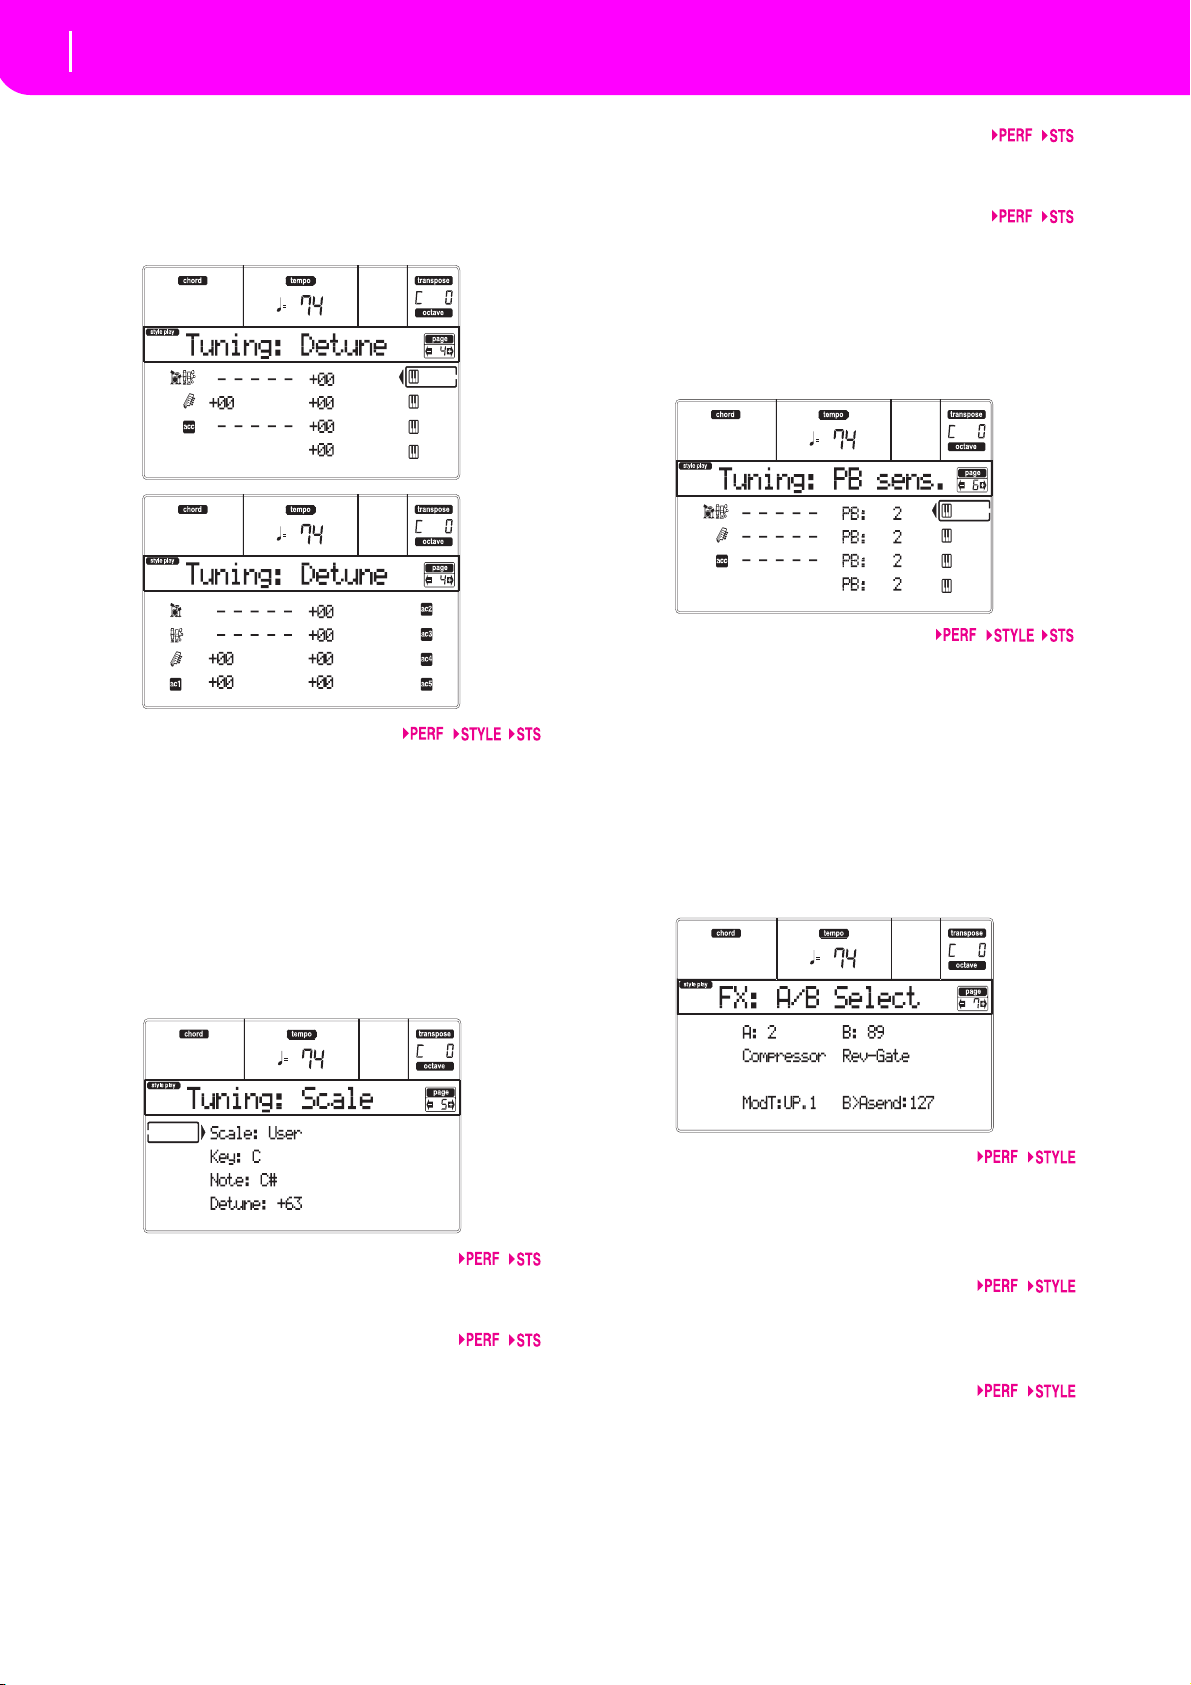
44
Style Play operating mode
Page 4 - Tuning: Detune
PAGE 4 - TUNING: DETUNE
This page is the place where you can set the fine tuning
for each track.
Use the TRACK SELECT button to switch from the Realtime (Keyboard) tracks to the Style tracks, and vice-versa.
Detune
This is the fine tuning value.
-64 Lowest pitch.
00 Standard tuning.
+63 Highest pitch.
PAGE 5 - TUNING: SCALE
This page lets you program the alternative scale for the
selected tracks (see “Scale Mode” on page 51). The
remaining tracks use the Scale set in the Global mode
(see “Scale” on page 126).
Note
Note in edit, to be detuned. This parameter can be
accessed when a User Scale is selected.
Detune
Note detune, relative to the standard Equal tuning. This
parameter can be accessed when a User Scale is selected.
PAGE 6 - TUNING: PITCHBEND SENSITIVITY
This page lets you program the Pitch Bend range for
the Realtime (Keyboard) tracks.
Parameters
These parameters show the Pitch Bend range for each
track, in semitones.
01…12 Maximum up/down pitchbend range (in
semitones). 12 = ±1 octave.
Off No pitchbend allowed.
PAGE 7 - FX: A/B SELECT
This page enables you to select the A and B effects.
Usually, the A effect is the reverb, and the B effect is the
modulating effect for the Style tracks.
Scale
Selected scale. See “Scales” on page 229 for a list of the
available scales.
Key
Parameter required for some Scales, when you should
select a preferred key.
A, B
Effects assigned to the A and B effect processors. Usually, A is the reverb, while B is the modulating effect
(chorus, flanger, delay…). For a list of the available
effects, see “Effects” on page 177.
ModTrk (Modulating Track)
Source track for modulating MIDI messages. You can
modulate an effect parameter with a MIDI message
generated by a physical controller.
B>Asend (B>A Send)
Amount of the B effect going back to the input of the A
effect.
Page 47
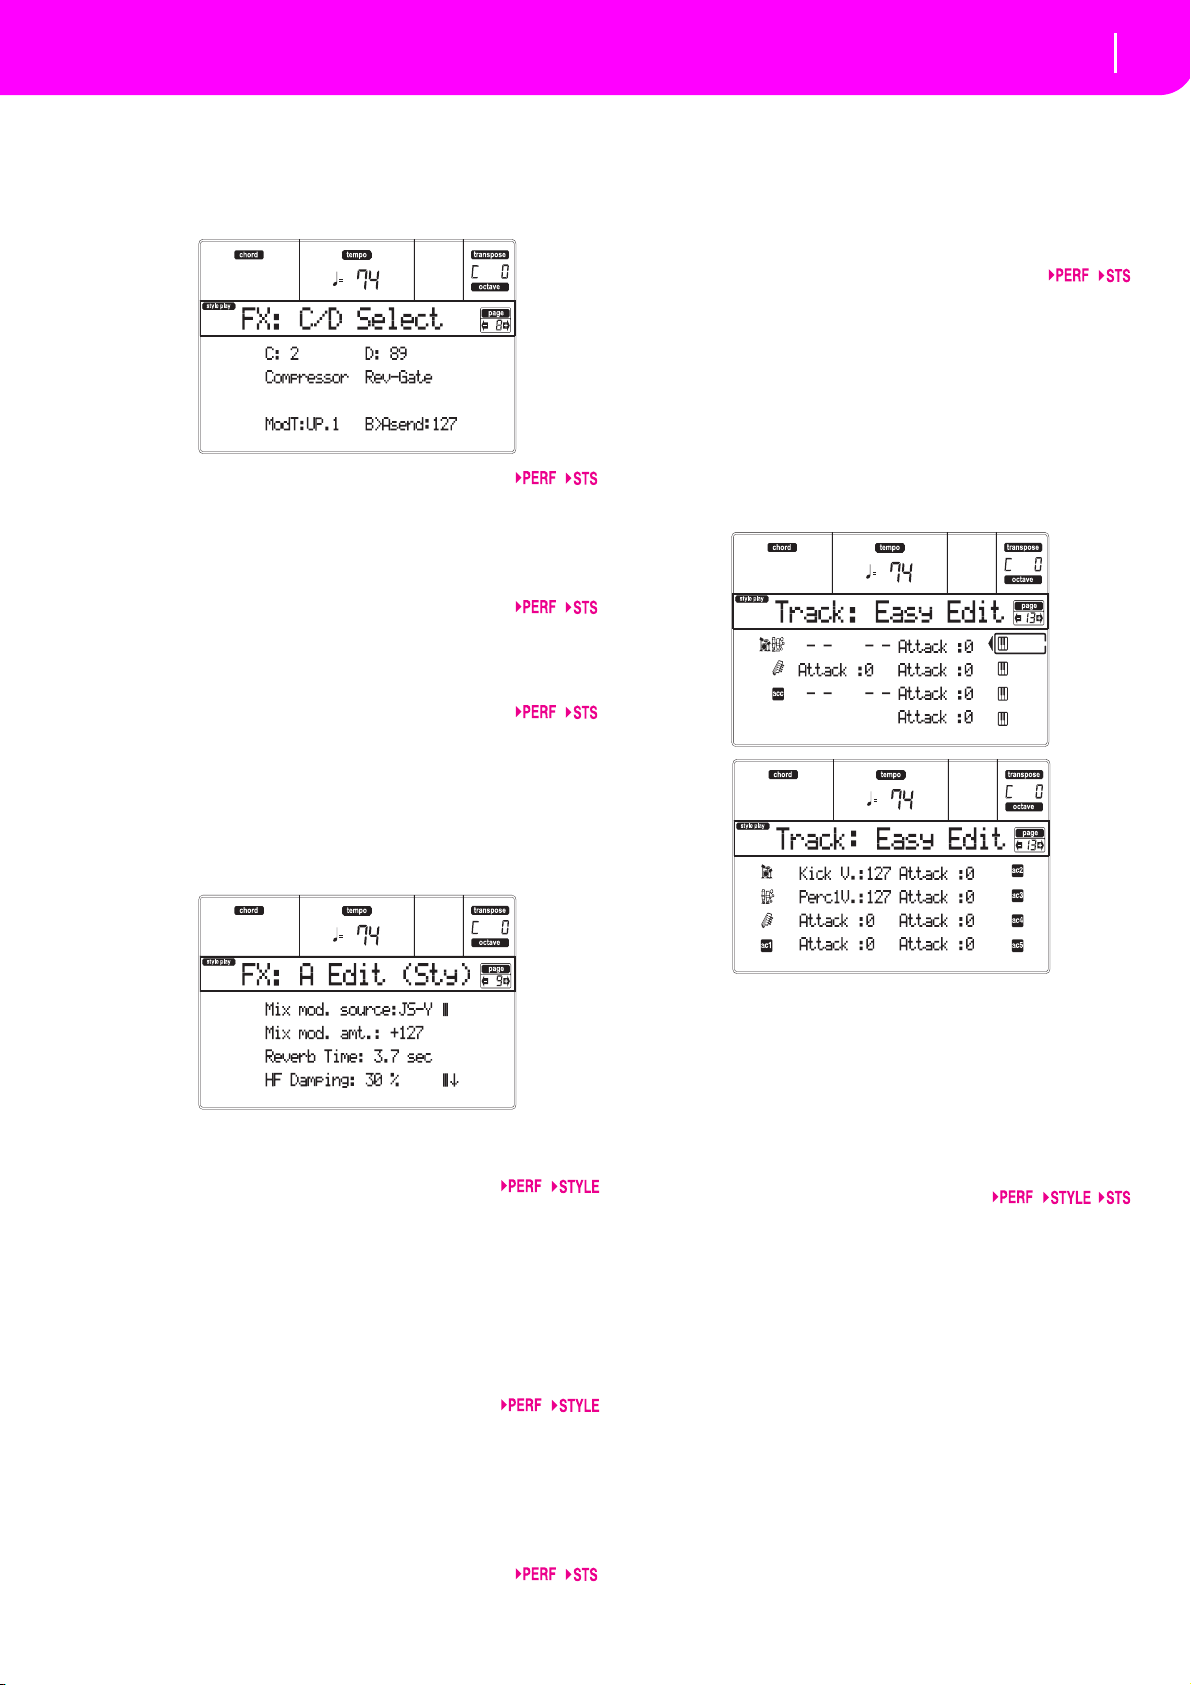
45
Style Play operating mode
Page 8 - FX: C/D Select
PAGE 8 - FX: C/D SELECT
This page lets you select the C and D effects. Usually,
the C effect is the reverb, and the D effect is the modulating effect for the Realtime (Keyboard) tracks.
C, D
Effects assigned to the C and D effect processors. Usually, C is the reverb, while D is the modulating effect
(chorus, flanger, delay…). For a list of the available
effects, see “Effects” on page 177.
ModTrk (Modulating Track)
Source track for modulating MIDI messages. You can
modulate an effect parameter with a MIDI message
generated by a physical controller.
D>Csend (D>C Send)
Amount of the D effect going back to the input of the C
effect.
PAGE 12 - FX: D EDITING
This page contains the editing parameters for the D
effect (usually modulating effect for the Realtime
tracks). For more details, see “Page 9 - FX: A editing”
above.
Parameters
PAGE 13 - TRACK: EASY EDIT
In this page you can edit the main parameters of the
Programs assigned to each track.
Note: All values are relative to the value of the original Program.
You can also change the volume for each class of
Drums and Percussion, if the selected track is set in
Drum mode (see below “Page 14 - Track: Mode”).
PAGE 9 - FX: A EDITING
This page contains the editing parameters for the A
effect (usually, reverb for the Style tracks).
Use the E and H VOLUME/VALUE buttons to scroll
the parameter list.
Parameters
See “Effects” on page 177 for a list of available parameters for each effect type.
PAGE 10 - FX: B EDITING
This page contains the editing parameters for the B
effect (usually modulating effect for the Style tracks).
For more details, see “Page 9 - FX: A editing” above.
Parameters
PAGE 11 - FX: C EDITING
This page contains the editing parameters for the C
effect (usually reverb for the Realtime tracks). For more
details, see “Page 9 - FX: A editing” above.
Parameters
Here is the edit procedure:
1. Use the VOLUME/VALUE (A–H) buttons to select
a track.
2. Use the F-1–F-4 buttons to select a Program
parameter, or its value. (For the Drum and Percus-
sion tracks, see below the “Drum tracks” section).
3. Use the TEMPO/VALUE controls to change the
Program parameter or its value.
Parameters
Attack Attack time. This is the time during which
the sound goes from zero (at the moment
when you strike a key) to it’s maximum
level.
Decay Decay time. Time to go from the final
Attack level to the beginning of the
Release.
Release Release time. This is the time during
which the sound goes from the sustaining
(or Decay) phase, to zero. The Release is
triggered by releasing a key.
Cutoff Filter cutoff. This sets the sound bright-
ness.
Resonance Use the Filter Resonance to define the
width of the frequency range affected by
the Filter.
Page 48
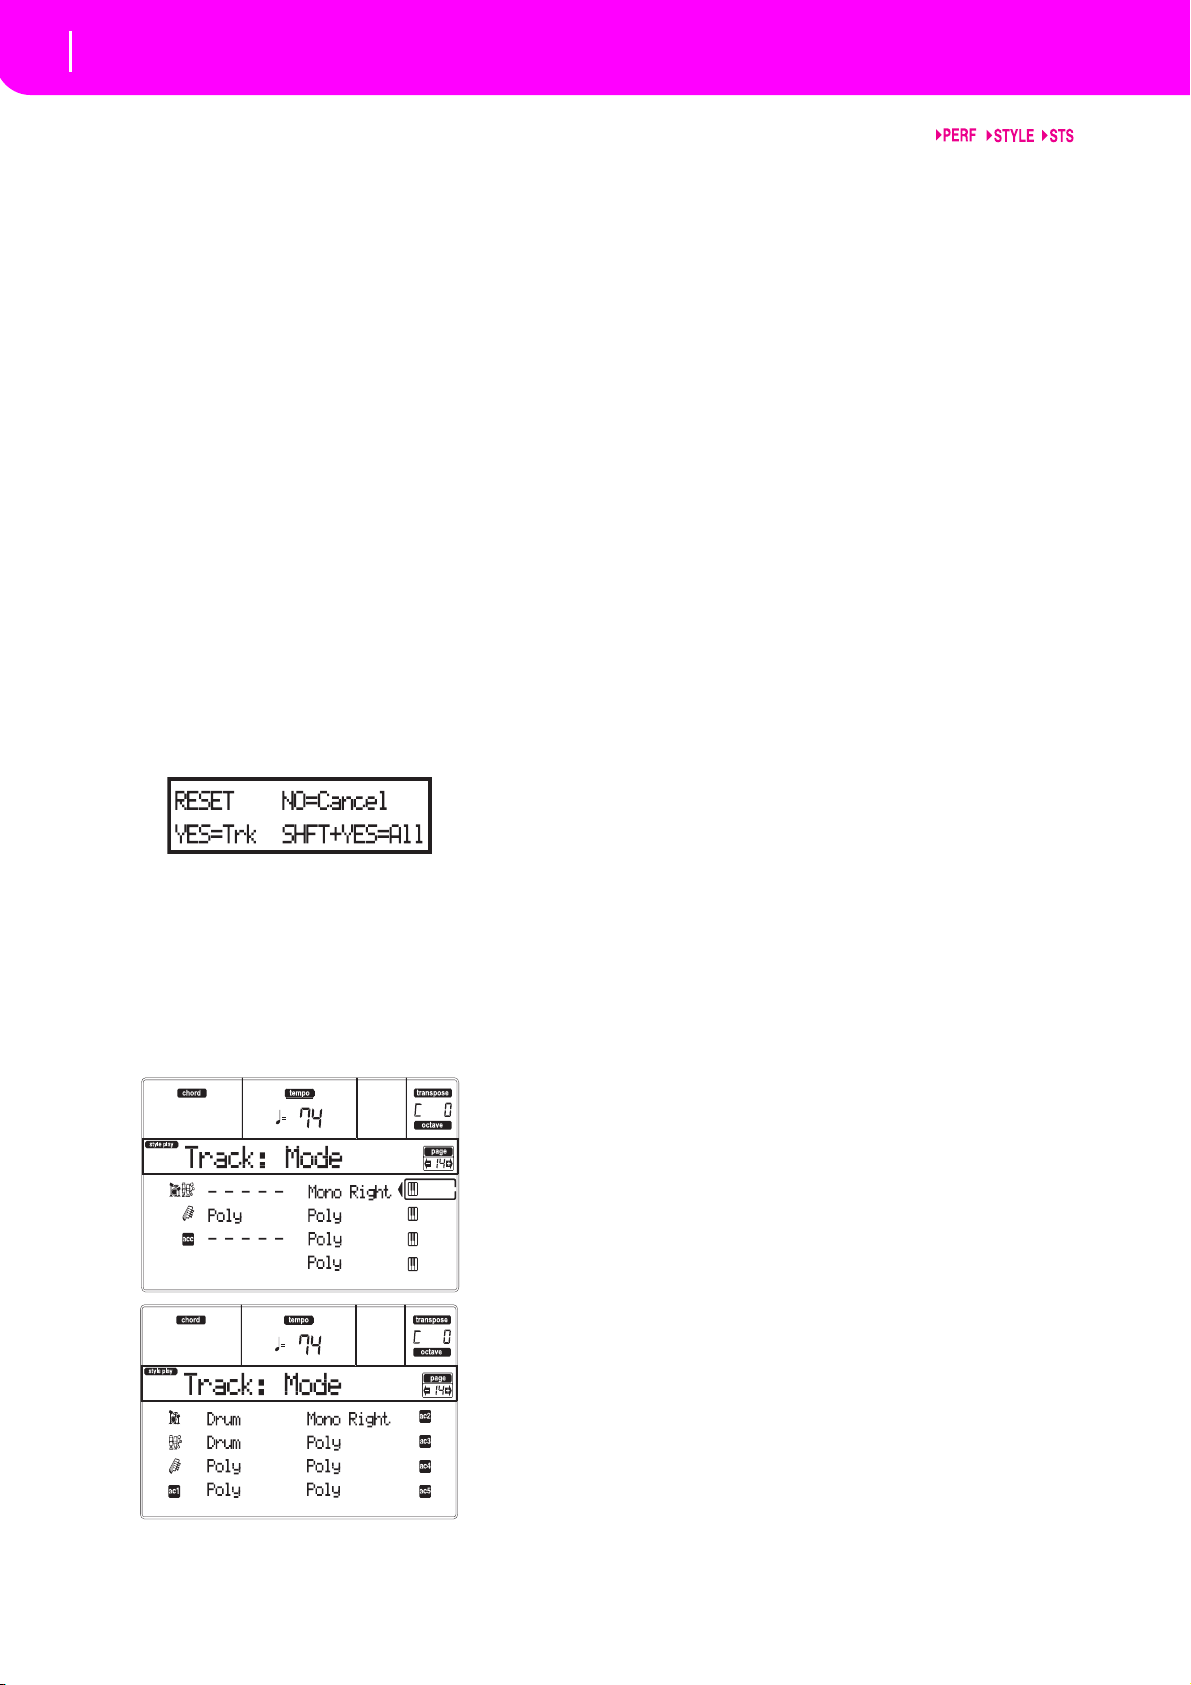
46
Style Play operating mode
Page 14 - Track: Mode
Vibrato RateSpeed of the Vibrato.
Vibrato Depth
Intensity of the Vibrato.
Vibrato Delay
Delay time before the Vibrato begins, after
the sound starts.
Drum tracks
When a track is set in Drum Mode (like the Drum and
Percussion tracks), you can adjust the volume for each
of the Drum and Percussion categories.
Kick V Kick drums volume.
Snare V Snare drums volume.
Tom V Toms volume.
HiHat V Hi-Hat volume.
CymbalV Ride, Crash and other cymbals volume.
Percus1V “Classic” percussion set volume.
Percus2V “Ethnic” percussion set volume.
SFX V Special effects volume.
Reset
You can reset the parameters’ value by keeping the
SHIFT button pressed, while pressing one of the selected
track VOLUME/VALUE buttons. After you press the
above button combination, the Reset window appears:
Parameters
Drum This is a Drum/Percussion track. No Mas-
ter or Octave Transpose applies to this
track. You can set a different volume for
each class of percussive instruments (see
“Page 13 - Track: Easy edit” on page 45).
Poly Tracks of this kind are polyphonic, i.e.
they can play more than one note at the
same time.
Mono Tracks of this kind are monophonic, i.e.
each new note stops the previous note.
Mono Right A Mono track, but with priority assigned
to the rightmost (highest) note.
Press ENTER/YES to reset the currently selected track.
Keep SHIFT pressed, and press ENTER/YES, to reset all
tracks. Press EXIT/NO to abort and keep all parameters
unchanged.
PAGE 14 - TRACK: MODE
This page lets you set the polyphony mode for each
track.
Page 49
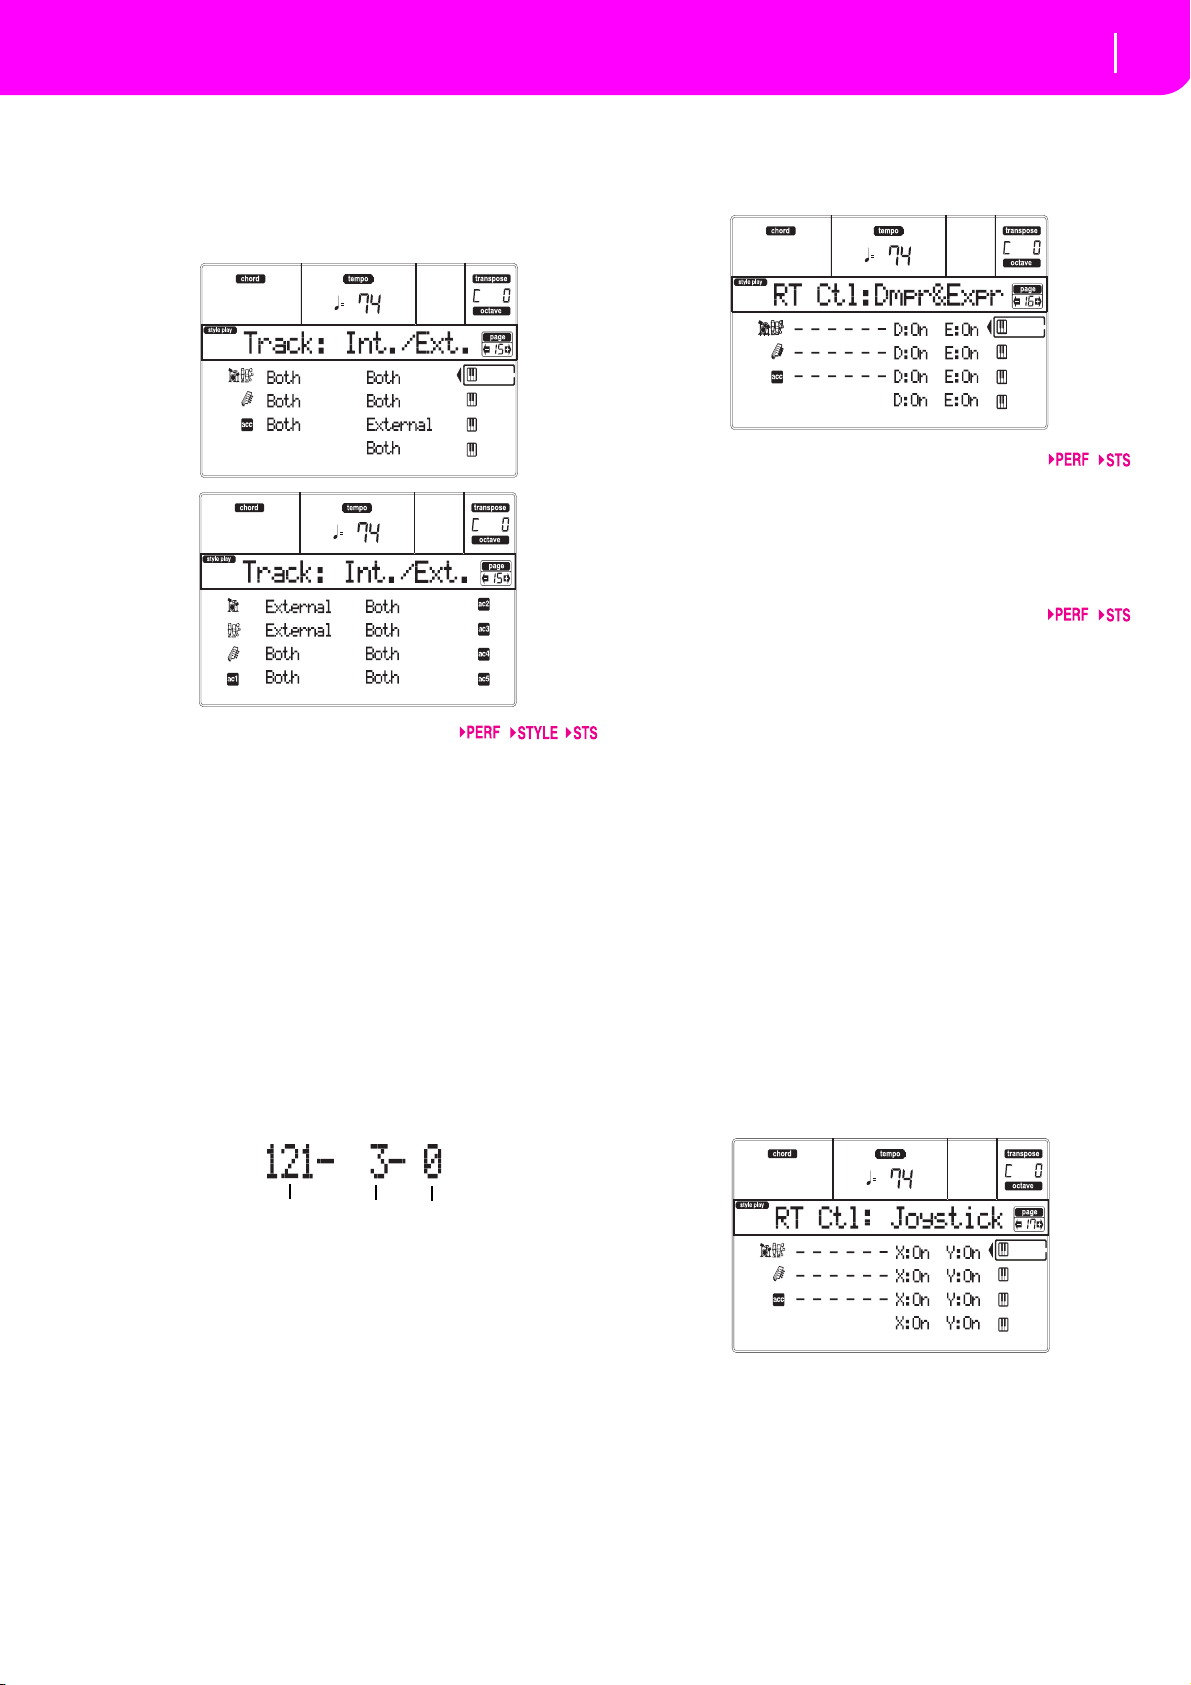
47
Style Play operating mode
Page 15 - Track: Internal/External
CC#0
CC#32
PC
PAGE 15 - TRACK: INTERNAL/EXTERNAL
This page lets you set the Internal or External status for
each track. It is very useful to let a Style track drive an
external expander, or play a digital piano with one of
Liverpool’s Realtime tracks.
Parameters
Internal The track plays the sounds generated by
the internal sound engine. It does not play
an external instrument connected to the
MIDI OUT.
External The track plays an external instrument
connected to the MIDI OUT. It does not
play the internal sounds, therefore saving
polyphony.
When a track is set to “External”, a strings
of transmitted Control Change and Program Change data is shown instead of the
Program name assigned to the track. In
the following example, CC#0 is the Control Change 0 (Bank Select MSB), CC#32 is
the Control Change 32 (Bank Select LSB),
PC is the Program Change.
PAGE 16 - R.T. CONTROLS: DAMPER
This page lets you enable/disable the Damper pedal for
each of the Realtime (Keyboard) tracks.
D (Damper)
On When you press the Damper pedal and
release the keys, the track’s sound is kept
sustained.
Off The Damper pedal is not active on any
track set to this status.
E (Expression)
This parameters allows you to switch the Expression
control on/off on each individual Realtime track. The
Expression control is a relative level control, always
subtracted from the Volume value of the track.
As an example, imagine you have a Piano sound
assigned to Upper 1, and a Strings sound assigned to
Upper 2. If you turn the Expression switch on on Upper
2, and off on Upper 1, you can use a pedal to control only
the Strings’ volume, while the Piano remains unchanged.
To program a pedal or the Assignable Slider to act as an
Expression control, see “Page 3 - Assignable Pedal/
Footswitch, Assignable Slider” on page 127. You can
only assign this function to a volume-type pedal, not to
a switch-type one. Assign the “KB Expression” option
to the pedal or Assignable Slider, then press WRITE to
save the setting into the Global.
PAGE 17 - R.T. CONTROLS: JOYSTICK
This page lets you enable/disable the Joystick for each
of the Realtime (Keyboard) tracks.
Both The track plays both the internal sounds
and an external instrument connected to
the MIDI OUT.
Here is the edit procedure:
1. Use the VOLUME/VALUE (E–H) buttons to select
a track.
2. Use the F-3–F-4 buttons to select the X or Y param-
eter for that track.
3. Use the TEMPO/VALUE controls to change the
status.
Page 50
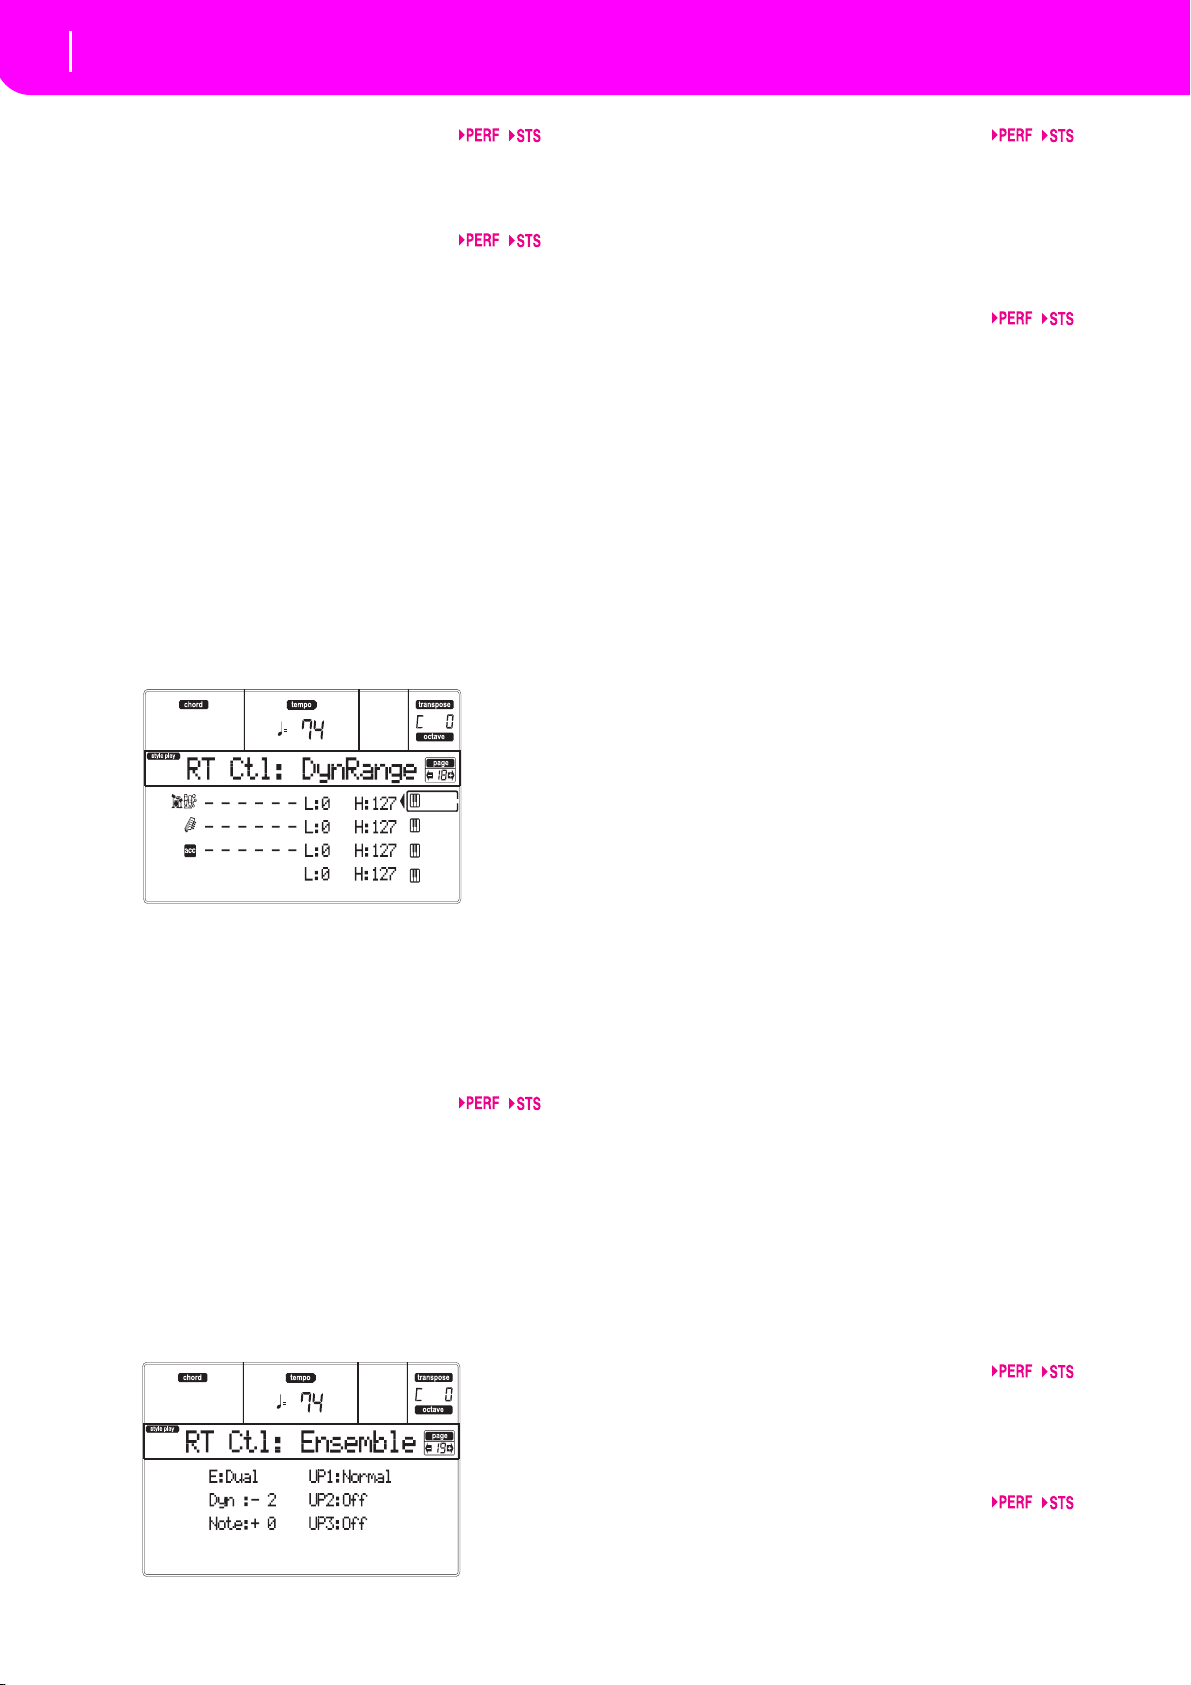
48
Style Play operating mode
Page 18 - R.T. controls: Dynamic range
X
This enables/disables the left/right movement of the
Joystick (Pitch Bend, and sometimes the sound parameter’s control).
Y
This enables/disables the front/rear movement of the
Joystick (Y+: Modulation, and sometimes the sound
parameter’s control; Y-: Various controls, or nonactive).
PAGE 18 - R.T. CONTROLS: DYNAMIC RANGE
This page lets you program a dynamic range for each
of the Realtime (Keyboard) tracks. This is useful to create a sound made of up to three dynamic layers, assigning each of the Upper tracks to a different dynamic
range.
As an example, you may assign the El.Piano 1 Program
to the Upper 1, and the El.Piano 2 Program to the
Upper 2 track. Then, set Upper 1 to [L=0, H=80], and
Upper 2 to [L=81, H=127]. The El.Piano 1 will play
when playing softer, the El.Piano 2 when playing
louder.
Here is the edit procedure:
1. Use the VOLUME/VALUE (E–H) buttons to select
a track.
2. Use the F-3–F-4 buttons to select the L or H parameter for that track.
3. Use the TEMPO/VALUE controls to change the
parameter’s value.
L/H
This parameter pair sets the Lower and Higher
dynamic range for the track.
0 Lowest velocity value.
127 Highest velocity value.
PAGE 19 - R.T. CONTROLS: ENSEMBLE
This page lets you program the Ensemble function.
This function harmonizes the right-hand played melody with the left-hand recognized chords.
Up1…Up3
Right-hand (Upper) tracks.
Off There is no harmonization on this track.
Normal This track is included in the harmoniza-
tion.
Mute This track only plays the Ensemble notes,
but not the original note.
E(nsemble)
Harmonization type.
Duet Adds a single note to the melody.
Close Adds a closed-position chord to the mel-
ody.
Open 1 Adds an open-position chord to the mel-
ody.
Open 2 As the above, but with a different algo-
rhythm.
Block Block harmonization – very typical of jazz
music.
Power Ensemble
Adds a fifth and an octave to the melody,
as heard in hard rock.
Fourths LO Typical of jazz, this option adds a perfect
fourth and a minor seventh under the melody.
Fourths UP As the above, but with notes added over
the melody.
Fifths This adds a series of Fifths below the orig-
inal note.
Octave Adds one or more octaves to the melody.
Dual This option adds to the melody line a sec-
ond note, at a fixed interval set with the
“Note” parameter. When selecting this
option, a transposition value appears (-
24…+24 semitones to the original note).
Brass Typical Brass section harmonization.
Reed Typical Reed section harmonization.
Trill This option trills the melody note. You can
set the trill speed by using the Tempo
parameter (see below).
Note: You must play at least two notes with
this option!
Repeat The played note is repeated in sync with
the Tempo parameter (see below). When
playing a chord, only the first note is
repeated.
Echo As the Repeat option, but with the
repeated notes fading away after the time
set with the Feedback parameter (see
below).
Dyn(amics)
This parameter sets the velocity difference between the
right-hand melody and the added harmonization
notes.
-10…0 Subtracted velocity value.
Tem po
Note: This parameter only appears when the Trill, Repeat or
Echo options are selected.
Page 51
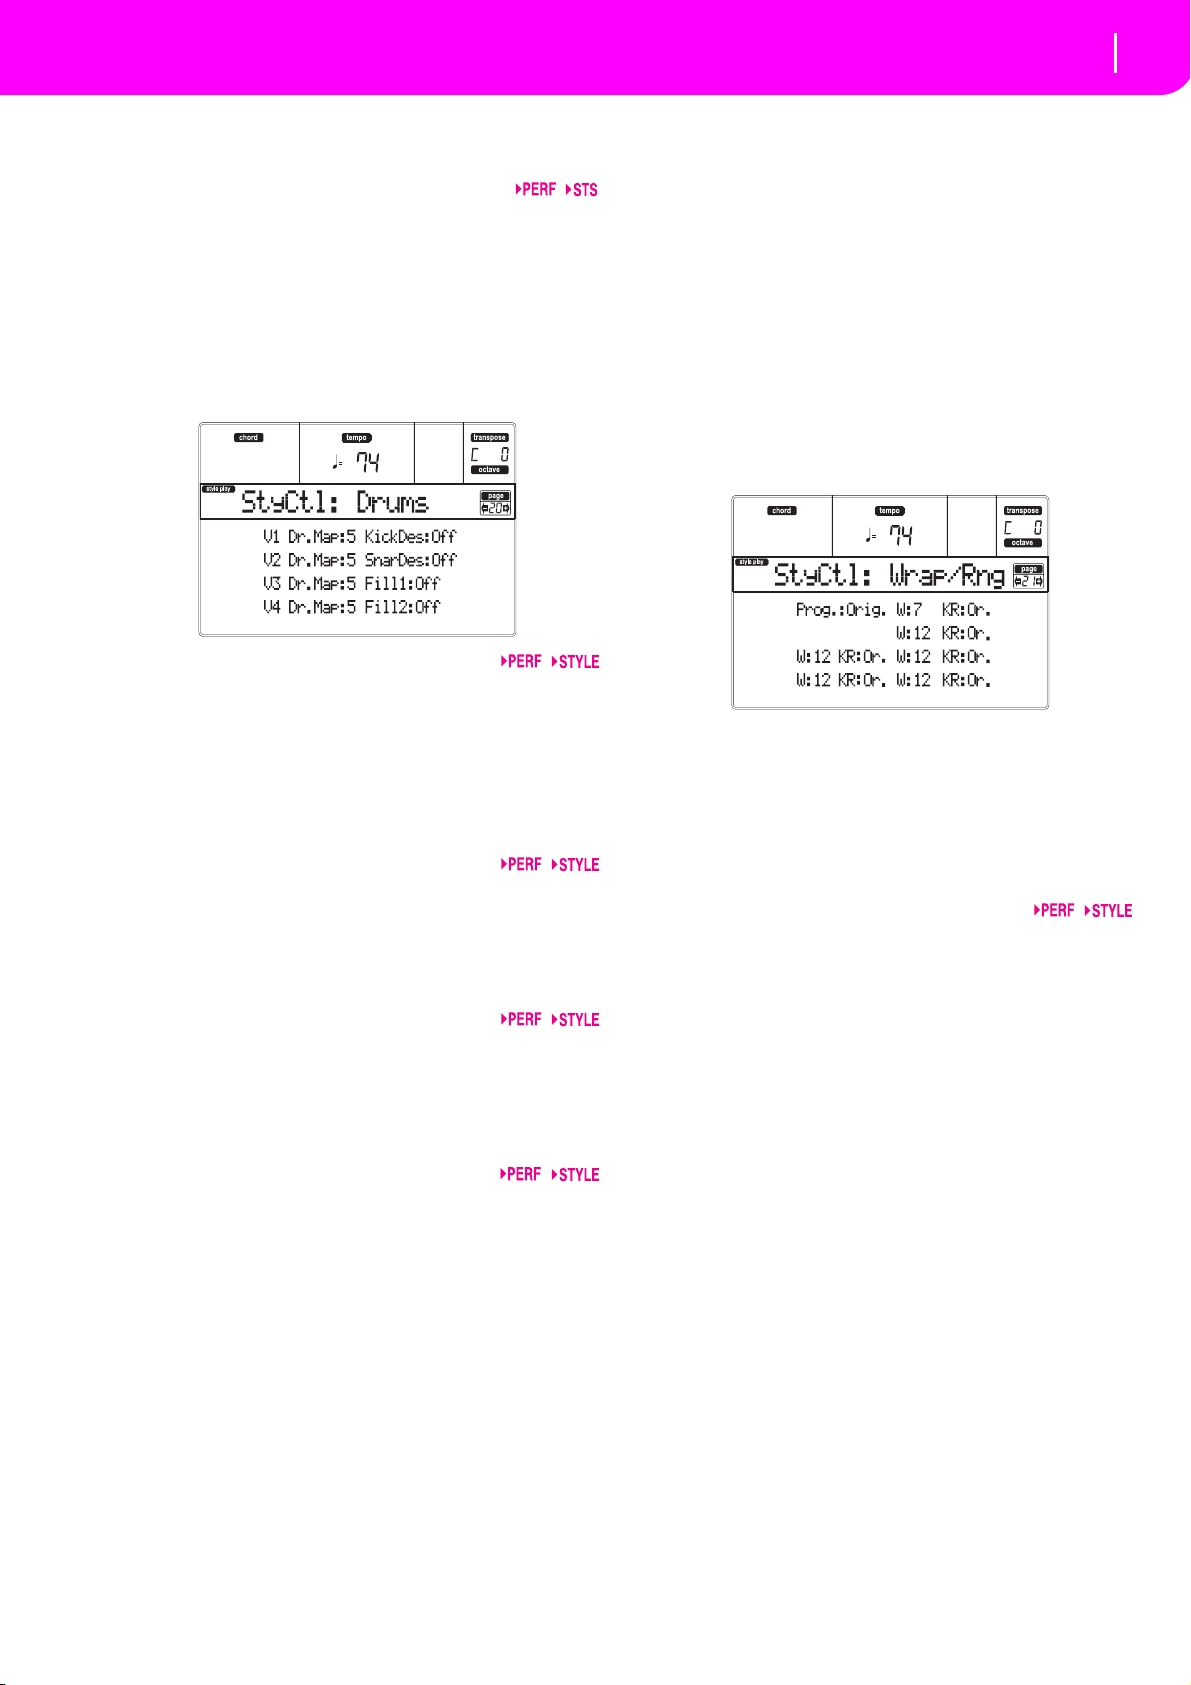
49
Style Play operating mode
Page 20 - Style controls: Drum/Fill
Note value for the Trill, Repeat or Echo Ensemble
options. This is in sync with the Metronome Tempo.
Feedback
Note: This parameter only appears when the Echo option is
selected.
This parameter sets how many times the original note/
chord is repeated by the Echo option.
PAGE 20 - STYLE CONTROLS: DRUM/FILL
In this page you can select various general parameters
for the Style.
V1–V4 Drum Map
The Drum Mapping lets you select an alternative
arrangement of percussive instruments for the selected
Drum Kit, without any additional programming. Just
select a Drum Map, and some percussive instruments
will be replaced with different instruments.
0…7 Drum Map number. Number 0 is the stan-
dard mapping.
Kick D(esignation)
The Kick Designation replaces the original Kick (Bass
Drum) sound with a different Kick of the same Drum
Kit.
Off, 1…3 Kick replacing the original one. Off corre-
sponds to the original Kick.
Snare D(esignation)
The Snare Designation replaces the original Snare
Drum sound with a different Snare of the same Drum
Kit.
Off, 1…3 Snare replacing the original one. Off corre-
sponds to the original Snare.
Fill1/2
These parameters set a Variation to be automatically
selected at the end of the Fill.
Off The same Variation, playing before select-
ing a Fill, will be selected again.
1&2…3&4 The specified Variations will be alterna-
tively selected. For example, with the
“1&2” option, Variation 1 and Variation 2
will be alternatively selected after the end
of the Fill.
Up/Down The next higher/lower numbered Varia-
tion is selected, in cycle. After Variation 4,
an Up command will select Variation 1.
After Variation 1, a Down command will
select Variation 4.
Inc/Dec The next higher/lower numbered Varia-
tion is selected. When Variation 4 is
reached, an Inc command will select Variation 4 again. When Variation 1 is reached,
a Dec command will select Variation 1
again.
->1…->4 “Fill to Variation” (->1, ->2, ->3, ->4) automatically selects one of the four available
Style Variations at the end of the fill.
PAGE 21 - STYLE CONTROLS: WRAP AROUND / KEYBOARD RANGE
In this page you can program the Wrap Around function and the Keyboard Range for the Style tracks.
Here is the edit procedure:
1. Use the VOLUME/VALUE (A–H) buttons to select
a parameter.
2. Use the F-1–F-4 buttons to move the cursor
between the parameter and its status or value.
3. Use the TEMPO/VALUE controls to change the
parameter’s status or value.
Prog (Program)
This parameter lets you select a different Program,
other than the one recorded into the Style Element
(Variations, Fills, Intros, Endings).
Note: This parameter is automatically set to On each time
you assign a Program to any of the Style tracks, either from
the front panel or via MIDI.
Original Style tracks always use the original Pro-
grams. If you assign a different Program
to a Style track, it may be reset to the original one when selecting a different Style
Element.
On You can assign different Programs to each
Style track, and save them in a Performance or Style Performance. This becomes
the only track’s Program for all Style Elements.
Page 52
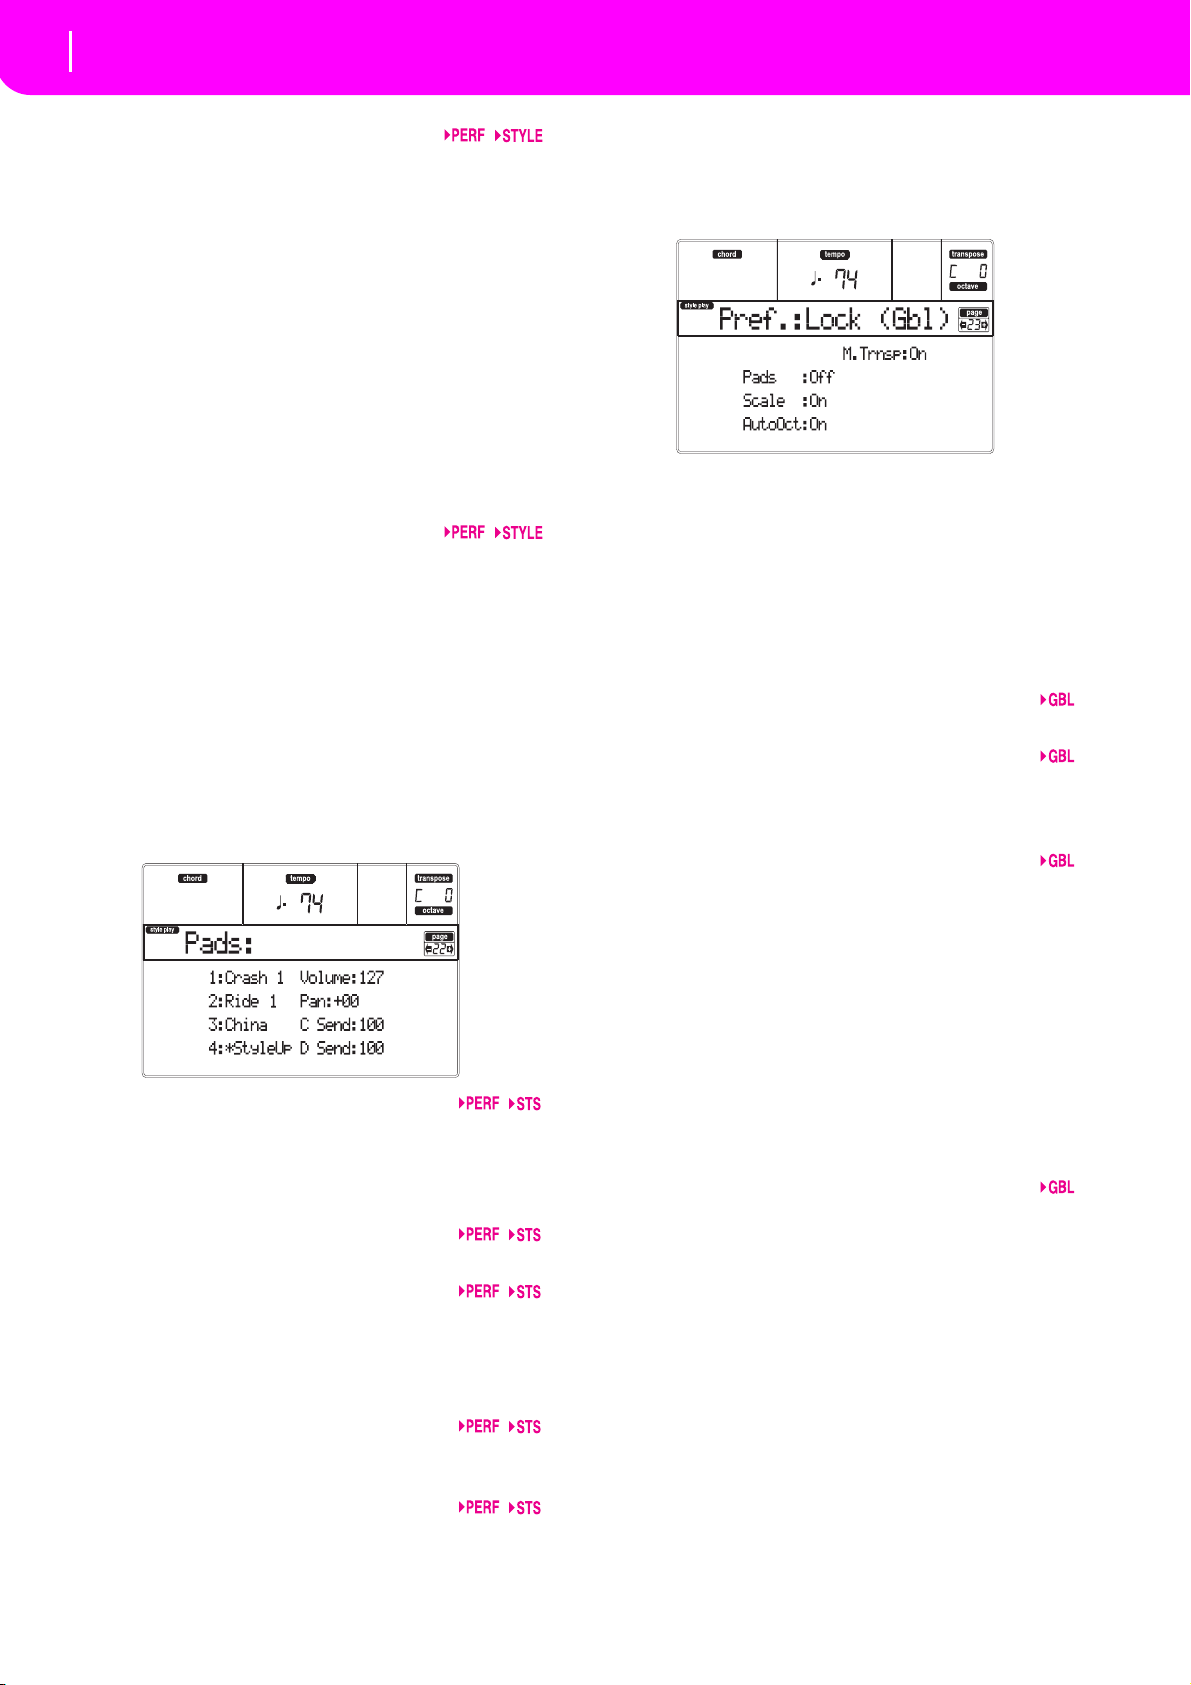
50
Style Play operating mode
Page 22 - Pads
W (Wrap Around)
The wrap-around point is the highest register limit for
the backing track. The accompaniment patterns will be
transposed according to the detected chord. If the
chord is too high, the Style tracks might play in a register that is too high, and therefore unnatural. If, however, it reaches the wrap-around point, it will be
automatically transposed an octave lower.
The wrap-around point can be set for each track in
semitone steps up to a maximum of 12 semitones, relative to the chord root. This value will be the interval
between the key specified by the Style Element and the
wrap-around point.
1…12 Maximum transposition (in semitones) of
the track, referred to the original key of
the pattern.
KR (Keyboard Range)
This parameter is an on/off switch for the Key Range
parameter memorized into the Style.
Or(iginal) The Keyboard Range is used. When a
track goes over the lower or higher limit
set by this (hidden) parameter, it is transposed, to play into the programmed
range.
Off No Keyboard Range used.
PAGE 22 - PADS
This page lets you select a different sound or function
for each of the four PAD buttons.
1–4
Each of the four PAD buttons. See “List of sounds
assignable to the Pads” on page 228 and “List of functions assignable to the Pads” on page 229.
Note: Function names are preceded by an asterisk (*)
Volu me
Volume for each of the four Pad tracks.
Pan
Pan for each of the four Pad tracks.
-64 Fully Left.
00 Centered.
+63 Fully Right.
C Send
Send level to the C Internal FX processor (usually
reverb) for each of the four Pad tracks.
D Send
Send level to the D Internal FX processor (usually modulating effect) for each of the four Pad tracks.
PAGE 23 - PREFERENCES: LOCK
You can “lock” various functions, to avoid they can be
changed when selecting a different Performance, Style
or Single Touch Setting.
Hint: When turning the instrument on, Performance 1 is
automatically selected. Therefore, if you wish your parameters to stay unchanged, save your preferred default settings
into Performance 1 (see “The Write window” on page 42),
and turn these locks on.
Note: These settings are stored in the Global file. After
changing these settings, press WRITE to save them into the
Global. The Write Global window will appear (see “The
Write window” on page 126).
Pads
Sounds or functions assigned to the Pads.
Scale
When this lock function is On, the Scale parameter
does not change when selecting a different Performance, Style or Single Touch Setting.
Auto Octave
This lock lets the instrument automatically transpose
the Upper tracks when switching between the FULL
UPPER and the SPLIT Keyboard modes.
On When switching to the FULL UPPER or
SPLIT Keyboard Mode, the Upper tracks
transposition is left unchanged.
Off When switching to the FULL UPPER Key-
board Mode, the Upper tracks Octave
Transpose is automatically set to “0”.
When switching to the SPLIT Keyboard
Mode, the Upper tracks Octave Transpose
is automatically set to “-1”.
M.Trnsp (Master Transpose)
The Master Transpose value is memorized into the Performance or Style Performance. To prevent the Master
Transpose to be automatically changed when selecting
a Style or Performance, this lock should be set to On.
On (Default) The lock is engaged. When
selecting a Style or Performance, the Master Transpose will not change.
Off The lock is turned off. When selecting a
Style or Performance, the Master Transpose value may change, according to the
data memorized into the Performance or
Style Performance.
Page 53
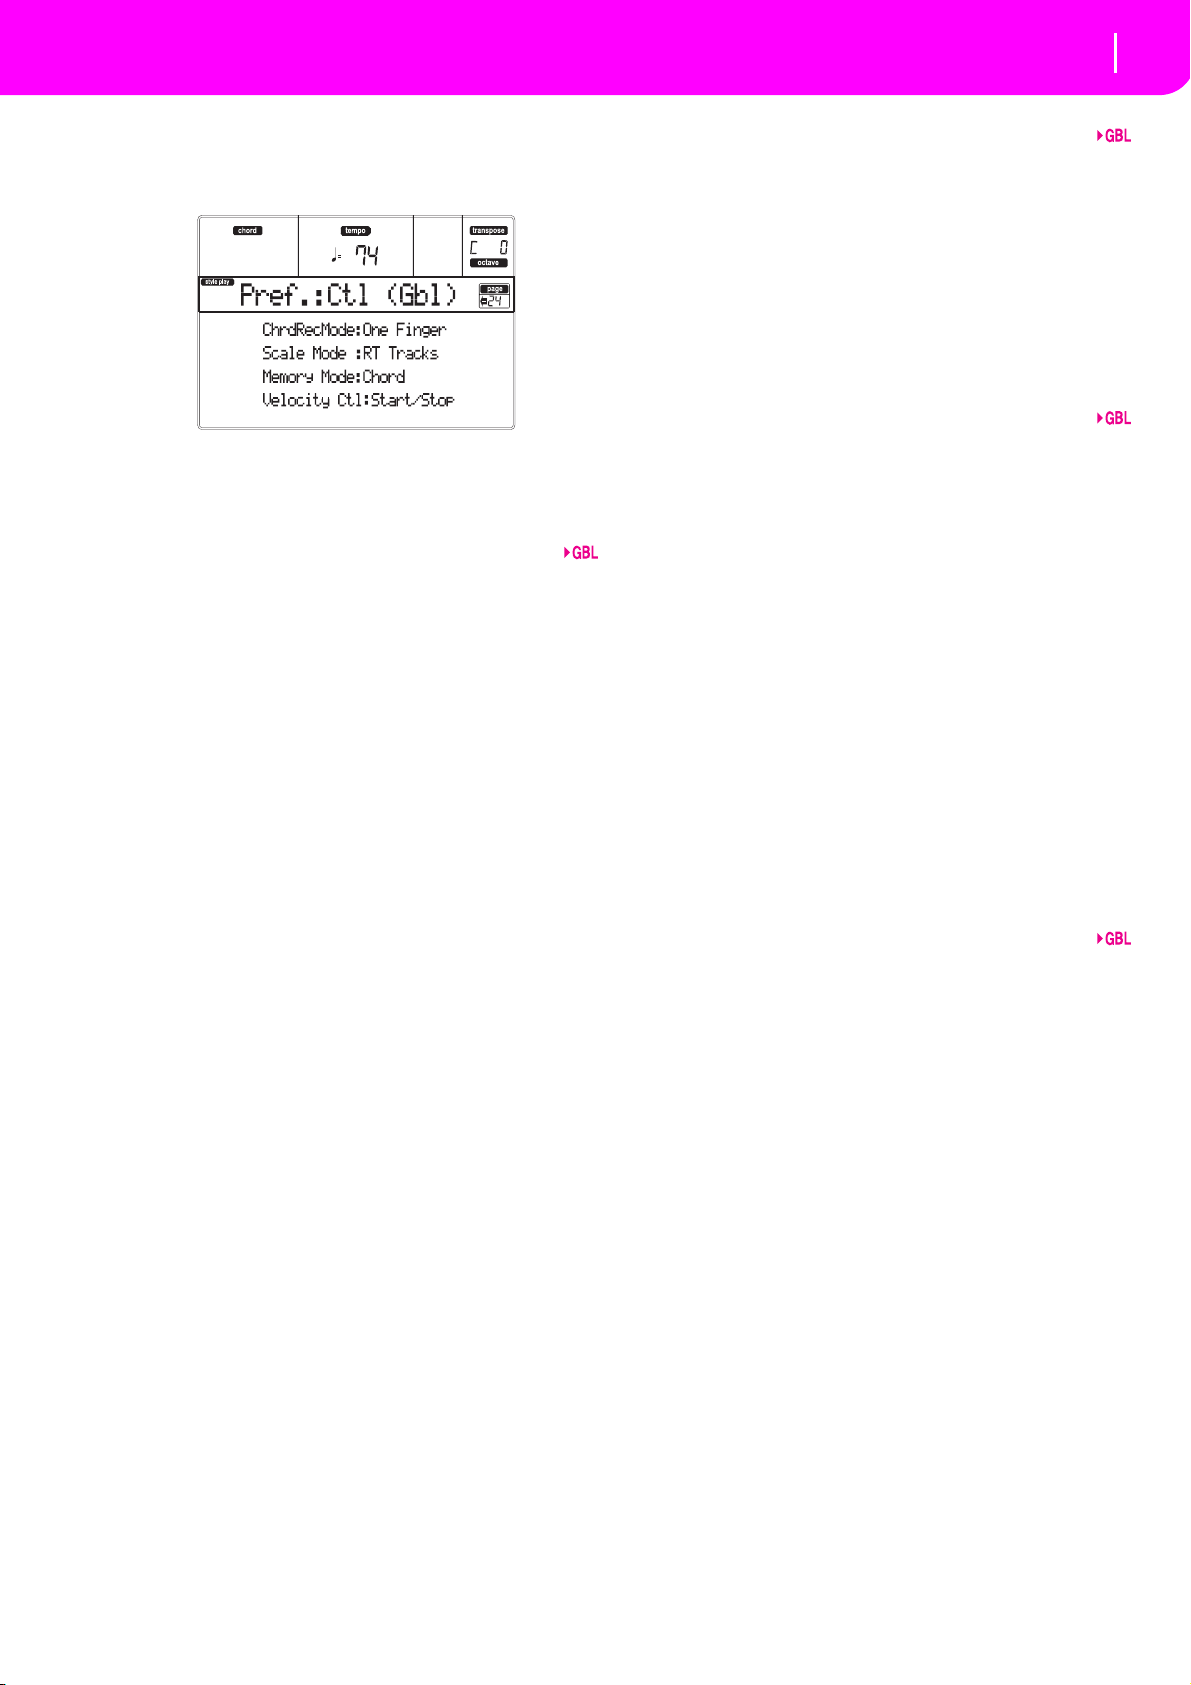
51
Style Play operating mode
Page 24 - Preferences: controls
PAGE 24 - PREFERENCES: CONTROLS
In this page you can set various general parameters for
the Style.
Note: These settings are stored in the Global file. After
changing these settings, press WRITE to save them into the
Global. The Write Global window will appear (see “The
Write window” on page 126).
Chord Recognition Mode
This parameter sets how chords are recognized by the
auto-accompaniment engine. Please note that when in
Full or Upper Chord Scanning mode, the Fingered 3
mode is always selected, and you must always play at
least three notes, to let a chord be recognized.
Fingered 1 Play one or more notes, according to the
selected Chord Scanning Mode. A full
Major chord will be recognized even if
only a single note is played.
Fingered 2 You must always play three or more notes
for a full chord to be recognized. If you
play just one note, a unison will be played.
If you play a suspended 5th, a suspended
chord will be played. The full chord will
be recognized when you play three or
more notes.
Fingered 3 You must always play three or more notes
for a chord to be recognized.
One Finger You can also compose a chord using a sim-
plified chord playing technique:
• If you play only one note, a Major chord
is recognized.
• Play the root note, plus a white key on
the left, for a 7th. Ex.: C3 + B2.
• Play the root note, plus a black key on
the left, for a Minor chord. Ex.: C3 + Bb2.
• Play the root note, plus a white and a
black key on the left, for a Minor 7th. Ex.:
C3 + B2 + Bb2.
Scale Mode
This parameter determines which tracks will use the
selected alternative scale (see “Scale” on page 44).
Realtime tracks
The scale will only affect the Realtime
(Keyboard) tracks.
Upper tracks
The scale will only affect the Upper 1–3
Realtime (Keyboard) tracks.
All Tracks The scale will affect all tracks (Realtime,
Style, Pads).
Memory Mode
This parameter sets the way the MEMORY button
works.
Chord When its LED is on, the MEMORY button
keeps the recognized chord in memory.
When its LED is off, the chord is reset
when raising the hand from the keyboard.
Chord + Lower
When its LED is on, the MEMORY button
keeps the recognized chord in memory,
and keeps the Lower track held until the
next note or chord is played. When its
LED is off, the chord is reset when raising
the hand from the keyboard, and the
Lower track is not sustained.
Lower When its LED is on, the MEMORY button
keeps the Lower track held until the next
note or chord is played. When off, the
Lower track is not sustained when raising
the hand from the keyboard. The chord is
always kept in memory.
Vel ocit y Con trol
Set this parameter to trigger a Fill or a Break simply by
playing louder with your left hand. When playing on
the Lower track with a velocity higher than 95, the
selected Style Element will start. For this function to
work, the SPLIT Keyboard Mode and LOWER Chord
Scanning Mode must be selected.
Off The function is turned off.
Break, Fill 1, Fill 2
When playing with a velocity higher than
95 on the Lower track, the selected element is automatically triggered.
Start/Stop You can start or stop the Style by playing
harder on the keyboard.
Page 54
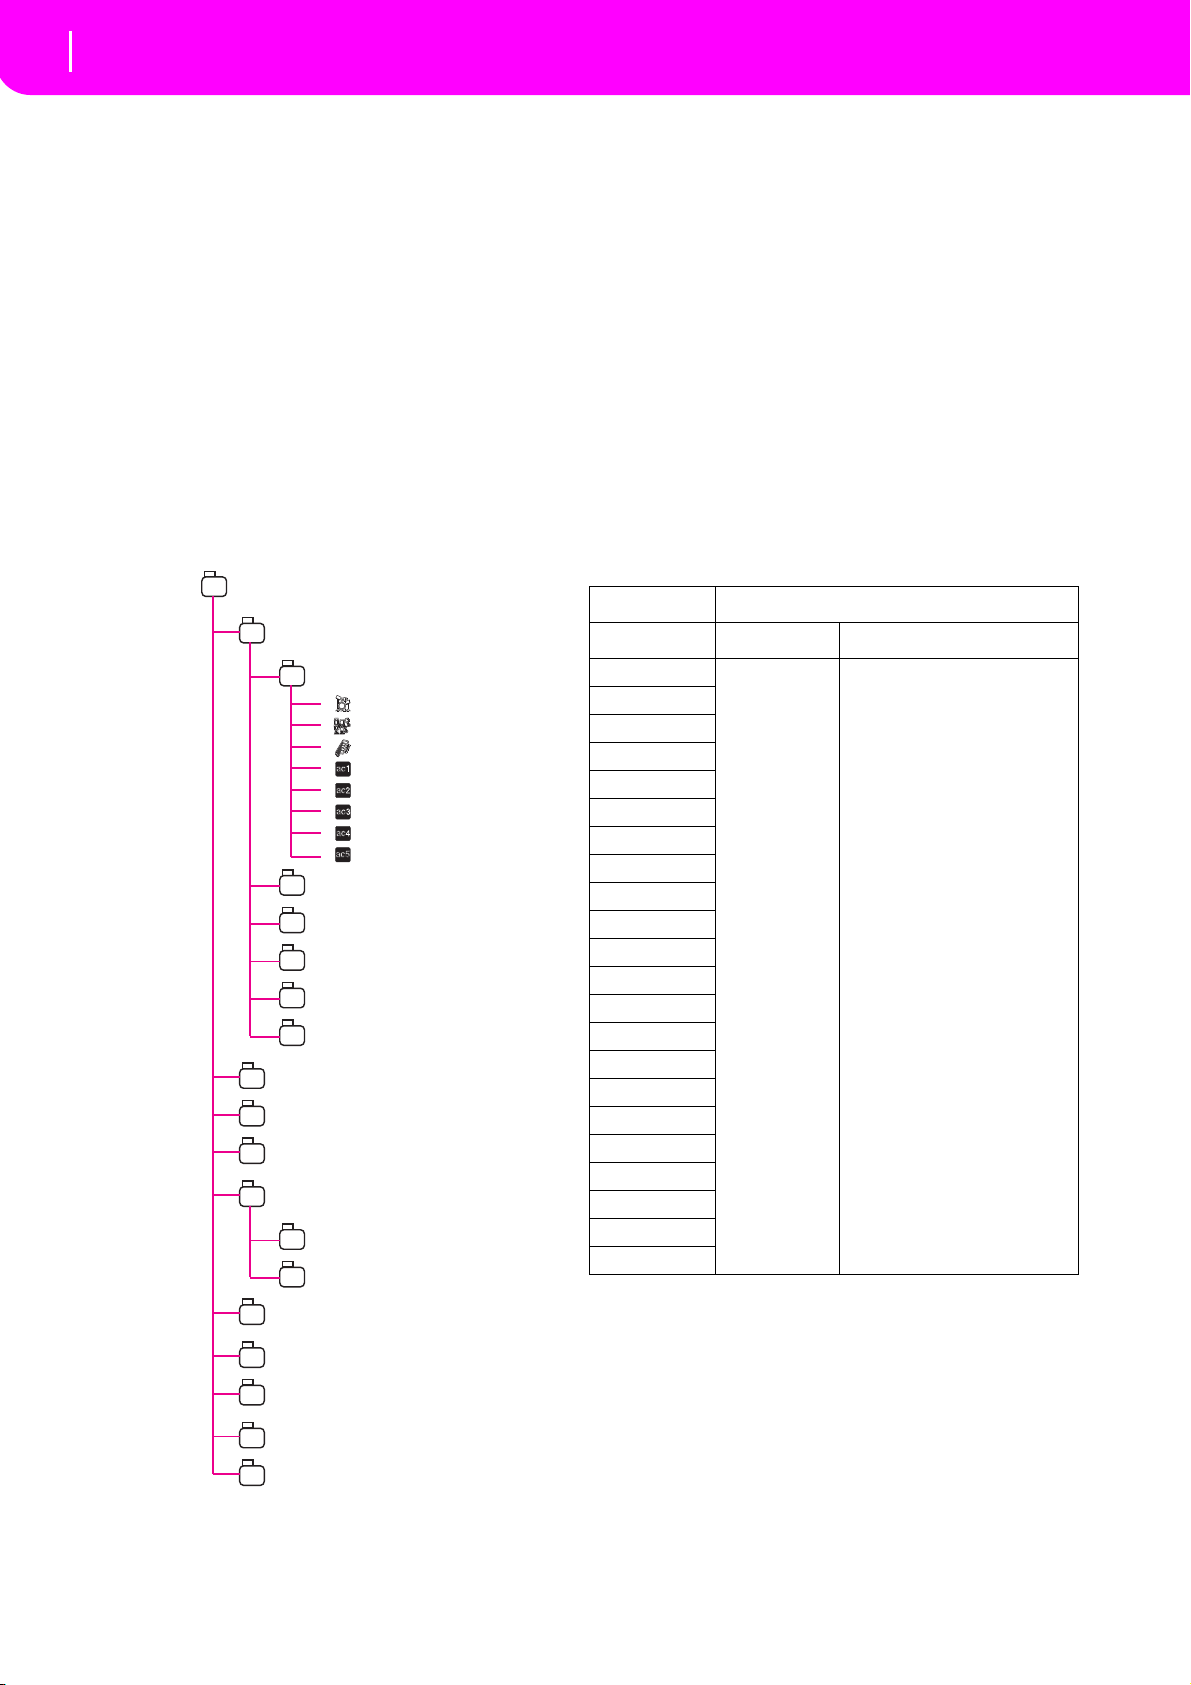
52
Style Record mode
The Style’s structure
Pop Ballad
Variation 1
CV1
Drum
Pe r c
Bass
Acc1
Acc2
Acc3
Acc4
Acc5
CV2
CV3
CV4
CV5
CV6
Variation 2
Variation 3
Variation 4
Intro1
CV1
CV2
Intro 2
Fill 1
Fill 2
Ending 1
Ending 2
10. STYLE RECORD MODE
By entering the Style Record mode, you can create your
own Styles, or edit an existing Style.
Note: LIVERPOOL STYLES cannot be edited.
THE STYLE’S STRUCTURE
The term “Style” relates with music sequences automatically played by the arranger of the Liverpool. A
Style consists of a predefined number of Style Ele-
ments (E) (Liverpool features ten different Style Elements: Variation 1–4, Intro 1–2, Fill 1–2, Ending 1–2).
When playing, these Style Elements can be selected
directly from the control panel, using the corresponding buttons.
To explain the Style structure, we can use a tree-structure, as shown in the following diagram:
Each Style Element is made up of smaller units, called
Chord Variations (CV), but not all of them have the
same number of CVs. Variations 1–4 have up to 6 CVs
each, while the other Style Elements have only up to 2
CVs.
When you play on the chord recognition area (Lower,
Upper or Full, depending on the Chord Scanning section on the control panel), the arranger scans the keyboard and determines which chord you are playing.
Then, depending on the selected Style Element, it
determines which Chord Variation (CV) should be
played for the scanned chord. Which Chord Variation
corresponds to each scanned chord is a setting of the
Style: the Chord Variation Table. Each Style Element
contains a Chord Variation Table, whose prototype is
the following:
Chord Chord Variations (CVs)
Variation 1–4 Intro 1–2, Fill 1–2, Ending 1–2
Maj
6
M7
M7b5
Sus4
Sus2
M7sus4
min
m6
m7
m7b5
mM7
7
7b5
7sus4
dim
dimM7
aug
aug7
augM7
no 3rd
no 3rd, no 5th
CV1 – CV6 CV1 – CV2
After deciding what CV to play, the arranger triggers
the right sequence for each track. Since each sequence
is written in a particular key (for example, CMajor,
GMajor or Emin), the arranger transposes it according
to the scanned chord. Notes in the sequence are carefully transposed according to the Note Transposition
Tables (NTT), to make them work fine with all recognized chords. The NTT allows you to record just some
Chord Variations, and have all the notes play in the
right place, avoiding dissonances and transposing the
pattern notes to the notes of the recognized chord.
Page 55
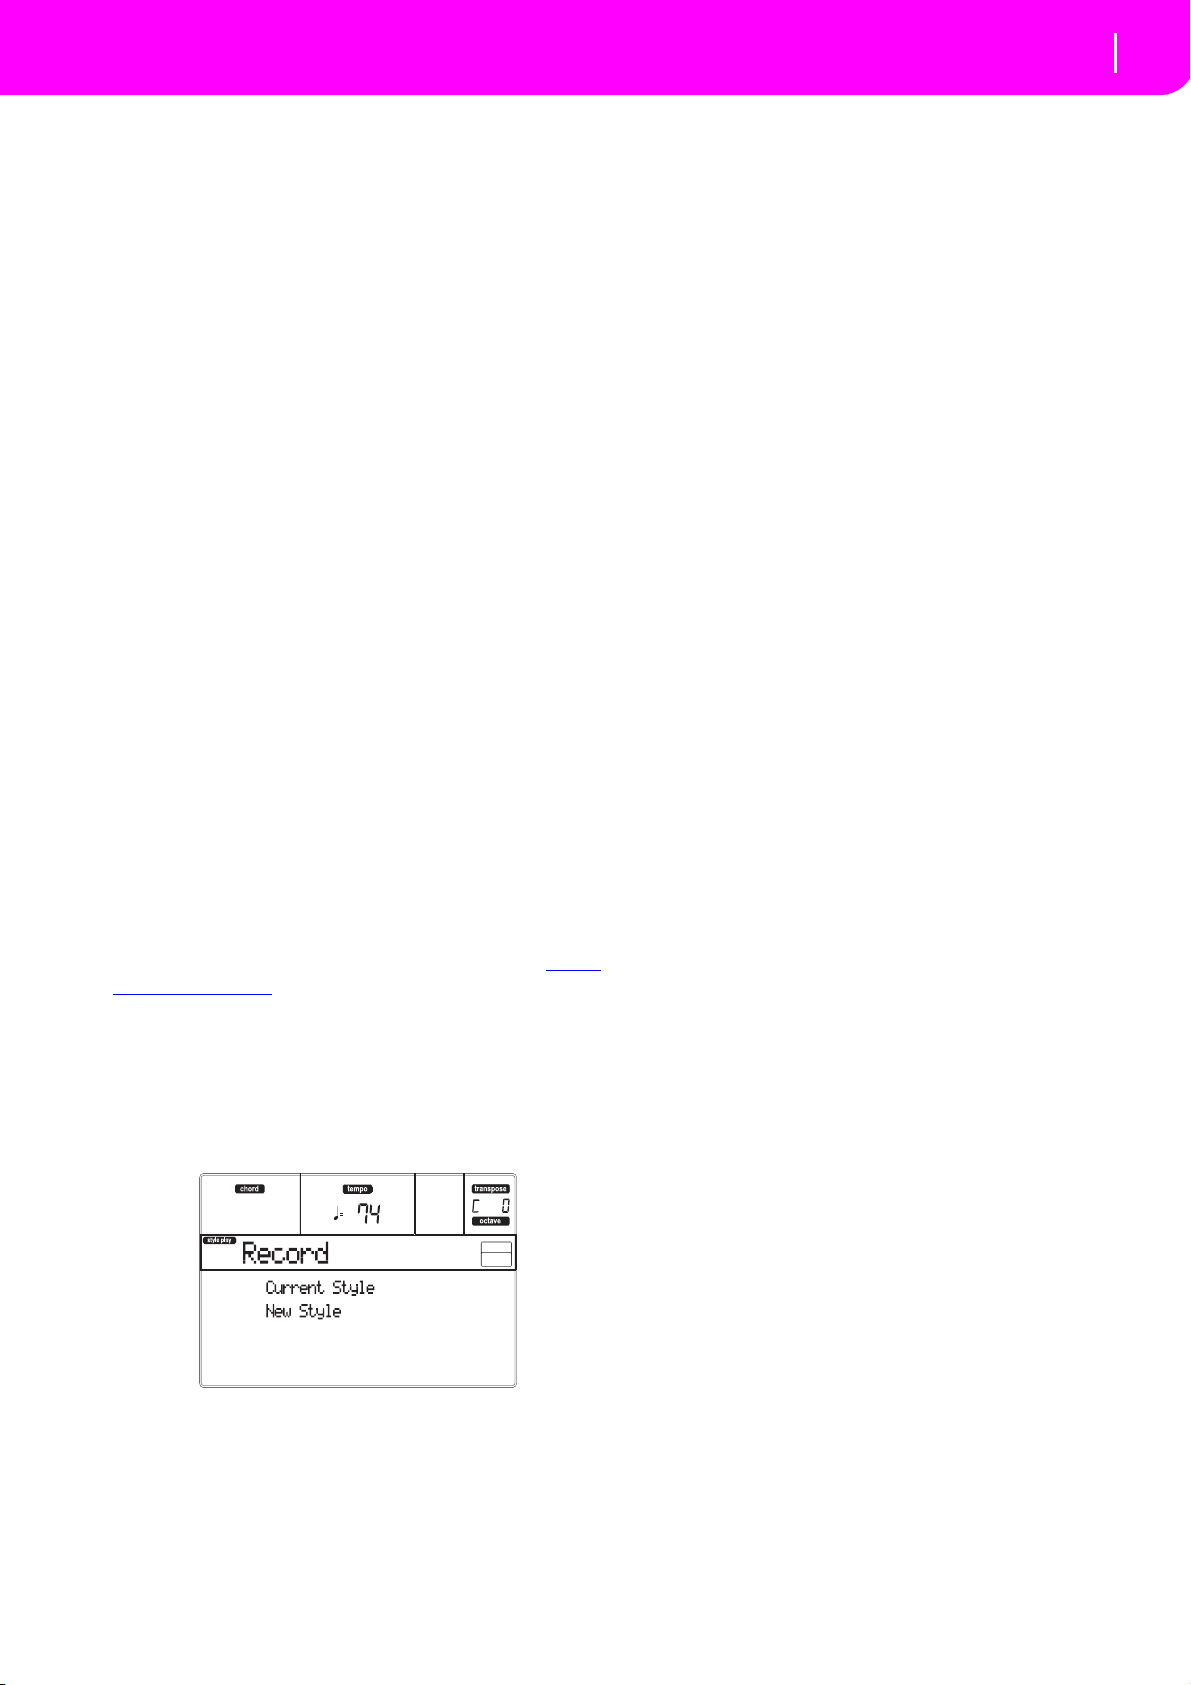
53
Style Record mode
Style Import/Export
Going deeper into the Style structure, we can see that
each Chord Variation is made up of Track Sequences,
and the Liverpool supports 8 different tracks. DRUM
and PERC are used for drum and percussion
sequences, BASS for bass and ACC1–5 are for accompaniment sequences (string, guitar, piano or other
accompaniment instruments).
Just to summarize, when you play a chord on the chord
recognition area, the arranger determines which Style
Element is used, then determines which Chord Variation should be used for the played chord, then Style
sequences for every track of that Chord Variation are
transposed from the original chord to the recognized
chord using the NTT, and so on every time you play a
chord.
Note: The Break and the Count In are not Style Elements,
and cannot be programmed by the user. While in record/edit,
the BREAK/COUNT IN button does not work.
What to record
Recording a Style is a matter of recording tracks, inside
a series of Chord Variations, inside a series of Style Elements, inside the Style itself.
You don’t need to record all Chord Variations for all
Style Elements. It is often only necessary to record just
a Chord Variation for each Style Element. Exceptions
are the Intro 1 and Ending 1, where we suggest to
record both a Major and minor Chord Variations.
STYLE IMPORT/EXPORT
You can use Korg’s Style To Midi application to
exchange Styles between your computer and the Liverpool, through the Standard MIDI File (SMF) format.
The application is freely downloadable from http://
www.korgpa.com/. Please read the included instruc-
tions.
ENTERING THE RECORD MODE
While in the Style Play operating mode, press RECORD.
Note: LIVERPOOL STYLES cannot be edited.
The following page will appear in the display:
• Select Current Style to edit the current Style. If it is
a Factory Style, you will not be able to save it on
the original location; you will select a User Style
instead.
When editing an existing Style, the original Style
Performance is recalled, but the following parameters are reset to their default values: Drum Mapping (0), Snare & Kick Designation (Off), Program
(Original), Keyboard Range (Original). This means
that you can hear some differences between the
Style in play and the same Style being edited; for
example, resetting the Drum Mapping may lead to
some instrument’s replacement.
After editing the Style, please save it (see “Exit and
Save/Abort Style” below). Then, edit the Style Performance to adjust the track’s settings (Tempo, Volume, Pan, FX Send… see page 43 and following in
the “Style Play operating mode” chapter) and save
it by pressing the WRITE button.
• Select New Style to start from a new, empty Style.
A default Style Performance will be recalled. When
finished recording, you will save the new Style
onto a User Style location.
After recording the Style, please save it (see “Exit
and Save/Abort Style” below). Then, edit the Style
Performance to adjust the track’s settings (Tempo,
Volume, Pan, FX Send… see page 43 and following
in the “Style Play operating mode” chapter) and
save it by pressing the WRITE button.
Note: After a record or edit operation, the Style is
rewritten in memory. When you press START/STOP
there is a delay before you can actually listen to the
Style. This delay is higher with a Style containing
more MIDI events.
Note: While in Record mode, all footswitches are disabled.
LISTENING TO THE STYLE WHILE IN RECORD/EDIT MODE
While you are in Record/Edit mode, you can listen to
the selected Chord Variation or to the whole Style,
depending on the page you are in.
To select a Chord Variation, go to the Main page of
the Record/Edit mode (see “E (Style Element)” and
“CV (Chord Variation)” on page 55).
• When you are in the Quantize, Transpose, Veloc-
ity, or Delete pages, you can listen to the selected
Chord Variation. Press START/STOP to check
how it works. Press START/STOP again to stop
the playback.
• When you are in the Delete All, Copy, Style Ele-
ment Controls or Style Control pages, you can
listen to the whole Style. Press START/STOP and
play some chords to do your tests. Select any
Style Element using the control panel buttons
(VARIATION 1–4, INTRO 1–2, FILL 1–2, ENDING 1–2). Press START/STOP again to stop the
playback.
Note: When doing the above tests, the Fingered 3 Chord
Scanning mode is automatically selected.
Page 56
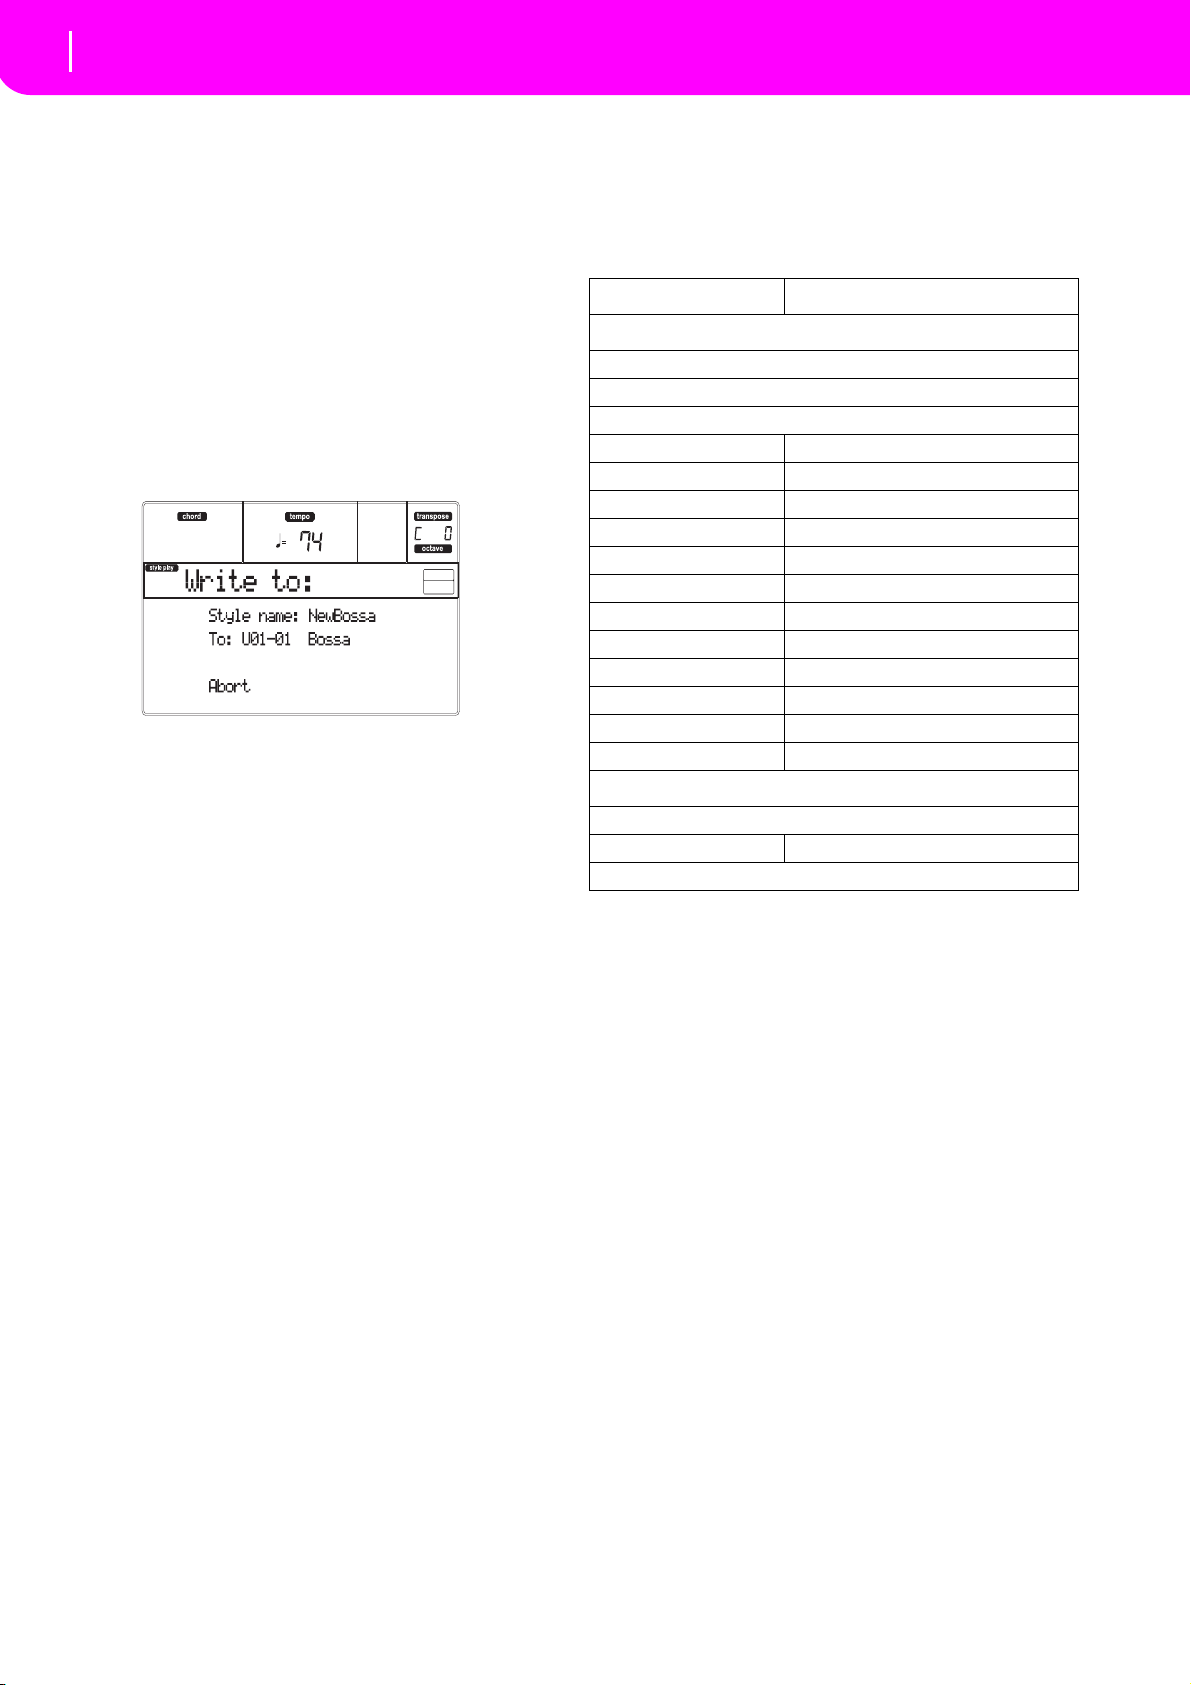
54
Style Record mode
Exit and Save/Abort Style
EXIT AND SAVE/ABORT STYLE
When finished editing, you can save your Style in
memory, or abort any change. Press WRITE or
RECORD to go to the Write page (see “The Write window” on page 54).
Note: When saving the Style in memory, Liverpool automatically compresses it to reduce its size and save memory.
Hint: Save often while recording, to avoid accidentally losing your Style.
THE WRITE WINDOW
This page appears when you press the WRITE or
RECORD button while in Record mode. Here you can
save the recorded or edited Style in memory
• To save the Style to the internal memory, press the
A or B VOLUME/VALUE buttons, then press
ENTER. The “Are you sure?” message will appear.
Press ENTER to confirm, or EXIT to abort.
• To return to the previous Style Record page, leaving all untouched and the Style unsaved, press
EXIT.
• To delete all changes to the Style, press one of the
D VOLUME/VALUE buttons to select the Abort
command. The “Are you sure message?” will
appear. Press ENTER to confirm deletion, or EXIT
to return to the Write page.
Style name
Use this parameter to change the Style’s name. Press
the right A VOLUME/VALUE button to enter editing,
and modify the name using the UP/DOWN buttons to
move the cursor, and the DIAL to select a character.
Press INSERT to insert a character at the cursor position, or DELETE to delete it
To (Style number)
Use the B VOLUME/VALUE buttons, or the TEMPO/
VALUE controls, to select a different User Style location in memory.
Note: Only User locations are available.
Abort
Select this command to delete any change to the Style.
LIST OF RECORDED EVENTS
The Style Record mode filters out some events that
may damage the right operation of the Style. Here are
the recorded events, and the most important filteredout events.
Control function CC# (Control Change Number)
Allowed
Note On
Note Off*
Pitch Bend
Modulation 1 1
Modulation 2 2
Pan 10
Expression 11
CC#12 12
CC#13 13
Damper 64
Filter Resonance 71
Low Pass Filter Cutoff 74
CC#80 80
CC#81 81
CC#82 82
Not allowed
After Touch
Volume 7
All other Control Change messages
(*) A Note Off will always be inserted at the end of
the Chord Variation.
Note: Some Control Change messages cannot be recorded
directly using Liverpool integrated controls.
FAST DELETE USING THE CONTROL PANEL BUTTONS
While in the Main page or the Style Tracks page, you
can use the control panel buttons to delete various elements of the Style:
DELETE + note
When a track is selected, you can use this key sequence
to delete a single note or a single percussive instrument.
If the Style is playing, this shortcut deletes the instrument only while the key is kept pressed, leaving all
other notes untouched within the track.
DELETE + Track
While in the Style Tracks page, you can delete a whole
track with a single shortcut. Keep the DELETE button
pressed, then press one of the VOLUME/VALUE buttons corresponding to the track to be deleted. The “Are
you sure?” message appear. Press ENTER to confirm,
EXIT to abort.
Page 57
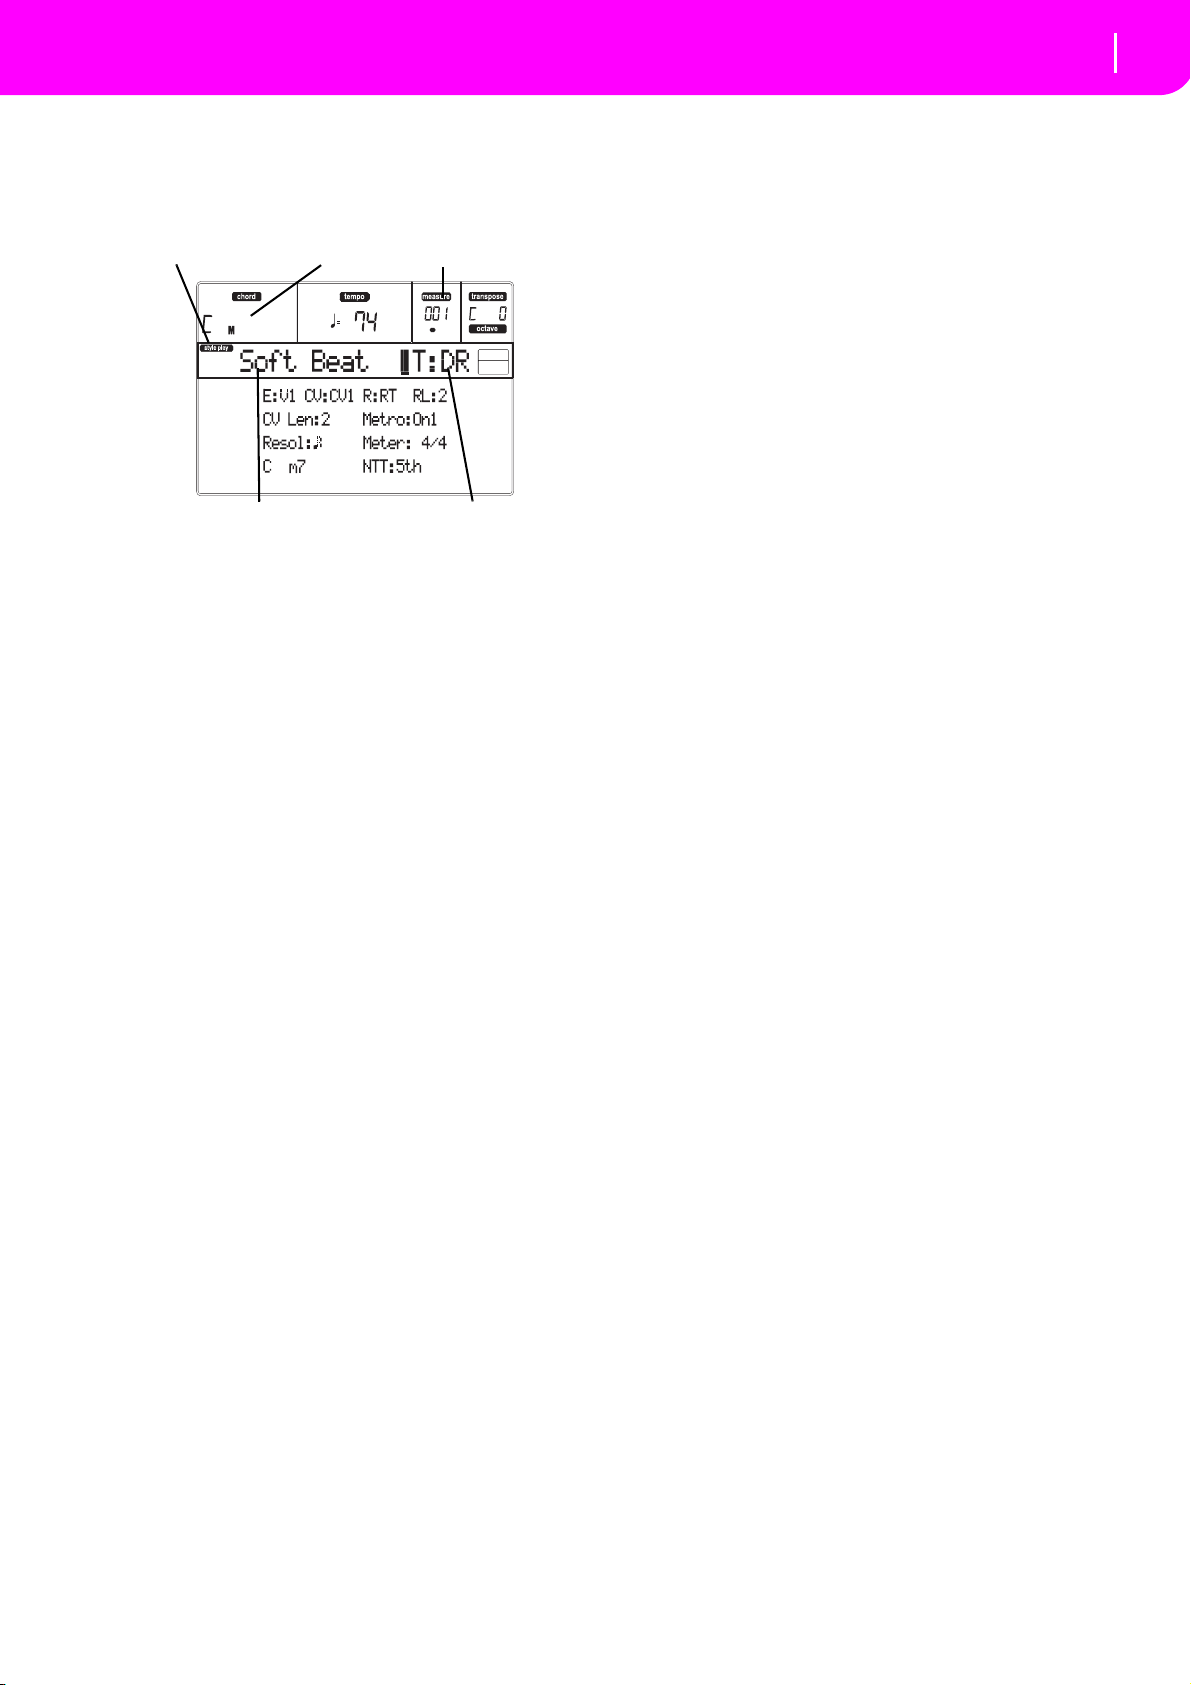
55
Style Record mode
Main page
Style Play icon
Measure counter
Track in record/editStyle name
Chord
MAIN PAGE
After pressing the RECORD button, and selected the
Style to record/edit, the Main page of the Style Record
mode appears.
Style Play icon
When this icon appears in the display, you are in Style
Play or Style Record mode.
Chord
While in the Main and Style Tracks page, this area
shows the Original Key/Chord (see “Original Key/
Chord” on page 56) for the selected track.
Style name
This is the name of the Style in record/edit.
Measure counter
This counter shows the measure in record. The measure range is specified by the “RecLen” parameter (see
“RL (Recording Length)” on page 55).
Track in record/edit
Most editing in this edit mode are executed on a single
track. While in the main page, the currently selected
track is shown on the upper right area of the display.
The abbreviations are: DR (Drums), PC (Percussion),
BS (Bass), A1…A5 (Accompaniment 1…5).
To select the track to edit, press TRACK SELECT to
jump to the Style Tacks page (see “Style Tracks page”
on page 56) and use the VOLUME/VALUE buttons to
select it.
E (Style Element)
Use the A VOLUME/VALUE buttons to select the line,
and the F-1 button to select this parameter.
This parameter lets you select the Style Element to put
in edit. Each Style Element corresponds to one of the
buttons on the control panel carrying the same name.
Note: When this parameter and the assigned value is in
small letters (e:v1), the Style Element is empty; when it is in
capitals (E:V1), it is already recorded
V1…V4 Variation 1 to Variation 4
I1…I2 Intro 1 to Intro 2
F1…F2 Fill 1 to Fill 2
E1…E2 Ending 1 to Ending 2
CV (Chord Variation)
Use the A VOLUME/VALUE buttons to select the line,
and the F-2 button to select this parameter. This parameter lets you select the Chord Variation to edit, after
selecting the Style Element this Chord Variation pertains to.
Note: When this parameter and the assigned value is in
small letters (cv:cv1), the Chord Variation is empty; when it
is in capitals (CV:CV1), it is already recorded
SE:V1…V4 You can select one of 6 Chord Variations to
edit.
SE:I1…E4 You can select one of 2 Chord Variations to
edit.
R (Recording Mode)
This parameters lets you select between the Realtime
and the Step recording modes. Use one of the E VOLUME/VALUE buttons and the F-3 function button to
select this parameter. Change its status using the E
VOLUME/VALUE buttons, or the TEMPO/VALUE
controls.
RT Realtime. This methods allows you to
record in realtime each pattern of the Style.
Stp Step Record. This method allows you to
enter the events one at a time. See “Style
Record procedure” below for more information.
RL (Recording Length)
This parameter sets the recording length (in measures) of
the selected track. Its value is always equal to, or a divider
of, the Chord Variation Length (see next parameter).
This is not the total length of the Chord Variation, but
just of the current track. For example, you may have a
Chord Variation eight measures long, with a drum pattern repeating each two measures. If so, set the CV Len
parameter to “8”, and the RecLen parameter to “2”
before starting recording the Drum track. When saving
the Style, or executing any edit operation on the Style,
the 2-measures pattern will be extended to the full 8measures length of the Chord Variation.
Warning: If you assign CVLen a value lower than
RecLen, the value of RecLen is not immediately
updated in the display. Therefore, you are still free of
changing the value of CVLen, before the measures
exceeding its value are deleted (see warning in “CVLen
(Chord Variation Length)” below).
However, if you press START/STOP to begin recording,
the real RecLen value is changed to the new one, even if
the display still shows the old value.
For example, you may have CVLen = 4 and RecLen = 4.
If you set CVLen to 2, and press START/STOP to begin
recording, RecLen is still shown as 4, but it is in reality
set to 2, and recording will cycle for just 2 measures.
After you press START/STOP to stop recording,
RecLen is updated to 2, and all measures after the second measure are deleted.
CVLen (Chord Variation Length)
This parameter sets the total length (in measures) for
the selected Chord Variation. When playing a Style,
this will be the length of the accompaniment pattern to
be cycled, when the chord corresponding to the Chord
Variation is recognized on the keyboard.
Warning: If you reduce the Chord Variation Length
after recording, any measure after the selected length
will be deleted. Be very careful when setting the CVLen
to a lower value after recording!
Page 58
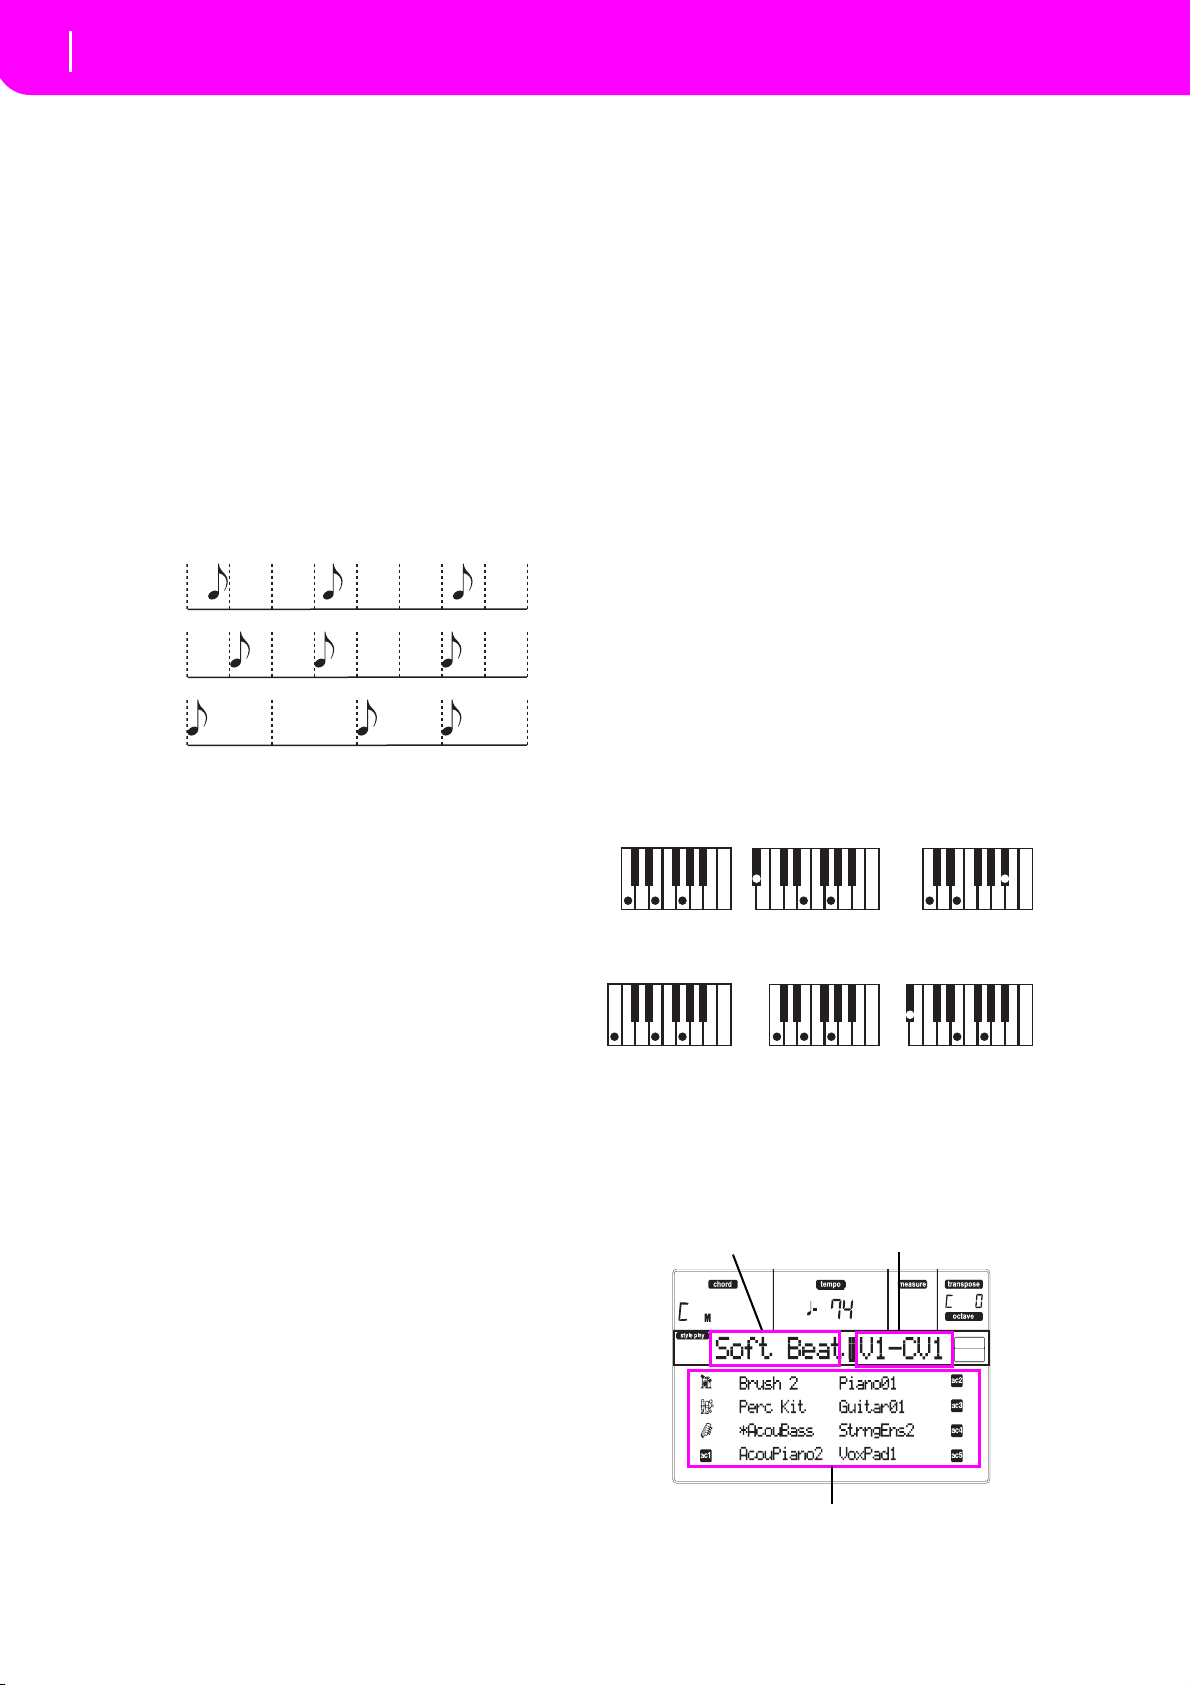
56
Style Record mode
Style Tracks page
No quanti-
zation
1/16
1/8
As recorded with
NTT = Root or 5th
(Key/Chord = CMaj)
When you play a CM7
with NTT = Root
When you play a CM7
with NTT = 5th
As recorded with
NTT = i-Series
(Key/Chord = CM7)
When you play a CMaj
with NTT = i-Series
When you play a CM7
with NTT = i-Series
Style in record/edit
Style Element-Chord Variation in
record/edit
Style tracks
Metro (Metronome)
This is the metronome heard during recording.
Off No metronome click will be heard during
recording. A one-bar precount will be
played before starting recording.
On1 Metronome on, with a one-bar precount
before starting recording.
On2 Metronome on, with a two-bar precount
before starting recording.
Resol (Resolution)
This parameter sets the quantization during recording.
(1/32)… (1/8)
Grid resolution, in musical values. For
example, when you select 1/16, all notes
are moved to the nearest 1/16 division.
When you select 1/8, all notes are moved
to the nearest 1/8 division.
Meter
This is the meter (time signature) of the Style. You can
edit this parameter only when the Style is empty, i.e.
before you begin recording anything.
Original Key/Chord
This is the track’s original key and chord. Use the D
VOLUME/VALUE buttons to select the line, and the F1 and F-2 buttons to switch from the key/chord name
and the key/chord type (Maj, min…).
When in Style Play mode, this chord will be played back
exactly as it was recorded, without any NTT processing
(see below). To record just one Chord Variation for a
Style Element, the suggested original key/chord is
“maj7”. Be very careful to play the 7th+ note (i.e., with a
“Cmaj7th” key/chord, the B), to avoid the lack of notes,
or a bad NTT conversion when playing different chords.
Note: To conform to Korg specifications, it is advisable to
record both the “Major” and “minor” Chord Variations for
the Intro 1 and Ending 1 Style Elements.
When you select a track, the original key/chord
assigned to the selected track will be activated. All
recorded tracks will play back on that key/chord. For
example, if the original key/chord for the Acc1 track is
A7th, when selecting the Acc1 tracks all the remaining
tracks will play according to the A7th key/chord.
In the above example, you will record the Acc1 track in
the AMajor key, with notes that will comply with the
A7th chord. This is the pattern that will be recalled
exactly as it was recorded, when playing an A7th chord.
Copying the Key/Chord value to all other tracks of the
same Chord Variation.
While in this page, you can keep
the SHIFT button pressed, while pressing one of the [D]
VOLUME/ VALUE buttons, to copy the Key of the currently selected track to all other tracks of the same
Chord Variation. This function is useful to speed-up pattern programming, and to avoid having different tracks
in different keys within the same Chord Variation.
NTT
The Note Transposition Table (NTT) determines how
the arranger will transpose pattern notes, when playing a chord that does not exactly match to the original
chord of a Chord Variation. For example, if you only
recorded a Chord Variation for the CMaj chord, when a
CMaj7 is recognized on the keyboard the arranger
must transpose some notes to create the missing 7th.
Note: To conform to Korg specifications, it is advisable to set
the NTT to “No Transpose” on the Intro 1 and Ending 1.
Root The root note (in CMaj = C) is transposed
to the missing notes.
5th The 5th note (in CMaj = G) is transposed to
the missing notes.
i-Series All original patterns must be programmed
on the “Maj7” or “min7” chords. When
loading old Korg i-Series instruments, this
option is automatically selected.
No Transp No transposition applied. The pattern will
always play as recorded. This is the standard setting of Intro 1 and Ending 1 in
Korg’s original Styles.
STYLE TRACKS PAGE
While in the main Style Record page, press TRACK
SELECT to jump to this page. Here you can see and
select any Style track.
Page 59
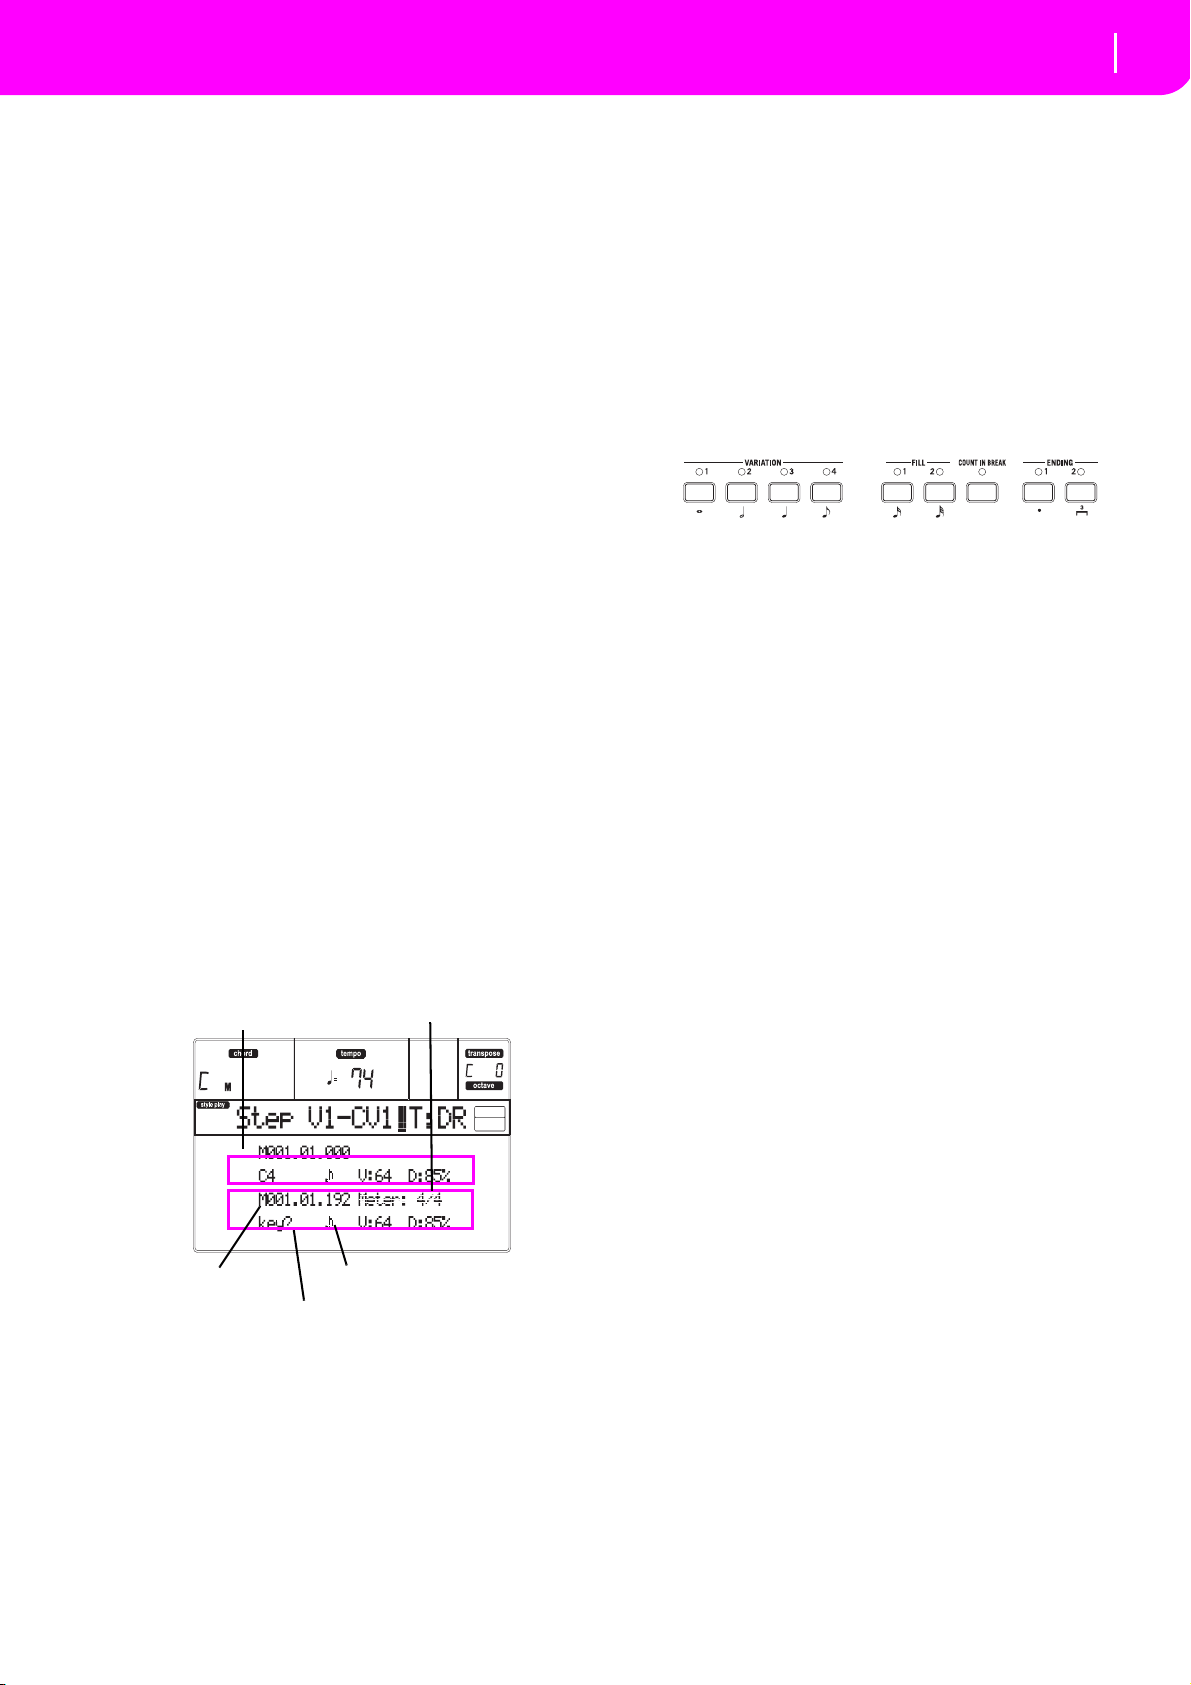
57
Style Record mode
Step Record page
(a)
(b)
Previous event
Event to be inserted
Current position
Waiting for a keystroke…
Step value
Program name
Select a track using the VOLUME/VALUE buttons.
Select a Program using the PROGRAM/PERFORMANCE section.
While in this page, you can set the track’s volume using
the VOLUME/VALUE buttons. Since the track’s volume is memorized in the Style Performance and not in
the pattern, this setting will not be recorded and saved.
However, this will allow you to play back louder any
reference track, or the track you are recording.
Track status
When in the Style Tracks page, each track can be in one
of three status.
Play (Visible status icon). This status is available
only for non-selected tracks. When in play,
a track can play back the recorded pattern.
Mute (Hidden status icon). When in this status,
you can play the track on the keyboard,
but you can’t record on it. This is useful to
do some preliminary test, before actually
start recording.
To set a track in mute, first select it, then
press both corresponding VOLUME/
VALUE buttons to hide the status icon. To
set the track in record again, press again
the corresponding VOLUME/VALUE buttons.
Record (Flashing status icon). When in this status,
the track is ready to record. Just select a
track to set it in record status.
STEP RECORD PAGE
Access this page from the Main page of the Style
Record mode, by selecting the “Stp” recording mode
(“R” parameter), and pressing START/STOP.
Meter
Meter of the current measure. This parameter can’t be
edited. You can set the Meter in the Main page of the
Style Record mode, before actually starting recording
(see step 6 on page 58 for more information).
key?
This is a prompt, asking for a note or chord to be
played on the keyboard, to enter an event on the current step.
Step value
Length of the event to be inserted. Use the NOTE
VALUE buttons, on the lower left area of the control
panel, to change this value.
… Note value.
Dot (.) Augments the selected note by one half of
its value.
Triplet (3) Makes the selected note a triplet note.
V (Velocity)
Set this parameter before entering a note or chord. This
will be the playing strength (i.e., velocity value) of the
event to be inserted.
KBD Keyboard. You can select this parameter,
by turning all counter-clockwise the dial.
When this option is selected, the playing
strength of the played note is recognized
and recorded.
1…127 Velocity value. The event will be inserted
with this velocity value, and the actual
playing strength of the note played on the
keyboard will be ignored.
D (Duration)
Relative duration of the inserted note. The percentage
is always referred to the step value.
50% Staccato.
85% Ordinary articulation.
100% Legato.
(a) section
Previously inserted event. You may delete this event,
and set it in edit again, by pressing the < button.
(b) section
Event to be inserted. See the following parameters for
information on each element of this section.
M (Measure)
This is the position of the event (note, rest or chord) to
be inserted.
Buttons used in Step Record mode
TIE button
Ties the note to be inserted to the previous note.
REST button
Inserts a rest.
NOTE VALUE buttons
Select the step value.
START/STOP button
Exits the Step Record mode.
< (Previous step)
Goes to the previous step, deleting the inserted step.
>> (Fast Forward)
Goes to the next measure, and fill the remaining space
with rests.
Page 60
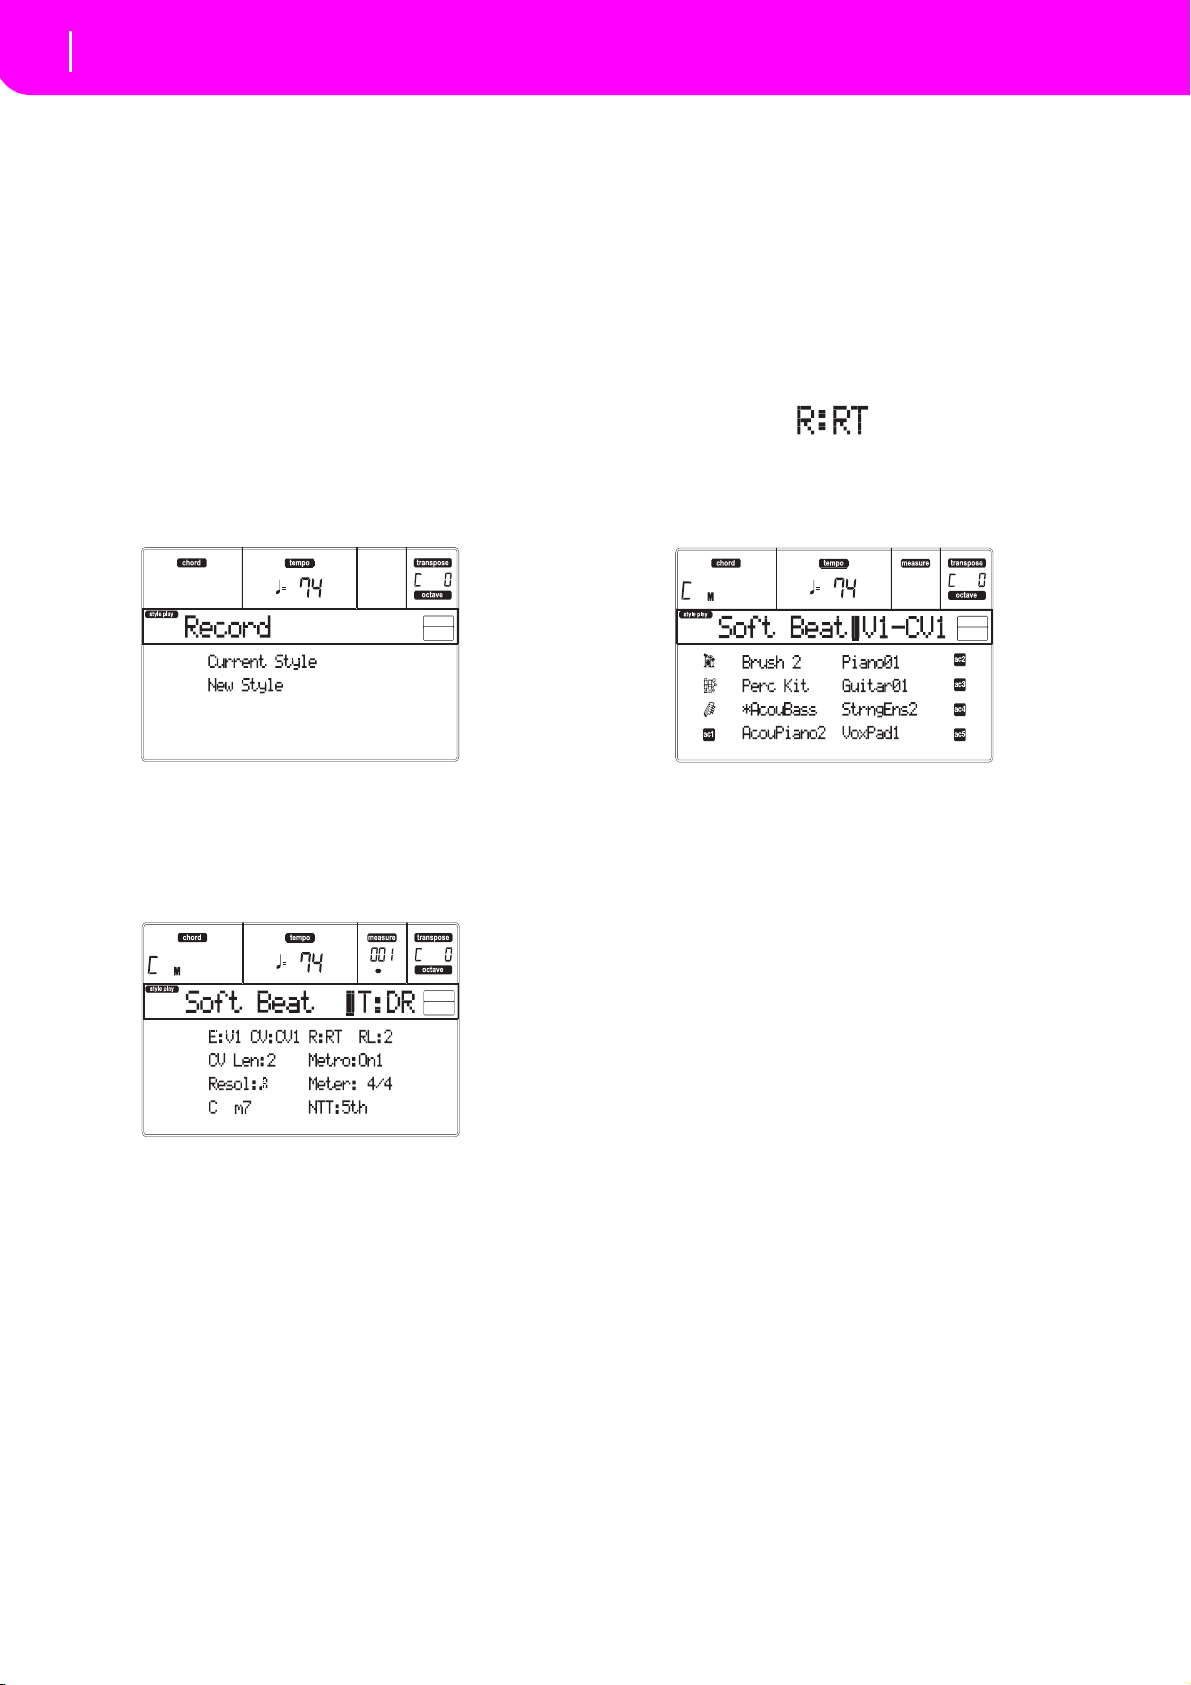
58
Style Record mode
Style Record procedure
STYLE RECORD PROCEDURE
There are two different methods for recording a Style:
Realtime and Step.
• Realtime Recording allows you to record Style patterns in realtime.
•
Step Recording allows you to create a new Style by
entering the single notes or chords in each track. This
is very useful when transcribing an existing score, or
needing a higher grade of detail, and is particularly
suitable to create drum and percussion tracks.
Preparing to record
1. If you like to edit an existing Style, select that Style.
2. Press RECORD to enter the Style Record mode.
You are prompted to select either the Current
Style, or a New Style.
8. At this point, if you want to do a Realtime Recording go on reading “Realtime Record procedure”
below. Otherwise, if you prefer to do a Step Record,
jump to “Step Record procedure” on page 59.
Realtime Record procedure
1. When still in the Main page of the Style Record
mode, press one of the E VOLUME/VALUE buttons, to select the “R” parameter. Use these buttons, or the TEMPO/VALUE controls, to select the
“RT” (Realtime) recording mode.
2. Press TRK SELECT to switch to the Style Tracks
page. Here you can assign the right Program to
each Style track. (For more details, see “Style
Tracks page” on page 56).
Select “Current Style” if you want to edit the current Style, or make a new Style starting from an
existing one. Select “New Style” if you want to
start from scratch with an empty Style.
3. After you select your preferred option, the Main
page of the Style Record mode will appear.
4. Use the A VOLUME/VALUE buttons, and the F-1
and F-2 function keys to select the E (Style Element) and CV (Chord Variation) parameter.
Note: For more information on the Style Elements and
Chord Variations, and the Style structure in general, see
“The Style’s structure” on page 52.
5. Use the RL (Recording Length) parameter to set
the length (in measures) of the pattern to steprecord. Select this parameter using the E VOLUME/VALUE buttons and the F-4 function button.
Use the TEMPO/VALUE controls to set the value.
6. Use the Meter parameter to set the Style’s meter.
You can edit this parameter only if you selected the
New Style option when entering the Record mode.
7. Set the tempo. Keep the SHIFT button pressed,
and use the TEMPO/VALUE controls to change the
tempo.
3. If you like, you can set the tempo again from this
page: just use the TEMPO/VALUE controls.
4. Assign a Program to each track, by using the PROGRAM/PERFORMANCE section.
5. If needed, set the Octave Transpose for each track.
Note: The Octave Transpose will affect only the notes
coming from the keyboard, and not from the arranger.
6. Select the track to put in record. Its status icon will
begin flashing.
Note: When entering the Record mode, the last
selected track is already in record. When you press
START/STOP after entering the Record mode, you
can immediately start recording.
If you like, you can try your part before recording:
• Set the track in mute, by pressing both corresponding VOLUME/VALUE buttons; the status
icon disappears.
• Press START/STOP to play back the other tracks,
if already recorded, and practice on the keyboard.
• When you have finished practicing, press
START/STOP to stop the arranger, and unmute the
track by pressing both VOLUME/VALUE buttons;
the track will be in record again.
7. While the status icon is flashing, press START/
STOP to begin recording. Depending on the
“Metro” (metronome) option you selected, a 1- or
2-bars precount may play before the recording
actually begins. When it begins, play freely. The
pattern will last for some measures, according to
the RecLen value, then restart.
Since the recording will happen in overdub, you
can add notes on any following passage. This is
Page 61
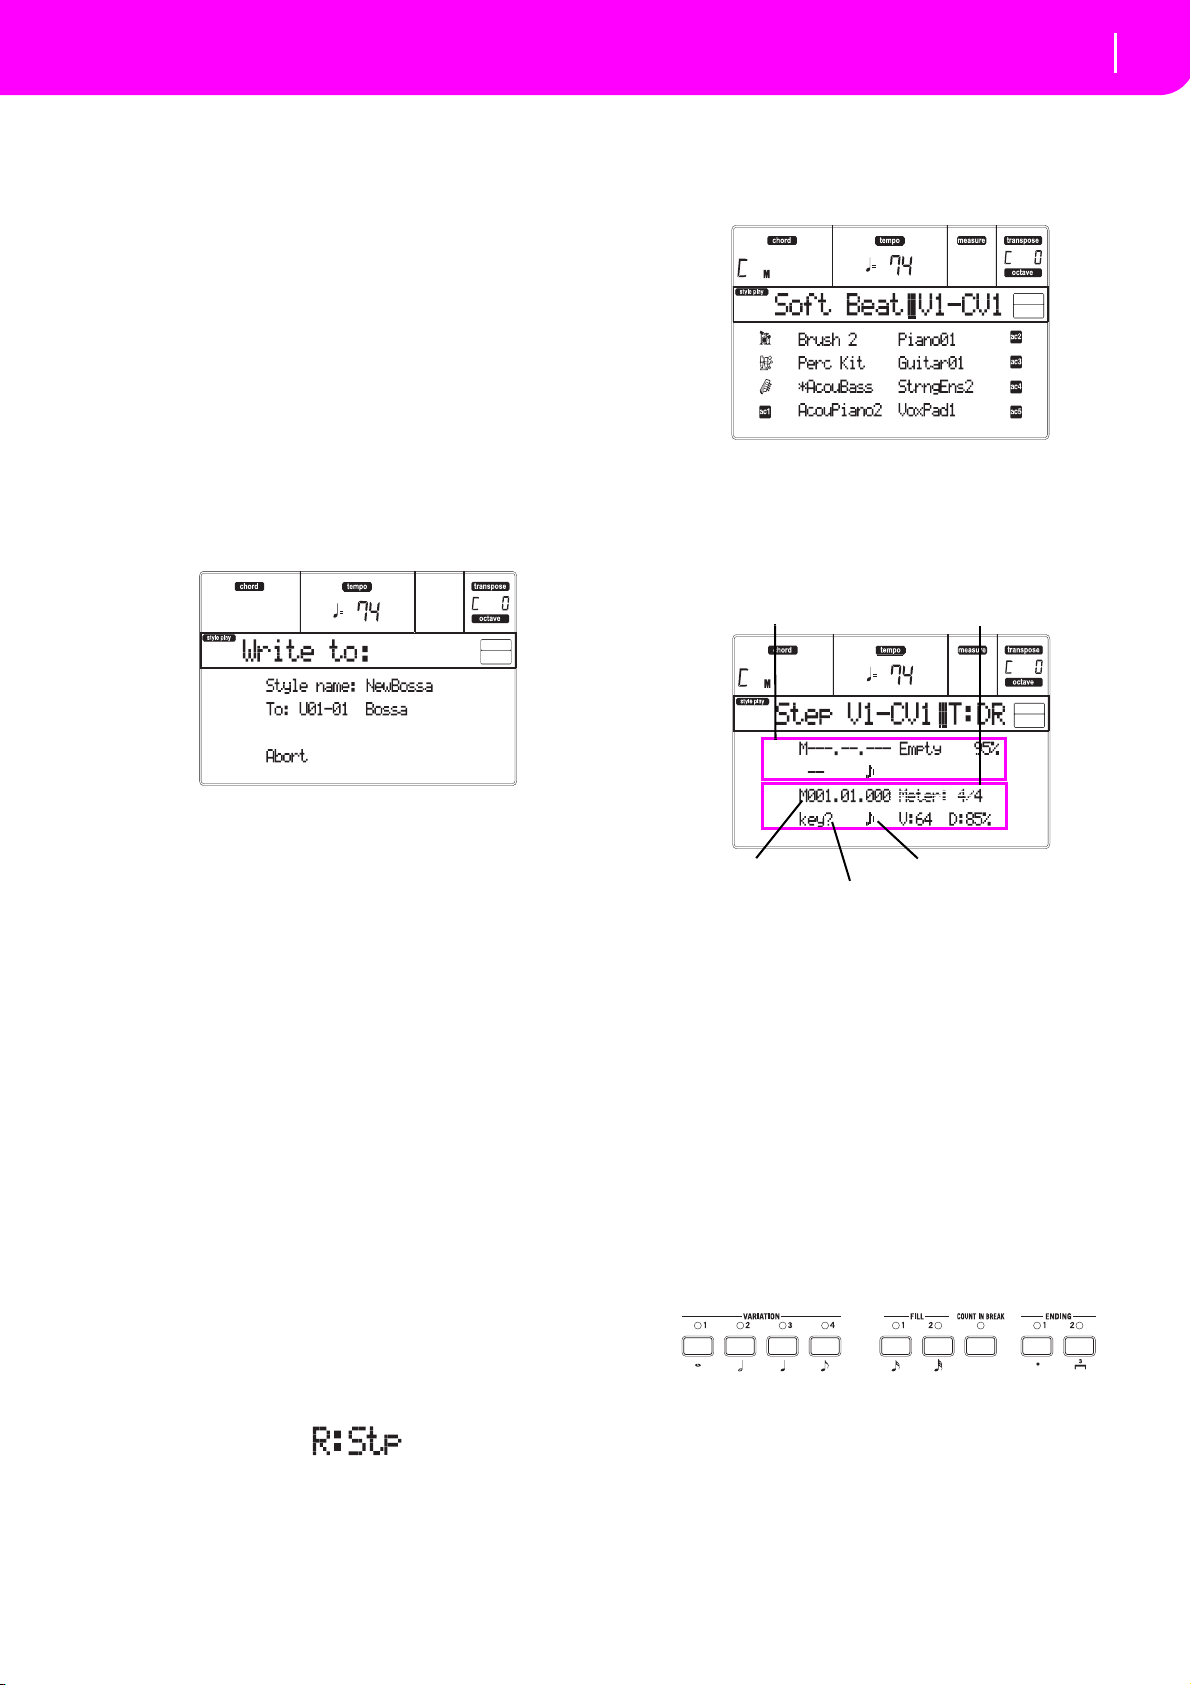
59
Style Record mode
Style Record procedure
(a)
(b)
Previous event
Event to be inserted
Current position
Waiting for a keystroke…
Step value
very useful to record different percussive instruments at any cycle on a Drum or Percussion track.
Note: While recording, the track’s Keyboard Range
(see page 68) is ignored, and the track can play over the
whole keyboard range. The Local parameter (see
“Local” on page 128) is also automatically set to On, to
allow playing on the keyboard.
8. When finished recording, press START/STOP to
stop the arranger. Select a different track, and go
on recording the whole Chord Variation.
Note: You can select a different track only when the
arranger is not running.
9. When finished recording the Chord Variation,
select a different Chord Variation or Style Element
to go on recording the whole Style.
10. When finished recording the new Style, press
WRITE or RECORD to save it in memory. The
Write page will appear:
2. Press TRK SELECT to switch to the Style Tracks
page. Here you can assign the right Program to
each Style track. (For more details, see “Style
Tracks page” on page 56).
3. Assign a Program to each track, by using the PROGRAM/PERFORMANCE section.
4. Press START/STOP to turn on its LED and enter
the Step Record page. (See “Step Record page” on
page 57 for more information on each parameter of
this page).
• To change the Style’s name: press the right A
VOLUME/VALUE button to enter editing, and
modify the name using the UP/DOWN buttons to
move the cursor, and the DIAL to select a character. Press INSERT to insert a character at the cursor
position, or DELETE to delete it.
• To select a different location in memory, press
one of the B VOLUME/VALUE buttons, then select
a location with these buttons or the TEMPO/
VALUE controls.
Press ENTER to confirm, or one of the D (Abort)
VOLUME/VALUE buttons to abort the save. The
“Are you sure?” message will appear in the display.
Press ENTER to confirm, EXIT to abort. After pressing ENTER, you will exit from the Record mode.
If you press EXIT while in the Write page, you will
go back to the previous Style Record page, without
any change.
Step Record procedure
1. When still in the Main page of the Style Record
mode, press one of the E VOLUME/VALUE buttons, to select the “R” parameter. Use these buttons, or the TEMPO/VALUE controls, to select the
“Stp” recording mode.
The first two lines (a) are the latest inserted event.
The last two lines (b) are the event currently in
edit, ready to be inserted.
The “Empty” event marks the beginning of the pattern, when there are no events inserted. It is automatically inserted when entering the Record mode.
It will be removed when an event is inserted.
5. The “Maaa.bb.ccc” parameter in (b) is the current
position. This is the place where the note in edit
will be inserted.
• If you don’t want to insert a note at this position, insert a rest instead, as shown in step 7.
• To jump to the next measure, filling the remaining beats with rests, press the >> button.
6. To change the step value, use the NOTE VALUE
buttons, on the lower left area of the control panel.
7. Insert a note, rest or chord at the current position.
• To insert a single note, just play it on the keyboard. The inserted note length will match the step
length. You may change the velocity and relative
duration of the note, by editing the V (Velocity)
and D (Duration) parameters. See “V (Velocity)”
and “D (Duration)” on page 57.
Page 62
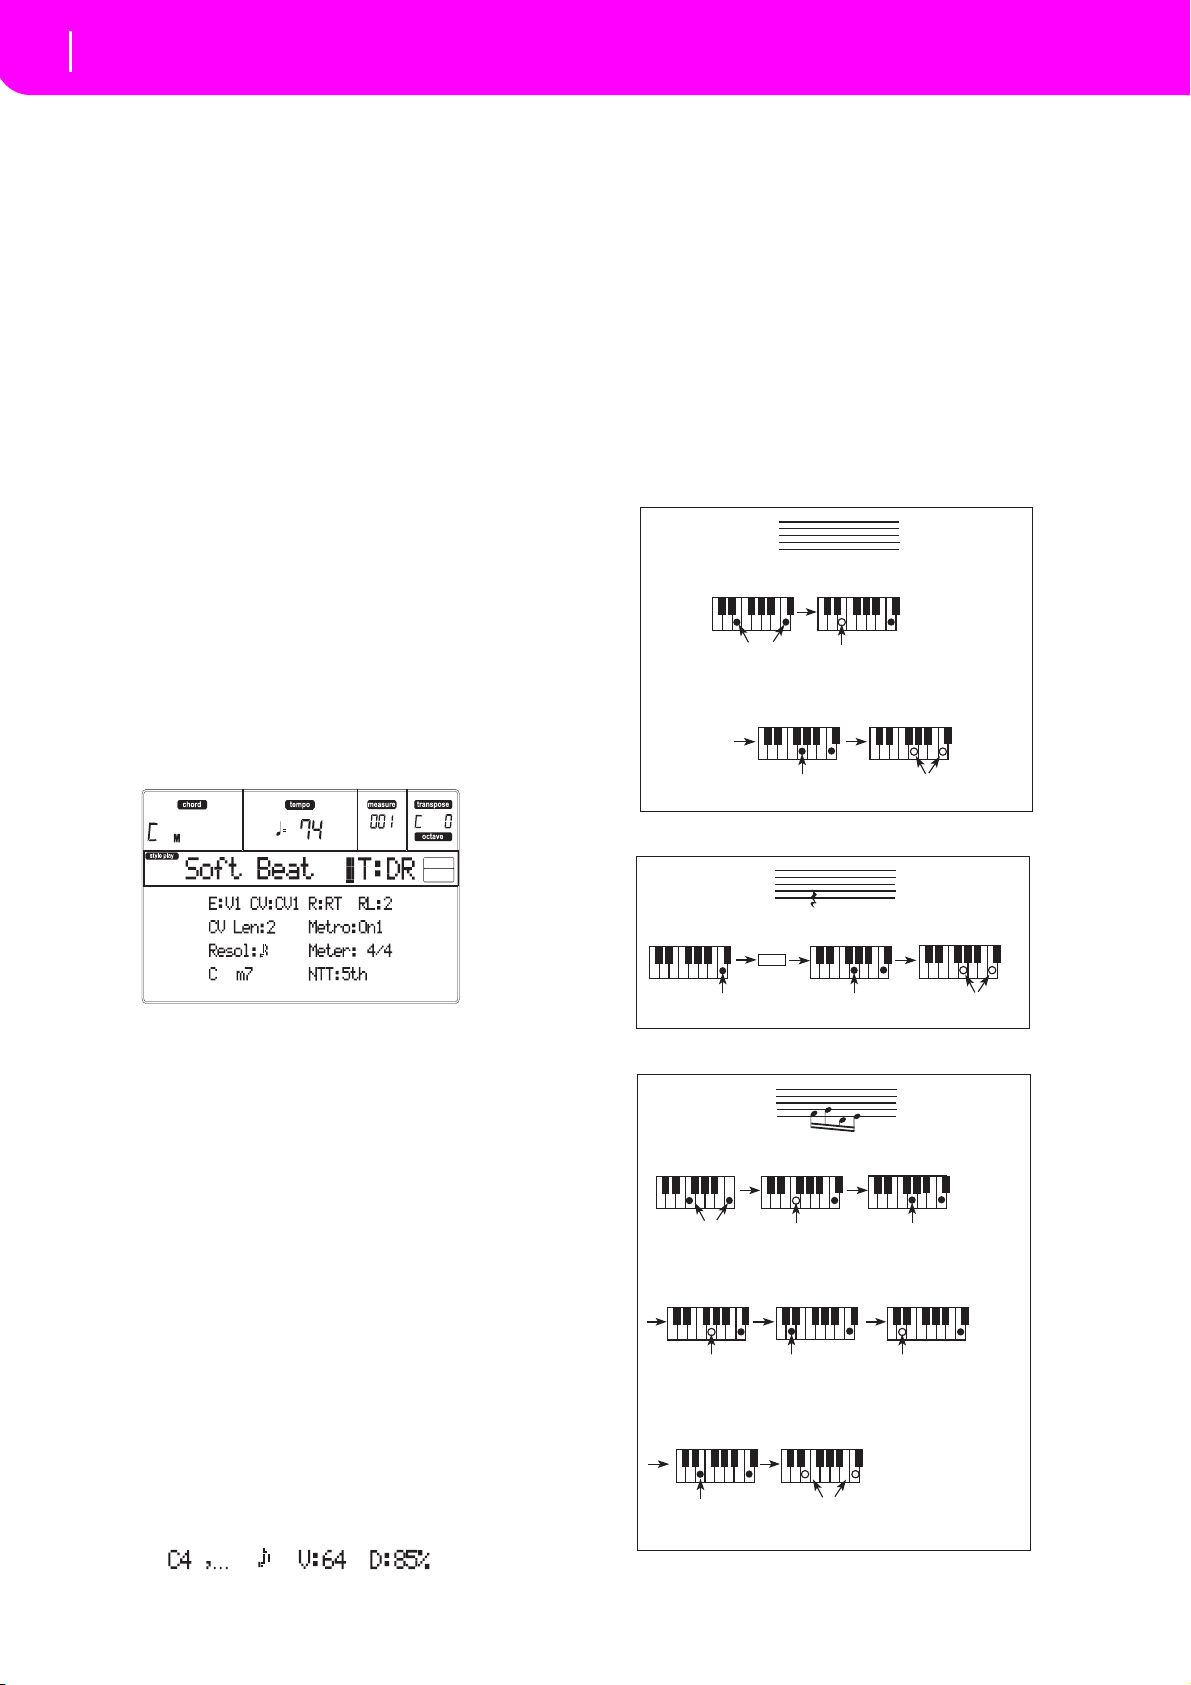
60
Style Record mode
Style Record procedure
Step Time =
Step Time =
On
Press E and C
On
Press G
Off
Off
Release G and C
Release E (continue holding C)
Step Time =
Step Time =
On
Press C
On
Press G (continue holding C)
Off
Release G and C
Tie
Step Time =
Step Time =
Step Time =
Press F and C
Press G
(continue holding C)
OffOn On
Release F
(continue holding C)
Step Time =
Step Time =
Press E
(continue holding C)
OffOn
Release E and C
Step Time =
Step Time =
Press D
(continue holding C)
Off On
Release G
(continue holding C)
Step Time =
Off
Release D
(continue holding C)
• To insert a rest, just press the REST button. Its
length will match the step value.
• To tie the note to be inserted to the previous one,
press the TIE button. A note will be inserted, tied
to the previous one, with exactly the same name.
You don’t need to play it on the keyboard again.
• To insert a chord or a second voice, see “Chords
and second voices in Step Record mode” below.
8. After inserting a new event, you may go back by
pressing the < button. This will delete the previously inserted event, and set the step in edit again.
9. When the end of the pattern is reached, the “End
Loop” (End of Loop) event is shown in the first
two lines of the display (a), and the recording
restarts from the “M001.01.000” position. Any note
exceeding the pattern length, inserted at its end,
will be reduced to fit the total length of the pattern.
At this point, you may go on, inserting new events
in overdub mode (the previously inserted events
will not be deleted). This is very useful when
recording a drum or percussion track, where you
may want to record the bass drum on a first cycle,
the snare drum on the second cycle, and the hi-hat
and cymbals during the following cycles.
10. When finished recording, press START/STOP to
turn off its LED. The Main page of the Style Record
mode appears.
Inserting a chord with notes with different velocity
values. You can make the upper or lower note of a
chord, for example, louder than the remaining ones, to
make the most important note emerge from the chord.
Here is how to insert a three-note chord:
1. Edit the Velocity value of the first note.
2. Press the first note and keep it pressed.
3. Edit the Velocity value of the second note.
4. Press the second note and keep it pressed.
5. Edit the Velocity value of the third note.
4. Press the third note, then release all notes.
Inserting a second voice. You can inser t pass a ges
where one note is kept pressed, and another voice
moves freely.
Ex. 1:
When exiting, the “RT” recording mode is automatically selected. You m a y press S TART/STOP t o
listen to the Style. Press START/STOP again to stop
the playback.
To enter the Step Record mode again, select the
“Stp” recording mode, and press START/STOP.
11. From the Main page of the Style Record mode,
press RECORD to exit the Record mode. You will
be prompted to assign a new name to the Style,
and select a memory location where to save it. See
“The Write window” on page 54 for information
on how to save a Style.
Chords and second voices in Step Record mode
With Liverpool, you are not obliged to insert single
notes in a track. There are several ways to insert chords
and double voices. Lets look at some.
Inserting a chord. When the “key?” prompt appears in
the display, play a chord instead of a single note. The
event’s name will be the first note of the chord you
pressed, followed by the “…” marking.
Ex.2:
Ex.3:
Page 63
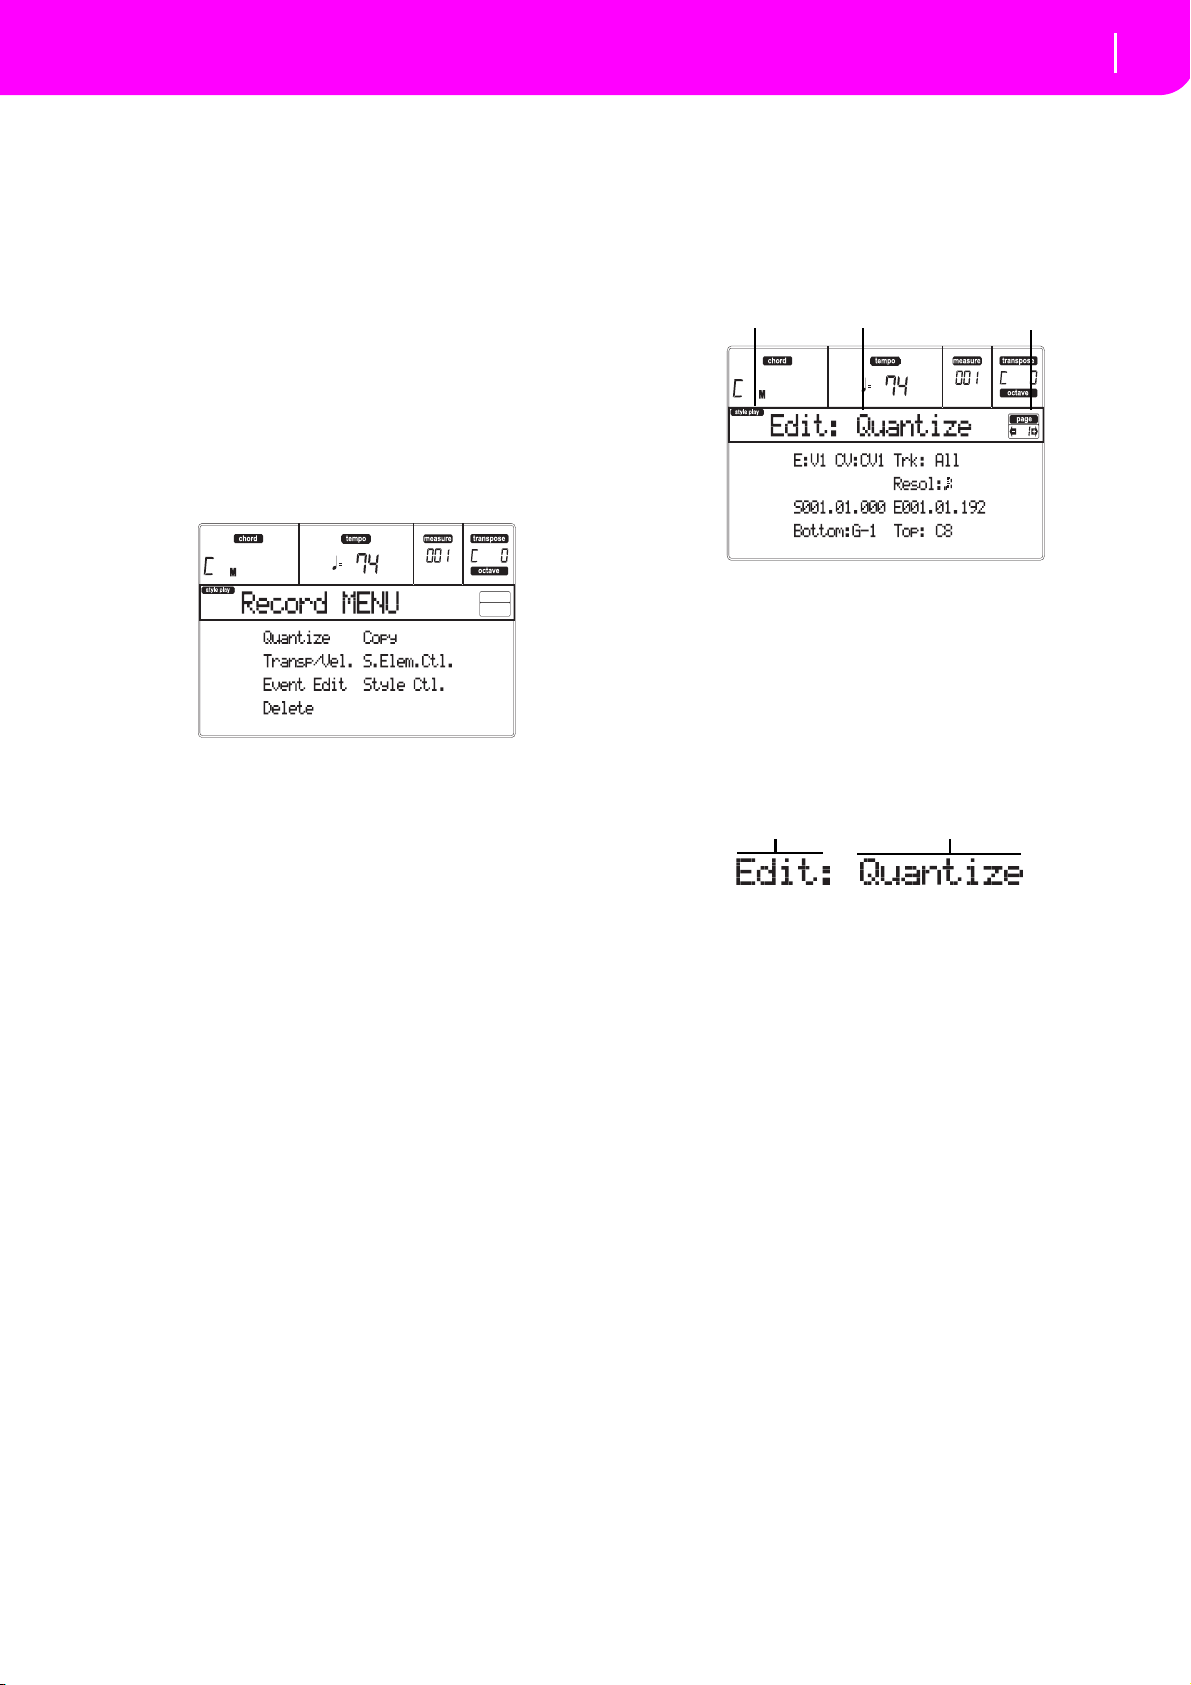
61
Style Record mode
Menu
Style Play icon
Page header Page number
Section name
Page name
MENU
From any page of the Style Record mode, press
MENU to open the Style Record edit menu. This
menu gives access to the various Style Record edit
sections.
Note: While the Style is in play, you cannot access the Edit
section pages from the Main page and the Style Tracks page
(see page 55 and page 56). Stop the playback before pressing
MENU.
When in the menu, select an edit section using the
VOLUME/VALUE (A–H) buttons, select an edit
page using PAGE +, or press EXIT to exit the menu.
When in an edit page, press EXIT to go back to the
main page (or the Style Tracks page) of the Style
Record mode.
Each item in this menu corresponds to an edit section. Each edit section groups various edit pages.
Note: When switching from the Edit section pages (Quantize, Transpose, Velocity, Delete) to the other pages, or viceversa, the Style (if in play) is automatically stopped.
EDIT PAGE STRUCTURE
Select an edit section from the Menu, and/or use the
PAGE b ut t ons to reach the desired page.
Press EXIT to go back to the main page of the Style
Record mode.
All edit pages share the same structure.
Style Play icon
When on, this icon indicates that the instrument is in
Style Play mode.
Page header
The header shows the name of the current edit page.
As a general rule, the header is divided in a first word,
identifying the section name (e.g., “Edit:Quantize” is
an “Edit” section page), and a second word, referring
to the page name (e.g. “Quantize”).
Page number
This area shows the current page number.
A–H
Each pair of VOLUME/VALUE (A–H) buttons selects a
different parameter of command, depending on the
edit page. After selecting a parameter, you can change
its value by pressing one of the two buttons in a pair, or
using the TEMPO/VALUE controls.
Page 64
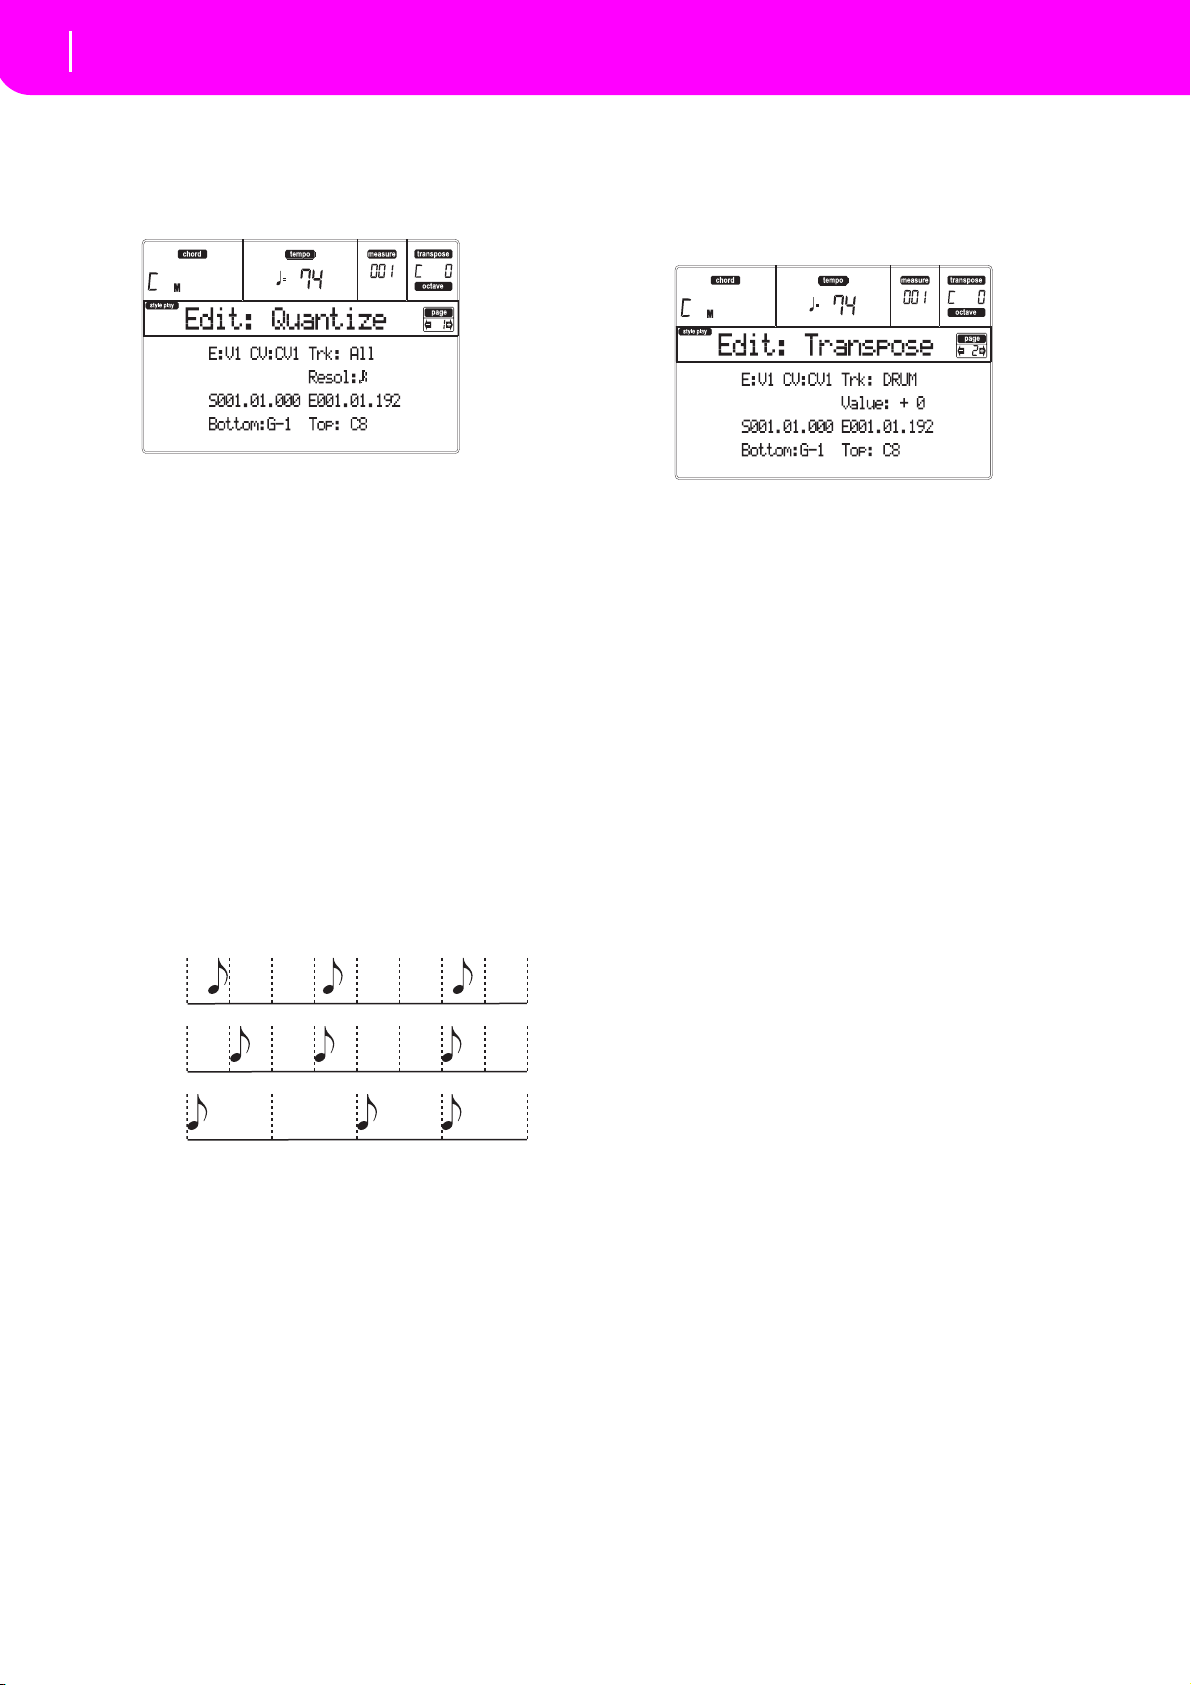
62
Style Record mode
Page 1 - Edit: Quantize
No quanti-
zation
1/8
1/4
PAGE 1 - EDIT: QUANTIZE
The quantize function may be used to correct any
rhythm error after recording, or to give the pattern a
“groovy” feeling.
After setting the various parameters, press ENTER to
execute. The “Are you sure?” message will appear.
Press ENTER to confirm, EXIT to abort.
E/CV (Style Element/Chord Variation)
(Non editable) These read-only parameters show which
Style Element and Chord Variation are currently
selected for editing. See the Main page “E (Style Element)” and “CV (Chord Variation)” parameters on
page 55 for information on selecting a different Style
Element and Chord Variation.
Trk (Tra ck)
Use this parameter to select a track.
All All tracks selected.
Drum…Acc5Selected track.
Resol (Resolution)
This parameter sets the quantization after recording.
For example, when you select 1/8a, all notes are moved
to the nearest 1/8 division. When you select 1/4, all
notes are moved to the nearest 1/4 division.
(1/32)… (1/4)
Grid resolution, in musical values. An “a”
after the value means no swing. A “b…f”
after the value means swing-quantization.
S / E (Start/End)
Use these parameters to set the starting (S) and ending
(E) points of the range to quantize.
If a Chord Variation is four measures long, and you
want to select it all, the Start will be positioned at
1.01.000, and the End at 5.01.000.
Bottom / Top
Use these parameters to set the bottom and top of the
keyboard range to quantize. If you select the same note
as the Bottom and Top parameters, you can select a single percussive instrument in a Drum or Percussion track.
Note: These parameters are available only when a Drum or
Percussion track is selected.
PAGE 2 - EDIT: TRANSPOSE
In this page you can transpose the selected track(s).
Note: After transposing, please don’t forget to readjust the
“Original Key/Chord” parameter in the Style Record page
(see page 56).
After setting the various parameters, press ENTER to
execute. The “Are you sure?” message will appear.
Press ENTER to confirm, EXIT to abort.
E/CV (Style Element/Chord Variation)
(Non editable) These read-only parameters show which
Style Element and Chord Variation are currently
selected for editing. See the Main page “E (Style Element)” and “CV (Chord Variation)” parameters on
page 55 for information on selecting a different Style
Element and Chord Variation.
Trk (Track)
Use this parameter to select a track.
All All tracks selected, apart for tracks set in
Drum mode (like the Drum and Percussion tracks). The whole selected Chord
Variation will be transposed.
Drum…Acc5Single selected track.
Value
Transpose value (±127 semitones).
S / E (Start/End)
Use these parameters to set the starting (S) and ending
(E) points of the range to be transposed.
If a Chord Variation is four measures long, and you
want to select it all, the Start will be positioned at
1.01.000, and the End at 5.01.000.
Bottom / Top
Use these parameters to set the bottom and top of the
keyboard range to be transposed. If you select the same
note as the Bottom and Top parameters, you can select
a single percussive instrument in a Drum or Percussion
track. Since in a Drum Kit each instrument is assigned
to a different note of the scale, transposing a percussive
instrument means assigning the part to a different
instrument.
Note: These parameters are available only when a Drum or
Percussion track is selected.
Page 65
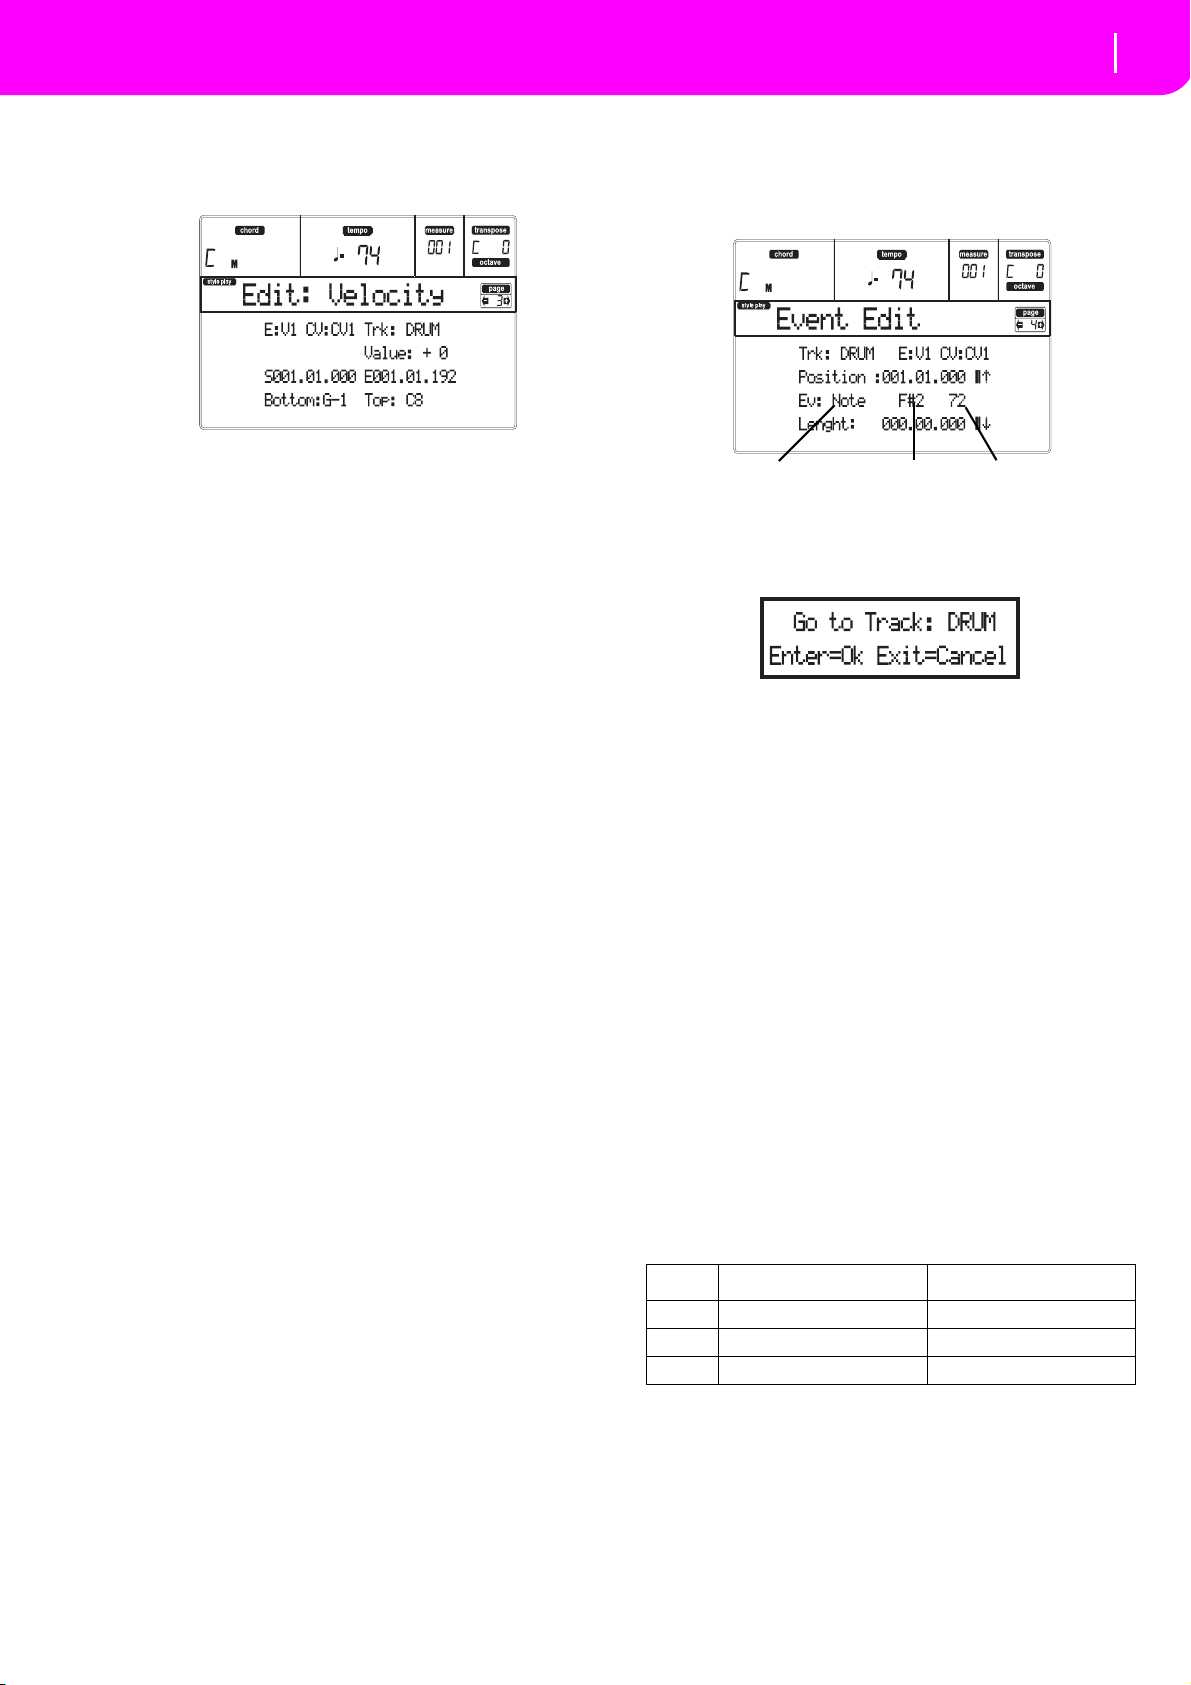
63
Style Record mode
Page 3 - Edit: Velocity
Event Type First value Second value
PAGE 3 - EDIT: VELOCITY
In this page you can change the velocity (dynamics)
value of notes in the selected track.
After setting the various parameters, press ENTER to
execute. The “Are you sure?” message will appear.
Press ENTER to confirm, EXIT to abort.
E/CV (Style Element/Chord Variation)
(Non editable) These read-only parameters show which
Style Element and Chord Variation are currently
selected for editing. See the Main page “E (Style Element)” and “CV (Chord Variation)” parameters on
page 55 for information on selecting a different Style
Element and Chord Variation.
Trk (Track)
Use this parameter to select a track.
All All tracks selected. The velocity for all
notes of the whole selected Chord Variation will be changed.
Drum…Acc5Selected track.
Val ue
Velocity change value (±127).
S / E (Start/End)
Use these parameters to set the starting (S) and ending
(E) points of the range to be modified.
If a Chord Variation is four measures long, and you
want to select it all, the Start will be positioned at
1.01.000, and the End at 5.01.000.
Bottom / Top
Use these parameters to set the bottom and top of the
keyboard range to be modified. If you select the same
note as the Bottom and Top parameters, you can select
a single percussive instrument in a Drum or Percussion
track.
Note: These parameters are available only when a Drum or
Percussion track is selected.
PAGE 4 - EVENT EDIT
The Event Edit page allows you to edit each event in a
single track. See “Event Edit procedure” on page 65 for
more information on the event editing procedure.
Trk (Track)
Track in edit. To select a different track, press one of the
A VOLUME/VALUE buttons to open the Go To Track
window.
Use the TEMPO/VALUE controls to select a track, and
press ENTER to confirm, or EXIT to abort.
E/CV (Style Element/Chord Variation)
Selected Style Element and Chord Variation. This
parameter can’t be edited. To select a different Style
Element and Chord Variation, press EXIT to go back to
the Main page of the Style Record mode (see “Main
page” on page 55).
Position
Position of the event shown in the display, expressed in
the form ‘aaa.bb.ccc’:
• ‘aaa’ is the measure
• ‘bb’ is the beat
• ‘ccc’ is the tick (each quarter beat = 384 ticks)
You can edit this parameter to move the event to a different position.
Ev (Event)
Type and values of the event shown in the display.
Depending on the selected event, the value may
change. This parameter also shows the (non-editable)
“End Loop” marking, when the end of a track is
reached.
Event First value Second value
Note Note name Velocity
Ctrl Control Change number Control Change value
Bend Bending value –
To change the event type, use the C VOLUME/VALUE
buttons to select the Event line, then use the same buttons or the TEMPO/VALUE controls to select a different event type.
To select and edit the event’s value, use the F-3 and F-4
function keys, and use the G/VOLUME/VALUE buttons or the TEMPO/VALUE controls.
Page 66
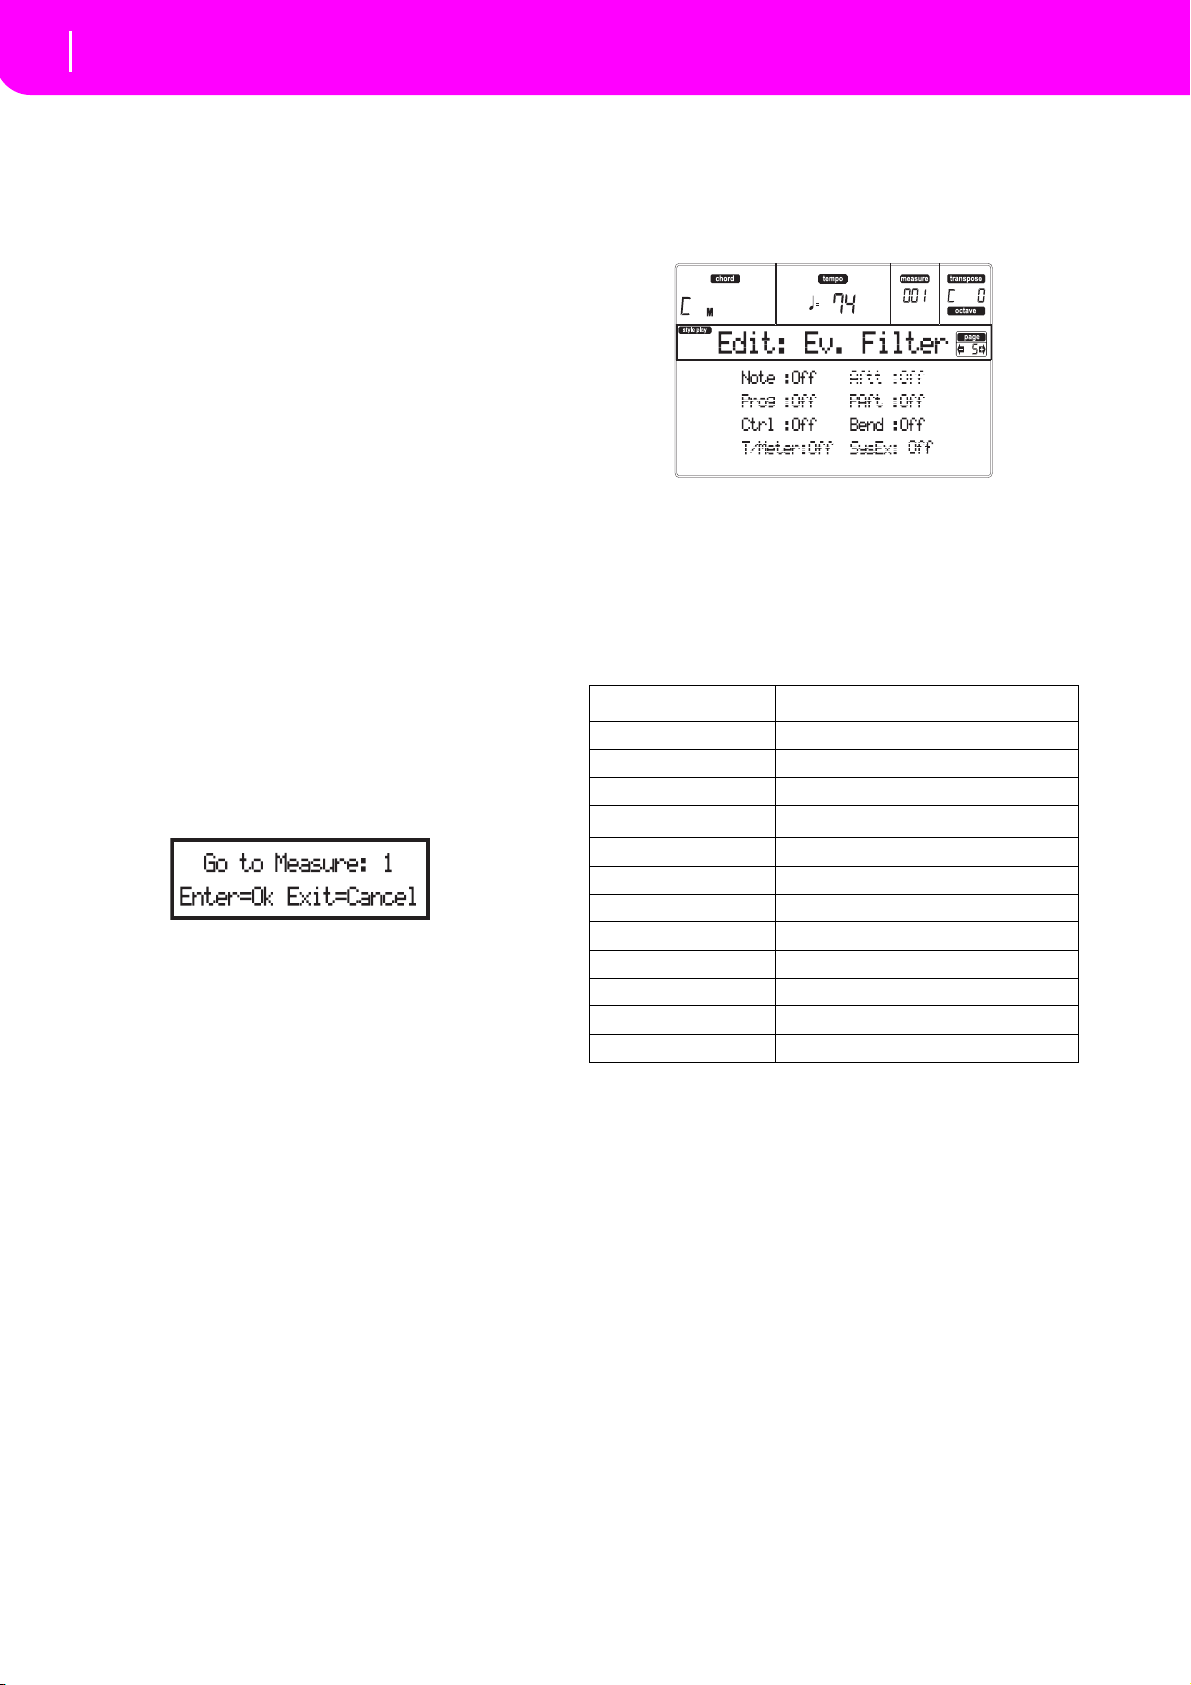
64
Style Record mode
Page 5 - Event Filter
Length
Length of the selected Note event. The value format is
the same as the Position value.
Note: If you change a length of “000.00.000” to a different
value, you can’t go back to the original value. This rather
uncommon zero-length value may be found in some drum or
percussion tracks.
Transport, navigation and editing controls
E/F and H VOLUME/VALUE buttons
These buttons are the “Scroll to previous event” (E/F)
and “Scroll to next event” (H) controls. They corresponds to the scrolling arrows shown on the screen.
G VOLUME/VALUE buttons
Use these buttons to select the corresponding parameter value area.
F-3 and F-4 buttons
After selecting the parameter value area with the G
VOLUME/VALUE buttons, use these buttons to select,
respectively, the first and second value of the event in
edit.
START/STOP button
Press START/STOP and play some chords on the keyboard to test the pattern in edit. Press START/STOP
again to stop the pattern running.
SHIFT + << or >>
Keep the SHIFT button pressed and press the << or >>
button to open the Go to Measure window.
Use the TEMPO/VALUE controls to select a measure,
then press ENTER to confirm, or EXIT to abort.
INSERT
Press the INSERT button to insert a new event at the
current shown Position. The default values are Type =
Note, Pitch = C4, Velocity = 100, Length = 192.
After inserting an event, use the C VOLUME/VALUE
buttons to select the Event line, and the same buttons
or the TEMPO/VALUE controls to select a different
event type.
DELETE
Press the DELETE button to delete the event shown in
the display.
PAGE 5 - EVENT FILTER
This page is where you can select the event types to be
shown in the Event Edit page. You can access this page
by pressing the PAGE+ button, while you are in the
Event Edit page.
Turn Off the filter for all event types you wish to see in
the Event Edit page.
Note: Some of the events are “ghosted”, and non editable,
since the corresponding events are not editable in a Style.
Note Notes.
Ctrl Control Change events. Only the follow-
ing Control Change numbers are allowed.
Control function CC# (Control Change Number)
Modulation 1 1
Modulation 2 2
Pan 10
Expression
CC#12 12
CC#13 13
Damper 64
Filter Resonance 71
Low Pass Filter Cutoff 74
CC#80 80
CC#81 81
CC#82 82
(a) Expression events cannot be inserted at the starting Position
(001.01.000). An Expression value is already among the default “header”
parameters of the Style Element.
(a)
Bend Pitch Bend events.
11
Page 67
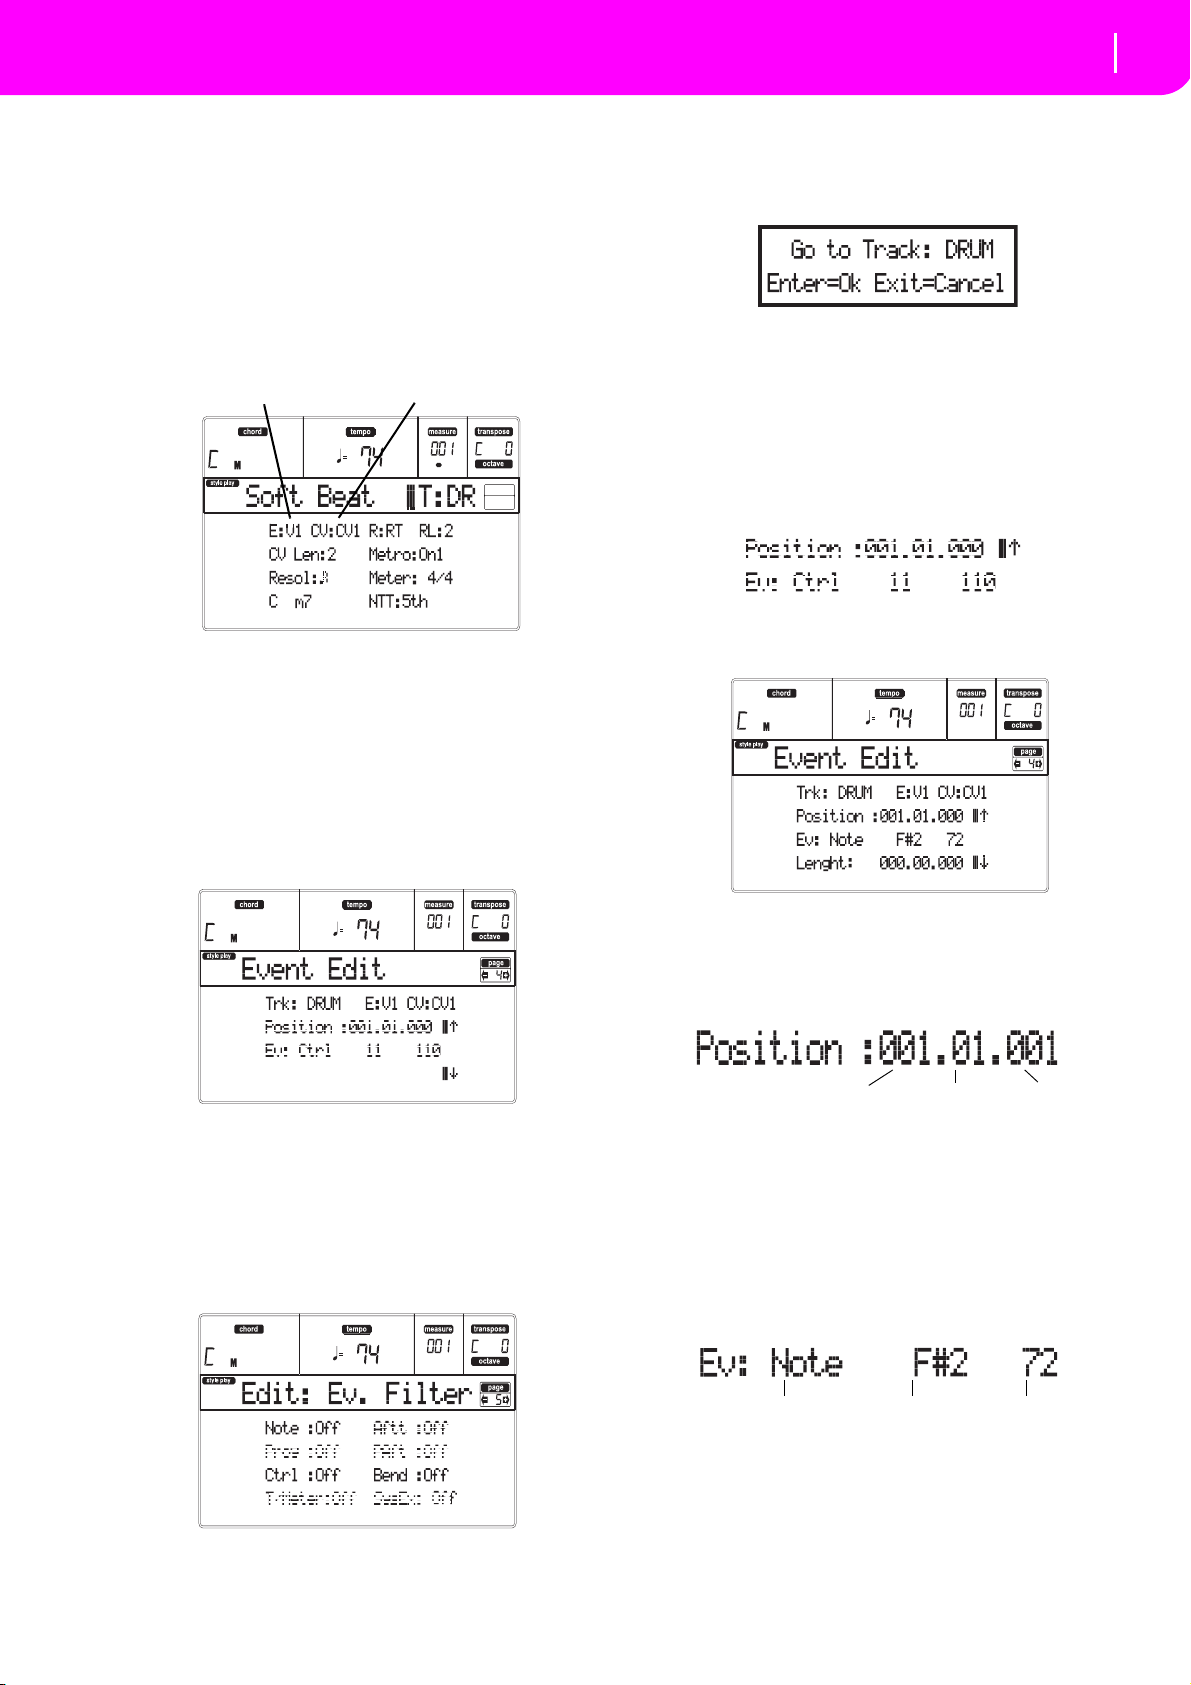
65
Style Record mode
Event Edit procedure
Style Element
Chord Variation
Measure Beat Tick
Event Type
First value
Second value
EVENT EDIT PROCEDURE
The Event Edit is the page where you can edit each single MIDI event of the selected Style Element. You can,
for example, replace a note with a different one, or
change its playing strength (i.e., velocity value). Here is
the general event editing procedure.
1. Select the Style to edit, and press RECORD. Select
the “Current Style” option to enter recording. The
LED on the RECORD button will turn on, and the
Main page of the Style Record mode will appear.
2. Use the A VOLUME/VALUE buttons, and the F-1
and F-2 function keys to select the E (Style Element) and CV (Chord Variation) parameters.
Note: For more information on the Style Elements and
Chord Variations, and the Style structure in general, see
“The Style’s structure” on page 52.
3. Press MENU, and use the VOLUME/VALUE (A–
H) buttons to select the Event Edit section. The
Event Edit page appears (see “Page 4 - Event Edit”
on page 63 for more information).
6. Press PAGE- to go back to the Event Edit page.
7. Press the A VOLUME/VALUE button (Trk), to
select the track to edit. The Go To Track window
appears.
Use the TEMPO/VALUE controls to select a track,
and press ENTER to confirm (or EXIT to abort).
8. The list of events contained in the selected track (in
the Style Element and Chord Variation selected on
step 2) will appear in the display. The first step, or
Measure Start, is currently shown. Since it contains
an initialization event, it is not editable and
appears “in grey” (i.e., written with a “ghost”
character).
9. Press one of the H VOLUME VALUE buttons
(Scroll Down arrow), to go to the next step. This is
usually a note, that you can edit.
4. Press START/STOP to listen to the selected Chord
5. Press PAGE+ to go to the Event Filter page, and
Variation. If you like, play some chords on the keyboard, to test the pattern. Press START/STOP to
stop it.
turn “Off” the filters for the event types you wish
to see in the display (see “Page 5 - Event Filter” on
page 64 for more information).
For more information on the event types and their
values, see “Page 4 - Event Edit” on page 63.
10. Use the B VOLUME/VALUE buttons to select the
Position line. Use these buttons or the TEMPO/
VALUE controls to change the event’s position.
11. Use the C VOLUME/VALUE buttons to select the
Event line. You may use the C VOLUME/VALUE
buttons or the TEMPO/VALUE controls to change
the event type. Use the G VOLUME/VALUE buttons, and the F-3 and F-4 function keys to respectively select the first and second value of the
parameter. Use the G VOLUME/VALUE buttons
or the TEMPO/VALUE controls to modify the
selected value.
12. If a Note event is selected, use the D VOLUME/
VALUE buttons to select the Length line, and use
Page 68
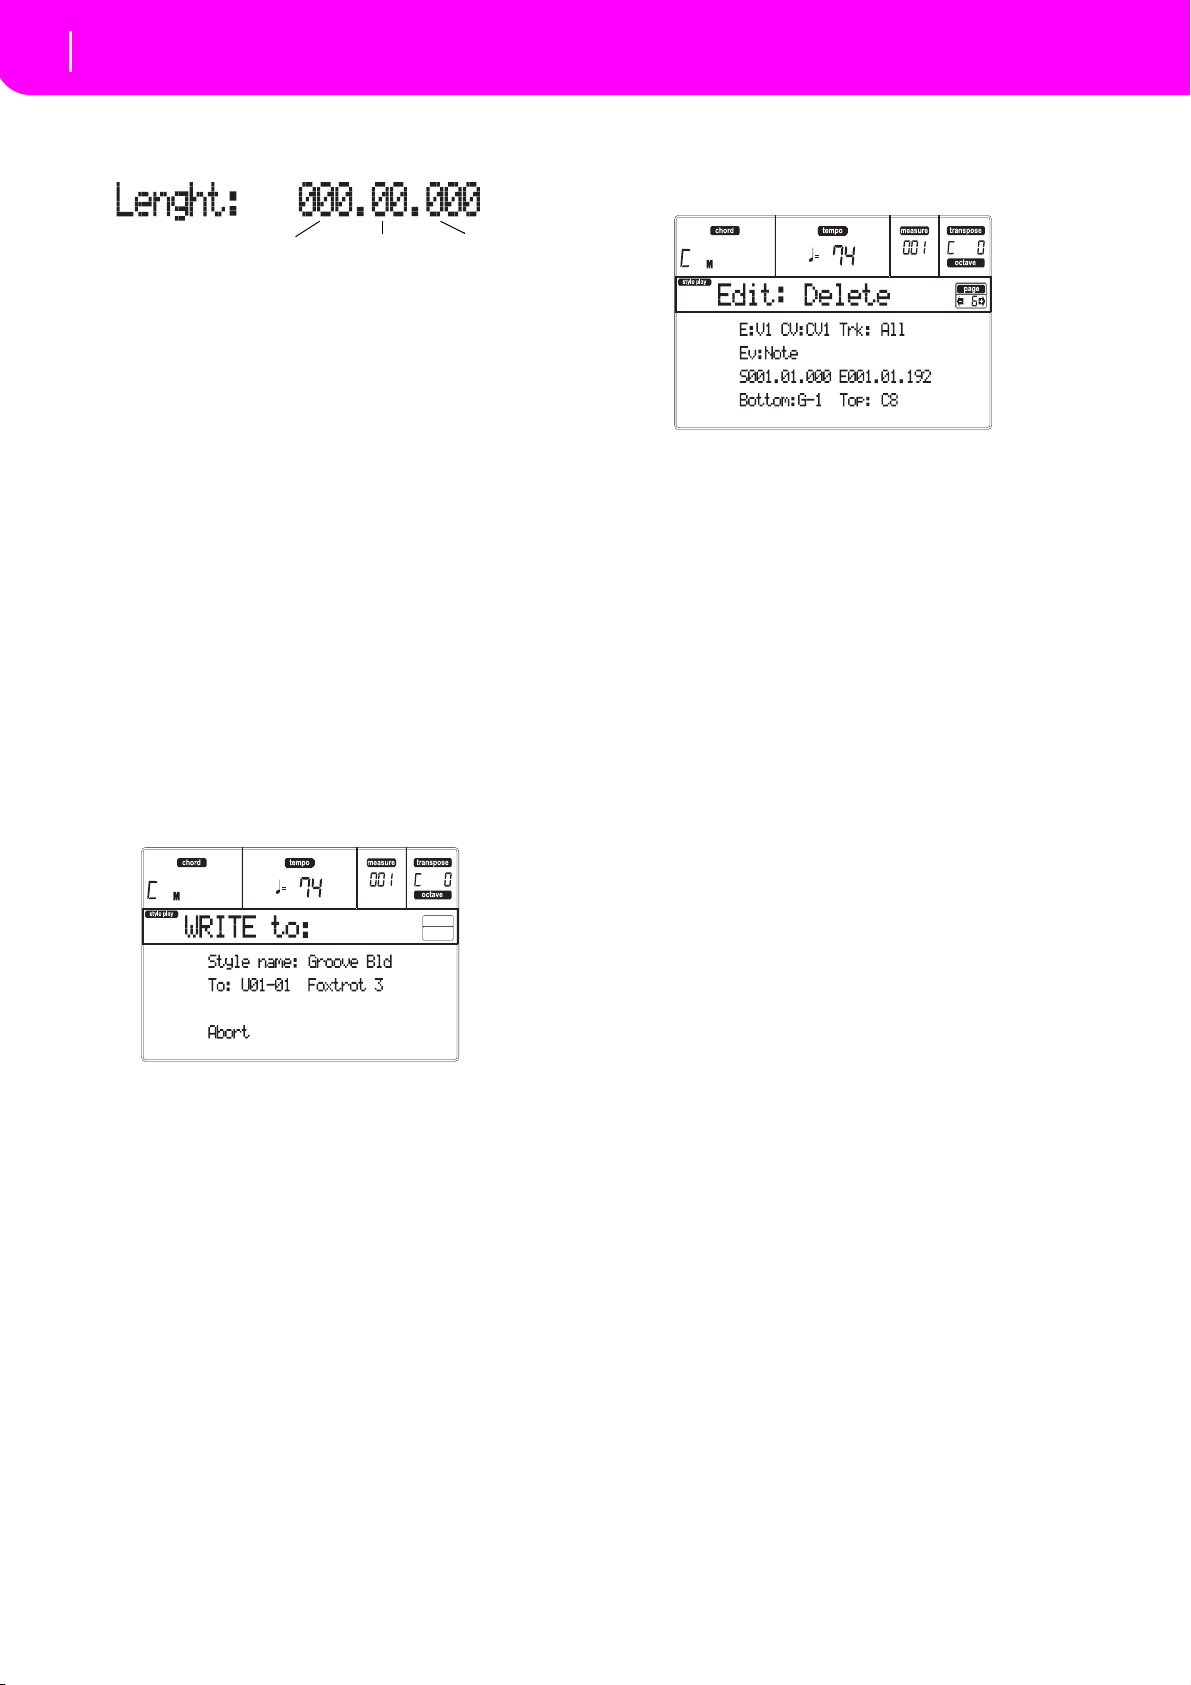
66
Style Record mode
Page 6 - Edit: Delete
Measure Beat Tick
the same buttons, or the TEMPO/VALUE controls,
to change the event’s length.
• After having modified the shown event, you
may scroll to the next event with the H VOLUME/
VALUE buttons (Scroll to next), or to the previous
event with the E/F VOLUME/VALUE buttons
(Scroll to previous).
• You may use the SHIFT + << or >> shortcut to go
to a different measure (see “SHIFT + << or >>” on
page 64)
• As described in step 4, you may press START/
STOP and play some chords to listen how the pattern sounds after your changes. Press START/
STOP again to stop the pattern running.
13. Use the INSERT button to insert an event at the
Position shown in the display (a Note event with
default values will be inserted). Use the DELETE
button to delete the event shown in the display.
14. When the editing is complete, you may select a different track (go to step 7), or a different Style Element and Chord Variation (press EXIT to go back
to the Main page of the Style Record mode, then go
to step 2).
15. When finished editing the whole Style, press
WRITE to open the Write Style page.
• Use the A or E VOLUME/VALUE buttons to
enter the Text Editing mode. Use the UP and
DOWN buttons to move the cursor, and the dial to
select a character.
• Use the B VOLUME/VALUE buttons to select a
target location. The name of the Style already
existing at the selected location is shown after the
Style Bank-Location number.
Warni ng: If you select an existing Style and confirm
writing, the older Style is deleted and replaced by the
new one. Save the Styles you don’t want to loose on a
card, before overwriting them.
16. Press ENTER to save the Style to the internal memory, or one of the D VOLUME/VALUE buttons
(Abort) to delete any changes made in Style
Record mode. When the “Are you sure?” message
appears, press ENTER to confirm, or EXIT to go
back to the Write Style page.
PAGE 6 - EDIT: DELETE
This page is where you can delete single elements or
MIDI events out of the Style.
After setting the various parameters, press ENTER to
execute. The “Are you sure?” message will appear.
Press ENTER to confirm, EXIT to abort.
E/CV (Style Element/Chord Variation)
(Non editable) These read-only parameters show which
Style Element and Chord Variation are currently
selected for editing. See the Main page “E (Style Element)” and “CV (Chord Variation)” parameters on
page 55 for information on selecting a different Style
Element and Chord Variation.
Trk (Track)
Use this parameter to select a track.
All All tracks selected. After deletion, the
selected Chord Variation will remain
empty.
Drum…Acc5Selected track.
Ev (Event)
Type of MIDI event to delete.
All All events. The measures are not removed
from the Chord Variation.
Note All notes in the selected range.
Dup.Note All duplicate notes. When two notes with
the same pitch are encountered on the
same tick, the one with the lowest velocity
is deleted.
A.Touch After Touch eve n ts.
Note: This kind of data is automatically
removed during recording.
P.Bend Pitch Bend events.
PrChange Program Change events, excluding the
bundled Control Change #00 (Bank Select
MSB) and #32 (Bank Select LSB).
Note: This kind of data is automatically
removed during recording.
C.Change All Control Change events, for example
Bank Select, Modulation, Damper, Soft
Pedal…
CC00/32…CC127
Single Control Change events. Double
Control Change numbers (like 00/32) are
MSB/LSB bundles.
Note: Some CC data are automatically
removed during recording. See the table on
page 54 for more information on the allowed
data.
Page 69
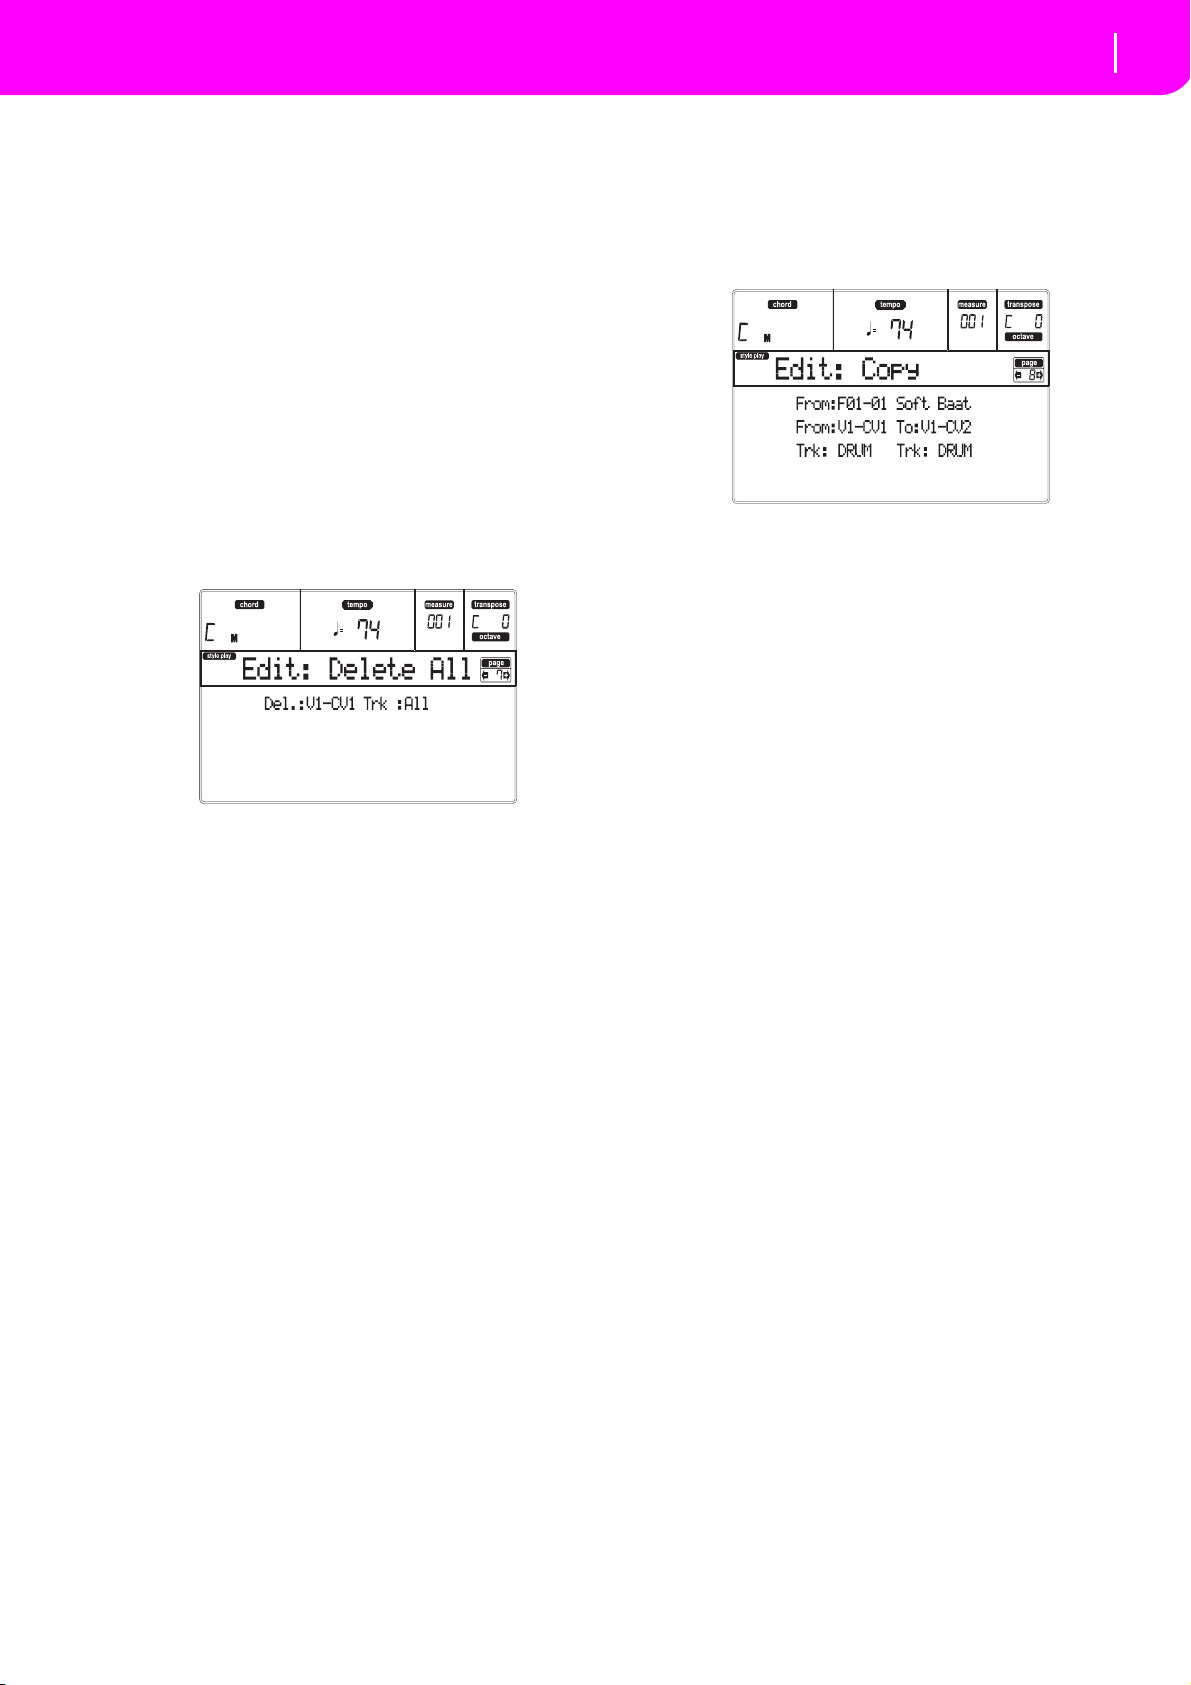
67
Style Record mode
Page 7 - Edit: Delete All
S / E (Start/End)
Use these parameters to set the starting (S) and ending
(E) points of the range to delete.
If a Chord Variation is four measures long, and you
want to select it all, the Start will be positioned at
1.01.000, and the End at 5.01.000.
Bottom / Top
Use these parameters to set the bottom and top of the
keyboard range to delete. If you select the same note as
the Bottom and Top parameters, you can select a single
percussive instrument in a Drum or Percussion track.
Note: These parameters are available only when the All or
Note option is selected.
PAGE 7 - EDIT: DELETE ALL
This function lets you quickly delete a selected Style
Element or Chord Variation, or the whole Style, resetting it to the default parameter’s values.
After setting the various parameters, press ENTER to
execute. The “Are you sure?” message will appear.
Press ENTER to confirm, EXIT to abort.
When in this page, press the corresponding button on
the control panel to select a Style Element
(VARIATION1 … ENDING2).
Del (Delete)
Use this parameter to select the whole Style, a single
Style Element, or a single Chord Variation.
All All Style Elements, i.e. the whole Style.
When Del=All and Trk=All, the whole
Style is deleted, and all parameters set to
the default status.
Var1…End2 Single Style Element.
V1-CV1…E2-CV2
Single Chord Variation.
Trk (Track)
All All tracks of the selected Style, Style Ele-
ment or Chord Variation.
Drum–Acc5 Single track of the selected Style, Style Ele-
ment or Chord Variation.
PAGE 8 - EDIT: COPY
Here you can copy a track, Chord Variation or Style
Element inside the same Style, or from a different one.
Furthermore, you can copy a whole Style.
Warn ing: The Copy operation deletes all data at the target
location (overwrite).
After setting the various parameters, press ENTER to
execute. The “Are you sure?” message will appear.
Press ENTER to confirm, EXIT to abort.
Note: If you copy too many events on the same “tick”, the
“Too many events!” message appears, and the copy operation
is aborted.
Note: When you copy over an existing Chord Variation, Program Change data is not copied, to leave the original Programs unchanged for that Chord Variation.
When in this page, press the corresponding button on
the control panel to select a Style Element
(VARIATION1 … ENDING2).
From Style
Use the first parameter to select the source Style to
copy the track, Chord Variation or Style Element from.
From… to Style Element/Chord Variation
Use these parameters to select the source and target
Style Elements or Chord Variations.
Note: You can’t copy from a Variation to a different Style
Element (or vice-versa), because of their different structure.
All All Style Elements, i.e. the whole Style.
You can’t change the target, that is auto-
matically set to All.
Var1…End2 Single Style Element.
V1-CV1…E2-CV2
Single Chord Variation.
From… to Track
Use these parameters to select the source and target
track to copy.
All All tracks of the selected Style, Style Ele-
ment or Chord Variation.
Drum–Acc5 Single track of the selected Style, Style Ele-
ment or Chord Variation.
Page 70
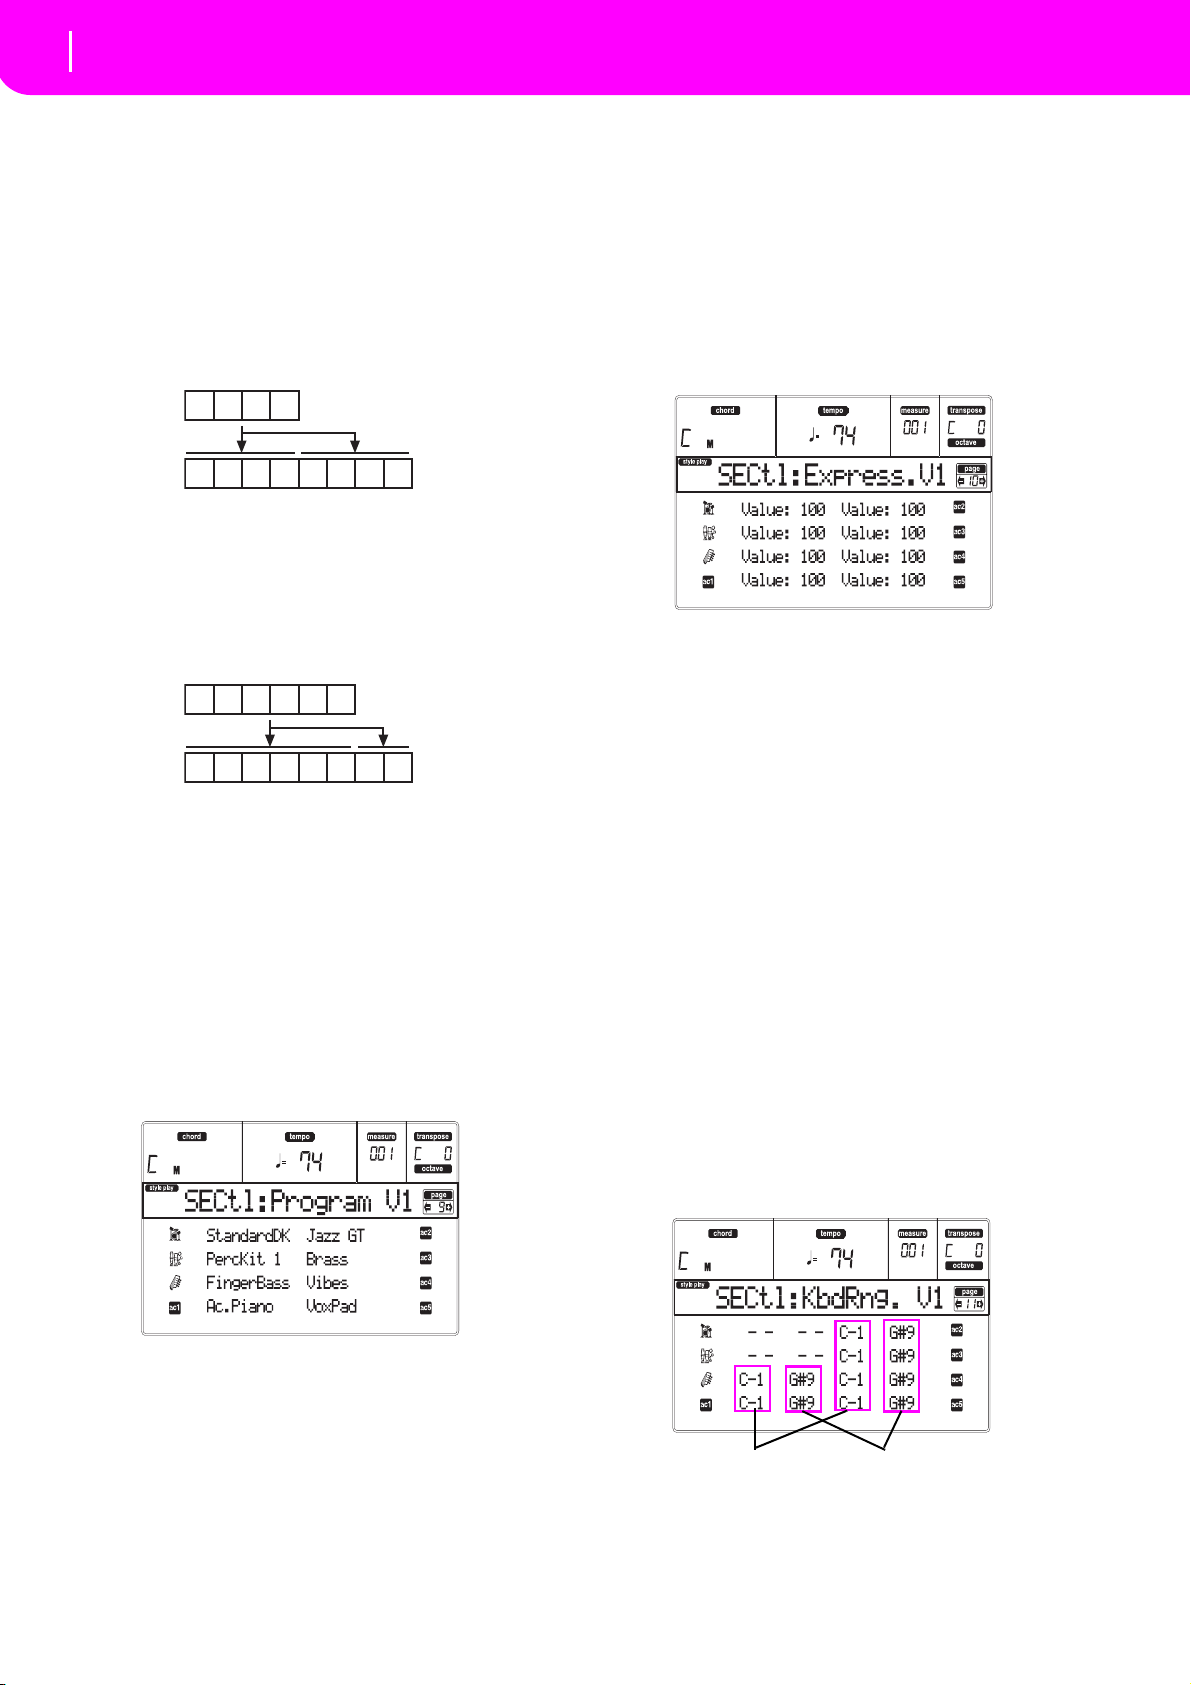
68
Style Record mode
Page 9 - Style Element Controls: Programs
1 2 3 4
1 2 3 4 1 2 3 4
1 2 3 4
1 2 3 4 5 6 1 2
5 6
Bottom
Top
Copying on a Chord Variation with a different
length
You can copy a Chord Element on a different Chord
Element with a different length. Just keep in mind the
following:
• If the source length is a divider of the target length,
the source Chord Variation will be multiplied to fit
the target Chord Variation. For example, if the
source is 4-measures long, and the target 8-measures, the source will be copied two times.
• If the source length is not a divider of the target
length, the source Chord Variation will be copied
for as many measures as can fit the target Chord
Variation. For example, if the source is 6-measures
long, and the target 8-measures, the source will be
copied once, then the fist 2 measures will be copied to fit the remaining 2 measures.
Note: Avoid copying on a Chord Variation with a different
meter, for example a 4/4 Chord Variation onto a 3/4 one.
PAGE 10 - STYLE ELEMENT CONTROLS: EXPRESSION
In this page you can modify the Expression (CC#11)
value for each of the Style tracks. This lets you reduce
the relative level of a track in a single Style Element,
without reducing the overall Volume of the Style.
This is a very useful control, when you have different
Programs assigned to the same track in different Style
Elements, and the internal level of these Programs is
different.
When in this page, press the corresponding button on
the control panel to select a Style Element
(VARIATION1 … ENDING2).
To copy the settings of this page to another Style Element, keep the SHIFT button pressed, and press the
button of the target Style Element.
Value
Use this parameter to set the Expression value for the
corresponding track.
PAGE 9 - STYLE ELEMENT CONTROLS:
PROGRAMS
In this page you can assign a different Program to each
track of the selected Style Element. Each Style Element
can have different Programs; after saving the new
Style, please don’t forget to set the “Prog” parameter to
“Original” (see “Prog (Program)” on page 49), to let the
Style select the Program bypassing the Style Performance settings.
When in this page, press the corresponding button on
the control panel to select a Style Element
(VARIATION1 … ENDING2).
To copy the settings of this page to another Style Element, keep the SHIFT button pressed, and press the
button of the target Style Element.
Program
Use the PROGRAM/PERFORMANCE section to assign
a Program to the selected track.
PAGE 11 - STYLE ELEMENT CONTROLS: KEYBOARD RANGE
The Keyboard Range automatically transposes any pattern note that would otherwise play too high or too low
in pitch, compared to the original acoustic instrument,
when transposed by the arranger. This will result in a
more natural sound for each accompaniment instrument.
For example, the lower limit for a guitar is E2. If you
play a chord under the E2, the transposed pattern
could exceed this limit, and sound unnatural. A Bottom
limit set to E2 for the guitar track will solve the problem.
Note: The Keyboard Range is ignored while recording. The
selected track can play on the full range of the keyboard.
When in this page, press the corresponding button on
the control panel to select a Style Element
(VARIATION1 … ENDING2).
Page 71
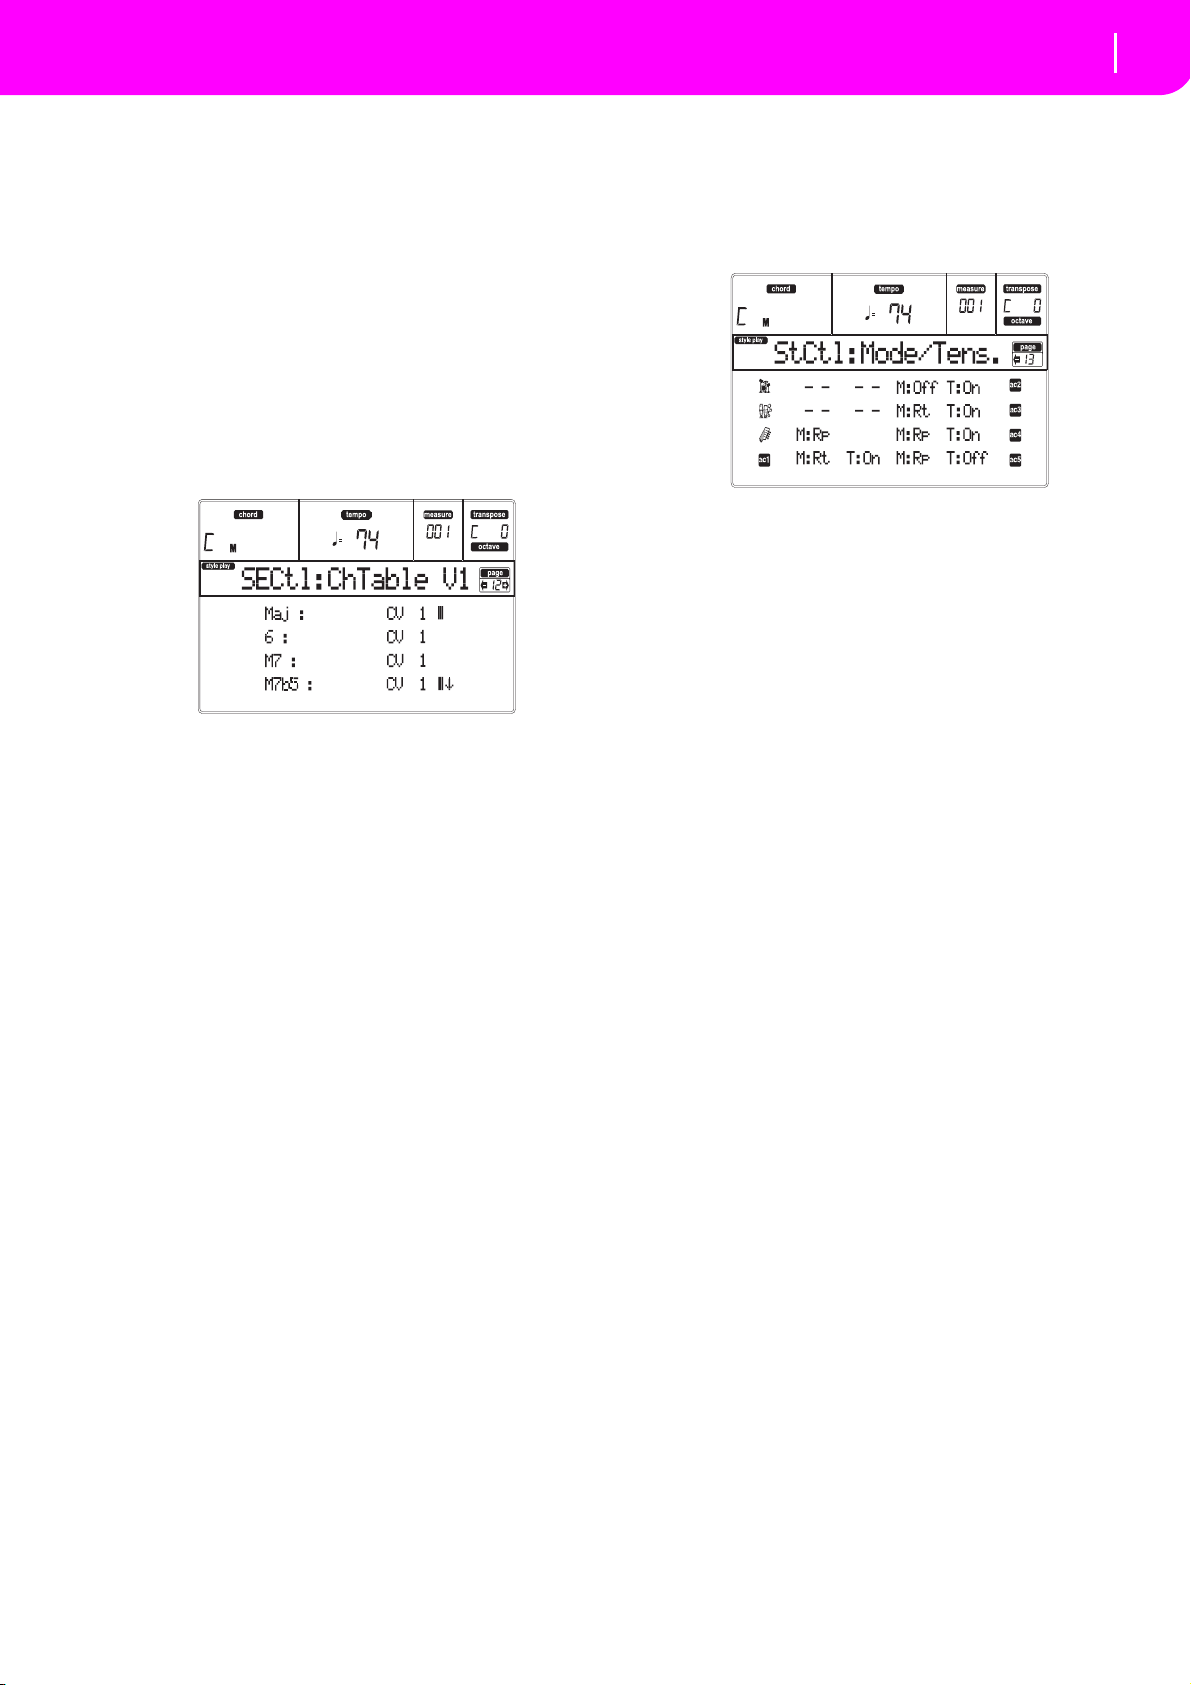
69
Style Record mode
Page 12 - Style Element Controls: Chord Variation Table
To copy the settings of this page to another Style Element, keep the SHIFT button pressed, and press the
button of the target Style Element.
Bottom/Top
Use these parameters to set the bottom and top of the
keyboard range for the corresponding track.
PAGE 12 - STYLE ELEMENT CONTROLS:
CHORD VARIATION TABLE
This is the page where you can assign a Chord Variation to each recognized chord. When a chord is recognized, the assigned Chord Variation will be
automatically selected by the arranger to play the
accompaniment.
When in this page, press the corresponding button on
the control panel to select a Style Element
(VARIATION1 … ENDING2).
E–F (Scroll Up), G–H (Scroll Down)
Use these buttons to scroll the available parameters in
the display.
Chords / Chord Variation
Use these parameters to assign a Chord Variation to
each of the enlisted chords.
PAGE 13 - STYLE CONTROLS: MODE/TENSION
In this page you can set the Retrigger mode for the
Style tracks, and activate/deactivate the Tension for the
Accompaniment tracks.
When in this page, press the corresponding button on
the control panel to select a Style Element
(VARIATION1 … ENDING2).
M (Mode)
This setting harmonizes the notes of the Bass track or
the Acc1–5 tracks to the new chord when the chord is
changed.
Off Each time you play a new chord, the cur-
rent notes will be stopped. The track will
remain silent until a new note will be
encountered in the pattern.
Rt (Retrigger) The sound will be stopped,
and new notes matching the recognized
chord will be played back.
Rp (Repitch) New notes matching the recog-
nized chord will be played back, by repitching notes already playing. There will
be no break in the sound. This is very useful on Guitar and Bass tracks.
T (Tension)
Tension adds notes (a 9th, 11th and/or 13th) that have
actually been played to the accompaniment, even if
they haven't been written in the Style pattern. This
parameter specifies whether or not the Tension
included in the recognized chord will be added to the
Acc1–5 tracks.
On The Tension will be added.
Off No Tension will be added.
Page 72
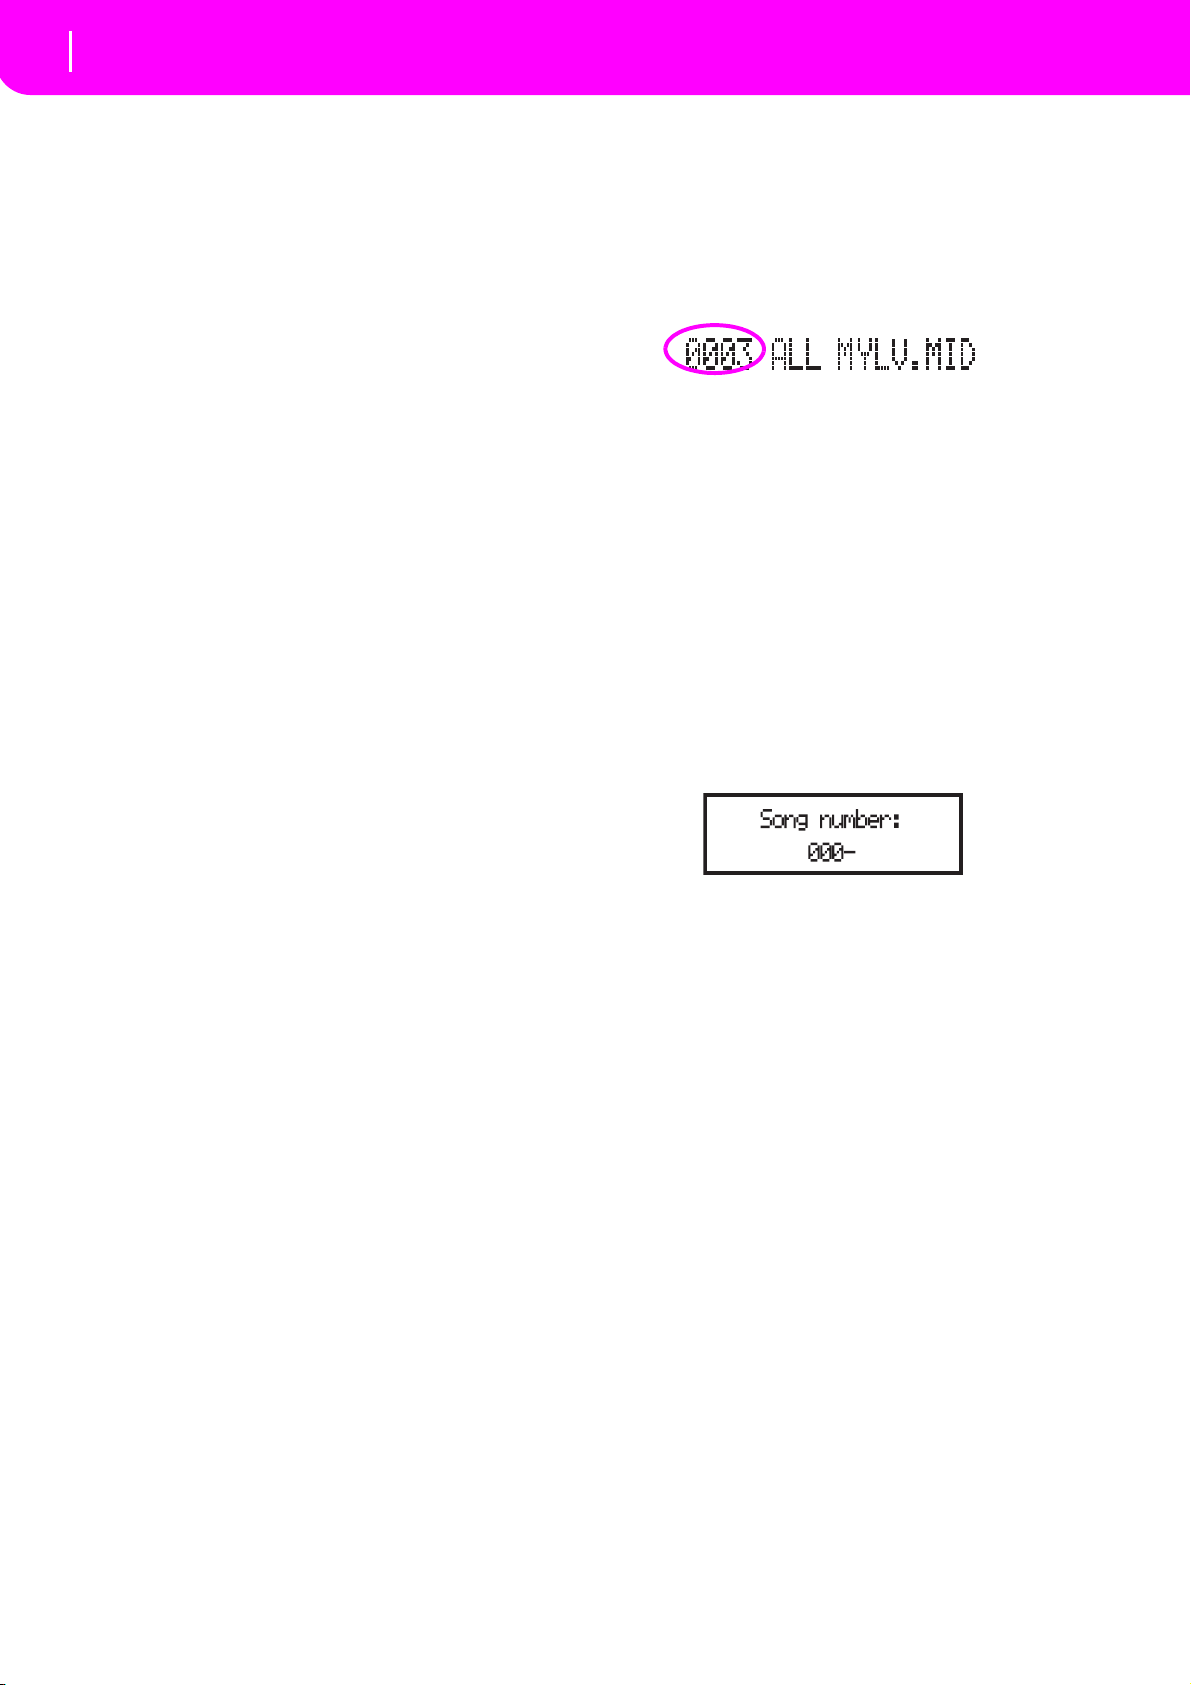
70
Song Play operating mode
The Songs and the Standard MIDI File format
11. SONG PLAY OPERATING MODE
The Song Play operating mode is where you can listen
to Songs (played directly from the card or the internal
SSD), and play along with the Song on the four Realtime (Keyboard) tracks (Upper 1–3, Lower). Since the
Liverpool is equipped with two onboard sequencers,
you can play two Songs at the same time. This is very
useful to mix between two Songs during a live performance.
THE SONGS AND THE STANDARD MIDI FILE
FORMAT
The native Song file format of the Liverpool is the Standard MIDI File (SMF), an universal standard set by all
manufacturers. You can read these files with any musical instrument or computer.
A difference could be in the sound played by each
track. If you recorded a Song with the Liverpool (Song
mode), using only General MIDI programs, you can
play the same Song on virtually any other musical
instrument or computer. If you used KORG native programs, you cannot reproduce the same sounds on
instruments from other brands.
When you read SMFs in Song Play mode, there is no
problem reading files made using only General MIDI
sounds. Sounds could be different when playing a
Song made on a different instrument: despite the wide
compatibility of Liverpool with other, non-standard
formats, differences may arise.
If so, go to the Song operating mode and load the SMF.
Then, manually reassign the non-matching Programs,
replacing them with similar Programs on the Liverpool. Then, save the SMF again, and you will be able to
play it in Song Play mode with the correct Programs.
TRANSPORT CONTROLS
You can use the separate transport controls for each of
the two onboard sequencers. Use the SEQ1 controls for
Sequencer 1, and SEQ2 controls for Sequencer 2. See
“SEQUENCER TRANSPORT CONTROLS - SEQ1 and
SEQ2” on page 18 for more information).
MIDI CLOCK
In Song Play mode the MIDI Clock is always generated
by the internal sequencer, even if the Clock parameter
is set to External (see “Clock” on page 128). Liverpool
transmits only the MIDI Clock message generated by
Sequencer 1.
SELECTING A SONG COMPOSING ITS PROGRESSIVE NUMBER
Each Song on a card (up to 9,999) has a progressive
number assigned. You can see this number before the
Song’s name in the Song Select page.
While in the Main, Song Select, or Lyrics page, the
STYLE section doubles as a numeric keypad. You can
use it for composing the 4-digit number corresponding
to the Song you wish to select; the folder selected in the
Song Select page will become the current folder. This
way, you can speed up the Song retrieval.
Selecting a Song in the Song Select page
1. Open the Song Select page.
2. Select the card or the internal SSD and open the
folder containing the Song to be selected. This
folder will be used also in the Main and Lyrics
page.
3. Compose the 4-digit number corresponding to the
Song you wish to select (for example: if the Song is
number “1043”, dial 1, 0, 4, 3).
After the fourth digit has been inserted, the window
automatically disappears, and the Song is selected.
•
If the Song number is just 1, 2 or 3-digit long, dial the
number, then press ENTER to confirm (for example:
if the Song is number “52”, dial 5, 2, ENTER).
Note: If no Song corresponds to the dialed number, the
“Song not available” message appears. Press any button
to make it disappear.
Selecting a Song in the Main page
While the S1 or S2 field is selected, compose the number
corresponding to the Song you wish to select. The current folder is the one selected in the Song Select page.
Selecting a Song in the Lyrics page
Compose the number corresponding to the Song
you wish to select. The current folder is the one
selected in the Song Select page.
SWITCHING BETWEEN SEQUENCERS DURING EDITING
When you enter Edit mode, you can edit the selected
sequencer’s parameters. Go to the main page of Song
Play mode, and select the S1 (A buttons) or S2 (B buttons) to select the sequencer you wish to edit (see
“Main page” on page 73).
REALTIME AND SEQUENCER TRACKS
The Liverpool is equipped with a double sequencer.
Each Song can play a maximum of 16 tracks, for a total
of 32 sequencer tracks.
In addition, you can play on the keyboard with four
additional Realtime tracks (Upper 1–3 and Lower). You
can edit the Volume, Mute status, and Program selection
for these tracks on the main page of the Song Play mode.
Page 73
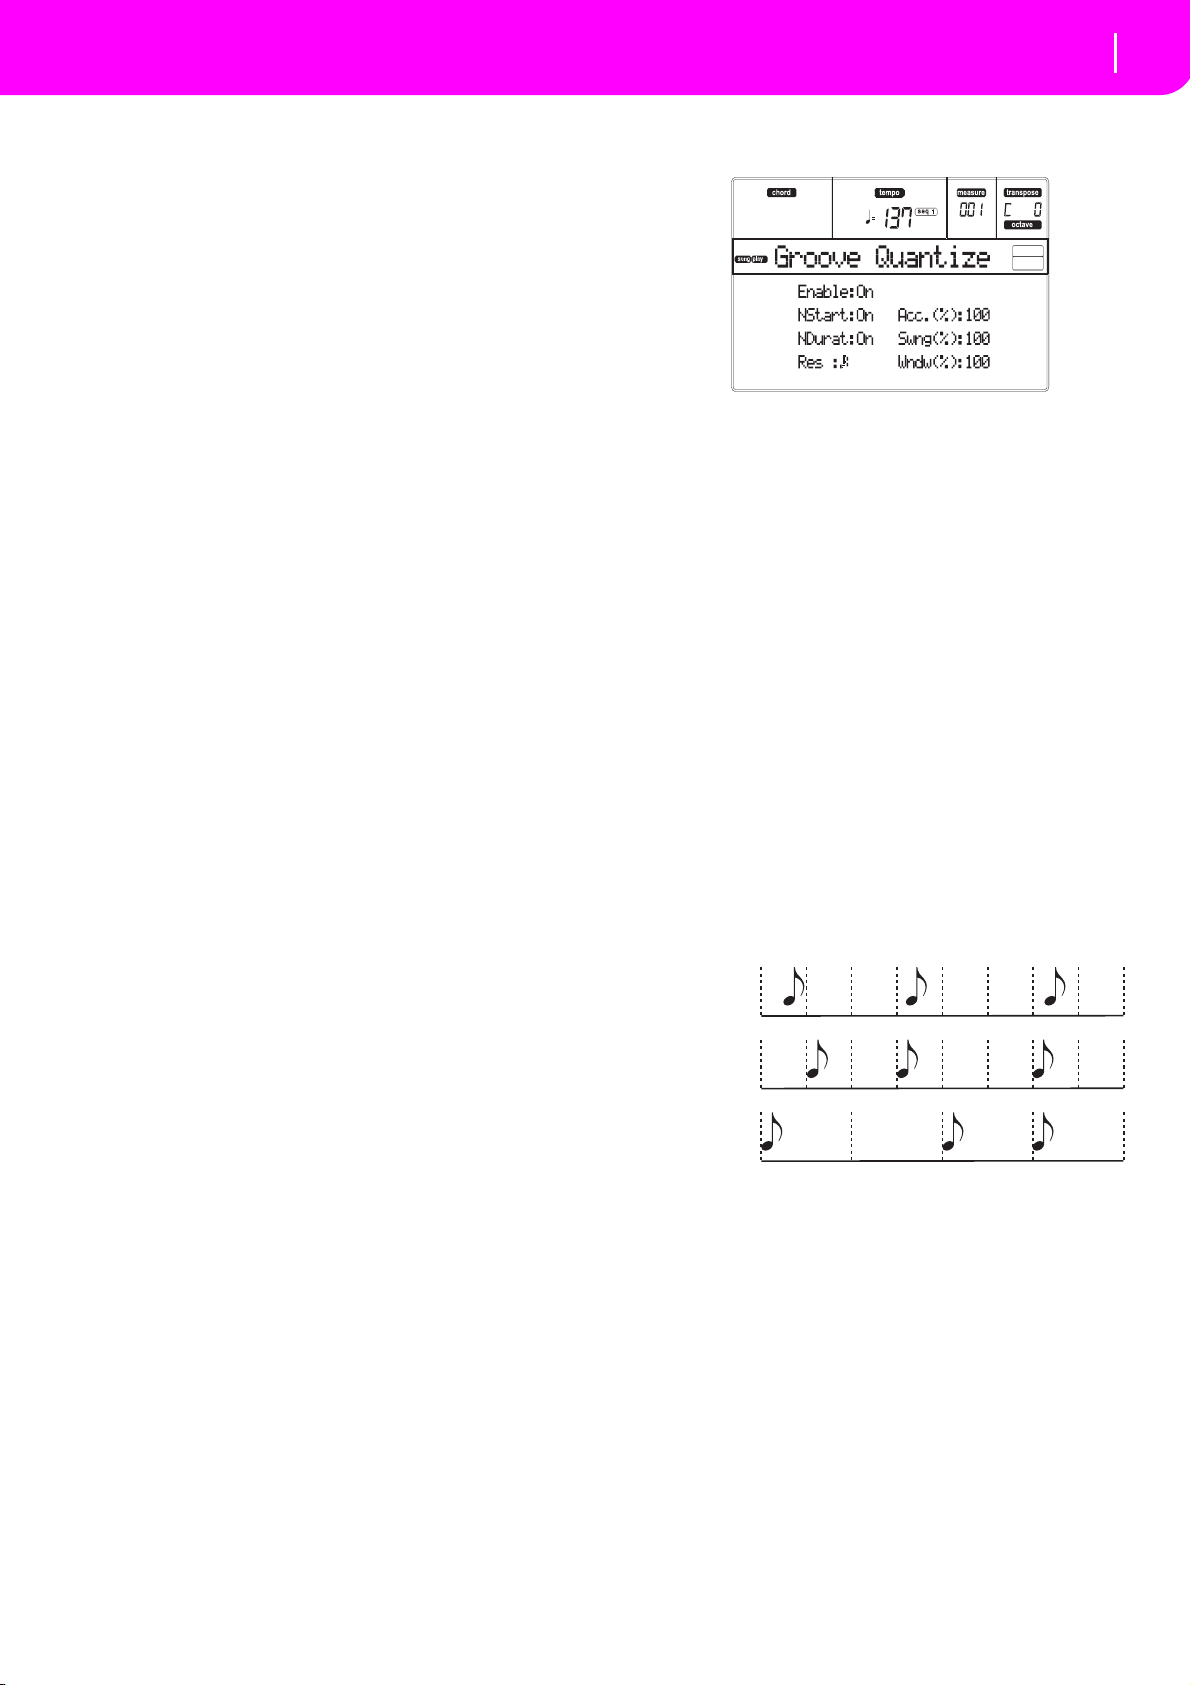
71
Song Play operating mode
Master Volume, Sequencer Volume, BALANCE
No quanti-
zation
1/8
1/4
When you enter Song Play mode from the Style Play
mode, the Realtime tracks are the same as the Style Play
mode. A quick way to select Programs and Effects for
the Realtime tracks is choosing a different Performance.
MASTER VOLUME, SEQUENCER VOLUME,
BALANCE
While the MASTER VOLUME slider controls the general volume of the instrument, you can use the ACC/
SEQ VOLUME slider to control only the Sequencer’s
tracks volume. This lets you adjust the Sequencer’s volume alone, while the Realtime (Keyboard) tracks are
not affected by this slider.
Use the BALANCE slider to mix between Sequencer 1
and Sequencer 2. Move it to the center for the maximum volume of both sequencers.
EFFECTS IN SONG PLAY MODE
The Liverpool is equipped with four effect processors,
or DSPs (Digital Signal Processors). In Song Play mode
you can have two or four effects at the same time,
depending on the midifile you are reading.
Note: When playing back a Song that makes use of all four
effects (A–D), you can’t edit any parameter devoted to the
effects. These parameters appear greyed out in the display.
• A Song created on the Liverpool (in Song or Backing Sequence mode) can use up to 4 effects (usually 2 reverbs + 2 modulating effects); each track
may use the A/B or C/D pair.
• A Standard MIDI File will only use 2 effects (usually 1 reverb + 1 modulating effect). This lets you
use the remaining 2 effects for the Realtime tracks.
When using both sequencers at the same time, and
•
the “S2 FX Mode” is set to “A/B Mode” (see
page 80), they only use the A/B pair, while the C/D
pair is reserved to the Realtime (keyboard tracks).
• When using both sequencers at the same time, and
the “S2 FX Mode” is set to “C/D Mode” (see
page 80), Sequencer 1 uses the A/B pair, while
Sequencer 2 uses the C/D pair, sharing it with the
Realtime (keyboard tracks).
While in Song Play, press G.QUANTIZE. The following
window will appear.
Press EXIT to exit this window.
Enable
Enables/disable the quantize. It is automatically set to
Off each time the instrument is turned on, or when
selecting a different Song.
NStart (Note Start)
Enables/disables the quantization of the Note On event
(i.e. beginning of the note).
NDurat (Note Duration)
Enables/disables the quantization of the Note Off event
(i.e. the length of the note).
Res (Resolution)
Coarse quantize grill resolution. This parameter is the
main quantization value, to be varied with the Acc,
Swing and Window values.
(1/32)… (1/4)
Grid resolution, in musical values (a “3”
after the value means “triplet”). For example, when you select 1/8, all notes are
moved to the nearest 1/8 division. When
you select 1/4, all notes are moved to the
nearest 1/4 division.
GROOVE QUANTIZE WINDOW
You can apply a realtime “groove-quantization” to
Sequencer 1. Groove-quantization is a way of changing the
music groove during the playback, moving notes to the
nearest axis of a rhythmic “grid”. Please feel free to experiment: this function is a great source of musical invention.
Acc (Accuracy)
Accuracy percentage of quantize. For example, if
Acc=50, and the note is 20 tics away from the coarse
grid, it is moved to the grid of only 10 tics.
0 No accuracy. The quantize is not executed.
100 Maximum accuracy. The note is moved
exactly at the grid position.
Swing
Asymmetry of quantization. Grid axis are moved to the
nearest grid axis.
0 Even-numbered axis are totally moved
over the previous odd-numbered axis.
50 Axis are perfectly equidistant.
Page 74
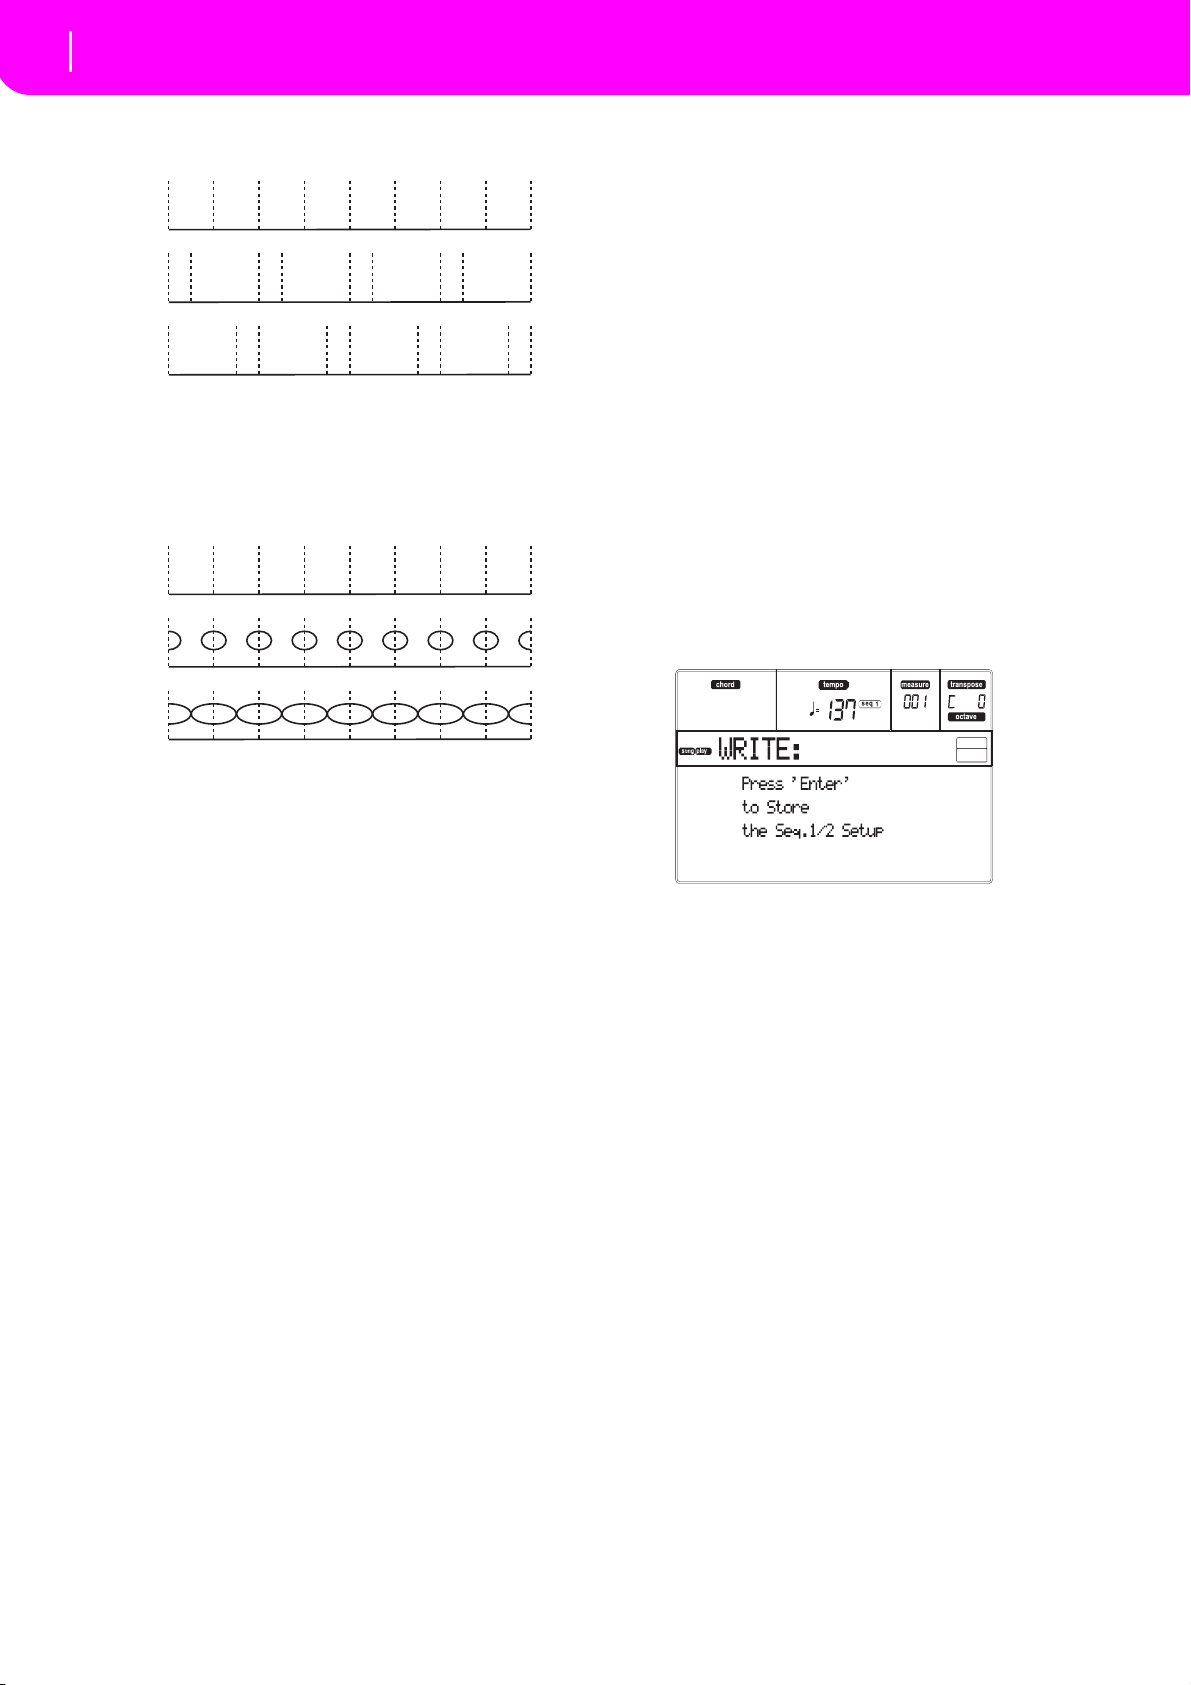
72
Song Play operating mode
The Write window
Swng=50
Swng=25
Swng=75
Win=0
Win=50
Win=100
100 Even-numbered axis are totally moved
over the following odd-numbered axis.
Window
Area of quantize intervention, bordering the grid axis.
0 The quantize window corresponds to the
axis. No quantization happens.
100 The quantize window extends to the near-
est window; all events are quantized.
the saved Setup is automatically recalled, and all
parameters are reset.
• Globally setting the Internal FX parameters allows
you, for example, to assign to all Songs a Reverb
suitable for the venue where you are performing,
without having to modify any of the Songs. (This
is true only for non-Liverpool Songs).
• Globally setting the Internal/External status allows
you, for example, to send the Piano track of all
Songs to a dedicated expander (just set globally
the Piano track to the External mode).
• The Play/Mute status allows you to globally mute
tracks that you don’t want to play during a show,
for example the melody track. (This is ture only for
non-Liverpool Songs).
For more information on the Internal FX settings for
the Song Play mode, see “Page 3 - Mixer: FX send A/B”
or “Page 3 - Mixer: FX send C/D”, and following, on
page 76.
Here is the procedure to save the Seq1+Seq2 Setup in
memory.
1. Press WRITE. The Write page appears.
THE WRITE WINDOW
You can save onto the internal memory a Seq1+Seq2
Setup. There is a separate Setup for each of the two
onboard sequencers.
This Setup memorizes the Internal FX settings, the
Internal/External status of each track, and the Play/
Mute status of each track. When a new Song is selected,
2. Press ENTER to confirm, or EXIT to abort.
If you confirm, the Setup is saved into the Global.
You may then save this Setup on the card together
with the Global data.
Page 75
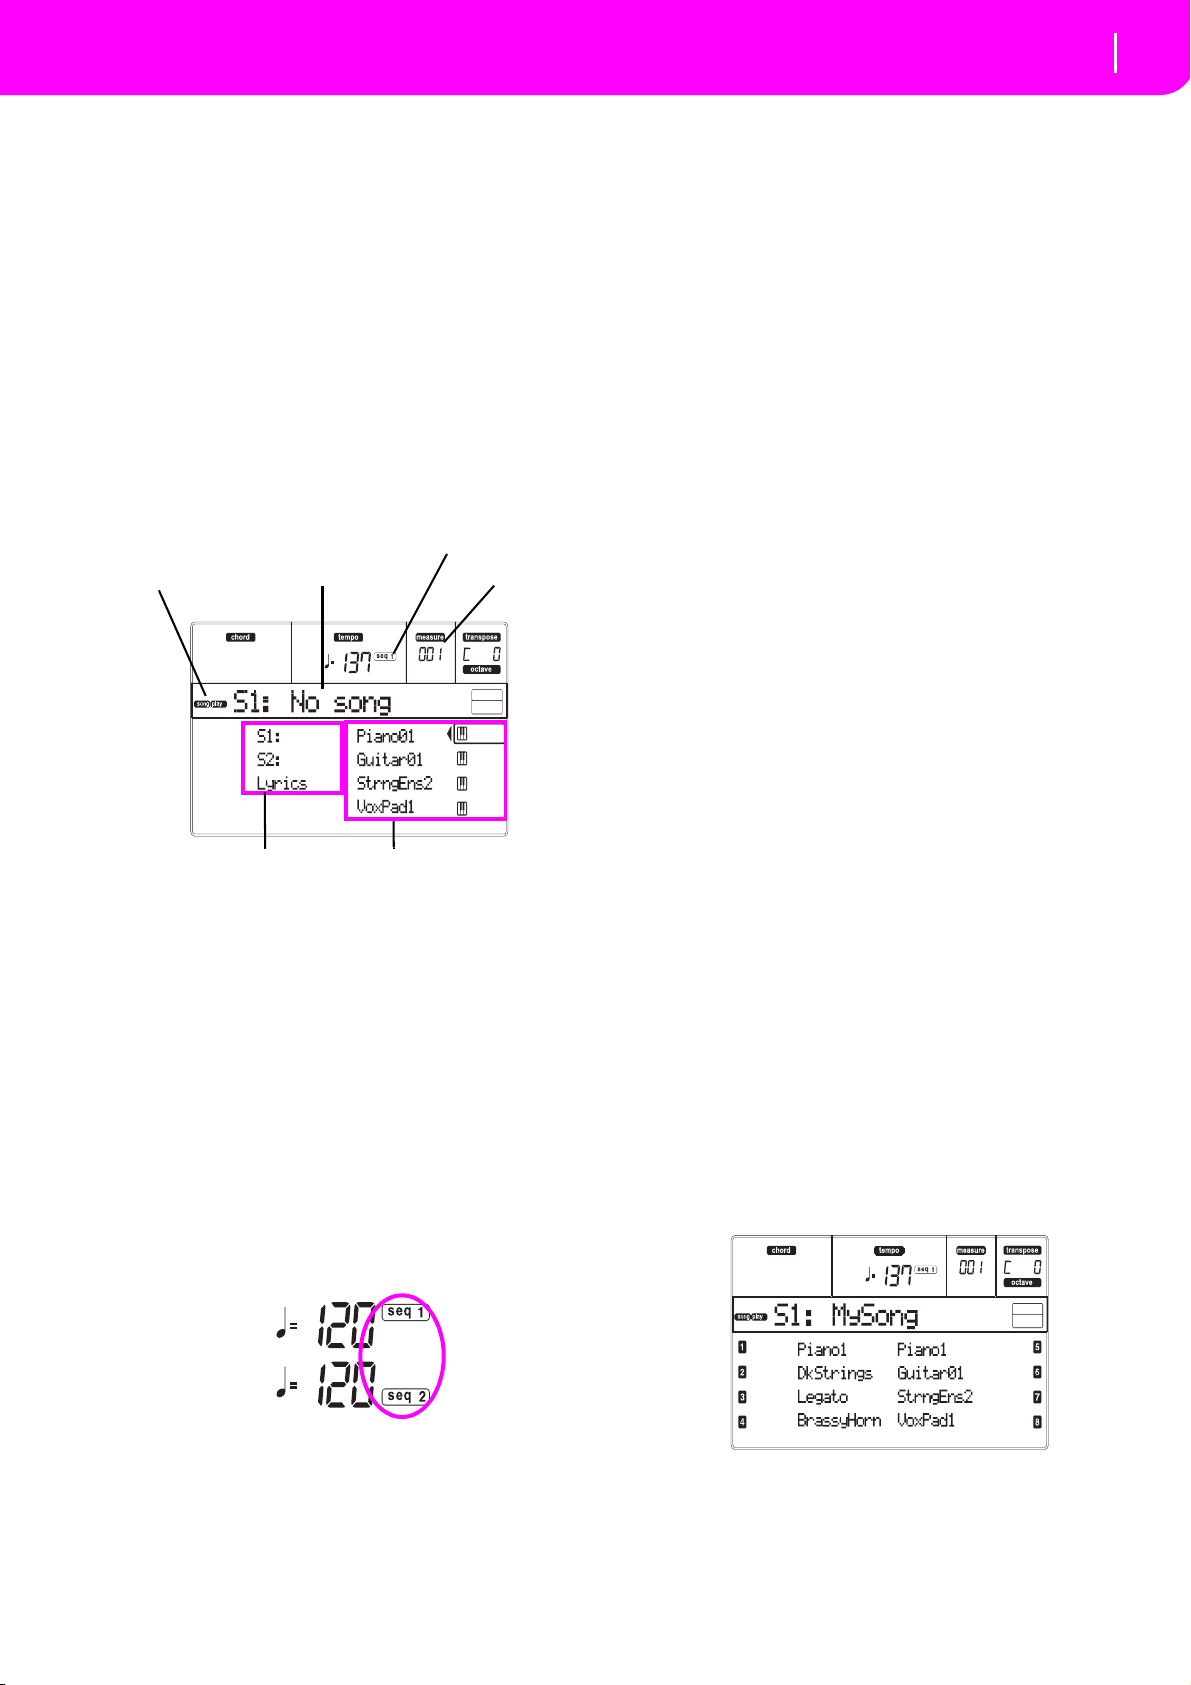
73
Song Play operating mode
Main page
Song Play icon
Page header
Realtime (Keyboard) tracks
Song select commands
Selected Sequencer
Measure number
MAIN PAGE
Press SONG PLAY to access this page from another
operating mode.
Note: When switching from Style Play to Song Play, the
Song Setup is automatically selected, and various track
parameters may change.
Press EXIT/NO to access this page from the Menu or
any of the Song Play edit pages.
To see the Song’s tracks, use the TRACK SELECT button to switch from the main page (showing the Realtime tracks), to the other tracks. Pressed a first time,
you will see tracks 1–8 (enlightened TRACK SELECT
LED); a second press will show tracks 9–16 (flashing
TRACK SELECT LED); pressed again, you will go back
to the Realtime tracks (TRACK SELECT LED switched
off).
Song Play icon
When on, this icon shows that the instrument is in Song
Play mode.
Page header
This line shows the currently selected sequencer, and
the assigned Song (“S1:Song Name” or “S2:Song
Name”).
When no Song is assigned to the current sequencer, this
line shows only the selected sequencer number (“S1:”
or “S2:”, depending on the selected sequencer).
When no sequencer or Song is selected, only the “No
Song” text appears.
Press either A (S1:) or B (S1:) to switch between
Sequencer 1 and Sequencer 2. When one of the
sequencers is selected, the sequencer number is also
shown at the right of the metronome Tempo.
Bar number
This counter shows the current bar number position of
the selected Song.
A (S1:SongName)
Pressed a first time (with a Song already selected) this
button pair selects Sequencer 1. Pressed a second time
(or with no Song selected), it opens the Song Selection
page (see “Song Select page” on page 74), allowing for
selection of a single Song or a Jukebox file for
Sequencer 1.
If you select another Song, while a Song is in play
within the same Sequencer, the new Song will start
playing.
While this parameter is selected, you can select a Song
by composing its progressive number (see “Selecting a
Song composing its progressive number” on page 70).
B (S2:SongName)
Pressed a first time (with a Song already selected) this
button pair selects Sequencer 2. Pressed a second time
(or with no Song selected), it opens the Song Selection
page (see “Song Select page” on page 74), allowing for
selection of a single Song for Sequencer 2.
If you select another Song, while a Song is in play
within the same Sequencer, the new Song will start
playing.
While this parameter is selected, you can select a Song
by composing its progressive number (see “Selecting a
Song composing its progressive number” on page 70).
C (Lyrics)
Open the Lyrics page (see “The Lyrics page” on
page 74). Lyrics will be shown only if included into the
selected Song, and compatible with a standard format
that Liverpool can recognize.
E (Upper 1 Program), F (Upper 2 Program), G (Upper 3
Program), H (Lower)
Name of the Programs assigned to the Realtime (Keyboard) tracks. Use these buttons to select, mute/unmute
or change the volume of the corresponding tracks.
TRACKS 1–8 PAGE
To see and edit tracks 1–8, press TRACK SELECT from
the main page. The TRACK SELECT LED turns on.
Press the TRACK SELECT button twice, to go back to
the main page.
When a Jukebox file is in play, its name appears on the
page header.
Selected Sequencer
These indicators show if the currently selected
sequencer is Seq1 or Seq2. Use the A and B VOLUME/
VALUE buttons to select a sequencer.
A–H (Tracks 1–8 Programs)
Name of the Programs assigned to tracks 1–8. Use
these buttons to select, mute/unmute or change the volume of the corresponding tracks.
Page 76
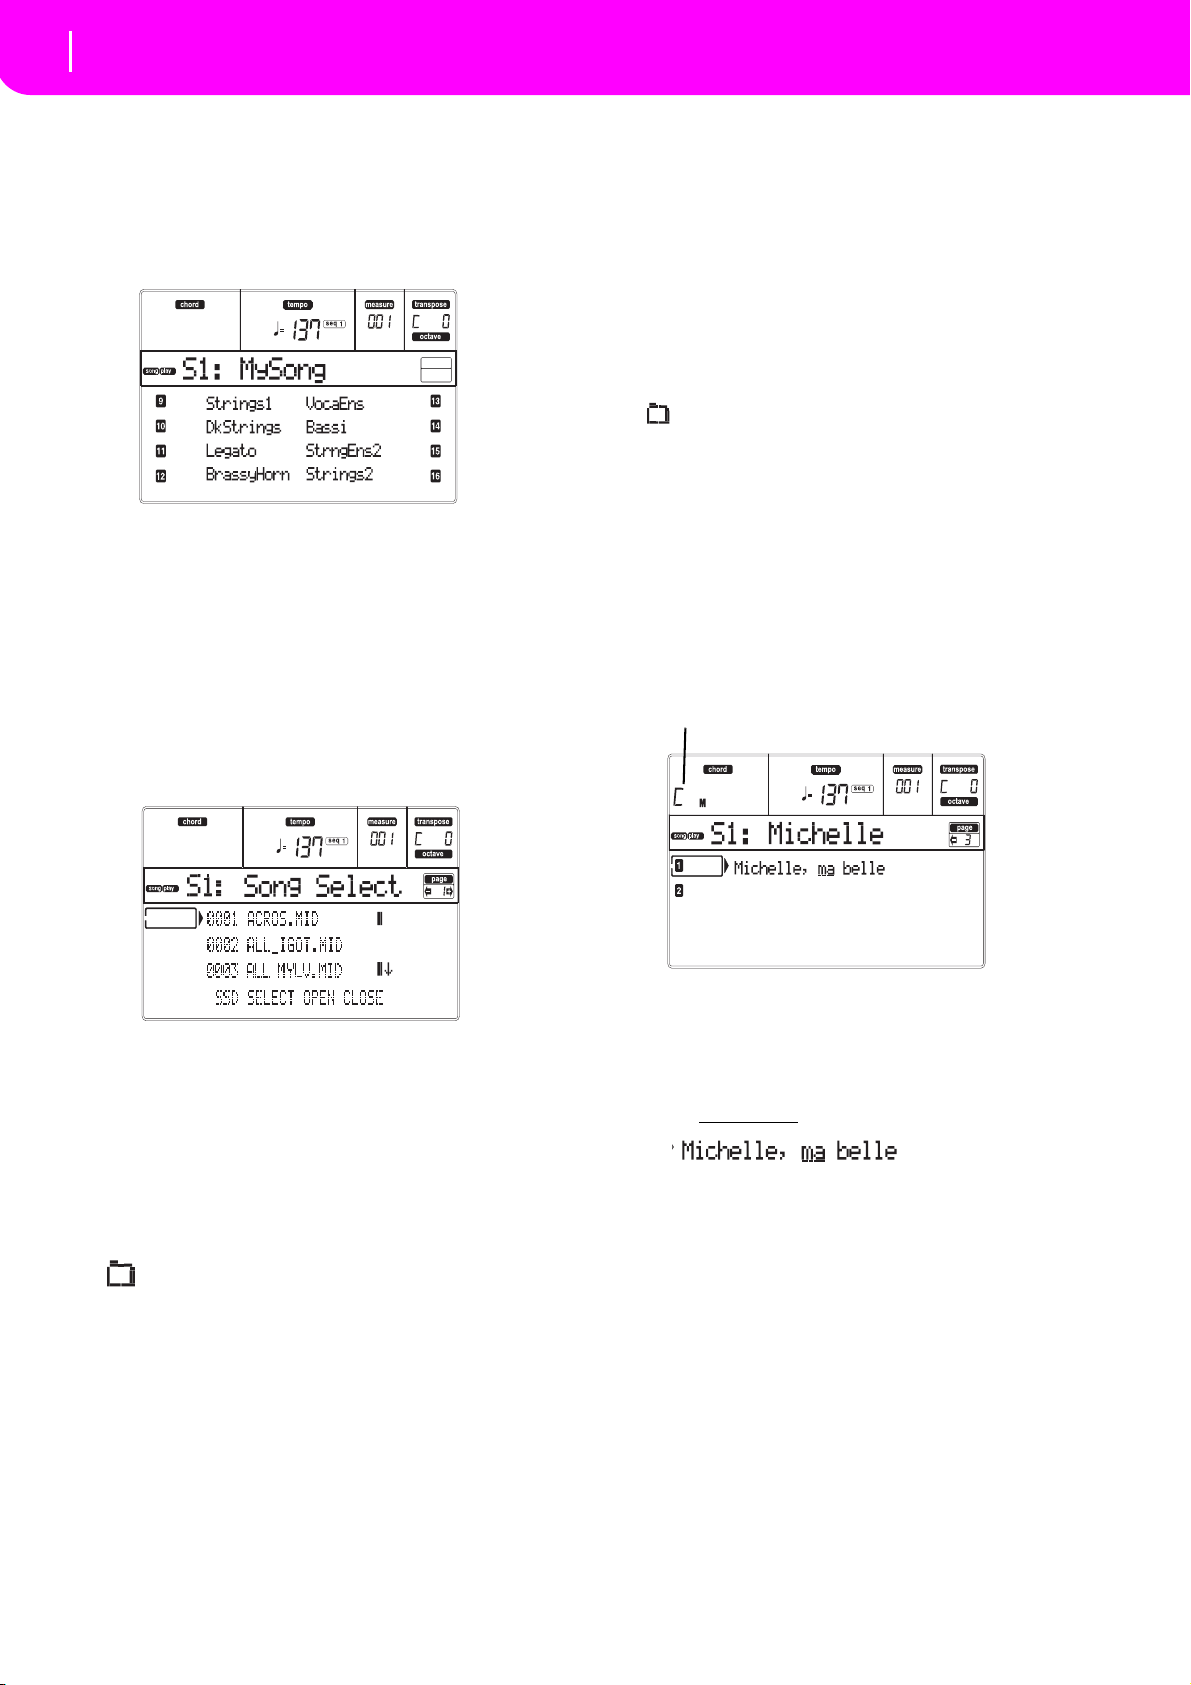
74
Song Play operating mode
Tracks 9–16 page
Chords
TRACKS 9–16 PAGE
To see and edit tracks 9–16, press TRACK SELECT once
from the Tracks 1–8 page, or twice from the main page.
The TRACK SELECT LED begins flashing.
Press the TRACK SELECT button again, to go back to
the main page.
A–H (Tracks 9–16 Programs)
Name of the Programs assigned to tracks 9–16. Use
these buttons to select, mute/unmute or change the volume of the corresponding tracks.
SONG SELECT PAGE
This page appears when you press either the A (S1:) or B
(S2:) button while you are in the main page. You can also
access the Song Select page by pressing PAGE +.
Press EXIT (or PAGE-) to go back to the main page of the
Song Play operating mode, without selecting a Song.
F-1 (SD)
Press this button after replacing a card in the card slot.
The new card will be read, and the file list shown on
the display will be updated.
F-2 (SELECT)
Selects the item on the first line in the display (Song or
Jukebox file). If a Song is already playing, it stops, and
the new Song starts playing. You are returned to the
Main page.
F-3 (OPEN)
Opens the selected folder (item whose name begins
with “ ”).
F-4 (CLOSE)
Closes the current folder, returning to the parent
(“upper”) folder.
THE LYRICS PAGE
This page shows the lyrics and chord abbreviations
included in the midifile (if any).
To access this page, select the Lyrics command, or press
PAGE+ twice, from the main page of the Song Play
mode (see “Main page” on page 73).
While in this page, select a Song for the selected
Sequencer, or a Jukebox file for Sequencer 1.
Note: There is a separate working directory for each onboard
sequencer.
A–C (File, folder)
Move the “.MID”, “.KAR” or “.JBX” file, or folder, to be
selected to the first line of the display. To select a file,
press the F-2 (SELECT) button. To open a folder, press
the F-3 (OPEN) button.
The “ ” symbol identifies a folder.
E–F (Scroll Up)
Scroll the list up. Keep SHIFT pressed and press one of
these buttons to jump to the previous alphabetical section.
G–H (Scroll Down)
Scroll the list down. Keep SHIFT pressed and press one
of these buttons to jump to the next alphabetical section
Exit from this display, and go back to the main page of
the Song Play mode, by pressing the EXIT button.
While the Song is playing, the text flows in the display,
and the chord abbreviations (if any) will appear on the
chords area of the display. The lyrics at the current
position are underlined
A (1)
Press this button pair to show Lyrics and Chords of
Sequencer 1.
B (2)
Press this button pair to show Lyrics and Chords of
Sequencer 2.
:
PLAYING A JUKEBOX FILE
With Sequencer 1, you can select a Jukebox file (a file
.
with the “.JBX” extension) instead of a single Song.
Page 77
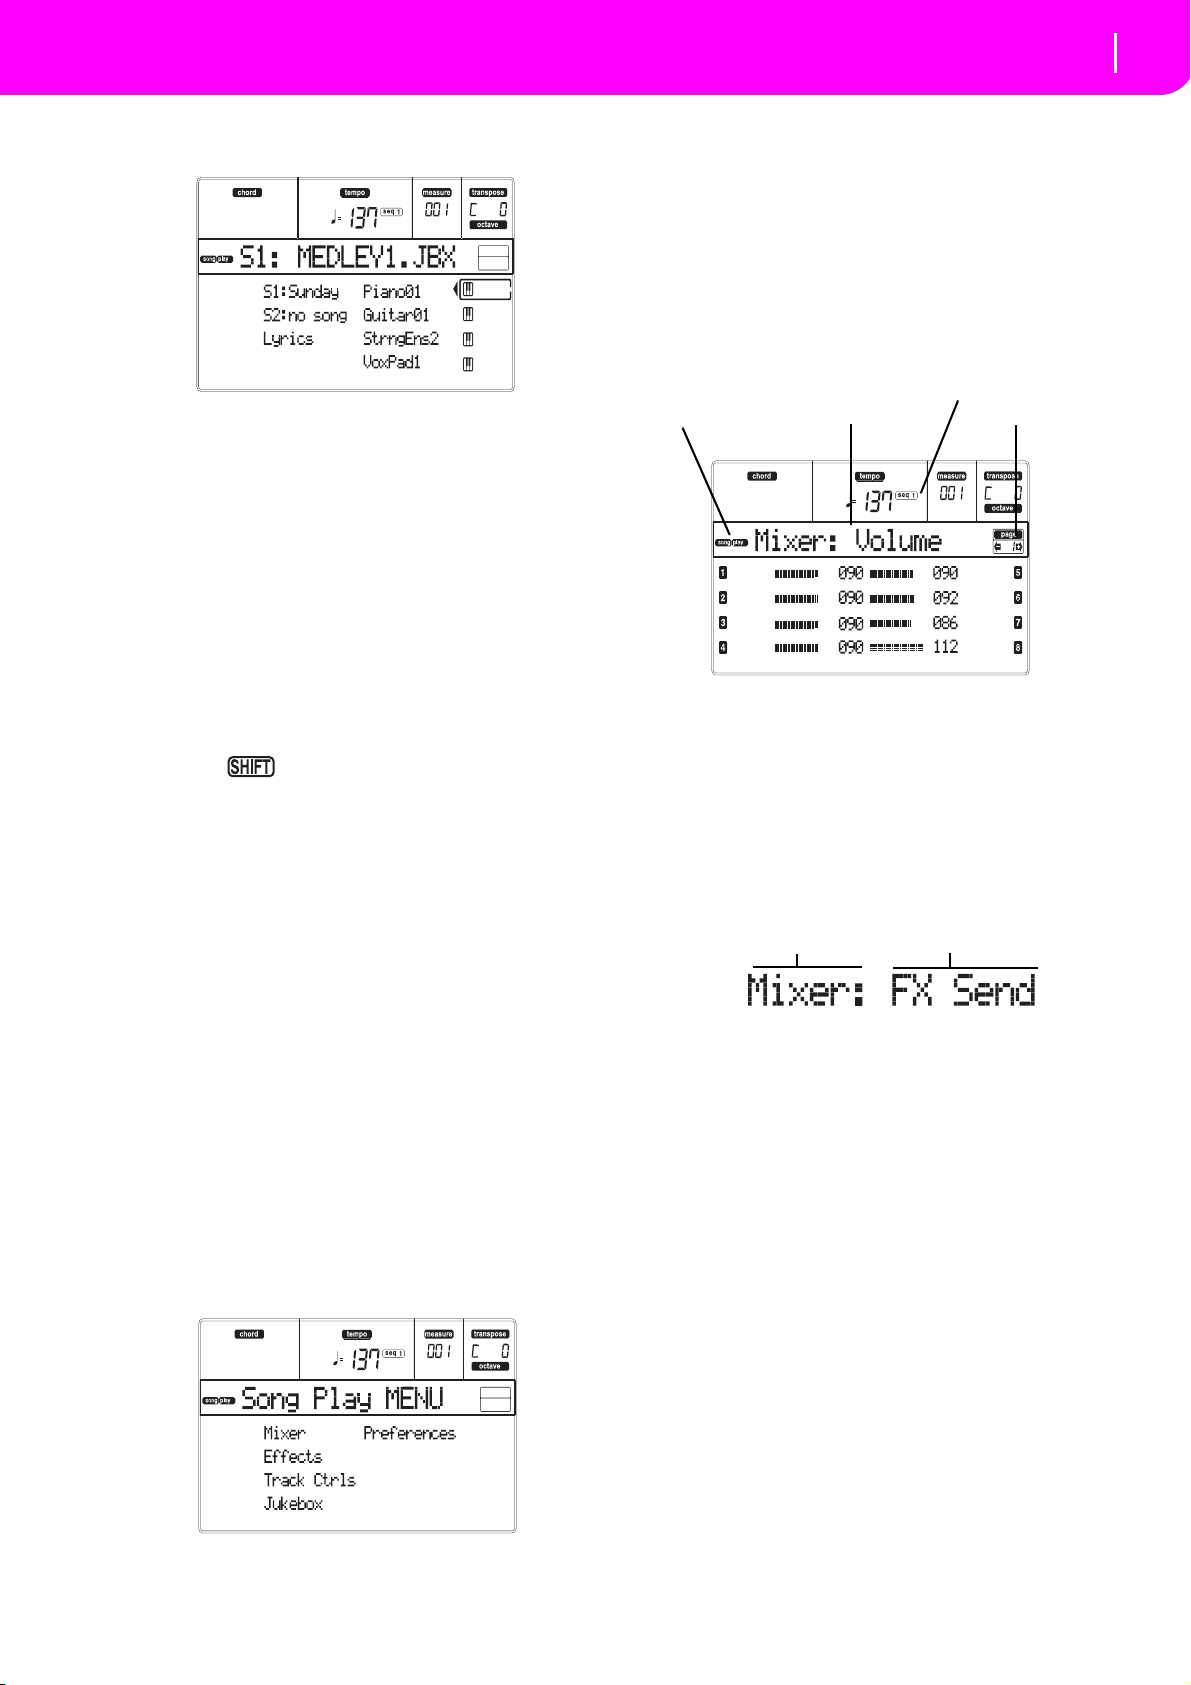
75
Song Play operating mode
Menu
Song Play icon
Page header Page number
Selected Sequencer
Section name
Page name
This lets you play a list of Songs without multiple selections.
Note: The Jukebox file can be assigned to the Sequencer
1 only.
Note: To create a Jukebox file, go to the Jukebox page (see
page 79).
Warn ing: Should you delete a Song included into the Jukebox list currently in play, the sequencer will stop, and the
“No Song” message will appear. At this point, press
SHIFT+>> (Seq1) to go to the next Song, and press PLAY/
STOP again.
Transport controls
When you select a Jukebox file, Sequencer 1 transport
controls are slightly different than with single Songs.
<< and >> Pressed alone, these buttons are the
Rewind and Fast Forward commands.
Keep the SHIFT button pressed,
and press these buttons to scroll to the
previous or next Song in the Jukebox list.
PAUSE Pauses the Song at the current position.
Press PAUSE or PLAY/STOP to start the
Song playing again.
PLAY/STOP Starts or stops the current Song. When
you stop the Song, the sequencer goes
back to measure 1 of the current Song.
If the Jukebox page is open, you can start
from the Song at the first line of the display. See “Page 9 - Jukebox” on page 79.
MENU
From any page, press MENU to open the Song Play
edit menu. This menu gives access to the various Song
Play edit sections.
When in the menu, select a section using the VOLUME/
VALUE buttons, press PAGE+ to select a page, or press
EXIT to exit the menu.
When in an edit page, press EXIT to go back to the
Song Play mode main page.
Each item of this menu corresponds to an edit section.
Each edit section groups many edit pages.
EDIT PAGE STRUCTURE
Select an edit section from the Menu, and/or use the
PAGE buttons to reach the desired page.
Press EXIT to go back to the main page of the Song Play
mode.
All edit pages share the same structure.
Song Play icon
When on, this icon indicates that the instrument is in
Song Play mode.
Page header
The header shows the name of the current edit page.
Usually, the header is divided into a first word, identifying the section name (e.g., “Mixer:FX Send” is a
“Mixer” section page), and a second word, referring to
the page name (e.g. “FX Send”).
Selected Sequencer
These indicators show if the currently selected
sequencer is Seq1 or Seq2. Go to the Main page and use
the A and B VOLUME/VALUE buttons to select a
sequencer.
Page
This area shows the current page number.
A–H
Each pair of VOLUME/VALUE buttons select a different parameter of command, depending on the edit
page.
Page 78
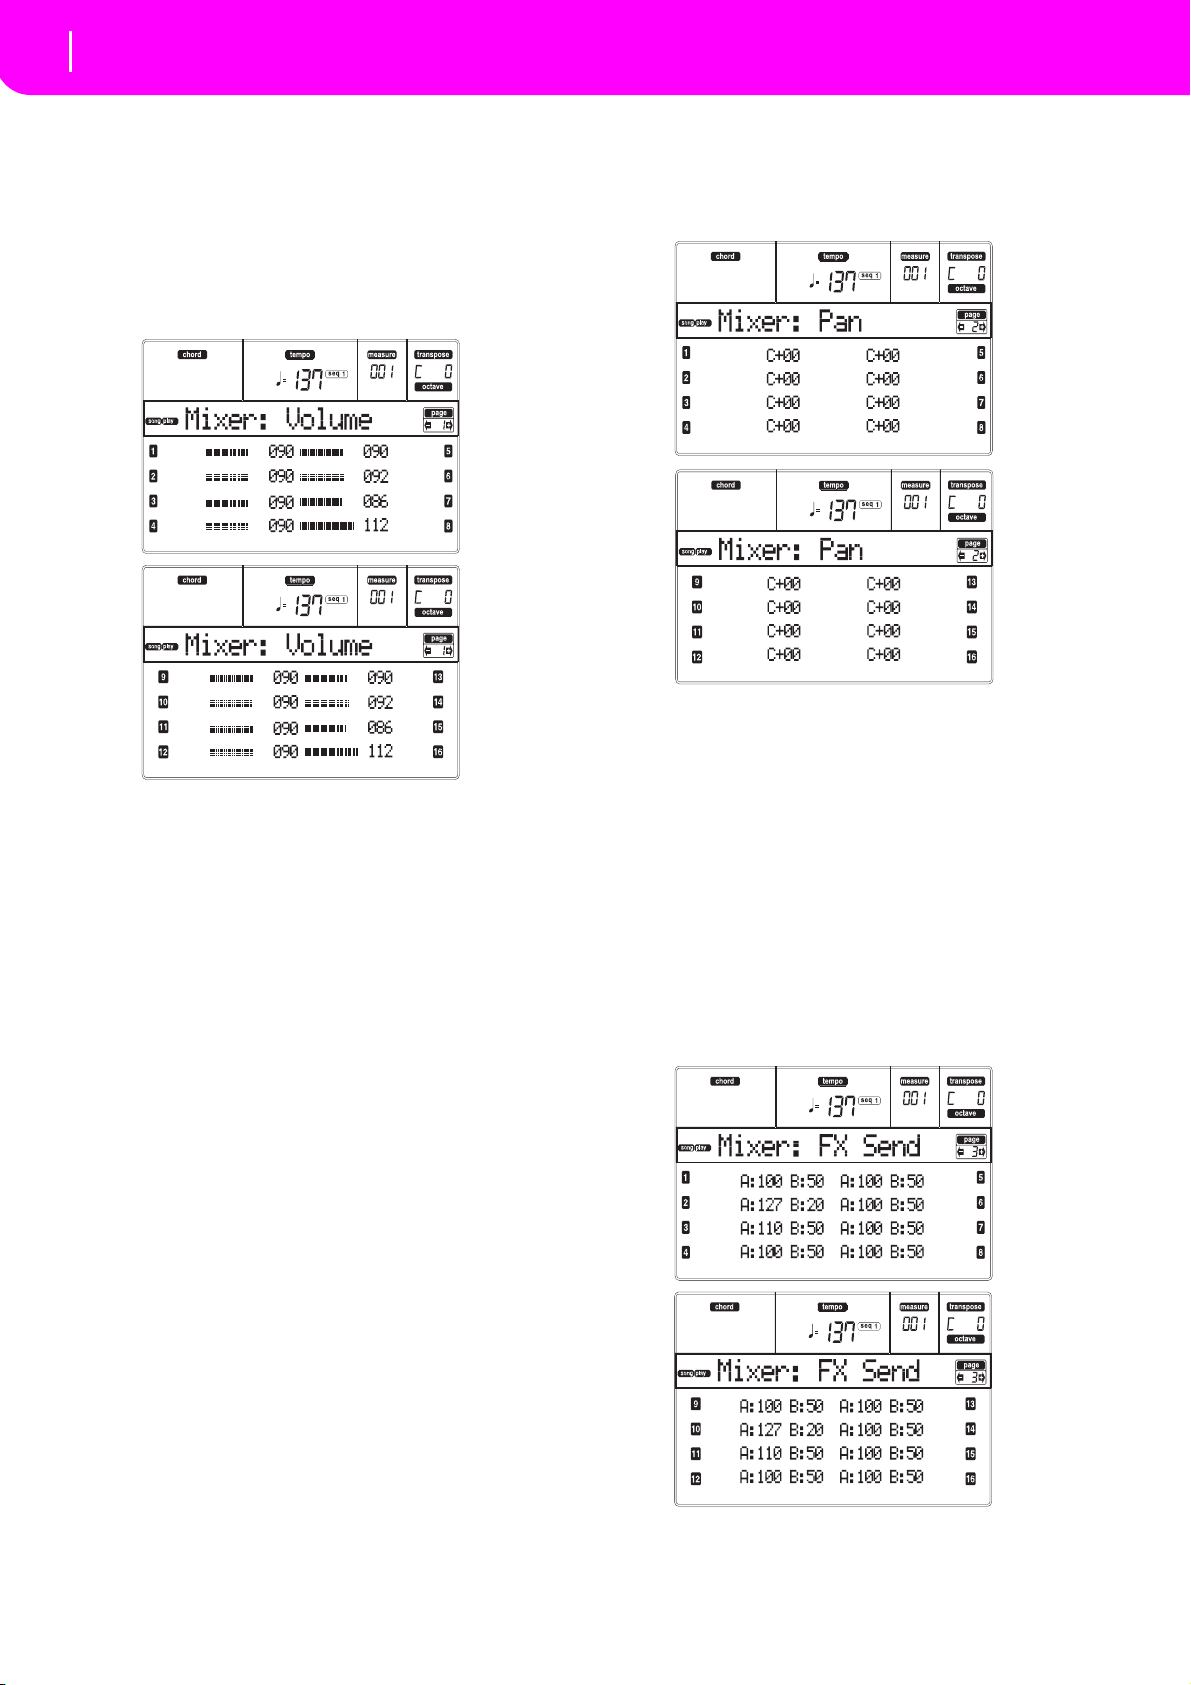
76
Song Play operating mode
Page 1 - Mixer: Volume
PAGE 1 - MIXER: VOLUME
Here you can adjust the volume for each of the 16
sequencer tracks. Press both VOLUME/VALUE button
to mute/unmute the corresponding track.
A muted track remains muted even when selecting a
different Song.
Use the TRACK SELECT button to switch between
Song tracks 1–8, Song tracks 9–16, and back again.
PAGE 2 - MIXER: PAN
Here you can adjust the pan for each Song track.
Use the TRACK SELECT button to switch between
Song tracks 1–8, Song tracks 9–16, and back again.
Pan
-64 Hard Left.
+00 Center.
+63 Hard Right.
Off The direct (uneffected) signal does not go
to the outputs; only the FX signal is heard
for this track.
PAGE 3 - MIXER: FX SEND A/B
This page lets you set the level of the track’s direct
(uneffected) signal going to the A and B Internal FX
processors (usually assigned to Sequencer 1).
Use the TRACK SELECT button to switch from tracks
1–8 to tracks 9–16.
Note: When playing back a Song that makes use of all four
effects (A–D), you can’t edit any effect parameter. These
parameters appear greyed out in the display.
Page 79
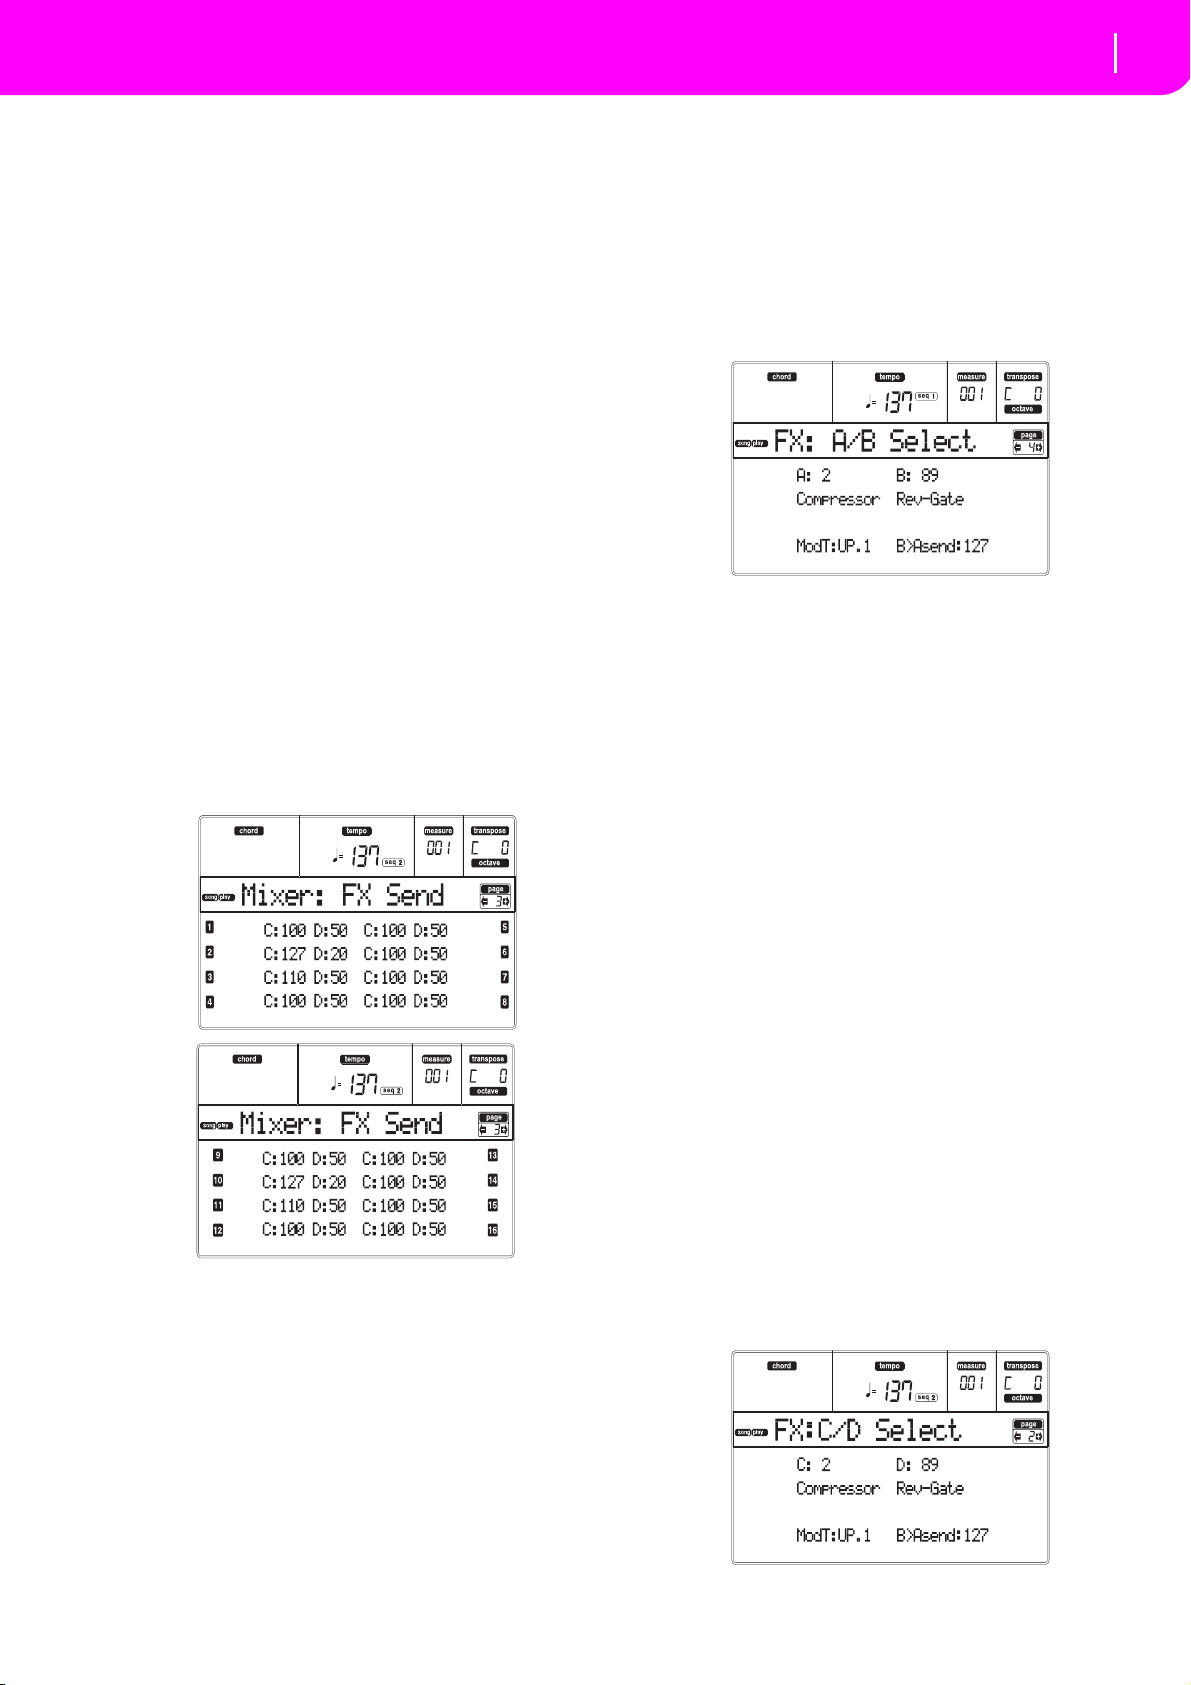
77
Song Play operating mode
Page 3 - Mixer: FX send C/D
Note: When you stop the Song, or select a different Song, the
default effects are selected again. You can, however, stop the
Song, change the effects, then start the Song again. Edit the
Song in Song mode to permanently change the effects.
Here is the edit procedure:
1. Use the VOLUME/VALUE (A–H) buttons to select
a track.
2. Use the F-1–F-4 buttons to select a parameter for
that track.
3. Use the TEMPO/VALUE controls to change the
parameter’s value.
Parameters
000 No effect. Only the direct (uneffected) sig-
nal goes to the outputs.
127 100% effect. The direct (uneffected) and
effected signals go to the outputs with the
same level.
PAGE 3 - MIXER: FX SEND C/D
This page lets you set the level of the track’s direct
(uneffected) signal going to the C and D Internal FX
processors.
Note: You can access this page only while editing the
Sequencer 2, and the “S2 FX Mode” parameter is set to “CD
Mode” (see page 80).
Use the TRACK SELECT button to switch from tracks
1–8 to tracks 9–16.
PAGE 4 - FX: A/B SELECT
This page lets you select the A and B effects. Usually,
the A effect is a reverb, while the B effect is a modulating effect.
Effects A and B are usually reserved to Sequencer 1.
You can, however, create Songs by using all four effects
in Song mode. Depending on the status of the “S2 FX
Mode” parameter, this effect pair could be reserved to
Sequencer 2, too (see page 80).
Note: When playing back a Song that makes use of all four
effects (A–D), you can’t edit any effect parameter. These
parameters appear greyed out in the display.
Note: When you stop the Song, or select a different Song, the
default effects are selected again. You can, however, stop the
Song, change the effects, then start the Song again. Edit the
Song in Song mode to permanently change the effects.
A, B
Effects assigned to the A and B effect processors. Usually, A is the reverb, while B is the modulating effect
(chorus, flanger, delay…). For a list of the available
effects, see “Effects” on page 177.
ModTrk (Modulating Track)
Source track for modulating MIDI messages. You can
modulate an effect parameter with a MIDI message
generated by a physical controller.
B>Asend (B>A Send)
Amount of the B effect going back to the input of the A
effect.
Here is the edit procedure:
1. Use the VOLUME/VALUE (A–H) buttons to select
a track.
2. Use the F-1–F-4 buttons to select a parameter for
that track.
3. Use the TEMPO/VALUE controls to change the
parameter’s value.
Parameters
000 No effect. Only the direct (uneffected) sig-
nal goes to the outputs.
127 100% effect. The direct (uneffected) and
effected signals go to the outputs with the
same level.
PAGE 4 - FX: C/D SELECT
This page lets you select the C and D effects. Usually,
the C effect is a reverb, while the D effect is a modulating effect.
Effects C and D are usually reserved to Sequencer 2
and the Realtime tracks. You can, however, create
Songs using all four effects in Song mode. Depending
on the status of the “S2 FX Mode” parameter,
Sequencer 2 might also use the A/B effect pair (see
page 80).
Page 80
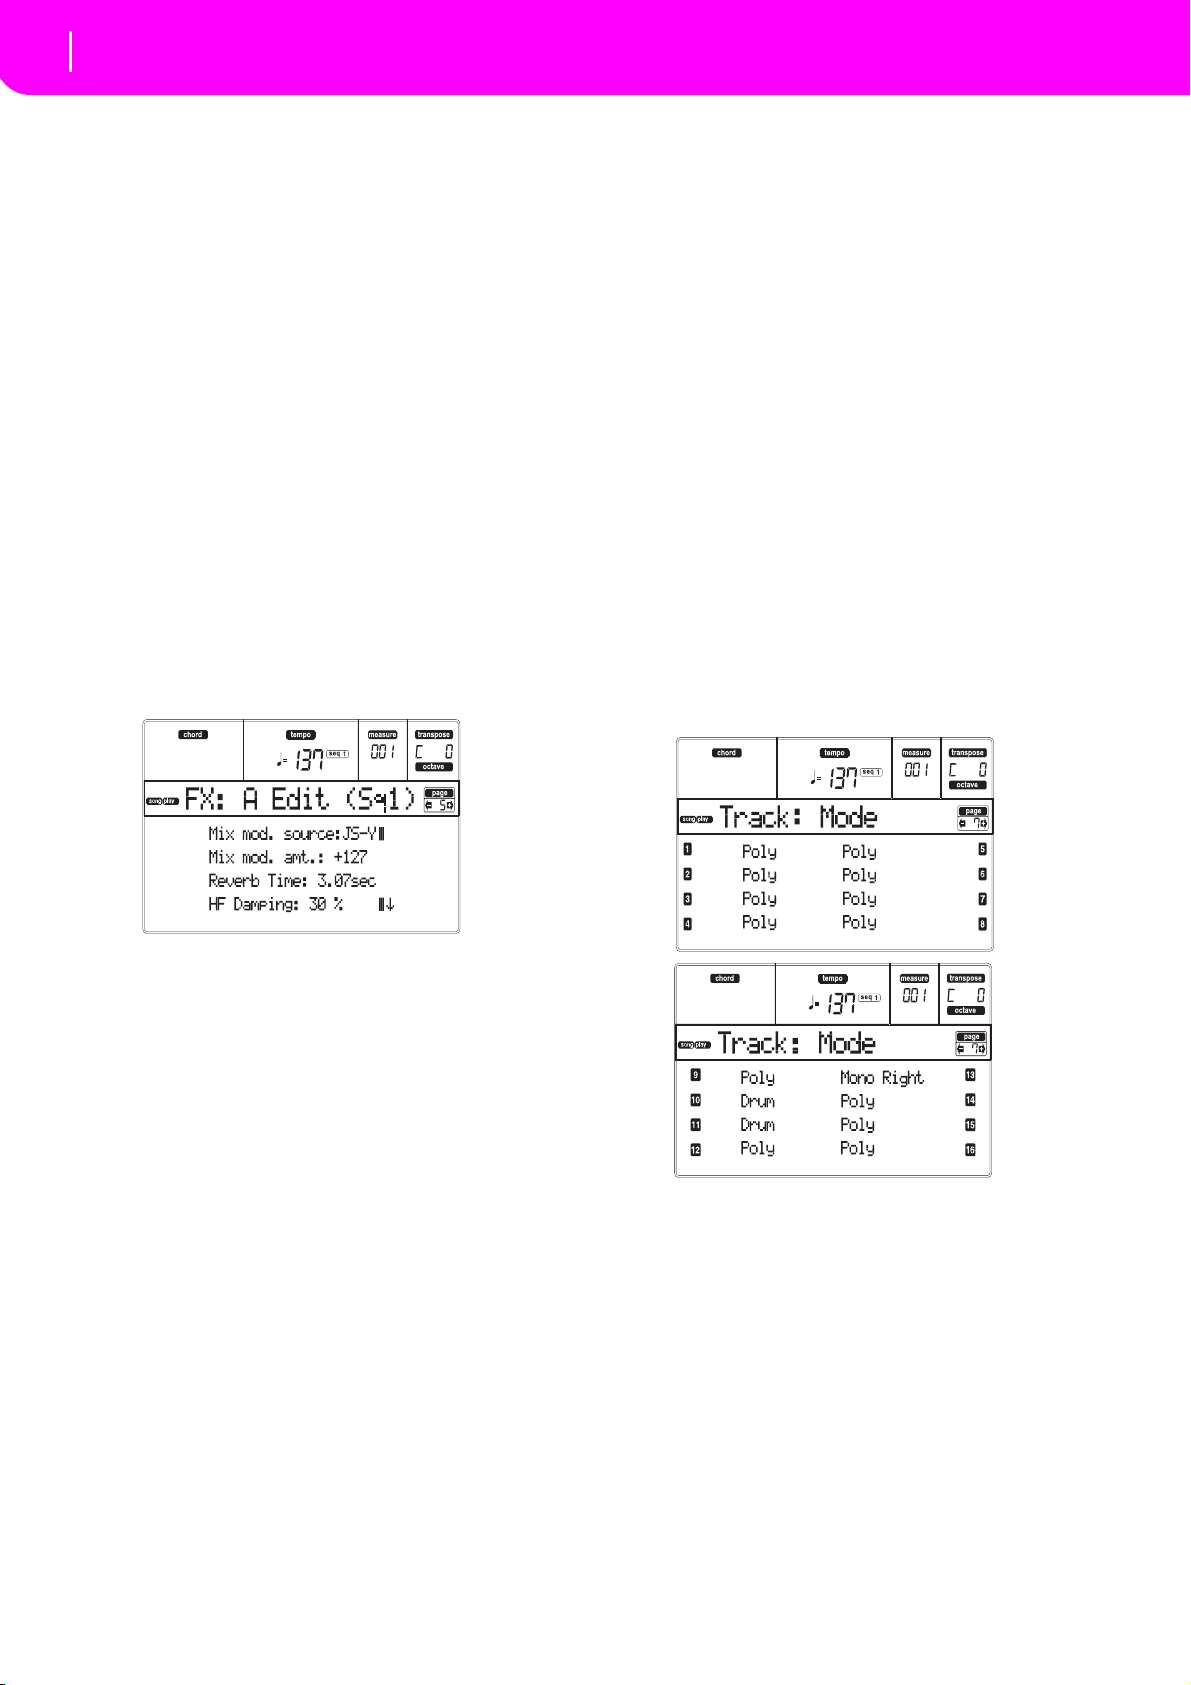
78
Song Play operating mode
Page 5 - FX: A editing
Note: When playing back a Song that makes use of all four
effects (A–D), you can’t edit any effect parameter. These
parameters appear greyed out in the display.
Note: When you stop the Song, or select a different Song, the
default effects are selected again. You can, however, stop the
Song, change the effects, then start the Song again. Edit the
Song in Song mode to permanently change the effects.
C, D
Effects assigned to the C and D effect processors. Usually, C is the reverb, while D is the modulating effect
(chorus, flanger, delay…). For a list of the available
effects, see “Effects” on page 177.
ModTrk (Modulating Track)
Source track for modulating MIDI messages. You can
modulate an effect parameter with a MIDI message
generated by a physical controller.
D>Csend (D>C Send)
Amount of the D effect going back to the input of the C
effect.
PAGE 5 - FX: A EDITING
This page contains the editing parameters for the A
effect (usually, reverb for Sequencer 1).
PAGE 5 - FX: C EDITING
This page contains the editing parameters for the C
effect. You can access this page only when the “S2 FX
Mode” parameter is set to C/D (see “S2 FX Mode” on
page 80). For more details, see “Page 5 - FX: A editing”
above.
Note: C and D effects are used also by the Realtime (Keyboard) tracks.
PAGE 6 - FX: D EDITING
This page contains the editing parameters for the D
effect. You can access this page only when the “S2 FX
Mode” parameter is set to C/D (see “S2 FX Mode” on
page 80). For more details, see “Page 5 - FX: A editing”
above.
Note: C and D effects are used also by the Realtime (Keyboard) tracks.
PAGE 7 - TRACK: MODE
This page lets you set the polyphony mode for each
Song track.
Use the TRACK SELECT button to switch from tracks
1–8 to tracks 9–16.
Use the E–F and G–H VOLUME/VALUE button pairs
to scroll the parameter list.
Use the A–D VOLUMME/VALUE button pairs to select
and edit a parameter.
Use the TEMPO/VALUE controls to edit the selected
parameter.
Note: When playing back a Song that makes use of all four
effects (A–D), you can’t edit any effect parameter. These
parameters appear greyed out in the display.
Note: When you stop the Song, or select a different Song, the
default effects are selected again. You can, however, stop the
Song, change the effects, then start the Song again. Edit the
Song in Song mode to permanently change the effects.
Parameters
See “Effects” on page 177 for a list of available parameters for each effect type.
PAGE 6 - FX: B EDITING
This page contains the editing parameters for the B
effect (usually modulating effect for Sequencer 1). For
more details, see “Page 5 - FX: A editing” above.
Parameters
Drum This is a Drum/Percussion track. No Mas-
ter or Octave Transpose applies to this
track.
Poly Tracks of this kind are polyphonic, i.e.
they can play more than one note at the
same time.
Mono Tracks of this kind are monophonic, i.e.
each new note stops the previous note.
Mono Right A Mono track, but with priority assigned
to the rightmost (highest) note.
Page 81
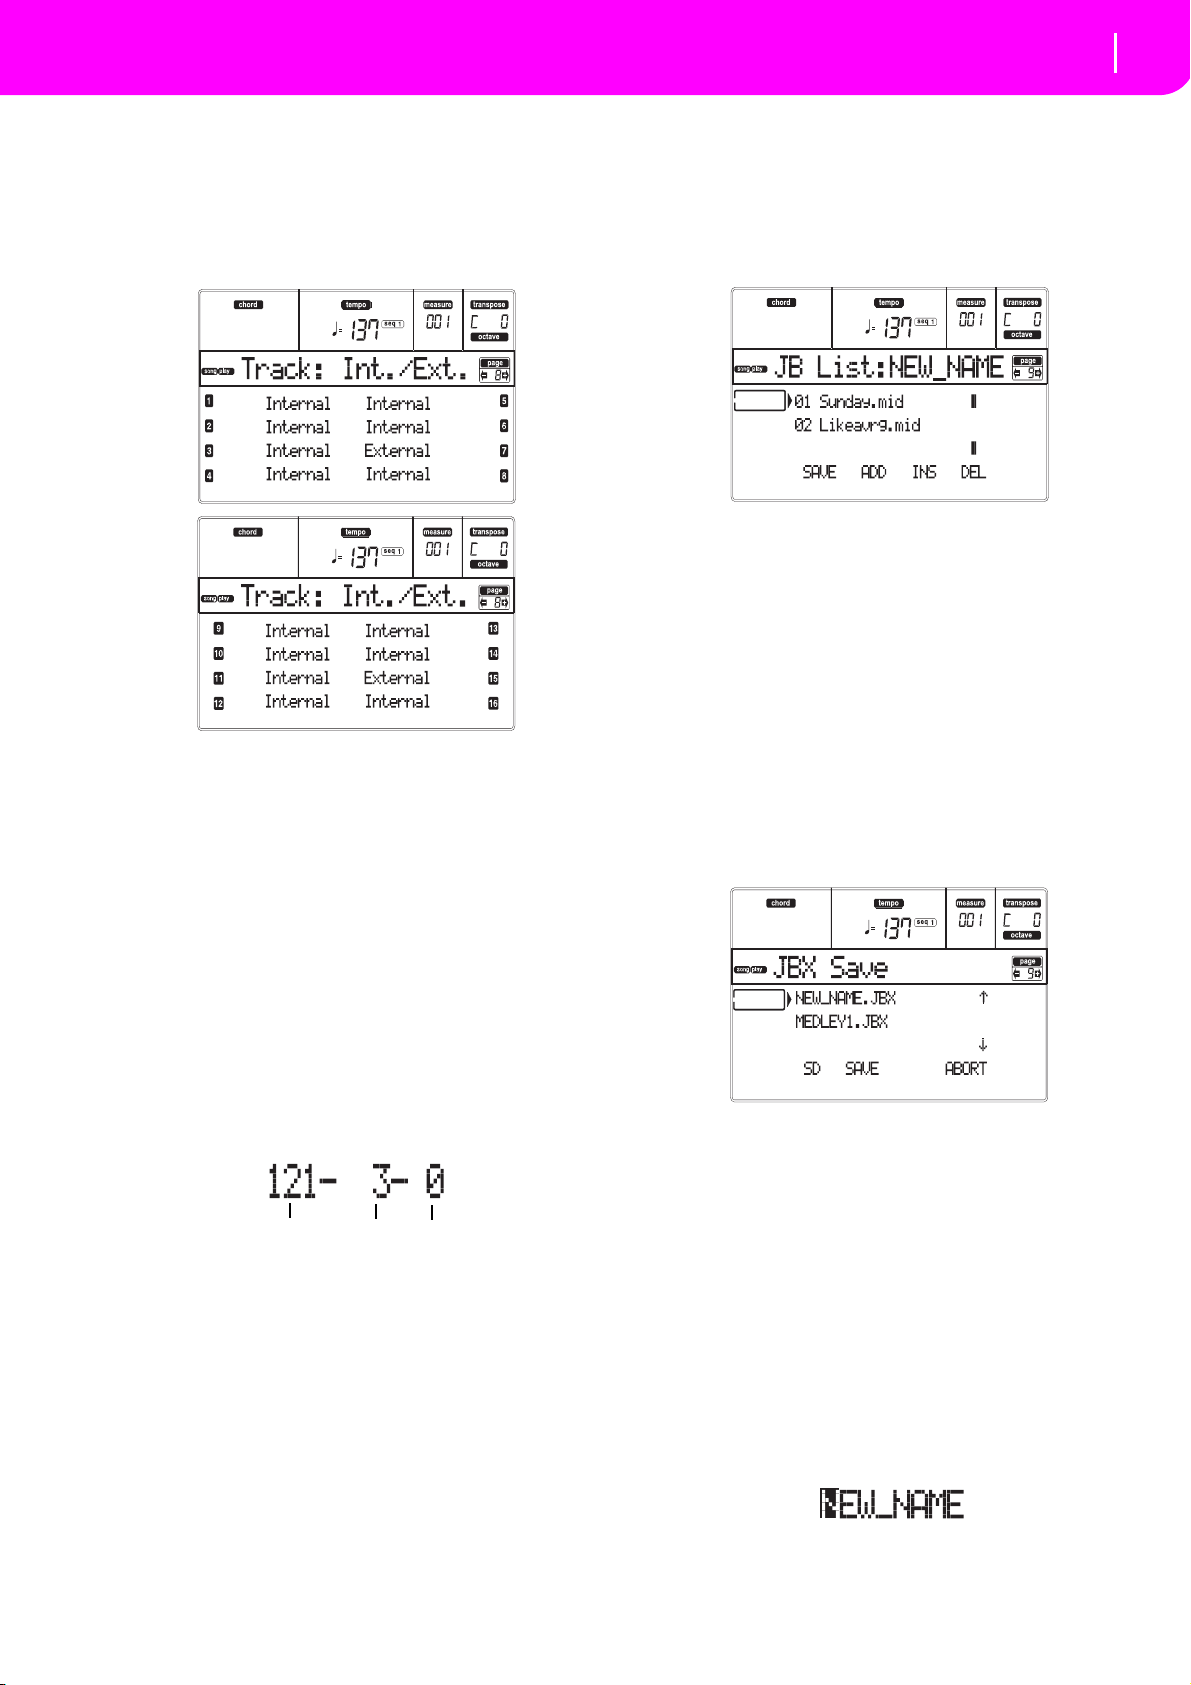
79
Song Play operating mode
Page 8 - Track: Internal/External
CC#0
CC#32
PC
PAGE 8 - TRACK: INTERNAL/EXTERNAL
This page lets you set the Internal or External status for
each track. It is very useful to let a Song track drive an
external expander.
Use the TRACK SELECT button to switch from tracks
1–8 to tracks 9–16.
Parameters
Internal The track plays the sounds generated by
the internal sound engine. It does not play
an external instrument connected to the
MIDI OUT.
External The track plays an external instrument
connected to the MIDI OUT. It does not
play the internal sounds, therefore saving
polyphony.
When a track is set to “External”, a strings
of transmitted Control Change and Program Change data is shown instead of the
Program name assigned to the track. In
the following example, CC#0 is the Control Change 0 (Bank Select MSB), CC#32 is
the Control Change 32 (Bank Select LSB),
PC is the Program Change.
Both The track plays both the internal sounds
and an external instrument connected to
the MIDI OUT.
PAGE 9 - JUKEBOX
The Jukebox function lets you play a list of Songs (127
max), at the simple touch of a button. You can play a
Jukebox file by selecting it in the Song Select page (see
“Playing a Jukebox file” on page 74), just as if it was a
normal Song.
In this page, you can create, edit and save a Jukebox
file. If a Jukebox file is already selected into a
Sequencer, you will enter this page with that file ready
to be edited. Otherwise, you will enter this page with
an empty “NEW_NAME.JBX” file.
To create a new file, even when a Jukebox file is already
selected, press SHIFT+ F-4 (Del), and confirm with
ENTER (see below the “F-4 (Del)” paragraph).
When you press PLAY/STOP from this page, the Jukebox playback begins from the currently selected Song
(i.e., the Song on the fist line of the display).
F-1 (SAVE)
Press this button to save the Jukebox file to the card.
The Jukebox Save page appears, allowing you to save
your file to the card.
Note: You can save your “.JBX” file only in the same folder
as the Songs in the list.
You can create a new file, or overwrite an existing one.
1. Move to the first line of the display the “.JBX” file
you want to save your list into. Select an existing
file if you want to overwrite it. Select the
“NEW_NAME.JBX” item to create a new file.
Use the E–F (Scroll Up) and G–H (Scroll Down)
VOLUME/VALUE buttons, or the TEMPO/VALUE
controls to scroll the list.
2. If you are making a new file, when the
“NEW_NAME.JBX” item is on the first line of the
display, press one of the A VOLUME/VALUE buttons. You are prompted to assign a name to the
selected item:
3. Move the cursor using the DOWN/- and UP/+ buttons. Select a character using the DIAL. Insert a
Page 82
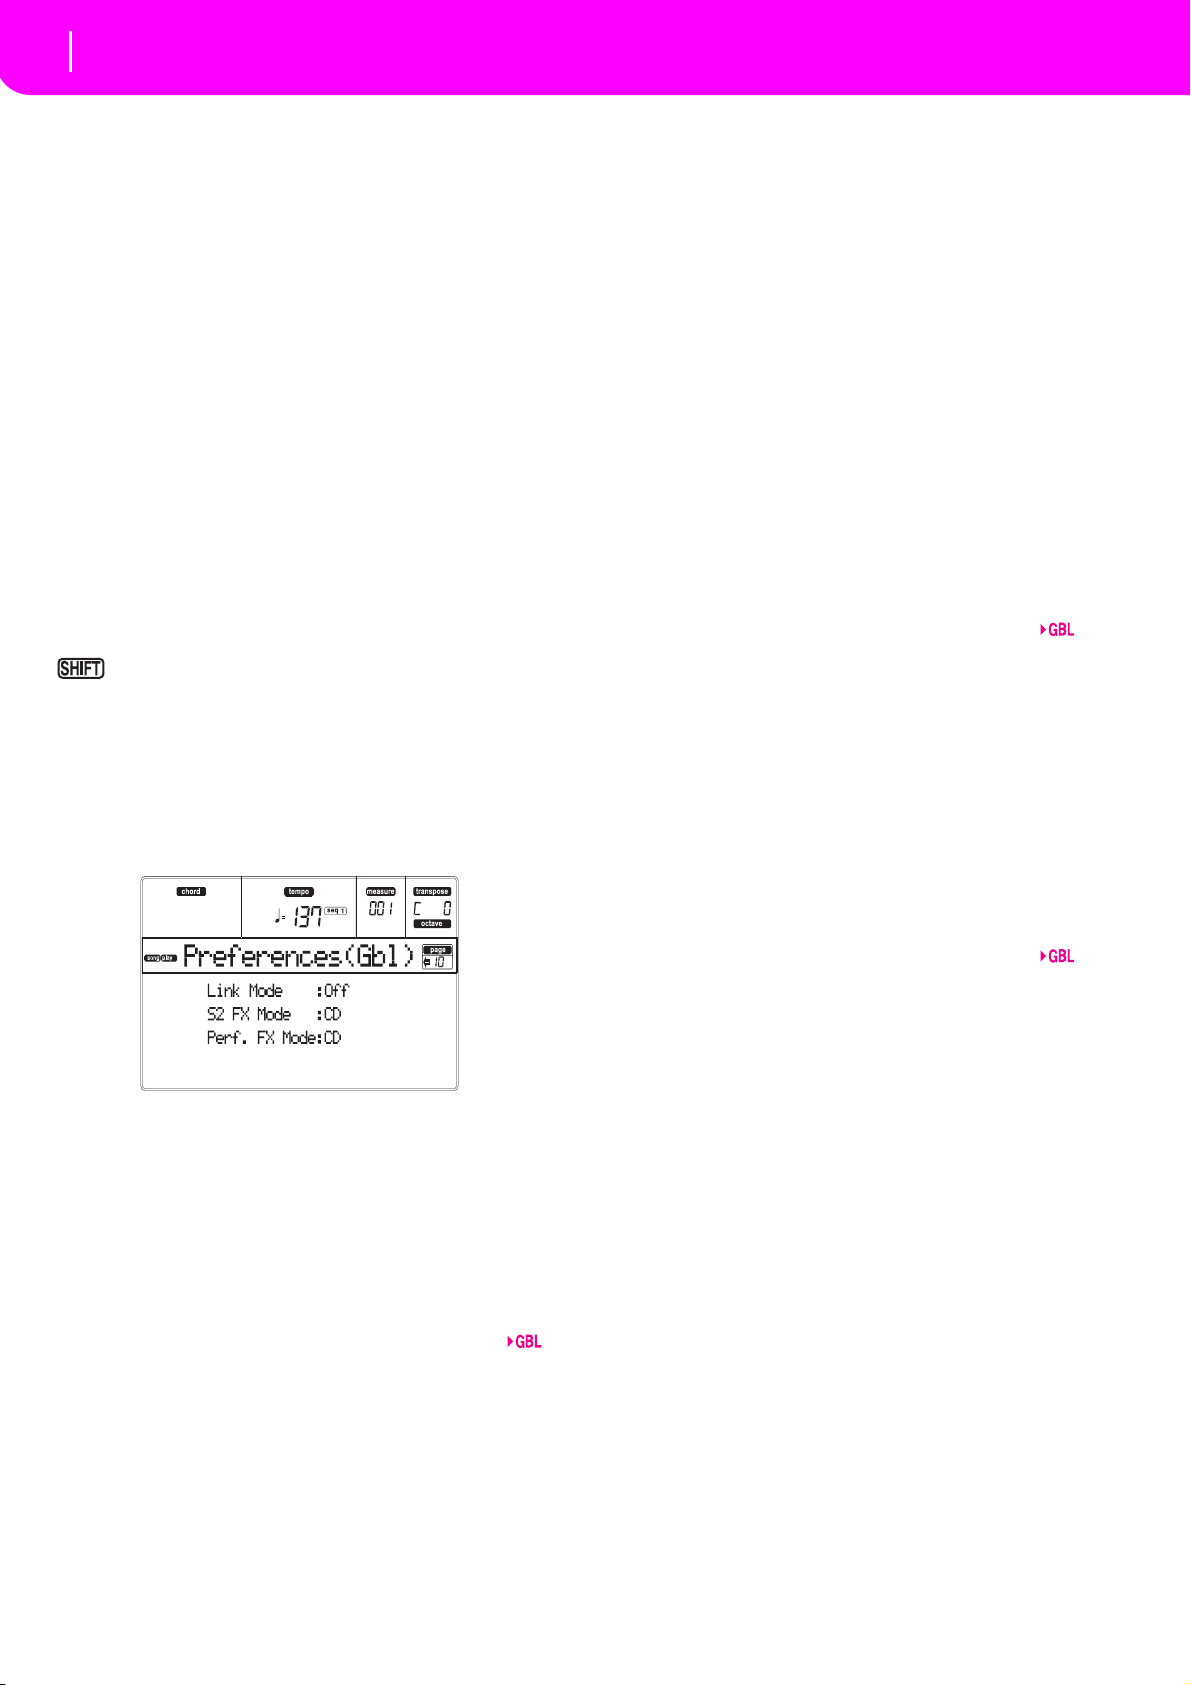
80
Song Play operating mode
Page 10 - Preferences
character at the cursor position by pressing the
INSERT button. Delete a character at the cursor
position by pressing the DELETE button.
4. When you have finished writing a name, press F-2
(SAVE) to confirm. The “Are you sure?” message
appears. Press ENTER to confirm, EXIT to abort.
F-2 (Add)
Adds a Song at the end of the current list. You can add
up to 127 Songs in a list.
Note: A Jukebox list can include only Songs contained in the
same folder.
F-3 (Ins)
Inserts a Song at the cursor position (i.e., the first line of
the display). All subsequent Songs are moved to the
next higher-numbered slot. You can add up to 127
Songs in a list.
Note: A Jukebox list can include only Songs contained in the
same folder.
F-4 (Del)
This command let’s you delete the Song on the first line
of the display.
Pressed while keeping SHIFT pressed, the
whole Jukebox list is deleted. (The instrument asks for
a confirmation with the “Are you sure?” message; press
ENTER to confirm, EXIT to abort).
The Jukebox file name changes to “NEW_NAME.JBX”.
PAGE 10 - PREFERENCES
In this page, you can set various general parameters.
Use the A–D VOLUME/VALUE button pairs to select a
parameter.
Note: These settings are stored in the Global file. After
changing these settings, press WRITE to save them into the
Global. The Write Global window will appear (see “The
Write window” on page 72).
Note: You can always start both sequencers simultaneously.
Start both sequencers simultaneously by keeping SHIFT held
down while pressing one of the PLAY/STOP controls.
Link Mode
The two onboard Sequencers can work each with a different Tempo (Off), or use the same Tempo (Link
modes).
Off The sequencers Tempo are not linked.
Each sequencer uses its own Tempo.
Link Measure
The two sequencers Tempo are linked
together. The Tempo data written into the
Songs are ignored. Adjust the Tempo
using the TEMPO/VALUE controls.
Start one of the sequencers, by pressing its
own PLAY/STOP control. Then, start the
other sequencer, by pressing the other
PLAY/STOP control; the second sequencer
starts at the next measure.
Link Beat The two sequencers Tempo are linked
together. The Tempo data written into the
Songs are ignored. Adjust the Tempo
using the TEMPO/VALUE controls.
Start one of the sequencers, by pressing its
own PLAY/STOP control. Then, start the
other sequencer, by pressing the other
PLAY/STOP control; the second sequencer
starts at the next beat (quarter or octave,
depending on the Song’s Time Signature).
S2 FX Mode
This parameter selects the effects mode for Sequencer
2. When a 4-effects Song is loaded, all four effects are
used, independently from this setting.
AB The A and B effect pair is used. Sequencer
2 shares its effects with Sequencer 1.
CD The C and D effect pair is used.
Note:
When this parameter is set to CD,
Sequencer 2 shares its effects with the Realtime
(Keyboard) tracks, so these effects can be changed
either selecting a Song for Sequencer 2, or selecting a Performance (unless the “Performance FX
Mode” parameter is set to Off – see below).
Performance FX Mode
This parameter selects the effects mode for the Performance.
Off When selecting a Performance, no effect is
selected.
CD The Performance selects the C and D effect
pair.
Note: When both this parameter and the “S2
FX Mode” parameter are set to CD, Sequencer
2 shares its effects with the Realtime (Keyboard) tracks, so these effects can be changed
either selecting a Song for Sequencer 2, or
selecting a Performance.
Page 83

81
Song Play operating mode
Saving a list of Songs
SAVING A LIST OF SONGS
How to save a list of Songs contained in a
folder
1. Press SONG PLAY to select the Song Play operative mode.
2. Press one of the A (S1:) VOLUME/VALUE button
to select the Load Song page.
3. Use the F-3 (OPEN) and F-4 (CLOSE) buttons to
browse through the folders inside the card.
4. Move the folder you are looking for to the first line
of the display. Use the TEMPO/VALUE controls, or
the E–F (Scroll Up) and G–H (Scroll Down) VOLUME/VALUE buttons.
5. Once the folder is selected, press SHIFT + F-2.
6. A dialog box will appear, asking you to insert a
new card into the card slot. Insert the card, and
press ENTER to confirm, or EXIT to abort.
Note: The text file will contain a list of “*.mid”, “*.kar” and
“*.jbx” files only (i.e., the files you can select using the
numeric keypad – see “Selecting a Song composing its progressive number” on page 70). Folders and different kinds of
files will not be included.
When saved, the text file will be named after the selected
folder. For example, a folder named “Dummy” will generate
a “Dummy.txt” file. If a file with the same name already
exists on the card, it will be overwritten without waiting for
any confirmation. A file containing the list of all valid files
contained into the root of the card will generate a “Root.txt”
file.
The list will include the progressive number assigned to each
Song, file names in MS-DOS format (8.3), the total number
of files in the list.
For the correct display and printing of the list on a personal
computer, use a fixed size (i.e., non-proportional) character
in your text editor.
Warn ing: While the list may contain more than 9999 files,
you can’t select Songs outside the 0001–9999 range when
using the numeric keypad.
How to save a list of Songs contained in a
Jukebox file
1. Press SONG PLAY to select the Song Play operative mode.
2. To select an existing Jukebox file, press one of the
A (S1:) VOLUME/VALUE buttons to select the
Load Song page.
If you are creating a new Jukebox file, press
MENU instead, select the Jukebox page, and jump
to step 7.
3. Use the F-3 (OPEN) and F-4 (CLOSE) buttons to
browse through the folders inside the card.
4. Move the folders and files to select to the first line
of the display. Use the TEMPO/VALUE controls, or
the E–F (Scroll Up) and G–H (Scroll Down) VOLUME/VALUE buttons.
5. When the Jukebox file you are looking for is
selected, press F-2 (SELECT) to select it.
6. Once the Jukebox file is selected, press MENU and
select the Jukebox page.
7. While you are in the Jukebox page, press SHIFT +
F-2 to save the list.
8. A dialog box will appear, asking you to insert a
new card into the card slot. Insert the card, and
press ENTER to confirm, or EXIT to abort.
Note: When saved, the text file will be named after the
selected Jukebox file. For example, a Jukebox file named
“Dummy.jbx” will generate a “Dummy.txt” file. A new,
unnamed Jukebox file will generate a “New_name.txt” file. If
a file with the same name already exists on the card, it will be
overwritten without waiting for any confirmation.
The list will include the progressive number assigned to each
Song, file names in MS-DOS format (8.3), the total number
of files in the list.
For the correct display and printing of the list on a personal
computer, use a fixed size (i.e., non-proportional) character
in your text editor.
Page 84
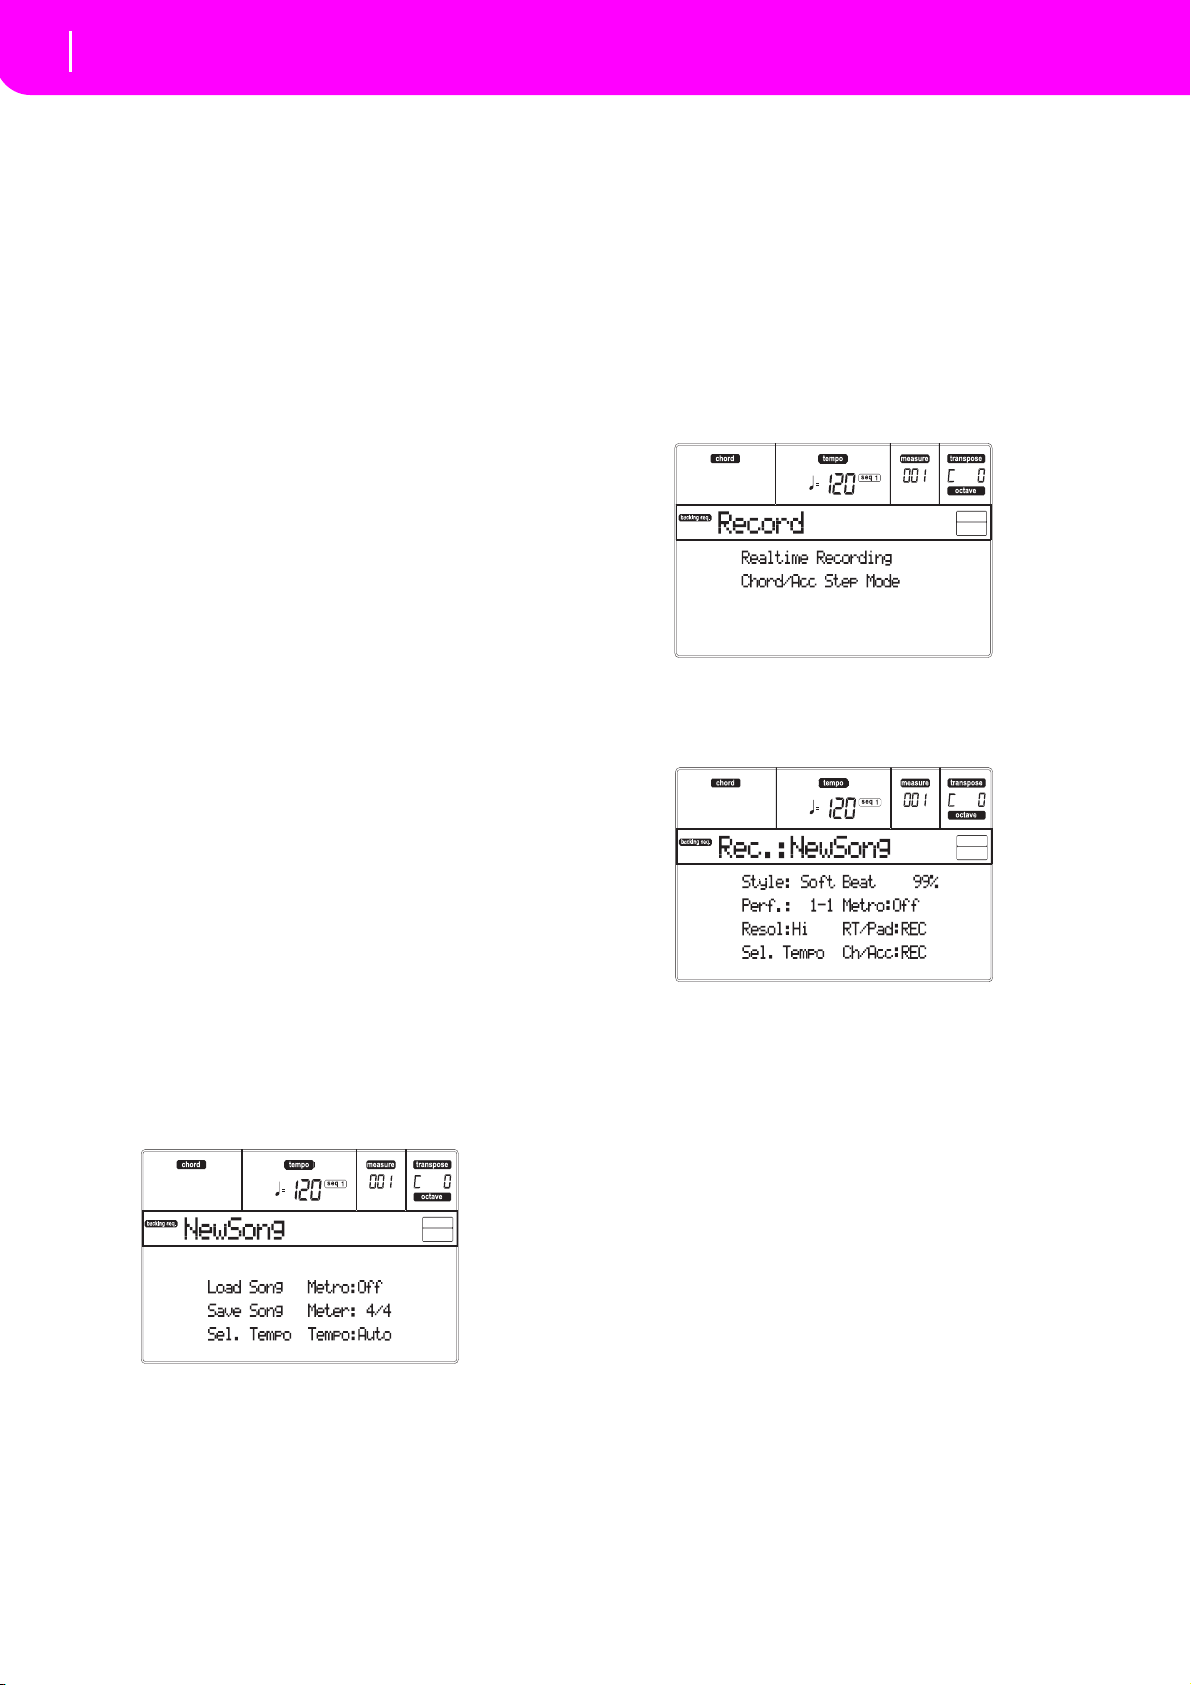
82
Backing Sequence operating mode
Transport controls
12. BACKING SEQUENCE OPERATING MODE
The Backing Sequence mode lets you record a live performance with the Styles. The front panel controls
work mostly as in Style Play mode, but here you are
recording what you are playing. After recording, the
result is a new Song made of the Realtime tracks and
the Style tracks.
TRANSPORT CONTROLS
When in Backing Sequence mode, use SEQ1 transport
controls (PLAY/STOP, PAUSE…). See “SEQUENCER
TRANSPORT CONTROLS - SEQ1 and SEQ2” on
page 18 for more information).
THE BACKING SEQUENCE, SONG AND SONG PLAY MODES
The Backing Sequence and Song modes are linked
together: go to Backing Sequence mode to record a
Song, and switch to Song mode to edit it.
Since they use the same sequencer and memory area,
recording a new Song in Backing Sequence mode
deletes the Song loaded in Song mode.
Note: The Song is kept in RAM, so save it before turning the
instrument off, or it will be lost.
Warni ng: When switching to Song Play, the Song is deleted,
since Backing Sequence, Song and Song Play share the same
sequencer (Sequencer 1). The “Erase Song?” message
appears. Press ENTER to confirm, EXIT to stay in Backing
Sequence mode, and avoid deleting the Song.
REALTIME RECORDING MODE
While in Backing Sequence mode, you can record a
new Song in realtime mode (i.e., recording exactly
what you play). Realtime (Keyboard) tracks will be
Song tracks 1–4, Pads will be Song tracks 5–8, while
Style tracks will be Song tracks 9–16.
1. Enter the Backing Sequence mode.
2. Press RECORD. You will be prompted to select the
Realtime Recording mode, or the Chord/Acc Step
.
Mode
3. Press one of the A VOLUME/VALUE buttons to
select the Realtime Recording mode. The Realtime
Recording page appears (see “Realtime Recording
page” on page 85).
HOW TO PLAYBACK A SONG
You can load a Standard MIDI File, and play it back
while in Backing Sequence mode.
Note: Songs on the internal SSD cannot be selected.
Note: When in the Main page (Backing Sequence Play) the
keyboard doesn’t play.
1. Enter the Backing Sequence mode. The Backing
Sequence Playback page appears (see page 83).
2. Press one of the B (Load Song) VOLUME/VALUE
buttons to load a Song (see “Load Song page” on
page 84). You can load any Standard Midi File
(files with the “.MID” or “.KAR” extension).
3. Press PLAY/STOP to start the playback.
4. Press PLAY/STOP again to stop the playback. The
playback is automatically stopped at the end of the
Song.
4. The last selected Style is currently selected. Should
it not be the right one, select a different Style to start
recording with. (See “Selecting a Style” on page 26).
5. The last selected Performance or STS is currently
selected. If you prefer, select a different Performance or STS. (See “Selecting a Performance” on
page 25, and “Selecting a Single Touch Setting
(STS)” on page 26).
6. Select the status of the Backing Sequence tracks,
using the G (RT) and H (Ch/Acc) button pairs. (RT
stays for Realtime/Keyboard; Ch/Acc stays for
Chord/Accompaniment, i.e. the Style tracks). To
record all you play on the keyboard, plus the automatic accompaniment, leave their status to REC
(see “Realtime Recording page” on page 85).
Warni ng: Tracks set to REC are automatically deleted
when starting recording. Set a track to the PLAY status, when you don’t want to delete it. For example, if
you are recording a Realtime (Keyboard) part on and
existing Style track, set the Ch/Acc parameter to PLAY,
and the RT track to REC.
7. Start recording by pressing the left PLAY/STOP
button (or the START/STOP button). After a countin (see “Metro (Metronome)” on page 85), you can
start recording.
Page 85
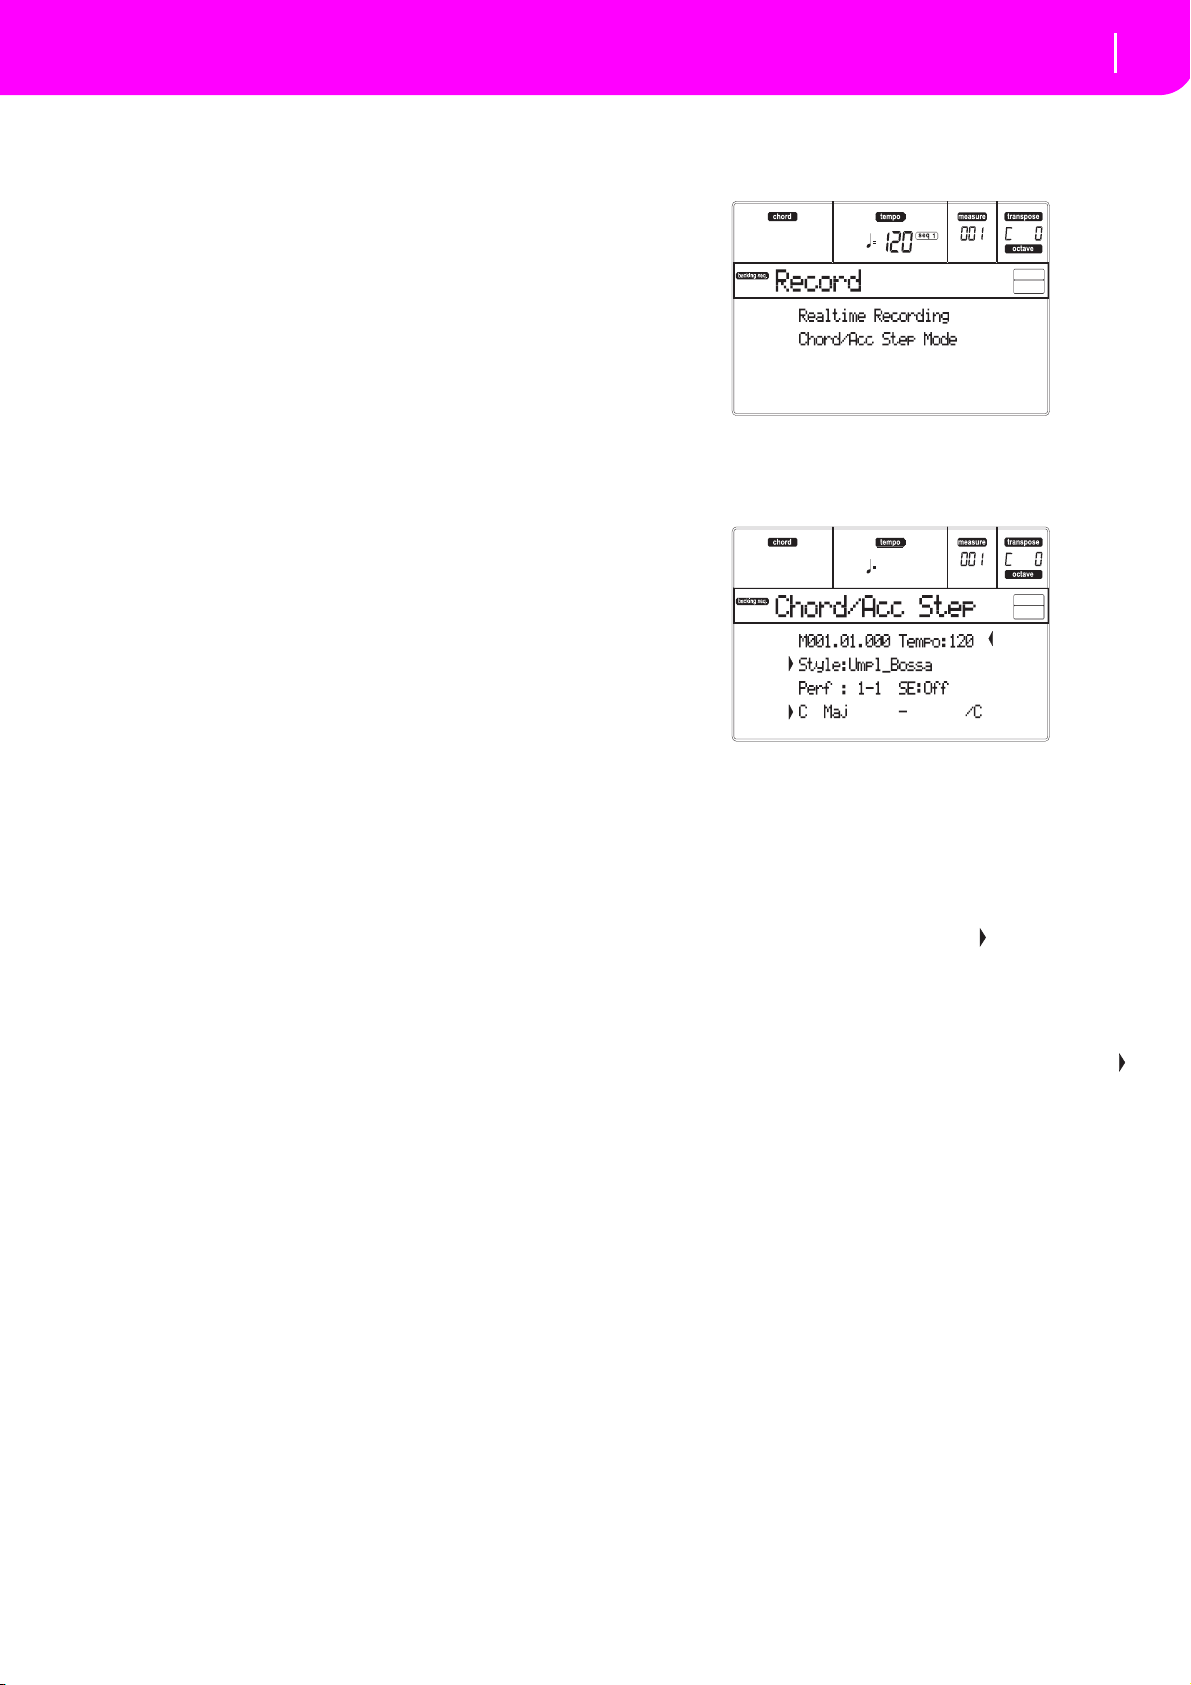
83
Backing Sequence operating mode
Chord/Acc Step recording
Play a solo intro, or start the auto-accompaniment
with the START/STOP button. To start with the
Style playing right from bar 1, keep the chord
pressed during the precount, and press START/
STOP before the end of the precount. Otherwise,
the Style will start playing from the next bar, following the one where you pressed START/STOP.
Since you can use any Style control, you could start with
the usual combinations (INTRO, ENDING, FILL… see
“Playing a Style (Automatic Accompaniment)” on
page 27 for more information).
Note: While in Backing Sequence mode, you can’t
record the SYNCHRO, FADE IN/OUT, TAP TEMPO/
RESET, ACCOMPANIMENT VOLUME controls.
8. Play your music. You can even stop the Style by pressing START/STOP. If you stop the Style while recording, start it again with the START/STOP button.
9. When finished recording your performance, press
the left PLAY/STOP button. The RECORD LED
will turn off, and you will go back to the Playback
page (see “How to playback a Song” before).
The recorded Song will be automatically converted
to the Standard MIDI File format.
10. At this point, you can edit the Song in Song mode
(see “Song operating mode” on page 89), or save it
to a card (see “Save Song page” on page 84).
Warning: The recorded Song is in RAM (Random
Access Memory), and will be deleted when turning the
instrument off, or entering Record again (either in
Backing Sequence or Song mode). Save the Song to the
card, if you wish to preserve it.
CHORD/ACC STEP RECORDING
While in the Backing Sequence operative mode, you
can enter the Chord/Acc Step Mode to create or edit the
Style (Chord/Acc) part of a Song. This mode lets you
enter chords even if you are not a keyboard player, or
fix any error made playing chords or selecting Style
controls, during the Realtime Recording mode.
You can edit only Songs created on the Liverpool, microARRANGER, Pa50, Pa60 or Pa80 (Backing Sequence
mode), provided that you have the same Styles in the
same locations. When saving a Song created in Backing
Sequence mode, all Chord/Acc data is preserved, and can
be loaded later, to be edited using the Chord/Acc Step
Mode.
Here is how to enter the Chord/Acc Step Mode, and
execute your editing:
1. Press B.SEQ to enter the Backing Sequence mode.
2. Press RECORD. You will be prompted to select the
Realtime Recording mode or the Chord/Acc Step
Mode.
3. Press one of the B (Chord/Acc Step Mode) VOLUME/VALUE buttons to enter the Step Mode. The
Chord/Acc Step mode page appears (see “Chord/
Acc Step Recording page” on page 86).
4. Select the M(easure) parameter, and go to a different position into the Song, using the TEMPO/
VALUE controls, or the A VOLUME/VALUE buttons. Alternatively, you can move the locator using
the < > and << >> buttons. See “Transport controls”
on page 87.
5. Select the parameter type to insert, edit or delete at
the current position. If an arrow ( ) appears next to
a parameter, the shown event has been inserted at
the current position.
6. Use the TEMPO/VALUE controls to modify the
selected event. Delete it using the DELETE button.
When editing a parameter without the arrow ( )
next to it, a new event is inserted.
7. Exit the Chord/Acc Step Mode by pressing the
RECORD button.
8. Press START/STOP to listen to the results of your
editing. If they are fine, save the Backing Sequence
on a card.
MAIN PAGE (BACKING SEQUENCE PLAY)
This is the main page of the Backing Sequence mode.
To access this page from another operating mode, press
the B.SEQ button.
Page 86
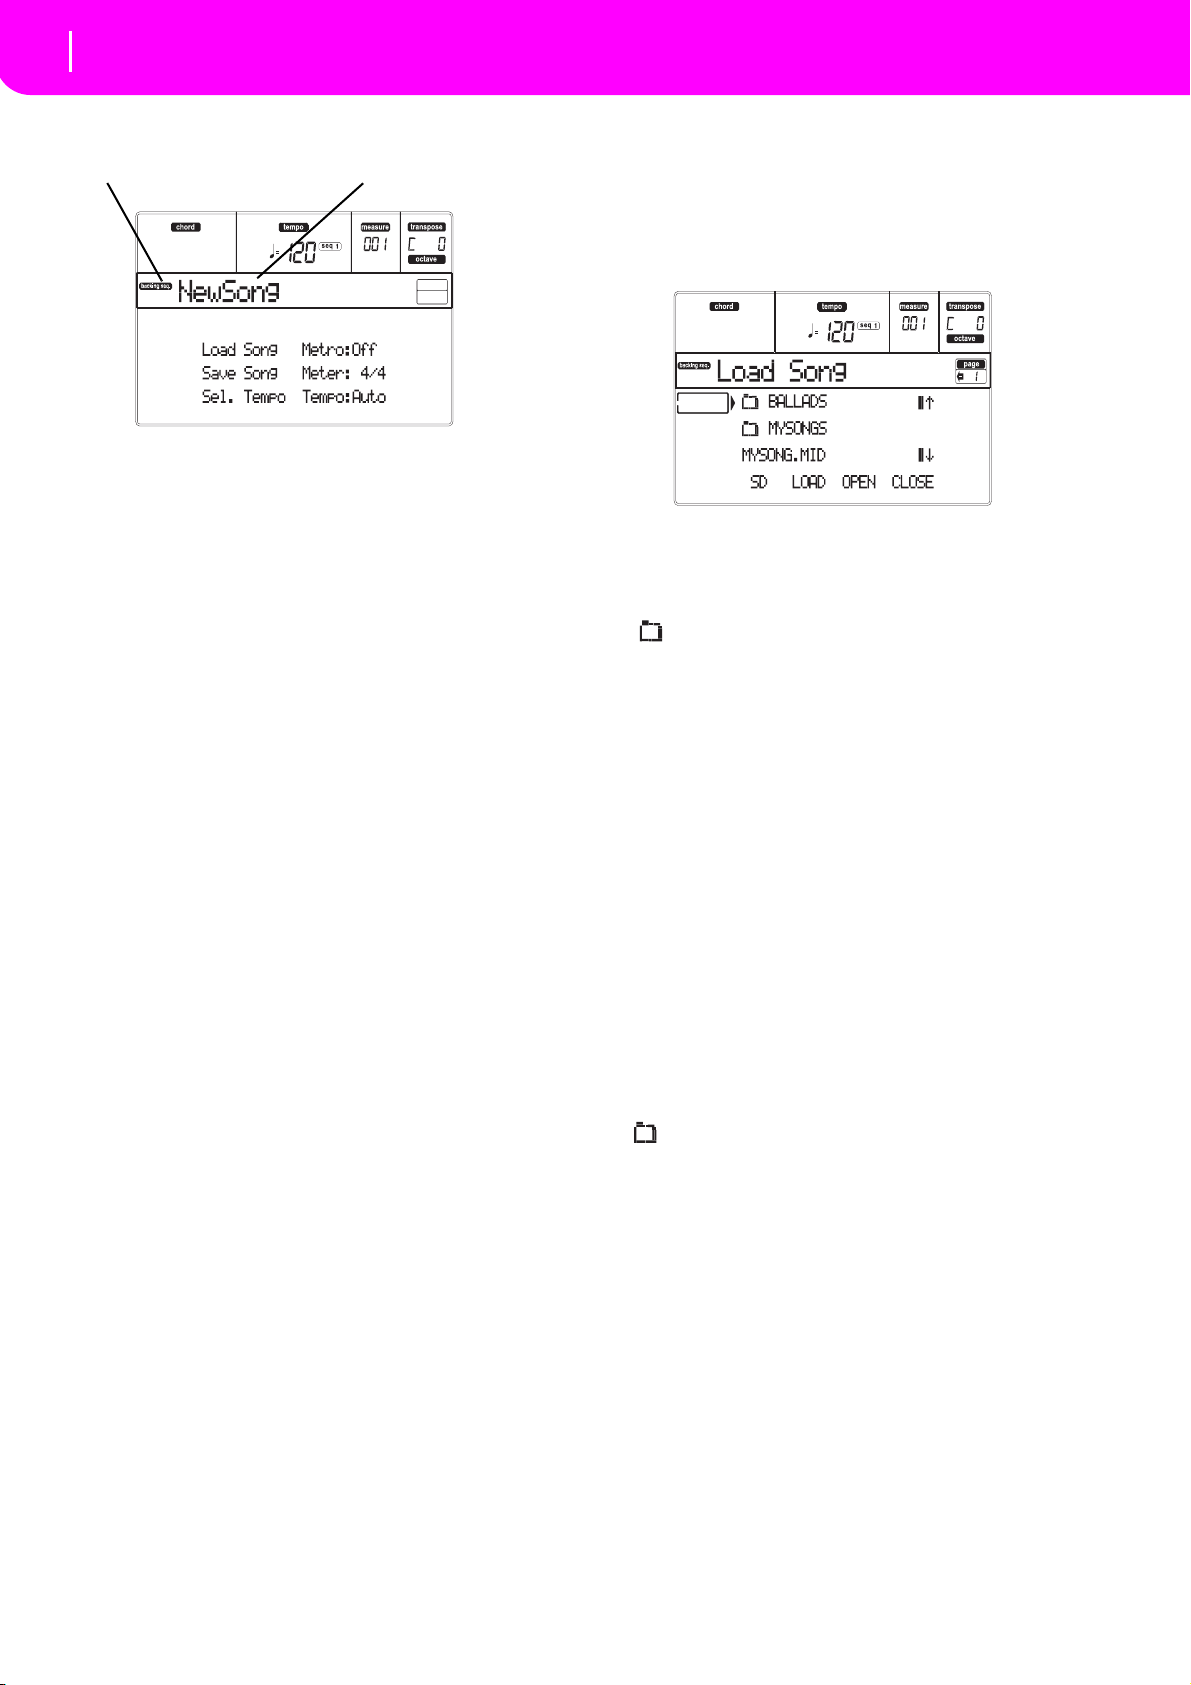
84
Backing Sequence operating mode
Load Song page
Backing Sequence icon
Page header
Note: When in this page, the keyboard doesn’t play.
Backing Sequence icon
When on, this icon indicates that the instrument is in
Backing Sequence mode.
Page header
This header shows the name of the selected Song.
B (Load Song)
Use these buttons to select a Song (i.e., a Standard
MIDI File). The Song Select page opens, and you can
select a Song (see below “Load Song page”).
C (Save Song)
This command saves the recorded Song as a Standard
MIDI File. The file is automatically added the “.MID”
extension. After pressing this command, the Save Song
page appears (see “Save Song page” on page 84).
D (Select Tempo)
Select this parameter to use the TEMPO/VALUE section to select the Tempo. When you select this parameter, the VALUE LED turns off.
F (Metro)
Use these buttons to turn the metronome on/off during
playback.
G (Meter)
This non-editable parameter shows the starting meter
(or time signature) of the selected Song.
H (Tempo mode)
This sets the Tempo change mode.
Man(ual) When the cursor is on the “D (Select
Tempo)” parameter, you can change the
Tempo using the TEMPO/VALUE section
controls. The Song will be played back
using the manually selected tempo.
Auto The Tempo recorded into the Song will be
used instead.
LOAD SONG PAGE
This page appears when you press PAGE+ or either the
B (Load Song) buttons while you are in the main page.
Note: Songs on the internal SSD cannot be selected.
Press EXIT to go back to the main page of the Backing
Sequence operating mode, without selecting a Song.
A–C (File, folder)
Move the file or folder to be selected to the first line of
the display. To select a file, press the F-2 (SELECT) button. To open a folder, press the F-3 (OPEN) button.
The “ ” symbol identifies a folder.
E–F (Scroll Up)
Scroll the list up. Keep SHIFT pressed and press one of
these buttons to jump to the previous alphabetical section.
G–H (Scroll Down)
Scroll the list down. Keep SHIFT pressed and press one
of these buttons to jump to the next alphabetical section.
TEMPO/VALUE section
These controls scroll the list up or down.
F-1 (SD)
Press this button after replacing a card in the card slot.
The new card will be read, and the file list shown on the
display will be updated.
F-2 (LOAD)
Load the Song at the first line of the display.
F-3 (OPEN)
Opens the selected folder (file whose name begins with
the “ ” symbol).
F-4 (CLOSE)
Closes the current folder, returning to the parent
(“upper”) folder.
SAVE SONG PAGE
The recorded Song is contained in RAM, and is lost
when turning the instrument off. The Song is also lost
when you overwrite it in Record mode, or when
switching to the Song Play mode. You must save to a
card any Song you wish to preserve.
Page 87
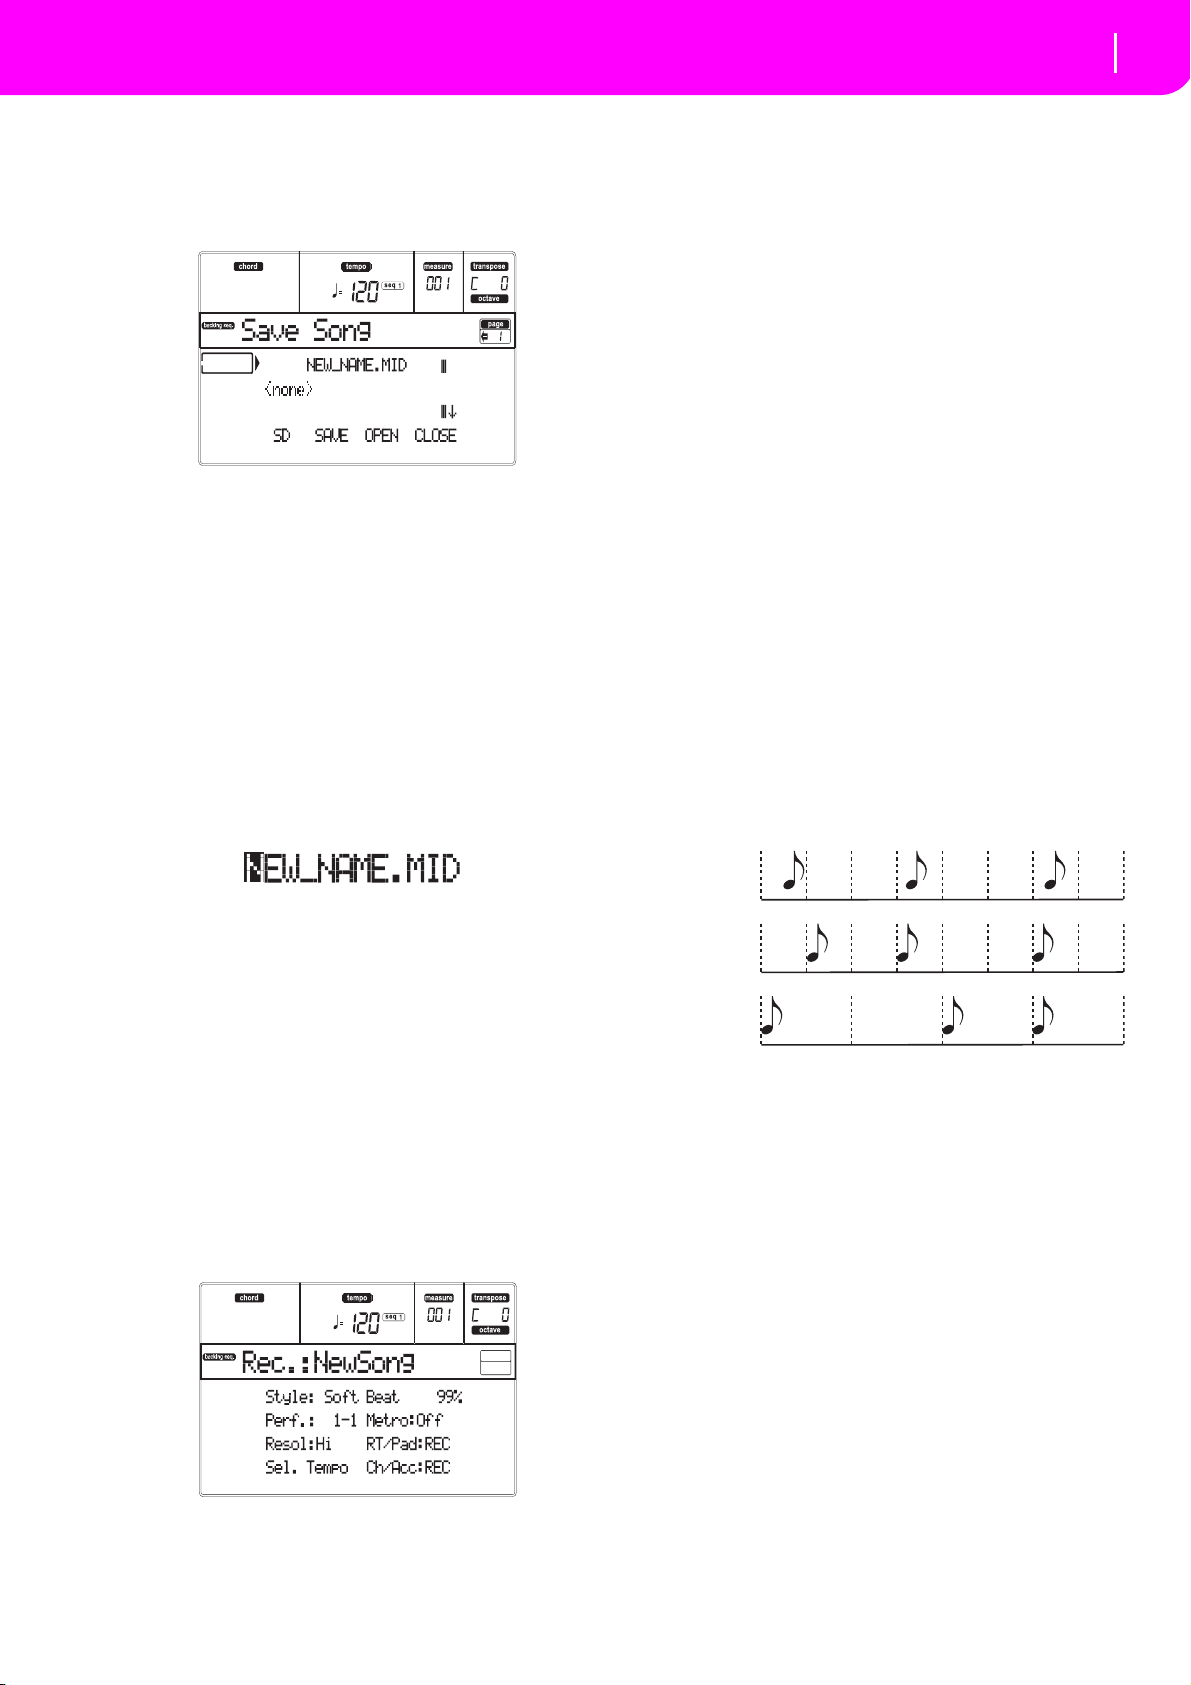
85
Backing Sequence operating mode
Realtime Recording page
Hi (no quan-
tization)
1/16
1/8
1. If you are in Record mode (RECORD LED on),
stop the sequencer and press RECORD to go back
to the Backing Sequence Playback page.
2. Select the Save Song button. The Save Song page
appears.
3. Move the folder where you wish to save your Song
to the first line of the display, using the E–F (Scroll
Up) and G–H (Scroll Down) VOLUME/VALUE
buttons, or the TEMPO/VALUE controls. Press F-3
(OPEN) to open it. Close the current folder by
pressing F-4 (CLOSE).
4. When in the selected folder, you can save the Song
over an existing file, or create a new file.
•To overwrite an existing file, move it to the first
line of the display.
•To
create
a new file, move the “NEW_NAME.MID”
item to the first line of the display.
5. When the “NEW_NAME.MID” item is selected,
press one of the A VOLUME/VALUE buttons. You
are prompted to assign a name to the new folder:
Style
This non-editable parameter shows the selected Style.
If no Style is selected, the name will be empty. You can
select a different Style, using the STYLE section (see
“Selecting a Style” on page 26).
0…99%
This non-editable parameters shows the remaining
recording space in memory, as a percentage.
Perf or STS (Performance or STS)
This non-editable parameter shows the selected Performance or STS (depending on the last item selected). If
no Performance or STS is selected, the name will be
empty. You can select a different Performance, using
the PROGRAM/PERFORMANCE section (see “Selecting a Performance” on page 25). To select one of the
four STS for the current Style, use the F-1–F-4 buttons.
Resol (Resolution)
Use this parameter to set the quantization during
recording. Quantization is a way of correcting timing
errors; notes played too soon or too later are moved to
the nearest axis of a rhythmic “grid”, set with this
parameter, thus playing perfectly in time.
Hi No quantization applied.
(1/32)… (1/8)
Grid resolution, in musical values. For
example, when you select 1/8, all notes are
moved to the nearest 1/8 division. When
you select 1/4, all notes are moved to the
nearest 1/4 division.
Move the cursor using the DOWN/- and UP/+ buttons. Select a character using the DIAL. Insert a
character at the cursor position by pressing the
INSERT button. Delete a character at the cursor
position by pressing the DELETE button.
6. When you have finished writing a name for the
new midifile, press F-2 (SAVE) to confirm. The
“Are you sure?” message will appear. Press
ENTER to confirm, or EXIT to abort.
REALTIME RECORDING PAGE
While you are in Backing Sequence mode, press
RECORD, then one of the A VOLUME/VALUE buttons, to access the Realtime Recording mode. The
RECORD LED turns on.
Sel.Tempo (Select Tempo)
Select this parameter to use the TEMPO/VALUE section to select the Tempo. When you select this parameter, the VALUE LED turns off.
Metro (Metronome)
This parameter sets the metronome mode during
recording.
Off The metronome can be heard only during
the precount.
On1 The metronome plays during recording.
Recording begins with a 1-bar precount.
Start recording after bar -1.
On2 The metronome plays during recording.
Recording begins with a 2-bar precount.
Start recording after bar -1.
RT/Pads
Ch/Acc
These parameters let you decide the track status during
recording.
Page 88
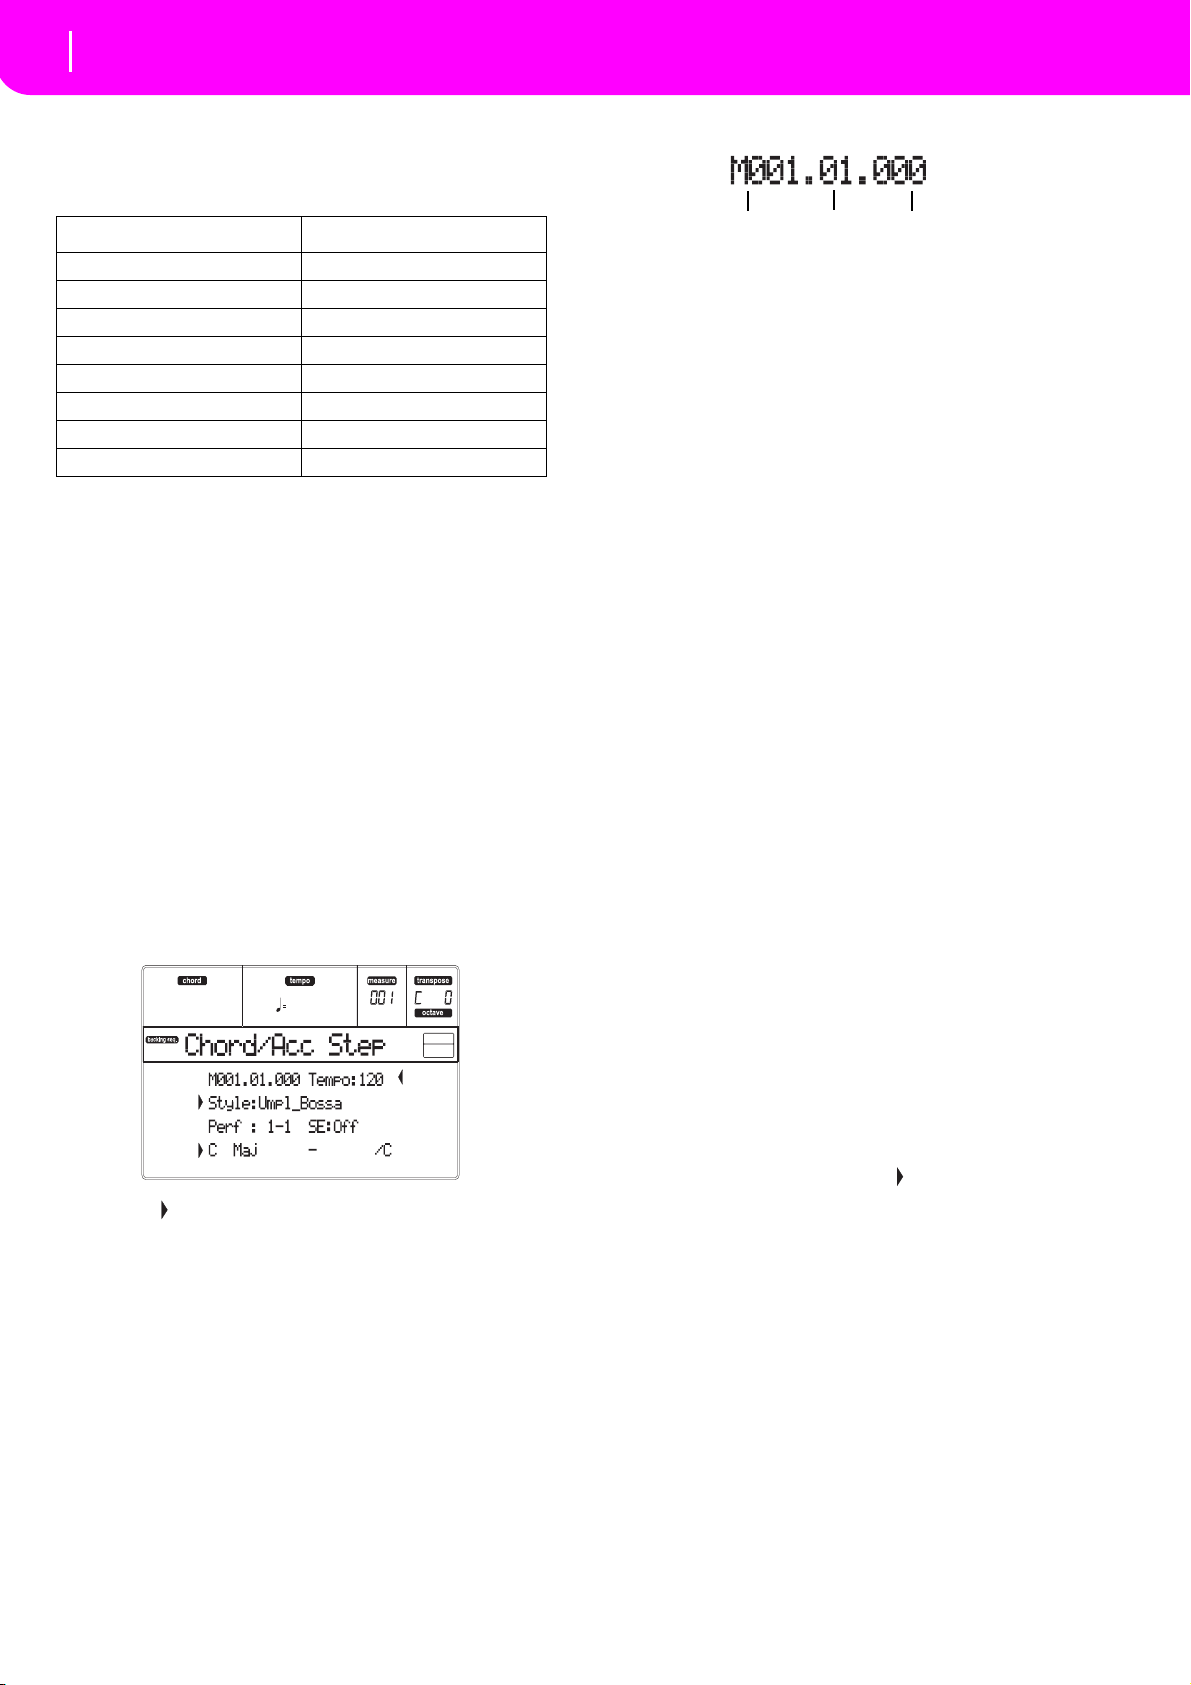
86
Backing Sequence operating mode
Chord/Acc Step Recording page
Measure
Beat
Tick
RT/Pads: This Backing Sequence track includes the
four Realtime (Keyboard) tracks, and the four Pads.
They will be Song tracks 1–8, as in the following table:
RT/Pad track Song track/Channel
Upper 1 1
Upper 2 2
Upper 3 3
Lower 4
Pad 1 5
Pad 2 6
Pad 3 7
Pad 4 8
Ch/Acc: This Backing Sequence track includes all Style
tracks, including recognized chords. They will be Song
tracks 9–16.
MUTE The track is muted. If this tracks has
already been recorded, it will not be heard
during recording of the other Backing
Sequence track.
PLAY The track is in play. If there are recorded
data, they will be heard during recording
of the other Backing Sequence track.
REC The track is in record. All previously
recorded data will be deleted.
CHORD/ACC STEP RECORDING PAGE
While you are in Backing Sequence mode, press
RECORD, then one of the B VOLUME/VALUE buttons,
to access the Chord/Acc Step Recording mode. The
RECORD LED turns on.
Side arrow ( )
The small arrow next to a parameter means that its
value is effective at the current position. For example, if
you are at the “M003.01.000” position, and an arrow
lights up next to the Chord parameter, this means that
a chord change happens at the “M003.01.000” position.
M(easure)
This is the locator. It shows the current position of the
Step Editor. To go to a different position within the
Song, select this parameter, then use the TEMPO/
VALUE controls, the A VOLUME/VALUE buttons, or
the < > buttons (while the << >> buttons let you move to
the previous or following measure). When using one of
these controls, the locator moves in steps of 1/8 (192
ticks), or jumps to the next event.
The locator’s format is as follows:
Measure: Measure or bar number.
Beat: Divider in the Time Signature ratio (e.g., a quar-
ter in a 3/4 time).
Tick: Minimal sequencer’s resolution. The Liverpool
internal sequencers feature a resolution of 384 ticks per
quarter.
INSERT When the Measure parameter is selected,
press INSERT to insert a measure starting
from the current position. All Chord/Acc
events contained into the current measure
will be moved to the following measure.
The event at the Mxxx.xx.000 position (i.e.,
exactly at the beginning of the measure,
like a Time Signature or Style change) will
not be moved.
DELETE When the Measure parameter is selected,
press DELETE to delete the current measure. All Chord/Acc event contained into
the following measures are moved to the
current measure.
SHIFT + DELETE
When the Measure parameter is selected,
press SHIFT + DELETE to delete all events
in the Style tracks, starting from the current position to the end of the Song. To
delete all events in the Style tracks, go
back to the M001.01.000 position, and
press SHIFT + DELETE.
Note: All events on the very first tick
(M001.01.000), like Style, Tempo, Chord,
Style Element selection, cannot be deleted.
Tem po
This is the Tempo Change parameter. To insert a Tempo
Change event at the current position, select this parameter and use the TEMPO/VALUE controls to change its
value.
DELETE When the Tempo parameter is selected,
and the side arrow ( ) – showing that a
Tempo Change event has been selected at
the current position – appears next to it,
press DELETE to delete the Tempo
Change at the current position.
Note: If the side arrow doesn’t appear, the
event was not selected at the current position,
and will not be deleted.
SHIFT + DELETE
When the Tempo parameter is selected,
press SHIFT + DELETE to delete all
Tempo Change events, starting from the
current position to the end of the Song. To
delete all Tempo Change events in the
Song, go back to the M001.01.000 position,
and press SHIFT + DELETE.
Page 89
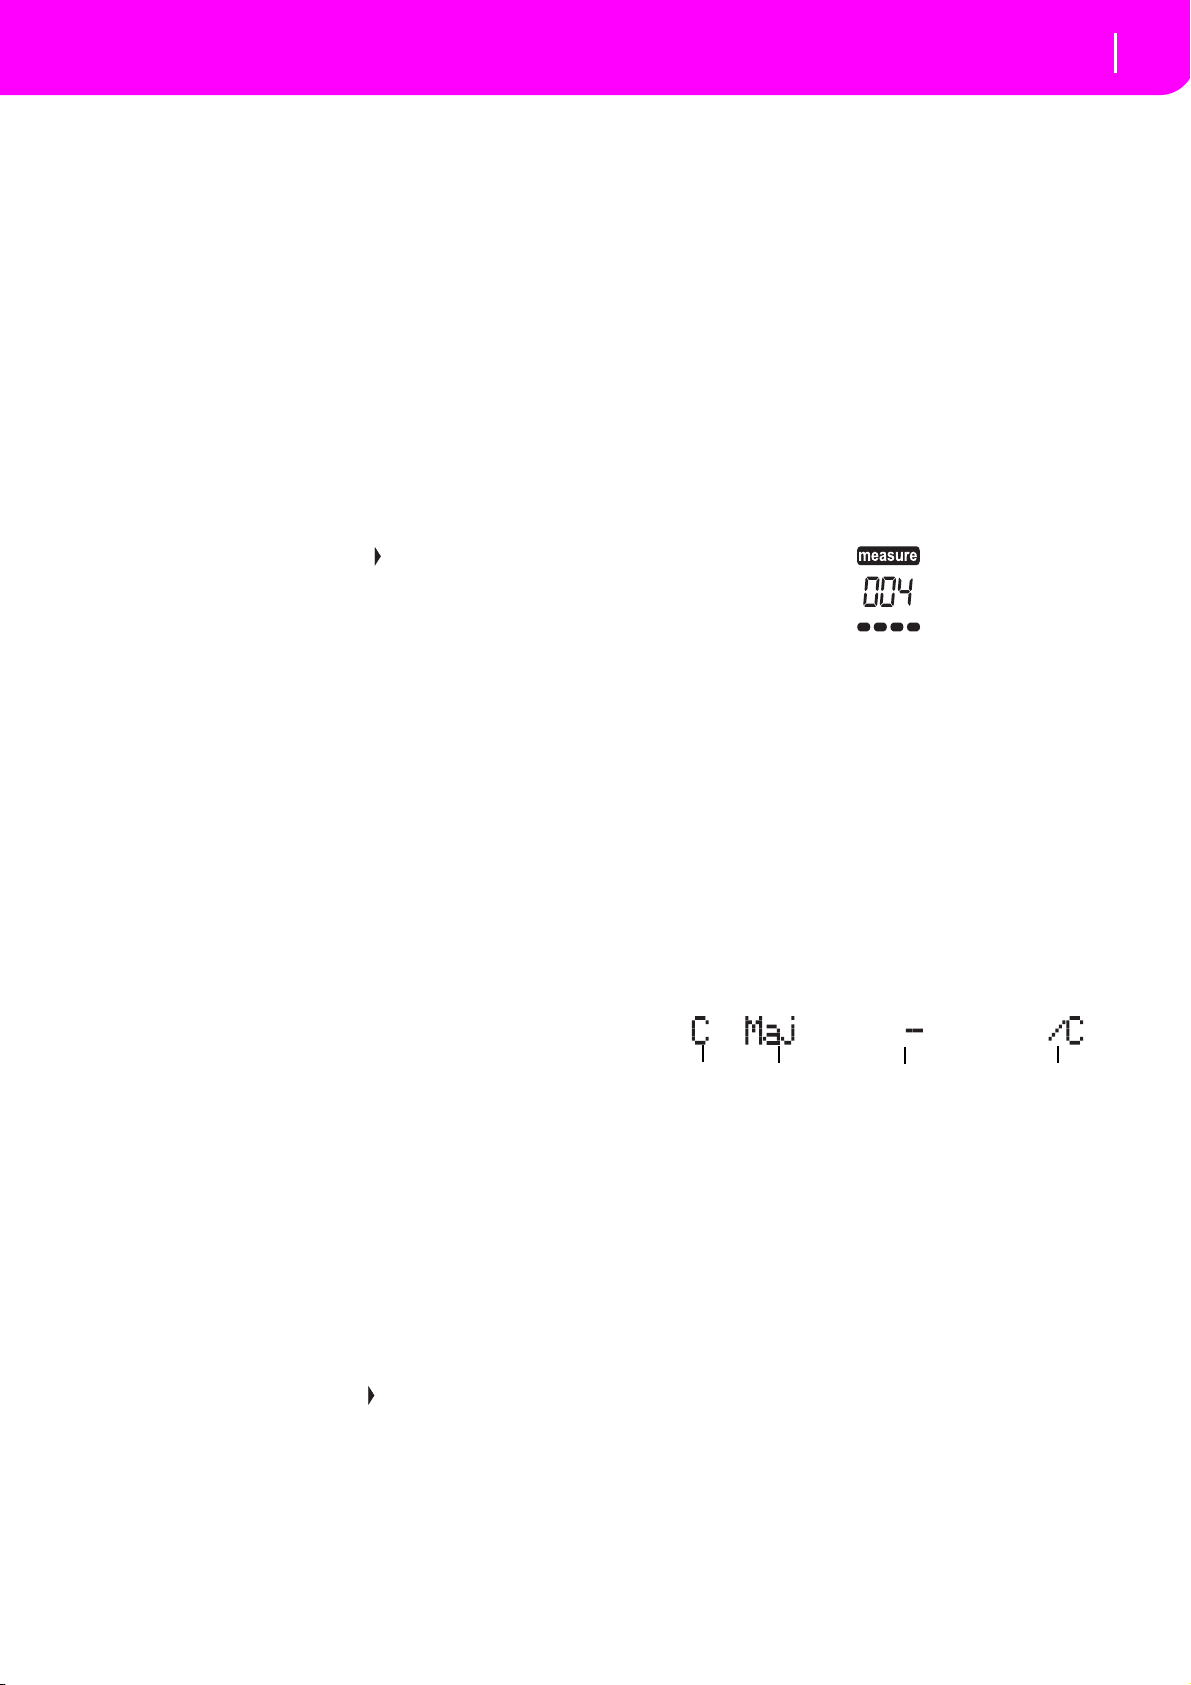
Backing Sequence operating mode
Chord/Acc Step Recording page
Note:
Name Type Tension Extension
All events on the very first tick
(M001.01.000), like Perf, Style, Tempo, Chord,
Style Element selection, cannot be deleted
Style
.
This is the last selected Style. To insert a Style change at
the current position, follow the standard selecting procedure using the buttons of the STYLE section.
Note: Any Style Change inserted after the beginning of the
measure (i.e., to a position other than Mxxx.01.000) will be
effective at the following measure. For example, if a Style
Change event has been inserted at M004.03.000, the selected
Style will be effectively selected at M005.01.000. (This works
exactly as in Style Play mode).
Note: When inserting a Style Change, you may also insert a
Tempo Change at the same position. A Style Change will not
automatically insert the Style’s Tempo.
DELETE When the Style parameter is selected, and
the side arrow ( ) – showing that a Style
Change event has been selected at the current position – appears next to it, press
DELETE to delete the Style Change at the
current position.
Note: If the side arrow doesn’t appear, the
event was not selected at the current position,
and will not be deleted.
SHIFT + DELETE
When the Style parameter is selected,
press SHIFT + DELETE to delete all Style
Change events, starting from the current
position to the end of the Song. To delete
all Style Change events in the Song, go
back to the M001.01.000 position, and
press SHIFT + DELETE.
Note: All events on the very first tick
(M001.01.000), like Perf, Style, Tempo,
Chord, Style Element selection, cannot be
deleted.
Perf
This is the last selected Performance. Select a Performance to recall the Style it memorizes. To insert a Performance change at the current position, follow the
standard selecting procedure using the buttons of the
PROGRAM/PERFORMANCE section.
Note: The STYLE CHANGE LED is automatically turned
on when entering the Chord/Acc Step Mode. This means that
selecting a Performance automatically selects the Style memorized into the Performance.
The SINGLE TOUCH and STS buttons are automatically
disabled, meaning that you can’t change the Realtime (Keyboard) tracks while in Chord/Acc Step Mode.
DELETE When the Perf parameter is selected, and
the side arrow ( ) – showing that a Performance Change event has been selected at
the current position – appears next to it,
press DELETE to delete the Performance
Change at the current position.
Note: If the side arrow doesn’t appear, the
event was not selected at the current position,
and will not be deleted.
87
SHIFT + DELETE
When the Perf parameter is selected, press
SHIFT + DELETE to delete all Performance Change events, starting from the
current position to the end of the Song. To
delete all Performance Change events in
the Song, go back to the M001.01.000 posi-
tion, and press SHIFT + DELETE.
Note: All events on the very first tick
(M001.01.000), like Perf, Style, Tempo,
Chord, Style Element selection, cannot be
deleted.
SE (Style Element)
This is the Style Element (i.e., a Variation, Fill, Intro, or
Ending). The length of the selected Style Element is
always shown on the measure counter, at the top of the
display:
This will let you know where to place the following
Style Element Change. For example, if you inserted an
Intro event lasting for 4 measures, you can insert 4
empty measure after this event, and a Variation event
at the end of the Intro, beginning at the 4th empty measure.
“Off” means that the accompaniment will not play at
the selected position – only the Realtime tracks will
play.
Hint: Insert a Style Element Off event exactly where the
auto-accompaniment must stop, at the end of the Song.
Chord
Use the D VOLUME/VALUE buttons to select the
Chord line. Use the F-1–F-4 buttons to select the part of
the chord you wish to edit.
Use the TEMPO/VALUE controls to modify the
selected parameter. You can also play a chord, and it
will be automatically recognized. While recognizing a
chord, the status of the BASS INV. button will be considered.
“No chord” means that the accompaniment will not
play at the current position (apart for the Drum and
Percussion tracks). To select the “No chord” option,
press F-1 to select the Name part of the Chord, then use
the TEMPO/VALUE section to select the very last value
(C…B, Off).
Note: If you replace a chord with a different one, please
remember that the Lower track will not be automatically
changed.
Transport controls
While in Step Mode, you can use various control panel
buttons to accomplish the editing procedure.
Page 90

88
Backing Sequence operating mode
How to delete a whole Song
<< or >> (Rewind or Fast Forward)
Use these buttons to move to the previous or following
measure. These commands are effective even if the
M(easure) parameter is not selected.
< or > (Previous or Next Step)
Use these button to go to the previous or next step (1/8,
or 192 ticks). If an event is located before the previous
or next step, the locator stops on that event. For example, if you are positioned on M001.01.000, and no event
exists before M001.01.192, the > button moves to the
M001.01.192 location. If an event exists on M001.01.010,
the > button stops to the M001.01.010 location.
These commands are effective even if the M(easure)
parameter is not selected.
+ < or > (Previous or Next Event)
Keep the SHIFT button pressed while pressing the < or
> button, to move to the previous or next recorded
event.
HOW TO DELETE A WHOLE SONG
You can delete a whole Song with the simple SHIFT +
DELETE button sequence.
1. Enter the Backing Sequence mode. You must be in
the main page of the mode. If you are in Record
mode, go back to the Playback mode.
2. Press SHIFT + DELETE.
3. The “Delete Song?” message appears. Press
ENTER to confirm, EXIT to abort.
Page 91
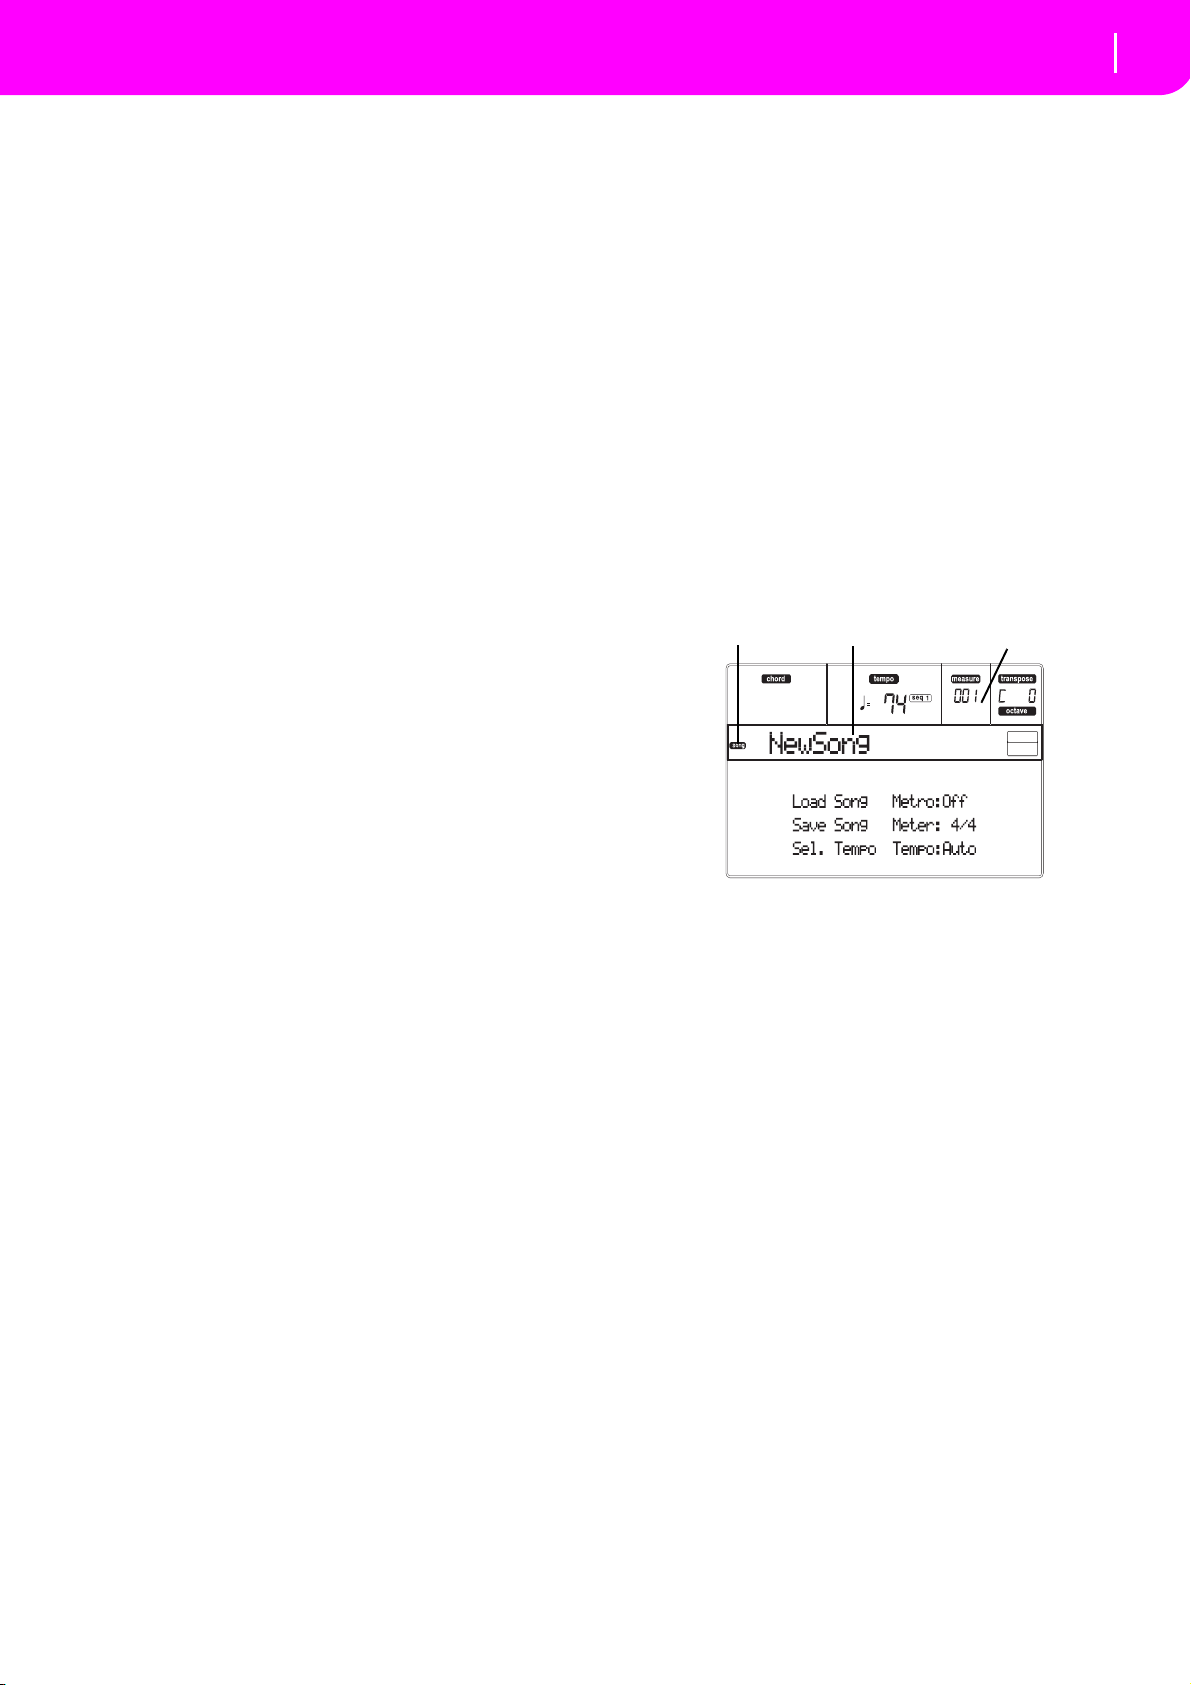
Song operating mode
Transport controls
13. SONG OPERATING MODE
Song icon
Page header
Bar number
89
The Song operating mode is the full-featured onboard
sequencer, where you can create from scratch or edit a
Song. You can also use this mode to edit the initial
parameters of a Standard MIDI File, either made with
an external sequencer or with Liverpool own Song and
Backing Sequence modes.
You can save the edited Song as a Standard MIDI File
(“.MID” file), and playback it either in Song Play, Backing Sequence or Song mode.
For a practical example of Song editing, see “Editing a
Song” on page 32.
Note: Songs on the internal SSD cannot be edited.
TRANSPORT CONTROLS
While in Song mode, use the SEQ1 transport controls
for the Song playback. See “SEQUENCER TRANSPORT CONTROLS - SEQ1 and SEQ2” on page 18 for
more information).
MASTER VOLUME AND SEQUENCER VOLUME
You can use the MASTER VOLUME and ACC/SEQ
VOLUME sliders to set the volume. See “Master Volume, Sequencer Volume, BALANCE” on page 71.
Move the BALANCE slider to the center (or the left) for
the maximum volume of the sequencer (Song mode
relies on Sequencer 1).
3. The “Delete Song?” message appears. Press
ENTER to confirm, EXIT to abort.
MAIN PAGE
Press SONG to access this page from another operating
mode.
Note: When switching from Style Play to Song, the Song
Setup is automatically selected, and various track parameters
may change.
Press EXIT/NO to access this page from the Menu or
any of the Song Play edit pages.
To see the Song’s tracks, use the TRK SELECT button to
switch from the Main page to the Tracks pages. Pressed
a first time, you will see tracks 1–8 (enlightened TRK
SELECT LED); a second press will show tracks 9–16
(flashing TRK SELECT LED); pressed again, you will go
back to the Main page (TRK SELECT LED switched off).
THE SONGS AND THE STANDARD MIDI FILE FORMAT
The native Song format for Liverpool is the Standard
MIDI File. See “The Songs and the Standard MIDI File
format” on page 70.
When saving a Song as a SMF, an empty measure in
automatically inserted to the beginning of the Song. This
measure contains various Song initialization parameters.
When a SMF is loaded, the empty measure is automatically removed.
FAST TRACK DELETION
When you are in the Main page of the Song Record
mode, and the Song tracks are shown in the display,
keep the DELETE button pressed, and press one of the
VOLUME/VALUE buttons corresponding to the track
to delete. The “Are you sure?” message will appear.
Press ENTER to delete the track, or EXIT to abort.
HOW TO DELETE A WHOLE SONG
While in the Main page, you can delete a whole Song,
with the simple SHIFT + DELETE button sequence.
1. Enter the Song mode. You must be in the Main
page of the mode. If you are in Record mode, go
back to the Playback mode.
2. Press SHIFT + DELETE.
Song icon
When on, this icon shows that the instrument is in Song
mode.
Page header
This line shows the selected Song name.
Bar number
This counter shows the current bar number position of
the selected Song.
B (Load Song)
Use these buttons to select a Song (i.e., a Standard
MIDI File). The Song Select page opens, and you can
select a Song (see below “Song Select page”).
C (Save Song)
This command saves the edited Song as a Standard
MIDI File. After pressing this command, the Save Song
page appears (see “Save Song page” on page 91).
D (Select Tempo)
Select this parameter to use the TEMPO/VALUE section to select the Tempo. When you select this parameter, the VALUE LED turns off.
Note: The tempo is always record in overwrite mode (old
data is replaced by the new data).
F (Metro)
Use these buttons to turn the metronome on/off during
playback.
Page 92
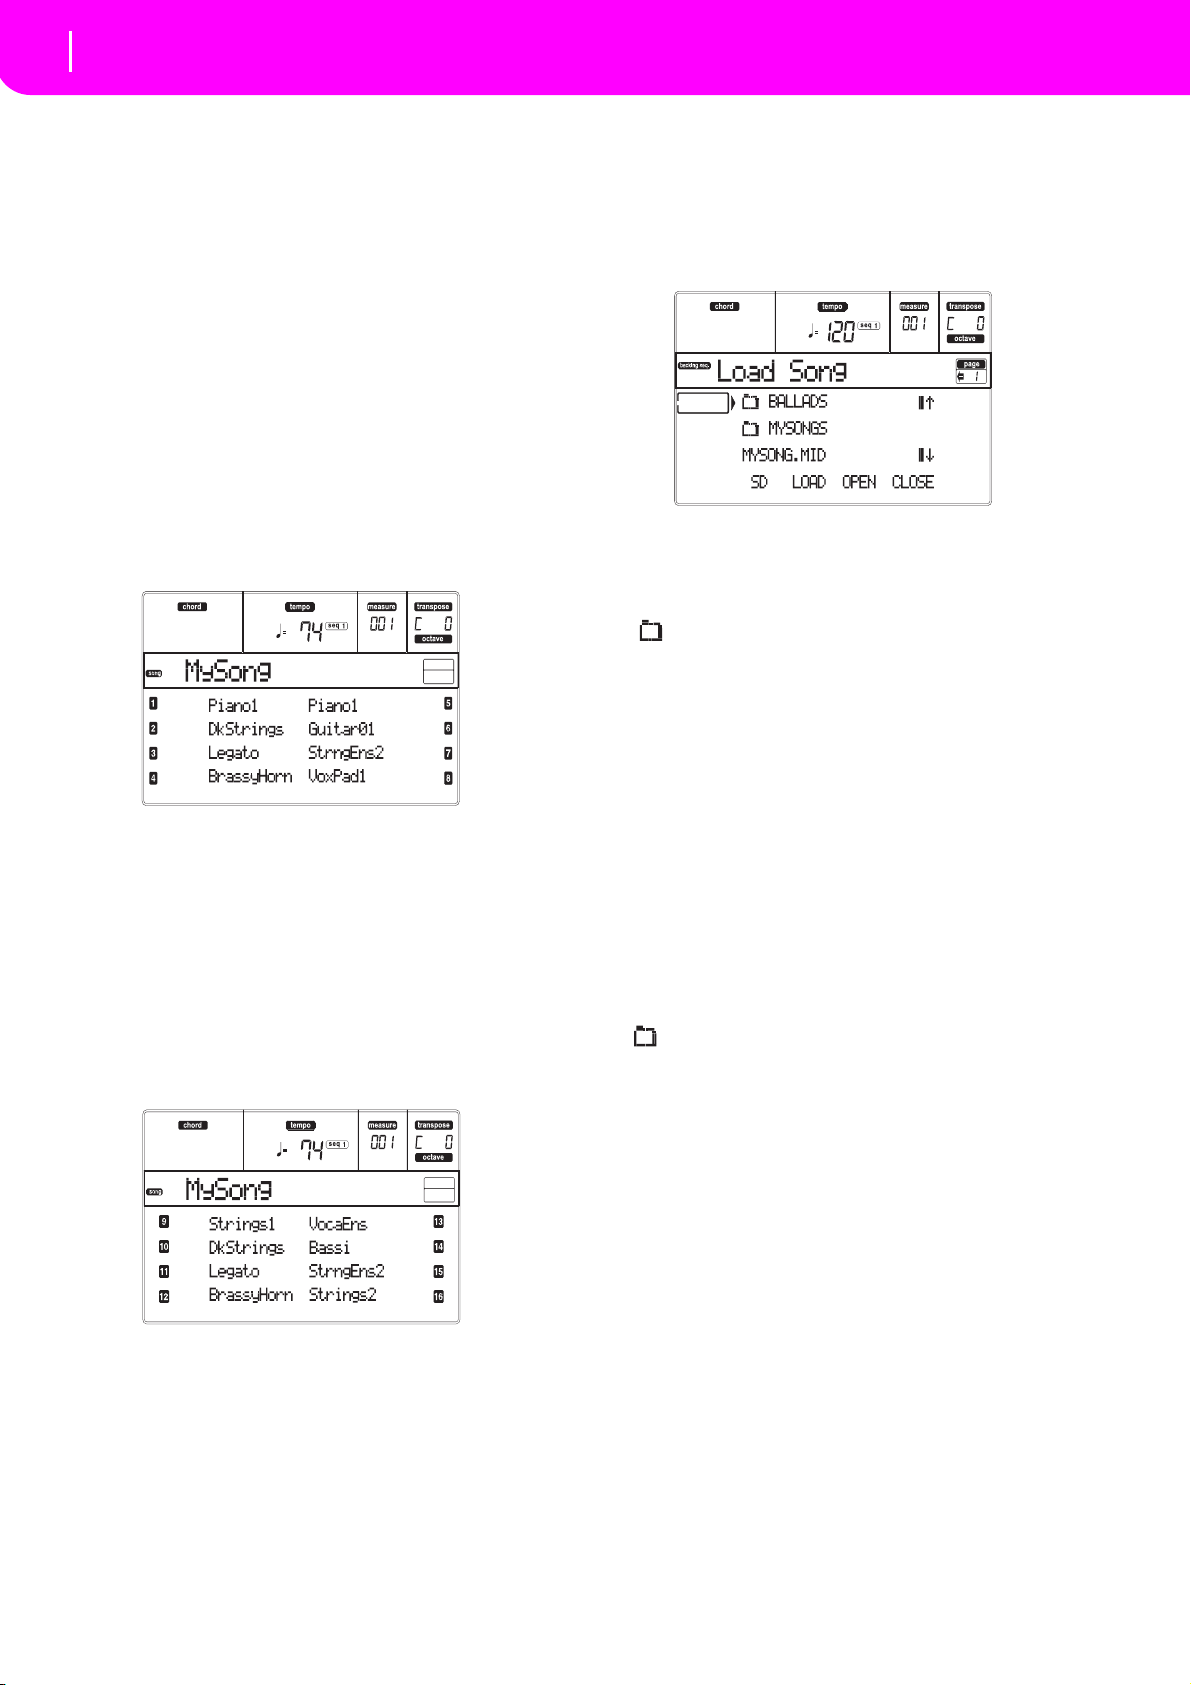
90
Song operating mode
Tracks 1–8 page
G (Meter)
This non-editable parameter shows the starting meter
(or time signature) of the selected Song.
H (Tempo mode)
This sets the Tempo change mode.
Man(ual) When the cursor is on the “D (Select
Tempo)” parameter, you can change the
Tempo using the TEMPO/VALUE section
controls. The Song will be played back
using the manually selected tempo.
Auto The Tempo recorded to the Song will be
used.
TRACKS 1–8 PAGE
To see and edit tracks 1–8, press TRACK SELECT from
the main page. The TRACK SELECT LED turns on.
Press the TRACK SELECT button twice, to go back to
the main page.
A–H (Tracks 1–8 Programs)
Name of the Programs assigned to tracks 1–8. Use
these buttons to select, mute/unmute or change the volume of the corresponding tracks.
TRACKS 9–16 PAGE
To see and edit tracks 9–16, press TRACK SELECT once
from the Tracks 1–8 page, or twice from the main page.
The TRACK SELECT LED begins flashing.
Press the TRACK SELECT button again, to go back to
the main page.
LOAD SONG PAGE
This page appears when you press PAGE+ or either the
B (Load Song) buttons while you are in the main page.
Note: Songs on the internal SSD cannot be edited.
Press EXIT to go back to the Main page of the Song
operating mode, without selecting a Song.
A–C (File, folder)
Move the file or folder to be selected to the first line of
the display. To select a file, press the F-2 (LOAD) button. To open a folder, press the F-3 (OPEN) button.
The “ ” symbol identifies a folder.
E–F (Scroll Up)
Scroll the list up.
G–H (Scroll Down)
Scroll the list down.
TEMPO/VALUE section
These controls scroll the list up or down.
F-1 (SD)
Press this button after replacing a card in the card slot.
The new card will be read, and the file list shown on the
display will be updated.
F-2 (LOAD)
Load the Song at the first line of the display.
F-3 (OPEN)
Opens the selected folder (file whose name begins with
the “ ” symbol).
F-4 (CLOSE)
Closes the current folder, returning to the parent
(“upper”) folder.
A–H (Tracks 9–16 Programs)
Name of the Programs assigned to tracks 9–16. Use
these buttons to select, mute/unmute or change the volume of the corresponding tracks.
Page 93
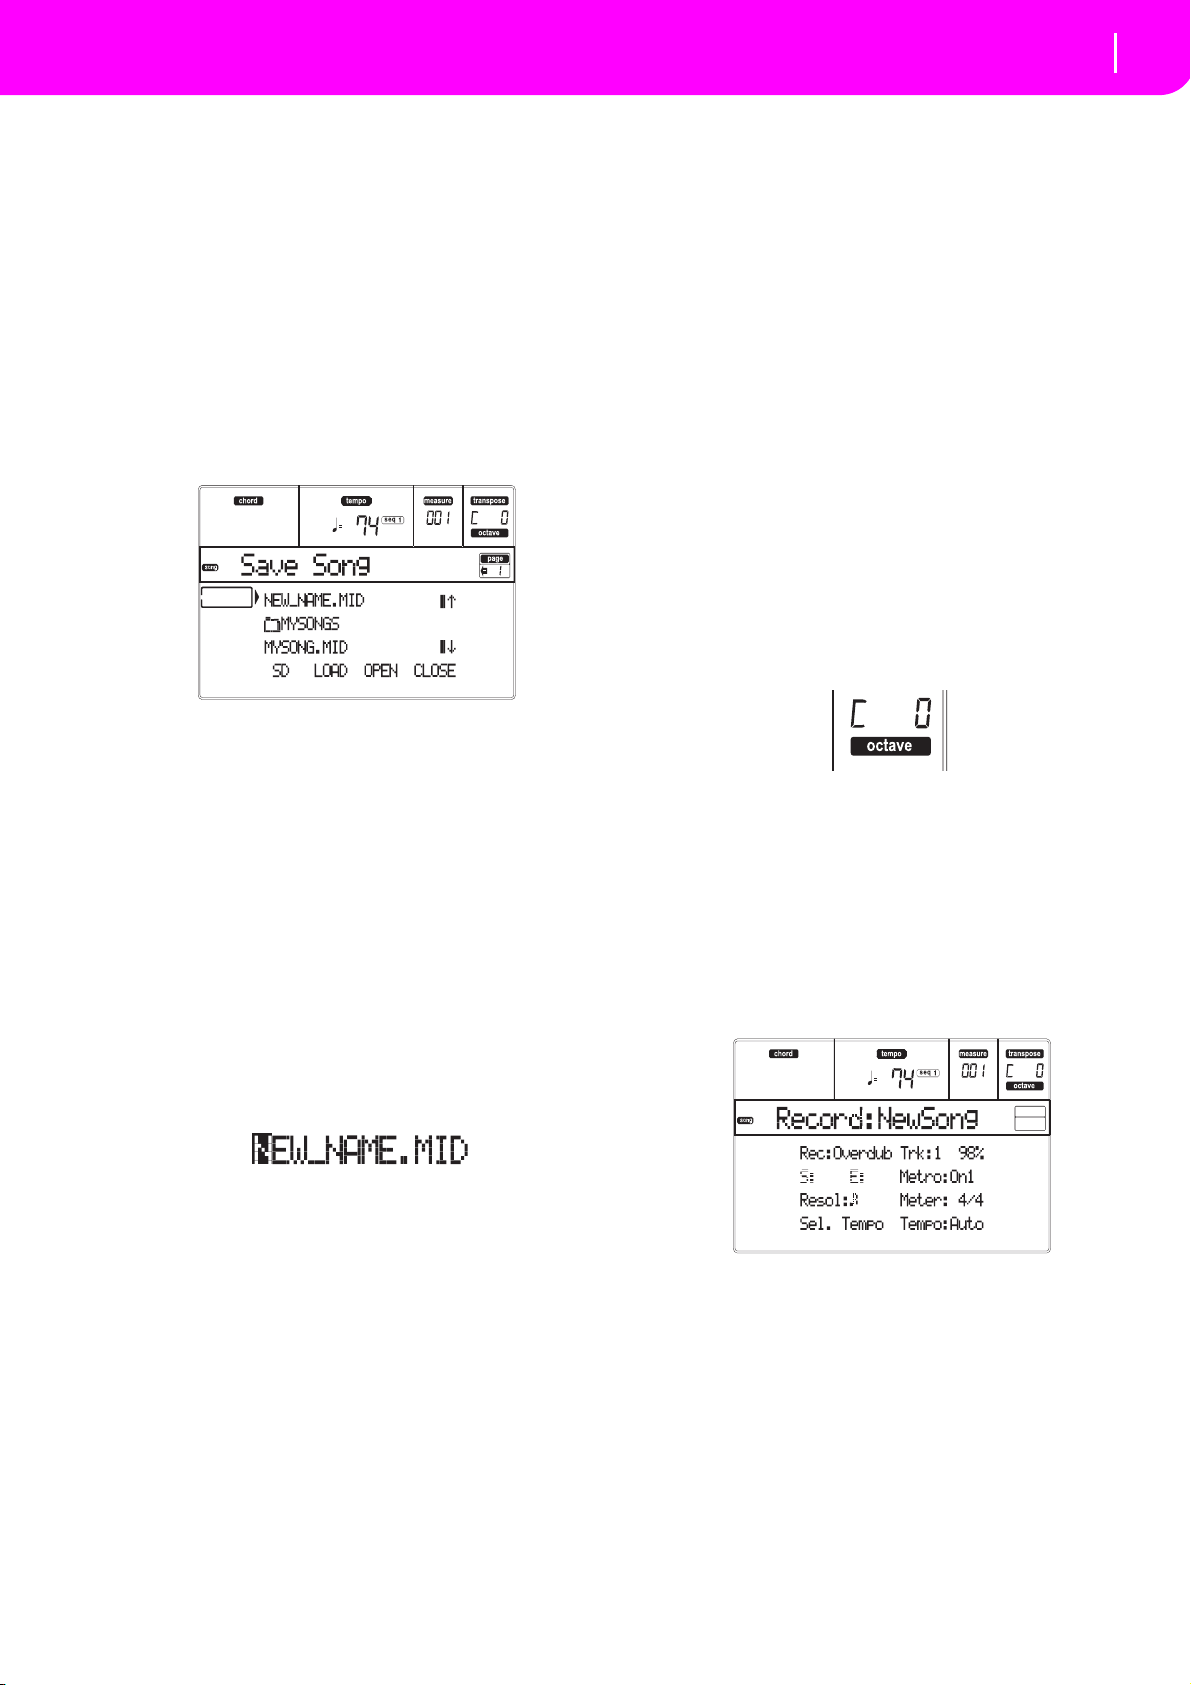
91
Song operating mode
Save Song page
SAVE SONG PAGE
The new or edited Song is contained in RAM, and is
lost when turning the instrument off. The Song is also
lost when you overwrite it in Backing Sequence Record
mode, or when switching to the Song Play mode. You
must save to a card any Song you wish to preserve. The
Song is saved as a Standard MIDI File (SMF).
Note: When saving a Song as a SMF, an empty measure in
automatically inserted to the beginning of the Song. This
measure contains various Song initialization parameters.
1. If you are in an edit page, press EXIT to go back to
the Main page.
2. Select the Save Song button. The Save Song page
appears.
Master Transpose saved with the Song
When saving a Song, the Master Transpose value is
saved with the Song. Since this value is saved as System Exclusive data, it is preserved when playing back
the Song in Song Play mode.
Hint: Since the Master Transpose is a global parameter, loading a Song with a non-standard transposition may result in
unwanted transposing when loading other Songs that do not
contain their own transposition data. To transpose a Song it
is advisable to use the Edit-Transpose function; you can
access this function by pressing the MENU button and one
of the E VOLUME/VALUE buttons (see “Page 18 - Edit:
Transpose” on page 101).
You may also lock the Master Transpose for various tracks, to
avoid unwanted transposition. See “Page 2 - Master Transpose” on page 127 of the Global chapter.
As a general rule, you should use the Master Transpose
(TRANSPOSE buttons on the control panel) when you need
to transpose the Realtime tracks together with the Song. You
should use the Edit-Transpose function (Song Edit mode)
when only the Song has to be transposed.
Note: The Master Transpose value is always shown in the
upper right corner of the display:
3. Move the folder where you wish to save your Song
to the first line of the display, using the E–F (Scroll
Up) and G–H (Scroll Down) VOLUME/VALUE
buttons, or the TEMPO/VALUE controls. Press F-3
(OPEN) to open it. Close the current folder by
pressing F-4 (CLOSE).
4. When in the selected folder, you can save the Song
over an existing midifile (a file with a “.MID”
extension), or create a new midifile.
•To overwrite an existing midifile, move it to the
first line of the display.
•To create a new midifile, move the
“NEW_NAME.MID” item to the first line of the
display.
5. When the “NEW_NAME.MID” item is selected,
press one of the A VOLUME/VALUE buttons. You
are prompted to assign a name to the new file:
Move the cursor using the DOWN/- and UP/+ buttons. Select a character using the DIAL. Insert a
character at the cursor position by pressing the
INSERT button. Delete a character at the cursor
position by pressing the DELETE button.
6. When you have finished writing a name for the
new midifile, press F-2 (SAVE) to confirm. The
“Are you sure?” message will appear. Press
ENTER to confirm, or EXIT to abort.
Play/Mute status saved with the Song
When saving a Song, the Play/Mute status is saved
with the Song. This status is preserved when playing
back the same Song in Song Play mode.
REALTIME RECORD PROCEDURE
Here is the general procedure to follow for the Realtime Recording.
1. Press SONG to enter the Song mode.
2. Press RECORD to enter the Song Record
mode.You are now in the Main page of the Song
Record mode, and you can prepare your recording. (For more details, see “Song Record page” on
page 93).
3. Be sure one of the Overdub or Overwrite recording options is selected (see “Rec (Record mode)”
on page 93).
4. Set the tempo. There are two ways of changing
tempo:
• Keep the SHIFT button pressed, and use the
TEMPO/VALUE controls to change the tempo.
• Move the cursor to the “Sel.Tempo” parameter,
and use the TEMPO/VALUE controls to change
tempo.
Page 94
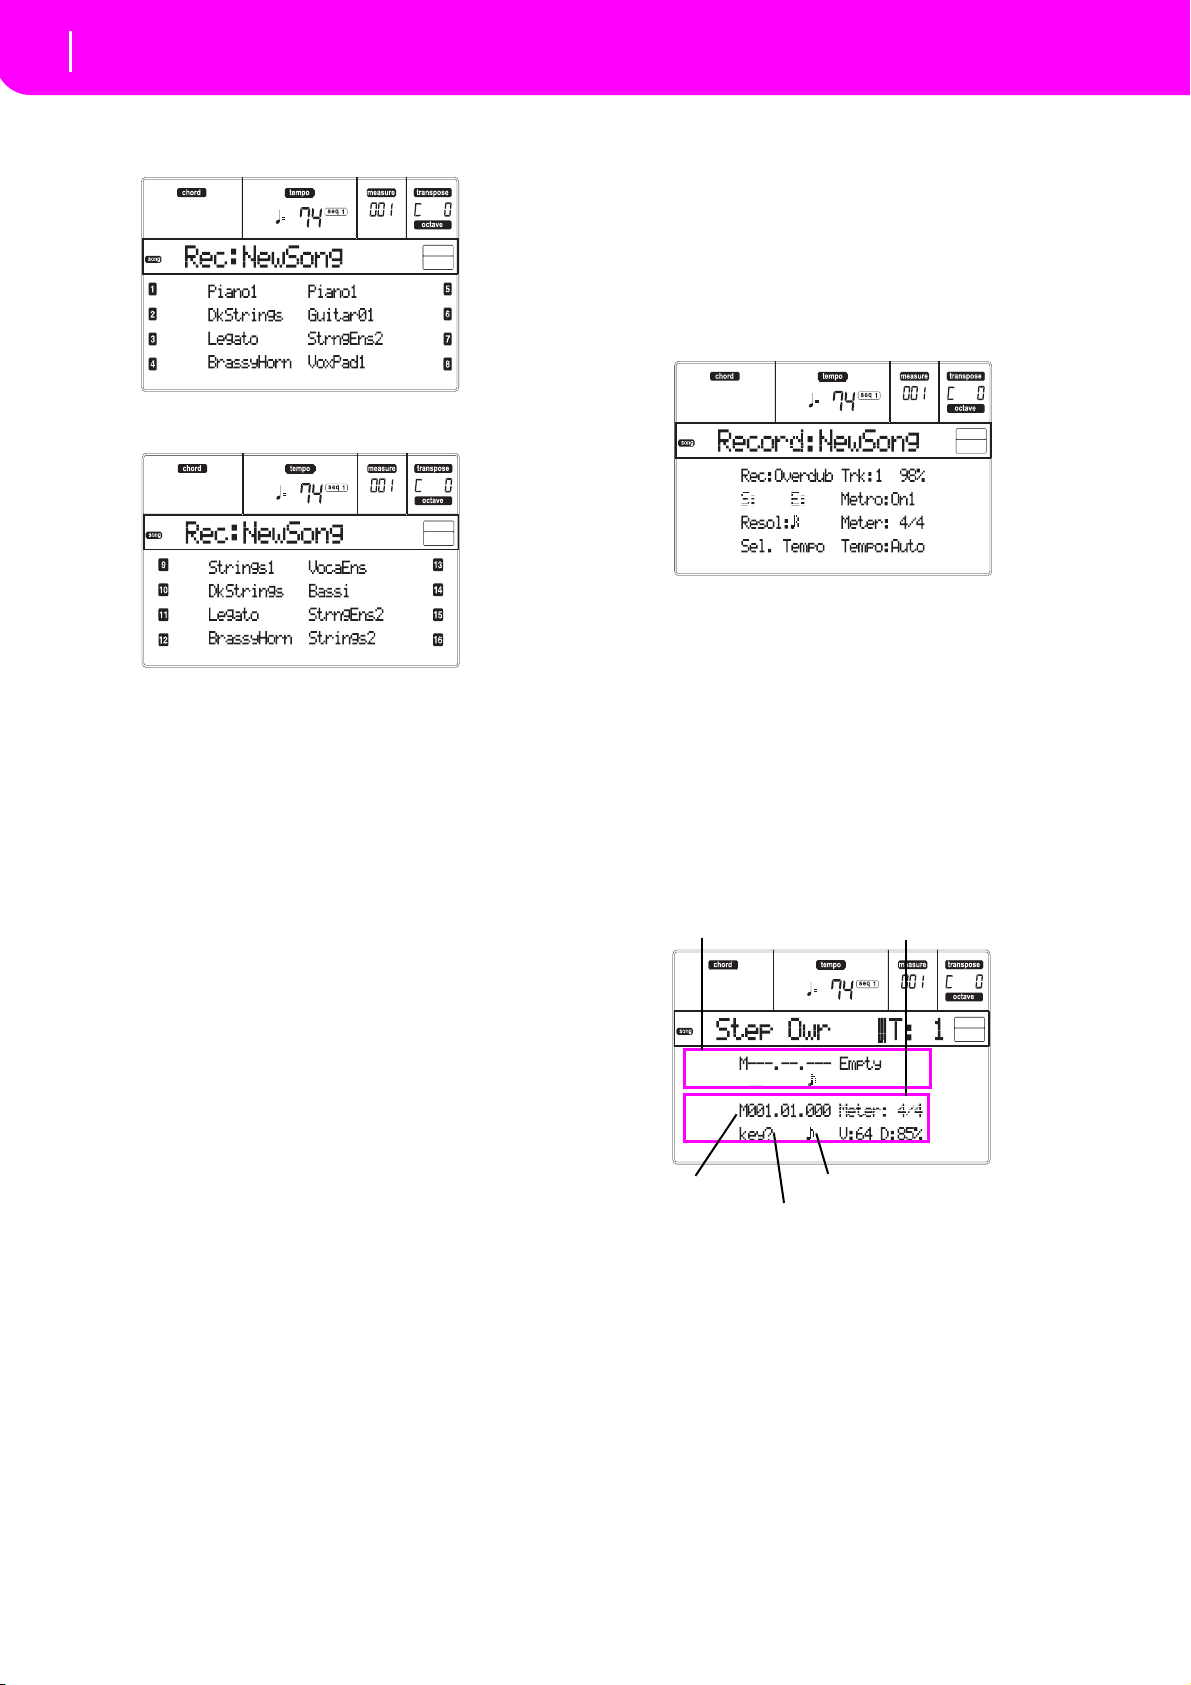
92
Song operating mode
Step Record procedure
(a)
(b)
Previous event
Event to be inserted
Current position
Waiting for a keystroke…
Step value
5. Press TRK SELECT to switch to the Song Tracks 1–
8 page.
Press the button again to switch to the Song Tracks
9–16 page.
6. If you like, you can set the tempo again from these
pages: just use the TEMPO/VALUE controls.
7. Assign the right Program to each track.
8. Select the track to put in record. Its status icon will
automatically begin flashing.
9. While the status icon is flashing, press PLAY/STOP
to begin recording. Depending on the Metro
option you selected, a 1- or 2-bars precount may
play before the recording actually begins. When it
begins, play freely.
• If you selected the Auto Punch recording mode,
the recording will begin only when reaching the
Start point.
• If you selected the Pedal Punch recording mode,
press the pedal when you want to begin recording.
Press it again to finish recording.
Note: The Punch functions will not work on an empty
Song. At least one track must already be recorded.
10. When finished recording, press PLAY/STOP to
stop the sequencer. Select a different track, and go
on recording the whole Song.
11. When finished recording the new Song, press
RECORD to exit the Record mode. The Song will
be saved in memory.
Warni ng: Save the Song to a card, to avoid it is lost
when turning the instrument off.
Note: When exiting the Record mode, the Octave
Transpose is automatically reset to “0”.
12. Edit the new Song; press the MENU page, and
select the various edit pages.
STEP RECORD PROCEDURE
The Step Record allows you to create a new Song by
entering the single notes or chords in each track. This is
very useful when transcribing an existing score, or
needing a higher grade of detail, and is particularly
suitable to create drum and percussion tracks.
1. While in the Main screen of the Song mode, press
RECORD to enter the Song Record mode. The
Main page of the Song Record mode will appear.
2. Use the A VOLUME/VALUE buttons to select the
“Rec” (Recording Mode) parameter. Use these buttons, or the TEMPO/VALUE controls, to select the
“Step Dub” (Step Overdub) or the “StepOwr”
(Step Overwrite) recording mode.
• The Step Overdub mode lets you add events to
the existing events.
• The Step Overwrite mode will overwrite all
existing events.
3. Press SEQ1 PLAY/STOP to turn its LED on, and
enter the Step Record page. (See “Step Record
page” on page 94 for more information on each
parameter of this page).
The first two lines (a) are the latest inserted event.
The second two lines (b) are the event currently in
edit, ready to be inserted.
The “Empty” event marks the beginning of the
Song, when there are no events inserted. It is automatically inserted when entering the Record
mode. It will be removed when an event is
inserted.
4. The “Maaa.bb.ccc” parameter in (b) is the current
position. This is the place where the note in edit
will be inserted.
• If you don’t want to insert a note at this position, insert a rest instead, as shown in step 6.
Page 95
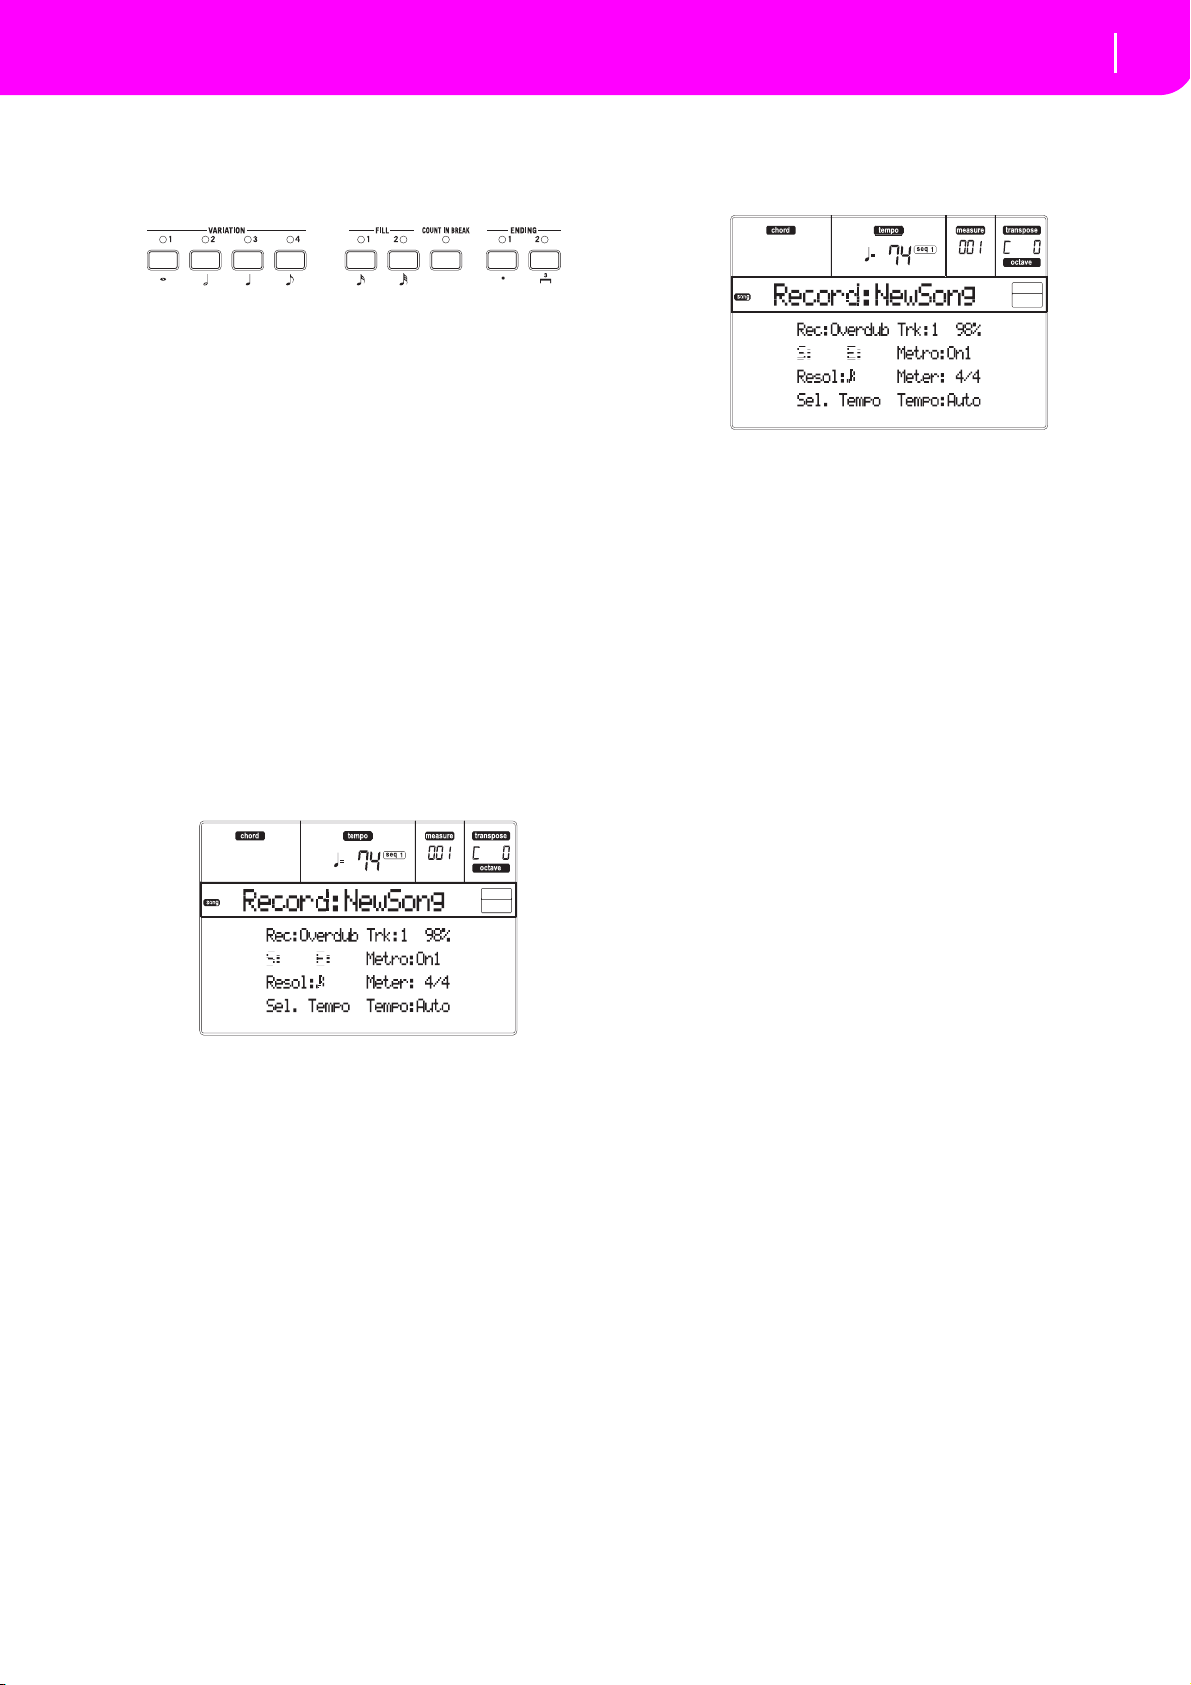
93
Song operating mode
Song Record page
• To jump to the next measure, filling the remaining beats with rests, press the >> button.
5. To change the step value, use the NOTE VALUE
buttons, on the lower left area of the control panel.
6. Insert a note, rest or chord at the current position.
• To insert a single note, just play it on the keyboard. The inserted note length will match the step
length. You may change the velocity and relative
duration of the note, by editing the V (Velocity)
and D (Duration) parameters. See “V (Velocity)”
and “D (Duration)” on page 95.
• To insert a rest, just press the REST button. Its
length will match the step value.
• To tie the note to be inserted to the previous one,
press the TIE button. A note will be inserted, tied
to the previous one, with exactly the same name.
You don’t need to play it on the keyboard again.
• To insert a chord or a second voice, see “Chords
and second voices” below.
7. After inserting a new event, you may go back by
pressing the < button. This will delete the previously inserted event, and set the step in edit again.
8. When finished recording, press SEQ1 PLAY/STOP
to turn off its LED. The Main page of the Song
Record mode appears again.
9. From the Main page of the Song Record mode,
press RECORD to exit the Record mode. While in
the Main page of the Song mode, you may press
SEQ1 PLAY/STOP to listen to the Song, or select
the Save Song command to save the Song to the
card.
Chords and second voices
With Liverpool, you are not obliged to insert single
notes in a track. There are several ways to insert chords
and double voices. For more information, see the
“Chords and second voices in Step Record mode” section on page 60 of the “Style Record mode” chapter.
SONG RECORD PAGE
While in the Song mode, press RECORD to enter the
Song Record mode. The Song Record page appears.
Rec (Record mode)
Set this parameter to select a recording mode.
Overdub The newly recorded events will be mixed
to any existing events.
Overwrite The newly recorded events will replace
any existing events.
Auto Punch Recording will automatically begin at the
“S” position, and stop at the “E” position
(see the following line).
Note: The Auto Punch function will not work
on an empty Song. At least one track must
already be recorded.
PedalPunch Recording will begin when pressing a
pedal set to the “Punch In/Out” function,
and will finish when pressing the same
pedal again.
Note: The Pedal Punch function will not work
on an empty Song. At least one track must
already be recorded.
StepDub Step Overdub. This recording mode lets
you enter events one at a time, adding
events to the existing events.
StepOwr Step Overwrite. This recording mode lets
you enter events one at a time, overwriting all existing events.
Trk (Track)
Track in record.
1…16 One of the 16 tracks selected. To select a
track, go to the Track pages (see “Tracks 1–
8 page” on page 90 and “Tracks 9–16
page” on page 90).
S/E (Start/End)
These parameters appear only when the “Auto Punch”
recording mode is selected. They set the starting and
ending points of the Punch recording.
Metro (Metronome)
This is the metronome heard during recording.
Off No metronome click will be heard during
recording. A one-bar precount will be
played before starting recording.
On1 Metronome on, with a one-bar precount
before starting recording.
On2 Metronome on, with a two-bar precount
before starting recording.
Page 96
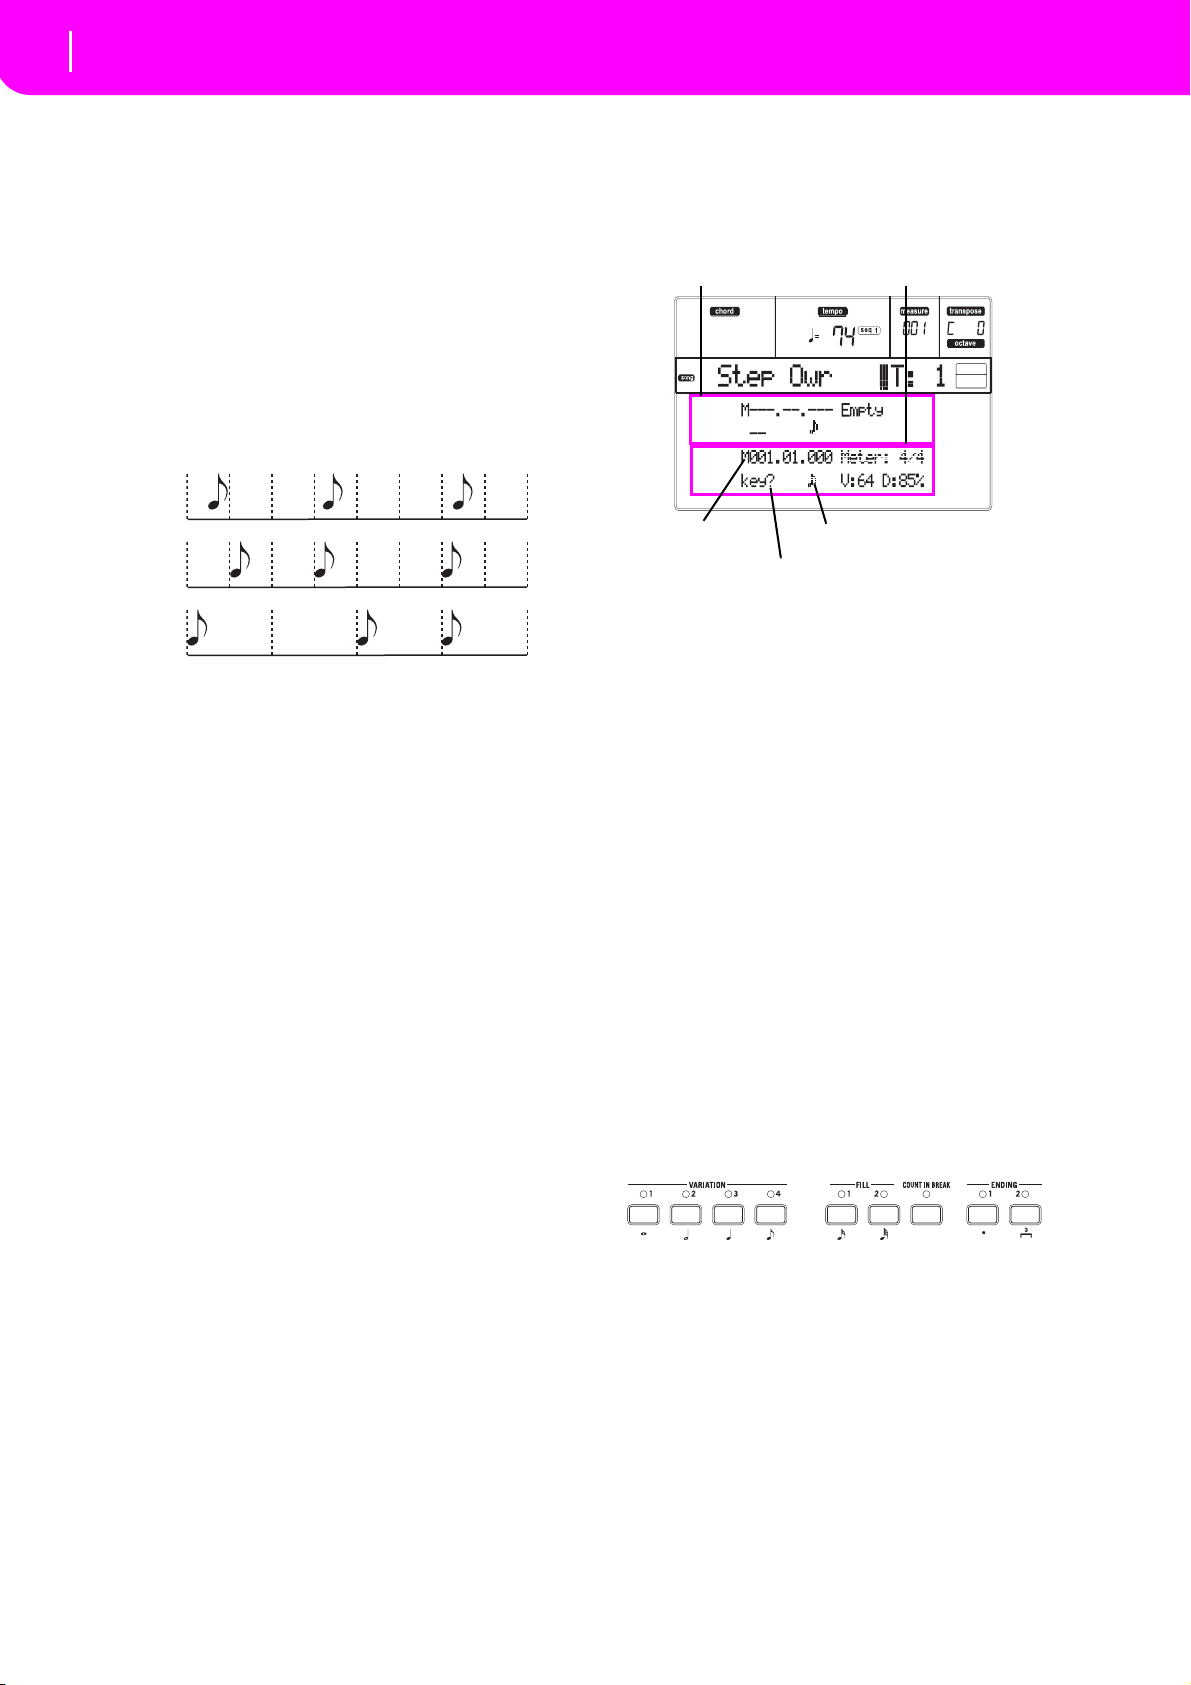
94
Song operating mode
Step Record page
No quanti-
zation
1/16
1/8
(a)
(b)
Previous event
Event to be inserted
Current position
Waiting for a keystroke…
Step value
Resol (Resolution)
Use this parameter to set the quantization during
recording. Quantization is a way of correcting timing errors; notes played too soon or too later are
moved to the nearest axis of a rhythmic “grid”, set
with this parameter, thus playing perfectly in time.
Hi No quantization applied.
(1/32)… (1/8)
Grid resolution, in musical values. For
example, when you select 1/16, all notes
are moved to the nearest 1/16 division.
When you select 1/8, all notes are moved
to the nearest 1/8 division
Meter
.
This is the meter (or time signature) of the Song. You
can edit this parameter only when the Song is empty,
i.e. before you begin recording anything. To insert a
meter change in the middle of the Song, use the “Insert
Measure” function (see page 102).
Sel.Tempo (Select Tempo)
Select this parameter to use the TEMPO/VALUE controls to set the tempo.
Note: You can always change the Tempo, when other parameters are selected, by keeping the SHIFT button pressed, and
rotating the DIAL.
Note: The tempo is always record in overwrite mode (old
data is replaced by the new data).
Tempo (Tempo mode)
This parameter sets the way tempo events are read.
Record All Tempo changes made during record-
ing will be recorded to the Master Track.
Auto The Sequencer plays back all recorded
Tempo events. No new Tempo events are
recorded.
Manual The latest manual Tempo setting (made
using the TEMPO/VALUE controls) is
considered the current Tempo value. No
Tempo change will be recorded. This is
very useful to record the Song much
slower than its actual Tempo.
STEP RECORD PAGE
Access this page from the Main page of the Song
Record mode, by selecting the “StepDub” or “StepOwr” recording mode (“Rec” parameter), and pressing SEQ1 PLAY/STOP.
(a) section
Previously inserted event. You may delete this event,
and set it in edit again, by pressing the < button.
(b) section
Event to be inserted. See the following parameters for
information on each element of this section.
M (Measure)
This is the position of the event (note, rest or chord) to
be inserted.
Meter
Meter of the current measure. This parameter can’t be
edited. You can set a Meter change by using the Insert
function of the Edit menu, and inserting a new series of
measures with a different Meter (see “Page 22 - Edit:
Insert Measures” on page 102).
key?
This is a prompt, asking for a note or chord to be
played on the keyboard, to enter an event on the current step.
Step value
Length of the event to be inserted. Use the NOTE
VALUE buttons, on the lower left area of the control
panel, to change this value.
… Note value.
Dot (.) Augments the selected note by one half of
its value.
Triplet (3) Makes the selected note a triplet note.
V (Velocity)
Set this parameter before entering a note or chord. This
will be the playing strength (i.e., velocity value) of the
event to be inserted.
KBD Keyboard. You can select this parameter,
by turning all counter-clockwise the dial.
When this option is selected, the playing
strength of the played note is recognized
and recorded.
Page 97
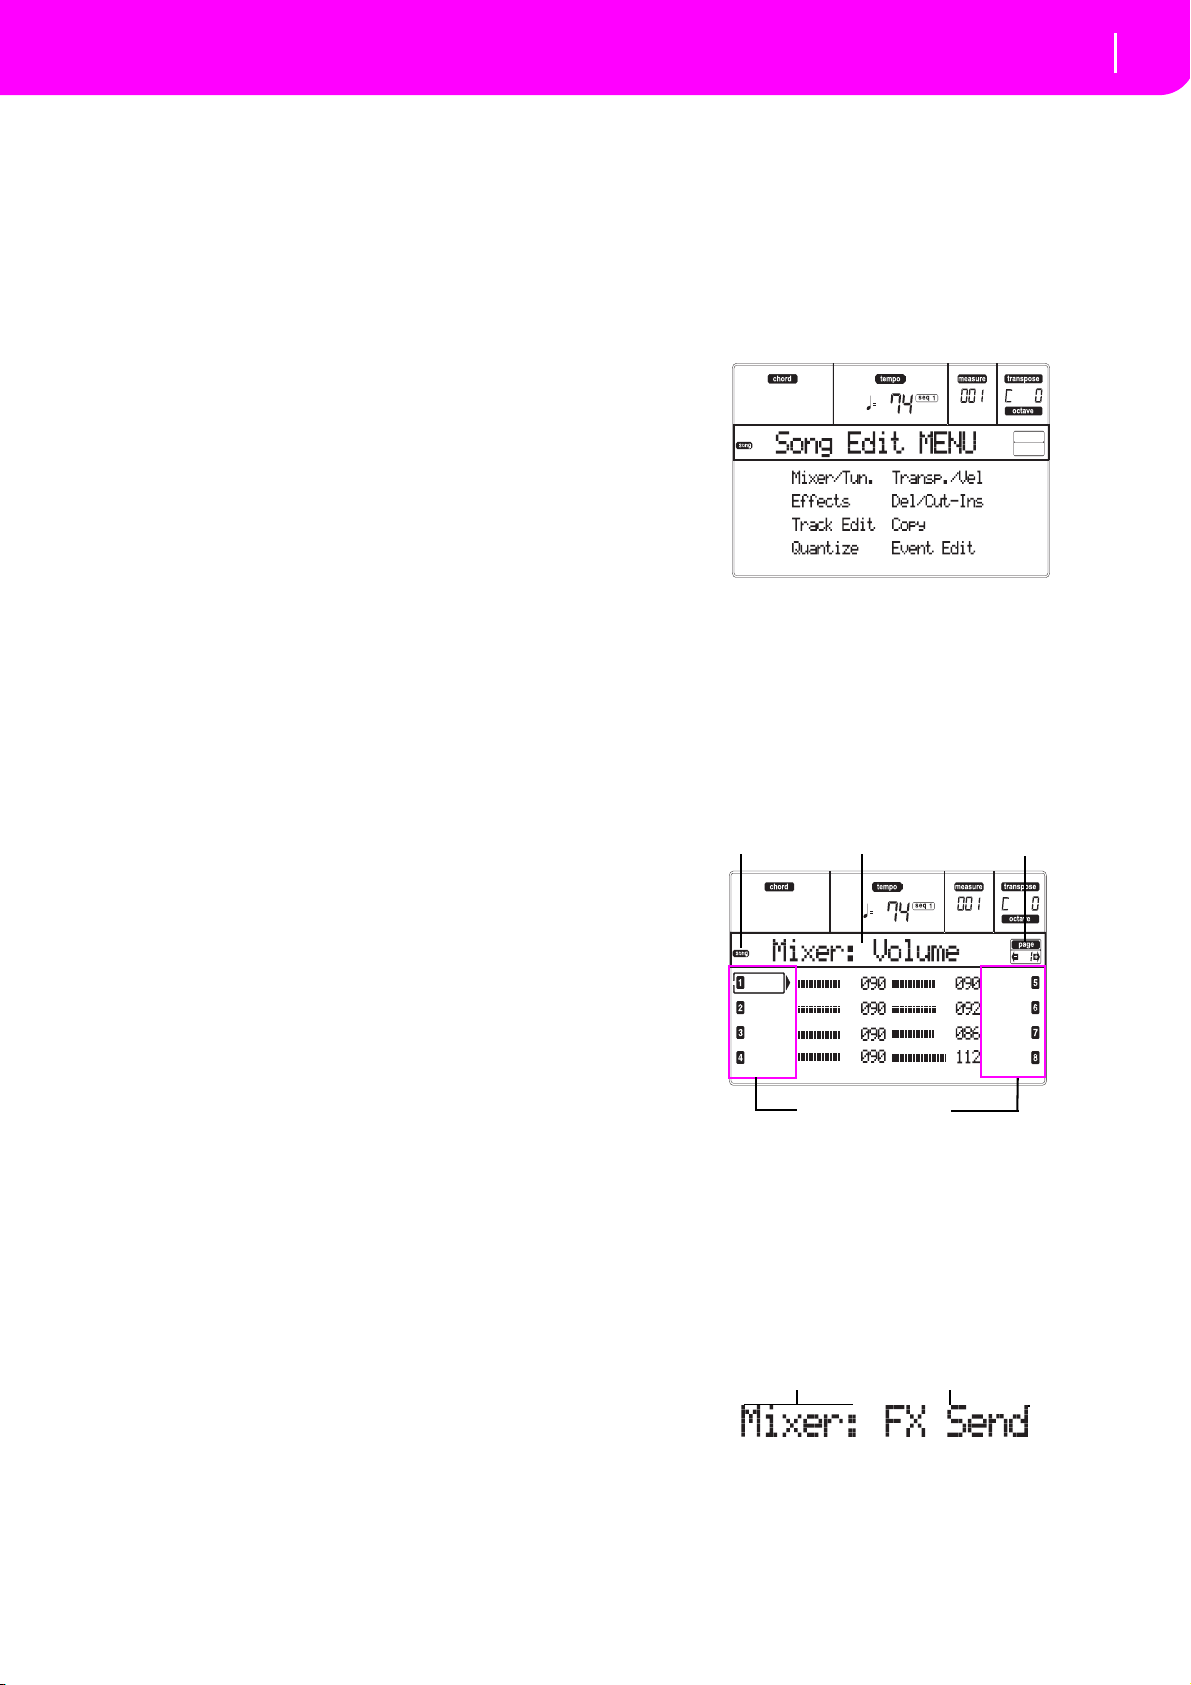
95
Song operating mode
Menu
Song icon
Page header
Page number
Track status icons
Section name
Page name
1…127 Velocity value. The event will be inserted
with this velocity value, and the actual
playing strength of the note played on the
keyboard will be ignored.
D (Duration)
Relative duration of the inserted note. The percentage
is always referred to the step value.
50% Staccato.
85% Ordinary articulation.
100% Legato.
Buttons used in Step Record mode
TIE button
Ties the note to be inserted to the previous note.
REST button
Inserts a rest.
NOTE VALUE buttons
Select the step value.
SEQ1 PLAY/STOP button
Exits the Step Record mode.
< (Previous step)
Goes to the previous step, erasing the inserted event.
>> (Fast Forward)
Goes to the next measure, and fill the remaining space
with rests.
MENU
While in any page, press MENU to open the Song edit
menu. This menu gives access to the various Song edit
sections.
When in the menu, select an edit section using the
VOLUME/VALUE (A–H) buttons, select an edit page
using PAGE +, or press EXIT to exit the menu.
When in an edit page, press EXIT to go back to the
main page of the Song operating mode.
Each item in this menu corresponds to an edit section.
Each edit section groups various edit pages.
EDIT PAGE STRUCTURE
Select an edit section from the Menu, and/or use the
PAGE buttons to reach the desired page.
Press EXIT to go back to the main page of the Song
mode.
All edit pages share the same structure.
Song icon
When on, this icon indicates that the instrument is in
Song mode.
Page header
The header shows the name of the current edit page.
Usually the header is divided in a first word, identifying the section name (e.g., “Mixer:FX Send” is a
“Mixer” section page), and a second word, referring to
the page name (e.g. “FX Send”).
Page
This area shows the current page number.
Page 98
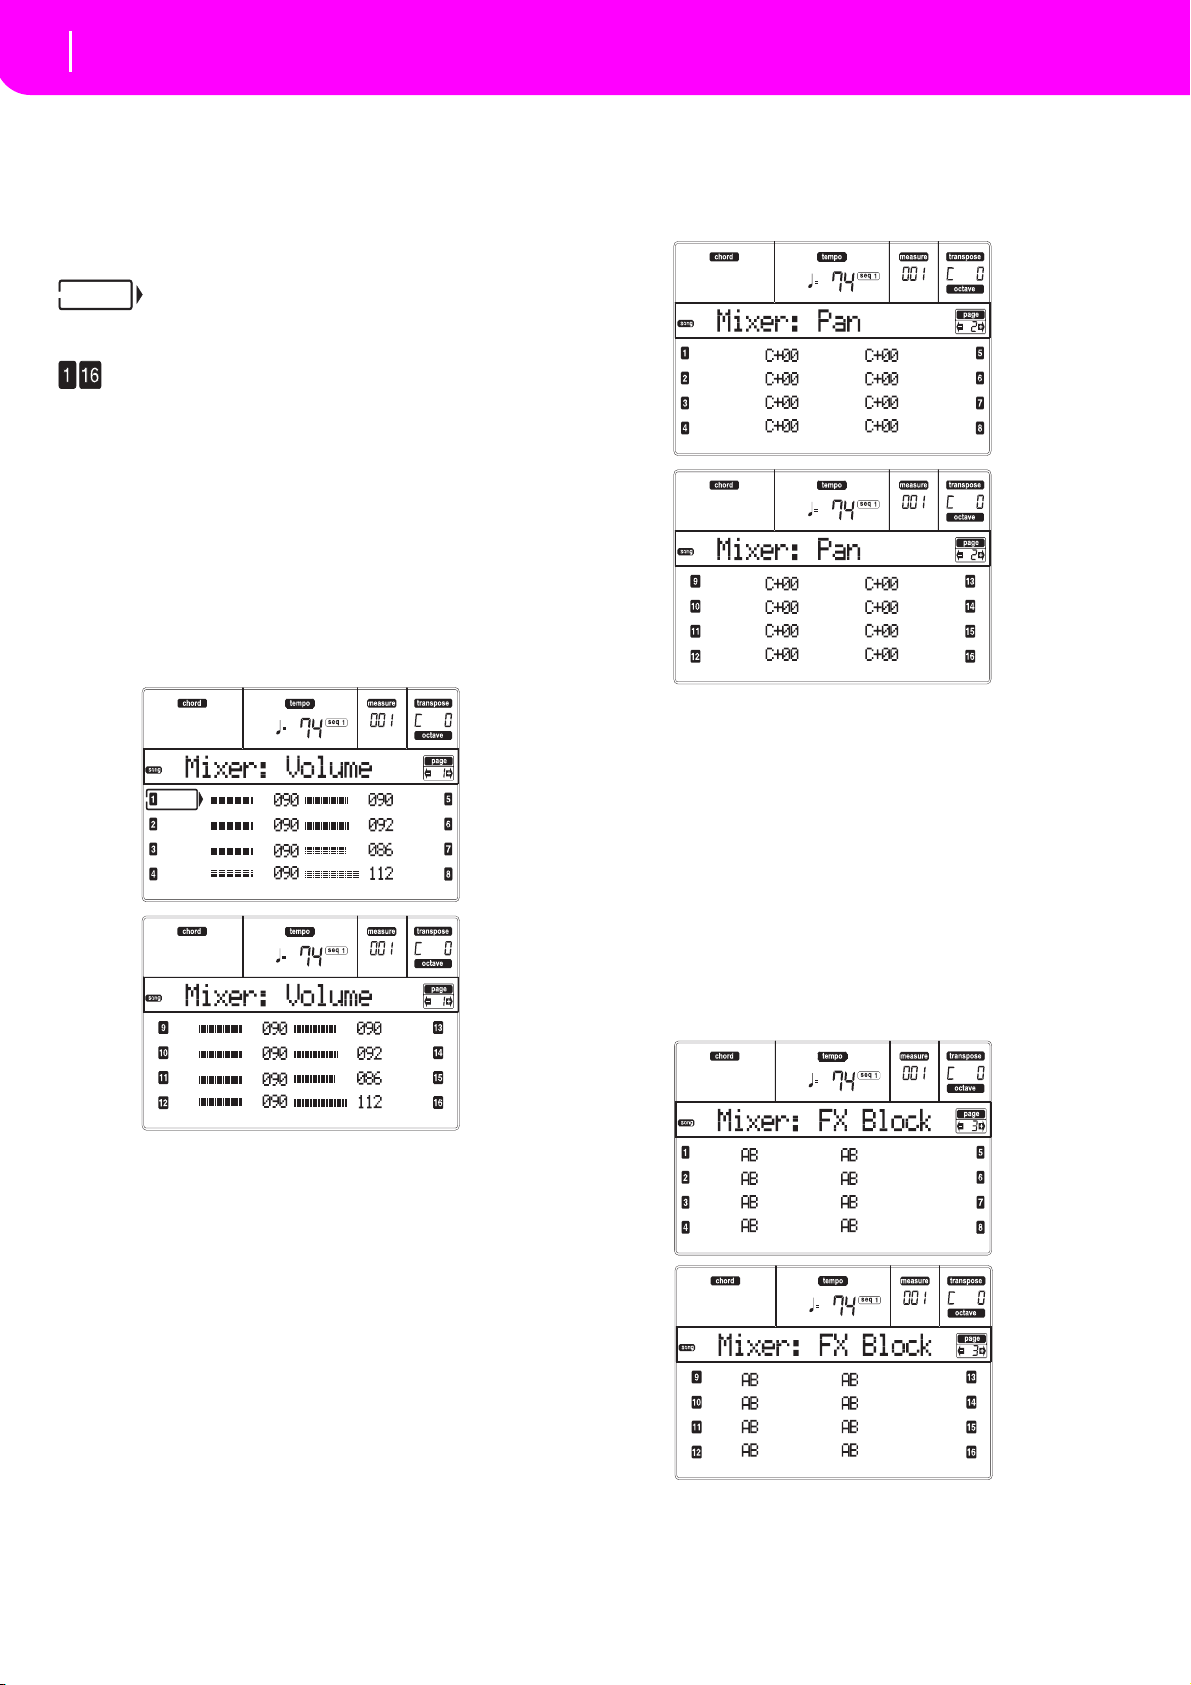
96
Song operating mode
Page 1 - Mixer: Volume
A–H
Each pair of VOLUME/VALUE buttons select a different track, parameter of command, depending on the
edit page.
Track status icons
A series of icons near each track show the track’s status.
Selected track or parameter. When this
symbol appears, you can execute any
available operation on the selected item.
Track in play or already recorded.
(no icon) The track is in mute, or does not contain
data.
PAGE 1 - MIXER: VOLUME
Here you can adjust the volume for each of the 16
sequencer tracks. Press both VOLUME/VALUE button
to mute/unmute the corresponding track.
A muted track remains muted even when selecting a
different Song.
Use the TRACK SELECT button to switch between
Song tracks 1–8, Song tracks 9–16, and back again.
PAGE 2 - MIXER: PAN
Here you can adjust the pan for each Song track.
Use the TRACK SELECT button to switch between
Song tracks 1–8, Song tracks 9–16, and back again.
Pan
-64 Hard Left.
+00 Center.
+63 Hard Right.
Off The direct (uneffected) signal does not go
to the outputs; only the FX signal is heard
for this track.
PAGE 3 - MIXER: FX BLOCK
This page lets you select a pair of effect processor (AB
or CD) for each of the Song track.
Use the TRACK SELECT button to switch between
Song tracks 1–8, Song tracks 9–16, and back again.
Page 99
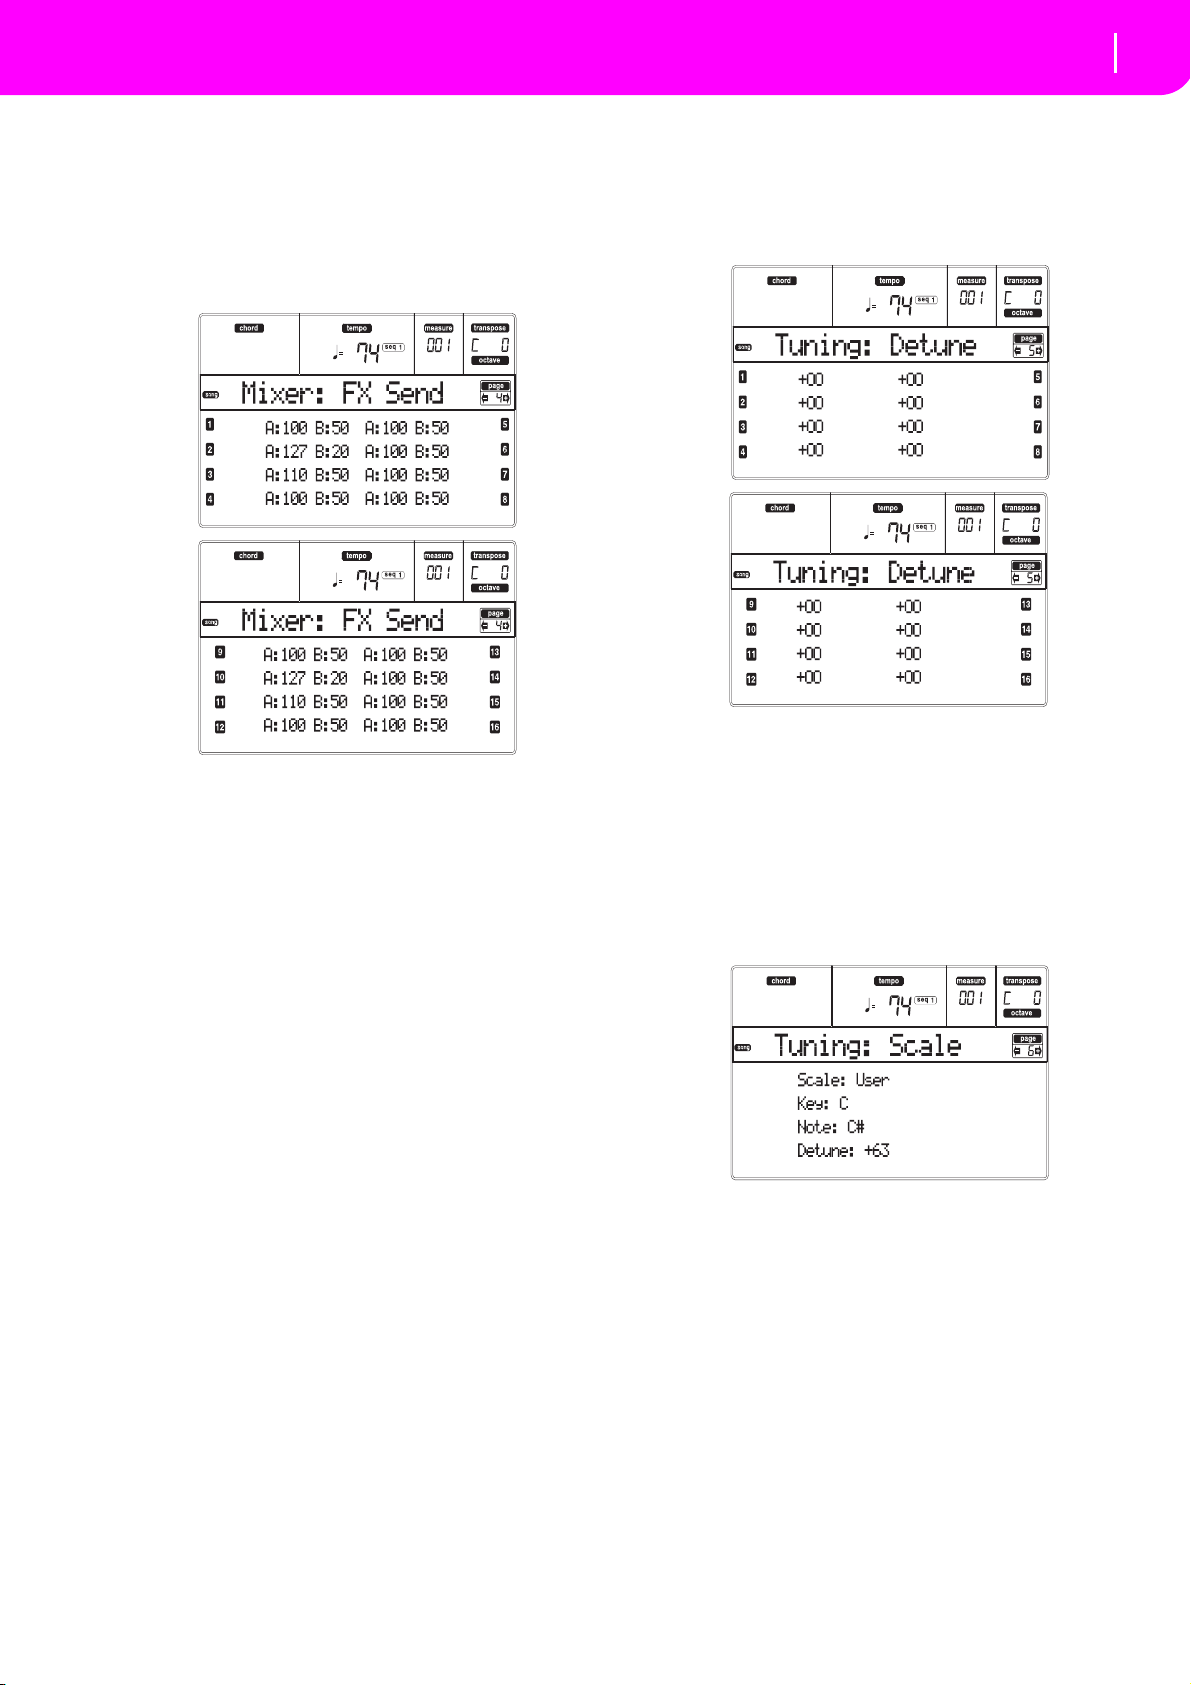
97
Song operating mode
Page 4 - Mixer: FX Send A/B (or C/D)
PAGE 4 - MIXER: FX SEND A/B (OR C/D)
This page lets you set the level of the track’s direct
(uneffected) signal going to the A and B, or C and D
Internal FX pair. Go to the previous page (“Page 3 Mixer: FX Block”) to select an FX pair.
Use the TRACK SELECT button to switch from tracks
1–8 to tracks 9–16.
PAGE 5 - TUNING: DETUNE
This page is where you can set the fine tuning for each
track.
Use the TRACK SELECT button to switch between
Song tracks 1–8, Song tracks 9–16, and back again.
Here is the edit procedure:
1. Use the VOLUME/VALUE (A–H) buttons to select
a track.
2. Use the F-1–F-4 buttons to select a parameter for
that track.
3. Use the TEMPO/VALUE controls to change the
parameter’s value.
Parameters
000 No effect. Only the direct (uneffected) sig-
nal goes to the outputs.
127 100% effect. The direct (uneffected) and
effected signals go to the outputs with the
same level.
Detune
This is the fine tuning.
-64 Lowest pitch.
0 Standard tuning.
+63 Highest pitch.
PAGE 6 - TUNING: SCALE
This page lets you program the alternative scale for the
Song tracks.
Scale
Alternative scale for the Song tracks. See “Scales” on
page 229 for a list of available scales. To enable/disable
the alternative scale for each Song track, see “Page 7 Tuning: PitchBend/Scale” on page 98.
Key
Parameter required for some Scales, when you should
set a preferred key.
Note
Note in edit, to be detuned. This parameter can be
accessed when a User Scale is selected.
Detune
Note detune, compared to the standard Equal tuning. This
parameter can be accessed when a User Scale is selected.
Page 100
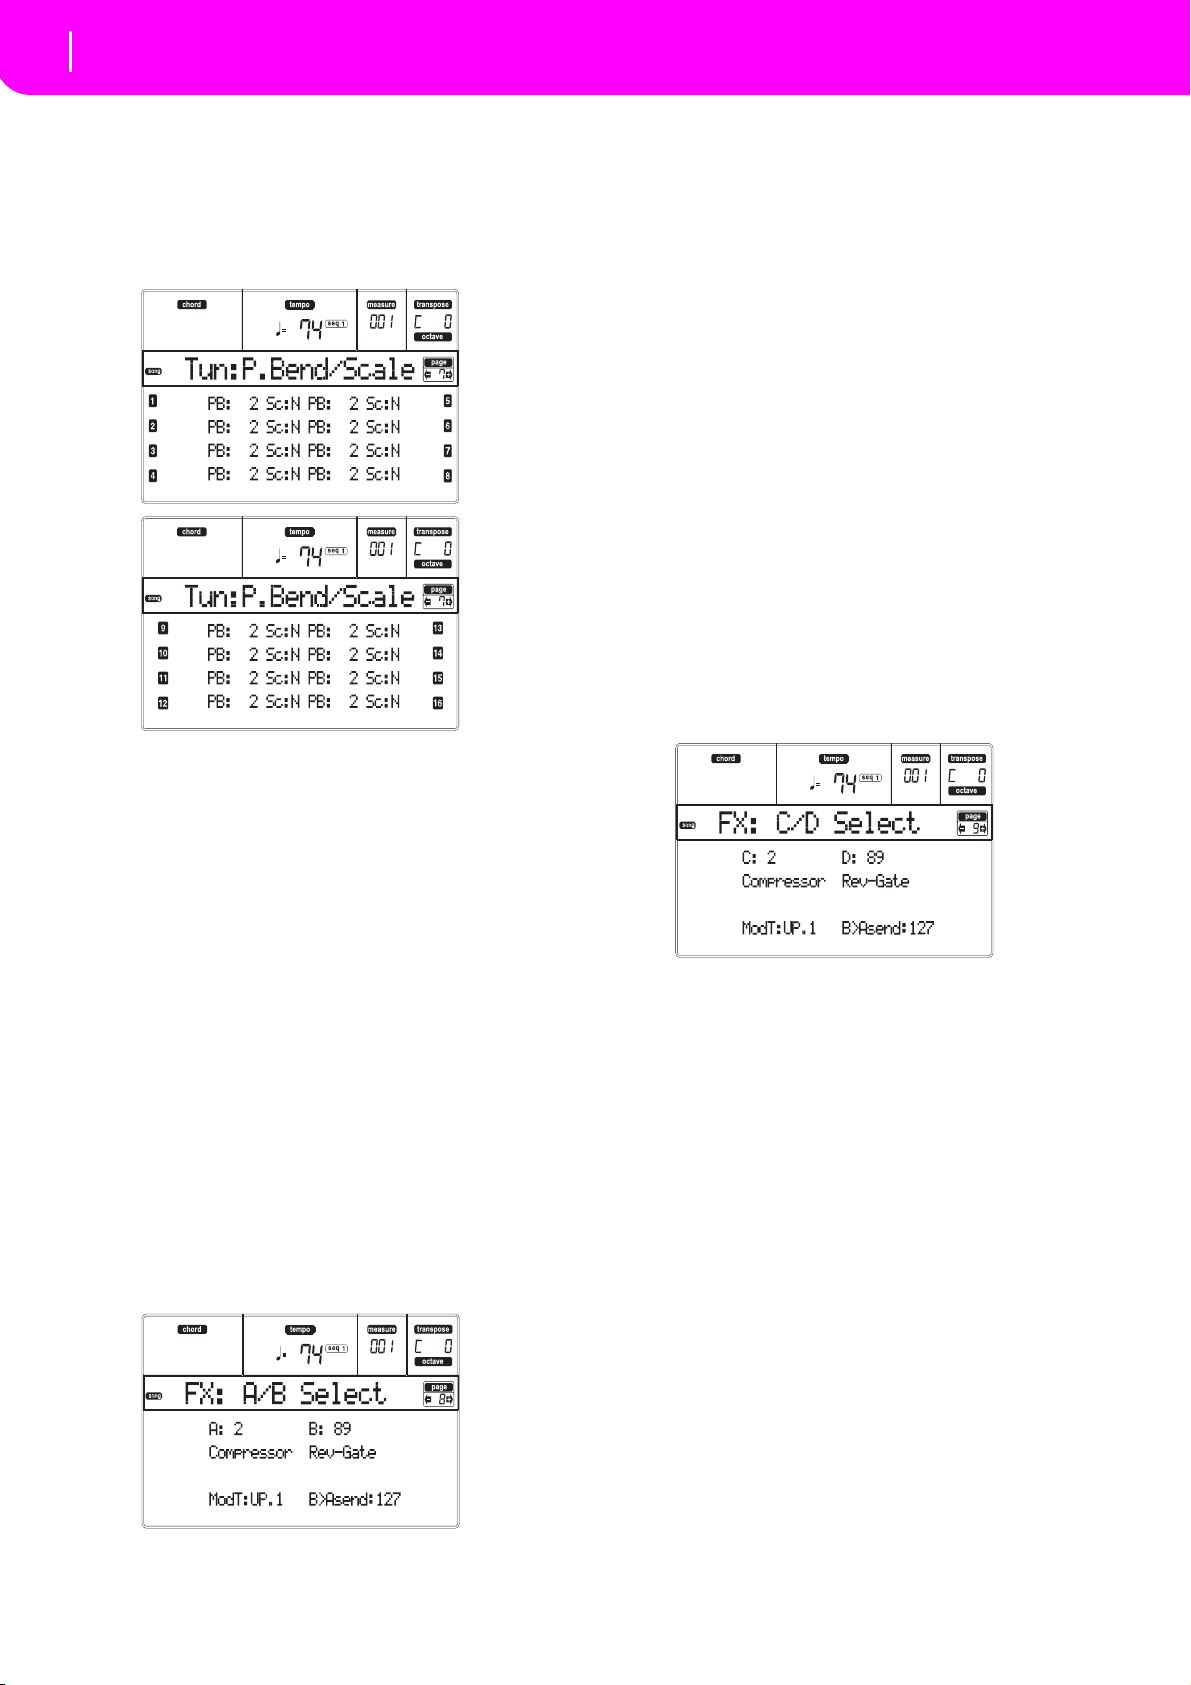
98
Song operating mode
Page 7 - Tuning: PitchBend/Scale
PAGE 7 - TUNING: PITCHBEND/SCALE
This page lets you program the Pitch Bend range for
the Song tracks. Furthermore, it lets you activate/deactivate the alternative scale for each track.
Use the TRACK SELECT button to switch between
Song tracks 1–8, Song tracks 9–16, and back again.
PB(end)
This parameters shows the Pitch Bend range for each
track, in semitones.
01…12 Maximum positive/negative pitchbend
range (in semitones). 12 = ±1 octave.
Off No pitchbend allowed.
Sc(ale)
This parameter lets you activate/deactivate the alternative
scale for each track. (See “Page 6 - Tuning: Scale” on page 97
for more information on selecting an alternative scale).
Yes The track is tuned according to the alter-
native scale.
No The track is tuned according to the Global
scale (see “Scale” on page 126).
PAGE 8 - FX: A/B SELECT
This page lets you select the A and B effects. Usually,
the A effect is a reverb, while the B effect is a modulating effect.
Standard MIDI Files usually require two effects only.
You can, however, assign all four effects to a Song (see
“Page 3 - Mixer: FX Block” on page 96).
Note: When you stop the Song, or select a different Song, the
default effects are selected again. You can, however, stop the
Song, change the effects, then start the Song again. Save the
Song to permanently change the effects.
A, B
Effects assigned to the A and B effect processors. Usually, A is the reverb, while B is the modulating effect
(chorus, flanger, delay…). For a list of the available
effects, see “Effects” on page 177.
ModTrk (Modulating Track)
Source track for modulating MIDI messages. You can
modulate an effect parameter with a MIDI message
generated by a physical controller.
B>Asend (B>A Send)
Amount of the B effect going back to the input of the A
effect.
PAGE 9 - FX: C/D SELECT
This page lets you select the C and D effects. Usually,
the C effect is a reverb, while the D effect is a modulating effect.
Standard MIDI Files usually require two effects only.
You can, however, assign all four effects to a Song (see
“Page 3 - Mixer: FX Block” on page 96).
Note: When you stop the Song, or select a different Song, the
default effects are selected again. You can, however, stop the
Song, change the effects, then start the Song again. Edit the
Song in Song mode to permanently change the effects.
C, D
Effects assigned to the C and D effect processors. Usually, C is the reverb, while D is the modulating effect
(chorus, flanger, delay…). For a list of the available
effects, see “Effects” on page 177.
ModTrk (Modulating Track)
Source track for modulating MIDI messages. You can
modulate an effect parameter with a MIDI message
generated by a physical controller.
D>Csend (D>C Send)
Amount of the D effect going back to the input of the C
effect.
 Loading...