

Page 1

Precautions
1
Location
Using the unit in the following locations can result in a malfunction.
• In direct sunlight
• Locations of extreme temperature or humidity
• Excessively dusty or dir ty locations
• Locations of excessive vibration
• Close to magnetic elds
Power supply
Please connect the designated AC adapter to an AC outlet of the
correct voltage. Do not connect it to an AC outlet of voltage other
than that for which your unit is intended.
Interference with other electrical devices
Radios and televisions placed nearby may experience reception
interference. Operate this unit at a suitable distance from radios
and televisions.
Handling
To avoid breakage, do not apply excessive force to the switches
or controls.
Care
If the exterior becomes dirty, wipe it with a clean, dry cloth. Do not use
liquid cleaners such as benzene or thinner, or cleaning compounds
or ammable polishes.
Keep this manual
After reading this manual, please keep it for later reference.
Keeping foreign matter out of your equipment
Never set any cont ainer with liquid in it near this equipment. If
liquid gets into the equipment, it could cause a breakdown, re,
or electrical shock.
Be careful not to let metal objects get into the equipment. If something
does slip into the equipment, unplug the AC adapter from the wall
outlet. Then contact your nearest Korg dealer or the store where the
equipment was purchased.
IMPORTANT NOTICE TO CONSUMERS
This product has been manufactured according to strict specications and voltage requirements that are applicable in the countr y
in which it is intended that this product should be used. If you have
purchased this product via the internet, through mail order, and/or
via a telephone sale, you must verif y that this product is intended
to be used in the country in which you reside.
WARNING: Use of this product in any countr y other than that for
which it is intended could be dangerous and could invalidate the
manufacturer’s or distributor’s warrant y.
Please also retain your receipt as proof of purchase otherwise
your product may be disquali ed f rom the manufacturer’s or
distributor’s warranty.
THE FCC REGULATION WARNING (for USA)
This equipment has been tested and found to comply with the
limits for a Class B digital device, pursuant to Part 15 of the
FCC Rules. These limits are designed to provide reasonable
protection against harmful interference in a residential installation. This equipment generates, uses, and can radiate radio
frequency energy and, if not installed and used in accordance
with the instructions, may cause harmful interference to radio
communications. However, there is no guarantee that interference
will not occur in a particular installation. If this equipment does
cause harmful interference to radio or television reception, which
can be determined by turning the equipment off and on, the user
is encouraged to try to correct the interference by one or more
of the following measures:
• Reorient or relocate the receiving antenna.
• Increase the separation between the equipment and receiver.
• Connect the equipment into an outlet on a circuit different from
that to which the receiver is c onnected.
• Consult the dealer or an experienced radio/T V technician
for help.
Unauthorized changes or modication to this system can void the
user’s authorit y to operate this equipment.
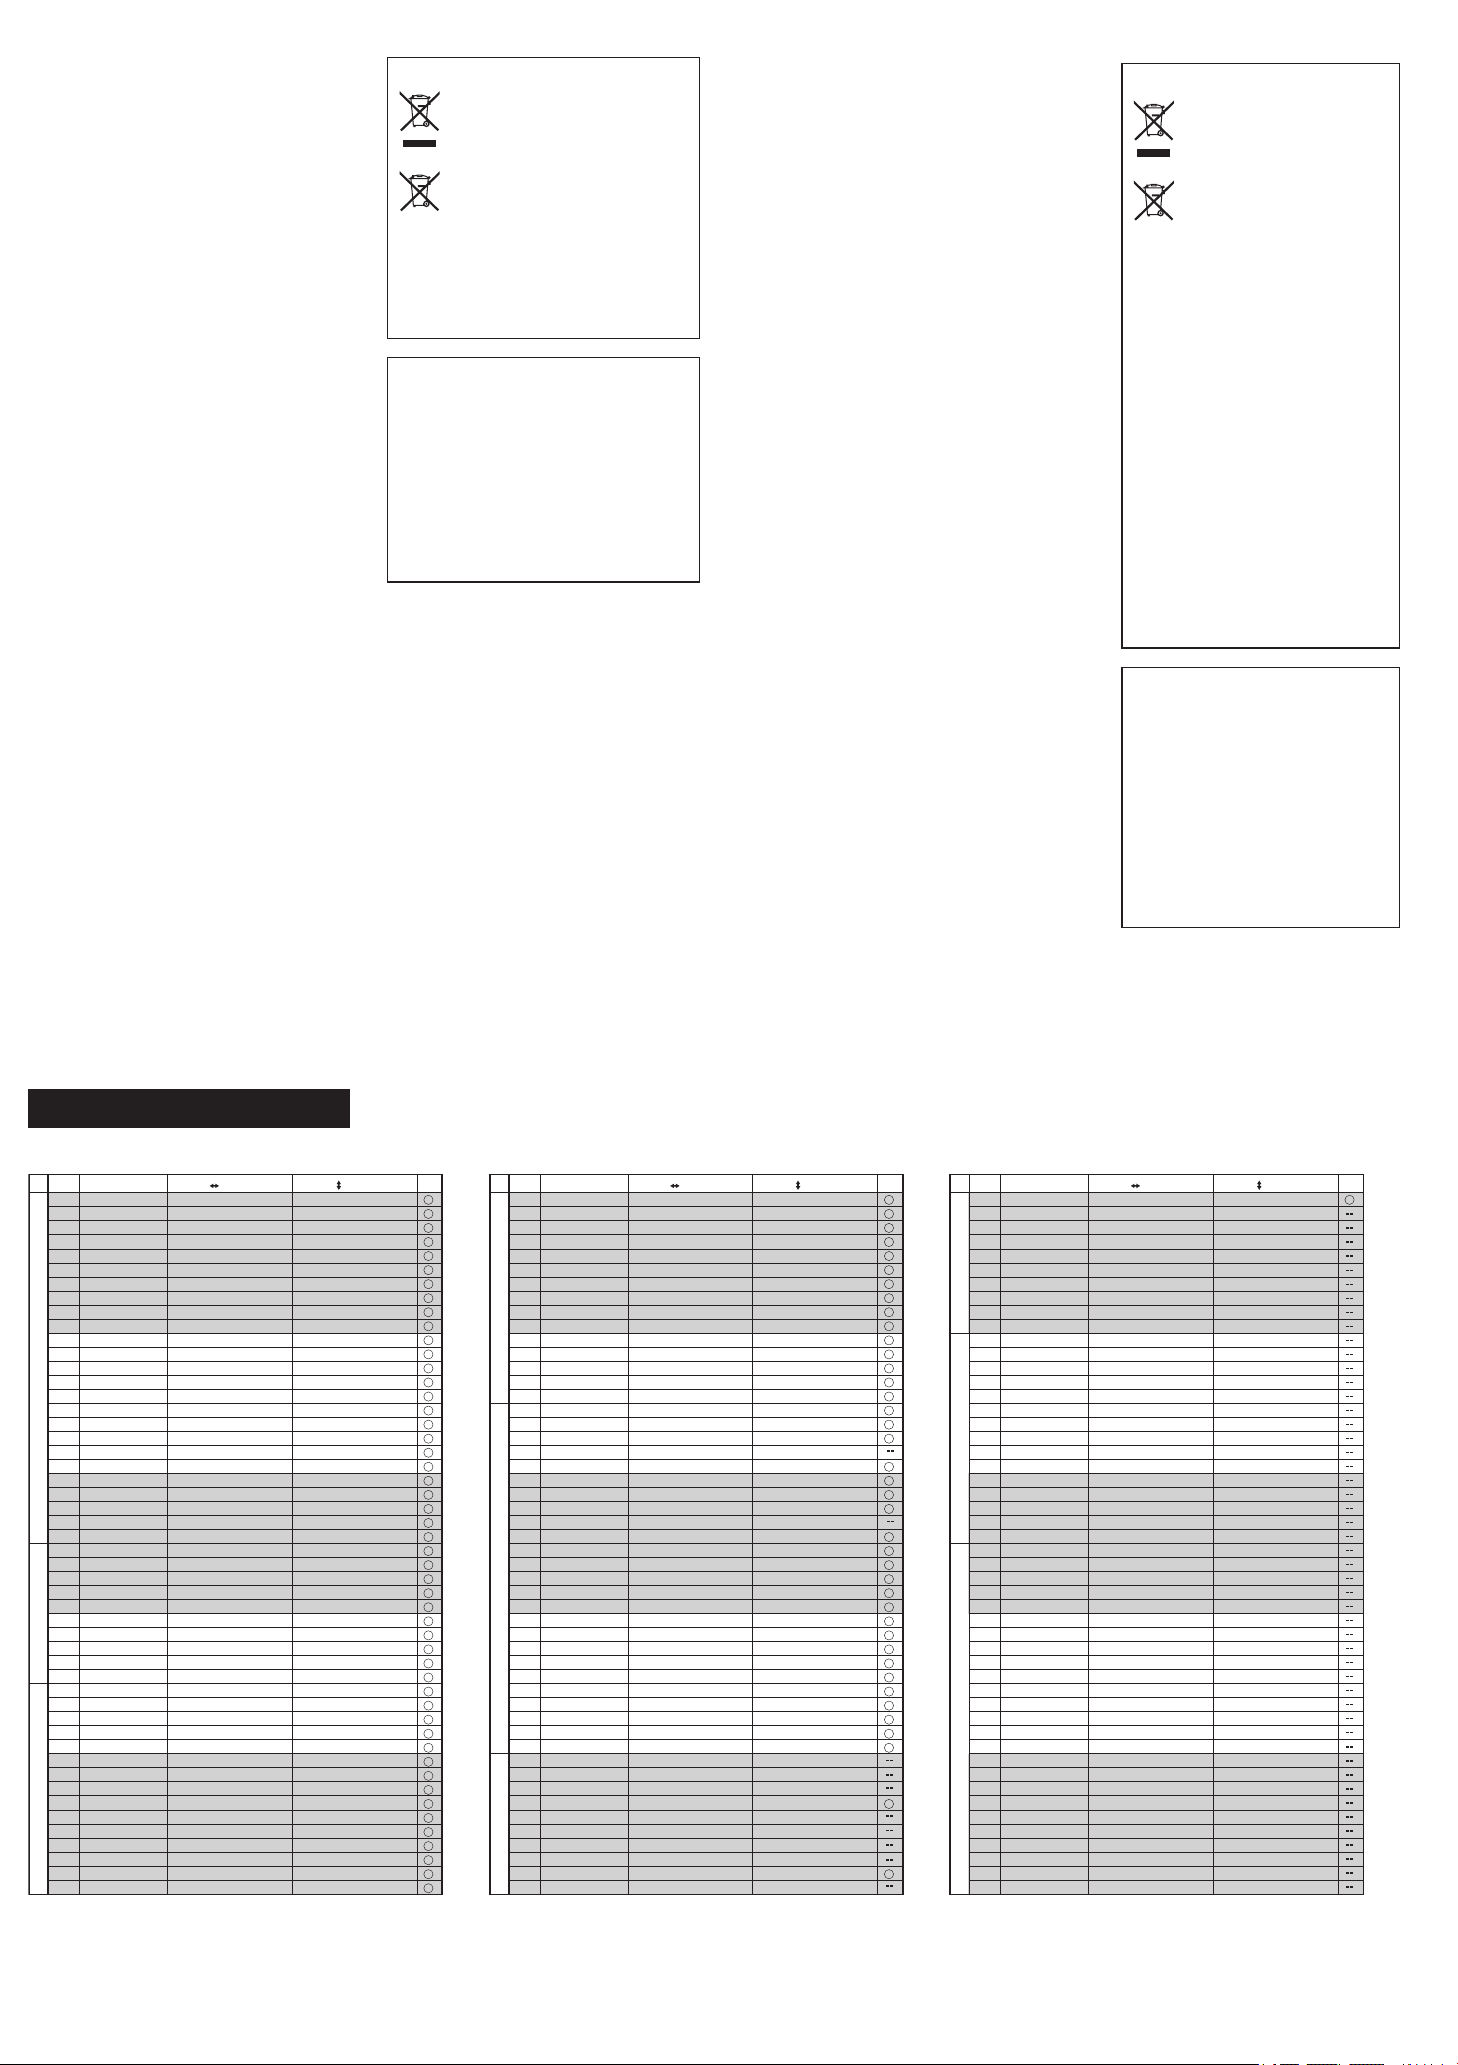
Notice regarding disposal (for EU)
When this “crossed-out wheeled bin” symbol is displayed on the product, owner’s manual, batter y, or
batter y package, it signies that when you wish to
dispose of this product, manual, package or battery
you must do so in an approved manner. Do not discard
this product, manual, package or battery along with
ordinar y household waste. Disposing in the correct
manner will prevent harm to human health and potential damage to the environment. Since the correct method of
disposal will depend on the applicable laws and regulations in
your locality, please contact your local administrative body for
details. If the battery contains heavy metals in excess of the
regulated amount, a chemical symbol is displayed below the
“crossed-out wheeled bin” symbol on the battery or battery package.
* All product names and company names are the trademarks or
registered trademarks of their respective owners.
4015-2 Yanokuchi, Inagi-city, Tokyo 206-0812 Japan
2012 KORG INC.
©
Page 2
Précautions
Emplacement
L’utilisation de cet instrument dans les endro its suivants peut en
entraîner le mauvais fonctionnement.
• En plein soleil
• Endroits très chauds ou très humides
• Endroits sales ou fort poussiéreux
• Endroits soumis à de fortes vibrations
• A proximité de champs magnétiques
Alimentation
Branc hez l’adaptateur secteur mentionné à une prise secteur de
tension appropriée. Evitez de brancher l’adaptateur à une pris e
de courant dont la tension ne correspond pas à celle pour laquelle
l’appareil est conçu.
Interférences avec d’autres appareils électriques
Les postes de radio et de télévision situés à proximité peuvent par
conséquent souffrir d’interférences à la réception. Veuillez dès lors
faire fonctionner cet appareil à une distance raisonnable de postes
de radio et de télévision.
Maniement
Pour éviter de les endommager, manipulez les commandes et les
boutons de cet instrument avec soin.
Entretien
Lorsque l’instrument se salit, nettoyez-le avec un chiffon propre et
sec. Ne vous ser vez pas d’agents de nettoyage liquides tels que du
benzène ou du diluant, voire des produits inammables.
Conser vez ce manuel
Après avoir lu ce manuel, veuillez le conserver soigneusement pour
toute référence ultérieure.
Evitez toute intrusion d’objets ou de liquide
Ne placez jamais de réc ipie nt con tena nt du liq uide p rès de
l’instrument. Si le liquide se renverse ou coule, il risque de provoquer
des dommages, un court- circuit ou une électrocution.
Veillez à ne pas laisser tomber des objets métalliques dans le boîtier
(trombones, par ex.). Si cela se produit, débranchez l’alimentation de
la prise de courant et contactez votre revendeur korg le plus proche
ou la surface où vous avez acheté l’instr ument.
Note concernant les dispositions (Seulement EU)
Quand un symbole avec une poubelle barrée d’une
croix apparait sur le produit, le mode d’emploi, les piles
ou le pack de piles, cela signie que ce produit, manuel ou piles doit être déposé chez un représentant
compétent, et non pas dans une poubelle ou toute
autre déchetterie conventionnelle. Disposer de cet te
manière, de prévenir les dommages pour la santé hu-
maine et les dommages potentiels pour l’environnement.
La bonne méthode d’élimination dépendra des lois et règlements
applicables dans votre localité, s’il vous plaît, c ontactez votre organisme administratif pour plus de détails. Si la pile contient des
métaux lourds au-delà du seuil réglementé, un symbole chimique
est afché en dessous du symbole de la poubelle barrée d’une
croix sur la pile ou le pack de piles.
REMARQUE IMPORTANTE POUR LES CLIENTS
Ce produit a été fabriqué suivant des spécications sévères et des
besoins en tension applicables dans le pays où ce produit doit être
utilisé. Si vous avez acheté ce produit via l’internet, par vente par
correspondance ou/et vente par téléphone, vous devez vérier
que ce produit est bien utilisable dans le pays où vous résidez.
ATTENTION: L’utilisation de ce produit dans un pays autre que
celui pour lequel il a été c onçu peut être dangereuse et annulera
la garantie du fabricant ou du distributeur. Conservez bien votre
récépissé qui est la preuve de votre achat, faute de quoi votre
produit ne risque de ne plus être couvert par la garantie du fabricant
ou du distr ibuteur.
* Tous les noms de produits et de sociétés sont des marques
commerciales ou déposées de leur détenteur respectif.
Vorsichtsmaßnahmen
Aufstellungsort
Vermeiden Sie das Aufstellen des Geräts an Or ten, an denen.
• es direkter Sonneneinstrahlung ausgesetzt ist;
• hohe Feuchtigkeit oder Extremtemperaturen auftreten können;
• Staub oder Schmutz in großen Mengen vorhanden sind;
• das Gerät Erschüt terungen ausgesetzt sein kann.
• in der Nähe eines Magnetfeldes.
Stromversorgung
Schließ en Sie das opti onal e N etzt eil nur an eine geei gnete
Steckdose an. Verbinden Sie es niemals mit einer Steckdose einer
anderen Spannung.
Störeinüsse auf andere Elektrogeräte
Dieser kann bei in der Nähe aufgestellten Rund-funkempfängern
oder Fernsehgeräten Empfangsstörungen hervorrufen. Betreiben
Sie solche Geräte nur in einem geeigneten Abstand von diesem
Erzeugnis.
Bedienung
Verm eiden Sie bei der Bedi enung von Schaltern und Reglern
unangemessenen Kraftaufwand.
Reinigung
Bei auftretender Verschmutzung können Sie das Gehäuse mit einem
trockenen, sauberen Tuch abwischen. Verwenden Sie keinerlei Flüssigreiniger wie beispielsweise Reinigungsbenzin, Verdünnungs- oder
Spülmit tel. Verwenden Sie niemals brennbare Reiniger.
Bedienungsanleitung
Bewahren Sie diese Bedienungsanleitung gut auf, falls Sie sie später
noch einmal benötigen.
Flüssigkeiten und Fremdkörper
Stellen Sie niemals Behältnisse mit Flüssigkeiten in der Nähe des
Geräts auf. Wenn Flüssigkeit in das Gerät gelangt, können Beschädigung des Geräts, Feuer oder ein elek-trischer Schlag die Folge sein.
Beachten Sie, daß keinerlei Fremdkör per in das Gerät gelangen.
Sollte ein Fremdkörper in das Gerät gelangt sein, so trennen Sie es
sofort vom Netz. Wenden Sie sich dann an Ihren KORG-Fachhändler.
Hinweis zur Entsorgung (Nur EU)
Wenn Sie das Symbol mit der „durchgekreuzten
Mülltonne“ auf Ihrem Produkt, der dazugehörigen Bedienungsanleitung, der Batterie oder
dem Batteriefach sehen, müssen Sie das
Produkt in der vorgeschriebenen Art und Weise
entsorgen. Dies bedeutet, dass dieses Produkt
mit elektrischen und elektronische n Kompo-
nenten nicht mit dem normalen Hausmüll entsorgt werden darf. Für Produkte dieser Art existiert ein
separates, geset zlich festgelegtes Entsorgungssystem.
Gebrauchte elektr ische und elektronische Geräte müssen
separat entsorgt werden, um ein umweltgerechtes Recycling sicherzustellen. Diese Produkte müssen bei benannten Sammelstellen abgegeben werden. Die Entsorgung
ist für den Endverbraucher kostenfrei! Bitte erkundigen sie
sich bei ihrer zuständigen Behörde, wo sie diese Produk te
zur fachgerechten Entsorgung abgeben können. Falls ihr
Produkt mit Batterien oder Akkumulatoren ausgerüstet ist,
müssen sie diese vor Abgabe des Produktes entfernen und
sep arat ent sorgen (siehe ob en). Die Abgabe die ses
Produktes bei einer zuständigen Stelle hilft ihnen, dass das
Produkt umweltgerecht entsor gt wird. Damit leisten sie
persönlich einen nicht unerheblichen Beitrag zum Schutz
der Umwelt und der menschlichen Gesundheit vor möglichen negativen Effekten durch unsachgemäße Entsorgung
von Müll. Batterien oder Akkus, die Schadstoffe enthalten,
sind auch mit dem Symbol einer durchgekreuzten Mülltonne
gekennzeichnet. In der Nähe zum Mülltonnensymbol bendet sich die chemische Bezeichnung des Schadstoffes.
Cd oder NiCd steht für Cadmium, Pb für Blei und Hg für
Quecksilber.
WICHTIGER HINWEIS FÜR KUNDEN
Dieses Produkt wurde unter strenger Beachtung von Spezikationen und Spannungsanforder ungen hergestellt, die
im Bestimmungsland gelten. Wenn Sie dieses Produkt über
das Internet, per Postversand und/oder mit telefonischer
Bestellung gekauft haben, müssen Sie bestätigen, dass
dieses Produkt für Ihr Wohngebiet ausgelegt ist.
WAR NUNG: Ver wend ung die ses Produkt s i n e inem
anderen Land als dem, für das es bestimmt ist, verwendet
wird, kann gefährlich sein und die Garantie des Herstellers
oder Importeurs hinfällig lassen werden. Bitte bewahren
Sie diese Quittung als Kaufbeleg auf, da andernfalls das
Produkt von der Garantie des Herstellers oder Importeurs
ausgeschlossen werden kann.
PROGRAM LIST
No. Program Name X-Assign Y-Assign Scale
LD.001 Wide Dist Lead Note Cuto
LD.002 Pulse Verb Note Cuto
LD.003 Unison S aw Note Reverb Depth
LD.004 Reverse Sine Note Attack Time, Decay Time
LD.005 Bleep Lead Note OSC Sync Pitch
LD.006 Air Spec trum Note Decay Time
LD.007 Paz Square Note Pitch EG Time
LD.008 Acid Rez Lead Note Cuto
LD.009 Ring Flutter Note Ring Mod Pitch
LD.010 Synth Lead Note Cuto
LD.011 PWM Lead Note Cuto
LD.012 8bit Square Note Octave
LEADACOUSTICBASS
LD.013 Syn Decay Note Cuto
LD.014 5th Lead Note OSC Pulse Width
LD.015 Square Lead Note Cuto
LD.016 Unison Lead Note Cuto
LD.017 SinePortamento Note Portamento
LD.018 Square Bell Note Decay Time
LD.019 Soft Lead Note Cuto
LD.020 Orange Lead Note Cuto
LD.021 Ambient Lead Note Ambient Depth, Vibrato
LD.022 Mini Lead Note Portamento
LD.023 Tell Min Note Level
LD.024 Sync Lead Note OSC Sync Pitch
LD.025 Unison Sweep Note Cuto
AC.026 Ray EP Note Velocity
AC.027 Trumpet Note Breath Pressure
AC.028 Kalimba Note Velocity
AC.029 Duo Strings Note 2nd Strings Level
AC.030 Piano Note Velocity
AC.031 Tape Flute Note Chord (Maj)
AC.032 Digerido Note LFO Speed
AC.033 Dist Guitar Note Sound Character
AC.034 Harmonica Note 2nd Reed Level
AC.035 Phase Clav Note Decay Time, Mute
BS.036 House Bass Note Resonance
BS.037 Duck Bass Note Cuto
BS.038 Hoover Bass Note Octave
BS.039 Dist Bass Note LFO Depth
BS.040 Wobble Bass Note, LFO Speed Cuto
BS.041 Slow Bass Note Attack Time
BS.042 Squ Rez Bass Note Cuto
BS.043 Pure Saw Note Octave
BS.044 Motion Bass Note LFO Speed
BS.045 Auto Oct Bass Note LFO Speed
BS.046 Elec Bass Note Velocity
BS.047 XMod Bass Note LFO Depth
BS.048 Synth Bass Note Cuto
BS.049 Valve Bass Note Cuto
BS.050 Talkin Bass Note Formant
No. Program Name X-Assign Y-Assign Scale
BS.051 Feed Y Bass Note Flanger Depth
BS.052 Organ Bass Note 3rd Percussion
BS.053 Simple Bass Note Cuto
BS.054 MG Bass Note Cuto
BS.055 Square Bass Note Cuto
BS.056 Fat Bass Note Cuto
BS.057 Slap Bass Note Decay Time, Mute
BS.058 Chorus Bass Note Cuto
BASSCHORDSE
BS.059 Bad Bass Note LFO Depth
BS.060 Big Bass Note Cuto
BS.061
Kick Bass Note
BS.062 Acid Bass Note Distortion
BS.063 Boost Bass Note Cuto
BS.064 Ring Bass Note Cuto
BS.065 Fall Bass Note Cuto
CH.066 Pulse Code Note Cuto
CH.067 Tech Kode Note Attack Time
CH.068 Pump Chord Note Chord (min - Maj)
CH.069 Guitar Strum Pitch Chord (min7 - Maj7)
CH.070 Scale Chord Note Level
CH.071 kasCode Note Cuto
CH.072 Dream Sine Note Attack Time, Decay Time
CH.073 OSCode Note Cuto
CH.074 Piano Chord Pitch Chord (min7 - Maj7)
CH.075 HPF Code Seq Note LFO Depth
CH.076 EP Chord Note Chord (min7 - Maj7)
CH.077 PWM Chord Note Attack Time, Decay Time
CH.078 Electro Stab Note Vibrato
CH.079 Pad Chord Note Cuto
CH.080 Arpeggio Down Note Chord (min7 - Maj7)
CH.081 Arpeggio Alt Note Chord (min - Maj)
CH.082 Power Chord Note Sound Character
CH.083 Side Chain Note
CH.084 Filter Chord Note Cuto
CH.085 Wurly Chord Note Chord (min7 - Maj7)
CH.086 Guitar Chord Note Decay Time, Mute
CH.087 2039 Note Mix Balance
CH.088 BPF Chord Note Cuto
CH.089 Sine Chord Note Octave
CH.090 Phaser Chord Note LFO Speed
SE.091 Pump Noise Cuto LFO Depth
SE.092 Disco Siren LFO Speed Sound Character
SE.093 Guitar Elements Sample Selec t Level
SE.094 Itch Noiz Note LFO Depth
SE.095 Resonate Cuto LFO Depth & Speed
SE.096 Helicopter Pan Propeller Speed
SE.097 Orch Hit Pitch Level
SE.098 Rise/Fall Pitch Rise, Fall
SE.099 HPF Square Note Cuto
SE.100 Kaoss Drone Cuto Feedback
Decay Time
Chord (min79 - Maj79), Cuto
* Alle Produkt- und Firmennamen sind Warenzeichen
oder eingetragene Warenzeic hen der betreffenden
Eigentümer.
No. Program Name X-Assign Y-Assign Scale
SE.101 Sync Random Note OSC Sync Pitch
SE.102 Noise Filter Cuto Resonance
SE.103 Metal Pitch LFO Depth
SE.104 Siren LFO Speed LFO Depth
SE.105 Random Pitch LFO Depth
SE.106 Beam Saber Mod Pitch Mod Depth
SEDRUMPATTERN
SE.107 Synth Looper Cuto, Looper Speed Looper, Noise Level
SE.108 Ring Mod SFX Pitch LFO Depth
SE.109 Sweep Pitch, Pan LFO Speed
SE.110 Drop Cuto Impulse Speed
DR.111 House Kit Sample Selec t Cuto
DR.112 Disco Kit Sample Select Level
DR.113 Techno Kit S ample Select Level, Decimator
DR.114 Minimal Kit Sample Select Delay Depth
DR.115 HipHop Kit Sample Select Level
DR.116 Breakbeat Kit Sample Select Level, Reverb Depth
DR.117 Dubstep Kit Sample Select Cuto
DR.118 Rock Kit Sample Select Level, Comp Depth
DR.119 Doncamatic Kit Sample Select Level, Reverb Depth
DR.120 Electric Kit Sample Selec t Grain Depth
DR.121 Tom Kit P
DR.122 Clap
Kit Sample Select Level, Reverb Depth
DR.123 Conga Kit Sample Select Level, Reverb Depth
DR.124 Cymbal Kit Sample Select Level
DR.125 Reverse Kit Pitch Sample Select
PT.126 House 1 Pattern Variation Reverb LFO Depth
PT.127 House 2 Pattern Variation Kick Decay Time
PT.128 Deep House Pattern Variation Delay Depth
PT.129 Electro House Pattern Variation Decimator
PT.130 Techno Pattern Variation Delay Depth
PT.131 Minimal 1 Pattern Variation Kick Decay Time
PT.132 Minimal 2 Pattern Variation Kick Level, Reverb Depth
PT.133 HipHop 1 Pattern Variation Snare Sample Select
PT.134 HipHop 2 Pattern Variation Sample Select
PT.135 Breaks 1 Pattern Variation Cuto
PT.136 Breaks 2 Pattern Variation Decimator
PT.137 Dubstep 1 Pattern Variation Reverb Depth
PT.138 Dubstep 2 Pattern Variation Reverb, Grain Depth
PT.139 Drum'n'Bass Pattern Variation Kick Decay Time, Cuto
PT.140 Rock 1 Pattern Variation Reverb Depth
PT.141 Rock 2 Pattern Variation HiHat Sample Selec t
PT.142 Disco Pattern Variation Cuto
PT.143 Bossa Pattern Variation Level, Rim Level
PT.144 Doncamatic Pattern Variation HiHat Decay Time
PT.145 Lo Beatz Pattern Variation Kick Level, Decimator
PT.146 Elec Perc Pattern Variation Sample Select
PT.147 Backbeat Pattern Variation Cuto
PT.148 NoKick Pattern Variation Delay Depth
PT.149 HiHat Pattern Variation HiHat (Close - Open), Level
PT.150 Conga Pattern Variation Level
itch Sample Select
Page 3
Detaching the back cover
Headphones
Mic
AC adapter
(sold separately)
Casque
Micro
Adaptateur secteur
(vendu séparément)
Here’s how to detach the back cover from the kaossilator 2
so that you can replace the batteries or insert and remove
the memory card.
Detaching the cover
Press the lock button to release the back cover lock.
Slide the kaossilator 2 toward yourself and separate it
from the cover.
Lock bu tton
Attaching the cover
Fit the tabs of the back cover into the upper par t of the
kaossilator 2, and close the cover until you hear the lock
button click.
Replacing the batteries
The batter y icon displays the remaining battery level.
Install fresh batteries when the level runs low. Insert two
AA batteries, making sure that they are oriented in the
correct polarity.
Turn off the power before you replace the batteries.
The speaker volume will decrease according to the
remaining battery level. When the batteries run low, it will
not be possible to record to the memory card.
Unusable batteries should be removed immediately.
You should also remove the batteries if you do not expect to
be using the kaossilator 2 for an extended period of time.
TIP Battery life will be extended if you enable the power
conservation feature.
TIP If you use nickel-metal hydride batteries, change the utility
menu BATTERY T YPE setting to "Ni-MH."
Inserting or removing a memory card
You can use a memory card to record your performance, and to
save or load data. You can also use the kaossilator 2 to play back
audio les (WAV format) that you've copied from a computer.
1. Make sure that the screen and all LEDs are unlit, and that
the power is off.
2. Insert the memory card into the slot until you hear it click into
place.
3. To remove the memory card, press it into the slot until you
hear it click, and then release your nger.
4. The memory card will pop out part-way, allowing you to pull
it out.
When inserting a memory card, make sure that it is oriented
correctly and that the correct side is facing upward, and insert it all
the way into the slot, being careful not to use excessive force.
Do not insert or remove a memory card while the kaossilator
2 is powered-on. Doing so may damage the data in the kaossilator
2 or on the card, or it may render the memory card unusable.
Formatting
A memor y card that has been previously used by a computer,
a mobile phone, or a digital camera might not be immediately
usable by the kaossilator 2 in that state. In order to use such a
card, it must rst be formatted by the kaossilator 2.
Formatting will erase the entire contents of the memory card.
Never turn off the power or remove the memory card while
recording or formatting is taking place.
Memor y cards that can be used
The kaossilator 2 can use 512 MByte–2 GByte microSD cards,
and microSDHC cards up to 16 GBytes.
TIP The kaossilator 2 cannot use SDXC cards.
TIP For more details on recommended memory cards that are
known to work with the kaossilator 2, please refer to the Korg website
(http://www.korg.com).
Memor y card handling
Carefully read and obser ve the instructions that accompany
your memory card.
TIP A memory card is not included. You will need to purchase
one separately.
Connections
DC 4.5V jack
Connect the optional (separately sold) AC adapter here.
The power must be turned of f when connecting the AC
adapter.
Use only the specied AC adapter.
PHONES jack (stereo mini-jack)
You can connect headphones here.
MIC IN jack (stereo mini -jack)
You can connect an external mic here. When you connect a
mic, an item on the display will appear, allowing you to enable
or disable plug-in power. Choose the setting that’s appropriate
for the mic that you’re using.
Specications
Connectors: MIC IN jack (Stereo 1/8" mini phone jack)
PHONES jack (Stereo 1/8" mini phone jack)
DC4.5V jack
Power supply:
Battery life: approximately ve hours (POWER SAVING : ON
Dimensions: 76 mm (W) x 128 mm (D) x 25 mm (H) / 2.99"
Weight: 100 g / 3.53 oz. (without batteries)
Included items:
owner’s manual, two AA batteries
Options (sold separately):
AC adapter (
* Specications and appearance are subject to change without
notice for improvement.
Two AA batteries (alkaline or nickel-metal hydride
batteries)
with nickel-metal hydride batteries)
(W) x 5.04" (D) x0.98" (H)
, 4.5V)
Ouvrir le cache arrière
Pour remplacer les piles ou insérer et extraire la carte de
mémoire du kaossilator 2, il faut ouvrir le cache arrière.
Détacher le cache
Appuyez sur le bouton de verrouillage pour libérer le
cache arrière. Faites glisser le kaossilator 2 vers vous et
détachez-le du cache.
Fixer le cache
Insérez les onglets du cache arrière dans la partie
supérieure du kaossilator 2 et fermez le cache jusqu’à ce
que vous entendiez le déclic du bouton de verrouillage.
Remplacer les piles
L’icône de pile indique le taux d’usure des piles. Remplacez les piles usées par des piles neuves.
Insérez deux piles AA en veillant à les orienter correctement.
Mettez l’instrument hors tension avant de changer
les piles.
Le volume du haut-parleur diminue en fonction de
l’usure des piles. Quand les piles s’épuisent, il n’est plus
possible d’enregistrer sur carte de mémoire.
Extrayez toujours immédiatement les piles usées.
Retirez également les piles si vous n’avez pas l’intention
d’utiliser le kaossilator 2 pendant une période prolongée.
ASTUCE La durée de vie des piles peut être prolongée avec
la fonction d’économie d’énergie.
Bouton de verrouillage
ASTUCE Si vous utilisez des piles au nickel-hydrure métallique,
afchez le menu “Utility” et réglez BATTERY TYPE sur “Ni-MH”.
Insérer ou extraire une carte de mémoire
Vous pouvez utiliser une carte de mémoire pour enregistrer ce
que vous jouez et pour sauvegarder/charger des données. Vous
pouvez aussi utiliser le kaossilator 2 pour reproduire des chiers
audio (format WAV) copiés à partir d’un ordinateur.
1. Vériez que l’écran et tous les témoins sont éteints et que
l’alimentation est coupée.
2. Insérez la carte de mémoire dans la fente jusqu’à ce que
vous entendiez le déclic.
3. Pour extraire la carte de mémoire, enfoncez-la dans la fente
jusqu’au déclic puis relâchez-la.
4. La carte est partiellement éjectée, ce qui vous permet de
l’extraire complètement.
Quand vous insérez une car te de mémoire, veillez à
l’orienter convenablement avec la bonne face vers le haut.
Insérez-la à fond dans la fente en évitant d’exercer une force
excessive.
N’insérez et n’extrayez jamais de carte de mémoire tant
que le kaossilator 2 est sous tension. Cela peut corrompre les
données du kaossilator 2 ou de la carte, voire rendre cette
dernière inutilisable.
Formatage
Une carte de mémoire que vous avez utilisée avec un ordinateur,
un téléphone mobile ou un appareil photo numérique peut ne pas
être utilisable telle quelle par le kaossilator 2. Il faut au préalable
la formater avec le kaossilator 2.
Le formatage efface toutes les données de la carte de
mémoire.
Ne coupez jamais l’alimentation et n’extrayez jamais la
carte durant son formatage ou en cours d’enregistrement.
Cartes de mémoire compatibles
Le kaossilator 2 vous permet d’utiliser des car tes microSDHC
de 512Mo~2Go et des cartes microSDHC allant jusqu’à 16Go.
ASTUCE Le kaossilator 2 ne reconnaît pas les cartes SDXC.
ASTUCE Pour en savoir plus sur les cartes de mémoire recom-
mandées et dont l’utilisation avec le kaossilator 2 a été vériée,
rendez-vous sur le site web de Korg (http://www.korg.com).
Maniement des cartes de mémoire
Veuillez lire attentivement et suivre les instructions accompagnant la carte de mémoire.
ASTUCE La carte n’est pas incluse. Vous devez l’acquérir séparément.
Liaisons
Prise DC 4.5V
Branchez l’adaptateur secteur disponible en option ici.
Coupez l’alimentation avant de brancher l’adaptateur
secteur.
Utilisez exclusivement l’adaptateur secteur spécié.
Prise PHONES (mini-jack stéréo)
Vous pouvez y brancher un casque.
Prise MIC IN (mini-jack stéréo)
Vous pouvez y brancher un micro. Quand vous branchez un
micro, un paramètre apparaît à l’écran et vous permet d’activer
ou de couper l’alimentation plug-in. Choisissez le réglage
convenant au micro utilisé.
Spécications
Bornes: prise MIC IN (prise mini-phone stéréo 3,5 mm),
Alimentation:
Durée de vie des piles:
Dimensions: 76 mm (L) X 128 mm (P) X 25 mm (H)
Poids: 100 g (sans les piles)
Accessoires inclus:
manuel de l’utilisateur, deux piles AA.
Options (vendues séparément):
adaptateur secteur (
* L es car actéristiques et l’aspec t du pro duit sont susceptibles d’ê tre
modiés sans avis préalable en vue d’une amélioration.
prise PHONES (prise mini-phone stéréo 3,5
mm), Prise DC4.5V
Deux piles AA (alcalines ou nickel- hydrure
métallique)
environ cinq heures (POWER SAVING : ON
avec des piles à hydrure métallique de nickel)
, DC 4.5V)
Page 4

SCALE LIST
Kopfhörer
Mikrofon
Netzteil
(Sonderzubehör)
Scale Name Scale [Key C]
-- (O)
1 Chromatic C, D, D, E, E, F, G, G, A, A, B, B
2 Ionian C, D, E, F, G, A, B
3 Dorian C, D, E, F, G, A, B
4 Phrygian C, D, E, F, G, A, B
5 Lydian C, D, E, F, G, A, B
6 Mixolydian C, D, E, F, G, A, B
7 Aeolian C, D, E, F, G, A, B
8 Locrian C, D, E, F, G, A, B
9 Harmonic minor C, D, E, F, G, A, B
10 Melodic minor C, D, E, F, G, A, B
11 Major Blues C, D, E, E, G, A
12 minor Blues C, E, F, G, G, B
13 Diminished C, D, E, F, F, G, A, B
14 Combination Diminished C, D, E, E, F, G, A, B
15 Major Pentatonic C, D, E, G, A
16 minor Pentatonic C, E, F, G, B
17 Raga Bhairav C, Db, E, F, G, A, B
18 Raga Gamanasrama C, D, E, F, G, A, B
19 Raga Todi C, D, E, F, G, A, B
20 Arabian C, D, E, F, Gb, A, B
21 Spanish C, D, Eb, E, F, G, A, B
22 Gypsy C, D, E, F, G, A, B
23 Egyptian C, D, F, G, B
24 Hawaiian C, D, E, G, A
25 Bali Island Pelog C, D, E, G, A
26 Japanese Miyakobushi C, D, F, G, A
27 Ryuku C, E, F, G, B
28 Chinese C, E, F, G, B
29 Bass Line C, G, B
30 Whole Tone C, D, E, G, A, B
31 minor 3rd Interval C, E, G, A
32 Major 3rd Interval C, E, A
33 4th Interval C, F, B
34 5th Interval C, G
35 Octave C
Entfernen der Rückwand
Um die Batterien des kaossilator 2 auszuwechseln und eine Speicherkarte einzulegen, müssen Sie die Rückwand entfernen.
Entfe rnen der Blende
Drücken Sie den Riegeltaster, um die Rückwand zu entriegeln.
Schieben Sie den kaossilator 2 zu sich hin und trennen Sie ihn
von der Rückwand.
Riegeltaster
Anbringen der Blende
Schieben Sie die Laschen der Rückwand in die Aussparungen an
der Oberseite des kaossilator 2 und drücken Sie die Rückwand so
weit, bis Sie ein Klicken hören.
Auswec hseln der Batt erien
Das Batteriesymbol informiert Sie über die Restlaufzeit der Batterie.
Bei einer niedrigen Anzeige müssen Sie frische Batterien einlegen.
Legen Sie 2 AA-Batterien ein. Achten Sie dabei auf die richtige Polarität.
Schalten Sie das Gerät vor Auswechseln der Batterien aus.
Die Lautstärke des Lautsprechers richtet sich nach der Batteriespannung. Wenn die Batterien fast erschöpft sind, können
Sie nicht mehr auf die Speicherkarte aufnehmen.
Erschöpfte Batterien müssen so schnell wie möglich
entfernt werden. Entfernen Sie die Batterien außerdem, wenn
Sie den kaossilator 2 längere Zeit nicht verwenden möchten.
Tipp Die Laufzeit der Batterien kann mit der Energiesparfunktion
verlängert werden.
Tipp Wenn Sie Nickel-Metallhydrid-Batterien verwenden, müs-
sen Sie den „BATTERY TYPE“-Parameter des „Utility“-Menüs
auf „Ni-MH“ stellen.
Einlegen/Entnehmen einer Speicherkarte
Mit einer Speicherkarte können Sie Ihr Spiel aufnehmen und Daten
sichern sowie laden. Außerdem kann der kaossilator 2 Audiodateien
(WAV-Format) abspielen, die Sie mit Ihrem Computer kopiert haben.
1. Schauen Sie nach, ob alle Dioden erloschen sind. Das Gerät
muss ausgeschaltet sein.
2. Schieben Sie eine Speicherkarte so weit in den Schacht, bis sie
festklickt.
3. Um die Speicherkarte wieder zu entfernen, müssen Sie sie noch
etwas weiter in den Schacht schieben, bis sie leicht herausspringt.
4. Die Karte ragt halb aus dem Schacht und kann bequem entnommen werden.
Achten Sie beim Einlegen einer Speicherkarte darauf, dass
sie richtig herum und mit der richtigen Seite nach oben eingeführt
wird. Schieben Sie sie komplett, aber ohne Gewaltanwendung,
in den Schacht.
Beim Einlegen/Entnehmen der Karte darf der kaossilator 2
nicht eingeschaltet sein. Sonst werden die Daten im kaossilator
2 oder auf der Karte nämlich beschädigt. Die Karte könnte sogar
unbrauchbar werden.
Formati eren
Eine Speicherkarte, die Sie zuvor mit einem Computer, Handy oder
einer Digital-Kamera verwendet haben, wird vom kaossilator 2 eventuell nicht ordnungsgemäß erkannt. Solch eine Karte muss dann mit
dem kaossilator 2 formatiert werden.
Beim Formatieren werden alle Daten der Karten gelöscht.
Schalten Sie das Gerät niemals aus bzw. entfernen Sie die
Karte niemals, während sie formatiert wird bzw. bei laufender
Aufnahme.
Karte n, die verwendet w erden können
Der kaossilator 2 er laubt die Verwendung von microSD -Karten
mit einer Kapazität von 512MB – 2GB sowie von microSDHC-Karten bis 16GB.
Tipp Der kaossilator 2 unterstützt keine SDXC-Kar ten.
Tipp Auf der Korg-Website (http://www.korg.com) nden Sie eine
Übersicht aller Karten, die bisher erfolgreich mit dem kaossilator
2 getestet wurden.
Handha bung von Speiche rkarten
Bitte lesen Sie sich die Gebrauchsanweisung der verwendeten
Karte durch.
Tipp Eine Speicherkarte gehört nicht zum Lieferumfang und
muss separat gekauft werden.
Anschlüsse
DC4.5 V-Buchse
Schließen Sie hier ein optionales Netzteil an.
Vor dem Anschließen des Netzteils müssen Sie das Gerät
ausschalten.
Verwenden Sie nur das ausdrücklich erwähnte Netzteil.
PHONES -Buchse (Stereo-Miniklinke)
Hier kann ein Kopfhörer angeschlossen werden.
MIC IN-Buchse (Stereo- Miniklinke)
Hier kann ein externes Mikrofon angeschlossen werden. Wenn Sie
ein Mikrofon anschließen, erscheint ein Symbol im Display, mit dem
Sie die Speisung ein- und ausschalten können. Wählen Sie jeweils
die Einstellung, die sich für das angeschlossene Mikrofon eignet.
Technische Daten
Anschlüsse: MIC IN-Buchse (Stereo-Miniklinkenbuchse),
Stromversorgung:
Zwei AA-Batterien (Alkali oder Nickel-Metall-
Batterielaufzeit:
±5 Stunden („POWER SAVING“-Parameter
Abmessungen:
76 mm (B) x 128 mm (T) x 25 mm (H)
Gewicht: 100 g (ohne Batterien)
Lieferumfang: Bedienungsanleitung, zwei AA-Batterien
Optionen (getrennt erhältlich):
Netzteil (
* Änderungen der technischen Daten und des Designs ohne vorherige Ankündigung vorbehalten.
PHONES-Buchse (Stereo-Miniklinkenbuchse), DC4.5V-Buchse
hydrid)
: ON und Nickel-Metallhydridbatterien)
,
4,5V Gleichspannung)
Page 5

Thank you for purchasing the Korg kaossilator 2 dynamic phrase synthesizer. To help you get the most out of your new instrument,
Internal mic
Setup screenProgram select screen
Note name Input level
Card status
Value
Value slider guide
Item
Battery indicator
Tempo
Page number
Program number
Program name
Loop data
please read this manual carefully.
Controls
1
Display
2
SND button
3
ARP button
4
MIC ON/OFF
button
5
VALUE slider
6
Touchpad
7
Internal speaker
14
1. Internal mic
Sounds picked up by the internal mic will be used while you hold
down the MIC ON/OFF button.
TIP Sound will not be output from the internal speaker while you’re
using the internal mic to avoid feedback.
2. Display
This shows information such as the program that’s currently selected. The lower part of the screen functions as the slider guide.
3. SND (sound) but ton
This button takes you back to the screen where you can select
a program.
4. ARP (ar peggiator) button and indicator
This button the arpeggiator on/off, and allows you to adjust
settings. Please refer to the "Using the arpeggiator" section.
The indicator will light up when you are adjusting settings for
the arpeggiator and when it is playing.
5. MIC ON/OFF button
Soounds picked up by the internal mic or from a mic that’s connected to the MIC IN jack will be used while you hold down the
MIC ON/OFF button.
6. VALUE slider
You can change programs or edit a value by sliding or tapping
your nger on this slider. Stroking the slider will change the
value smoothly. To change the value in steps of one, press
either end of the slider.
FNC button
8
BMP indicator
9
Power button
10
DEL button
11
Volume buttons
12
loop I/II buttons
13
Do not use a hard or sharp object to operate the slider. Also,
the slider might not work if you attempt to operate it with an object
other than your nger, or while wearing gloves.
7. Touchpad
Please refer to the “Performing with the touchpad” section.
8. FNC (function) button
Use this button to adjust various settings. Repeatedly press
the FNC button to select the menu item that you want to set.
TIP By holding down the SND button and pressing the FNC button,
you can step through the menu items in reverse order.
9. BPM (tempo) indicator
This indicator will light up in time with the current tempo.
10. Power button
Please refer to the “Turning the power on/off” section.
11. DEL (delete) button
Please refer to the “ Partially erasing a recorded phrase” and
“Erasing a phrase completely” section.
12. Volume buttons
Use these buttons to adjust the volume of the headphones or
the internal speaker. You can adjust the input volume by holding
down the MIC ON/OFF button and using these buttons.
13. Loop I/II but tons
Please refer to the “Loop recording” section.
14. Internal speaker
The sound of your performance is played from this speaker.
If you connect headphones to the PHONES jack, the internal
speaker will not produce sound.
TIP For some programs, the volume might be low or difcult to
notice.
Setup menu contents
Page Item Content Default value
P-1/14 BPM Species the tempo for arpeggiator playback, etc. 120.0
P-2/14 KEY Species the key (pitch) that will be the root of the scale.*1 C
P-3/14 SCALE Species the scale assigned to the touch pad. Ionian
P-4/14 NOTE RANGE Species the octave range that can be played on the touchpad.*1 Program
P-5/14 ARP PATTERN Species the arpeggio pattern. Type:00
P-6/14 ARP TIME Species the duration of the notes sounded by the arpeggiator.*1 0%
P-7/14 ARP SWING Adjusts the timing of the arpeggiator. OFF
P-8/14 LOOP I LENGTH Species the length of the Loop I phrase. 4Beat
P-9/14 LOOP II LENGTH Species the length of the Loop II phrase. 4Beat
P-10/14 LOOP FADER Allows you to crossfade the volumes of Loops I and II. CENTER
P-11/14 LOOP SAVE/LOAD Allows you to save or load data. -P-12/14 MASTER RECORDER Records your kaossilator 2 performance onto the memory card. -P-13/14 AUDIO PLAYER Plays back audio data from the memory card. -P-14/14 UTILITY Tap the center of the VALUE slider to enter the UTILITY menu selections. --
Utility menu contents
Press the FNC button repeatedly until UTILITY appears; then tap the VALUE slider to make utility menu settings.
Page Item Content
U-1/10 DATE Sets the date and time of the internal clock. This information is used to time-stamp les.
U-2/10 BATTERY TYPE Species the type of battery you’re using.
U-3/10 POWER SAVING Lowers the power consumption of the kaossilator 2 by limiting the speaker output, extending
the battery life.
U-4/10 AUTO POWER OFF Species whether the kaossilator 2 will automatically power-off (after four hours). *2
U-5/10 DISPLAY BRIGHTNESS Adjusts the brightness of the screen. *3
U-6/10 EXT.MIC SETTING Species the type of mic that is connected.
U-7/10 CARD TEST Tests the inserted memory card to check whether it can be used with the kaossilator 2.
U-8/10 CARD FORMAT Checks and formats the memory card.
U-9/10 PAD CALIBRATION Calibrates the active region of the touchpad and VALUE slider.
U-10/10 SOFTWARE UPDATE Updates the system software of the kaossilator 2. For more details on updating the system, please
refer to the Korg website.
*1 Availability depends on the program. Depending on the settings, you might not hear sound, or noise might be produced.
*2 Even if this is Enabled, the power will not turn off automatically if there is audio input.
*3 Extended use at high settings will affect the display's lifespan.
TIP After you select this setting, the program display will reappear if you don’t per form any operation for a while. By pressing the SND button
you can immediately return to the program display.
Performing
Turning the power on/off
To turn the power on, hold down the power button until the
startup screen appears. To turn the power off, hold down the
power button until the shutdown screen appears.
Do not touch the buttons or touchpad while turning the power
on.
Auto power-off function
The kaossilator 2 has an auto power-off function. After approximately four hours have elapsed since the last user input, the
auto power-off function will automatically turn off the power.
TIP The auto power-off function will not engage if there is audio
being input.
TIP To disable this function, set the AUTO POWER OFF setting to
“Disable” in the utility menu. To enable the auto power-off function,
select the “Enable” setting. The factory setting is “Enable.”
Selecting a program
Press the SND (sound) button to access a screen where you
can select a program.
To change programs, slide or tap your nger on the VALUE
slider.
TIP By using the VALUE slider while holding down the SND button,
you can switch programs by category.
Performing with the touchpad
Perform by using your nger to rub or tap the touchpad.
Do not use a hard or sharp object. The screen might not
work correctly if you attempt to use it with a different object or while
wearing gloves.
Specifying the scale
SCALE: This function species the scale assigned to the touch-
pad. The display will show the note name. The availability of
this setting will depend on the program. Please refer to the
program list.
Specifying the key
KEY: This function species the root note of the scale. The
availability of this setting will depend on the program. Please
refer to the program list.
For some settings, there might be no sound, or noise might
be produced.
Specifying the note range
NOTE RANGE: This function species the range of pitches
assigned to the touchpad.
Program: The optimal pitch range specied for each program
will be used.
1– 4 Octaves: The pitch range will be 1– 4 octaves.
Max Range: The pitch range will be the maximum.
TIP The actual range of Max Range will depend on the program.
be produced.
For some settings, there might be no sound, or noise might
Specifying the BPM (tempo)
You can specify the tempo for drum pattern programs, the arpeggiator, or loop recording.
BPM: With the BPM displayed, stroke the VALUE slider or tap
either end of the slider to change the value. In addition, tapping
the center of the VALUE slider several times will set the BPM to
the interval that you tapped.
Using the arpeggiator
The kaossilator 2 contains an arpeggiator that lets you generate rhythmic performances simply by touching the touchpad.
When you press the ARP button, the ARP button will light up.
Now when you touch the touchpad, the arpeggiator pattern that’s
currently selected will play.
Selecting an arpeggiator pattern
The kaossilator 2 contains numerous arpeggiator patterns.
While holding down the ARP button, use the VALUE slider to
select an arpeggiator pattern in the range of Type: 01–50.
TIP This item can also be set from within the menu.
Changing arpeggiator settings
To set the arpeggiator parameters, press the FNC button to
select the parameter that you want to edit, and use the VALUE
slider to set the value.
Specifying the note duration
ARP TIME: This species the duration of the notes. If ARP TIME
is set to “100%,” the notes will be played legato. If the setting is
“-100%,” the duration will be extremely shor t, and the notes will
appear to be interrupted.
TIP
With short settings, some programs might not produce any sound.
Adjusting the note timing
ARP SWI NG: This species how the timing of the notes will
be adjusted. You can adjust this from a straight 16-beat to a
shufe rhythm.
Loop recording
You can record a performance of up to eight beats (two measures of a 4/4 time signature) and play it back as a loop. You
can also overdub additional performances while playing along
with that phrase.
Recording the sound of a program
Here’s how you can record a rhythm or bass phrase using one
of the program sounds built into the kaossilator 2.
1. While holding down one of the loop buttons (I or II), perform
on the touchpad. Your performance on the touchpad will be
recorded while you hold down the loop button.
During recording, the loop button will light up red. Even
when the specied number of beats have been recorded,
loop recording will continue, allowing you to overdub onto
the previously-recorded phrase.
2. When you release the loop button, the loop button indicator
will turn green; recording will end, and the recorded phrase
will continue playing as a loop.
3. During playback, you can hold down the loop button and
use the touchpad to overdub onto the phrase that’s currently
playing.
4. If you press the loop button during loop playback, playback
will stop, and the loop button indicator will blink green.
If you press the loop button while stopped, the recorded phrase
5.
will start playing as a loop, and the loop button indicator will
light up green.
TIP While stopped, you can hold down the loop button and use
the touchpad to overdub from the beginning of the phrase that was
previously recorded.
Recording audio input
You can record the audio from the built-in mic of the kaossilator
2 or from a mic connected to the kaossilator 2.
1. While holding down the MIC ON/OFF button, use the volume
buttons to adjust the input volume.
2. While continuing to hold down the MIC ON/OFF button, press
the loop button to start recording. The phrase will be recorded
while you continue holding down the loop button.
3. When you want to stop recording, release the loop button.
Adjusting the volume balance between
two loops
1. Hold down the FNC button to access the LOOP FADER page.
2. Use the VALUE slider to adjust the balance.
TIP You can use the VALUE slider as a crossfader.
Specifying the length of the phrase
While holding down the loop button of the phrase whose length
you want to change, use the VALUE slider. The recording/playback length of the phrase that you’re editing will be shown in
the display.
TIP The length of the phrase you can record is limited to a
maximum of four beats when the BPM value is 37.5–74.9, and to a
maximum of two beats when the BPM value is 20.0–37.4.
TIP This item can also be edited from within the setup menu.
Partially erasing a recorded phrase
While the phrase plays back, hold down the loop button and
press the DEL button; the portion of the phrase that plays while
you’re holding down the DEL button will be deleted.
TIP When you hold down the loop button and press the DEL
button during playback, the previously-recorded phrase will be
erased during the time you hold down the DEL button, allowing
you to replace it with a newly recorded phrase.
Deleting an entire phrase
1. Press the DEL button. The DELETE LOOP page will appear.
2. Press the loop button for the loop you want to delete. If you
want to delete both loops, press both loop buttons. The
phrase will be deleted.
Saving or loading data
Settings and loop recorder data can be saved on a memory card.
By loading this data later, you can reproduce the previous state that
you saved.
Saving to a memory card
TIP You can also access LOOP LOAD/SAVE by holding down the FNC
button and pressing the loop (I or II) button.
1. Press the FNC button to make the screen indicate LOOP SAVE/
LOAD.
2. Use the VALUE slider to choose “SAVE.”
3. The display will indicate “Finished,” and the name of the saved data
will appear.
Loading from a memory card
1. Use the VALUE slider to choose “LOAD.”
2. Use the VALUE slider to select the data that you want to load and
execute loading.
TIP The saved data is created as two les named KO2D??_1.WAV and
KO2D??_2.WAV located in the DATA?? folder inside the DATA folder inside
the KO2 folder (?? is 00–99).
Do not use your computer to edit the les inside the DATA folder.
Master recorder
The performances that you’ve created on the kaossilator 2 can be
recorded to a memory card.
1. Press the FNC button to make the screen indicate MASTER RECORDER.
2. Tap the VALUE slider to star t recording. A counter will start.
3. Press the SND button to return to the program indication, and start
performing.
4. To stop recording, press the FNC button to make the screen indicate
MASTER RECORDER, and tap the VALUE slider.
TIP Recording will end automatically when the memory card has no
more space left, or when the recording time reaches approximately two
hours.
TIP The audio data is saved as a le named KO2REC??.WAV (?? is
00–99) located in the RECORD?? folder inside the RECORD folder inside
the KO2 folder.
Do not use your computer to edit the les inside the RECORD folder.
Audio player
You can play back the audio data that was recorded by the master
recorder. You can also play back audio data that you’ve copied to
the memory card.
1. Press the FNC button to make the screen indicate AUDIO PLAYER,
and tap the VALUE slider.
2. Use the VALUE slider to select the le that you want to play.
3. During playback, press the SND button to stop playback and return
to the program indication screen.
Supported le formats
16-bit 44.1 kHz/48 kHz stereo WAV les
Page 6

Nous vous remercions d’avoir choisi le synthétiseur dynamique de phrase kaossilator 2 de Korg. An de pouvoir exploiter au mieux
Numéro de la pagePage de sélection de programme
Note Niveau d’entrée
Statut de la carte
Indicateur de piles
Elément
Valeur
Tempo
Page de réglage
N° de programme
Nom du programme
Boucle
Guide pour curseur
de réglage
Micro interne
toutes les possibilités offertes par l’instrument, veuillez lire attentivement ce manuel.
Commandes
1
Ecran
2
Bouton SND
3
Bouton et
Témoin ARP
4
Bouton MIC
ON/OFF
5
Curseur de réglage
6
Pad tactile
7
Haut-parleur
interne
14
1. Micro interne
Les sons captés par le micro interne sont utilisés tant que vous
maintenez le bouton MIC ON/OFF enfoncé.
ASTUCE Le haut-parleur interne reste muet tant que vous utilisez
le micro interne pour éviter un effet larsen.
2. Ecran
Il afche des informations telles que le programme sélectionné.
La partie inférieure de l’écran sert de guide pour le curseur.
3. Bouton SND (son)
Ce bouton vous ramène à la page d’écran permettant de
sélectionner un programme.
4. Bouton et témoin ARP (arpégiateur)
Ce bouton active/coupe l’arpégiateur et permet d’effectuer des
réglages. Voyez la section “Arpégiateur ”.
Le témoin s’allume quand vous réglez ou utilisez l’arpégiateur.
5. Bouton MIC ON /OFF
Les sons captés par le micro interne ou un micro branché à la
prise MIC IN sont utilisés tant que vous maintenez le bouton
MIC ON/OFF enfoncé.
6. Curseur de réglage
Vous pouvez changer de programme ou modier un réglage
en glissant le doigt sur ce curseur ou en le tapant. Glissez le
doigt sur le curseur pour changer la valeur de façon continue.
Bouton FNC
Témoin BMP
Interrupteur
d’alimentation
Bouton DEL
Boutons de
volume
Boutons de
boucle I/II
Pour changer la valeur par unités, tapez sur une des extrémités
du curseur.
8
9
10
11
12
N’utilisez pas d’objet dur ou pointu sur le curseur. De plus,
le curseur risque de ne pas réagir si vous utilisez un objet au
13
lieu du doigt ou si vous portez des gants.
7. Pad tactil e
Voyez la section “Jouer avec le pad tactile”.
8. Bouton FNC (fonction)
Ce bouton permet d’effectuer dive rs réglages. Appuyez
plusieurs fois sur le bouton FNC pour sélectionner l’élément à
régler dans un menu.
ASTUCE Maintenez le bouton SND enfoncé et appuyez sur le
bouton FNC pour inverser l’ordre de délement des éléments
du menu.
9. Témoin BPM (tempo)
Ce témoin clignote en fonction du tempo en vigueur.
10. Inter rupteur d’alimentation
Voyez la section “Mise sous/hors tension”.
11. Bouton DEL (effac er)
Voyez les sections “Effacer partiellement une phrase enregistrée” et “Effacer toute une phrase”.
12. Boutons de volume
Utilisez ces boutons pour régler le volume du casque ou du
haut-parleur interne. Vous pouvez régler le niveau d’entrée
en maintenant le bouton MIC ON/OFF enfoncé et en utilisant
ces boutons.
13. Boutons de boucle I/II
Voyez la section “Enregistrement de boucle”.
14. Haut- parleur interne
Ce haut-parleur restitue ce que vous avez joué.
Quand vous branchez un casque à la prise PHONES, le hautparleur interne est coupé.
ASTUCE Certains programmes peuvent avoir un volume fort bas
voire inaudible.
Menu de réglage (“Setup”)
Page Elément Fonction
P-1/14 BPM Règle le tempo de l’arpégiateur etc. 120.0
P-2/14 KEY Détermine la tonique de la gamme.*1 C
P-3/14 SCALE Détermine la gamme assignée au pad tactile. Ionian
P-4/14 NOTE RANGE Détermine la tessiture du pad tactile.*1 Program
P-5/14 ARP PATTERN Sélectionne le motif d’arpège. Type:00
P-6/14 ARP TIME Détermine la durée des notes produites par l’arpégiateur.*1 0%
P-7/14 ARP SWING Règle le timing de l’arpégiateur. OFF
P-8/14 LOOP I LENGTH Détermine la longueur de la phrase de la boucle I. 4Beat
P-9/14 LOOP II LENGTH Détermine la longueur de la phrase de la boucle II. 4Beat
P-10/14 LOOP FADER Chassé-croisé entre les volumes des boucles I et II. CENTER
P-11/14 LOOP SAVE/LOAD Sauvegarde/chargement de données. -P-12/14 MASTER RECORDER
P-13/14 AUDIO PLAYER Lit des données audio de la carte de mémoire. -P-14/14 UTILITY
Enregistre sur car te de mémoire ce que vous jouez sur le kaossilator 2.
Tapez au centre du curseur de réglage pour accéder au menu “UTILITY”.
Réglage par défaut
--
--
Contenu du menu “Utility”
Appuyez plusieurs fois sur le bouton FNC jusqu’à ce que “UTILITY” apparaisse; tapez ensuite sur le curseur de réglage pour régler les
éléments de ce menu.
Page Elément Fonction
U-1/10 DATE Réglage de la date et de l’heure. Ces informations permettent de dater les chiers.
U-2/10 BATTERY TYPE Type de piles utilisées.
U-3/10 POWER SAVING Diminue la consommation du kaossilator 2 en limitant la sortie du haut-parleur an de prolonger la
U-4/10 AUTO POWER OFF Détermine si l’alimentation du kaossilator 2 se coupe automatiquement après 4 heures.*2
U-5/10 DISPLAY BRIGHTNESS Réglage de la luminosité de l’écran. *3
U-6/10 EXT.MIC SETTING Type de micro branché.
U-7/10 CARD TEST Vérie la carte de mémoire insérée pour s’assurer qu’elle est compatible avec le kaossilator 2.
U-8/10 CARD FORMAT Vérie et formate la
U-9/10 PAD CALIBRATION Calibre la plage active du pad tactile et du curseur de réglage.
U-10/10 SOFTWARE UPDATE Mise à jour du système du kaossilator 2. Pour en savoir davantage sur la mise à jour du système,
*1 Sa disponibilité dépend du programme. Selon les réglages, il peut arriver que le son soit inaudible ou que du bruit soit généré.
*2 Même avec le réglage “Enabled” (activé), l’alimentation ne se coupe pas si un signal audio parvient à l’instrument.
*3 Une utilisation prolongée avec un réglage élevé a une incidence sur la durée de vie de l’écran.
ASTUCE Après avoir sélectionné ce réglage, la page de sélection de programme réapparaît si vous n’effectuez aucune opération durant
un moment. Une pression sur le bouton SND afche immédiatement la page de sélection de programme.
durée de vie des piles.
carte de mémoire
voyez le site web de Korg.
.
Jeu
Mise sous/hors tension
Pour mettre l’instrument sous tension, maintenez l’interrupteur
d’alimentation enfoncé jusqu’à ce que la page de démarrage
apparaisse. Pour mettre l’instrument hors tension, maintenez
l’interrupteur d’alimentation enfoncé jusqu’à ce que la page
d’extinction apparaisse.
Ne touchez pas les boutons ni le pad tactile durant la mise
sous tension.
Coupure automatique d’alimentation
Le kaossilator 2 propose une fonction de coupure d’alimentation
automatique. L’alimentation est automatiquement coupée si
l’instrument reste inutilisé durant environ 4 heures.
ASTUCE La coupure automatique de l’alimentation n’a pas lieu
en cas d’entrée de données audio.
ASTUCE Pour couper cette fonction, réglez le paramètre AUTO
POWER OFF sur “Disable” dans le menu “Utility”. Pour activer
la mise hors tension automatique, sélectionnez le réglage “Enable”. Le réglage d’usine est “Enable”.
Choisir un programme
Appuyez sur le bouton SND (son) pour afcher la page d’écran
permettant de sélectionner un programme.
Pour changer de programme, faites glisser le doigt ou tapez du
doigt sur le curseur de réglage.
ASTUCE Vous pouvez utiliser le curseur de réglage en maintenant le bouton SND enfoncé pour changer de catégorie de
programme.
Jouer avec le pad tactile
Pour jouer, faites glisser le doigt ou tapez du doigt sur le pad
tactile.
N’utilisez pas d’objet dur ou pointu. De plus, le pad risque
de ne pas réagir correctement si vous utilisez un objet au lieu
du doigt ou si vous portez des gants.
Sélection de la gamme
SCALE: Cette fonction détermine la gamme assignée au
pad tactile. L’écran aff iche la note. La disponibilité de ce
paramètre dépend du programme. Veuillez consulter la liste
des programmes.
Sélection de la tonique
KEY: Cette fonction détermine la tonique de la gamme. La
disponibilité de ce paramètre dépend du programme. Veuillez
consulter la liste des programmes.
Selon les réglages, il peut arriver que le son soit inaudible
ou que du bruit soit généré.
Sélection de la tessiture
NOTE RANGE: Cette fonction détermine la tessiture assignée
au pad tactile.
Program: La tessiture est déterminée par le programme
utilisé.
1– 4 Octaves: La tessiture est de 1~4 octaves.
Max Range: La tessiture maximum est utilisée.
ASTUCE La tessiture “Max Range” varie selon le programme.
Selon les réglages, il peut arriver que le son soit inaudible
ou que du bruit soit généré.
Sélection du tempo (BPM)
Vous pouvez entrer le tempo pour les patterns de batterie,
l’arpégiateur ou l’enregistrement de boucle.
BPM: Quand “BPM” est afché, glissez le doigt sur le curseur
de réglage ou tapez sur une de ses extrémités pour changer
le réglage. Vous pouvez aussi taper sur le centre du curseur
à intervalles réguliers pour entrer la valeur BPM: elle adopte
l’intervalle choisi.
Arpégiateur
L’arpégiateur du kaossilator 2 permet de créer des accompagnements rythmiques en touchant simplement le pad tactile.
Appuyez sur le bouton ARP; son témoin s’allume. Quand vous
touchez le pad tactile, le pattern sélectionné pour l’arpégiateur
démarre.
Sélectionner un motif d’arpège
Le kaossilator 2 contient de nombreux motifs d’arpège.
Maintenez le bouton ARP enfoncé et utilisez le curseur de
réglage pour sélectionner un motif d’arpège (“Type: 01~50”).
ASTUCE Cet élément peut aussi être réglé au sein du menu.
Changer les réglages de l’arpégiateur
Pour régler les paramètres de l’arpégiateur, appuyez sur le
bouton FNC pour sélectionner un paramètre puis utilisez le
curseur de réglage pour modier son réglage.
Sélection de la durée des notes
ARP TIME: Détermine la longueur des notes. Si ARP TIME est
réglé sur “100%”, les notes sont jouées de façon liée (legato).
Avec un réglage “-100%”, les notes sont extrêmement brèves
et semblent avoir été interrompues.
ASTUCE Avec un réglage trop bref, certains programmes ne
produisent aucun son.
Timing des notes
ARP SWING: Ce paramètre détermine le timing des notes.
Vous pouvez aller d’un r ythme “16-beat ” (doubles croches)
d’une grande précision à un shufe.
Enregistrement de boucle
Vous pouvez enregistrer une phrase comptant jusqu’à huit temps
(2 mesures en 4/4) et la reproduire en boucle. Vous pouvez
ensuite superposer des enregistrements supplémentaires à
cette phrase initiale.
Enregistrer avec un programme interne
Vous pouvez créer et enregistrer des phrases rythmiques ou de
basse avec les sons des programmes internes du kaossilator 2.
1. En maintenant un des boutons de boucle (I ou II) enfoncé,
jouez sur le pad tactile. Votre jeu sur le pad tactile est enregistré tant que vous maintenez le bouton de boucle enfoncé.
Durant l’enregistrement, le bouton de boucle est allumé en
rouge. Quand le nombre de temps spécié a été enregistré,
l’enregistrement se poursuit et permet d’ajouter des données
à la phrase initiale.
2. Quand vous relâchez le bouton de boucle, le témoin de ce
bouton devient vert: l’enregistrement cesse et la phrase enregistrée est reproduite en boucle.
3. Durant la reproduction, vous pouvez maintenir le bouton de
boucle enfoncé et jouer sur le pad tactile pour ajouter des
données à la phrase reproduite.
4. Si vous appuyez sur le bouton de boucle durant la reproduction, celle-ci s’arrête et le témoin du bouton clignote en vert.
5. Si vous appuyez sur le bouton de boucle à l’arrêt, la phrase
enregistrée est reproduite en boucle et le témoin du bouton
s’allume en ver t.
ASTUCE A l’arrêt, vous pouvez maintenir le bouton de boucle
enfoncé et jouer sur le pad tactile pour ajouter des données à
partir du début de la phrase enregistrée au préalable.
Enregistrement d’une source audio
Vous pouvez enregistrer un signal audio avec le micro du
kaossilator 2 ou un micro branché au kaossilator 2.
1. Maintenez le bouton MIC ON/OFF enfoncé et utilisez les
boutons de volume pour régler le niveau d’entrée.
2. Continuez à maintenir le bouton MIC ON/OFF enfoncé et
appuyez sur le bouton de boucle pour lancer l’enregistrement.
La phrase est enregistrée tant que vous maintenez le bouton
de boucle enfoncé.
3. Pour arrêter l’enregistrement, relâchez le bouton de boucle.
Réglage de la balance de deux boucles
1. Maintenez le bouton FNC enfoncé pour afcher la page
“LOOP FADER”.
2. Utilisez le curseur de réglage pour régler la balance.
ASTUCE Vous pouvez utiliser le curseur de réglage comme un
crossfader.
Régler la longueur de la phrase
Maintenez enfoncé le bouton de la boucle dont vous voulez
changer la longueur et utilisez le curseur de réglage. La durée
d’enregistrement /de reproduction de la phrase que vous éditez
est afchée à l’écran.
ASTUCE La longueur de la phrase que vous pouvez enregistrer
est limitée à 4 temps quand la valeur BPM est comprise dans
la plage 37.5~74.9 et à 2 temps avec une valeur BPM comprise
dans la plage 20.0~37.4.
ASTUCE Cet élément peut aussi être modié au sein du menu
de réglage (“Setup”).
Effacer partiellement une phrase enregistrée
Durant la reproduction de la phrase, maintenez le bouton de
boucle enfoncé et appuyez sur le bouton DEL; la partie de la
phrase reproduite quand vous avez enfoncé le bouton DEL
est effacée.
ASTUCE Si vous maintenez le bouton de boucle enfoncé et
appuyez sur le bouton DEL durant la reproduction, la phrase
enregistrée en dernier lieu est effacée tant que vous maintenez
le bouton DEL enfoncé. Cela vous permet de la remplacer par
une nouvelle phrase.
Effacer toute une phrase
1. Appuyez sur le bouton DEL. La page “DELETE LOOP” ap-
paraît.
2. Appuyez sur le bouton de la boucle à effacer. Si vous souhaitez effacer les deux boucles, appuyez sur les deux boutons
de boucle. La phrase est effacée.
Sauvegarde et chargement de données
Vous pouvez conser ver vos réglages et les enregistrements de
boucles sur carte de mémoire. Cela vous permet de retrouver ces
données ultérieurement.
Sauvegarder sur carte de mémoire
ASTUCE Vous pouvez aussi afcher “LOOP LOAD/SAVE” en maintenant le bouton FNC enfoncé et en appuyant sur un bouton de boucle (I
ou II).
1. Appuyez sur le bouton FNC pour afcher “LOOP SAVE/LOAD”.
2. Utilisez le curseur de réglage pour sélectionner “SAVE”.
3. L’écran afche “Finished” et le nom des données sauvegardées
apparaît.
Charger d’une car te de mémoire
1. Utilisez le curseur de réglage pour sélectionner “LOAD”.
2. Utilisez le curseur de réglage pour sélectionner les données à
charger puis chargez-les.
ASTUCE Les données sont sauvegardées sous forme de deux chiers
appelés KO2D??_1.WAV et KO2D??_2.WAV, situés dans le dossier
DATA??, au sein du dossier DATA se trouvant dans le dossier KO2
(?? représente 00 ~99).
N’utilisez pas l’ordinateur pour modier les chiers se trouvant
dans le dossier DATA.
Enregistreur maître
Les données que vous avez créées sur le kaossilator 2 peuvent être
enregistrées sur carte de mémoire.
1. Appuyez sur le bouton FNC pour afcher “MASTER RECORDER”.
2. Tapez sur le curseur de réglage pour lancer l’enregistrement. Un
compteur démarre.
3. Appuyez sur le bouton SND pour retourner à la page d’afchage
du programme et commencez à jouer.
4. Pour arrêter l’enregistrement, appuyez sur le bouton FNC pour
afcher “MASTER RECORDER” et tapez sur le curseur de réglage.
ASTUCE L’enregistrement cesse automatiquement quand la car te de
mémoire est pleine ou quand l’enregistrement atteint environ deux
heures.
ASTUCE Les données sont sauvegardées dans un chier appelé
KO2REC??.WAV (?? représente 00~ 99), s itué dans le dossier
RECORD??, au sein du dossier RECORD, compris dans le dossier
KO2.
N’utilisez pas l’ordinateur pour modier les chiers du dossier
RECORD.
Lecteur audio
Vous pouvez reproduire les données audio enregistrées par l’enregistreur maître. Vous pouvez aussi reproduire des données audio
copiées sur carte de mémoire.
1. Appuyez sur le bouton FNC pour afcher “AUDIO PLAYER” et
tapez sur le curseur de réglage.
2. Utilisez le curseur de réglage pour sélectionner le chier à reproduire.
3. Durant la reproduction, appuyez sur le bouton SND pour arrêter
la reproduction et retourner à l’afchage du programme.
Formats de chier reconnus
Fichiers WAV stéréo, 16 bits, 44.1kHz/48kHz
Page 7

Vielen Dank für Ihre Entscheidung zum dynamischen Phrasen-Synthesizer kaossilator 2 von Korg. Bitte lesen Sie sich diese Anleitung vollstän-
SeitennummerProgram-Wahlseite
Notenname Eingangspegel
Kartenstatus
Batterieanzeige
Eintrag
Wert
Tempo
Einstellungsseite
Program-Nummer
Program-Name
Schleifendaten
Hilfestellung für den
Eingaberegler
Eingebautes Mikrofon
dig durch, um bei der Bedienung alles richtig zu machen.
Bedienelemente
1
Display
2
SND-Taster
3
ARP-Taster
und Diode
4
MIC
ON/OFF-Taster
5
Eingaberegler
6
Berührungsempfindliches Pad
7
Interner
Lautsprecher
14
1. Eingebautes Mikrofon
Halten Sie den MIC ON/OFF-Taster gedrückt, um die Mikrofonsignale aufzunehmen.
Tipp Bei Verwendung des internen Mikrofons wird der Lautsprecher
stummgeschaltet, um Rückkopplung zu vermeiden.
2. Display
Hier erfahren Sie, welcher Speicher momentan gewählt ist usw. Der untere Teil des Displays zeigt die aktuelle Reglerposition an.
3. SND-Taster (Sound)
Hiermit springen Sie wieder zur Seite, wo Sie ein Program wählen können.
4. ARP-Taster und -Diode (Arpeggiator)
Mit diesem Taster schalten Sie den Arpeggiator ein/aus und wählen Einstellungen. Siehe auch „Verwendung des Arpeggiators“.
Die Diode leuchtet, wenn Sie die Einstellungen des Arpeggiators ändern
können und während er spielt.
5. MIC ON/OFF-Taster
Halten Sie den MIC ON/OFF-Taster gedrückt, um die Signale des internen oder eines an MIC IN angeschlossenen Mikrofons aufzunehmen.
6. Eingaberegler
Hiermit können Sie Programs wählen oder Werte editieren, indem Sie
einen Finger hin und her bewegen oder auf eine bestimmte Stelle tippen. Wenn Sie den Regler berühren, ändert sich der Wert ganz allmählich. Um einen Wert in kleinen Schritten zu ändern, müssen Sie ihn ganz
links oder rechts drücken.
FNC-Taster
BMP-Diode
Netzschalter
DEL-Taster
Lautstärketaster
Loop I/II-Taster
8
9
10
11
12
13
Verwenden Sie niemals einen harten oder spitzen Gegenstand als Griffel. Generell kann nicht gewährleistet werden,
dass der Regler einen Griffel oder eine Berührung mit einem
Handschuh überhaupt erkennt.
7. Berührungsempndliches Pad
Siehe auch „Verwendung des berührungsempndlichen Pads“.
8. FNC-Taster (Funktion)
Hiermit können mehrere Parameter eingestellt werden. Für die
Parameteranwahl muss der FNC-Taster eventuell mehrmals gedrückt werden.
Tipp Halten Sie den SND-Taster gedrückt, während Sie FNC
betätigen, um die Parameter in umgekehrter Reihenfolge zu
wählen.
9. BPM- Diode (Tempo)
Diese Diode blinkt im aktuell gewählten Tempo.
10. Netz schal ter
Siehe „Ein- und Ausschalten des Geräts“.
11. DEL-Taster (Delete)
Siehe „Einen Teil einer Phrase löschen“ und „Löschen einer ganzen Phrase“.
12. Lautstärketaster
Hiermit stellen Sie die Lautstärke des internen Lautsprechers oder
eines angeschlossenen Kopfhörers ein. Um den Eingangspegel einzustellen, müssen Sie MIC ON/OFF gedrückt halten, während Sie
diesen Taster betätigen.
13. Loop I/II-Taster
Siehe „Aufnahme in einer Schleife“.
14. Interner Lautsprecher
Dieser Lautsprecher gibt die jeweils abgespielten Signale wieder.
Wenn Sie einen Kopfhörer an die PHONES-Buchse anschließen,
wird der Lautsprecher stummgeschaltet.
Tipp Bei bestimmten Programs ist der Pegel extrem niedrig bzw.
hört man fast nichts.
Inhalt de s Parameterme nüs
Seite Eintrag Bedeutung Vorgabewert
P-1/14 BPM Tempower t für die Arpeggiator-Wiedergabe usw. 120.0
P-2/14 KEY Wahl des Grundtons (Tonhöhe) der Skala.*1 C
P-3/14 SCALE Wahl der Skala, die auf dem berührungsempndlichen Pad gespielt werden kann. Ionian
P-4/14 NOTE RANGE Wahl des Oktavbereichs, der mit dem Pad gespielt werden kann.*1 Program
P-5/14 ARP PATTERN Anwahl eines Arpeggio-Pattern. Type:00
P-6/14 ARP TIME Hier legen Sie die Dauer der vom Arpeggiator gespielten Noten fest.*1 0%
P-7/14 ARP SWING Regelt das Timing der Arpeggiator-Noten. OFF
P-8/14 LOOP I LENGTH Hiermit wählen Sie die Länge der Phrase von Loop I. 4Beat
P-9/14 LOOP II LENGTH Hiermit wählen Sie die Länge der Phrase von Loop II. 4Beat
P-10/14 LOOP FADER Hiermit können Sie zwischen Loop I und II überblenden. CENTER
P-11/14 LOOP SAVE/LOAD Hiermit können Daten gespeichert und geladen werden. -P-12/14 MASTER RECORDER Erlaubt die Aufnahme Ihres Spiels auf dem kaossilator 2 auf eine Speicherkarte. -P-13/14 AUDIO PLAYER Erlaubt das Abspielen der Daten von einer Speicherkarte. -P-14/14 UTILITY Drücken Sie auf die Mitte des Eingabereglers, um das „UTILITY“-Menü aufzurufen. --
Inhalt de s ‘Utility ’-Menüs
Drücken Sie den FNC-Taster so oft, bis „UTILITY“ angezeigt wird. Verwenden Sie anschließend den Eingaberegler zum Vornehmen der Einstellungen.
Seite Eintrag Bedeutung
U-1/10 DATE Hier können das Datum und die Uhrzeit eingestellt werden. Diese Informationen werden für die Da-
U-2/10 BATTERY TYPE Hier kann der verwendete Batterietyp angegeben werden.
U-3/10 POWER SAVING Hiermit kann der Stromverbrauch des kaossilator 2 verringert werden. Dies wird durch eine Reduzie-
U-4/10 AUTO POWER OFF Hiermit können Sie angeben, ob sich der kaossilator 2 (nach ein paar Stunden) automatisch aus-
U-5/10 DISPLAY BRIGHTNESS Hiermit stellen Sie die Display-Helligkeit ein. *3
U-6/10 EXT.MIC SETTING Hiermit geben Sie an, welchen Mikrofontyp Sie angeschlossen haben.
U-7/10 CARD TEST Hiermit können Sie die eingesteckte Speicherkarte testen, um zu überprüfen, ob sie sich für den
U-8/10 CARD FORMAT Hiermit kann die Speicherkarte überprüft und formatiert werden.
U-9/10 PAD CALIBR ATION Hiermit kalibrieren Sie das aktive Gebiet des Pads und des Eingabereglers.
U-10/10 SOFTWARE UPDATE Hiermit kann das Betriebssystem des kaossilator 2 aktiviert werden. Alles Weitere hierzu nden Sie
*1 Nicht für alle Program-Typen belegt. Bei bestimmten Einstellungen hören Sie nichts bzw. nur Rauschen.
Selbst wenn Sie diese Einstellung aktivieren, schaltet sich das Gerät nur aus, wenn kein Eingangssignal mehr empfangen wird.
*2
*3 Wenn Sie längere Zeit einen hohen Wert verwenden, verringert dies die Lebensdauer des Displays.
Tipp Selbst nach Anwahl dieser Einstellung wird nach einer Weile wieder die Program-Seite angezeigt, wenn Sie längere Zeit nichts
mehr einstellen. Drücken Sie den SND-Taster, um sofort zur Program-Seite zu springen.
tierung der Dateien verwendet.
rung der Lautsprecherleistung erreicht.
schalten soll.*2
kaossilator 2 eignet.
auf der Korg-Webpage.
Spielen
Ein-/Ausschalten
Um das Gerät einzuschalten, müssen Sie den Netzschalter so lange gedrückt halten, bis die Begrüßungsanzeige erscheint. Um das Gerät auszuschalten, müssen Sie den Netzschalter so lange gedrückt halten, bis
die Abmeldungsanzeige erscheint.
Berühren Sie beim Einschalten weder die Taster, noch das Pad.
Energi esparfunk tion
Der kaossilator 2 enthält eine Energiesparfunktion. Ungefähr 4 Stunden nach dem letzten Bedienvorgang schaltet er sich automatisch aus.
Tipp Solange ein Audiosignal empfangen wird, schaltet sich das
Gerät nicht aus.
Tipp Um diese Funktion zu deaktivieren, müssen Sie den „ AUTO
POWER OFF“-Parameter („Utility“-Menü) auf „Disable“ stellen. Um
die Energiesparfunktion zu aktivieren, müssen Sie „Enable“ wählen.
Die Werksvorgabe lautet „Enable“.
Anwahl eines Programs
Drücken Sie den SND-Taster (Sound), um die Seite aufzurufen, wo man
Programs wählen kann.
Wählen Sie mit Fingerbewegungen auf dem Eingaberegler das gewünschte Program.
Tipp Halten Sie den SND-Taster gedrückt, während Sie einen Finger
über den Eingaberegler bewegen, um die Programs nach Kategorien
zu wählen.
Spielen auf dem berührungsempndlichen Pad
Wischen Sie mit einem Finger über das Pad bzw. tippen Sie es an.
Verwenden Sie hierfür keinen harten oder spitzen Gegenstand.
Generell kann nicht gewährleistet werden, dass der Regler einen
Griffel oder eine Berührung mit einem Handschuh überhaupt erkennt.
Anwahl de r Skala
SCALE: Hiermit wählen Sie die Skala (Tonleiter), die auf dem berührungsempndlichen Pad gespielt werden kann. Das Display zeigt den Notennamen an. Die Verfügbarkeit richtet sich nach der Einstellung des gewählten Programs. Siehe daher auch die Program-Übersicht.
Anwahl de r Tonart
KEY: Hiermit wählen Sie den Grundton der Skala. Die Verfügbarkeit richtet sich nach der Einstellung des gewählten Programs. Siehe daher auch
die Program-Übersicht.
Bei b estimmten Einstellungen hören S ie nichts bzw. nur
Rauschen.
Anwahl de s Notenbereic hs
NOTE RANGE: Hiermit wählen Sie den Tonumfang des berührungsempndlichen Pads.
Program: Der Tonhöhenumfang des Programs wird übernommen.
1–4 Octaves: Der Tonhöhenbereich beträgt 1 – 4 Oktaven.
Max Range: Es wird der maximale Tonhöhenbereich verwendet.
Tipp Der tatsächliche „Max Range“-Bereich richtet sich nach dem
gewählten Program.
Bei b estimmten Einstellungen hören S ie nichts bzw. nur
Rauschen.
Einstellen des Tempos (BPM)
Der Tempowert ist wichtig für Schlagzeug-Programs, den Arpeggiator
und die Schleifenaufnahme.
BPM: Wenn der BPM-Wert angezeigt wird, können Sie den Tempowert mit Fingerbewegungen auf dem Eingaberegler bzw. durch
Antippen des linken und rechten Rands einstellen. Wenn Sie mehrere Male in der Mitte des Reglers tippen, wird das Tempo berechnet und dem „BPM“-Parameter zugeordnet.
Arbeiten mit dem Arpeggiator
Der kaossilator 2 enthält einen Arpeggiator, der das Erzeugen rhythmischer Phrasen durch Antippen des Pads erlaubt.
Wenn Sie den ARP-Taster drücken, leuchtet er. Berühren Sie jetzt
das Pad, damit das momentan gewählte Arpeggio-Muster abgespielt wird.
Anwahl eines Arpeggio-Pattern
Der kaossilator 2 enthält zahlreiche Arpeggiator-Pattern.
Halten Sie den ARP-Taster gedrückt, während Sie mit dem Eingaberegler ein Pattern im Bereich „Type: 01 – 50“ wählen.
Tipp Diese Einstellung kann auch über das Menü gewählt
werden.
Ändern d er Arpeggiato r-Einstellun gen
Um die Arpeggiator-Parameter einstellen zu können, müssen Sie
mit dem FNC-Taster den gewünschten Parameter wählen und seinen Wert mit dem Eingaberegler einstellen.
Einste llen der Notenda uer
ARP TIME: Hiermit legen Sie die Länge der Noten fest. Wenn Sie
ARP TIME auf „100%“ stellen, werden die Noten gebunden abgespielt. Wenn Sie „–100%“ wählen, sind die Noten so kurz, dass sie
fast abgeschnitten werden.
Tipp Bei sehr kurzen Einstellungen kann es passieren, dass
bestimmte Programs überhaupt nichts mehr abspielen.
Einste llen des Noten-Timi ngs
ARP SWING: Hiermit beeinussen Sie das Timing der Noten. Der
Einstellbereich reicht von einem normalen 16-Beat-Muster bis zu
einem Shufe-Rhythmus.
Schleifenaufnahme
Sie können bis 8 Schläge Ihres Spiels (zwei 4/4-Takte) aufzeichnen und in einer Endlos-Schleife abspielen. Außerdem können Sie
alles, was Sie während der Schleifenwiedergabe spielen, ebenfalls aufzeichnen.
Aufzeichnen eines Program-Klangs
Mit den internen Programs des kaossilator 2 können Rhythmus- und
Basspar ts aufgezeichnet werden.
1. Halten Sie einen der Schleifentaster (I oder II) gedrückt, während
Sie auf dem berührungsempndlichen Pad spielen. Solange Sie
den Schleifentaster drücken, wird Ihr Spiel auf dem Pad aufgezeichnet.
Während der Aufnahme leuchtet die Schleifendiode rot. Selbst
nach dem letzten möglichen Schlag läuft die Aufnahme einfach
weiter, so dass Sie weitere Parts hinzufügen können.
2. Wenn Sie den Schleifentaster freigeben, leuchtet die Schleifendiode grün. Die Aufnahme wird dann deaktiviert, aber die Phrase wird weiterhin in einer Schleife abgespielt.
3. Während der Schleifenwiedergabe können Sie den Schleifentaster gedrückt halten und erneut auf dem Pad spielen, um auch
jene Noten aufzuzeichnen.
4. Wenn Sie bei laufender Schleifenwiedergabe einen Schleifentaster drücken, hält die Wiedergabe an und der Schleifentaster
blinkt grün.
5. Wenn Sie einen Schleifentaster bei angehaltener Wiedergabe
drücken, wird die aufgezeichnete Phrase in einer Schleife abgespielt und die Schleifendiode leuchtet grün.
Tipp Nach Anhalten der Wiedergabe können Sie einen Schleifentaster gedrückt halten und mit dem Pad ab dem Beginn der
Phrase einen weiteren Part hinzufügen.
Aufnahme eines Audiosignals
Der kaossilator 2 erlaubt die Aufnahme eines Audiosignals mit dem
internen oder einem externen Mikrofon.
1. Halten Sie den MIC ON/OFF-Taster gedrückt, während Sie mit
den Lautstärketastern den Eingangspegel einstellen.
2. Halten Sie den MIC ON/OFF-Taster gedrückt, während Sie einen Schleifentaster drücken, um die Aufnahme zu starten. Solange Sie den Schleifentaster drücken, wird das Signal aufgezeichnet.
3. Geben Sie den Schleifentaster wieder frei, um die Aufnahme zu
beenden.
Lautstärkeverhältnis der beiden Schleifen
1. Halten Sie den FNC-Taster gedrückt, um zur Seite „LOOP FADER“ zu gehen.
2. Stellen Sie mit dem Eingaberegler die Balance ein.
Tipp Der Eingaberegler kann hier wie ein DJ -Crossfader
verwendet werden.
Festlegen der Phrasenlänge
Halten Sie den Schleifentaster der Phrase, deren Länge Sie ändern möchten, gedrückt, während Sie den Eingaberegler betätigen.
Die Dauer der gewählten Phrase wird jetzt im Display angezeigt.
Tipp Die maximale Phrasenlänge beträgt vier Taktschläge für
BPM-Werte im Bereich 37.5–74.9 und zwei Taktschläge für
Werte im Bereich 20.0–37.4.
Tipp Diese Einstellung kann auch über das Menü geändert
werden.
Einen Teil einer Phrase löschen
Starten Sie die Phrasenwiedergabe und halten Sie den Schleifentaster gedrückt, während Sie den DEL-Taster betätigen. Solange Sie DEL drücken, wird der betreffende Phrasenteil gelöscht.
Tipp Wenn Sie den Schleifentaster gedrückt halten, während
Sie den DEL-Taster drücken, wird der betreffenden Phrasenteil
gelöscht. Dieser kann dann durch eine neue Phrase ersetzt
werden.
Löschen einer ganzen Phrase
1. Drücken Sie den DEL-Taster. Die Seite „DELETE LOOP“ erscheint.
2. Drücken Sie den Taster der Schleife, die Sie löschen möchten.
Um beide Schleifen zu löschen, müssen Sie beide Schleifentaster drücken. Die betreffende Phrase wird gelöscht.
Sichern oder Laden von Daten
Die Einstellungen sowie die Daten der Schleifen können auf einer
Speicherkarte gesichert werden. Solche Daten kann man zu einem
späteren Zeitpunkt dann wieder laden.
Datensi cherung auf ei ner Speicherk arte
Tipp „LOOP LOAD/SAVE“ kann man auch aufrufen, indem man
den FNC-Taster gedrückt hält, während man einen SchleifenTaster (I oder II) betätigt.
1. Drücken Sie den FNC-Taster, damit im Display „LOOP SAVE/
LOAD“ angezeigt wird.
2. Wählen Sie mit dem Eingaberegler „SAVE“.
3. Das Display zeigt jetzt die Meldung „Finished“ und den Namen
der gespeicherten Daten an.
Laden von D aten einer Speic herkarte
1. Wählen Sie mit dem Eingaberegler „LOAD“.
2. Wählen Sie mit dem Eingaberegler die Datei, die Sie laden möch-
ten und starten Sie den Ladebefehl.
Tipp Die Daten werden in zwei Dateien namens „KO2D??_1.
WAV“ und „KO2D??_2.WAV“ im „DATA??“-Ordner des „DATA“Ordners im „KO2“-Ordner gesichert („??“ vertritt eine Zahl im
Bereich 00 – 99).
Ändern Sie die Namen der Dateien im „DATA“-Ordner
niemals mit Ihrem Computer.
Mastermaschine
Alles, was Sie mit dem kaossilator 2 spielen, kann auf eine Speicherkarte aufgenommen werden.
1. Drücken Sie den FNC-Taster, damit im Display „MASTER RECORDER“ angezeigt wird.
2. Tippen Sie den Eingaberegler an, um die Aufnahme zu starten.
Das Zählwerk beginnt zu arbeiten.
3. Drücken Sie den SND-Taster, um wieder die Program-Anzeige
zu wählen und beginnen Sie zu spielen.
4. Drücken Sie den FNC-Taster, damit im Display „MASTER RECORDER“ angezeigt wird und tippen Sie den Eingaberegler erneut an, um die Aufnahme anzuhalten.
Tipp Wenn die Speicherkapazität der Karte erschöpft ist bzw.
wenn Sie mehr als 2 Stunden aufnehmen, hält die Aufnahme
automatisch an.
Tipp Die Daten werden in einer Datei namens „KO2REC??.
WAV“ im „RECORD??“-Ordner des „ RECORD“-Ordners im
„KO2“- Ordner gesichert („??“ vertrit t eine Zahl im Bereich
00 – 99).
Ändern Sie die Namen der Dateien im „RECORD“-Ordner
niemals mit Ihrem Computer.
Audio-Player
Die mit der „MASTER RECORDER“-Funktion aufgezeichneten Daten können auch abgespielt werden. Außerdem können Sie andere
Audiodateien auf der Speicherkarte abspielen.
1. Drücken Sie den FNC-Taster, damit im Display „AUDIO PLAYER“ angezeigt wird und tippen Sie den Eingaberegler an.
2. Wählen Sie mit dem Eingaberegler die Datei, die Sie abspielen
möchten.
3. Drücken Sie den SND-Taster, um die Wiedergabe anzuhalten
und zur Program-Seite zurückzukehren.
Unters tützte Dateif ormate
Stereo-WAV-Dateien im 16-Bit/44.1kHz/48kHz-Format
 Loading...