


1
2

Precautions
Location
Using the unit in the following locations can result in a malfunction.
•In direct sunlight
•Locations of extreme temperature or humidity
•Excessively dusty or dirty locations
•Locations of excessive vibration
•Close to magnetic fields
Power supply
Please connect the designated AC adapter to an AC outlet of the correct voltage. Do not connect it to an AC outlet of voltage other than that for which your unit is intended.
Interference with other electrical devices
Radios and televisions placed nearby may experience reception interference. Operate this unit at a suitable distance from radios and televisions.
Handling
To avoid breakage, do not apply excessive force to the switches or controls.
Care
If the exterior becomes dirty, wipe it with a clean, dry cloth. Do not use liquid cleaners such as benzene or thinner, or cleaning compounds or flammable polishes.
Keep this manual
After reading this manual, please keep it for later reference.
Keeping foreign matter out of your equip-
ment
Never set any container with liquid in it near this equipment. If liquid gets into the equipment, it could cause a breakdown, fire, or electrical shock.
Be careful not to let metal objects get into the equipment. If something does slip into the equipment, unplug the AC adapter from the wall outlet. Then contact your nearest Korg dealer or the store where the equipment was purchased.
THE FCC REGULATION WARNING (for USA)
This equipment has been tested and found to comply with the limits for a Class B digital device, pursuant to Part 15 of the FCC Rules. These limits are designed to provide reasonable protection against harmful interference in a residential installation. This equipment generates, uses, and can radiate radio frequency energy and, if not installed and used in accordance with the instructions, may cause harmful interference to radio communications. However, there is no guarantee that interference will not occur in a particular installation. If this equipment does cause harmful interference to radio or television reception, which can be determined by turning the equipment off and on, the user is encouraged to try to correct the interference by one or more of the following measures:
Reorient or relocate the receiving antenna. Increase the separation between the equipment and receiver.
Connect the equipment into an outlet on a circuit different from that to which the receiver is connected.
Consult the dealer or an experienced radio/TV technician for help.
Unauthorized changes or modification to this system can void the user’s authority to operate this equipment.
Notice regarding disposal (EU only)
When this “crossed-out wheeled bin” symbol is displayed on the product, owner’s  manual, battery, or battery package, it signifies that when you wish to dispose of this product, manual, package or battery you must do so in an approved manner. Do not discard this product, manual, package or
battery along with ordinary household waste. Disposing in the correct manner will prevent harm to human health and potential damage to the environment. Since the correct method of disposal will depend on the applicable laws and regulations in your locality, please contact your local administrative body for details. If the battery contains heavy metals in excess of the regulated amount, a chemical symbol is displayed below the “crossed-out wheeled bin” symbol on the battery or battery package.
* All product names and company names are the trademarks or registered trademarks of their respective owners.
3

Table of Contents |
|
Introduction.................................... |
5 |
Main features........................................... |
5 |
Getting ready.................................. |
6 |
Connections............................................ |
6 |
Operation........................................ |
7 |
Using the power switch........................... |
7 |
Adjusting the volume............................... |
7 |
Selecting a program................................ |
7 |
Using the touch pad................................ |
7 |
Selecting the audio input......................... |
8 |
Using the gate arpeggiator...................... |
8 |
Specifying the scale................................ |
9 |
Specifying the key................................... |
9 |
Specifying the note range....................... |
9 |
Specifying the BPM................................. |
9 |
Storing settings to a PROGRAM MEMO- |
|
RY.......................................................... |
10 |
Loop recording...................................... |
10 |
Function settings......................... |
14 |
Procedure for Function settings............ |
14 |
About each function.............................. |
14 |
Using an SD card......................... |
16 |
Inserting or removing SD cards............ |
16 |
Checking the total capacity of the card.16 |
|
Checking the remaining capacity of the |
|
card........................................................ |
17 |
Formatting the SD card......................... |
17 |
Saving to SD card................................. |
17 |
Loading from an SD card...................... |
18 |
Accessing the SD card from your com- |
|
puter....................................................... |
18 |
MIDI functions.............................. |
20 |
MIDI connections.................................. |
20 |
MIDI settings......................................... |
20 |
Using the KAOSSILATOR PRO as a MIDI |
|
controller................................................ |
22 |
Specifications.............................. |
24 |
PROGRAM LIST................................... |
95 |
SCALE LIST.......................................... |
99 |
Parts of the Kaossilator PRO and their |
|
functions.............................................. |
100 |
4

Introduction
Thank you for purchasing the Korg KAOSSILATOR PRO dynamic phrase synthesizer / loop recorder. To enjoy the KAOSSILATOR PRO to the fullest potential, please read this manual carefully and use the KAOSSILATOR PRO only as directed.
Main features
200 internal programs (sounds)
The two hundred internal programs are organized into eight categories such as lead, drum, pattern, and vocoder. You can control the pitch by moving your finger on the touch pad horizontally, or vertically to control aspects of the tone such as cutoff, feedback, or modulation depth.
Scale function lets you assign a scale to the touch pad
You can choose one of 31 scales and assign it to the touch pad, allowing you to perform in the appropriate key for your song. The Note Range function lets you specify the range of notes that correspond to the touch pad’s horizontal dimension.
The new Gate Arp function lets you control phrases with the slider
The KAOSSILATOR PRO contains a gate arpeggiator that you can use immediately for live performance or song creation. To start automatic playback, simply press the GATE ARP button and touch the touch pad. For even more creative freedom in generating phrases, you can use the slider to control the gate time or gate speed.
Four loop recorders allow recording of internal sounds or external input
The KAOSSILATOR PRO contains loop recorders that can record not only its own internal sound, but also from the line inputs or mic input. The four loop recording banks can be used simultaneously, and also support BPMsynchronized loop playback. You can mute each bank, making this a great feature for DJ performance.
USB MIDI functionality for tempo sync or data transfer
In addition to MIDI IN/OUT connectors, the KAOSSILATOR PRO provides a USB connector, allowing you to back up the recorded loop data, or to control your application software or external MIDI equipment.
Use SD cards to back up phrases and settings
The SD card slot lets you store data such as your loop-recorded phrases and program memories.
Dedicated software available for download
The dedicated KAOSSILATOR PRO Editor software provides librarian functionality that lets your computer store and manage a virtually unlimited amount of recorded loop data, as well as a MIDI Assignment Editor function that transforms your KAOSSILATOR PRO into a powerful MIDI controller that can be set up just the way you want. The KAOSSILATOR PRO Editor can be downloaded free of charge from the Korg website (http://www.korg.com/).
5
Getting ready
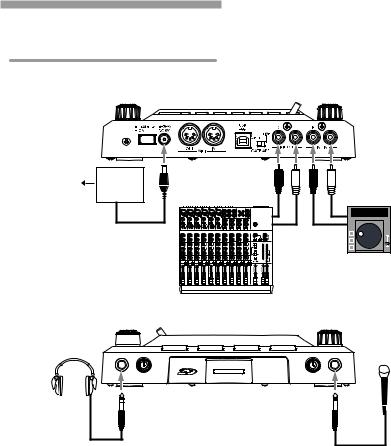
Connections
AC ADAPTER
AC
CD PLAYER
MIXER, DJ MIXER
Connecting your monitor amp or mixer to the output jacks
Connect the KAOSSILATOR PRO’s LINE OUT jacks to your mixer or powered monitors
(amplified speakers).
If you’re using headphones, connect them to the PHONES jack.
TIP: The KAOSSILATOR PRO’s sound will still be output from the LINE OUT jacks even if headphones are connected.
Connecting your mic or audio source to the input jacks
If you’re using a mic, connect it to the MIC jack.
If you want to connect a sampler or other audio source device, connect its output jacks to the
KAOSSILATOR PRO’s LINE IN jacks.
 Always make connections with the power turned off. Careless operation can damage your speaker system or cause malfunctions.
6
Operation
Using the power switch
1. Connect the KAOSSILATOR PRO to your other equipment as shown in the diagrams on the preceding pages, and connect the AC adapter to an electrical outlet.
 Never use any AC adapter other than the one that’s included.
2. Press the Power button to turn the KAOSSILATOR PRO on. The display will lightup.
To turn the KAOSSILATOR PRO off, press the Power button once again to return it to the standby position
Adjusting the volume
1.Use the PROGRAM VOLUME knob to adjust the volume of the program.
2.If you’re using headphones, use the PHONES VOLUME knob to adjust the volume.
TIP: The PHONES VOLUME knob does not affect the volume of the LINE OUT jacks.
Selecting a program
1. The display shows the number of the program that’s currently selected.
TIP: If the display shows the BPM, you can switch to the program indication simply by pressing the PROGRAM/BPM knob.
2. Use the PROGRAM/BPM knob to select a program.
When you reach the last number, it will wrap around to the beginning.
grams; this is a quick way to select a program by category.
TIP: For programs in the Vocoder category, the ef- fect-processed input sound will only be audible while you use the touch pad. Using the touch pad when there’s no input sound will not produce sound. The input sound cannot be output directly (unprocessed by the effect) while you’re using the touch pad.
TIP: For some programs, the sound will continue even after you take your finger off the touch pad.
Using the touch pad
You can control the sound by using your finger to rub or tap the touch pad.
TIP: Affix the included protective sheet to the touch pad before using it.
Touch pad care
Never press the touch pad with excessive force, or place heavy objects on it. It may crack or break if handled roughly. Press the touch pad only with your finger, since rubbing or pressing the touch pad with a sharp object will scratch it. To clean the touch pad, wipe it lightly with a soft dry cloth. Do not use solvents such as thinner, since this may cause deformation.
Touch pad correction
Touch pad correction is a function that applies an adjustment that fixes the pitch that is produced when you touch the pad at the edge of its scale boundary. Touch pad correction can be turned on/off in Function mode (→p.15).
Hold
If you hold down the SHIFT button and release the touch pad, the last position where you had been touching the pad will be held; the pad LED for that location and the SHIFT button will light-up, and the sound will continue to be output.
To defeat the Hold function, press the SHIFT button once again; the sound will stop.
TIP: By holding down the SHIFT button and turning the PROGRAM/BPM knob you can jump to the beginning of the next (or previous) category of pro-
TIP: The position of the pad LED that lights-up may |
|
shift depending on how or where you press the touch |
|
pad. |
7 |
|
TIP: For some programs, the sound may stop even if the Hold function is enabled.
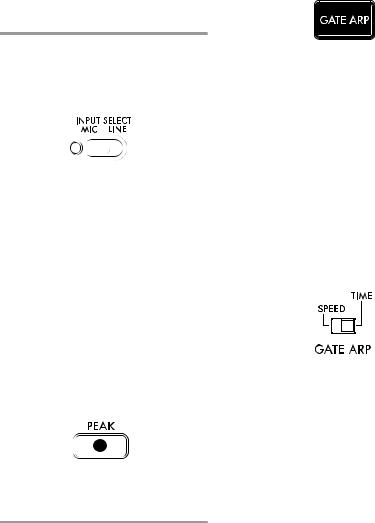
Selecting the audio input
Use the INPUT SELECT switch to select the jack that’s connected your mic or audio device.
MIC: The sound from the mic that’s connected to the mic input jack will be selected for input. LINE: The sound from the audio source that’s connected to the LINE IN jack will be selected for input.
TIP: With the exception of when certain programs are selected, the audio that is input will be output directly.
TIP: If you want to mute the audio input, you can either adjust the audio source device or turn down the INPUT VOLUME knob.
Adjusting the audio input volume
Use the INPUT VOLUME knob to adjust the input level of the audio input source.
Input the audio from your connected source device, and adjust the level so that the peak indicator does not light-up red.
If you’re using the mic input jack, adjust the MIC TRIM knob as appropriate for the mic’s sensitivity so that the audio is not distorted.
Using the gate arpeggiator
The gate arpeggiator is a function that automatically performs the tapping operation on the touch pad. The sound will be heard at the specified Gate Time and Gate Speed.
Using the gate arpeggiator
Press the GATE ARP button; it will blink, and the Gate Arpeggiator will turn on.
When you touch the touch pad, you’ll hear the sound produced by the automatic tapping of the gate arpeggiator.
When you press the GATE ARP button once again, the light in the button will go dark and the Gate Arpeggiator will turn off.
Setting the gate arpeggiator parameters
There are two gate arpeggiator parameters:
Gate Time specifies the duration of the sound, and Gate Speed specifies the speed of the sound that’s heard. You can assign one of these two parameters to the GATE ARP TIME/ SPEED slider, and use the slider to control it. Use the rear panel GATE ARP switch to choose which parameter is assigned to the slider.
GATE TIME: The slider will specify the duration of the sound as a percentage. Setting the GATE TIME to  (100%) will produce legato playing. Setting this to
  (0%) will mute the sound; there will be no sound even if you use the touch pad.
TIP: If you change the GATE ARP switch to SPEED when this parameter is set to legato or stopped, the legato or muted state will be cancelled.
TIP: Shortly after you’ve selected this setting, the display will automatically return to indicating the program number. Alternatively, you can press the SHIFT button to immediately return to program indication.
GATE SPEED: The slider will specify the speed where the sound is heard. With a setting of 1, the sound will be heard at quarter-note intervals. With a setting of 0.5, the sound will be heard at eighth-note intervals.
TIP: Shortly after you’ve selected this setting, the display will automatically return to indicating the program number. Alternatively, you can press the SHIFT button to immediately return to program indication.
8
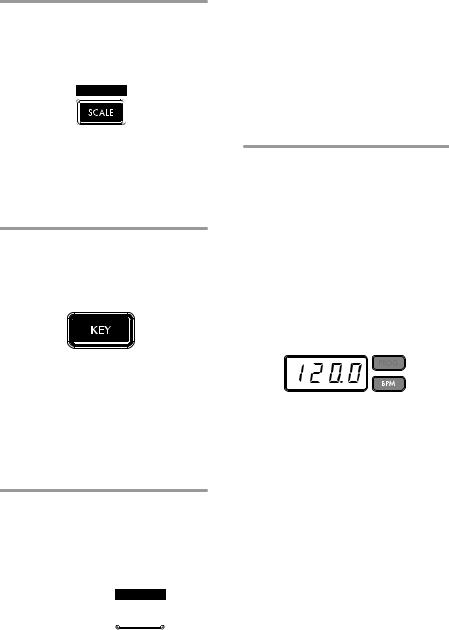
Specifying the scale
Here’s how to specify the scale that’s assigned to the touch pad.
1.Press the SCALE button.
2.Turn the PROGRAM/BPM knob to select the desired scale (→p.99: SCALE LIST).
TIP: Shortly after you’ve selected this setting, the display will automatically return to indicating the program number. Alternatively, you can press the SHIFT button to immediately return to program indication.
Specifying the key
Here’s how to specify the root note of the scale.
1.Press the KEY button.
2.Turn the PROGRAM/BPM knob to select the desired key.
C4=[ ] C#4=[
 ]
]
C3=[ ] C5=[
 ]
]
TIP: Shortly after you’ve selected this setting, the display will automatically return to indicating the program number. Alternatively, you can press the SHIFT
button to immediately return to program indication.
Specifying the note range
Here’s how to specify the range of notes that are assigned to the touch pad.
1. Hold down the SHIFT button and press the SCALE button.
 +
+ 


2. Select the desired range of notes.
Prog: The appropriate note range setting specified by each program will be used.
1–4oct: The note range will be 1–4 octaves.
FULL: The note range will be the maximum.
TIP: Depending on the key and note range settings, you might not hear sound, or noise might be heard.
TIP: The note range for FULL will depend on the program.
TIP: Shortly after you’ve selected this setting, the display will automatically return to indicating the program number. Alternatively, you can press the SHIFT button to immediately return to program indication.
Specifying the BPM
What is BPM?
BPM (Beats Per Minute) is the tempo of the song expressed as the number of beats (quarter notes) that occur in one minute. A higher BPM value means a faster tempo.
Viewing the BPM
When you turn on the KAOSSILATOR PRO, the BPM will be set to 120.0.
If the display shows the current program, press the PROGRAM/BPM knob to switch to the BPM display.
TIP: If the clock is set to external synchronization, “Ext” will be shown in the display, and you won’t be able to specify the BPM value.
Manually setting the BPM
1.If the display shows the current program, press the PROGRAM/BPM knob to switch to the BPM display.
2.Use the PROGRAM/BPM knob to adjust the BPM value in steps of 0.1. By turning the PROGRAM/BPM knob while holding down the SHIFT button, you can adjust the integer portion of the value in steps of 1.
Using Tap Tempo to set the BPM
If you’re not certain of the BPM value of a song, you can set the BPM by pressing the TAP TEMPO button in rhythm with the beat of the song.
1. Press the TAP TEMPO button three or more times in rhythm with the beat of the song. The KAOSSILATOR PRO will detect how fast 9

you’re pressing the button, the corresponding BPM value will appear in the display, and that BPM value will be set.
TIP: You can’t use Tap Tempo if the KAOSSILATOR PRO is synchronized to MIDI timing clock data that’s received from an external MIDI device.
MIDI Sync function
The BPM of the KAOSSILATOR PRO can be set to follow MIDI Time Clock messages from an external MIDI device. Connect the MIDI OUT connector of an external MIDI device (such as a sequencer set to transmit MIDI time clock messages) to the MIDI IN connector of the KAOSSILATOR PRO.
TIP: This function will not synchronize sequence data with the KAOSSILATOR PRO’s rhythm pattern programs. If you want to synchronize sequenced data and the KAOSSILATOR PRO’s internal rhythm patterns, you will either have to insert a Touch Pad On message into the beginning of each measure of your sequence data, or touch the touch pad at the beginning of each of the KAOSSILATOR PRO phrases to start the pattern.
TIP: If you want the KAOSSILATOR PRO to receive Timing Clock and Touch Pad On messages, go to
MIDI Setting (→p.20), and select “Applying the MIDI message filter” (→p.21) so that these messages will be received.
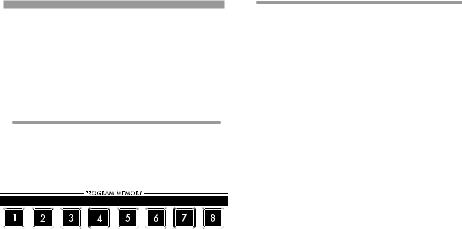
Storing settings to a PROGRAM MEMORY
The PROGRAM MEMORY buttons allow you to save and instantly recall your eight favorite KAOSSILATOR PRO programs and settings.
Stored data
-Program
-Scale
-Key
-Note range
Storing
1.Set the KAOSSILATOR PRO to the condition you want to store.
2.Press the WRITE button.
The PROGRAM MEMORY button and the WRITE button will blink.
10
3. Press the PROGRAM MEMORY button of the number that you want to use to store the settings; the settings will be stored, and then the KAOSSILATOR PRO will return to the program display.
 Never turn off the power or perform any other operations while settings are being stored. Doing so may damage the data.
Recalling
1. Press one of the PROGRAM MEMORY buttons (1–8); the settings stored in that memory location will be recalled.
TIP: You can change the content that is recalled when you press a PROGRAM MEMORY button (→p.14).
Loop recording
You can create a phrase by overdubbing program sounds or audio input. A phrase of up to four measures can be recorded into each of the four banks.
TIP: The phrases you recorded will be lost when you turn off the power. If you want to save your phrases, write them to an SD card (→p.17) before you turn off the power, or use the KAOSSILATOR PRO Editor to save the phrases.
TIP: For several seconds immediately after recording, it won’t be possible to resume playback from a state where all banks are stopped. Please wait until the LOOP RECORDER BANK button has stopped blinking before you attempt to play back.
Recording
Recording a mix of the program’s sound and the audio input
1.Press the REC button. When you press the button, the LOOP RECORDER BANK buttons and the REC button will blink; the KAOSSILATOR PRO will be in record-ready mode.
2.Press the LOOP RECORDER BANK button that you want to use for recording; that LOOP RECORDER BANK button will light-up, and recording will begin.
3.When you want to stop recording, press the LOOP RECORDER BANK button; recording will stop, and the KAOSSILATOR PRO will switch to playback.
4.When you want to start recording again, press the LOOP RECORDER BANK button once again to start recording.
5.When you press the REC button, recordready mode will be cancelled, and the REC button will go dark.
TIP: If you press the REC button during recording, the REC button will go dark and recording will stop. The LOOP RECORDER BANK button that had been
recording will switch to playback.
Recording the program’s sound
You can create and record rhythm or bass phrases using the sounds of the KAOSSILATOR PRO’s built-in programs. This can be useful preparation for a live performance or as a guide for practicing.
1.Hold down the LOOP RECORDER BANK button for the bank that you want to record, and use the touch pad to perform.
2.When you want to stop recording, release the LOOP RECORDER BANK button. When you release the button, the bank will switch to playback.
3.If you want to overdub another layer onto the recorded phrase, hold down the LOOP RECORDER BANK button when you want to start overdubbing, and use the touch pad to perform.
Recording the audio input
1.Hold down the LOOP RECORDER BANK button for the bank that you want to record, and press the REC button. The audio input will be recorded while you hold down the REC button.
2.When you want to stop recording, release the REC button. When you release the button, the bank will switch to playback.
3.If you want to overdub another layer onto the recorded phrase, hold down the LOOP RECORDER BANK button and press the REC button when you want to start overdubbing.
TIP: By holding down the LOOP RECORDER BANK button and repeatedly pressing the REC button, you can slice the audio input while you record.
Specifying the length of the phrase to be recorded
1.Hold down the SHIFT button and press one of the LOOP RECORDER BANK buttons.
2.Press the LOOP RECORDER BANK button whose phrase length you want to change. The selected LOOP RECORDER BANK button will blink red.
TIP: If you want to cancel your selection, press the same LOOP RECORDER BANK button once again.
3.Turn the PROGRAM/BPM knob to specify the desired phrase length. The phrase length is specified as a number of quarter notes.
4.Press the SHIFT button to return to the program indication.
Phrase length |
Display |
4 measures
2 measures
1 measure
Half note
Quarter note
Eighth note
Sixteenth note
Thirty-second note
Sixty-fourth note
TIP: The maximum length of the phrase will depend on the BPM you’ve specified. The maximum length will be sixteen beats if the BPM is 108.5 or higher, eight beats if the BPM is lower than 108.5, four beats if the BPM is lower than 54.3, or two beats if the BPM is lower than 27.2.
TIP: The phrase length that you specify will revert to the default setting when you turn off the power.
TIP: If a LOOP RECORDER BANK button blinks orange or green when you hold down the SHIFT button and press that LOOP RECORDER BANK button, this means that this bank has not yet finished processing
after recording, and therefore the phrase length cannot be changed. Wait for the blinking LOOP RECORDER BANK button to change to steadily lit,
and then change the phrase.
11

Playing a recorded phrase
Press the LOOP RECORDER BANK button that you want to play; it will begin playing. To stop playback, press that LOOP RECORDER BANK button once again.
TIP: If you start playback from a state where all banks are stopped, the phrase will start playing from its beginning. If even one bank is already playing, the newly triggered bank will start playing from the same position as the bank that’s currently playing ensuring that all banks always play in synchronization.
Adjusting the phrase playback volume
1.Hold down the SHIFT button and press one of the LOOP RECORDER BANK buttons. The touch pad will show a bar graph for the LOOP RECORDER BANK buttons.
2.Touch the touch pad to adjust the playback volume of each LOOP RECORDER BANK.
3.Press the SHIFT button to return to the program indication.
Changing the length of a phrase
You can shorten the length of a recorded phrase to loop it, or extend the length of a short phrase.
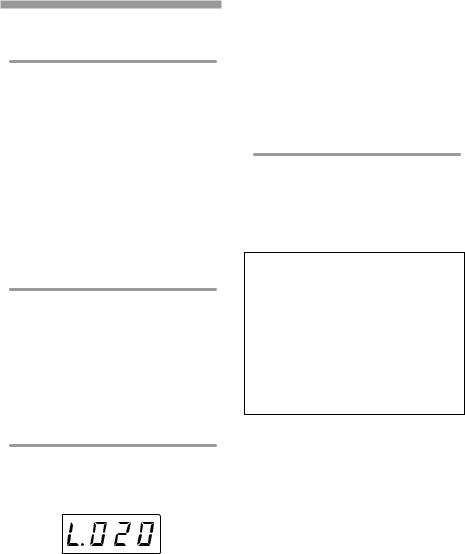
Change the length of a loop recorder bank that’s already been recorded, as described in “Specifying the length of the phrase to be recorded”(→p.11).
If you shorten the playback length, the phrase will play as a loop of the specified length.
If you increase the playback length, the phrase of the specified length will play repeatedly over the specified length. Here’s an example of how you can use this. Specify “L4” (one measure) and record a rhythm phrase. Then set the length of that phrase to “L16” (four measures), and record a melody phrase.
TIP: If you’ve shortened the playback length, you are still free to change it back to the original length. However if you perform recording or erasure on the phrase in its shortened state, the data will be recorded as a phrase of the shortened length, meaning that the original phrase data will be lost, and you won’t be able to change it back to its original length.
BPM setting during loop recording
The BPM value will be used for the following parameters during loop recording:
12 • Phrase playback speed
•Phrase recording time
If you change the BPM value, the change will affect the playback speed while recording a phrase and will be recorded.
The maximum length of a phrase depends on the BPM you specified. Therefore, changing the BPM value during loop recording could cause an overdubbed phrase to be truncated, or a silent part to be appended to the end of a phrase.
Also, changing the BPM value in the following situations will affect the phrase recording:
•You changed the BPM value and recorded BEFORE the top of the phrase was located.
•After recording, but BEFORE the top of the phrase was located, you changed the BPM value.
During phrase playback, the KAOSSILATOR PRO manages the BPM based on a playback cycle (time duration from the beginning of the playback until the top of the phrase is again located).
If you do not want your recording loop to be affected by unexpected changes in playback speed or phrase recording time due to changes in the BPM value, be sure to wait for playback to return to the top of the phrase, then start recording. Also, after recordings, do not change the BPM value until the top of the phrase has been located.
Erasing a phrase
Here’s how to erase the recorded content from the selected phrase. You can also erase while playing back another phrase.
Erasing a phrase
Here’s how you can erase an entire phrase. You can also erase a phrase while the other phrases play back.
1.Press the ERASE LOOP button; it will blink.
2.Press the LOOP RECORDER BANK button of the phrase that you want to erase; erasure will begin.

TIP: If desired, you can erase more than one loop recorder bank at the same time.
TIP: Erasure will take the same length of time as the length of the phrase that’s currently assigned.
When the phrase has been erased, the LOOP RECORDER BANK button will light-up orange.
3. If you’re finished erasing phrases, press the ERASE LOOP button and the button will go dark.
TIP: You can press the ERASE LOOP button after performing steps 1–2 to return to normal operation while allowing erasure of the phrase to continue. The LOOP RECORDER BANK button will blink red while the data is being erased.
Erasing a portion of a phrase
Here’s how you can erase a specific portion of a recorded phrase.
While the phrase is playing, hold down the LOOP RECORDER BANK button where you want to selectively erase material, and press the ERASE LOOP button. Material will be erased from the phrase while you hold down the ERASE LOOP button.
TIP: If you want to erase a phrase from its beginning, stop playback of all phrases; then hold down the LOOP RECORDER BANK button that you want to erase, and press the ERASE LOOP button.
TIP: By using the touch pad to perform while you erase, you can selectively replace a specific portion of the recorded phrase.
Initializing a phrase
Here’s how to delete a recorded phrase, returning the LOOP RECORDER BANK to its initial status.
1. Hold down the SHIFT button and press the ERASE LOOP button.
 +
+ 


2.Press the LOOP RECORDER BANK button that you want to initialize.
3.Press the WRITE button; initialization of the selected LOOP RECORDER BANK will begin. When initialization is complete, the program indication will reappear.
TIP: Except for the audio input source, the KAOSSILATOR PRO will not produce sound while a phrase is being deleted.
13
Function settings
These settings let you format an SD card, and save or load your loop-recorded data.
TIP: The program’s sound will not be heard while you’re making Function settings.
Procedure for Function settings
1.Hold down the SHIFT button and press one of the PROGRAM MEMORY buttons 1–8.
2.Use the PROGRAM/BPM knob to select a sub-parameter.
3.Press the PROGRAM/BPM knob to view the value options for that parameter.
4.Use the PROGRAM/BPM knob to select a value.
5.Press the TAP TEMPO button (lit orange) to return to the parameter list. Repeat steps 2–5 to edit additional parameters.
6.At this point, you can either press the WRITE button (blinking) to save the changes you have made, or you can press the SHIFT button to exit without saving.
TIP: While the TAP TEMPO button is lit orange, you can press the TAP TEMPO button to return to the preceding page.
14
About each function
[1] CARD
Displays information about the SD card, or formats the SD card (→p.16: Using an SD card).
[2] LOAD
Loads data from the SD card into the KAOSSI-
LATOR PRO (→p.18: Loading from an SD card).
[3] SAVE
Saves data from the KAOSSILATOR PRO to the SD card (→p.17: Saving to SD card).
[4] MIDI
Adjusts MIDI-related settings (→p.20: MIDI functions).
[5] PAD LED
Prog: This turns on/off the function that displays the program name in the touch pad LED when a program change occurs.
ILLU: This specifies the illumination shown in the pad LED when a certain time has elapsed since you took your hand off the touch pad.
“oFF”: Illumination will be off.
“ChAr”: A text string will be scrolled. You can use the editor software to edit this text string.
“TYP.1–8”: Illumination in a variety of patterns will be displayed.
“TYP.C”: Illumination patterns TYP.1 through TYP.8 will be switched automatically.
TIP: Illumination will not occur if Hold is active, nor when you’re making function settings.
TIP: You can download the KAOSSILATOR PRO Editor from the Korg website. (http://www.korg.com)
Scrl: Specifies the speed setting used for
the text to scroll. This setting determines the speed used for the pad LED to scroll. You can choose Slow, Mid, or Fast speeds.
TIP: You can’t change the speed of the illumination display.
[6] UTILITY
Adjusts settings for touch pad correction, loads program memory, or sets the loop recorder’s
BPM SYNC function.
PrLd: Selects the content that will be loaded from program memory.
“PrNo.”: Only the program will be loaded. “ALL.P”: All stored settings (program, scale, key, note range) will be loaded.
CrCt: Turns the Touch Pad Correction function on/off.
SYNC: Specifies whether loop recorder operations will synchronize to BPM.
If this is on, the recorder will synchronize to BPM, but the sound may be interrupted at the beginning of the phrase. If this is off, the recorder will not synchronize to BPM, but there will be no interruption of the sound. However if you change the length of the phrase or if you change the BPM, the recorder will automatically operate as if SYNC were on.
TIP: When operating with BPM SYNC off, the TAP TEMPO button will blink green. When operating with BPM SYNC on, the TAP TEMPO button will blink red.
 In order to operate with SYNC turned off, you must either start just after turning on the KAOSSILATOR PRO, or initialize all banks, and then match the length of the phrases before you record. Even if SYNC turns on automatically, there has been no change to the SYNC setting, so turning the power off and on again will make the KAOSSILATOR PRO operate with this setting off.
[7] USB
You can connect the KAOSSILATOR PRO to your computer and read/write the contents of the inserted card via USB (→p.18: Accessing the SD card from your computer).
[8] EXT.CTRL
This lets you use the KAOSSILATOR PRO as a MIDI controller.
The MIDI message assigned to each controller using the KAOSSILATOR PRO Editor will be transmitted (→p.22: Using the KAOSSILATOR PRO as a MIDI controller).
TIP: You can download the KAOSSILATOR PRO Editor from the Korg website. (http://www.korg.com)
15
Using an SD card
You can use an SD card to save or load internal data.
Audio files (WAV format or AIFF format) that you’ve created on your computer can also be loaded.
 Before you can use the SD card, you must format it in the KAOSSILATOR PRO. Don’t use your computer or digital camera to format (initialize) a card you plan to use with the KAOSSILATOR PRO. If the card was formatted on a different device, it may not work correctly with the KAOSSILATOR PRO.
TIP: The SD card is not included. It must be purchased separately.
TIP: The KAOSSILATOR PRO can use SD cards up to 2 Gbytes in capacity.
TIP: The KAOSSILATOR PRO cannot use SDHC or SDXC cards.
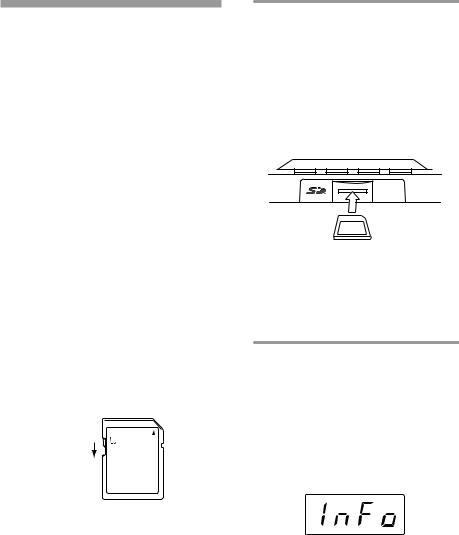
About the write protect setting of an SD card
SD cards have a write protect switch that prevents the data from being overwritten accidentally and lost. If you set the card’s switch to the protected setting, it will be impossible to write or erase data on the card, or to format it. If you need to save edited data on the card, move the switch back to its original unprotected setting.
Write protect switch 
Protected
Handling SD cards
Please carefully read and observe the instructions that came with your SD card.
 Format your SD card in the KAOSSILATOR PRO before using it. If you use an SD card that was formatted by a different device, it may be unusable, or you might not be able to enter Function parameters. If this occurs, you may be asked to format the card.
Inserting or removing SD cards
Inserting an SD card
Taking care that the SD card is oriented correctly, push into the slot until it locks into place with a click. Insert the card, making sure that it is oriented correctly. The gold contacts should be facing down, and the angled corner to your right.
 SD Card Slot
SD Card
Removing an SD card
Press the SD card inward until it pops outward with a click; then pull out the card to remove it.
Checking the total capacity of the card
Here is how you can display the total capacity of the SD card.
1.Hold down the SHIFT button and press the PROGRAM MEMORY 1 (CARD) button.
2.Use the PROGRAM/BPM knob to select “InFo” (card capacity).
3.Press the PROGRAM/BPM knob to view the total capacity of the card.
Press the TAP TEMPO button (lit orange) to return select another parameter, press the SHIFT button to return to normal operation.
16

Checking the remaining capacity of the card
Here is how you can display the remaining ca-
pacity of the SD card.
1.Hold down the SHIFT button and press the PROGRAM MEMORY 1 (CARD) button.
2.Use the PROGRAM/BPM knob to select “FrEE” (remaining card capacity).
3.Press the PROGRAM/BPM knob to view the remaining capacity of the card.
Press the TAP TEMPO button (lit orange) to return select another parameter, press the SHIFT button to return to normal operation.
Formatting the SD card
 Before you can use an SD card, you must format it on the KAOSSILATOR PRO. The card may not work if it was formatted on another device.
All data on the card will be lost when you format it.
1.Hold down the SHIFT button and press the PROGRAM MEMORY 1 button.
2.Use the PROGRAM/BPM knob to select “ForM.”
3.Press the PROGRAM/BPM knob; the display will indicate  (No.)
(No.)
4.Use the PROGRAM/BPM knob to select
 (Yes) and press the PROGRAM/BPM knob to format the card. When formatting is complete, the display will indicate
  (End.)
Press the TAP TEMPO button (lit orange) to return select another parameter, press the SHIFT button to return to normal operation.
 If an SD card operation fails, the display will indicate “Err” (Error).
Saving to SD card
Here’s how you can save the loop recorder data, program memories, and all settings onto an SD card.
1.Hold down the SHIFT button and press the PROGRAM MEMORY 3 (SAVE) button.
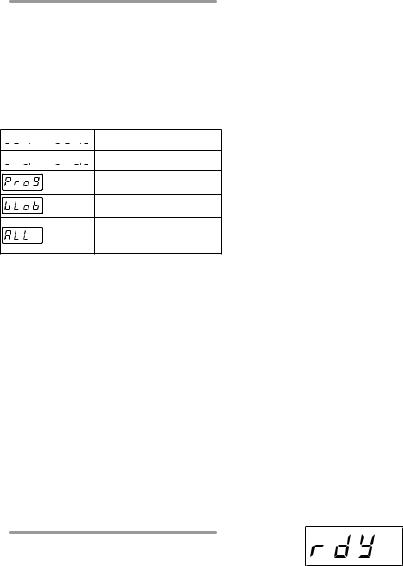
2.Use the PROGRAM/BPM knob to select the type of data that you want to save.
 –
–  Loop recorder data
Contents of program memory
MIDI, pad LED, and utility setting data file
The contents of “LoP.A”– “LoP.D”, “Prog,” and “GLob” combined in a single file
3. Press the PROGRAM/BPM knob; the display will show the file numbers (0–9, or 0–99 for loop recorder data) that can be saved. Use the PROGRAM/BPM knob to select the file number in which you want to save the data.
 A new file will be added.


 The data will overwrite an existing file (in


 this case, file 1).


 There is an identically-named file or


 folder that cannot be rewritten.
4. To execute the Save operation, press the PROGRAM/BPM knob, then use the PROGRAM/BPM knob to select  (Yes), and finally press the PROGRAM/BPM knob. When saving is completed, the display will indicate
  (End.) Press the SHIFT button to return to the program indication.
 Never turn off the power or remove the SD card while data is being saved. Doing so may render the SD card unusable.
TIP: If the SD card is protected, the display will indicate “Prct” and it will not be possible to save. Remove the card, turn off write protect, and try the operation again.
 Never turn off the power or remove the SD card while data is being formated. Doing so may render the SD card
unusable.
17
Loading from an SD card
Here’s how you can load data from an SD card.
1. Hold down the SHIFT button and press the
PROGRAM MEMORY 2 (LOAD) button.
2. Use the PROGRAM/BPM knob to select the type of data that you want to load.
 –
–  Loop recorder data
 –
–  A WAV or AIFF file
Contents of program memory
MIDI, pad LED, and utility setting data file
The contents of “LoP.A”– “LoP.D”, “Prog,” and “GLob” combined in a single file
3. Press the PROGRAM/BPM knob; the display will show the file numbers (0–9 or 0–99) that can be loaded. Use the PROGRAM/BPM knob to select the number that you want to load.
TIP: For WAV files and AIFF files, the KAOSSILATOR PRO will recognize only files whose name consists of a two-digit number with a file extension, such as “00.wav” or “99.aif.” If .wav and .aif files with the same two-digit number exist, the WAVE file will take priority.
4. Press the PROGRAM/BPM knob, then use the PROGRAM/BPM knob to select 
(Yes), and finally press the PROGRAM/BPM knob again to execute the Load operation. When loading is complete, the display will indicate  (End.) Press the SHIFT button to return to the program indication.
you press the SHIFT button while communication is occurring, a warning will be displayed, and you won’t be able to exit USB mode.
 Don’t use your computer or digital camera to format (initialize) a card that you plan to use with the KAOSSILATOR PRO. You must use the KAOSSILATOR PRO to perform the formatting operation. If the card was formatted on a different device, it may not work correctly with the KAOSSILATOR PRO.
Connecting the USB connector
If you connect the KAOSSILATOR PRO’s USB connector directly to your computer, you’ll be able to use your computer to manage the data on the card that’s in the KAOSSILATOR PRO’s card slot.
Follow the procedure for the operating system on your computer.
Windows users
 Before you continue, power-on your computer and start up the operating system.
1. Use a USB cable to connect the KAOSSILATOR PRO to your computer.
Plug the connector of the USB cable that is connected to your computer into the KAOSSILATOR PRO’s USB connector.
Make sure that the connector is oriented correctly, and insert it as far as it will go.
TIP: When you connect the KAOSSILATOR PRO for the first time, the standard Windows device driver will be installed automatically.
2.The drive name of the card in the card slot will appear on your computer.
3.Hold down the SHIFT button and press the PROGRAM MEMORY 7 (USB) button. The display will indicate “rdy.”
Accessing the SD card from your computer
The KAOSSILATOR PRO has a USB connector that can be connected to your computer, allowing you to copy settings or loop recorder data from the SD card to your computer for saving (backup).
TIP: If you press the SHIFT button while in USB mode, you’ll return to the program indication, allowing the 18 KAOSSILATOR PRO to operate as a synthesizer. If
The contents of the KAOSSILATOR PRO’s card won’t be visible from your computer until you enter “USB Storage Mode.”
 From this point until you’ve completed step 5, you must not disconnect the USB cable, remove the card from the slot, or switch the power of your computer on or off. Doing so may damage the data.

4.To view the contents of the KAOSSILATOR PRO’s card, open the drive that was added to your computer in step 2.
Copy the desired data onto your computer. You can also copy data from your computer onto the card.
5.Exit USB mode.
In Explorer or My Computer, right-click the “Removable Disk” icon and choose “Remove.” Then press the KAOSSILATOR PRO’s SHIFT button to exit USB mode.
When you’re ready to disconnect the KAOSSILATOR
PRO from your computer, you must first exit USB mode and then disconnect the USB cable.
MacOSX users (OSX 10.4 or later)
1.Use a USB cable to connect the KAOSSILATOR PRO to your computer.
Plug the USB connector into the KAOSSILATOR PRO’s USB connector. Make sure that the connector is oriented correctly, and insert it as far as it will go.
2.Hold down the SHIFT button and press the PROGRAM MEMORY 7 (USB) button.
The display will indicate “buSy.”
3.The drive name of the card in the card slot will appear on your computer.
 While this screen is shown, you must not disconnect the USB cable, remove the card from the slot, or switch the power of your computer on or off. Doing so may damage the data.
4.To view the contents of the KAOSSILATOR PRO’s card, open the drive that was added to your computer in step 2.
Copy the desired data onto your computer. You can also copy data from your computer onto the card.
5.When you’re ready to disconnect the KAOSSILATOR PRO, drag the drive from the desktop into the Trash.
Then press the KAOSSILATOR PRO’s SHIFT button to exit USB mode.
When you’re ready to disconnect the KAOSSILATOR
PRO from your computer, you must first exit USB mode and then disconnect the USB cable.
About the contents of the card
The following files and folders will be created in the root directory of the card.
Files you can save
LOOP REC Data |
00–99.KOS |
GLOBAL |
0–9.KOG |
PROGRAM MEMORY Set |
0–9.KOP |
All Data |
0–9.KOA |
Files you can load
LOOP REC Data |
00– 99.KOS |
|
00– 99.WAV |
|
00–99.AIF |
GLOBAL |
0–9.KOG |
PROGRAM MEMORY Set |
0–9.KOP |
All Data |
0–9.KOA |
TIP: If an All data file named “0.KOA” exists on the card, this file will automatically be loaded when you start up the KAOSSILATOR PRO.
TIP: The WAVE or AIFF files that can be loaded must be 8/16-bit linear PCM mono or stereo files. Data that is other than 16-bit will be handled by discarding the bits below 16 bits or by filling the lacking bits with zeros. You must place the files in the root folder of the SD card.
TIP: Since WAVE and AIFF files do not contain the tempo or length settings needed for playback on the KAOSSILATOR PRO’s loop recorder, the tempo and length will automatically be set to appropriate values when the file is loaded. If the data is longer than can be recorded in one bank, it will be truncated. If the data is shorter than can be recorded in one bank, the remaining length will be handled as silence.
19
MIDI functions
What is MIDI?
MIDI stands for Musical Instrument Digital Interface, and is a world-wide standard for exchanging a variety of performance-related information between electronic musical instruments and computers.
About the MIDI implementation chart
The MIDI implementation chart is designed to let you compare the MIDI messages that can be transmitted and received by a device. When using two MIDI devices, you can compare their MIDI implementation charts to see which messages are compatible between them. You can download the KAOSSILATOR PRO’s MIDI implementation chart from the Korg website. (http://www.korg.com)
* Details on the MIDI functionality are provided in the separate MIDI implementation. To obtain the MIDI implementation, please contact your local Korg distributor.
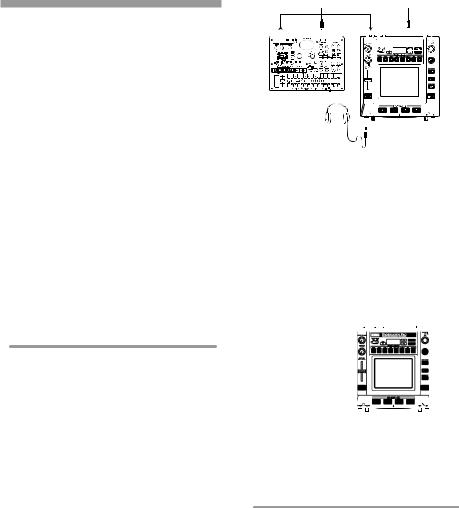
MIDI connections
Commercially available MIDI cables are used to transmit and receive MIDI messages. Connect these cables between the MIDI connectors of the KAOSSILATOR PRO and the MIDI connectors of the external MIDI device where you want to transfer data.
MIDI IN connector: This connector receives MIDI messages from another MIDI device. Connect it to the MIDI OUT connector of the external device.
MIDI OUT connector: This connector transmits messages from the KAOSSILATOR PRO.
Connect it to the MIDI IN connector of the external device.
OUTPUT |
|
|
|
LINE IN MIDI IN |
||||
|
||||||||
|
|
|
|
|
|
|
|
|
|
|
|
|
|
|
|
|
|
|
|
|
|
|
|
|
|
|
|
|
|
|
|
|
|
|
|
KORG ELECTRIBE MX
Connecting to your computer
You can use a USB cable to connect the KAOSSILATOR PRO directly to a computer equipped with a USB connector, and transmit or receive the same MIDI messages as via the MIDI connectors.
In order to use the KAOSSILATOR PRO Editor, you must connect the KAOSSILATOR PRO to your computer via USB.
USB
Computer
TIP: To use the USB connection, the Korg USB-MIDI driver must be installed in your computer. Download the Korg USB-MIDI driver from the Korg website (http://www.korg.com), and install it as described in
the documentation included with the driver.
MIDI settings
In addition to using the KAOSSILATOR PRO as a synthesizer, you can also use it as a realtime controller for an external MIDI device.
By connecting the KAOSSILATOR PRO to your MIDI sequencer and recording the MIDI messages that are transmitted when you operate the touch pad, you can play back the touch pad operations.
|
If you turn off the power without storing your settings, |
|
the settings will revert to their original state, and will not be |
20 |
saved. |
Setting the MIDI channel
Here’s how to set the KAOSSILATOR PRO’s MIDI channel.
1.Hold down the SHIFT button and press PROGRAM MEMORY 4 (MIDI).
2.Use the PROGRAM/BPM knob to select “MSSG,” and then press the PROGRAM/BPM knob.
3.Use the PROGRAM/BPM knob to select “GL.Ch” (Global MIDI channel), and then press the PROGRAM/BPM knob.
The currently-specified MIDI channel is displayed. Use the PROGRAM/BPM knob to change the MIDI channel.
4. If you want to store the setting, press the WRITE button. If you don’t want to store the setting, press the SHIFT button.
TIP: So that data can be sent independently to mulTIP:le MIDI devices via a single MIDI cable, MIDI has sixteen channels (1–16). If the transmitting device is set to MIDI channel “1,” the receiving device must also be set to channel “1” in order for MIDI messages to be received.
Changing the control change numbers or note numbers
1.Hold down the SHIFT button and press PROGRAM MEMORY 4 (MIDI).
2.Use the PROGRAM/BPM knob to select “MSSG,” and then press the PROGRAM/BPM knob.
3.Use the PROGRAM/BPM knob to select the control of the assignment that you want to change, and then press the PROGRAM/BPM knob.
Transmit/receive note messages

 –
– 
 LOOP REC BANK buttons
Transmit control change messages
Pad Touch
Program Volume
GATE ARP TIME/SPEED slider / Gate Time
GATE ARP TIME/SPEED slider / Gate Speed
GATE ARP button
4.Use the PROGRAM/BPM knob to specify a control change number or note number in the range of 0–127. If you choose a control number that has already been assigned to a different controller, the decimal point will light-up. If you assign that same number, this controller will transmit and receive the same control change message as the other controller.
5.If you want to store the setting, press the WRITE button. If you don’t want to store the setting, press the SHIFT button.
Applying the MIDI message filter
1. |
Hold down the SHIFT button and press |
|||
PROGRAM MEMORY 4 (MIDI). |
|
|||
2. |
Use the PROGRAM/BPM knob to select |
|||
“FiLt,” and then press the PROGRAM/BPM |
||||
knob. |
|
|
|
|
3. |
Use the PROGRAM/BPM knob to select |
|||
the message that you want to filter, and then |
||||
press the PROGRAM/BPM knob. |
|
|||
You can filter the transmission and reception |
||||
of |
(clock), |
(program change), |
||
|
(control |
change), |
(note), |
and |
4. |
(system exclusive) messages. |
|
||
Use the PROGRAM/BPM knob to disable |
||||
or enable the message. Choose |
(Dis- |
|||
abled; i.e., filtered) or |
(Enabled; i.e., not |
|||
filtered). For |
(clock), you can specify |
|||
|
(Int), |
(Ext), or |
(Auto). |
21 |

 (Int): The KAOSSILATOR PRO will operate using its internal clock. Choose this setting if you’re using the KAOSSILATOR PRO on its own, or as the master (the controlling device), where external MIDI devices are synchronized.
 (Ext): The KAOSSILATOR PRO will synchronize to MIDI clock messages that are received from an external MIDI device connected to the MIDI IN connector or to the USB connector.
TIP: If you choose “Ext” as the clock setting, USB will take priority if clock messages are received via both MIDI and USB.
TIP: For more about settings for synchronizing with an external MIDI device, please refer to the owner’s manual of the device you’re using.
 (Auto): If MIDI clock messages are received from an external MIDI device connected to the MIDI IN connector or USB connector, the KAOSSILATOR PRO will automatically operate using the “Ext” setting. If clock messages are not being received, the KAOSSILATOR PRO will operate using the “Int” setting.
5. If you want to store the setting, press the WRITE button. If you don’t want to store the setting, press the SHIFT button.
Using the KAOSSILATOR PRO as a MIDI controller
In External Control mode you can use the KAOSSILATOR PRO as a MIDI controller to control an external MIDI device such as a synthesizer, or a software synthesizer on your
computer.
Example connections for External Control mode
MIDI OUT |
|
MIDI IN |
||||
|
|
|
|
|
|
|
|
|
|
|
|
|
|
|
|
|
|
|
|
|
|
|
|
|
|
|
|
KORG ELECTRIBE MX
TIP: For details on the parameters that can be controlled, please refer to the owner’s manual of the device or software that you’re using.
TIP: Depending on the device or software that you’re using, there may be cases where parameters cannot be controlled, or cases where you must adjust settings first. Please refer to the owner’s manual for the device or software that you’re using.
Switching to External Control mode
Hold down the SHIFT button and press the PROGRAM MEMORY 8 (EXT.CTRL) button. To exit External Control mode, press the SHIFT button.
MIDI message assignments in External Control mode
Assignments for the MIDI messages transmitted in External Control mode are made using the KAOSSILATOR PRO Editor.
TIP: The KAOSSILATOR PRO Editor can be downloaded free of charge from the Korg website (http:// www.korg.com). For details on how to adjust these settings, please refer to the documentation included with the KAOSSILATOR PRO Editor.
22

Controllers available in External Control mode
You can use the following controllers in External Control mode.
If note numbers are assigned to the touch pad, you can also specify the scale, key, and note range in the same way as when the KAOSSILATOR PRO operates as a synthesizer.
Controller |
Transmitted MIDI message (factory setting) |
Touch pad X-axis |
Note on/off (#48–#72)* |
Touch pad Y-axis (entire range) |
Control change (#117) |
Touch pad Y-axis (middle to top) |
Control change (#118) |
Touch pad Y-axis (middle to bottom) |
Control change (#119) |
Touch pad on/off |
Control change (#92) |
PROGRAM VOLUME knob |
Control change (#94) |
GATE ARP TIME/SPEED slider |
Control change (#93) |
GATE ARP button |
Control change (#95) |
PROGRAM MEMORY 1 button |
Control change (#49) |
PROGRAM MEMORY 2 button |
Control change (#50) |
PROGRAM MEMORY 3 button |
Control change (#51) |
PROGRAM MEMORY 4 button |
Control change (#52) |
PROGRAM MEMORY 5 button |
Control change (#53) |
PROGRAM MEMORY 6 button |
Control change (#54) |
PROGRAM MEMORY 7 button |
Control change (#55) |
PROGRAM MEMORY 8 button |
Control change (#56) |
LOOP RECORDER BANK A button |
Control change (#80) |
LOOP RECORDER BANK B button |
Control change (#81) |
LOOP RECORDER BANK C button |
Control change (#82) |
LOOP RECORDER BANK D button |
Control change (#83) |
PROGRAM/BPM knob |
Program change (#0–#127), Timing clock |
* If note range is set to “Prog” and key is set to “C”
TIP: If note range is set to “Prog,” the range will be two octaves; if set to “FULL,” the range will be eight octaves.
Messages that can be transmitted/received outside of External Control mode
With the factory settings, the following MIDI messages can be transmitted and received.
Data and MIDI messages transmitted and received (factory settings)
Touch pad X-axis |
Control change (#12) |
Touch pad Y-axis |
Control change (#13) |
Touch pad on/off |
Control change (#92) |
GATE ARP on/off |
Control change (#90) |
GATE ARP time |
Control change (#93) |
GATE ARP speed |
Control change (#91) |
PROGRAM VOLUME knob |
Control change (#94) |
LOOP RECORDER BANK A button |
Note on/off (#36) |
LOOP RECORDER BANK B button |
Note on/off (#37) |
LOOP RECORDER BANK C button |
Note on/off (#38) |
LOOP RECORDER BANK D button |
Note on/off (#39) |
PROGRAM/BPM knob |
Program change, bank select, MIDI timing clock (only if |
|
the clock setting is Int) |
23

Specifications
|
Number of programs |
200 (including 15 effect programs) |
||
|
|
|
|
|
|
Main controllers |
Touch pad, GATE ARP TIME/SPEED slider |
||
|
|
|
|
|
|
Display |
4-digit LED display |
||
|
|
|
|
|
|
Connectors |
OUTPUT (stereo, RCA jacks), LINE IN (stereo, |
||
|
|
RCA jacks), MIC IN (unbalanced 6.3 mm phone |
||
|
|
jack), HEADPHONES (6.3 mm stereo phone jack), |
||
|
|
MIDI IN/OUT, USB (type B) |
||
|
|
|
|
|
|
Power supply |
DC9V |
|
|
|
|
|||
|
Dimensions and weight |
210 (W) x 226 (D) x 49 (H) mm, 1.3 kg |
||
|
|
8.27” x 8.90” x 1.93", 2.87 lbs. |
||
|
|
|
|
|
|
Operating temperature |
0–+40 ˚C (non-condensing) |
||
|
|
|
|
|
|
Included items |
AC adapter, protective sheet for touch pad |
||
* Appearance and specifications of this product are subject to change without notice.
24
 Loading...