

Korg Grandstage 88, Grandstage 73 Owner's Manual
Owner’s Manual
Manuel d’utilisation
Bedienungsanleitung
Manual de usuario
取扱説明書
EFGSJ 5
IMPORTANT SAFETY INSTRUCTIONS
1) Read these instructions.
2)
ep these instructions.
Ke
3)
ed all warnings.
He
4)
llow all instructions.
Fo
5)
ot use this apparatus near water.
Do n
6)
ean only with dry cloth.
Cl
7)
ot block any ventilation openings. Install in accordance with
Do n
the manufacturer’s instructions.
8)
ot install near any heat sources such as radiators, heat
Do n
registers, stoves, or other apparatus (including ampliers) that
produce heat.
Do n
9)
ot defeat the safety purpose of the polarized or groundingtype plug. A polarized plug has two blades with one wider than the
other. A grounding type plug has two blades and a third grounding
prong.
The wide blade or the third prong are provided for your safety.
If the provided plug does not t into your outlet, consult an
electrician for replacement of the obsolete outlet.
10)
otect the power cord from being walked on or pinched
Pr
particularly at plugs, convenience receptacles, and the point
where they exit from the apparatus.
11)
ly use attachments/accessories specied by the manufacturer.
On
12) Use only with the cart, stand, tripod, bracket, or
table specied by the manufacturer, or sold with
the apparatus. When a cart is used, use caution
when moving the cart/apparatus combination to
avoid injury from tip-over.
13) Unplug this apparatus during lightning storms or when unused for
long periods of time.
14)
fer all servicing to qualied service personnel. Servicing is
Re
required when the apparatus has been damaged in any way, such
as power-supply cord or plug is damaged, liquid has been spilled
or objects have fallen into the apparatus, the apparatus has been
exposed to rain or moisture, does not operate normally, or has
been dropped.
•
RNING —This apparatus shall be connected to a mains socket
WA
outlet with a protective earthing connection.
•
ins powered apparatus shall not be exposed to dripping or
Ma
splashing. No objects lled with liquids, such as vases or drinking
glasses, shall be placed on the apparatus.
•
rning off the power switch does not completely isolate this
Tu
product from the power line.
•
ep the power plug easily accessible. Do not install this
Ke
equipment far from a power outlet and/or power strip.
•
ot install this equipment in a conned space such as a box for
Do n
the conveyance or similar unit.
• Excessive sound pressure from earphones and headphones can
cause hearing loss.
THE FCC REGULATION WARNING (for USA)
NOTE: This equipment has been tested and found to comply with
the limits for a Class B digital device, pursuant to Part 15 of the FCC
Rules. These limits are designed to provide reasonable protection
against harmful interference in a residential installation. This equipment
generates, uses, and can radiate radio frequency energy and, if not
installed and used in accordance with the instructions, may cause
harmful interference to radio communications. However, there is no
guarantee that interference will not occur in a particular installation. If
this equipment does cause harmful interference to radio or television
reception, which can be determined by turning the equipment off and
on, the user is encouraged to try to correct the interference by one or
more of the following measures:
Re
•
orient or relocate the receiving antenna.
• Increase the separation between the equipment and receiver.
Co
•
nnect the equipment into an outlet on a circuit different from that to
which the receiver is connected.
• Consult the dealer or an experienced radio/TV technician for help.
If items such as cables are included with this equipment, you must use
those included items.
Unauthorized changes or modication to this system can void the user’s
authority to operate this equipment.
DECLARATION OF CONFORMITY (for USA)
Responsible Party : KORG USA INC.
Address :
Telephone :
Equipment Type :
Model : GS1-88, GS1-73
This device complies with Part 15 of FCC Rules. Operation is subject to
the following two conditions:
(1) This device may not cause harmful interference,and (2) this device
must accept any interference received, including interference that may
cause undesired operation.
31
1-
ST
6 SOUTH SERVICE ROAD, MELVILLE, NY
631-390-6500
AGE PIANO
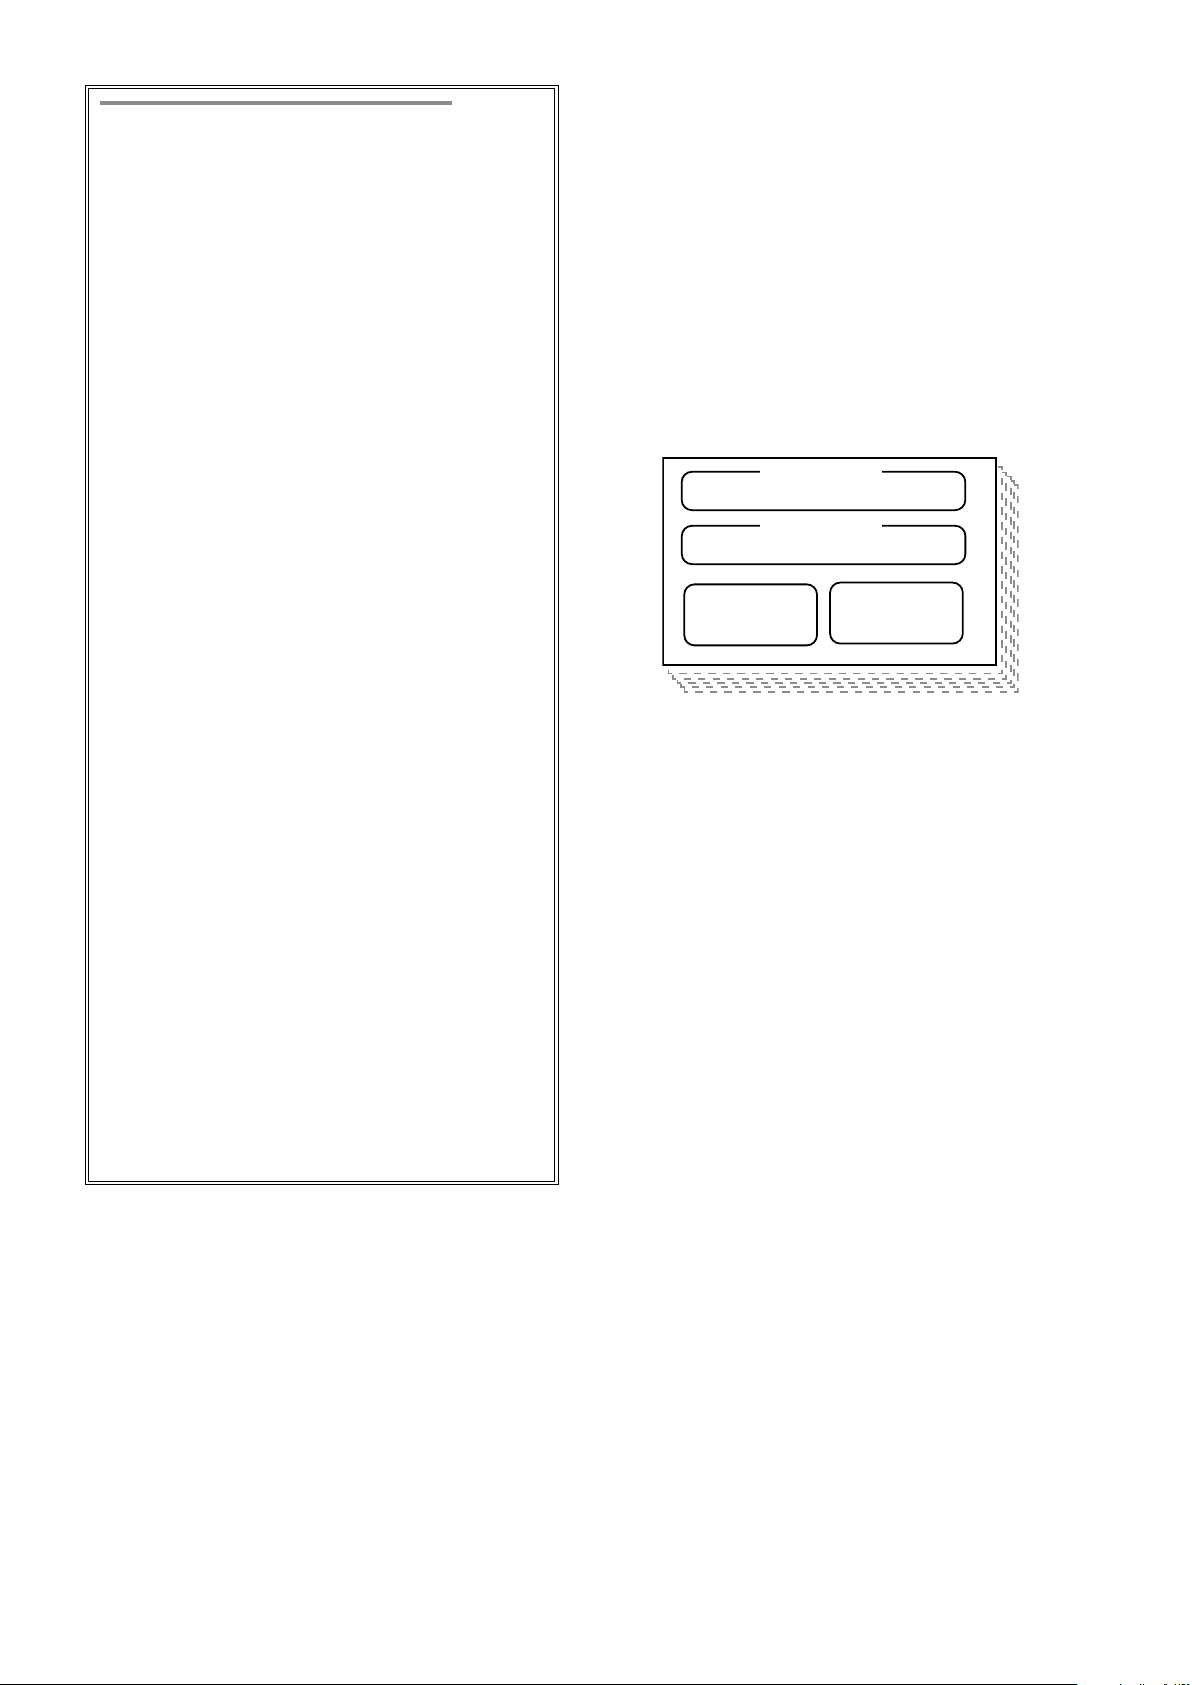
Notice regarding disposal (EU only)
When this “crossed-out wheeled bin” symbol is displayed on
the product, owner’s manual, battery, or battery package, it
signies that when you wish to dispose of this product, manual,
package or battery you must do so in an approved manner.
Do not discard this product, manual, package or battery
along with ordinary household waste. Disposing in the correct
manner will prevent harm to human health and potential
damage to the environment. Since the correct method of disposal
will depend on the applicable laws and regulations in your locality,
please contact your local administrative body for details. If the battery
contains heavy metals in excess of the regulated amount, a chemical
symbol is displayed below the “crossed-out wheeled bin” symbol on
the battery or battery package.
*
l product names and company names are the trademarks or registered
Al
trademarks of their respective owners.
Data handling
Incorrect operation or malfunction may cause the contents of memory to
be lost, so we recommend that you save important data on USB storage
devices or other media. Please be aware that Korg will accept no responsibility for any damages which may result from loss of data.
The lightning ash with arrowhead symbol within an
equilateral triangle, is intended to alert the user to the
presence of uninsulated “dangerous voltage” within the
product’s enclosure that may be of sufcient magnitude to
constitute a risk of electric shock to persons.
The exclamation point within an equilateral triangle is
intended to alert the user to the presence of important
operating and maintenance (servicing) instructions in the
literature accompanying the product.
This product has been manufactured according to strict specications
and voltage requirements that are applicable in the country in which it
is intended that this product should be used. If you have purchased this
product via the internet, through mail order, and/or via a telephone sale,
you must verify that this product is intended to be used in the country in
which you reside.
WARNING: Use of this product in any country other than that for which it
is intended could be dangerous and could invalidate the manufacturer’s
or distributor’s warranty.
Please also retain your receipt as proof of purchase otherwise your
product may be disqualied from the manufacturer’s or distributor’s
warranty.
2
IMPORTANT NOTICE TO CONSUMERS
Table of Contents
IMPORTANT SAFETY INSTRUCTIONS -------------------- 2
About the owner’s manual --------------------------------------3
Main Features -------------------------------------------------- 4
Panel description and functions
Front panel -----------------------------------------------------------4
Rear panel
------------------------------------------------------------ 6
Preparations ---------------------------------------------------- 7
Making connections ----------------------------------------------- 7
Connecting audio devices
C
onnecting the power cord included with
this keyboard
urning the power on/o
T
urning the power on ------------------------------------------ 7
T
Turning the power o
List
ening to the demo songs
----------------------------------------------------- 7
Selecting and playing sounds ----------------------------- 8
Selecting favorites -------------------------------------------------9
Selecting a program
U
sing the controllers
P
itch bend wheel ---------------------------------------------- 10
Modulation wheel--------------------------------------------- 10
SW1, SW2 -------------------------------------------------------- 10
FOOT CONTROLLERS
A
djusting the dynamics and equalizer
D
ynamics -------------------------------------------------------- 11
Equalizer
T
ranspose and panel lock
T
ranspose-------------------------------------------------------- 11
Panel lock
--------------------------------------------------------- 11
----------------------------------------------- 9
-------------------------------------------- 10
----------------------------------------- 10
-------------------------------------------------------- 11
Creating favorites ------------------------------------------- 12
Changing the programs used --------------------------------- 12
Creating layered sounds
C
reating split sounds
S
aving a favorite that has been changed ------------------ 13
Editing a program
Ho
w to edit
R
everb/delay settings
----------------------------------------------------- 13
----------------------------------------- 12
------------------------------------------------ 13
------------------------------------------- 15
-------------------------- 4
------------------------------------ 7
----------------------------------------7
----------------------------------------- 7
------------------------------------ 8
--------------------- 11
-------------------------------------- 11
------------------------------------- 12
Thank you for purchasing the Korg Grandstage.
To help you get the most out of your new instrument,
please read this manual carefully.
About the owner’s manual
The documentation for this product consists of the following.
• Owner’s Manual (what you’re reading)
MIDI guide (PDF)
•
(you can download it from the Kor
http://www.korg.com)
• Sound Name List (PDF)
(you can download it from the Korg website
http://www.korg.com)
Owner’s Manual
This provides a simple explanation of the Grandstage’s main
functionality. Read this rst.
MIDI guide (PDF)
This guide also explains the MIDI messages and other
information that can be handled by the Grandstage 88/73. Read
this in order to use the Grandstage 88/73 with external MIDI
devices, DAWs and so on.
Download this manual at http://www.korg.com.
Sound Name List (PDF)
This contains a list of the programs, favorites and demo songs on
the Grandstage 88/73.
Download this manual at http://www.korg.com.
Descriptions used in the User’s Manual
There are two Grandstage models, the Grandstage 88 with 88
keys, and the Grandstage 73 with 73 keys.
The Grandstage is referred to as “Grandstage” in this manual
unless otherwise specied, or as “this keyboard”. The panel
diagrams and other illustrations feature the Grandstage 88.
Symbols ,
These symbols respectively indicate a caution, a supplementary
note, or a tip.
Note
,
Tips
Display indications
The values of various parameters shown in the manual are only
examples; they might not match what you see on the Grandstage’s
display.
g website
System settings ---------------------------------------------- 15
Types of system settings ---------------------------------------15
Steps for making system settings
ystem setting parameters ------------------------------------ 15
S
Calibrating the pedal
esetting, saving and loading data
R
----------------------------------------- 17
--------------------------- 15
----------------------- 18
Appendices --------------------------------------------------- 20
Trouble shooting ------------------------------------------------- 20
Error messages ---------------------------------------------------- 21
Specications ------------------------------------------------ 22
3

Main Features
Panel description and
The Korg Grandstage is a stage piano that was designed in the
pursuit of onstage playability, offering a rich variation of sounds
including the greatest acoustic and electric piano sounds, along
with an intuitive user interface.
The greatest piano sounds
• The Grandstage includes ve of the world’s most famous
grand piano sounds. An SGX-2 dedicated acoustic piano
sound generator makes both delicate and powerful, richly
expressive sounds a reality with large, non-looping waveform
samples in full stereo sound across the keyboard.
•
The Grandstage includes vintage electric piano sounds from
six classic models. The EP-1 dedicated electric piano sound
generator makes the best sound a reality
in sound and delicately-modeled panel effects, cabinets and so
on.
, with natural changes
Rich variation of sounds
• The Grandstage offers 500 types of sounds separated into
two sections, KEYBOARDS and ENSEMBLE. Selecting
a category and variation within each section allows you to
choose your sound and play right away. The names of sounds
are shown on an easy-to-read organic EL (electro-luminescent)
display.
Wi
•
thin the KEYBOARDS section, you can select grand piano,
upright piano, electric piano, clav, and organ sounds. Within
the ENSEMBLE section, you can select sound commonly
used in stage performance such as strings, brass, synthesizer,
and bells.
The Grandstage features seven high-quality sound synthesis
•
engines, including the SGX-2 (acoustic piano), EP-1 (electric
piano), CX-3 (tonewheel organ),
organ, AL-1 (analog modeling), and the HD-1 (PCM sound
generator).
A powerful ef
•
each sound is already preset, such the standard assortment of
effects like phaser and chorus for electric piano. Also, on the
REVERB/DELAY section, reverb and delay can be instantly
set.
Layer and split functions can be set instantly.
•
stack two sounds together, or to play two different sounds on
the left and right of the keyboard.
fects section is provided. The optimum effect for
VOX organ, compact electric
This is used to
The pursuit of onstage playability
• FAVORITE buttons are located at the center of the front panel.
These 16 buttons can be combined to register 64 types of
sounds or settings. These sounds and settings can be recalled
instantly while playing live.
•
The DYNAMICS knob can be used to instantly change how
the volume and sound responds to changes in touch (i.e., how
hard or soft the keys are played). The performance feel can be
customized to match the playing style required (such as solos,
ensembles, and bands) and the song.
tion can be used to instantly change the characteristics of the
entire sound, to match the acoustics of the performance venue.
•
A smooth sound transition (SST) feature eliminates dropouts
in sound when changing sounds, making it possible to switch
sound and ef
•
The Grandstage uses an RH3 (Real weighted-Hammer action
3) keyboard. This keyboard recreates the feel of a grand piano,
letting you perform highly nuanced, delicate passages.
fects naturally.
The EQUALIZER sec-
4
functions
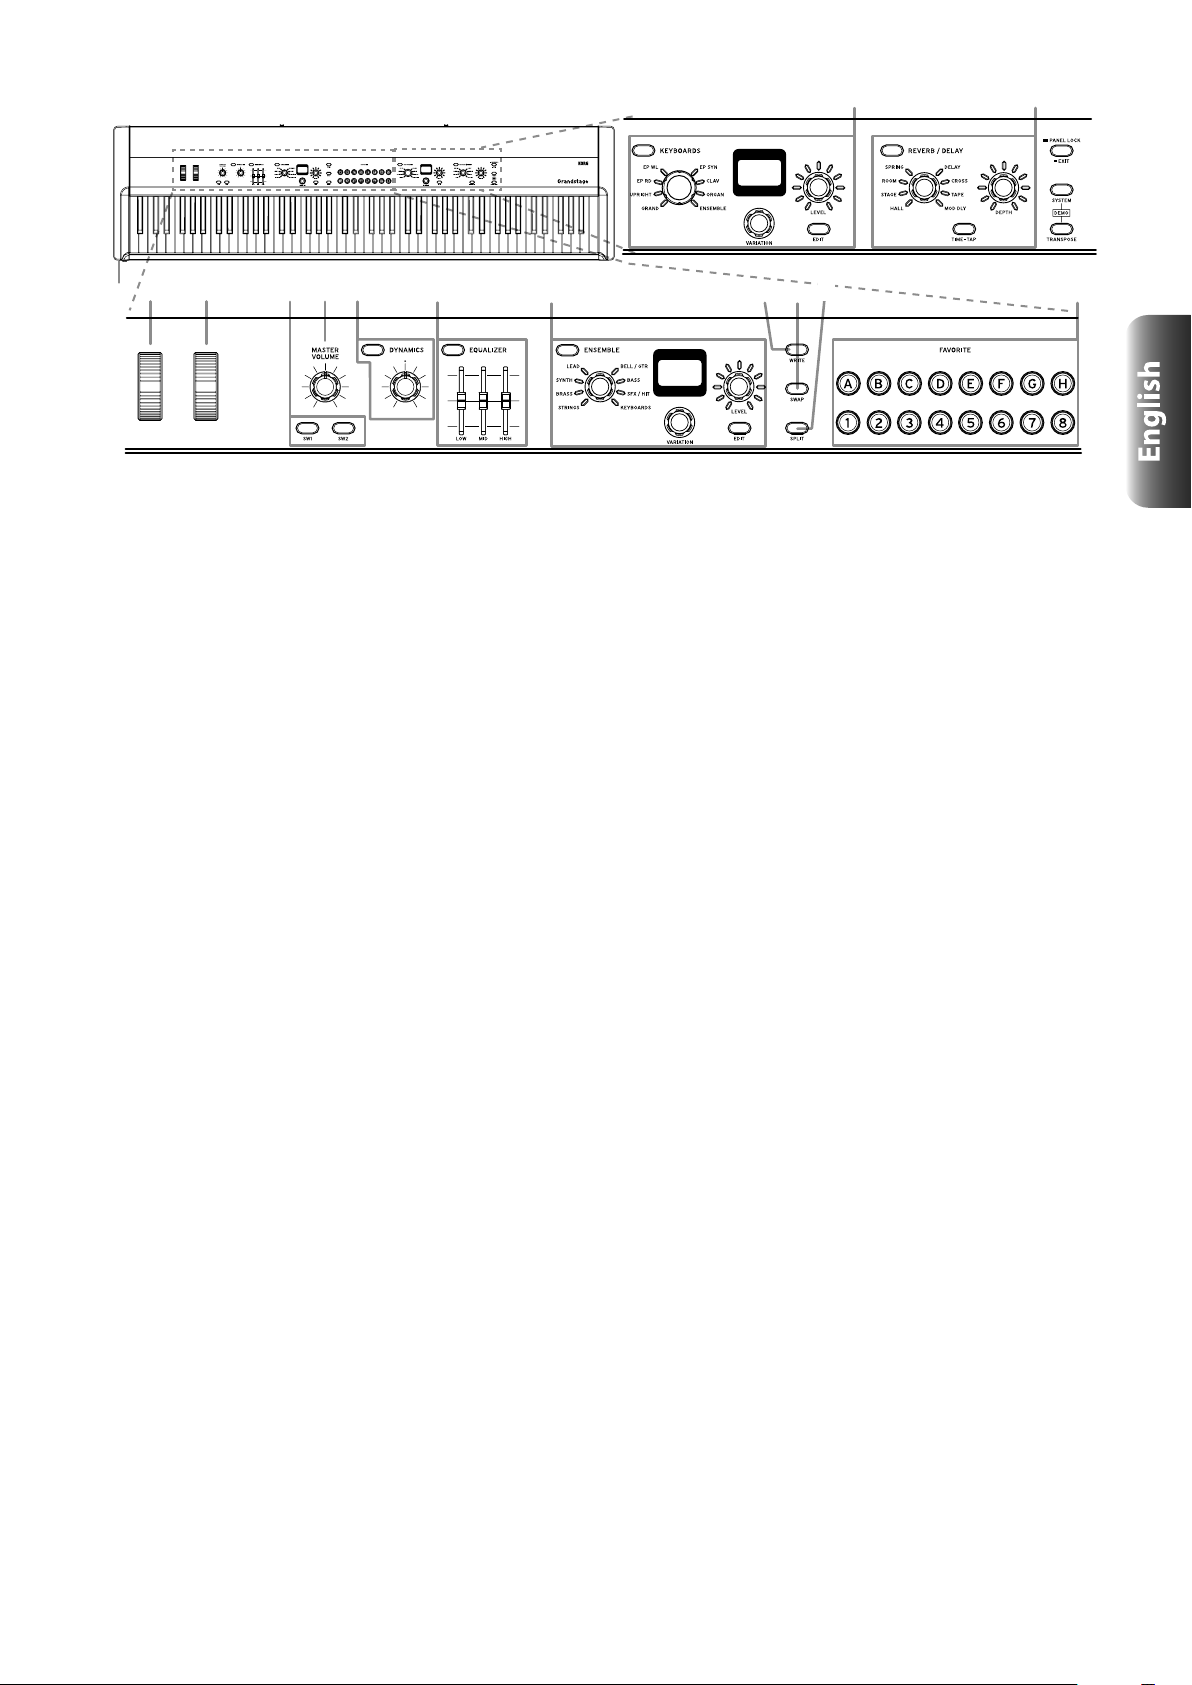
Front panel
1. Headphone jack (Front left) (see page7)
Here you can connect a set of headphones equipped with a
1/4" (φ6.3 mm) stereo phone-plug. This jack will output the
same signals as the AUDIO OUTPUT. Use the MASTER
VOLUME knob to adjust the headphone volume.
Note:
2. Pitch bend wheel (see page10)
Controls the pitch of notes played.
Moving the wheel up causes the pitch to rise, while moving
the wheel down causes the pitch to fall.
3. Modulation wheel (see page10)
Controls the vibrato effect applied to the sound.
Moving the wheel up will apply the effect set for each sound.
4. SW1 button, SW2 button (see page10)
These buttons control the sound.
SW1 controls the tone, and SW2 mainly controls whether
the effect is on/off. The functions that can be controlled are
effectively set for each sound.
5. MASTER VOLUME knob
This adjusts the volume of the AUDIO OUTPUT and
headphone jack.
6. DYNAMICS button, knob (see page11)
Pressing the button to turn DYNAMICS on (the button will
light) will activate the knob.
This adjusts how the volume and tone will be changed in
response to how hard the keys are played (velocity) on the
Grandstage.
7. EQUALIZER button, LOW, MID, HIGH slider
(see page11)
This is a three-band equalizer, placed just before the audio
output.
Pressing the button to turn the equalizer on (the button will
light) will activate the sliders.
8. ENSEMBLE (Ensemble section) (see page9)
This section is used to select and edit programs in the
ENSEMBLE category for non-keyboard instrument sounds,
such as strings and brass. Programs selected and parameters
edited here can be saved as favorites.
ENSEMBLE button
Turns ENSEMBLE programs on (the button will light) or
OFF (the button will go dark). The ENSEMBLE sounds will
not be heard when the button is off.
Category selection knob
Selects the ENSEMBLE program category.
Display
Shows the program name and parameter values while in Edit
mode.
VARIATION knob
Selects programs within categories, as well as parameters
while in Edit mode.
LEVEL knob
Adjusts the volume of the program. The volume level is
shown by the LEDs surrounding the knob. Also, this knob
is used to set the values for the parameters shown on the
display in Edit mode.
The output from the AUDIO OUTPUT is not
turned off even if headphones are connected to the
Headphone jack.
13
14
15
16
17
1
32
EDIT button (see page13)
Enters Edit mode for the program. When this happens, the
button will light up.
4 5 6 7 8 9
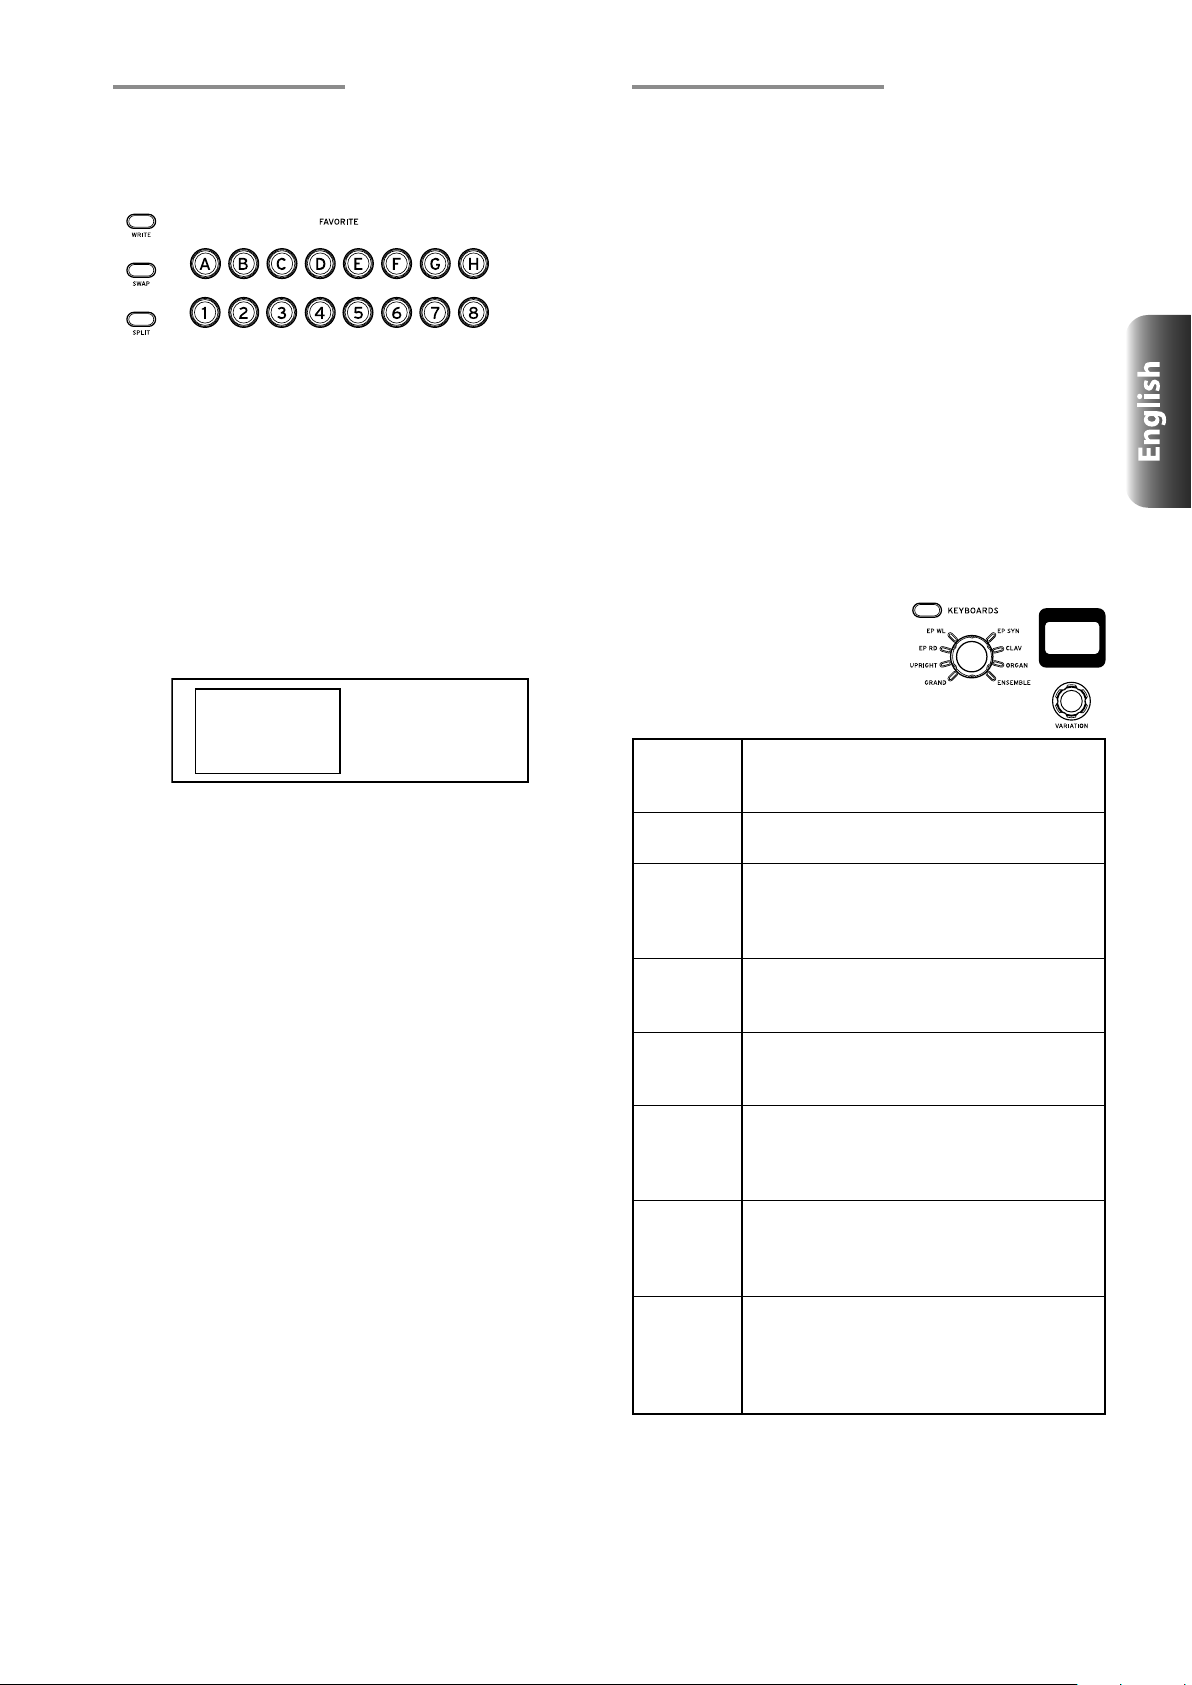
9. WRITE button (see page13)
The current sound settings can be saved to the favorites.
10. SWAP button (see page13)
When this button is pressed (the button will light) while
the keyboard is in split sound mode, the lower part of
the keyboard (lower note range) will be switched to the
KEYBOARDS program, and the upper part of the keyboard
(higher note range) will be switched to the ENSEMBLE
program.
11. SPLIT button (see page12)
When this button is pressed (the button will light), the
keyboard will be split into two different sounds. This button
is also used to set the split point.
12. FAVORITE (Favorite section)
(see page8) (see page12)
One of 64 favorite saved sounds to use can be selected.
Favorites can be quickly selected through a combination of
the A–H buttons and 1–8 buttons.
13. KEYBOARDS (Keyboard section) (see page9)
This section is used to select and edit keyboard instrument
programs in the KEYBOARDS category, such as pianos,
electric pianos, organs and so on. Programs selected and
parameters edited here can be saved as favorites.
KEYBOARDS button
Turns KEYBOARDS programs on (the button will light) or
OFF (the button will go dark). The KEYBOARDS sounds
will not be heard when the button is off.
Category selection knob
Selects the KEYBOARDS program category.
Display
Shows the program name and parameter values while in Edit
mode.
VARIATION knob
Selects programs within categories, as well as parameters
while in Edit mode.
LEVEL knob
Adjusts the volume of the program. The volume level is
shown by the LEDs surrounding the knob. Also, this knob
is used to set the values for the parameters shown on the
display in Edit mode.
EDIT button (see page13)
Enters Edit mode for the program. When this happens, the
button will light up.
10
11
14. REVERB/DELAY (Reverb/Delay section)
(see page15)
Sets the reverb and delay effects. The settings can be saved
as favorites.
REVERB/DELAY button
Turns reverb and delay effects on (the button will light) or
off (the button will go dark).
Eect selection knob
Selects the reverb or delay effect type.
DEPTH knob
This sets the depth of the effect. The setting value is shown
by the LEDs surrounding the knob.
TIME-TAP button
Set the reverb time or delay time, according to the intervals
at which you press the TAP button.
15. EXIT (PANEL LOCK) buttton
Pressing this button quickly will activate the Exit function.
This is used to cancel a favorite write operation, and can also
be used to exit the Panel Lock function, edit mode, navigate
out of the system settings and so on.
Hold this button down for about 1 second to turn on the
Panel Lock function. The button will blink (see page 11).
16. SYSTEM button (see page15)
Press this button to access the overall settings for the
Grandstage, such as master tune, MIDI, the Control function,
sound data restore and so on. When this is on, the button will
blink.
17. TRANSPOSE button (see page11)
Adjusts the overall pitch in semitones, over a range of one
octave up or down. Press a key from C3 to C5 while holding
down the button to transpose the pitch.
12
5

GN
T
COLD
Rear panel
3 4 5
6
7
2
1
1. KORG logo
The LED of the KORG logo will light up.
The color of the LED illumination can be set, as well as
whether the logo lights or not (see page
16).
2. Music stand holes
These holes are used to mount the music stand that is
included with this keyboard.
Mount the stand as shown in the diagram below.
Music stand
3. USB:
A port
USB storage devices such as USB ash drives can be
connected.
B port
Connect the USB A port on a Windows PC or Mac to
exchange MIDI data.
4. MIDI:
IN connector, OUT connector
These connectors allow the Grandstage to exchange MIDI
messages with an external MIDI device.
5. FOOT CONTROLLERS: (see page10)
DAMPER jack
Connect the damper pedal included with the Grandstage
here.
SWITCH jack
Connect the separately sold foot switch here.
PEDAL jack
Connect an expression pedal or foot controller (sold
separately) here.
The Grandstage will automatically detect the polarity of the
pedal switch and damper pedal that are connected. The pedal
position will be considered to be off when the Grandstage
power is turned on, or when the pedal is connected.
Do not press down the pedal when turning on the power
or while connecting the pedal to the Grandstage.
8
6. AUDIO OUTPUT: (see page7)
You can connect powered monitors, a stereo amp, mixer, or
multi-track recorder to these jacks.
L/MONO, R jack
These are φ6.3mm TS (unbalanced tip-sleeve) phone jacks
for outputting audio.
Adjust the volume level using the MASTER VOLUME
knob.
If you’re using a stereo connection, connect to both
L/MONO and R jacks.
If you’re using a monaural connection, connect to the
L/MONO jack. This jack is used for devices that only have a
mono input.
LEFT, RIGHT jack
These are XLS (balanced) jacks are
for stereo audio output.
Adjust the volume level using the
MASTER VOLUME knob.
If you connect the Grandstage’s LEFT
and RIGHT jacks (XLR) to a mixer or
similar device, be sure to turn off the phantom power of that
device. The Grandstage might be damaged if you fail to do
so.
LIFT - GND switch
Normally, the GND side is used. When the LIFT side is
used, the GND jacks of the LEFT and RIGHT jacks will be
separated from the ground of the main unit. If noise occurs
from the ground loop and so on, using the LIFT side may
cause the noise to dissipate.
D
7. (Power button)
This turns the power on/off (see page 7).
Auto Power-O function
When a set period of time has passed without operating this
keyboard, the power is automatically turned off. To change
the set period of time or to disable this function, refer to
“Auto Power Off” on page
The factory-set default is 4 hours.
After turning off the power, any settings not saved in
the favorites will be lost. Be sure to write any settings
into memory that you want to keep before turning off
the power. The system settings are maintained whenever
they are changed (refer to “Types of system settings” on
page 15).
16).
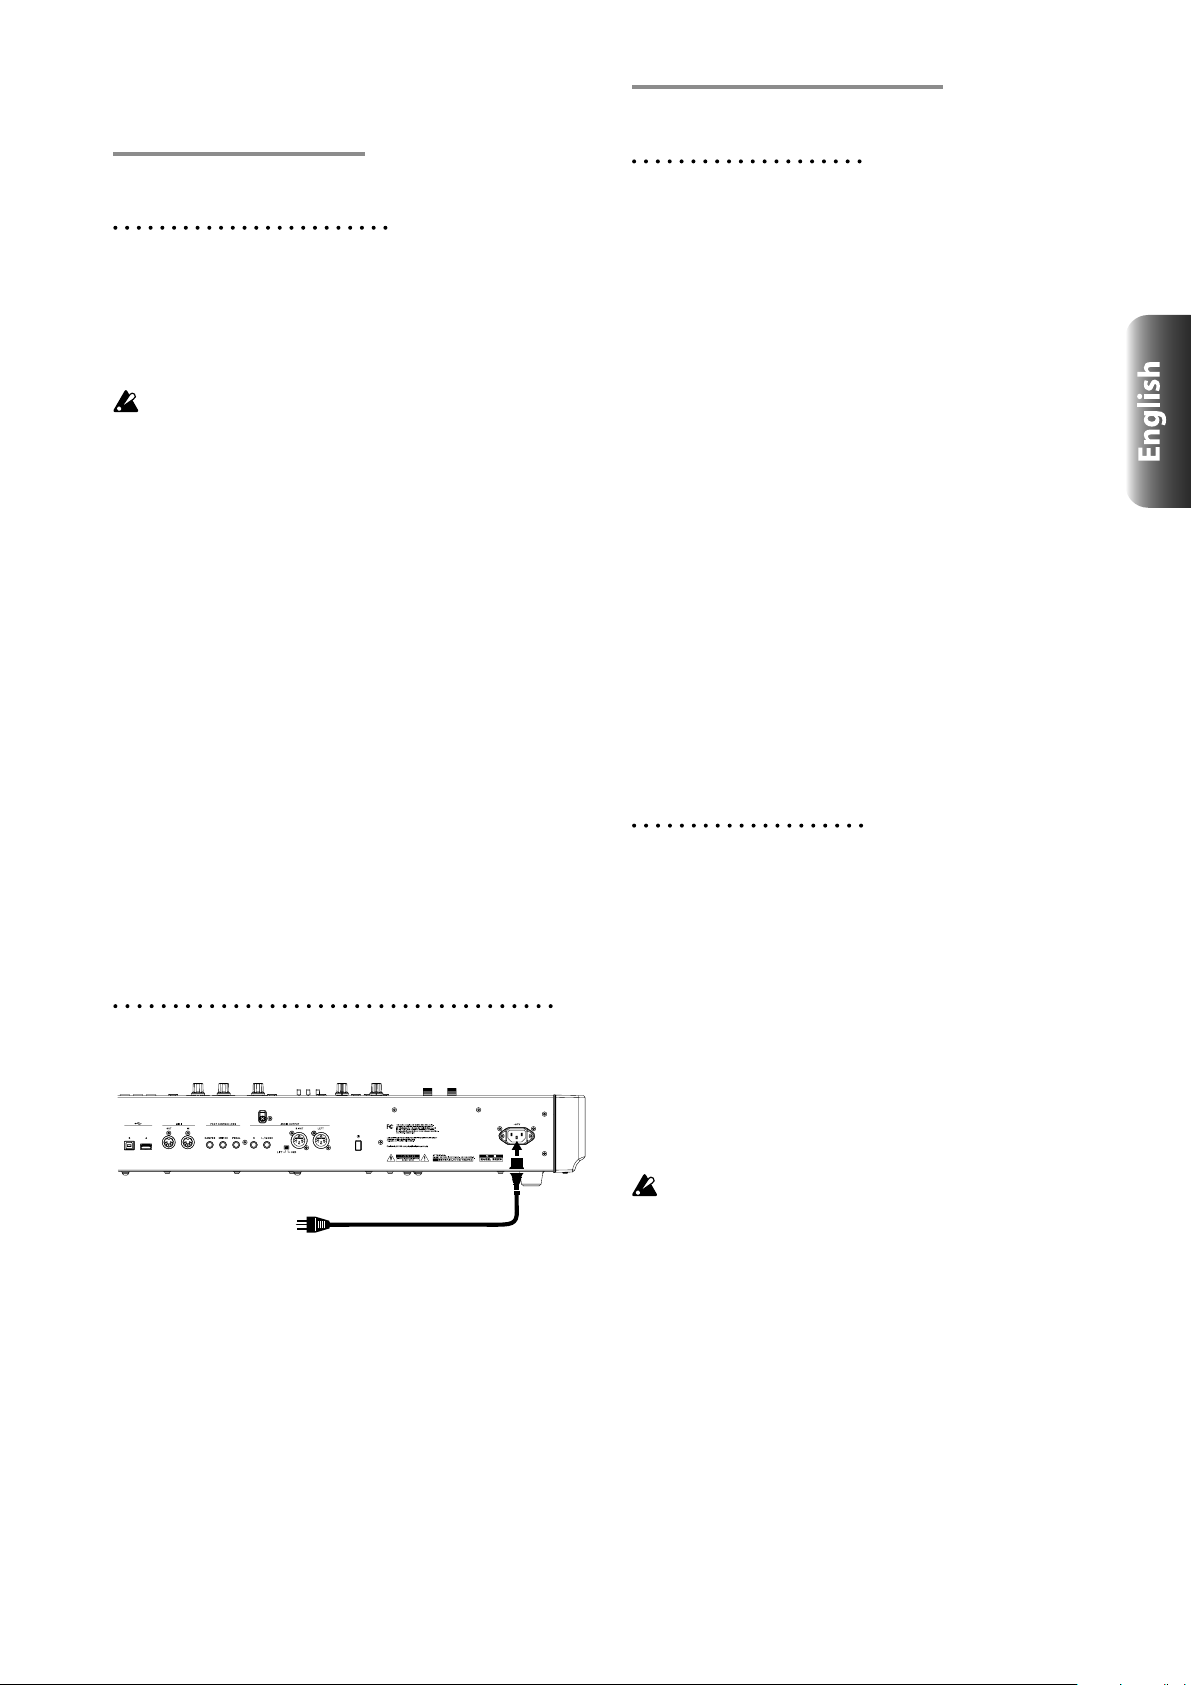
8. ~ACV (AC Power connector)
Connect the included power cord here. We recommend that
you rst connect the power cord to the Grandstage, and then
connect the other end of the cord to an AC outlet.
HO
6
Preparations
Turning the power on/o
Making connections
Connecting audio devices
The Grandstage does not have built-in speakers.
You will need to connect audio equipment such as powered
monitor speakers or a stereo set, or use headphones in order to
hear sound.
Connecting powered monitor speakers or a mixer
The audio outputs on this keyboard output signal at a higher
level than ordinary home audio equipment like CD players.
For this reason, playing at an excessive volume may damage
the connected speakers or audio equipment, so use caution
with the volume level.
1. Turn down the volume on all of your connected
equipment, and then turn o the power.
2. Connect the L/MONO and R jacks or the LEFT
and RIGHT (XLR) jacks from the AUDIO OUTPUT
of this keyboard to the audio input jacks of your
powered monitor speakers or mixer.
The signals outputted from the L/MONO and R jacks are
Tip:
the same as those from the LEFT and RIGHT (XLR) jacks.
You can use both at the same time.
If you’re using a monaural connection, connect to the
Tip:
L/MONO jack.
Connecting headphones
Here you can connect a set of headphones equipped with a 1/4"
(φ6.3 mm) stereo phone-plug. This jack will output the same
signals as the AUDIO OUTPUT. Use the MASTER VOLUME
knob to adjust the headphone volume.
Note:
Connecting the power cord included with this keyboard
The output from the AUDIO OUTPUT is not turned
off even if headphones are connected to the Headphone
jack.
Connect the plug to an AC outlet
Power cord
Turning the power on
1. Turn the Grandstage’s VOLUME knob all the way
to the left so that the volume is down.
If any external equipment, such as a monitor amplier is
connected, lower their volume as well and then turn off their
power.
2. Press the power button on the rear panel of the
Grandstage.
The opening screen will be shown in the KEYBOARDS
section display for a short while.
3. The Grandstage will be ready to play once the
buttons and LEDs on the front panel light up.
When turning on the power, bank A, number 1 of the
favorites will always be selected.
4. Turn on the power of the external equipment
that’s connected to the Grandstage’s AUDIO
OUTPUT jacks, such as a monitor amplier or
stereo amplier.
5. Use the Grandstage’s MASTER VOLUME knob and
the volume controls of your external equipment
to set the volume to a suitable level.
When a set period of time has passed without playing the
Tip:
keys, turning the knobs or pressing the buttons on this
keyboard, the power is automatically turned off. Refer to
“Auto Power Off” on page
16.
Turning the power o
1. Lower the volume of your powered monitor
speakers, stereo amp or other external output
device, and then turn o their power.
2. Hold down the power button on the rear panel
of the Grandstage for several seconds to turn
o the power until the buttons and LEDs on the
control panel have gone dark, and then release
the power button.
“POWER OFF” will be shown in the KEYBOARDS section
display for several seconds.
3. Once the display goes dark, the power will
automatically turn o.
Do not remove the power cord before the display goes dark.
Doing so may cause a malfunction.
7
Listening to the demo songs
64 favorites from A1 to H8
The Grandstage contains 16 demo songs. You can check
which sounds are typically used while playing back each
song (refer to the demo song list in the “Sound Name List”.)
1. Press the SYSTEM and TRANSPOSE buttons
together.
Each button will blink, and the keyboard will enter
demo song performance mode.
The FAVORITE button, bank A will blink, and the rst
demo song will automatically start to play.
One demo song is assigned to each favorite button,
•
for a total of 16 demo songs.
• When song A
begin. The button for each song will blink while the
song is playing. All of the demo songs will play back
in order, while you are not operating the Grandstage .
• The program number and sound name used by the
demo song are shown in the left and right displays.
This allows you to see which sounds are being used
by the demo song.
In demo song performance mode, all operations
•
except for the SYSTEM button, TRANSPOSE
button, the 16 F
VOLUME knob are disabled.
You will not be able to select sounds or operate the
•
dif
ferent knobs, or use the controllers including the
wheels, SW 1/2, damper pedal and so on.
2. To select another demo song, press the
desired FAVORITE button.
The button will blink, and the demo song you select will
play back from the top.
Press the blinking button again to restart the song once
more from the top.
3. To stop playback on a demo song, press the
SYSTEM button, TRANSPOSE button or EXIT
button.
The Grandstage will exit demo song performance mode
and return to the state shown in step 1.
Note:
The settings for favorites that you have changed
but not saved will be reset after entering demo song
performance mode. Be sure to write any favorites
to memory before entering demo song performance
mode if you want to save them, by using the
following steps. (see page
nishes, song B will automatically
AVORITE buttons and the MASTER
13)
Selecting and playing sounds
The Grandstage includes 500 programs that are separated into
categories (refer to the program list in the “Sound Name List”.)
Each sound, such as piano, strings and so on is referred to as
a “program”. Programs can be played on their own, or two
programs can be layered or split to be played together.
These programs can be played by directly selecting a category
and variation in the KEYBOARDS and ENSEMBLE sections;
but programs that you wish to use can also be saved as favorites,
which are convenient to quickly call up while playing.
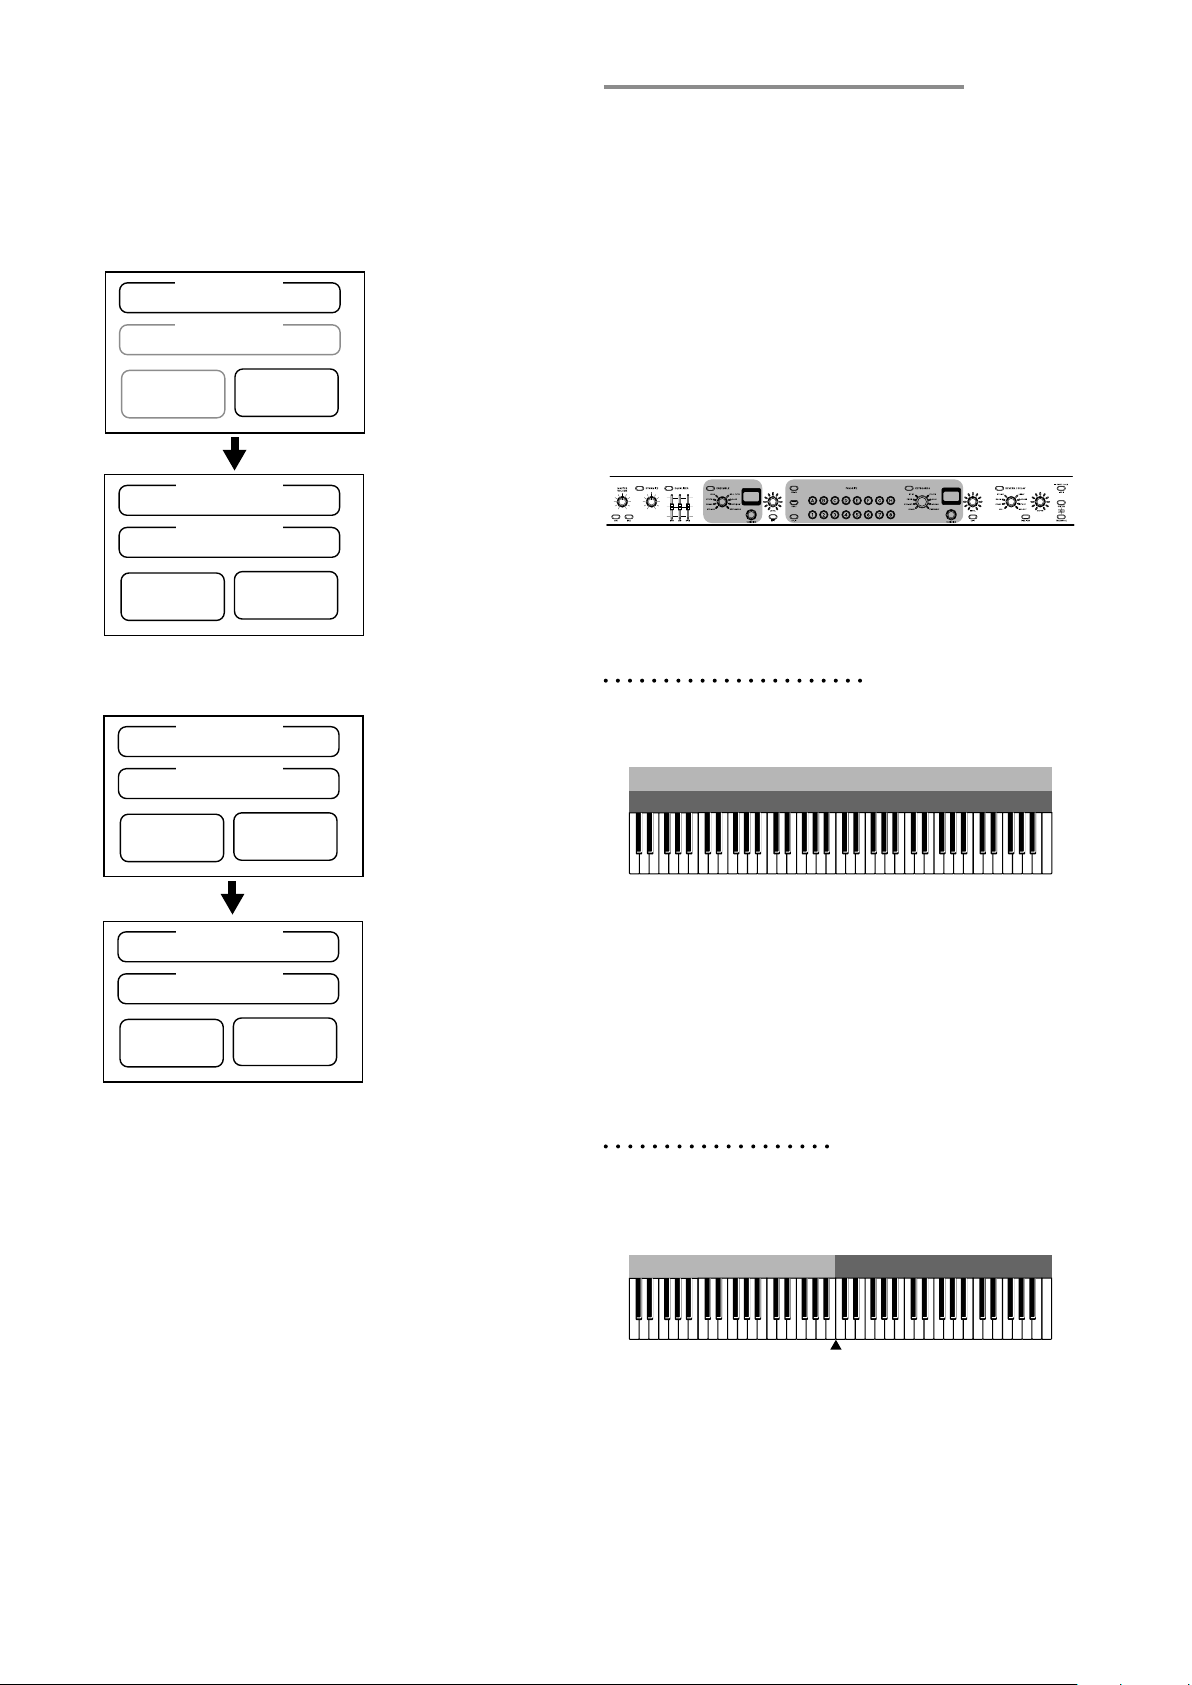
Sound programs
PIANO 1
Sound programs
BASS 1
Layer/split
settings
Favorites include programs, levels and edit information, and can
also include as reverb/delay settings, layer/split settings and so on
when saved.
The 64 favorites can be selected by using the 16 FAVORITE
buttons (bank buttons A–H and number buttons 1–8; refer to the
favorite list in the “Sound Name List”.)
Some of the favorites include recommended settings by factory
default.
Favorite data can be backed up using external USB ash
Tip:
memory and replaced as necessary (see page
Reverb/delay
settings
A1
18).
8
Selecting favorites
Number
When turning on the power, bank A, number 1 of the favorites
will always be selected.
Bank A and number 1 on the FAVORITE buttons will be lit.
Bank
1. Press one of the numbered buttons from 1 to 8 to
switch to a dierent favorite in bank A.
2. Press one of the bank buttons from A to H to
switch to a dierent favorite bank.
The selected bank button will light, and buttons 1–8 will
blink.
3. Press one of the blinking numbered buttons from
1 to 8.
The button you press will light up.
The program information saved in the favorite you select will
be shown in the KEYBOARDS section or ENSEMBLE section
display.
Selecting a program
The programs in the KEYBOARDS and ENSEMBLE sections
are stored by category.
On the Grandstage, programs are not selected directly; rather,
favorites are selected, and then the programs inside of the
favorites are changed.
1. Check that the KEYBOARDS or the ENSEMBLE
buttons on the front panel are lit.
If only the KEYBOARDS button or the ENSEMBLE button
is lit, they cannot be turned off. Turn both of the sections on
and then turn off the section that you will not use.
2. Use the category selection knob for the section
you wish to change, in order to select the
category.
When switching to a different category, the program
previously selected for that category will be selected again.
3. Select a program using the VARIATION knob.
The programs that can be selected for each category are
shown in the program list, found in the “Sound Name List”.
KEYBOARDS categories
001
Grandstage
Piano
The KEYBOARDS, ENSEMBLE, SPLIT or SWAP buttons will
light when playing a favorite with layered sounds or split sounds,
according to the settings.
The settings below are saved in the favorite data.
• One or two programs (category, variation, levels, edit information)
Reverb/delay settings (type, depth, time)
•
•
Layer or split (split point) settings
Refer to “Creating favorites” on page 12 for details.
The preloaded favorites in banks A–D include
Tip:
recommended sounds (refer to the favorite list in the “Sound
Name List”.)
The favorites in banks E–H include default settings. Use
these banks to conveniently create and write your own
original favorites. The preloaded favorites can also be
edited and written to banks A–H.
Program number
Program name
GRAND Grand piano. Includes ve world-renowned
grand piano sounds, including Italian, German,
Berlin, Austrian and Japanese pianos.
UPRIGHT Includes various piano sounds, such as two
types of upright pianos.
EP RD Vintage electric piano with tines. A wealth of
variation sounds including the classic Model I,
II, V, and Dyno-My-Piano (DMP) basic sounds,
tones and eects are provided.
EP WL Reed-type and string-type vintage electric
pianos. Includes classic sounds such as the
model 200, 200A, CP and so on.
EP SYN Synthesizer-type electric piano. Includes many
famous sounds created through analog and
FM synthesis.
CLAV Clav sounds. Includes the classic D model with
four types of pickups and a regular assortment
of eects, for variation sounds. Also includes
harpsichord.
ORGAN Organs. Includes a tonewheel organ, VOX
transistor organ, compact transistor organ and
three types of vintage organ sounds, as well as
pipe organ and accordion.
ENSEMBLE Selects the programs from the ENSEMBLE
section. Select this when you want to use two
programs from the ENSEMBLE section, for
instance, when layering strings and a synth
pad.
9
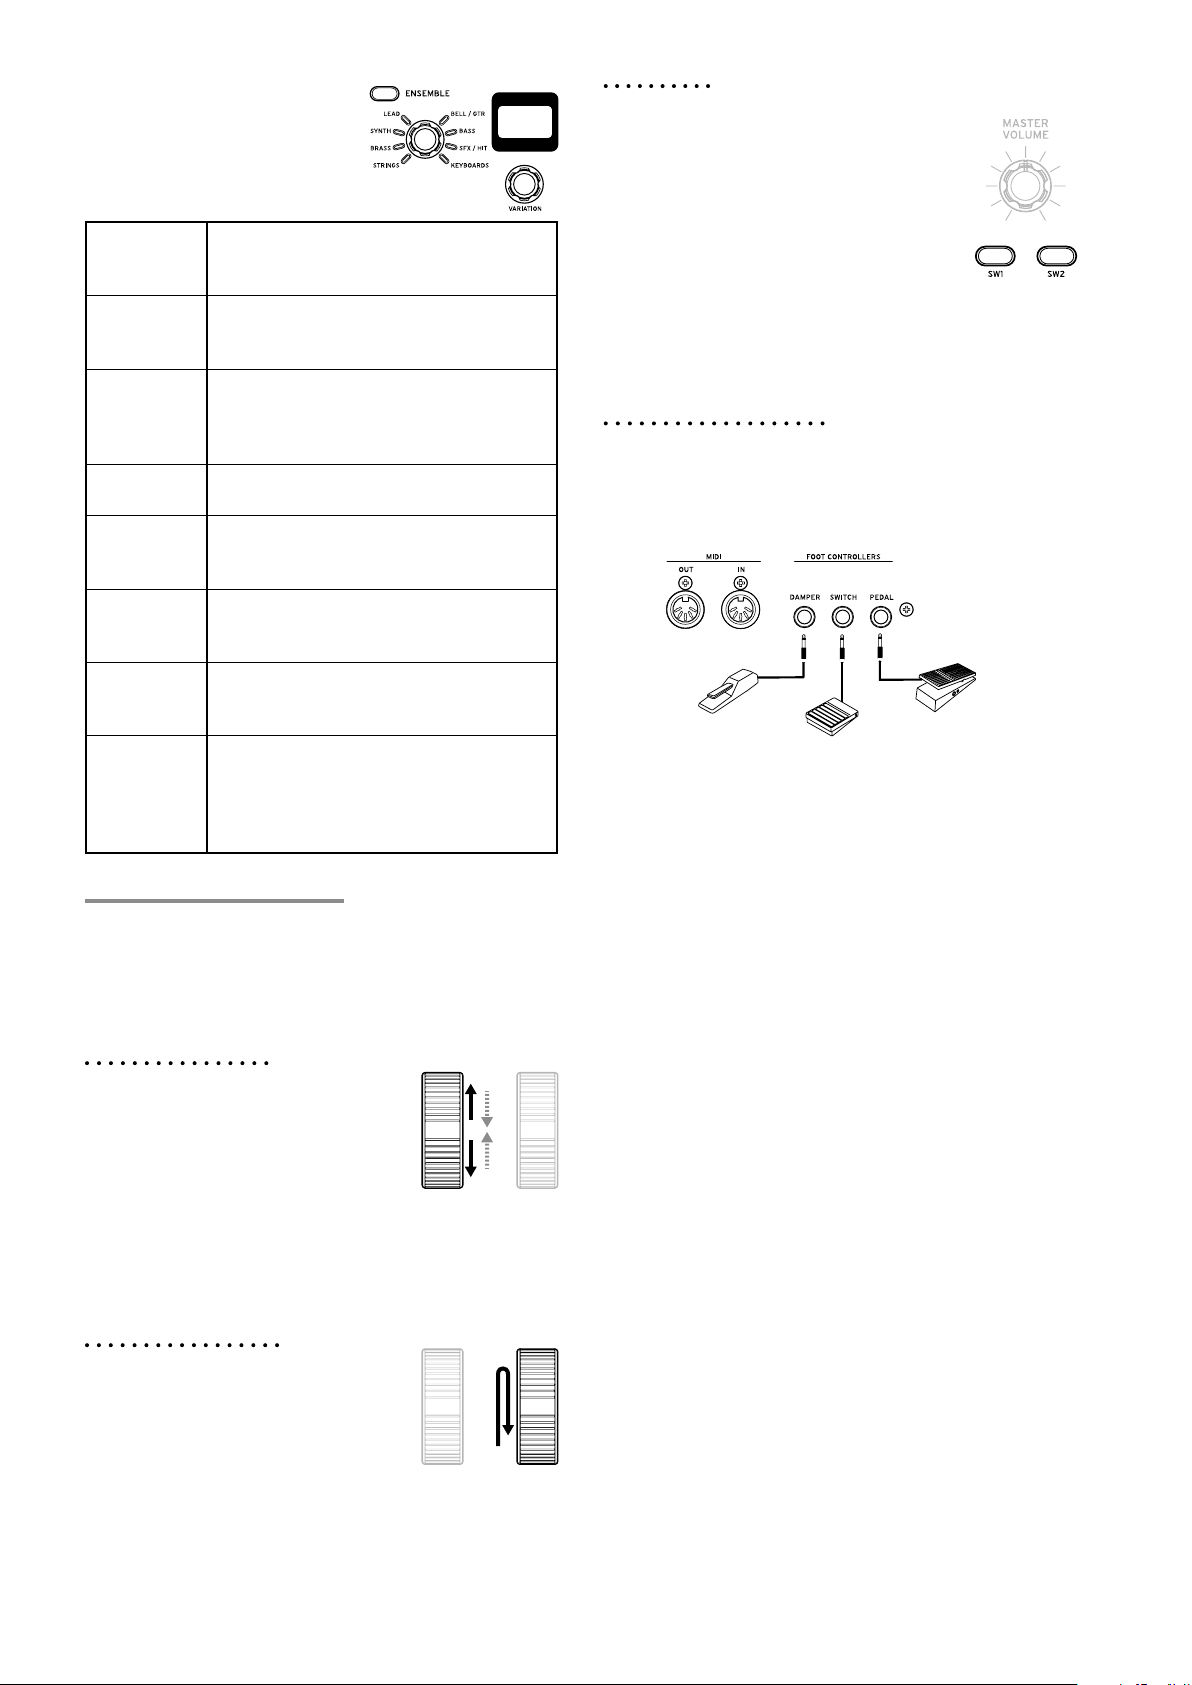
ENSEMBLE categories
PS-1, PS-3
-20
STRINGS Strings, pads and choirs. Includes realistic-
sounding string ensemble sounds, as well as
synth pad sounds optimal for use in layering.
BRASS Brass, reed and woodwind instruments.
Includes realistic-sounding brass sections,
and wind instruments.
SYNTH Synthesizer sounds. An assortment of
many standard sounds, mainly focusing on
polyphonic synthesizer sounds like bells and
decaying sounds.
LEAD Synth lead sounds. Includes lead sounds
from mono and polyphonic synths.
BELL/GTR Bells and guitar sounds. Includes acoustic
sounds, mainly decaying sounds played with
a mallet.
BASS Bass. Includes a wide variety of bass sounds
including acoustic, electric, synth bass and so
on.
SFX/HIT Sound eects, orchestral hits and percussion
instruments. Includes various sounds that
oer exibility in onstage performance.
KEYBOARDS Selects the various programs from the
KEYBOARDS section. Select this when
you want to use two programs from the
KEYBOARDS section, for instance, when
layering a grand piano and an electric piano.
Using the controllers
For split and layered sounds, controllers aside from SW1 and
SW2 can be turned on (enabled) or off (disabled) for each section
(KEYBOARDS or ENSEMBLE; refer to “Other Controls” on
14).
page
Pitch bend wheel
Moving the pitch bend wheel up and down
while playing controls the pitch of notes
played. Moving the wheel up causes the
pitch to rise, while moving the wheel down
causes the pitch to fall.
The wheel will move back to center position when released.
The pitch bend wheel may control other aspects of the sound
besides pitch, depending on the program.
Refer to the program list in the “Sound Name List” for the
functions that are set.
Modulation wheel
Moving the modulation wheel up and down
while playing controls the depth of the
modulation set for each sound. Moving the
wheel up strengthens the effect that is set,
and moving the wheel all the way down
turns the effect off.
The modulation wheel remains in the position where you move
it, and the effect remains the same.
Refer to the program list in the “Sound Name List” for the
functions that are set.
SW1, SW2
These buttons can be turned on or off to control
the sound while you play . The functions that
can be controlled are effectively set for the
sound of each program.
SW1 mainly controls the tone, and SW2 mainly
controls whether the effect is on/off.
Refer to the program list in the “Sound Name
List” for the functions that are set.
Note:
Note:
The on and off settings for SW1 and SW2 can be saved
as favorites.
With split and layered sounds, this can only be used to
control the KEYBOARDS section side.
FOOT CONTROLLERS
You can control the sound of the Grandstage using the foot pedals
connected to each foot controller jack. Note that the polarity and
variable range for each pedal must be adjusted as necessary (refer
to “Calibrating the pedal” on page
DS-1H
DAMPER jack
Connect the damper pedal (DS-1H) included with the Grandstage.
This is used to make sounds sustain after removing your hands
from the keys, for a piano damper effect.
When connecting the DS-1H pedal, this functions as a halfdamper pedal. This will allow for more delicate damper control
of piano and electric piano sounds on this keyboard.
When a switch-type pedal is connected, the pedal will act as a
damper switch.
SWITCH jack
Connect an optional PS-1, PS-3 or other foot switch (sold
separately) to this jack for on/off switching. This allows you to
switch between favorites, as well as control sounds and effects.
The functions for the foot switches are set in the system settings
(refer to “Foot - Switch (foot switch functions)” on page 17).
The factory-set default settings are front panel and SW2 button
on/off (CC#81).
PEDAL jack
Used to connect an optional XVP-20 or XVP-10 expression/
volume pedal, or an EXP-2 foot controller. This is used to control
the overall volume and effects.
The functions for the foot switches are set in the system settings
(refer to “Foot - Pedal (foot pedal functions)” on page
The pedal is set to control the overall volume of the Grandstage
by factory-set default using expression (CC#1
However, for preloaded programs that include the pedal wah
effect, the pedal is automatically set to control the wow effect.
Some of these programs contain the word “Pedal Wah” in the
name.
17).
EXP-2, XVP-10, XVP
16).
1).
10

Adjusting the dynamics and equalizer
C4
C5
C3
Panel lock on (wheels, knobs and buttons that can be used)
Dynamics
This adjusts how the volume and tone will be changed in
response to how hard the keys are played (velocity) on the
Grandstage.
Pressing the button to turn DYNAMICS on (the button will light)
will activate the knob settings.
Turning the knob to the left will cause the sound to play
softer in response to the strength of the keys played.
This is good for playing highly inected passages from
pianissimo (very soft) to fortissimo (very loud), such as solo
piano or in band ensembles.
Turning the knob to the right will cause the sound to play
louder in response to the strength of the keys played.
This is good for generally making your sound stand out when
playing backing parts in a band ensemble, or when playing a
solo.
The DYNAMICS eect will not be applied when the knob is
in center position.
For layered and split sounds, the dynamics effect will be applied
to both sounds.
Note:
Note:
Note:
Equalizer
The overall audio output characteristics can be adjusted using the
three equalizer faders, LOW, MID and HIGH.
Pressing the button to turn the equalizer on (the button will light)
will activate the slider settings.
The equalizer effect will be applied to all sounds in the same way,
regardless of favorite or program.
The effect controlled may differ, depending on the
program. The dynamics will have no effect on programs
that do not change in volume or tone with velocity, such
as organ sounds or some synth sounds.
Dynamics settings cannot be saved to the favorites.
Dynamics will always be off when turning on the
Grandstage. Turning DYNAMICS on will cause the
effect to be applied, according to the position of the knob.
The effect will be applied according to the velocity curve
(see page
16) that is set.
Transpose and panel lock
Transpose
By changing (transposing) the key in semitones, you can play
using fewer black keys, or play along with other instruments
that may be in different keys, while still using the ngering you
previously memorized.
Setting the transpose feature
While holding down the TRANSPOSE button, press a key from
C3 to B3 to transpose the keyboard down in semitones, or press a
key from C
a maximum of one octave in either direction.
The TRANSPOSE button will light when the keyboard is
transposed. The display in the KEYBOARDS section will show
the transpose value while the TRANSPOSE button is being held.
Cancelling the transpose feature
Press the lighted TRANSPOSE button. The button will go dark,
and the transpose feature will be cancelled.
Note:
Panel lock
The Grandstage features a Panel Lock function to
prevent the sounds and programs on the panel from
accidentally being changed by hitting the wrong button
or knob while playing.
When this function is turned on, all buttons and knobs
on the panel will be “frozen” and will not respond,
except for the pitch bend wheel, modulation wheel,
MASTER VOLUME knob, SW1 and SW2 buttons,
and the EXIT button.
Turning the Panel Lock function ON or OFF (cancel)
Hold do
1.
2. Press the blinking EXIT button to turn panel lock
#
4 to C5 to transpose the keyboard up in semitones, to
Grandstage73
The transpose feature will be cancelled when the power
is turned off.
wn the EXIT (PANEL LOCK) button for
about two seconds to turn Panel Lock ON.
When this happens, the button will blink.
OFF (cancel).
The button will go dark.
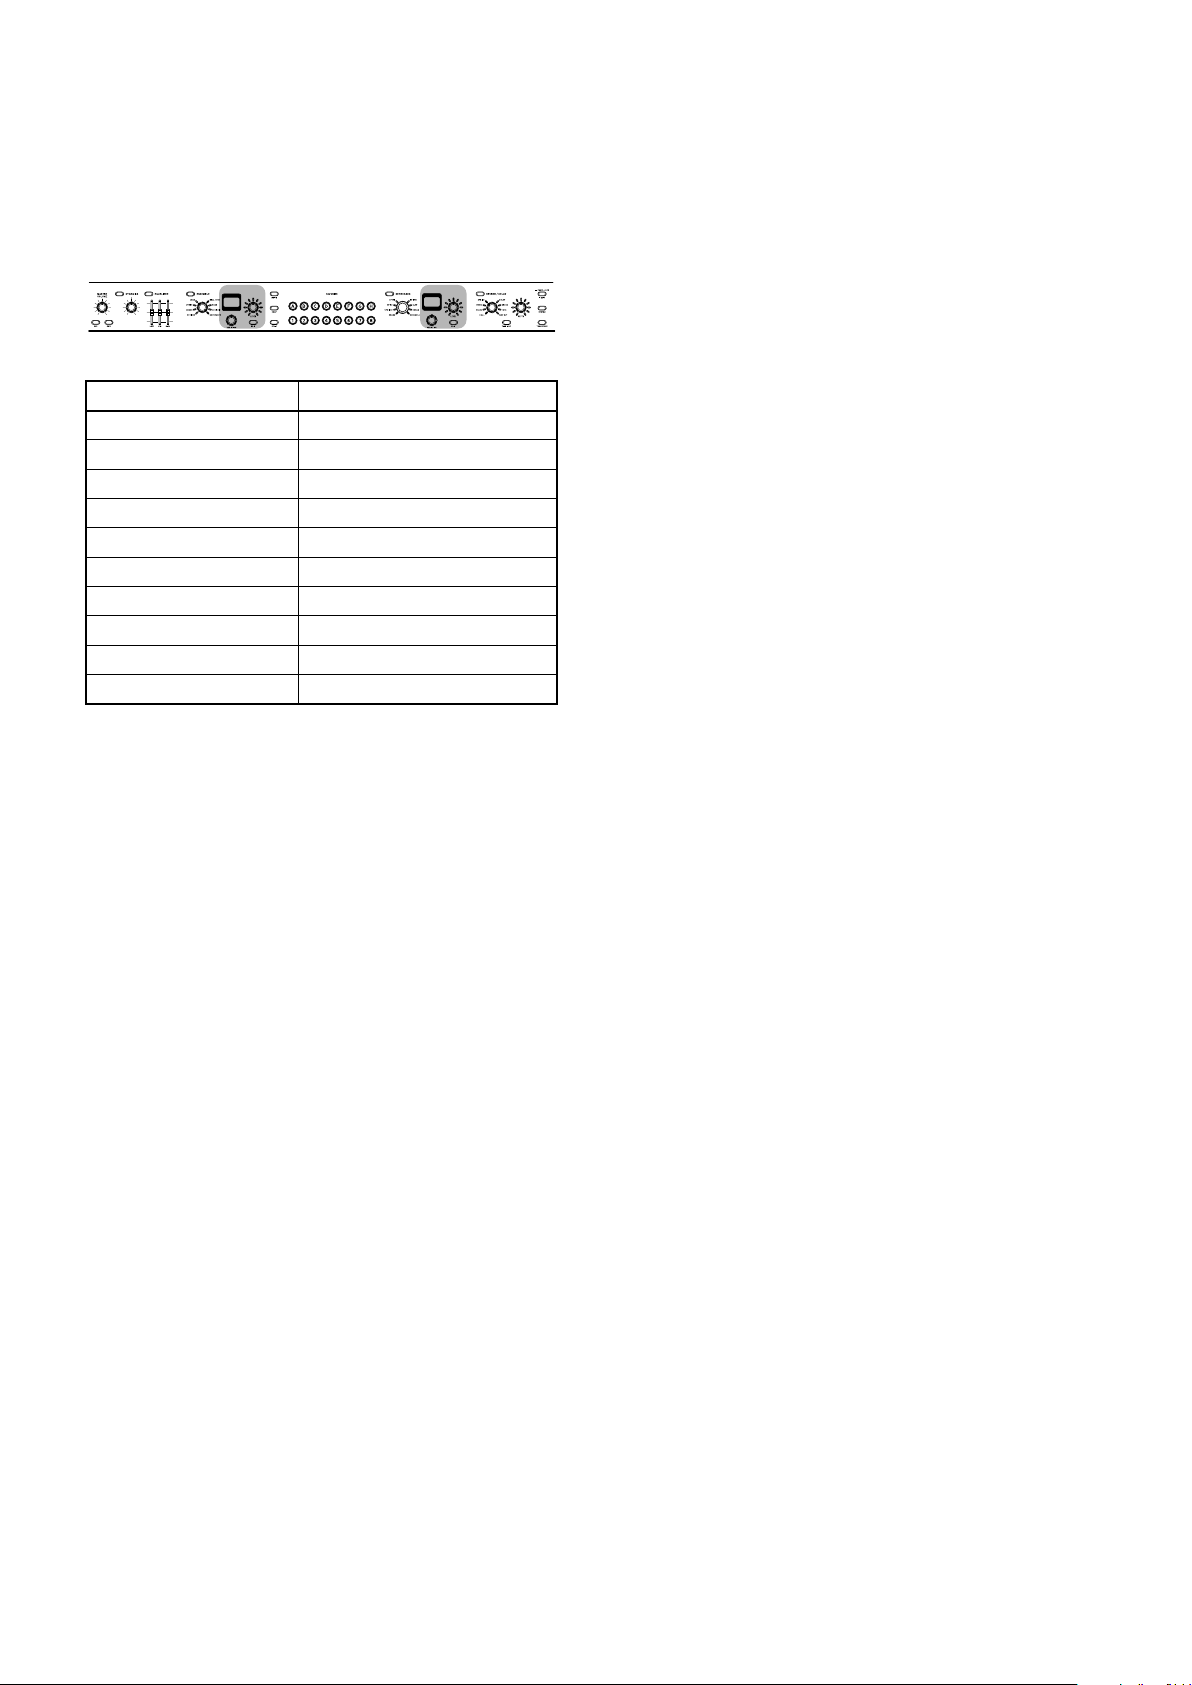
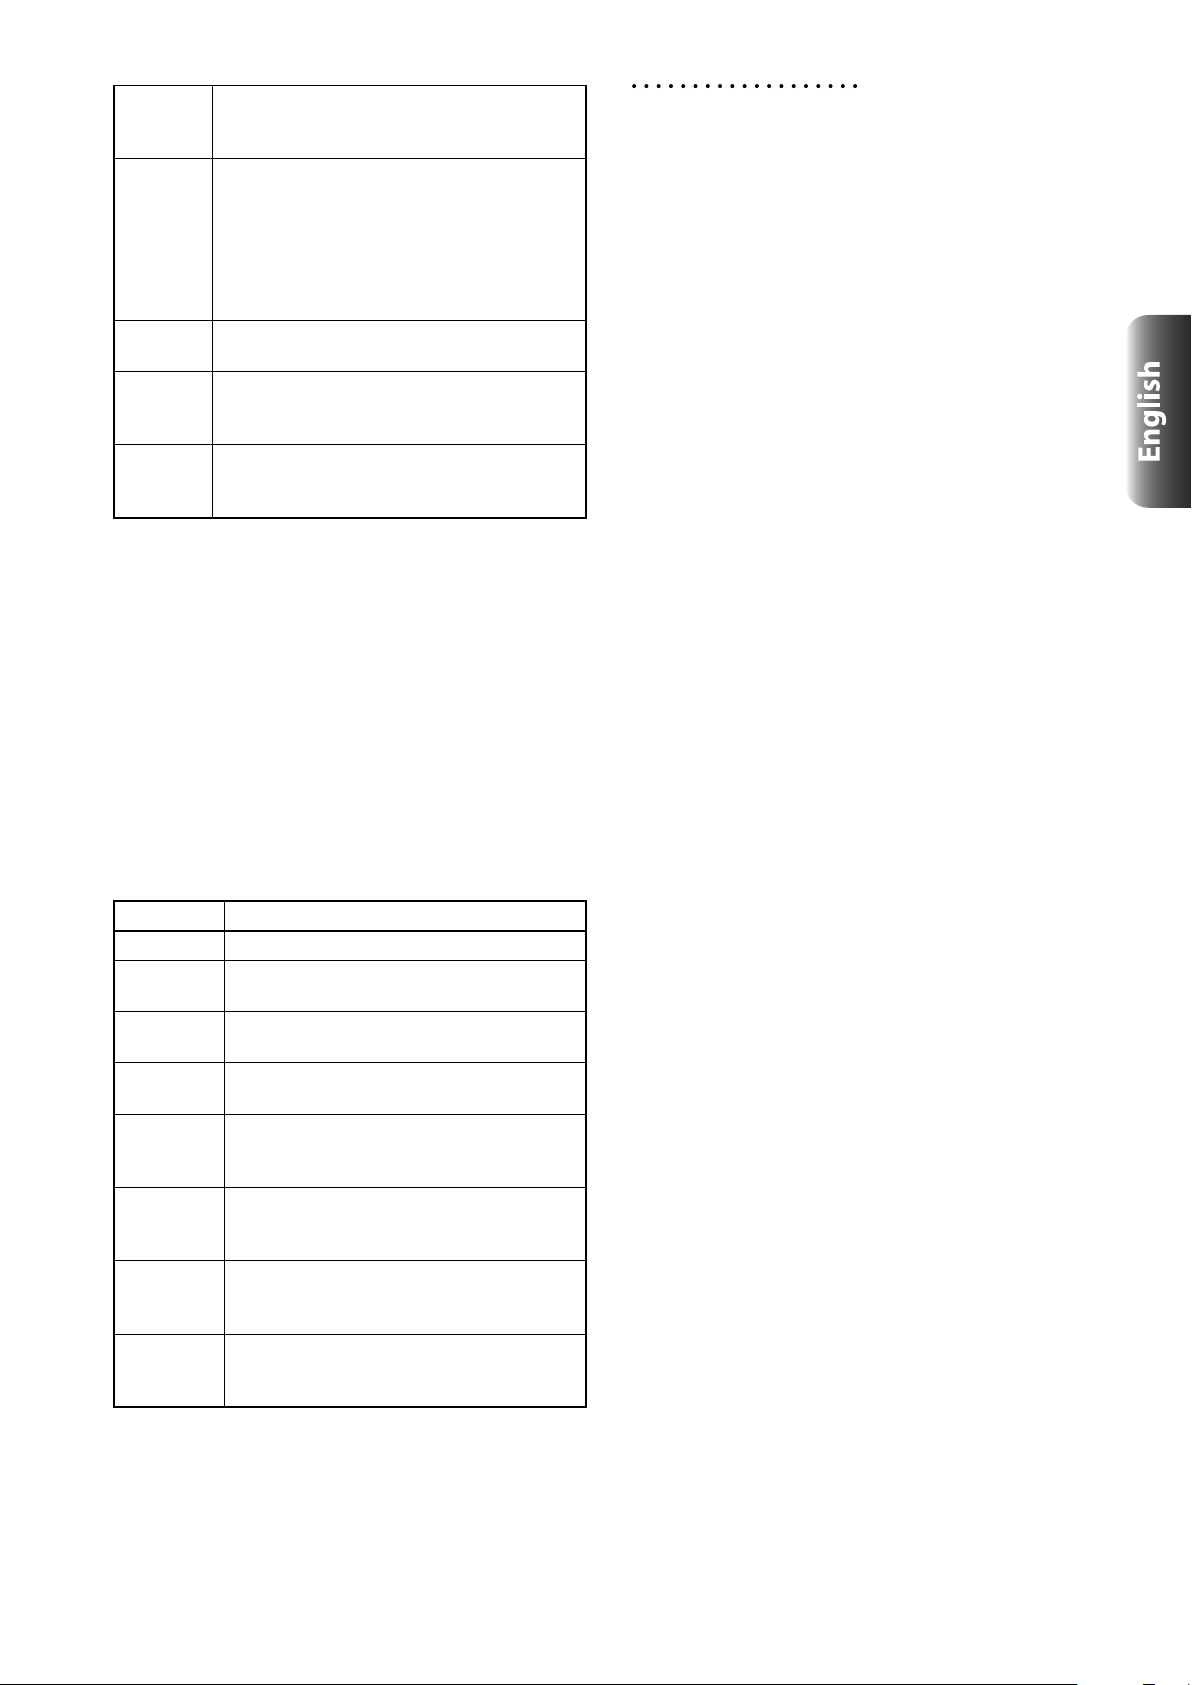
Slider Explanation Adjustable range
LOW Low-end shelving type –12 ~ 0 ~ +12dB
MID Midrange band type –12 ~ 0 ~ +12dB
HIGH High-end shelving type –12 ~ 0 ~ +12dB
Note:
Equalizer settings cannot be saved to the favorites.
The equalizer will always be off when turning on the
Grandstage. Turning the equalizer on will cause the
effect to be applied, according to the positions of the
sliders.
Increasing the equalizer settings may cause excessive levels,
which could distort the audio output. Turn the LEVEL knobs
for the KEYBOARDS and ENSEMBLE sections down
when adjusting the equalizer settings.
Panel lock off
Note:
The panel lock setting will not be saved. When the
power is turned off and then on again, the keyboard will
reset.
11
Creating favorites
Changing a program within a favorite
KEYBOARDS program
Split point
To create a new favorite, you must modify the two programs (in
single sound mode) originally saved, or modify the program with
layer/split sounds that uses two programs.
You can also edit the sound of the program you are using.
Sound programs
PIANO 1
Sound programs
Sound programs
ORGAN 1
Sound programs
BASS 1
Split settings
Reverb/delay
settings
Reverb/delay
settings
PIANO 1 single sound,
KEYBOARDS program
Split sound with
ORGAN 1,
and BASS 1,
ENSEMBLE program
Changing the programs used
1. Use the FAVORITE buttons to select a favorite
(see page9).
Note:
2. Press either the KEYBOARDS button or the
ENSEMBLE button to make them light (on) or go
dark (o).
If only the KEYBOARDS button or the ENSEMBLE button
is lit, they cannot be turned off. Turn both of the sections on
and then turn off the section that you will not use.
3. Select the program using the category selection
knob and the VARIATION knob, in the section on
which the button is lit.
Any changes you make to a favorite will be lost and the favorite
will return to its previous saved state, if you select a different
favorite or turn off the power.
Be sure to write the favorite to memory in order to save any
changes you make. (Refer to “Saving a favorite that has been
changed” on page 13.)
When selecting a favorite that was set by default,
select any bank from E and up.
Editing a program within a favorite
Sound programs
ORGAN 1
Sound programs
BASS 1
Split settings
Sound programs
ORGAN 1 Sound, tonal range, etc.
Sound programs
BASS 1 Sound, tonal range, etc.
Split settings
Change split
point
Note:
Since the edits you make to the program will be saved
as part of the favorite’s settings, this will not affect
the original program. This means that when you edit a
program, this will not change the same program’s sounds
that happen to be used in another favorite.
The “Release” edit parameter and the sound parameters
will be reset to their original settings when you select a
program again.
Reverb/delay
settings
Reverb/delay
settings
Default settings for
ORGAN 1,
KEYBOARDS program
Default settings for
BASS 1, ENSEMBLE
program
Split sound and split
point default settings
Edit ORGAN 1 sound,
tonal range, etc. in
KEYBOARDS program
Edit BASS 1 sound,
tonal range, etc. in
ENSEMBLE program
Changing the split
sound and split point
Creating layered sounds
Two sounds can be stacked together to create a layered sound
(example: piano and strings).
Strings
Piano
1. Turn both the KEYBOARDS and ENSEMBLE section
buttons on, and select a program for each.
This will make a layered sound.
2. Use the LEVEL knobs for each section to adjust
the volume balance between both programs.
When creating a layered sound with two programs from the
Tip:
ENSEMBLE section, select the ENSEMBLE category for
the KEYBOARDS program. When creating a layered sound
with two programs from the KEYBOARDS section, select
the KEYBOARDS category for the ENSEMBLE program.
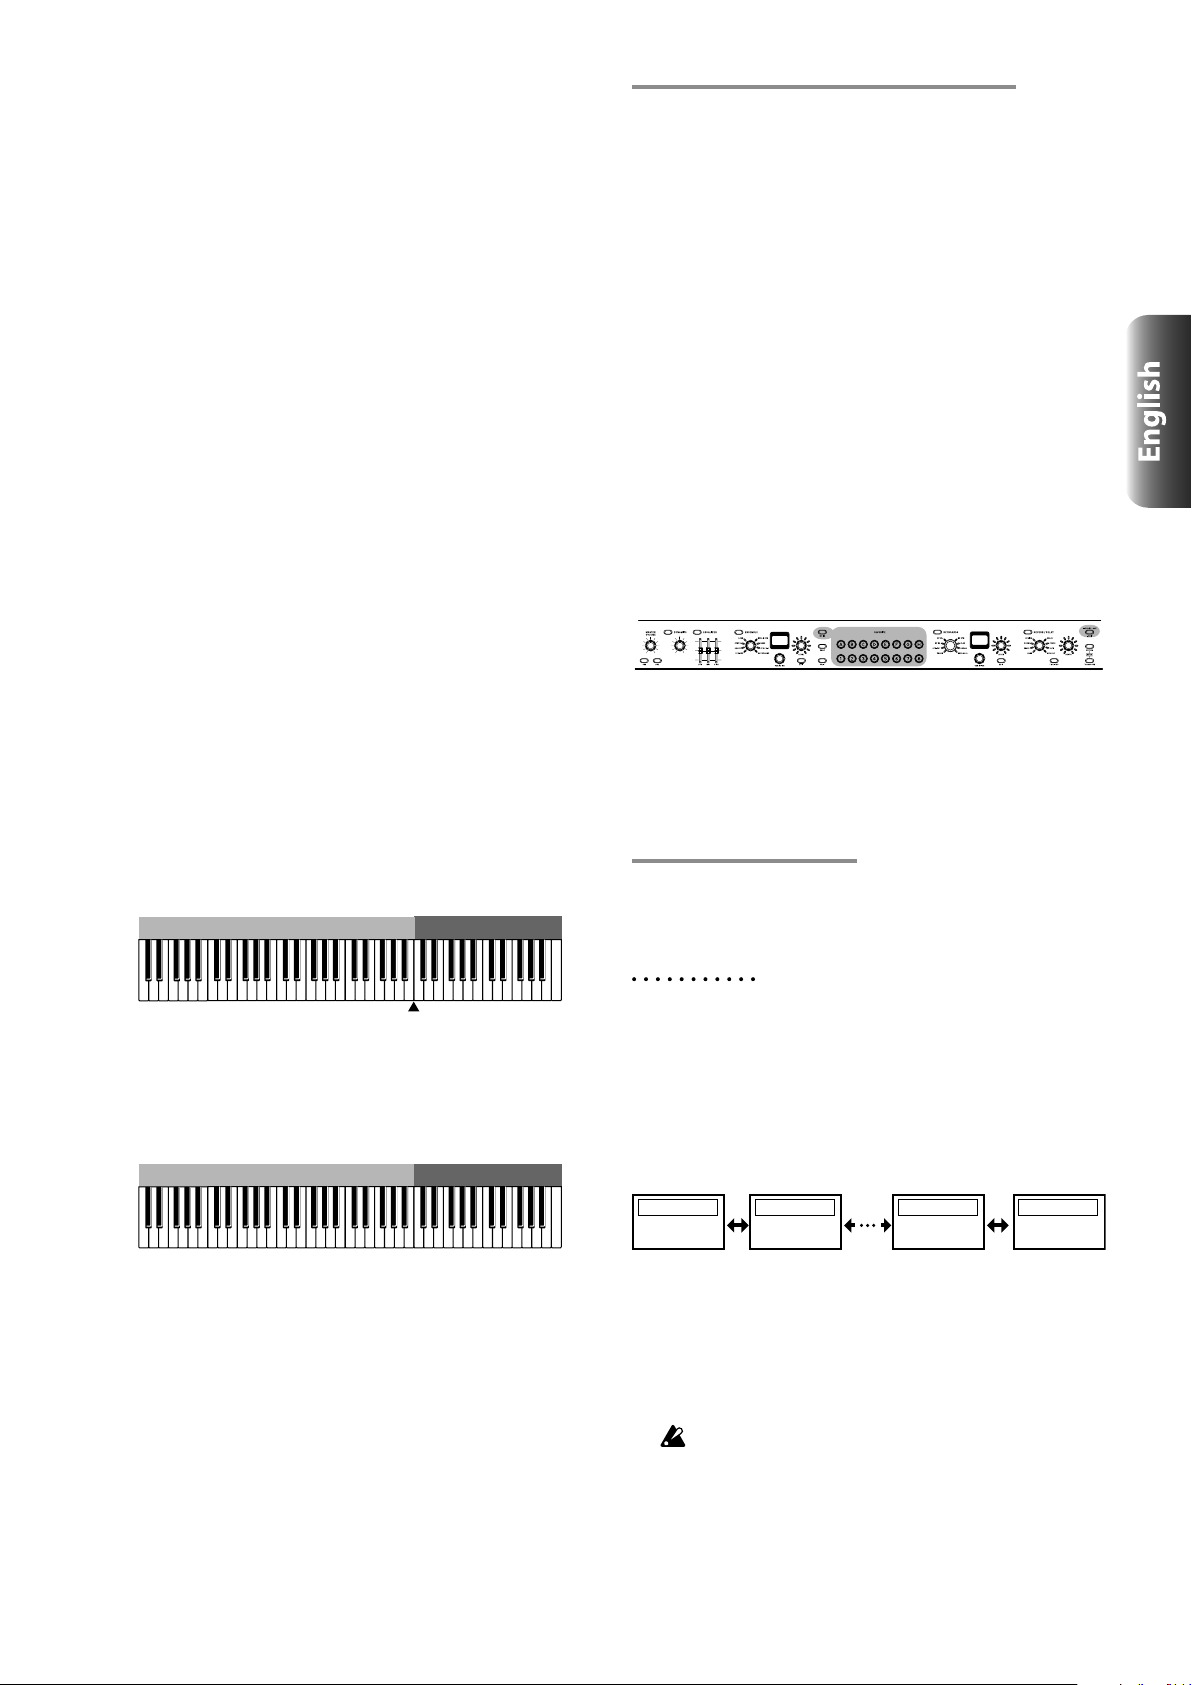
Creating split sounds
You can assign a different sound to the higher range of the
keyboard and the lower range of the keyboard to create a split
sound (for instance, piano and bass).
Bass
Piano
12
1. When in single sound mode, press the SPLIT
button.
The SPLIT button will light, and the KEYBOARDS and
ENSEMBLE buttons will both turn on (light up).
2. Select a program for each section.
The ENSEMBLE program will be assigned to the lower part
of the keyboard (lower note range), and the KEYBOARDS
program will be assigned to the upper part of the keyboard
(higher note range).
3. To cancel the split sound, press the SPLIT button,
Piano
Split point
Lead
Lead
or press either the KEYBOARDS or ENSEMBLE
button to return to single sound mode.
The SPLIT button will go dark.
When using layered sound, pressing the SPLIT button will switch
to a split sound.
Press the SPLIT button once more (the button will go dark) to
switch to layered sound.
The ENSEMBLE program will be assigned to the lower part of
the keyboard (lower note range), and the KEYBOARDS program
will be assigned to the higher part of the keyboard (higher note
range).
Note:
Tip:
When setting a split sound, if the SPLIT button is
pressed to turn split sound OFF, the Grandstage will
return to the mode it was in before entering split sound
mode.
However, if you select a favorite that uses split sound,
only the KEYBOARDS section will turn on when the
SPLIT button is OFF, and the keyboard will return to
single mode.
When creating a split sound with two programs from the
ENSEMBLE section, select the ENSEMBLE category for
the KEYBOARDS program. When creating a split sound
with two programs from the KEYBOARDS section, select
the KEYBOARDS category for the ENSEMBLE program.
Saving a favorite that has been changed
Favorites that have been changed will return to their previous
saved state, if you select a different favorite or turn off the power.
Be sure to write any favorites that you have changed to memory
if you want to save them, by using the following steps.
1. Press the WRITE button once you are nished
with editing.
The WRITE and EXIT buttons will blink.
2. If you wish to overwrite the current favorite,
simply press the WRITE button.
The WRITE and EXIT buttons will go dark, and writing will
be nished.
To cancel the write operation, press the EXIT button.
3. To save to a dierent favorite, press the new bank
and number buttons where you want the favorite
to be saved.
4. Press the WRITE button.
The WRITE and EXIT buttons will go dark, and writing will
be nished.
Split point
The lowest note of the upper part on the keyboard is called the
“split point”. The split point is set to C4 by factory default.
Changing the split point
•
While holding down the SPLIT button, press the key (on the
keyboard) where you want the split point to be.
ou can save the split point that you have changed, as a split
Y
sound in a favorite. Note that the split point will return to the
default setting of C4 if you return to single sound mode before
saving, or when you turn off the power.
Switching upper and lower keyboard parts
• Pressing the SWAP button to make the button light will allow
you to switch the sounds used on the upper part (higher note
range) and lower part (lower note range) of the keyboard in
split sound mode.
Piano
Although you will be able to change or edit sounds after pressing
SWAP, be careful to remember that the higher note range
is the ENSEMBLE section, and the lower note range is the
KEYBOARDS section—the left and right sides of the keyboard
have been swapped.
Pressing the SWAP button once more will cause the button to
go dark, and the sounds on the upper and lower sides of the
keyboard will return to the way the sections are labeled on the
panel.
When you press a bank or number button during the
Tip:
write operation, the selected program in the favorite to
be saved will be shown on the display, until you release
the button. You can use this to check the contents of the
favorite location you are saving to. This function is useful
for making sure that it’s all right to overwrite the desired
favorite location.
Editing a program
You can make basic adjustments to the sound and effects of the
programs you select. Edited programs can be saved as a favorite.
How to edit
The steps to edit a program are the same for both the
KEYBOARDS and ENSEMBLE sections.
1. After selecting the program to edit, press the
EDIT button.
The button lights up, and the parameters are shown in the
display.
2. Select a parameter using the VARIATION knob.
EDIT
Octave
0
3. Edit the parameter values using the LEVEL knob.
4. Repeat steps 2 and 3 to continue editing.
5. To nish editing, press the EDIT button or the
EXIT button.
The EDIT button will go dark, and the program name will be
shown in the display.
Editing will automatically end if you select a different
program or favorite, or switch the Grandstage to layer or
split sound mode.
EDIT
Tune
0.00 semitones
EDIT
Damper
Off
EDIT
Other Controls
On
13
6. To save the settings you have edited, be sure to
write the favorite to memory. (Refer to “Saving a
favorite that has been changed”.)
Note:
Any changes you make to a program will return
to the previous saved state if you select a different
favorite or turn off the power without saving them.
Use caution, as the release and sound parameters
will be reset if you select another program.
Program parameter list
Parameter Value
Octave –3, –2, –1, 0, +1, +2, +3
Tune –100 ... 0 ... +100 (cents)
Release –100 ... 0 ... +100%
Sound parameter 1 Depends on program
Sound parameter 2 Depends on program
Sound parameter 3 Depends on program
Sound parameter 4 Depends on program
Reverb Send –inf ... + 6.0dB
Damper O, On
Other Controls O, On
Octave
Sets the pitch of the Grandstage in octaves. The setting range is
±3 octaves.
Use this when adjusting the pitch balance between two different
programs when setting layers or split sounds.
The value is “0” when this function is not used.
Tune
Sets the pitch of the Grandstage in cents (1 semitone=100 cents).
The pitch is adjustable within a range of ±100 cents.
For instance, this could be used when ne-tuning the pitch
between layered sounds in a program, to create a thicker sound.
The value is “0” when this function is not used.
Release
This adjusts the release times for the program.
Specify the time from note-off until the sound fades to silence.
The value is set to “0” when this function is not used.
This is a value that is relative to the actual release time for each
program. A value of “0” means that the release time will be the
same as the program parameters. Negative values make shorter
release times, and positive values make longer release times.
Sound parameters 1–4
Adjusts the sound parameters of a program.
The editable parameters differ for each program. There are a
maximum of four sound parameters already set in each sound, to
allow the sound to be effectively adjusted.
Reverb Send
This adjusts the send level to output from the program, into the
REVERB/DELAY section.
Normally, this is set to 0 db, and the reverb and delay volume are
adjusted using the DEPTH knob in the REVERB/DELAY section.
To balance the volume between the programs of the two sections
and the reverb/delay when in layer or split mode, adjust the
Reverb Send value.
For instance, you can apply a deep reverb to the piano sound, and
apply no reverb to the bass sound.
If the input level of the REVERB/DELAY section is too loud,
the reverb or delay sound may distort. If this happens, lower the
Reverb Send value, so that the sound does not distort.
Damper
This sets whether the damper effect is enabled (on) or disabled
(off).
Normally, the setting is enabled. When turning off the Damper
function for one of the sections when using split or layered
sound, make the setting in each section.
For example, if you are using a split sound, you can enable the
Damper function for the piano sound, but disable the Damper
function for the bass sound.
Other Controls
This sets whether other controllers shown below are enabled (on)
or disabled (off).
Note:
N
bend or the expression pedal function for only one of the sounds
in split or layered sound, make the setting in each section.
For example, when using layered sound, the volume control
using the expression pedal function can be enabled for just the
piano sound or the strings sound. Another example is when you
are using a split sound, you can disable the pitch bend function
for the piano sound, but enable it for the synth lead sound or bass
sound.
Controllers cannot be individually enabled or disabled.
•
Pitch bend wheel
Modulation wheel
•
Pedal connected to the FOOT CONTROLLERS PEDAL
•
jack. Note that if the PEDAL jack function set in system
settings (see “Foot - Pedal” on page
V
olume”, this pedal function will always be enabled, without
regard to the “Other Controls” setting here.
•
Switches connected to the FOOT CONTROLLERS
SWITCH jack.
system settings (see “Foot - Switch” on page
“Favorite Up” or “Favorite Down”, those pedal functions will
always be enabled, without regard to the “Other Controls”
setting here.
ormally, the setting is enabled. When turning off either the pitch
Note that if the SWITCH jack function set in
16) is set to “Master
17) is set to
14

Reverb/delay settings
To equalizer
Favorite
These are the settings for the reverb and delay effects.
Four types of reverbs and four types of delays can be set as
effects.
Type Details
HALL This is a hall-type reverb that simulates the
reverberations of a large concert hall or
ensemble hall.
STAGE This reverb simulates a stage with less
reverberations that that of the hall type.
ROOM
SPRING This reverb simulates the spring reverb sound
DELAY This is a simple stereo delay.
CROSS This is a stereo delay that bounces back and
TAPE This eect models the analog tape echo found
MOD DLY This eect adds a pitch shift-type eect similar
1. Press the REVERB/DELAY button.
The LEDs of the button and the selection knob will light,
and the effect will be applied.
2. Use the selection knob to select the eect.
3. Adjust the amount of the eect to apply with the
DEPTH knob.
The value will be shown on the LEDs around the knob.
Reverb type is used to control the reverb level, and delay
type is used to control the delay level and feedback level at
the same time.
4. The delay and reverb times can be adjusted to
match the intervals at which you press the TIMETAP button.
The button will blink at the interval that is currently set.
Note:
When using layered or split sound, the effect volume balance can
be adjusted with the “Reverb Send” effect edit parameter in the
KEYBOARDS and ENSEMBLE programs.
The settings in this section can be saved as a favorite.
This reverb simulates the reverberations of a
small room. The reverb includes multiple initial
reections of the sound from the walls and ceiling.
used in some guitar amps and organs.
forth from left to right.
on popular devices. The eect recreates the
changes in tone from sound distortion and
vibration produced by the rotation of magnetic
tape and the motor. This oers a warm echo
sound.
to a chorus eect to a delay, creating a swelling,
wobbly delay sound.
The reverb time will be set to the interval between
taps, when you tap the button four times.
System settings
Types of system settings
The settings that can be made here include overall settings for the
Grandstage including master tune, MIDI, controller functions and
so on.
Master tune
•
MIDI channel settings
•
•
MIDI channel mode settings
Lower part MIDI channel settings
•
Local control settings
•
Velocity curve settings
•
•
Convert position
Auto power-off settings
•
Adjustments made to display brightness
•
KORG logo backlight (on/off)
•
•
KORG logo backlight color
Foot pedal functions
•
Foot switch functions
•
Pedal calibration
•
Restoring the Grandstage to factory-set default settings
•
•
Saving/loading favorite settings
Any changes made to these settings will be automatically
written to memory within several seconds, and will be saved
even after the power is turned off.
Steps for making system settings
The steps for making system settings basically involve the
following operations. Separate steps will be provided for steps
that differ from what is written below.
1. Press the SYSTEM button to turn it on (the button
blinks).
The word “SYSTEM” will display on the top line of the
KEYBOARDS section display.
2. Select a parameter using the VARIATION knob of
the KEYBOARDS section.
Each parameter is shown on the second line of the display.
SYSTEM
Master Tune
0 (440.00 Hz)
3. Set the values using the LEVEL knob in the
KEYBOARDS section.
The values and setting details are shown on the third line of
the display.
Changing these values will immediately apply them as
system settings and save them to memory, even after the
power is turned off.
4. After you are nished with the settings, press the
SYSTEM button or the EXIT button.
The SYSTEM button will go dark.
SYSTEM
MIDI Channel
1
SYSTEM
Save .FAV File
[Press EDIT]
SYSTEM
Load .FAV File
[Press EDIT]
KEYBOARDS
program
Reverb Send
ENSEMBLE
program
Reverb Send
The sound can be played right after changing the reverb or delay
effect settings, but the settings will return to their previous saved
state if you select a different favorite or turn off the power. To
save your settings, be sure to write the favorite to memory. (Refer
to “Saving a favorite that has been changed” on page 13.)
System setting parameters
Master Tune
Sets the tuning for the entire keyboard.
Tuning can be set in cents (1 semitone=100 cents), within a range
of ±50 cents (427.47... 440...452.89Hz). The default setting is
“+0”, or 440Hz (the frequency for A4).
MIDI Channel
Species the MIDI channels on which the Grandstage will
transmit and receive (from 1–16).
15
Soft
127
Strong
The default setting is “1”.
Download and refer to the “Grandstage 88/73 MIDI Guide” (PDF)
for details.
MIDI Ch Mode (MIDI channel mode)
This selects the MIDI channel mode used by the Grandstage to
transmit and receive MIDI data.
Global Only: Uses only the channels set in “MIDI Channel”.
When playing in layered or split mode, this keyboard will
transmit and receive on only one channel.
U/L Individual (Upper/Lower Individual): the channels set
using the “MIDI Channel” and “MIDI Ch (Lower)” settings will
be used to transmit and receive MIDI data for the KEYBOARDS
and ENSEMBLE sections.
The default setting is “Global Only”.
Download and refer to the “Grandstage 88/73 MIDI Guide” (PDF)
for details.
MIDI Ch (Lower) (MIDI channel for the lower part)
This setting is enabled when the MIDI Ch Mode is set to
“U/L Individual”. This species the MIDI channels on which the
Grandstage will transmit and receive (from 1–16) on the lower
ENSEMBLE section note range.
The default setting is “2”.
Download and refer to the “Grandstage 88/73 MIDI Guide” (PDF)
for details.
Local Control (MIDI local control)
Set whether the Grandstage’s own keyboard, wheels and other
controls will control the Grandstage’s sound engine (On), or
whether the Grandstage’s own keyboard will only be used to
output MIDI messages to external devices, without controlling
the Grandstage’s sound engine (Off). Normally, this is “On”
when playing the Grandstage by itself.
The default setting is “On”.
Download and refer to the “Grandstage 88/73 MIDI Guide” (PDF)
for details.
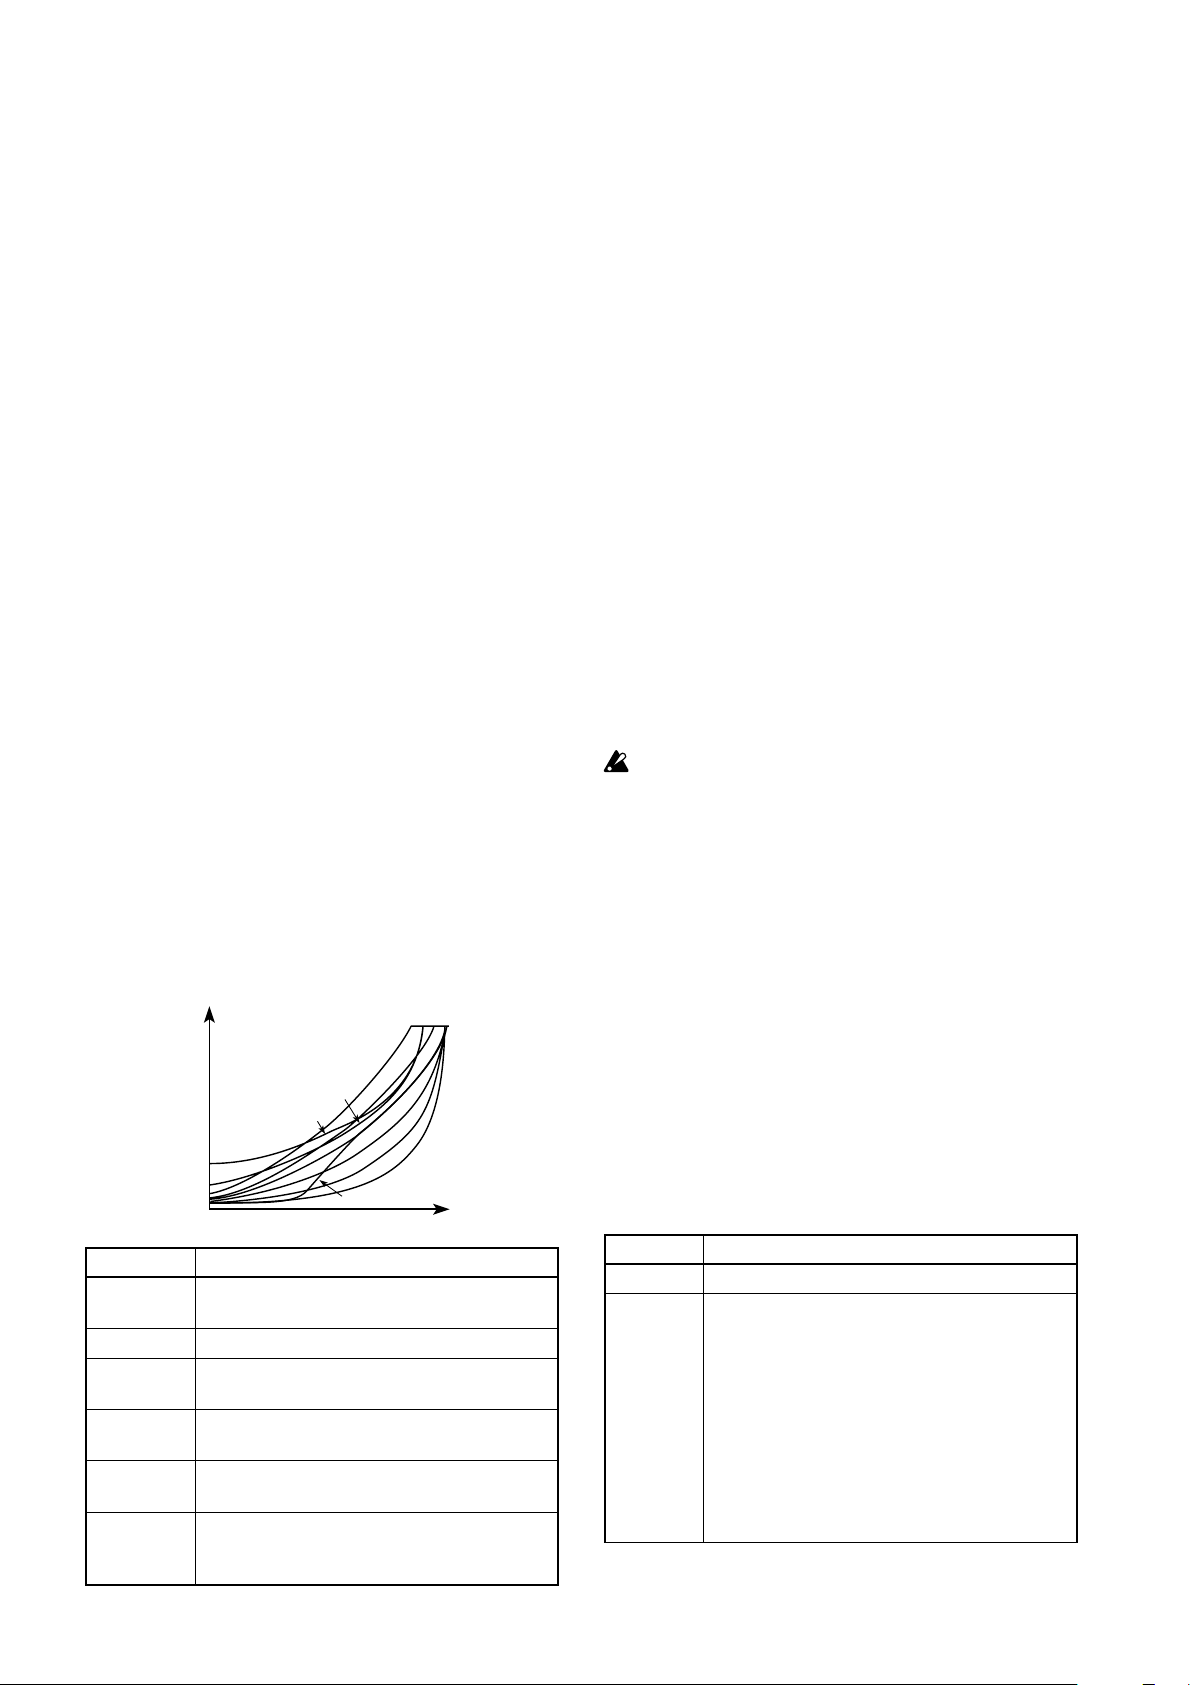
Velocity Curve
This sets how the volume and tone will be changed in response
to the keyboard velocity (how hard the keys are played) on the
Grandstage.
The default setting is “4 (Normal)”.
6
5
7
8
1
Value Details
1 (Heavy), 2, 3 These curves produce an eect when you play
strongly.
4 (Normal) This is the typical curve.
5, 6 These curves let you produce dynamic change
without having to play very hard.
7 This curve provides a at eect when playing
softly.
8 (Light) This curve provides an even more at eect
when playing softly.
9 (Wide) This curve produces an even softer response
when playing softly compared to the typical
curve #4.
4
3
2
1
9
Convert Position
This species the position at which the transposition and velocity
curve will apply. The setting has an effect on MIDI data that is
transmitted and received.
Note:
The transpose value is set from the TRANSPOSE button
(see page 11).
Pre-MIDI: Transposes and applies the velocity curve to data
immediately after it is outputted from the keyboard.
Post-MIDI: Transposes and applies the velocity curve to data
before it enters the sound generator.
This setting does not have an effect when playing the
Grandstage’s own sounds using this keyboard.
The default setting is “Pre-MIDI”.
Download and refer to the “Grandstage 88/73 MIDI Guide” (PDF)
for details.
Auto Power O
When a set period of time has passed without playing the keys,
turning the knobs or pressing the buttons on this keyboard, the
power is automatically turned off. This is called “auto power off”.
Select a setting of either “Disabled” or “4 Hours”.
The default setting is “4 Hours”, which means that the power
will automatically turn off if the Grandstage is not used for four
hours.
Brightness (display brightness)
Sets the display brightness for each display corresponding to the
two sections on the front panel. The setting range is from 1–10,
and the default setting is “8”.
Continuing to use the Grandstage while the brightness is set
to a high value will have an effect on the life of the displays.
KORG Logo Light (turning the KORG logo light on/o)
This sets the brightness of the rear panel KORG logo. To make
the logo light up in response to the note-on velocities played on
the keyboard, set this to “On-Note Vel”.
The default setting is “5”.
KORG Logo Color (color of KORG light)
Sets the color of the KORG logo on the rear panel when it lights
up.
The logo will light up in one of the following colors: white, red,
pink, blue, green, purple, or gold.
When selecting “Cycle”, the color will change gradually over time.
The default setting is “White”.
Foot - Pedal (foot pedal functions)
This sets the functions that will be controlled when a foot pedal
(such as the XVP-20, XVP-10 or EXP-2, sold separately) is
connected to the FOOT CONTROLLERS PEDAL jack on the
rear panel. This allows the volume and effects to be controlled.
The default setting is “Expression (CC#11)”.
Function Details
O The connected pedal will not function.
Expression
(CC#11)
The pedal will control expression. Controls
the volume on the output line for both the
KEYBOARDS and ENSEMBLE sections. The value
of the MIDI Volume (CC#7) message and the
expression are multiplied to get the actual
volume. (*1) (*2)
Pedal Wah
This functions dierently from normal in some
programs. For programs that include the words
“Pedal Wah”, the pedal controls the pedal wah
eect within the program, not the volume.
16
Volume
(CC#7)
Master
Volume
M. Wheel
(CC#1)
MIDI
CC#0...
#95
MIDI
CC#102...
#119
Controls the volume of the REVERB/DELA
*1:
the equalizer prior to input.
On the CX-3 type organ programs, this controls the volume
*2:
before the rotary speaker input. Recreates the ef
expression pedal used with drawbar organs. The expression
pedal effect can be recreated in the same way for VOX organ
and electric organ programs as well.
The MASTER VOLUME knob adjusts the output level from
*3:
AUDIO OUTPUT
This is used to control the volume.
Controls the volume on the output line for both
the KEYBOARDS and ENSEMBLE sections. (*1)
Controls the master volume.
This controls the volume at the last stage of
the sound generator output. At the same time,
this sends a master volume message (universal
exclusive message) to control the volume of all
outputs, including the REVERB/DELAY section
and the equalizer. (*3)
This allows the modulation wheel eect of the
Grandstage to be controlled by pedal.
Outputs the MIDI control change message that
is set. If the Grandstage supports this control
setting, the eect will be applied.
Outputs the MIDI control change message that
is set. If the Grandstage supports this control
setting, the eect will be applied.
Y section and
fect of an
.
Foot - Switch (foot switch functions)
This sets the functions that will be controlled when a foot pedal
(such as the PS-1 or PS-3, sold separately) is connected to the
FOOT CONTROLLERS SWITCH jack on the rear panel. This
allows you to switch between favorites, as well as control sounds
and effects.
The default setting is “SW2 (CC#81)”.
Function Details
O The connected pedal will not function.
SW 1
(CC#80)
SW 2
(CC#81)
Soft
(CC#67)
Favorite
Up
Favorite
Down
MIDI
CC#0...
#95
MIDI
CC#102...
#119
This controls the SW1 button eect using a foot
switch.
This controls the SW2 button eect using a foot
switch.
Turns the soft pedal eect on or o.
Selects the next favorite number using a foot
switch. At the same time, this sends a program
change message.
Selects the previous favorite number using
a foot switch. At the same time, this sends a
program change message.
Outputs the MIDI control change message that
is set. If the Grandstage supports this control
setting, the eect will be applied.
Outputs the MIDI control change message that
is set. If the Grandstage supports this control
setting, the eect will be applied.
Calibrating the pedal
Damper Calib. (damper pedal calibration)
Calibrate the damper pedal (such as the DS-1H) that is connected
to the DAMPER jack. This will adjust the half-damper variable
range.
The calibration set here will be stored in memory until you
Tip:
perform the calibration again.
1. Connect the damper pedal to the Grandstage.
Refer to “FOOT CONTROLLERS” on page 10 for how to
connect the pedal.
2. Lift your foot o the damper pedal.
3. Press the SYSTEM button, and select “Damper
Calib.” using the VARIATION knob.
“[Press Pedal]” will blink on the third line of the display.
Note:
4. Press the damper pedal down all the way until it
stops, and then lift your foot o the pedal.
Note:
5. When the calibration is completed, the word
“Completed” will be shown on the third line of
the display.
Note:
6. To continue making other settings, use the
VARIATION knob to select the necessary
parameter.
Foot Sw Calib. (foot switch calibration)
Calibrate the switch-type foot pedal (such as the PS-1 or PS-3,
sold separately) that is connected to the SWITCH jack. This will
adjust the pedal’s variable range.
Tip:
1. Connect the switch-type foot pedal to the
Grandstage.
Refer to “FOOT CONTROLLERS” on page 10 for how to
connect the pedal.
2. Lift your foot o the foot pedal.
3. Press the SYSTEM button, and select “Foot Sw
Calib.” using the VARIATION knob.
“[Press Pedal]” will blink on the third line of the display.
Note:
4. Press the foot pedal down all the way until it
stops, and then lift your foot o the pedal.
Note:
If you wish to cancel the calibration while
Pedal]” is blinking, select a parameter using
“[Press
the
VARIATION knob, or press the SYSTEM or
EXIT button to nish system settings.
The display will stop blinking and remain lit while
the damper pedal is being used. If nothing happens
even when you press the pedal, the pedal may not
be connected properly to the DAMPER jack. Check
the connections.
If calibration was not correctly completed,
“[Press
Pedal]” will blink. Do step 4 once more.
The calibration set here will be stored in memory until you
perform the calibration again.
If you wish to cancel the calibration while
Pedal]” is blinking, select a parameter using
“[Press
the
VARIATION knob, or press the SYSTEM or
EXIT button to nish system settings.
The display will stop blinking and remain lit while
the foot pedal is being used. If nothing happens
even when you press the pedal, the pedal may not
be connected properly to the SWITCH jack. Check
the connections.
17

5. When the calibration is completed, the word
“Completed” will be shown on the third line of
the display.
Note:
If calibration was not correctly completed,
Pedal]” will blink. Do step 4 once more.
“[Press
6. To continue making other settings, use the
VARIATION knob to select the necessary
parameter.
Pedal Calib. (pedal calibration)
Calibrate the expression pedal (such as the XVP-20, XVP-10 or
EXP-2, sold separately) that is connected to the PEDAL jack.
This will adjust the pedal’s variable range.
The calibration set here will be stored in memory until you
Tip:
perform the calibration again.
1. Connect the expression pedal to the Grandstage.
Refer to “FOOT CONTROLLERS” on page 10 for how to
connect the pedal.
2. Tilt the expression pedal all the way down
towards you.
3. Press the SYSTEM button, and select “Pedal Calib.”
using the VARIATION knob.
“[Press Pedal]” will blink on the third line of the display.
Note:
If you wish to cancel the calibration while
“[Press
Pedal]” is blinking, select a parameter using
VARIATION knob, or press the SYSTEM or
the
EXIT button to nish system settings.
4. Press the expression pedal upward all the way
until it stops, and then bring the pedal all the way
down.
Note:
The display will stop blinking and remain lit while
the expression pedal is being used. If nothing
happens even when you press the pedal, the pedal
may not be connected properly to the PEDAL jack.
Check the connections.
5. When the calibration is completed, the word
“Completed” will be shown on the third line of
the display.
Note:
If calibration was not correctly completed,
Pedal]” will blink. Do step 4 once more.
“[Press
6. To continue making other settings, use the
VARIATION knob to select the necessary
parameter.
Resetting, saving and loading data
Factory Reset (restoring the factory default settings)
The Grandstage can be returned to its factory default settings.
This will reset (initialize) the favorite data and system
setting data. Any edited or newly created favorite data will
be overwritten, and your data will be lost. If you want to
keep your favorite data, save the data to a USB storage
device (aftermarket product). All system settings (including
calibration data) will be reset, and you will need to make
your settings and perform calibration once more.
While resetting, do not turn off the Grandstage’s power, play
the keyboard, or move any buttons, knobs or controllers.
Doing so may cause the reset operation to fail, and you will
be unable to use the Grandstage.
1. Press the SYSTEM button, and select “Factory
Reset” using the VARIATION knob.
“[Press EDIT]” will blink on the third line of the display.
Note:
2. Press the EDIT button.
The words “OK?[Press EDIT]” will blink on the third line of
the display, to reconrm that you wish to reset the data.
3. Press the EDIT button once more to reset the
keyboard.
4. When the reset is completed, the word
“Completed” will be shown on the third line of
the display.
5. Press the SYSTEM or EXIT button to nish the
system settings.
Save .FAV File (saving the favorite data)
This saves the 64 favorites that have been edited on or written to
the Grandstage, to external USB storage media connected to this
keyboard via the USB A port.
For instance, you could save the favorites that you created in your
home studio to a USB ash drive or other USB device, and then
reload these favorites in the studio or onstage to the Grandstage,
which will bring back the favorite sounds you created in your
home studio. Also, by managing your favorites that might differ
for each live performance or project as a .FAV le, you can
instantly prepare a “set” of the favorites that you need each time.
1. Plug a USB storage device into the USB A port of
the Grandstage.
Note:
2. Press the SYSTEM button, and select “Save .FAV
File” using the VARIATION knob.
“[Press EDIT]” will blink on the third line of the display.
Note:
If you wish to cancel the reset to factory default
settings while “[Press EDIT]” is blinking, select a
parameter using the VARIATION knob, or press the
SYSTEM or EXIT button to nish system settings.
The USB A port on the Grandstage supports hotplugging (meaning that the USB media/cable can be
removed while the power is turned on).
If you wish to cancel the save operation while
“[Press EDIT]” is blinking, select a parameter using
the VARIATION knob, or press the SYSTEM or
EXIT button to nish system settings.
18
3. Press the EDIT button once more to continue
saving.
Note:
If a USB storage device is not connected to the
USB A port, the message “No valid media” will be
displayed on the third line of the display, and the
save operation will be cancelled. If this happens,
connect a USB storage device, select “Save .FAV
File” once more using the VARIATION knob, and
perform step 3.
4. The words “Set File Name” and “Save [Hold EDIT]”
will be alternately shown on the middle line of
the display, and the le name will be shown on
the third line.
5. Turn the VARIATION knob to select the characters
to edit (the selected character will blink), and use
the LEVEL knob to change the blinking character.
The name is “GS0000” by default, and the leftmost character
“G” will blink. Filenames can be up to six characters long.
Note:
Press the EXIT button if you wish to cancel the
renaming of the lename. “[Press EDIT]” will be
displayed.
6. After you have nished naming the le, hold
down the EDIT button for around one second to
save the data.
7. The words “OK?[Press EDIT]” will blink on the
third line of the display, to reconrm that you
wish to save the data.
Note:
To cancel the save operation, press the EXIT button.
This will return the display to a point three steps
back.
8. Press the EDIT button quickly to begin saving the
data.
9. When the save is completed, the word
“Completed” will be shown on the third line of
the display.
Note:
If a le with the same name already exists where
the le will be saved, the message “File Overwrite”
will be shown on the second line of the display. To
overwrite the le, press the EDIT button.
To cancel overwriting the le, press the EXIT
button. The display will return to the “Set File
Name” screen. Change the le name, and then save
using step 6 again.
10. Press the SYSTEM or EXIT button to nish the
system settings.
Storage media that can be used
USB storage devices, such as MS-DOS FAT16 or FAT32-
formatted ash media or disks
Maximum usable storage capacity
FAT32: Up to 2 TB (2,000 GB)
FAT16: Up to 4 GB
When saving to storage media, the “KORG/Grandstage” directory
will automatically be created in the media’s root directory. This
directory will be used exclusively by the Grandstage. When using
the “Save .FAV File” function, a le with the .FAV extension will
be created in this directory.
If the storage media is not formatted as MS-DOS FAT16 or
FAT32, the message “No valid media” will be shown. Format the
storage media on your computer. If there is very little free space
remaining on the storage media and data cannot be saved, the
message “No free space” will be displayed. In this case, delete
any unnecessary les from the storage media to free up disk
space, or use a different storage media with more capacity.
When loading a .FAV le from storage media, only the .FAV
les in the “KORG/Grandstage” directory can be shown and
selected for loading. Note that if you change the directory,
folder hierarchy or lename using your computer, you will
no longer be able to load the le.
The Grandstage recognizes the .FAV le extension. If you
change the le extension on a computer or other device, the
Grandstage will recognize this as an undened le, and will
not be able to load it. The lenames saved by the Grandstage
are six characters long. If you add more characters to a
lename using your computer or other device, you may no
longer be able to display any of the lenames on the storage
media.
Load .FAV File (loading the favorite data)
This loads the favorite data (64 favorites) into the Grandstage’s
memory, which were saved to a USB storage device using the
favorite data save function.
This will load the favorite data into memory. Any factory-set
default data or favorite data that was edited and saved on the
Grandstage will be overwritten, and your favorites will be
lost. If you want to keep your favorite data, save the data to
a USB storage device (aftermarket product).
1. Plug the USB storage device that contains the
saved favorite data into the USB A port of the
Grandstage.
Note:
The USB A port on the Grandstage supports hotplugging (meaning that the USB media/cable can be
removed while the power is turned on).
2. Press the SYSTEM button, and select “Load .FAV
File” using the VARIATION knob.
“[Press EDIT]” will blink on the third line of the display.
Note:
If you wish to cancel the load operation while
“[Press EDIT]” is blinking, select a different system
parameter using the VARIATION knob, or press the
SYSTEM or EXIT button to nish system settings.
19

3. Press the EDIT button once more to continue
loading.
Note:
If there is no USB storage device plugged into
the USB A port, the KORG/Grandstage directory
that was created when executing the “Save .FAV
File” function on this keyboard was not found, or
if there is no .FAV le located in that directory, the
message “No valid media” or “No File/Path” will be
shown on the third line of the display, and loading
will stop. If this happens, connect a USB storage
device to the Grandstage that contains the .FAV
le you saved, select “Load .FAV File” using the
VARIATION knob, and perform step 3.
4. The le to load is shown on the third line of the
display. If there is more than one le that can be
loaded, use the LEVEL knob to select the lename
to load.
5. Hold down the EDIT button for around one
second to load the data.
The words “OK?[Press EDIT]” will blink on the third line of
the display, to reconrm that you wish to load the data.
Note:
To cancel the load operation, press the EXIT button.
This will go back to the “Select File” display.
6. Press the EDIT button quickly to begin loading
the data.
When loading is completed, the word “Completed” will be
shown on the third line of the display.
7. Press the SYSTEM or EXIT button to nish the
system settings.
Appendices
Trouble shooting
If the Grandstage does not function as you expect, check the
following points.
Power does not turn on
□ Is the power cord connected to an AC outlet?
Did you hold down the power button?
□
Power won’t turn o
□ Did you hold down the power button for several seconds?
Power turns o
□ Could the Auto Power-Off function be enabled?
No sound when you play the keyboard
□ Is your powered monitor system or headphones connected to
the correct jack(s)?
Is the connected monitor system
□
volume raised?
□ Is the MASTER VOLUME knob set to a position where sound
will be output?
Is Local Control turned on?
□
□
Are the LEVEL knobs for each section turned all the way
down (to the left)?
□ Is the volume down on the pedal connected to the FOOT
CONTROLLERS PEDAL jack?
Are you exceeding the Grandstag
□
when you do not hear some sounds while playing?
powered-on, and is the
e’s maximum polyphony
The sound will not stop.
□ Are the settings for the damper pedal correct? Use the
Calibration function to adjust the polarity and half-damper
variable range of the pedal.
The sound seems to be doubled.
□ If you are using an external MIDI device or a DAW, check
whether the local control setting of the Grandstage is turned
OFF.
The sound is distorted.
□ Are the inputs of the mixer, powered monitor speakers and so
on being overloaded?
Use the MASTER VOLUME knob on the Grandstage to
adjust the output level, as well as the volume faders on the
mixer to adjust the input level gain.
Chords cannot be played on the keyboard.
□ On some programs such as monophonic synthesizer sounds,
you will not be able to play chords. This is not a malfunction.
The pitch doesn’t sound right.
□ Is the Transpose function set correctly?
Are “Master Tune” in the system settings, as well as the
□
Octave and Tune edit parameters for the program set correctly?
The knobs and buttons on the panel won’t respond.
□ Is panel lock on? (The EXIT (PANEL LOCK) button is
blinking in this case.)
20
The equalizer, dynamics and reverb/delay eects
don’t sound, or I can’t control them.
□ Is panel lock on? (EXIT (PANEL LOCK) is blinking in this
case.)
□ Are the DYNAMICS, EQUALIZER, or REVERB/DELAY
buttons off (dark)?

I hear noise.
□ One effect used by programs is a noise-like effect, called
“Analog Record”. The resonance lter may also be used to
make the sound resonate. In either of these cases, this is not a
malfunction.
□ When raising the volume using the DYNAMICS knob,
EQUALIZER slider, LEVEL knob and other controls, the
levels may become excessive due to signal processing,
which might result in a distorted or noisy sound. This is not a
malfunction.
Adjust this by turning down the levels for each section.
□
When the REVERB/DELAY
be distorted or noisy due to excessive input. This is not a
malfunction.
Adjust this by lowering the LEVEL knobs on the
KEYBOARDS and ENSEMBLE sections, and by lowering
the value on the Reverb Send effect parameter.
□
Some noise may occur when you change the delay effect
time using the
the delay time is being abruptly changed and becomes noncontinuous. This is not a malfunction.
□
You may hear some noise as a re
depending on your power supply situation. This noise may be
defeated in some cases by switching the LIFT-GND switch to
the LIFT side.
TIME-TAP button and so on. This is because
section is on, the sound may
sult of a ground loop,
The knobs and buttons on the KEYBOARDS and
ENSEMBLE sections do not work, and I can’t control
them.
□ Is panel lock on? (The EXIT (PANEL LOCK) button is
blinking in this case.)
□ Are the KEYBOARDS or ENSEMBLE buttons off (dark)?
Error messages
No valid media
Refer to “Storage media that can be used” on page 19, “Save
.FAV File (saving the favorite data)” on page
.F
AV File (loading the favorite data)” on page
No File/Path
Refer to “Save .FAV File (saving the favorite data)” on
18.
page
No free space
Refer to “Storage media that can be used” on page 19.
Save Error
An error occurred when writing to media while executing “Save
FAV File”. The media may become unusable if it is ejected during
a save operation, and data may not be able to be saved to it. Use
a computer to back up the data as necessary, and repair the media
by reformatting it or by other means.
Write Protected
The media where you attempted to write data is write protected.
Disable write protect on the media, and execute the command
once again.
18, and “Load
19.
I made a favorite by modifying its program or making
other edits, but it’s no longer there.
□ You may have switched to another favorite or turned off the
power before saving your favorite.
The damper pedal, expression pedal and foot switch
connected to the FOOT CONTROLLERS jacks don’t
work as intended.
□ Are you using the correct settings when connecting the
pedals? Use the Calibration function to adjust the polarity and
variable range.
MIDI transmit and receive is not working correctly
with external devices.
□ Are the MIDI cables connected correctly?
□
If connecting via USB-MIDI, is the USB cable correctly
plugged in to the USB B port?
□ Is the Grandstage set to transmit and receive MIDI data on the
same channel as the external MIDI device?
□ Are MIDI messages being transmitted and received that are
compatible with the Grandstage?
The Grandstage is not responding to MIDI program
change messages.
□ The Grandstage supports MIDI program change messages
for selecting favorites. However, sound programs on the
KEYBOARDS and ENSEMBLE sections cannot be selected
using MIDI program change messages.
The DYNAMICS knob does not respond to MIDI input.
□ The Dynamics function only works on notes that are played
using this keyboard. Dynamics has no effect on notes received
via MIDI IN.
21
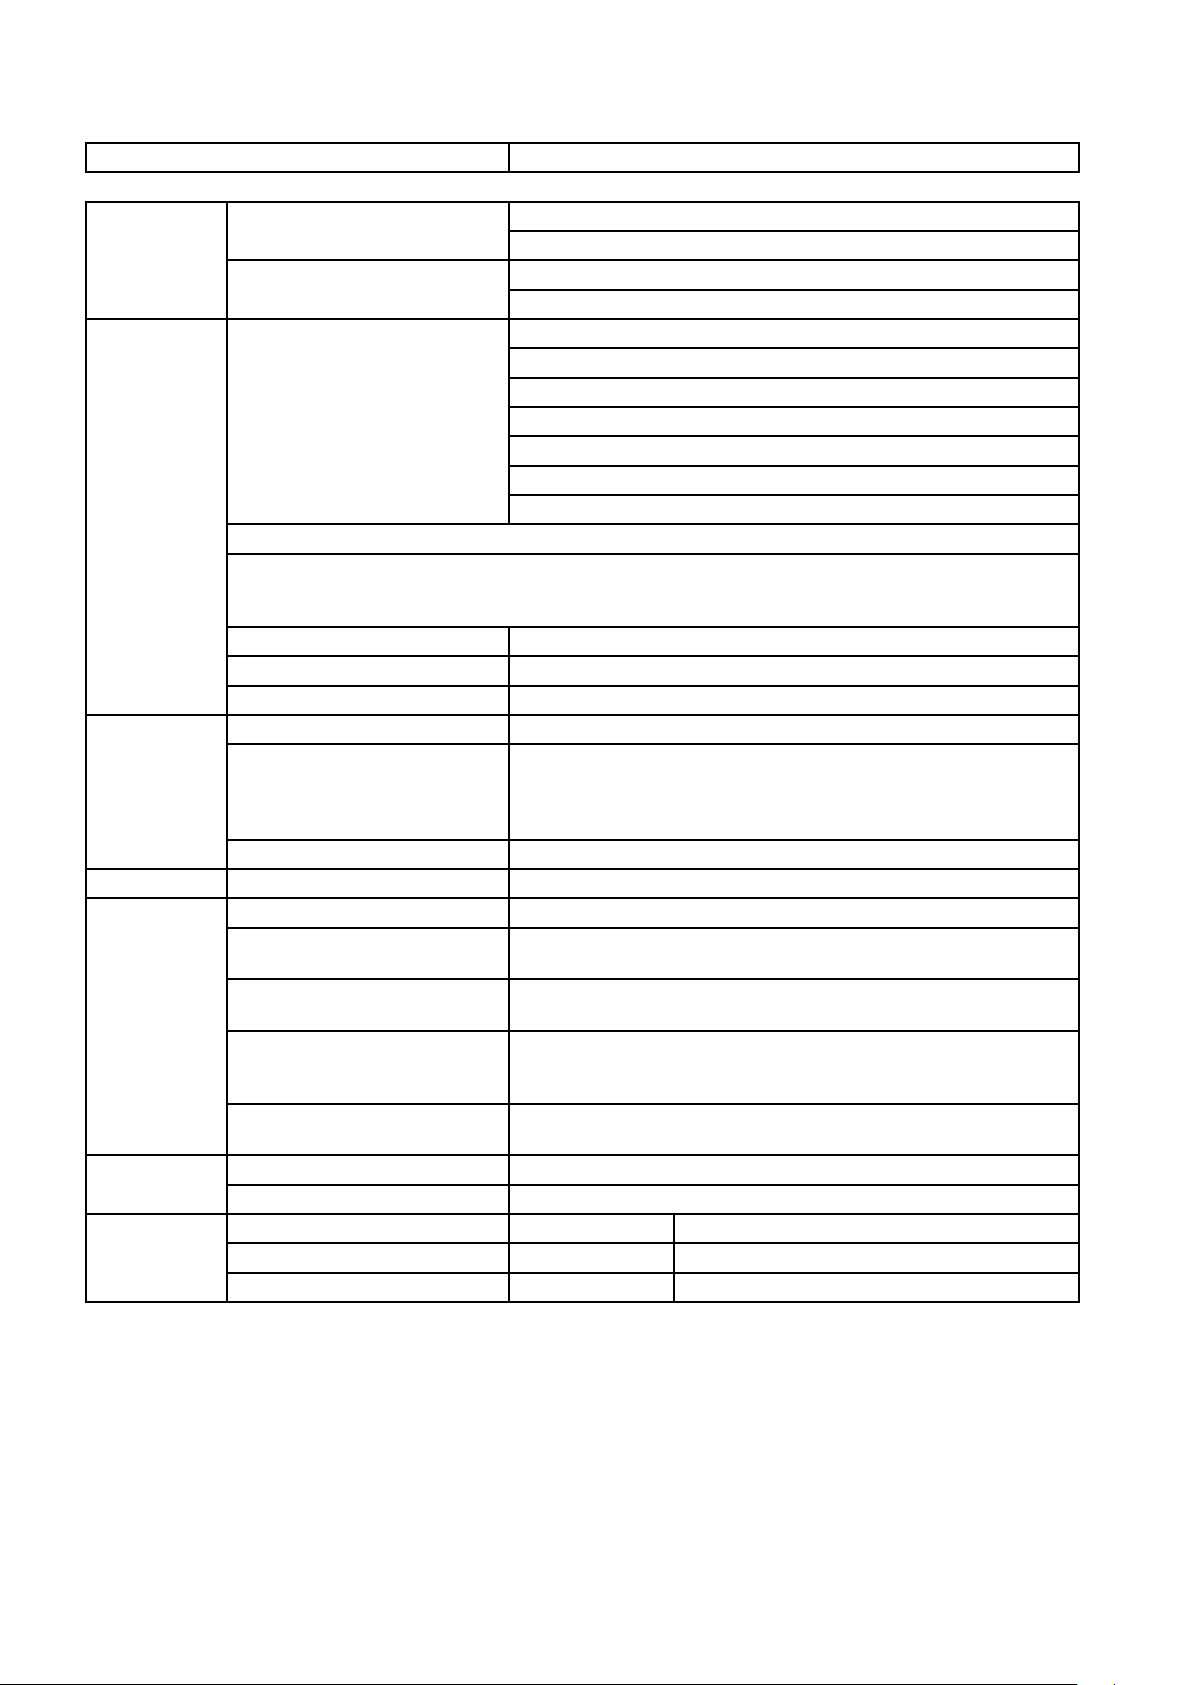
Specications
Operating temperature +5 – +40 °C (no condensation)
Keyboard Grandstage 88 RH3 (Real Weighted Hammer Action 3)
88-key: A0–C8, velocity sensitive, aftertouch not supported
Grandstage 73 RH3 (Real Weighted Hammer Action 3)
73-key: E1–E7, velocity sensitive, aftertouch not supported
Tone Generator Synthesis type and maximum
polyphony
*1, *2
The ac
*1:
*2
:
Preloaded PCM storage capacity Approx. 19 GB (approx. 32 GB using linear conversion)
Number of sounds 500
Favorite 64 (Includes 32 preloads)
Eect Insert eect for sound programs 3-band EQ and four insert eects.
Reverb/Delay section REVERB/DELAY button, Type selection knob, DEPTH knob, TIME-TAP button
Equalizer section EQUALIZER button, LOW, MID, HIGH slider (3 band Equalizer)
Demo songs 16
Panel interface Favorite section FAVORITE buttons: 64 (A–H: 8, 1–8: 8), WRITE button
Keyboard section KEYBOARDS button, Category selection knob, Display (128 x 64 dots), LEVEL
Ensenble section ENSEMBLE button, Category selection knob, Display (128 x 64 dots), LEVEL
Dynamics section DYNAMICS button, DYNAMICS knob
Other SPLIT button, SWAP button, EXIT(PANEL LOCK) button, SYSTEM button,
Controllers Realtime controller Pitch bend wheel, Modulation wheel, SW1 button, SW2 button
MASTER VOLUME MASTER VOLUME knob
Principal
specications
Frequency response 20 Hz–22 kHz ±1.0 dB, 10 kΩ load
THD+N 20 Hz–22 kHz 0.005%, 10 kΩ load
S/N ratio 105 dB, 10 kΩ load
tual polyphony will vary depending on the synthesis types and eects being used.
The quot
single engine. Dynamic voice allocation between synthesis types: exclusive system intelligently allocates
resources as necessary.
ed maximum numbers of voices apply when 100% of the voice processing power is devoted to a
SGX-2: 60 dual stereo notes (equivalent to 240 voices max.)
EP-1: 100 voices
AL-1: 36 voices
CX-3: 128 voices
VOX Organ: 100 voices
Compact Organ: 100 voices
HD-1: 64 stereo notes (equivalent to 128 voices max.)
Select 1 from Reverb type (HALL, STAGE, ROOM, SPRING), Delay type (DELAY,
CROSS, TAPE, MOD DLY).
DEPTH, TIME (Tap) parameter, user-editable
knob, VARIATION knob, EDITbutton
knob, VARIATION knob, EDITbutton
Controls how the volume and sound respond to changes in keyboard
touch.
TRANSPOSE button, DEMO (SYSTEM button + TRANSPOSE button)
22
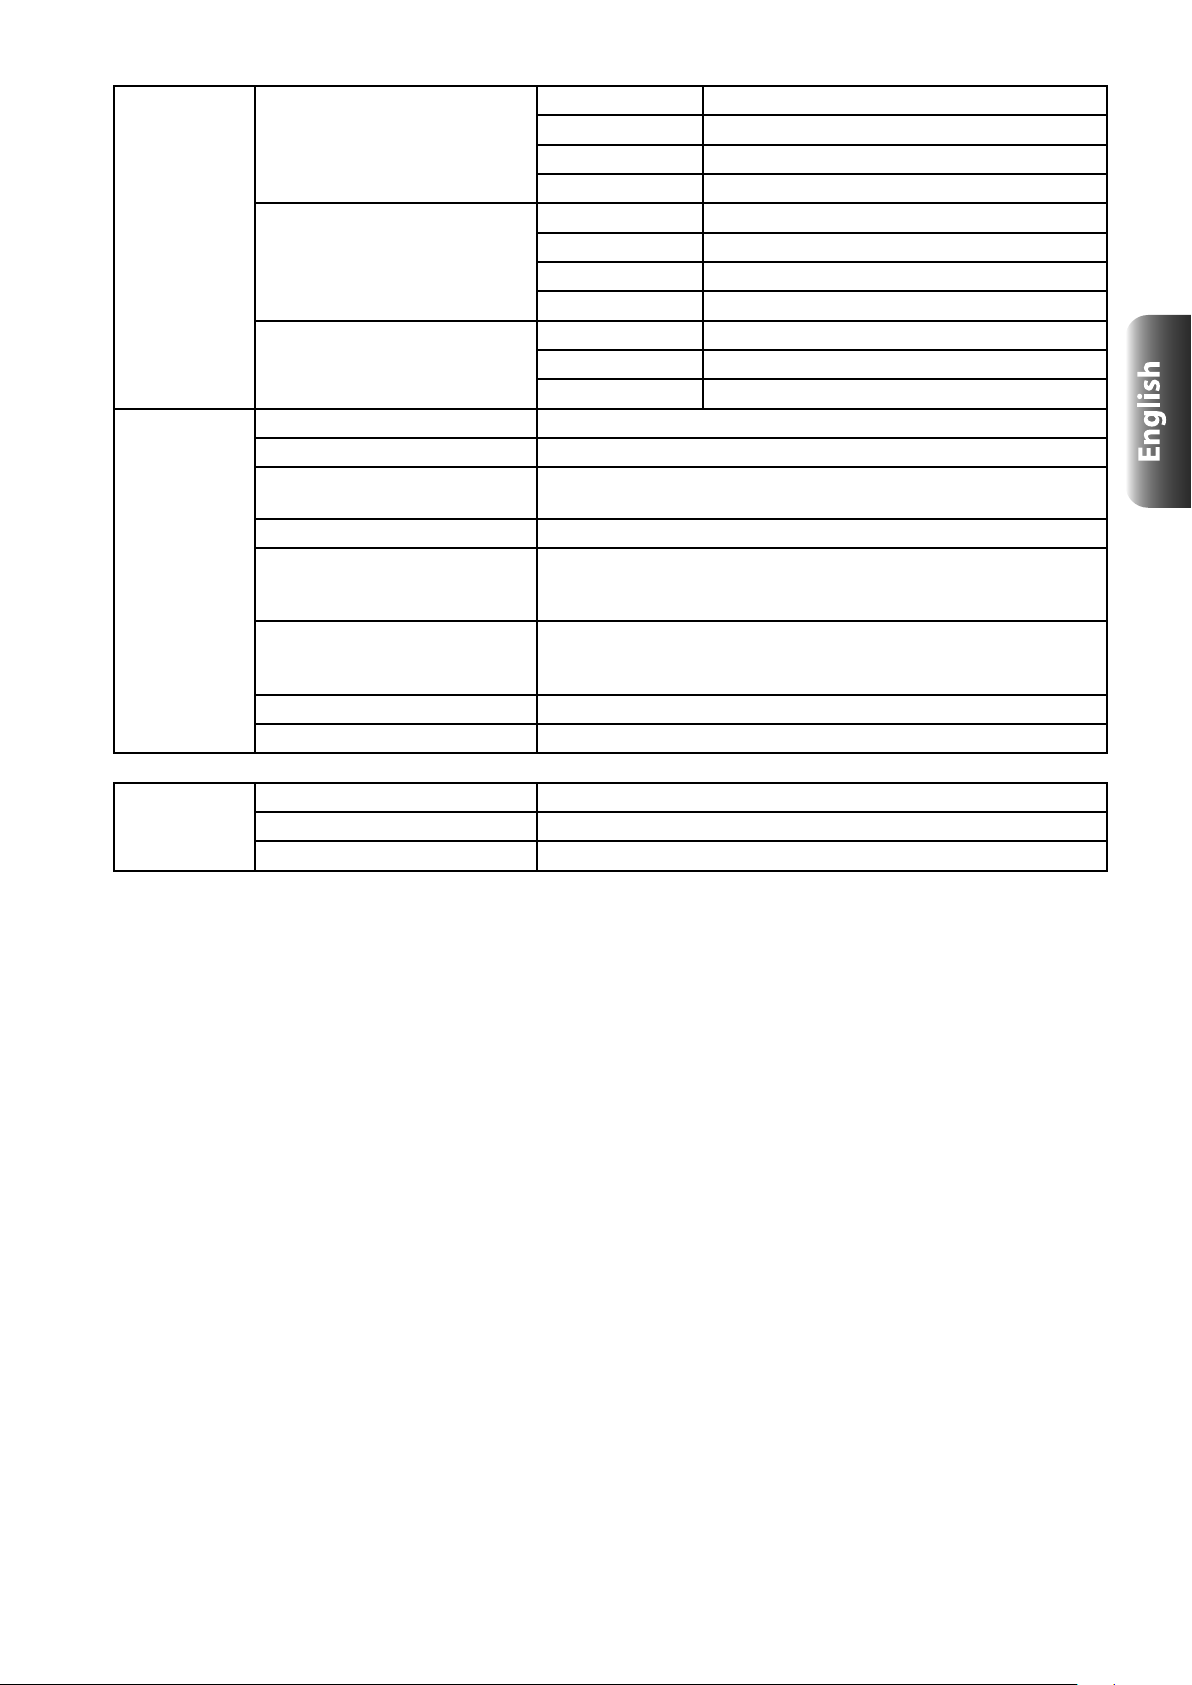
Audio Output AUDIO OUTPUT (LEFT, RIGHT): XLR Connector XLR-3-32 type (balanced) + LIFT - GND switch
Output Impedance 600 Ω
Maximum Level +16 dBu
Load Impedance 10 kΩ
AUDIO OUTPUT (L/MONO, R): phone Connector φ6.3 mm TS phone jacks (unbalanced)
Output Impedance 1.1 kΩ stereo; 600 Ω mono (L/Mono only)
Maximum Level +16 dBu
Load Impedance 10 kΩ
Headphones Connector φ6.3 mm stereo phone jack
Output Impedance 50 Ω
Maximum level 150 mW + 150 mW @32 Ω
General FOOT CONTROLLERS DAMPER (half-pedaling supported), SWITCH, PEDAL
MIDI IN, OUT
USB • USB A (TYPE A) x1: For connecting USB storage media
• USB B (TYPE B) x1: USB-MIDI Interface
Power supply AC Power Supply terminal, Power button
Dimensions
(width x depth x height)
Weight 20 kg / 44.09 lbs. (Grandstage 88)
Power consumption 30 W
Included items Owner’s manual, Power cord, Music stand, Damper pedal (DS-1H)
1311 mm x 359 mm x 140 mm / 51.64" x 14.13" x 5.51" (Grandstage 88)
1099 mm x 359 mm x 140 mm / 43.27" x 14.13" x 5.51" (Grandstage 73)
(excluding music stand)
17 kg / 37.48 lbs. (Grandstage 73)
(excluding music stand)
Options Expression/volume pedal XVP-20, XVP-10
Foot controller EXP-2
Pedal switch PS-3, PS-1
Specications and appearance are subject to change without notice for improvement.
•
23
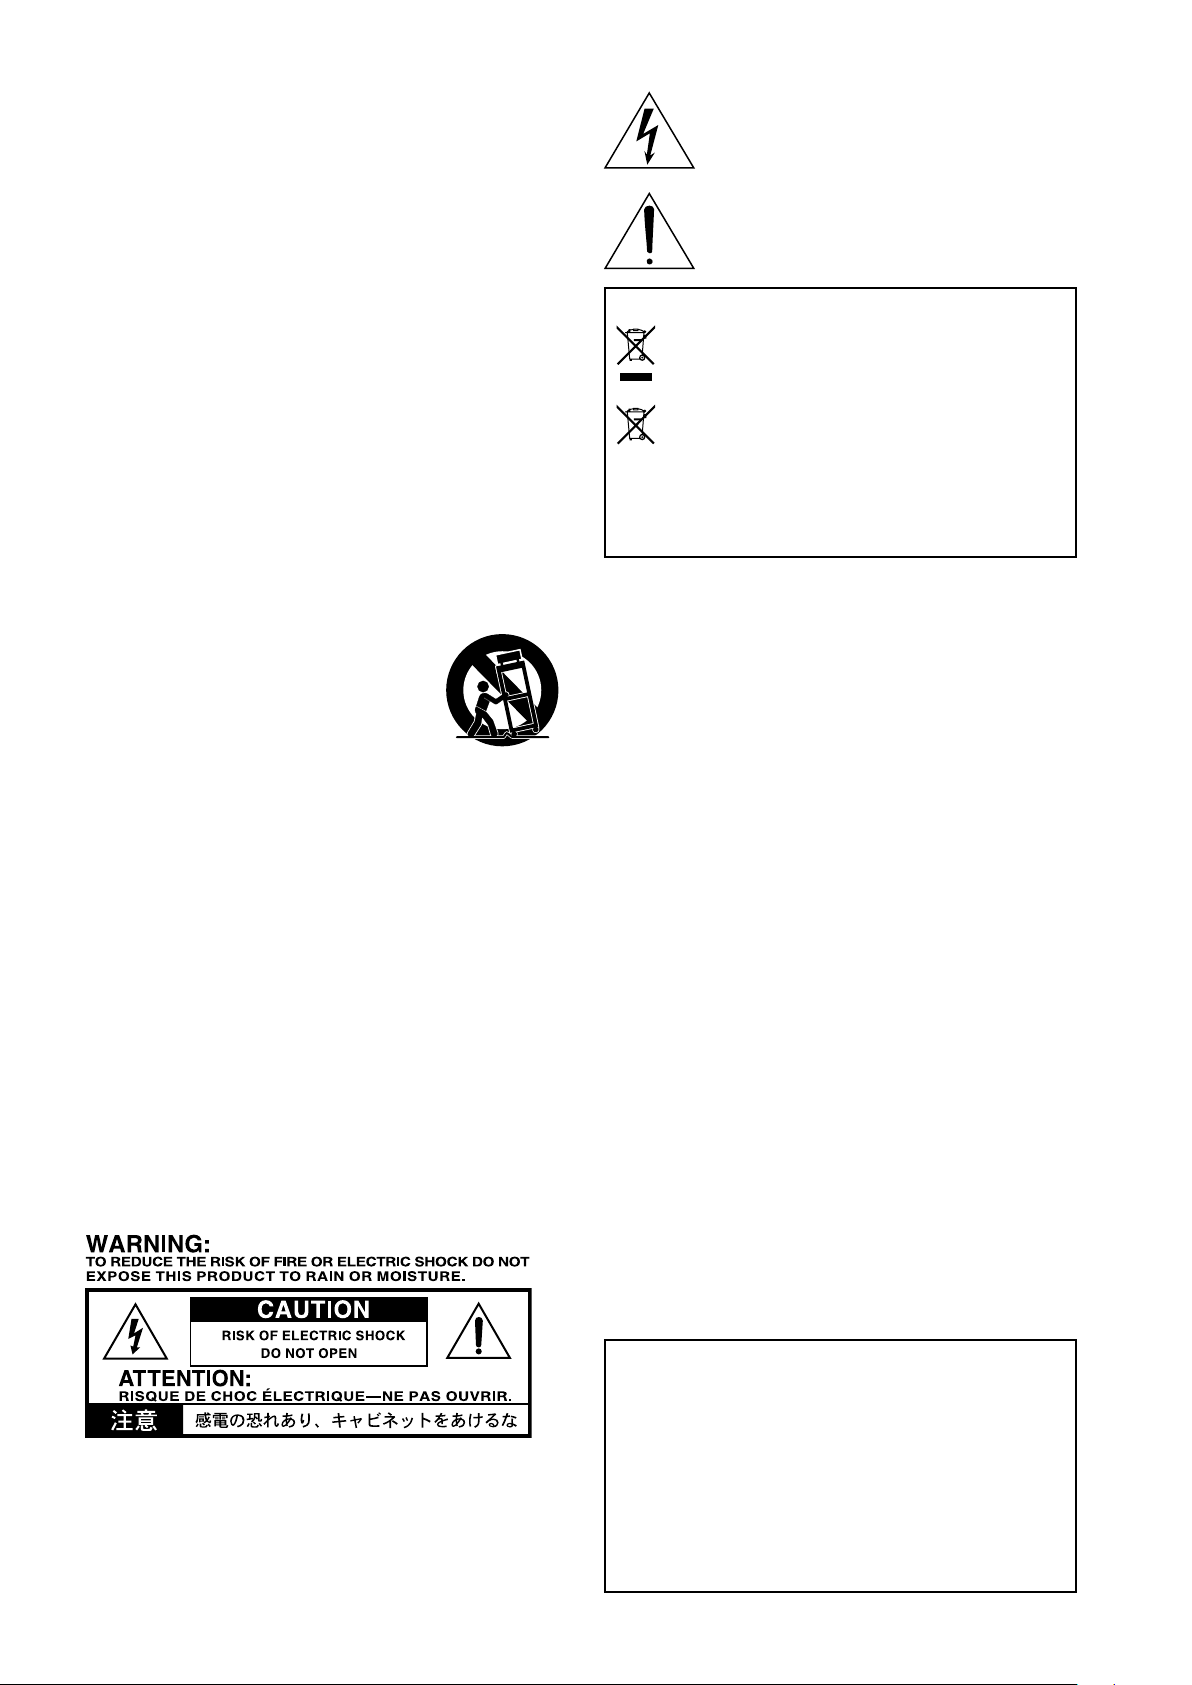
CONSIGNES IMPORTANTES DE SÉCURITÉ
1) Veuillez lire ces consignes.
Co
2)
nservez ces consignes.
3)
ez compte de tous les avertissements.
Ten
4) Suivez toutes les instructions.
5)
utilisez pas ce produit à proximité d’eau.
N’
6)
ttoyez le produit avec un chiffon sec uniquement.
Ne
N’
7)
obstruez aucun orice d’aération. Installez le produit conformé-
ment aux consignes du fabricant.
8)
’installez pas à proximité de sources de chaleur comme des
Ne l
radiateurs, des bouches d’air chaud, des poêles ou d’autres appareils générateurs de chaleur (amplicateurs compris).
9) Ne supprimez pas la sécurité offerte par la che polarisée ou
dotée d’une broche de terre. Une che polarisée dispose de deux
lames dont une plus large que l’autre. Une che avec broche de
terre dispose de deux lames (ou broches) et d’une broche de
terre. La lame plus large ou la troisième broche est conçue pour
votre sécurité. Si la che fournie ne s’adapte pas à votre prise
de courant, consultez un électricien pour faire remplacer cette
ancienne prise.
10)
otégez le cordon d’alimentation pour éviter qu’il ne soit piétiné
Pr
ou abîmé notamment à la hauteur des ches, des rallonges et au
point de connexion du produit.
11) Utilisez exclusivement des xations ou accessoires spéciés par
le fabricant.
12)
ilisez cet appareil exclusivement avec un cha-
Ut
riot, stand, pied, support ou table du type spécié
par le constructeur ou livré avec l’appareil. Si
vous utilisez un chariot, soyez prudent lors de
son déplacement an d’éviter que le produit ne
bascule et ne blesse quelqu’un.
13) Débranchez cet appareil en cas d’orage ou s’il doit rester inutilisé
durant une période assez longue.
14)
ur tout dépannage ou entretien, veuillez consulter un service
Po
ou un technicien qualié. Il est impératif de faire appel à un technicien qualié si l’appareil a été endommagé d’une quelconque
façon, notamment, si le cordon d’alimentation ou la che est
endommagée, si du liquide s’est renversé ou si des objets sont
tombés dans l’appareil, si l’appareil a été exposé à la pluie ou à
l’humidité, s’il ne fonctionne plus normalement ou s’il est tombé.
• AVERTISSEMENT—Ce produit doit être branché à une prise
secteur disposant d’une connexion de sécurité à la terre.
•
roduit branché au secteur ne peut pas être exposé à des
Un p
gouttes ou des éclaboussures. Ne placez aucun conteneur de
liquide (vase, verre) sur le produit.
•
fait de couper l’interrupteur n’isole pas complètement le produit
Le
de la source de courant.
•
intenez un accès facile à la prise d’alimentation. N’installez
Ma
pas ce produit trop loin d’une prise secteur et/ou d’un multiprise.
•
installez pas ce produit dans un espace conné comme un
N’
ightcase ou autre meuble de ce type.
•
e pression sonore excessive en provenance d’oreillettes ou d’un
Un
casque peut entraîner une perte auditive.
Le symbole d’éclair dans un triangle équilatéral est destiné
à avertir l’utilisateur de la présence d’une tension
dangereuse non isolée au sein du produit. Cette tension
est sufsante pour constituer un risque d’électrocution.
Le point d’exclamation dans un triangle équilatéral avertit
l’utilisateur de la présence d’importantes consignes
de manipulation ou d’entretien dans la documentation
accompagnant ce produit.
Note concernant les dispositions (Seulement EU)
Quand un symbole avec une poubelle barrée d’une croix
apparait sur le produit, le mode d’emploi, les piles ou le pack
de piles, cela signie que ce produit, manuel ou piles doit être
déposé chez un représentant compétent, et non pas dans une
poubelle ou toute autre déchetterie conventionnelle. Disposer
de cette manière, de prévenir les dommages pour la santé
humaine et les dommages potentiels pour l’environnement.
La bonne méthode d’élimination dépendra des lois et règlements
applicables dans votre localité, s’il vous plaît, contactez votre
organisme administratif pour plus de détails. Si la pile contient des
métaux lourds au-delà du seuil réglementé, un symbole chimique est
afché en dessous du symbole de la poubelle barrée d’une croix sur la
pile ou le pack de piles.
To
*
us les noms de produits et de sociétés sont des marques commer-
ciales ou déposées de leur détenteur respectif.
Gestion des données
Une procédure incorrecte ou un mauvais fonctionnement peut entraîner
la perte du contenu de la mémoire, aussi nous vous recommandons de
sauvegarder vos données importantes sur support de stockage USB
ou un autre type de support. Korg décline toute responsabilité pour tout
dommage résultant de la per te de données.
24
REMARQUE IMPORTANTE POUR LES CLIENTS
Ce produit a été fabriqué suivant des spécications sévères et des
besoins en tension applicables dans le pays où ce produit doit être
utilisé. Si vous avez acheté ce produit via l’internet, par vente par
correspondance ou/et vente par téléphone, vous devez vérier que ce
produit est bien utilisable dans le pays où vous résidez.
ATTENTION: L’utilisation de ce produit dans un pays autre que
celui pour lequel il a été conçu peut être dangereuse et annulera
la garantie du fabricant ou du distributeur. Conservez bien votre
récépissé qui est la preuve de votre achat, faute de quoi votre
produit ne risque de ne plus être couvert par la garantie du fabricant
ou du distributeur.

Sommaire
CONSIGNES IMPORTANTES DE SÉCURITÉ ------------ 24
À propos du manuel d’utilisation ---------------------------- 25
Nous vous remercions d’avoir choisi le Grandstage
de Korg. Pour proter au mieux de votre nouvel
instrument, veuillez lire attentivement ce manuel et
suivre ses consignes.
Caractéristiques principales ----------------------------- 26
Description des panneaux et fonctions
Panneau avant ---------------------------------------------------- 26
Panneau arrière
--------------------------------------------------- 28
-------------- 26
Préparatifs ---------------------------------------------------- 29
Connexions -------------------------------------------------------- 29
Connexion de dispositifs audio
C
onnexion du cordon d’alimentation fourni
avec le clavier--------------------------------------------------- 29
Mise sous/hors tension
ise sous tension --------------------------------------------- 29
M
Mise hors tension
É
coute des morceaux de démonstration
----------------------------------------- 29
--------------------------------------------- 29
---------------------------- 29
------------------ 30
Sélectionner et jouer des sons -------------------------- 30
Sélectionner un favori ------------------------------------------ 31
Sélectionner un programme
Utilisa
tion des contrôleurs
M
olette de Pitch bend --------------------------------------- 32
Molette de modulation
SW1, SW2
FOOT CONTROLLERS
R
égler la dynamique et l’égaliseur
D
ynamique ----------------------------------------------------- 33
Égaliseur
T
ransposition et verrouillage des commandes
T
ranspose-------------------------------------------------------- 33
Panel Lock
-------------------------------------------------------- 32
--------------------------------------------------------- 33
------------------------------------------------------- 33
---------------------------------- 31
------------------------------------- 32
-------------------------------------- 32
----------------------------------------- 32
-------------------------- 33
---------- 33
Création de favoris------------------------------------------ 34
Changer les programmes utilisés ---------------------------- 34
Superposer deux sons
C
réer un partage de sons
M
émoriser un favori édité ------------------------------------- 35
Édition d’un programme
M
éthode d’édition
R
églages de réverbération/retard
--------------------------------------- 34
----------------------------------- 34
--------------------------------------- 35
-------------------------------------------- 35
--------------------------- 36
À propos du manuel d’utilisation
La documentation pour ce produit comprend les manuels
suivants.
• Manuel d’utilisation (ce que vous lisez)
Guide MIDI (PDF)
•
(que vous pouvez télécharger sur le site internet de Kor
http://www.korg.com)
• Sound Name List (PDF)
(que vous pouvez télécharger sur le site internet de Korg
http://www.korg.com)
Manuel d’utilisation
Ce guide propose une introduction simple aux fonctions
principales du Grandstage. Lisez d’abord ce manuel.
Guide MIDI (PDF)
Ce guide décrit également les types de messages MIDI et de
données pris en charge par le Grandstage 88/73. Lisez ce guide
avant d’utiliser le Grandstage 88/73 avec des dispositifs MIDI
externes, des logiciels DAW, etc.
Téléchargez ce manuel sur http://www.korg.com.
Sound Name List (PDF)
Ce document contient la liste des programmes, des favoris et des
morceaux de démonstration du Grandstage 88/73.
Téléchargez ce manuel sur http://www.korg.com.
Appellations utilisées dans ce mode d’emploi
Le Grandstage se décline en deux versions: 88 touches
(Grandstage 88) et 73 touches (Grandstage 73).
Dans ce mode d’emploi, nous utiliserons simplement l’appellation
“Grandstage” ou encore simplement “clavier” pour désigner
les deux versions, sauf cas spéciques. Les illustrations des
panneaux de l’instrument et les autres illustrations représentent le
Grandstage 88.
Symboles ,
Ces symboles signalent respectivement un avertissement, une
remarque supplémentaire ou une astuce.
Remarque
,
Astuce
Saisies d’écran du manuel
Les valeurs des paramètres gurant dans les illustrations de ce
manuel sont uniquement fournies à titre d’exemple; elles ne
correspondent pas nécessairement aux réglages qui apparaissent
sur l’écran du Grandstage.
g
Paramètres système ---------------------------------------- 37
Types de paramètres système -------------------------------- 37
Procédure de réglage des paramètres système---------- 37
Paramètres système --------------------------------------------- 37
Calibrage de la pédale
nitialisation, sauvegarde et chargement de
I
données
--------------------------------------------------------- 40
--------------------------------------- 39
Appendices --------------------------------------------------- 42
Dépannage --------------------------------------------------------- 42
Messages d’erreur ------------------------------------------------ 43
Fiche technique ---------------------------------------------- 44
25

Caractéristiques
Description des panneaux
principales
Le Grandstage de Korg est un piano de scène conçu pour offrir
une jouabilité adaptée à la scène, et propose une riche palette de
sonorités incluant les plus beaux sons de piano acoustiques et
électriques, ainsi qu’une interface utilisateur intuitive.
De superbes sonorités de piano
• Le Grandstage inclut cinq des sons de piano à queue les plus
recherchés de la planète. Le moteur dédié de piano acoustique
SGX-2 offre une riche gamme d’expression, du délicat au
puissant, grâce à des échantillons stéréo non bouclés.
•
Le Grandstage propose des sons de pianos électriques issus
de six modèles classiques. Le moteur de piano électrique
EP-1 produit un son époustouant de délité, recréant chaque
changement naturel du son et offrant des modélisations dèles
fet des panneaux, des meubles, etc.
de l’ef
Une palette de sons exceptionnelle
• Le Grandstage propose 500 types de sons divisés en deux
sections: KEYBOARDS et ENSEMBLE. Sélectionnez un son
et explorez-le sur le clavier en choisissant simplement une
catégorie et une variation au sein de chaque section. Le nom
des sons est afché sur un écran électroluminescent de haute
lisibilité.
La section KEYBOARDS propose des sons de piano à queue,
•
de piano droit, de piano électrique, de clavi et d’orgue. La
section ENSEMBLE rassemble des sons généralement utilisés
sur scène, tels que cordes, cuivres, synthétiseur et cloches.
• Le Grandstage bénécie des sept moteurs de synthèse sonore
suivants, tous de qualité irréprochable: SGX-2 (piano acoustique), EP-1 (piano électrique), CX-3 (orgue à roues phoniques), or
sation analogique) et HD-1 (générateur de sons PCM).
L’instrument of
•
effet optimum est préprogrammé pour chaque son, comme par
exemple des effets classiques comme le phaser et le chorus
pour le son de piano électrique. La section REVERB/DELAY
permet en outre de régler instantanément les effets de réverbération et de retard.
Le réglage des fonctions de superposition (Layer) et de
•
partage (Split) est instantané. Ces fonctions permettent respec-
tivement de superposer et jouer simultanément deux sons, et
d’assigner un son dif
Un modèle de jouabilité pour la scène
• Les boutons FAVORITE sont stratégiquement placés au centre
du panneau avant. L’utilisation combinée de ces 16 boutons
permet de mémoriser 64 types de sons ou réglages. Ces sons
et réglages peuvent être rappelés instantanément sur scène.
•
La commande DYNAMICS permet de gérer instantanément
la manière dont le volume et le son répondent aux variations
de toucher (à la force d’enfoncement des touches du clavier).
Vous pouvez donc adapter la réponse de l’instrument en fonc
tion du style de jeu (comme par exemple solo, ensemble et
groupe) et de morceau. Utilisez la section EQUALIZER pour
modier instantanément la nature du son, en vue par exemple
de l’adapter à l’acoustique d’une salle de concert.
•
La fonction de transition en douceur des sons (SST) élimine
tout décrochage lors du changement de sons et produit des
changements de sons et d’effets parfaitement uides.
• Le Grandstage bénécie d’un clavier RH3 (avec mécanique
à marteau pondérée). Ce clavier recrée sous vos doigts le
toucher d’un véritable piano à queue et vous permet de jouer
les passages délicats dans leurs moindres nuances.
gue VOX, orgue électrique compact, AL-1 (modéli-
fre en outre une puissante section d’effets. Un
férent aux deux moitiés du clavier.
et fonctions
Panneau avant
1. Prise casque (avant gauche) (voyez page29)
Utilisez cette prise pour brancher un casque doté d’une che
jack stéréo de 6,3 mm. Cette prise transmet le même signal
que la prise AUDIO OUTPUT. Réglez le volume du casque
avec la commande MASTER VOLUME.
Remarque:
2. Molette de Pitch bend (voyez page32)
Contrôle la hauteur des notes jouées sur le clavier.
La hauteur augmente quand vous poussez la molette vers le
haut et diminue quand vous tirez la molette vers le bas.
3. Molette de modulation (voyez page32)
Contrôle l’effet de vibrato appliqué au son.
L’effet déni pour chaque son est appliqué quand vous
poussez la molette vers le haut.
4. Boutons SW1 et SW2 (voyez page32)
Ces boutons offrent un contrôle du son.
SW1 contrôle le timbre et SW2 sert principalement à activer/
couper l’effet. L’assignation des fonctions disponibles via
ces boutons se fait pour chaque son.
5. Commande MASTER VOLUME
Règle le niveau du signal transmis à la prise AUDIO
OUTPUT et à la prise casque.
6. Bouton et commande DYNAMICS
(voyez page33)
Une pression sur ce bouton active la fonction DYNAMICS
(le bouton s’allume) et la commande.
Cette fonction détermine la manière dont le volume et le
timbre de l’instrument varient en fonction de la force de
votre jeu (vélocité) sur le clavier du Grandstage.
7. Bouton EQUALIZER, curseurs LOW, MID, HIGH
(voyez page33)
Cet égaliseur à trois bandes est placé juste avant la sortie
audio.
Une pression sur ce bouton active l’égaliseur (le bouton
s’allume) et les curseurs.
8. ENSEMBLE (section d’ensemble)
(voyez page31)
Cette section permet de choisir et d’éditer des programmes
de la catégorie ENSEMBLE pour des sons d’instruments
autres que le clavier, comme par exemple des cordes et
des cuivres. La sélection de programmes et les éditions
de paramètres effectuées dans cette section peuvent être
-
mémorisées comme favoris.
Bouton ENSEMBLE
Active (le bouton s’allume) et désactive (le bouton s’éteint)
les programmes de la section ENSEMBLE. Les sons de la
section ENSEMBLE ne sont pas audibles quand la fonction
est désactivée (off).
Commande de catégorie
Permet de choisir la catégorie du programme pour la section
ENSEMBLE.
Écran
Afche le nom et les valeurs de paramètres du programme
en mode d’édition.
Le signal est toujours transmis à la prise AUDIO
OUTPUT quand un casque est branché à la prise
casque.
26
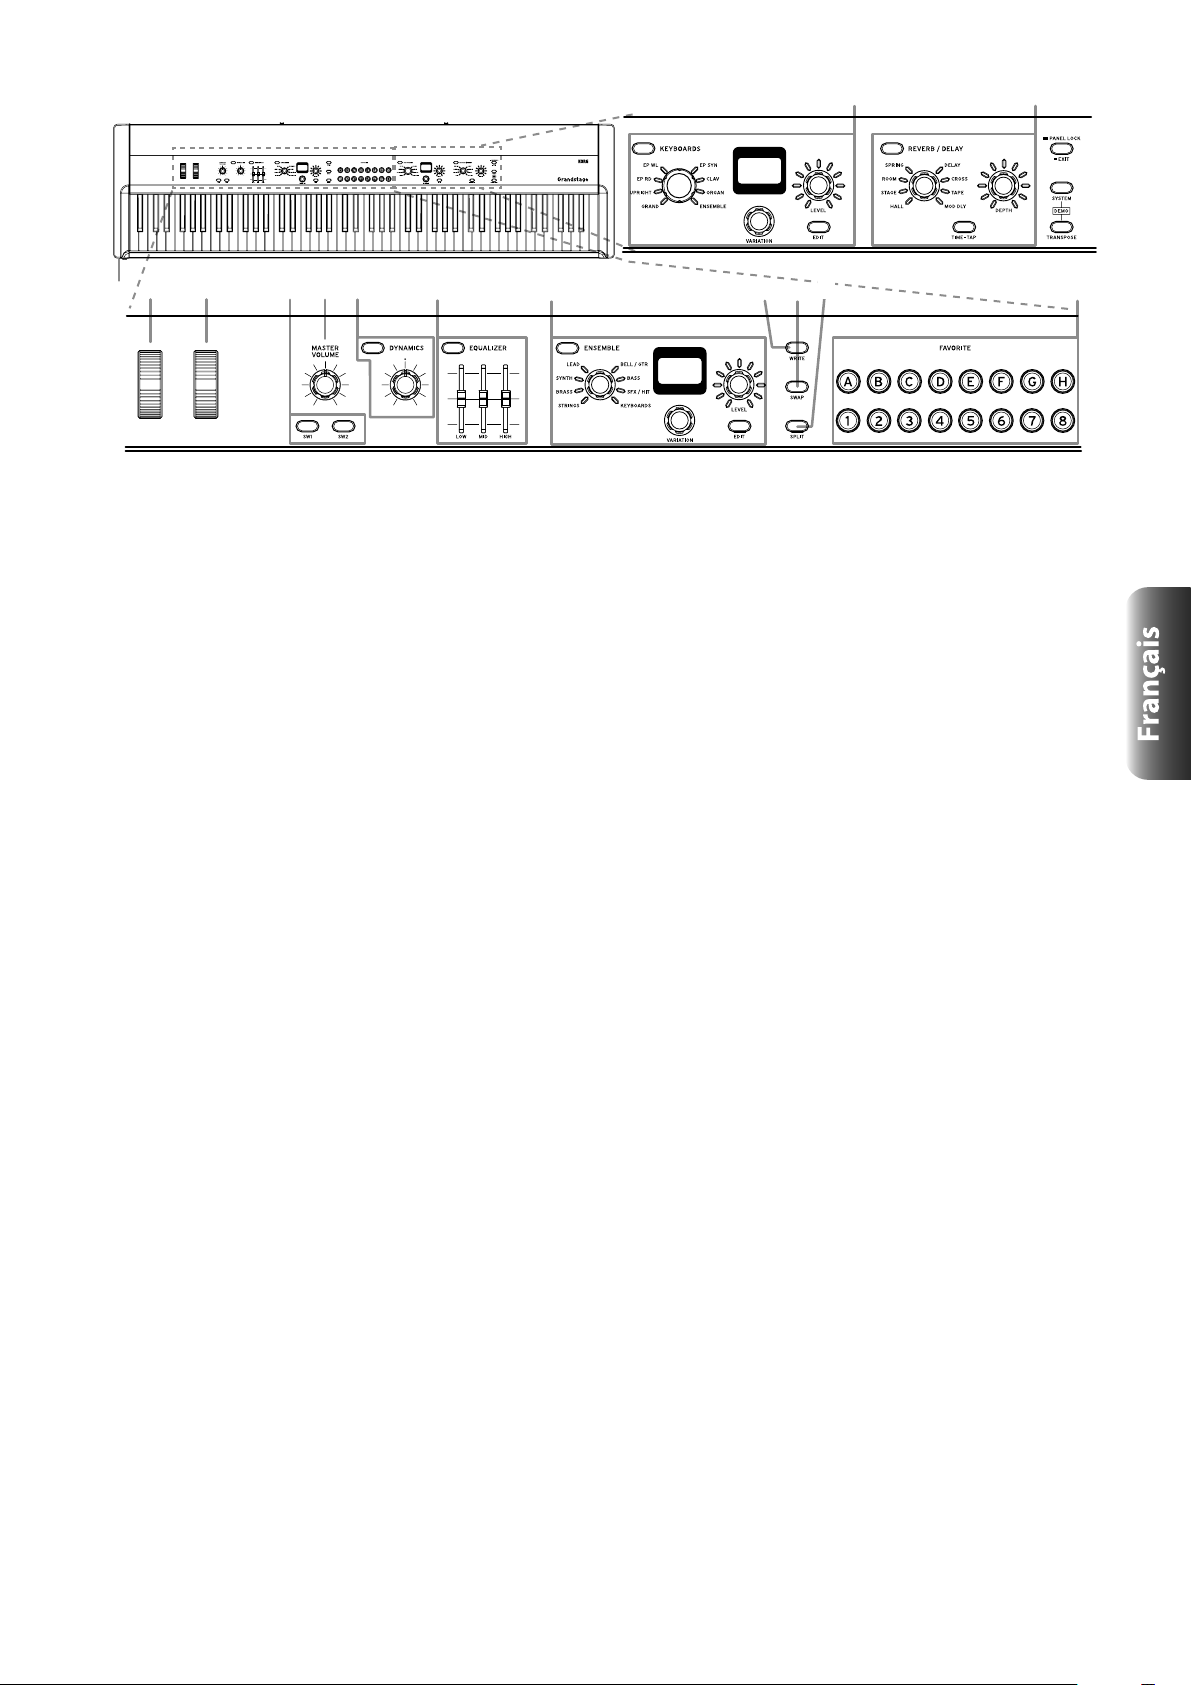
13
14
15
16
17
1
32
Commande VARIATION
Permet de choisir les programmes par catégorie ainsi que les
paramètres en mode d’édition.
Commande LEVEL
Règle le volume du programme. Les diodes autour de la
commande indiquent le niveau de volume. Cette commande
sert aussi au réglage des paramètres afchés à l’écran en
mode d’édition.
Bouton EDIT (voyez page35)
Permet d’activer le mode d’édition de programme. Quand le
mode d’édition est actif, le bouton s’allume.
4 5 6 7 8 9
9. Bouton WRITE (voyez page35)
Permet de mémoriser les réglages de son actuels sous forme
de favoris.
10. Bouton SWAP (voyez page35)
Une pression sur ce bouton (il s’allume) en mode de partage
(Split) du clavier assigne le programme de KEYBOARDS
à la partie inférieure du clavier (plage du grave) et le
programme ENSEMBLE à la partie supérieure du clavier
(plage de l’aigu).
11. Bouton SPLIT (voyez page34)
Une pression sur ce bouton (il s’allume) divise le clavier en
assignant un son différent de chaque côté. Ce bouton sert
aussi à dénir le point de partage du clavier.
12. FAVORITE (section des sons favoris)
(voyez page30) (voyez page34)
Vous pouvez choisir un des 64 sons favoris sauvegardés sur
l’instrument. L’accès simple et rapide aux sons favoris se fait
en combinant l’utilisation des boutons A–H et 1–8.
13. KEYBOARDS (section clavier) (voyez page31)
Cette section permet de choisir et d’éditer des programmes
de la catégorie KEYBOARDS pour des sons d’instruments à
clavier, comme par exemple des pianos, pianos électriques,
orgues, etc. La sélection de programmes et les éditions
de paramètres effectuées dans cette section peuvent être
mémorisées comme favoris.
Bouton KEYBOARDS
Active (le bouton s’allume) et désactive (le bouton s’éteint)
les programmes de la section KEYBOARDS. Les sons de
la section KEYBOARDS ne sont pas audibles quand la
fonction est désactivée (off).
Commande de catégorie
Permet de choisir la catégorie du programme pour la section
KEYBOARDS.
Écran
Afche le nom et les valeurs de paramètres du programme
en mode d’édition.
10
11
Commande VARIATION
Permet de choisir les programmes par catégorie ainsi que les
paramètres en mode d’édition.
Commande LEVEL
Règle le volume du programme. Les diodes autour de la
commande indiquent le niveau de volume. Cette commande
sert aussi au réglage des paramètres afchés à l’écran en
mode d’édition.
Bouton EDIT (voyez page35)
Permet d’activer le mode d’édition de programme. Quand le
mode d’édition est actif, le bouton s’allume.
14. REVERB/DELAY (section réverbération/retard)
(voyez page36)
Permet de régler les effets de réverbération et de retard
(Delay). Les réglages d’effet peuvent être sauvegardés sous
forme de favoris.
Bouton REVERB/DELAY
Active (le bouton s’allume) et désactive (le bouton s’éteint)
les effets de réverbération et de retard.
Commande de sélection d’eet
Permet de choisir un type d’effet de réverbération ou de
retard.
Commande DEPTH
Règle l’intensité de l’effet. Les diodes autour de la
commande indiquent le niveau de l’effet.
Bouton TIME-TAP
Règle le temps de réverbération ou de retard en se basant sur
le timing des impulsions générées avec le bouton TAP.
15. Bouton EXIT (PANEL LOCK)
Appuyez brièvement sur ce bouton pour activer la fonction
de sortie (Exit).
Cette fonction permet d’annuler une mémorisation de son
favori, de quitter la fonction Panel Lock, le mode d’édition
et les paramètres système, etc.
Maintenez enfoncé ce bouton pendant environ une seconde
pour activer la fonction Panel Lock. Le bouton clignote alors
(voyez page 33).
16. Bouton SYSTEM (voyez page37)
Appuyez sur ce bouton pour accéder aux paramètres globaux
du Grandstage, comme l’accordage global, les réglages
MIDI, les fonctions de jeu, l’initialisation des sons, etc.
Quand la fonction est active, ce bouton clignote.
17. Bouton TRANSPOSE (voyez page33)
Décale la hauteur du clavier de l’instrument par pas de demiton, sur une plage de -/+ 1 octave. Maintenez ce bouton
enfoncé en appuyant sur une touche entre Do3 et Do5 pour
décaler (transposer) la hauteur du clavier.
12
27
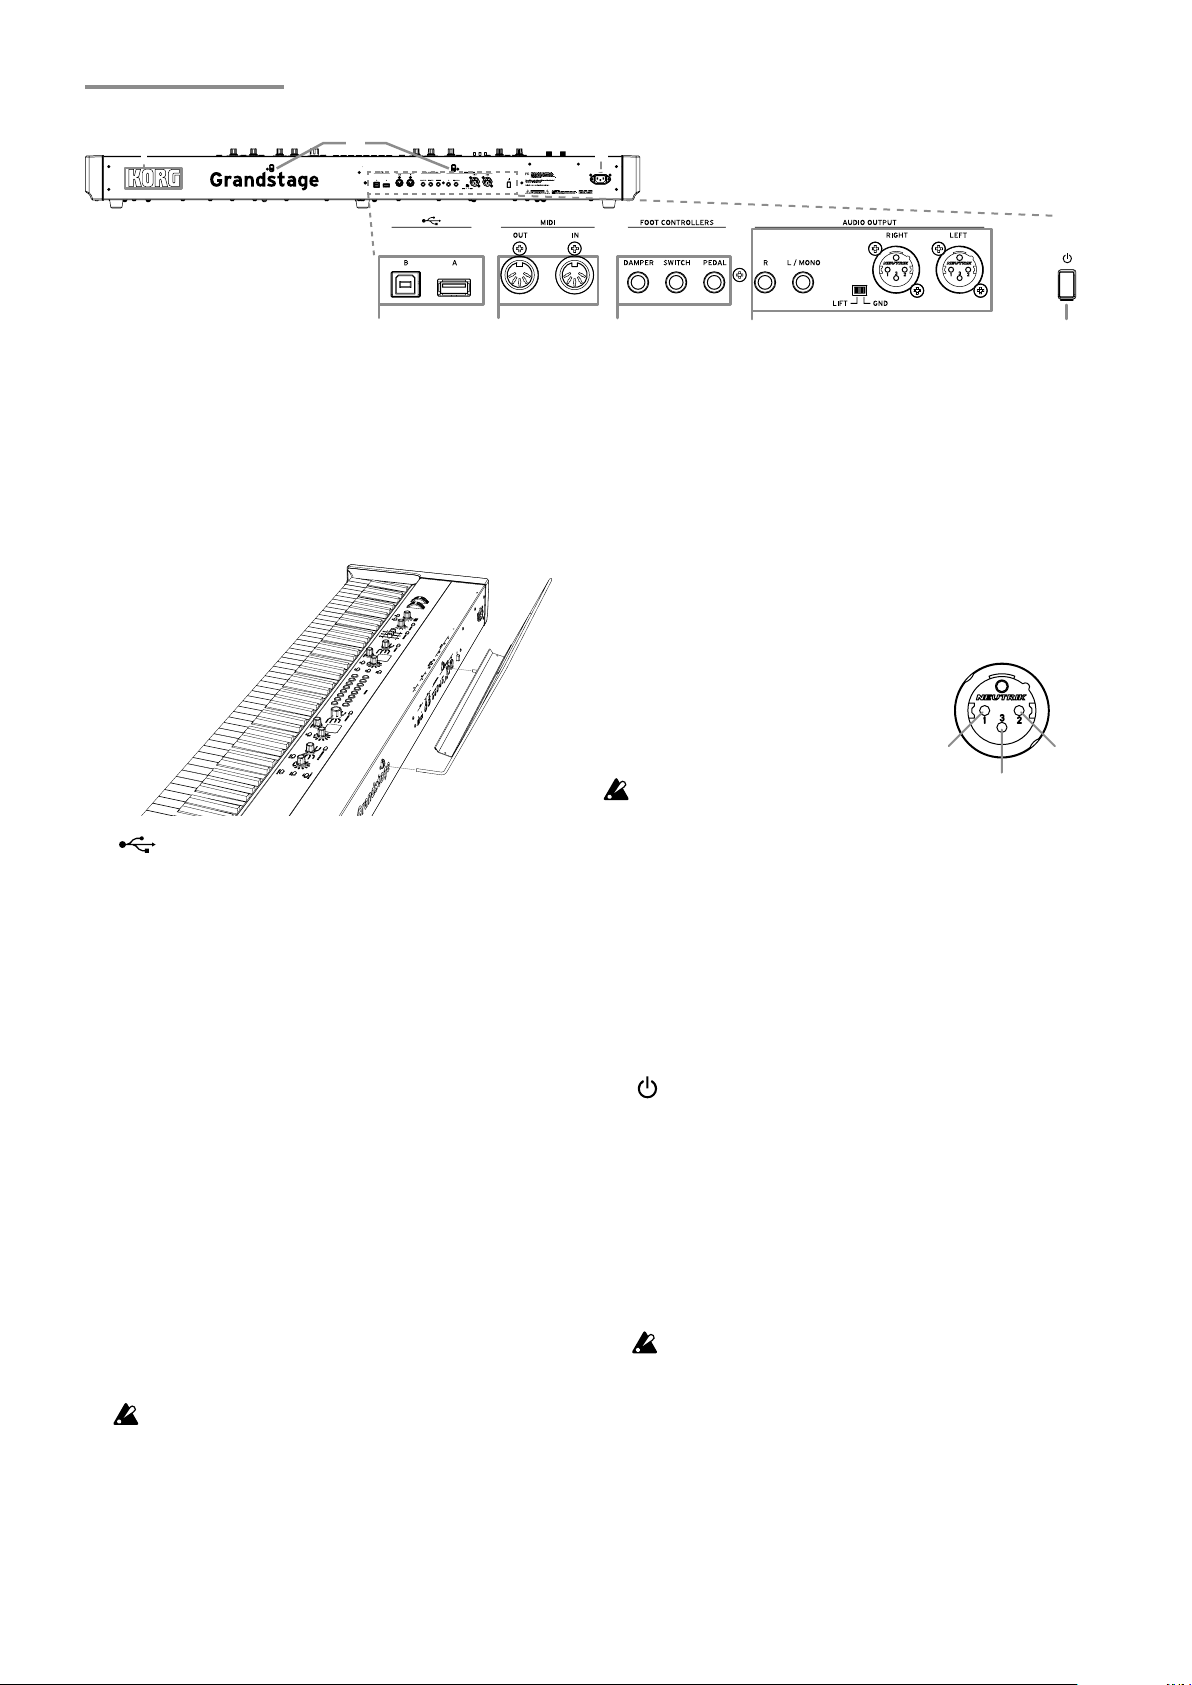
Panneau arrière
3 4 5
6
7
2
GN
T
COLD
1
1. Logo KORG
Le logo KORG s’illumine pendant l’utilisation.
Vous pouvez choisir la couleur d’illumination du logo et
activer ou désactiver cette fonction (voyez page
38).
2. Orices de montage du pupitre
Ces orices servent à monter le pupitre fourni avec ce
clavier.
Installez le pupitre comme illustré ci-dessous.
Pupitre
3. USB:
Port A
Permet de connecter un dispositif de stockage USB tel
qu’une clé USB.
Port B
Permet de relier l’instrument à un ordinateur Windows ou
Mac en vue du transfert de données MIDI.
4. MIDI:
Prises IN et OUT
Ces prises permettent d’échanger des messages MIDI entre
le Grandstage et un dispositif MIDI externe.
5. FOOT CONTROLLERS: (voyez page32)
Prise DAMPER
Connectez ici la pédale forte fournie avec le Grandstage.
Prise SWITCH
Connectez ici le commutateur au pied disponible en option.
Prise PEDAL
Connectez ici une pédale d’expression ou un contrôleur au
pied (en option).
Le Grandstage détecte automatiquement la polarité de la
pédale interrupteur et de la pédale forte connectées. À la
mise sous tension ou lors du branchement d’une pédale, le
Grandstage considère le contrôleur comme désactivé (off).
N’enfoncez pas la pédale pendant la mise sous tension de
l’instrument et la connexion de la pédale au Grandstage.
8
6. AUDIO OUTPUT: (voyez page29)
Ces prises permettent de relier l’instrument à des enceintes
actives, un amplicateur, une console de mixage ou un
enregistreur multipiste stéréo.
Prises L/MONO, R
Ces prises jack TS (asymétriques pointe-corps) de 6,3 mm
transmettent le signal de l’instrument.
Réglez le volume avec la commande MASTER VOLUME.
Si vous reliez l’instrument à un appareil stéréo, effectuez la
connexion aux prises L/MONO et R.
Si l’instrument est utilisé avec un appareil mono, effectuez la
connexion à la prise L/MONO. Cette prise est utilisée pour
la connexion à un appareil à entrée mono.
Prises LEFT, RIGHT
Il s’agit de prises XLR (symétriques)
de sortie stéréo.
Réglez le volume avec la commande
MASTER VOLUME.
Si vous reliez les prises LEFT et
RIGHT (XLR) du Grandstage à
une console ou un appareil similaire, veillez à couper
l’alimentation fantôme de l’appareil en question. Le nonrespect de cette précaution risque d’endommager le
Grandstage.
Sélecteur LIFT - GND
La position GND de ce sélecteur est utilisée en temps
normal. Quand ce sélecteur est sur LIFT, la masse des prises
LEFT et RIGHT est séparée de la masse de l’instrument. Si
une boucle de masse ou un autre problème induit du bruit,
placer ce sélecteur sur la position LIFT pourrait éliminer le
bruit.
D
7. (bouton d’alimentation)
Permet de mettre l’instrument sous tension et hors tension
(voyez page
C
oupure automatique d’alimentation
Cette fonction coupe automatiquement l’alimentation
de l’instrument après l’écoulement d’un délai prédéni
sans aucune manipulation de l’instrument. Pour savoir
comment modier le délai de coupure de l’alimentation ou
désactiver cette fonction, voyez “Auto Power Off (Coupure
automatique de l’alimentation)” à la page 38).
À la sortie d’usine, ce paramètre est réglé sur 4 heures.
Quand l’instrument est mis automatiquement hors
29).
tension par cette fonction, tout réglage non mémorisé
dans les favoris est perdu. Mémorisez donc toujours
tous les réglages voulus avant de mettre l’instrument
hors tension. Tout réglage des paramètres système est
immédiatement mémorisé et conservé (voyez “Types de
paramètres système” à la page 37).
8. ~ACV (prise secteur)
Branchez le cordon d’alimentation secteur fourni à cette
prise. Nous vous conseillons de raccorder d’abord le cordon
d’alimentation secteur au Grandstage, puis de brancher son
autre che à une prise de courant.
HO
28

Préparatifs
une prise de courant de
secteur
Mise sous/hors tension
Connexions
Connexion de dispositifs audio
Le Grandstage ne comporte pas de haut-parleurs intégrés.
Pour pouvoir écouter le son de l’instrument, il vous faudra le
connecter à un système d’écoute comme des enceintes actives, un
système stéréo ou encore à un casque d’écoute.
Connexion à des enceintes actives ou à un mélangeur
Les sorties audio de ce clavier produisent un signal de niveau
supérieur à celui des appareils audio domestiques tels que
les lecteurs CD. Soyez donc prudent car un volume excessif
risquerait d’endommager les enceintes ou l’équipement
audio connectés.
1. Mettez le volume de tous les appareils connectés
sur le minimum avant la mise hors tension.
2. Branchez les prises L/MONO et R ou les prises
LEFT et RIGHT (XLR) de la section AUDIO OUTPUT
de ce clavier aux prises d’entrée de vos enceintes
actives ou de votre mélangeur.
Les signaux des prises L/MONO et R sont identiques à
Astuce:
ceux des prises LEFT et RIGHT (XLR). Vous pouvez
utiliser simultanément ces deux paires de prises.
Si l’instrument est utilisé avec un appareil mono, effectuez
Astuce:
la connexion à la prise L/MONO.
Connexion d’un casque
Utilisez cette prise pour brancher un casque doté d’une che
jack stéréo de 6,3 mm. Cette prise transmet le même signal que
la prise AUDIO OUTPUT. Réglez le volume du casque avec la
commande MASTER VOLUME.
Remarque:
Connexion du cordon d’alimentation fourni avec le clavier
Le signal est toujours transmis à la prise AUDIO
OUTPUT quand un casque est branché à la prise casque.
Branchez la fiche à
tension appropriée.
Cordon d’alimentation
Mise sous tension
1. Tournez la commande VOLUME du Grandstage à
fond à gauche pour couper le volume.
Si tout appareil est connecté à l’instrument, tel qu’un
amplicateur de retour, réglez son volume sur le minimum et
mettez-le hors tension.
2. Appuyez sur le bouton d’alimentation sur le
panneau arrière du Grandstage.
L’afchage de démarrage apparaît brièvement sur l’écran
dans la section KEYBOARDS.
3. Le Grandstage est démarré et prêt une fois que
ses boutons et diodes en face avant sont allumés.
À la mise sous tension, l’instrument active le son 1 de la
banque A des favoris.
4. Mettez sous tension l’équipement externe (ampli
de retour ou ampli stéréo, par exemple) connecté
aux prises AUDIO OUTPUT du Grandstage.
5. Réglez le volume avec la commande MASTER
VOLUME du Grandstage et la commande de
volume de l’équipement connecté.
Quand un délai prédéni s’est écoulé sans aucune
Astuce:
manipulation des commandes, boutons et du clavier du
Grandstage, l’instrument est automatiquement mis hors
tension. Voyez “Auto Power Off (Coupure automatique de
l’alimentation)” à la page
38.
Mise hors tension
1. Baissez le volume des moniteurs actifs, de
l’ampli stéréo (ou de tout autre système d’écoute
externe), puis mettez-les hors tension.
2. Pour mettre le Grandstage hors tension,
maintenez son bouton d’alimentation sur le
panneau arrière enfoncé pendant quelques
secondes (jusqu’à ce que les boutons et diodes
du panneau avant soient éteints), puis relâchez le
bouton.
Le message “POWER OFF” apparaît pendant quelques
secondes sur l’écran dans la section KEYBOARDS.
3. Quand l’écran s’éteint, l’instrument est
automatiquement mis hors tension.
Ne débranchez pas le cordon d’alimentation avant que l’écran
soit éteint. Cela peut entraîner un dysfonctionnement.
29

Écoute des morceaux de
64 favoris (A1 à H8)
démonstration
Le Grandstage contient 16 morceaux de démonstration. Vous
pouvez vérier les sons utilisés dans chacun de ces morceaux
(voyez la liste des morceaux de démonstration dans le
document “Sound Name List”).
1. Appuyez simultanément sur les boutons
SYSTEM et TRANSPOSE.
Chaque bouton se met à clignoter et le clavier active son
mode de démonstration.
Le bouton FAVORITE de la banque A clignote et la
lecture du premier morceau de démonstration démarre
automatiquement.
Un morceau de démonstration est attribué à chaque
•
bouton FA
de démonstration.
•
À la n du morceau A, la lecture du morceau
B commence automatiquement. Le bouton
correspondant au morceau clignote pendant la lecture
du morceau.
sont lus l’un après l’autre dans l’ordre tant que le
Grandstage n’est pas utilisé.
Le numéro du programme et le nom du son utilisés
•
dans le morceau de démonstration sont afchés
sur les écrans gauche et droit. Cela vous permet de
vérier les
Quand le mode de démonstration est actif, toutes les
•
commandes de l’instrument sont désactivées, sauf
les boutons SYSTEM, TRANSPOSE, les 16 boutons
F
AVORITE et la commande MASTER VOLUME.
Vous ne pouvez pas sélectionner les sons ni utiliser
•
les commandes de l’instrument, y compris les
molettes, les boutons SW
2. Pour sélectionner un autre morceau de
démonstration, appuyez sur le bouton
FAVORITE du morceau voulu.
Le bouton se met à clignoter et le morceau de
démonstration choisi est lu depuis le début.
Appuyez à nouveau sur le bouton clignotant pour
relancer la lecture du morceau depuis le début.
3. Pour arrêter la lecture du morceau de
démonstration, appuyez sur le bouton
SYSTEM, TRANSPOSE ou EXIT.
Le Grandstage quitte le mode de lecture des morceaux
de démonstration et retourne au statut décrit à l’étape 1.
Remarque:
Les réglages des favoris que vous avez modiés
mais pas sauvegardés sont initialisés quand vous
activez le mode de lecture des morceaux de
démonstration. Veillez à sauvegarder tous les favoris
que vous souhaitez conserver avant d’activer le
mode de lecture des morceaux de démonstration, en
effectuant les étapes ci-dessous (voyez page 35).
VORITE, offrant un total de 16 morceaux
Tous les morceaux de démonstration
sons présentés dans chaque démonstration.
1/2, la pédale forte, etc.
Sélectionner et jouer des sons
Le Grandstage propose 500 programmes divisés en catégories
(voyez la liste des programmes dans le document “Sound Name
List”).
Chaque son (piano, cordes, etc.) est ce que nous appelons
un “programme”. Vous pouvez jouer les programmes
individuellement, ou combiner deux programmes avec les
fonctions de superposition (Layer) et de partage (Split).
Vous pouvez accéder directement à ces programmes en
choisissant une catégorie et une variation dans les sections
KEYBOARDS et ENSEMBLE. En outre, la fonction FAVORITE
permet de mémoriser les programmes sous forme de favoris et de
les rappeler instantanément.
Programmes
PIANO 1
Programmes
BASS 1
Réglages de
superposition/
partage
Chaque mémoire favori permet de sauvegarder un programme,
son niveau et ses réglages utilisateur ainsi que ses réglages de
réverbération/retard, de fonction Layer/Split, etc.
Vous accédez aux 64 favoris via les 16 boutons FAVORITE
(boutons de banque A–H et boutons numériques 1–8; voyez la
liste des favoris dans le document “Sound Name List”).
À la sortie d’usine, certaines mémoires Favorite contiennent des
suggestions de réglages.
Vous pouvez faire une copie de sauvegarde des données
Astuce:
Favorite sur une clé USB et recharger ces données quand
vous le voulez (voyez page 40).
Réglages de
réverbération/
retard
A1
30
 Loading...