

Page 1
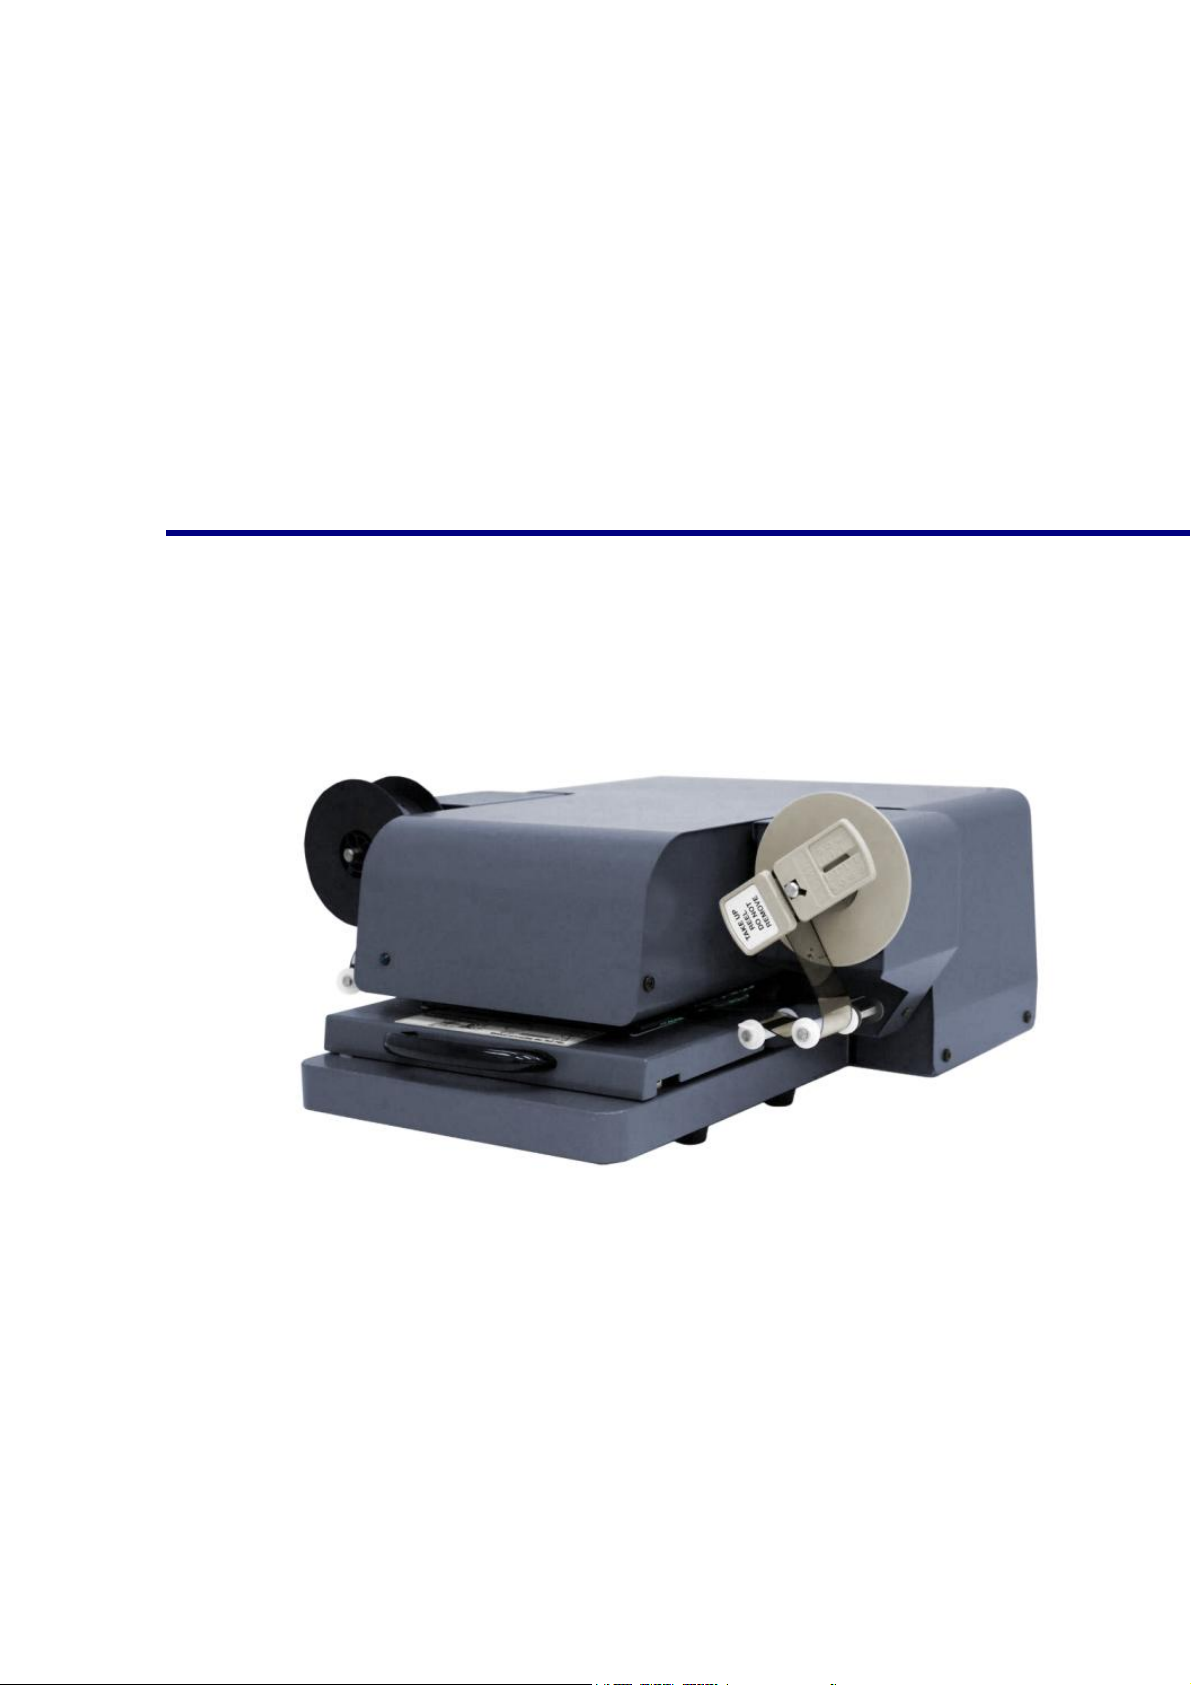
SL1000 Digital Film Scanner
User’s Guide
Page 2

International ENERGY STAR® Compliance Statement
The purpose of the International ENERGY STAR® Program is to promote the
development and popularization of energy-efficient office equipment.
Page 3
SAFETY INFORMATION
This section contains detailed instructions on the operation and maintenance of this machine. To
achieve optimum utility of this device, all operators should carefully read and follow the instructions
in this manual. Please keep this manual in a handy place near the machine.
Make sure you observe all of the precautions listed in this manual.
* Please NOTE that some parts of the contents of this section may not correspond with the purchased
product.
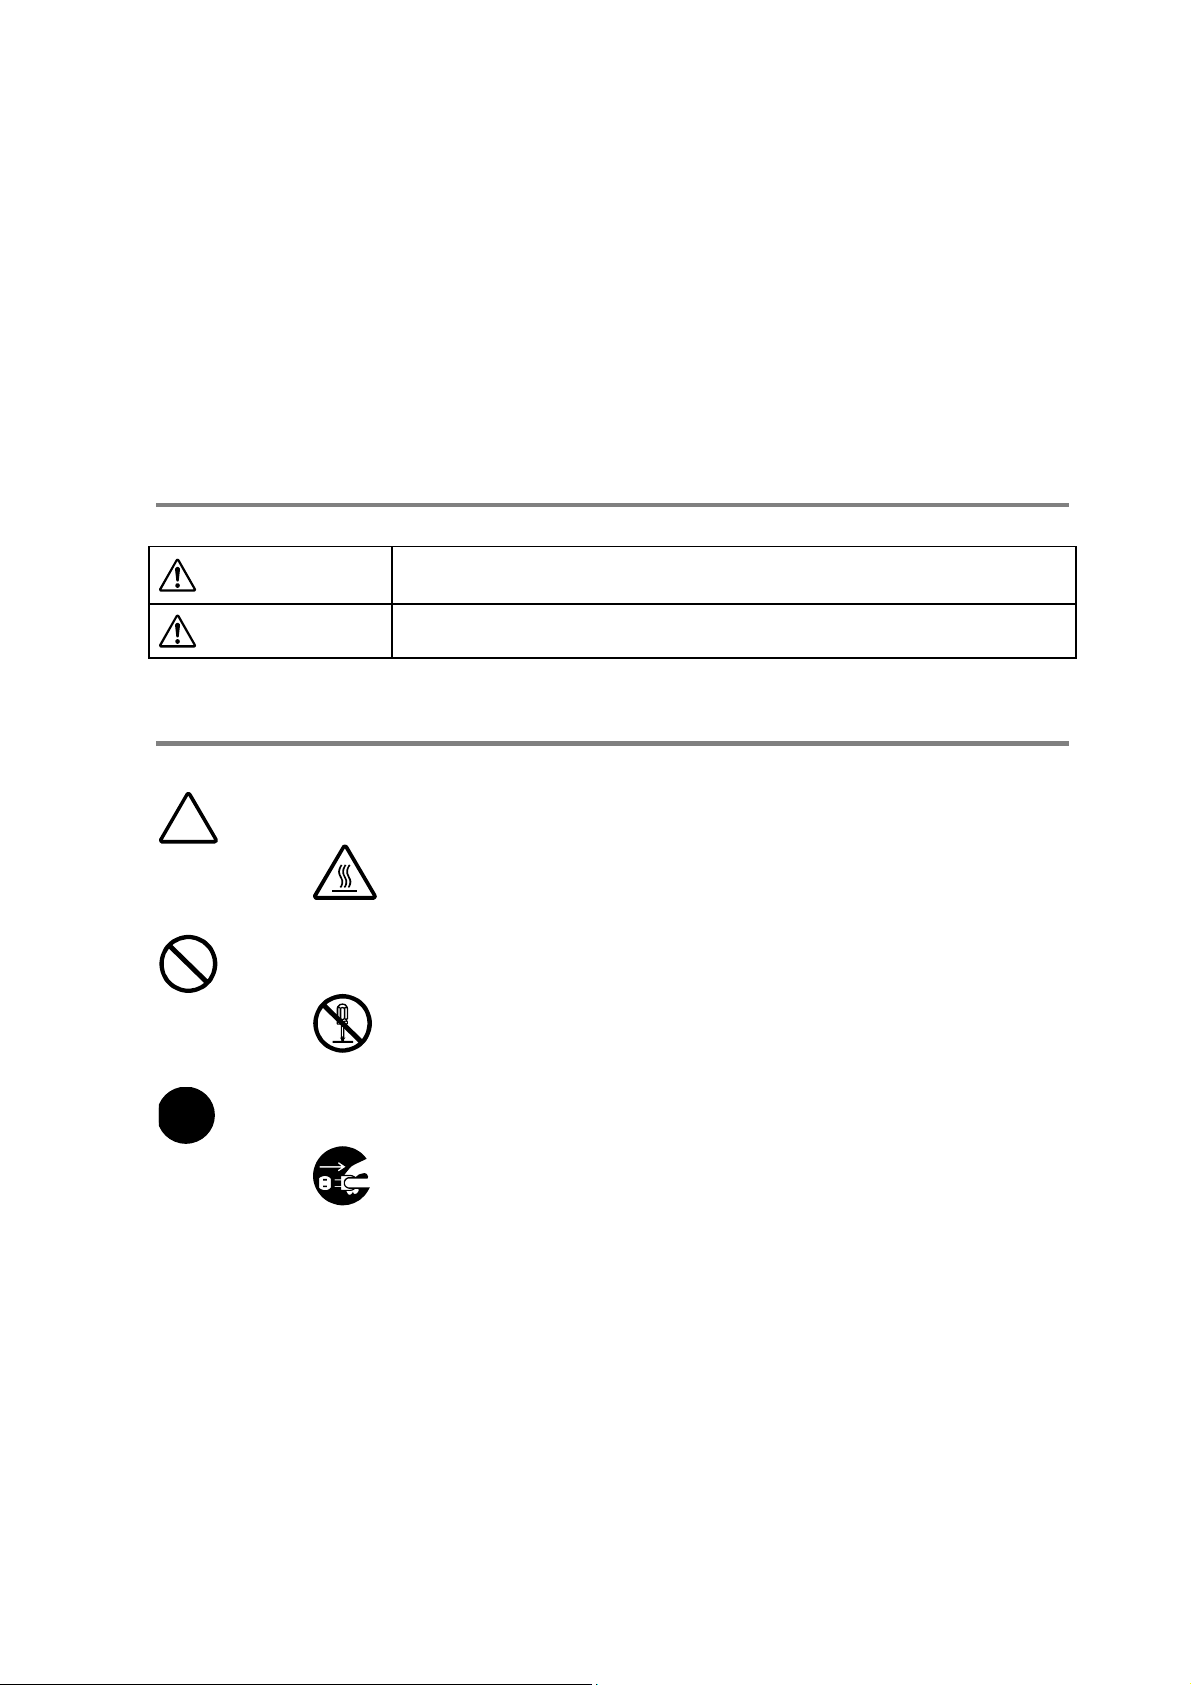
Warning and Precautions Symbols
WARNING:
CAUTION:
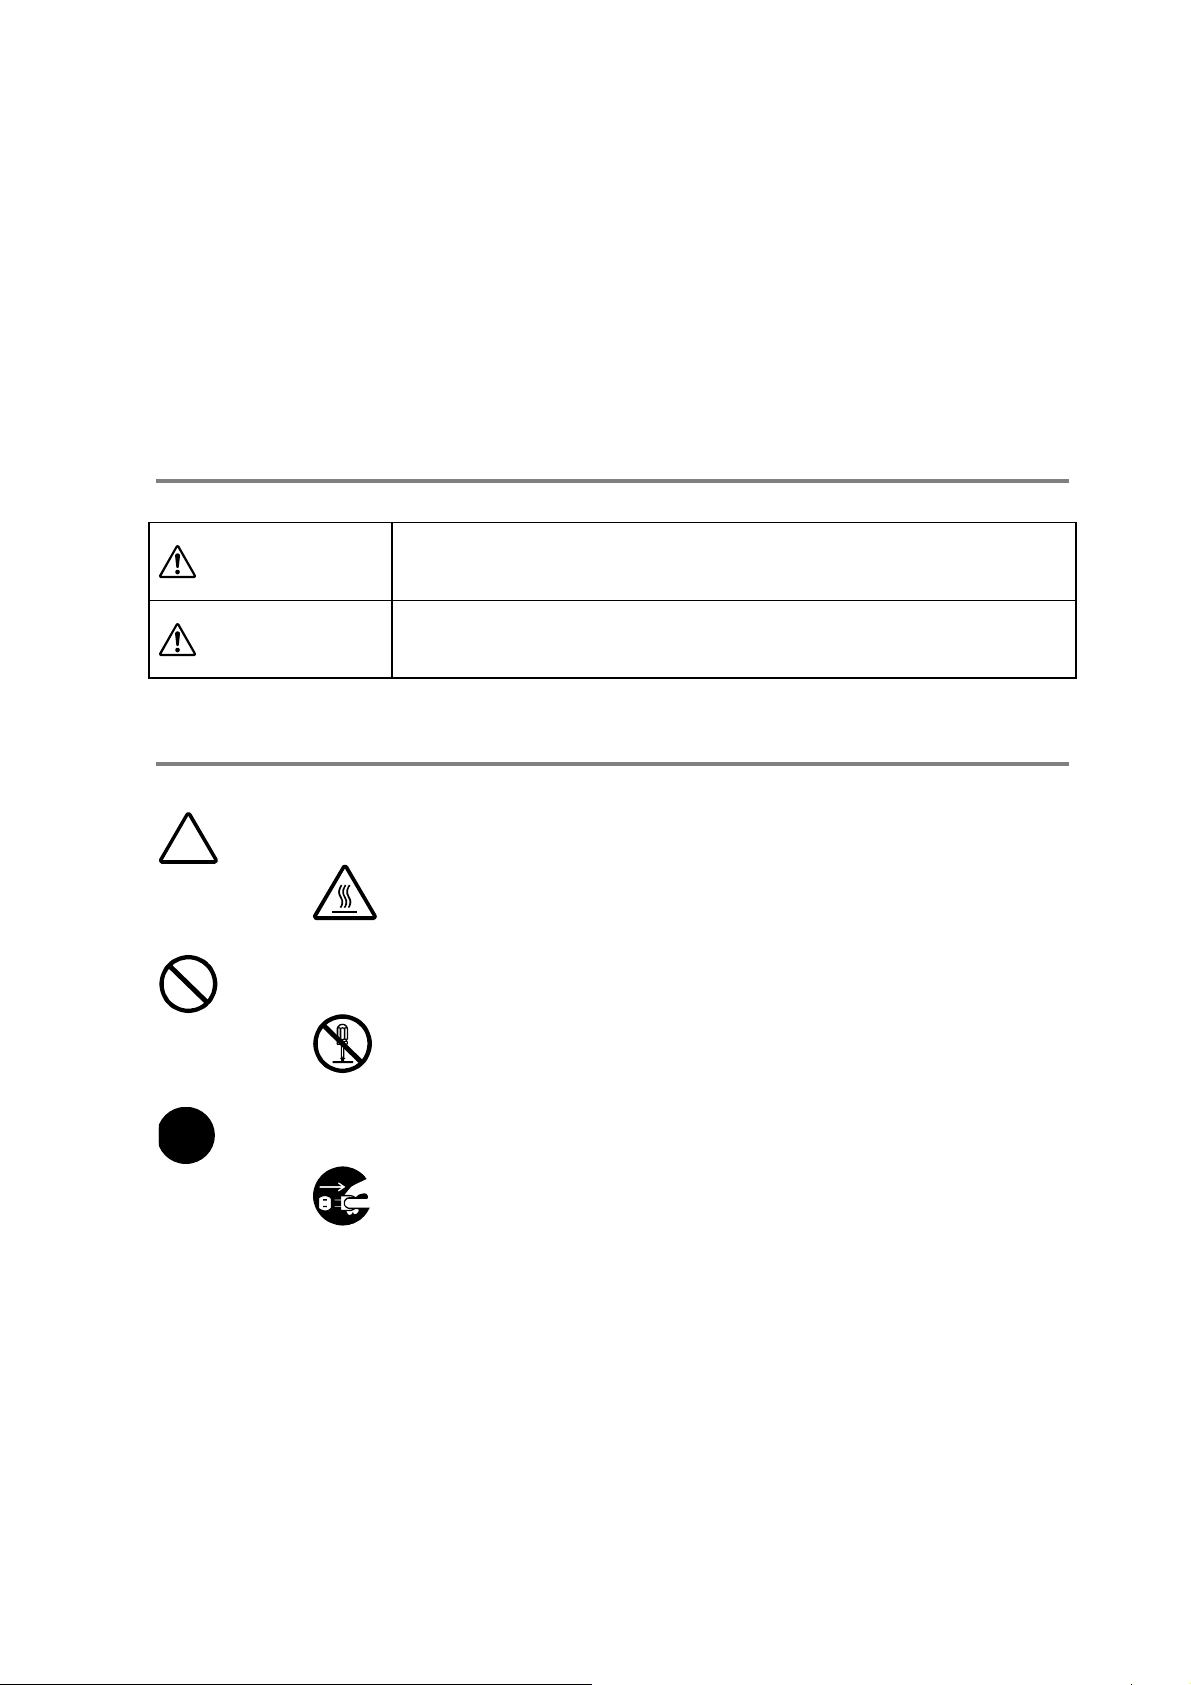
Meaning of Symbols
A triangle indicates a danger against which you should take precautions.
A dialog line indicates a prohibited course of action.
A Black circle indicates an imperative course of action.
Ignoring this warning could cause serious injury or even death.
Ignoring this caution could cause injury or damage to property.
This symbol warns against possible burns.
This symbol warns against dismantling the device.
This Symbol indicates you must unplug device.
i
Page 4
SAFETY INFORMATION
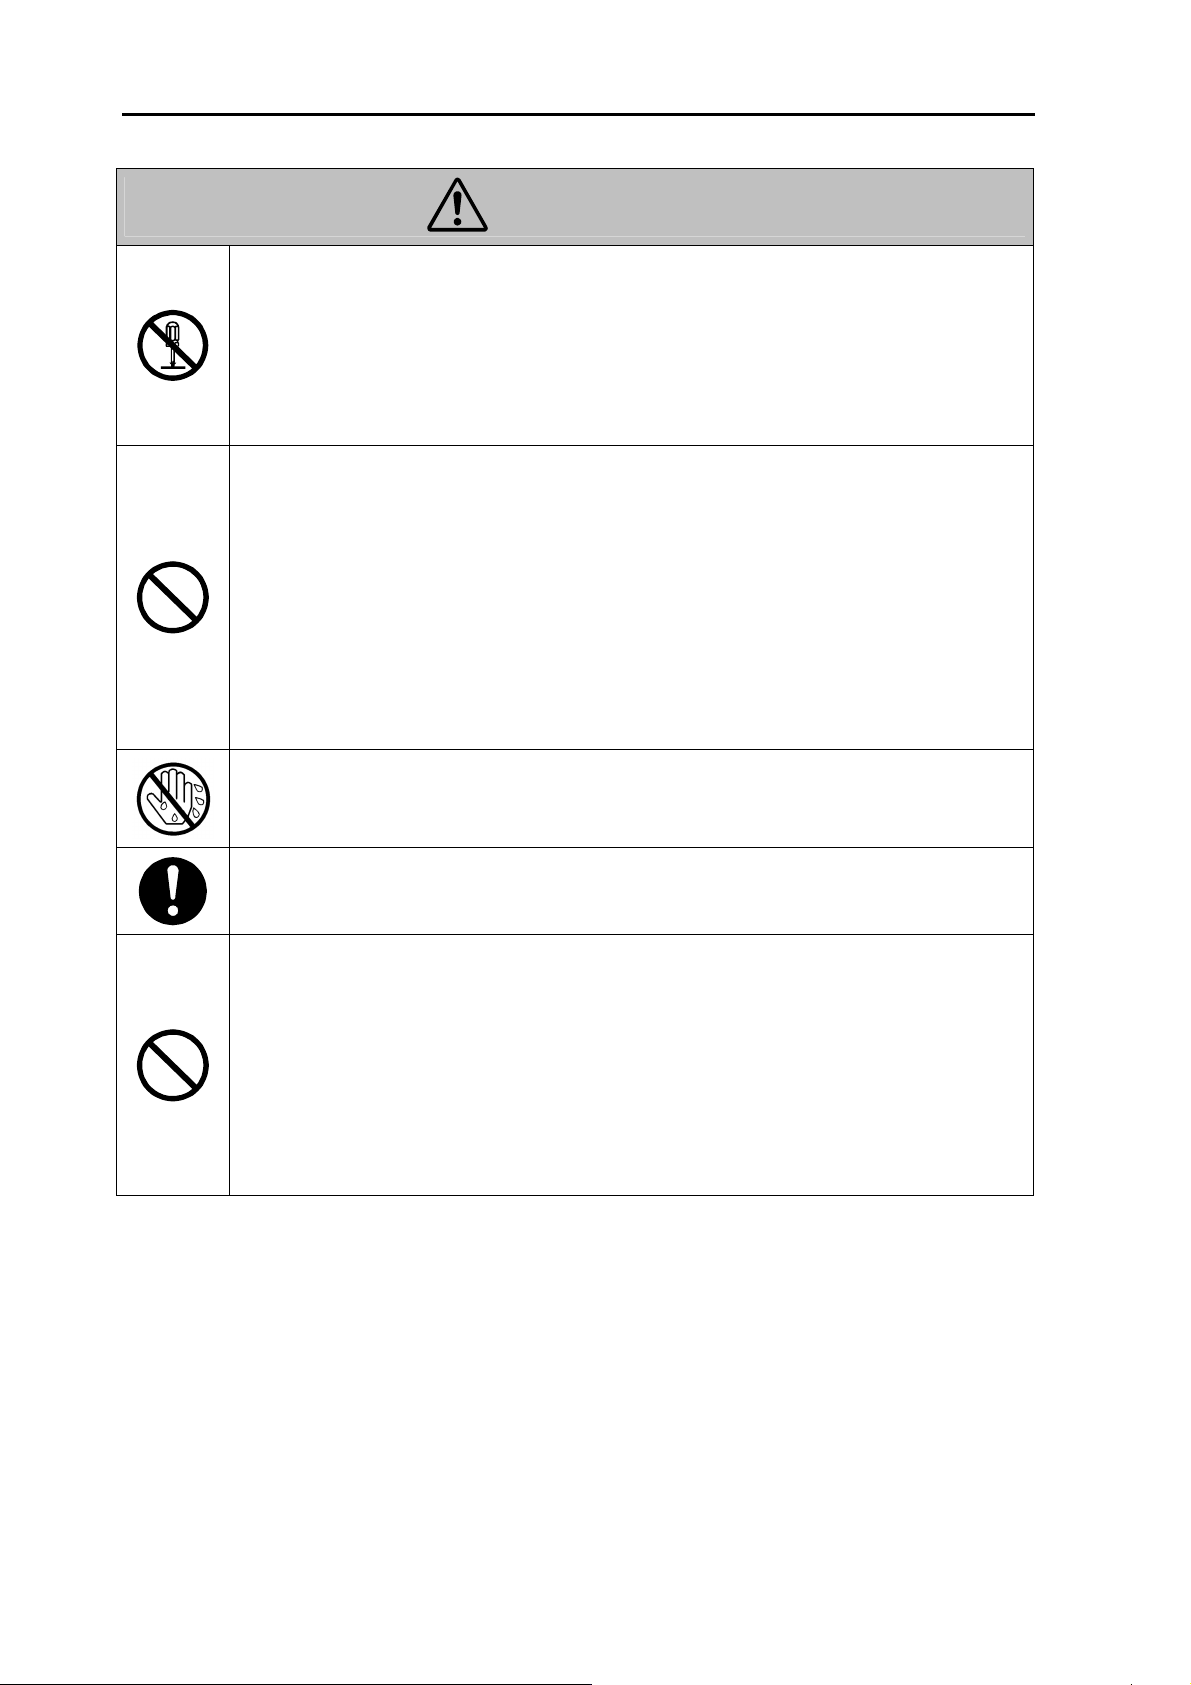
WARNING
● Do not modify this product, as a fire, electrical shock, or breakdown could result. If
the product employs a laser, the laser beam source could cause blindness.
● Do not attempt to remove the covers and panels which have been fixed to the product.
Some products have a high-voltage part or a laser beam source inside that could cause
an electrical shock or blindness.
● Do not remove or exchange the fuse of this product, as a fire, electrical shock, or
breakdown could result.
● Only use the power cord supplied in the package. If a power cord is not supplied,
only use the power cord and plug that is specified in POWER CORD
INSTRUCTION. Failure to use this cord could result in a fire or electrical shock.
● Use the power cord supplied in the package only for this machine and NEVER uses it
for any other product. Failure to observe this precaution could result in a fire or
electrical shock.
● Use only the specified power source voltage. Failure to do that could result in a fire or
electrical shock.
● Do not use a multiple outlet adapter to connect any other appliances or machines. Use
of a power outlet for more than the marked current value could result in a fire or
electrical shock.
● Do not unplug or plug in the power cord with a wet hand, as an electrical shock could
result.
● Plug the power cord all the way into the power outlet. Failure to do this could result
in a fire or electrical shock.
● Do not scratch, abrade, place a heavy object on, heat, twist, bend, pull on, or damage
the power cord. Use of a damaged power cord (exposed core wire, broken wire, etc.)
could result in a fire or breakdown.
Should any of these conditions be found, immediately turn OFF the Power Switch,
unplug the power cord from the power outlet, and then call your authorized service
representative.
● Do not use an extension cord, in principle. Use of an extension cord could cause a fire
or electrical shock. Contact your authorized service representative if an extension
cord is required.
ii
Page 5
SAFETY INFORMATION
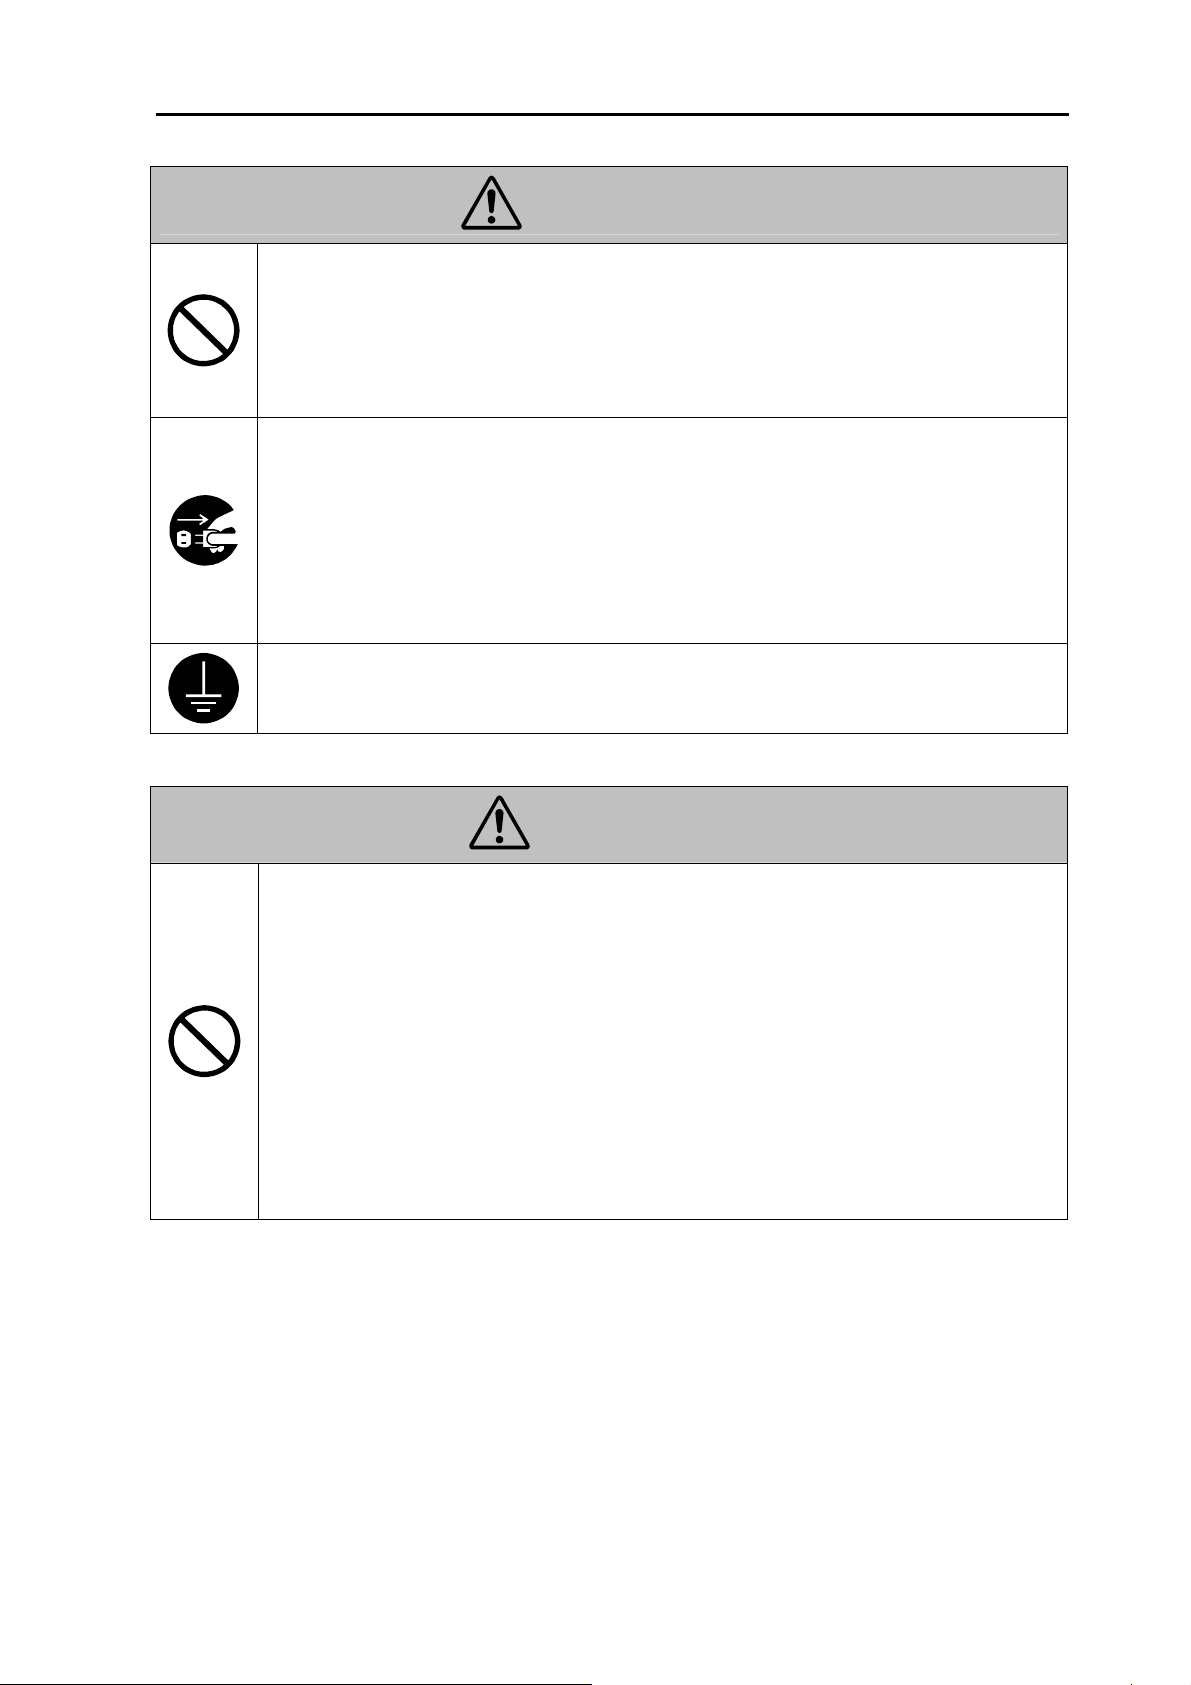
WARNING
● Do not place a flower vase or other container that contains water, or metal clips or
other small metallic objects on this product. Spilled water or metallic objects dropped
inside the product could result in a fire, electrical shock, or breakdown.
Should a piece of metal, water, or any other similar foreign matter get inside the
product, immediately turn OFF the Power Switch, unplug the power cord from the
power outlet, and then call your authorized service representative.
● Do not keep using this product if it becomes inordinately hot or emits smoke, or
unusual odor or noise. Immediately turn OFF the Power Switch, unplug the power
cord from the power outlet, and then call your authorized service representative. If you
keep on using it as is, a fire or electrical shock could result.
● Do not keep using this product, if this product has been dropped or its cover damaged.
Immediately turn OFF the Power Switch, unplug the power cord from the power
outlet, and then call your authorized service representative. If you keep on using it as
is, a fire or electrical shock could result.
● Connect the power cord to an electrical outlet that is equipped with a grounding
terminal.
CAUTION
● Do not use flammable sprays, liquids, or gases near this product, as a fire could result.
● Do not let any object plug the ventilation holes of this product.
Heat could accumulate inside the product, resulting in a fire or malfunction.
● Do not install this product at a site that is exposed to direct sunlight, or near an air
conditioner or heating apparatus. The resultant temperature changes inside the product
could cause a malfunction, fire, or electrical shock.
● Do not place the product in a dusty place, or a site exposed to soot or steam, near a
kitchen table, bath, or a humidifier. A fire, electrical shock, or breakdown could result.
● Do not place this product on an unstable or tilted bench, or in a location subject to a
lot of vibration and shock. It could drop or fall, causing personal injury or mechanical
breakdown.
● After installing this product, mount it on a secure base. If the unit moves or falls, it
may cause personal injury.
iii
Page 6
SAFETY INFORMATION
CAUTION
● Do not place any objects around the power plug as the power plug may be difficult to
pull out when an emergency occurs.
● The socket-outlet shall be installed near the machine and shall be easily accessible as
the power plug may be difficult to pull out when an emergency occurs.
● Always use this product in a well ventilated location. Operating the product in a
poorly ventilated room for an extended period of time could injure your health.
Ventilate the room at regular intervals.
● Whenever moving this product, be sure to disconnect the power cord and other cables.
Failure to do this could damage the cord or cable, resulting in a fire, electrical shock,
or breakdown.
● When moving this product, always hold it by the locations specified in the User’s
Guide or other documents. If the unit falls it may cause severe personal injury. The
product may also be damaged or malfunction.
● Remove the power plug from the outlet more than one time a year and clean the area
between the plug terminals. Dust that accumulates between the plug terminals may
cause a fire.
● When unplugging the power cord, be sure to hold onto the plug. Pulling on the power
cord could damage the cord, resulting in a fire or electrical shock.
Precautions for Routine Use
● Do not use this product in an area where ammonia or other gases or chemicals are
present. Failure to do so may shorten the service life of the product, cause damage or
decrease performance.
● Do not use this product in an environment with a temperature outside the range
specified in the User’s Guide, as a breakdown or malfunction could result.
iv
Page 7
INFORMATIONS DE SÉCURITÉ
Cette section contient des instructions détaillées sur l'utilisation et l'entretien de cette machine. Pour
obtenir un rendement optimal de cette machine, il est imperative que toutes les personnes l'utilisant
lisent attentivement et observent scrupuleusement les consignes de ce manuel. Veuillez conserver ce
manuel en lieu sûr, à proximité de la machine.
Veuillez observer toutes les consignes de sécurité énumérées dans ce manuel.
Veuillez NOTE r que certaines informations contenues dans cette section pourraient ne pas
correspondre à votre produit.
Symboles d'avertissement et de précaution
WARNING:
CAUTION:
Le non-respect de cet avertissement pourrait causer de graves blessures,
voire un accident mortel.
Le non-respect de cette précaution pourrait causer des blessures ou des
dommages matériels.
Signification des symboles
Un triangle indique un danger potentiel requérant certaines précautions.
Ce symbole vous met en garde contre des risques de brûlures.
Une diagonale dans un cercle désigne une interdiction.
Ce symbole signifie qu'il est interdit de démonter l'appareil.
Un cercle noir désigne une procédure obligatoire.
Ce symbole signifie que vous devez débrancher l'appareil.
v
Page 8
INFORMATIONS DE SÉCURITÉ
WARNING
Ne modifiez pas ce produit, car cela risquerait de causer un incendie, une
électrocution ou une panne de l'appareil. Si ce produit comporte un laser, sachez que
l'exposition au rayon laser pose un risque pour les yeux.
N'essayez jamais de démonter les couvercles et panneaux montés sur le produit.
Certains produits renferment des composants de haute tension ou une source de
rayon laser qui risqueraient de causer une electrocution ou des lésions aux yeux.
Ne pas retirer ou d'échanger le fusible de ce produit, comme un incendie,
d'électrocution ou une panne peut en résulter.
Utilisez uniquement le cordon d'alimentation contenu dans l'emballage.
Si le cordon d'alimentation n'est pas fourni, veillez à vous procurer uniquement un
cordon avec fiches conformes aux INSTRUCTIONS POUR LE CORDON
D'ALIMENTATION. Le non-respect de cette consigne risquerait de provoquer un
incendie.
Utilisez le cordon d'alimentation contenu dans l'emballage uniquement avec cette
machine; ne l'utilisez JAMAIS avec aucun autre appareil. Le non-respect de cette
consigne risquerait de provoquer un incendie ou une électrocution.
Utilisez uniquement la tension d'alimentation spécifiée. Le non-respect de cette
consigne risquerait de provoquer un incendie ou une électrocution.
N'utilisez jamais d'adaptateur multi-prise pour alimenter simultanément d'autres
appareils ou machines. Le branchement à une prise de courant délivrant une tension
supérieure aux spécifications risquerait de provoquer un incendie ou une
électrocution.
Né branchez ni débranchez jamais le cordon d'alimentation avec des mains
mouillées car cela risquerait de provoquer une électrocution.
Branchez le cordon d'alimentation à fond dans la prise de courant. Le non-respect de
cette consigne risquerait de provoquer un incendie ou une électrocution.
Veillez à ne jamais entailler, user, chauffer, tordre, déformer ni placer d'objet lourd
sur le cordon d'alimentation. L'utilisation d'un cordon d'alimentation endommagé
(dont un fil est rompu ou à nu, etc.) risquerait de provoquer un incendie ou une
électrocution.
Si le cordon présente un de ces endommagements, mettez immédiatement l'appareil
HORS tension, débranchez son cordon d'alimentation et contactez un centre de SAV.
N'utilisez pas de rallonge. L'utilisation d'une rallonge risquerait de provoquer un
incendie ou une électrocution. Contactez un centre de SAV si vous souhaitez un
cordon d'alimentation plus long.
vi
Page 9
INFORMATIONS DE SÉCURITÉ
WARNING
Ne posez jamais de vase ou tout autre récipient contenant de l’eau, ainsi que de petits
objets métalliques tels que des trombones sur l’appareil.
Si le récipient venait à être renversé ou des objets métalliques venaient à tomber dans
l’appareil, cela risquerait de provoquer un incendie, une électrocution ou une panne de
l’appareil.
En cas de pénétration de liquide, d’objet métallique ou de tout autre objet à l’intérieur
de l’appareil, mettez immédiatement l’appareil HORS tension avec son interrupteur
d’alimentation, débranchez son cordon d’alimentation de la prise de courant et
contactez un centre de SAV.
Si cet appareil venait à chauffer anormalement ou dégageait de la fumée, une odeur ou
un bruit anormal, cessez immédiatement de l’utiliser. Mettez immédiatement
l’appareil HORS tension avec son interrupteur d’alimentation, débranchez son cordon
d’alimentation de la prise de courant et contactez un centre de SAV. Le non-respect de
cette consigne risquerait de provoquer un incendie ou une électrocution.
En cas de chute de l’appareil ou d’endommagement de son boîtier, cessez
immédiatement d’utiliser l’appareil. Mettez immédiatement l’appareil HORS tension
avec son interrupteur d’alimentation, débranchez son cordon d’alimentation de la prise
de courant et contactez un centre de SAV. Le non-respect de cette consigne risquerait
de provoquer un incendie ou une électrocution.
Branchez le cordon d’alimentation à une prise de courant pourvue d’une broche de
mise à la terre.
CAUTION
Tenez toujours tout produit inflammable -liquide, gaz et vaporisateur- à l’écart de
l’appareil car ces produits posent un risqué d’incendie.
N’obstruez jamais les orifices de ventilation de cet appareil avec quelque objet que ce
soit.
La chaleur risquerait de s’accumuler à l’intérieur de l’appareil, provoquant un
incendie ou une panne.
N’installez pas cet appareil dans un endroit directement exposé aux rayons du soleil,
ni à proximité d’un climatiseur ou d’un appareil de chauffage. Le changement de
température ainsi provoqué à l’intérieur de l’appareil risquerait de causer une panne,
un incendie ou une électrocution.
N’installez pas cet appareil dans un endroit poussiéreux et évitez également les
endroits exposés à de la suie ou de la vapeur, à proximité d’une table de cuisine, d’une
baignoire ou d’un humidificateur. Cela risquerait de provoquer un incendie, une
électrocution ou une panne de l’appareil.
N’installez pas cet appareil sur une surface instable ou inclinée, et évitez également
les endroits particulièrement exposés aux vibrations et chocs. L’appareil risquerait de
se renverser ou de tomber, causant des blessures ou une panne.
Tenez les unités de toner et unités de tambour PC à l’écart des disquettes, montres et
autres objets sensibles aux champs magnétiques.
Cela risquerait de provoquer un fonctionnement erratique de ces appareils.
vii
Page 10
INFORMATIONS DE SÉCURITÉ
CAUTION
Ne posez aucun objet à proximité de la prise de courant alimentant le cordon car cela
risquerait de gêner l’accès au cordon et son retrait en cas d’urgence.
Veillez à ce que la prise de courant alimentant l’appareil se trouve à proximité de ce
dernier et soit facile d’accès afin de permettre un retrait rapide du cordon
d’alimentation en cas d’urgence.
Utilisez uniquement cet appareil dans un endroit bien ventilé. Une utilization
prolongée de l’appareil dans une pièce faiblement ventilée pourrait poser un risque
pour la santé de l’utilisateur. Veillez à aérer la pièce à intervalles réguliers.
Veillez à toujours débrancher le cordon d’alimentation et tout autre câble avant de
déplacer l’appareil. Le non-respect de cette precaution risquerait d’endommager le
cordon d’alimentation ou le câble et de provoquer un incendie, une électrocution ou
une panne.
Lorsque vous déplacez l’appareil, veillez à toujours le tenir aux endroits indiqués dans
le mode d’emploi ou toute autre documentation. Une chute de l’appareil risquerait de
causer de graves blessures. Cela pourrait en outre causer une panne et/ou un
endommagement de l’appareil.
Veillez à débrancher la fiche du cordon d’alimentation de la prise de courant plusieurs
fois par an afin de nettoyer les broches de la fiche.
Toute accumulation de poussière entre les broches de la fiche risquerait de provoquer
un incendie.
Quand vous débranchez le cordon d’alimentation, veillez à saisir le cordon par sa
fiche. Ne tirez jamais sur le cordon même car cela risquerait de l’endommager et de
provoquer un incendie ou une électrocution.
Precautions for Routine Use
N’utilisez jamais cet appareil en présence d’ammoniaque ou d’autres produits
chimiques ou gaz. Le non-respect de cette précaution risquerait de réduire la durée de
vie de l’appareil, de causer des dommages ou de réduire ses performances.
N’utilisez jamais cet appareil dans un endroit où la temperature ambiante sort de la
plage spécifiée dans le mode d’emploi, car cela risquerait de causer une panne et/ou
un endommagement de l’appareil.
viii
Page 11

Welcome
Please follow the instructions given in this manual when operating the system and do not touch any
part of the system the manual does not cover.
NEVER attempt to disassemble or rebuild the system.
The contents of this manual are subject to change without notice.
No part of this manual may be quoted, reproduced or translated into any other language.
ix
Page 12

Introduction
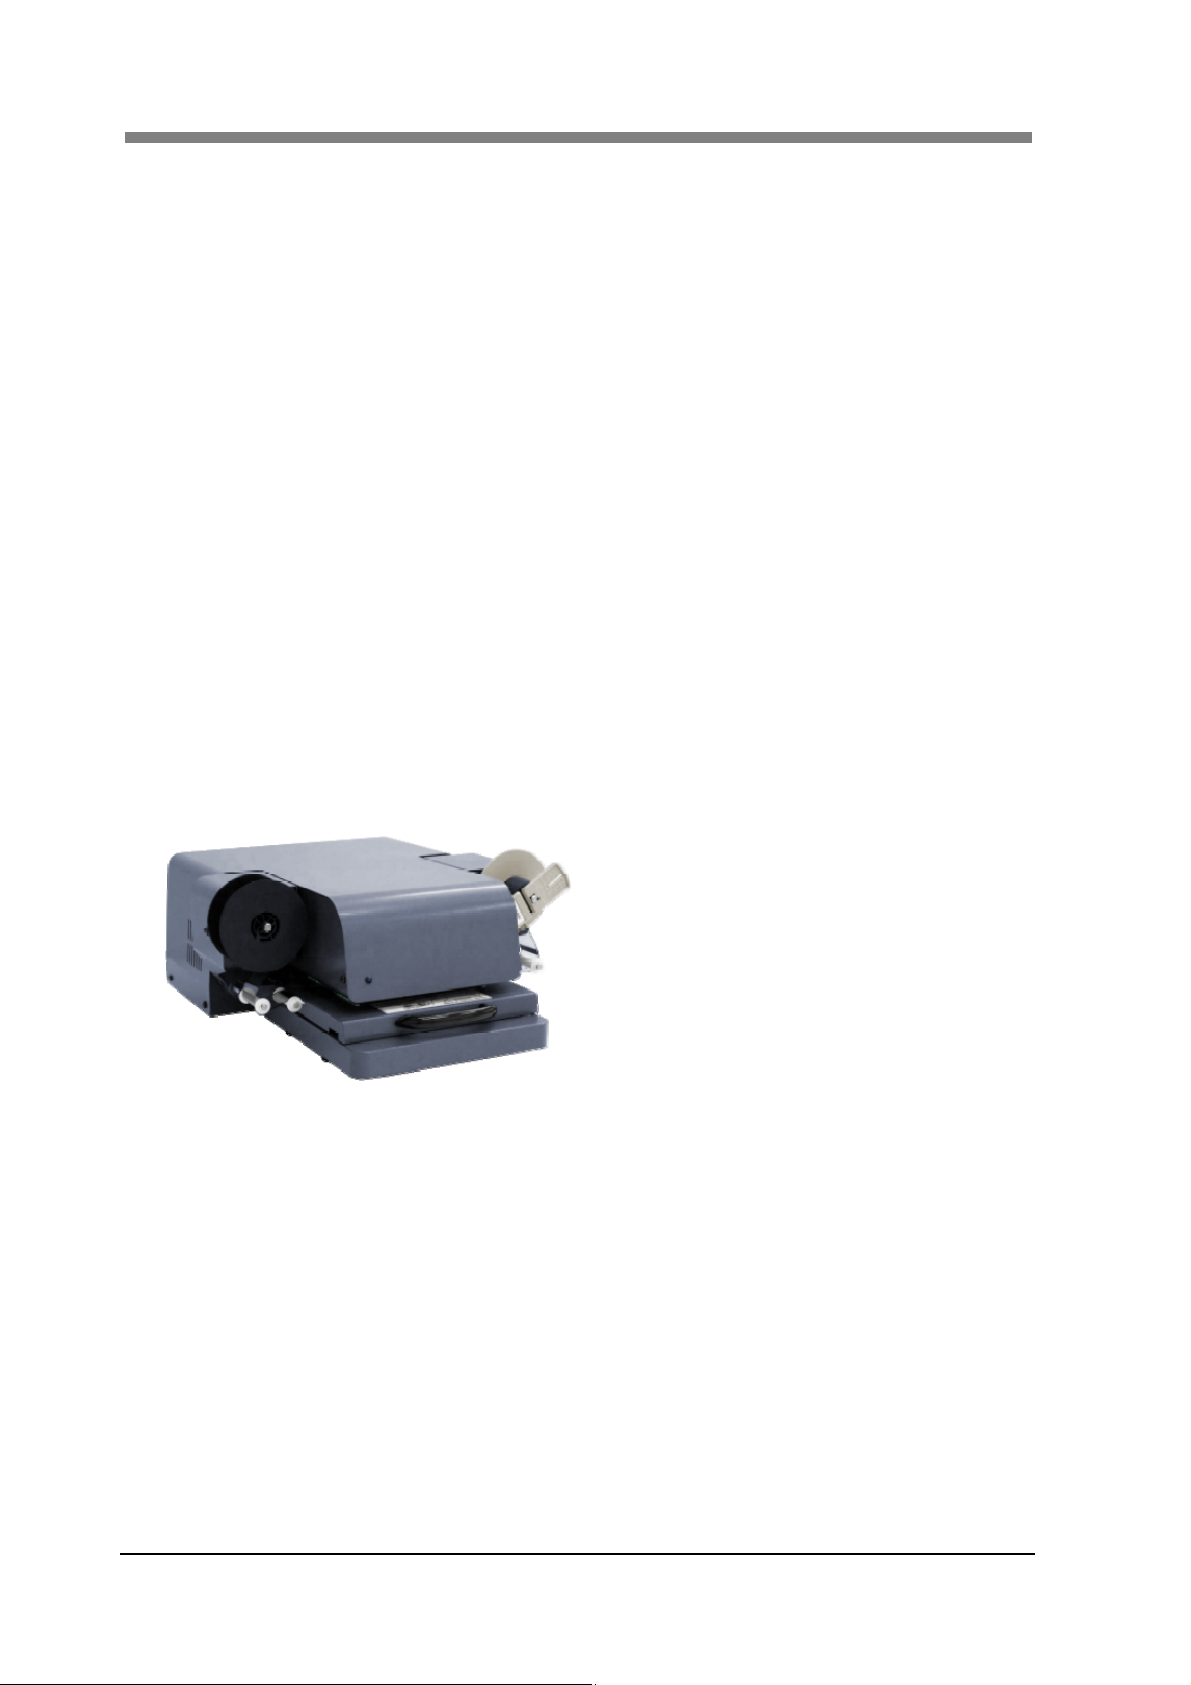
Thank you for choosing our Digital Film Scanner “SL1000” (herein after referred to as “the Scanner”).
This User’s Guide includes precautions for installation/operation of the Scanner, a system outline, an
explanation of the Driver software, operation procedures for the Scanner, troubleshooting tips,
maintenance, and product specifications.
To ensure the best performance and effective use of your unit, read this manual carefully until you
familiarize yourself thoroughly with the unit's operation and features.
Please keep this manual and use it as a quick and handy reference tool for immediately clarifying any
questions that may arise.
Please also NOTE the following precautions.
Safety Information
All Areas
Use the USB Cable supplied with the equipment. Use of an unshielded cable invites radio frequency
interference.
Always refer to this manual when operating the Scanner and do not attempt to touch the Scanner parts
for which no explanations are given in the text.
NEVER attempt to disassemble or modify the Scanner, as it is very dangerous.
Call your authorized dealer when you want to move the Scanner, which has been installed.
FCC Part 15 - Radio Frequency Devices (For U.S.A. Users)
This device complies with Part 15 of the FCC Rules.
Operation is subject to the following two conditions:
1. This device may not cause harmful interference, and
2. This device must accept any interference received, including interference that may cause undesired
operation.
WARNING
This equipment has been tested and found to comply with the limits for a Class A digital device,
pursuant to Part 15 of the FCC Rules. These limits are designed to provide reasonable protection
against harmful interference when the equipment is operated in a commercial environment. This
equipment generates, uses, and can radiate radio frequency energy and, if not installed and used in
accordance with the instruction manual, may cause harmful interference to radio communications.
Operation of this equipment in a residential area is likely to cause harmful interference in which case
the user will be required to correct the interference at their own expense.
The design and production of this unit conform to FCC regulations, and any changes or modifications
must be registered with the FCC and are subject to FCC control. Any changes made by the purchaser
or user without first contacting the manufacturer will be subject to penalty under FCC regulations.
x
Page 13

Interference-Causing Equipment Standard (ICES-003 ISSUE 4) For Canada Users)
This Class A digital apparatus complies with Canadian ICES-003.
Cet appareil numérique de la classe A est conforme à la norme NMB-003 du Canada.
UL/UL Marking
This equipment has been tested and found to comply with UL60950-1.
CE Marking (Declaration of Conformity) (For European Users)
This product complies with the following EU directives:
2006/95/EC and 2004/108/EC directives.
This declaration is valid for the area of the European Union (EU) only.
This device must be used with shielded interface cable and shielded network cable.
The use of non-shielded cable is likely to result in interference with radio communications and is
prohibited under rules.
We declare under our sole responsibility that the Scanner and options to which this declaration relates
is in conformity with the specifications below.
This declaration is valid for the area of the European Union (EU) only.
Trademark Acknowledgments
IBM and IBM PC/AT are registered trademarks of International Business Machines Corporation.
Microsoft, Windows, Windows Vista, Windows 7 and Windows 8 are registered trademarks of
Microsoft Corporation.
All other brand or product names are trademarks or registered trademarks of their respective
companies or organizations.
xi
Page 14

Organization
This manual consists of the following seven chapters. Chapters 1 and 2 contain basic information
about the Scanner, including safety precautions for installation/operation, system configuration, and
features. Be sure to read these chapters before using the Scanner.
Chapter 1 Precautions for Installation and Operation
Provides safety precautions required to ensure correct installation and operation of the
Scanner.
Chapter 2 Overview
An overview of the features, system configuration, functions and part names of the
Scanner
Chapter 3 Application “SL-Touch for SL1000”
Describes the application “SL-Touch for SL1000”.
Chapter 4 Operation
Describes operation precautions and procedures, and settings for each function.
Chapter 5 Troubleshooting
Describes error and warning messages that appear on the Personal Computer, and
procedures for eliminating these problems.
Chapter 6 Maintenance
Describes daily maintenance required for satisfactory operation of the Scanner.
Chapter 7 Specifications
Complete specifications of the Scanner.
NOTE:
In this manual, important points requiring special attention are described in sections marked with
“NOTE ”. Items that appear on the menu screen in the Personal Computer are enclosed by double
quotation marks “ ”. Referenced chapters or their titles are shown in brackets [ ].
xii
Page 15

Contents
Chapter 1 Precautions for Installation & Operation.................1-1
1 Precautions for Installation............................................................1-2
1.1 Installation Environment.............................................................. 1-2
1.2 Power Source ............................................................................. 1-2
1.3 Grounding ................................................................................... 1-2
1.4 Space Requirements................................................................... 1-3
2 Precautions for Installation and Operation .................................... 1-5
2.1 Operating Environment............................................................... 1-5
2.2 Precautions when operating the Scanner................................... 1-5
2.3 Precautions when operating the Personal Computer ................. 1-5
2.4 Moving the Scanner.................................................................... 1-6
Chapter 2 Overview ....................................................................2-1
1 Features........................................................................................2-2
2 Part Identification and Functions................................................... 2-3
2.1 Main Unit..................................................................................... 2-3
2.2 Roll Film Carrier (Option)............................................................ 2-4
Chapter 3 Application “SL-Touch for SL1000”.........................3-1
1 SL-Touch for SL1000 Setup .......................................................... 3-2
1.1 Trademark Acknowledgments..................................................... 3-2
1.2 System environment ................................................................... 3-2
1.3 Installation the Application Software and the Driver Software .... 3-3
1.4 Update the Application Software and the Driver Software .......... 3-9
1.5 Uninstalling the Application Software and the Driver Software ..3-11
2 Application Start-Up and Shutdown............................................. 3-13
2.1 Application Start-Up .................................................................. 3-13
2.2 Application Shutdown ............................................................... 3-14
3 SCAN Mode Screen....................................................................3-15
3.1 Toolbar ...................................................................................... 3-17
3.2 Film Selection ........................................................................... 3-22
3.3 Image Adjustment ..................................................................... 3-25
3.4 Lamp Illuminance...................................................................... 3-29
3.5 Output Setting........................................................................... 3-30
3.6 Preferences .............................................................................. 3-35
3.7 Custom Setting ......................................................................... 3-39
3.8 Password Change .................................................................... 3-43
3.9 E-Mail Setting ........................................................................... 3-44
4 VIEW Mode Screen..................................................................... 3-46
4.1 Toolbar ...................................................................................... 3-48
4.2 Image Adjustment ..................................................................... 3-50
4.3 Convert multi-page.................................................................... 3-52
4.4 OCR.......................................................................................... 3-54
4.5 E-Mail........................................................................................ 3-56
xiii
Page 16

4.6 Delete File .................................................................................3-59
5 Roll Film Carrier ..........................................................................3-60
5.1 Roll Film Carrier ........................................................................3-60
5.2 Multiple SCAN ........................................................................... 3-62
5.3 Multiple SERACH ...................................................................... 3-64
5.4 Alignment when starting the Film Search..................................3-66
Chapter 4 Operation....................................................................4-1
1 Precautions for Operation ............................................................. 4-2
1.1 Main Unit .....................................................................................4-2
1.2 Roll Film Carrier (Option) ............................................................4-2
2 Turning the Scanner ON/OFF .......................................................4-3
2.1 Turning ON the Power Switch ..................................................... 4-3
2.2 Turning OFF the Power Switch ................................................... 4-3
2.3 Power Saving Features ............................................................... 4-4
3 Operating the Fiche Film...............................................................4-5
3.1 Film Selection..............................................................................4-5
3.2 Film Insertion...............................................................................4-5
4 Operating the Roll Film .................................................................4-7
4.1 Film Selection..............................................................................4-7
4.2 Selecting the Film Width 16 mm/35 mm...................................... 4-8
4.3 Loading the Roll Film................................................................... 4-9
4.4 Feeding the Film........................................................................ 4-13
4.5 Rewinding the Film....................................................................4-15
4.6 Operation of the A-Type Cartridge Adaptor (Option) .................4-16
4.7 Operation of the M-Type Cartridge Adaptor (Option).................4-18
Chapter 5 Troubleshooting.........................................................5-1
1 Problems with the Scanner ........................................................... 5-2
2 Troubleshooting ............................................................................5-3
2.1 Flashing display of the Indicator Lamp........................................5-3
2.2 Attention display on the Personal Computer Screen................... 5-3
2.3 Errors shown on the Personal Computer Screen........................5-4
3 Trouble when scanning an image .................................................5-6
4 Trouble when the Film Rewinding and Winding ............................5-6
Chapter 6 Maintenance...............................................................6-1
1 Maintenance .................................................................................6-2
1.1 Daily checks ................................................................................ 6-2
1.2 Cleaning ......................................................................................6-3
Chapter 7 Product Specifications..............................................7-1
1 Major Specifications ...................................................................... 7-2
xiv
Page 17

Chapter 1
Precautions for Installation
& Operation
Page 18

SL1000 User’s Guide
1 Precautions for Installation
1.1 Installation Environment
Install the Scanner in a location, which meets the following requirements to ensure safe
operation and utmost performance.
A well-ventilated place
An area which is free from ammonia or other organic gases.
A place which has easy access to a power outlet so that the unit may be easily plugged and
unplugged.
An area free from direct sunlight
A place which is out of the direct air stream of an air conditioner, heater or ventilator and is
not subject to extremely high or low temperatures or humidity.
A stable location with a flat surface that is not subject to undue vibration.
A place away from curtains or other objects that catch fire and burn easily
An area that is safe from spilled water or other liquids.
A dust-free location
1.2 Power Source
The Power Source Voltage Requirements are as follows.
Use a Power Source with little voltage/frequency fluctuations.
Power Source: 50 Hz – 60 Hz
Voltage Fluctuation: 120 VAC ±10%, 230 VAC ±10%
Frequency Fluctuation: 50 Hz ±3 Hz
60 Hz ±3 Hz
Be careful not to exceed the capacity of the outlet, especially when sharing other appliances
from the same outlet.
The outlet should be located near the unit and be easily accessible so that the Power Cord
can be unplugged immediately if necessary.
NEVER connect any other appliances or machines by means of a multiple socket to the
outlet being used for the unit.
If an Extension Cord is needed, use one with a capacity greater than the power consumption
of the unit.
Make sure that the Power Cord and extension cord do not become caught in any mechanism
of the system. Do not allow either the power or extension cord to become caught underneath
the weight of the unit.
1.3 Grounding
Be sure to connect the Ground Wire for the Power Cable to any of the following places to
prevent electrical shocks due to electrical leakage:
Ground Terminal of the outlet
Ground terminal that complies with local electrical standards
NOTE : NEVER connect the Ground Cable to a Gas Pipe, the Ground Wire for a Telephone
Line, or a Water Pipe.
1-2
Page 19
Chapter 1 Precautions for Installation & Operation
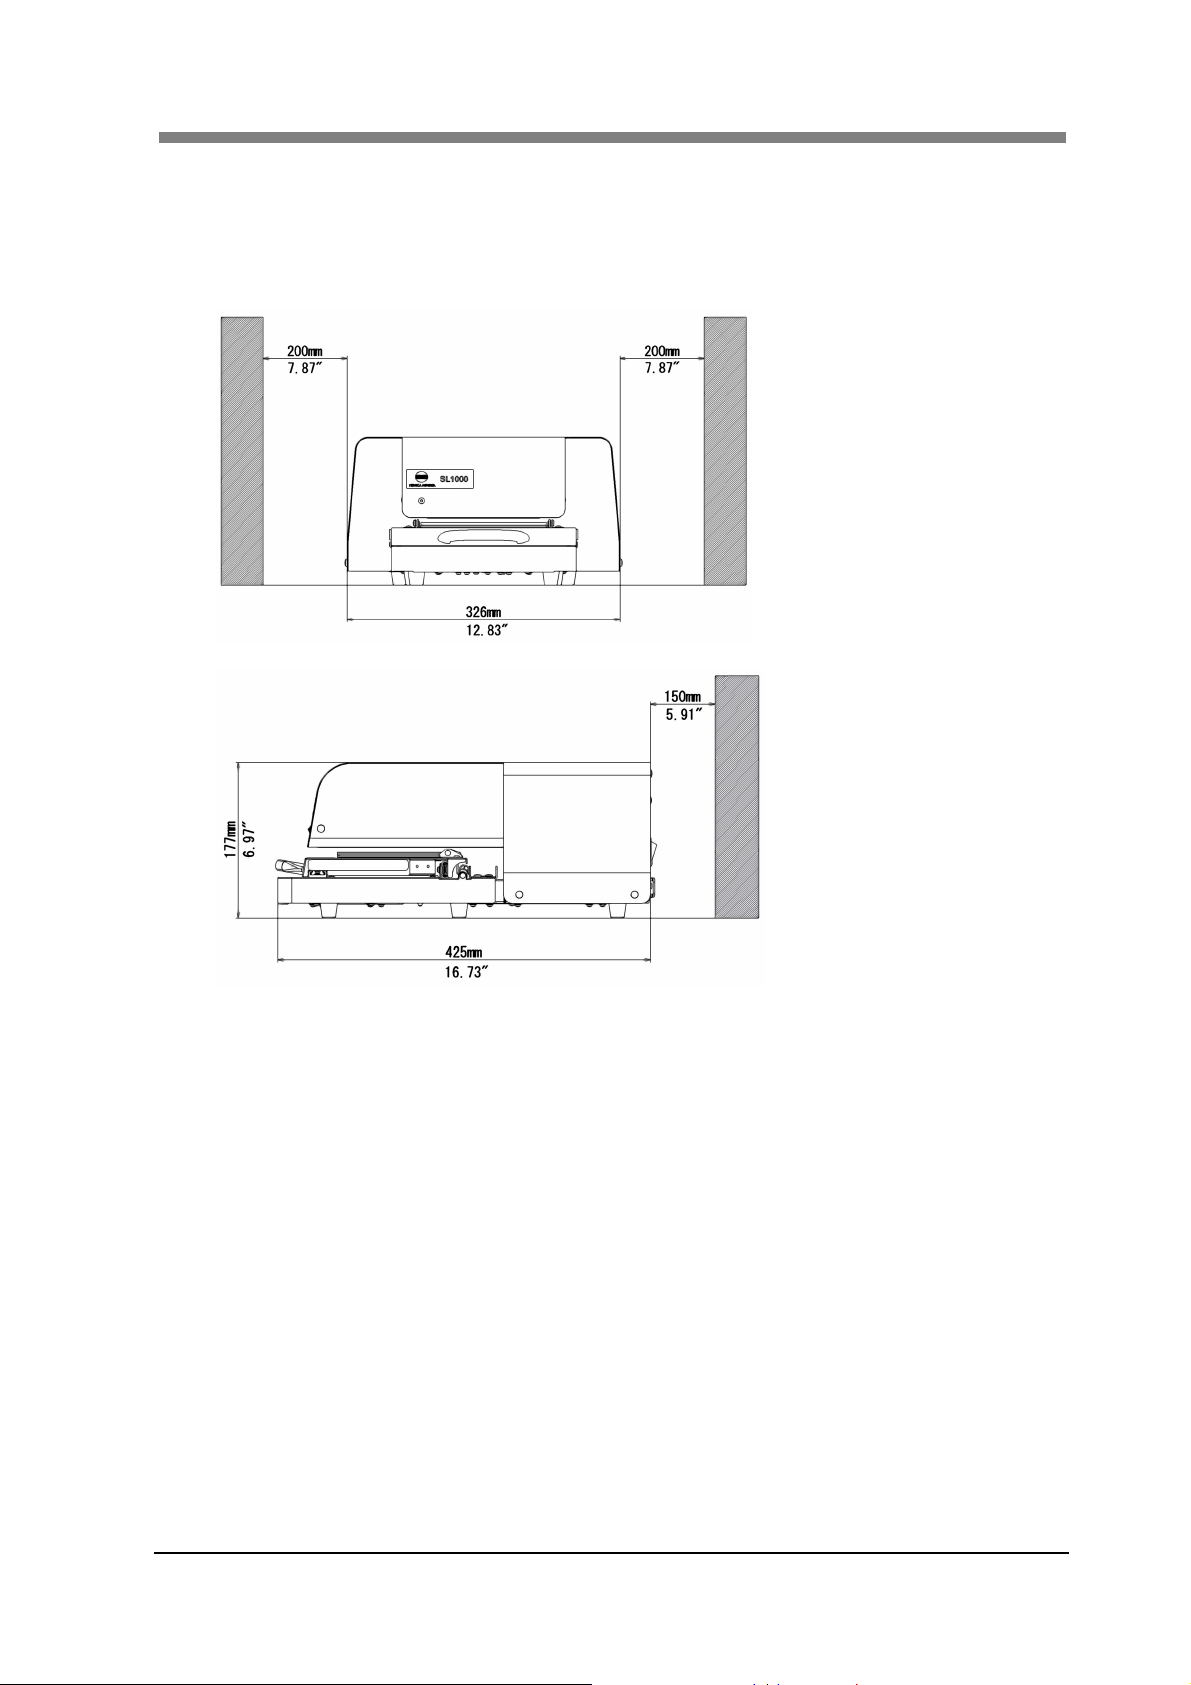
1.4 Space Requirements
Secure the recommended space shown in the figure below to ensure easy operation and
maintenance of the Scanner.
[Standard: Fiche Carrier Model]
1-3
Page 20
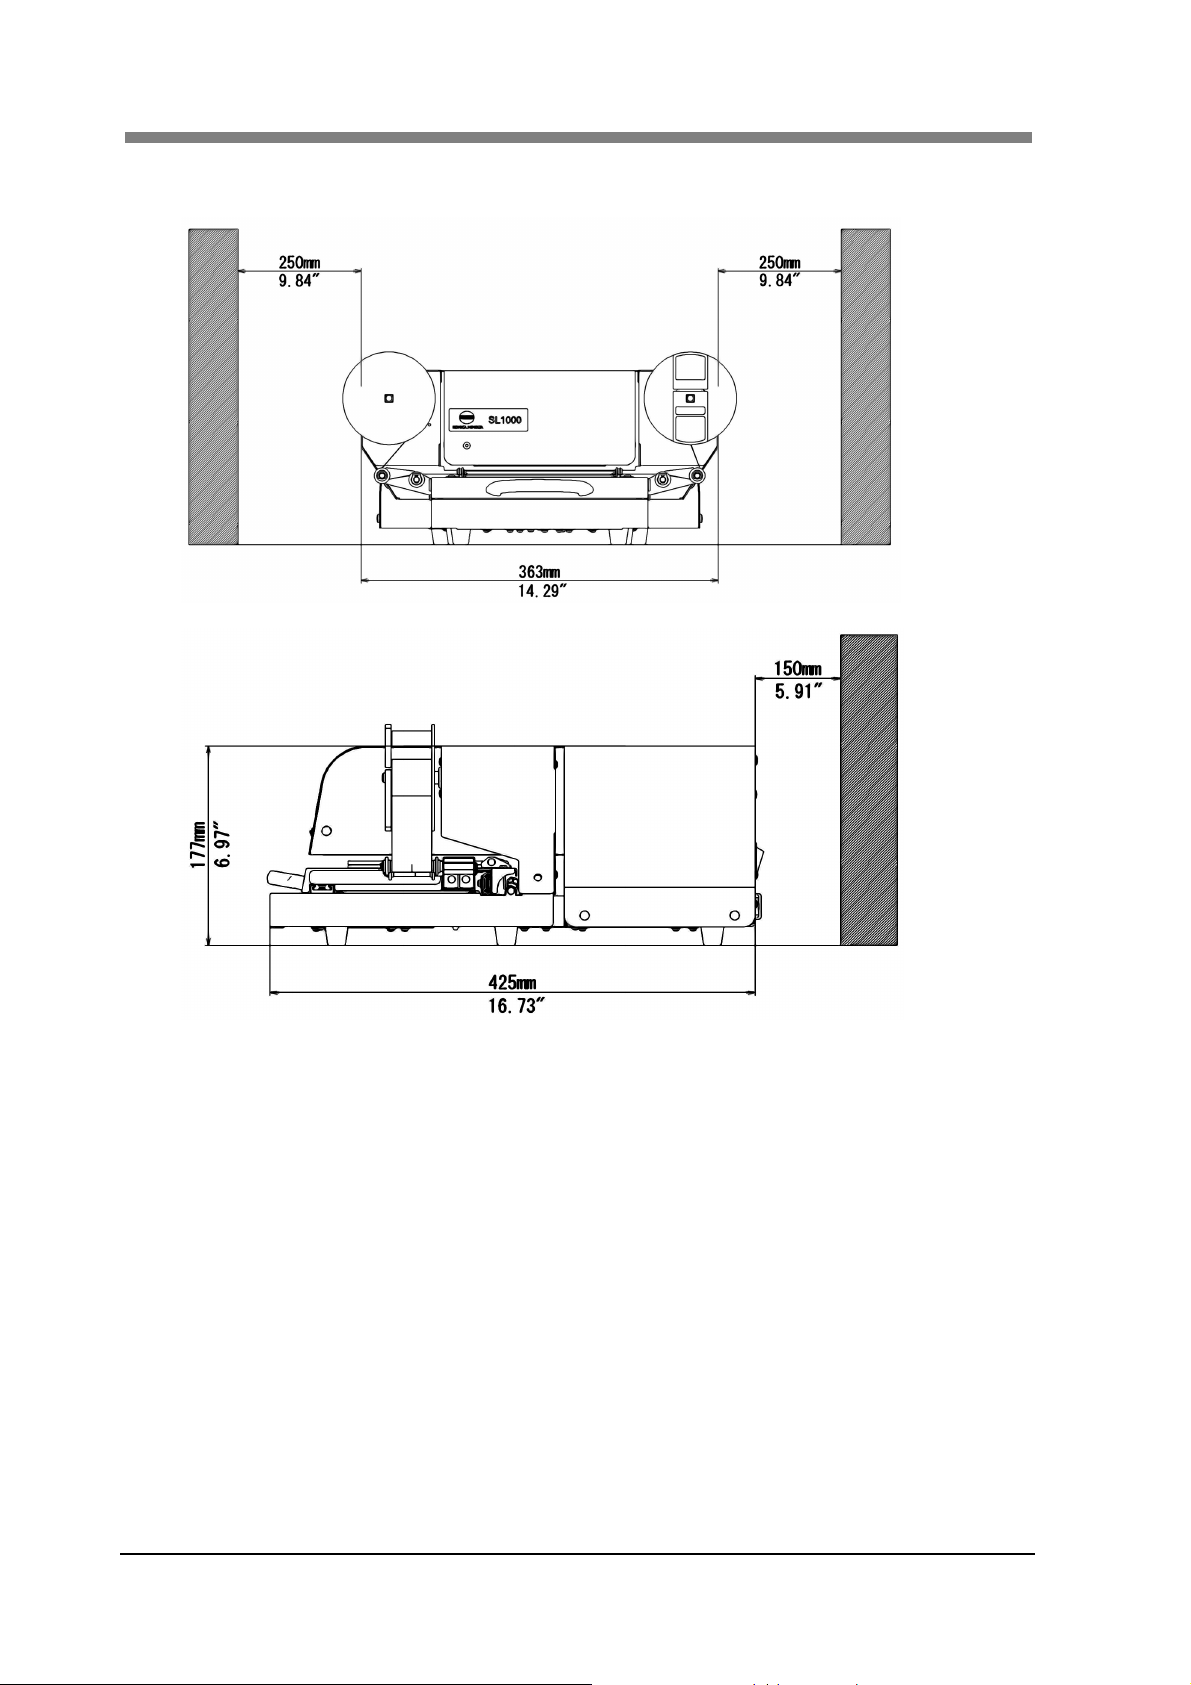
SL1000 User’s Guide
[Motorized Roll Film Carrier /Manual Roll Film Carrier Model]
1-4
Page 21

Chapter 1 Precautions for Installation & Operation
2 Precautions for Installation and Operation
2.1 Operating Environment
The following environment is required for consistent performance of the Scanner:
Temperature: 50 to 95°F (10 to 35°C) with temperature variations not exceeding 18°F (10°C)
per hour.
Humidity: 15 to 85%RH with humidity variation not exceeding 20% per hour.
2.2 Precautions when operating the Scanner
Observe the following precautions to ensure the optimum performance of the Scanner:
◆ NEVER place any object or exert shock on the Scanner.
◆ NEVER place finger(s) between the glass when operating the Scanner.
NEVER bring any magnetized object or use flammable sprays/liquids near the Scanner.
NEVER place a vase or vessel containing water on the Scanner.
NEVER drop paper clips, staples, or other small pieces of metal into the Scanner. If this
occurs, contact your Authorized Dealer.
NEVER remove the Fixed Outer Cover.
ALWAYS completely insert the Power Cord Plug into the Power Outlet.
ALWAYS make sure that the outlet into which the Power Cord Plug is inserted is visible.
NEVER use this device with Power Cords or USB Cables for other electrical devices.
IMMEDIATELY turn the Power Switch OFF, unplug the Power Cord, and call your
authorized dealer for appropriate action when the Power Cord or USB Cable of the Scanner
has been damaged.
ALWAYS be sure to turn the Power Switch OFF, unplug the Power Cord, and call your
authorized dealer for appropriate action when the Scanner becomes excessively hot or
produces abnormal noise.
2.3 Precautions when operating the Personal Computer
Refer to the Operation Manual provided for the Personal Computer.
1-5
Page 22
SL1000 User’s Guide
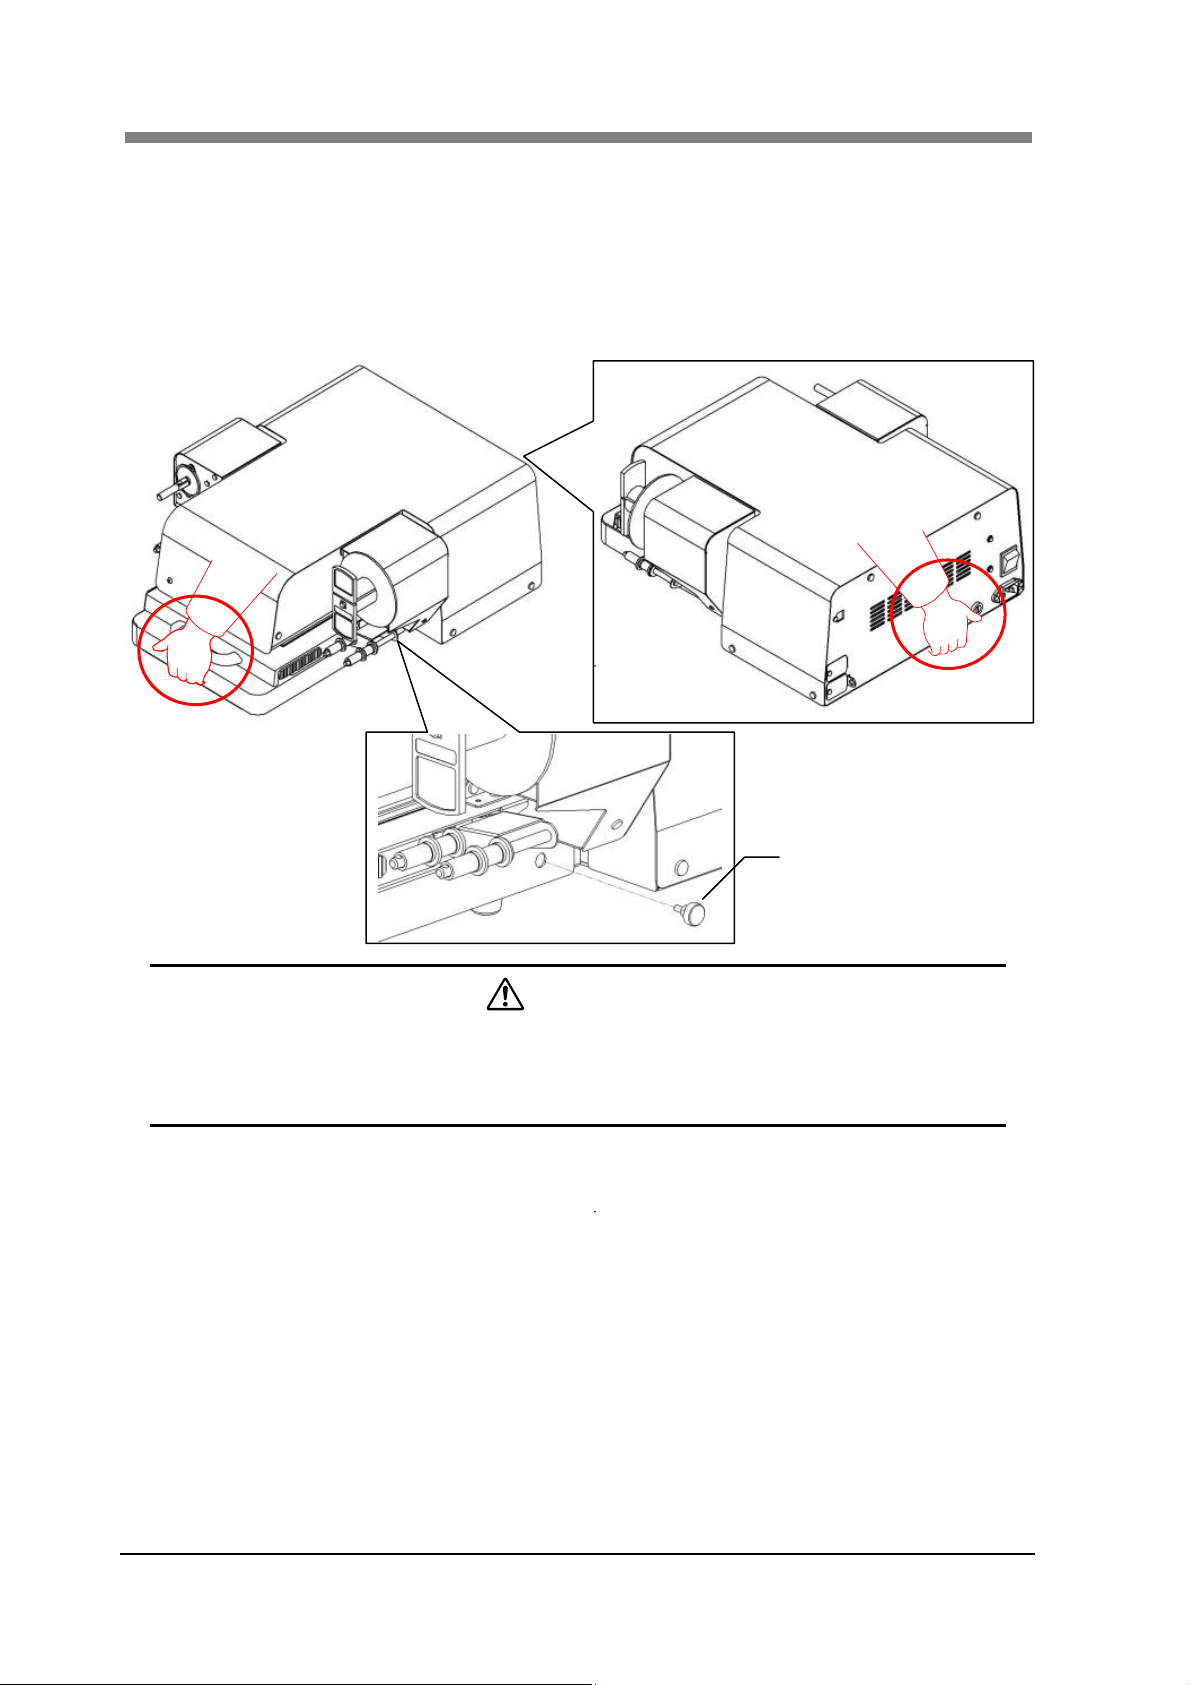
2.4 Moving the Scanner
When moving the Scanner, observe the following:
When carrying the Scanner, hold as shown in the below figure. Be careful not to hurt your
back.
When moving the Scanner, be sure to disconnect the Power Cord and the USB Cable.
When transporting the Scanner, contact your authorized dealer.
Fixing Screw for Fiche Carrier
CAUTION
・ Never move the Scanner while the Fiche Carrier is pulled out, it could cause trouble. When
the Scanner the Fiche Carrier should be pushed all the way into the Scanner.
・ Never hold in a manner other than the identified in the figure. Scanner must be held in the
area designated in the illustration.
1-6
Page 23

Chapter 2
Overview
Page 24
SL1000 User’s Guide
1 Features
This Scanner is digital screen-less Scanner that has developed for the microfilm editing to the digital
image for a high-speed scanning. There are the following features.
◆ The machine has a small footprint and light weight. And, the installation location is not limited.
◆ The lens exchange is unnecessary, and a super-high magnification optical zoom of (6.8 - 54 x) is
equipped, and with "electrical zoom" magnifications up to 8.5 - 105 x.
◆ The film in various types can be read by installing the option.
* Roll Film/Fiche Carrier, Monochrome(B/W)/Color, Positive/Negative etc,
◆ The optical resolution can be read by the high-resolution with 360dpi (A4 L or Letter L conversion).
*L = landscape
◆ The color image of the high-resolution can be read by a Color Area CCD Sensor (14.22 Mega
pixels).
◆ It is designed by the power saving corresponding to the regulation (Energy Star (US), ErP Directive
(EU)).
◆ Special application software (SL-Touch for SL1000) that can be operated by a Touch Panel is
standard.
◆ The real-time view (film image) and the image view (preservation image) can be switched with one
touch by operating the special application software (SL-Touch for SL1000).
◆ Various options such as an Motorized Roll Film Carrier, Manual Roll Film Carrier, Manual Switch,
etc. are also available.
2-2
Page 25
2 Part Identification and Functions
2.1 Main Unit
Chapter 2 Overview
1
3
5
4
5
10
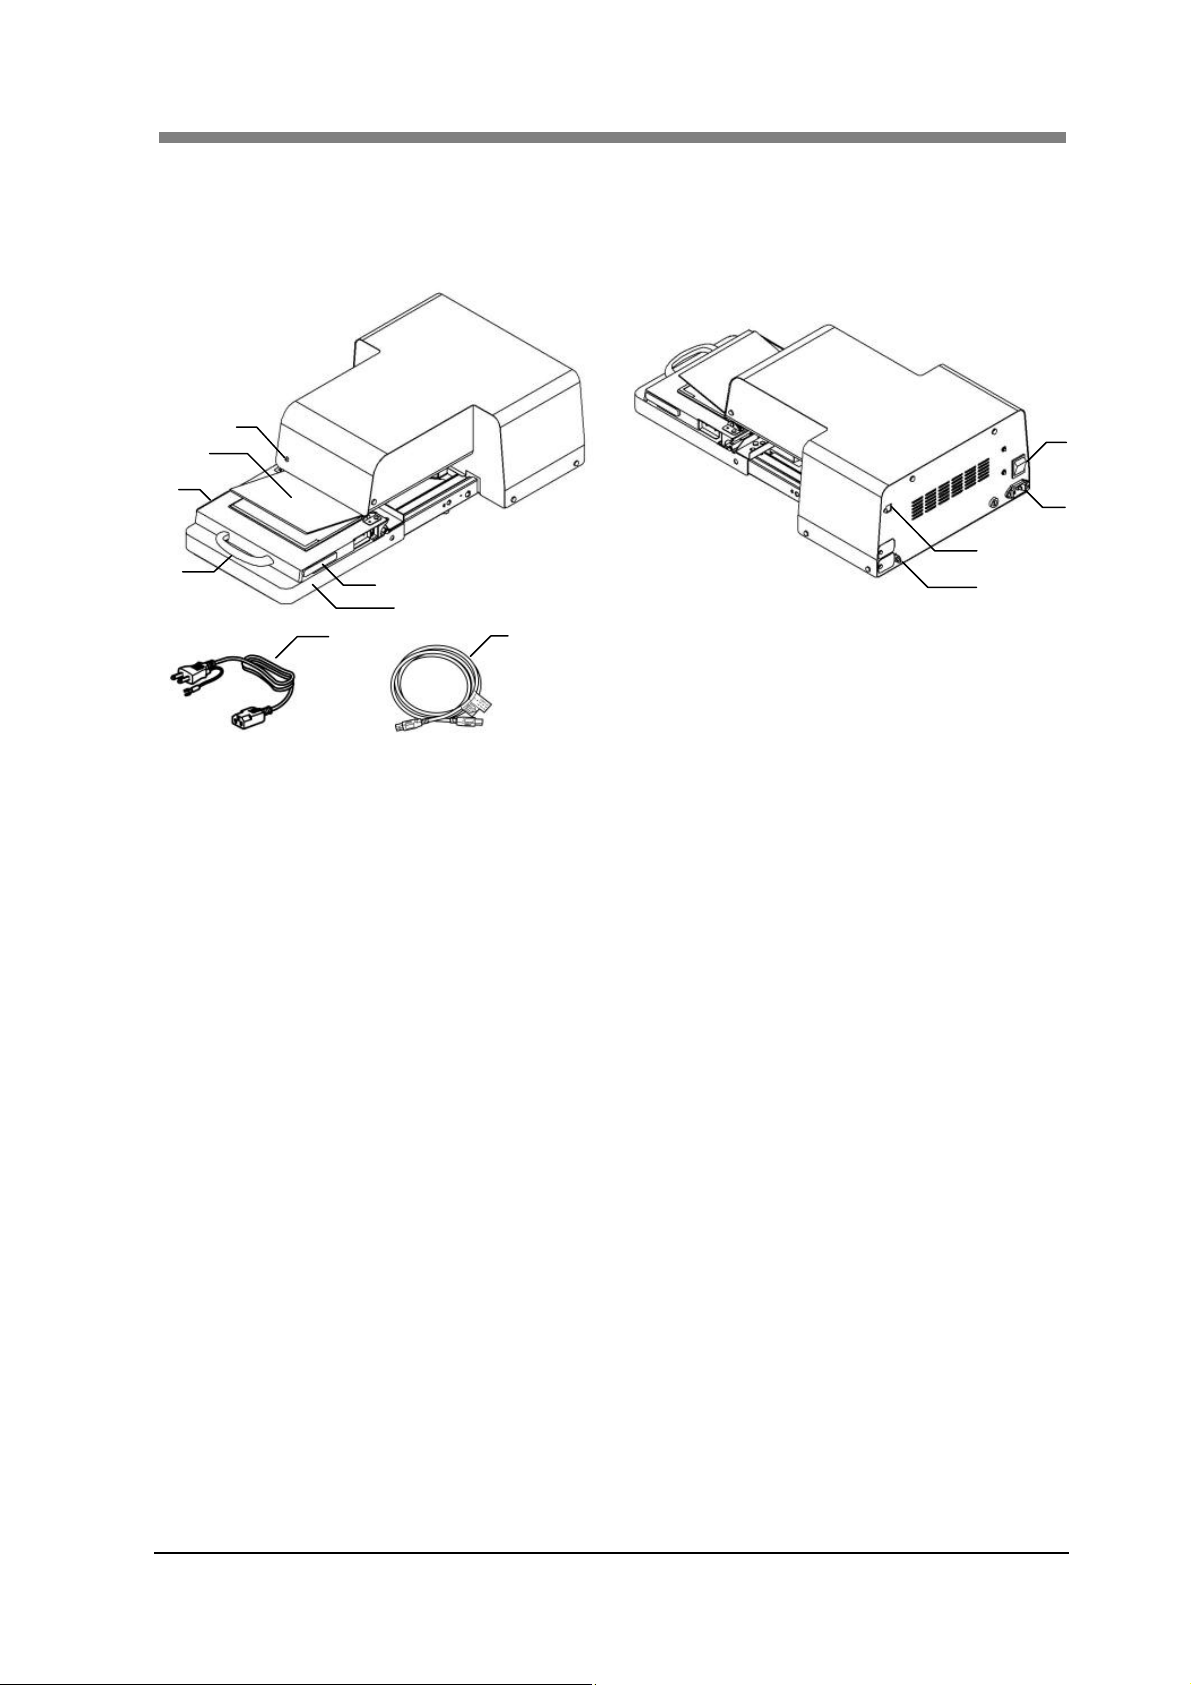
1. Indicator Lamp
2. Fiche Carrier:
3. Fiche Glass:
4. Carrier Handle:
5. Grip:
6. Power Switch:
7. USB Connector:
8. Power Cord Socket:
9. Security Slot:
10. Power Cord:
11. USB Cable:
6
8
7
9
2
11
Scanner condition is shown.
Film is set to desired position.
Film held in place.
To insert, remove or correctly position the fiche film.
The area that the hand is placed when the image position is
fine-tuned, and the Fiche Carrier is moved.
Turns the Scanner ON/OFF.
Connect the USB Cable that is supplied with the
equipment.
Plug the Power Cord into this socket.
General-purpose security wire (for anti-theft) can be
connected through this slot.
Connects the Scanner to the Power Outlet.
Connects the Scanner to the Personal Computer.
2-3
Page 26
SL1000 User’s Guide
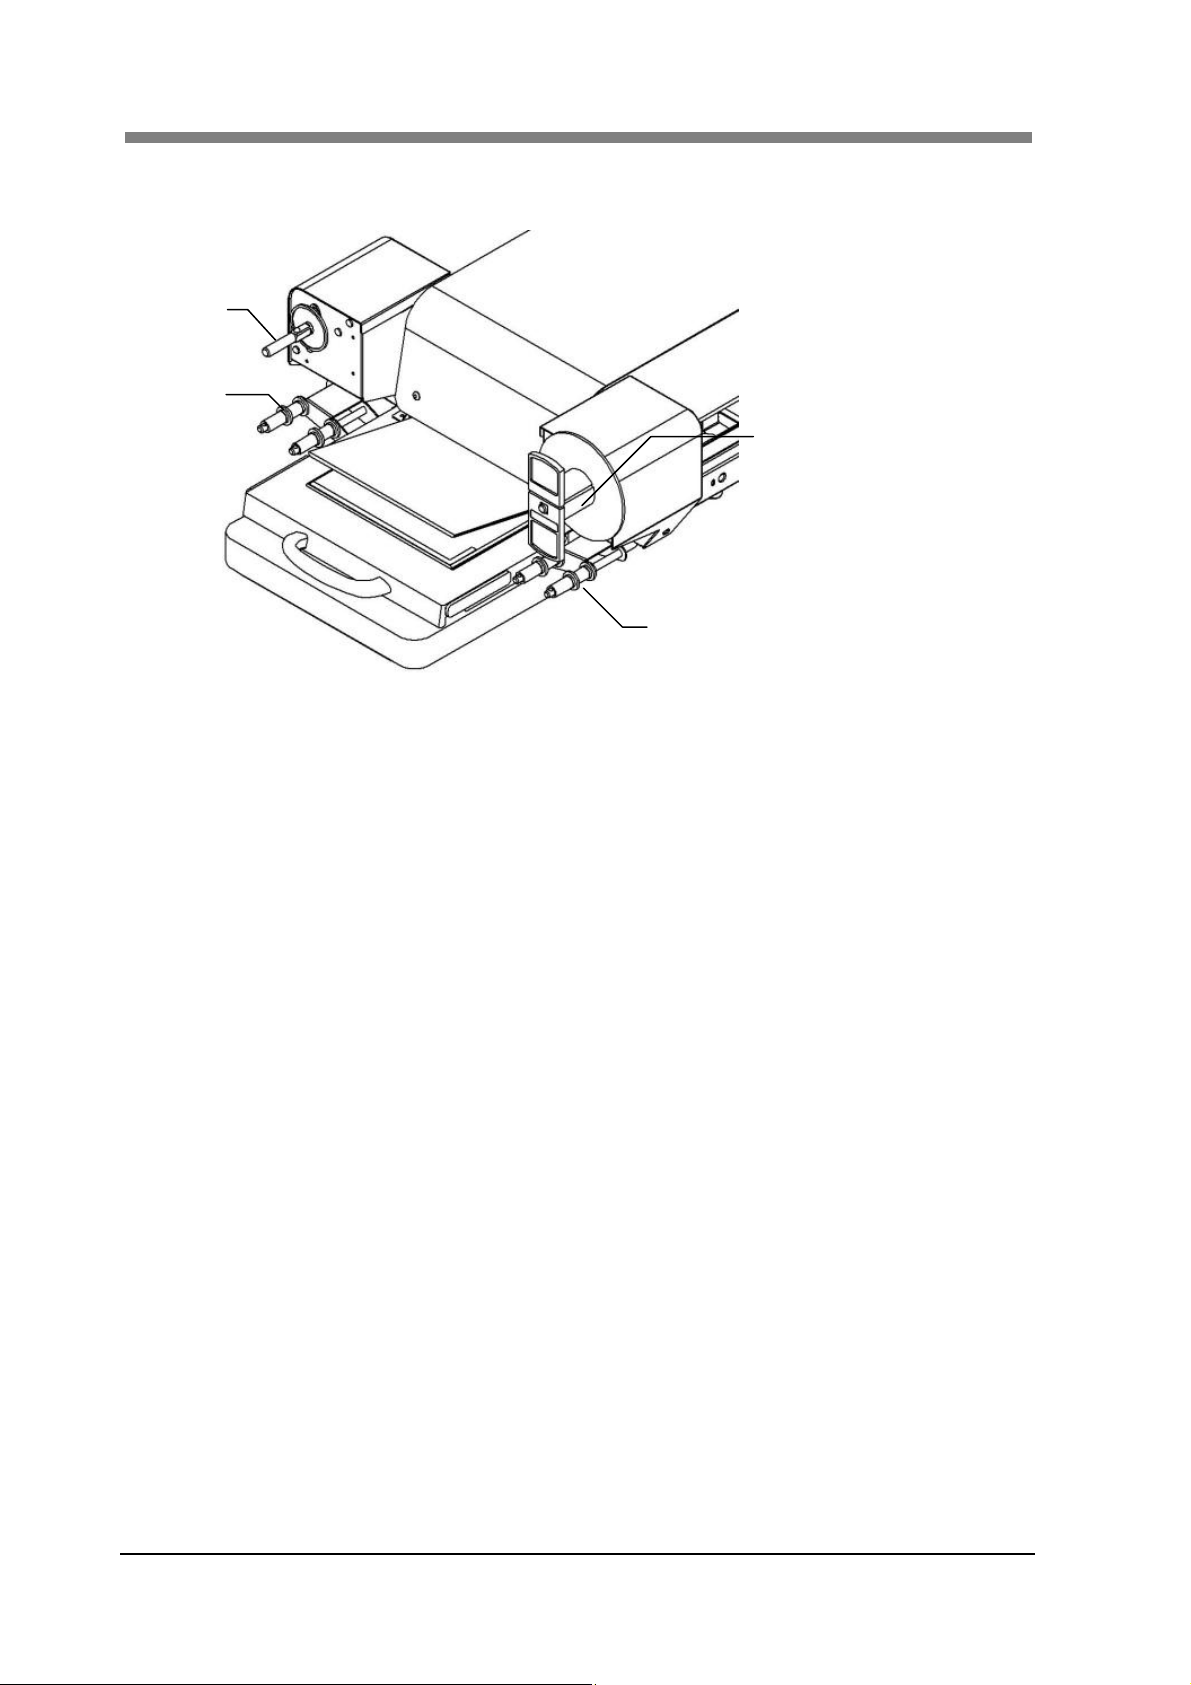
2.2 Roll Film Carrier (Option)
1
3
2
3
1. Reel Shaft:
2. Take-Up Reel:
3. Guide Roller:
Roll Film is inserted.
Roll Film is wound.
The Roll Film is guided.
2-4
Page 27

Chapter 3
Application “SL-Touch for SL1000”
Page 28

SL1000 User’s Guide
1 SL-Touch for SL1000 Setup
It is necessary to install 'SL-Touch for SL1000' in the Personal Computer beforehand to display the
image and to take it with a Personal Computer connected with SL1000. This chapter describes the
system requirements of the Personal Computer and the installation procedure of 'SL-Touch for
SL1000'.
1.1 Trademark Acknowledgments
IBM and IBM PC/AT are registered trademarks of International Business Machines
Corporation.
Microsoft, Windows, Windows Vista, Windows 7 and Windows 8 are registered trademarks of
Microsoft Corporation.
All other brand or product names are trademarks or registered trademarks of their respective
companies or organizations
1.2 System environment
The following are the minimum system requirements for the computer connected to the Scanner
to install the Driver. The operator should be completely familiar with basic Windows operations.
Computer Compatible with IBM PC/AT
OS Windows 8: 32 bit, 64 bit
Windows 7: 32 bit, 64 bit
Windows Vista: 32 bit, 64 bit SP2 or later
CPU INTEL Core i7 or greater
Memory 4 GB or greater
Hard disk drive 2 GB of available hard-disk space
Interface Hi-Speed USB 2.0
Optical disc drive CD-ROM drive
Display Display that has screen resolution of 1,280 x 1,024 or greater
Recommended System Requirements
CPU INTEL Core i7 2.93 GHz or faster
Memory 4 GB or greater
Hard disk drive SATA 3 7200 rpm or greater
Video Card GeForce GT430 1 GB or greater
Display Display that has a screen resolution of 1,920 x 1,080
Touch Panel Multi-touch monitor or display equipped with a Touch Panel
3-2
NOTE ! To use the zoom function with a multi touch panel, the display must be supported
by the multi-touch function of Windows 7 or Windows 8.
Page 29
Chapter 3 SL-Touch for SL1000
1.3 Installation the Application Software and the Driver Software
NOTE ! Must install "SL-Touch for SL1000" before connecting the Scanner.
When the Scanner is connected before "SL-Touch for SL1000" is installed,
"Found New Hardware Wizard" is displayed.
In this case, please end the wizard clicking the cancel button.
The driver is installed concurrently with the application.
The following procedure shows the Application Installation for Windows 8.
Administrative rights are needed for the Application Installation.
NOTE : Screens may differ slightly depending on the Windows version.
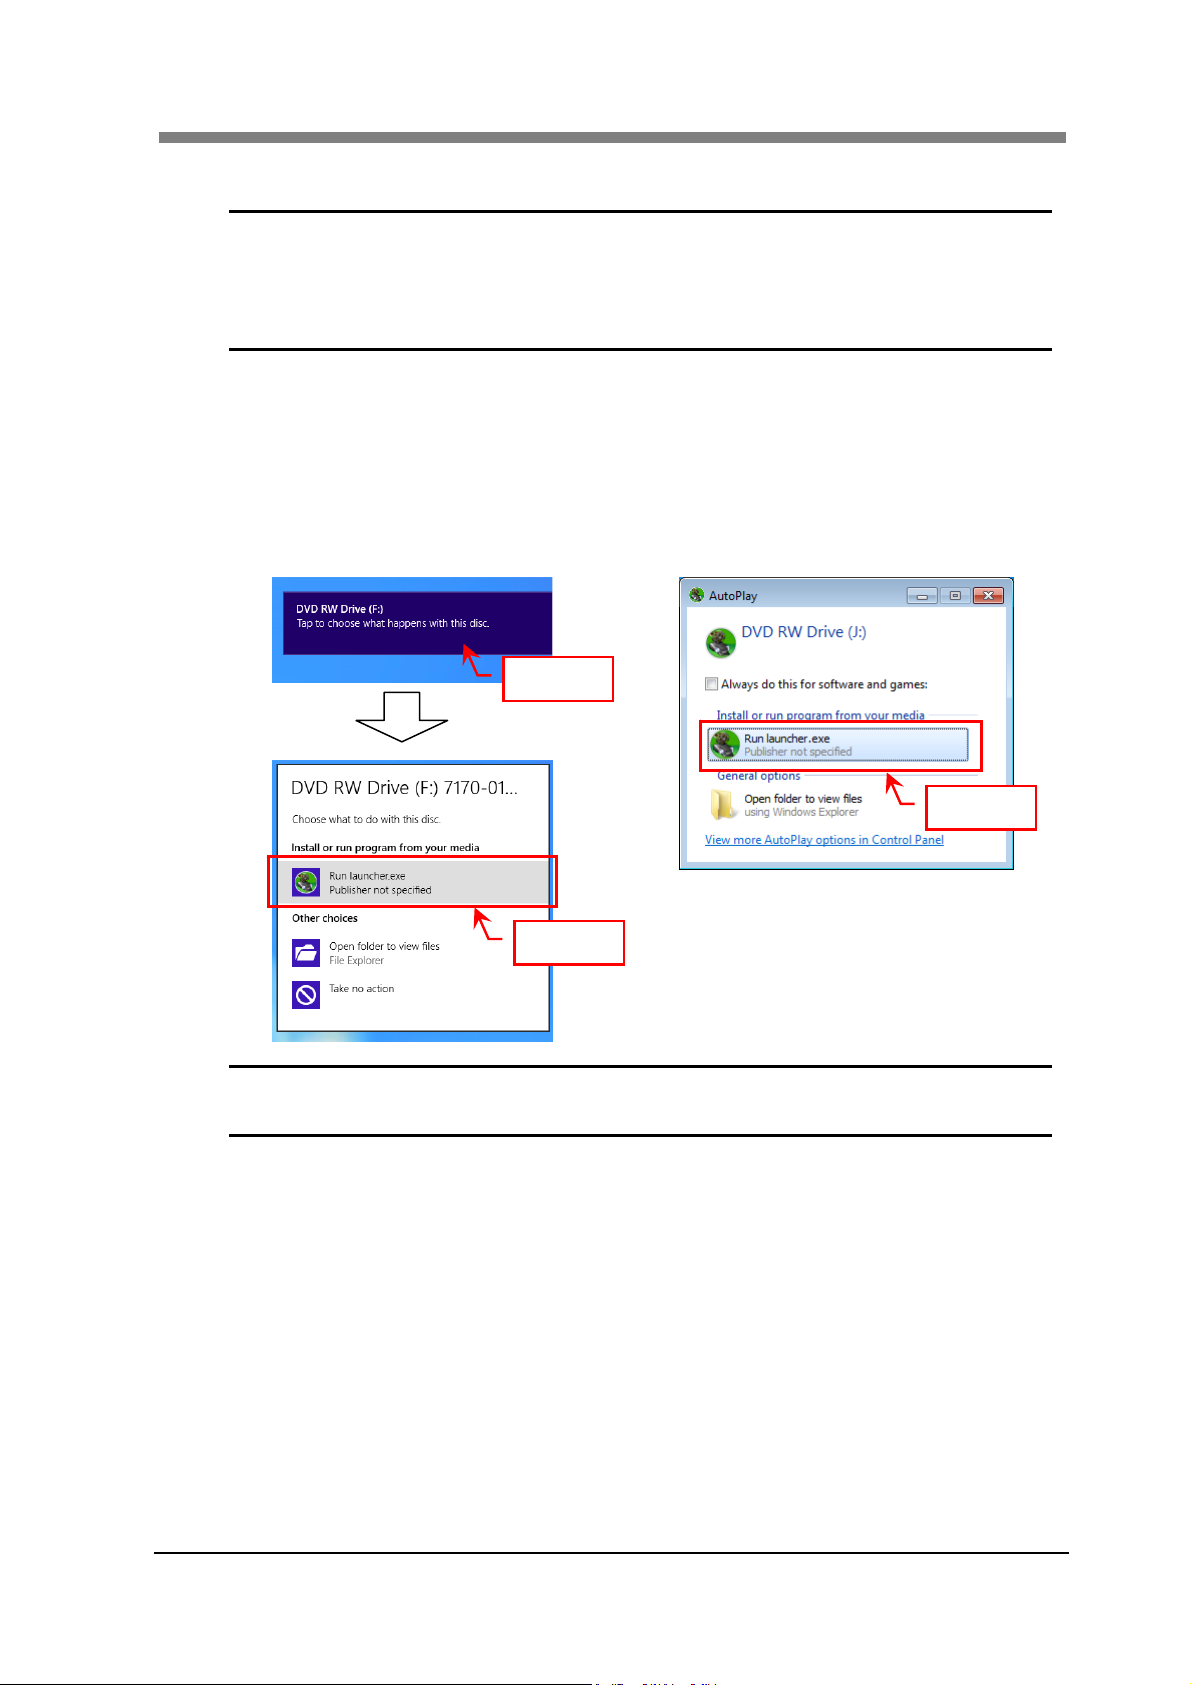
Load the installation CD-ROM in the CD-ROM drive of the Personal Computer. The Auto
1
Play screen will automatically appear. Click “Run launcher.exe”.
Windows 8 Windows 7 or Windows Vista
Click
Click
Click
NOTE ! When the "Auto Play" function of the computer is “OFF”, this screen will not be
displayed. Please execute launcher.exe in the CD-ROM and start.
3-3
Page 30

SL1000 User’s Guide
When the installation screen appears, Click “Install SL-Touch for SL1000” to begin the
2
installation.
If the “User Account Control” screen appears, click the “Yes” button or the “Continue”
3
Button.
Windows 8 or Windows 7 Windows Vista
NOTE ! This screen may not be displayed, depending on the settings of the computer.
3-4
Page 31
Chapter 3 SL-Touch for SL1000
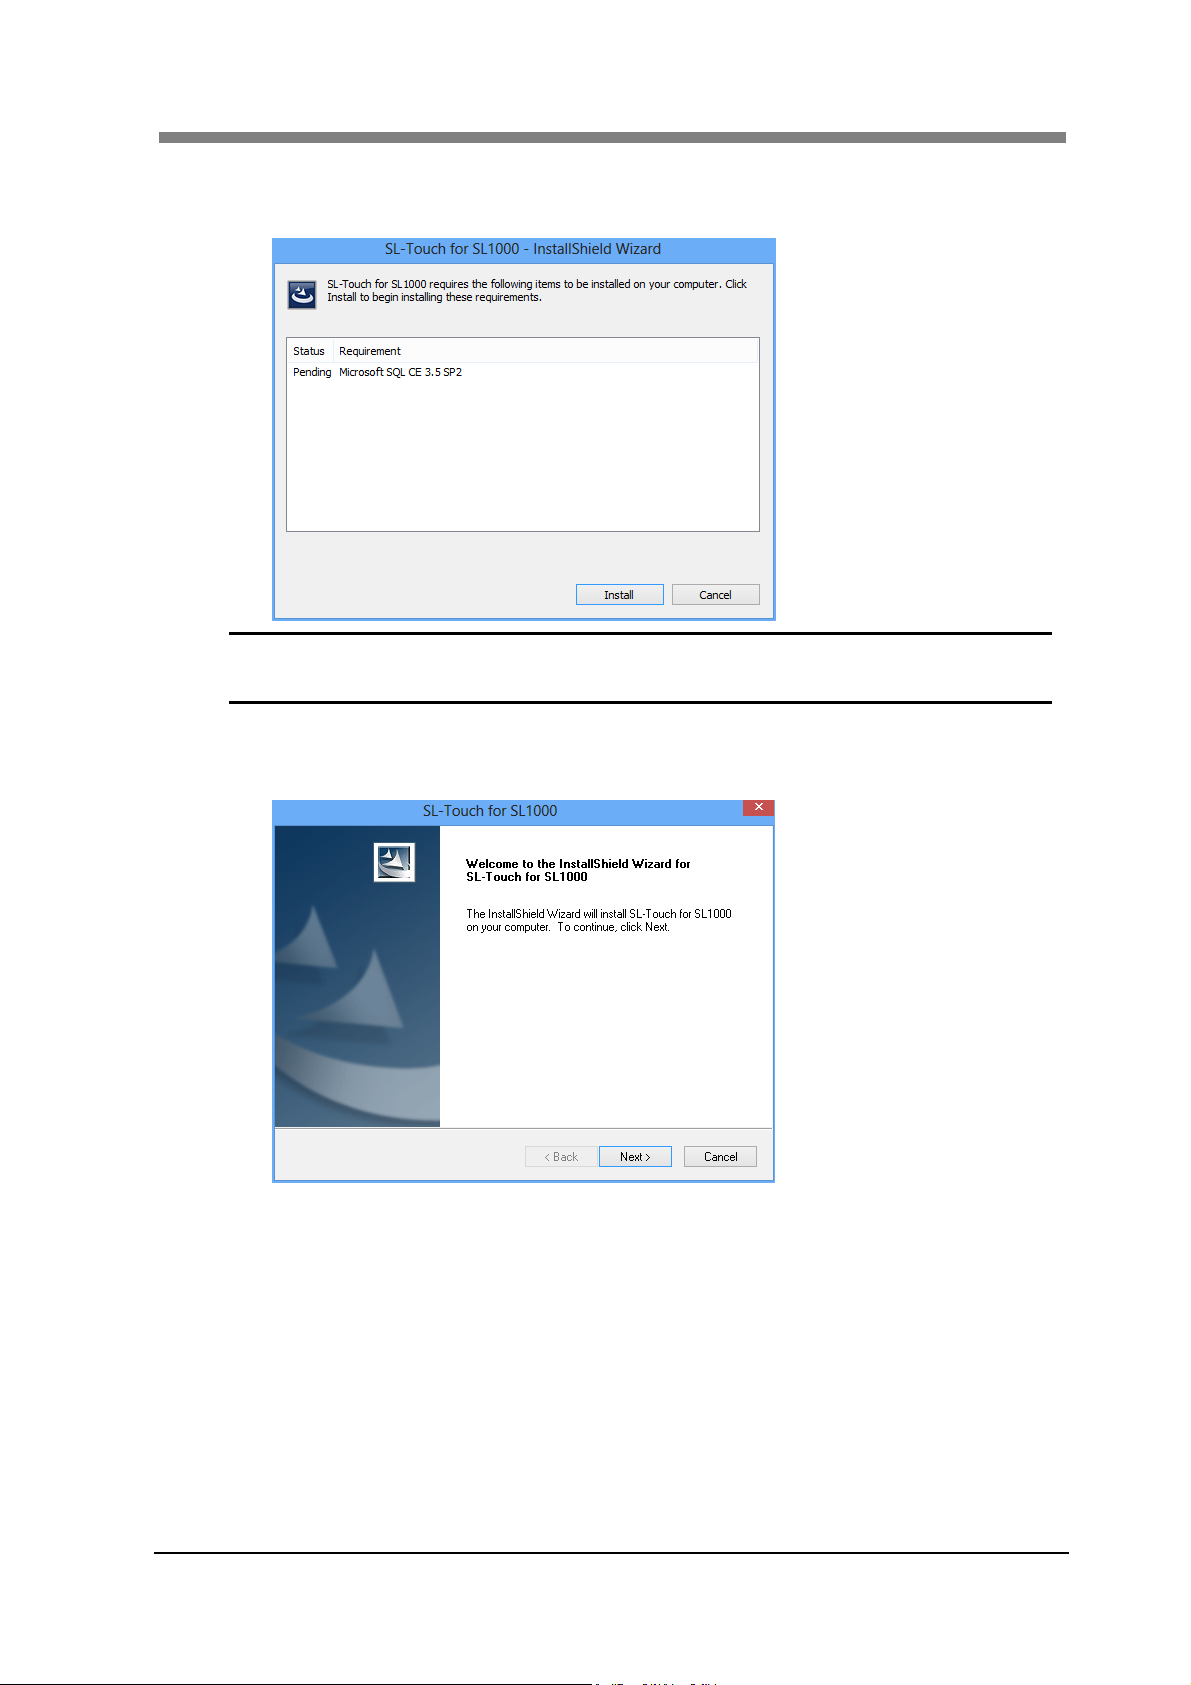
When the installation screen of “Microsoft .NET Framework 4.0 Client" and “Microsoft
4
SQL CE3.5 SP2" is displayed, click the “Install" button.
NOTE ! When the above-mentioned item has already been installed the Personal
Computer, this installation screen is not displayed.
When the “Welcome to the InstallShield Wizard for SL-Touch for SL1000” screen appears,
5
click the “Next” button.
3-5
Page 32
SL1000 User’s Guide
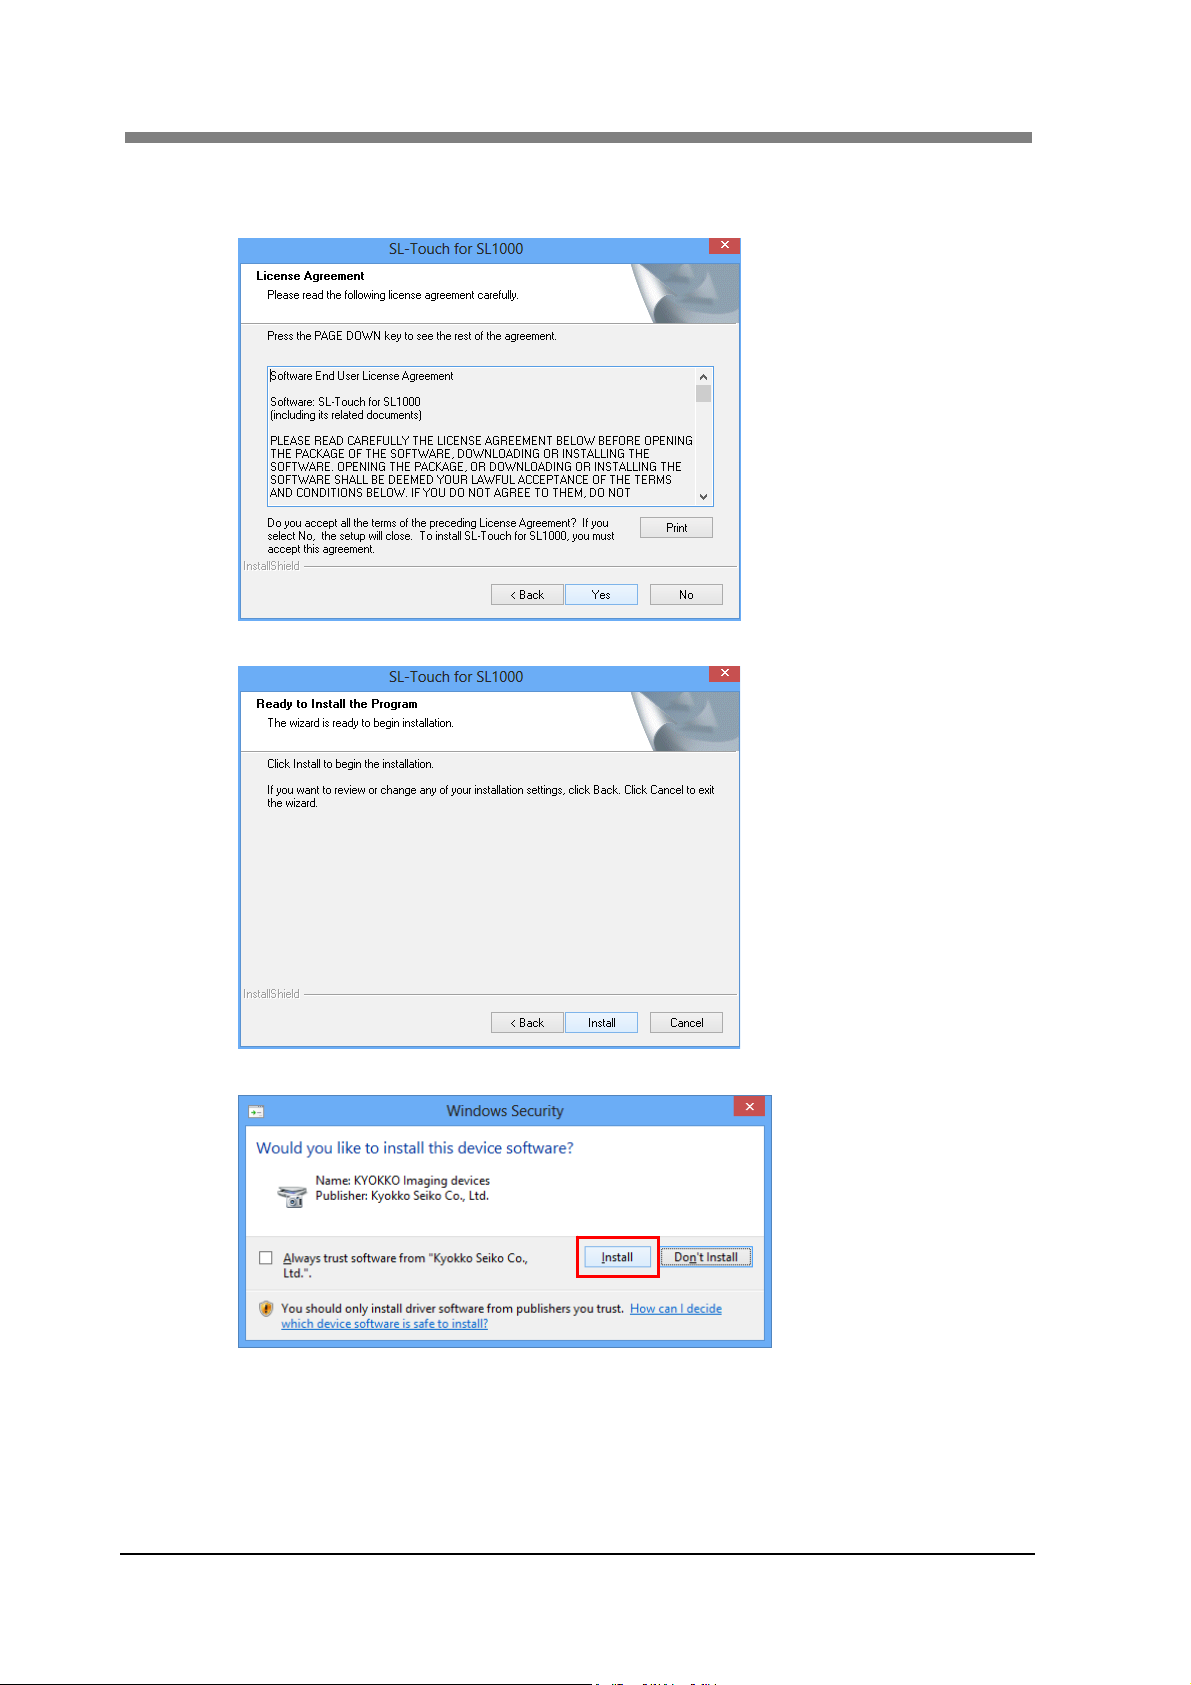
When the License Agreement” screen appears, confirm the following messages and click
6
the “Yes" button.
Click the “Install” button.
7
3-6
When the “Windows Security” screen appears, click “Install” button.
8
Page 33

Chapter 3 SL-Touch for SL1000
The language selection screen will be displayed, then, select the language and click the
9
“OK” button.
NOTE ! The selected language can be changed in the “Preferences”.
When the “InstallShield Wizard Complete” screen appears, click the “Finish” button and
10
remove the CD-ROM from the Personal Computer.
IMPORTANT ! Execute the installation of the device driver when the installation of
SL-Touch for SL1000 application is completed.
If the installation of the device driver is not completed, the application
cannot be started.
Install the device driver according to the following procedures.
Connect the Scanner to the Personal Computer with the USB cable.
11
Turn the Power Switch of the Scanner ON.
12
3-7
Page 34

SL1000 User’s Guide
When the scanner is detected, and the installation of the device driver is completed, the
13
installation of the Application completes.
Windows 8
The installation screen is displayed on the taskbar.
When the progress bar reaches termination, and the installation screen disappears, the
installation completes.
Windows 7 and Windows Vista
“Installing device driver software” appears.
When “SL1000 Digital Film Scanner Device driver software installed successfully” is
displayed, the driver was installed successfully.
3-8
Page 35

Chapter 3 SL-Touch for SL1000
1.4 Update the Application Software and the Driver Software
The SL-Touch for SL1000 application is updated in the computer according to the following
procedures.
The following procedure shows the application and driver update for Windows 7.
Administrative rights are needed for the application and the driver update.
NOTE ! When updating the application and driver, the uninstallation of the application and
driver of the previous version is unnecessary.
Screens may differ slightly depending on the Windows Version.
Load the installation CD-ROM in the CD-ROM drive of the Personal Computer. The Auto
1
Play screen will automatically appear. Click “Run launcher.exe”.
When the installation screen appears, click “Install SL-Touch for SL1000” to begin the
2
installation.
If the “User Account Control” screen appears, click the “Yes” button.
3
NOTE ! Please refer to 1-3 of the "1.3 Installation the Application Software and the Driver"
for details.
If the following screen appears, click the “Yes” button.
4
When the “Resuming the InstallShield Wizard for SL-Touch for SL1000” screen appears,
5
click the “Next” button.
3-9
Page 36

SL1000 User’s Guide
When the “Windows Security” screen appears, click “Install” button.
6
When the “Update Complete” screen appears, click the “Finish” button, and remove the
7
CD-ROM from the Personal Computer.
IMPORTANT ! When the SL-Touch for SL1000 application is updated, the device driver is
deleted once. Therefore, please install the device driver again.
If the installation is not completed, the application cannot be started.Install
the device driver according to the following procedures.
Connect the Scanner to the Personal Computer with the USB cable.
8
Turn the Power Switch of the Scanner ON.
9
When the scanner is detected, and the installation of the device driver is completed, the
10
installation of the Application completes.
NOTE ! Please refer to 13 of the "1.3 Installation the Application Software and the Driver"
for details.
3-10
Page 37

Chapter 3 SL-Touch for SL1000
1.5 Uninstalling the Application Software and the Driver Software
When “SL-Touch for SL1000” installed on the Personal Computer is no longer necessary, use
the following procedure to remove it.
The following procedure shows the application and driver uninstall for Windows 8.
Administrative rights are needed for the application and the driver uninstall.
NOTE ! Screens may differ slightly depending on the Windows Version.
Confirm the Power Switch of the Scanner is turned OFF.
1
From “Start” menu, choose “Control panel”. Click “uninstall a program”.
2
Select “SL-Touch for SL1000” and then click the “Uninstall” button.
3
When the following window appears, Click “Yes”.
4
3-11
Page 38

SL1000 User’s Guide
When the “Uninstall Complete” screen appears, click the “Finish” button.
5
Restart the Personal Computer.
6
3-12
Page 39

Chapter 3 SL-Touch for SL1000
2 Application Start-Up and Shutdown
2.1 Application Start-Up
There are "SCAN Mode" and "VIEW Mode", and the mode changes into "SL-Touch for
SL1000" by connecting the Scanner when start up.
NOTE ! Connect the Scanner before you start an application, complete the Application
and the Driver Installation. If you start an application before connecting the
Scanner will display an error message.
Execute it while quit the application whenever the resolution on the display or the
direction of portrait and landscape is changed. When the display setting is
changed while the application Start-Up, the screen is not normally displayed.
SCAN Mode
Turn on the Power Switch of the Personal Computer, and start Windows.
1
Connect the Scanner to the Personal Computer with a USB Cable, and turn ON the Power
2
Switch of the Scanner.
Select the button "Start" "All programs" “SL-Touch" “SL-Touch".
3
The application starts in the SCAN Mode after the main screen of “SL-Touch for SL1000”
4
is displayed.
NOTE ! It takes time to start to read the Scanner adjustment value while displaying the
The film used or the registered custom profile is selected after "Film Selection" screen is
5
displayed, and click the “OK" button.
NOTE ! Non-display setting of "Film Selection" is also possible.
VIEW Mode
Turn on the Power Switch of the Personal Computer, and start Windows.
1
Select the button "Start" "All programs" “SL-Touch" “SL-Touch".
2
The application starts in the VIEW Mode after the opening screen of “SL-Touch for
3
SL1000” is displayed.
opening screen.
When the Scanner is not connected, VIEW Mode starts.
3-13
Page 40

SL1000 User’s Guide
2.2 Application Shutdown
It is possible to shutdown the application using one of the following methods.
Click the "×" button in the upper right corner of the title bar.
Hold down the application bar (located under the title bar) until “Shutdown Application” is
displayed. Click OK and the application will shutdown.
SCAN Mode:Normal Screen
SCAN Mode:Full Screen
VIEW Mode:Normal Screen
VIE Mode:Full Screen
Shutdown Screen
Presses the "Alt" + "F4" keys on the keyboard.
3-14
Page 41

Chapter 3 SL-Touch for SL1000
3 SCAN Mode Screen
The image is displayed on the application screen. This mode enables you to read the image and set
various functions.
Listed below is an explanation of the functions that can be set in SCAN Mode.
4
1
2
5
3
1. Scan Window
2. Cropping Area
3. Toolbar
The scanning image is displayed.
While the film is moving, animation (Follow to movement) is displayed.
Moreover, when the film stops, the still picture (Read by high resolution)
is displayed.
NOTE ! The image arbitrarily displayed by the zoom operation of
the Touch Panel can be magnified and be reduced for
the multi touch environment.
The area to the output file and the output printer is selected, and
displayed. The size of the Cropping Area changes if a quadrangle in four
corners and all sides is dragged.
NOTE ! The Cropping Area set within the selection crop size
range is output when the fixed form size (Excluding
Custom) has been selected by "Output setting",
The Cropping Area is not changed at the zoom. Please
return to normal display pressing "Fit", and execute it.
The application and the Scanner are operated and set.
3.1 Toolbar
NOTE ! There is no menu bar in this application.
All are operated with buttons on the toolbar.
The button displayed on the tool bar can be changed.
3-15
Page 42

SL1000 User’s Guide
4. Help Button
5. Roll Film Carrier
The Help file is displayed
The Help file is also displayed when the "F1" key on the keyboard is
pressed.
The Motorized Roll Film Carrier (Option) is operated.
5.1 RollFilmCarrier
3-16
Page 43
3.1 Toolbar
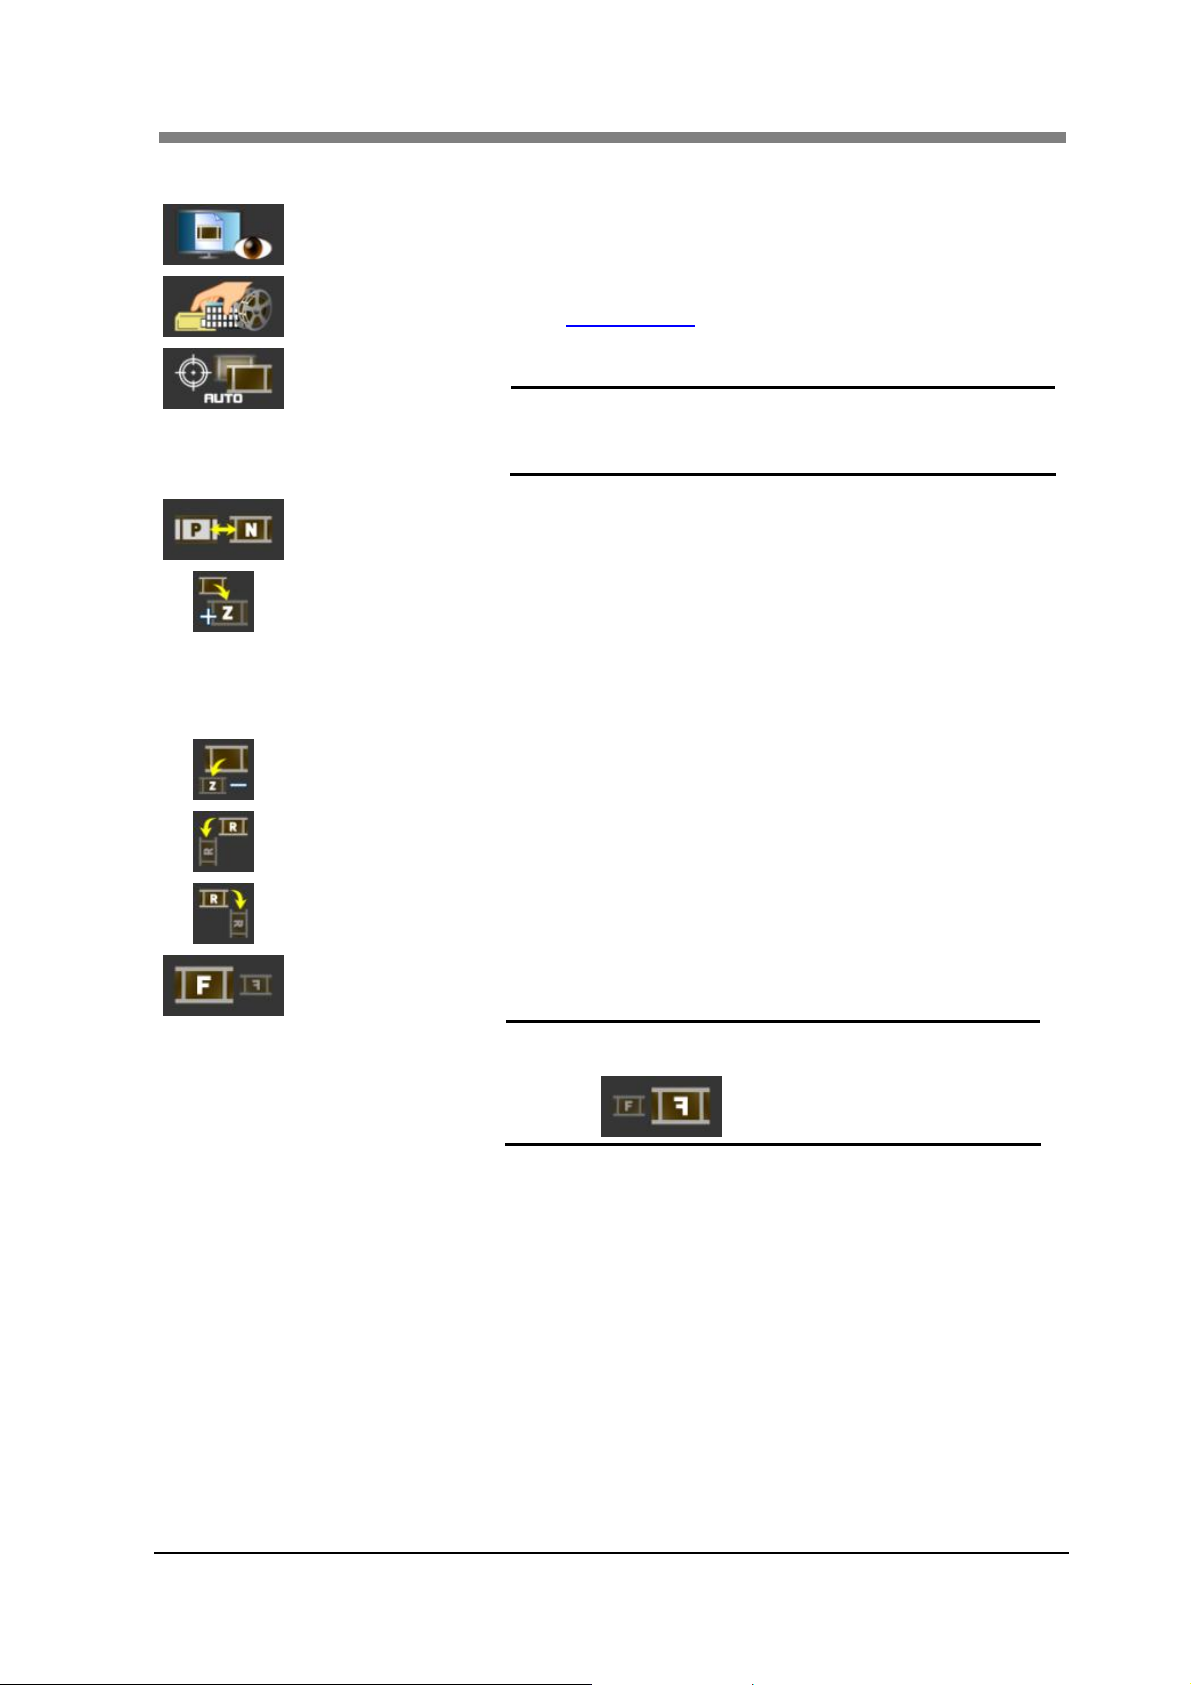
to VIEW Mode
Film Selection
Auto Focus
Film Polarity
Zoom In
Zoom Out
Rotate CCW
Rotate CW
Horizontal Flip
Chapter 3 SL-Touch for SL1000
It changes from the SCAN Mode to the VIEW Mode.
The Film Selection screen is displayed.
3.2 Film Selection
It is automatically adjusted to the best focus.
NOTE ! It may not function correctly due to the
condition of the film (density, contrast, and
image pattern). In this case, adjust it manually.
The polarity of the film ("Positive film" or "Negative film")
is selected.
The Scanner performs the zoom operation so that the
magnification display is adjusted as long as button is
depressed.
The Scanner shifts to an electronic zoom when the upper
bound of the optical zoom is exceeded and does the
magnification operation.
The Scanner does the zoom operation like wide-ranging
being displayed as long as button is depressed.
Whenever the button is pushed, the image is rotated 90
degrees counterclockwise.
Whenever the button is pushed, the image is rotated 90
degrees clockwise.
Whenever the button is pushed, the image reverses right and
left.
NOTE ! It changes into the picture that reverses the
icon for the reverse image.
3-17
Page 44
SL1000 User’s Guide
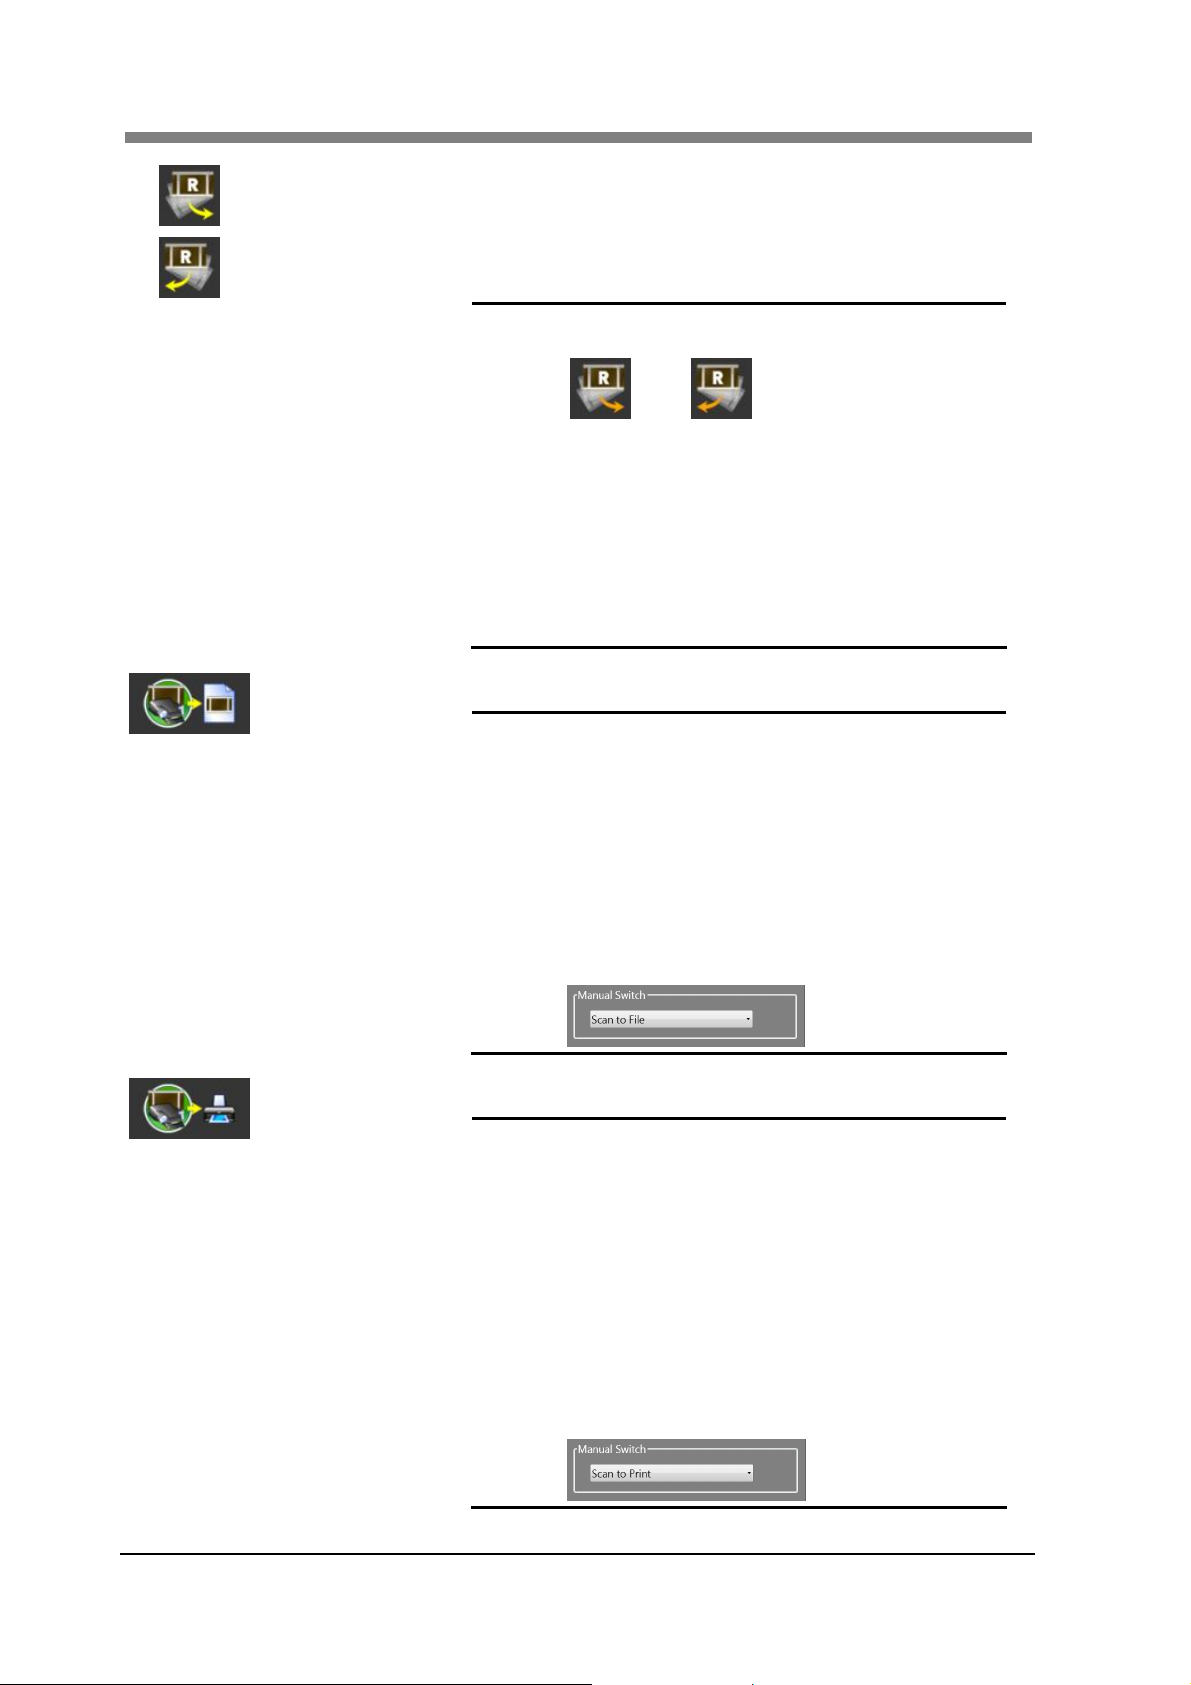
Deskew CCW
Deskew CW
Scan to File
The image is counterclockwise and is aligned when the
button is depressed. (max. 45 degrees)
The image is clockwise and is aligned when the button is
depressed. (max. 45 degrees)
NOTE ! When the inclination is corrected, the arrow of
the icon becomes an orange.
or
The correction returns to the origin (0
degrees) when "Deskew CCW" or "Deskew
CW" is pushed while depress the “Shift" key
on the keyboard.
Even if "Deskew CCW" and "Deskew CW" of
the Touch Panel are pushed at the same time
for the multi touch environment, the
correction angle can be returned to the origin
(0 degrees).
The image is scanned, and it outputs to the file.
NOTE ! The range set in Cropping Area is outputted
except "Auto Fit".
The scan size, resolution, and output
destinations etc. are set by "Output Setting"
When the Manual Switch (Option) is installed,
"Scan to File" and "Scan to Print" operations
can be executed even if the Manual Switch is
used to scan the microfilm.
In this case, you can toggle between "Scan to
File" or "Scan to Print" in the "Preferences"
menu.
3-18
Scan to Print
The image is scanned, and it outputs to the printer.
NOTE ! The range set in Cropping Area is outputted
except "Auto Fit".
The printer screen is not displayed when
printing by “Scan to Print ".
The scan size and output destinations etc.
are set by "Output Setting".
When the Manual Switch (Option) is installed,
"Scan to File" and "Scan to Print" operations
can be executed even if the Manual Switch is
-is used to scan the microfilm.
In this case, you can toggle between "Scan to
File" or "Scan to Print" in the "Preferences"
menu.
Page 45

Chapter 3 SL-Touch for SL1000
Magnifier +
Magnifier -
The displayed image is continuously magnified. The
magnification amount is displayed in the scan window (upper
right) while zooming.
The image that has been magnified is reduced.
NOTE ! When an image is magnified, the Cropping
Area cannot be changed.
The reduction image doesn't become smaller
than the scan window size.
It is possible to magnify and to reduce even
by the zoom operation of the Touch Panel for
the multi touch environment.
Fit to Window
Image Adjustment
Auto Cropping
The zoom image is returned to normal size.
The image quality is adjusted
3.3 Image Adjustment
The Cropping Area is automatically adjusted to the size of the
image frame.
NOTE ! The Auto Cropping might not function
normally according to the shape and the
density of the image. In this case, it adjusts
manually.
Cropping Mode
Normal Mode :
The Cropping Mode ("Normal Mode" or "Custom Mode") is
changed.
The selected area (Cropping Area) is read in an area one
rectangular.
Custom Mode :
The rectangular area is added to plurals, and the area is read.
"Custom Mode" is selected, a mouse cursor becomes a
"cross" and it can specify two or more ranges.
NOTE ! It returns to the Cropping Area at the Normal
Mode immediately before when changing
from the Custom Mode to the Normal Mode.
When the "Custom Mode" has been
selected, the setting of "Edit" (Masking etc.)
becomes invalid.
Auto Zoom
To be suitable for the scan window size, the range of the
Cropping Area selection is automatic zoom position
corrected.
NOTE ! The magnification becomes the upper bound
of the optical zoom.
3-19
Page 46

SL1000 User’s Guide
Multiple SCAN
Multiple SEARCH
Auto Exposure
Lamp Illuminance
Auto Corrections
Step Focus
Auto Deskew
The continuous scanning screen of the Roll Film is displayed.
(The Motorized Roll Film Carrier of the option must be
installed.)
5.1 Multiple SCAN
The continuous retrieval screen of the Roll Film is displayed.
(The Motorized Roll Film Carrier of the option must be
installed.)
5.2 Multiple SEARCH
The image in Cropping Area is adjusted to the proper density
automatically.
NOTE ! It may not function correctly due to the
condition of the film (density, contrast, and
image pattern). In this case, please adjust it
with Image Adjustment.
The illuminance of the exposure lamp are set
.
3.4 Lamp Illuminance
The item selected from "Automatic inclination correction",
"Automatic density correction", and "Automatic focus" is
corrected automatically grouped together.
NOTE ! The item selection is executed by
“Preference".
Focus is adjusted manually.
The inclination of the image is automatically corrected.
NOTE ! It may not function correctly due to the
condition of the film (density, contrast, and
image pattern). In this case, adjust it manually.
When the inclination is corrected, the arrow of
the icon changes to the color orange.
3-20
or
Page 47

Chapter 3 SL-Touch for SL1000
Pan Window
The window of a whole image (pan window) is displayed at
the zoom.
The image in the scan window also follows when the frame
of the pan window is dragged and moved.
Oppositely the frame of the pan window also follows when
the image in the scan window is dragged and moved.
Output Setting
Preferences
When the scan is output, the scan size and the resolution,
etc. are variously set.
3.5 Output Setting
The application and the Scanner are variously set (Power
Saving, etc.).
It is necessary to input the password for the setting.
3.6 Preferences
3-21
Page 48

SL1000 User’s Guide
3.2 Film Selection
The type of the film is selected and the setting (display color and zoom magnification, etc.) that is
appropriate for the film is achieved.
1
2
3
4
5
6
7
8
1. Custom Profile
2. Film Type
Allows you to select a registered custom profile.
NOTE ! When the “Allow to select the Custom Profile" has been
set to OFF on Preferences, the switch of Custom Profile
becomes invalid.
The zoom magnification and the exposure lamp illuminance that is
appropriate for the film format are set.
The proper zoom magnification is set to the aperture card.
3-22
The proper zoom magnification is set to the 35 mm Roll Film.
NOTE ! When the Motorized Roll Film Carrier is installed, the
screen of the Roll Film Carrier is displayed.
Page 49

Chapter 3 SL-Touch for SL1000
The proper zoom magnification is set to the 16 mm Roll Film.
NOTE ! When the Motorized Roll Film Carrier is installed, the
The proper zoom magnification is set to the Micro Fiche Film 60F or 98F.
screen of the Roll Film Carrier is displayed.
The proper zoom magnification is set to the Micro Fiche Film 270F or 420F.
The proper zoom magnification is set to the Micro Opaque Card.
Moreover, the exposure lamp illuminance also set a proper value to the
Micro Opaque Card.
NOTE ! When the Micro Opaque Card is selected, the film polarity
cannot be set.
The arbitrary zoom magnification is set.
3. Show Roll Film
Carrier
4. Zoom
5. Film Polarity
When "Custom" is selected in Film Type, the “Roll Film Carrier" screen is
displayed.
NOTE ! It is only effective, when the "Motorized Roll Film Carrier" is
installed.
When “Custom" is selected in Film Type, the zoom magnification is set.
NOTE ! The zoom magnification range can be set from “6.8x" to
“105.0x".
The zoom magnification range can only be designated
when the Film Type is set to Custom. Specifying a Zoom
Magnification Range is not available for any other Film
Selection type.
When a “Custom Profile” is registered, the zoom
magnification of each film type can be changed. The
zoom magnification can be registered via the Custom
Settings in the Preference Menu.
The polarity of the film used is selected.
Negative Film: When the negative film is used, the reversing display
(Conversion: the black from the transparency, white
from the black) and the scanning are selected.
Positive Film: When the positive film is used, the neutral display
(Neutral: the white from the transparency, black from
the black) and the scanning are selected.
3-23
Page 50

SL1000 User’s Guide
6. Film Color
7. Horizontal Flip
8. Rotate
9. OK
10. Cancel
The color of the film used is selected.
Monochrome Film: The film is selected when the monochrome display
and scanning.
Color Film: The film is selected when the color display and
Images are flipped to the right and left..
NOTE ! When the Roll Film is selected, the initial value of
scanning.
"Horizontal Flip" is “ON”
The image rotation is selected.
You can select four rotation values (None, CW90°, CCW180° and
CCW90°).
It moves to the zoom position and the color display to set of the selection.
NOTE ! The following settings change into an initial value or the
registration value of each custom profile if the film
selection is executed.
Film Type
Film Color (Monochrome and Color Film)
Film Polarity (Positive and Negative Film)
Zoom Position
Horizontal Flip (ON and OFF)
Rotate (None, CW 90°, CCW180° and CCW 90°)
Image Adjustment
Cropping Mode
It cancels the moving of the setting of the color display or the zoom
position.
NOTE ! When the application starts, the color display and the
zoom position are moved to set of the memory at the end.
3-24
Page 51

Chapter 3 SL-Touch for SL1000
3.3 Image Adjustment
The display and the image quality when scanning are adjusted.
The adjusted value is in real time reflected in the displayed image.
“Standard Mode” and "Advance Mode" can respectively be set by switching the tab.
Standard Mode
A common item to the reading color is set.
1
2
3
4
5
1. Histogram
Distribution and the Mean Value of the Histogram of the adjustment area that
has been selected are displayed.
Dark Light
3-25
Page 52

SL1000 User’s Guide
2. Adjustment Area
The adjustable range of "Brightness" and "Contrast" is selected.
Entire: Display of the histogram in read whole area and "Brightness"
and "Contrast" are adjusted.
Selected: Display of the histogram in read selected area and "Brightness"
and "Contrast" are adjusted.
Procedure of the operation:
1) The Cropping Area disappears when “Selected" is selected,
and the selection range frame is displayed in the dotted line
of "Orange" and "White".
2) The selection range frame is set to the adjusted position.
3) When “Brightness" or “Contrast" is changed, it is affected in
the image of the selection range frame. Please set it to a
proper value.
4) The changed setting is settled when “OK" is pressed, the
selection range frame disappears, and the Cropping Area is
displayed.
5) When other range is adjusted, the “Image adjustment" is
pressed again, and 1) to 4) is executed.
NOTE ! A specified frequency of “Selected" is eight
places or less.
The adjusted image returns to the initial when
"Image rotation" and "Skew correction" are
executed, and the scan image of the film is
changed.
The selection range frame is not changed at the
zoom. Please return to normal display pressing
"Fit to Window", and execute it.
NOTE ! Whole areas except "Brightness" and "Contrast" are
adjusted.
3. Brightness
3-26
The brightness of the image is adjusted.
Lighter
Darker
The image is lightened.
The image is darkened.
Page 53

4. Contrast
The contrast of the image is adjusted.
Chapter 3 SL-Touch for SL1000
5. Sharpness
NOTE ! Even if "Brightness" and "Contrast" are adjusted according to the film, an
High
Low
The contrast of the image is increased.
The contrast of the image is decreased.
NOTE ! The proper image density can be obtained by adjusting
"Brightness" and "Contrast" to distribute the histogram in the
whole area.
The sharpness of the image is adjusted.
Sharp
Soft
The image is made sharper.
The image is made softer.
appropriate image density might not be obtained. In that case, it might be
improved by changing illuminance intensity of the LED lamp. (Please refer to the
section "3.4 Lamp Illuminance".)
3-27
Page 54

SL1000 User’s Guide
Advance Mode
When the reading color is "Color" or "Monochrome binary", the following items can be set.
Image Type: Color Image Type: B/W (Manual)
6
7
8
6. Hue
7. Saturation
8. Lightness
9. B/W Threshold
9
The hue of the color image is adjusted.
The saturation of the color image is adjusted.
The lightness of the color image is adjusted.
NOTE ! "Hue", "Saturation", and "Lightness" can be adjusted only
for the "Color" "Image type" of "Output setting".
When a black and white binary image is made, the threshold is adjusted.
NOTE ! When "Output setting" of the "Image type" is only "B/W
(Manual)", the binary threshold can be adjusted.
3-28
Page 55

3.4 Lamp Illuminance
The illuminance of the exposure lamp are set.
1
1. Lamp Illuminance
Quantities of light of the exposure lamp are set.
The exposure lamp is lightened.
The image lightens for the positive film.
The image darkens for the negative film.
The exposure lamp is darkened.
The image darkens for the positive film.
The image lightens for the negative film.
NOTE ! The usually according to the film and the
magnification, brightness is adjusted automatically to
standard position.
Chapter 3 SL-Touch for SL1000
3-29
Page 56

SL1000 User’s Guide
3.5 Output Setting
The scan setting, the output setting and printer setting when "Scan to File" and "Scan to Print" are
executed are set.
1
2
6
7
8
9
10
1. Batch – Title
2. Batch – NOTE
3. Delete
3 4
5
11
12
13
14
15
16
17
18
Register, set scan settings and delete batch settings of associated settings.
When the selected item is registered, the registered name is input to
"Batch Title" column.
When the registered batch is accessed, it selects from the pull-down list.
* The Default setting cannot be deleted.
NOTE ! The character (\ and / etc.) cannot be used for the title
as a file name of Windows.
Because the batch of each logon user of Windows is
preserved, the batch of another logon user cannot be
read.
The comment is added to the registered batch.
The registered batch is deleted.
When "Delete" is clicked after "Batch Title" is selected, the selected
batch is deleted.
NOTE ! The setting of “Default" cannot be deleted.
Even if the batch is deleted, the image file in batch is
not deleted.
3-30
Page 57

4. Save
5. Rename
6. Orientation
7. Size
8. Resolution
Chapter 3 SL-Touch for SL1000
The input batch is preserved.
When "Save" is clicked after "Batch title" is input, the batch is preserved.
The following setting is preserved in the batch.
Orientation, Size, Resolution, Image Type, Edit, Save in, File name,
File number, Format, Compression, Printer Name,
Fit to printable area of paper size, Rotate to orientation of paper
NOTE ! It can not be preserved by changing the setting of
"Default".
Batch of each logon user of Windows is preserved.
The Batch Name can be changed.
When the fixed form size is output, the output direction is set.
Portrait: Scan image is output by a portrait fixed form
size.
Landscape: Scan image is output by a landscape fixed
form size
The output image size is set.
It can be selected according to 12 selections (A2, A3, A4, B3, B4, B5, 17”
x 22”, Ledger, Legal, Letter, Check and Custom).
NOTE ! For “Image Type” you can only select “Grayscale" or
“B/W" for A2, B3, and 17"X22" documents.
When the fixed form size (excluding Custom) is selected,
the range of the Cropping Area is output to the selected
output size or less.
When Custom is selected, it is output in the condition
within the range of the Cropping Area that has been
selected.
The output resolution when saving a file is set.
It can be selected according to 9 selections ( 600, 400, 360, 300, 240, 200,
150, 100 ,75dpi.)
NOTE ! As for "600 dpi", if the "Image type" is "Gray scale" or
"Monochrome binary", and "Size" is less than “A4" or
“Letter", only it can be selected ".
The resolution when the printer output is fixed by
"360dpi".
3-31
Page 58

SL1000 User’s Guide
9. Image Type
10. Edit
The mode of the output image (Color and Binary) is set.
When Film "Color Film" is selected:
Only the Color (24bit) can be selected.
When film “Monochrome Film" is selected:
It can be selected according to 4 selections (Gray Scale (8bit),
B/W (Manual), B/W (Auto), B/W (Error Diffusion)).
"Masking", "Centering" and “Auto Fit” are set.
1. Masking: When a size that is larger than the image that has
been selected, the outside of the image is deleted by
"White".
2. Centering: The center gap of the image is detected, and the
image is arranged at the center of the output area.
3. Auto Fit: The image is enlarged to fit the paper size and output.
When "Custom" paper size is selected, only the
NOTE ! The “Edit” might not function correctly according to
image is output.
shape and the density of the image.
When the "Custom Mode" has been selected by
"Cropping Mode", the setting of "Edit" becomes invalid.
3-32
Page 59

11. Save In
Chapter 3 SL-Touch for SL1000
It selects the repository for each batch scanned file.
The scanned file is saved to each batch folder.
When the “Save In” repository is not designated, a folder for each
custom profile registered in the SL-Touch folder is created, and the
folder of each batch is created under that name. ・・・ Reference to figure
below
As for the Default batch folder, preservation place cannot change.
Batch
Folder
Custom
profile
registered
Each Batch
folder
Change
Repository
folder
SL-Touch Default Default
Impossible
Batch 1
Possible
Profile A Default
Impossible
Batch 1
Possible
Profile B Default
Impossible
Batch 1
NOTE ! When the “Batch Folder” is default, it becomes
Possible
"SL-Touch" Folder under "My Pictures folder of the
logon user of Windows".
And, Batch Folder is able to change in Preferences.
→ 3.6 Preferences
When repository location has not been selected, “Save
In” is displayed by the blank.
When you set the preservation place, save the batch
after that.
If the batch is not saved, the preservation place will not
be changed.
When the file is stored in a folder before the folder is
changed, all files except the subordinate position folder
are copied onto the new selection folder.
When the image file exists in the folder that preserves
the rewrite, the file is not registered as an image in the
batch. Only the file newly scanned is registered in the
batch.
3-33
Page 60

SL1000 User’s Guide
12. File Name
13. File Number
14. Format
15. Compression
16. Printer Name
17. Fit to printable area
of paper size
18. Rotate to
orientation of paper
The character of a fixed part of the file name is set.
The file name is preserved by the name of "fixed character" and "file
number (four digits)".
NOTE ! When the file name is not set, file number (four digits)
becomes a file name.
Sequential number for the file name and "Increment" and "Decrement"
are selected.
The file format is selected.
It can be selected according to 6 selections (BMP (*.bmp), TIFF (*.tif),
JPEG (*.jpg), PDF (*.pdf) and PNG (*.png)).
NOTE ! JPEG (*.jpg) cannot be selected in case of
monochrome binary.
The multi page file (TIFF and PDF) cannot be preserved
directly.
When the multi page file is made, "VIEW Mode" and
"Convert multi-page" are used for conversion.
A Searchable PDF file cannot be saved directly.
Please save as a Searchable PDF file after selecting
and converting "OCR" or "Convert multi-page" in "VIEW
Mode".
When the file is preserved, the compressed format is selected.
NOTE ! The compressed format is different depending on the
file.
There are three compression types available for JPEG
files — Fine, Standard and Economy.
The output printer is selected.
When the image is output, the image is magnified or reduced based on
the size of the paper.
The image rotates and is printed according to the orientation of the
paper.
3-34
Page 61

Chapter 3 SL-Touch for SL1000
3.6 Preferences
The Application and the Scanner Settings are saved.
It is necessary to input the password to display the screen in the environmental setting.
NOTE ! The password of default is "0000".
To initialize the password when the password was forgotten, contact the Servicing
Dealer.
1
2
3
4
5
7
8
8
16
17
18
19
20
21
22
9
10
11
12
13
14
15
23 24
1. Show Scan Image
2. Image Display Time
25
26
After it scans, the scanning image is displayed based on the selected
time interval.
When "Show Scan Image" is enabled (Check Show Scan Image Box),
set the image display time.
3-35
Page 62

SL1000 User’s Guide
3. Ask Before Output
It displays on the confirmation screen before the scan image is output
when "The scan image is displayed" is “ON".
For Scan to File
Scan to Print
4. Color Correction
5. ICC Profile
6. Auto Contrast
7. Digital GEM
8. Display Language
9. Custom Setting
10. Use the default
destination
11. Batch Folder
The correction of the color reproduction for the color image is set.
There are three selections available (Non, Standard and Color
Management).
The ICC Profile is selected.
When the monochrome film is set, the image contrast is automatically
corrected.
The graininess of the film is decreased.
It is effective for the image quality reproduction of negative film.
The display language of the application is selected.
The language can be arbitrarily selected from the following nine
settings.
Auto Select, Chinese, Dutch, English, French, German, Japanese,
Russian and Spanish
When the “Auto Select” is selected, the language of the application is
changed automatically according to the display language of OS.
NOTE ! When the “Display Language” is changed, also the
language of Help screen changes automatically.
However as for the language of the User's Guide
changing the “Display Language”, it does not change.
The film and toolbar are set by each custom profile in Custom Setting.
3.7 Custom Setting
The folder of the default destination which is specified by application
is used as parent folder for the batch data preservation.
NOTE ! The default folder becomes "SL-Touch" Folder under
"My Pictures folder of the logon user of Windows".
When the setting of “Use the default destination" is OFF, the parent
folder of the batch data is specified.
NOTE ! When the Batch Folder has been changed, the data in
the previous folder is moved to the new folder.
3-36
Page 63
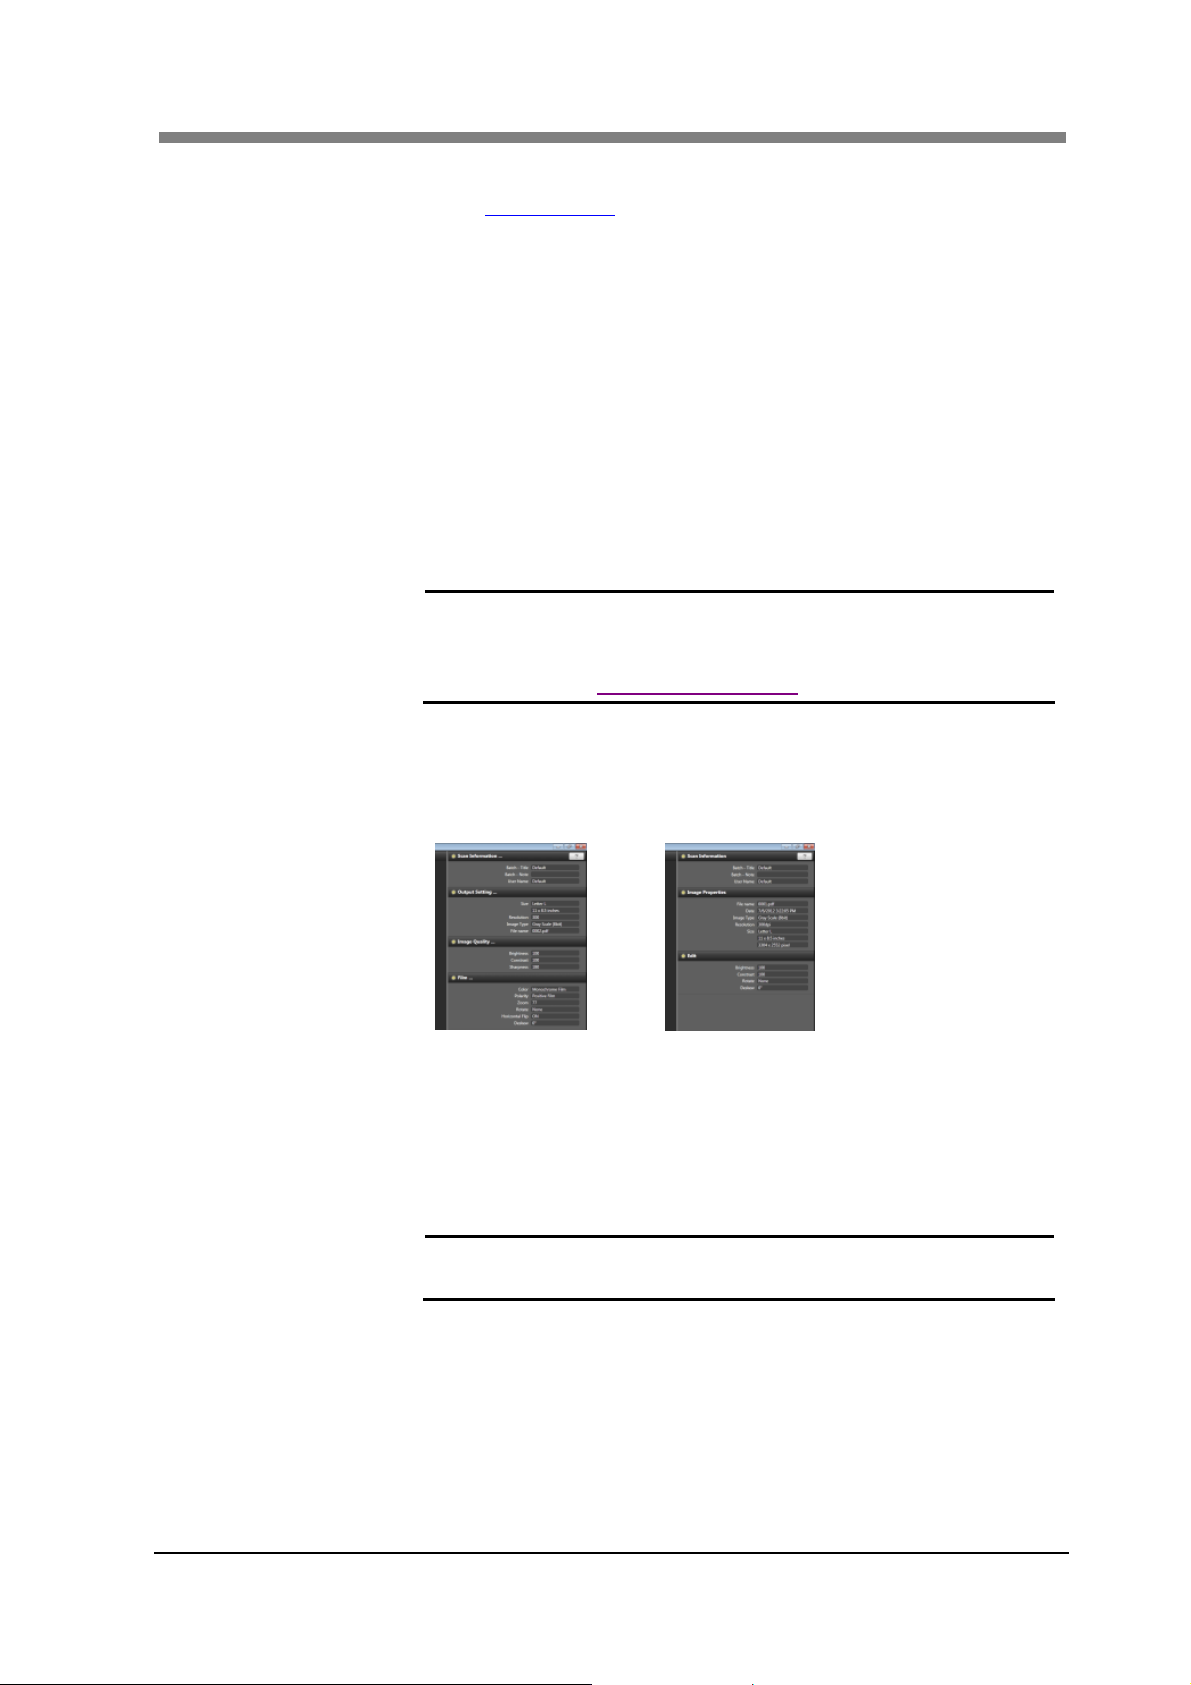
12. E-Mail Setting
13. Manual Switch
14. Put the Scanner to
Sleep
15. Turn OFF the
Scanner
16. Full Screen
17. Use Large Icon
18. Show Property
Chapter 3 SL-Touch for SL1000
Settings related to E-mail transmissions are available.
3.9 E-Mail Setting
When the Manual Switch (option) is used, the operation is set.
The setting can be selected from “Scan to File” or “Scan to Print”.
The time that should elapse when no operation is performed before the
device enters Sleep Mode.
It can be selected according to 7 selections (5 Minutes, 15 Minutes, 30
Minutes, 60 Minutes, 2 Hours, 3 Hours and 4 Hours).
The time that should elapse when no operation is performed in Sleep
Mode before the Power Supply is turned OFF.
It can be selected according to 4 selections (60 Minutes, 2 Hours, 3
Hours and 4 Hours).
Change to the “Full Screen Mode" that doesn't display Windows
Taskbar.
NOTE ! In case of “Full Screen Mode", the application is able
to quit by "Shutdown Screen" or "Alt + F4 of the
keyboard".
2.2 Application Shutdown
The size of the icon button in the Toolbar is enlarged by one step.
Various properties are displayed at the right of the scan window by the
sidebar.
SCAN Mode
VIEW Mode
19. Launch Film
Selection at Startup
20. Allow to select the
Custom Profile
21. Use operation sound
When the application is started, the "Film Selection" screen is
displayed.
The switch of the “Custom Profile” becomes effective for the screen of
“Film Selection" and “Open (VIEW Mode)".
When the application starts, and the operation is executed, the sound is
reproduced.
NOTE ! When Windows Media Player is not installed, the
operation sound is not reproduced.
3-37
Page 64

SL1000 User’s Guide
22. The setting is
preserved and
complete.
23. Change Password
24. Maintenance Mode
25. OK
26. Cancel
The last settings are preserved when quitting the application and it
ends.
NOTE ! The setting of each logon user of Windows is
preserved.
When the screen of "Preference" is accessed, the password is changed.
3.8 Password Change
The device is adjusted in this area.
Only Service Technicians can use this mode.
The setting is saved, and exits out of the screen.
The setting is canceled, and exits out of the screen.
3-38
Page 65

Chapter 3 SL-Touch for SL1000
3.7 Custom Setting
"Film Setting" and “Toolbar Setting" for each custom profile can be saved as a custom registration.
Film Setting
5
8
1
7
9
4
6
10
2
3
1. Custom profile
Displays the custom profile name on the Film Selection screen. This is
where the custom profile name is registered and can be deleted.
When the custom profile is registered, the name of the custom profile is
input to "Custom Profile" column.
When the custom profile which registered is presented, it selects from the
pull-down list.
*The Default custom profile cannot delete.
NOTE ! The character (\ and / etc.) cannot be used for the
custom profile name as a file name of Windows
Because the batch of each logon user of Windows is
preserved, the batch of another logon user cannot be
read.
3-39
Page 66

SL1000 User’s Guide
2. Delete
3. Save
4. Film Type
5. Show Roll Film
Carrier
6. Zoom
7. Film Polarity
8. Film Color
9. Horizontal Flip
10. Rotate
11. O K
12. Cancel
Deletes registered custom profile.
When deleted "Custom Profile" is selected, and "Delete" is clicked, the
custom profile is deleted.
NOTE ! The custom profile of "Default" cannot delete.
The custom profile which input is preserved.
When "Save" is clicked after "Custom Profile" is input, the custom
profile is preserved.
The following setting can be saved in a custom profile.
1) Film Type, 2) Film Polarity, 3) Zoom, 4) Horizontal Flip,
5) Image Rotation and 6) Toolbar Setting etc.
NOTE ! If the Custom Profile is set to Default, Film polarity,
Zoom Range, Horizontal Flip, Image Rotation and Tool
Bar Setting can not be changed and saved in a Custom
Profile unless the Film Type is set to “Custom”.
The user of each logon user of Windows is preserved.
The Film Type is selected.
NOTE ! When the Custom Profile is newly registered, the
current setting value in the application software is to be
the default value in the “Custom”.
When “Custom" is selected in Film Type, the "Roll Film Carrier" screen
is displayed.
The zoom magnification is set.
The polarity of the film used is selected.
The color of the film used is selected.
The image is flipped to right and left.
The image rotation is selected.
NOTE ! Please refer to "3.2 Film Selection" for details
concerning items (10 from 4).
Customer is registered by the selected setting condition.
NOTE ! When "Preferences" is closed after Custom Setting is
executed, Film Selection is executed under the
registered Custom Setting condition.
It ends without registering custom profile.
3-40
Page 67

Toolbar Setting
Chapter 3 SL-Touch for SL1000
8
9
10
1. Non-display button
2. Toolbar
3. Add
4. Remove
5. Move Up
6. Move Down
1
2
3
4
5
6
7
11
The buttons not displayed on the toolbar is displayed in the list.
The button displayed on the toolbar is displayed in the list.
The list is displayed, queuing up in order from the left of the toolbar to
the lower right.
The button displayed on the toolbar is added.
"Non-display button" is selected, and "Addition" is clicked, and the
oriented button is added onto the "Toolbar" list.
The button displayed on the toolbar is deleted.
The oriented button on the "Toolbar" is selected, and the button is
deleted when "Remove" is clicked.
The position of the selection button on the toolbar is moved (on the
left).
When the button is selected on the "Toolbar", and "Move Up" is
clicked, it shifts up one.
The position of the selection button in the toolbar is moved on (lower
right).
When the button is selected on the "Toolbar", and "Move Down" is
clicked, it shifts down by one.
3-41
Page 68

SL1000 User’s Guide
7. Reset
8. Show Text of Icons
9. Show Output Setting
Button
10. Show E-Mail Button
11. Auto Correction
The button displayed in the toolbar is reset in the initial values.
The toolbar functions are displayed under the toolbar.
"Output setting" button of the toolbar is displayed.
“E-Mail" button is displayed on Toolbar in VIEW Mode.
The adjusting item executed when the "Auto Corrections" button is
clicked, is set.
It can be selected according to the following.
1. Exposure & Deskew & Focus
2. Exposure & Deskew
3. Deskew & Focus
4. Exposure & Focus
3-42
Page 69

3.8 Password Change
The password to display "Preferences" screen can be changed.
1
2
1. Old password
2. New password
The password set now is input.
NOTE ! The default password is “0000".
The new password is input.
The password can set only 4 digit numeral.
Chapter 3 SL-Touch for SL1000
3-43
Page 70

SL1000 User’s Guide
3.9 E-Mail Setting
1
2
3
4
5
6
7
14
15
E-Mail TX (SMTP)
The transmission of the E-Mail is set.
1. SMTP server
2. Port Number
3. SSL
4. Mail Address
5. SMTP Authentication
6. User ID
7. Password
Sets the SMTP server address.
Sets the port number for E-mail is transmission.
Sets the SSL (enable/disable) for E-mail is transmission.
Sets the sender's mail address.
Sets the SMTP verification (enable/disable).
NOTE ! SMTP Authentication is not available when POP
Sets the SMTP User ID.
Sets the SMTP Password.
8
9
10
11
12
13
16
Before SMTP is enabled.
3-44
Page 71

E-Mail RX (POP)
When "POP Before SMTP" is “ON", E-mail reception is enabled.
8. POP Before SMTP
Sets POP Before SMTP (enable/disable).
NOTE ! POP Before SMTP is not available when SMTP
Authentication is enabled.
9. POP Server
10. Port Number
11. SSL
12. Login Name
13. Password
Sets the POP Server Address for E-mail reception.
Sets the Port Number for E-mail reception.
Sets the SSL (enable/disable) for E-mail reception.
Sets the POP server Login Name.
Sets the POP server Password.
Other Setting
Other settings to which E-Mail relates are performed.
14. Server Capacity
15. Server Timeouts
16. Use Address Book
Sets the maximum E-mail file size.
A warning message is displayed when the size of the image data
exceeds the maximum value and the E-mail transmission is canceled.
Sets the time interval for cancelling E-mail reception if the operation
is delayed in either of the following cases.
・Mail is being transmitted to the SMTP Server.
・Mail is being received from the POP Server.
Sets the Address Book (enable/disable) for E-mail transmission.
Chapter 3 SL-Touch for SL1000
3-45
Page 72

SL1000 User’s Guide
4 VIEW Mode Screen
The image file preserved in the SCAN Mode is displayed and it can be edited.
NOTE ! It is possible to display only with the batch file preserved with the connected
Scanner.
1
2
4
3
1. Thumbnail
The image preserved in the batch that is currently open is displayed in the
Thumbnail.
The file is selected by the Thumbnail, and the image is displayed in the
scan image window by using the drag & drop to the window or by
performing a double-click.
NOTE ! It can also be scrolled on the Touch Panel by the flick
operation of the Touch Panel.
When the thumbnail bar is clicked, the sorting screen is displayed as
follows.
Click
3-46
File Sorting can be set to respectively by "Increment" or "Decrement"
according to "File Name", "Date", and "Type".
Page 73

2. View Window
3. Toolbar
4.Help Button
Chapter 3 SL-Touch for SL1000
The image selected from the Thumbnail is displayed.
When the VIEW Mode is started, the final scanned image is displayed in
the SCAN Mode.
NOTE ! When the touch panel is used, the image can be
switched back and forth by the flick operation on the
touch panel.
The image can be magnified and be reduced by the
zoom operation of the Touch Panel for the multi touch
environment.
If the image is edited with other applications, it may be
unable to read normally.
The application is operated.
4.1 Toolbar
NOTE ! There is no menu bar in this application.
All are operated with buttons on the toolbar.
The button displayed in the toolbar is not changed in the
VIEW Mode.
The Help File is displayed.
The Help file is also displayed when the "F1" key on the keyboard is
pressed.
3-47
Page 74

SL1000 User’s Guide
4.1 Toolbar
to SCAN Mode
Open
Save
Print
Undo
Image Adjustment
Rotate CCW
Rotate CW
Deskew CCW
Deskew CW
Magnifier +
Magnifier –
Fit to Window
It changes to the SCAN Mode.
NOTE ! When the Scanner is not connected, it
does not change to the SCAN Mode.
Registered Custom Profile is selected, and Batch is
opened.
NOTE ! When “Allow to select the Custom Profile"
on Preferences has been set to OFF,
custom profile is not able to switch.
The edited image is overwritten and preserved.
NOTE ! It cannot save by an another name or file
format.
The displayed image is printed.
NOTE ! Output setting of the printer is executed
with setting of the batch which presently is
opened.
The operation is canceled and it returns to the previous
condition.
The image quality is adjusted.
4.2 Image Adjustment
Whenever the button is clicked, the image is rotated 90
degrees counterclockwise.
Whenever the button is clicked, the image is rotated 90
degrees clockwise.
When it keeps pressing the button, the image is adjusted
counterclockwise (45 degrees or less).
When it keeps pressing the button, the image is adjusted
clockwise (45 degrees or less).
The displayed image is magnified and displayed.
The magnification ratio is displayed on the right of the
window between zooms.
The image that the magnification display is done is
reduced.
The image that the magnification display is done is
returned to the normal size.
3-48
Page 75

Chapter 3 SL-Touch for SL1000
Convert multi-page
OCR
E-Mail
Delete File
The multi page is output.
4.3 Convert multi-page
After the OCR operation is executed with PDF File, it
converts it into Searchable PDF.
4.4 OCR
The scanned file is transmitted via E-mail.
4.5 E-Mail
The scanned file is deleted.
4.6 Delete File
3-49
Page 76
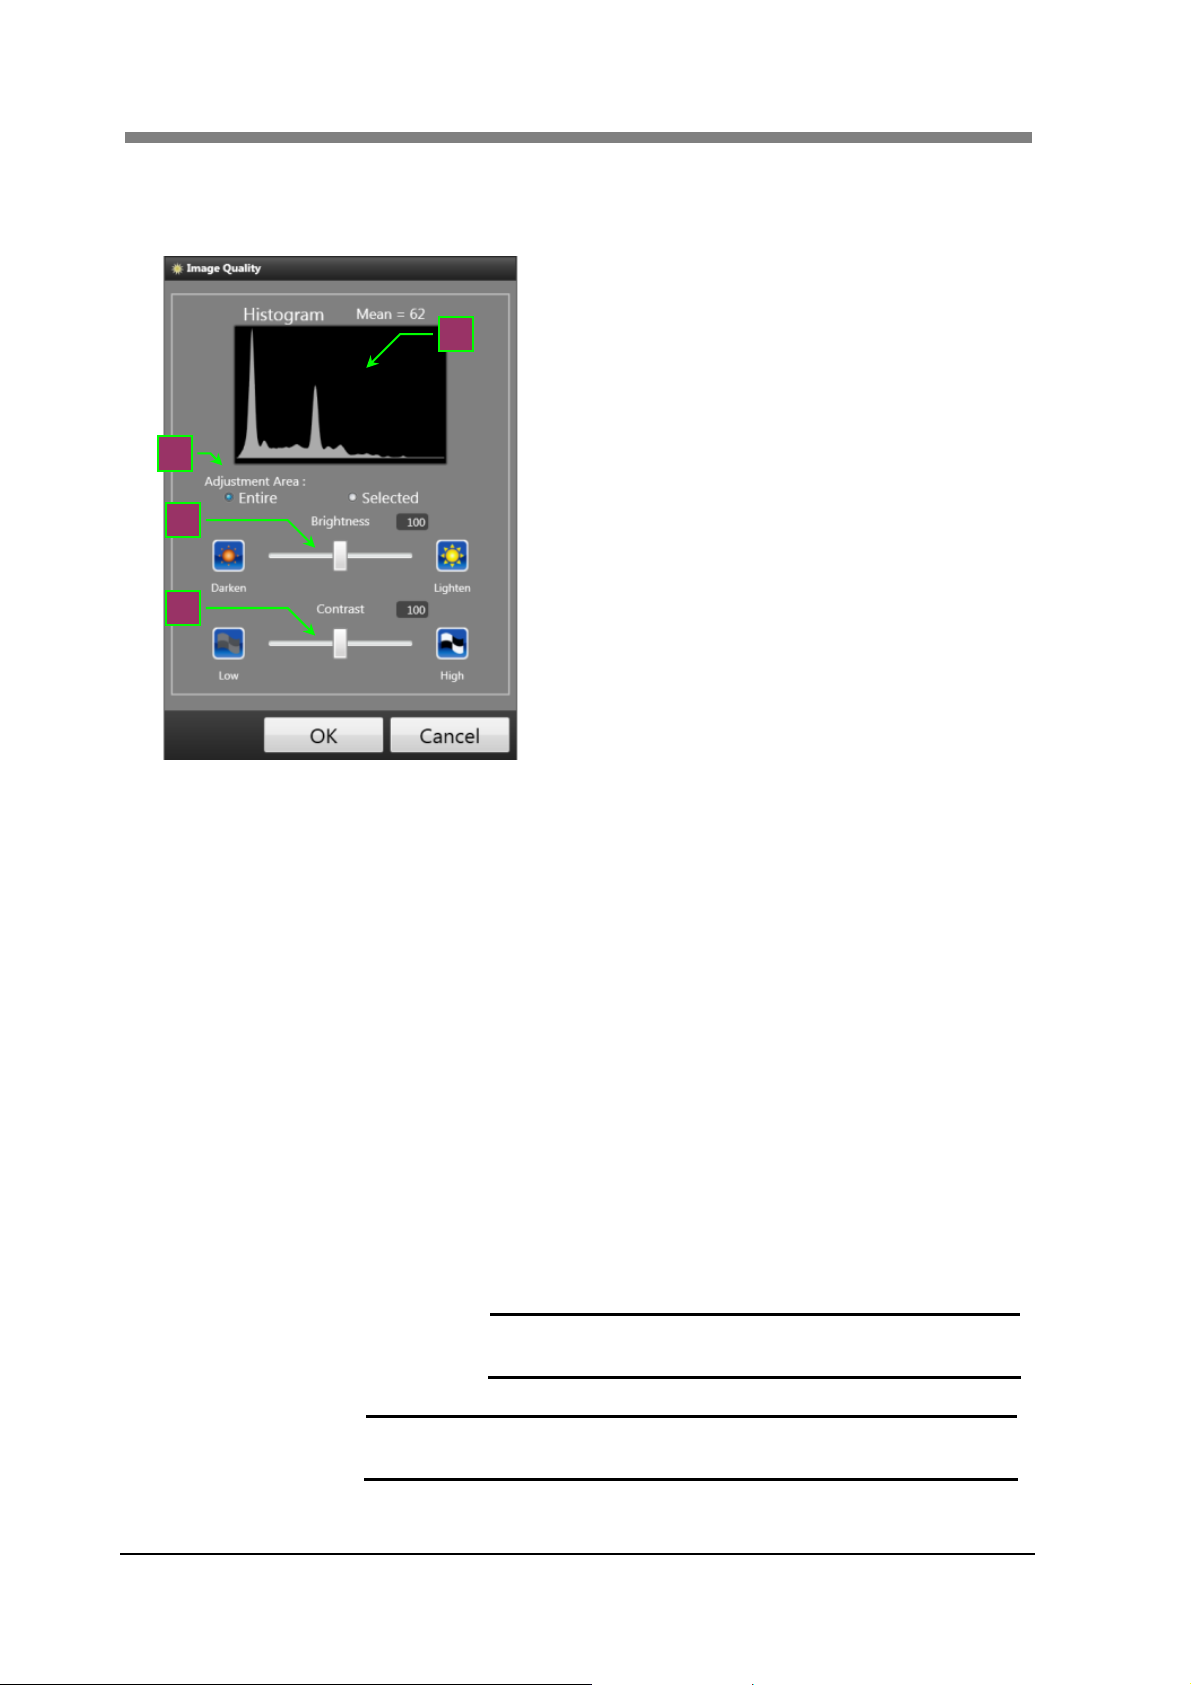
SL1000 User’s Guide
4.2 Image Adjustment
The image quality of the image being displayed now can be adjusted.
1
2
3
4
1. Histogram
2. Adjustment Area
Distribution and the Mean Value of the Histogram of the Adjustment Area
that has been selected are displayed.
The adjustable range of "Brightness" and "Contrast" is selected.
Entire: Display of the histogram in read whole area and
"Brightness" and "Contrast" are adjusted.
Selected: Display of the histogram in read selected area and
"Brightness" and "Contrast" are adjusted.
Procedure of the operation:
1) When “Selected" is selected the selection range frame is
displayed in the dotted line of "Orange" and "White".
2) The selection range frame is set to the adjusted position.
3) When “Brightness" or “Contrast" is changed, it is
affected in the image of the selection range frame.
Please set it to a proper value.
4) The changed setting is settled when “OK" is pressed, the
selection range frame disappears.
5) When other range is adjusted, the “Image adjustment" is
pressed again, and 1) to 4) is executed.
NOTE ! A specified frequency of “Selected" is eight
places or less.
NOTE ! Whole areas except "Brightness" and "Contrast" are
adjusted.
3-50
Page 77

3. Brightness
4. Contrast
Chapter 3 SL-Touch for SL1000
The brightness of the image is adjusted.
The contrast of the image is adjusted.
NOTE ! The proper image density can be obtained by adjusting
"Brightness" and "Contrast" to distribute the Histogram
in the whole area.
3-51
Page 78

SL1000 User’s Guide
4.3 Convert multi-page
The selected image is converted from the image preserved in the batch into the multi page file.
NOTE ! OCR conversion is only supported in English for "Searchable PDF" functions.
Other languages are not supported.
It may take several minutes per file when OCR is executed.
When a high resolution is selected the processing time is shortened and the
accuracy level increases. Therefore, it is recommended that the file is saved using
a high resolution for all OCR functions.
4
1. File Name
2. Format
3. Compression
4. Export File
5. Selection File
6
7
8
9
10
1
2
3
5
12
11
13
The file name of the multi-page output is input.
The file type of the multi page output is selected.
3 selections are available (PDF (*.pdf), Searchable PDF (*.pdf) and
TIFF (*.tif)).
The image compression method for a multi page file is selected.
There are four types of compression methods available (JPEG (Fine),
JPEG (Standard), JPEG (Economy), and Maintain the original
compression method).
The batch file of the multi page output is displayed by the thumbnail.
The selected file of the multi page output is displayed.
Top list is the first page.
3-52
Page 79

6. Add All
7. Add
8. Delete
9. Move Up
10. Move Down
11. Delete original file
after export
12. Export
13. Close
Chapter 3 SL-Touch for SL1000
All the object files of multi page output are added.
The selected file of the multi page output is added.
It is added to the selection file that the file is selected, and "Add" is
clicked.
The selected file of the multi page output is deleted.
When the file is selected. "Delete" is clicked, it is deleted from the
selection file.
The position of the selected file is moved to the upward (forward).
When the file is selected with the selection file, and "Move Up" is
clicked, it moves above one.
The position of the selected file is moved to the downward
(backward).
When the file is selected with the selection file, and "Move Down" is
clicked, it moves one the below.
After the multi page is exported, the selected original file is deleted.
The export to the multi page file begins.
This key changes into "Cancel", and the file export can be canceled
while exporting the multi page file.
NOTE ! The message is displayed when the export is
canceled and the file is deleted.
Exporting may take several minutes per file.
The Export time required is based on the amount of
text and the quality of the text within the scanned
file when the "Searchable PDF" file format is
selected and OCR is executed.
The screen of the Convert multi-page is closed.
3-53
Page 80

SL1000 User’s Guide
4.4 OCR
The file is selected from PDF file where the batch was preserved, OCR is executed, and it converts it
into PDF file for the OCR retrieval.
NOTE ! OCR conversion is only supported in English for "Searchable PDF" functions.
Other languages are not supported
The OCR conversion cannot be applied to file types other than PDF. You can create
Searchable PDF files from non-PDF files using the “Convert Multi-Page” function.
The processing time shortens when the image is set to a high resolution and the
identification accuracy increases. When the OCR is executed, it is recommended to
preserve it by a high resolution.
1
1. Export File
2. Selection File
3. Add All
4 Add
5. Delete
3
4
5
2
6
7
The file (PDF file in the batch) for the OCR conversion is displayed as
a thumbnail.
The file selected for OCR conversion is displayed.
All the files selected for OCR conversion are added.
The file selected for OCR conversion is added.
It is added to the selection file that the file is selected, and "Add" is
clicked.
The file selected for OCR conversion is deleted.
When the file is selected, and "Delete" is clicked, it is deleted from the
selection file.
3-54
Page 81

10. Export
11. Close
Chapter 3 SL-Touch for SL1000
The OCR conversion begins.
The "Cancel" button appears while executing the OCR conversion.
When the Cancel button is clicked, the execution of the OCR
conversion is canceled.
NOTE ! When the OCR conversion is executed, it overwrites
to the original file.
When the output is canceled, it may take some time
to complete the cancellation. The file enters the stage
of the OCR conversion that was completed before the
process was canceled.
The OCR screen is closed.
3-55
Page 82

SL1000 User’s Guide
4.5 E-Mail
The selected file is transmitted as an E-mail among files preserved by the batch.
E-Mail
4
1. To:
2. Address Book
3. Subject:
4. Export File
5. Selection File
6. Add
7. Delete
6
7
1
2
3
5
8
9
Inputs the E-mail Address.
NOTE ! Image cannot be sent to multiple recipients.
Opens the Address Book window.
NOTE ! The Address Book button is only displayed when it is
10
11
enabled in E-Mail Settings.
Inputs the Subject.
Default settings are as follows.
SL-Touch, year (4 digits A.D.), the month (2 digits), day (2 digits),
hour (2 digits for 24 hours), and minute (2 digits) and seconds (2
digits)
The file (file in the batch) for the E-Mail execution is displayed as a
thumbnail.
The file selected for the E-mail transmission is displayed.
The file to be transmitted via E-mail is added.
It is added to the selection file that the file is selected, and "Add" is
clicked.
The file selected for the E-mail transmission is deleted.
When the file is selected, and "Delete" is clicked, it is deleted from
the selection file.
3-56
Page 83

Chapter 3 SL-Touch for SL1000
8. Message:
9. Total File Size
10. Send
Input the Message.
The accumulated size of all files selected for transmission via E-mail
is displayed.
Sends the E-mail.
NOTE ! When a problem is encountered with an E-mail
transmission, an error message is displayed.
11. Close
The E-Mail screen is closed.
Address Book
The address is selected from E-mail addresses that have been registered in the Address Book.
1
2
1. Name, Address
2. Add
3. Edit
4. Delete
5. Select
6. Cancel
3
4
5
6
The names and the addresses registered in the Address Book are
displayed.
Adds a new E-mail address.
Edit E-mail addresses that have been registered.
Delete E-mail addresses that have been registered.
Select an E-mail address that has been registered.
Cancels the setting and closes the window.
3-57
Page 84

SL1000 User’s Guide
Edit
E-mail address is registered and edited.
1. Name
2. E-Mail Address
3. OK
4. Cancel
Inputs the address name.
Inputs the E-mail address.
Registers the edited name and address.
Cancels the selection and close the window.
3
1
2
4
3-58
Page 85

4.6 Delete File
Operation that enables you to delete files.
Chapter 3 SL-Touch for SL1000
1
1. Object File
2. Delete
3. Cancel
2
3
The file (file in the batch) selected for the deletion is displayed by the
thumbnail.
When you click on the thumbnail and the file background changes to
orange, it indicates the file has been selected for deletion.
The selection is canceled by clicking on the thumbnail again (click or
touch).
The selected file is deleted.
The deletion is canceled and the screen is closed.
3-59
Page 86

SL1000 User’s Guide
5 Roll Film Carrier
When the option "Motorized Roll Film Carrier" is utilized, it can be operated from "Roll Film Carrier"
screen of the application.
5.1 Roll Film Carrier
Display Monitor
Portrait Screen
Display Monitor
Landscape Screen
Rewind
The film is rewound.
NOTE ! Only when the Fiche Glass is opened, it
can be operated.
When the Fiche Glass is shut, this key
becomes gray, and it can not be operated.
3-60
Glass Open Glass Close
After a few seconds, it stops automatically
when the film rewind is completed.
Page 87

slow fast
fast slow
Previous page
movement
Next page
movement
Film Feeding
(FWD Direction)
Film Feeding
(REV Direction)
Chapter 3 SL-Touch for SL1000
The frame of the film (image) is detected, and it
reverses to previous one.
The frame of the film (image) is detected, and it
advances to next one.
NOTE ! Only when the Fiche Glass is closed,
the frame movement can be operated.
When starting the Page Movement, in
order for space (black band) of Frame
Advanced Pitch to be arranged in
Search direction, adjusting the position
of the film.
5.4 Alignment when starting the Film
Search
The frame might not be normally
detected according to the film condition
(image shape and image density).
The film feeding is continued in the forward direction
while pressing ”FWD”, and stops when ”FWD” is
released.
The film rewinding is continued in the reverse
direction while pressing ”REV”, and stops
when ”REV” is released.
The function continues when "FWD" or "REV" is
double-clicked, and moves at the same speed.
Operation is locked when "FWD" or "REV" is
double-clicked and moves at the same speed.
NOTE ! When "FWD" "REV" is locked, the
outer display changes to orange.
After a few seconds, it stops
automatically when winding the film is
completed.
Stop
Operation stops when "STOP" is clicked at the lock
condition.
3-61
Page 88

SL1000 User’s Guide
5.2 Multiple SCAN
The frame (image) on the Roll Film is automatically detected, and the scan image is preserved in the
file.
1
2
3
4
5
1. Film Operating
Direction
2. Edit
3. Set Frame Counter
4. Counter
6
7
When continuously scanning, the film operating direction is set.
When continuous scan is executed, “Masking", “Centering", and “Auto
Fit" are set.
1. Masking When a size larger than the image has been selected,
the outside of the image is deleted by displaying a
"White" border.
2. Centering The center of the image is detected and the image is
positioned at the center of the output area.
3. Auto Fit The image is enlarged to fit the paper size and
output. When "Custom" paper size is selected, only
NOTE ! It is linked with “Edit” on Output Setting.
The “Edit” might not function correctly according to
the image is output.
shape and the density of the image.
The number of frames (images) continuously scanned is set.
It can be set up to 9,999 frames.
The number of frames continuously scanned is displayed.
3-62
Page 89

5. Film Position
6. SCAN
Chapter 3 SL-Touch for SL1000
The position of the film stop is adjusted.
NOTE ! The stop position of "Multiple SEARCH", "Previous",
and "Next" changes when the film position setting is
altered.
The film position can be adjusted while continuously
scanning.
The continuous scanning begins.
NOTE ! When starting the Multiple SCAN, in order for space
(black band) of Frame Advanced Pitch to be arranged
in Search direction, adjusting the position of the film.
5.4 Alignment when starting the Film Search
The screen size is reduced, and only "Counter" display and "Film
Position" adjustment can be operated while continuously scanning.
In addition, the button display changes to "Cancel", and a continuous
scanning can be stopped.
Continuous Scanning
7. Close
The screen is closed.
NOTE ! The position where Multiple SCAN is stopped might vary.
The film might not normally detect the frame depending on the image condition
(shape and density).
When the frame cannot be detected for a defined time, a message is displayed, and
a continuous scan is canceled.
3-63
Page 90

SL1000 User’s Guide
5.3 Multiple SERACH
The frame (image) on the Roll Film is automatically detected, and it displays on the screen at constant
intervals.
1
2
3
4
5
6
1. Film Operating
Direction
2. Interval
3. Set Frame Counter
4. Counter
5. Film Position
7
When continuously retrieving, the film operating direction is set.
After the frame (image) is retrieved, the stop time is set.
It can be set from 2 to 10 seconds every second.
The number of frames (image) continuously retrieved is set.
It can be set up to 9,999 frames.
The number of frames continuously retrieved is displayed.
The position of the film stop is adjusted.
NOTE ! The stop position of "Multiple SCAN", "Previous", and
"Next" changes when the film position setting is altered.
The film position can be adjusted while continuously
retrieving.
3-64
Page 91

6. SEARCH
Chapter 3 SL-Touch for SL1000
The continuous searching begins.
NOTE ! When starting the Multiple SEARCH, in order for space
(black band) of Frame Advanced Pitch to be arranged in
Search direction, adjusting the position of the film.
5.4 Alignment when starting the Film Search
The screen size is reduced and only "Counter" display and "Film
Position" adjustment can be operated while continuously retrieving.
In addition, the button display changes to "Cancel", and a continuous
retrieving can be stopped.
Continuous Retrieving
7. Close
The screen is closed.
NOTE ! The position where Multiple SEARCH is stopped might vary.
The film might not normally detect the frame depending on the image condition
(shape and density).
When the frame cannot be detected for a defined time, the message is displayed,
and a continuous retrieving is canceled.
3-65
Page 92

SL1000 User’s Guide
5.4 Alignment when starting the Film Search
When the Film Search operation (Previous Page Movement, Next Page Movement, Multiple SCAN
and Multiple SEARCH) it executes, in order on advanced side of Search direction, the Space(black
band) of Frame Advanced Pitch to be arranged, adjusting the position of the film.
Selecting the Roll Film, setting Initial Value “Horizontal Flip: ON and Image Rotation: OFF” the film
alignment when is, below has been expressed with standard.
Basic position of the film
Basically, in order for both Spaces (black band) of Film Advanced Pitch to be visible, please
adjust the position of the film.
In case below, both directions are searched.
OK
OK
Only one side when the Space of Film Advanced Pitch cannot be allocated
When it searches in FWD direction, in order for the Space (black band) of Film Advanced Pitch
to be visible in the screen right side, adjust the position of the film.
In this case, it can search to FWD direction. However, it cannot search to REV direction.
OK
When it searches in REV direction, in order for the Space (black band) of Film Advanced Pitch
to be visible in the screen right side, adjust the position of the film.
In this case, it can search to REV direction. However, it cannot search to FWD direction.
NG
3-66
NG
OK
Page 93

Chapter 4
Operation
Page 94

SL1000 User’s Guide
1 Precautions for Operation
1.1 Main Unit
The following sections require special attention when operating the Scanner.
Do Not Place hands or
fingers in this area when
the Carrier Table is pushed
into the unit.
1.2 Roll Film Carrier (Option)
The following sections require special attention when operating the Scanner.
Do not place anything
heavy on the Carrier Table,
and prohibit leaning on it.
Do not put anything on top
of the Unit.
Do not put items on the
Fiche Glass.
Do not put anything other
than the film on the Fiche
Glass.
The Fiche Glass shuts
when the carrier is pushed
into the unit, do not place
your hand or the fingers in
this area.
Do not touch the reel when
the film is being rewound.
Do not apply any load to
this area.
Do not touch the film when
rewinding.
4-2
Page 95
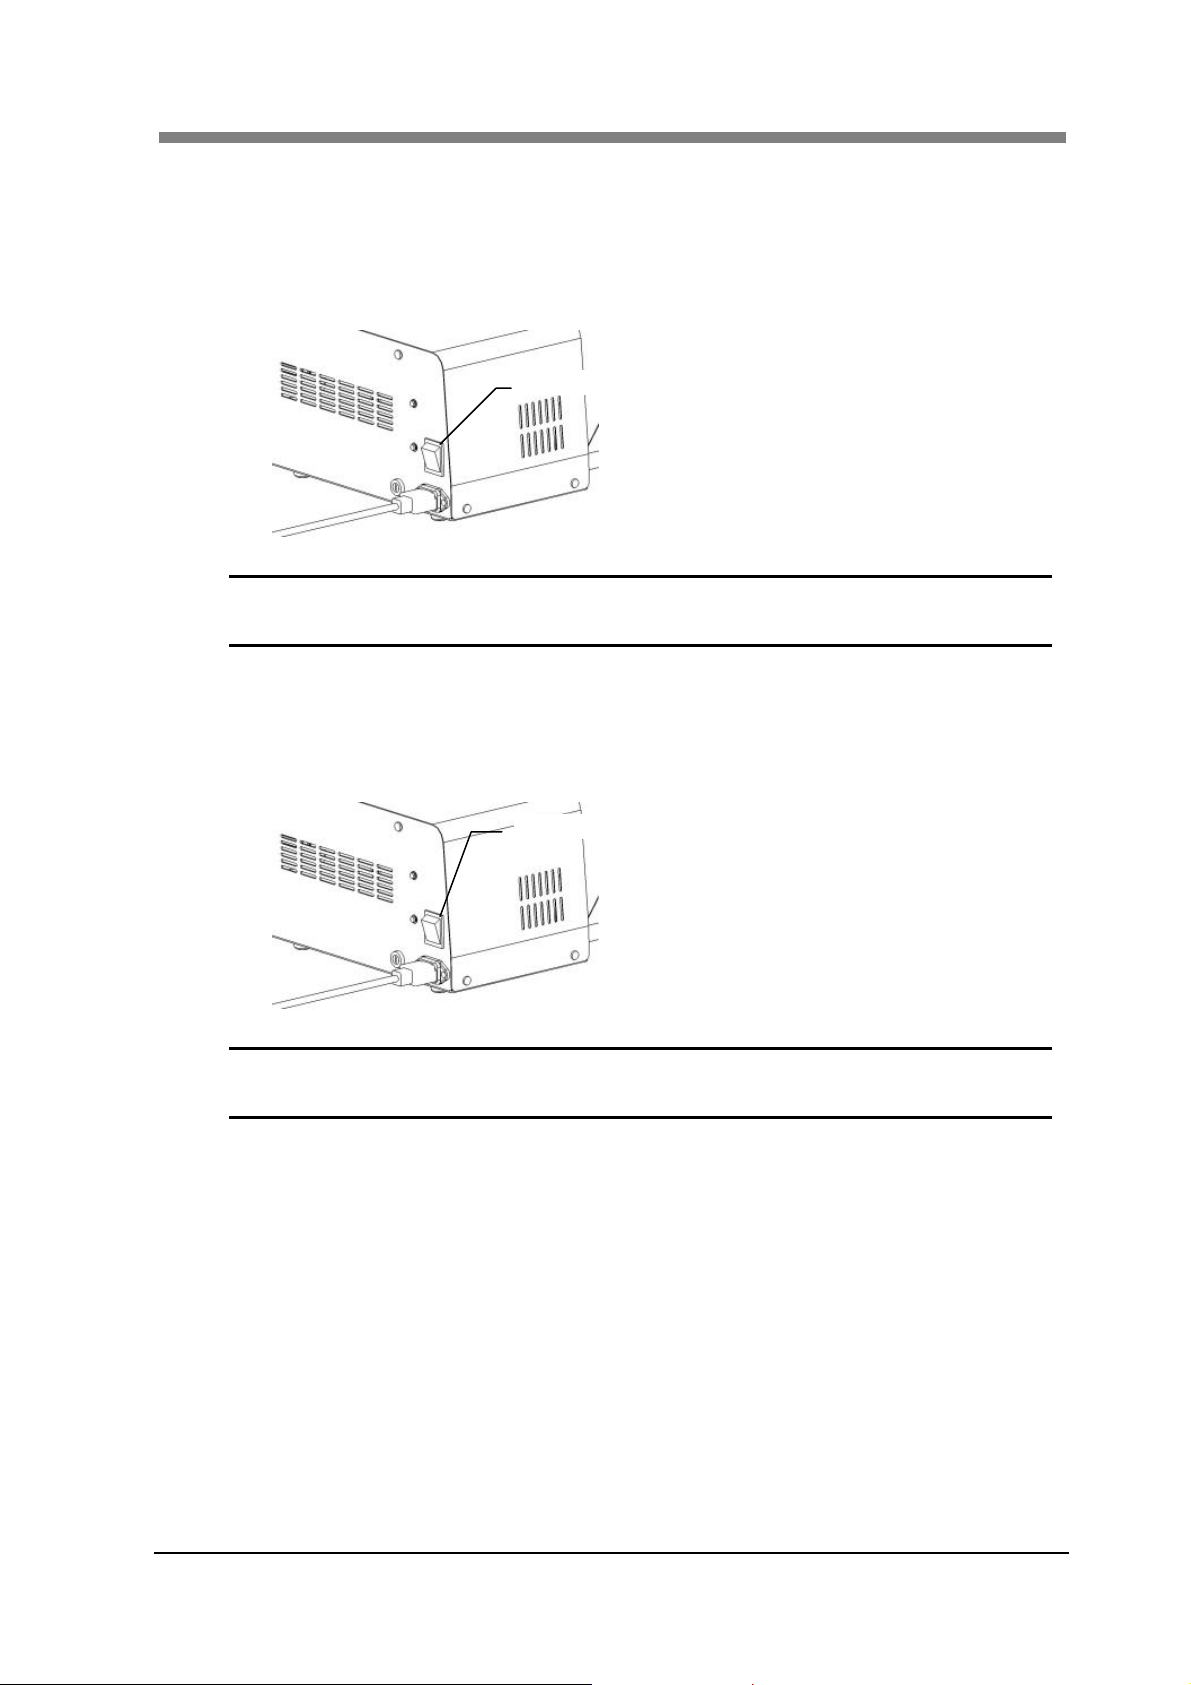
2 Turning the Scanner ON/OFF
2.1 Turning ON the Power Switch
Check that the Scanner is securely connected to the Personal Computer with the USB Cable,
1
and press the Power Switch of the Scanner to the ON (“I” Position).
Power Switch
NOTE ! When the USB Cable that connects this machine with the computer is not
securely connected, scanner image data cannot be read.
2.2 Turning OFF the Power Switch
Chapter 4 Operation
Quit the application (SL-Touch for SL1000).
1
Press the Power Switch to the OFF (“O” Position).
2
Power Switch
NOTE ! Do not turn OFF the Power Switch when the application is starting in the
Scanning Mode.
4-3
Page 96

SL1000 User’s Guide
2.3 Power Saving Features
The Exposure Lamp goes OFF, and the Indicator Lamp flashes when the Scanner has not been
used for a determined amount of time, and it enters the Sleep Mode.
To return it to the Stand-by Condition, press any button of the application.
This machine shuts down when leaving it without any operation after a continued amount of
time when in the Sleep Mode Condition.
NOTE ! When returning from Sleep Mode, the initialization operation is done.
It also returns from Sleep Mode if the Manual Switch is pressed once, when
the Manual Switch (Option) is utilized.
It also returns from Sleep Mode if the Fiche Glass is opened and closed
when the Motorized Roll Film Carrier (Option) is utilized.
4-4
Page 97

3 Operating the Fiche Film
3.1 Film Selection
"Film Selection" screen is opened by "SCAN Mode", and the type of the fiche film is
1
selected.
3.2 Film Insertion
Take hold of the Carrier Handle and pull it forward fully, then the Fiche Glass will open.
1
Chapter 4 Operation
NOTE ! When the Fiche Carrier is pulled out to the maximum position, do not put heavy
objects on the Carrier Table. And, prohibit lean against the Fiche Carrier as is
could cause damage.
Insert the film between the Fiche Glasses.
2
Aperture Card
Place the Card so that the film area is on the right side, face-up.
Fiche, Jacket Film
Place the film so that the title is toward the rear and face-up.
4-5
Page 98

SL1000 User’s Guide
Position the Fiche Film on the Fiche Glass as shown on the figure below.
3
Fiche Film
Place hands to both sides of the grips of the Fiche Carrier and fine-tune the image position.
4
Fiche Film Setting
Left Grip
Right Grip
4-6
Page 99

4 Operating the Roll Film
(When optional Roll Film Carrier is installed)
4.1 Film Selection
From Scan Mode please open the Film Selection Screen.
1
Select the film and “Show Roll Film Carrier" is turned “ON”. You can select "35 mm Roll
Film", "16 mm Roll Film" Either of and “Custom".
Chapter 4 Operation
NOTE ! When the Motorized Roll Film Carrier is used, it is necessary to turn “ON” "Show
Roll Film Carrier". Roll Film Carrier cannot be operated when setting is set to
“OFF”.
4-7
Page 100

SL1000 User’s Guide
4.2 Selecting the Film Width 16 mm/35 mm
Pull out the front part of the Guide Roller, then reverse the directions of the roller and insert
1
again.
Change the position of other Guide Rollers in the same manner (4 pieces in total).
2
NOTE ! All of the directions of the Guide Rollers must be in the same orientation.
16 mm Setting 35 mm Setting
4-8
 Loading...