

Page 1

®
QMS 1725E Print System Operation
1800386-001B
Page 2

Trademarks
The following are tradema rks or registered trademarks of their respective ow ners.
Other product names m entioned in this m anual may a lso be trade marks or reg istered
trademarks of their resp ective owners. Re gistered trademar ks are register ed in the
United States Patent and Trademark Office; some trademarks ma y also be re gistered in
other countries. QMS and the QMS logo are r egistered tradema rks of QMS, Inc., and
Crown, the Crown sea l, and PS Execu tive Series are trademarks of QMS, Inc.
PostScript is a trademark of Adobe Sys tems Incor porated for a pa ge description
language and may b e registered in cer tain jurisdiction s. Througho ut this manual,
“PostScript Level 2” is use d to refer to a set of capabilitie s define d by Adobe System s
for its PostScript Level 2 p age description la nguag e. Thes e c apabili ti es, a mong others,
are implemented in this produ ct thr ough a Q MS-dev eloped emulation that is compatib le
with Adobe's PostScript Level 2 la nguag e. Adobe/Adobe Systems Inc or porated. 3C om,
3+Open/3Com Corpora tion. Aldus, Aldu s PageMaker, Aldus FreeHand/A ldus
Corporation. Apple, AppleTalk, EtherTalk, LaserWriter, LocalTalk, Macintosh, TrueType/
Apple Computer, Inc. VINES/Banyan. CompuSe rve /H & R Block. DEC, DEC net, VMS/
Digital Equipment Corporation. P honeNE T/Farallon Comp uting, Inc. Hewlett-P ackard,
HP, PCL, HP-GL, LaserJet/Hewlett-Packar d Co. IBM PC, Token-Ring/International
Business Machines Corporation. Intel/Intel Co rporation. Microsoft, MS-DOS/Mi crosoft
Corporation. Novell and N etWare/Novell, Inc. QuarkXPr ess/Quark, Inc. TOPS/Sun
Microsystems, Inc . UNIX/UNIX System s Labor atories.
Proprietary Statement
The digitally encoded software included w ith your QMS 172 5E Print System is
Copyrighted © 1995 by QM S, Inc. All Rights R eserved. This software may not be
reproduced, modified, d isplay ed, tr ans ferred, or cop ied in any form or in any manner or
on any media, in whole or in par t, without the express written permiss ion of QMS, Inc.
Copyright Notice
This manual is Copyrighted © 1995 by QM S, Inc., One Mag num Pass, Mob ile, AL
36618. All Rights Reserve d. This manual m ay not be copie d in whole or in pa rt, nor
transferred to any other me dia or language, w ithout the express written permiss ion of
QMS, Inc.
Page 3
Contents
1 Introduction
Introduction ......................................... ..........................................1-2
Abo u t Th is Guide ... ..................... . ....................................... . ......... 1-2
Typographic Conventions 1-3
2 Consumables
Introduction ......................................... ..........................................2-2
Preventing Media Jams ...............................................................2-2
About Paper .... ... .... ... ...... . ...... ... ... .... ... ...... . ..... .... ... .... ... ...... ... ... ....2-3
Paper Sizes 2-3
Paper Storage 2-4
Paper Feeding .......... ....... ...... ..... ..... ... ....... ..... ....... ...... ... ..... ..... ....2-5
Page 4

Face-up Output Bin ........................... .............. ..... .............. ....... .. 2-6
Manual Feed ................................................................................. 2-7
Printing Tran spa renc ies .................. ..... ..... ..... ..... ....... ...... ..... ... .. 2-8
Printing La b e l s ... ............................... . ................................ . ......... 2- 9
Printing Envelopes ...................................................................... 2-9
Formatting Data for Envelopes 2-10
Printing a Single Envelope 2-10
The Optional Envelope Cassette 2-11
Using Toner Cartrid ges .. ....... ....... ....... ....... ....... ......... ....... ....... . 2-11
When to Replace the To ner Cartridge 2-11
Handling the Toner Cartridge 2-12
Installing the Toner Cartridge .................................................. 2-13
3 Advanced Printing Features
Introduction................................................................................... 3-2
High-Resolutio n Printin g ............................... ...... .............. ....... .. 3-2
High-Resolution Printing and Duplexing 3-2
Cassette Chaining ....................................................................... 3-3
Collating Ou tput .................................................... ......................3-4
Working with S tatus Pa ges . ..... ..... ..... ..... ....... ..... ...... ..... ... ....... .. 3-5
Identifying a Status Page Type 3-5
Printing a Status Page 3-6
Cancelling/Ending Print Jobs ..................................................... 3-6
Cancelling a Print Job 3-7
Ending a Print Job 3-8
4 Printer Care
Introduction................................................................................... 4-2
Handling the Printer .................................................................... 4-2
QMS 1725E Print System Op e rati o nii
Page 5
Keeping the Printer Clean ........................ ............ ................... ....4 -3
Cleaning the Anti-Static Teeth 4-3
Cleaning the Transfer-Guide Lock-Tray and Strip 4-5
Cleaning the Media-Feed-Guide Area 4-6
5 Print Quality
Introduction ...................................................................................5-2
About Print Density . ..... ......... ...... ....... ....... ..... ....... ....... ....... ....... ..5 -2
About Gamma Cor recti on .......... ....... ......... ....... ....... ......... ...... ....5-3
Changing Print Resolution ..........................................................5-4
Setting Default Resolution 5-5
6 Troubleshooting Printer
Problems
Introduction ..................... ........ ..... ....... ....... ......... ......... ........ ..... ....6-2
Status Messages ...... .................................................... ................6 -2
Service Messages 6-4
HP-GL and PCL Error Codes 6-5
PostScript Er rors ............ ....... ..... ...... ..... ..... ..... ..... ....... ...... ..... .....6-5
Printer Problem Checklist .......... .............. ................... ............ ....6 -6
Media Jams ...................................................................................6- 8
Locations 6-8
Clearing an Input Bin Media Jam 6-9
Clearing an Image-Transfer Area Media Jam 6-11
Clearing a Fuser Assembly Area Media Jam 6-12
Clearing an Output Bin Media Jam 6-14
Clearing a Duplexer Media Jam 6-15
Problem Descriptions ................................................................6-16
Paper Jam Message Stays On 6-16
Data Indicator Stays Lit 6-16
No Advanced Status Page 6-17
iii
Page 6

No Start-up Page 6-17
Printer Resets 6-17
Blank Pages 6-18
Not All Pages Print 6-18
Printer Will Not Duplex 6-19
Print Quality Problems ................................. ............................. 6-19
Printer Will Not Print 600 dpi 6-20
Image Defects ............................................................................ 6-20
White or Light Lines 6-20
Light Image (Entire Page) 6-20
Dark Image (Entire Page) 6-21
Stain Along the Edge of the Page 6-21
Stains on the Back of the Page 6- 21
Image Easily Smears when Rubbed 6-21
Placing a Service Call ............................................................... 6-22
A QMS Customer Support
Sources of Supp ort ............... ....... ..... ...... ... ..... ..... ....... ....... .... .....A -2
Your QMS Vendor A-2
Your Application Vendor A-2
Q-FAX A-2
The QMS Corporate Bulletin Board System A-3
CompuServe A-3
Internet A-3
QMS Customer Technical Assurance (CTA) A-4
QMS National Service A-5
QMS World-wide Offices .............................................................A-6
Index
v
QMS 1725E Print System Op e rati o niv
Page 7

1
Introduction
In This Chapter . . .
n
About this guide
n
Typographic convent ions
Page 8
Introduction
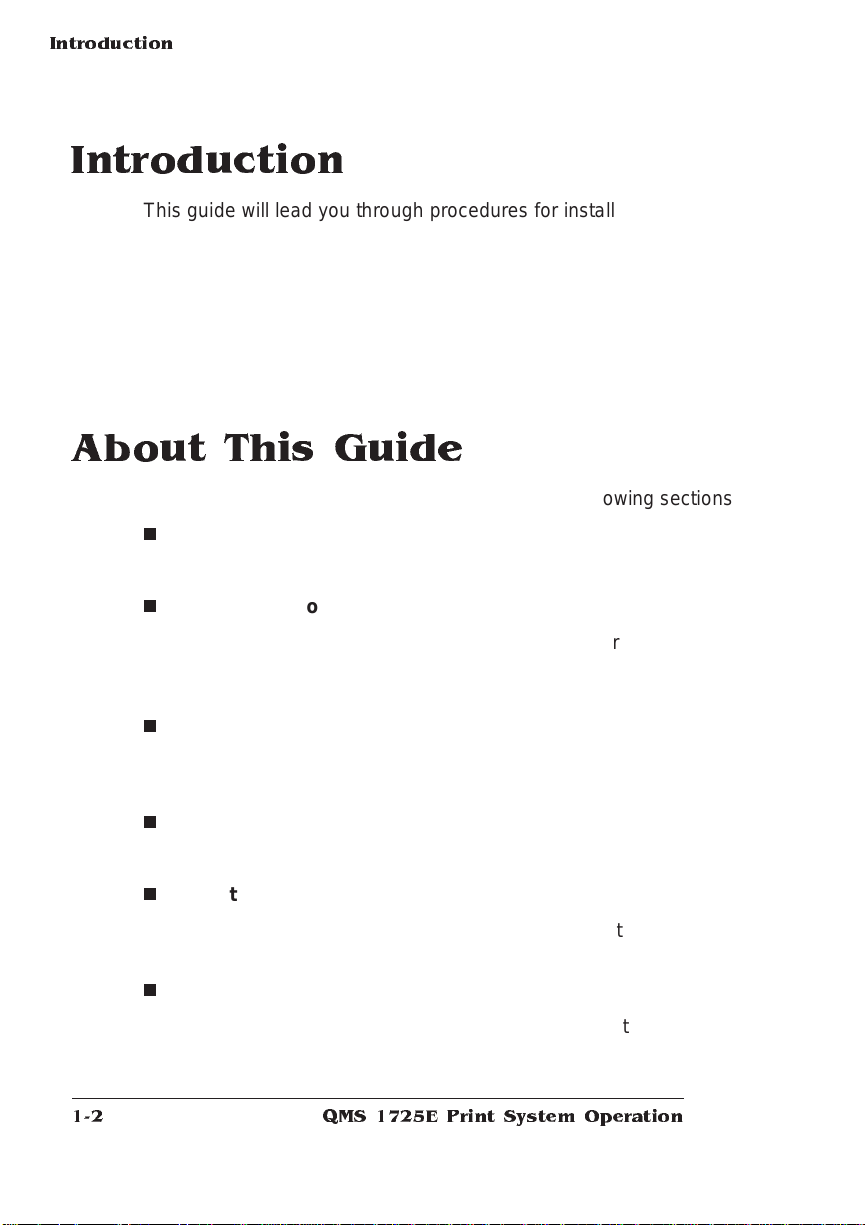
Introduction
This guide will lead you through procedures for installing consumables such as media and toner cartridges. You’ll also find information
on advanced printing feature s, printer care, print quality, and a troubleshooting section in case something goes wrong. Use this guide in
conjunction with your other QMS 1725E Print System documentation.
This chapter gives you a brief overview of this manual.
About This Guide
The informati on in thi s manual is divided into the foll owing secti on s:
n
Chapter 1—Intr oductio n
Provides an overview of this guide.
n
Chapter 2—Consumab les
Describes the paper stocks best suited for your printer; how to
load paper, labels, t ransparencies, envelopes; and how to
replace the toner cartridge.
n
Chapter 3—Advanced P rintin g Features
Explains how to print duplex, chain cassettes, collate output, print
a status page, cancel a print job, and end a print job.
n
Chapter 4—Printer Care
Describes how to handle and clean the printer.
n
Chapter 5—Print Qu ality
Gives information on how to improve print quality through adjustments of print density, gamma correction and printer resolution.
n
Chapter 6—Troubleshootin g
Provides media jam prevention tips, explai ns how to locate and
clear media jams, lists printer status messages, outlines printer
QMS 1725E Print System Op e rati o n1-2
Page 9
About This
Guide
and print quality problems and solution s, and describes how to
place a service call.
n
Appendix A—QM S Custom er Suppo rt
Provides world-wide product sales and support telephone numbers and describes how to communicate with QMS through the
QMS Bulletin Board, Comp uS e rve , the Internet, and Q-FAX.
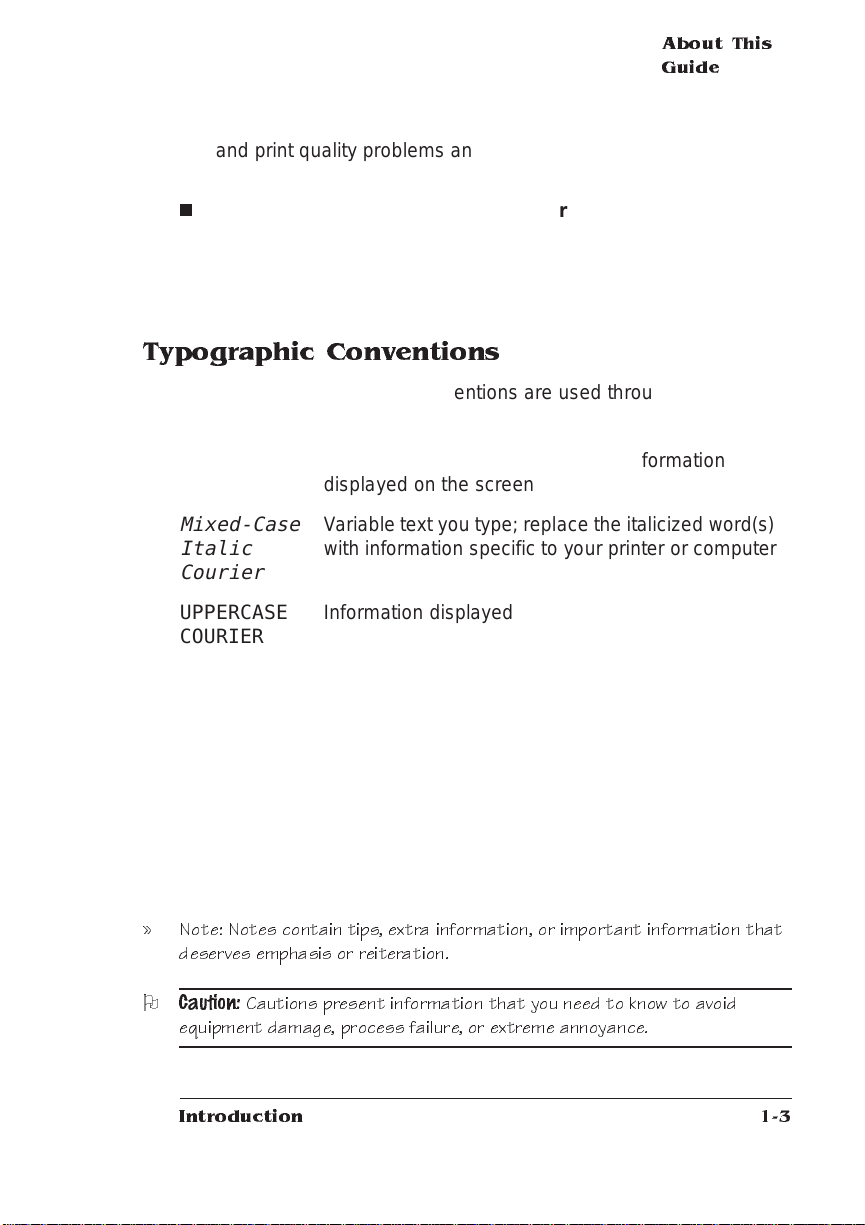
Typograph ic Conventions
The following typographic conve ntions are used throughout this manual:
Mixed-Case
Courier
Mixed-Case
Italic
Text you type, and messages and information
displayed on the screen
V ariable text you type; replace the italicized word(s)
with information specif ic to your printer or comput er
Courier
UPPERCASE
COURIER
lowercase
bold
lowercase
Information displayed in the printer message
window
PostScript operators and DOS comm ands
Variable inform ation in text and P ostS cript variables
italic
UPPERCASE File and utility names
↵ Press the Enter key (PC) or Return key (Macintosh)
^ Press and hold down the Ctrl key (PC)
» Note: Notes contain tips, extra inform ation, or important information that
deserves emphasi s or reiteration.
O
Caution:
equipment dam age, process fail ure, or extreme annoyance.
Cautions present information that you nee d to know to a void
Introduction
1-3
Page 10
About This
Guide
M
WARNING!
procedure is not performed ex a ctly as described in the manual.
ACHTUNG! Bitte halten Sie s ich ex akt a n die im Handbuch beschriebene
Vorgehensweise, da sonst Verletzungsgefahr beste hen könnte.
v
Warnings indicate the possibility of personal injury if a specific
QMS 1725E Print System Op e rati o n1-4
Page 11
2
Consumables
In This Chapter . . .
n
Preventing media jams
n
About paper
n
Loading paper, transparencies, label s, and envelopes
n
Toner cartridges
Page 12
Introduction
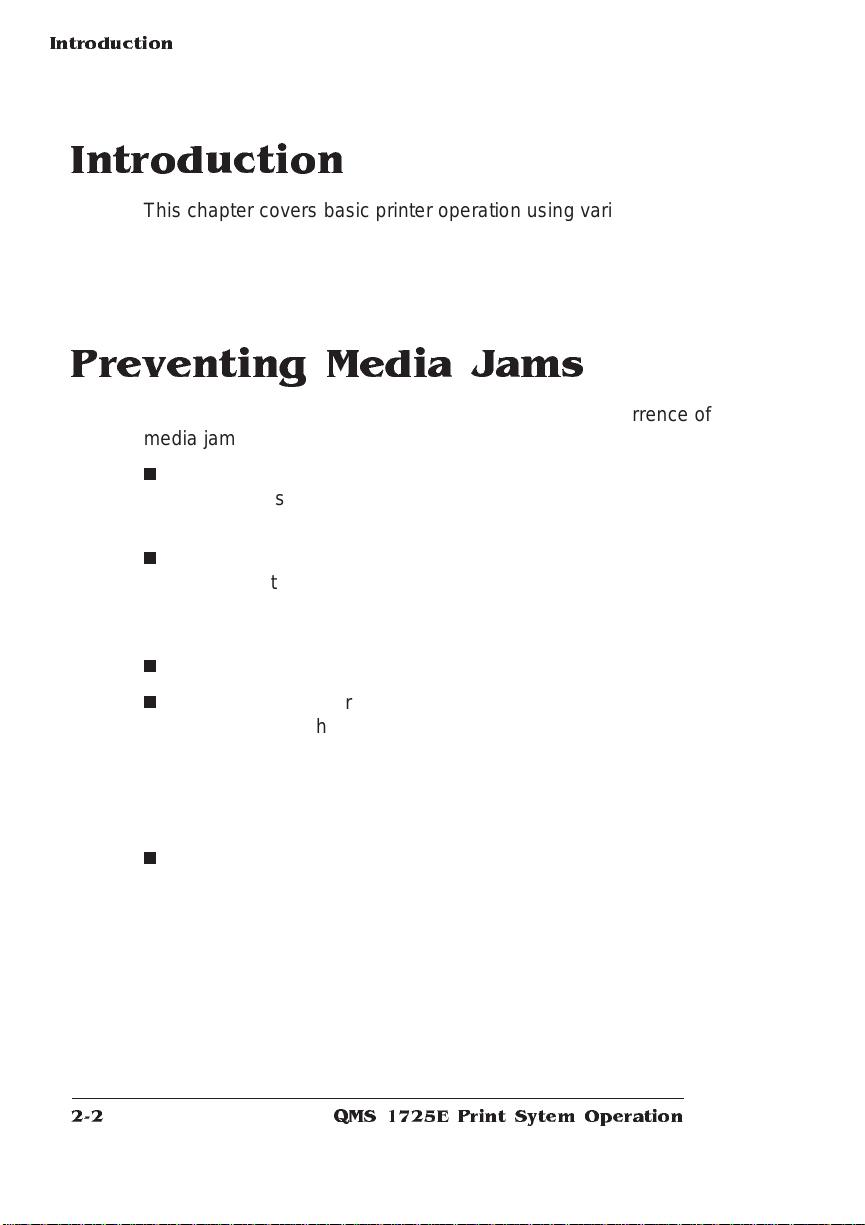
Introduction
This chapter covers basic printer operation using various kinds of
paper and print media; loading paper, transparencies, labels, and
envelopes; and toner cartridge handling and replacem ent .
Preventing Media Jams
There are several things you can do to reduce the occurrence of
media jams.
n
Your paper, labels, and overhead transparencies must meet the
guidelines set for the printer. See appendix B, “Technical Specifications,” in your
n
If you have problems with double feeding, remove the media from
the cassette or input bin and fan the edges. The sheets may be
sticking together. However, do not fan transparencies since this
causes static electricity.
Reference
guide.
n
Print media must be stored away from moi sture and humidi ty.
n
Many manufacture rs place an arrow on the end of the wrapper
that indicates which side of the media should be used for printing.
If you have problems and cannot determine which side of the
paper should be printed, remove the paper from the cassette,
rotate the stack a half-turn, turn the stack over, and then place it
back in the cassette.
n
If none of the above relieves media jamming, notif y your vendor.
QMS 1725E Print Sytem Ope rati o n2-2
Page 13

About Paper
Your print quality depends in large part on the quality of the pape r.
You can get sharper contrast on printed pages by using special laser
printer paper, which is available from a variety of paper manufacturers. This paper is thicker, smoother, and whiter than copier paper and
gives your page a more professional appearance.
The printer accommodat es paper from 16 to 24 pounds (60 to 90 g/
2
) with cassette feed and 16 to 36 pounds (60 to 135 g/m2) with
m
manual feed. Conventional copier paper is adequate for most applications. Copier paper has a smooth, clean surface, controlled elect rical
properties, and heat stability. This assures good image tra nsfer wit hout excessive curling of the paper.
You can use special paper, such as bond paper, often used for stationery, for special applications. However, textured paper may result in
uneven toner placement and print quality may vary . You may want to
do a test run before printing a large quantity. Colored paper may also
be used, but not paper with a colored coating applied . Appendi x B,
“Technical Specifications,” in your
tional paper specifications.
Reference
About Paper
guide contains addi-
Paper Sizes
Your printer supports four different paper sizes. It autom ati cally
detects which size paper cassette is installed and jud ges the paper
size accordingly; letter-size paper in a legal-size cassette does not
work. Be sure to match the paper size to the appropriate paper cassette. You may purchase additional paper cassettes from your QMS
vendor.
Consumables
2-3
Page 14
About Paper
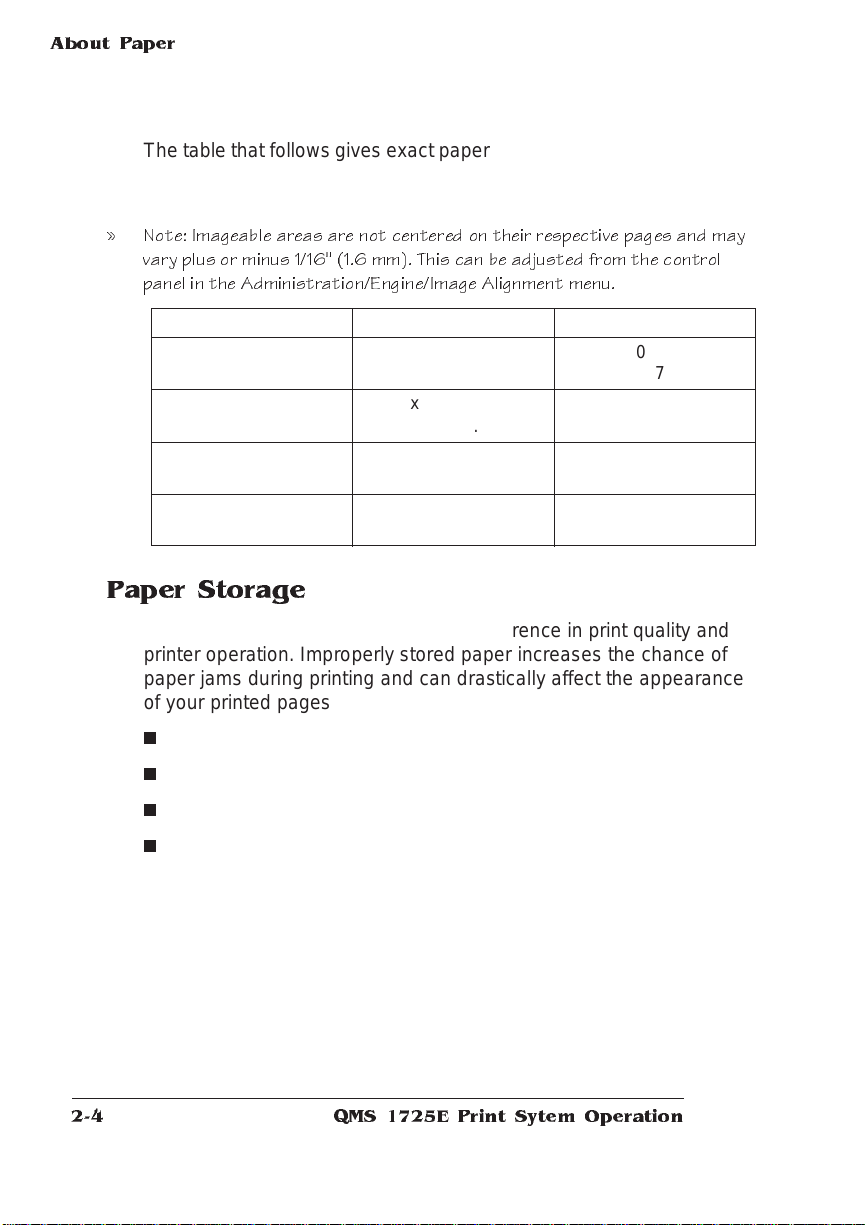
The table that follows gives exact paper sizes your printer supports as
well as the imageable area. This imageable area is smaller than the
size of the paper.
» Note: Imageable areas are not cente red on t heir respect ive page s and may
vary plus or minus 1/1 6" ( 1.6 mm). This can be adjusted from the control
panel in the Administration/E ngine/Ima ge Al ignment menu.
Type Size Imageable Area
Letter 8.50" x 11.00"
(215.90 x 279.40mm)
Legal 8.50" x 14.00"
(215.90 x 355.60mm)
Executive 7.25" x 10.50"
(184.15 x 266.70mm)
A4 8.27" x 11.69"
(210.00 x 297.00mm)
8.20" x 10.66"
(208.28 x 270.76mm)
8.20" x 13.66"
(208.28 x 346.96mm)
6.95" x 10.16"
(176.53 x 258.06mm)
7.97" x 11.36"
(202.50 x 288.50mm)
Paper Storage
How you store paper can make a big difference in print quality and
printer operation. Improperly stored paper increases the chance of
paper jams during printing and can dra stically affect the appearance
of your printed pages. Keep paper in good condition by storing it
n
In its wrapper
n
On a flat surface
n
In a closed cabinet
n
In a cool, dry area
Do not leave paper unwrapped or in a place where heat and humidity
can damage it.
QMS 1725E Print Sytem Ope rati o n2-4
Page 15
Paper Feeding
There are two ways of feeding paper through your printer:
n
Cassette feed (automat ically)
n
Manual feed (by hand)
Cassette feed automatically pull s paper from one of the cassettes at
the front of the printer. The cassettes handle paper as light as 16
pounds (60 g/m
mum loading depth is 1.97 inches (50 mm).
Use the following instructions to install a casset te:
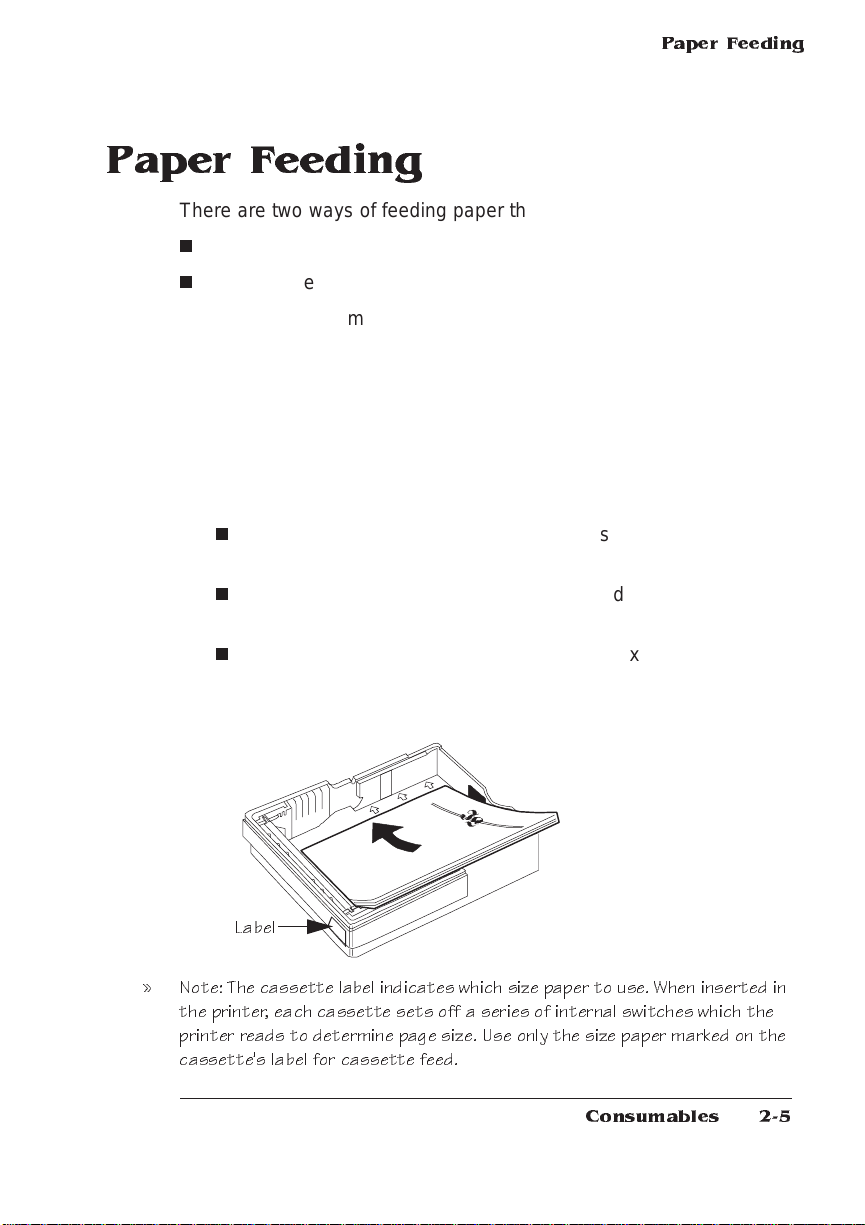
1 Fill the cassettes with paper.
If you’re using
n
Letterhead and printing simp lex (single sided), be sure to
place the paper face up, top edge inserted first.
n
Letterhead and printing duplex (doubl e sided), place the
paper face down, bottom edge inserted first.
2
) or as heavy as 24 pounds (90 g/m2), and the maxi-
Paper Feeding
n
Letterhead and printing combination simplex and duplex jobs,
refer to the Letterhead option in the Engine submenu covered
in chapter 4, “Printer Configuration,” of your
Label
» Note: T he cas s e tte label indicates which size pape r to use. When inse r ted in
the printer, each casse tte sets off a seri e s of i nterna l s wi tches which the
printer reads to determine page size. Use only the size paper marked on the
cassette's label f or cassette feed.
Reference
Consumables
guide.
2-5
Page 16

Face-up
Output Bin
2 Place the covers on the cassettes.
3 Slide the filled cassettes into the pr op er ope nings in the
front of the printer.
Face-up Output Bin
After being printed, paper normall y stacks face down in the recessed
area on the top of the printer. The face-down output bin holds up to
500 sheets of paper. For face-up output, you must attach the face-up
output bin to the rear of the printer and configure the printer to access
this bin. This output bin holds up to 50 sheets of paper. Use the following instructions to attach the face-up output bin:
1 Insert the two end tabs of the face-up output bin into the slot
on the back of the printer.
2 Allow the extended par t of the bin to lean back into its nor-
mal positio n.
1
2
QMS 1725E Print Sytem Ope rati o n2-6
Page 17
Manual Feed
Manual Feed
Manual feed is the method of feeding media by hand. Y ou can use the
manual feed slot with the adjustabl e feed guide on top of the paper
cassettes for a single manual-feed job. Single-sheet manual feed
makes it possible to feed individual sheet s of paper or other material
(such as envelopes, label stock, and transparencies) into your printer.
Paper weight can range from 16 to 36 pounds (60 to 135 g/m
Envelopes can be fed from the manual feed slot of the upper cassette
or with the optional envelope feeder (see chapter 6, “Printer Options,”
in the Reference guide for more informa tion). Cut sheets, labe ls, and
transparencies can be fed from the manual feed slot of either cassette.
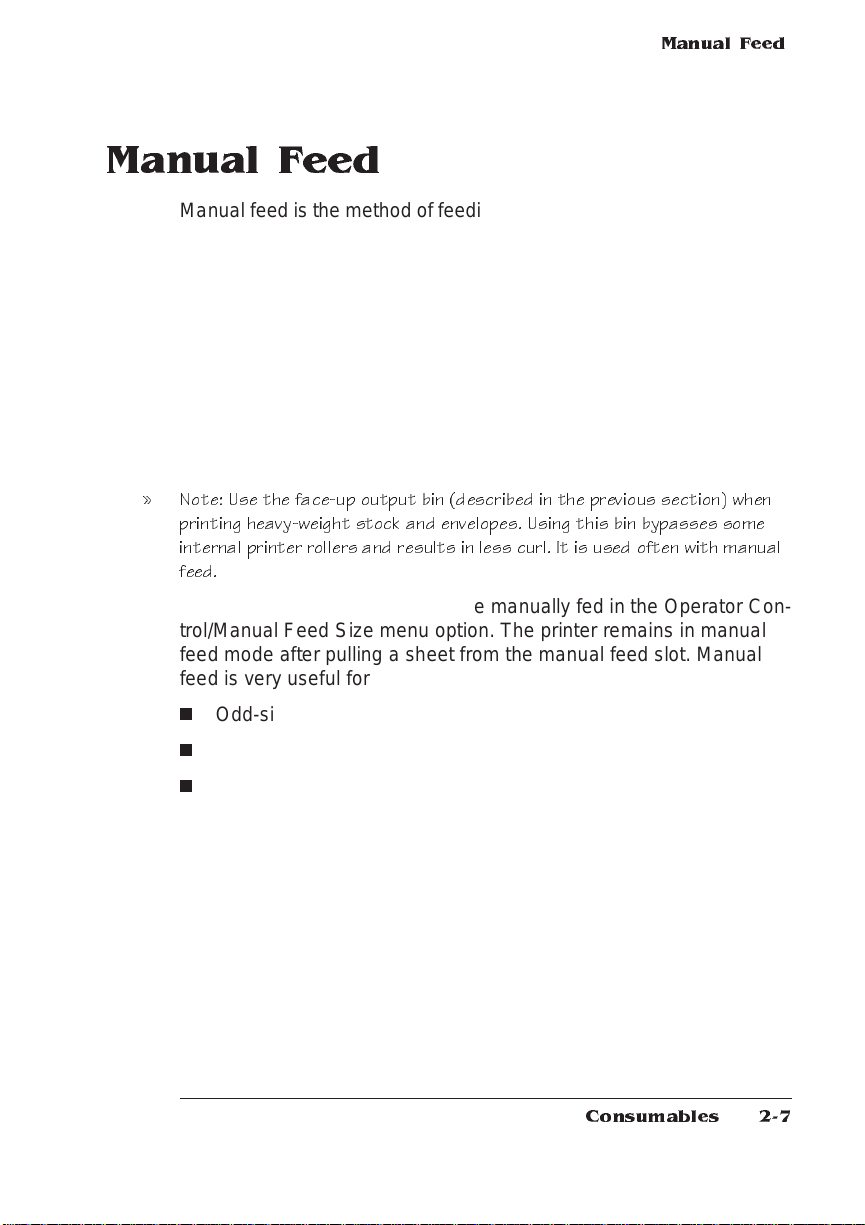
» Note: Use the face-up output bin (de scribed in the previous section) when
printing heavy-weight stock and envelopes. Us ing this bin bypas ses some
internal printer rollers and r esults in less curl. It is us ed ofte n with m anual
feed.
Specify the size of the media to be manually fed in the Operator Control/Manual Feed Size menu option. The printer remai ns in manua l
feed mode after pulling a sheet from the manu al feed slot. Manual
feed is very useful for
2
).
n
Odd-sized paper (cut sheets)
n
Transparencies
n
Heavy-weight labels and envelopes
Use the following instructions to feed med ia by hand.
Consumables
2-7
Page 18
Printing
Transparencies
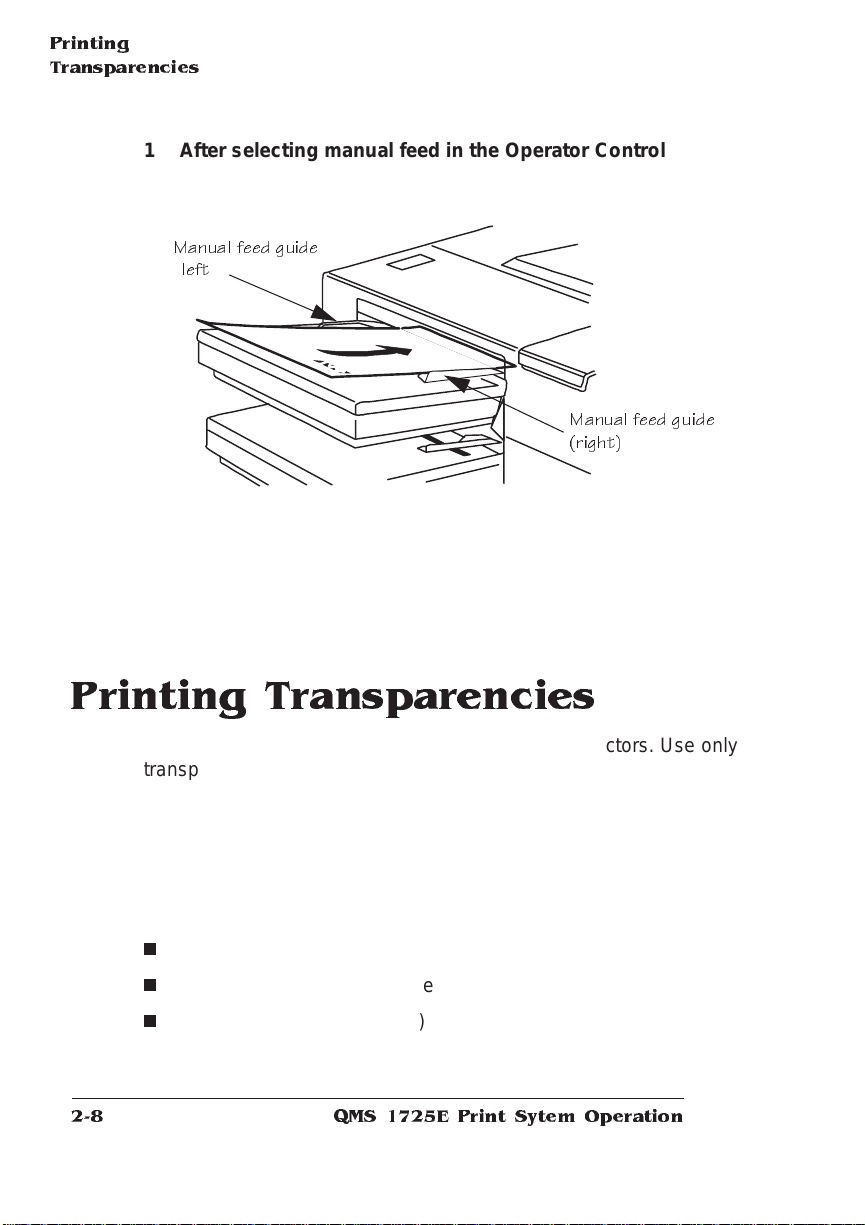
1 After selecting manu al feed in the Operator Contro l menu,
adjust the manual feed guide s on the upper or lower paper
cassette to match the width of media you are using.
Manual feed guide
(
left
2 Insert the media alo ng the guides as far as it goes.
The media is automa tical ly fed into the print er, and the printed
media is forwarded to the selected output bin.
)
Manual feed guide
(right)
Printing Transparencies
You can also print transparencies for overhead projectors. Use only
transparencies recommended for laser printers, such as Canon brand
type D and 3M type PP2500. Always use manual feed from either the
upper or lower paper cassette, and the face-up output bin at the back
of the printer. Remove each transparen cy from the face-up bin after
printing to avoid jams. Transparencies must withstand temperatures
up to 356° F (180° C). Other specifications on overhead transpa rencies are
n
Thickness: 0.111 to 0.113 mm (4.37 to 4.45 mils)
n
Cutting Dimen sion Tolerance: +/-0. 7 mm (0.03 1")
n
Cutting Angle: 90° (+/- 0.2°)
QMS 1725E Print Sytem Ope rati o n2-8
Page 19
Transparencies are especially sensitive to a dirty paper path. If there
are shadows either on the top or the bottom of the sheet s, see chap ter 4, “Printer Care,” of this manual for instructions on how to clean
the media path.
Printing Labels
Adhesive label stock has pressure-sensitive (peel and stick) adhesive
backing. The procedure for feeding labels is almost the same as for
regular paper; however, you must use the face-up output bin.
Recommended labels have the following specif icat ions:
n
Type: Use only labels recommend ed for laser printers, such
as Avery 5260. Adhesive label stock should have pressuresensitive (peel-and-stick) adhesive backing.
n
Weight: The printer supports 17-34 lb (64-128 g/m
when using manual feed.
Printing Labels
2
) labels
» Note: Label data should be formatted within your application. Try printing
your dat a on a plain shee t of paper first to check pl acement. This reduces
the number of label sheets you use.
Printing Envelopes
Envelopes may be printed in two ways:
n
From the manual feed slot on the upper cassette (single en velopes)
n
From the optional envelope tray (up to 100 envelopes)
Non-standard-size envelopes are acceptable using manual feed as
long as they fall into the following size ranges:
n
Minimum size: 3.5" x 7" (86 mm x 178 mm)
n
Maximum size: 7.4" x 10.5" (188 mm x 267 mm)
Consumables
2-9
Page 20
Printing
Envelopes
Formatting Data for Envelopes
Your printer receives the necessary instructions to print on envelopes
from your software. Read the printing section of your application manual to find out how your software supports envelope printing. The
printer should be in landscape mode for most application s. Usually,
this is accomplished through the application.
When formatting data for envelopes, leave a 0.6" (15 mm) margin
from the edges of the envelope. Print on only one side. Rememb e r,
some parts of an envelope consist of three layers of paper the front,
back, and flap. Print in these layered regions may be faded.
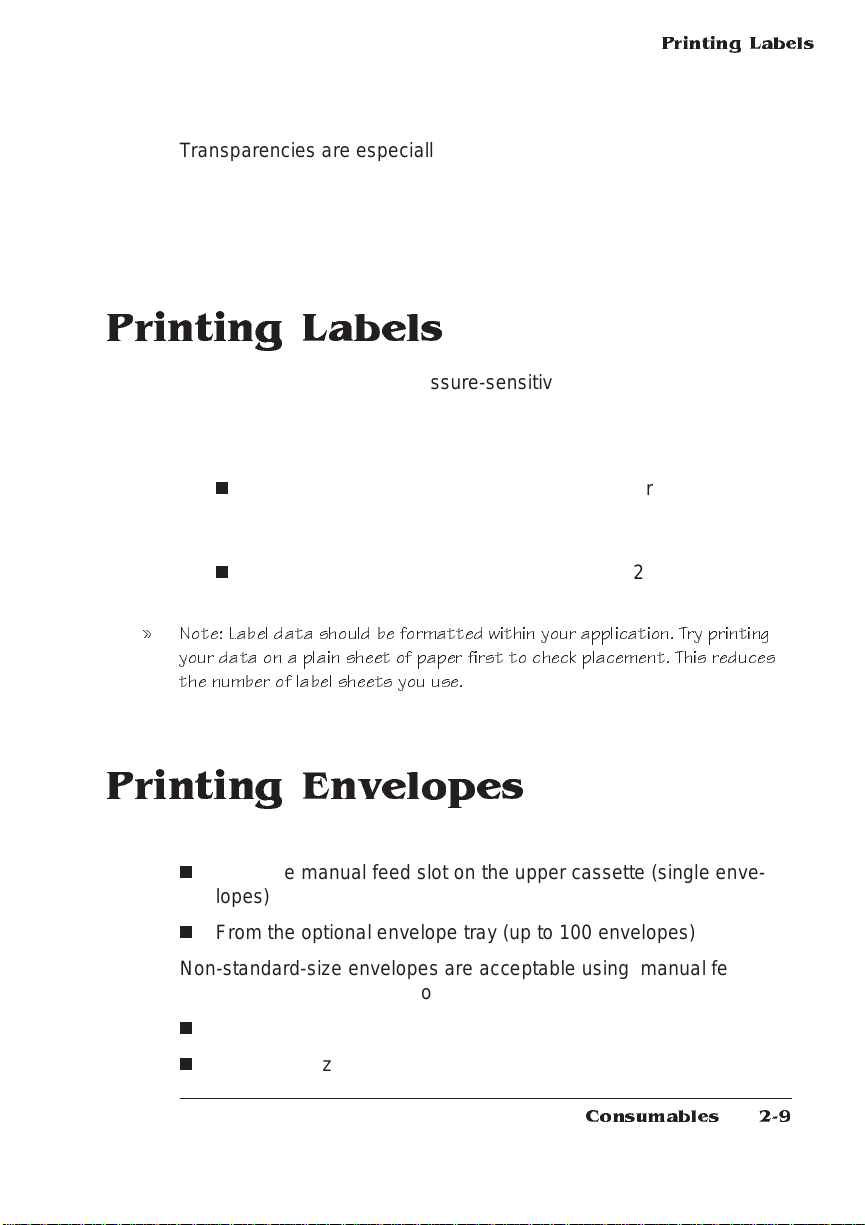
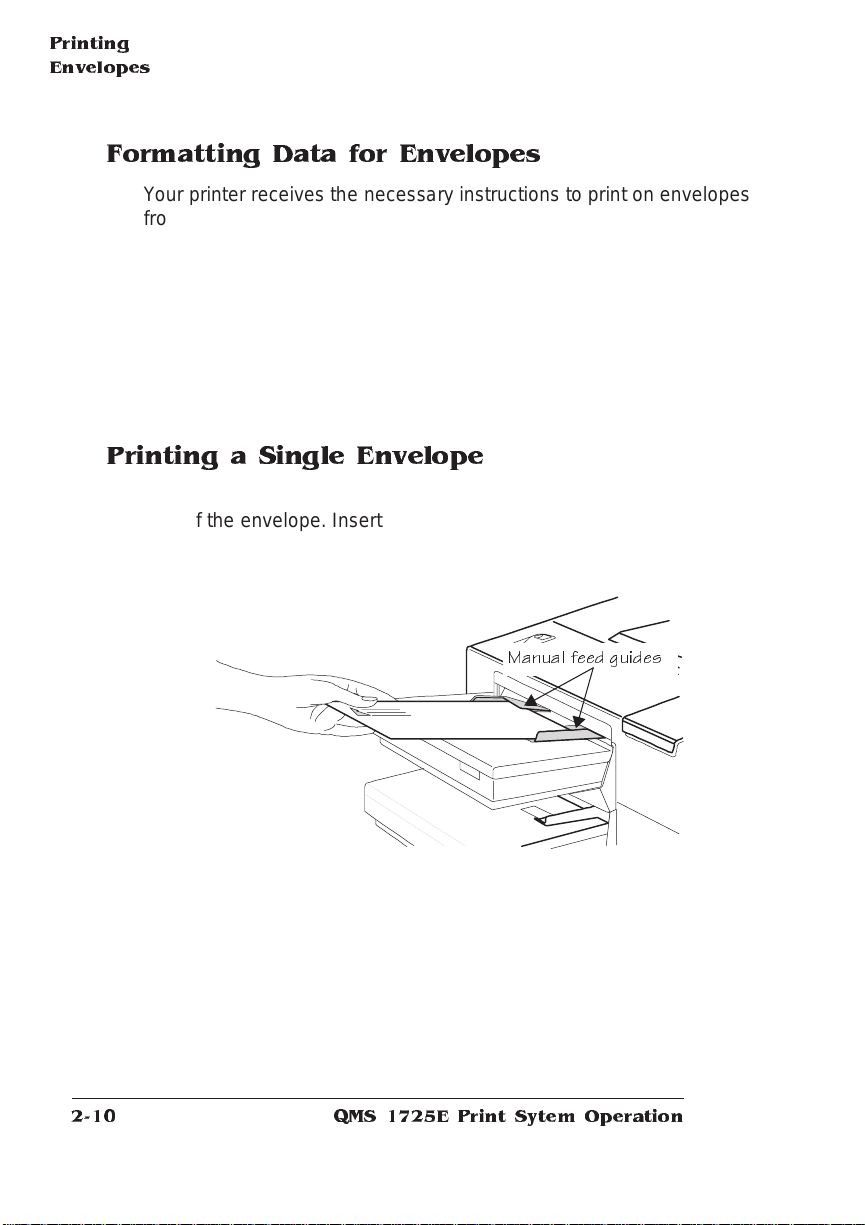
Printing a Single Envelope
Adjust the manual fee d guides on top of the casset te to the correct
size of the envelope. Insert a single envelope into the manual feed
slot as shown in the following illustration, with the face up and the flap
side toward the left manual feed guide.
Manual feed guide s
Because envelopes pass through hea ted roll er s, the gumm ed area
on the flap may seal. Open the flap immedia tely after it passes
through the printer, before the seal cools. You may then reseal in the
QMS 1725E Print Sytem Ope rati o n2-10
Page 21
Using Toner
Cartridg es
normal manner. The use of envelopes with emulsion-based glue
avoids this problem.
» Note: Before printing envelopes, disab le the dupl exer if it is i nstalled a nd
check the manual feed guide s to make sure t heyre not too tight and
buckling the envelopes. Also, make sure envelope size and type meet
specifications listed in appendix B, Technical Specifications, of your
Reference
the rear of the printer.
guide. If envelopes curl excessively, use the face-up output bi n at
The Optional Envelope Cassette
To load up to 100 envelopes at a time, use the optional envelope cassette. Instructions for installat ion and use are in chapt er 6, “Printer
Options,” in your
information on the optional envelope ca ssett e.
Reference
guide. See your QMS vend or for m ore
Using Toner Cartridges
Quality printing requi res uni form tone r application and a clean paper
path. This chapter explains basic maintenance to keep your printer
running smoothly. It includes instal ling a toner cartridge, cleaning
printer parts, and general print er care.
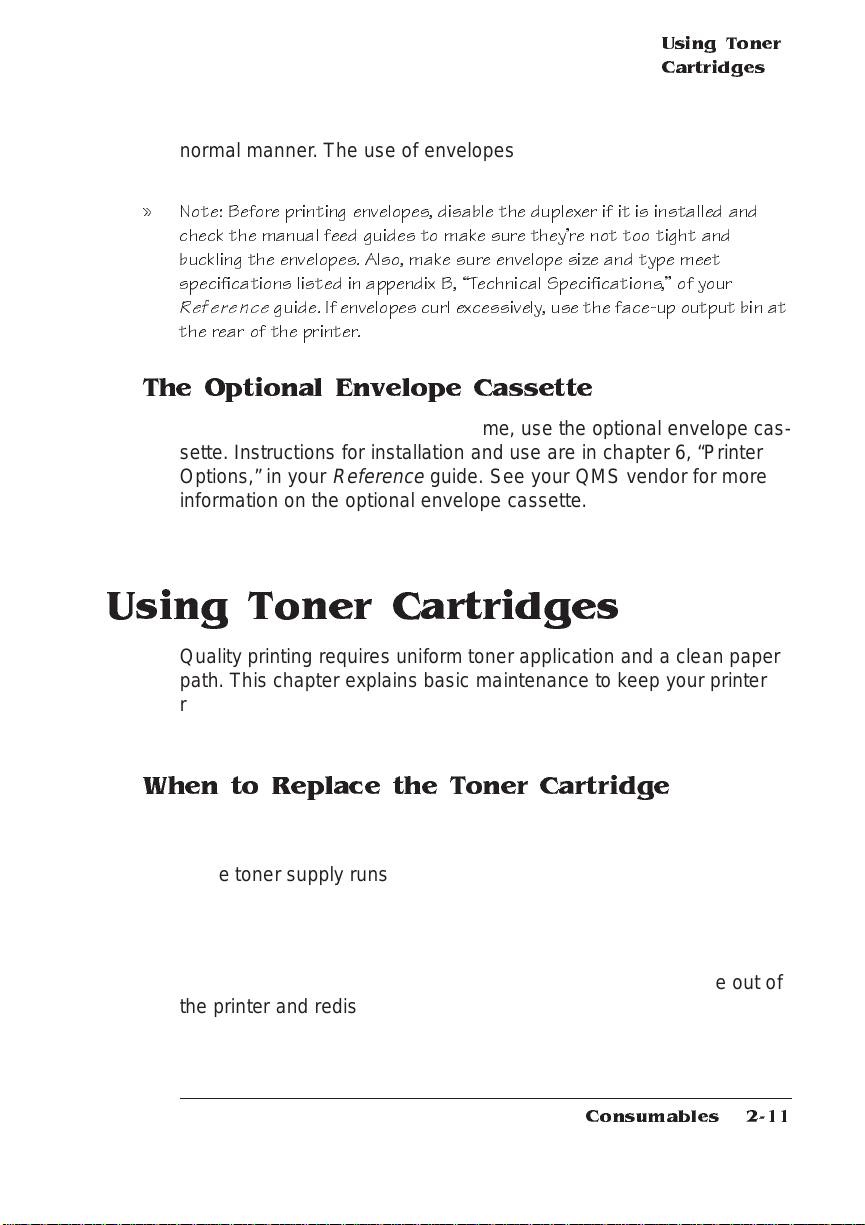
When to Replace the Toner Cartridge
The toner cartridge lasts for approximately 8,000 print s at 5% coverage. (For example, a one-page letter with no graphics.) When the cartridge toner supply runs low, the printer message TONER OUT
displays. Usually, parts of the page print lighte r. It is your option
whether or not to continue printing when the engine senses it is out of
toner.
When toner is low, it is sometimes helpfu l to take the cartridge out of
the printer and redistribute the ton er. This is done by gently rocking
the cartridge side to side. Then reinstall the cartridge . If the TONER
OUT message rem ains in the display panel after redistributing toner,
Consumables
2-11
Page 22
Using Toner
Cartridge s
the cartridge must be replaced.
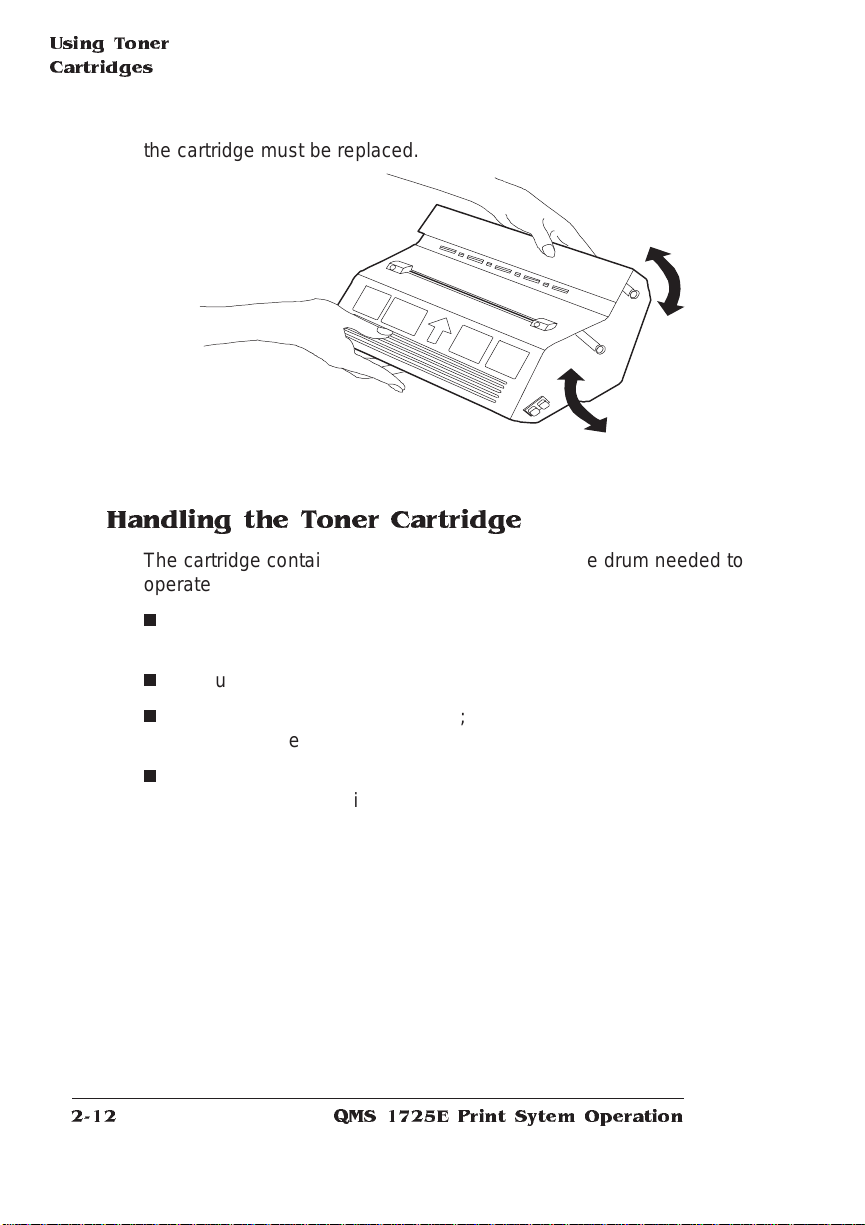
Handling the Toner Cartridge
The cartridge contains the ton er and laser-sensitive drum needed to
operate the laser printer. The cartridge
n
Is sensitive to light; do not expose it to direct sunlight after op ening
n
Should be installed immedia tely af ter openi ng
n
Should be kept level for storage; do not stand or store the cartridge on its end
n
Contains a magnet; keep the cartridge away from CRTs, disk
drives, and floppy disks since damage may occur to stored data
Additional toner cartridges may be purchased from your QMS vendor.
Toner specifications are in appendix B, “Technical Specificati ons,” of
your
Reference
manual.
QMS 1725E Print Sytem Ope rati o n2-12
Page 23
Installing the
Toner Cartridge
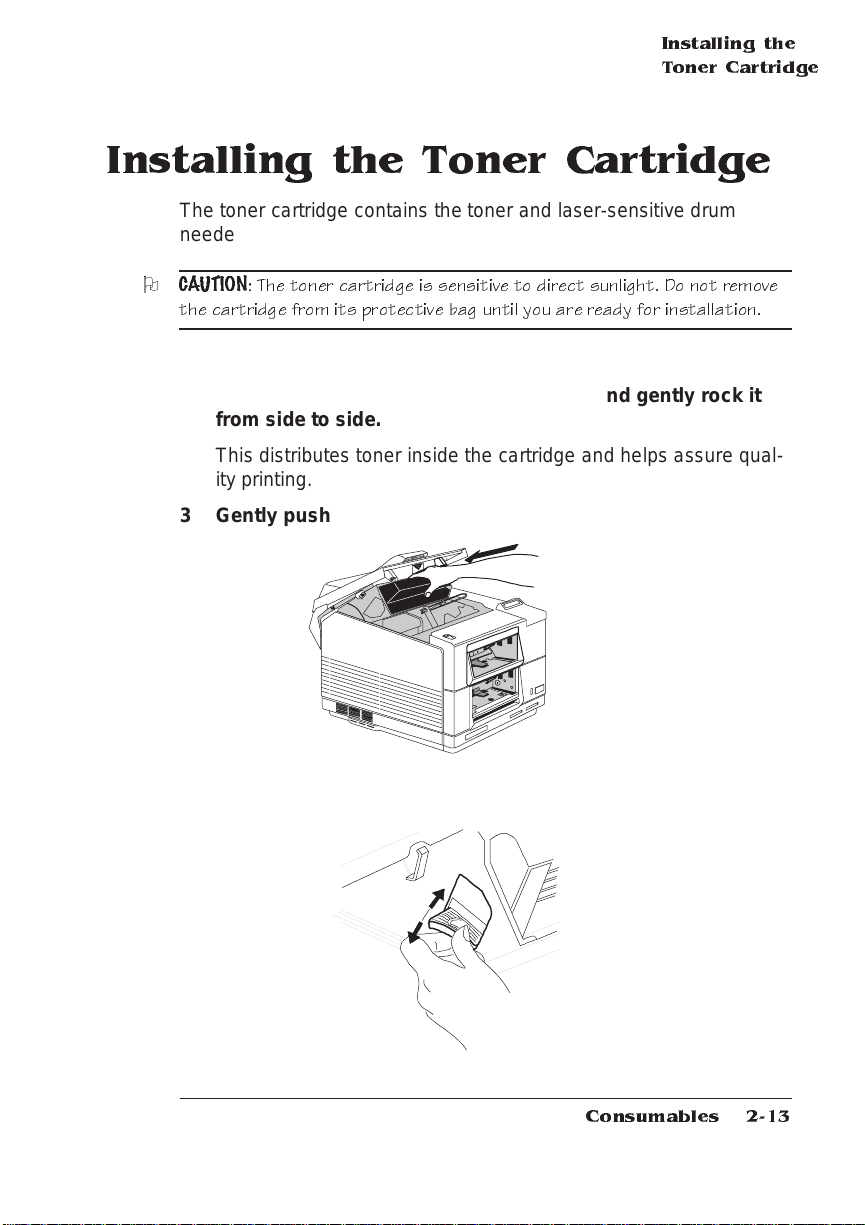
Installing the Toner Cartridge
The toner cartridge contains the toner and laser-sensitive drum
needed to operate the laser printer.
O
CAUTION
the cartridge from its protective b ag until you are ready for installation.
1 Open the printer top cover.
2 Hold the new cartridg e with both han ds and gently ro ck it
3 Gently push the ca r trid ge into the pri nter unti l it fits firml y.
: The toner cartridge is sensitive to direct sunlight. Do not remove
from side to sid e.
This distributes toner inside the cartridge and helps assure quality printing.
4 Grasp the tab protrudin g from the le ft side of the cartrid ge
and flex it to break it loose.
Consumables
2-13
Page 24

Installing the
Toner Cartridge
5 Pull the tab straight out. Pul l the attached 22 inches (55 cm)
of tape comple te ly out of the cartrid ge. Disc ard the tab an d
tape.
6 Close the printer top cover.
The toner cartridge is now ready for use.
v
QMS 1725E Print Sytem Ope rati o n2-14
Page 25

3
Advanced Printing Features
In This Chapter . . .
n
High-resolution printing
n
Chaining cassettes
n
Collating output
n
Working with status pages
n
Cancelling a print job
n
Ending a print job
Page 26

Introduction
Introduction
This chapter describes changing print resolution, using high-resolution while duplexing, chaining pape r cassettes, collating outpu t, printing a status page, cancelling a print job, and ending a print job.
High-Resolution Printing
The QMS 1725E Print System supports two print resolutions: 300 and
600 dpi (dots per inch). Printing at 300 dpi, your printer requires less
processing time compared to 600 dpi, since it has fewer dots per inch
to map, therefore reducing the time it takes to print. Printing at 300 dpi
also reduces the amount of toner used compared to pages printed at
600 dpi. For pages that contain gre at detail, such as graphics with
multiple levels of shading, or for document s requiring the best pos sible character detail, you should set your printer to 600 dpi resolution.
QMS 1725E Print System
Your
(megabytes) of memory, more than enough to handle both 300 or 600
dpi during simplex printing.
comes from t he f act o r y with 8 MB
You can set the default resolution of your printer through the Administration/Engine/Def Resolution m e nu.
Menu Administration/Engine/Def Resolution
Choices 300 dpi—300x300 dpi resolution.
600 dpi—600x600 dpi resolution.
Default 600 dpi
High-Resolution Printing and Duplexing
If you purchased a printer with the duplex option installed, you may
print on any of the media sizes at 300x300 dpi. However, printing
duplex at 600x600 dpi will require additional mem or y. The foll owing
QMS 1725E Print Sytem Ope rati o n3-2
Page 27

table lists the minimum amount of memory necessary for each resolution/media size combination :
Media Minimum RAM (in MB)
300x300 dpi 600x600 dpi
Simplex Duplex Simplex Duplex
Letter 4 MB 6 MB 8 MB 12 MB
Legal 4 MB 6 MB 8 MB 16 MB
Executive 4 MB 6 MB 8 MB 12 MB
A4 4 MB 6 MB 8 MB 12 MB
Cassette Chain ing
This printer has two cassettes (also known as trays or input bins) for a
total media capacity of approximately 1000 sh eets bef ore a reload is
necessary. You may choose to have the printer automatically draw
from the alternate cassette when the current cassette empties. There
are three ways to do this:
Cassette Chaining
n
Your application may include a specific procedure for using a
dual-cassette printer. Check your document ation.
n
The PS Executive Series Utilities offer a menu-driven program for
paper tray selection in the paper source section. If you have this
program installed, you can use it to help you configure the
printer's paper source.
n
The most convenient way to configure the printer is through its
control panel.
Use the following table to help you configure cassette chaining
through the control panel.
» Note: Make sure that the two paper ca ssette s instal led in your printer use
the same size paper.
Advanced Printing Feature s
3-3
Page 28

Menu Operator Control/Chain Inputbins
Choices On—turns on tray chaining.
Off—turns off tray chaining.
Default On
Notes Use the Operator Control/Inputbin menu to set the
default input bin.
Collating Output
With sufficient memory (12MB minim um ) or a hard disk installed, th e
QMS 1725E Print System can deliver multiple copies of your files in
collated order to the face-down output bin without havin g to send the
file repeatedly. This feature dramatically reduces your data transmis sion and improves performance. The illustration below shows collated
and uncollated stacking for two copies of a three-page file.
2
1
3
2
1
3
2
2
1
1
3
3
Collated Uncollated
The face-down output bin has an offset stacking fea ture that when
enabled, offsets the mult iple copies of a print job. With a hard disk
installed, collation performance is greatly improved because the file is
stored in QMS-compressed format for repeated printing. When disk
space is consumed during a print job, the printer begins chunk collating. Chunk collation breaks a job into sections and perform s collation
on each of those sections. The next diagram shows the printing
QMS 1725E Print Sytem Ope rati o n3-4
Page 29

Working with
Status Pages
order of three copies of a large document when chunk collation is
used. Several factors control the point when chunk collati on occurs.
Copy
1
Pages 101-200 Pages 101-200 Pages 101-200
Copy Copy Copy
Pages 1-100 Pages 1-100 Pages 1-100
The maximum collation sequence is 100 sheets. See the “Collation”
section in chapter 4, “Printer Configu ratio n,” in your
for more informat ion on collat ion .
Copy
2
Copy
3
321
Reference
Working with Status Pages
Printing a status page is a two-step procedure: Identify the type of
status page you want to print, and then print it.
guide
Identifying a S tatus Pag e Type
Two types of status pages are available:
n
Standard— This one-page document provides printer identification information (printer type and nam e, firmware version and
release, and number of sheets printed), printer sett ings (Po stScript level, start-up options, paper handling inf ormatio n, resolution, and gamma correction sett ing ), current memory
configuration, time-outs, communication settings and input buffer
sizes for all standard and optional interfaces, and hard disk status
Advanced Printing Feature s
3-5
Page 30

Cancelling/
Ending Print
Jobs
(address, size, and free space). In addition, an angle bar prints in
the lower-left corner for image alignment.
n
Advanced—This docum ent , which can be five or more pages
long, contains the same informat ion as the stand ard statu s page
as well as configuration menu setting s and a full list of fonts and
downloaded emulations.
Menu Administration/Special Pages/Status Page Type
Choices Standard, Advanced
Default Standard
Printing a Status Page
After you have identified the type of status page to print, send it to the
printer in one of the following ways:
n
Use the PS Executive Series Utilities (see the PS Executive online help for instructions).
n
Use the control panel keys to select “Yes” in the Print Status
menu option.
Menu Administration/Special Pages/Print Status
Choices Yes, No
Default Yes
» Note: Only standard status pages can be printed from PS Executive.
Advanced status pages are not available.
Cancelling/Ending Print Jobs
The Cancel key has two functions:
n
It cancels all print jobs that are currently printing, interpreting, or
spooling.
n
It allows you to send an end-of-job indicator to a currently compiling print job that is waiting for incoming dat a.
QMS 1725E Print Sytem Ope rati o n3-6
Page 31

Cancelling/
Ending Print
Jobs
Once the print jobs are canceled or ended, the printer resumes printing other jobs in the queue.
You don’t have to press the Online/Offline key to take th e printer off
line before using the Cancel key. There are no equivalent functions in
the configuration menu.
» Note: If you nee d to cancel the cancel job or end job procedure, press the
Menu key.
Cancelling a Print Job
Press the control panel keys in the order shown in the followi ng
instructions to cancel a print job.
Press
this key
Cancel Access the Cancelling Job menu. You
Cancel
or Select
to... The message window
are prompted for confirmation that you
want to cancel the print job.
Select Yes. YES
Cancel all print jobs in the queue that
are currently printing, interpreting, or
terminating. The CANC ELLING JO B
message displays until the print job is
completely removed from the printer.
reads...
CANCELLING JOB?
YES
IS SE LECTED
CANCELLING JOB
Advanced Printing Feature s
3-7
Page 32

Cancelling/
Ending Print
Jobs
Ending a Print Job
If the first print job in the queue is waiting for, but not receiving the
data it needs to finish printing, the message window displa ys
WAITING FOR INPUT
END JOB?
Use the following procedure to end all print jobs in the queue that are
waiting for incoming data.
» Note: T his procedure does not end a print job that is st ill receiving data. Its
only purpose is to provide an e nd-of-job indicator for a print job that does
not have one. You can identify an end-of-job ind icat or in the Administration/
Communications/Parallel and Administration/Communications/ Serial menu.
(See chapter 4, Printer Configuration, in the
information). Also see chapter 5, Additional Technical Information, in the
Reference
guide for a complete d iscussi on of End Job Mode.
Reference
guide for more
Press this
key
Cancel Access the Cancelling Job menu. CANCELLING JO B?
Next Advance to the End Job option. CANCELLING JO B?
Cancel
or Select
to... The message window
reads...
YES
END JO B
Select End Job. END JO B
IS SE LECTED
v
QMS 1725E Print Sytem Ope rati o n3-8
Page 33

4
Printer Care
In This Chapter . . .
n
Handling the printer
n
Cleaning the printer
Page 34

Introduction
Introduction
This chapter describes the proper handling and cleanin g procedures
used during routine maintenance. Keeping your printer clean will help
maintain the professional appearance of your documents.
Handling the Printer
Handle the printer with care to preserve its life. Abuse may cause
damage.
n
Do not place anything on the top of the printer.
n
Two or more people are required to move the printer. Never carry
or move the printer by lifting from the paper cassette slot. Lift the
printer from the bottom only.
n
Keep the output bin at minim um level. If paper stacks too high,
you may experience paper jams and excessive paper curl.
n
Do not leave the printer open for any length of time, esp ecially in
well-lit places. Light may damage the toner cartridge.
n
Remove the toner cartridge before moving the printer . Never ship
printer with a toner cartridge installed.
n
If you are not going to use the printer for an extended length of
time
n
Unplug the power cord from the power source outlet
n
Leave the cartridge inside the printer
QMS 1725E Print System Op e rati o n4-2
Page 35

Keeping the
Printer Clean
Keeping the Printer Clean
To maintain sharp print quality, clean the inside of the printer at the
following times:
n
Every time the toner cartridge is changed
n
After printing 8,000 single-sided pages
n
Whenever print quality becomes unsatisfactory
The inside of the printer must be wiped clean of any toner residue and
paper dust. The areas requiring regular cleaning are
n
The anti-static te eth
n
The transfer-guide lock-tray (green with handle)
n
The transfer-guide strip (silver metal)
n
The media-feed-guide area (black steel)
M
WARNING!
Unplug the printers power cord before cleaning the printer.
ACHTUNG!
Drucker reinigen.
Ziehen Sie den Netzs tecker aus der Steckdose bevor Sie den
Cleaning the Anti-Static T eeth
The anti-static teeth decrease the static charge placed on each sheet
of media as it passes through the printer. This allows the media to pull
toner from the toner cartridge drum. If the anti-static teeth are dirty, too
much of the static charge remains on the media and can cause light or
missing print on pages (especially in duplex operation).
Printer Care
4-3
Page 36

Keeping the
Printer Clean
To clean the anti-static teeth
1 Open the printer top cover to the uprigh t posi tio n and
2 Use the cleaning brush to wipe clea n the anti-static teeth.
remove the clea ning brush from its position guides lo cated
directly behin d the con trol panel on the inside of the printe r.
Anti-static
teeth
Transfer
charging
roller
O
Caution:
Be careful not to t ouch the transfer charging roller when cleaning
the anti-static tee th. Finger oil, scratches, or other contaminants on the
roller may reduce print q uality
.
QMS 1725E Print System Op e rati o n4-4
Page 37

Keeping the
Printer Clean
Cleaning the Transfer-Guide Lock-Tray and Strip
The transfer-guide area controls the path of the media as it passes
through the printer. Dust can accumulate over time on these guides
and affect the appearance of your print. T o clean the transfer-guide area
1 Make sure the prin ter’s power cord is unpl ugg ed an d open
the printer top section.
2 With a water-dampened, soft cloth, gen tly wipe off any dust
that may have accumulated on the transfer-gu id e lock-tray
and the transfer-guide strip.
Transfer
charging
roller
O
Caution:
moistened cloth. Finger oil, scratches , and other contaminants may re duce
the print quality
3 Using a dry, soft cloth, wipe the cleane d area to remov e
Be careful not to touch the trans fer charging roller with the water-
.
moisture.
Transfer-
guide lock-
Printer Care
tray
4-5
Page 38

Keeping the
Printer Clean
Cleaning the Media-Feed-Guide Area
The media feed guide area provides the media path bet ween t he
transfer guide area and the fuser assembly.
M
WARNING
: Be careful; the a rea around the fuser ass em bly is h ot.
ACHTUNG!
Fixiereinheit heib.
1 Make sure the prin ter’s power cord is unpl ugg ed an d open
the printer top section.
2 With a water-dampened, soft cloth, wipe off any accumulated
dust from the media feed guide area.
Fuser
assembly
3 Using a dry, soft cloth, wipe the cleane d area to remov e
moisture.
Verletzungsgefahr! Bei B etrieb wird die Umgebung der
Media
feed
guide
v
QMS 1725E Print System Op e rati o n4-6
Page 39

5
Print Quality
In This Chapter . . .
n
About print quality
n
About gamma correction
n
Changing print resolution
Page 40

Introduction
Introduction
Density, gamm a correction, and print resolu tion are some of the factors that affect print quality. High-resolution technol o gy, while more
complex, gives you more flexibility to control the print quality fact ors.
This chapter will aid you in setting your printer up for maximum performance. For a more detailed explanat ion of factors that affect your
printer ’s output, refer to chapte r 5, “Additional Technical Information, ”
in your
Reference
guide.
About Print Density
Changing the print reso lut ion sett ing fro m 300 to 600 dpi de crea ses
the spacing between dots of toner put on the page. Print density is the
amount of toner placed on each dot, making the print appear lighte r
or darker. The higher the density, the darker the print looks and the
higher the contrast is on the page. To adjust the print density
1 Open the printer top cover.
2 Locate the density ad justm ent dial that is insi de the printer
on the left side.
The scale on the density adjustm ent dia l shows the densit y setting; the dark marking identifies increased densit y, and the light
marking identifies reduced density.
QMS 1725E Print System Op e rati o n5-2
Page 41

About Gamma
Correction
3 Adjust the dial to the desired setti ng.
To increase density (darken print on the page), slide the dial
toward the rear of the printer. To decrease density (lighten print
on the page), slide the dial toward the front of the printer. The dial
clicks at the center setting.
» Note: You may want to increase dens ity as the toner cartridge
depletes.
About Gamma Correction
Gamma correction is an adjustm ent of the ranges of shading in a
printed image to provide the best copy of scanned images. Through
manipulation of shading levels, your printer can be se t to improve the
print quality of a scanned image automat ically. For detailed information on the steps taken during the automated process, see chapter 5,
“Additional Technical Informatio n,” in your
The main benefit of gamma correction is that it improves the print
quality of a scanned image by improving contrasts at a given resolution. To get the best gray-scale PostSc ript image at any resolution ,
gamma correction should be turne d on.
Print Quality
Reference
guide.
5-3
Page 42

Changing Print
Resolution
You can se t gamma correction throu gh PS Exec or through the
Administration /Engin e/G am ma Correction me nu.
Menu Administration/Engine/Gamma Correction
Choices On, off
Default Off
Notes When gamma correction is set to “on,” gamma correction is
automatically adjusted when printer resolution is changed.
Gamma correction applies only to PostScript images.
If turning on gamma correction doesn’t yield a suitable gray-
scale image for your needs, set a specific gamma correction
value through your drawing application or through the
PostScript settransfer operator. (See your drawing application
documentation, the
and the
information.)
PostScript Language Reference Manual
QMS Crown Technical Reference Manual
for more
,
Changing Print Resolution
Another way to sharpen the images printed on your pages is through
setting the print resolution. Y our printer is capable of printing at 300 or
600 dpi. For pages requiring the best quality your printer can provide,
set the printer resolution to 600 dpi.
QMS 1725E Print System Op e rati o n5-4
Page 43

Changing Print
Resolution
Setting Default Resolution
This option sets the print engine’s default resoluti on.
Menu Administration/Engine/Def Resolution
Choices 300 dpi—300x300 dpi resolution.
600 dpi—600x600 dpi resolution.
Default 600 dpi
Notes Printing duplex using 600x600 re solution with lega l size media
requires 16 MB of printer memory.
v
Print Quality
5-5
Page 44

Page 45

6
Troubleshooting Printer Problems
In This Chapter . . .
n
Status messages
n
Printer problem checklist
n
Media jams
n
Problem descriptions
n
Print quality problems
n
Image defects
n
Placing a service call
Page 46

Introduction
Introduction
This chapter provides information to aid you in resolving printer problems you may encounter, or at least guide you to the proper sources
of help. Y ou’ll find in this chapter tables of common status messages,
a problem checklist, and actions you should ta ke when a specific
problem occurs. There are step-by-step instruction for rem oving
media jams from the ke y locations alon g the media path, as well as
descriptions of common print quality problems with corresponding
solutions. You’ll also find what informat ion you’l l need to have before
placing a service call if one becomes necessary.
Status Messages
Printer control panel mes sages help you locate many pro blem s.
When the printer needs operator assistance, the message window
displays one of the following messages:
Status message Explanation
x
ACTIVE JOBS The printer is on line. x identifies the
number of jobs in process.
ADJUST
INPU TBIN
CANCELLING JO B The Cancel k ey h as bee n pressed, and
CLOS E ENG IN E DOOR(S ) One or more of the front or side covers
DUPLEXER ABSE NT The optional duplexer unit is not
DUPLEXER JAM Media has jammed while passing
INPUTBIN
BIN JA M Media has jammed while being pulled
BIN The specified input bin (cassette) isn’t
inserted correctly, or the cover is open.
from the specified input bin.
the oldest job in the print queue is
being cancelled.
is open and must be closed.
installed.
through the duplexer.
QMS 1725E Print System Op e rati o n6-2
Page 47

Status
Messages
IDLE The printer is on line, but no jobs are in
process.
ILLE GA L DUP LEX PRIN TING The optional envelope feeder was
selected as the input bin and the
duplexer as the output bin. The printer
does not support duplexing envelopes.
ILLE GA L MAN UAL FEED
PRIN TI NG
INITIALIZING The printer is getting ready to go on
Media has been inserted in the manual
feed slot before the paper tray lifting
mechanism is in the ready position.
line.
INPUT IDLE
PRIN TI NG
OUTPUTBIN
OUTPUTBIN
PRINTING STAT US A status page is printing
SIZE
PUT
BIN
TEST PRINT A test print page is printing.
TONER ABSENT The toner cartridge is not installed.
TONE R OUT The engine’s toner cartridge is empty.
TRANSPORT JAM Media has jammed while passing
WAI TING FOR IDLE A job is in process. Acce ss to the menu
OUTPUTBIN
OUTPUTBIN
PAPER I N
FULL T he specified output bin is full.
JAM Media has jammed between the printer
INPUTBIN
The printer is on line and printing jobs
already in the queue. No new jobs are
arriving at the communication
interfaces.
engine and the specified output bin
(tray).
The selected input b in (cass ette) needs
paper of the specified size.
through the engine.
is not allowed until the job is finished.
Troubleshooting Printer Problem s
6-3
Page 48

Status
Messages
WAITING ON INPUT
END JOB?
WARMING UP The printer is warming up.
The compiler is waiting on incoming
data for the first job in the queue. The
job may not have an end-of-job
indicator and therefore cann ot end. The
message clears if more input arrives
from the port or if you press the Cancel
key. No other jobs can be printed until
this job has ended.
Service Messages
When the printer requires service, operation stops and the message
window displays CALL FOR SERVICE followed by the location of the
problem and error number. Have this inform ation availabl e when yo u
call for service.
» Note: A service me ssage someti mes occurs as a result of an unusual
combination of events, not beca use of an actual problem. When the printer
stops and a service message displays i n the message window, turn the
printer off and back on. This ofte n clears the serv ice mes sage indicator and
printer operation resumes. Al ways try this b efore making a se rvice call .
Service calls should be placed to the vendor from whom you purchased the printer. If you cannot get service from your vendor, see
appendix A, “QMS Customer Support.”
QMS 1725E Print System Op e rati o n6-4
Page 49

PostScript Errors
HP-GL Error Codes and PCL Error Codes
The following tables list error codes that could appear on the printer
message window when running HPG L or PCL emulation s.
HP-
GL
Error
Code
0 Not enough memory for
1 Too many
2 Math error. 2 Math error.
3 Job aborted. 3 Job aborted.
4 Instruction not
5 Wrong number of
6 Out of range parameter,
7 Not used.
8 Unknown character set.
9 Position overflow.
10 Buffer overflow.
Explanation
job.
transformations.
recognized.
parameters.
or illegal character.
PCL
Error
Codes
0 Not enough memory for
1 State lost.
4 Out of memory for
5 Disk full. Cannot store
6 - 13 Internal error 1 - 8.
Explanation
job.
macros.
fonts.
PostScript Errors
If your printer is having trouble printing when using PostS cript emulation, you should turn on the Error Handler in the control panel menu.
Error Handler is a diagnostic tool that identifies PostScrip t errors
encountered during a print job.
Troubleshooting Printer Problem s
6-5
Page 50

Printer Problem
Checklist
Menu Administration/Startup Options/Do Error Handler
Choices Yes—Load the Error Handler.
No—Don’t load the Error Handler.
Default No
Notes Refer to the
Systems Incorporated, Reading, PA: Addison-Wesley, 1990,
ISBN 0-201-18127-4) for information on PostScript errors.
PostScript Language Reference Manual
Printer Problem Checklist
This section contains a list of possible printer problems and solutions.
If you have just installed your printer, be sure you have followed the
steps in chapter 2, “Setting Up Your Printer,” in the
guide.
If there is no display message, use the following steps to identify the
source of your problem and to learn of possible solutions:
(Adobe
Getting Start ed
1 Does the printer power ligh t come on ?
YES - Go to number 2.
NO - Check the following:
n
Is the power cord plugged into both the power outlet and
the printer?
n
Are both printer power switches in the On position (|)?
n
Is the power outlet working?
n
Does the line voltage from the power outlet m atch the
printer's power requirements? See appendi x B, “Technical Specifications,” in your
QMS 1725E Print System Op e rati o n6-6
Reference
guide.
Page 51

Printer Probl e m
Checklist
2 Can you print a status page?
YES - Go to question 3.
NO - Check the following:
n
Is the printer off line before you try to ent er the Ad mi nistration/Special Pages/P rint Sta tus me nu? It should be.
n
Does the cassette have paper? If it is out of paper, the
PAPER OUT message displays and the Error indicator
lights.
n
Is the method of tray delivery configured correctly? See
chapter 4, “Printer Configuration,” in your
guide.
n
Are all the printer covers closed securely?
n
Is there a media jam? If a paper jam message displays
and the Error indicator lights, go to one of the following
sections in this chapter on clearing a media jam.
3 Is the printer receiving data from the compu ter? If the Data
indicator blinks after a file is sent, the printer is receiving the
data. If not, check the foll owi ng :
Reference
n
Is the printer on line? The online/off line in d icato r should
be on and the message window should display IDLE.
n
Has the emulation been chang ed from ESP to an emulation that doesn’t match the file you are sending. S ee
chapter 4, “Printer Configuration,” in the
guide.
n
Print a status page from the control panel. If you are
using the serial interface, is the baud rate (speed of data
transmission) of the printer, the computer, and your software application the same? See chapter 4, “Printer C onfiguration,” in the
n
If you still cannot identify the problem, contact your QMS
vendor.
Troubleshooting Printer Problem s
Reference
guide.
Reference
6-7
Page 52

Media Jams
4 Is the printer printing codes o r not printi ng at all when in
5 If nothing prints at all, do an engine test print.
ESP mode?
n
Reconfigure the port to the specific printer emul ati on of
the file you are trying to print. See chapter 4, “Printer
Configuration,” in the
use the PS Executive Series Utilities to change modes.
n
If a PostScript file prints PostScript emulation statements
while in ESP mode, increase the ESP timeout. See chapter 4, “Printer Confi gurati on, ” in your
change it from the control panel, or use the PS Executive
Series Utilities.
n
If you continue t o have problems with the ESP mode
selecting the appropriate printer emulation, contact you r
QMS vendor.
On the front of the printer below the control panel and above the
power switch is a line indentation with an opening. Insert a pen or
end of a paper clip into the opening until you hear a slight click.
This should produce a page with vertical lines from one end to the
other. If the test print sh ows any patte rn other than this, contact
your QMS vendor.
Reference
guide for instructions, or
Reference
guide to
Media Ja ms
Locations
When a media jam occurs, the media path graphic on the printer's
control panel lights in the area closest to the location of the jam and a
paper jam message displays in the message window. Frequent jams
in any area indicate that area should be checked, repaired, or
QMS 1725E Print System Op e rati o n6-8
Page 53

Media Jams
cleaned. Repeated jams may also happen if you are using the wrong
weight paper. Jams can occur in the following areas:
n
Upper input bin
n
Lower input bin
n
Image transfer area
n
Fuser assembly area
n
Output are a
n
Duplexing unit
After checking for and removing media from the areas indicated,
open and close the printer cover to clear the jam signal. If all the
jammed media has been removed, printing automatically restarts
when the cover is closed. If printing does not restart or if the printer
jams again, make sure that no pieces of media remain in the printer.
Clearing an Input Bin Media Jam
Follow these instructions to clear a media jam from the upper or lower
input bin:
1 Open the printer top cover and locate the transfer-gu id e
lock-tray.
M
WARNING
hot.
ACHTUNG!
Papierführung heiß.
: Be careful; the area around t he trans fer-guide and roller is
Verletzungsgefahr! Bei B etrieb wird die Umbegung der
Troubleshooting Printer Problem s
6-9
Page 54

Media Jams
2 Gently open the tran sfer-guid e lock-tray and remove an y
media.
If necessary, remove the cassettes from the print er first.
Transfer
lock-tray
-guide
3 If you experien ce diffi cul ty in removi ng the me dia, or i f
media isn’t visib le under the transfer-g ui de lock-tray, lift the
green lever on the inner metal plate to check for jammed
media under the metal pla te. Remov e the medi a.
Transfer-
guide lock-tray
Green lever
QMS 1725E Print System Op e rati o n6-10
Page 55

Media Jams
4 Restore the inner metal plate to its or igin al posi tio n and
close the transfer-guide lock -tray.
Both must be properly in place before closi ng the print er or the
printer may be damaged.
5 Close the printer ’s top cover.
Clearing an Imag e-Transfer Area Media Jam
To clear a media jam from the image-t ransfe r area, fol low these
steps:
1 Open the printer top cover and locate the transfer-gu id e
lock-tray.
M
WARNING
hot.
ACHTUNG!
Papierführung heiß
: Be careful; the area around t he trans fer-guide and roller is
Verletzungsgefahr! Bei B etrieb wird die Umbegung der
.
Troubleshooting Printer Problem s
6-11
Page 56

Media Jams
2 Gently open the tran sfer-guid e lock-tray and remove an y
3 After removing the media, close the transfer-gui de lock-tray.
O
media by rolling it toward you.
Avoid touching the transfer roller. Be careful not to get the paper
near any clothing. It may contain som e unfused toner.
Transfer
roller
Caution: Make sure the tra nsfer-gui de lock-tray i s properly in place
before closing the printer or the printer may be d amaged .
Transfer-guide
lock-tray
4 Close the printer top cover.
Clearing a Fuser Assem bly Area Media Jam
Use this procedure to clear a paper jam from the fuser assembly
area:
1 Open the printer top cover and locate the fuser assem bly.
M
WARNING
ACHTUNG!
Fixiereinheit heiß .
: Be careful; the area around the f user as sembl y is hot.
Verletzungsgefahr! Bei B etrieb wird die Umgebung der
QMS 1725E Print System Op e rati o n6-12
Page 57

Media Jams
2 If the jam is at the front of the fuser assembly, remove the
media by using the green plas tic kno b at the left of the fuser
and rolling it away from you.
Be careful not to get the media near any clothing . It may contain
some unfused toner.
Green
knob
Fuser
assembly
3 If the media is stuck in the rear of the fuser assemb ly, open
the green fuser assembly rear do or.
Remove the media by turning the green plastic knob at the left of
the fuser to feed the media through the fuser assembl y.
M
WARNING
ACHTUNG!
Fixiereinheit heiß .
: Be careful; the a rea around the fuser ass em bly is h ot.
Verletzungsgefahr! Bei B etrieb wird die Umgebung der
Fuser
assembly
rear door
Troubleshooting Printer Problem s
6-13
Page 58

Media Jams
4 After removing the media, close the fuser assem b ly rear
door and make sure it is properly in place before closing the
printer or the printer may be damaged .
5 Close the printer top cover.
Clearing an O utp ut Bin Media Jam
Follow these steps to clear a jam from the output are a:
1 Open the printer top cover and locate the fuser assem bly.
M
WARNING
: B e ca reful; the area around t he fuser as semb ly is hot.
ACHTUNG!
Fixiereinheit heiß .
2 If the media is jammed inside the fuser assembl y, grasp the
edge of the media and remove it.
3 If the jammed media has pa ssed com pletel y throu gh the
fuser assembly and is partially visib le in the upper ou tpu t
Verletzungsgefahr! Bei B etrieb wird die Umgebung der
QMS 1725E Print System Op e rati o n6-14
Page 59

Media Jams
bin, close the printer top cover, and then lift the media guide
arm and pull out the media slowly.
After removing the media, lower the media guide arm.
Media
guide arm
Clearing a Du plexer Med ia Jam
To clear a jam from the duplexing unit , follow these instructions:
1 Press lightly on the upper edge of the duplex access door on
the lower-left side of the printer.
2 The door clicks and springs open.
1
2
Troubleshooting Printer Problem s
6-15
Page 60

Problem
Descriptions
3 Carefully remove any jammed medi a. Then close the duplex
access door.
Problem Descriptions
Paper Jam Message Stays On
If a PAPER JAM message stays on, open the printer and clear the
jam. If the message is still there, try opening and closing the top of the
printer again. See the prece ding secti on on clearing me dia jam s for
more information.
Data Indicator Stays Lit
If the printer has warmed up and the Data indicator stays on, two
problems may exist. If you are downloading additional typ efaces, too
many can overload the printer’s memo ry, causing the printer to reset
and lose information previously downloaded to RAM. Make sure you
have enough printer memory.
On an LocalTa lk network, Macintosh comput ers sometim es interf ere
with each other. If this happen s often, reinstall th e LaserWriter and
Laser Prep files, which reset the printer. If neither of these is the problem, place a service call to your QMS vendor.
QMS 1725E Print System Op e rati o n6-16
Page 61

Problem
Descriptions
No Advanced Status Page
If your printer prints a standard status page even though you’ve configured the printer in the Adm inist rati on/ Spe cial Pa ges/S t atu s Page
Type menu to print an advanced status page, your printer probably
doesn’t have enough free memory available. To print an advanced
status page you may need to reduce the amount of memory assigned
to one or more of the memory clients or add more memory (see the
“Memory” section in chapter 5,”Additiona l Technical Inform at ion, ” of
Reference
the
guide for information abo ut memo ry clients ).
No Start-up Page
If the Ready indicator is on, but no start-up page prints, check the following:
1 Has the start-up page been disabled?
Use the PS Executive Series Utilities or the control panel to make
sure the start-up page is on.
2 Turn the printer off. From a cold start, the printer takes
approximatel y 1 to 2 minutes to warm up.
Be sure you wait long enough for a start-up page before suspecting a problem.
3 Check to be sure the paper casset tes are loaded with paper,
in place and secure.
4 Open the top cover of the printer and check for a medi a jam.
5 Make sure a toner cartridge is install ed.
If you still have not solved the problem, you need to call your QMS
vendor for help. Go to the last section of this chapter, “Pla cing a Service Call.”
Printer Resets
Occasionally, Macintosh appli cations interf ere with each other. Applications send a printer prep file to the printer at the beginning of each
document. Other prep files cannot be sen t without resetting the
Troubleshooting Printer Problem s
6-17
Page 62

Problem
Descriptions
printer. Monitor your activities to see if there is a correlation between
your use of a certain application and the printer resetting. If so, contact the application developer.
Downloading too many typefaces can ove rload the printer memory
and cause the printer to reset to default. Additional m emo ry (RAM),
which can be used for font storage, is available and easily installed.
Contact your QMS vendor for information on RAM upgrades. See
chapter 6, “Printer Options,” in your
If the printer resets in other circumstances, you should call your QMS
vendor for service.
Blank Pages
If a blank start-up page ejects or blank pages come out during a printing job, try the followin g:
1 Check the to ner cartridge.
2 Be sure you have broken the tab on the side of the toner car-
Reference
The image does not print if the cartridge is empty.
tridge and removed the seal ing tape .
guide.
3 If the toner cartridge is not emp ty, the sealing tape has been
removed, and blank page s are ejec ting , take the cartridge
out, roll it from side to side, and rein stal l the cartridg e in the
printer.
4 If these solutions do not work, contact your QMS vendor to
purchase another toner cartridge.
Not All Pages Print
If the printer stops printing in the middle of your file, try the followi ng:
1 Check your cable.
You could have th e wrong kind of cable, or your printer may not
be configured for the correct cable and port.
2 Make sure no one pressed the Cancel key while your job was
printing.
QMS 1725E Print System Op e rati o n6-18
Page 63

3 Check the message window to see if the cassette you are
using need s mo re m edi a.
Printer Will Not Dup lex
If the error message DUPLEXER ABSENT appears in the message
window, make sure you have the optional duplexing assembly c orrectly installed by referring to chapter 6, “Printer Options,” in your
erence
configured the printer from the front panel to duplex (Operator Control/Def.Duplex), but the printer conti nues print ing simp lex, you may
need additional memory allocat ed to the fra me buffe r. See chapter 3,
“Advanced Printer Feat ures, ” in this guide for additional inf ormatio n
on memory required for duplexing.
guide. If you have correctly installed the duplexing unit and
Print Quality Problems
Print quality problems are those related to the appearance of the
pages you print. Print quality problems include white lines on the
page, uneven blacks, and other print distortions.
Print Quality
Problems
Ref-
First, refer to the appendix B, “Techn ical Specifi ca tions,” in your
erence
mended media and continue to have problems with the quality of your
printed pages, try this quick-check procedure:
1 Check the print density con trol leve r on the inside of the
2 If the TONER OUT message is on, remove the toner cartridge
3 If the message remains on , replac e the toner cartrid ge.
guide for recommended media type s. If you are using recom-
printer.
Change the setting and try printing another page. See chapter 5,
“Print Quality,” for inform ati on on sett ing the prin t density.
and gently rock it from side to side.
The toner can settle, and this procedure redistributes th e toner.
Reinsert the cartridge and try printing again.
Troubleshooting Printer Problem s
Ref-
6-19
Page 64

Image Defects
4 Place a service call to your QM S vendo r.
Printer Will Not Print 60 0 dpi
If you have configured the printer from the front panel to print at 600
dpi resolution but the printer continues printing 300 dpi, you may need
additional memory allocat ed to the fram e buffer. See the “Memory”
section in chapter 5, “Additional Technical Inform ati on, ” in your
guide for additional informati on on memory config urati on.
ence
Image Defects
The following list includes several image defects with possible solutions. Try the solutions in the sequence given. If the solutions listed
don’t solve the problem, place a service call to your QMS vendor. See
the next section in this chapter, “Placing a Service Call.”
Refer-
White or L ight Lines
1 Remove the toner car trid ge and gently rock it from side to
side as you would before instal ling a new cartridg e.
This redistributes toner inside the cartridg e. Reinstall t he cartridge.
2 If step 1 does not solve the probl em, insta ll a new tone r car-
tridge.
Light Image (Entire Page)
1 Make sure you pu lled the tab from the toner cartri dg e.
2 Increase the print density by ad ju sting the print den si ty con-
trol lever inside the printer to the thick end of the wedge shaped scale.
QMS 1725E Print System Op e rati o n6-20
Page 65

Image Defects
3 Remove the toner car trid ge and gently rock it from side to
side as you would when i nstal ling a new cartri dg e.
This redistributes toner inside the cartridg e. Then, reinstall t he
cartridge.
4 If steps 1, 2, and 3 do not solve the problem, install a new
cartridge.
Dark Image (Entire Page)
1 Decrease print density by adjusting the print density control
lever inside the printer to the thi n end of the wedg e-sha ped
scale.
2 Remove the toner car trid ge and gently rock it from side to
side as you would when i nstal ling a new cartri dg e.
This redistributes toner inside the cartridg e. Then, reinstall t he
cartridge.
3 If steps 1 and 2 do not solve the problem, install a new toner
cartridge.
Stain Along the Edge of the Page
Install a new toner cartridge.
Stains on the Back of th e Page
The media path may be dirty. Clean the media path area. See chapter
4, “Printer Care,” for more information.
Image Easily Sm ears when Rub bed
Place a service call.
Troubleshooting Printer Problem s
6-21
Page 66

Placing a
Service Call
Placing a Service C all
If you have a problem you cannot resolve, contact your QMS vendor.
Your QM S vendor is best equipped to immedia tely handle any problem you may e ncounter.
If you have technical questions your vendor is unable to answer, you
can call or fax questions to QMS Customer Technical Assurance (See
Appendix A, “QMS Customer Suppo rt” for informa tio n on contacti ng
QMS Customer Technical Assurance). If you’ve determined your
printer needs to be examined by a QMS service technician, contact
QMS National Service for work inside the US, or one of the QMS
international offices for work outside of the US. (National and int er national contacts are listed in appendix A, “QMS Customer S upport .”)
Before calling, be sure you have the answers to these questions
handy to help our technicians serve you more quickly:
1 What is your printer model an d serial num ber ?
2 What kind of host comp uter do you h ave?
3 What operating system do you have and wh at versio n?
4 What interface are you using? If serial, what protocol?
5 What application are you using?
6 What is the emulation of the file you'r e trying to print? I n
what emulation mode is the port?
7 What is the firmw are revi sio n num ber for your prin ter? (It is
listed on both the status and start-up pages. )
8 If you can print, have a status page available.
Your service representative needs to know these things prior to helping you.
v
QMS 1725E Print System Op e rati o n6-22
Page 67

A
QMS Customer Support
In This Chapter . . .
n
Sources of customer support
n
QMS world-wide offices
Page 68

Sources of Support
Sources of Support
Several sources of help and information are availa ble, dependin g on
the type of help you need:
Your QMS Vendor
Your local vendor (the one from whom you bought the printer) may be
best equipped to help you. Your vendor has specially trained service
technicians available to answer questions, and the equipment to analyze your printer problems.
Your Application Vendor
Often, “printing” problems ha ve more to do with the application being
used than with the printer. In this case, the app lication ma nufa cturer
is the best source of help.
Q-FAX
Q-FAX, a QMS informa tion retrieval service, provides applicati on
notes, technical support notes on comm on print ing proble ms, and
information about printer sp ecifi catio ns, opt ions, accessories, consumables, and prices.
In the United States and Canada, call (800) 633-7213 to reach QFAX. In all other countries, call (205) 633-3850. Have your fax num ber handy when you call (or place the call from your fax machine's
handset).
» Note: The 205 area code will change to 334 on January 15 , 1995.
You can choose to have either a directory (a list of currently available
documents on a particular topic) or a specific docum ent sent to you.
The first time you call, request the directory (press 2 on your phone or
fax keypad when prompted). Then call back to request sp ecific documents. You can order up to three documents per call.
QMS 1725E Print System Op e rati o nA-2
Page 69

Sources of
Support
The QMS Corporate Bulletin Board System
The QMS Corporate Bulletin Board Sy stem (BBS ) contains te chnical
support notes, application not es, drivers, pat ches, and ut ilities. T echnical questions not requiring an immed iate respon se can be left on
electronic mail for the Sysop (System Operato r).
The bulletin board [(205) 633-3632] operates at 1200, 2400, 9600,
and 14400 baud, 8 data bits, no parity, 1 stop bit, with XMODEM,
YMODEM, and ZMODEM capabilities. Contact QMS Customer Technical Assurance for more inform ation about the bulletin board.
» Note: The 205 area code will change to 334 on January 15 , 1995.
CompuServe
Through CompuServe, you can ask general (non-technical) questions, share information with other users, and access printing information and programs. When you use CompuServe, type the following
command:
n
go qmsprint takes you to the forum where QM S is located.
The QMS library section contains appli catio n notes, printer drivers,
utilities, technical information, and announcement files.
Internet
The QMS server provides access to technical reports, new product
announcements, a trade show schedule, and other general information about QMS.
You can access the QMS server via any one of the many web viewers
available to Internet users. If you don’t have access to a web viewer,
we recommend the NC SA Mo sa ic web viewer (Mosaic i s at
ftp.ncsa.uiuc.edu ). The QMS home page is at http://w w w.qms.com/.
The QMS ftp resource is ftp.qms.com.
QMS Customer Support
A-3
Page 70

Sources of
Support
QMS Customer Technical Assurance (CTA)
QMS Customer Technical Assurance is available M-F, 7:00 am-6:00
pm, Central Standard Time, at (205) 633-4500 (US). Y ou can also fax
questions to CTA at (205) 633-3716 (US). Please indicate wheth er
you would like a fax or a phone call.
» Note: The 205 area code will change to 334 on January 15 , 1995.
If you call for assistance, have the following information ready so our
technicians can help you more quickly:
n
Your phone number, fax number, and shipping address
n
A description of the problem
n
The printer model and serial numb er
n
The type of host computer you are using
n
The type and version of operating system you are using
n
The interface you are using, and, if serial, the protocol
n
The application and version you are using
n
The emulation you are using
n
Your print er firm ware ve rsion (listed on t he status and start-up
pages)
QMS 1725E Print System Op e rati o nA-4
Page 71

Sources of
Support
QMS National Service
The following numbers are valid in the US. To contact QMS in other
countries, see the list of world-wide offices inthe following section.
(800) 762-8894 Call for service information and
maintenance pricing for repair of a ll
QMS printers and printers of
various other manufacturers.
(800) 858-1597 On-Site Service and Depot Repair
Information 7:00 am -7:00 pm,
Central Standard Time
(205) 633-4300 Spare Parts Ordering and
Information 8:00 am - 5:00 pm
Central Standard Time
» Note: The 205 area code will change to 334 on January 15 , 1995.
QMS Customer Support
A-5
Page 72

QMS World-
wide Office s
QMS World-wide Offices
United States/
Latin America
QMS, Inc.
One Magnum Pass
Mobile, AL 36618
(205) 633-4300
Product Information: (800) 523-2696
OEM Information: (800) 631-2692
Consumables: (800) 777-7782
Fax: (205) 633-4866
E-mail: info@qms.com
Latin America Fax: (205) 639-3347
» Note: The 205 area code will change to 33 4 on
January 15, 1995.
Asia-Pacific QMS A sia-Pacific
Auckland 64 (9) 630 7912
Melbourne 61 (3) 899 5777
Sydney 61 (2) 901 3235
To k yo (81) (3) 3437 4030
Canada QMS Canada, Inc.
9630 Rte. Trans-Canadienne
Saint-Laurent, Québec H4S 1V9
Telephones: (514) 333-5940, (800) 361-3392
Fax: (514) 333-5949
National Service: (800) 268-4969
National Service Fax: (905) 673-7676
Europe, Middle
East, Africa
v
Offices in Ottawa, Québec City, Toronto, and Vancouver
Düsseldorf (49) 211/596 1333
London (44) 1 784 442255
Maarssen (31) 3465 51 333
Paris (33) (1) 4107 9393
Stockholm (46) (8) 725 5680
QMS 1725E Print System Op e rati o nA-6
Page 73

Index
A
Alignment
Image 3-6
Anti-static teeth 4-3
B
Blank pages 6-18
Buffer sizes 3-6
Bulletin board, QMS A-3
C
Cancel key 3-6
Cancelling a print job 3-6
Cancelling
Print job 3-6, 3-7, 3-8
Status message 6-2
Cassette
Envelope 2-11
Chaining 3-3
Chunk collati o n 3-5
Cleaning
Anti-static teeth 4-3
Paper feed guide 4-6
Printer 4-3
Transfer guide lock tray 4-5
Transfer guide strip 4-5
Collating
Chunk 3-5
Output 3-4
Communication
Settings 3-6
CompuServe A-3
Control panel messages 6-2
Conventions, typographic 1-3
Customer support, QMS A-2
Page 74

D
Dark image 6-21
Data indicator
Stays lit 6-16
Won’t light 6-7
Def Resolution menu 5- 5
Downloading typefaces 6-18
Duplexing
Problems 6-19
Imageable Area 2-4
Indicator lights
Data 6-16
Initializing
Status message 6-3
Input bin, chaining 3-3
See also
Installing
Toner cartridge 2-13
Internet A-3
Cassette
E
Ending a print job 3-6
See also
Envelopes
See
Errors
See
ESP
Not working 6-8
Cancelling
Media
Problems, Printer
or
F
Face-up output 2-6
Feeding media
Cassette 2 -5
Manual feed 2-7
G
Gamma correction 5-3
H
High-resoluti o n printing 3-2
I
Idle
Status message 6-3
Idle input printing
Status message 6-3
Image alignment 3-6
Messages
J
Jams
Clearing 6-9, 6-11, 6-12, 6-14, 6-15
Locations 6-8
Preventing 2-2
Jobs
Incomplete printing 6-18
L
Labels
See
Media
Light image 6-20
M
Manual feed
Guides 2-8
Media
Envelope
Cassette 2-11
Formatting data 2-10
Printing 2-10
Specifications 2-9
Labels
Printing 2-9
Specifications 2-9
I-2 QMS 1725E Print System Op e ra t ion—Index
Page 75

Paper
Cassette selection 3-3
Feeding 2-5
Jams 6-9, 6-11, 6-12, 6-14, 6-15
Label 2-9
Sizes 2-3, 2-4
Storage 2-4
Weight 2-3
Transparencies
Printing 2-9
Specifications 2-9
Media See also
Memory
Configuration 3-6
Spooling 3-6
Messages 6-2
Control panel messages 6-2
Service 6-2
Status message 6-3
Moving printer 4-2
Printing
O
Output
Face-up output bin 2-6
P
Paper
See
Media
Paper Jam
Message stays on 6-16
Paper stacking
Face-up 2-6
Power light
Won’t light 6-6
Preventing paper jams 2-2
Print density 5-2
Print job
Cancelling 3-6, 3-7, 3-8
Print quality
Density adjustment 5-2
Gamma correction 5-3
Print quality problems 6- 19
Printable area
Table 2-4
Printer
Care 4-2
Cleaning 4-3
Moving 4-2
Printing
Envelopes 2-9
Labels 2-9
Transparencies 2-8
Printing status
Status message 6-3
Problems, printer
All pages don’t print 6-18
Blank pages 6-18
Checklist 6-6, 6-22
Dark image 6-21
Data indicator stays lit 6-16
Data indicator won’t light 6-7
ESP not working 6-8
Jams 6-9, 6-11, 6-12, 6-14, 6-15
Light image 6-20
No print 6-8
Paper Jam message stays on 6-16
Power light not on 6-6
Print quality 6-19
Resets 6-17
Smears 6-21
Stains 6-21
Start-u p page w on’t pr int 6-1 7
Stat us Page won’t print 6 -7
White lines 6-20
Q
Q-FAX A-2
Quality proble ms 6-19
I-3QMS 172 5 E Print Syste m O p eration—Index
Page 76

R
Resets
Printer 6-17
Resolution
Changing 3-2
Problems 6-20
Setting 5-5
S
Service
QMS, World-wide A-6
Service call
Placing 6-22
Service messages 6-2
Smears 6-21
Stain 6-21
Start-up page
Won’t print 6-17
Status message
Cancelling job 6-2
Idle 6- 3
Idle input printing 6-3
Initializing 6-3
Printing status 6-3
See also
Test print 6-3
Waiting for idle 6-3
Waiting on input end job 6-4
Warming up 6-4
Messages
T
Test print
Status message 6-3
Timeout settings 3-6
Toner cartridge
Care 2-12
Installati on 2- 1 3
Replacing 2-11
Transparencies
See
Media
Tray chaining 3-3
See also
Typographic conventions 1-3
Cassette
W
Waiting for idle
Status message 6-3
Waiting on input end job
Status message 6-4
Warming up
Status message 6-4
White lines 6-20
v
Status Page
Printing 3-5
Won’t print 6-7
Support
CompuServe A-3
Customer A-2
Internet A-3
QMS bulletin board A-3
QMS, World-wide A-6
Technical A-4
I-4 QMS 1725E Print System Op e ra t ion—Index
 Loading...