

Page 1

QMS® 1660E
Print System
Reference
1800384-001A
Page 2
Trademarks
The following are tradema rks or registered trademarks of their respective ow ners.
Those listed as registered a re register ed in the United S tates Patent and Trademark
Office. Some trademarks are also reg istered in other countries. Other pr oduct nam es
mentioned in this man ual may be tradem arks o r registered tradem arks of the ir
respective owners. QMS, the QMS logo, Crow n, the Crown sea l, CrownNet, PS
Executive Series/QMS , Inc. Adobe is a registered tr ademark of Adob e System s
Incorporated, registered in the United States Pate nt and Trademark Office. PostScript
is a trademark of Adob e Systems Inco rporated for a page descrip tion language an d
may be regis tered in certain juri sdictio ns. Thr ougho ut this m anual , “ PostS cript Leve l 2”
is used to refer to a set of capabili ties defined by A dobe Syste ms for its PostSc ript
Level 2 page d escriptio n language. These cap abilities , amo ng oth er s, are i mplem ented
in this product through a QM S-developed em ulation that is compatible with Ado be's
PostScript Level 2 language . Apple, AppleTalk, ImageWriter, LaserWriter, Macintosh,
EtherTalk, and LocalTalk/Apple Computer, Inc. CompuServe/H & R Block. DEC,
DECnet, VMS, LN03 /Digital E quip ment Corpor ation. Hew lett-P ackar d, HP, PCL HP-GL,
LaserJet/Hewlett-Packar d Co. IBM PC, AT, PC/XT, Token-Ring/International Busines s
Machines Corporation. Intel/Intel Cor poration. Micros oft, MS-DOS/Microsoft
Corporation. ITC Avant Garde Gothic, ITC Zapf C hancery, ITC Bookman, ITC Zapf
Dingbats/International Typeface Corporati on. Helvetica, Palatino, an d Times/LinotypeHell AG and/or its subsidiaries . Novell, NetWare/Novell, Inc. UNIX/UNIX Systems
Laboratories, Inc. Ethernet, Xer ox/Xerox Co rporation. Velcro is a trademark of Velcro
USA, Inc. Samsung/Sams ung Electron ics Company, Ltd. The ENERGY STAR logo is a
trademark of the United States Environmental P rotection Agency. The ENERGY STAR
emblem does not repres ent EPA endorsement of any produc t or servic e.
Proprietary Statement
The digitally encoded software included w ith your QMS 166 0E Print System is
Copyrighted © 1994 by QM S, Inc. All Rights R eserved. This software may not be
reproduced, modified, d isplay ed, tr ans ferred, or cop ied in any form or in any manner or
on any media, in whole or in par t, without the express written permiss ion of QMS, Inc.
Copyright Notice
This manual is Copyrighted © 1994 by QM S, Inc., One Mag num Pass, Mob ile, AL
36618. All Rights Reserve d. This manual m ay not be copie d in whole or in pa rt, nor
transferred to any other me dia or language, w ithout the express written permiss ion of
QMS, Inc.
Page 3
ContentsContents
1 Introduction
Introduction .................................................................................. 1-2
About This Manual .......................................................................1-2
Typographic Conventions 1-4
2 Print Media
Introduction .................................................................................. 2-2
Media Sizes and Imageable Areas ..............................................2-2
Setting Page Margins 2-4
Media Types and Weights ...........................................................2-4
Labels 2-4
Paper 2-5
Postcards 2-5
Page 4
Transparencies 2-5
Media Storage .............................................................................. 2-6
3 Professional Printing
Introduction . . .. ..... .... ... ..... .... ... ...... . ..... .... ... ...... . ..... .... ... ...... . ....... .. 3 -2
About Typefaces and Fon ts ........ ..... ......... .......... ....... ....... ......... 3 -2
Typeface Classificati on .. ....... ........... ........ ....... ......... .......... ....... .. 3-3
Typograph y Term ino l ogy ..... ....... ..... .... ..... ..... ..... ...... ... ..... ....... .. 3 -4
Resident Fonts ............................................................................. 3-7
Resident PostScript Fonts 3-7
Resident HP PCL Fonts 3-8
Resident HP-GL Symbol Sets 3-9
Opti onal Fonts .......... ......................... ................................. ....... 3-10
PostScript Typ eface Sa m pler ...... ..... ....... ....... ..... ....... ....... ...... . 3-1 1
Page Design ................. ..... ....... ..... ....... ..... ....... ..... ....... ....... ....... 3 -13
References ................................................................................. 3-13
4 Printer Configuration
Introduction . . .. ..... .... ... ..... .... ... ...... . ..... .... ... ...... . ..... .... ... ...... . ....... .. 4 -2
Methods of Confi gu ratio n ..... ...... ... ..... ..... ...... ..... ... ..... ....... .... ..... 4-2
Using an Application 4-2
Using PS Executive Series Utilities 4-3
Using Printer Commands 4-3
Using the Control Panel 4-3
Using a Remote Console 4-4
Configuration Menu ..................................................................... 4-4
Accessing the Configuration Menu 4-5
Selecting Configuration Menu Options 4-6
Changing Character Information 4-7
Saving Configuration Changes 4-9
QMS 1660E Print System Referenceii
Page 5

Canceling Configuration Changes 4-10
Restoring the Factory Default Configuration 4-11
Configurati on Menu Opti on s . ..... ....... .... ..... ... ....... ...... ... ..... ..... ..4-1 1
Collation ...................................................................................... 4-12
Copies . ........................ ................ ....... ............ ....... ....... ............ ...4-13
Emulations . ............ ................ ............. ................ ................ ........ 4 -13
Setting ESP Default Parameters 4-13
Setting HP-GL Parameters 4-14
Setting HP PCL5 Parameters 4-17
Setting Lineprinter Parameters 4-24
Setting PostScript Parameters 4-27
Hard Disks ..................................................................................4-28
Formatting a Hard Disk 4-28
Installing an Optional Font 4-28
Removing an Optional Font 4-29
Interfaces ....................................................................................4-29
Setting Ethernet Interface Parameters 4-29
Setting LocalTalk Interface Parameters 4-30
Setting Optional Network Interface Parameters 4-30
Setting Parallel Interface Paramet ers 4-30
Setting Serial Interface Parameters 4-33
Media Input ..................................................... ........................... .4-39
Selecting a Media Input Source 4-40
Chaining Media Input Sources 4-40
Naming Media Input Sources 4-40
Media Orientation .......................................................................4-41
Media Output ..............................................................................4-42
Naming the Media Outputbin 4-42
Media Size ...................................................................................4-42
Identifying the Media Size 4-42
Identifying a Default Media Size 4-43
Memory .......................................................................................4-44
Disk Cache 4-44
Display 4-46
Emulation 4-46
Contents iii
Page 6

Emulation (Temporary) 4-46
Enable Disk Swap 4-47
Frame Buffer 4-48
PostScript Font s 4-49
PostScript He ap 4-50
Printer Memory 4-50
Spooling 4-50
Optional Features ...................................................................... 4-51
Passwords .... ....... ..... ....... .............. ..... ....... ....... ............ ....... ....... 4 -52
Selecting Passwords 4-52
Enabling Passwords 4-53
Using Passwords 4-53
Printer Engine Features ............................................................ 4-54
Adjusting the Image Alignment 4-54
Enabling/Disabling the Warning Buzzer 4-56
Setting Gamma Correction 4-56
Specifying Page Recovery Action 4-56
Setting Default Resolution 4-57
Setting Toner Options 4-57
Setting Energy Conservation 4-58
Printer Start-Up Option s ................... ...... ....... ..... ....... ..... ....... ... 4-5 8
Enabling/Disabling the Start-Up Page 4-59
Enabling/Disabling the SYS\START File 4-59
Loading the PostScript Error Handler 4-59
Special Pages ............................................................................ 4-60
Working with Status Pages 4-60
Working with Calibrati on Pages 4-61
Working with Header Pages 4-61
Working with Trailer Pages 4-62
Tim eou t s .. .. .. ... .. .. ... .. . .... .. . .. .... . .. .. ... .. .. ... .. .. ... .. .. . .... . .. .. ... .. .. .. ... .. .. . 4 -6 3
Setting an Emulation Timeout 4-64
Setting an ESP Timeout 4-64
Setting a Manual Feed Timeout 4-64
Setting a PostScript Emulation Timeout 4-65
Setting a Print Job Timeout 4-66
QMS 1660E Print System Referenceiv
Page 7

5 Additional Technical
Information
Introduction .................................................................................. 5-2
Printer-Host Commu nicati on ................... ............ .............. .........5 -2
Interface 5-2
Simultaneous Interface Operation (SIO) 5-2
ESP Technology 5-2
Communication Modes 5-3
Gamma Correcti on ................. ..... ....... ....... ..... ....... ....... ....... ..... ....5-4
Terms 5-4
Gamma Correction Concept 5-7
Memory .........................................................................................5-8
QMS Memory Management 5-9
Memory Terms 5-9
Evaluation of Your Printing Environment 5-12
Memory Clients 5-14
Hard Disk Management 5-21
Specific Printing Environment Example 5-21
End J ob Mod e . ..... .. ..... ..... ...... ..... ..... ..... ..... .. ..... ..... ...... ..... ..... .....5-22
Common Reasons to Use End Job Mode 5-23
Using the EOD Commands 5-24
Setting the End Job Mode for the Serial and Parallel Protocols 5-25
Setting the End Job Mode via the Control Panel 5-25
Adding an EOD Command to Your File 5-27
Creating a Network Job Separator 5-28
Parallel Interface Modes ............................................................5-29
Byte Mode 5-29
Compatibility Mode 5-29
ECP (Enhanced Compatibility Port) Mode 5-30
EPP (Enhanced Parallel Port) Mode 5-30
Nibble Mode 5-30
PS Protocol Opti on ........ ..... ... ..... ....... .... ..... ... ....... ...... ... ..... ..... ..5-3 0
Options 5-32
Advantages 5-33
Implementation 5-33
Contents v
Page 8
HP-GL Color Encoding ..............................................................5-33
6 Printer Options
Introduction . . .. ..... .... ... ..... .... ... ...... . ..... .... ... ...... . ..... .... ... ...... . ....... .. 6 -2
Media Input Options ....................................................................6-2
Paper Cassettes 6-2
The Paper Feeder 6-3
The Cassette Supporter 6-9
The 500-Sheet Paper Cassette 6-12
Paper Output Ramp ........ ....... ....... ..... ....... ....... ..... ....... ....... ....... 6 -1 5
Font and Security Card s ..................... ........... ...... ....... ........... ... 6-1 6
Using a Font Card 6-17
Removing a Font Card 6-18
Using a Security Card 6-19
Removing the Printer and Controller Boar d Covers .............. 6-22
Procedure 6-23
Replacing the Printer and Controller Board Covers .............. 6-25
Procedure 6-26
Single In-Line Memory Modules ...............................................6-27
Installing a SIMM 6-28
Removing a SIMM 6-30
Intellifont SI MM ........ ...... ..... ... ....... ..... .... ..... ..... ..... ...... ... ..... ....... 6 -3 3
Installing the Intellifont SIMM 6-33
Increasing the Disk Cache Size 6-35
Verifying the Installati on 6 -36
Font List 6-37
Accessing the Fonts 6-38
Optional Interfaces .................................................................... 6-39
CrownNet Network Interface 6-39
LocalTalk Interface 6-40
Optional Interface Assembly Kit 6-40
Installing an Optional Interface 6-41
Using a CrownNet Network Interface 6-44
Using a LocalTalk Interface 6-44
QMS 1660E Print System Referencevi
Page 9
Storage Options .........................................................................6-53
IDE-SCSI Board 6-53
Internal IDE Hard Disk 6-60
External SCSI Hard Disks 6-64
The Disk Operations Menu 6-65
Formatting a Hard Disk 6-66
Using a Hard Disk 6-67
Installing an Optional Font 6-68
Removing an Optional Font 6-69
Downloading an Emulation 6-70
Kanji Option Kit ..........................................................................6-72
Installing the IDE-SCSI Board and the Kanji Internal IDE Hard Disk
6-72
Configuring the Printer 6-73
Accessing the Kanji Fonts 6-73
Updating System Software . ....... ........ ....... ......... .......... ....... .......6 -74
Procedure—Macintosh Users 6-74
Procedure—PC Users 6-77
A QMS Customer Support
Sources of Supp ort ......... ...... ..... ... ..... ....... .... ..... ... ....... ...... ... ..... . A-2
Your QMS Vendor A-2
Your Application Vendor A-2
Q-FAX A-2
The QMS Corporate Bulletin Board System A-3
CompuServe A-3
Internet A-3
QMS Customer Technical Assurance (CTA) A-4
QMS National Service A-4
QMS World-wide Offices ............................................................ A-5
B Technical Specifications
Print Engin e Speci ficati on s ... .... ..... ... ....... ..... .... ..... ..... ...... ..... ... . B-2
Controller Specifications ............................................................ B-3
Contents vii
Page 10
Electrical Requirements . ...... . ....... .. ... ...... . ....... .. ... ...... . ....... .. ..... ..B-4
Environm ental Requirements . .. ... ..... .... ... ...... . ..... .... ... ...... . ....... ..B -4
Physical Characteristics .............................................................B-5
Print Media ...................................................................................B-5
Print Media Sizes B-6
Cable Pinouts . ..... .... ..... ... ....... ...... ... ..... ..... ...... ..... ... ..... ....... .... .....B -7
Centronics/IEEE 1284 Parallel B-7
Serial B-9
LocalTalk (Optional Interface) B-11
Macintosh to Serial B-11
Ethernet B-12
Printer Option s ... .... ..... ... ....... ...... ... ..... ..... ...... ..... ... ..... ....... .... ...B-1 3
Consumable Su pplies ...............................................................B-13
Warranty Considerati on s .................. .............. ............ ..............B-14
Consumables and Your Warranty B-14
Electrostatic Discharge and Your Warranty B-15
C Document Option
Commands
Introduction . . .. ..... .... ... ..... .... ... ...... . ..... .... ... ...... . ..... .... ... ...... . ....... ..C-2
Supported DOC Com man ds ............. ........... ........ ....... ......... .......C-2
Header/Trailer Page Commands C-2
HP-GL Emulation Comma nds C-2
HP PCL 5 Emulation Comma nds C-3
Lineprinter Emulation Commands C-3
PostScript Emulation Commands C-4
Printer Commands C-4
Updated DOC Command s ............ ............ ............ .............. .........C-4
PCL 5 Emulation Terminology C-5
Updated PCL 5 DOC Commands C-8
QMS 1660E Print System Referenceviii
Page 11
D Notices
Manual Notice ............. ....... ..... ....... ..... ....... ..... ....... ....... ....... ..... ... D-2
Laser Safety ................................................................................. D-2
FCC Complian ce .......... ....... ..... ....... ..... ....... ..... ....... ..... ....... ..... ... D-2
Energy Star Com plian ce . ...... ... ..... ..... ...... ..... ... ..... ....... .... ..... ... ... D-4
International Notices ................................................................... D-4
Canadian Users D-4
Vfg 1046/1984 Conformity Statement D-4
Bescheinigung des Herstellers/Importeurs D-4
Declaration of Manufacturer/Importer D-5
Electronics Emissions D-5
Colophon .....................................................................................D-6
Glossary
Index
v
Contents ix
Page 12

Page 13
1
Introduction
In This Chapter...
n
About this manual
n
Typographic conventions
Page 14
Introduction
Introduction
This manual provides information you may need only once in a while.
Use it in conjunction with your other QMS 1660E Print System documentation .
This chapter gives you a brief overview of this manual.
About This Manual
The informati on in thi s manual is divided into the foll owing secti o ns:
n
Chapter 1—Introdu ctio n
Provides an overview of the manual.
n
Chapter 2—Print M edi a
Lists print media size s, margi ns, and im ageab le a reas and provides media storage information.
n
Chapter 3—Pro fessi onal P rintin g
Discusses typographic terms, displays the printer’s typefa ces,
and provides some page design tips.
n
Chapter 4—Printer Confi gu ratio n
Explains the methods of configuring the printe r, demonstrates
how to use printer control panel, and provides a complete discussion of the configuration menu.
n
Chapter 5—Additio nal Technical Information
Discusses printer-host communication, memory terms and configuration, end job mode, IEEE 1284 bidirectional parallel interface modes, PS Protocol, HP-GL color encodi ng, and P CM CIA
card slots.
QMS 1660E Print System Re fer ence1-2
Page 15
About This
Manual
n
Chapter 6—Printer Opti ons
Describes how to install and use additional paper cassettes, a
paper feeder, and a paper cassette supporter; font, emulation,
and security cards; memo ry upgrades (SIMMs); an Intellifont font
SIMM; LocalTalk and network interfaces; an IDE-SCSI hard disk
drive board, an internal IDE hard disk, an internal Kanji font IDE
hard disk, and external SCSI hard disks.
n
Appendix A—QM S Custom er Suppo rt
Provides world-wide product sales and support telephone numbers and describes how to communicate with QMS through the
QMS Bulletin Board, Comp uServe, the Internet, and Q-FAX.
n
Appendix B—Technical Specific atio ns
Provides technical specifications for the printer and lists available
supplies and replacement parts.
n
Appendix C—Docu ment Op tio n Com man ds
Lists printer-supported Document Option Commands (DOCs),
provides updated PCL 5 terminology, and discusses updated
DOCs.
n
Appendix E—N otic es
Lists manual and legal notices.
n
Glossary
Defines commonly used terms .
Introduction
1-3
Page 16
About This
Manual
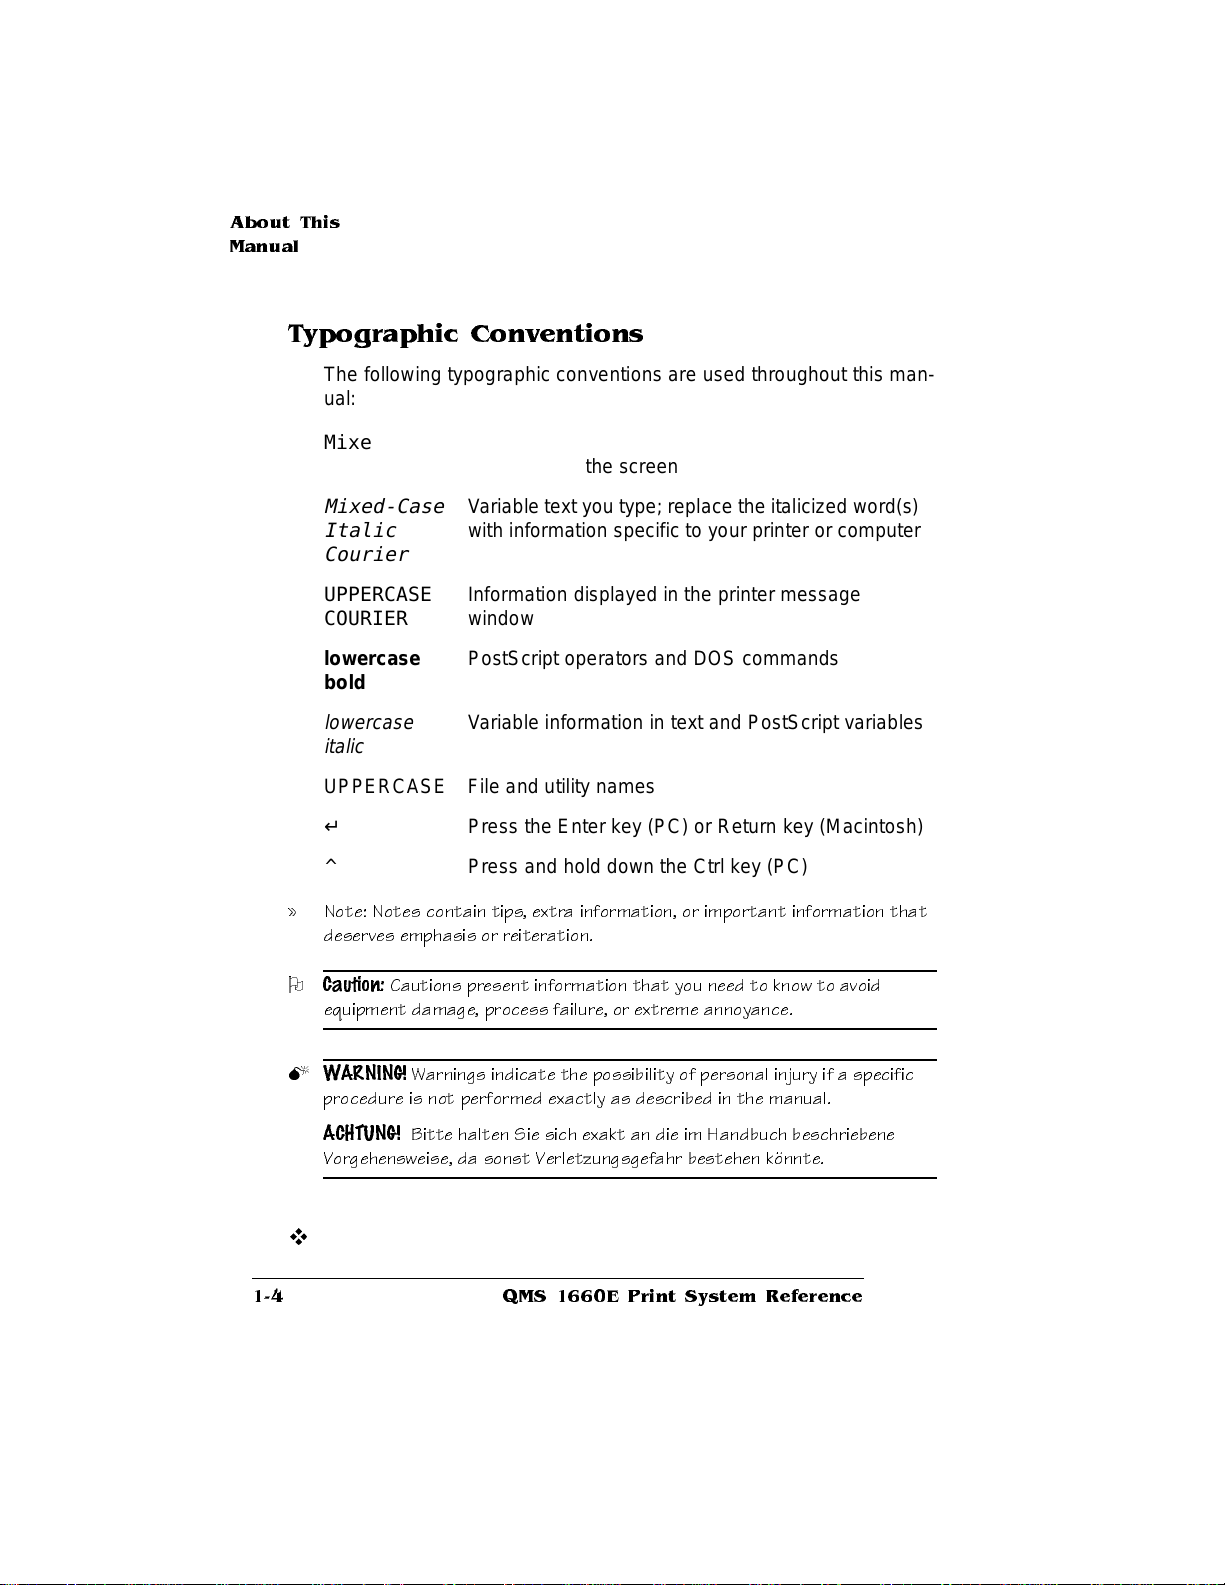
Typographic Conventions
The following typographic conve ntions are used throughout this manual:
Mixed-Case
Courier
Mixed-Case
Italic
Text you type, and messages and information
displayed on the screen
V ariable text you type; replace the italicized word(s)
with information specif ic to your prin ter or comput er
Courier
UPPERCASE
COURIER
lowercase
bold
lowercase
Information displayed in the printer message
window
PostScript operators and DOS comm ands
Variable information in text and P ostS cript variables
italic
UPPERCASE File and utility names
↵ Press the Enter key (PC) or Return key (Macintosh)
^ Press and hold down the Ctrl key (PC)
» Note: Notes contain tips, extra information, or important information that
deserves emphasis or reiteration.
O
Caution:
equipment dam age, proces s f ailure, or extreme annoyance.
Cautions present information tha t you nee d to know to a void
M
WARNING!
procedure is not performed exactly as descri bed in the ma nual.
ACHTUNG!
Vorgehensweise, da sonst Verletzungsge fahr beste hen könnte.
Warnings indi cate the poss ib ili ty of pers onal injury i f a sp ecifi c
Bitte halten Sie sich exakt an die im Handbuch beschrie bene
v
QMS 1660E Print System Re fer ence1-4
Page 17
2
Print Media
In This Chapter . . .
n
Media sizes, margins, and im ageable areas
n
Media storage
Page 18
Introduction
Introduction
This chapter lists the media sizes and imageable areas supported by
the QMS 1660E Print System , and th en provi des info rmat ion on
selecting and storing media.
Media Sizes and Imageable
Areas
Your printer supports media in a number of sizes. Each media size
has a certain imageable area, the maximum area on which the printer
can print. This area is subject to both hardware limits (the physical
media size and the margins required by the print er) and software constraints (the amount of memory availab le for the full-page fram e
buffer).
» Note: The media size must match the cassette size. Since the cassette
sends a size signal to the printer controller, using the wrong size media will
cause your image to be positioned incorrectly on the page or clipped. You
may purchase additional cassettes from your QMS vendor.
QMS 1660E Print System Reference2-2
Page 19
Media Sizes and
Imageable
Areas
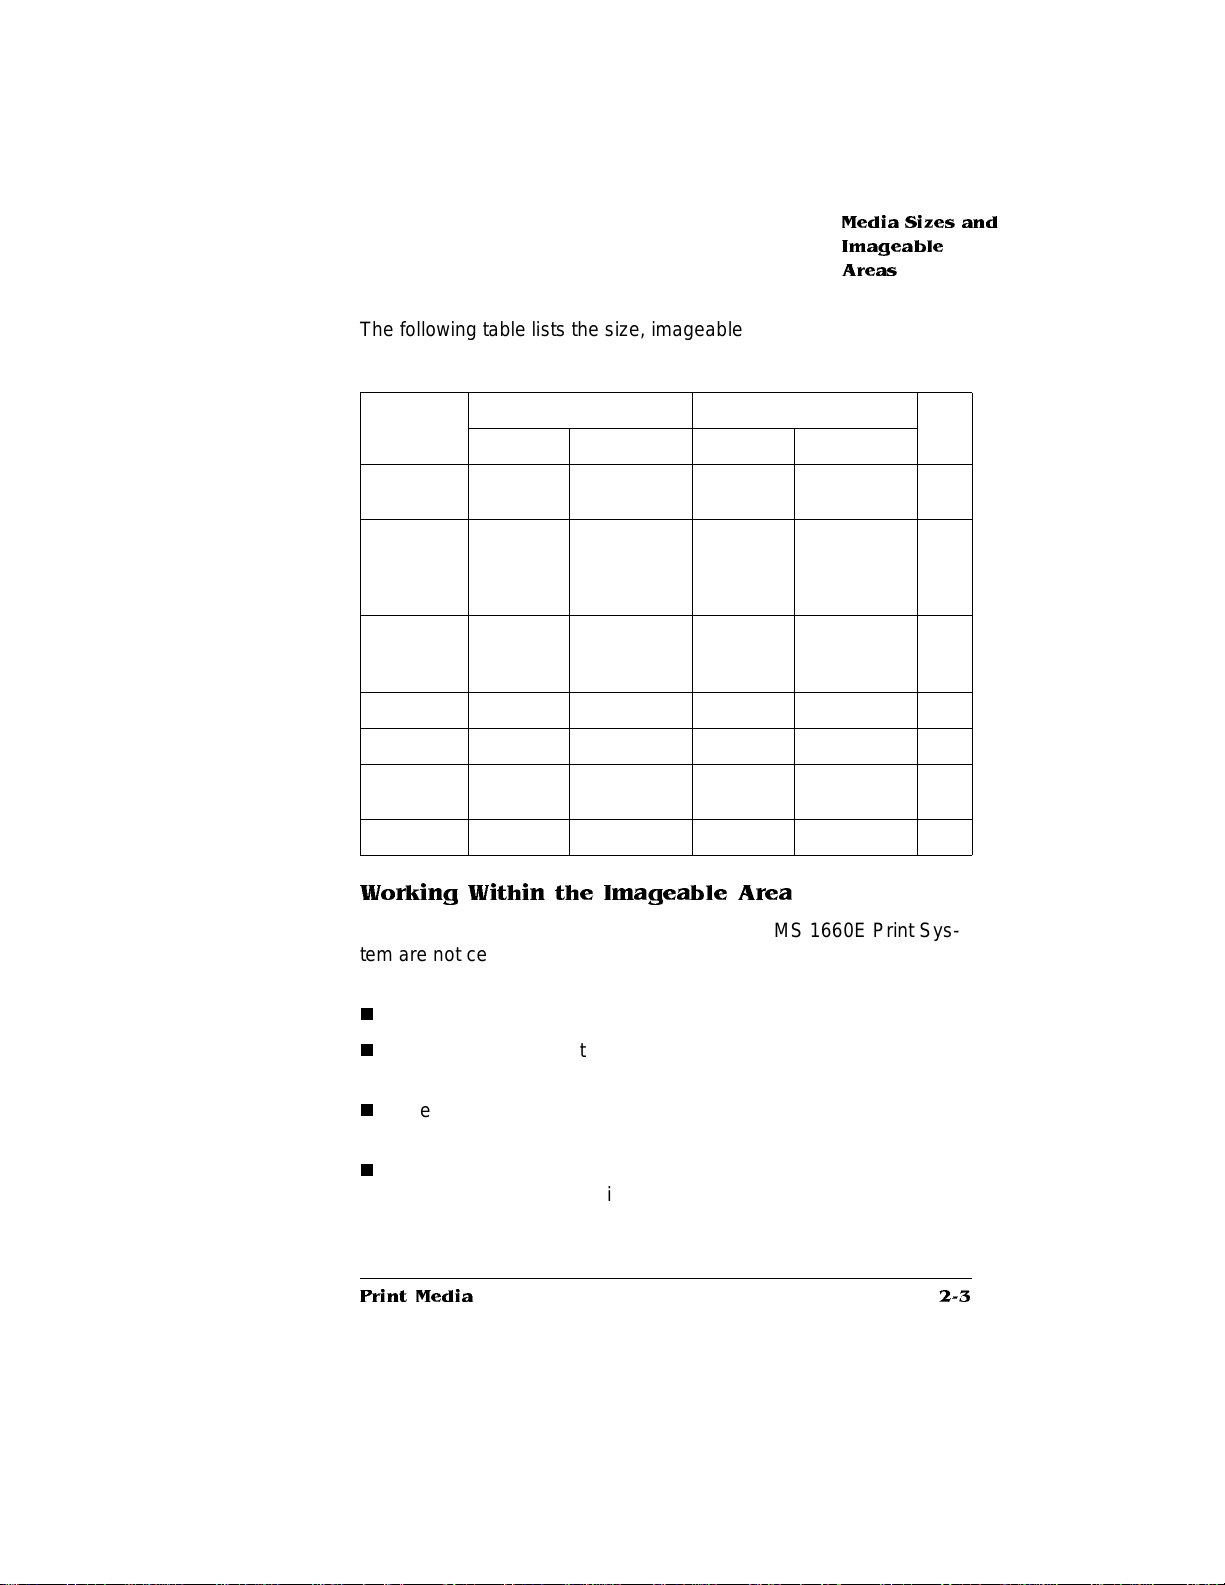
The following table lists the size, imageable area, and feed edge (the
edge of the media drawn into the printer first) of all supported medi a:
Media Media Size Imageable Area Feed
Inches Millimeters Inches Millimeters
11x17
12x19
A3
A4
A5
A6/Postcard
B4
B5
B6
Executive 7.25x1 0. 50 184.15x266.70 6.94x10.16 176.44x258.06 Short
Full Ledger 11.70x17.40 297.18x441.96 11.37x17.16 288.80x435.86 Short
Legal
Letter
Universal 11.70x17.00 297.18x431.80 11.38x16.66 287.02x429.26 Short
11.00x17.00
11.70x19.50
11.69x16.54
8.27x11.69
5.83x8.27
4.13x5.85
10.12x14.32
7.16x10.12
5.06x7.17
8.50x14.00
8.50x11.00
279.40x431.80
297.18x49 5.30
296.93x420.12
210.06x296.93
148.09x210.06
104.90x14 8.59
257.05x363.73
181.86x257.05
128.52x18 2.12
215.90x355.60
215.90x279.40
10.69x16.66
11.37x19.16
11.38x16.20
7.92x11.38
5.48x7.96
3.82x5.50
9.81x13.98
6.82x9.81
4.74x6.82
8.18x13.66
8.16x10.69
271.61x432.17
288.80x486.66
289.22x411.48
201.38x289.22
139.32x202.18
97.19x139.82
249.26x355.09
173.23x249.26
120.56x173.35
207.94x346.96
207.26x271.61
Edge
Short
Short
Short
Long
Long
Short
Short
Long
Short
Short
Long
Working Within the Imageable Area
The imageable areas for print media on your QMS 1660E Print System are not centered vertically on their respective pages and may
1
/16" (1.6 mm). You can align the image in several different ways:
vary
n
Adjust the margins or page size through your applicati on.
n
Use the printer ’s control panel (Admini strat ion/ En gine/ Image
Alignment menu).
n
Use the PS Executive Series Utilities. See the on-line help for
instructions.
n
Use the PostScript translate and scale operators to reduce
image size and change its placement on the page. The
Crown Technical Reference Manual
contains informat ion on
PostScript ope rators.
Print Media
QMS
2-3
Page 20
Media Type s
and Weights
Setting Page Margins
Margins are set through your application. Some applications allow
you to set custom page sizes and margins while others have only
standard page sizes and margins from which to choose. If you
choose a standard format, you may lose part of your image (due to
imageable area constraints). If you can custom-size yo ur page, use
exactly those sizes given for the imageable area.
Media Types and Weights
Your printer supports labels, paper, postcards, and transparencies in
a number of sizes. Although the printer is not specifically designed for
envelope printing, you may want to test print a standard envelope to
see if the print quality is suitable for your needs. See “Envelopes:
Special Considerations ” in chapter 2, “Consumables,” of the
Operation
manual for more informaiton on printing envelopes.
Labels
Type
Use only labels recommended for laser printers, such as Avery 5260.
Adhesive label stock has pressure-sensitive (peel-and-stick)
adhesive backing.
Weight
The printer supports 17-34 lb (64-128 g/m2) labels in the multipurpose
tray .
QMS 1660E Print System Reference2-4
Page 21

Paper
Type
Media Type s
and Weights
Use only paper recommended for laser printers, such as Hammermill
Laser Print. Thicker paper, such as Xerox 4024 (28 lb [105 g/m
also acceptable in the multipurpo se tra y.
» Note: We recommend that you do not print on perforated or 3-hole punched
paper.
2
]), is
Weight
The printer supports the following weig hts of pap er:
n
Multipu rpo se tr ay—17-34 lb (64-128 g/m
n
Paper cassettes—17-24 lb (64-90 g/m
2
)
2
)
Postcards
Weight
The printer supports 1 7-34 lb (64-128 g/m2) postcards in the multipurpose tray.
Transparencies
Type
Use only transparencies recommended for laser printers, such as
Canon brand type D and 3M type PP2500.
Weight
The printer supports 17-34 lb (64-128 g/m2) transparencies in the
multipurpose tray.
Print Media
2-5
Page 22
Media Stora g e
Media Storage
Improperly stored media increases the chance of paper jams during
printing and can drastically affect the print qua lity of the printed page.
Keep media in good condition by storing it
n
In its wrapper
n
On a flat surface
n
In a closed cabinet
n
In a cool, dry area
v
QMS 1660E Print System Reference2-6
Page 23
3
Professional
Printing
In This Chapter . . .
n
Introduction to typefaces and fonts
n
Introduction to page design
n
References
Page 24
Introduction
Introduction
This chapter displays the printer’s resident typefaces, offers suggestions for using them, and includes page design tips. A bibliography for
graphic design and desktop publishing can be found at the end of this
chapter.
About Typefaces and Fonts
Many of the terms and phrases used in desktop publishing are
derived from the language of profession al printers and typesetters.
This section explains common words and phrases used when printing
typefaces.
Typeface
A named design of a set of printed characters, such as Times, that
has a specified obliqueness (degree of slant) and stroke weight
(thickness of stroke). It does not define a particular size.
Typeface Family
A typeface family is a group of similar typefaces. For exampl e, the
Times typeface family consists of four typefaces: Times Roman,
Times Bold,
Times Ital ic
, and
Times Bold Italic
.
Font
A font is a set of characters of the same typeface (such as Times),
italic
style (such as
(such as 10). Although you hear the term “fo nt” used more genera lly,
as if referring to a typeface, it’s really a subset of a typeface.
), stroke weight (such as bold), and point size
Character Set
A character set is a collection of symbols designed for various printing
applications. Many character sets are composed of the letters (uppercase and lowercase A-Z), digits (0-9), and any symbol (such as blank
QMS 1660E Print System Reference3-2
Page 25
space, dollar sign, and ampersand). Other character sets are composed entirely of symbols.
Typeface Classification
One way of classifying the different typefa ces is to group them into
the following categories:
n
Serif
n
Sans serif
n
Script
n
Pi or symbol
Serif
A serif is a decorative line or tail on the ends of the strokes of a letter.
Serifs, usually on the lower half of a letter, have also been referred to
as feet or curlicues. Courier, ITC Bookman, New Century School book, Palatino, and Times are serif typefaces.
Typeface
Classification
In the following example, all th e letters except “e” and “o” have serifs:
Times Roman
Sans Serif
Sans serif (“sans” is French for “without”) indicates a typeface without
any of these small tails. A sans serif typeface is decorative by the
shape and styling of its letters but has less detail th an a serif typeface. Helvetica, Helvetica Conde nsed, Helvetica Narrow, and ITC
Avant Garde Gothic, are all sans serif typefaces.
Professional Printing
3-3
Page 26
Typography
Terminolo gy
In the following example, the slight curving at the bottom of the letters
“t” and “a” is not a serif. It is part of the line forming the letter rather
than a decorative line added on:
Script
Script typefaces simulate handwriting or brush lettering. Each letter is
connected visually, if not physically. ITC Zapf Chancery is a script
typeface.
Pi or Symbol
Pi or symbol typefaces are collections of assorted special-purpose
characters (for example, decorative, graphic, math, or monetary characters). They are especially useful for highlighting items in lists, providing graphics, and displaying symbols that mig ht otherwise have to
be drawn in by hand. Many typefaces today include a complement of
the more commonly used pi characters. Symbol and ITC Zapf Dingbats are pi typefaces.
Helvetica
Typography Terminology
Monospacing
The terms “monospaced” and “fixed-pitch” refer to a typeface whose
characters all have uniform and equal spacing. These typefaces a re
useful for spreadsheets and other documents with colum nar data.
Monospacing is the opposite of proporti onal spacing.
Proportional Spacing
The term “proportionally spaced” refer s to a typeface in which the
width of each character varies. For example, the letter “i” is thinner
than the letter “m” and therefore takes up less space. Proportional
QMS 1660E Print System Reference3-4
Page 27

Typography
Terminology
spacing saves page space and is easier on the eye. This manual
uses Helvetica, a proportionally spaced typefac e.
Because proportionally spaced typef aces place each cha racter
according to its individual size, they increase legibility and readability.
The following example shows the differe nce between a monospaced
font (Courier) and a proportionally spaced typeface (Times):
Alphabet
Alphabet
Bitmapped Font
A bitmapped font is a one in which each character is represented by a
set of dot patterns. Each font size requires a different set of dot patterns.
Scalable Font
A scalable font is one in which each character’s dot pattern (bitmap)
is generated from a mathematical representation (or outl ine) of the
character. Scalable fonts eliminate the need to store many diffe rent
font sizes.
Point Size
Point size refers to the height of a proportionally spaced typeface. A
point is a unit of measure equal to
size, the larger the letter. The following example shows text in 8, 10,
12, 24, and 36 point sizes:
ABCABCABCABCABC
1
/72”. Therefore, the larger the point
Pitch
Pitch refers to the number of characters per horizontal inch (cpi) in a
monospaced typeface. Therefore, the larger the pitch, the smaller the
letter. For example, a ten-pitch typeface prints ten characters per inch
Professional Printing
3-5
Page 28
Typography
Terminolo gy
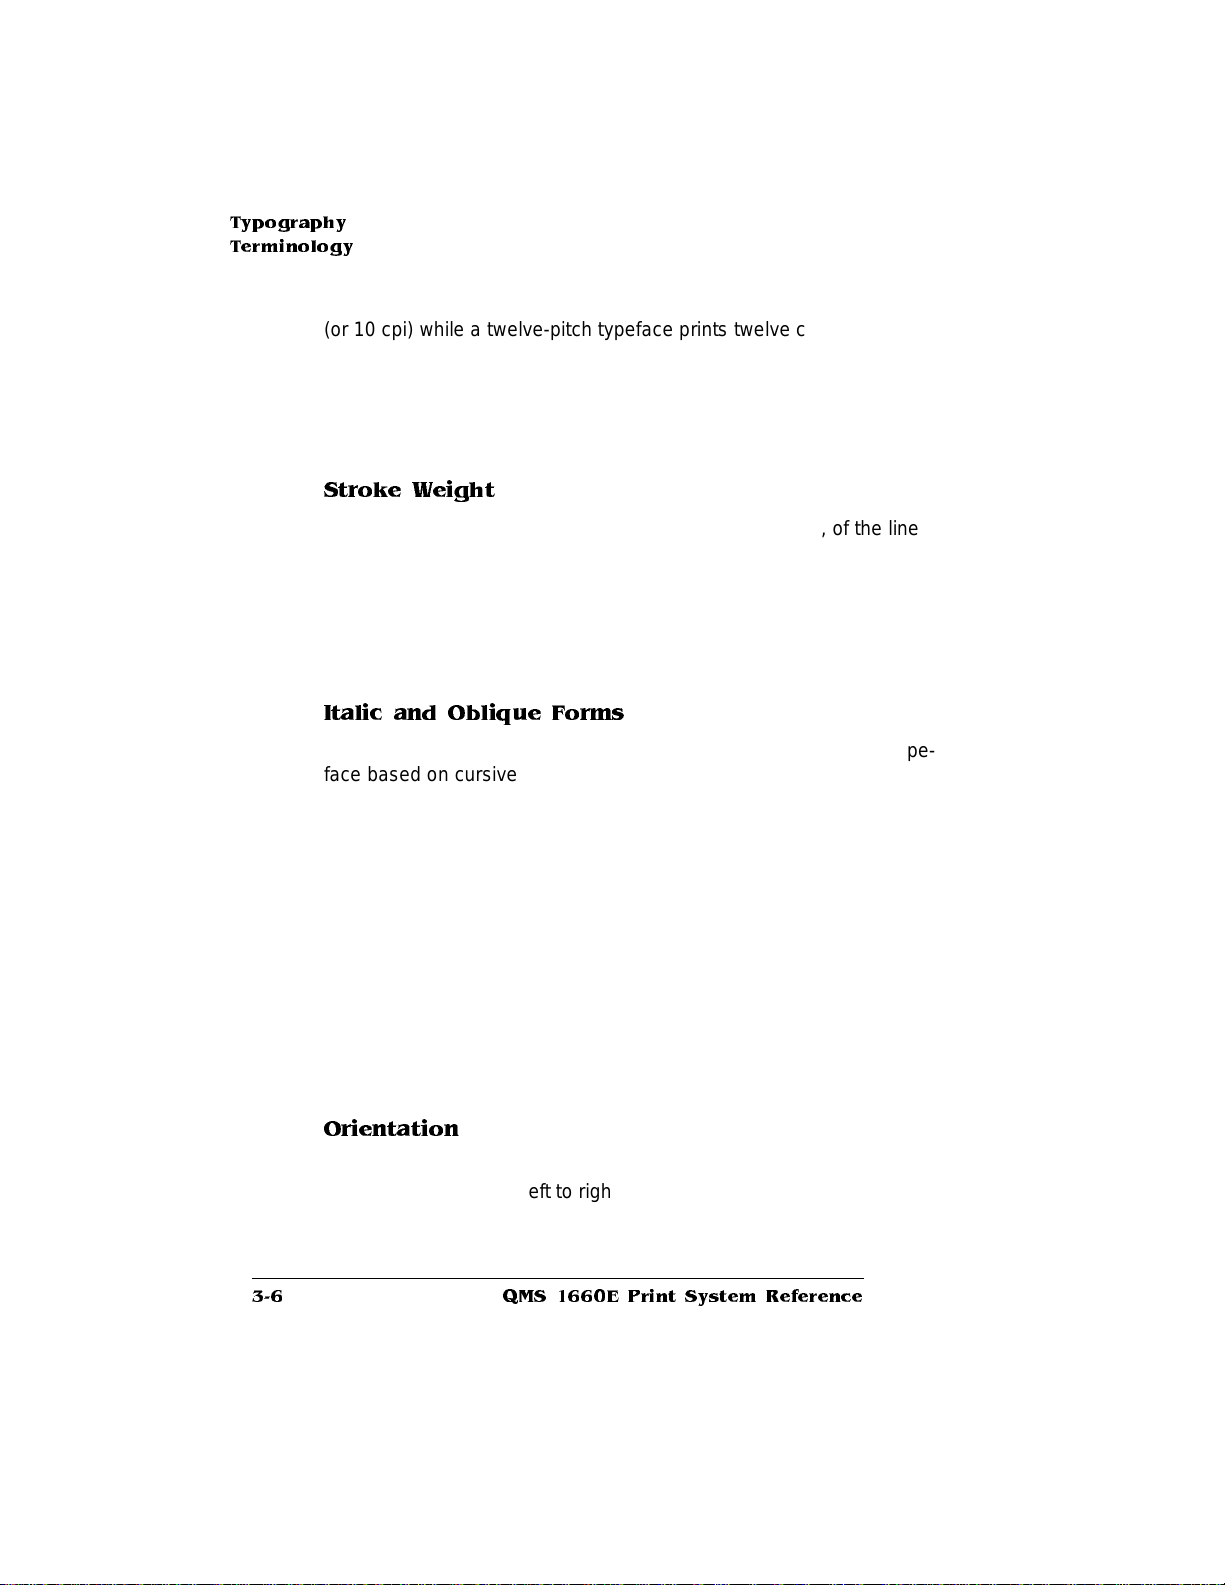
(or 10 cpi) while a twelve-pitch typeface prints twelve characters per
inch (or 12 cpi).The following example shows ten-pit ch and twel vepitch Courier:
Stroke Weight
Stoke weight (light/med ium /bo ld) is the width (thickness), of the lines
(strokes) that make up a character. The following example shows the
medium and bold weights of Palat ino:
Italic and Oblique Forms
Italic was originally developed in the early sixteenth century as a typeface based on cursive handwriting. Today’s italics are still individually
crafted typefaces designed to blend wit h a specific roman (upright)
typeface. Oblique (or slanted) type fo rms, however, are not designed
and crafted individually but are mechanically slanted versions of the
roman form from which they derive. The following example shows the
roman and italic forms of Times and the roman and oblique forms of
ITC Avant Garde:
10-Pitch Courier
12-Pitch Courier
Palatino
Palatino
Times Roman
Times Italic
ITC Avant Gard e
ITC Avant Garde Oblique
Orientation
Orientation is the direction of the print or image on a page. Port rait
orientation reads from left to right, across the narrower dimension of
the page. Landscap e orientatio n also reads from left to right but
places the print across the wider dimension of the page. Spreadsheet
QMS 1660E Print System Reference3-6
Page 29
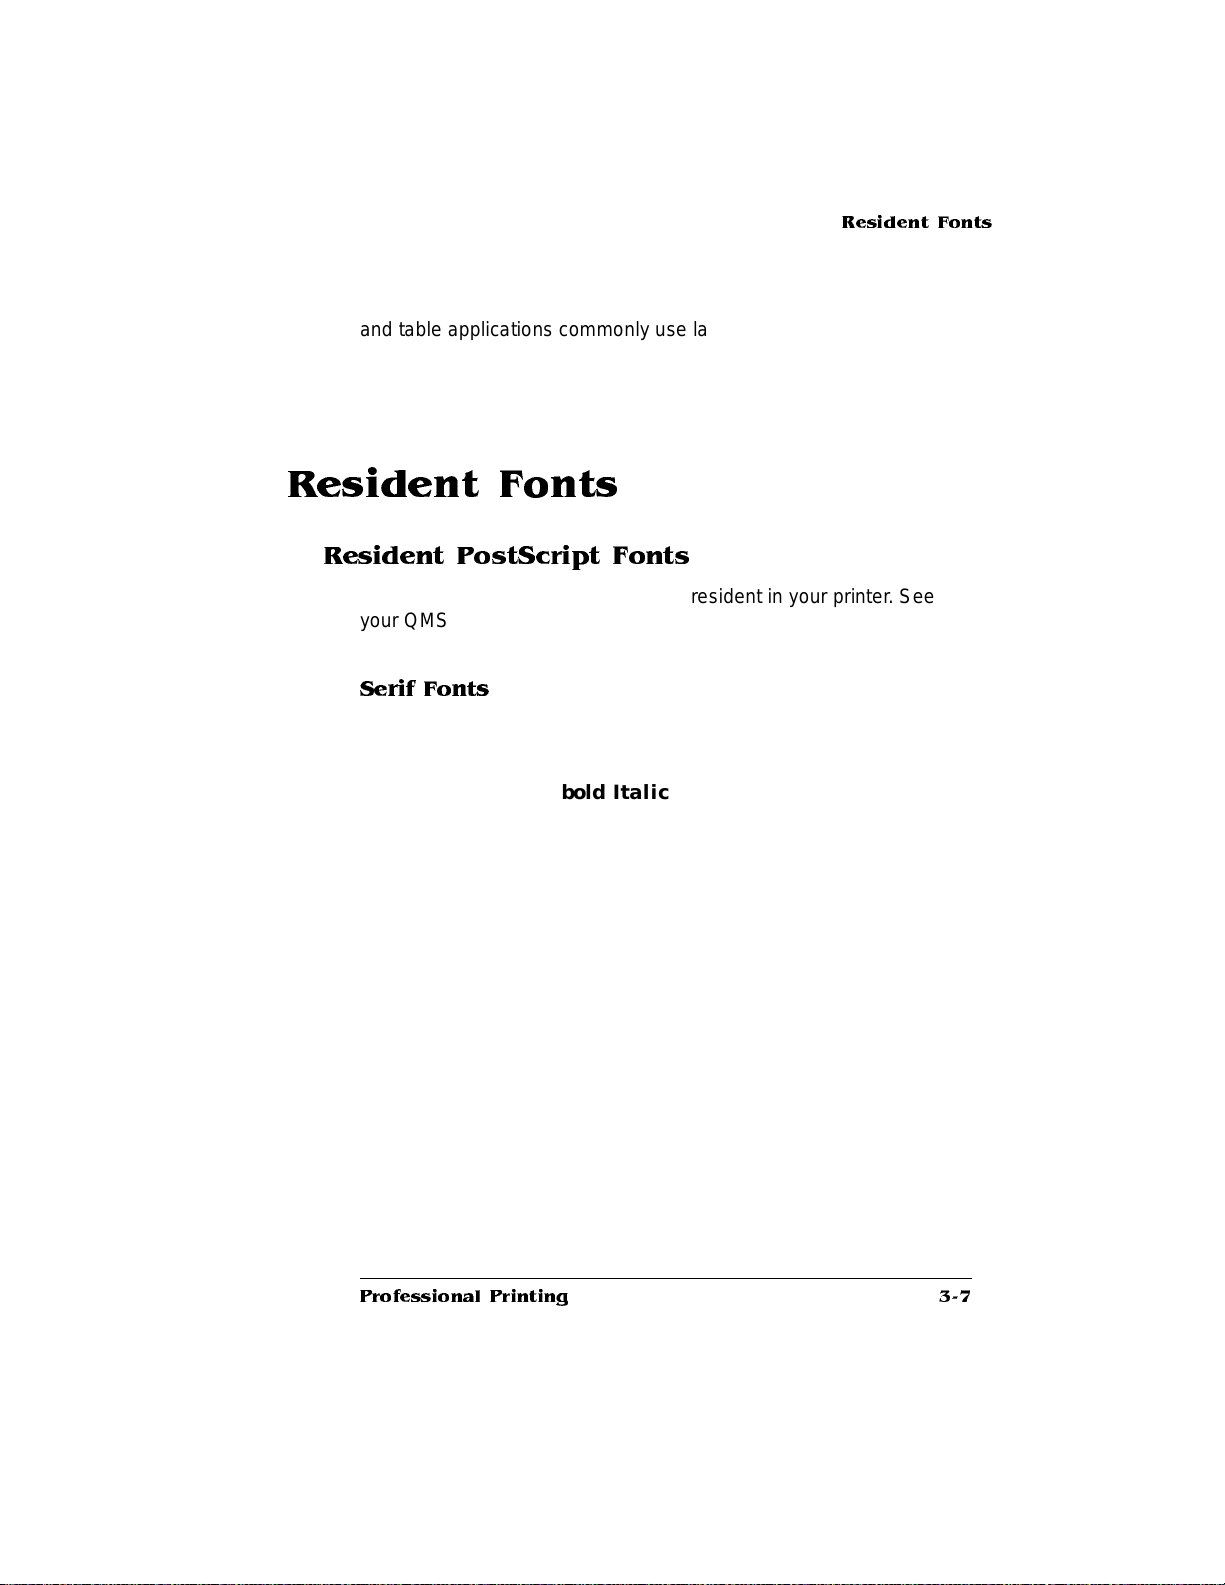
and table applicatio ns commo nly use landscape printing. Both terms
derive from painting; a portrait is usually a vertical view while a landscape is usually a horizontal view.
Resident Fonts
Resident PostScript Fonts
The following 39 PostS cript fonts are re sident in your printe r. See
your QMS vendor if you are interested in expanding your printer's
typeface families.
Serif Fonts
ITC Bookman Light
ITC Bookman Light Italic
ITC Bookman Demibo ld
ITC Bookman Demibold Italic
Resident Fonts
Courier
Courier Oblique
Courier Bold
Courier Bold Oblique
New Century Schoolbook Roman
New Century Schoolbook Italic
New Century Scho ol book Bold
New Century Schoolbook Bold Italic
Palatino Roman
Palatino Italic
Palatino Bold
Palatino Bold Italic
Times Roman
Times Italic
Times Bold
Times Bold Italic
Professional Printing
3-7
Page 30
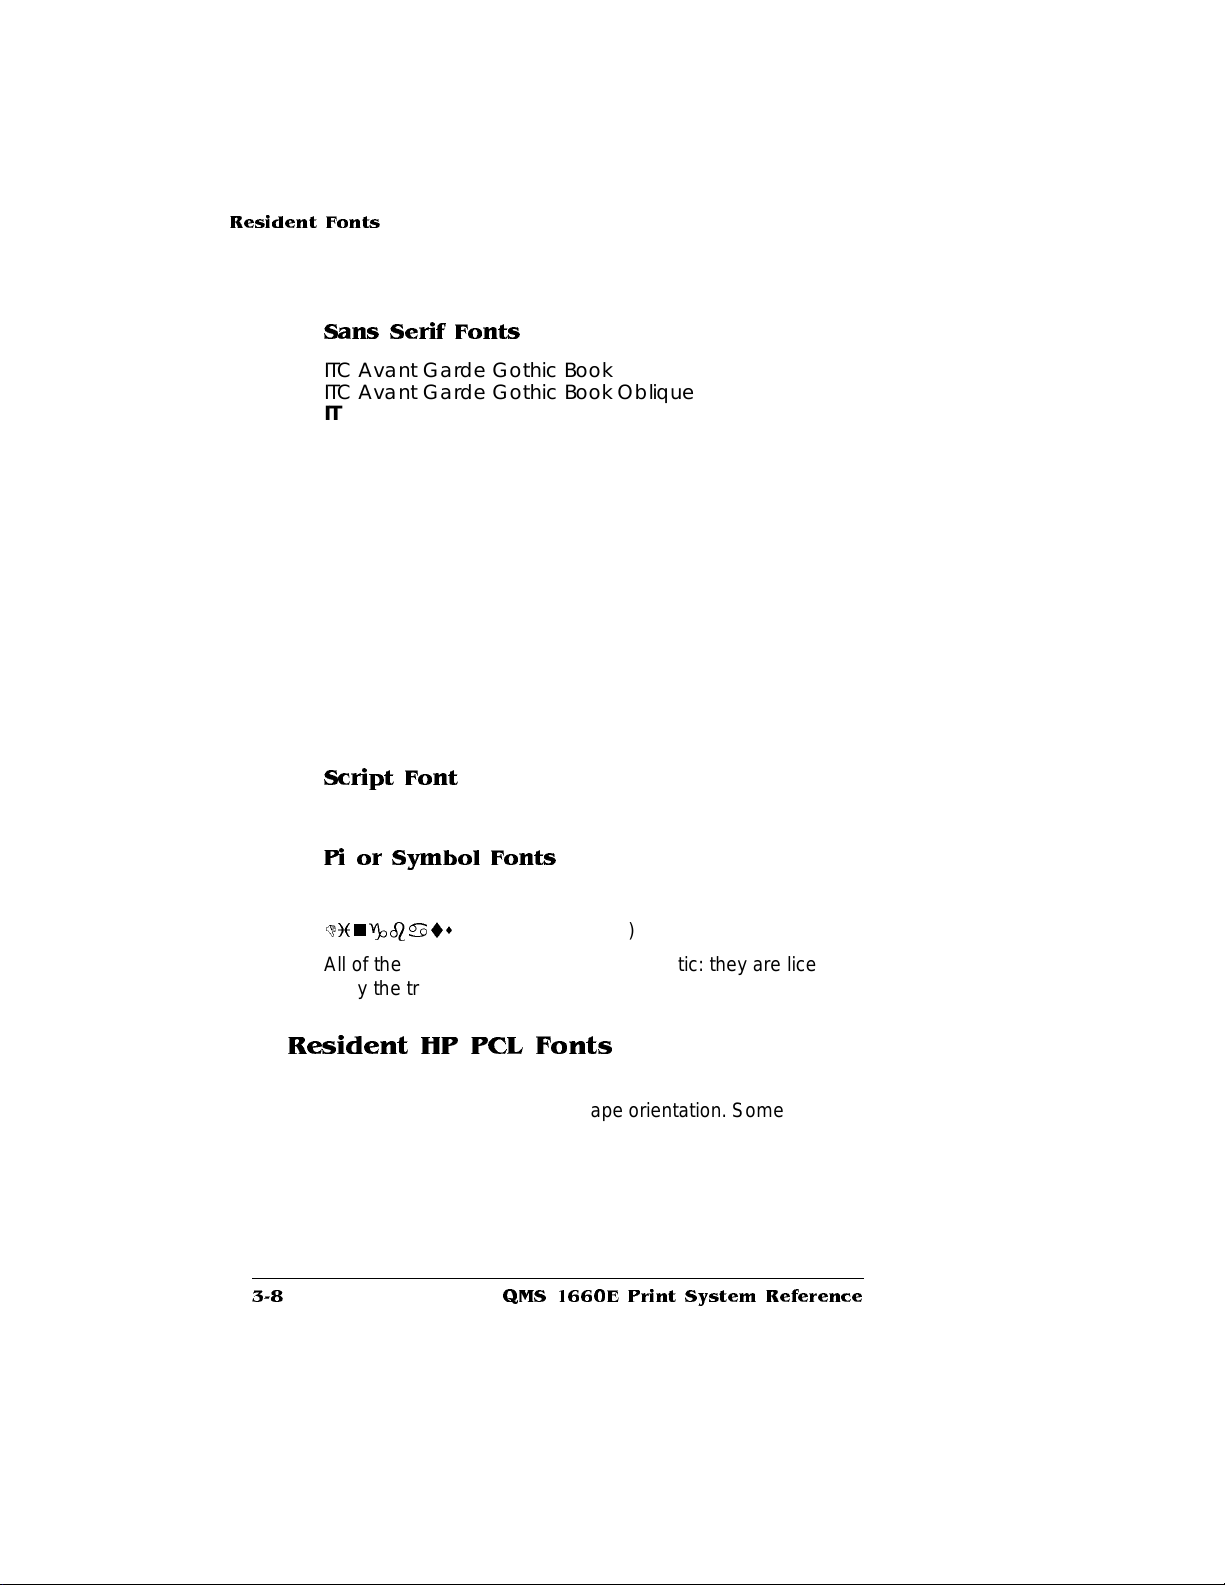
Resident Fonts
Sans Serif Fonts
ITC Avant Garde Gothic Book
ITC Avant Garde Gothi c Book Oblique
ITC Avant Garde Goth ic Demibo ld
ITC Avant Garde Goth ic Demibo ld Ob lique
Helvetica
Helvetica Oblique
Helvetica Bold
Helvetica Bold Oblique
Helvetica Condensed
Helvetica Condensed Oblique
Helvetica Condensed Bold
Helvetica Condensed Bold Oblique
Helvetica Nar row
Helvetica Nar row Obliq ue
Helvetica Narrow Bold
Helvetica Narrow Bold Oblique
Script Font
ITC Zapf Chancery Medium Italic
Pi or Symbol Fonts
Σψµβολ (Symbol)
Dingbats
All of these typeface familie s are authent ic: t hey are licensed, th ey
carry the true name, and they have multilingual character sets.
(ITC Zapf Dingbats)
Resident HP PCL Fonts
Your printer has the following resident HP PCL fonts. All fonts can be
automatically rotated to landscape orientation. Some are fixed in pitch
and point size while others are scalable . Unless otherw ise noted,
samples are show in 10 point size.
QMS 1660E Print System Reference3-8
Page 31

Serif Fonts
Courier 12 pitch 10 point
Courier 12 pitch 10 point Italic
Courier 12 pitch 10 point Bold
Courier 10 pitch 12 point
Courier 10 pitch 12 point Italic
Courier 10 pitch 12 point Bold
Times (scalable)
Times Italic (scal able )
Times Bold (scalable)
Times Italic Bold (scalable)
Sans Serif Fonts
Univers (scalable)
Univers Italic ( scalable)
Univers Bold (scalab le)
Univers Italic Bol d (scal abl e)
Univers Condensed(scalable)
Univers Condensed Italic (scalable)
Univers Condensed Bold (scalable)
Univers Condensed Italic Bold (scalable)
Resident Fonts
Pi or Symbol Font
Dingbats
(ITC Zapf Dingbats)
Resident HP-GL Symbol Sets
Your printer has the following resident HP-GL symbol sets. All come
in both fixed- and variable-spaced version, and all are scalable:
9825 Character Set
ANSI ASCI I
French/German
ISO F rench
ISO G e rman
ISO IRV (International Ref erence Version)
Professional Printing
3-9
Page 32

Optional Fonts
ISO Italian
ISO Norway, Version 1
ISO Norway, Version 2
ISO Portuguese
ISO Spanish
ISO Swedish
ISO Swedish For Names
ISO United Kingdom
JIS ASCII
Katakana
Roman Extensions
Scandinavian
Spanish/Latin American
Special Symbols
Optional Fonts
Your printer supports the following optional fonts:
n
Downloadable Fonts—Include Type 1 and Type 3 host-resident
and printer-card-resident downloadable fo nts and Type 42 (PostScript format) downloadable TrueType fonts. TrueType fonts in
HP PCL format are not supported.
n
Optional Intellifont SIMM—Increases the number of PCL 5 fonts
from 20 to 37. See chapter 6, “Printer Options, ” for more inf orm ation.
n
Optional Kan ji in ternal IDE hard disk—Provides 6 Kanji fonts.
See chapter 6, “Printer Opti ons,” fo r more info rm at ion.
QMS 1660E Print System Reference3-10
Page 33

PostScript
Typeface
Sampler
PostScript Typeface Sampler
Following are some tips on using your printer ’s resident PostSc ript
typefaces appropriately and effectively. All samples are printed 10
points in size.
Helvetica—Hel veti ca is a popular typeface, a modificat ion of a kind
of sans serif typeface called Grotesque. It is used widely in publishing
and is admired for its clean lines, alt hough it can be repetitive to th e
eye, ESPECIA LLY WHEN IN ALL CAPS. Helvetica has a strong
bold and
oblique is the slanted form
Helvetica Condensed—Y ou have a problem! Y our space is limited, your
copy is too long, and you need a typeface that is bold and attention-getting. Try
Helvetica Condensed. This typeface conserves s pace, gets att ention, and is
readable. There is a bold form,
Helvetica Narrow—Y ou have a problem! Your space is limited, your copy is too long,
and you need a typeface that is bold and attention-getting. Try Helvetica Narrow. This
typeface conserves space, gets attention, and is readable. There is a bold form, an
oblique form, and a bold oblique form.
bold oblique
form. There is no italic form.
. This typeface is proportionally spaced.
an oblique form, and a bold oblique form.
Helvetica
ITC Avant Garde Gothic—ITC Avant Garde Gothic is a sans serif
typeface that orig inated in 1970. It has a highl y stylize d look,
particularly in some of the sym b ol chara cters like % and @. The
bold form is called “de mibo ld ”; the obliq ue form simulat es an
italic. In addition, there is a bold, oblique form. ITC Avant Garde
Gothic is useful for headlines and documen ts that need a
strong, contemporary look.
Courier—Courier is a relatively new typeface
designed for electric typewriters by IBM. Courier
has a bold form that is thick and stylish.
oblique form has its merits and uses, too, as does
the bold oblique form.
used for counterpoint with Times and Helvetica.
Courier is a monospaced, serif typeface.
Times—Times is a popular typeface adapted from older forms. Once used
by the London TIMES, it is considered an elegant, b ookish typefac e and has
Professional Printing
The Courier family may be
The
3-11
Page 34

PostScript
Typeface
Sampler
been used in the United States for decades. This typeface is excellent for a
wide variety of applications except for small, condensed formats, where Helvetica proves superior. Times italic is particularly graceful while the bold
italic form is thicker. Times is a proportionally spaced typeface.
Palatino—Palatino is a graceful typeface designed by Hermann Zapf.
It is highly legible and often used for headlines. It has a bold form
and a true, crafted italic form. The bold italic form is also elegant.
Palatino is a popular and useful typeface, always in good taste.
New Century Schoolbook—Like Palatino, New Century Schoolbook is a highly legible typeface that is popular for many genera l
purposes. It was designed in this cen tury, based on scientific
research into typographic legibility. New Century Schoolbook has
a bold, an italic, and a bold italic form. It is a practical, sturdy
typeface.
ITC Bookman—ITC Bookman is a strongly styled, updated
typeface. Although modified to improve legibility, it dates back
to the hand-set prin t era. IT C Book ma n is used for he ad line s
and displays since they need a strong style. ITC Bookman has
a bold form that is somewhat playful while the l ight italic
and bold italic forms are more elegant.
ITC Zapf Chancery Medium Italic—Dating from 1979, ITC Zapf Chancery Medium
Italic is a graceful typeface that has the look of calligraphy. Designed by Hermann
Zapf, it is useful for invitations, announcements, and text that needs elaborate flourishes. This typeface has only one form, the medium italic used here.
Symbol—The Symbol typeface is used for technical and mathem atical notation. It also contains Greek letters.
1 2 3 4 5 6 7 8 9 0 − = ∴ ∼ ! ≅ # ∃ % ⊥ & ∗ ( ) _ + | { } [ ] : ∀ ; ∋ ? , . / Θ Ω
Ε Ρ Τ Ψ Υ Ι Ο Π Α Σ ∆ Φ Γ Η ϑ Κ Λ Ζ Ξ Χ ς Β Ν Μ θ ω ε ρ τ ψ υ ι ο π α
σ δ φ γ η ϕ κ λ ζ ξ χ ϖ β ν µ
ITC Zapf Dingbats—ITC Zapf Dingbat s, also designed by Hermann
Zapf, is a typeface of whimsical character s with a wide variety of
uses.
❀ ✑ ✒ ✓ ✔ ✕ ✖ ✗ ✘ ✙ ✐ ✍ ✝ ✼ ❞ ✁ ✠ ✃ ✄ ☎ ✾ ✆ ☛ ✈ ✉ ✿ ☞ ❜ ❛ ❝
✻ ✽ ✚ ✂ ✛ ✇ ✟ ✌ ✎ ✏ ✱ ✷ ✥ ✲ ✴ ✹ ✵ ✩ ✯ ✰ ✡ ✳ ✤ ✦ ✧ ★ ✪ ✫ ✬
✺ ✸ ✣ ✶ ✢ ✮ ✭ ❑ ◗ ❅ ❒ ▼ ❙ ◆ ❉ ❏ ❐ ❁ ▲ ❄ ❆ ❇ ❈ ❊ ❋ ● ❚ ❘ ❃ ❖ ❂
■ ❍
QMS 1660E Print System Reference3-12
Page 35

Page Design
One rule to remember when designing docum ents is to keep it simple. Avoid cluttering your documents with unnecessary font changes,
which can detract from the document.
Consider your reader first. Select the typeface that is best for your
particular document, and co nsider the meanin g of your words. What
are you trying to communicate? A strong, no-nonsense typeface, like
Helvetica, proclaims its message loud and clear. For this reason,
sans serif type is often used for signs, as in NO PARKING. However,
Helvetica can be overwhelming, so a font like Times or New Century
Schoolbook may suit yo ur words bet ter.
The skillful use of typeface in page design can also increase readability . Good newspapers are an example of the use of text placement for
maximum readability. The typeface chosen for text and headlines varies in size, and text is contained in col umns two to three inches wide.
Thus, the eye does not have to travel far, and readers do not lose
their place.
Page Design
Other aspects of design such as word spacing (justified or unjustified), line spacing, the spacing of letters within words, and uppercase
and lowercase letters all affect the legibili ty of your page.
While page design has no set rules, there are many books available
on page layout and design as well as on typography to guide you in
making effective choices. Some of these references are listed in the
following section.
References
For more information on Po stS cript printing , graphic design, and
desktop publishing, refer to the following publications:
n
Adobe Systems, Inc.
Reading, MA: Addison-Wesley, 1988. ISBN 0-201-14396-8.
Professional Printing
PostScript Langua ge Program Design
.
3-13
Page 36

References
n
Adobe Systems, Inc.
Reading, MA: Addison-Wesley, 1990. ISBN 0-201-18127-4.
PostScript Langua ge Reference Manual
.
v
n
Adobe Systems, Inc.
. Reading, MA: Addison-Wesley, 1985. ISBN 0-201-10179-3.
book
n
Bonura, Larry S.
Wordware, 1989. ISBN 1-55622-106-1.
n
Campbell, Alastair, ed.
delphia: Running Press, 1983. ISBN 0-89471-226-8.
n
Holzgang, David,
Glenview, IL: Scott, Foresman, 1989. ISBN 0-673-38575-4.
n
Holzgang, David,
Alameda, CA: Sybex, 1988. ISBN 0-89588-566-2.
n
Karsnitz, John R.,
1984. ISBN 0-8273-1828-6.
PostScript Lan guage Journal,
n
West Orange, NJ: Pipeline Associates. ISSN 0891-5873.
n
Smith, Ross.
Peachpit Press, 1990. ISBN 0-938151-12-6.
n
White, Jan V.
Watson-Guptill, 1988. ISBN 0-8230-2122-X.
Learning PostScript : A Visual Approach
Graphic Design for the Electronic Age
PostScript Language Tutorial and Cook-
Desktop Publisher's Dictionary
. Plano, TX:
The Graphic Designer's Handbook
PostScript Programmer's R eference Guide
Understanding P ostScript Programm ing
Graphic Arts Technology
the PostScript industry newslet te r,
. Albany, NY: Delmar,
. Phila-
.
.
. Berkeley:
. New York:
QMS 1660E Print System Reference3-14
Page 37

4
Printer
Configuration
In This Chapter...
n
Methods of printer conf iguration
n
Using the printer control panel
n
Using the printer configuration m e nu
Page 38

Introduction
Introduction
This chapter begins by listing and describing the different ways you
can configure your printer to meet your special printing needs.
The next section describes how to use the printer control panel to
access the configuration menu and how to make configuration
changes.
The rest of the chapter provides basic printer configuration inf ormation about all configuration menu options. The
face System Admini strat or’s Guide
contains complete Administration/Communications/Network2/CrownNet menu configuration inf orm ati on for the Eth ernet int erf ac e.
Menu options discussed in this chapter are grouped according to
task. After each option is introduced, a table lists the option’s location
in the configuration menu, the available choices for th at option, and
the factory default (the value set at the factory).
QMS CrownNet Inter-
(shipped with your printer)
Methods of Configuration
You have four major ways to configure your printer to meet your printing needs. In order of priority, they are
n
Through an application
n
Through PS Executive Series Utilities
n
Through printer commands
n
Through the printer control panel
n
Through a remote console (for network users)
Using an Application
Using your application is the best way to control your printer since
most printing is done on a per-job basis. This helps prevent confusion
in network environments and saves you from making changes at the
QMS 1660E Print System Re fer ence4-2
Page 39

Methods of
Configuration
printer control panel. Your application documentation explains how to
control your printer settings: probably by choosing options from a
printing menu.
Applications use printer drivers to send the appropriate commands
automatically to the printer for the requested tasks. If your application
doesn’t have a QMS 1660 Print System driver, you can select a comparable PostScript driver, such as another QMS driver or a LaserWriter driver. However, comparable drivers may not allow you to
access all of your printer's features, such as 1200x600 dpi printing or
collating.
Using PS Executive Series Utilities
You can also use the PS Executive Series Utilities (shipped with your
printer) to control the printer from your host. See the README file on
the utilities disk for inform ati on on install ing th e util iti es, and see the
utilities on-line documentat ion fo r details on using the soft ware.
Using Printer Commands
Printer commands (such as PostScript operators, QMS Docum ent
Option Commands [DOCs], and HP PCL and HP-GL commands) can
enable job-specific features your application or page description language can’t access. See the
ual (shipped on disk with your printer) as well as the
Document Option Commands
Technical Reference
vendor), for information on these commands. See appendix C, “Document Option Commands and PCL 5 Terminology,” of this manual for a
list of the DOCs this printer supports and updated DOC information.
(both available for purchase from your QMS
QMS Crown Technical Reference
QMS Crown
manual, and the
HP PCL5 Emulation
Using the Control Panel
Your printer is configured at the factory for the most typi ca l printi ng
environments, so most users don't have to use the control panel
often. However, if you do need to change a printer setting for all print
jobs (not just on a per-job basis), you can do so through the control
panel. If you are working in a shared printing environment, your sys-
Printer Configuration
man-
4-3
Page 40

Configuration
Menu
tem administrator should be the only person to make changes
through the printer's control pane l.
The rest of this chapter explains how to use the printer control panel
and configuration men u.
Using a Remote Console
Many of the configuration choices that can be made at the control
panel can also be made through a remote console if you’re connected
to a network via the Ethernet interface or another optional network
interface. To avoid confusion in a shared printing environment, only
the system administrator should make configurati on changes.
» Note: If a remote console has the printer off l ine, pressing the O nline /O ffl ine
key will not take effect until the console puts the printer back on line.
See the
instructions on accessing Remote Console through the Ethernet
interface and the
information on using a remote console.
QMS CrownNet Interf ace Syst em Adm inist rator’s Guide
QMS Remote Console User’s Guide
Configuration Menu
The printer ’s confi gurat ion men u allows you change the def ault
printer configuration settings. I n other words, changes you make
affect all subsequent print job s.
The options in the configuratio n menu are organize d under three
main menu s:
n
Administration Menu
Use this menu to maintain print er-host com mun icati on info rmation, and for selecting and configuring pri nte r emulation s, confi guring special pages, printing engine calibrat ion, and configu ring
hard disks (if installed).
for
for complet e
QMS 1660E Print System Re fer ence4-4
Page 41

Configuration
Menu
>> Note: For information on any of the Administration/Communications/
Network2/CrownNet options (for the Ethernet inter face), see chapter
2, Printer Configuration, in the
Admin istrators G u ide
n
Installation Menu
QMS CrownNet Interface Syst em
.
Use this menu to establish passwords for the Operator Cont rol
and Administration menus. This menu displays only when an
optional security card is installed.
n
Operator Control Menu
Use this menu to maintain document processing options (number
of copies, media type, and paper orientation).These capabil ities
are usually handled most efficiently within specific print jobs since
each job has its own requirements. However, if there is no way of
specifying these options wit hin a job, you may do so from the
control panel.
Accessing the Configuration Menu
To access the configuration menu, make sure the printer is idle (IDLE
displays in the message window), then press the Online/Offline key to
take the printer off line (the Online/Offline indicator is not lighted), and
finally press the Menu key.
Example
The following table sho ws how to use the control panel ke ys to
access the printer configuration menu. Press the control panel keys in
the order shown. The printer responds by displaying a status message or configuration menu in the message window.
» Note: You may need to press the Nex t key more than one tim e to a dvance
through the list of options.
Press this
key...
Online/
Offline
Printer Configuration
to... The message
window reads...
Turn off the Online/Offline indicator and
ready the printer f or configuration.
IDLE
4-5
Page 42

Configuration
Menu
Menu Access the configuration menu. CONFIGURATION
The printer must be off line and idle before you can access the configuration menu.
Selecting Configuration Menu Options
Once you access the configuration menu, you use the control panel
keys to move through the menu. Use the following keys:
OPERATOR CONTROL
Press this key...
Next Advance to the next option or submenu within a menu.
Previous Return to the previous option or submenu within a menu.
Select Select an opti on or enter a submenu.
to...
Example
To change the default printer emulation from ESP to PostScript, press
the control panel keys in the order shown in the following tabl e.
» Note: You may need to press the Next key more than once to advance
through the list of selections or options.
Press this
key...
Online/
Offline
Menu Access the configuration menu. CONFIGURATION
Next Advance to the Operator Control/
Select Access the Administration menu ADMINISTRATION
Select Access the Communications menu. COMMUNICATIONS
Next Advance to the Communications/Parallel
to... The message
window reads...
Turn off the Online/Offline indicator and
ready the printer f or configuration.
Administration menu.
menu.
IDLE
OPERATOR CONTROL
CONFIGURATION
ADMINISTRATION
COMMUNICATIONS
TIMEOUTS
COMMUNICATIONS
PARALLEL
QMS 1660E Print System Re fer ence4-6
Page 43

Configuration
Menu
Select Access the Parallel menu. PARALLEL
MODE
Next Advance to the Parallel/Emulation menu. PARALLEL
EMULATION
Select Access the Emulation menu. EMULATION
ESP
Previous Advance to the Emulation/PostScript
menu.
Select Select PostScript as the default
emulation.
After 3 seconds you are returned to the
Parallel/Emulation menu.
EMULATION
POSTSCRIPT
POSTSCRIPT
IS SELECTE D
PARALLEL
EMULATION
Changing Character Information
Sometimes, rather than select ing an option, yo u need to enter character information. A character is any letter , digit, or symbol. A field is a
group of characters that have meaning. Use the printer co ntrol panel
to enter character information in the message window during print er
configuration. The maxi mum length of the message wind ow is 16
characters.
Entering character informat ion through the control panel is similar to
setting the time and dat e on a digital watch. You enter one character
at a time. The current input character flashes. Use the following keys
to change the current input character:
Press this key...
Next Advance to the next choice for the current input character.
Previous Return to the previous choice for the current input
to...
character.
Once you have changed the current input character, use the following
keys to move the cursor to another input chara cter:
Press this key...
Select Advance the cursor to the next character.
Menu Return the cursor to the previous character.
Printer Configuration
to...
4-7
Page 44

Configuration
Menu
To exit from the character selection process, move the cursor to the
last character of the input field (the character farthest to the right) and
press the Select key, or move to the first character of the input field
(the character farthest to the left) and press the Menu key.
When you exit, the printer verifies the character informati on and confirms it in the message window. If the character information is valid,
you are returned to the previous menu; if it is invalid, you are returned
to the input field. Press the Menu key to cancel any changes to the
character information.
If the current character information is longer than the value that you
need to enter, replace each extra character with a space. The printer
interprets a space at the end of character information as a blank.
Example
To change the HP-GL emulation scaling pe rcen t, press the control
panel keys in the order shown in the following table. The printer
responds by displaying a status message or configuration menu in
the message window. An underline indicates the current input character in the message window.
» Note: You may need to press the Nex t key more than one tim e to a dvance
through the list of selections or options.
Press this
key...
Online/
Offline
Menu Access the configuration menu. CONFIGURATION
Next Advance to the Administration menu. CONFIGURATION
Select Access the Administration menu ADMINISTRATION
Next Advance to the Communications/
Select Access the Emulations menu. EMULATIONS
to... The message
window reads...
Turn off the Online/Offline indicator and
readies the printer f or configuration.
Emulation menu.
IDLE
OPERATOR CONTROL
ADMINISTRATION
COMMUNICATIONS
COMMUNICATIONS
EMULATIONS
ESP DEFAULT EMUL
QMS 1660E Print System Re fer ence4-8
Page 45

Configuration
Menu
Next Advance to the Emulations/HP-GL menu. EMULATIONS
HP-GL
Select Access the HP-GL menu. HP-GL
PLOTTER
Next Advance to the HP-GL/Scaling Percent
menu.
Select Access the Scaling Percent menu. SCALING PERCENT
Previous Lower the current character to 0. SCALING PERCENT
Select Select 0 and move the current character
to the next 0.
Next
(4 times)
Select Select 5 and move the current character
Select Select 50 as the default scaling percent. 50
Advance the current character to 5. SCALIN G PER CE NT
to the last 0.
After 3 seconds you are returned to the
HP-GL/Scaling Percent menu.
HP-GL
SCALING PERCEN T
00
1
00
0
SCALING PERCENT
0
00
0
05
SCALING PERCENT
050
IS SELECTE D
HP-GL
SCALING PERCEN T
Saving Configuration Changes
Before the printer can accept print jobs with configurat ion changes,
the changes must be saved.
Example
To save your configuration changes, press the control panel keys in
the order shown in the following table. The printer responds by displaying a status message in the message window.
Press this
key...
Online/Offline
or Menu
Next Advance to the Save Changes?/Yes
Printer Configuration
to... The message
window reads...
Exit from the menu (Online/Offline) or
return to the previous menu (Menu). You
are prompted to save your change(s).
option.
SAVE CH ANGES?
NO
SAVE CH ANGES?
YES
4-9
Page 46

Configuration
Menu
Select Select Yes. The printer finishes printing
any print jobs in process, saves your
change, and returns to idle.
Online/Offline Turn on the Online/Offline indicator and
ready the printer to accept and print jobs.
IDLE
IDLE
» Note: The printer may need to be restarted before certain changes to the
Administration menu take effe ct. Some change s restart the pri nter auto-
matically while others display the mes sag e
panel message window. If this message appears, select
REBOOT NOW?
YES
in the control
to restart the
printer and have the change(s) take effect immediately, or select NO to wait
until you manually restart the printer for the change(s) to take effect.
Canceling Configuration Changes
If you change a configuration option and then decide to cancel that
change, you can do so when exiting from the configuration menu.
Example
To cancel your configuration changes, press the control panel keys in
the order shown in the following table. The printer responds by displaying a status message in the message window.
Press this
key ...
Online/
Offline or
Menu
Select Select No. The printer finishes printing any
Online/
Offline
to... The message
window reads...
Exit from the menu (Online/Offline) or
return to the previous menu (Menu) and be
prompted to save your change.
print jobs in process, does not save your
changes, and returns to idle.
Turn on the Online/Offline indicator and
ready the printer to accept print jobs.
SAVE CHANGES?
NO
IDLE
IDLE
Setting the Message Window Language
Status messages and configuration me nus can be displayed in the
message window in English, French, German, or Spanish. I f you
QMS 1660E Print System Re fer ence4-10
Page 47

Configuration
Menu Options
need to change the message window language, use the Keypad
Language option in the Adm inist rati on/M iscell aneous menu.
Menu Administration/Miscellaneous/Keypad Language
Choices E nglish, Fre nch, German, Spanish
Default English
Notes The printer must be restarted for changes to the Keypad
Language menu to take effect. You can either let the printer
restart automatically after you save the change and exit from
the configuration menu, or you can wait for the change to take
effect the next time you manually turn on the printer.
Restoring the Factory Default Configuration
If you need to cancel all of the configuration changes you have made,
you can reset all of the configuration settings to their factory default s .
Menu Administration/Miscellaneous/Restore Defaults
Choices Yes, No
Default No
Notes This process takes several minutes to complete.
Configuration Menu Options
The rest of this chapter describes the options in the printer configuration menu. Information is organized in the following order:
n
Collation
n
Copies
n
Emulatio ns
n
Hard disks
n
Interf a ces
n
Media input
n
Media orientat ion
Printer Configuration
4-11
Page 48

Collation
n
Media output
n
Media size
n
Memory
n
Optional features
n
Passwords
n
Printer engine
n
Printer start-up opt ions
n
Special pages
n
Timeouts
Collation
Collation is the printing of multiple copies of a document in numeric
order. The QMS 1660E Print System is collation capable . It can
deliver multiple copie s of your files in col lat ed or uncol lat ed order t o
the output tray.
Menu Operator Control/Collation
Choices On—Enable collation.
Off—Disable collation.
Default On
If not enough memory is available, chunk collation occurs. Chunk collation breaks a print job into several smaller collation sequences,
which must be manually combi ned to create a single, coll ated document.
See chapter 3, “Advanced Printing Features,” in the
ual for more information on colla tion and on improving collati on performance on your printer.
QMS 1660E Print System Re fer ence4-12
Operation
man-
Page 49

Copies
While it is usually preferable to select in your application the num ber
of copies you want to print, you can change the default number of
copies for all print jobs through the printer control pane l.
Menu Operator Control/Copies
Choices 001-999
Default 001
Notes Sets the default number of copies for all subsequent print jobs.
Emulations
Use the Administrat ion/ Emul ati on menu to set the paramete rs for the
available printer emulations. Optional printing emulations appear only
if installed.
Copies
» Note: To choose an emulation or ESP for a particular interface, use the
appropriate interface menu in the Administration/Communicati ons menu.
See Interfaces, later in this chapter, for more information.
Setting ESP Default Parameters
ESP (Emulation Sensing Processor) technology analyzes incoming
file data and selects the appropriate print er em ulat ion from those
installed on the printer. The ESP Default Emul option allows you to
set the emulation used when ESP is unable to identify the language
of a print job. For more information on ESP, see chapter 5, “Additional
Technical Information,” in the
Menu Administration/Emulations/ESP Default Emul
Choices HPGL, Linepr inter, PCL5, PostScript
Default PCL5
Notes You must turn the printer off and back on again for the change
to take effect.
Printer Configuration
Reference
.
4-13
Page 50

Emulations
Setting HP-GL Parameters
Fifteen configuration ch oices are available. The
cal Reference
detailed inform at ion on thi s emulat ion .
(shipped on disk with your printer) contains more
QMS Crown Techni-
Enhanced Mode
Increases the resolution of a downloaded character.
Menu Administration/Emulations/HPGL/Enhanced Mode
Choices On—Uses an increased resolution for the grid
Off—Uses standard resolution for the grid
Default Off
Notes
The HP-GL user-defined character (UC) command
downloads and draws character s with an encoding
scheme that uses pen control movement s and
coordinate sequences. The characters are drawn on a
grid that is superimposed on the character plot cell.
Expand Mode
Defines a larger imageable area for the selected media type. This
increased imageable area affects the default placement of the scaling
points P1 and P2.
Menu Administration/Emulations/HPGL/Expand Mode
Choices O n—Expands the imageable area.
Off—Doesn’t expand the imageable area.
Default Off
QMS 1660E Print System Re fer ence4-14
Page 51

Emulations
Notes Setting this option to On partially determines the range of
plotter units for a selected media type. When the plotter
senses the media type, it automatically sets the hard clip limits
to 0.591"/15 mm on three sides and to 1.537"/39 mm on the
fourth side. However, if Expand Mode is set to On, then the
limits are set to 0.197"/5 mm on three sides and 1.143"/29 mm
on the fourth side.
The HP-GL emulation senses the media size when the Paper
Type is set to Scale to Paper or when it is set to a particular
media size through the control panel or through a QMS
Document Option Command.
Origin
Sets the image offset from the plott er’s origin in 0.01" increments.
Menu Administration/Emulations/HPGL/Origin/X Direction
Choices 0000-8500 (0"-8.5")
Default 0000
Menu Administration/Emulations/HPGL/Origin/Y Direction
Choices 00000-11000 (0"-11.0")
Default 00000
Paper Type
Identifies the o ri ginal image’s paper size.
Menu Administration/Emulations/HPGL/Paper Type
Choices A (letter/8.5”x11.0”), A3 (297x420 mm), A4 (210x297 mm), B
(11.0”x17.0”), Scale to Paper
Default Scale to Paper
Printer Configuration
4-15
Page 52

Emulations
Pen 1 - Pen 8
Sets the width and color for the eight plotter pens. A width and a color
option are available for each pen.
» Note: See chapter 5, Additional Technical Information, for more informa-
tion on the HP-GL emulati on color encoding equation.
Menu Administration/Emulations/HPGL/Pen x/Width
Choices 00-60 (0.1-6.0 mm)–see Notes below
Default Pen 1—7 (0.7 mm)
Pen 2—3 (0.3 mm)
Pen 3—3 (0.3 mm)
Pen 4—3 (0.3 mm)
Pen 5—3 (0.3 mm)
Pen 6—3 (0.3 mm)
Pen 7—3 (0.3 mm)
Pen 8—3 (0.3 mm)
Notes A pen width of 00 defaults to 0.1 mm.
x
Menu Administration/Emulations/HPGL/Pen
Choices Black, Blue, Brown, Cyan, Gray - 25%, Gray - 50%,
Gray - 75%, Green, Magenta, Orange, Red, Violet, Yell ow
Default Pen 1—Black (100% black)
Pen 2—Black (100% black)
Pen 3—Red (70% black)
Pen 4—Green (41% black)
Pen 5—Blue (89% black)
Pen 6—Violet (59% black)
Pen 7—Orange (25.8% black)
Pen 8—Brown (50% black)
Notes Cyan=30% black, magenta=59% black, and yellow=11%
black.
/Color
QMS 1660E Print System Re fer ence4-16
Page 53

Emulations
Plotter
Identifies the HP-G L pl otter type.
Menu Administration/Emulations/HPGL/Plotter
Choices 7 470A, 7475A, 7550A, ColorPro
Default 7550A
Reverse Image
Determines whether an image is printe d in reverse.
Menu Administration/Emulations/HPGL/Reverse Image
Choices On—Print a white image on a black background.
Off—Print a black image on a white background.
Default Off
Scaling Percent
Identifies the percentag e to reduce or enlarge an image.
Menu Administration/Emulations/HPGL/Scaling Percent
Choices 0 01-150 (1-150%)
Default 100 (100%)
» Note: To scale plots, select the paper size originally used for the plot in the
Paper Type menu, and then enter the reduction or enlargement needed to fit
the plot on the new page in the Scaling Percent menu. If necessary, enter new
x,y coordinates in the Origin menu to reposition the plot on the page.
Setting HP PCL5 Parameters
The
QMS Crown Technical Reference
printer) and the
for purchase from your QMS vendor) contain more detailed information on this emulation. The
available free through the QMS Bullet in B oard, Q-FAX, and CompuServe, has informatio n on HP PCL 5C. (S ee appendi x A, “QMS
Customer Support,” to find out how to access the bulletin board, QFAX, and CompuServe.) In addition, appendix C, “Document Option
Printer Configuration
HP PCL5 Emulation Technical Reference
HP PCL5C Technical Support Notes
(shipped on disk with your
(available
,
4-17
Page 54

Emulations
Commands,” of this manual has update d informat ion on the PCL5
DOC commands.
Default Font
Sets the default fon t for this emul ati on.
Menu Administration/Emulations/PCL 5/Default Font
Choices Courier12, Courier12Bold, Courier12Italic, Courier10,
Default Courier12
Notes * represents a scalable font (default point size (12 points) is
Courier10Bold, Courier10Italic, Lineprinter, Select by Index,
Times*, Times*Italic, Times*Bold, Times*BoldItalic, Univ* ,
Univ*Italic, Univ*Bold, Univ*BoldItalic, UnivCond*,
UnivCond*Italic, UnivCond*Bold, UnivCond*BldItlc, Zapf
Dingbats*
used to scale the font and produce the characters in the
selected size).
If you use Select by Index to select a font by its font index, the
printer uses the Administration/Emulations/PCL5/Default Font
Idx value to choose the default font.
Default Font Index
Sets the default font index when Select by Index is chosen in the
Administration /E m ulat ions/ PC L 5/Default Font menu . If a font by the
same index number exists, it is selected as the default font. This font
must be a cartridge or downloaded soft font.
Menu Administration/Emulations/PCL 5/Default Font Idx
Choices 0 0000-32767
Default Depends on cartridge or downloaded font(s)
Download Location
Controls the default storage locat ion of PCL objects (font s, macros,
and patterns) when it is not otherwise specified through DOC c om mands.
Menu Administration/Emulations/PCL 5/Downld Location
QMS 1660E Print System Re fer ence4-18
Page 55

Emulations
Choices Disk—All downloaded PCL objects are stored on the default
disk, if present. These objects remain on the disk even if
the printer power is turned off.
Memory—All downloaded PCL objects are stored in temporary
storage in RAM.
Default Disk
Notes DOC commands specifying resources override this option on a
per-job basis.
If this option is set to Disk and no hard disk is installed, mem-
ory is used as the default storage location.
If the printer has both a hard disk and a large amount of mem-
ory, setting this option to Memory enhances printer performance.
Before you download any objects, ensure that the printer has
enough memory, or they may not be available for use. If it
doesn’t, you can install SIMMs (see chapter 6, “Printer
Options”) to increase printer memory, or you can install a hard
disk (see chapter 6, “Printer Options”) and enable disk
swapping (Administration/Memory/Enable Disk Swap menu–
see the “Memory” section, later in this chapter).
Printer Configuration
4-19
Page 56

Emulations
Line Termination
Adds an indicator which controls the way the printer int erprets CR
(carriage return) and LF (line feed) characters.
Menu Administration/Emulations/PCL 5/Line Termination
Choices CR=CR, LF= LF
Default CR=CR, LF=LF
Lines Per Inch
Sets the number of lines printed per inch in increments of .01".
Menu Administration/Emulations/PCL 5/Lines/Inch x100
Choices 0100-4800
Default 0600
CR=CR+LF, LF=LF
CR=CR, LF=CR+LF
CR or LF=CR+LF
Monochrome HP-GL/2
Allows your printer to emulate a monochrome or color plotter.
Menu Administration/Emulations/PCL 5/Monochrome GL/2
Choices Off—Emulate a color plotter (8 pens). Since a monochrome
print system has only 2 pen colors (black and white),
grayscale patterns are substituted for other colors.
On—Emulate a monochrome plotter (2 pens).
Default On
QMS 1660E Print System Re fer ence4-20
Page 57

Emulations
Notes When set to off, this option maps pen colors as follows:
Pen 0=White, Pen 1=Black, Pen 2=Red, Pen 3=Green,
Pen 4=Yel low, Pen 5=Blue, Pen 6=Magenta, Pen 7=Cyan.
When set to on, this option tells the printer to map each pen to
its assigned color, then convert the color to a grayscale using
the National Television System Committee (NTSC) color
standard for luminosity coeffici ents (Addit i ve System):
Y = 0.30R + 0.59G + 0.11B
Example of how to use the color standard formula:
White Y = [1*0.30) + (1*0.59) + (1*0.11)]—100% gray
Black Y = [0*0.30) + (0*0.59) + (0*0.11)]— 0% gray
Red Y = [1*0.30) + (0*0.59) + (0*0.11)]— 30% gray
Green Y = [0*0.30) + (1*0.59) + (0*0.11) ]—59% gray
Yellow Y = [1*0.30) + (1*0.59) + (0*0.11)]—89% gray
Blue Y = [0*0.30) + (0*0.59) + (1*0.11)]—11% gray
Magenta Y = [1*0.30) + (0*0.59) + (1*0.11)]—41% gray
Cyan Y = [0*0.30) + (1*0.59) + (1*0.11)]—70% gray
Point Size x100
Identifies the point size for scalable fonts in 0.25 poin t increment s.
Menu Administration/Emulations/PCL 5/Point Size x100
Choices 0 0025-99975 (0.25-999.75 points)
Default 01200 (12 points)
Notes If the font is not scalable or if a bitmap font is specified, this
setting is ignored.
Retain Temporary Fonts and Macros
Allows you to choose whether to retain temporary HP PCL5 fonts and
macros at the end of each print job.
Menu Administration/Emulations/HP PCL 5/Retain Temporary
Printer Configuration
4-21
Page 58

Emulations
Choices Off—Reset P CL to its default state at the end of each PCL
print job, execute an implicit <ESC>E at the start and end
of the job, and delete any temporary fonts, macros, and
patterns.
On—Reset PCL to its default state at the end of each PCL
print job. Temporary fonts, macros, and patterns from
previous PCL print jobs are retained in memory after the
print job has completed. You can recall these downloaded
fonts, macros, and patterns from within your PCL file
without having to download them again.
On Compatibility—Retain the entire state of PCL as well as the
temporary macros, fonts, and patterns from previous PCL
jobs unless you do one of the following:
n
Change any PCL front panel option
n
Send any PCL-specific DOC command—exc ept the DOC
emulation command
n
Send any other DOC command, such as number of copies, duplex, orientation, or inputbin
n
Send a PCL job from a different communications port—
for examples, if the PCL print environment is set for PCL
jobs to print from the parallel port, and a PCL job is sent
from the serial port
If any one of these occurs, the PCL state is reset to the
new default, and the previous state is lost.
Default Off
Scalable Fonts
Specifies whether to enable or disable the printi ng of HP PCL5 scalable fonts by an application. This feature may be useful when printing
PCL4 documents which may inadvertent ly select unwa nted scalable
fonts.
Menu Administration/Emulations/HP PCL 5/Scalable Fonts
QMS 1660E Print System Re fer ence4-22
Page 59

Emulations
Choices Enable—Allow selection of scalable fonts. When you print
PCL4 documents, PCL5 may substitute scalable fonts that
could cause your PCL 4 documents to print incorrectly.
Disable—Print using bitmap fonts only.
Default Enable
Symbol Set
Sets the character set used by the HP PCL5 emul ati o n.
Menu Administration/Emulations/HP PCL 5/Symbol Set
Choices Roman-8, PC-850, PC8-US, PC8-DN, ECMA-94, L egal,
HPGerman, HPSpanish, ISO-2, ISO-4, ISO-6, ISO-10, ISO-1 1,
ISO-14, ISO-15, ISO-16, ISO-17, ISO-21, ISO-25, ISO-57,
ISO-60, ISO-61, ISO-69, ISO-84, ISO-85, Desktop, PS Math,
Math 8, Microsoft-Pub, Pi-Font, PS-Text, Ventur a-Intl , VenturaMath, Ventura-US, Windows, PS-Zapf-Dingbats, VenturaDingbats, Zapf-Dingbats100, Zapf-Dingbats200, ZapfDingbats300
Default Roman-8
Notes Not all symbol sets are available with certain resident fonts.
The Desktop, PS Math, Math 8, Microsoft-Pub, Pi-Font, PSText, Ventura-Intl, Ventura-Math, Ventur a-US, and Windows
symbol sets cannot be used with the resident bitmap fonts
Courier 10, Courier 10 Italic, Courier 10 Bold, Courier 12,
Courier 12 Italic, Courier 12 Bold, and LinePrinter.
The five dingbat symbol sets (PS-ZapfDingbats, VenturaDingbats, Zapf-Dingbats100, Zapf-Dingbats200, and ZapfDingbats300) can be used with all fonts.
If a mismatch between a symbol set and font occurs, the
standard PCL font selection mechanism is used to locate a
font that matches the selected symbol set. With the standard
set of fonts distributed for your printer, this matches the Times*
font, but other user-installed fonts could change this result.
See the
on selecting PCL 5 fonts.
HP PCL 5 Technical Reference
Printer Configuration
for more information
4-23
Page 60

Emulations
Setting Lineprinter Parameters
Twelve configuration options are available. The
cal Reference
tion on each of these options.
(shipped on disk with your printer) has more informa-
QMS Crown Techni-
Autowrap
Indicates whether long lines are to be wrapped to the next line
instead of being truncated.
Menu Administration/Emulations/Lineprinter/CRISCRLF
Choices On—Wrap long lines.
Off—Truncate long lines.
Default On
Character Map
Specifies the type of character map to be used.
Menu Administration/Emulations/Lineprinter/Character Map
Choices ASCII, EBCDIC
Default ASCII
Carriage Return is Carriage Return-Line Feed
Stipulates whether each carriage return (CR) in the print job is tra ns lated to a carriage return/line feed (CRLF) combination .
Menu Administration/Emulations/Lineprinter/CR is CRLF
Choices On—Translate all c arriage returns to line feeds.
Off—Use carriage returns only as carriage returns.
Default Off
Font
Sets the printer fonts for the current print job . Any PostS cript fonts
available on the printer can be used. To see a list of available
QMS 1660E Print System Re fer ence4-24
Page 61

Emulations
PostScript fonts, print an advanced status page through the printer
configuration menu or through the PS Executive Seri es Utilitie s.
Menu Administration/Emulations/Lineprinter/Font
Choices All print er -re sid ent PostScript fonts.
Default Courier
Form Feed is Carriage Return-Form Feed
Stipulates whether each form feed (FF) in the print job is translated to
a carriage return/form feed (CRFF) combination.
Menu Administration/Emulations/Lineprinter/FF is CRFF
Choices On—Translate all form feeds to carriage return/form feed
combinations.
Off—Use form feeds only as form feeds.
Default On
Line Feed is Carriage Return-Line Feed
Stipulates whether each line feed (LF) in the print job is translated to
a carriage return/line feed (CRLF) combination.
Menu Administration/Emulations/Lineprinter/LF is CRLF
Choices On—Translate all line feeds to carriage return/line feed
combinations.
Off—Use lines feeds only as line feeds.
Default On
Line Numbering
Specifies that a five-digit num ber is to be prefixed to the beginning of
each line.
Menu Administration/Emulations/Lineprinter/Line Numbering
Choices On—Number all lines.
Off—Don’t number lines.
Default Off
Printer Configuration
4-25
Page 62

Emulations
Lines Per Page
Specifies the number of lines print ed on a page before an automat ic
page eject. Interline spacing is set to the selected point size. Logical
pages consisting of more lines than specified are split into m ult iple
pages.
Menu Administration/Emulations/Lineprinter/Lines per Page
Choices 1-128
Default 87
Margins
Defines the left, right, top, and bottom ma rgins in 1/100 " increment s.
Menu Administration/Emulations/Lineprinter/Margins
Choices Bottom 0-1700 (0"-17.00")
Default Bottom 0
Left 0-1700 (0"-17.00")
Right 0-1700 (0"-17.00")
Top 0-1700 (0"-17.00")
Left 0
Right 0
Top 0
Orientation
Specifies whether text and graphics are placed on the pag e in a portrait or landscape orientation.
Menu Administration/Emulations/Lineprinter/Orientation
Choices L andscape, Portrait
Default Portrait
Point Sz 100ths
Sets point size (in .01 point increments) of the font for the curr ent print
job.
Menu Administration/Emulations/Lineprinter/Point Sz 100ths
Choices 0 0400-25600 (4-256 points)
QMS 1660E Print System Re fer ence4-26
Page 63

Emulations
Default 00880 (8.8 points)
Tab Stops
Specifies the number of spaces between tab stops.
Menu Administration/Emulations/Lineprinter/Tab Stops
Choices 0-256
Default 8
Setting PostScript Parameters
This menu allows you to select a PostScript emul ation level. This is
useful if you have files prepared in an application which is not fully
compatible with Adobe’s PostScript Level 2 page description language.
Menu Administration/Emulations/PostScript/Emulation Level
Choices L evel 2—For PostScript Level 2 files and most Level 1 files.
Level 1 B/W—For files that contain only black-and-white
PostScript Level 1 operators. This mode does not support
the PostScript color operators; the use of color operators
could cause the print job to fail.
Level 1 Color—For files that contain color PostScript Level 1
operators. This mode accepts color PostScript Level 1
operators and translates these commands to the
appropriate grayscale. This is the recommen ded setting for
Level 1 compatibility since it contains all of the commands
in Level 1 B/W and the color commands.
Default Level 2
Printer Configuration
4-27
Page 64

Hard Disks
Hard Disks
Use the Administration /Di sk Operation s menu to perform disk operation processes that appear only when optional hard disks are
installed.
O
Caution
: If you connect to this printer an external hard disk you previously
used with an earlier Q MS Cr own printer (QMS 8 60, QM S 86 0 P lus, QMS-
PS 1700, QMS 1725, QMS 1725 SLS, QMS-PS 2000 , QMS 2025, QMS -PS
3200, or QMS 322 5, QMS 45 25 , QMS ColorScript 210/ 23 0, QMS
ColorScript Laser 1000, or QMS magicolor L a s er Printer), this QM S 1660E
Print System softwa re release will automatically reorganize the files on the
hard disk when the printer is turned back on again. (The printer release
number is listed on both the start-up and the status page.) O nce this
reor ganization is done, the files on the hard disk can no longer be accessed if
the hard disk is reattached to an earlier QMS Crown printer.
This reorganization process takes time. If, when you first turn the printer on
after attaching a previously used hard disk, it does not come on line
immediately, be patient. Interrupting the reorganization process could cause
all files on the hard disk to be lost.
Formatting a Hard Disk
Use the Administration /Di sk Operation s/Fo rmat Dis k menu to format
a hard disk. See chapter 6, “Printer Optio ns,” for inst ru ction s.
» Note: If a
ing the Format Disk operation, the disk cannot be used. Press the Menu key
to remove the message and contact your QMS vendor.
FORMAT FAILED
message displays in the message window dur-
Installing an Optional Font
Use the Administration /Di sk Operation s/I nstal l Option men u to add
optional fonts to the hard disk from a font card. This selection copies
data from the card to the hard disk. See chapter 6, “Printer Options, ”
for instructions.
QMS 1660E Print System Re fer ence4-28
Page 65

Interfaces
» Note: If an error message displays in the me ssage window during this opera-
tion, press the Menu key to remove the message and restart the operation
from the beginning.
O
Caution
: Before you install any optional fonts, ensure that the printer has
enough memory, or they may not all be available for use. If it doesnt, you can
install SIMMs (see chapter 6 , Printer Options) to increase printer
memory, or you can install a hard disk (see chapter 6, Printer Options) and
enable disk swapping ( Ad m inis tration/Memory/Enable D is k Swa p m enuse e
the Memory section, later in this chapter).
Removing an Optional Font
Use the Administration /Di sk Operation s/Rem ove Opt ion m enu to
remove a previously installed optional font. See chapter 6, “Printer
Options,” for instructions.
» Note: If an error message displays in the me ssage window during this opera-
tion, press the Menu key to remove the message and restart the operation
from the beginning.
Interfaces
You can cu stom ize all of the print er ’s interf aces through the Admin is tration/Com municat ions me nu.
Setting Ethernet Interface Parameters
Use the Administration/Communications/Network 2/CrownNet menu
to set the printer-host communicati on values for the Eth ernet int erface. Complete configu ratio n inform ation is include d in the
CrownNet Interface System Administrator’s Guide
Printer Configuration
QMS
.
4-29
Page 66

Interfaces
Setting LocalTalk Interface Parameters
Use the Administration/Communications/Network 1/LocalTalk menu
to set the printer-host communicati on values for the opt iona l LocalTalk interface. Complete configuration information is included in chapter 6, “Printer Opti ons,” of this manual.
Setting Optional Network Interface
Parameters
Use the Administration/Communications/Network 1/
set the printer-host comm unicat ion values for an optional network
interface, such as CrownNet. The documentation that comes with the
interface contains complete configura tion informat ion.
Interface
Setting Parallel Interface Parameters
Use the Administration /Com m unicat ions/ Parallel menu to set the parallel interface values used for printer-host comm uni cati on s.
Data Bits
Sets the number of data bits transmitted per cha racter.
Menu Administration/Communications/Parallel/Data Bits
Choices 7 Bits, 8 Bits
Default 8 Bits
Default Job Priority
Allows you to specify which jobs are printed first, acco rding to the
interface through which they are received, when jobs are received
simultaneously. In other words, you can give jobs received via the
parallel interface priority over jobs received via other interfaces.
Menu Administration/Communications/Parallel/Def Job Prio
Choices 0 01-100 (highest-lowest priority)
Default 001 (highest priority)
menu to
QMS 1660E Print System Re fer ence4-30
Page 67

Interfaces
Emulation
Sets the parallel interfa ce emula tio n.
Menu Administration/Communications/Parallel/Emulation
Choices E SP, Hexdump, HPGL, Lineprinter, PCL5, PostScript
Other optional emulations also appear, if installed.
Default ESP
End Job Mode
Enables (and identifies an end-of-job se quence) or disables data
stream sensing for the end-of-docu ment (EOD) com mand. These
sequences allow hosts to enforce print job sequencing without considerations for interacting timeouts. See chapter 5, “Additional Technical Information,” fo r detail s on how to implemen t this feat ure on your
QMS 1660E Print System.
Menu Administration/Communications/Parallel/End Job Mode
Choices N one— T he printer recognizes only the PostScript ^D
command.
QMS EOD—The printer recognizes only the QMS
%%EndOfDocument command.
HP EOD—The printer recognizes only the HP <ESC>%-
12345X command.
Default None
Minimum Number of Kilobytes for Spooling
Sets the minimum number of kilobytes of system memory allocated to
the parallel interface.
Menu Administration/Communications/Parallel/Min K Spool
Choices 0 0000-99999
Default 00015
Printer Configuration
4-31
Page 68

Interfaces
Notes This value must be less than K Mem For Spool.
A 00000 value does not turn off the spool ing buffer for the
parallel interface. If the value is set to 00000, the printer
calculates the Min K Spool automatically at initialization.
The printer must be restarted for changes to the Min K Spool
menu to take effect. You can eit her let the printer restart
automatically after you save the change and exit from the
configuration menu, or you can wait for the change to take
effect the next time you manually turn on the printer.
Mode
The parallel interfa ce suppo rts Ce ntroni cs parallel communication as
well as IEEE 1284 bidirectional (tw o-way) parallel communication,
which provides five modes of operation: byte, compatib ilit y, ECP
(enhanced compatibility port ), EPP (enhanced parall el port), and
nibble. See chapter 5, “Additio nal Technical Information, ” for a
discussion of the different modes.
Menu Administration/Communications/Parallel/Mode
Choices Inter act ive—Establish bidirectional (IEEE 1284) parallel
communication between the host and the printer.
Noninteractive—Establish Centronics parallel communication
from the host to the printer.
Disabled—Turn off parallel communication with the host. The
printer stops accepting print jobs over the parallel interface.
Default Noninteractive
Notes The printer must b e restarted for changes to the menu to take
effect. You can eit her let the printer restart automatically after
you save the change a nd exit from the configuration menu, or
you can wait for the change to take effect the next time you
manually turn on the printer.
QMS 1660E Print System Re fer ence4-32
Page 69

Interfaces
PS Protocol
Sets the binary communicat ions protocol (BCP) for communicat ing
over a parallel interface to a PostScript print er. See chapter 5, “Additional Technical Informat ion ,” for a full discussion of PS Protocol.
Menu Administration/Communications/Parallel/PS Protocol
Choices Normal—Enable standard, ASCII hex protocol. Data is sent
and received in ASCII format. This mode is recommended if
you do not print binary data. It was designed for data in the
printable ASCII range. Print jobs can alter the PS protocol
value through PostScript operators.
Normal Fixed—Enable standard, ASCII hex protocol. Print
jobs cannot alter this value through PostScript operators.
Binary—Enable binary communications protocol. Print jobs
can alter this value through PostScript operators. Data in the
printable ASCII range also prints.
Binary Fixed—Enable binary communications protocol. Print
jobs can not alter this value through PostScript operators. Data
in the printable ASCII range also prints.
Default Normal
Spooling Timeout
Sets the number of seconds the interface waits for data from the host
before terminating a sp ooled print job.
Menu Administration/Communications/Parallel/Spool Timeout
Choices 00000-99999
Default 00030
Setting Serial Interface Parameters
Use the Administration/Communications/Serial menu to set the serial
interface commu nicati on values used for print e r-host comm uni cations. The following options are availabl e.
Printer Configuration
4-33
Page 70

Interfaces
Baud Rate
Sets the rate data is received (bits per second) from the host over the
serial interface.
Menu Administration/Communications/Serial/Baud Rate
Choices 3 00, 600, 1200, 2400, 4800, 9600, 19200, 38400
Default 9600
Notes Set this option to match the baud rate used by the host. Baud
rates of 19200 and 38400 require RTS/CTS hardware flow
control (Administrati on/Communications/Serial /Hdwe Flow Ctl
menu).
When selecting a baud rate of 2400 or below, increase the
Administration/Communications/Timeouts/Emul Timeout
value as follows:
Baud Rate Emulation Ti meout (se conds)
2400 10*
1200 20
600 40
300 80
*A baud rate of 2400 works with a 5-second emulation timeout
value, but there is no margin for delays between characters.
Data Bits
Sets the number of data bits transmitted per cha racter.
Menu Administration/Communications/Serial/Data Bits
Choices 7 Bits, 8 Bits
Default 8 Bits
Default Job Priority
Allows you to specify which jobs are printed first, acco rding to the
interface through which they are received, when jobs are received
simultaneously. In other words, you can give jobs received via the
serial interface priority over jobs received via the other interfaces.
Menu Administration/Communications/Serial/Def Job Prio
QMS 1660E Print System Re fer ence4-34
Page 71

Interfaces
Choices 0 01-100 (highest-lowest priority)
Default 001 (highest priority)
Emulation
Sets the serial interface e mul ati on.
Menu Administration/Communications/Serial/Emulation
Choices E SP, Hexdump, HPGL, Lineprinter, PCL5, PostScript
Other optional emulations also appear, if installed.
Default ESP
End Job Mode
Enables (and identifies an end-of-job se quence) or disables data
stream sensing for the end-of-docu ment (EOD) com mand. These
sequences allow hosts to enforce print job sequencing without considerations for interacting timeouts. See chapter 5, “Additional Technical Information,” fo r detail s on how to implemen t this feat ure on your
QMS 1660E Print System.
Menu Administration/Communications/Serial/End Job Mode
Choices N one— T he printer recognizes only the PostScript ^D
command.
QMS EOD—The printer recognizes only the QMS
%%EndOfDocument command.
HP EOD—The printer recognizes only the HP
<ESC>%12345X command.
Default None
Hardware Flow Control
Controls the flow of data between the printer and the host .
Menu Administration/Communications/Serial/Hdwe Flow Ctl
Printer Configuration
4-35
Page 72

Interfaces
Choices CTS
DSR
DSR POL
DTR
DTR POL
RTS
Defaults CTS
DSR
DSR POL
DTR
DTR POL
RTS
Notes If the host uses hardware flow control, s et this option to match
the type used by the host.
However, to download printer system software to flash ROM
via the serial port, RTS and CTS must both be set to On, and
the cable pinouts must be connected as shown in appendix B,
“Technical Specifications.”
Off, on
Off, on
Normal, reverse
Off, on
Normal, reverse
Off, on
Off
Off
Normal
On
Normal
Off
Ignore Parity Errors
Specifies how the printer should handle parity errors.
Menu Administration/Communications/Serial/Ignore Par. Err.
Choices Off—I g nor e parity err ors. The printer prints its best
interpretation of th e charact er(s) affected by the error.
On—Don’t ignore parity errors. The printer replaces the
character(s) affected by the error with a qu estio n mark.
Default Off
Notes Use the Administration/Communications/Serial/Parity menu to
set parity.
Minimum Number of Kilobytes for Spooling
Sets the minimum number of kilobytes of system memory allocated to
the serial interface.
Menu Administration/Communications/Serial/Min K Spool
Choices 0 0000-99999
Default 00015
QMS 1660E Print System Re fer ence4-36
Page 73

Interfaces
Notes This value must be less than K Mem For Spool.
A 00000 value does not turn off the spool ing buffer for the
serial interface. If the value is set to 00000, the printer
calculates the Min K Spool automatically at initialization.
The printer must be restarted for changes to the Min K Spool
menu to take effect. You can either let the printer restart
automatically after you save the change and exit from the
configuration menu, or you can wait for the change to take
effect the next time you manually turn on the printer.
Mode
Enables or disables the PostScript int eractive m ode from the host.
Menu Administration/Communications/Serial/Mode
Choices Interactive—Establish two-way communication between the
host and the printer.
Noninteractive—E stablis h one-wa y commu nication from t h e
host to the printer.
Disabled—Turn off serial communication with the host. The
printer stops accepting print jobs over the serial interface.
Default Interactive
Notes The printer must be restarted for changes to the Mode menu to
take effect. You can either let the printer restart automatically
after you save the change and exit from the configuration
menu, or you can wait for the change to take effect the next
time you manually turn on the printer.
Parity
Sets the check bit used to identify data transmission errors.
Menu Administration/Communications/Serial/Parity
Choices Even, None, Odd
Default None
Printer Configuration
4-37
Page 74

Interfaces
Notes The printer’s parity setting must match that of the host or
application.
Use the Administration/Communications/Serial/Ignore Par . Err .
menu to specify how the printer handles parity errors.
PS Protocol
Sets the binary communicat ions protocol (BCP) for communicat ing
over a serial interface to a PostScript printer. See chapter 5, “Additional Technical Informat ion ,” for a full discussion of PS Protocol.
Menu Administration/Communications/Serial/PS Protocol
Choices Normal—Enable standard, ASCII hex protocol. Data is sent
and received in ASCII format. This mode is recommended
if you do not print binary data. It was designed for data in
the printable ASCII range. Print jobs can alter the PS
protocol value through PostScript operators.
Normal Fixed—Enable standard, ASCII hex protocol. Print
jobs cannot alter this value through PostScript operators.
Binary—Enable binary communications protocol. Print jobs
can alter this value through PostScript operators. Data in
the printable ASCII range also prints.
Binary Fixed—Enable binary communications protocol. Print
jobs cannot alter this value through PostScript operators.
Data in the printable ASCII range also prints.
Default Normal
Receive Software Flow Control
Sets the software com mu nicat ion proto col use d by the printer to control communication from the host compute r.
Menu Administration/Communications/Serial/Rcv Sw Flow Ctl
Choices ETX/ACK, N one, Robust XON/XOFF, XON/XOFF
Default XON/XOFF
QMS 1660E Print System Re fer ence4-38
Page 75

Media Input
Spooling Timeout
Sets the number of seconds the interface waits for data from the host
before terminating a sp ooled print job.
Menu Administration/Communications/Serial/Spool Timeout
Choices 0 0000-99999
Default 00030
Stop Bits
Sets the number of stop bits transm itt ed per character.
Menu Administration/Communications/Serial/Stop Bits
Choices 1 Bit, 2 Bits
Default 1 Bit
Transmit Software Flow Control
Sets the software communication protocol used by the host computer
to control communication with the printer.
Menu Administration/Communications/Serial/Xmit Sw Flow Ctl
Choices ETX/ACK, N one, XON/XO FF
Default None
Media Input
Your QM S 1660E Print System come s standard with two media ca ssettes. Using the control pan el, you can select a defa ult media input
source, chaining these input sources, and name them.
Printer Configuration
4-39
Page 76

Media Input
Selecting a Media Input Source
An option in the Operator Control menu allows you to select the
default tray or cassette (inputbin) from which med ia is drawn into the
printer.
Menu Operator Control/Inputbin
Choices L ower—Standard cassette
Multipurpose—Multipurpose tray
Optional—Optional cassette (if installed)
Default Lower
Notes The current default inputbin is indicated by the appropriate
LED on the print control panel.
Chaining Media Input Sources
An option in the Operator Control menu allows you to “chain” inputbins (tray and cassettes) so that when the first inputbin empties, the
printer will automatical ly draw media from another input bin with the
same size and type of media.
» Note: Make sure the two trays/cassettes use the sam e size paper.
Menu Operator Control/Chain Inputbins
Choices On—Switch to the next inputbin with the same size and type of
media when the default inputbin is empty.
Off—Don’t switch inputbins; use only the default inputbin.
Default On
Notes Use the Operator Control/Inputbin menu to set the default
inputbin.
Naming Media Input Sources
Options in the Admini strat ion/ En gine m enu allow you to give each
inputbin a more descriptive name. These nam es are displayed in the
printer message window, where appropriate. You can also use them
with DOC commands. (See the
QMS 1660E Print System Re fer ence4-40
QMS Crown Document Option Com-
Page 77

Media
Orientation
mands
complete information on DOC comm and s.)
manual (available for purchase from your QMS vendor) for
Inputbin 1
Inputbin 1 is the multipurpose tray.
Menu Administration/Engine/Inputbin 1 Name
Choices Up to 16 characters
Default multipurpose
Inputbin 2
Inputbin 2 is the standard paper cassette.
Menu Administration/Engine/Inputbin 2 Name
Choices Up to 16 characters
Default lower
Inputbin 3
Inputbin 3 is the optional paper cassette.
Menu Administration/Engine/Inputbin 3 Name
Choices Up to 16 characters
Default optional
Media Orientation
While you can usually specify the orientation of a print job in your
application, if you consistently use a certain media orientat ion , you
can set this in the Operat or Co ntrol/Orientation me nu .
Menu Operator Control/Orientation
Choices Portrait—Vertical
Landscape—Horizontal
Default Portrait
Printer Configuration
4-41
Page 78

Media Output
Media Output
Naming the Media Output bin
Even though there is only one outputbin, you may want to name it.
You can use this nam e with DOC comm ands. (S ee the
Document Option Commands
your QMS vendor, for complete information on DOC comm and s.)
Menu Administration/Engine/Outputbin 1 Name
Choices Up to 16 characters
Default Upper
Media Size
Identifying the Media Size
QMS Crown
manual, available for purchase f rom
Use the Operator Control/ Mul tip urpose Sz me nu to ident ify the size
media in the multipurpose tray (inputbin 1).
Menu Operator Control/Multipurpose Sz
QMS 1660E Print System Re fer ence4-42
Page 79

Media Siz e
Choices 11x17
12x19
A3
A4
A5
B4
B5
B6
Executive
Full Ledger
Legal
Letter
Postcard
Universal
Default Letter
11.00"x17.00"
11. 70x19.50"
11.69"x16.54"
8.27"x11.69"
5.83"x8.27"
10.12"x14.32"
7.16"x10.12"
5.06"x7.17"
7.25"x10.50"
17.40"x11.70"
8.50"x14.00"
8.50"x11.00"
4.13"x5.85"
11.70"x17.00"
279.40x431.80 mm
297.18x495.30 mm
296.93x420.12 mm
210.06x296.93 mm
148.09x210.06 mm
257.05x363.73 mm
181.86x257.05 mm
128.52x182.12 mm
184.15x266.70 mm
439.42x297.18 mm
215.90x355.60 mm
215.90x279.40 mm
104.90x148.59 mm
297.18x431.80 mm
Identifying a Default Media Size
Use an option in the Administration/Engine menu to identify the size
media the print should use if it does not recognize the size specified
for a print job or if no size is specified.
Menu Administration/Engine/Default Paper
Choices Letter
A4
Default Letter
8.50"x11.00"
11. 69"x8.27"
Printer Configuration
279.4x215.9 mm
297.2x420.4 mm
4-43
Page 80

Memory
Memory
Your printer is shipped with either 12 MB or 24 MB of memory (RAM),
but this memory can be upgraded to 64 MB. The Admi nistrat ion /
Memory menu allows experienced users (systems engineers and
technical support staff) to custom-configure the RAM among the
various memory users (or “clients”) to best meet specific printing,
computing, and network n eeds.
This section briefly describes each of the memory clients. Se e chapter 5, “Additional Technical Information,” for more detailed information
on the printer ’s memory and what benefits, if any, may result from
adding memory to each client.
To find out how memory is currently allocat ed, print a status page
Administration/Special Pages menu) or check each cli ent individually
in the configuration menu. The printer automatically distributes added
or freed memory among all of the memory clients, but it can be reallocated to specific memory clients.
» Note: Keep in mind that misallocating memory may hinder printer per for-
mance and that the print engines fa ste s t spe ed i s 1 6 p ages per m inute, no
matter how you configure the memory. If you try to set a memory client
below a minimum required value, the message
in the control panel message window.
INCORRECT VALUE
appears
Disk Cache
The K Mem Disk Cache memory client is the number of kilobytes of
RAM dedicated to the disk cache. This memory client speeds fil e
system throughput on the hard disks, if one or more are installed, by
storing frequently used data in system memory instead of continually
storing it to and retrieving it from a hard disk.
Menu Administration/Memory/K Mem Disk Cache
Choices 00032-08192
Default 00036
QMS 1660E Print System Re fer ence4-44
Page 81

Memory
Notes If no hard disk is used, the disk cache should be set to the
minimum. The printer then reallocates the released memory to
other clients that need additional memory.
If one or more hard disks are installed and formatted, they
remain unavailable until sufficient memory is available to the
disk cache. You may need to do one of the following:
n
Add more memory, which automatically increases the
disk cache cl ient’s size. See chapter 6, “Printer Options,”
for information on installing additional printer memory
(SIMMs).
n
Set Administration/Memory/Enable Disk Swap to Yes.
Any extra memory is distributed to all memory clients.
n
Take any memory, if available and not being used by
other clients, and add it to the Administration/Memory/K
Mem Display memory setting.
O
Caution:
familiar with adjusting memory clients values. Incorrect use of
this option could cause t he sy s te m to ope r a t e incor r e ctl y.
This option should be used only by i ndiv iduals who are
If you change the K Mem Disk Cache value, the printer
automatically restarts after you save your changes and exit
from the configuration menu.
The amount of memory needed for this memory client depends on the
size and number of hard disks, the number of subdirect ories on each
disk, and the amount of memory dedicated to caching.
» Note: If sufficient memory is available to the disk cache, all disks are acces-
sible. If insufficient memory is available to the disk cache, some disks may be
accessible while others may not be.
The recommended amount of memory for the disk cache client is
n
120 KB minimum
n
0.5 KB per MB of disk storage total for all disks
For example, the recommend ed amount of memory for the disk
cache for a single 120 MB hard disk is 180 KB, and for two 120 MB
hard disks it is 240 KB. These are recommended values. The printer
Printer Configuration
4-45
Page 82

Memory
Display
Emulation
will still operate with a sma ller cache, but dec reased perform ance
may result.
The K Mem Display memory client is the number of kilobytes of RAM
dedicated to the display lists. The displ ay list holds the interm edia te
representation of pages to be printed.
Menu Administration/Memory/K Mem Display
Choices 00128-12288
Default 00208
Notes If you change the K Mem Display value, the printer
automatically restarts after you save your changes and exit
from the configuration menu.
The K Mem Emulation memory client is the number of kilo bytes of
RAM to be used by non-PostScript emulatio ns for temporary storage
and for loading optional emulations. If you receive an emulation error,
you may need to increase the amount of mem ory for this clien t.
Menu Administration/Memory/K Mem Emulation
Choices 00768-08192
Default 00848
Notes If you change the K Mem Emulation value, the printer
automatically restarts after you save your changes and exit
from the configuration menu.
Emulation (Tempo rary)
The K Mem Emul Tmp memory client is the number o f kilobyt es of
RAM to be used by non-PostScript emulations for storing downloaded
(soft) fonts, forms, or macros. Data in this client disappears when the
printer is turned off. This client is listed as Temporary on the status
QMS 1660E Print System Re fer ence4-46
Page 83

Memory
page. Increasing this client's size increases the number of PCL downloaded fonts which can be accepted.
Menu Administration/Memory/K Mem Emul Tmp
Choices 00256-08192
Default 00256
Notes This value must be greater than the sum of the Min K Spool for
all installed and enabled interfaces.
If you change the K Mem Emul Tmp value, the printer
automatically restarts after you save your changes and exit
from the configuration menu.
Enable Disk Swap
The Enable Disk Swap memory client give s your printer virtual memory capability for all memory client s through the cre a tio n of a “swap
file” on the printer ’s hard disk. The default size of the swap file
depends on the amount of RAM instal led. The more RAM install ed,
the larger the default swap file size will be. The printer uses this file as
an extension of its memory. As the physical RAM fills, the printe r can
swap the contents to the hard disk file to allow more space. This file
swapping between disk and RAM occurs at various times throughout
the printing process and is completely transparent.
» Note: The printer must have a hard disk to take advantage of this feature.
Menu Administration/Memory/Enable Disk Swap
Choices No—Don’t e nable disk swapping.
Ye s—Enable disk swapping.
Default No
Printer Configuration
4-47
Page 84

Memory
Notes If disk swapping is enabled and the system hard disk is
Frame Buffer
removed or not turned on, the printer automatically resets to
the factory defaults. It is then necessary to re-enable disk
swapping if you want this functionality.
Before you install printer options, such as fonts and macros,
ensure that the printer has enough memory, or they may not all
be available for use. If it doesn’t, you can install SIMMs (see
chapter 6, “Printer Options”) to increase printer memory , or you
can install a hard disk (see chapter 6, “Printer Options”) and
enable disk swapping.
The printer must be restarted for changes to the Enable Disk
Swap menu to take effect. You can either let the printer restart
automatically after you save the change and exit from the
configuration menu, or you can wait for the change to take
effect the next time you manually turn on the printer.
If you enable disk swapping and restart the printer, the disk
cache size automatically increases to 256 KB.
The Frame Buffer me mory client holds rasterized or bit map ped
images of page faces which are ready to be sent to the print engine.
A frame holds the contents of each single page image.
If you are uncertain about how to configure your printer’s memo ry,
use only the Administra tio n/M em ory/F rame Buffer menu. Or use this
menu as a starting point before trying manuall y to configu re your
printer ’s memory. It provides a simple method of defining how mu ch
memory should go to each of the clients for the most c om plicat ed
printing conditions in your environment . Menu opti ons allow you to
specify the largest media size you plan to use for each resolut ion.
Memory is then automati ca lly allocat ed to the clients that require it.
Any excess memory is allocated to the excess memory client. See
chapter 5, “Additional Techn ical Informa tio n,” for more informa tio n on
memory and the frame buffer client.
QMS 1660E Print System Re fer ence4-48
Page 85

Memory
» Note: The printer does not allow you to c hoose featu res that do not work
with the amount of memory currently installed.
Using this option does not change the media size. It just ensures that you
have enough memory allocated to the appropriate clients t o print on the
requested media size.
Menu Administration/Memory/Frame Buffer/300 dpi
Choices 12x19
Default 12x19
Menu Administration/Memory/Frame Buffer/600 dpi
Choices 11x17, 12x19, A3, A4, A5, B4, B5, B6, executive, full ledger,
legal, letter, postcard, and universal
Default 11x17
Menu Administration/Memory/Frame Buffer/1200 dpi
Choices 11x17, 12x19, A3, A4, A5, B4, B5, B6, executive, full ledger,
legal, letter, postcard, and universal
Default letter
PostScript Fonts
The K Mem for PS Fonts memory client is the number of ki lobyt e s of
RAM dedicated to caching previously scale d bitmap representat ions
of fonts for the PostScript em ulation int erpret e r. This reduces the
number of times a PostScript font m ust be converted from outlin e
form to bitmap form, thus reducing processing time. K Mem for P S
Fonts is listed on the status page as Font Cache.
Menu Administration/Memory/K Mem for PS Fonts
Choices 00088-08192
Default 00168
Notes If you change the K Mem for PS F o nts value, the printer
automatically restarts after you save your changes and exit
from the configuration menu.
Printer Configuration
4-49
Page 86

Memory
PostScript Heap
The K Mem for PSHeap memory client , listed on the status page as
Heap, is the number of kilobytes of RAM dedicated to the Post S cript
emulation interpreter. This memory client holds downloaded PostScript emulation fo nts, operato rs, and forms .
Menu Administration/Memory/K Mem for PSHeap
Choices 0 1024-08192
Default 01360
Notes If you change the K Mem for PSHeap value, the printer
Printer Memory
The MB Printer Mem memory client , listed as System Use on the status page, is the number of megabyte s of RAM availabl e to be split
among the various memory client s. The size of this client's mem ory
limits the number of jobs that may be queued simultaneously. When
this client's memory is exhausted, the printer slows do wn, and the
hosts are forced to wait.
automatically restarts after you save your changes and exit
from the configuration menu.
Menu Administration/Memory/MB Printer Mem
Choices 0 0012-00064
Default Depends on the amount of memory installed.
Notes This memory client is not user-configurable.
If disk swapping is enabled (Administration/Memory/Enable
Disk Swap menu), the amount of memory displayed is larger
than the actual amount of memory installed in the printer.
Spooling
The K Mem for Spool memory client, listed on the statu s page as
Host Input, is the total number of kilo bytes of RAM allocat ed to all
spooling buffers. This memory client sto res incoming data from the
various interfaces until it is processed and printed.
Menu Administration/Memory/K Mem for Spool
QMS 1660E Print System Re fer ence4-50
Page 87

Optional
Features
Choices 00112-06144
Default 00200
Notes This value must be greater than the sum of the Min K Spool for
all installed and enabled interfaces.
Notes If you change the K Mem for Spool value, the printer
automatically restarts after you save your changes and exit
from the configuration menu.
When the sum of the Min K Spool for all interfaces is less than K Mem
for Spool, memory is allocat ed as follows:
1 Interfaces with Min K Spool (in the Administ rati on/ Commun i ca-
tions menu) value greater than zero to receive their specified allocation.
2 Half of the remaining memory is equally distri bute d among any
interfaces with a Min K Spool value of zero.
3 The other half of the remaining mem ory is called floa t memory.
This memory is divided among all ports wit h a Min K Spool value
of zero. If only one port has a Min K Spool value of zero, that port
receives all float memory.
Optional Features
Several printe r options (for example, an optional emulation, an
optional network interface, and internal and external hard disks) affect
printer configuratio n and the conf igurat ion menu. When an opti on is
installed, its configurat ion inf orm ati on merges int o the conf igurat ion
menu. New menu entries may appear, and the choices for existing
configuration values may be extended. See the docume ntation
accompanying the option to learn exactly how it affects the configuration menu.
Printer Configuration
4-51
Page 88

Passwords
Passwords
Use the Installation men u to pas sword-protect the Operator Cont rol
and Administration menus. The Installa tio n menu appear s when an
optional security card is installed in your printer. See chapter 6,
“Printer Options,” for more inform ati on on using a security card.
Selecting Passwords
Menus Installation/Admin P assword
Choices Up to 16 alphanumeric characters
Default Blank (no password)
Notes Enable the password in the Installation/Use Admin Pwd menu.
Menus Installation/Operator Passwrd
Choices Up to 16 alphanumeric characters
Default Blank (no password)
Notes Enable the password in the Installation/Use Operator Pwd
menu.
QMS 1660E Print System Re fer ence4-52
Page 89

Passwords
Enabling Password s
Menus Installation/Use Admin Pwd
Choices On—Require a password to enter the Administration menu.
Off—Don’t require a password to enter the Administration
menu.
Default Off
Notes Select the password in the Installation/Admin Password menu.
Menus Installation/Use Operator Pwd
Choices On—Require a pa ssword to enter the Operator Control menu.
Off—Don’t require a password to enter the Operator Control
menu.
Default Off
Notes Select the password in the Installation/Operator Passwrd
menu.
Using Passwords
When a password is required to enter the Operator Control or Administration menu, the mes sage window displays
ENTER PASSWORD
when you use the Select key to enter the menu. Ente r the password
or press the Menu key to return to the menu.
If you specify the correct password, access to the selected menu is
granted. However, if you enter an invalid password, the message window flashes
INVALID PASSWORD
for three seconds and then returns you to the configuration menu.
Printer Configuration
4-53
Page 90

Printer Engine
Features
Printer Engine Features
Through the Administra tion/Engi ne menu you can set print enginerelated parameters.
Adjusting the Image Alignment
Usually, you don’t need to change the way images are placed on the
printed page. But if you do, the Image Alignment option allows you to
adjust both the horizontal and the vertical placem e nt.
To check image ali gnm ent, print a standard status page (use the Status Page key on the printer control panel) on letter/ A 4-size paper.
When the printer is placing images properly, the alignment angle bar
in the lower-left corner of the status page is 0.5"/12.7 mm from the left
and bottom edges of the page. If the angle bar is off, use the Image
Alignment option to align the ima ge horizon tal ly and vertically in pixel
increments (
» Note: Engine constraints may limit the accuracy of pixel alignment.
1
/300" or 0.08 mm ).
Horizontal Offset
Menu Administration/Engine/Image Alignment/Horiz Offset
Choices 0 00-300 (0.00"/ 0 mm-1.00"/25.4 mm)
Default 100 (0.33"/.84 mm)
Notes See the following sections, “Horizontal and Vertical Controls,”
and “Image Alignment Guidelines.”
Vertical Offset
Menu Administration/Engine/Image Alignment/Vertical Offset
Choices 0 00-300 (0.00"- 1.0 0")
Default 100 (0.33"/.84 mm)
Notes See the following sections, “Horizontal and Vertical Controls,”
and “Image Alignment Guidelines.”
QMS 1660E Print System Re fer ence4-54
Page 91

Printer Engine
Features
Horizontal and Vertical Controls
Horizontal and vertical controls are based on the leading edge of the
paper. Although they are consistent, they may seem to be reversed in
function, depending on the leading edge of the paper.
n
Media fed long edge first (for exam ple , letter/A4) wi th po rtrait-oriented printing—horizontal and verti cal seem reversed.
n
Media fed long edge first (for exam ple , letter/A4) wi th lan dscape-oriented printi ng — horizontal and vertical operate as
expected.
n
Media fed short edge first (for exam ple, 11x17/A3) with portrait-oriented printing—horizontal and verti cal operate as
expected.
n
Media fed short edge first (for exam ple, 11x17/A3) with landscape-oriented printi ng—horizontal and vertical seem
reversed.
Image Alignment Guidelines
Use the following table to determin e which value to adjust and
whether to increase or decrease it to get the desired results:
With this
feed
edge...
short edge portrait vertical
long edge portrait horizontal
and this
orientation...
landscape horizontal
landscape vertical
...adjust this control to move the image...
up down right left
below 100
above 100
above 100
above 100
vertical
above 100
horizontal
below 100
horizontal
below 100
vertical
below 100
horizontal
above 100
vertical
above 100
vertical
above 100
horizontal
below 100
horizontal
below 100
vertical
below 100
vertical
below 100
horizontal
above 100
Printer Configuration
4-55
Page 92

Printer Engine
Features
Enabling/Disabling the Warning Buzzer
You can enable or disable the warning buzzer the print engine sounds
when it encounters an error (such as paper out).
Menu Administration/Engine/Buzzer
Choices On, Off
Default Off
Setting Gamma Correction
This option sets the print engine’s gamma correction. For complet e
information on gamma correction, see chapter 5, “Print Quality ,” i n the
Operation
Menu Administration/Engine/Gamma Correction
Choices 0—No gamma correction.
Default 0
Notes Matching the gamma correction setting to the resolution
manual.
1—Gamma correction for 300x300 dpi images.
2—Gamma correction for 600x600 dpi images.
3—Gamma correction for 1200x600 dpi images.
ensures optimum print quali ty for halftones.
Specifying Page Recovery Action
When a media jam or other similar error occurs, the printer has the
capability of reprinting the print job from the page on which the jam
occurred.
Menu Administration/Engine/Page Recovery
Choices On—Reprints a print job from the page on which the jam or
error occurred.
Off—Don’t reprint a print job when a jam or error occurs.
Default Off
QMS 1660E Print System Re fer ence4-56
Page 93

Printer Engine
Features
Setting Default Resolution
This option sets the print engine’s default resoluti o n.
Menu Administration/Engine/Def Resolution
Choices 300 dpi—300x300 dpi resolution.
600 dpi—600x600 dpi resolution.
1200 dpi—1200x600 dpi resolution.
Default 600 dpi
Notes If you purchased a printer with 24 MB RAM, all resolutions are
available with all media sizes. However, if you purchased a
printer with 12 MB RAM, 600x600 dpi and 1200x600 dpi are
available only with certain media sizes. Using these
resolutions with other media sizes requires additional memory.
See appendix B, “Technical Specifications,” for details.
Setting Toner Options
Two toner cartridge configu ratio n options are available: Conserve
Toner and Toner Out Act[ion].
Conserve Toner
To help you conser ve toner, your printer provides an option called
Conserve Toner, which simulates draft-quality printing. The amount of
toner used during printing is reduced by screening the black dots in a
1:4.5 ratio. In other words, 1 black dot is printed for every 4.5 black
dots that would in normal printing mode.
» Note: The Conserve Toner option is designed for d raft printing only. Turn off
the Conserve Toner option when printing proof or final c opies of documents
to avoid any possible distortion of patterns, halftone, and images.
Menu Administration/Engine/Conserve Toner
Choices On—Conserve toner; print draft-quality documents.
Off—Don’t conserve toner; print normal, laser-quality
documents.
Default Off
Printer Configuration
4-57
Page 94

Printer Start-Up
Options
Toner Out Action
You can co nfi gure the print er to stop when a TONER OUT error message is displayed in the message window or to continue printing.
Menu Administration/Engine/Toner Out Act.
Choices Continue—Continue printing when a TO NE R OUT message
displays.
Stop—Stop printing when a TONER OU T me ssage displays.
Default Continue
Setting Energy Conservation
Your print er is complia nt with US Environm ent al Protect ion Ag ency
(EPA) Energy S tar regulations. The EPA Energy Star Computers
program promotes the use of energy-efficient per sonal compu ters,
monitors, and printe rs and the reducti on of air pollution caused by
power generation.
» Note: The addition of some optional interfaces, in some combinations, may
cause the product to become non-complian t.
The Energy Star option specifies whether th e printer changes to a
low-power state (the engine remains on, but the fuser turns off) after
30 minutes of inactivi ty. When a print job is received, the printer
returns to normal power within 90 seconds.
Menu Administration/Engine/Energy Star
Choices On—Use lower power after 30 minutes of inactivity.
Off—Use normal power all of the time.
Default Off
Printer Start-Up Options
The Administrati on/S t artu p Opti ons menu allows you to config ure
your printer to run certain options automaticall y when you turn it on.
QMS 1660E Print System Re fer ence4-58
Page 95

Printer Start-Up
Options
Enabling/Disabling the Start-U p Pag e
By default, the printer prints a start-up pa g e when you turn it on. The
start-up page lists basic informatio n about the print er, such as its
name, the PostScript emulation level and version, and various printer
settings. However, you can turn the start-up page off to conserve
paper and toner.
Menu Administration/Startup Options/Do Start Page
Choices Yes—Print a start-up page each time the printer is turned on.
No—Don’t print a start-up page each time the printer is turned
on.
Default Yes
x
Notes If you used the Administration/Engine/Inputbin
to change the names of the inputbins, these names replace
Multipurpose, Lower, and Optional in the message window.
Name options
Enabling/Disabling the SYS\S TART File
If you have a hard disk an d Do Sys Start is enabled, when the printer
is turned on, the controller checks the hard disk for a PostScript file
named SYS\START and executes this file. This file does not print .
Information on crea ting a SYS\S TART file is available in th e
Crown Technical Ref erence Man ual
printer) and also via Q-FAX.
(shipped on disk with your
QMS
Menu Administration/Startup Options/Do Sys Start
Choices Yes—Check the hard disk for and execute the SYS\STAR T file
when the printer is turned on.
No—Don’t check the hard disk for a SYS\STA RT file.
Default Yes
Loading the PostScript Error Handler
You have the optio n of loading Error Handler, a diagnostic tool that
allows you to identify PostScript errors encountered during a print job.
Refe r to the
PostScript Language Ref erence Ma nual
Printer Configuration
(Adobe
4-59
Page 96

Special Pages
Systems Incorporated, Reading, PA: Addison-Wesley , 1990, ISBN 0201-18127-4) for more information on PostScript errors.
Menu Administration/Startup Options/Do Error Handler
Choices Yes—Load the Error Handler.
No—Don’t load the Error Handler.
Default No
Special Pages
Use the Administration /Specia l Pages menu to print special pages,
such as status pages, calibration pages, header pages, and trailer
pages.
Working with Status Pages
Printing a status page is a two-step procedure: Identify the type of
status page you want to print, and then print it.
Identifying a Status Page Type
Two types of status pages are available:
n
Standard— This one-page docum ent lists printer identification
information, current memory configu ration, timeo uts, communication settings, input buffer sizes, and available fonts.
n
Advanced—This docum ent , which can be five or more pages
long, contains the same informat ion as the stand ard status page
as well as configuration menu settings, fonts, and down loaded
emulations.
Menu Administration/Special Pages/Status Page Ty pe
Choices Standard—Choose the single-page status page.
Advanced—Choose the multipage status page.
Default Standard
QMS 1660E Print System Re fer ence4-60
Page 97

Special Pages
Printing a Status Page
After you have identified the type of status page to print, use the Status Page key on the printer control panel to print it.
» Note: If you choose an advanced status page but only a standard status
page prints, the printer has run out of RAM. Eithe r reallocate m e mory
among the memory clients (see chapter 5 , Additional Technical
Information) or add more memory to the printer (see chapter 6, Printer
Options).
Working with Calibration Pages
A calibration page helps you test and maint ain optimal print qualit y.
The calibration image contain s a gray-scale chart that lets you check
print density and gamma correction to get the best possible gray scaling from your printer.
In addition, the calibrat ion page can serve as a quick reference to
help you determin e whether you need lower or higher resolution for a
print job. Print a calibration page at each resolution. By comparing the
pages, you can easily see the difference in the screens, the type quality, and the precision of curves and diagonal lines.
Menu Administration/Special Pages/Calibration Page
Choices Yes—Print a calibration page.
No—Don’t print a calibration page.
Default Yes
Note The calibration page prints when you exit from the menu.
Working with Header Pages
A header page is a separator page that prints before a print job to
help users sort out their jobs. The information on the header page can
be customized. See th e
manual (available for purchase from yo ur QMS vendor) for more
information.
Printer Configuration
QMS Crown Document Option Commands
4-61
Page 98

Special Pages
Enabling/Disabling Header Pages
Menu Administration/Special Pages/Header Page
Choices On—Pr int a header page before each job.
Default Off
Identifying a Header Page Input Source
You can select t he input bin (tray or cassette) from which the printer
pulls media when printing the header page.
Menu Administration/Special Pages/Header Inputbin
Choices Multipurpose—Pull header page media from the multipurpose
Default Multipurpose
Notes If you used the Administration/Engine/Inputbin
Off—Don’t print a header page before each job.
tray.
Lower—Pull header page media from t he 250-sheet paper
cassette.
Optional—Pull header page media from the optional paper
cassette.
x
Name options
to change the names of the inputbins, these names replace
Multipurpose, Lower, and Optional in the message window.
Working with Trailer Pages
A trailer page is a separator page that prints after a print job to help
users sort out their jobs and, if requested, identify print job errors. The
information on the trailer page can be customi ze d. See the
Crown Document Option Commands
manual (available for purchase
from your QMS ve ndor) f or more inf ormation.
Enabling/Disabling Trailer Pages
Menu Administration/Special Pages/Trailer Page
QMS 1660E Print System Re fer ence4-62
QMS
Page 99

Timeouts
Choices Off—Don’t print a trailer/error page for each print job.
On—Print a trailer/error page for each print job.
On Error—If any print job errors exist, print a trailer page that
lists the errors as well as other trailer page informati on.
Errors Only—If any print job errors exist, print a trailer page
that lists the errors but omits other trailer page information.
Default Off
Identifying a Trailer Page Input Source
You can select t he input bin (tray or cassette) from which the printer
pulls media when printing the trailer pag e.
Menu Administration/Special Pages/Trailer Inputbin
Choices Multipurpose—Pull trailer page media from the multipurpose
tray.
Lower—Pull trailer page media from the 250-sheet paper
cassette.
Optional—Pull trailer page media from the optional paper
cassette.
Default Multipurpose
x
Notes If you used the Administration/Engine/Inputbin
to change the names of the inputbins, these names replace
Multipurpose, Lower, and Optional in the message window.
Name options
Timeouts
You can configure a number of printer timeout settings to set a limit to
the amount of time the printer waits to perform a certain task.
Printer Configuration
4-63
Page 100

Timeouts
Setting an Emulation Timeout
The emulation timeout is the maximum number of seconds emulations other than PostScript (such as HP-GL, HP PCL5, and Lineprinter) wait for incoming data.
Menu Administration/Communications/Timeouts/Emul Timeout
Choices 00000-99999
Default 00005 (5 sec.)
Notes A value of 000 is the same as infinity (no timeout).
When selecting a baud rate of 2400 or below (Administration/
Communications/Serial/Baud Rate menu), increase the
emulation timeout value as follows:
Baud Rate Emulation Ti meout (se conds)
2400 10*
1200 20
600 40
300 80
*A baud rate of 2400 works with a 5-second emulation timeout
value, but there is no margin for delays between characters.
Setting an ESP Timeout
The ESP (Emulation Se n sing Processor) timeout is the maxi mu m
number of seconds the printer uses to match an emulation before
printing the job i n the E SP def ault emulation (Adm inistration/Emulations/ESP Default Emul menu).
Menu Administration/Communications/Timeouts/ESP Tim eout
Choices 0 0000-99999
Default 00003 (3 sec.)
Notes A value of 000 is the same as infinity (no timeout).
Setting a Manual Feed Timeout
The manual feed timeout is the maxim um number of seconds the
printer waits for the next sheet of media to be placed in the manual
QMS 1660E Print System Re fer ence4-64
 Loading...