

Page 1

®
QMS 1660 Print System Getting Started
1800356-001B
Page 2

Trademarks
The following are tradema rks or registered trademarks of their respective ow ners.
Other product names m entioned in this m anual may a lso be trade marks or reg istered
trademarks of their resp ective owners. Re gistered trademar ks are register ed in the
United States Patent and Trademark Office; some trademarks ma y also be re gistered in
other countries. QMS and the QMS logo are r egistered tradema rks of QMS, Inc., and
Crown, the Crown seal, Crow nNet, PS Executiv e Series, an d QUIC are trademark s of
QMS, Inc. PostScript is a trademar k of Adobe Sys tems Incorpor ated for a page
description language a nd may be regis tered in certain jurisdic tions. Throug hout this
manual, “PostScript Lev el 2” is used to refer to a set of c apabiliti es defined by Ado be
Systems for its PostSc ript Level 2 page description language. Thes e capabilities,
among others, are implem ented in this produc t through a QMS- developed emulation
that is compatible with Adobe's PostScript Lev el 2 language. Ado be/Adobe Systems
Incorporated. 3Com, 3+Open/3 Com Cor poration. Aldus, Al dus FreeHand , PageMaker,
PrePrint/Aldus Corporation. Apple , AppleShar e, AppleTalk, EtherTalk, LaserWriter,
LocalTalk, Mac intosh, TrueType/Apple Computer, Inc. Banyan, VINES/Banyan.
CompuServe/H & R Block. DEC, DECnet, LN03, VM S/Digital Equipment Co rporation.
PhoneNET/Farallon Computing , Inc. Hewlett-Pac kard, HP, PCL, H P-GL, LaserJet/
Hewlett-Packard Co. IB M PC, Token-Ring/International Business Machin es
Corporation. Intel/Intel Corporatio n. Microsoft, MS-DOS/Mic rosoft Corporation. Nove ll
and NetWare/Novell, Inc. QuarkXPres s/Quark, Inc. TOPS/S un Microsys tems, Inc. The
ENERGY STAR™ logo/United States Env ironmental Pro tection Agency. The ENERGY
STAR emblem does not represent EPA endorsement of any product or se rvice. UNIX/
UNIX Systems Laborator ies. Etherne t/Xerox Corporation.
Proprietary Statement
The digitally encoded software included w ith your QMS 166 0 Print System is
Copyrighted © 1995 by QM S, Inc. All Rights R eserved. This software may not be
reproduced, modified, d isplay ed, tr ans ferred, or cop ied in any form or in any manner or
on any media, in whole or in par t, without the express written permiss ion of QMS, Inc.
Copyright Notice
This manual is Copyrighted © 1995 by QM S, Inc., One Mag num Pass, Mob ile, AL
36618. All Rights Reserve d. This manual m ay not be copie d in whole or in pa rt, nor
transferred to any other me dia or language, w ithout the express written permiss ion of
QMS, Inc.
Page 3

Dear Customer,
Mark Twain once said that only two things in life are certain: death
and taxes. Well, if he were living t oday, we're sure he'd add m anual s
to this list. Just about everything you buy is accompanied by a manual—and your new QMS printer is no exception.
Now, we know that even though we've devot ed our lives to writing
manuals, very few people actually enjoy reading th em. So we've written this user’s guide with you in mind. However, there are as many of
you out there as there are printers, and you all need something different. Because of this, we've tried to design your user’s guide to help
you reach your destination as quickly and easily as possible:
n
Tabl e of Contents— U se this section as a road map to discover
what there is to see in t he user’s guide.
n
About the Documentati on —T his section functions as a Welcome Center. It gives you an idea about what's in this city (your
guide to getting started) as well as in other nearby cities (other
printer documentation).
n
About This Manual— As long as you're at the Welcome Center,
you probably want a list of local attractions. This section lets you
know which chapters you really shouldn't miss and which you
need to visit only if you have the time and interest, or a special
purpose. It's pretty much the same information as in the table of
contents, but in a descriptive format.
n
Headers, Footers, and Tab Dividers—Use these as roa d signs
to help you locate the section of the manual yo u want to visit.
n
Index—While some people like to wander through a city, stopping wherever they find something interesting , others like to call
ahead to make a reservation for a specific hotel or restaurant.
Our Blue Pages help you find information quickly without unnecessary detours. Easy on, easy off. We think you'll find the blue
color especially useful since you’ll have more than one manual in
the binder.
We hope you enjoy your new QMS printer (and traveling through it s
manuals, too!)
Your QMS Technical Writer
Page 4

Page 5
ContentsContents
1 Introduction
Abo u t the Pr inte r ..... . .................. . ................................ . ................ 1 -2
About the Documentati on .......... ....... ............ ....... .............. ....... ..1 -2
Standard Product Documentation 1-3
Optional Documentation 1-4
Related Documentation 1-5
About This Manual .......................................................................1-5
Typographic Conventions 1-6
Printer Features ........ ............. ...... .............. ..... .............. ....... .........1-7
Media Flexibility 1-7
Multiple Resolutions 1-7
Toner Savings 1-8
Three Standard Interfaces 1-8
Four Resident Emulations 1-8
Resident Fonts and Symbol Sets 1-10
QMS Crown Technology 1-10
Page 6
Energy Star Compliance 1-12
Software Loadable System 1-13
Remote Console 1-13
PCMCIA Card Slots 1-13
Printer Options 1-14
What's Next? .. .... ................. .............. ....... ........................ .......... 1-17
2 Setting Up Your Printer
Introduction . . .... ... ..... ...... . ....... .... ... ..... ...... . ....... ..... .. ..... ...... ... ..... .. 2-2
Finding a Good Lo catio n ........................... ..... ..... ....... ...... ..... ..... 2-2
Location Requirements 2-2
Power Requirements 2-3
Checking Shipment Contents .................................................... 2-4
Registering the Printer ................................................................ 2-5
Unpacking the Printer ................................................................. 2-5
Installing Consumables .............................................................. 2-8
Installing the Toner Cartridge 2-8
Loading the 250-Sheet Paper Cassette 2-11
Connecting the Power Cord ..................................................... 2-15
Printing a Start-up Page ............................................................2-16
Enabling/Disabling the Start -up Page 2-17
Installing Options ...................................................................... 2-17
What's Next? .. .... ................. .............. ....... ........................ .......... 2-17
3 Connecting to a Macintosh
Introduction . . .... ... ..... ...... . ....... .... ... ..... ...... . ....... ..... .. ..... ...... ... ..... .. 3-2
Before Making the Connection ................................................... 3-3
What You Need 3-3
Making the Connec tion ................ ..... ....... ....... ..... ....... ......... ....... 3-3
Macintosh Printing Software ...................................................... 3-5
QMS 1660 Print System G etting Startedvi
Page 7
Installing PS Executive Series Printer Utilities 3-5
Printing from the Ma cin tosh .................... ..... ....... ...... ..... ... ..... ..3 -10
A Note for Users of "Aldus" Applications 3-10
A Note for Users of Adobe PhotoShop 3-10
What's Next? ..............................................................................3-10
4 Connecting to a PC
Introduction .................................................................................. 4-2
Before Making the Connection ...................................................4-2
What You Need 4-2
Making the Connec tion ......... ...... ....... ....... ..... ....... ....... ....... ....... ..4 -4
PC Printing Software .............................. ..... ..... ...........................4-6
Installing PS Executive Series Printer Utilities 4-6
Installing a PostScript Printer Driver 4-6
Printing from the PC .. .. ... ...... ..... ... ..... .... ... ..... ...... ... ..... ...... ... ... ....4-9
What's Next? ................................................................................4-9
5 Control Panel
Introduction .................................................................................. 5-2
Control Panel Ind icato rs ....... ...... ....... ....... ..... ....... ....... ....... ....... ..5 -2
Message Window .........................................................................5-4
Setting the Message Window Language 5-4
Control Panel Keys ......................................................................5-5
Online/Offline, Cancel, and Status Page Keys 5-5
Menu, Next, Previous, and Select Keys 5-6
What's Next? ................................................................................5-7
Contents vii
Page 8
A QMS Customer Support
Sources of Supp ort .......................... ..... ..... ..... ..... ....... ...... ..... ... ..A-2
Your QMS Vendor A-2
Your Application Vendor A-2
Q-FAX A-2
The QMS Corporate Bulletin Board System A-3
CompuServe A-3
Internet A-3
QMS Customer Response Center (CRC) A-4
QMS National Service A-4
QMS World-wide Offices .............................................................A-5
B Configuration Menu
Index
v
QMS 166 0 Print System Getting Startedviii
Page 9
1
Introduction
In This Chapter...
n
About the printer
n
About the documentation
n
About this manual
n
Printer features and user benef it s
Page 10
About the
Printer
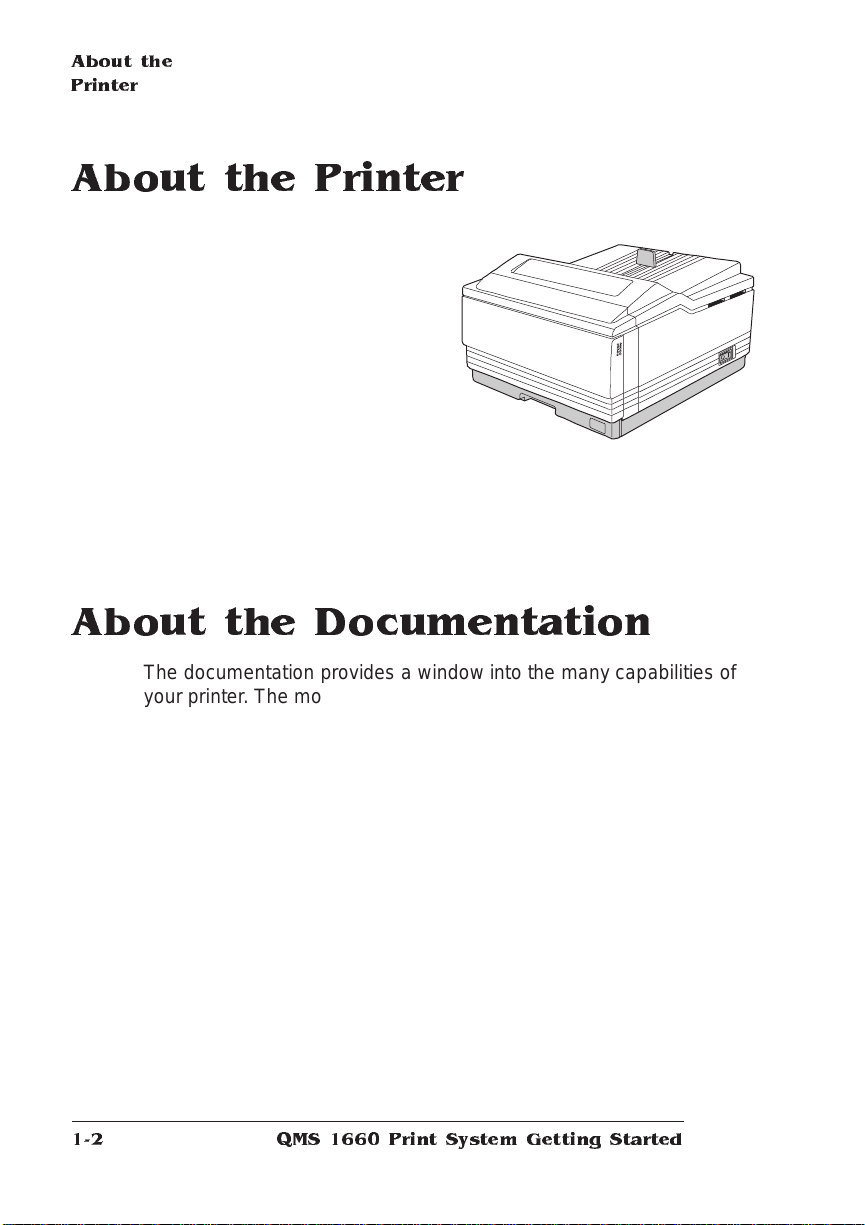
About the Printer
The QMS 1660 Print System offers
the unique QMS Crown multitasking
operating system, superior
performance, extensive connectivity,
upgrade options, and flexible
emulation support.
It prints 16 letter/A4-size pages per minute; uses media up to 11.70"x19.50"/
297.18x495.30 mm in size; and offers 300x300 , 600x 600, and 1200x6 00 dpi
(dots-per-inch) resolution.
About the Documentation
The documentation provides a window int o the many capabili tie s of
your printer. The more familiar you are with the documentat ion, the
easier it’ll be for you to achieve the results you want from your printer.
Several pieces of standard documentation accompany your printer. If
you’ve ordered any printer options, you’ll have even more documentation. But don’t worry—you don’t have to read th em all tonight to be
able to use your printer. In fact, some of them you may never have to
refer to at all, depending on the type of documen ts yo u print and the
environment in which you print them.
This section will give you an idea of how we’ve organized inf ormation
and which documents you’ll probably refer to the most.
QMS 166 0 Print System Getting Started1-2
Page 11
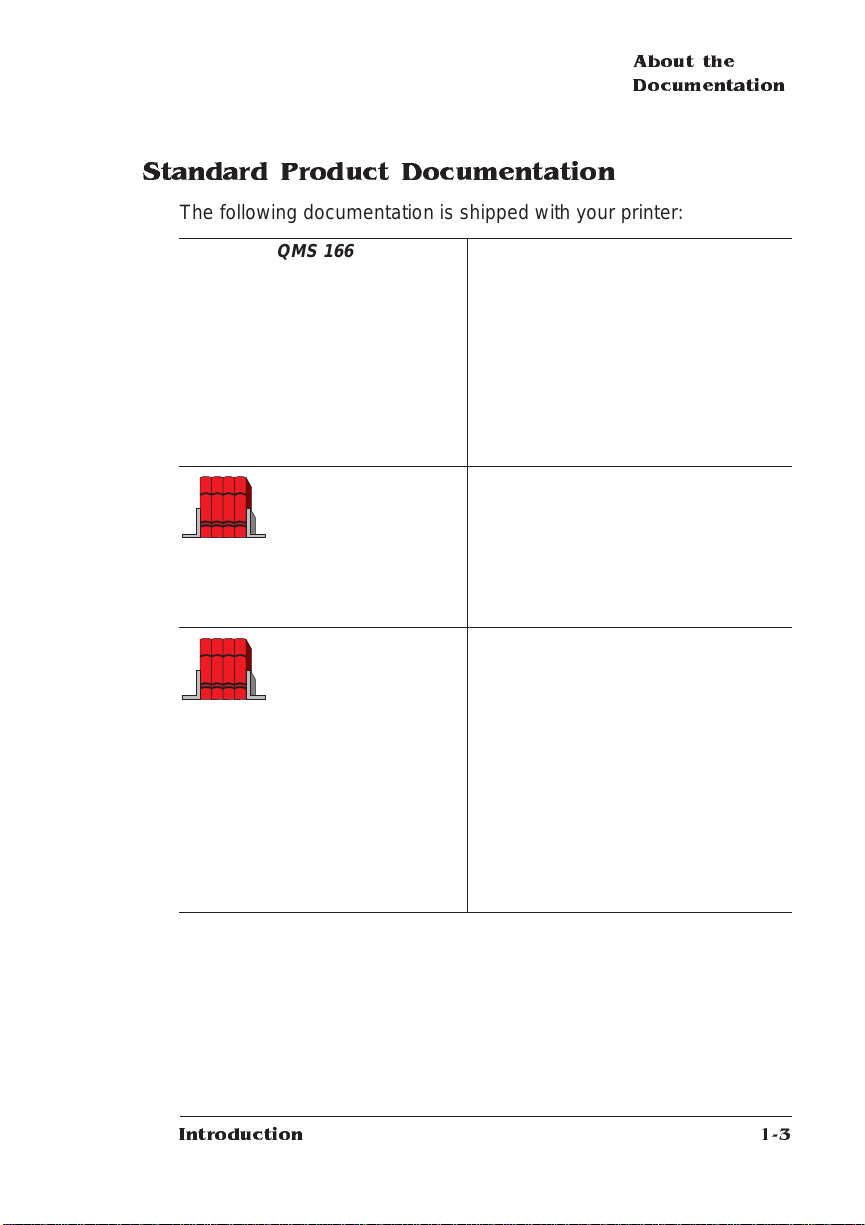
Standard Product Documentation
The following document atio n is shipped with your print er:
About the
Documentation
&
QMS 1660 Print
System Getting
Started
QMS 1660 Print
System Operation
QMS 1660 Print
System Reference
You're looking at this manual right now.
It contains detailed, illustrated
instructions to guide you as you unpack
and set up your printer and connect it to
an Apple Macintosh or an IBM or
compatible PC. In addition, it introduces
you to the printer’s control panel. The
“About This Manual” section later in this
chapter details the contents of this
manual.
This manual guides y ou through the
day-to-day operation of your printer. It
includes information on replacing print
media and toner, using advanced
printing features, handling and cleaning
your printer, improving print quality, and
troubleshooting printer problems.
This manual provides information you
may need only once in a while, such as
information on typefaces and fonts,
control panel configuration menu,
memory , e nd job mode, the PS protocol
option, HP-GL color encoding, and
installing and using printer options.
This manual also provides technical
specifications, a list of printer-supported
QMS Document Option Commands
(DOC), and a glossary of frequently
used terms.
Introduction
1-3
Page 12
About the
Documentation
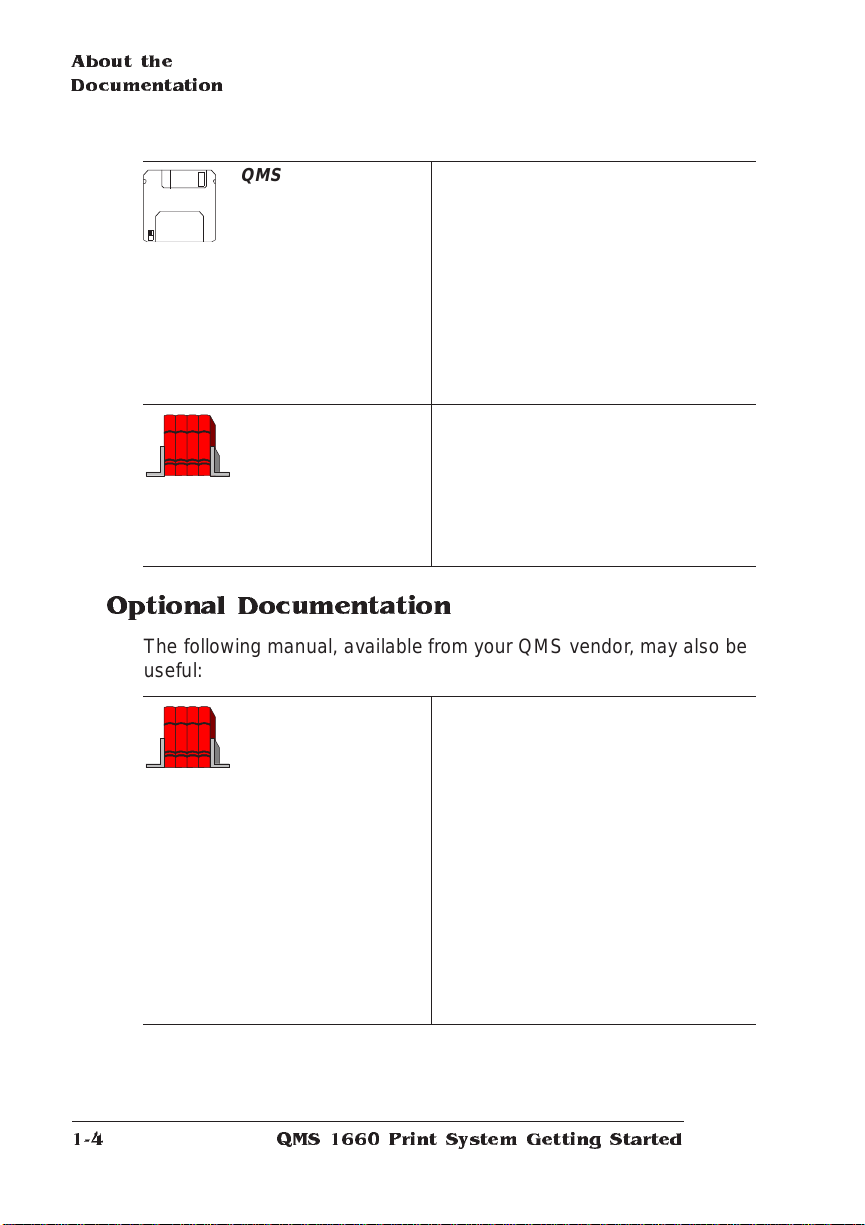
QMS Crown Network
Notes
» Note:
This manual is provided
on disk in encapsulated
PostScript (EPS) form. Refer to
the README file for information
on printing a hard copy of the
manual.
Printer Option
Documentation
Refer to this manual for tips on using
your QMS 1660 Print System if you’re
connecting t o a network through the
serial or parallel port.
It discusses 3Com 3+Open, Banyan
VINES, LAN Manager-based LANs,
Novell NetWare, TCP/IP, UNIX, and
VMS/DECnet. In most cases, only
advanced networ k users and system
administrators need this information.
If you purchased a printer option (for
example, a network interface or a Kanji
option kit), you received separate
documentation for it. See chapter 6,
“Printer Options,” of the
System Reference
information.
QMS 1660 Print
for additional option
Optional Documentation
The following manual, availabl e from your QMS vendor, may also be
useful:
QMS Crown Document
Option Commands
Document Option Commands (DOCs)
are software codes you insert in
documents to enable printer features
that cannot be accessed by your
application or page description
language. This manual lists and
explains all of the DOC commands. The
DOCs supported by your printer are
listed in appendix D, “Document Option
Commands,” of the
System Reference.
QMS 1660 Print
In most cases, only advanced users
and system administrators need this
information.
QMS 166 0 Print System Getting Started1-4
Page 13
Related Documentation
Don't forget that your application, host operating system, and network
documentation all contain useful printing inform ation.
About This Manual
This manual provides detailed information on how to set up your QMS
1660 Print System and how to use the control panel. It is divided into
the following sections:
About This
Manual
Introduction
1
Setting Up Yo ur
2
Printer
Connecting to a
3
Macintosh
Connecting to a PC
4
Using the Control
5
Panel
QMS Customer
A
Support
Provides an overview of the
documentation, this m anual, and the
printer’ s features.
Guides you in selecting a location for
your printer and explains how to
unpack and set up your printer.
Explains how to connect the printer to
an Apple Macintosh.
Explains how to connect the printer to
an IBM or compatible PC via the
parallel and serial ports.
Introduces the parts of the printer
control panel.
Provides world-wide product sales
and support telephone numbers and
describes how to communicate with
QMS through the QMS Bulletin
Board, CompuServe, the Internet and
Q-FAX.
Introduction
1-5
Page 14
About This
Manual
Configuration Menu
B
Displays the printer configuration
menu in tree form.
Index
Typographic Conventions
The following typographic conve ntions are used in this manual:
Mixed-Case
Cour ier
Mixed-Case
Ital ic
Cour ier
UPPERCASE
COUR IER
lowercase bold PostScript operators and DOS commands
lowercase italic
UPPERCASE File and utility names
↵ Press the Enter key (PC) or Return key (Macintosh)
^ Press and hold down the Ctrl key (PC)
» Note:
Notes contain tips, extra informati on, or important inform ation
that deserves emphasis or reiteration.
Text you type, and messages and information displayed
on the screen
Variable text you type; replace the italicized word(s) with
information specific to your printer or com put er
Information displayed in the printer message window
Variable information in text
▲ Caution
:
Cautions present information that you need to know to avoid
equipment damage, proce ss failure, or extreme annoyan ce.
M
WARNING
!
Warnings indicate the possibility of personal injury if a
specific procedure is not performed exactly as des cribed in the
manual.
ACHTUNG!
Bitte halten Sie sich exakt an die im Handbuch
beschriebene Vorgehensweise, da sonst Verletzungsgefahr
bestehen könnte.
QMS 166 0 Print System Getting Started1-6
Page 15
Printer Features
This brief overview will acquaint you with your printer’s major features
and how they can benefit you. Specific chapters throughout this manual, the operation manual, and the reference manual cont ain mo re
information on each feature. Consult the index or the table of contents
in each manual for guidance in locating thi s inf orm ati on.
Media Flexibility
The printer supports print med ia in 14 different sizes—11"x17"/
279.40x431.80, full ledger (full -bleed 11"x17" on 11.70"x17. 40"/
297.18x441.96 mm me dia), 11.7"x19.5"/297.18x495.30 mm, A3, A4,
A5, A6 (postcard), B4, B5, B6, executive, legal, letter, and universal)—and in both portrait and landscape orientations. The multipurpose tray also supports custom print media in sizes ranging from 3.9"
to 11. 7" (101 mm to 297 mm) wide and from 5.8" to 19.5" (147 mm to
495 mm) long.
User Benefit—You have the option of printing on a variety of
standard and non-standard media sizes, including full ledger
(11.70x17. 40/ 297. 18x441. 96 mm) and 11.70"x19.5"/297.18x495. 30
mm, which provide full-bleed 11"x17"/279.40 x 431.80 mm images in
both portrait and landscape orientations and wit h enough addi tional
imageable area to accommodate crop marks outside the 11"x17"
area.
Printer
Features
Multiple Resolutions
The printer supports three print resolutions: 300x300, 600x600, and
1200x600 dpi (dots per inch).
» Note:
Printing at 600x600 and 1200x600 dpi resolution on certain
media sizes requires additional mem or y. S ee the “High -Reso lution
Printing” section in chapter 3, “Advanced Printing Fe atu res,” of the
Operation manual for details.
User Benefit—Three different resolutions allow you to customize the
quality of your output according to its use: 300x300 dpi for most hardcopy needs, 600x600 dpi for good camera-ready output, and
Introduction
1-7
Page 16
Printer
Features
1200x600 dpi for better camera-ready output and enhanced gray
scales (depending on your application).
Toner Savings
The Conserve Toner option allows you to increase the life of the
printer ’s toner cartridge. Using the printer ’ s control panel or Remote
Console, you can turn Conserve Toner on or off for all print jobs. However, with PS Executive Series Utilities, you can set Conserve Toner
on a per-job basis.
User Benefit—A choice of printing modes allows you to lower printing costs by reducing the amount of toner on the printed page when
you’re printing draft copies of documents.
Three Standard Interfaces
LocalTalk, Centronics/IE EE 1284 parallel, and serial inte rfaces are
standard on your printer. An optional CrownNet (E thern et or Toke nRing) interface allows you to connect to EtherTalk (Ethernet only),
LAN Manager/LAN Se rver, NetWare, and TCP/IP networks.
User Benefit—You can connect a computer directly to the printer’s
LocalTalk, parallel, and serial ports or use the optional CrownNet
interface to connect to a wide variety of microcomputers, workstations, minicomput ers, and ma inf rame co m put er s on several different
networks using either Ethernet or Token-Ring cabling).
Four Resident Emulations
Your printer supports print ing in HP PCL 5, HP-GL, Lineprinter, and
PostScript emulations.
User Benefit—Most applicat ion s can print directly to the printer.
HP PCL 5 Emulation
The printer simultaneously emulates a Hewlett-Packard LaserJet IIISi
and an HP PaintJet XL300 Color Printer (the output is gray-scaled on
your QMS 1660). PCL 5 files print at both 300x300 dpi (bitmap and
QMS 166 0 Print System Getting Started1-8
Page 17
Printer
Features
scalable fonts) and 600x600 dpi (scalable font s only), but HP-GL/ 2
files print at 300x300 dpi only.
» Note:
Using 600x600 dpi resolution with certain media sizes may
require additional memory. See the “High-Resolution Printing” section
in chapter 3, “Advanced Printing Features,” of the
details.
Reference
HP-GL Emulation
The printer provides HP-GL plotter emulation (7470A, 7475A, 7550A,
and ColorPro) at 300x300 dpi, 600x600 dpi, and 1200x600 dpi.
» Note:
Using 600x600 dpi and 1200x600 dpi resolution with certain
media sizes may require additiona l memor y. S ee the “Hig hResolution Printing” section in chapter 3, “Advanced Prin ting
Features,” of the
Reference
for details.
Lineprinter Emulation
The Lineprinter emul ati on prints sim ple, unformat ted text files at
300x300 and 600x600 dpi. Each text line ends with a carriage return.
» Note:
Using 600x600 dpi resolution with certain media sizes may
require additional memory. See the “High-Resolution Printing” section
in chapter 3, “Advanced Printing Features,” of the
details.
Reference
PostScript Level 2 Emulation and Leve l 1
Compatibility
for
for
The QMS 1660 Print Sy stem’s Level 2 emulati on allows you to take
full advantage of your printer's high print resolution (up to 1200x600
dpi). The Level 2 emulation is compatible with Adobe's Post Script
Level 2 language while providing additional capabilities. QMS Level 2
supports extensive graphics capabilities to control the appearance of
text, geometric shapes and images, and improves mem ory and
resource management. Full support for PostScript Level 1 files is also
included.
Introduction
1-9
Page 18

Printer
Features
» Note:
Printing at 600x600 and 1200x600 dpi resolution on certain
media sizes requires additional mem or y. S ee the “High -Reso lution
Printing” section in chapter 3, “Advanced Printing Fe ature s,” of the
Operation manual for details.
Resident Fonts and Symbol Sets
Your printer comes with 12 PostScript typeface families containing 39
licensed fonts, and it provides TrueType font support (in PostSc ript
emulation only). All resident PostS cript typeface families have mu lti lingual character sets. The printer also has 7 resident bitmap HP PCL
fonts in 25 symbol sets each, 12 resident scalable HP PCL fonts in 35
symbol sets each, 1 resident scalable HP PCL font in 5 symbol sets,
and 40 resident HP-GL symbol sets.
User Benefit—With so many resident fonts and symbol sets, there is
less need for time-consuming downloadin g.
QMS Crown Technology
The QMS Crown multitasking operat ing s ystem provides fast processing speeds, networking capability, and higher printer performance while maintaining outstanding print quality.
Compile-Ahead Technology and True Multitasking
Compile-ahead technology ke eps all of the QMS 1660’s printing
resources busy to improve throughput. While the engine is printing a
page, compile-ahead technology uses available printer memory to
prepare the subsequent pages of the document (or the next job). With
pages ready in mem ory, the engine continues printi ng as soon as it
deposits printe d pages in the output tray. In other words, compili ng,
rasterizing, and printing all work independently but simultaneou sly.
User Benefit—Because print job processing time is significantly
reduced, the host is free sooner and you spend less time waiting for
your documents to print.
QMS 166 0 Print System Getting Started1-10
Page 19
Printer
Features
Simultaneous Interface Operation (SIO)
Although many other print er s have multiple interfa ce ports and automatically designate a “hot port,” only one port actively receives data
at a time. Y our QMS 1660 Print System is unique because SIO allows
all of its interface ports—LocalTalk, Centronics IEEE 488/1284 parallel, serial, and up to two optional network int erfaces— to be active at
the same time.
User Benefit—You can have m ore than one computer print ing to the
printer. E ach interface has an input buffer (which may be expanded
with additional memory) that receives data while anot her interface is
being used to print.
Emulation Sensing Processor (ESP) Technology
Most printers can recognize only their native comma nd languag e.
However, using a form of artif icial intel ligence , ESP techno logy analyzes incoming file data from any of the printer ’s interfaces, selects
the appropriate emulation from those insta lled on the printe r, and processes the print job.
User Benefit—When your printer is in ESP mo de, you can easily
print PostScript, HP PCL 5, HP-GL, and Lineprinter documen ts with out changing printer switch settings or sending soft ware comm and s
to accommodate different printer languages.
Context Switching
After its initial use, the state of an emulat ion and downl oaded dat a
(such as fonts, macros, and overlays) is preserved for as long as the
printer power is on.
User Benefit—Repetit ive download ing of emulat ion s, font s, m acros,
and overlays is unnecessary.
Compressed Data Formats
Crown printers convert data received from the input buffer s into
intermediate, compressed blocks until the data is needed for printing.
These compressed blocks of data are designed t o be processed
Introduction
1-11
Page 20

Printer
Features
rapidly by the printer, and many more can be stored in memory at one
time than can traditional bitmapped image s.
User Benefit—This allows and increa se s the speed o f such printer
features as collation and aut oma tic jam recovery.
Automatic Jam Recovery
Crown technology also provides automatic jam recovery. With most
printers, when a media jam occurs, you must remove the jammed
media and then reprint the job. If jam recovery is enabled on a Crown
printer, once you remove the jammed media, the printer reprints the
jammed page and then cont inue s with the print job. This is possible
because compressed data formats allow more pag e s to be stored in
memory. The print er re members the last page printed, pulls the nec essary information from memory, and automatically reprints any lost
pages.
User Benefit—You save time and print media because it’s unnecessary to resend a print job after clearing a media jam.
Energy Star Compliance
The QMS 1660 Print System is compliant wit h
US Environmental Protection Agency (EPA)
Energy Star regulations. After a specified
period of inactivity, the printer changes to a
low-power state (the engine remains on, but
the fuser turns off). When a print job is
received, the printer returns to normal power
within 90 seconds.
User Benefit—The EPA Energy Star Computers program promotes
the use of energy-efficient personal computers, monitors, and printers
and the reduction of air pollution caused by power generation.
QMS 166 0 Print System Getting Started1-12
Page 21
Printer
Features
Software Loadable System
Your printer has a software load able system , which allows you to
replace or upgrade its system software from a Macintosh or a PC, or
over an Ethernet or T oken-Ring network. Future enhancements to the
system software can be easily installed as they become availab le
from QMS.
Remote Console
An optional CrownNet network interface card (NIC) and its accompanying software allow your printer to establish a remot e console connection via EtherTalk, LAN Manager/LAN Server, Novell NetWare,
and TCP/IP. Printer status that requires user intervention is displayed
on the remote console. Fo r example, a status messa ge may indi cate
that paper is low, t he out put bin is full, or a media jam has occurred.
QMS CrownNet Interface Syst em Admini strat o r ’s Manual
The
explains how to begin a remote console session, and the
Remote Console User’s Guide
to control and configure the printer. A copy of each manual is shipped
with the CrownNet NIC.
explains how to use a remote console
QMS Crown
User Benefit—The ability to control your printe r from a remote console as well as from the printer’s own control panel means you don’t
have to leave your workstation every time the printer needs attention.
Moreover, you’ll know right away if the printer is tied up with a media
jam or other simple problem requiring user inte rventio n.
PCMCIA Card S lots
The two PCMCIA (Pe rsonal Com put er Mem ory Card Internatio nal
Association) card slots on the right side of the printer under the output
tray support PCMCIA Release 1.0 Type I and Type II cards. The right
slot also supports Release 2.0 Type I and Type I I cards.
User Benefit—Both slots support font and security cards (see the following section, “Printer Options,” for details).
Introduction
1-13
Page 22
Printer
Features
Printer Options
The following options are available for your QMS 1660 Prin t System.
Contact your QMS vendor for purchase information.
Upgradable RAM (Random Acce ss Memory)
The QMS 1660 Print Sy stem comes in two conf igurat ions :
n
12 MB of RA M
n
24 MB of RA M
However , you can upgrade this RAM to 64 MB through the installation
of SIMMs (single in-line memory modules). Additi onal RA M allows
you to print at higher resolutions on certain media sizes, download
and cache fonts, and attach and use multiple hard disks. Ad ditional
RAM also increases the printer's buffer (the area where data sent
from the host computer is stored), all owing you to send large dataintensive files to the printer without tying up the host for long periods.
» Note:
» Note:
SIMM specifications are included in Q-FAX document 6502,
“QMS-tested SIMMs and Hard Disks.” This document contains a
description of each approved SIMM, its manufacturers and part
numbers, and the QMS products on which it’s used. See appendix A,
“QMS Customer Support,” of this manual to find out how to access QFAX docum ents.
User Benefit—Your print e r’s memory can be upgraded as your
needs grow.
Printing at 600x600 and 1200x600 dpi resolution on certain
media sizes requires additional mem or y. S ee the “High -Reso lution
Printing” section in chapter 3, “Advanced Printing Fe ature s,” of the
Operation
manual for details.
250-Sheet and 500-Sheet Paper Cassettes
This option increases the printer's paper feed capacity. While your
printer comes standard with two 250-sheet paper cassettes (letter/A4
and 11" x 17"/A3), you can install only one paper cassette at a time in
the printer. However, an optional paper feeder allows you to install
dual paper cassettes, increasing paper feed capacity to 600 sheets
QMS 166 0 Print System Getting Started1-14
Page 23
Printer
Features
(including the multipurpose t ray). Attaching an opti onal cassett e supporter to the paper feeder allows you to install a 500-sheet paper cassette, increasing paper feed capacity to 850 sheets (including the
multipurpose tray).
User Benefit— You can customize the print er’s media input sour ces
to your printing needs.
Fonts
Optional fonts are available in three different formats:
n
The HP ProCollection fon ts and special PostS cript fonts are
either contained on font cards or must be download ed to an
optional printer hard disk. Font cards can be inserted in either of
the two card slots.
n
An Intellifont SIMM increases the number of fonts available to the
HP PCL 5 emulation from 20 to the 37 PCL 5 fonts available on
an HP LaserJet 4Si.
n
A pre-formatted IDE hard disk provides the Ka nji fon ts R yumi n
Light-KL and Gothic BBB Medium (bot h licensed to QMS by
Morisawa and Company, Ltd.) as well as the fonts Mincho
Medium, Mincho Heavy, Go thic Bold, and Gothic Heavy (licensed
to QMS by TypeBank). These fonts can be printed at a variety of
point sizes and in diff erent styles and resolutio n s.
Contact your QMS vendor for a complete list of available fonts.
User Benefit—Optional fonts increase the printer’s functionality and
allow you to create more distinctive docu ments.
Emulations
Optional emulations, such a s LN03 and QUIC II, are contained on
floppy disks and must be downloaded to an optional printer hard disk.
Contact your QMS vendor for a complete list of available emulat ions.
User Benefit—Extra emul ations allow you to print docume nts c re-
ated in printer languages other than tho se resident on the printer.
Introduction
1-15
Page 24
Printer
Features
Security Card
An optional security card allows you to password-protect the printer’s
configuration menu. Th e card can be inserted in either PCMCI A (Personal Computer Memory Card Intern atio nal Associatio n) card slot.
User Benefit—A security card restricts access to the configuration
menu to those users with valid password s, thus ensuring that defaul t
settings are not changed inappropriatel y.
CrownNet Network Interfaces
Using a CrownNet network interface card (NIC), the QMS 1660 Print
System can be attached to an Ethernet and/or a Token-Ring net wo rk
running multiple protocols. Contact your QMS vendor for a list of
available protocols.
User Benefit—CrownNet network interfaces provide f lexibil ity and
fast data transfer in complex network environment s.
Hard Disk Expandability
An optional internal IDE-SCSI disk drive board supports an internal
2.5" IDE hard disk and up to three external SCSI hard disks.
» Note:
Q-FA X document 6502, “QMS -tested S IMM s and Hard Disks,”
contains a description of each approved hard disk, its manufacturers
and part num bers, and the QMS products on which it’s used. See
appendix A, “QMS Customer Support,” of this manual to find out how
to access Q-FAX documents.
User Benefit— Hard disks provide true virtual mem or y as well as
storage for character bitmaps, downloaded outl ine fo nts, and other
files.
Paper Output Ramp
The paper output ramp exte nds the QM S 1660’s output t ray to
accommodate 11.7" x 19.5"/297. 18 x 495.30 mm me dia.
User Benefit—Extra-large-size me dia lies flat in the output tray.
QMS 166 0 Print System Getting Started1-16
Page 25
What's Next?
Chapter 2, “Setting Up Your Printer,” explains how to find a good location for the printer, unpack t he print e r, install a toner cartridge, and
load and install a 250-sheet paper cassette.
v
What's Next?
Introduction
1-17
Page 26

Page 27
2
Setting Up Your Printer
In This Chapter...
n
Finding a good location for the printer
n
Unpacking the printer
n
Installing a toner cartridge
n
Loading and installing a 250-sheet paper cassette
Page 28
Introduction
Introduction
This chapter explains how to set up your QMS 1660 Print System for
the first time.
It includes information on finding a good location for the printer,
unpacking it and checking the shipment content s, inst alling a toner
cartridge and paper cassette, and printing a start-up page.
Finding a Good Location
Your QMS 1660 Print System operat es in almost any comput ing en vironment. However, when selecting your printer's location, use the following guidelines.
Location Requirements
n
Away from cooling sources, heat ing sources, extreme tem perature changes, direct sunlight, excessive dust, and corrosive
chemicals or vapors.
n
Away from any strong electromagnetic field (such as that created
by an air conditioner) and excessive vibration.
n
Temperature range of 50° F (10° C) to 90° F (32.5°C).
n
Relative humidit y range of 20% to 80%.
n
Level (with less than 2° slope) and capable of supporting the
printer weight, which is about 50 lbs (23 kg) for the printer only.
n
An appropriate distance from the host comp uter, based on your
operating environment— 6 feet (1.8 m eters) or less for parallel
connection or 25 feet (7.5 meters) or less for a serial connection.
n
Well ventilated. Leave space on each side of the printer for adequate ventilation.
n
Enough space to hold the four printer legs and to allow you to
open the front cover, access the multipurp ose tray, and slide out
QMS 166 0 Print System Getting Started2-2
Page 29
Finding a Good
Location
the paper cassette. In other words, with the 11" x 17"/A3 paper
cassette installed, you need an area at least 25.4"/664 mm x
49.2"/1250 mm.
3.4" (85 m m)
4
4
6
(
"
4
.
5
2
3.5" (90
3.9" (100 m m)
49.2" (1250
mm)
Power Requirements
Your print er requires a properly groun ded AC outlet with a power
range of ±10% of the rated voltage (100, 110/120, or 220/240 V).
Noise-generating equipment should not be connected to the same
electrical outlet as the printer. The recommended frequency is 50 Hz
±2 Hz for 100 and 220/240 V systems and 60 Hz ±2 Hz for 110/120 V
systems.
▲ Caution:
grounding plug for safety purposes. Use the proper grounding-t ype
power outlet.
Energy Star Compliance
The printer is compliant with US Environment al Protect ion A gency
(EPA) Energy Star regulations. After a specified period of inactivit y,
the printer changes to a low-power state (the engine remains on, but
the fuser turns off). When a print job is received, the printer returns to
normal power within 90 seconds.
The supplied power cord is equipped with a 3-wire
Setting Up Your Printer
2-3
Page 30
Checking
Shipment
Contents
Checking Shipment Contents
In addition to this manual, your shipment consists of the following
items. As you unpack the printer in the next section, make sure that
all of these items are included in your shipment before setting up your
printer. I f any items are missing or damaged, co ntact you r shipping
company or your QMS vendor. Se e appendix A, “QMS Custom er
Support,” for world-wide product sales and support informat ion.
n
QMS 1660 Print System
n
250-sheet ledger or A3 paper cassette
n
250-sheet letter or A4 paper cassette
n
Paper cassette rear cover
n
Power cord
n
Warranty and registration card
n
Toner cartridge
n
Documentation
— QMS 1660 Print Syst em Operation
— QMS 1660 Print Syst em Ref erence
—
QMS Crown Network Notes
n
Documentation binder
n
PS Executive Series Util ities softw are (on disk)
» Note:
Interface cables aren’t included in the shipment. If you need
cables, contact your QMS vendor or a local computer store. Chapters
3, “Connecting to a Macintosh,” and 4, “Connecting to a PC,” of thi s
manual specify the type of cable you need.
QMS 166 0 Print System Getting Started2-4
(on disk)
Page 31

Registering the Printer
QMS is committed to develop ing print systems tha t offer you flexible,
efficient solutions, so we’re interested in knowing how you plan to use
your printer. Regist er it now, and we’ll send you a special gift.
To register by mail, fill out and send in your warranty card. To register
by telephone, in the US call QMS toll-free at (800) 637-8049. In other
countries, refer to appendi x A, “QM S Customer Support,” for the
appropriate telephone number.
Unpacking the Printer
The packing materials that protect your printer during shipment —
cardboard, polystyrene, tape, and shipping spacers—must be
removed before you can use the printe r.
Use the following procedure to unpack the printer. To ensure that your
printer was not damaged during shipment , follow the enti re procedure, including printing the start-up page.
Registering
the Printer
» Note:
▲ Caution:
M
You may want t o save the packing materi als in case you ever
have to move or ship the printer to a new location.
You may damage the printer if you turn it on before all of the
packing materials are removed.
WARNING!
yourself.
ACHTUNG!
niemals, das Gerät alleine anzuheben oder zu tragen.
1 Remove everythi ng except the printer fr om the shipp ing
carton.
Setting Up Your Printer
The printer weighs about 50 lbs (23 kg). Don’t lift it by
Der Drucker wiegt ca 23 kg; bitte versuchen Sie
2-5
Page 32

Unpacking th e
Printer
2 Lift the printer out of the shipp ing carton.
The printer is heavy, so two peop le should lif t it. Hold the printer
by the carrying grips located on the printer bottom.
3 Remove the protective plasti c cover in g and tape from the
printer body.
4 Using both hands, open the mul tip urp ose tray.
5 Open the printer's front cove r.
QMS 166 0 Print System Getting Started2-6
Release Button
Page 33

Unpacking the
Printer
6 Remove the two orange sh ipping spacers from inside the
printer.
7 Remove the piece of cardboard that holds the paper lift plate
in plac e.
Setting Up Your Printer
2-7
Page 34

Installing
Consumables
Installing Consumables
You must install the toner cartridge, load and install a paper cassette,
connect the power cord, and print the start-up page before you can
install any option s.
Installing the To ner Cartridge
Characters and images are created in your laser printer through a
process that applies toner (made of carbon particles) to the page in
the printer’s fusing unit. When an image is formed, heat and pressure
from the printer are applied to transfer the im age to the page. The
toner cartridge contains the toner and the photosensit ive drum
needed to operate the laser printer. You may purchase additional
toner cartridges from you r QMS ven d or.
» Note:
The toner cartridge is sensitive to bright light. Do not remove
the cartridge from its protective bag unt il you are ready to install it.
Keep the toner cartridge away from your comput er. The magnets in
the cartridge can damage data, particularly on your floppy disks.
1 Lift the toner cartri dg e out of its sh ippi ng carto n, ope n the
aluminum pr otecti ve bag , and remove the cartrid ge.
QMS 166 0 Print System Getting Started2-8
Page 35

Installing
Consumables
2 Remove the black pro tective sh eet, an d discard it.
Place the cartridge on a stable, flat surface to get a good grip on
the protective sheet tab.
3 Distribute the toner in the cartridge.
Hold the cartridge with both hands, and gent ly rock it from sideto-side five or six times to distribute the toner.
Setting Up Your Printer
2-9
Page 36

Installing
Consumables
4 Remove the tape seal.
Holding the cartridge in place with one hand, use your other hand
to grasp the orange tab on the right side of the tape seal. Pull the
orange tab (26.4"/670 mm) straight out, and then discard both the
orange tab and the tape seal.
Tape Seal
QMS 166 0 Print System Getting Started2-10
Page 37

Installing
Consumables
5 Slide the toner cartridg e into the printer.
Grasp the green tabs on the toner cartridge and place the cartridge on the rails inside the printer. Then lift the green t abs
slightly , and slide the cartridge straight back into the printer until it
is firmly seated.
6 Close the front cover, and then close the multipur pos e tray.
» Note:
When a toner cartridge is installed, keep the printer's front
cover closed unless you need access to the inside of the printer.
When the front cover is open, the protective shutters of the
cartridge’s photosensitive drum open, and the drum surface is
exposed to light. This may deteriorate the drum and reduce print
quality.
Loading the 250-Sheet Paper Cassette
The QMS 1660 Print System comes standa rd with two 250- sheet
paper cassettes (letter/A4 and ledger/A3). Load paper in either 250sheet cassette as follo ws.
» Note:
Paper must be loaded only in the appropriate casset te (for
example, letter and A4 paper must be loaded only in the letter/A 4
cassette). When the cassette is inserted into the printer, it sends a
paper size signal to the printer software.
Setting Up Your Printer
2-11
Page 38

Installing
Consumables
1 Remove the packi ng mate rial s from insi de the two paper
cassettes.
One paper cassette is already installed in the printer.
2 Align a stack of paper on a flat surface.
The cassette holds about 250 sheets of 20 pound (75 g/m
paper.
3 Insert the paper into the approp ri ate cassette.
Make sure the paper lies flat, does not exceed the top limit mark,
and rests under the retaining clips.
Top Limit
Bottom
2
)
QMS 166 0 Print System Getting Started2-12
Page 39

Installing
Consumables
4 Slide the cassette into the cassette slo t until it’s firmly
seated.
5 Adjust the media stop to fit the paper size.
The printer delivers your output, print-side down , to the output
tray at the top of the printer. The media stop keeps the sheets
positioned in the output tray.
Setting Up Your Printer
2-13
Page 40

Installing
Consumables
6 If you’re using ei ther a led ger /A3 or an optio nal leg al/B4
media cassette, place the cassette rear cover on the end of
the cassette at the rear of the printer.
QMS 166 0 Print System Getting Started2-14
Page 41

Connecting
the Power Cord
Connecting the Power Cord
The power cord connector is located at the rear of the printer. The
power switch is located at the lower right of the printer.
▲ Caution:
is pressed down).
1 Plug the power cord in to the connecto r on the rear of the
2 Connect the oppo site en d of the po wer cor d to a ground ed
Make sure that the printer power switch is turned off (the O
printer.
AC outlet.
3 Turn on the printer (press down the | side of the switch).
After a brief warm-up (2 minutes m axim um ) the p rinte r produce s
a start-up page.
Setting Up Your Printer
2-15
Page 42

Printing a Start-up Page
Printing a S tart-up Page
When you turn on the printer, a start -up page print s. This page gives
you an overview of your QMS 1660 Print S y stem.
The following information prints on the start-up page:
n
Printer product name
n
Cumulative num ber of printed sh eets
n
Amount of resident RAM (in bytes)
n
Number of PostScript typefa ces in ROM
n
Default resolution
n
Software version, revision, and release numb ers
n
Firmware level number
n
Address and status (on or off line) of attached hard disk(s), if any
n
Emulation and protocol informat ion for all standard and optional
interfaces
If the start-up page prints with all the start-up page informat ion , and
the print quality is good, go to chapter 3, “Connecting to a Macintosh,”
or chapter 4, “Connecting to a PC.”
Otherwise, see chapter 6, “Troubleshooting,” of the
for more information on print ing a start -up pag e.
M
WARNING
checking for correct printer installation.
ACHTUNG!
den Netzstecker heraus, bevor Sie die korrekte Installation des
Druckers überprüfen.
!
Turn the printer off and unplug the power cord before
Schalten Sie bitte den Drucker aus und ziehen Sie auch
QMS 166 0 Print System Getting Started2-16
Operation
manual
Page 43

Enabling/Disabling the Start-up Page
A start-up page automatically print s when you turn on your print system. You can save time, paper, and toner by disabling the start-up
page. However, you m ay need the information included on the startup page after you have disabled the page (for example, to provide to
QMS Customer Technical Assurance).
You can disable (and enable) the sta rt-up page in two different wa ys:
1 Use the PS Executive Series Utilities. S ee the PS Executive
Series Utilities on-line document atio n for compl ete information.
2 Use the printer control panel (Admini strat ion/ Start up Opt ions/ Do
Start Page menu). See “Enabl ing/ Disabl ing the S tart -up Pag e ” in
chapter 4, “Printer Configuration,” of the
information.
Reference
Installing Options
Installing
Options
for complet e
If you purchased any printer options, such as extra memory (SIMMs)
or a hard disk, you can install them now. If installation instructions are
included with the option, follow them. If not, installat ion inst ructio ns
are included in chapter 6, “Printer Options,” of the
What's Next?
Now that you’ve set up your printer, go to chapter 3, “Connecting to a
Macintosh,” or chapter 4, “Connecting to a PC,” of this manual to connect your printer to a host computer.
If you want to connect your printer to a network via an optional
CrownNet network interface, use the installat ion instructions in chapter 6, “Printer Opti ons,” of the
tions that came with the interface.
v
Setting Up Your Printer
Reference
Reference
and the connection instruc-
.
2-17
Page 44

Page 45

3
Connecting to a Macintosh
In This Chapter . . .
n
Printer-host int erfac e
n
AppleTalk port connection
n
Macintosh printing software
Page 46

Introduction
Introduction
This chapter explains how to connect your printer to a Macintosh (or
another computer on a network tha t uses LocalTalk-t ype connectors
and boxes) and how to install the necessary Macintosh printing software.
The AppleTalk port is use d to print if
n
Your host is any member of the Apple Macintosh f ami ly. I f you’re
connecting the printer to an AppleTalk ne twork wit h more than
one Macintosh, see your PhoneNET and Macint osh document ation for more informati on.
n
Your host is an IBM PC or compatible microcomput er, workstation, minicomputer, or mainframe computer that connects through
a print network (such as TOPS or AppleShare) using LocalTalktype connectors and boxes. If you’re connecting the printer to one
of these computers, you may need additional hardware or software (see your computer or network documentatio n).
» Note:
If you’re connecting your printer to a network, see your network
documentation for connection inf ormat ion.
QMS 166 0 Print System Getting Started3-2
Page 47

Before Mak ing
the Connection
Before Making the Connection
If you have a brand-new Macintosh, before connecting the printer you
should follow the manufacturer’s instructions for setting up the Macintosh and installing (if it's not already insta lled) any operat ing s ystem
software.
What You Need
Interface cables are not included with your printer. If you’re replacing
a printer, you may already have the necessary cables. If not, contact
your QMS vendor or a local computer store.
To connect your printer to a single Macintosh, you need the followi n g:
n
Two P hon eNE T-type transformer boxes (one for the printer port
and one for the Macintosh port), each with a DIN-8 connector
n
An RJ11 (telephone) cable
n
Two t erm inat ing resisto rs to close the open sockets left in the
transformer boxes after the connectio n is made
Making the Connection
▲ Caution:
the connection.
SERIAL PARALLEL LOCAL OPT I/O-1 OPT I/O-2
1 Plug the connector from one transfor mer box into the
Connecting to a Ma cintosh
Turn off both the printe r and the Macintosh bef ore makin g
TALK
printer’s AppleTa lk port.
3-3
Page 48

Making the
Connection
2 Plug the connector from the othe r transfor mer box into the
3 Connect the two transformer boxes with the telephone cable.
4 Put terminating resi stors in all open sockets in the connec-
Macintosh printer port.
tor boxes.
This ensures proper communication and helps speed up transmissi o n.
Macintosh
DIN-8 Male Port
DIN-8 Female Connector
Transformer Boxes
Terminating Resistors
DIN-8 Female Connector
RJ11 C able
Printer
DIN-8 Male Port
5 Turn on both the printer and the Macintosh.
A start-up page should print. If it doesn’t, see the “Printer Problem
Checklist” in chapter 6, “Troubleshooting,” of the
Operation
guide.
6 Test communicatio n betw een the pr inte r and the Maci ntos h.
You can do this by sending a file from one of your applications, or
you can refer to “Testing Communication” in chapter 6, “Troubleshooting,” of the
Operation
guide.
QMS 166 0 Print System Getting Started3-4
Page 49

Macintosh
Printing
Software
Macintosh Printing Software
If your Macintosh was previously connected to a PostS cript prin ter,
you can probably start printing now wit h the printing sof twa re already
in place. Refer to your application documen tation for instructi ons on
sending a document to the printer.
However, if you want to use all of your printer's special features (like
collation, 600x600 and 1200x6 00 dpi printing, and gamm a correction), or if you've never printed to a PostScript printer bef ore, you
need to take a few mi nut es to make sure you have the following printing software installed:
n
PS Executive Series Util ities
n
The 1660 PP D fil e
n
Application-specific print er files
Installing PS E xecutive Series Printer Utilities
The PS Executive Series Utilit ies (or PS Exec), included on the M acintosh-format disks we shipped with your printer, is a utilities program
for controlling the printer from the Macintosh. For example, through
PS Exec you can turn off the start-up page, rename the printer, install
printer-resident screen fonts, download fonts, print font samples, and
manage hard disks. Many of the procedures described in this manual
involve using PS Exec.
1 With the Macintosh on, insert the Ma cintosh Forma t PS
Executive Serie s Utilitie s disk in the disk driv e.
xx
2 Double-click the P S Exe c3.
3 In the PSExec 3.
Location.
To change the Install Location you can either use the drop-down
list box to display and select the appropriate disk, or you can
choose the Switch Disk button to scroll through the available
disks.
Connecting to a Ma cintosh
xx
dialog box that appears, verify the In stal l
Installer icon.
3-5
Page 50

Macintosh
Printing
Software
4 Also in the PSExec 3.xx dialog box, choose Easy In stal l or
Custom Install.
n
Easy Install automatically installs all of the utilities, including
x
the PS Exec application; the LaserWriter 8.
PDX, and PPD files; and the screen fonts.
n
Custom Install allows you to choose the options you want to
install.
The amount of available space on your Macintosh hard disk
and the amount of space necessary for all of the selected
options are indicated near the botto m of the window.
driver; the PD F,
» Note:
If you’re using Custom Install, you can click the sma ll
I
icon (it looks like an
inside a square) to the right of each
install option for more info rmat ion abou t that option.
5 Click the Install but ton to beg in the in stall atio n.
The installation takes approxim ate ly one minute. The Install er
x
places the LaserWriter 8.
the System Folder and all of the other options inside a newly created PSExec 3.
folder is the Installer log file, which you can view to verify the
installation.
» Note:
x
ƒ folder in the hard disk wi ndow. Also inside this
All Macintosh users on a network must use the same
driver in the Extensions folder inside
version of the LaserWriter and Laser Prep files to run correctly.
For example, if the network has a mixture of LaserWriter 6.x, 7.x,
and/or 8.x, the printer will experience frequent reiniti alization
problems. To check the version numb er, select the LaserWriter
icon and then hold down the Command key and press the
The driver version number appears in the Info window on t he
second-to-last line. LaserWriter 7.x and 8.x do not require a Laser
Prep file to work correctly with your printer. The Laser Prep
information is located within the Lase rWrite r driver itself.
6 When the installati on is finish ed, you are prom p ted to
choose Continue to install addi tion al opti ons from the Custom installati on o ptio n or to choos e Qui t to exit the In stall er
program.
I
key.
QMS 166 0 Print System Getting Started3-6
Page 51

Macintosh
Printing
Software
» Note:
The Easy Install procedure automatical ly install s the
x
Version 4.
PPDs but not the Version 3. 0 PPDs. If you want to
install them, you can do so now as a Custom installation. Return
to step 4.
7 Back at the hard disk window, open the new PSExec 3.x ƒ
folder and then , insid e that, the PS Exec ƒ fold er.
8 Open PSInstall to personal ize you r copy of PS Exec.
9 Check the README file(s) for updates, and see the PS Exec
on-line help for inform atio n on usin g the utilit y.
Installing the QMS 1660 4.1 PPD
The QMS 1660 Print System 4.1 PPD (a printer description file)
allows you to take advantage of printer features like multiple-resolution printing and collat ion that are not available through LaserWriter
x
alone.
8.
» Note:
If you have problems printing with LaserWriter 8.x, reinstall the
LaserWriter 7.x driver that came with your Macintosh (if available), or
call the QMS Customer Response Center (CRC). See appendix A,
“QMS Customer Support,” for a list of telephone numbers.
1 If you haven't already, follow the instructions given abov e in
“Installing PS Executive Series Pr inter U tilities. ”
2 If necessary, cre ate a Printer Descr iptions fol der:
System 7 users—Create a folder called Printer Descriptions
inside the Extensions folder inside the System Folder.
System 6 users—Create a folder called Printer Descriptions
inside the System Folder.
xx
3 Open the 4.1 PPDs fo lder in si de the P SEx e c 3.
4 Select the QMS 1660 Print System PDF, an d drag it to the
Printer Description s fold er.
5 From the Apple menu, choose Chooser.
6 In the Chooser wind ow, select the LaserWriter 8.
select QMS 1660.
Connecting to a Ma cintosh
ƒ folde r.
x
icon and
3-7
Page 52

Macintosh
Printing
Software
7 Choose the Setup button .
8 Exit from the Choose r.
Installing Application-Specific Printer Files
If you plan to print from Aldus PageMaker, Aldus FreeHand, Aldus
PrePrint, Adobe Separator, or QuarkXPress, you’ll also want to install
the latest printer description fi le (PPD, PDX, or PDF) for your particular software. You can probably print without this file, but you may not
be able to access all of your printer’s features, and you may get an
error message telling you to change the printer name.
The LaserWriter driver to queries the printer and automatically
chooses the appropriate PPD.
Now, when you open the application, you can access QMS printing options by choosing Options in your applicat ion’s Print dialog
box. Choose Help in the Options dialog box for info rmat ion on
these options.
» Note:
The application (PageMaker, FreeHand, PrePrint, Separator, or
QuarkXPress) should be installed before you install the printer
description file(s).
1 If you haven't already, follow the instructions given abov e in
“Installing PS Executive Series Pr inter U tilities. ”
2 Install the appropri ate pri nter des cri ptio n file(s) for your ap-
plication from 4.1 PPDs, PDFs, or PDXs folder in the PSExec
x
ƒ folder:
3.
n
If you use Adobe Separator, install the PPD file. Your Separator documentation explain s where to put it.
n
If you use Adobe PageMaker 5.
PPD in the Printer Descriptions folder.
n
If you use Aldus PageMaker 4.
and PDX files in the PPD s folder in the Aldu s folder in the
System Folder.
n
If you use Aldus FreeHand 4.
in the Printer Descriptions folder.
QMS 166 0 Print System Getting Started3-8
x
, install the version 4.1
x
, install the version 3.0 PPD
x
, install the version 4.1 PPD
Page 53

Macintosh
Printing
Software
x
n
If you use Aldus FreeHand 3.
and PDX files in the PPD s folder in the Aldu s folder in the
System Folder.
, install the version 3.0 PPD
» Note:
the PS Exec Easy Install procedure. You must use the
Custom Install procedure. Refer to the PS Exec installation
instructions at the very beginning of this section.
n
If you use Aldus PreP ri nt, in st all the version 3.0 PPD and
PDX files in the PPDs folder in the Aldus folder in the System
Folder.
» Note:
the PS Exec Easy Install procedure. You must use the
Custom Install procedure. Refer to the PS Exec installation
instructions at the very beginning of this section.
n
If you use QuarkXPress , instal l the QMS 1660 and 1660E
PDFs in the PDF folder in the QuarkXPress folder. While
QuarkXPress 3.3 allows you to access either a PDF or a
PPD, to have access to all of your pri nter’s features, you
should use the PDF. To select the PDF, go to the Page Setup
dialog box in QuarkXPress, and hold down the Shift key while
clicking the Printer Type list box. (The italicized selections are
PPDs, and the non-italicized sel ections are PDFs. )
» Note:
and enhanced (advanced) halftoning (or scree ning) in
QuarkXPress. If this PDF is not present, you won’t be able to
used enhanced halftoning even though the printer supports it.
See “A Special Note for QuarkXPress Users” in chapter 5,
“Additional Techni ca l Reference,” in the Reference, for more
information on halftones.
Version 3 PPDs are not installed automatically through
Version 3 PPDs are not installed automatically through
The 1660E PDF allows you to choose between basic
Connecting to a Ma cintosh
3-9
Page 54

Printing from
the Macintosh
Printing from the Macintosh
You're now ready to print from your Macintosh. From this point, you'll
probably perform most printing tasks from your applicat ion. For
specific information, check the printin g section in your application
documentation.
For information on print media types and sizes, see chapt er 2, “Print
Media,” in the
Reference
A Note for Users of "Aldus" Applications
If you use an Aldus application (or one that used to be owned by
Aldus, such as Adobe PageMaker or MacroMedia FreeHand), when
you want to print, hold down the Option key while selecting Print from
the File menu. This brings up the LaserWriter windows, which contains the QMS printing options. Norm ally, Aldus applications bypass
LaserWriter and use an Aldus printer driver, which prevents you from
accessing QMS printing options.
guide.
A Note fo r Users of Adobe PhotoShop
If you use Adobe PhotoShop, go t o PhotoS hop’s Page S etu p dialog
box, and select Use Printer ’s Default Scree n under the S creens
option. This allows your choices in the QMS driver to take effect.
What's Next?
Now that you’ve connected your printer to a Macintosh, skip to chapter 5, “Control Panel,” to learn about the printer’s control panel keys,
indicators, and message window.
v
QMS 166 0 Print System Getting Started3-10
Page 55

4
Connecting to a PC
In This Chapter . . .
n
Connecting via the parallel po rt
n
Connecting via the serial port
n
Using PS Executive Series Util ities
n
Using the QMS-developed Windows driver
Page 56

Introduction
Introduction
This chapter explains how to connect your printer to a PC via the parallel and serial ports and how to install the necessary PC printing software.
» Note:
If you’re connecting your printer to a network, see your network
documentation for connection inf ormat ion.
Before Making the Connection
If you have a brand-new PC, before connecting the printer you should
follow the manufact ur er ’s instructi ons for sett ing up the PC and
installing (if it’s not already inst alled ) any operat ing s y stem sof tw are,
such as DOS and Windows.
What You Need
Interface cables are not included with your printer. If you’re replacing
a printer, you may already have the necessary cables. If not, contact
your QMS vendor or a local computer store.
To connect your printer to a single PC, you need one of the following:
n
A parallel cable with a 36-pin male and a 25-pin mal e connector.
or
n
A serial cable with either a 9- or 25-pin connector (depending on
your PC’s serial port) and a 9- or 25-pi n null modem assembly to
connect to the serial cable. Depending on the type of null modem
assembly you have, you may also need a 9-to-25-pin adapter.
See your cable vendor for more specific cable assembly information. (Appendix B, “Technical Specif ications, ” of the
contains cable pinout specifications.)
Reference
QMS 166 0 Print System Getting Started4-2
Page 57

Before Mak ing
the Connection
Choosing a Cable
Parallel cable— If a parallel port is available on you r PC, we recommend using a parallel cable. Your printer supports both Centron ics
parallel and IEEE 1284 bidirectional parallel communication. The type
of parallel cable you use depends on the type of parallel communication your PC supports (check your PC’s documentation if you’re
unsure).
n
If your PC supports IEEE 1284 bidirectional parallel communication, you need an IEEE 1284 bidirectional parallel cable (IEEE
1284 is indicated on the cable). Thi s cable must be 6.5 feet/
2 meters or less in length.
n
If your PC supports only Centronics parallel (IEEE 488) communication, you may use either an IEEE 488 parallel cable (unmarked
on cable) or an IEEE 1284 bidirectional parallel cable (IEEE 1284
is indicated on the cable). However, we recommend an IEEE
1284 cable. The IEEE 1284 cable mu st be 6.5 feet/2 meters or
less in length while the IEEE 488 cable may be longer.
Serial cable—If the printer is more than about 6.5 feet/2 meters from
the PC, we recommend using a serial cable for better communication.
For best results, the serial cable should be less than 25 feet/7.6
meters long.
Connecting to a PC
4-3
Page 58

Making the
Connection
Making the Connection
▲ Caution:
connection
SERIAL PARALLEL LOCAL OPT I/O-1 OPT I/O-2
1 Attach the cable to the printer and the PC.
Turn off both t he printe r and the PC before maki ng the
.
TALK
n
Parallel Cable
PC
25-pin Fema le Port
Printer
36-pin Female Port
To PrinterTo PC
a Connect the 36-pin end of the cable to the printer’s
parallel port (it’s labeled “PARA LLE L” ).
b Close the clips.
c Connect the 25-pin end of the cable to the PC’s parallel
port.
d Tighten the screws.
QMS 166 0 Print System Getting Started4-4
Page 59

n
Serial Cable
Making the
Connection
PC
9-pin Male Port OR
25-pin Male Port
To PC To Printer
a Connect the serial cable, null modem assembly, and, if
necessary, an adapter.
b Connect one end of the serial cable-null modem
assembly to the printer ’s serial port (labeled “SERI AL ”)
and the other end to the PC’s serial port.
c Tighten the screws.
2 Turn on both the printer and the PC.
Printer
9-pin Female Port
A start-up page should print. If it doesn’t, see the “Printer Problem
Checklist” in chapter 6, “Troubleshooting,” of the
Operation
3 Test communicatio n betw een the pr inte r and the PC.
You can do this by sending a file from one of your applications, or
you can refer to “Testing Communication” in chapter 6, “Troubleshooting,” of the
Operation
guide.
Connecting to a PC
guide.
4-5
Page 60

PC Printing Software
PC Printing Software
If you're replacing a PostScript printer, you can probably start printing
now with the printing software already in place. Refer to your application documentation for instructions on sending document s to the
printer.
However, if you want to use all of your printer's special features (like
collation, 600x600 dpi and 1200x600 dpi printing, and gamma correction), or if you've never printed to a PostS cript printer bef ore, we recommend you take a few minutes to make sure you have the following
printing software installed :
n
PS Executive Series Util ities
n
A PostScript printer driver
n
Printer description files (if you use QuarkXPress 3.3, Aldus PageMaker, or Adobe PhotoShop)
Installing PS E xecutive Series Printer Utilities
The PS Executive Series Utilities (or PS Exec), included on the DOSformat disks we shipped with your printer, is a utilities program for
controlling the printer from your PC. For example, through PS Exec
you can turn off t he sta rt-up page, renam e the printer, download
fonts, print font samples, and manage hard disks. M any of the procedures described in this manual involve using PS Exec. The README
file on the PS Exec disk explains how t o install the program, and the
on-line help explains how to use it.
Installing a PostS cript Printer Driver
If you're using Wind ows , we recomm end that you inst all th e
QMS-developed Windows driver. See “Installing the QMS Windows
Driver,” belo w.
If you're using a non-Wi nd ows applic atio n, read the printing se ction of the application document ation for inf ormatio n on choosing a
PostScript driver. If the application does not provide a PostScript
driver, contact the application manufacturer to see if one has become
QMS 166 0 Print System Getting Started4-6
Page 61

PC Printing
Software
available since you bought the program. Also, P ostS cript drivers for
some applications are availabl e through the QM S Corporate Bullet in
Board System and through CompuS erve; see appendi x A, “QMS
Customer Support,” for informati on.
Also, check to see if application notes (tips for printing from specific
applications) are available for your applicat ion from Q-FAX, the QMS
bulletin board, or CompuSe r ve. Appendix A, “QMS Custom er Support,” explains how to use these QMS informatio n services.
Installing the QMS Windows Driver
The QMS-developed Window s driver supports all the printer's features. Use the following procedure to install the driver:
1 With Windows ru nn ing on your PC, insert the QM S “Win-
dows Driver” disk (shipped with your printer) in the PC’s 3.5"
disk drive.
2 Open the Windo ws Con trol Panel, and doubl e-cli ck the
Printer’s icon.
The Control Panel icon is usually located in the Program Manager’s Main window.
3 In the Printers dialog box, choose the Add button.
4 From the List of Printers that appears , choose Install
Unlisted or Updated Printer, and then choose the Install button.
5 In the text box that appears, type the name of the di sk drive
(for example, a: \) the Windows Dri ver di sk is in, and then
choose OK.
6 In the Add Unlisted or Updated Printer dialog box, select the
appropriate printer:
n
If you’re using the QMS Level 2 Windows printer driver, select
your printer (for example, QMS 1660 Level 2) from the list of
printers, and choose OK.
Connecting to a PC
4-7
Page 62

PC Printing
Software
n
Otherwise, select QMS PostScript Printer, and choose OK.
» Note:
If you see the message Insert Microsoft Windows
3.1 Disk #5 or a disk with the updated
SSERIFF.FON file in..., choose Cancel.
7 When QMS 1660 Level 2 appears in the list of printer s,
choose the Connect button to configure the printer port.
8 In the Connect dialog bo x, select the app rop ri ate compu ter
port in the Ports list, and then choo se OK.
9 Choose the Setup button to configu re the printer’s default
settings:
n
If you’re using the QMS Level 2 Windows printer drive r, on
the setup tabs select the appropriate default settings.
n
Otherwise, in the PostScript Printer on xxx dialog box, select
your printer (for example, QMS 1660) in the Printer dropdown list box, and select the appropriate def ault settin gs.
10 Cho ose OK to retu rn to the Prin ters dialo g box.
11 Choose S et As Default Printer to m ake the QM S printer the
default printer.
12 Repeat steps 3-10 to install the QMS driver for other ports, or
choose Close to exit from the Printers dialo g box.
Now you can set printer options from your applicat ion by choosing
Print Setup from the application’s File menu and then ch oosing the
Options button. Choose the Help button in any of the driver dialog
boxes for information on driver options.
Printer Description Files
Printer description files for Windows applicat ions are included on t he
QMS Windows Drivers disk shipped with your printer.
n
If you use Adobe Pho toS hop , for best output quality use the
QMS-developed Windows driver. Then, so th at choices in the
QMS driver take effect, go to PhotoShop ’s Page Setup dialo g
box, and select Use Printer ’s Default Scree n under the S creens
option.
QMS 166 0 Print System Getting Started4-8
Page 63

x
n
If you use Adobe PageMaker 5.
QMS Windows Drivers disk. If you experience problems using the
QMS driver with this applicati on, refer to chapte r 6, “Troubleshooting,” in the
n
If you use QuarkXPress 3. 3, after you instal l the QMS driver
install the QMS 1660 PDF according to the instructions in your
QuarkXPress documentation.
Operation
guide for more inform at ion.
, use th e v ersion 4 PP D on t h e
Printing from the PC
You're now ready to print from your PC. From this point, you'll probably perform most printing tasks from your applicati on. Fo r specific
informatio n, check the printing sect ion in your application document ation.
For information on print media types and sizes, see chapt er 2, “Print
Media,” in the
Reference
guide.
Printing from
the PC
What's Next?
Now that you’ve connected your print er to a PC, contin ue with chapter 5, “Control Panel,” to learn about the printer’s control panel keys,
indicators, and message window.
v
Connecting to a PC
4-9
Page 64

Page 65

5
Control Panel
In This Chapter...
n
Control panel indicators
n
Control panel messa ge window
n
Control panel keys
Page 66

Introduction
Introduction
The control panel, located on the front of the printe r, allows you to
direct the printer ’s operation. In addition, it displays the current status
of the printer, including any condition th at needs your attention.
The control panel consists of the following parts:
n
Eight indicators provide printer status information and identify the
current media source.
n
A message window displays status and configuration information.
n
Seven keys allow you to control the printer.
Control Panel Indicators
Five indicators on the control panel display printer status information,
and three other indicators (locate d on the print engine diagram ) identify the current media source:
Flashes when the printer is warming up. It remains o n
when the printer is ready to receive a print job and while it
is processing or pr inti ng a job (unless an error is
encountered).
Lights when the printer requires operator intervention.
This indicator is usually accompanied by a status
message in the message window.
Lights when the printer is receiving data from one or more
of the simultaneous interfaces.
QMS 166 0 Print System Getting Started5-2
Page 67

Control Panel
Indicators
Lights when the printer is on line and ready to accept and
process new print jobs. Press it once to take the printer off
line (the indicator is not lighted) and make the printer
ready for configuration.
Lights when you access the configuration menu and
remains on until you press the Online/Offl ine key to put
the printer back on line.
Lights when the multipurpose tray is the current input bin.
Lights when the lower cassette is the current input bin.
Lights when the optional cassette is the current input bin.
Control Panel
5-3
Page 68

Message
Window
Message Window
The control panel message window provides status and configuration
information. Status messages are listed in chapter 6, “Troubleshooting,” of the
chapter 4, “Printer Configuration,” of the
Operation
Setting the Message Window Language
Status messages and configuration me nus can be displayed in the
message window in English, French, German , or Spanish. If you
need to change the message window language, use the Keypad
Language option in the Administ rati on/M iscell aneous me nu.
If you’re not familiar with using the configurat ion m enu, refer to chapter 4, “Printer Confi gurati on, ” of the
tion.
Menu Administration/Miscellaneous/Keypad Language
Choices E nglish, Fre nch, German, Spanish
Default English
Notes The printer must be restarted for changes to this menu to take
effect. You can either let the printer restart automatically after
you save the change and exit f rom the configuration menu, or
you can wait f or the change to take effect the next time you
manually turn on the printer.
guide. Printer confi gurat ion is exp lained in
Reference
Reference
for complete informa-
.
QMS 166 0 Print System Getting Started5-4
Page 69

Control Panel
Keys
Control Panel Keys
Online/Offline, Cancel, and Status Page Keys
The Online/Offline, Cancel, and Stat u s Page keys access frequent ly
used printer options.
Press the Online/Offline key once to take the printer
off line (the indicator goes out). You must take the
printer off line before using all other keys except the
Cancel and Status Page keys.
When the printer goes off line, th e com m unicat ion
ports are closed, so no new data is accepted. The
printer continues printing until it has finished all jobs
in process. Although jobs continue to compile and
print using the data already received, a job may be
interrupted, causing it to wait for more incoming data
before printing resumes.
Control Panel
When the printer is off line, press the Online/Offline
key once to place it back on line and ready to accept
new print jobs (the indicator goes back on). If a
remote console has the printer off line , pressing the
Online/Offl ine key will not take effect unt il th e
console puts the printer back on line.
Press the Cancel key to cancel all print jobs
currently printing, interpreting, or spooling, or to
send an end-of-job indicator to print jobs waiting for
incoming data. The printe r then resumes printing
other print jobs in the queue. If you press the Cancel
key by mistake, or if you decide not to cancel a print
job after pressing this key, pre ss the Menu key to
“cancel” the Cancel key’s function.
See chapter 3, “Advanced Printing Features,” of the
Operation
necessary to take the printer off line first.
guide for complete information. ) It is not
5-5
Page 70

Control Panel
Keys
Press the Status Page key to print a page listing the
current printer settings. It is not necessary to take
the printer off line first.
See the “Special Pages” section of chapter 4,
“Printer Configurat ion, ” in the
Reference
for more information.
User’s Guide:
Menu, Next, Previous, and Select Keys
The Menu, Next, Previous, and Select keys are used in printer configuration (explained in detail in chapter 4, “Printer Configuration,” of the
Reference
Online/Offl ine key to take the printer off line.
). Before using any of these keys, you must press the
» Note:
The printer must be idle and off line before using these keys to
make configuration changes. If the printer is not idle, print jobs may
be lost.
Press the Menu key to access the configura tion
menu after the printer goes off line. When you’re
changing printer configuration, pre ss this key to
cancel a change (before pressing the Select key), to
return to a previous menu, or to return to a previous
character when entering character informat ion.
Press the Next key to advance through the list of
selections or options for the current me nu. Wh en
changing character informat ion, use t his k e y to
advance to the next choice for the current input
character.
Press the Previous key to return to the previous
selection or option for the current menu. When
changing character informat ion, use t his k e y to
return to the previous choice for the current input
character.
QMS 166 0 Print System Getting Started5-6
Page 71

Press the Select key to access a menu or to choose
a displayed menu option.
What's Next?
Now, you’re ready to print. For more information on the day-to-day
operation of your printer, refer to the
technical information , refer to the
v
Operation
Reference
What's Next?
manual. For more
manual.
Control Panel
5-7
Page 72

Page 73

A
QMS Customer Support
In This Appendix . . .
n
Sources of customer support
n
QMS world-wide offices
Page 74

Sources of Support
Sources of Support
Several sources of help and information are availa ble, dependin g on
the type of help you need:
Your QMS Vendor
Your local vendor (the one from whom you bought the printer) may be
best equipped to help you. Your vendor has specially trained se rvice
technicians available to answer questions, and the equipment to analyze your printer problems.
Your Application Vendor
Often, “printing” problems ha ve more to do with the application being
used than with the printer. In t his case, the app licat ion ma nufa cturer
is the best source of help.
Q-FAX
Q-FAX, a QMS information retrieval service, provides appl icati on
notes, technical support notes on comm on print ing proble ms, and
information about printer sp ecifi catio ns, opt ions, accessories, consumables, and prices.
In the United States and Canada, call (800) 633-7213 to reach
Q-FAX. I n all other cou ntrie s, call (334) 633-3850. Have your fax
number handy when you call (or place the call from your fax
machine's handset ).
You can choose to have either a directory (a list of currently available
documents on a particular topic) or a specific docum ent sent to you.
The first time you call, request the directory (press 2 on your phone or
fax keypad when prompted). Then call back to request sp ecific documents. You can order up to three document s per call.
QMS 166 0 Print System Getting StartedA-2
Page 75

Sources of
Support
The QMS Corporate Bulletin Board System
The QMS Corporate Bulletin Board Sy stem (BBS ) contains te chnical
support notes, application not es, drivers, pat ches, and ut ilities, and
you may leave technical questions not requi ring an immedi ate
response on electronic mail for the Sysop (System Operator).
The bulletin board [(334) 633-3632] operates at 1200, 2400, 9600,
and 14400 baud, 8 data bits, no parity, 1 stop bit, with XMODEM,
YMODEM, and ZMODEM capabilities. Contact the QMS Customer
Response Center (CRC) for more information about the bullet in
board.
CompuServe
Through CompuServe, you ask general (non-technical) questions,
share information with other users, and access printing i nformation
and programs. When you use CompuServe, type go qmsprint↵ to
go directly to the forum where QMS is located. The QMS library section contains application notes, printer drivers, utilities, technical information, and announcement files.
Internet
The QMS server provides access to technical reports, new product
announcements, a trade show schedule, and other general information about QMS.
You can access the QMS server via any one of the many web viewers
available to Internet users. If you don’t have access to a web viewer,
we recommend the NC SA Mo sa ic web viewer (Mosaic i s at
ftp.ncsa.uiuc.edu ). The QMS home page is at http://w w w.qms.com/.
The QMS FT P resource is ftp.qms.co m.
QMS Customer Support
A-3
Page 76

Sources of
Support
QMS Customer Response Center (CRC)
The QMS Customer Response Center (CRC) is available M-F, 7:00
am-6:00 pm, Central Standard Time, at (334) 633-4500 (US). You can
also fax questions to the CRC at (334) 633-3716 (US). Please indicate whether you would like a faxed or a phoned reply.
If you call for assistance, have the following information ready so our
technicians can help you more quickly:
n
Your phone number, fax number, and shipping address
n
A description of the problem
n
The printer model and serial numb er
n
The type of host computer you are using
n
The type and version of operating system you are using
n
The interface you are using, and, if serial, the protocol
n
The application and version you are using
n
The emulation you are using
n
Your printer firm ware versi on (listed on the stat us and start-up
pages)
QMS National Service
The following numbers are valid in the US. To contact QMS in other
countries, see the list of world-wide offices in the following section.
(800) 762-8894 Call for service information and maintenance pricing for
repair of all QMS printers and printers of various other
manufacturers.
(800) 858-1597 On-Site Service and Depot Repai r Information
7:00-7:00 pm, Central Standard Time
(334) 633-4300
(x2530)
Spare Parts Ordering and I nformation
QMS 166 0 Print System Getting StartedA-4
Page 77

QMS World-wide Offices
QMS World-
wide O ffice s
United States/
Latin America
Asia-Pacific QMS A sia-Pacific
Canada QMS Canada, Inc.
Europe, Middle
East, Africa
QMS, Inc.
One Magnum Pass
Mobile, AL 36618
(334) 633-4300
Product Information: (800) 523-2696
OEM Information: (800) 631-2692
Consumables: (800) 777-7782
Fax: (334) 633-4866
E-mail: info@qms.com
Latin America Fax: (334) 639-3347
Melbourne 61 (3) 899 5777
Sydney 61 (2) 901 3235
Tokyo (81) (3) 3 437 4030
9630 Rte. Trans-Canadienne
Saint-Laurent, Québec H4S 1V9
Telephones: (514) 333-5940, (800) 361-3392
Fax: (514) 333-5949
National Service: (800) 268-4969
National Service Fax: (905) 673-7676
Offices in Ottawa, Québec City, Toronto, and Vancouver
Düsseldorf (49) 211/596 1333
London (44) 1 784 442255
Maarssen (31) 3465 51 333
Paris (33) (1) 4107 9393
Stockholm (46) (8) 725 5680
v
QMS Customer Support
A-5
Page 78

Page 79

B
Configuration Menu
In This Chapter . . .
n
Configuration menu diagram
Page 80

Install ati on
Print Status
Trai ler Page
Do Start Page
Do Sys Start
Do Error Handler
Startup Options
Operator Passwrd
Use Operator Pwd
Admin Password
Use Admin Pwd
Opera tor Con trol
Copies
Collation
Orientati on
Inputbin
Outputbin
Chain Inputs
Multip urpose Sz
Communications
Timeouts
PS Wait Time out
Emul Timeout
Job Timeout
ESP Timeout
Serial
Mode
Emulation
Min K Spool
Spool Timeout
End Job Mode
Def Jo b P ri o
Baud Rate
Parity
Ignore Parity
Rcv SW Flow
Xmit SW Flow CTL
Data Bits
Stop Bits
HDWE Flow CTL
PS Protoco l
Parallel
Mode
Emulation
Min K Spool
Spool Timeout
Data Bits
End Job Mode
Def Job Prio
PS Protocol
LocalTalk
Mode
Min K Spool
Connectio n
PS Protocol
Def Job Prio
Emulations
ESP Default
Postscript
Halftone Type
Emulation Level
Gamma Correction
PCL5
Default Font
Symbol Set
Lines Per Inch
Line Termination
Point Size x100
Retain Temporar y
Scalable Fonts
Default Font IDX
Monochrome GL/2
Downld Loca tion
HP-GL
Plotter
Scaling Percent
Origin
Revers e Image
Enhanced Mode
Expan d Mo de
Paper Type
Pen 1 - 8
LinePrinter
Font
Point Sz 100ths
Character Map
Line Numbering
Tab Stops
LF is CRLF
CR is CRLF
FF is CRLF
Orientation
Autowrap
Lines Per Page
Margins
Special Pages
Calibration Page
Header Page
Header Inputbin
Trailer Inputbin
Status Page Ty pe
Adm i nistr at i on
» Note: We have scaled this
Memory
K Mem For Spool
K Mem For PSHeap
K Mem PSFonts
K Mem Emulatio n
K Mem Emul. Temp
K Mem Display
K Mem Disk Cache
FrameBuffer
300 DPI
600 DPI
1200 DPI
MB Printer Mem.
Enable Disk Swap
Engine
Image Alignment
Horiz. Of fset
Vertical Offset
Default Paper
Inputbin 1 Name
Inputbin 2 Name
Outputbin 1 Name
Page Recovery
Toner Out Act.
Energy Saver
Man Feed Timeout
Def. Resolution
Conserve Toner
Miscellaneous
Restore Defaults
Reboot System
New Flash Image
Keypad Language
diagram to fit it on the page.
We recommend that you
enlarge it on a photocopy
machine for ease of use.
QMS 166 0 Print System Getting StartedB-2
v
Page 81

Index
%%EndOfDocument (R)4-38
<ESC>%12345X (R)4-38
1200x600 dpi resolution unavailable
(O)6-28
1284, IEEE, cable pinouts (R)B-7
3 hole punched (O)6-29
500-sheet paper cassette (R)6-13
600x600 dpi resolution unavailable
(O)6-28
A
About this manual (GS)1-5, (O)1-2,
(R)1-2
Accessories
See Optional Accessories
Active jobs
Status message (O)6-9
Add EOD command, to your file
(R)5-28
Adjust Inputbin bin
Status message (O)6-9
Administration menu (R) 4- 5
Memory (R)4-47
Passwords (R)4-54
Special Pages menu (R)4-62
Legend
GS
Getting Starte d
Operation
O
Reference
R
manual
manual
manual
Page 82

Startup Options menu (R)4-61
Adobe
PageMaker (GS)3-8, (GS)3-10,
(GS)4-9
PhotoShop (GS)3-10, (GS)4-8
Separator (GS)3-8
Advanced status page (R)4-63
Albertus (R)6-36
Aldus (GS)3-10
FreeHand (GS)3-8, (GS)3-9
PageMaker (GS)3-8, (GS)4-9
PrePrint (GS)3-9
Aligning image (R) 2-3
Alignment, image (O)3-9, (R)4-56
Allocating memory (R)4-47
ANSI ASCII symbol set (HP-GL)
(R)3-10
Antique Olive (R)6-3 6
AppleTalk (R)G-1
Connection (GS)3-3
See also LocalTalk
Testing communication (O)6-13
Troubleshooting (O)6-22
Application (R)G-1
Configuration, printer (R)4-2
Macintosh (GS)3-9, (O)6-32
Notes, QMS (GS)4-7
PC (GS)4-6
ASCII (R)G-1
AUTOEXEC.BAT file (O)6-14, (O)6-15
Autowrap menu (Lineprinter) (R)4-23
Avant Garde Gothic
ITC Avant Garde Gothic (R)3-3
Legend
GS
Getting Starte d
Operation
O
Reference
R
manual
manual
manual
B
Baud (R)G-2
Baud rate (R)G-2
Baud Rate menu (Serial) (R)4-37
BCP
See PS Protocol
Binary Communications Protocol
See PS Protocol
Binary data printing problem (O)6-28
Bit (R)G-2
Bitmap (R)G-2
Bitmapped font (R)3-5, (R)G-2
Black image (O)6- 33
Blurred background (O)6-34
Bookman
ITC Bookman (R)3-3
Buffer (R)G-2
Frame, allocating memory (R)4-5 0
Sizes (O)3-9
Spooling (R)5-20
Bulletin board, QMS (GS)4-7, (GS)A-3,
(O)A-3, (R)A-3
Buzzer
Menu (R)4-58
Buzzer, warning (R)4-58
Byte (R)G-2
Byte mode, parallel (R) 5-3 1
C
Cables
Macintosh interface (GS)3-3
PC interface (GS)4-2
See also Pinouts
Calibration page (R) 4- 6 3
Canadian users
Statement (R)D-4
Cancel key (GS)5-5, (O)3-11, (R)G-2
Cancelling a print job (O)3-11
Cancelling a print jo b (O)3-11
Cancelling job
Status message (O)6-9
I-2 QMS 1660 Print Syst em—Master Index
Page 83

Card
Emulation (R)6-18, (R)6-19
Font (R)6-18, (R)6-19
Installing (R)6-17, (R)6-19
Security (R)6-19
Using (R)6-17
Cassette supporter (O)3-4, (R)6-3,
(R)6-10
Dual cassette (R)6-3
Installing (R)6-10
Removing (R)6-13
Unpacking (R) 6-10
Cassette, media
Chaining (R)4-43
Sizes (R)B-12
Chain Inputbins menu (R)4-43
Character Map menu (Lineprinter)
(R)4-23
Character set (R)3-2
Chunk collation (O)3-6
Clarendon Condensed (R)6-36
Clearing print media jam (O)6-2
Client, memory (R)5-11, (R)5-15
Close engine door
Status message (O)6-9
Collating output (O)3-6
Collation (O)3-6, (R)4-13
Advantag es (O)3-6
Chunk collation (O)3-6
Disabling (O)3-6
Enabling (O)3-6
Improving performance (O)3-7
Menu (O)3-6
PCL 5 files (O)3-8
Colophon (R)D-4
Color encoding
HP-GL (R)5-35
Communication
Modes (R)5-3
Settings (O)3-9
Testing, Macintosh (O)6-13
Testing, parallel port (O)6-13
Testing, serial port (O)6-13
Compatibility mode, parallel (R)5-31
CompuServe (GS)A-3, (O)A-3, (R)A-3
Configuration
Application, via (R)4-2
Changes, saving (R)4-9
Character information, changing
(R)4-7
Commands, via (R)4-3
Control panel, via (R)4-4
Defaults, restoring (R)4-10, (R)4-11
Examples (R)5-23
Hard disk (R)6-56
Menu options, selecting (R)4-6
Methods (R)4-2
PostScript operators, via (R)4-3
PS Executive Series Utilities, via
(R)4-3
Quick (see Frame Buffer)
Remote Console, via (R)4-4
Configuration menu (R)4-4
Accessing (R)4-5
Administration menu (R)4-5
Changes, saving (R)4-9
Character information, changing
(R)4-7
Installation menu (R)4-5
Operator Control me nu (R)4- 5
Options, selecting (R)4-6
Connection
AppleTalk (GS)3-3
Parallel por t (GS) 4- 4
Serial port (GS)4-4
Connection menu (LocalTalk) (R)4-31
Connector (R)G-3
Connector box (R)G-3
Legend
GS
Getting Starte d
Operation
O
Reference
R
manual
manual
manual
I-3QMS 1660 Print System—Master Index
Page 84

Conserva tion
Energy (R)4-60
Power (R)4-60
Toner (R)4-60
Conserve Toner menu (R)4-60
Consumable supplies (R)B-12
Consumables (R)G-3
Warranty (R)B-13
Context switching (R)5-20
Control panel (R)G-3
Cancel key (GS)5-5
Configuration, printer (R)4-4
Indicators (GS)5-2
Language, message window (R)4-11
LEDs (GS)5-2
Menu key (GS)5-6
Message window (GS) 5-4, (O) 6-8
Message window language (R)4-11
Next key (GS)5-6
Online/Offline key (GS)5-5
Previous ke y (GS)5-6
Select key (GS)5-6
Status messages (O)6-8
Status Page key (GS)5-5
Controller (R)G-3
Specifications (R)B-3
Conventions, typographic (GS)1-6,
(O)1-3, (R)1-4
Copies (R)4-13
Copies menu (R)4-13
Coronet (R)6-36
Correction, gamma (R)4-27, (R)4-58,
(R)5-4
Courier (R)3-8, (R)6-36
cpi
Pitch (R)3-5
Legend
GS
Getting Starte d
Operation
O
Reference
R
manual
manual
manual
CR is CRLF menu (Lineprinter) (R)4-24
Creating a network jo b separator
(R)5-30
Crown (GS)1-10, (R)G-3
Customer Response Center (CRC),
QMS (GS)A-4, (O)A-4, (R)A-4
Customer support, QMS (GS)A-2,
(O)A-2, (R)A-2
D
Dark image (O)6-34
Data Bits menu (parallel) (R)4-33
Data Bits menu (Serial) (R)4-37
Data indicator
Troubleshooting (O)6-20, (O)6-22
Def Job Prio menu
LocalTalk (R)4-31
Parallel (R)4- 33
Serial (R)4-37
Def Resolution menu (R) 4- 5 9
Default (R)G-3
Default Font Index menu (PCL5)
(R)4-18
Default Font menu (PCL5) (R)4-18
Default Paper menu (R)4 - 46
Defaults, configuration
Restoring (R)4-10, (R)4-11
Device numbers, hard disks (R)6-53
Dingbats
ITC Zapf Dingbats (R)3-3
Disk
See Hard disk
Disk cache (R)4-47, (R)5-20
Increasing (R)6-56
Intellifont SIMM (R)6-34
Disk operations
Collation (O)3-6
Disk Operations menu (R)6- 5 4
Disk swap (R)4-49, (R)6-56
Display (R)4-48
Display list (R)5-1 7
Do Error Handler menu (R)4-62
I-4 QMS 1660 Print Syst em—Master Index
Page 85

Do Start Page menu (R)4-61
Do Sys Start menu (R)4-62
DOC (R)C-4
Header page commands (R)C-2
HP PCL 5 emulation commands
(R)C-3
HP-GL emulation commands (R)C-2
Lineprinter emulation commands
(R)C-3
PCL 4 emulation commands (R)C-5
PCL 5 (R)C-8
PCL 5 emulation commands (R)C-3,
(R)C-5
PostScript emulation commands
(R)C-4
Printer commands (R)C-4
Trailer p age commands (R)C-2
Updated commands (R)C-5
Document Option Commands
See DOC
Documentati on
About (GS)1-2
About this manual (GS)1-5, (O)1-2,
(R)1-2
Conventions, typographic (GS)1-6,
(O)1-3, (R)1-4
Printer (GS)1-2
QMS (GS)1-2
QMS Crown Remote Console User’s
Guide (GS)1-4
Related (GS)1-5
Standard (GS)1-3
DOS commands
mode (O)6-15
Dots per inch
See dpi
Downld Location menu (PCL5) (R)4-18
Download (R)G-3
Downloading optional emulation
(R)6-59
dpi (R)G-4
See also Resolution
Drivers
LaserWriter, troubleshooting (O)6-24
Macintosh (GS)3-5
PC (GS)4-6
PostScript (GS)4-6
Windows (GS)4-6
Windows, troubleshooting (O)6-24
Drivers folder
PDX (GS)3-8, (GS) 3-9
PPD (GS)3-8, (GS) 3-9
Dual paper cassettes (R) 6- 13
E
ECP mode, parallel (R)5-31
Emul Timeout menu (R)4-66
Emulation (R)4-67, (R)5-19
Cards (R)6-18, (R)6-19
Downloading optional (R)6-59
ESP Default Emul, setting parameters
(R)4-14
HP-GL parameters, setti ng (R)4-14
Lineprinter parameters, setting (R)4-23
Memory, allocating (R)4-49
Optional, downloading ( R)6-59
PCL 5 parameters, setting (R)4-18
PostScript parameters, setting (R)4-27
Setting parameters (R)4-14
Temporary, allocating memory (R)4-49
Timeout (R)4-66
Emulation error (O)6-25
Emulation Level menu (PostScript)
(R)4-27
Emulation menu (R)4-14
Parallel (R) 4-3 4
Serial (R)4-38
Legend
GS
Getting Starte d
Operation
O
Reference
R
manual
manual
manual
I-5QMS 1660 Print System—Master Index
Page 86

Emulation temporary (R)5-20
Enable disk swap (R)6-56
Enable Disk Swap menu (R)4-49,
(R)6-56
Encoding, color
HP-GL (R)5-35
End job mode (R)5-2 4
%%EndOfDocument (R)4-38
<ESC>%12345X (R)4-38
HP EOD (R)4-38
QMS EOD (R)4-38
Setting (R)5-26, (R)5-27
End Job Mode menu
Parallel (R)4-34
Serial (R)4-38
Ending a print job (O)3-11
End-of-document command (R)5-24
Energy conservation (R)4-60
Energy Saver menu (R)4-60
Engine
Features, configuring (R)4-56
Engine error 2 (O)6-11
Engine error 3 (O)6-11
Engine error 4 (O)6-11
Engine error 6 (O)6-11
Engine error 7 (O)6-11
Engine menu
Buzzer menu (R)4-58
Conserve Toner menu (R)4-60
Default Paper menu (R)4-46
Energy Saver menu (R)4-60
Gamma Correction (R)4-58
Image Alignment menu (R)4-56
Inputbin 1 Name menu (R)4-44
Inputbin 2 Name menu (R)4-44
Inputbin 3 Name menu (R)4-44
Legend
GS
Getting Starte d
Operation
O
Reference
R
manual
manual
manual
Man Feed Timeout menu (R)4-67
Outputbin 1 menu (R)4-45
Page Recovery menu (R)4-59
Resolution menu (R)4-59
Toner Out Act. menu (R)4-60
Vertical Offset menu (R)4-57
Enhanced Compatibility Port mode,
parallel (R)5-31
Enhanced Mode menu (HP-GL)
(R)4-14
Enhanced Parallel Port mode, parallel
(R)5-32
Envelop e (O)2-6
Environment examples (R)5-23
Environmental requirements (R)B-4
EOD command
Network job separator (R)5-30
Other print queuing systems (R)5-27
PC print server (R)5-26
Stand-alone PC (R)5-26
EOD commands (R)5-26
EOD problems (O)6-29
EPP mode, parallel (R)5-32
Equation
Bytes to kilobytes (R)5-15
Error Handler, PostScript (R) 4- 6 2
Error messages
Engine error 2 (O)6-11
Engine error 3 (O)6-11
Engine error 4 (O)6-11
Engine error 6 (O)6-11
Engine error 7 (O)6-11
Format failed (R)4-29
Hard disks (R)6-55
HP-GL error codes (O)6-12
Paper size mismatch (O)2-6, (O)6-9
PCL error codes (O)6-12
See also Status messages
Waiting for idle (O)6-10
Waiting on input end job ( O)6-1 0
ESP (R)5-24
Printing mo des (R)5-2
Setting parameters (R)4-14
I-6 QMS 1660 Print Syst em—Master Index
Page 87

Timeout (R)4-66
Troubleshooting (O)6-20
ESP Default Emul menu (R)4-1 4
ESP Timeout menu (R)4-66
Examples, configurati on (R)5-23
Excess memory (R)5-11
Expand Mode menu (HP-GL) (R)4-15
External hard disks (R)B-12
F
Factory defaults, restoring (R)4-1 0,
(R)4-11
FCC compliance (R)D-2
Caution (R)D-3
FF is CRFF menu (Lineprinter) (R)4-24
File swap (R)4-49
Flash ROM (R)5-13, (R)6-71, (R)6-72,
(R)6-76, (R)6-77
System software, updating (R)6-63
Flow control
Hardware (R)4-38
Software, receive (R)4-41
Software, transmit (R)4-42
Font cache (R)5-18
Font card (R)6-18, (R)6-19
Note (R)6-18
Removing (R)6-18
Using (R)6-17
Font index number (R)C-6
Font menu (Lineprinter) (R)4-24
Fonts (R)3-2
Bitmapped (R)3-5, (R) G-2
Defined (R)3-2
Downloading, troubleshooting (O)6-26
HP-GL (R)3-10
Installing on hard disk (R)4-29
Installing optional (R)6-57
Intellifont pro ms (R)6 -32
Intellifont SIMM (R)6- 36
Intellifonts (R)6-36
Intellifonts, troubleshooting (O)6-26
Kanji option kit (R)6-61
PCL (R)3-9
PCL 5 (R)C-5
PCL 5, scalable (R)4-22
PCL 5, temporary, retaining (R)4-21
PostScript, allocating memory (R)4-51
Removing from hard disk (R)4-30
Removing optional (R)6-58
Resident, PostScript (R)B-3
Scalable (R)3-5, (R)G-14
Screen, Macintosh (GS)3-5
See also specific font name
Troubleshooting (O)6-26
Format failed message (R)4-29
Formatting
Hard disk (R)6-55
Frame buffer (R)5-15
Memory, allocating (R)4-50
FreeHand
See Aldus
See Aldus or MacroMedia
French/German symbol set (HP-GL)
(R)3-10
Function key
Cancel key (O)3-11
G
Gamma correction (O)5-4, (R)4-27,
(R)4-58, (R)5-4, (R)5-7
Gray levels (R)5-4
Halftone (R)5-4
Screen angle (R)5-6
Screen frequency (R)5-5
Gamma Correction menu (R)4-2 7,
(R)4-58
Garamond (Stempel) (R)6-36
Legend
GS
Getting Starte d
Operation
O
Reference
R
manual
manual
manual
I-7QMS 1660 Print System—Master Index
Page 88

Gray levels (R)5-4, (R)5-6
Gray-scale (R)5-7
H
Halftone quality
Device resolution (R)5-5
Laser beam (R)5-5
Scan quality (R)5-5
Screen frequency (R)5-5
Halftone types (O)5-5
Halftones (R) 5-4
Cells (R)5-4
Gamma correction (R)5-4
Hard disk (R)4-28, (R)5-22, (R)6-49,
(R)6-56
Configuration (R)6-56
Device numbers (R)6-53
Disk cache, increasing (R)6-56
Disk Operations menu (R)6-54
Enable Disk Swap menu (R)4-49
Error messages (R)6-55
External (R)B-12
External SCSI (R)6-53
External, identifying (R)6-53
Font, installing (R)4-29
Font, removing (R)4-30
Format failed message (R)4-29
Formatting (R)4-29, (R)6-55
IDE-SCSI board (R)B-12
Internal (R)6-49, (R)B-12
Internal, identifying (R)6-49
Internal, removing (R)6-52
Internal, specs (R)B-12
Kanji option kit (R)6-61
Kanji, troubleshooting (O)6-25
Legend
GS
Getting Starte d
Operation
O
Reference
R
manual
manual
manual
Memory (R)6-56
SCSI (R)6-53, (R)B-12
SCSI, turning on (R)6-54
Swap file (R)4-49
Troubleshooting (O)6-27
Using (R)6-56
Hardware flow control (R)4-38
Hdwe Flow Ctl menu (serial) (R)4-38
Header Inputbin menu (R)4-64
Header pages (R)4-64
DOC (R)C-2
Header Page menu (R)4-64
Inpu tbin (R)4-6 4
Heap (R)4-52, (R)5-19
Helvetica (R)3-8
High-resolution printing (O) 3 -2
Horiz. Offset menu (R)4-56
Host Input (R)4-53, (R)5-20
Host input (R)5-20
HP EOD (R)4-38, (R)5-26
HP PCL 5
See PCL 5
HP-GL
Color encoding (R)5-35
DOC (R)C-2
Encoding, color (R) 5-35
Enhanced Mode (R)4-14
Error codes (O)6- 12
Expand Mode menu (R)4-15
Fonts (R)3-10
Origin menu (R)4-15, (R)4- 17
Paper Type menu (R)4-15, (R)4-17
Pen 1 - Pen 8 (R)4-16
Plotter menu (R)4-17
Reverse Image menu (R)4-17
Scaling Percent menu (R)4-17
Setting parameters (R)4-14
HP-GL symbol sets (R)3-10
9825 Character Set symbol set
(HP-GL) (R)3-10
ANSI ASCII (R)3-10
French/German (R)3-10
ISO French (R)3-10
I-8 QMS 1660 Print Syst em—Master Index
Page 89

ISO German (R)3-10
ISO IRV (International Reference
Version) (R)3-10
ISO Italian (R)3-10
ISO Norway, Version 1 (R)3-1 0
ISO Norway, Version 2 (R)3-1 0
ISO Spanish (R)3-10
ISO Swedish (R)3-10
ISO Swedish For Names (R)3-10
ISO United Kingdom (R)3-10
JIS ASCII (R)3-10
Katakana (R)3-10
Roman Extensions (R)3-10
Scandinavian (R)3-10
Spanish/Latin (R)3-10
Special Symbols (R)3-10
HP-GL/2
See PCL 5
I
IBM PC
AT cable pinouts (R)B-10
XT cable pinouts (R)B-10
IDE (R)5-12, (R)6-49
IDE board (R)B-12
IDE hard disk (R)6-49
Installing (R)6-49
Removing (R)6-52
IDE-SCSI board
Removing (R)6-47
Idle
Status message (O)6-9
Idle input printing
Status message (O)6-9
IEEE 1284 cable pinouts (R)B-7
Ignore Par. Err. menu (serial) (R)4-39
Image alignment (O)3-9, (R)2-3,
(R)4-56
Image Alignment menu (R)4-56
Image orientation problem (O)6-30
Imageable area (R)2-2
Image alignment (R)2-3
Indicators, control pa nel (GS)5-2
Initializing
Status message (O)6-9
Input bin 1 (O)2-6
Input rays
Standard (O)2-3
Inputbin
Chaining (R)4-43
Header pages (R)4-64
Naming (R)4-44
Trailer pages (R)4-65
Inputbin 1 Name menu (R)4- 44
Inputbin 2 Name menu (R)4- 44
Inputbin 3 Name menu (R)4- 44
Inputbins
Naming (R)4-44
Install option
Installing (R)6-57, (R)6-59
Installation
Font cards (R)6-16
Paper cassette (GS)2-11
Toner cartridge (GS)2-8
Installation menu (R)4-5
Integrated Drive Electronics
See IDE
Intellifont proms (R) 6- 3 2
Accessing fonts (R)6-37
Disk cache size (R)6-34
Installation (R)6-32
Verifying installation (R)6-35
Intellifonts
Albertus (R)6-36
Antique Olive (R)6-36
Clarendon Condensed (R)6-36
Coronet (R)6-36
Courier (R)6-36
Legend
GS
Getting Starte d
Operation
O
Reference
R
manual
manual
manual
I-9QMS 1660 Print System—Master Index
Page 90

Font list (R)6-36
Garamond (Stempel) (R)6-36
Letter Gothic (R)6-36
Marigold (R)6-36
Omega (R)6-36
Tim es Roman (R )6-37
Troubleshooting (O)6-26
Univers (R)6-37
Univers Condensed (R)6-37
Interface
LocalTalk parameters, setting (R)4-30
Network, optional (R)6-38
Optional (R)4-42
Parallel parameters, setting (R)4-33
Priority (R)4-31
Serial parameters, setting (R)4-36
Internal, installing (R)6-49
International Reference Version
See ISO IRV
Internet (GS)A-3, (O)A-3, (R) A-3
Invalid password (R)4-55
ISO French symbol set (HP-G L)
(R)3-10
ISO German symbol set (HP-GL)
(R)3-10
ISO IRV (R)3-10
ISO IRV (International Refere n ce
Version) symbol set (HP-GL)
(R)3-10
ISO Italian symbol set (HP-GL) (R)3-10
ISO Norway, Version 1 symbol set
(HP-GL) (R)3- 1 0
ISO Norway, Version 2 symbol set
(HP-GL) (R)3- 1 0
ISO Spanish symbol set (HP-GL)
(R)3-10
Legend
GS
Getting Starte d
Operation
O
Reference
R
manual
manual
manual
ISO Swedish For Names symbol set
(HP-GL) (R)3- 1 0
ISO Swedish symbol set (HP-GL)
(R)3-10
ISO United Kingdom symbol set
(HP-GL) (R)3- 1 0
Ital i c (R)3-6
ITC Bookman (R)3-8
ITC Zapf Chancery (R)3-8
ITC Zapf Dingbats (R)3-8
J
Jams
Preventing (R)2-6
Recovery (R)4-59
JIS ASCII symbol set (HP-GL) (R)3-10
Job Timeout menu (R)4-68
K
K Mem Disk Cache menu (R)4-47
K Mem Display (R)5-1 7
K Mem Display menu (R)4 -48
K Mem Emul Tmp (R)5-20
K Mem Emul Tmp menu (R)4-49
K Mem Emulation menu (R)4-49
K Mem for PS Fonts menu (R)4-51
K Mem for PS Heap menu (R) 4- 52
K Mem for Spool (R)5-20
K Mem for Spool menu (R)4-53
K Mem PS Fonts (R)5-1 8
K Mem PS Heap (R)5-19
Kanji hard disk (GS)1-15
Troubleshooting (O)6-25
Kanji option kit (R)6-61
Katakana symbol set (HP-GL) (R)3-10
Key
See key name
Keypad language menu (R)4-11
I-10 QMS 1660 Print Syst em—Master Index
Page 91

L
Labels
Printing (R) 2- 4
Stock (R)2-4
Storage (R)2-6
Type (R) 2-4
Vendor (R)B-13
Weight (R)2-4
Landscape orientation (R)3-6
Language
Message window (R)4-11
Laser Prep (GS)3-7, (O)6-22
Laser safety (R)D-2
LaserJet 4Si (R)6-32
LaserWriter (GS)3-7, (O)6-22
Troubleshooting (O)6-24
LEDs (GS)5-2
Letter Gothic (R)6-36
Letterhead (O)2-6, (O) 2- 1 1
Level 1 PostScript (R)4-27
Level 2 PostScript (R)4-27
LF is CRLF menu (Lineprinter) (R)4-25
Light image (O)6-34
Limit check error (O)6-22
Line Numbering menu (Lineprinter)
(R)4-25
Line Termination menu (PCL5) (R)4-19
Lineprinter
Autowrap menu (R)4-23
Character Map menu (R)4-23
CR is CRLF menu (R)4-24
DOC (R)C-3
FF is CRFF menu (R)4-24
Font menu (R)4-24
LF is CRLF menu (R)4-25
Line Numbering menu (R)4-25
Lines per Page menu (R) 4-25
Margins menu (R)4-26
Orientatio n menu (R)4-26
Parameters, setting (R)4-23
Point Sz 100ths menu (R)4-26
Tab Stops menu (R)4-26
Lines per inch (R)5-5
Lines per Inch menu (PCL5) (R)4-19
Lines Per Page menu(Lineprinter)
(R)4-25
Loading print media
Multipurpose tray (O)2-6
LocalTalk (GS)3-3
Connection menu (R)4-31
Def Job Prio menu (R)4-31
Menu (R)4-30
Min K Spool menu (R)4-3 2
Mode menu (R)4-30
Parameters, setting (R)4-30
Pinouts, cable (R)B-11
PS Protocol menu (R)4-32
See also AppleTalk
Location requirements (GS)2-2
M
Macintosh
Application (GS)3-9
Applications (GS)3-9
Drivers, print (GS)3-5
Laser Prep (GS)3-7
LaserWriter (GS)3-7
Macintosh-to-serial cable pinouts
(R)B-11
PrintMonitor (GS) 3-7
PS Executive Series Utilities (GS)3-5
PS Executive Series Utilities, installing
(GS)3-5
Screen fonts (GS)3-5
Software (GS)3-9
Software, printing (GS)3-5
System 6 (GS)3-7
System 7 (GS)3-7
Legend
GS
Getting Starte d
Operation
O
Reference
R
manual
manual
manual
I-11QMS 1 660 Print System—Master Index
Page 92

System software, updating (R)6-63
Testing communication (O)6-13
Troubleshooting (O)6-22
MacroMedia
FreeHand (GS)3-10
Macros
PCL 5, temporary, retaining (R)4-21
Man Feed Timeout menu (R)4-67
Manual feed
Timeout (R)4-67
Manual notice (R)D-2
Margins
Imageable region (R)2-2
Page (R)2-4
Margins menu (Lineprinter) (R)4-26
Marigold (R)6-36
MB printer mem (R)5-22
MB Printer Mem menu (R)4-52
Media
Feed edges (R)B-6
Imageable area (R)2-2, (R)2-3
Imageable areas (R)B-6
Input (R)4-43
Jam recovery (R)4-59
Jams, preventing (R)2-6
Margins (R)2-4
Orientation, choosing (R)4-45
Outputbin, naming (R)4-45
Page sizes (R)B-5, (R)B-6
Size, selecting (R)4-45, (R)4-46
Storage (R)2-6
Types (R) 2-4
Weig hts (R) 2- 4
Memo (O)2-11
Memory (R)5-9, (R)5-11
Allocating (R)4-47
Legend
GS
Getting Starte d
Operation
O
Reference
R
manual
manual
manual
Buffer, frame (R)4-50
Client (R)5-11, (R)5-15
Definitions (R)5-10
Disk cache (R) 4-47, (R)6-34
Disk swap (R)4-49
Display (R)4-48
Emulation (R)4-49
Emulation, temporary, allocating
memory (R)4-49
Enable Disk Swap menu (R)4-49
Excess (R)5-11
Fonts, PostScript (R)4-51
Frame Buffer (R)4-50
Frame Buffer menu (R)4-50
Heap, PostScript (R)4-52
Host Input (R)4-53
IDE (R)5-12
K Mem Disk Cache menu (R)4-47
K Mem Display menu (R)4-48
K Mem Emul Tmp menu (R)4-49
K Mem Emulation (R)4-49
K Mem for PS Fonts menu (R)4-51
K Mem for PS Head menu (R)4-52
K Mem for Spool menu (R)4-53
MB Printer Mem menu (R)4-52
Non-volatile (R)5-12
NV RAM (R)5-13
Physical (R)5-13
PostScript fonts (R)4-51
Printer (R)4-52
PS Heap (R)4-52
RAM (R)5-11
RAM disk (R) 5-12
ROM (R)5-11
SCSI (R)5-12
Spooling (O)3-9, (R)4-53
Storage (R)5-11
System Use (R)4-52
Upgrade (SIMMs) (R)6-26
Virtual (R)5-13, (R)5-19, (R)5-22,
(R)5-23
Volatile (R)5-12
Memory clients (R)5-9, (R)5-17, (R)G-9
I-12 QMS 1660 Print Syst em—Master Index
Page 93

Disk cache (R)5-20
Emulation temporary (R)5-20
Font cache (R)5-18
Frame buffer (R)5-15
Heap (R)5-19
Host Input (R)5-20
K Mem Display (R)5-17
K Mem Emul Tmp (R)5-20
K Mem for Spool (R)5-20
K Mem PS Fonts (R)5-18
K Mem PS Heap (R)5-19
MB printer mem (R)5-22
PostScript font cache (R)5-18
PostScript heap (R)5-19
PostScript VM (R)5-19
PS heap (R)5-19
Spool buffers (R)5-20
System memory (R)5-22
System use (R)5-22
Virtual memory (R)5-19
Memory configuration (O)3-9
Memory management (R)5-10
Menu
See menu name
Menu key (GS)5-6
Message
Toner out (O)6-33
Message window (GS)5-4, (O)6-8
Language, changing (R)4-11
Min K Spool menu
LocalTalk (R)4-32
Parallel (R)4-34
Serial (R)4-40
mode command (DOS) (O)6-15
Mode menu
LocalTalk (R)4-30
Parallel (R)4-35
Serial (R)4-40
Mode, printing (R)5-2
PostScript (R)5-2
Modes, communication (R)5-3
Monochrome HP-GL/2 menu (PCL5)
(R)4-20
Monospacing (R)3-4
Multiple pages problem (O)6-30
Multiple resolutions (O )5-2
Multipurpose Sz menu (R)4- 4 5
Multipurpose tray
Labels (R)2-4
Loading print media (O) 2-6
Media, selecting size (R)4-45
Transparencies (O)2-11
N
Naming
Inpu tbins (R )4-44
National Service, QMS (GS)A-4,
(O)A-4, (R)A-4
NetWare
Banner page jobs do not print (O)6-30
Network 1 menu (R)4-42
Network 2 menu (R)4-42
Network interface (R)6-38
Installing (R)6-39
Kit (R)6-39
Using (R)6-42
New Flash Image menu (R)6-63
Next key (GS)5-6
Nibble mode, parallel (R)5-32
Non-volatile memory (R) 5- 1 2
NV RAM (R)5-13, (R)G-10
O
Object (R)C-6
Oblique (R)3- 6
Offset, image, configuring (R)4-56
Omega (R)6-36
Legend
GS
Getting Starte d
Operation
O
Reference
R
manual
manual
manual
I-13QMS 1 660 Print System—Master Index
Page 94

Online/Offline k ey (GS)5-5, (GS)5-6
Operator Control menu (R)4-5
Chain Inputbins menu (R)4-43
Multipurpose Sz menu (R)4-45
Network 1 (R)4-42
Network 2 (R)4-42
Orientatio n menu (R)4-45
Passwords (R)4-54
Optional accessories
Cards (R)6-1 7, (R)6- 19
Cassette supporter (O)3-4, (R)6-10
Font cards (R)6-16
Hard d (R)B-12
Hard disk, internal ( R)B-12
IDE board (R)B-12
IDE hard disk (R)6-49
Internal hard disk (R)6-49
Kanji hard disk (GS)1-15
Kanji option kit (R)6-61
Network interface (R)6-38
Paper cassette s (R)6-3
Paper feeder (O)3-4, (R)6-4
Paper output ramp (GS)1-16, (R)6-15
SCSI hard disk (R)6-53
SCSI-IDE board (R)6-42
Security card (R)6-19
Security cards (R)6-16
SIMMs (R)6-26
Options
Configuring (R)4-54
Interface, menu (R) 4-42
See also Optional Accessories
Orientation
Landscape (R)3-6
Portrait (R)3-6
Orientation menu (R)4-45
Legend
GS
Getting Starte d
Operation
O
Reference
R
manual
manual
manual
Lineprinter (R)4-26
Origin menu (HP-GL) (R)4-15, (R)4-17
Output ramp (R)6-15
Outputbin 1 Name menu (R)4-45
Ozone density (R)B-4
P
Page margins (R)2-4
Page Recovery menu (R)4-59
PageMaker (GS)4-9
See Adobe and Aldus (GS)3-8
Paper
Capacity (O)3-4
Cassette, 250-sheet (GS)1-15
Cassette, 500-sheet (GS)1-15
Envelope (R)B-5
Jams (R)2-2
Letterhead (O)2-11
Memo (O)2-11
See also Media
Sizes (R)2-2
Storage (R)2-6
Transparencies (R)2-2
Types (R) 2-5
Vendor (R)B-13
Weights (R)2-5
Paper cassette (R)6- 3
250- sheet (GS)1-15
500-sheet (GS)1-15, (R)6-13
Chaining (O)3-4
Dual (R)6-13
Installing (GS)2-11
Optional accessories (R)6-3
See Cassette, Inputbin, Cassett e
Paper cassettes
Standard (O)2-3
Paper feeder (O)3-4, (R)6-4, (R)6-9
Installing (R)6-4
Removing (R)6-9
Paper jam
Message stays on (O)6-23
See also Jams (O)6-9
I-14 QMS 1660 Print Syst em—Master Index
Page 95

Status message (O)6-9
Paper output ramp (R)6-15
Paper output ramp, optional (GS)1-16
Paper path (O)2 - 12
Paper size mismatch (O)6-23
Status message (O)6-9
Paper size mismatch error (O)2-6
Paper Type menu (HP-GL) (R)4-15,
(R)4-17
Parallel
Byte mode (R)5-31
Compatibility mode (R)5-31
Data Bits menu (R)4-33
Def Job Prio menu (R) 4-33
ECP mode (R)5-31
Emulation menu (R)4-34
End Job Mode menu (R)4-34
Enhanced Compatibility Port mode
(R)5-31
Enhanced Parallel Port mode (R)5-32
EPP mode (R)5-32
Menu (R)4-33
Min K Spool menu (R)4-3 4
Mode menu (R)4-35
Modes (R)5-30
Nibble mode (R)5-32
Parameters, setting (R)4-33
PS Protocol menu (R)4-36
Spool Timeout menu (R)4-36
Parallel interface
IEEE 1284 cable pi nouts (R)B-7
System software, downloading
(R)6-71, (R)6-76
Parallel port
Connection (GS)4-4
Testing communication (O)6-13
Parallel protocol (R)5-2 5
Parity
Errors, ignore (R)4- 39
Ignore errors (R)4-39
Serial (R)4-41
Parity menu
Serial (R)4-41
Passwords (R)4-54
Enabling (R)4-55
Invalid (R)4-55
Selecting (R)4-54
Using (R)4-55
PC
Applications (GS)4-6
Driver (GS)4-6
PS Executive Series Utilities (GS)4-6
Software (GS)4-6
System software, updating (R)6-63
Testing parallel port (O)6-13
Troubleshooting (O)6-21
PC/AT
See IBM PC
PC/XT
See IBM PC
PCL 4
DOC (R)C-5
PCL 5
Collation (O)3-8
Default Font Index menu (R)4-18
Default Font me nu (R)4-18
DOC (R)C-3, (R)C-5, (R)C-8
Downld Location menu (R)4-18
Error codes (O)6- 12
Font (R)C-5
Font index number (R) C-6
Fonts (R)3-9
Fonts, scalable (R)4-22
Fonts, temporary, retaining (R)4-21
Intellifont font list (R)6- 36
Intellifont pro ms (R)6 -32
Line Termination menu (R)4-19
Lines per Inch menu (R)4-19
Macros, temporary, retaining (R)4-21
Legend
GS
Getting Starte d
Operation
O
Reference
R
manual
manual
manual
I-15QMS 1 660 Print System—Master Index
Page 96

Monochrome HP-GL/2 menu (R)4-20
Object (R)C-6
Parameters, setting (R)4-18
Point Size x 100 menu (R)4-20
Resource (R)C-7
Retain Temporary menu (R)4-21
Scalable Fonts menu (R)4-22
Symbol Set menu (R)4-22
Terminology (R)C-5
PDX (GS)3-8, (GS)3-9
Pen 1 - Pen 8 menu (HP-GL) (R)4-16
PhotoShop (GS) 3-10, (GS)4-8
Physical characteristics
Dimensions (R)B-5
Physical memory (R)5-13
Pinouts
IBM PC/AT (R)B-10
IBM PC/XT (R)B-10
Pinouts, cable
Centronics cable pinouts (R)B-7
IBM PC/AT (R)B-10
IBM PC/XT (R)B-10
LocalTalk (R)B-11
Macintosh-to-serial (R)B-11
Serial (R)B-9
Pitch (R)3- 5
Plotter menu (HP-GL) (R)4-17
Point size (R)3-5
Point Size x 100 menu (PCL5) (R)4-2 0
Point Sz 100ths menu (Lineprinter)
(R)4-26
Portrait orientation (R)3-6
Postcards
Storage (R)2-6
Type (R) 2-5
Weight (R)2-5
Legend
GS
Getting Starte d
Operation
O
Reference
R
manual
manual
manual
PostScript
DOC (R)C-4
Emulation Level menu (R)4-27
Error Handler (O)6-31, (R)4-62
Error with Error Handler enabled
(O)6-31
Fonts, allocating memory (R)4-51
Heap (R)4-52
Job does not print (O)6-25
Level 1 (R)4-27
Level 2 (R)4-27
Parameters, setting (R)4-27
Printing mo de (R)5- 2
Timeout (R)4-67
PostScript font cache (R)5-18
PostScript heap (R)5-19
PostScript menu
Gamma Correction (R)4-27
PostScript operators
setgray (R)5-7
setscreen (R)5-6
showpage (O)6-13
PostScript VM (R)5-19
Power
Conservation (R)4-60
Power cord, connecting (GS)2-15
Power requirements (GS)2-3
PPD file (GS)3-8, (GS) 3-9
PrePrint
See Aldus
Previous key (GS)5-6
Print density (O)5-3
Uneven (O)6-35
Print job
Cancelling (O)3-11, (O)3-12
Print media
Page sizes and imageabl e regions
(R)2-2
Preventing jams (O)2-2
Print media jams
Curled (O)3-4
Locating (O)6-2
Locations (O)6 -3
I-16 QMS 1660 Print Syst em—Master Index
Page 97

Restart printing (O)6-7, (O)6-8
Restarting print (O)6-5
Print problems (O)4-2
Print quality
Cleaning (O)4-4
Density adjustment (O)5-3
Distorti ons (O)6-33
Gamma correction (O)5-4, (R)5-4
Halftones (R)5-4
Problems (O)6-33
Resolution (O)5-2
Screen angles (R)5-6
Uneven black s (O)6-33
White lines (O)6-33
Wrinkled pages (O)2-2
Print resolution (R)5-6
Gray levels (R)5-6
Printer
Cleaning (O)4-2, (O)4-4
Electrical requirements (R)B-4
Lifting (O)4-2
Memory (R)4-52
Physical characteristics (R)B-5
Problem checklist (O)6-18
Removing Covers (R)6-21
Replacing covers (R)6-24
Start-up options (R)4-61
Printer commands (R)C-4
Printer driv ers
Macintosh (GS)3-5
PC (GS)4-6
PostScript emulation (GS)4-6
Windows (GS)4-6
Printer, turn off
Warning (R)6-32
Printing
Blank pages (O)6-29
Environments (R)5-13
Incomplete jobs (O) 6-30
Modes (R)5-2
Two-sided (O)3-4
Printing status
Status message (O)6-10
PrintMonitor (GS)3-7
Priority
See Interface, priority
Problem checklist (O)6-18
Print quality (O)6-33
Problems
Troubleshooting (O)6-23
Proms
Intellifont (R)6-3 2
Proportional spacing (R)3 -4
Protocol (O)6-21
Troubleshooting (O)6-21
PS Executive
Conserve Toner option (R)4-6 0
PS Executive Series Utilities (GS)3-5,
(GS)4-6
Configuration, printer (R)4-3
Image alignment (R)2-3
Installation, Macintosh (GS)3-5
PS heap (R)5-19
PS Protocol (R)4-41, (R)5-32
Advantag es (R)5-35
Implementation (R)5-35
Quoted character (R)5-33
PS Protocol menu
LocalTa lk (R)4-32
Parallel (R) 4-3 6
Serial (R)4-41
PS Wail Timeout menu (R)4-67
Put size paper in input bin
Status message (O)6-10
Q
Q-FAX (GS)4-7, (GS)A-2, (O)A-2, (R)A-2
Legend
GS
Getting Starte d
Operation
O
Reference
R
manual
manual
manual
I-17QMS 1 660 Print System—Master Index
Page 98

QMS
Bulletin board (GS)4-7
Customer Response Center (CRC)
(GS)A-4, (O)A-4, (R)A-4
National Service (GS)A-4, (O)A-4,
(R)A-4
Q-FAX (GS)4-7
Registration, printer (GS)2-5
QMS Crown Remote Console User’s
Guide (GS)1-4
QMS EOD (R)4-38, (R)5-26
QMSPS.DRV, troubleshooting (O) 6- 24
QSCRIPT.DRV, troubleshooting
(O)6-24
Quality proble ms (O)6-33
QuarkXPress (GS)3-9, (GS)4-9, (R)5-3
Quick configuration
See Frame buffer
Quoted character (R)5-33
Guide (GS)1-4
Removal
Font, optional (R)6-58
Removing the paper feeder (R)6-9
Residen t fon t s
HP PCL fonts (R)3-9, (R)3-10
Resolution (O)5-2
1200x600 dpi unavailable (O)6-28
600x600 dpi unavailable (O)6-28
Changing (O)3-2
Setting (R)4-59
Resource (R)C-7
Retain Temporary menu (PCL5)
(R)4-21
Reverse Image menu (HP-GL) (R) 4- 1 7
ROM (R)5-11
Flash (R)5-13
Roman Extensions symbol set
(HP-GL) (R)3- 1 0
R
Radiation (R)D-2
RAM (R)5-11
NV RAM (R)5-13, (R)G-10
RAM disk (R)5- 12
Random Access Memory (R)5-11
Rcv Sw Flow Ctl menu (serial) (R) 4 -4 1
Read-Only Memory (R)5-11
Reasons to Use End Job Mode (R)5-25
Reboot Now? message (R)4-10
Refilled toner cartridges (O)2-13
Registration, printer (GS)2-5
Remote Console
Configuration, printer (R)4-4
QMS Crown Remote Console User’s
Legend
GS
Getting Starte d
Operation
O
Reference
R
manual
manual
manual
S
Sans serif typefaces (R)3-3
Scalab le font (R)3-5, (R)G-14
Scalable Fonts menu (PCL5) (R)4-2 2
Scaling Percent menu (HP-GL) (R)4-17
Scandinavian symbol set (HP-GL)
(R)3-10
Schoolbook
New Century Schoolbook (R)3-3
Screen angle (R)5-6
Screen fonts
Macintosh (GS)3-5
Screen frequency (R)5-5, (R)5-6
Screens (R)5-4
Script typefaces (R)3-3
SCSI (R)5-12, (R)6-53
SCSI hard disks (R)6-53
Specs (R) B-12
SCSI-IDE board (R)6-42
Installing (R)6-43
Security card (R)6-19
Security cards (R)6-16
I-18 QMS 1660 Print Syst em—Master Index
Page 99

Select key (GS)5-6
Separator
See Adobe<$npage> (GS)3-8
Serial
Baud Rate menu (R)4-37
Data Bits menu (R)4-37
Def Job Prio menu (R) 4-37
Emulation menu (R)4-38
End Job Mode menu (R)4-38
Hardware control (R)4-38
Hdwe Flow Ctl menu (R)4-38
Ignore Par. Err. me nu (R) 4-39
Menu (R)4-36
Min K Spool menu (R)4-4 0
Mode menu (R)4-40
Parameters, setting (R)4-36
Parity menu (R)4-41
PS Protocol menu (R)4-41
Rcv sw flow Ctl menu (R)4-41
Software control, receive (R)4-41
Software flow control
Transmit (R)4-42
Spool Timeout menu (R)4-42
Stop Bits menu (R)4-42
Xmit software flow control menu
(R)4-42
Serial interface
Cable pinouts (R)B-9
System software, downloading
(R)6-72, (R)6-77
Serial port (O)6-13
Connection (GS)4-4
Parameters (O)6-15
Parameters, changing (O)6-16
Testing communication (O)6-13
Serial protocol (R)5-25
Serif typefaces (R)3-3
Service call
Placing (O)6-35
Service, QMS
National Service (GS)A-4, (O)A-4,
(R)A-4
United States (GS)A-4, (O)A-4, (R)A-4
World-wide (GS)A-5, (O)A-5, (R)A-5
setgray (R)5-7
setscreen (R)5-6
Shipment (GS)2-5
Contents (GS)2-4
showpage operator (PostScript)
(O)6-13
Signal direction (R)B-8
SIMMs (R)5-12, (R)6-26
Installing (R)6-27
Removing (R)6-29
Simultaneous Interface Operation
(R)5-2
Single In-line Memory Modules
(SIMMs) (R) 6 - 26
SIO (R)5-2
Size
Media, selecting (R)4-46
SLS (GS)1-13
Small Computer System Interface
See SCSI
Smudges, toner (O)6-34
Software
Macintosh, printing (GS)3-5
PC (GS)4-6
Software flow control (R)4-42
Receive (R)4-41
Software Loadable System (SLS)
(GS)1-13
Software, system (GS)1-13
Sofware
Macintosh (GS)3-9
Spanish/Latin symb ol set (HP-GL)
(R)3-10
Special Pages
Header pages (R)4-64
Legend
GS
Getting Starte d
Operation
O
Reference
R
manual
manual
manual
I-19QMS 1 660 Print System—Master Index
Page 100

Menu (R)4-62
Status Page Type menu (R)4-63
Trailer pages (R)4-65
Special pages
Calibration page (R)4-63
Special Pages menu
Header Inputbin menu (R)4-64
Header Page menu (R)4-64
Trailer Inputbin menu (R)4-65
Trailer Pages men u (R)4-65
Special Symbols symbol set (HP-GL)
(R)3-10
Specifications
Controller (R)B-3
Duty cycle (R)B-2
Emulations (R)B-3
Memory (R)B-3
Ozone density (R)B-4
Print engine (R)B-2
Print Media (R)B-5
Print method (R)B-2
Print speed (R)B-2
Resolution (R)B-2
SIMMs (R)B-12
Toner (R)B-2
Toner cartridge (R)B-2
Warm-up tim e (R) B-2
Spool (R)5-13
Spool buffers (R)5-20
Spool Timeout menu (Parallel) (R)4-36
Spool Timeout menu (serial) (R)4-42
Spooling
Memory (R)4-40
Memory, allocating (R)4-53
Min K Spool menu (R)4-32 , (R)4-34
Timeout (R)4-42
Legend
GS
Getting Starte d
Operation
O
Reference
R
manual
manual
manual
Stain (O)6-34
Standard status page (R)4-63
Start-up options (R)4-61
Startup Options menu
Do Error Handler menu (R) 4-62
Do Start Page menu (R)4-61
Do Sys Start menu (R)4-62
Start-up page
Disabling (GS)2-17
Enabling (GS)2-17
Information (GS)2-16
Menu (R)4-61
Printing (GS) 2- 16
Troubleshooting (O)6-31
Status message
Active jobs (O)6-9
Adjust Inputbin bin (O)6-9
Cancelling job (O)6-9
Close engine door (O)6-9
Control panel (O)6-8
Engine error 2 (O)6-11
Engine error 3 (O)6-11
Engine error 4 (O)6-11
Engine error 6 (O)6-11
Engine error 7 (O)6-11
Format failed (R)4-29
HP-GL error codes (O)6-12
Idle (O)6-9
Idle input printing (O)6-9
Initializing (O)6-9
Message window (O)6-8
Off line (O)6-8
Paper jam (O)6-9
Paper size mismatch (O)6-9
PCL error codes (O)6-12
Printing status (O)6-10
Priority (O)6-8
Put size paper in input bin (O)6-10
Reboot Now? (R)4-10
Test print (O)6-10
Toner absent (O)6-10
Toner out (O)6-10
Waiting for idle (O)6-10
I-20 QMS 1660 Print Syst em—Master Index
 Loading...