

Page 1

QMS 1060
®
Print System
Getting Started
1800327-001B
Page 2

Trademarks
The following are tradema rks or registered trademarks of their respective ow ners.
Other product names m entioned in this m anual may a lso be trade marks or reg istered
trademarks of their resp ective owners. Re gistered trademar ks are register ed in the
United States Patent and Trademark Office; some trademarks ma y also be re gistered in
other countries. QMS and the QMS logo are r egistered tradema rks of QMS, Inc., and
Crown, the Crown seal, QUIC, Cr ownNet, and PS Executive Series are trademark s of
QMS, Inc. PostScript is a trademar k of Adobe Sys tems Incorpor ated for a page
description language a nd may be regis tered in certain jurisdic tions. Throug hout this
manual, “PostScript Lev el 2” is used to refer to a set of c apabiliti es defined by Ado be
Systems for its PostSc ript Level 2 page description language. Thes e capabilities,
among others, are implem ented in this produc t through a QMS- developed emulation
that is compatible with Adobe's PostScript Level 2 language. Adobe, Adobe PhotoShop ,
Adobe PageMaker/Ad obe Systems Incorporated . Intellifont/Agfa Division, Mile s, Inc. 3
Com, 3+Open/3Com Corp oration. Aldus, PrePrint/Aldus Corporation. A pple,
AppleShare, AppleTalk, EtherTalk, LaserWriter, LaserPrep, LocalTalk, M acintosh,
TrueType/Apple C omputer, Inc. Banyan, VINES/Bany an. Centronics /Centronics Data
Computer Corporation . CompuServe /H & R Block. DEC, DE Cnet, LN03, VMS/D igital
Equipment Corporation. Phon eNET/Fara llon Comput ing, Inc. Hewlett-Packa rd, HP,
PCL, HP-GL, LaserJet/Hewlett-Packard Co. IBM PC, Token-Ring/International Business
Machines Corporation. Intel/Intel Corpor ation. Aldus FreeHand/Ma cromedia, Microso ft,
MS-DOS, Windows/Microsoft Corporation. Gothic Medium BBB and Ryumin Lgiht KL/
Morisawa and Company, Ltd. Novell and NetWare/Novell, Inc. QuarkXPress/Quar k, Inc.
TOPS/Sun Microsystems, Inc. TypeBank/TypeBank, Ltd. The EN ERGY STAR logo/
United States Environmen tal Protection Agen cy. The ENERGY STAR emblem does not
represent EPA endorsement of any product or se rvice. UN IX/UNIX System s
Laboratories. Ethernet/Xer ox Corporation .
Proprietary Statement
The digitally encoded software included w ith your QMS 106 0 Print System is
Copyrighted © 1995 by QM S, Inc. All Rights R eserved. This software may not be
reproduced, modified, d isplay ed, tr ans ferred, or cop ied in any form or in any manner or
on any media, in whole or in par t, without the express written permiss ion of QMS, Inc.
Copyright Notice
This manual is Copyrighted © 1995 by QM S, Inc., One Mag num Pass, Mob ile, AL
36618. All Rights Reserve d. This manual m ay not be copie d in whole or in pa rt, nor
transferred to any other me dia or language, w ithout the express written permiss ion of
QMS, Inc.
Page 3
Contents
1 Introduction
Abo u t the Prin ter ...... .. .... . .... ....... . .... ....... .. ... ....... .. ... .. ... .. .... . .... . ....1-8
About the Documentati on .......... ....... ............ ....... .............. ..... ....1-8
Standard Product Documentation 1-9
Other Relevant Documentation 1-11
About This Manual 1-12
Typographic Conventions 1-13
Page 4
Printer Features ............................ ..... .............. ....... ............ ....... 1-14
Media Flexibility 1-14
Toner Savings 1-14
Multiple Resolutions 1-15
Four Resident Emulations 1-15
Resident Fonts and Symbol Sets 1-16
QMS Crown Technology 1-16
Energy Star Compliance 1-19
Software Loadable System (SLS) 1-19
Remote Console 1-20
PCMCIA Card Slot 1-20
Printer Options 1-20
What's Next? ....................... ... ......................... ............... ............ 1-23
2 Setting Up Your Printer
Introduction . . .... ... ..... ...... . ....... .... ... ..... ...... . ....... ..... .. ..... ...... ... ..... .. 2-2
Finding a Good Lo catio n . ..... ....... ..... ...... ..... ..... ... ....... ....... ...... ... 2-2
Location Requirements 2-2
Power Requirements 2-4
Checking Shipment Contents .................................................... 2-4
Registering the Printer ................................................................ 2-5
Unpacking the Printer ................................................................. 2-5
Installing Consumables .............................................................. 2-9
Installing the Toner Cartridge 2-9
Loading the 500-Sheet Cassette 2-12
Connecting the Power Cord ..................................................... 2-17
Printing a Start-up Page ........................ .................................... 2-18
Enabling/Disabling the Start -up Page 2-19
Installing Options ...................................................................... 2-20
What's Next? ....................... ... ......................... ............... ............ 2-20
QMS 10 60 Print Syste m Ge tting Starte dii
Page 5
3 Connecting to a Macintosh
Introduction .................................................................................. 3-2
Using an Optional Network Interfaces 3-2
Using the LocalTalk Interface . ... ....... ............ .............. ....... .........3-2
Interface 3-3
Macintosh Interface Cabling 3-3
Making the Connection 3-5
Macintosh Printing Software 3-5
Testing Macintosh Communication 3-11
Printing from the Macintosh 3-11
What Next? .................................................................................3-12
4 Connecting to a PC
Introduction .................................................................................. 4-2
Interface 4-2
Optional Interfaces 4-2
Before Making the Connection ...................................................4-2
What You Need 4-3
Making the Connec tion ... ....... .... ..... ..... ..... ..... ....... ...... ..... ..... ..... ..4-4
Testing Communication ..............................................................4-5
Creating the Test File 4-6
Sending the Test File 4-6
PC Printing Software ........................................ .........................4-11
Installing PS Executive Series Printer Utility Software 4-11
Installing a PostScript Printer Driver 4-11
Printer Description Files 4-14
Printing from the PC .... ... ...... ... ... ....... .... ... ..... ...... ... ..... .... ..... ... ..4 -1 4
What's Next? ................................................. ............... ..............4-15
Contents iii
Page 6
5 Control Panel
Introduction . . .... ... ..... ...... . ....... .... ... ..... ...... . ....... ..... .. ..... ...... ... ..... .. 5-2
Control Panel Indicators ............................................................. 5-3
Message Window ......................................................................... 5-3
Setting the Message Window Language 5-4
Control Panel Keys ...................................................................... 5-5
Online/Offline, Tray Select, Status Page, and Cancel Keys 5-5
Menu, Select, Previous, and Next Keys 5-6
What's Next? ................................................................................ 5-8
A QMS Customer Support
Sources of Supp ort ...................... ..... ....... ....... ..... .... ..... ..... ....... ..A -2
Your QMS Vendor A-2
Your Application Vendor A-2
Q-FAX A-2
The QMS Corporate Bulletin Board System A-3
CompuServe A-3
Internet A-3
QMS Customer Response Center (CRC) A-4
QMS National Service A-5
QMS World-wide Offices .............................................................A-6
QMS 10 60 Print Syste m Ge tting Starte div
Page 7
B Configuration
Menu
Introduction ..................................................................................... 8
Menu Chart Conventions 8
Configuration Menu ........................................................................ 9
Administration/Emulations Menu 10
Administration/Communications Menu 11
Index
v
Contents v
Page 8

Page 9
1
Introduction
In This Chapter . . .
n
About the printer
n
About the documentation
n
About this manual
n
Printer features and user benef it s
1-7Introduction
Page 10
About the
Printer
About the Printer
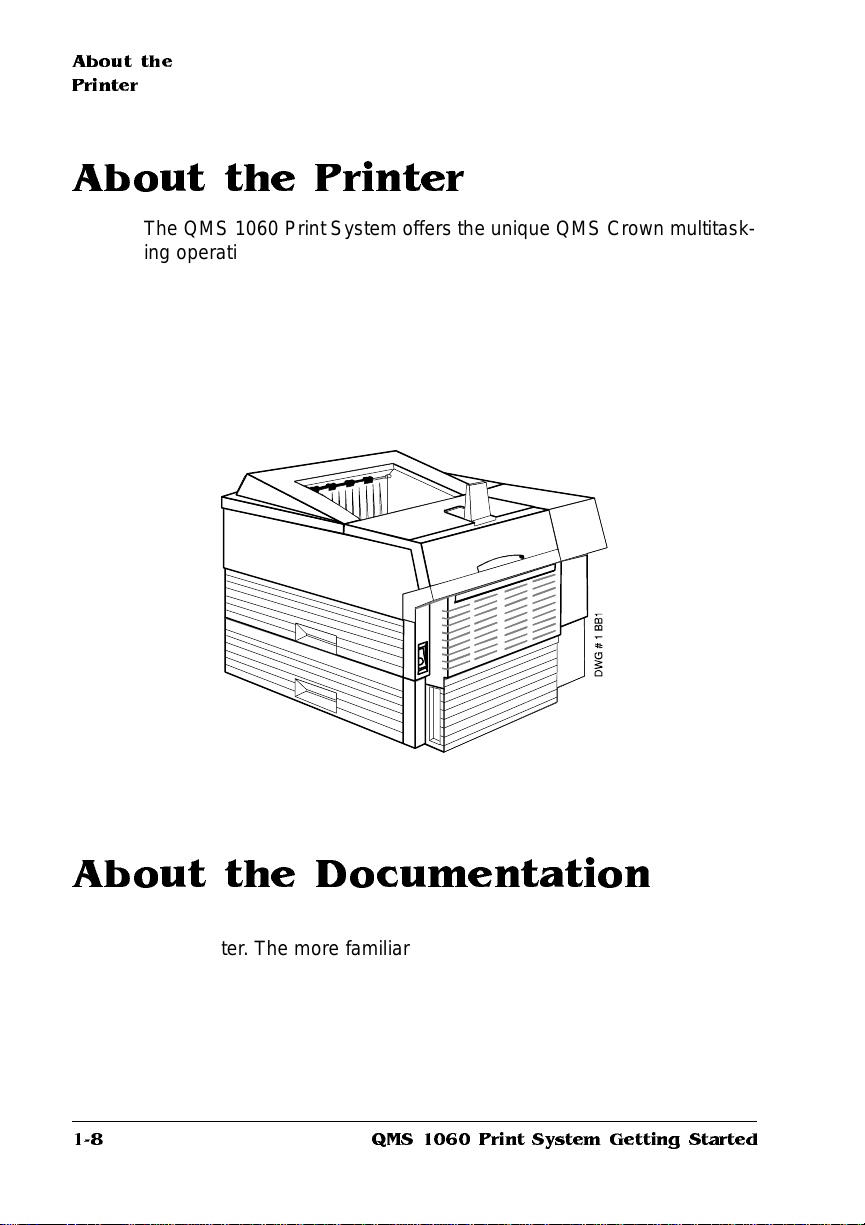
The QMS 1060 Print System offers the unique QMS Crown multitasking operating system, superior perform ance, ext ensive connecti vity,
upgrade options, and flexible emulat ion support .
In addition, it prints 10 pages per minute on let te r/A4-size paper and
offers a choice of 300x300 or 600x600 dpi printing on letter, legal,
executive, A4, B5 ISO, or postcard-size paper. Its ability to handle
envelopes, transparencies, and lab els makes it a great printer for
your day-to-day office needs.
About the Documentation
The documentation provides a window int o the many capabili tie s of
your printer. The more familiar you are with the document at ion, the
easier it’ll be for you to achieve the results you want from your printer.
Several pieces of standard documentation accompany your printer. If
you’ve ordered any printer options, you’ll have even more documentation. But don’t worry—you don’t have to read them all tonight to be
able to use your printer. In fact, you may never need to use some of
1-8
QMS 1060 Print System Getting Started
Page 11
About the
Documentation
them at all, depending on the type of documents you print and the
environment in which you print them.
This section will give you an idea of how we’ve organized information
and which documents you’ll probably refer to the most.
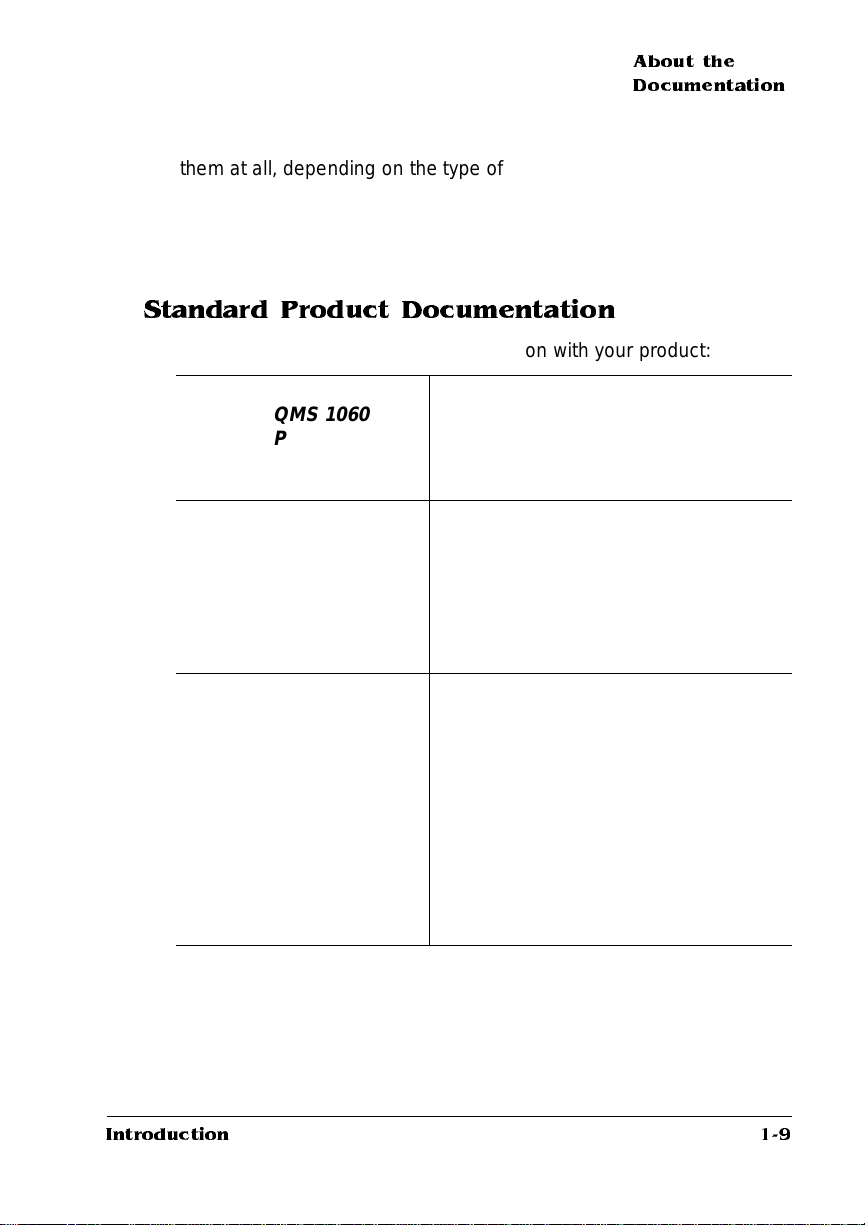
Standard Product Documentation
You received the following documentat ion wit h your product:
You’re looking at this manual right now.
The section called “About This Manu al”
later in this chapter tells you what’s
included in this manual.
This manual guides you through the
day-to-day operation of your printer. It
includes information on replacing print
media and toner, using advanced
printing feature s, handling and cleaning
your printer, improving print qualit y, and
troubleshooting printer problem s .
&
&
QMS 1060
Print System
Getting Started
QMS 1060
Print System
Operation
&
Introduction
QMS 1060
Print System
Reference
This manual provides information you
may need only once in a while, such as
information on typefaces and font s,
control panel configurat ion menu,
memory, end job mode, PS protocol,
HP-GL color encoding, and insta lling
and using printer options. This manual
also provides technical specifications, a
list of printer-supported QMS Document
Option Commands (DOC), characte r
tables, and a glossary of frequently
used terms.
1-9
Page 12
About the
Documentation
&
&
QMS Crown
Network Notes
Printer Option
Documentation
Refer to this documentation for tips on using
your QMS 1060 Print System if you’re
connecting to a network through the serial or
parallel port. It discusses 3Com 3+Open,
Banyan VINES, LAN Manager-based LANs,
Novell NetWare, TCP/IP, UNIX, and VMS/
DECnet. In most cases, only advanced
network users and system administrators
need this information.
» Note:
If you purchased a printer option (for
example, a Kanji option kit), you received
separate documentation for it. See chapter
6, “Printer Options,” of the
System Reference
information.
This manual is provided on
disk in encapsulated PostScript
(EPS) form. Refer to the README
file for inform ati on on p rinti ng a
hardcopy of the manual.
QMS 1060 Print
for additional option
1-10
QMS 1060 Print System Getting Started
Page 13
About the
Documentation
Other Relevant Documentation
Don’t forget that your application, host operating system, and
network documentation all co ntain useful information.:
QMS Crown
Document Option
Commands
*
(This manual is
available from your
QMS vendor)
Document Option Commands (DOCs)
are software codes you insert in
documents to enable printer features
that cannot be accessed by your
application or page description
language. This manual lists and
explains all of the commands. The
DOCs supported by your printer are
listed in appendix C, “Document Option
Commands,” of the
Reference
guide
.
Using QMS DOC, you can develop
one driver to support all languages
and emulations for your printe r.
Also, you can use host network
management software to create
customized network printer queues
for all users connected to the
printer. In most cases, only
advanced users and system
administrators need this
information.
PostScript Reference
Manuals
Other manuals that contain
PostScript information are the
PostScript Language Reference
Manual
(Adobe System s, Inc.,
Reading, MA: Addison-Wesle y,
1990 ISBN-0201-18127-4), and the
“PostScript Language Reference
Manual” (in
Adobe Systems, Inc., January
2011
Supplement for Version
24, 1992).
Introduction
1-11
Page 14
About the
Documentation
About This Manual
This manual contains detailed, illustrated instructions to guide you as
you unpack and set up your printer and connect it to a host (such as
an Apple Macintosh or an IBM or compatible PC ). In addition, it introduces you to the printer’s control panel. This manual is divided as follows:
Introduction
1
Settin g Up
2
Your Printer
Connecting to
3
a Macintosh
Connecting to
4
a PC
Using the
5
Control Panel
Presents an overview of the
documentation and of the printer ’s
features.
Guides you in selecting a location
for your printer and explains how to
unpack and set up your printer.
Explains how to connect the printer
to an Apple Macintosh and then
discusses Simultaneous Interface
Operation (SIO) and Emulation
Sensing Processor (ESP)
technology.
Explains how to connect the printer
to an IBM PC or com pa tib le
computer using the parallel or serial
interface.
Introduces the parts of the printer
control panel.
1-12
QMS 1060 Print System Getting Started
Page 15
About the
Documentation
QMS Customer
A
Support
Configuration
B
Provides product sales and support
telephone numbers and describes
how to communicate with QMS
through the QMS
Bulletin Board, CompuS erve, the
Internet, and Q-FAX
Provides a menu chart that shows a
Configuration menu opt ion’s tree.
.
Menu
Typographic Conventions
The following typographic conve ntions are used in this manual:
Mixed-Case Courier Text you type, and messages and information
displayed on the screen
Mixed-Case
Italic Courier
UPPERCASE
COUR IER
lowercase bold PostScript operators and DOS commands
lowercase italic Variable information in text
UPPERCASE File and utility names
↵ Press the Enter key (PC) or Return key (Macintosh)
^ Press and hold down the Ctrl key (PC)
Variable text you type; replace the italicized word(s)
with information specific to your printer or computer
Information displayed in the printer message window
» Note:
that deserves emphasis or reiteration.
▲ Caution
equipment damage, proce ss failure, or extreme annoya nce.
Introduction
Notes contain tips, extra informati on, or important inform ation
:
Cautions present information that you need to know to avoid
1-13
Page 16
Printer
Features
M
WARNING!
specific procedure is not performed exactly as des cribed in the
manual.
Warnings indicate the possibility of personal injury if a
ACHTUNG!
beschriebene Vorgenhensweise, da sonst Verletzungsgefahr
bestehen könnte.
Bitte halten Sie sich exakt an die im Handbuch
Printer Features
This brief overview will acquaint you with your printer’s major features
and how they can benefit you. Specific chapters throughout the three
volumes of the user’s guide (this manual, the
Reference
the
Consult the index or the table of contents in each manual for guidance in locating this information.
Media Flexibility
The printer supports print media in five diff erent sizes (legal, letter,
executive, A4, B5 ISO) in both portrait and landscape orientations. It
also supports envelopes, postcard s, and other custom print media.
User Benefit—You have the option of printing on a variety of standard and non-standard media sizes in both portrait and landscape orientations, as well as printi ng on enve lopes, postcards, and ot her
custom print media.
manual) contain more inform ation on each feat ure.
Operation
manual, and
Toner Savings
The printer provides toner savings with the Conserve Toner option.
User Benefit—A choice of printing modes allows you to lower print-
ing costs by reducing the amount of toner on the printed page when
printing draft copies of documents.
1-14
QMS 1060 Print System Getting Started
Page 17
Printer
Features
Multiple Resolutions
Two printer resolut ions are availab le: 300 x300 and 600x600 dots per
inch.
» Note:
With the standard 8 MB of RAM on the QMS 1060 printe r
300x300 dpi is available for all media sizes and 600x600 dpi is
available for all media sizes excep t legal which requires additional
memory.
User Benefit—A choice of print resolutions allows you to customize
the quality of your output accordi ng to its use: 300x300 dpi for most
hardcopy needs or 600x600 dpi for camera-ready output (depending
on your application and requirement s ).
Four Resident Emulations
Your printer supports printing in HP PCL 5, HP-GL, Lineprinter, and
PostScript emulations.
User Benefit—Most applicat ion s can print directly to the printer.
HP PCL 5 Emulation
The printer simultaneously emu lates the Hewlet t-Packard LaserJet
IIISi and the HP PaintJet XL300 Colo r Printer (the out put is g rayscaled on your QMS 1060 Print Sy stem). These printers are emulated at both 300x300 dpi (bitmap and scalable fonts) and 600x600
dpi (scalable font s only).
» Note:
Using 600x600 dpi resolution with the legal media size requires
additional memor y. Only 300x300 dpi resolution is available for HPGL/2.
HP-GL Emulation
The printer provides HP-GL plotter emulation (7470A, 7475A, 7550A,
and ColorPro) at 300x300 dpi and 600x600 dpi.
» Note:
additional mem or y.
Introduction
Using 600x600 dpi resolution with the legal media size requires
1-15
Page 18
Printer
Features
Lineprinter Emulation
The Lineprinter emul ati on prints sim ple, unformat ted text files at
300x300 and 600x600 dpi.
» Note:
Using 600x600 dpi resolution with the legal media size requires
additional mem or y.
PostScript Level 2 Emulation and Level l
Compatibility
The QMS 1060 Print Sy stem’s Level 2 emulati on allows you to take
full advantage of your printer’s high print resolution. The Level 2 em ulation is compatible with Adobe’s Post Script Level 2 language while
providing additional capabilities. The Level 2 emul ati on sup ports
extensive graphics capabilities to cont rol the appearance of text, geometric shapes and images, and improves memory and resource management. Full support for Post Script Level 1 files is also included.
Resident Fonts and Symbol Sets
Your printer comes with 12 PostScript typeface families containing 39
licensed fonts, and it provides support for any TrueType font that’s in
the format required for PostScript. All resident PostScript typeface
families have multilingual character sets. The printer also has 7 resident bitmap PCL 5 fonts in 25 symbol sets each, 12 resident scalable
PCL 5 fonts in 35 symbol sets each, 1 resident scalabl e PCL 5 font in
5 symbol sets, and 40 resident HP-GL symbol sets.
User Benefit—With so many resident fonts and symbol sets, there is
less need for time-consuming downloadin g.
QMS Crown Technology
The QMS Crown multitasking operat ing s ystem provides fast processing speeds, net working capabi lity, and higher printer performance while maintaining outstanding print quality.
1-16
QMS 1060 Print System Getting Started
Page 19
Printer
Features
Multitasking and Compile-Ahead Technology
Your printer receives, compi les, processes, and print s multipl e do cuments at the same time—true mul titasking. The print er has a variety
of resources that it uses to print the page. Memory, emul ations, and
the laser printer engine (the mechanical parts that actually put toner
on the page) are all resources of the printer.
Compile-ahead technology is the temporary storage of page images
in a proprietary compressed data format . It makes maximum use of
the memory resource. While the engine is busy printing a page, compile-ahead technology uses the availa ble printer mem ory to prepare
the subsequent pages of the document (or the next job). These page
images are available as soon as the current page is printed. For
example, while the QMS 1060 Pri nt Sy stem is actually print ing the
third page of a five-page docum ent, pages four, five, and the next job
in the queue are already compiled into the compressed data format .
User Benefit—With mul titasking, your job s are printed more quic kly,
and the host is free sooner. With compile -ahead te chnology you
spend less time waiting for documents to print. This improves printer
throughput and increases your productivity.
Simultaneous Interface Operation (SIO)
Although many other print er s have multiple interfa ce ports and automatically designate a “hot port,” only one port actively receives data
at a time. Y our QMS 1060 Print System is unique because SIO allows
all of its interface ports—LocalTalk, parallel (Centronics and bidirectional IEEE 1284), serial, and two opt iona l netwo rk interfa ce s—t o be
active at the same time.
The standard interfaces let you connect to any Macintosh or IBM PC
or compatible. The printer also works in many minicomputer, mainframe computer, and network environments.
User Benefit—You can have more than one co mpu ter sending print
jobs to the printer. Each inte rface has an input buffer (which may be
expanded with additional memory or an option al hard disk) that
receives data while another interf ace is being used to print.
Introduction
1-17
Page 20
Printer
Features
Emulation Sensing Processor (ESP) Technology
Most printers can recognize only their native comma nd languag e.
However, ESP technology, which works with most popular commercially available applicati ons, uses a form of artificial int ell igence to
analyze incoming file data and select th e appropriat e printer emula tion from those installed on the printer, and processes the print job.
User Benefit—When your printer is in ESP mo de, you can easily
print PostScript, HP PCL 5, HP-GL, or Lineprinter documents without
changing printer switch settings or sending softwa re commands to
accommodate different printer langua ge s.
The QMS 1060 Print System prints almost any file sent in a language
ESP technology understands, whet her you have one, two, or more
hosts, and whether you are communicatin g through an LocalTalk,
Centronics or bidirectional IEEE 1284 parallel, serial, or optional network interface. Most users never have to change from ESP mode to
another mode.
Context Switching
1-18
After its initial use, the state of an emulat ion and downl oaded dat a
(such as fonts, macros, and overlays when changing emulation s) is
preserved for as long as the printer power is on.
User Benefit—Repetit ive download ing of emulat ion s, font s, m acros,
and overlays is unnecessary.
Compressed Data Formats
Crown printers convert data received from the input buffer s into intermediate, compressed blocks until the data is needed for printing.
These compressed blocks of data are designed to be processed rapidly by the printer, and m any mo re can be stored in memor y at one
time than can traditional bitmapped image s.
User Benefit—This allows and increa se s the speed o f such printer
features as collation and aut oma tic jam recovery, if enabled.
QMS 1060 Print System Getting Started
Page 21

Printer
Features
Automatic Jam Recovery
Crown technology also provides automatic jam recovery, if enabled.
With most printers, if a media jam occurs, you must remove the
jammed media and then reprint the job. If a media jam occurs on a
Crown printer, however, the printer reprints the jammed page as soon
as you remove the jammed media and then continue s with the print
job. This is possible because compressed dat a format s allow more
pages to be stored in memory. The print er remem bers the last page
printed, pulls the necessary inform ation from mem or y, and automatically reprints any lost pages.
User Benefit—You save time and print media beca use it’s unnecessary to resend a print job after clearing a media jam.
Energy Star Compliance
The QMS 1060 Print System is compliant
with US Environmental Protection
Agency (EPA) Energy Star regulat ion s.
After a specified length of inactivity, the
printer changes to a low-power state (the
engine remains on, but the fuser turns
off). When a print job is received the
printer returns to normal power within 90
seconds.
User Benefit—The EPA Energy Star Computers program promotes
the use of energy-efficient personal computers, monitors, and printers
and the reduction of air pollution caused by power generation.
Software Loadable System (SLS)
Your printer has a software loadable s ystem, which allows you to
replace or upgrade its system software from a Macintosh, a PC, or
over any network interface.
User Benefit—Future enhancem ents to the system software ca n be
easily installed as they become available from QMS.
Introduction
1-19
Page 22

Printer
Features
Remote Console
The 1060 Print System printer allows you to establish a remote co nsole connection via TCP/IP Telnet, and you can additionall y use NetWare, EtherTalk, and LAN Manager/LAN Server to establi sh this
connection, if you have the optional CrownNet interfa ce install ed.
Printer status condit ions tha t require user inter ventio n display on the
remote console. For example, status mes sages may indicate that
paper is low, outpu t bin is full, or a paper jam has occurred. (Refer to
QMS CrownNet Interface S y stem Administrator’s G uide
the
mation on how to start the session, and refer to the
Remote Console User’s Gui de
remote console to control and configure the printer.)
User Benefit—The ability to control your printe r from a remote con-
sole as well as from the printer’s own control panel means you don’t
have to leave your work station whenever the printer needs attention.
Moreover , i t means you’ll know right away if the printer is tied up with
a jam or other simple probl em requiring user intervention.
for infor-
QMS Crown
for complete information on using a
PCMCIA Card Slot
A PCMCIA (Personal Computer Me mory Card Internationa l Association) card slot is available to support Release 1 and 2, Type I, II and III
cards.
User Benefit—This card slot allows you to use optional fonts or emulations (see “Printer Options,” in the following secti on ).
Printer Options
The following options are available for your QMS 1060 Prin t System.
Contact your QMS vendor for purchase information.
Upgradable RAM (Random Access Memory)
The 8 megabytes (MB) of resident RAM (Random Access Memory) is
upgradable to 64 MB through the installation of Single In-line Memory
Modules (SIMMs).
1-20
QMS 1060 Print System Getting Started
Page 23
Printer
Features
User Benefit—Your printe r’s memory can be upgraded as your
needs grow. Additiona l RAM provides room for font downloading and
font caching, and it increases the printer’s buffer (the area where data
sent from the host computer is stored), allowing you to send large
data-intensive files to the printer with out t ying up the host for long
periods. Additional RAM also allows you to attach and use mult iple
SCSI drives.
500-Sheet Cassette, Optional Cassette, Optional
Cassette and Feeder, and 50-Envelope Cassette
These options increase the printer ’s media feed capacity and flexibil ity. Your printer co mes standard w ith a multi purpose tray to handle
150 sheets of 20-pound (75 g/m
or B5 ISO sizes, or 10 envelopes. The 500-sheet cassette is capable
of supporting letter or A4 paper. The optional cassette and feeder
supports another 500 sheets of paper in letter, A4, or legal sizes, for a
total input of 1150 sheets, includi ng the mult ipurpose t ray. The
optional 50-envelope cassett e allows you to feed 50 envelopes
instead of the 10 allowed in the multipurpose tr ay.
2
) paper in letter, A4, legal, executive,
User Benefit—You can cu stom ize the printe r’s media input sour ces
to your printing needs and double the amount of paper available
before refilling cassettes. The envelope cassette increases 5-times
the number of envelopes that can be handled by the mult ipurpose
tray.
Optional Fonts
Optional fonts are available in several differe nt formats .
n
Introduction
The PCL ProCollection and special PostS cript fonts are either
contained on PCMCIA cards or must be downloaded to an
optional printer hard disk. Optional font cards are plugged into the
slot on the back of the print e r.
1-21
Page 24
Printer
Features
n
Kanji fonts Ryumin Light-KL and Got hic BB B Medium licensed to
QMS by Morisawa and Compa ny, Lt d. and the fonts Mi ncho
Medium, Mincho Heavy, Gothic Bold , and Gothic Heavy licensed
to QMS by TypeB ank are on a pre-formatted IDE hard disk.
These fonts are available with the Kanji Opt ion Kit and they can
be printed at a variety of point sizes and in different styles and
resolutions.
n
The Intellifont SIMM increases the number of PCL 5 fonts from 20
to 37 for compatibility wit h the LaserJet 4Si.
User Benefit—Optional fonts increase the printer’s functionality.
Extra fonts allow you to create more distinctive docum ent s.
Optional Emulations
Optional emulations, such a s LN03 Plus and QUIC II are contained
on diskettes and must be downloaded to an optional printer hard disk.
Contact your QMS vendor for a complete list of available emulat ions.
User Benefit—Extra emul ations allow you to print docume nts c reated in printer languages other than tho se resident on the printer.
1-22
Security Card
An optional security card allows you to password-protect the printer’s
configuration menu. O p tional security cards are plug ged int o the
PCMCIA card slot on the back of the printer.
User Benefit—A security card restricts access to the configuration
menu to those users with valid pas sword s, ensuring that def ault settings are not changed inappropriately.
QMS 1060 Print System Getting Started
Page 25
What's Next?
Optional I/O Slot
Your 1060 Print System has dual I/O slots to support two network
interfaces, or one hard disk and one network interface.
n
Network Interfaces
Using CrownNet NICs (network interface cards), the QMS 1060
Print System can be attached to Ethernet or Token-Ring networks
running multiple protocols. Contact your QMS vendor for a list of
available protocols.
User Benefit—Network interfaces provide flexibility and fast data
transfer in complex network environments.
n
Hard Disk Expandability
One of the two optional interface slots can support one IDE-SCSI
board with a 2.5” internal IDE hard disk and up to three external
SCSI hard disks. Either slot can be used for the IDE drive , but
only one IDE drive can be supported at a time. See appendix E,
“Technical Specifications” in
information.
Reference
for hard disk specification
User Benefit—Hard disks provide virtual memory type capabilities as well as storage for downloaded character bitmaps, outline
fonts, forms, and other files.
What's Next?
Chapter 2, “Setting Up Your Printer,” explains how to find a good location for the printer, unpack the print e r, install a toner cartridge, and
load and install a 500-sheet paper cassette.
v
Introduction
1-23
Page 26

Page 27
2
Setting Up Your
Printer
In This Chapter...
n
Finding a good location for the printer
n
Unpacking the printer
n
Installing a toner cartridge
n
Loading and installing a 500-sheet cassette
n
Connecting the power cord
n
Printing a start-up page
Page 28
Introduction
Introduction
This chapter explains how to set up your QMS 1060 Print System for
the first time.
It includes information on finding a good location for the printer,
unpacking and checking the shipment contents, installing a ton er cartridge and media cassette, and printing a start -up pag e.
Finding a Good Location
Your QMS 1060 Print System operates in any computing environment
with the following requirements.
Location Requirements
n
Away from cooling sources, heat ing sources, extreme tem perature changes, direct sunlight, excessive dust, and corrosive
chemicals or vapors.
2-2
n
Away from any strong electromagnetic field (such as that created
by an air conditioner) and excessive vibration.
n
Temperature range of 50° F (10° C) to 95° F (35°C).
n
Relative humidit y range of 15% to 85%.
n
Level and capable of supporting the printer weight, which is about
38 lbs (17.25 kg) for the printer only (without the ca rtridge and
media).
n
An appropriate distance from the host comp uter, based on your
operating environment— 6 feet (1.8 meters) or less for a parallel
connection or 25 feet (7.5 meters) or less for a serial connection.
n
Close to an easily accessible power supply.
n
Well ventilated room.
QMS 1060 Print System Getting Started
Page 29
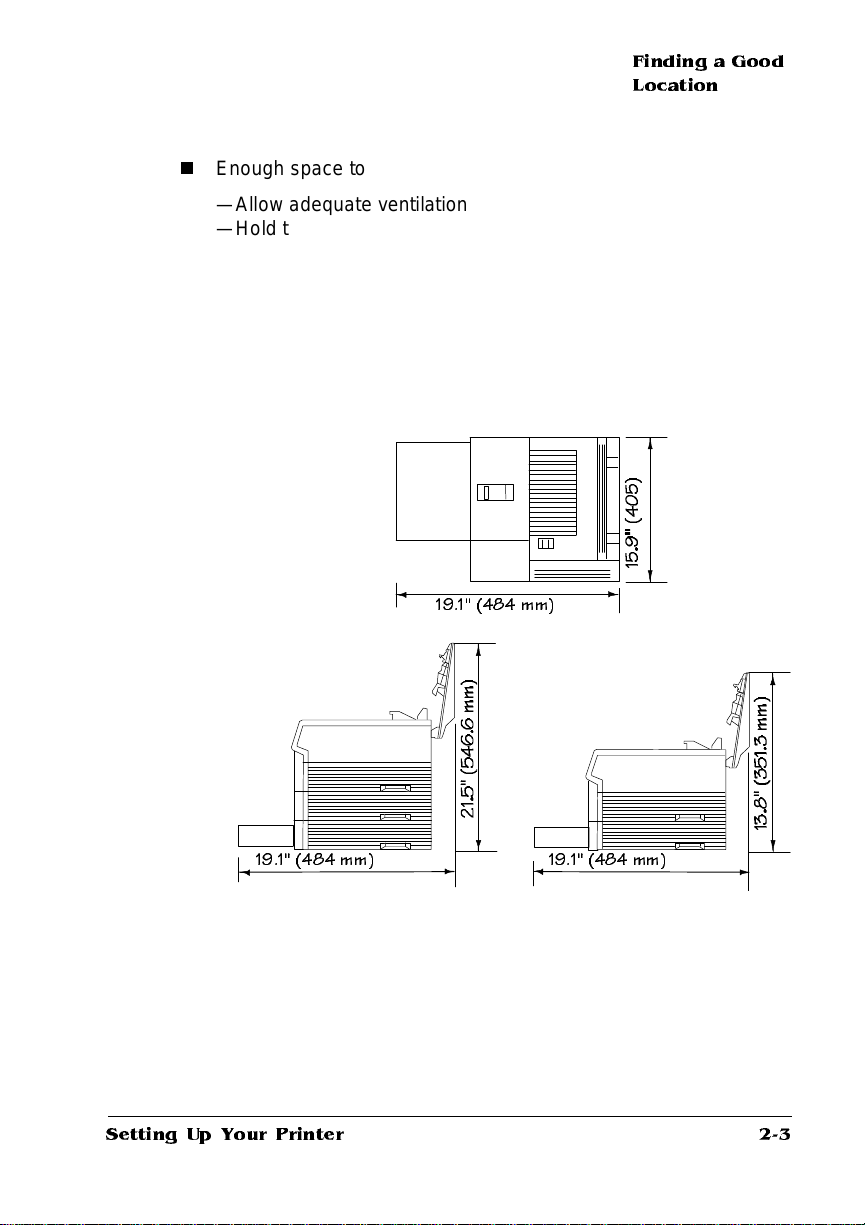
Finding a Good
Location
n
Enough space to
—Allow adequate ventilation
—Hold the printer and its standard casset te and feeder
—Open the printer ’s top cover
—Access the multipurpose tray
—Open the media cassettes
—Hold the printer and an opti onal cassett e and fee der (if
installed))
19.1'' (484 mm)
19.1" (484 mm) 19.1" (484 mm)
Setting Up Your Printer
2-3
Page 30
Checking
Shipment
Contents
Power Requirements
Your printer requires a properly grounded AC outlet with a power
range of ±10% of the rated line voltage (120 V or 220/240 V). Noisegenerating equipment should not be connected to the same electrical
outlet as the printer. The recommended frequency is 47-63 Hz for
120 V system and 47-50 Hz for 220/2 40 V s ystem .
▲ Caution:
grounding plug for safety purposes. Connect the plug to the proper
grounding-type power outlet.
The supplied power cord is equipped with a 3-wire
Energy Star Compliance
The printer is compliant with US Environment al Protect ion A gency
(EPA) Energy Star regulat ions. After a specified period of inactivity,
the printer changes to a low-power state (the engine remains on, but
the fuser turns off). When a print job is received, the printer returns to
normal power within 90 seconds.
Checking Shipment Contents
In addition to this manual, your shipment consists of the following
items:
n
QMS 1060 Print System (with multipurpose tray)
n
Paper feeder and standard 500-sheet letter/A4 cassette boxed
separately but banded to the printer unit’s box)
n
Paper stopper
2-4
n
Documentation
—QMS 1060 Print System Operat ion
—
QMS 1060 Print System R efe re nce
—QMS Crown Network Notes
QMS 1060 Print System Getting Started
(on disk)
Page 31

n
Software
—PS Executive Series Utilities software (on disk )
n
Documentation binder
n
Toner cartridge
n
Power cord
n
Warranty and registration card
Registering
the Printer
» Note:
Interface cables aren’t included in the shipment. If you need
cables, contact your QMS vendor or a local computer store. Chapters
3, “Connecting to a Macintosh,” and 4, “Connecting to a PC,” of this
manual specify the type of cable you need.
Make sure that all items are included in your shipment before setting
up your printer. If any item s are missing or damag ed, cont act your
shipping company or your QMS ve ndor. See appendix A, “QMS Customer Support,” for product sales and support information .
Registering the Printer
QMS is committed to develop ing print systems tha t offer you flexible,
efficient solutions, so we’re interested in knowing how you plan to use
your printer.
To register by mail, fill out and send in your warranty card. To register
by telephone, in the US call QMS toll-free at (800) 637-8049. In other
countries, refer to appendi x A, “QM S Customer Support,” for the
appropriate telephone number.
Unpacking the Printer
The packing materials that protect your printer during shipment —
cardboard, polystyrene, tape, and shipping spacers—must be
removed before you can use the printe r.
Setting Up Your Printer
2-5
Page 32

Unpacking the
Printer
Use the following procedure to unpack the printer. To ensure that your
printer was not damaged during shipment , follow the enti re procedure, including printing the start-up page.
» Note:
You may want to save the packing materi als in case you ever
have to move or ship the printer to a new location.
▲ Caution
: You may damage the printer if you turn it on before all of the
packing materials are removed.
M
WAR NING !
The printer weighs about 38 lbs (17.25 kg). Don’t lift it by
yourself.
ACHTUNG!
Der Drucker wiegt ca 17.25 kg; bitte versuchen Sie
niemals, das Gerät alleine anzuheben oder zu tragen.
1 Remove everythi ng except the printer fr om the shipp ing
carton.
2 Lift the printer out of the shipp ing carton.
Hold the printer by the carrying grips located on the printer bottom.
M
WAR NING !
ACHTUNG!
The printer is heavy, so two people should lift it.
Der Drucker ist schwer und solte von 2 Personen
getragen werden.
3 Remove the protective plasti c cover in g and tape from the
printer body.
2-6
QMS 1060 Print System Getting Started
Page 33

Unpacking the
Printer
4 Remove the packing materials and tape from inside the stan-
dard feeder and place it in the location where the printer is to
reside.
5 Slide the cassette out of feeder.
6 Remove the packi ng mate rial s and tape fr om insid e the c as-
sette and slide it in the feeder as far as possible.
Setting Up Your Printer
2-7
Page 34

Unpacking the
Printer
7 Slide the paper stopper on the tray cover.
8 Stack the printer on top of the feeder.
2-8
M
WAR NING !
ACHTUNG!
getragen werden.
The printer is heavy, so two people should lift it.
Der Drucker ist schwer und solte von 2 Personen
QMS 1060 Print System Getting Started
Page 35

Installing Consumables
You must install the toner cartridge, load and install the cassette, connect the power cord, and print the start-up page before you can install
any options.
Installing the Toner Cartridge
In your laser printer, character s and images are created through a
process that applies toner (made of carbon particles) to the page in
the printer’s fusing unit. When an image is formed, heat and pressure
are applied to transfer the image to the page. The toner cartridge contains the toner and photosensitive drum needed to operate the laser
printer. You may purchase additional t oner cartridges from your QMS
vendor.
Installing
Consumables
» Note:
» Note:
Setting Up Your Printer
The toner cartridge is sensitive to bright light. Do not remove
the cartridge from its protective bag unt il you are ready to install it.
Store the cartridge in an environment that is not subject to extreme
heat or humidity. Ke ep the toner cartridge away from your comput er.
The magnets in the cartridge can damage data, particularly on your
floppy disks.
1 Lift the toner cartri dg e out of its sh ippi ng carto n, ope n the
aluminum pr otecti ve bag , and remove the cartrid ge.
After taking the toner cartridge from its protective bag, do
not open the cover or touch the PC drum of the toner cartridge
because it may deteriorate the drum and reduce print quality.
2 Remove the tape seal.
Holding the cartridge in place with your right hand, use your left
hand to grasp the green tab on the left side of the toner cartridge.
Pull the tab straight out (it is about 22''/559 mm long). If the tab
2-9
Page 36

Installing
Consumables
breaks, grasp the clear part of the tape seal and pull it straight
out. Discard both the green tab and the tape seal.
3 Distribute the toner in the cartridge.
Holding the cartridge with both hands, gently rock it from side-toside five or six times to distribute the toner.
Tape Seal
2-10
QMS 1060 Print System Getting Started
Page 37

Installing
Consumables
4 Open the printer’s top cover.
5 Slide the toner cartridg e into the printer.
Hold the grooved area on the toner cartridge with your right hand,
with the arrow on the toner cartridge facing away from you angle
the cartridge down in the printer. Place the cartridge on the rails
inside the upper unit of the printer, and gently slide it straight
down until it is firmly seated.
6 Close the printer ’s top cover.
Setting Up Your Printer
2-11
Page 38

Installing
Consumables
Loading the 500-Sheet Cassette
The QMS 1060 Print System comes standa rd with one 500-sheet letter/A4 cassette. The printer auto matical ly pulls medi a from the cassette. Load media in the cassette as follows:
» Note:
You should ensure th at the media size matches the cassette
size; otherwise, the printed image will not be correctly placed on the
page.
1 Unwrap the paper, pull the stack out, and then with one hand
at each end of the stack, lift and hold it in a curved posi tio n
as shown in the following illustra tion.
» Note:
Paper is packed in reams of 500 sheets. Do not unpack the
paper above the printer as this might cause particles to fall into
the printer components. Not e the arrows on the wrapper. T hey
show which side of the paper should be on top when it is loaded
in the cassette.
Hold
Without
Gripping
2-12
QMS 1060 Print System Getting Started
Page 39

Installing
Consumables
2 Grip each end of the stack firmly.
Grip
3 Straighten the stack, and then roll the fanned sheets fro m
side to side to get air through the sheets and prevent static
buildup.
4 Take off the top and bottom sh ee ts
Setting Up Your Printer
Straighten and Roll from Side to Side
2-13
Page 40

Installing
Consumables
The top and bottom sheets sometimes have residual glue buildup
that could cause the printer to jam.
5 Position the cassette.
The cassette has a spring in the bottom that provides some resistance when print media is placed on it. Lay the cassette flat on a
hard surface and using your left hand push down on the plate in
the cassette until it locks.
Remove Top She et
Remove Bottom Sheet
2-14
QMS 1060 Print System Getting Started
Page 41

Installing
Consumables
6 Load media in the 500-sheet casse tte in incremen ts so that
the 500 sheets fit in the cassette and the media stack is properly leveled out.
Load the media so the front end of the stack comes against the
front of the cassette in three steps as follows:
a Up to the bottom limit mark
b Halfway to the top lim it mark
c Up to the top lim it ma rk.
Top Limit
Bottom Limit
Retaining Clips
7 Ensure that the media stack lies flat, does not exceed the top
limit mark, and is positio ned und er the retai ning clips.
8 Slide the cassette into the feeder.
Setting Up Your Printer
2-15
Page 42

Installing
Consumables
Push the cassette straight into the cassett e slot on the feeder
until it’s firmly seated.
9 Adjust the med ia stop to fit the media size.
The printer delivers your output, print-side down , to the output
tray on the top of the printer. The media stop keeps the sheets
positioned in the output tray.
Cassette
2-16
QMS 1060 Print System Getting Started
Page 43

Connecting
the Power Cord
Connecting the Power Cord
Connect the power cord as follows:
▲ Caution
is pressed down).
1 Plug the female end of the po wer cord in the conn ector on
2 Plug the oppo s ite end of the pow er cord in a groun ded AC
3 Turn on the printer (press do wn the | side of the switch).
: Make sure that the printer power switch is turned off (the O
the rear lower right of the printer.
outlet.
After a brief warm-up (less than 2 minutes) the printer produces a
start-up page.
Setting Up Your Printer
2-17
Page 44

Printing a
Start-up Page
Printing a Start-up Page
When you turn on the printer, a start-up page print s. This page gives
you an overview of your QMS 1060 Print S y stem.
The following information prints on the start-up page:
n
Printer product name
n
Cumulative num ber of printed sh eets
n
Amount of resident RAM (in megabyte s)
n
Number of PostScript typefa ces in ROM
n
Default resolution
n
Software version, revision, and release numb ers
n
Firmware level number
n
Hard disks or cartridge atta ched, if any
n
Emulation and protocol informat ion of all standard and optiona l
interfaces
» Note:
2-18
When an Intellifont ROM is installed th e following appe ar s in
the Options section of the start-up page even though you have only
one installed:
%cartridge1%
%cartridge%
If the start-up page prints with all the start-up page informat ion , and
the print quality is good, go to chapter 3, “Connecting to a Macintosh,”
or chapter 4, “Connecting to a PC” of this manual, depending on your
computer platform.
If you purchased any printer options, you can install them now. If
installation inst ructi ons are included wit h your option, follow them . If
not, installation instructi ons are included in chapt er 6, “Printer
Options,” of the
Reference
guide.
QMS 1060 Print System Getting Started
Page 45

Printing a
Start-up Page
If a start-up page does not print, see chapter 6, “Troubleshooting,” of
the
M
WAR NING !
Operation
guide for more information on printing a start-up page.
Turn the printer off and unplug the power cord before
checking for correct printer installation.
ACHTUNG!
Schalten Sie bitte den Drucker aus und ziehen Sie auch
den Netzstecker heraus, bevor Sie die korrekte Installation des
Druckers überprüfen.
Enabling/Disabling the Start-up Page
A start-up page automatically print s when you turn on your print system. However, you can save time, paper, and toner by disabling the
start-up page.
If you need the information included on the start-up page after you
have disabled the page (for example, to provide to the QMS Customer Technical Assurance staff when you need technical support.
The two easiest ways to disable (and enable) the start-up page are
1 Use the PS Executive Series U tilitie s.
(See the PS Executive Series Util ities on-line help for complete
information.)
2 Use the printer control panel (Adm inistra tio n/Star tup
Options/Do Start Page menu).
See “Enabling/Disabl ing the Start-up Page” in chapte r 4, “Printer
Configuration, ” of the
Reference
guide for complete inform ati on.
Setting Up Your Printer
2-19
Page 46

Installing
Options
Installing Options
If you purchased any printer options, such as extra memory (SIMMs),
emulations, a SCSI-IDE b oa rd, a netwo rk interfa ce card, or an internal hard disk drive, install them now. If installation instructio n s are
included with the option, follow them. If not, insta llat ion inst ructio ns
are included in chapter 6, “Printer Options,” of the
What's Next?
Now that you’ve set up your printer, go to chapter 3, “Connecting to a
Macintosh,” or chapter 4, “Connecting to a PC,” of this manual to connect your printer to a host computer.
v
Reference
guide.
2-20
QMS 1060 Print System Getting Started
Page 47

3
Connecting to a
Macintosh
In This Chapter . . .
n
Printer-host interface
n
Connecting via the LocalTalk Port
Page 48

Introduction
Introduction
This chapter explains what an interface is, describes how to connect
your printer to a Macintosh (or another computer on a network tha t
uses LocalTalk-type connectors and boxes).
Using an Optional Network Interfaces
In addition to the three standard interfaces—LocalTalk, parallel (bidirectional), and serial—the QM S 1060 Print System has the option of
using two optional interfaces to connect your printer to an Ethernet or
Token-Ring network.
If you have purchased an optional interface for your printer, refer to
the following for more information:
n
If you’ve purchased an optional net work interf ace for the print e r,
see chapter 6, “Printer Options,” of the
as the documentation that comes with the interface for installation
instructions.
Referenc e
guide as well
n
The documentation th at come s with the optional netwo rk interface contains information about all other options in the net work
interface menu as well as instructions for connecting the printer to
the network and for printing over the net work.
n
Your application and netwo rk document ation co ntai n informat ion
on printing over the network.
Using the LocalTalk Interface
Connecting to the LocalTalk port involves basically three steps:
assembling the proper interface cabling (use a LocalT alk-type kit such
as Farallon's PhoneNET, available from your QM S vend or), making
the connection, and making sure the necessary printing files are
installed on the Macinto sh.
3-2
QMS 1060 Print System Getting Started
Page 49

Using the
LocalTalk
Interface
The LocalTalk port is used to print if
n
Your host is any member of the Apple Macintosh fami ly. The
instructions in this chapter explain how to connect a Maci ntosh
(via either a direct connection or through a LocalTalk network
connection) to the QMS 1060 Print System.
n
Your host is an IBM PC or compatible microcomputer, workstation, minicomputer, or mainframe computer that connects through
a print network (such as AppleShare) using LocalTalk-type connectors and boxes.
If you’re connecting to a host such as these, you may need additional hardware or software. See your host or network documentation for details specific to your setup.
Interface
Interface is the point at which two elements connect so they can work
together. Printer-host interface is the way a printer connects to and
works with a host (for example, a microcomputer, minicomputer,
mainframe compute r, or a netwo rk), and it involves both hardware
and software. The way your printer interfaces with a host depends on
many things, including computer type, computer ports available, interface cabling, application software, printer emulations, and printer drivers.
Macintosh Interface Cabling
To connect your printer to a single Macintosh, you must have
» Note:
Connecting to a Macintosh
For cable pinout information, see appendix B, of the Reference
guide, the “Cable Pinouts” section,.
3-3
Page 50

Using the
LocalTalk
Interface
n
n
n
If you’re replacing a printer already connected to a Macintosh, you
probably already have this equipment.
If you’re connecting the printer to an AppleTalk network with more
than one Macintosh, see your PhoneNE T and Macintosh docum ent ation for more informati on.
Two Phon eNE T-type transformer boxes: one with a DIN-8 connector for the printer port and one with a DIN-8 connector for the
Macintosh po rt
An RJ11 (telephone) cable
Two term inat ing resisto rs to close the open socket s left in the
transformer boxes after the connectio n is made
Host
DIN-8 Female Port
DIN-8 Male Connector
Printer
DIN-8 Female Port
DIN-8 Male Connector
Transformer Boxes
RJ11 Cable
Terminating Resistors
3-4
QMS 1060 Print System Getting Started
Page 51

Using the
LocalTalk
Interface
Making the Connection
Use the following procedure to connect your printer to the Macinto sh.
▲ Caution
the connection.
1 Plug the connector from one transfor mer box into the
2 Plug the connector from the othe r transfor mer box into the
3 Connect the two transformer boxes with the telepho ne cable.
4 Put terminating resi stors in all open sockets in the connec-
5 Turn on the printer.
: Turn off both the printer and the Macintosh before m aking
printer’s Local Talk port.
Macintosh printer port.
tor boxes.
This ensures proper communication and helps speed up transmissi o n.
A start-up page should print if it has not been disabled.
Macintosh Printing Software
If your Macintosh was previously connected to a PostS cript prin ter,
you can probably start printing now with the printing software already
in place. Refer to your applicatio n docu men tation f or instructi ons on
sending a document to the printer.
However, if you want to use all of your printer's special feat ures (like
collation, 600x600 dpi printing, and gamm a correction), or if you've
never printed to a PostScript printer before, you need to take a few
minutes to make sure you have the following printing softwa re
installed:
n
PS Executive Series Utilities
n
The 1060 PPD fil e
n
Application-specific print er files
Connecting to a Macintosh
3-5
Page 52

Using the
LocalTalk
Interface
Installing PS Executive Series Printer Utilities
The PS Executive Series Utilit ies (or PS Exec), included on the M acintosh-format disks we shipped with your printer, is a uti lities program
for controlling the printer from the Macintosh. For example, through
PS Exec you can turn off the start-up page, rename the printer, install
printer-resident screen fonts, download fonts, print font samples, and
manage hard disks. Many of the procedures described in this manual
involve using PS Exec.
1 With the Macintosh on, insert the Ma cintosh Forma t PS
2 Double-click the P S Exe c3.
Executive Serie s Utilitie s disk in the disk driv e.
xx
Installer icon.
3 In the PSExec 3.
Location.
To change the Install Location you can either use the drop-down
list box to display and select the appropriate disk, or you can
choose the Switch Disk button to scroll through the available
disks.
4 Als o in th e PS E XE C 3.
Custom install.
n
Easy Install automatically installs all of the utilities, including
the PS Exec application; the LaserWriter 8.
PDX, and PPD files; and the screen fonts.
n
Custom Install allows you to choose the options you want to
install.
The amount of available space on your Macintosh hard disk
and the amount of space necessary for all of the selected
options are indicated near the botto m of the window.
» Note:
If you’re using Custom Install, you can click the sma ll
icon (it looks like an
x
dialog box that appears, verify the Install
x
dialog box, choose Easy In stal l or
I
inside a square) to the right of each
option for more info rmation abou t that inst all opt ion.
5 Click Install to begin the ins tallatio n.
x
driver; the PD F,
3-6
QMS 1060 Print System Getting Started
Page 53

Using the
LocalTalk
Interface
The installation takes approxim ate ly one minute. The Install er
x
places the LaserWriter 8.
the System Folder and all of the other options inside a newly cre-
x
ated PSExec 3.
folder is the Installer log file, which you can view to verify the
installation.
ƒ folder in the hard disk wi ndow. Also inside this
driver in the Extensions folder inside
» Note:
All Macintosh users on a network must use the same
version of the LaserWriter and Laser Prep files to run correctly.
For example, if the network has a mixture of LaserWriter 6.x, 7.x,
and/or 8.x, the printer will experience frequent reiniti alization
problems. To check the version numbe r, select t he LaserWri ter
icon and then hold down the Command key and press the
The driver version number appears in the Info window on the
second to last line. LaserWriter 7.x and 8.x do not require a Laser
Prep file to work correctly with your printer. The Laser Prep
information is located within the Lase rW riter driver itself.
6 When the installati on is finish ed, you are prom p ted to
choose Continue to install ad dition al options from the Custom installati on o ptio n or to choos e Qui t to exit the In stall er
program.
» Note:
The Easy Install procedure automatical ly install s the
x
Version 4.
PPDs but not the Version 3.0 PPDs. If you want to
install them, you can do so now as a Custom installation. Return
to step 4.
7 Back at the hard disk window, open the new PSExec 3.x ƒ
folder and then , insid e that, the PS Exec ƒ folde r.
8 Open PSInstall to personal ize you r copy of PS Exec.
9 Check the README file(s) for updates, and see the PS Exec
on-line help for inform atio n on usin g the utilit y.
I
key.
Installing the QMS 1060 4.1 PPD
The QMS 1060 Print System 4.1 PPD (a printer description file)
allows you to take advantage of printer-features like multi ple-resolution printing and collat ion that are not available through LaserWriter
x
alone.
8.
Connecting to a Macintosh
3-7
Page 54

Using the
LocalTalk
Interface
» Note:
If you have problems printing with LaserWriter 8.x, reinstall the
LaserWriter 7.x driver that came with your Macintosh (if available), or
call the QMS Customer Response Center (CRC). See appendix A,
“QMS Customer Support,” for a list of telephone numbers.
1 If you haven't already, fo llow the instructio ns given abov e in
“Installing PS Executive Series Pr inter U tilities. ”
2 If necessary, create a Printer Descr iptio ns folder:
System 7 users—Create a folder called Printer Descriptions
inside the Extensions folder inside the System Folder.
System 6 users—Create a folder called Printer Descriptions
inside the System Folder.
xx
3 Open the 4.1 PPDs fo lder in si de the P SEx e c 3.
4 Select the QMS 1060 Print System PDF, and drag it to the
Printer Description s fold er.
5 From the Apple menu, choose Chooser.
6 In the Chooser wind ow, select the LaserWriter 8.
select QMS 1060.
7 Choose the Setup button.
This causes the LaserWriter to query the printer and automati -
cally choose the appropriate PPD.
ƒ F o l d e r .
x
icon and
3-8
8 Exit from the Choose r.
Now, when you open your application, you can access QMS
printing options by choosing Opt ions in your applicat ion’s Print
dialog box. Choose Help in the Options dialog box for information
on these options.
QMS 1060 Print System Getting Started
Page 55

Using the
LocalTalk
Interface
Installing Application-Specific Printer Files
If you plan to print from Aldus PageMaker, Aldus FreeHand, Aldus
PrePrint, Adobe Separator , or QuarkXPress, you’ll also want to install
the latest printer description fi le (PPD, PDX, or PDF) for your particu-
lar software. You can probably print without this file, but you may not
be able to access all of your printer’s features, and you may get an
error message telling you to change the printer name.
» Note:
The application (PageMaker, FreeHand, PrePrint, Separator, or
QuarkXPress) should be installed before you install the printer
description file(s).
1 If you haven't already, fo llow the instructio ns given abov e in
“Installing PS Executive Series Pr inter U tilities. ”
2 Install the appropri ate pri nter des cri ptio n file(s) for your ap-
plication from 4.1 PPDs, PDFs, or PDXs folder in the PSExec
x
ƒ folder:
3.
n
If you use Adobe Separator, install the PPD file. Your Separator documentation explain s where to put it.
n
If you use QuarkXPress, instal l the PDF in the same folder
as QuarkXPress. Check your QuarkXPress docume ntation
for details.
x
n
If you use Adobe PageMaker 5.
PPD in the Printer Descriptions folder.
n
If you use Aldus PageMaker 4.
and PDX files in the PPD s folder in the Aldu s folder in the
System Folder.
n
If you use Aldus FreeHand 4.
in the Printer Descriptions folder.
, install the version 4.1
x
, install the version 3.0 PPD
x
, install the version 4.1 PPD
Connecting to a Macintosh
3-9
Page 56

Using the
LocalTalk
Interface
n
If you use Aldus FreeHand 3.x, install the version 3.0 PPD
and PDX files in the PPD s folder in the Aldu s folder in the
System Folder.
» Note:
the PS Exec Easy Install procedure. You must use the
Custom Install procedure. Refer to the PS Exec installation
instructions at the very beginning of this section.
n
If you use Aldus PreP ri nt, in st all the version 3.0 PPD and
PDX files in the PPDs folder in the Aldus folder in the System
Folder.
» Note:
the PS Exec Easy Install procedure. You must use the
Custom Install procedure. Refer to the PS Exec installation
instructions at the very beginning of this section.
n
If you use QuarkXPress , instal l the QMS 1060 and 1060E
PDFs in the same folder as QuarkXPress. While Quar kXPress 3.3 allows you to access either PDFs or PPDs, to
have access to all of your printer’s features, you should use
the PDF. To select the PDFs, go to the Page Setup dialog box
in QuarkXPress, and hold down the Shi ft key while clicking
the Printer Type list box. (The italicized selections are PPDs,
and the non-italicized selections are PDF s.) See your
QuarkXPress documentation for more inform at ion.
» Note:
and Enhanced (Advanced) Halftoning in QuarkXPress. If this
PDF is not present, you won’t be able to used Enhanced
Halftoning even though the printer supports it. See chapter 5,
“Additional Techni cal Informa tion,” in the Reference fo r more
information on halftones.
Version 3 PPDs are not installed automatically through
Version 3 PPDs are not installed automatically through
The 1060E PDF allows you to choose between Basic
3-10
QMS 1060 Print System Getting Started
Page 57

Using the
LocalTalk
Interface
Testing Macintosh Communication
You can check commu nicati on betw een the print er selecte d in the
Chooser and the Macintosh by sending a file to the printer from an
application (see your application documentation for more information)
or by printing a directory, as described here:
1 Display a disk or folder window.
2 Set up page information.
Choose Page Setup from the File m enu. Select paper size, print ing orientation, and any other necessary options. Then select OK.
3 Print a directory or a window.
a Choose Print Directory or Print Window from the File menu. A
dialog box appears.
b Select the printing options you want; then click OK. If no page
prints, check chapter 6, “Troubleshooting ,” of the
guide
.
Operation
Printing from the Macintosh
You're now ready to print from your Macintosh. From thi s point, you'll
probably perform most printing tasks from your applicat ion. For
specific information, check the printin g section in your application
documentation.
For information on print media types and sizes, see chapt er 2, “Print
Media,” in the
Reference
A Note for Users of Aldus Applications
If you use an Aldus application (or one that used to be owned by
Aldus, such as Adobe PageMaker or MacroMedia FreeHand), when
you want to print, hold down the Option key while selecting Print from
the File menu. This brings up the LaserWriter windows, which contains the QMS printing options. Norm ally, Aldus applications bypass
LaserWriter and use an Aldus printer driver, which prevents you from
accessing QMS printing options.
Connecting to a Macintosh
guide.
3-11
Page 58

What Next?
A Note for Users of Adobe PhotoShop
If you use Adobe PhotoShop, go t o PhotoS hop’s Page S etu p dialog
box, and select Use Printer ’s Default Scree n under the S creens
option. This allows your choices in the QMS driver to take effect.
What Next?
Now that you’ve connected your printer to a Macintosh and inst alle d
the printing utilities and drivers, you need to set the LocalTalk interface values via the control panel for your printing environment. Use
the Administrati on/ Com mun icati ons/Lo calTalk me nu to set the Loca lTalk interface values used for printer-host commu nicat ion in your
environment. See chapter 4, “Printer Conf igurat ion, ” in the
, for details on all the interface values. But first, skip to chapter 4,
ence
“Control Panel,” to find out how to use the printer’s control panel keys,
indicators, and message window.
Refer-
3-12
v
QMS 1060 Print System Getting Started
Page 59

4
Connecting to a
PC
In This Chapter . . .
n
Connecting via the parallel po rt
n
Connecting via the serial port
Page 60

Introduction
Introduction
This chapter explains what an interface is and describes how to connect your printer to a PC via the parallel port and/or the serial port.
Interface
Interface is the point at which two elements connect so they can work
together. Printer-computer interface is the way a printer connects to
and works with a computer (a microcomputer, workstation, minicomputer, mainframe computer, or a network), and it involves both hardware and software. The way your printer interfaces with a computer
depends on many things, including comput er type, compu ter ports
available, interf ace cabling, appli ca tio n softwa re, print er emul ati ons,
and printer drivers.
Optional Interfaces
In addition to the three standard interfaces—LocalTalk, bidirectional
parallel, and serial—the QM S 1060 Print Syst em has the option of
using two optional interfaces to connect your printe r to an Ethernet or
Token-Ring network.
If you’ve purchased an optional interface for your printer, see chapter
6, “Printer Options” of the
tion that comes with the interface for installati on instructions.
Referenc e
guide as well as the documenta-
Before Making the Connection
If you have new PC and it has not been connected yet, before connecting the printer to the PC, you should follow the m anuf acturer’s
instructions for setting up the PC and installing (if necessary) any
operating system software, such as DOS and and/ or Windo ws.
QMS 10 60 Pr int Syste m G e tting Start e d4-2
Page 61

Before Making
the Connection
What You Need
Interface cables are not included with your printer. If you’re replacing
a printer, you may already have the necessary cables. If not, you’ll
need to purchase the cables from your QMS vendor or a local computer store.
To connect your printer to a single PC, you need one of the following:
n
A parallel cable with a 36-pin male and a 25-pin mal e connector
or
n
A serial cable with either a 9-pin female and a 9- or 25-pin con-
(depending on your computer’s serial port) and a null
nector
modem adapter.
» Note:
See the “Cable Pinouts” section of appendix B , in the
Reference guide
for cable pinout inform ati on.
How to Choose a Cable
Parallel cable— If a parallel port is available on your comput e r, we
recommend using a parallel cable. Your print er supports both
Centronics parallel and IEEE 1284 bidirectional parallel communication. The type of parallel cable you use depends on the type of parallel communicati on your comput er supports (che ck your comput er
user’s guide if you’re unsure).
n
If your computer supports only IEEE 1284 bidirectional parallel
communicatio n, you need an IEEE 1284 bidirect ional parallel
cable (IEEE 1284 is indicated on cable) . This cable mu st be 6.5
feet/2 meters or less in length.
n
If your computer supports only Centronics parallel unidirectional
communication, you may use either a Centronics paralle l cable
(marked on cable) or an IEEE 1284 bidirectional parallel cable
(IEEE 1284 is indicated on the cable). However, we recommend
an IEEE 1284 cable. It must be 6.5 feet/2 meters or less in length
while the Centronics cable may be longer.
Connecting to a PC
4-3
Page 62

Making the
Connection
Serial cable—If the print er is more th an 6.5 feet/ 2 met ers from the
computer, we re commend using a serial cable for better communication. For best results, the printer and computer should be less than 25
feet/7.6 meters from each other.
Making the Connection
▲ Caution
systems first.
1 Connect the PC and the print er
: If you’re connecting the printer to a single PC, turn off both
n
Parallel cable
a Connect the 25-pin end of the cable to the PC’s parallel
port.
b Tighten the screws.
c Attach the 36-pin end of the cable to the printer’s parallel
port (it’s labeled “PARA LLE L ”).
d Close the clips.
To Computer 25-pin Female
To Printer 36-pin Female
QMS 10 60 Pr int Syste m G e tting Start e d4-4
Page 63

Testing
Communication
n
Serial cable
a Connect the serial cable (with the null modem adapter
attached) to the PC’s 9- or 25-pin male serial port.
b Connect the other end of the cable to the printer’s serial
port (labeled “SERIA L” ).
c Tighten the screws.
To Computer
9-pin Female
To Printer
Or
25-pin Female
2 Turn on both the printer an d the PC.
3 Test comm un icatio n betw een the pr inte r and the PC.
You can do this by sending a file from one of your applications, or
you can see the following section, “Testing Commun icati on.”
Testing Communication
To test communication between your printer and your PC, first create
a short file that ejects a page from the printer. Then send the file to
the printer.
9-pin
Female
Connecting to a PC
4-5
Page 64

Testing
Communica tion
Creating the Test File
To create the test file, type the following comma nd s at the DOS
prompt:
copy con printest.ps↵
showpage↵
^D^Z↵
(All commands above except the DOS copy com ma nd a re case s ensitive and must be typed exactly as shown.) Sho wpage is a PostScript command that prints a blank page. The ↵ symbol m eans to
press the Enter key. To produce the ^D and ^Z, press and hold down
the Ctrl key while you type the appropriate letter s (d and z). These
characters signify the end of the file and must always be included.
Sending the Test File
Parallel Communication
1 To send the PRINTE S T.PS file you just created to the printer,
type
print printest.ps↵
2 If you’re prompted for the na m e of the list device, type
lpt1↵
or type the name of the PC’s parallel port to which the printer is
connected (for example, lpt2 or lpt3).
» Note:
3 If the printer and PC are communicating, a blank page ejects
If the computer has more than one parallel port, they're
probably labeled. If not, check the comput er document at ion for
the LPT port names.
from the printer. Skip ahead to “PC Printing Software ” to finish connecting the printer.
If a blank page doesn’t eject and you typed the file correctly, you
may want to check your AUTOEXEC.BAT file to see if LPT1 (the
parallel port) is being directed to COM1 (the serial port):
QMS 10 60 Pr int Syste m G e tting Start e d4-6
Page 65

Testing
Communication
a If the AUTOEXEC. B AT file contains the line
MODE LPT1:=COM1:
delete it.
b Then type
MODE LPT1:,,P↵
The “P” represents infinite retry and it tells the PC to send
print jobs until the printer accepts them.
c Resta rt the PC and retry the comm uni cati on test .
See chapter 6, “Troubleshooting,” of the
refer to your DOS documentatio n for more informati on.
Operation
guide and
Serial Communication
1 To send the PRINTE S T.PS file you just created to the printer,
type
print printest.ps↵
2 If you’re prompted for the na m e of the list device, type
com1↵
or type the name of the PC’s serial port to which the printer is
connected (for example, com2 or com3).
» Note:
3 If the printer and PC are communicating, a blank page ejects
If the PC has more than one serial port, they're probably
labeled. If not, check the PC documentation fo r the COM port
names.
from the printer. Skip ahead to “PC Printing Softwar e ” to finish connecting the printer.
If a blank page doesn’t eject and you typed the file correctly, you
may want to check your AUTOEXEC.BAT file in DOS to make
sure that the printer's serial port settings match tho se of the PC.
Connecting to a PC
4-7
Page 66

Testing
Communica tion
a Look for a command line like this in your AUTOE X EC. BAT
» Note:
b Restart the PC, and then ch e ck the start-up page, which
c If the serial settings (baud rate, parity, data bits, and stop bits)
file:
MODE COM1:9600,N,8,1,P↵
In this example, the serial port setting s are 9600 for baud
rate, N (no) parity, 8 data bits, and 1 stop bit. The “P” stands
for infinite retry.
If the mode statem ent isn’t in yo ur A UTOEXEC.B AT
file, you may temporarily set these paramet ers at the DOS
prompt to continue this test by typing the mode
statement as
shown above. To make this setting permanent, you’ll need to
add this statement to your AUTOEXE C.B AT file.
prints when you turn on the printer (unless you disabled it).
This tells you the current serial port settings for the printer.
shown on the start-up page match those in your
AUTOEXEC.BAT file, you need make no further changes. Go
to the section “Special PC Concerns” later in this chapter.
If the printer’s serial port settings are different from your PC’s
settings, use the printer control panel , as described in the following section, “Changing Serial Port Settings,” to make them
match.
Changing Serial Settings
Since your printer is configured at the factory for the most typical
printing environments, the serial settings in your AUTOEXEC.BAT file
and on the start-up page should be the same. However, if they differ,
you must configure the printer to u se the serial settings specif ied in
the AUTOEXEC.BAT file.
QMS 10 60 Pr int Syste m G e tting Start e d4-8
Page 67

Testing
Communication
Press the following control panel keys in the order shown:
Press
this
key...
Online/
Offline
Menu Access the
Next Advance to the
Select Access the
Select Access the
Next Advance to the
Select Access the Serial
to... For 1.5 seconds, the
Turn off the Ready
indicator and
enable printer
configuration.
configuration
menu.
Administration
menu.
Administration
menu.
Communications
menu.
Serial menu.
menu.
and then it reads ...
message window
reads ...
IDLE
CONFIGURATION OPERATOR CONTROL
ADMINISTRATION
COMMUNICATIONS
TIMEOUTS
SERIAL
MODE
Next
(one or
more
times)
Select Access the Baud
Access the Baud
Rate menu.
Rate menu.
BAUD RATE
*9600
Connecting to a PC
4-9
Page 68

Testing
Communica tion
Next
(one or
more
times)
Select Select the
If you need to change other settings, press the Next key to a ccess the
appropriate menu option, then return to the point where you press the
Select key to access the Administr ati on menu and select the new
settings.
Online/
Offline
Next Advance to the
Select Save changes. IDLE
Online/
Offline
Advance to the
correct baud rate.
displayed baud
rate.
Access the Save
Changes option.
Yes option.
Put the printer
back on line (the
Ready indicator
lights).
» Note:
Shaded table cells indicate that the message scrolls.
#
#
IS SELECTED
BAUD RATE
SAVE CHANGES ?
*NO
YES
IDLE
Verifying the Serial Setting Changes
1 Turn the printer on and off again.
2 Compare the seri al port settin gs listed on the start-up page
to those in you r A UTO EXE C. B AT file.
3 Try the communicatio n test again.
If a blank page ejects from the printer, the printer and the PC are
communicating. Skip ahead to “PC Printing Software ,” below, to
finish connecting the printer. If a blank page does not eject and
you typed the file correctly, see chapter 9, “Troubleshooting,” of
Operation
the
more information.
guide, and refer to your DOS documentation for
QMS 10 60 Pr int Syste m G e tting Start e d4-10
Page 69

PC Printing
Software
PC Printing Software
If you're replacing a PostScript printer, you can probably start printing
now with the printing software already in place. Refer to your application documentation for instructions on sending document s to the
printer.
However, if you want to be able to use all your printer's special features (like collation, 600x600 dpi printing, and gamma correction), or
if you've never printed to a PostScript printer before, we recommend
you take a few minutes to make sure you have the following printing
software installed:
n
PS Executive Series Util ities
n
A PostScript printer driver
n
Printer description files (if you use QuarkXPress 3.3, Aldus PageMaker, or Adobe PhotoShop)
Installing PS Executive Series Printer Utility Software
PS Exec, included on the DOS format disks we shipped with your
printer, is a utilities program for controlling the printer from the PC. For
example, through PS Exec you can turn off the start-up page, rename
the printer, download fonts, print font samples, and m anage hard
disks. Many of the procedures described in this manual involve using
PS Exec. The README file on the PS Executive disk explains how to
install the program, and the on-line help explai ns how to use it.
Installing a PostScript Printer Driver
If you're using Wind ows , we recomm end that you inst all th e
QMS-developed Windows driver, which is on the disk called Windows
Drivers (shipped with the print e r). Instructio ns for in stall ing and acti vating the driver are in the next section.
Connecting to a PC
4-11
Page 70

PC Printing
Software
If you're using a non-Wi nd ows applic atio n, read the printing se ction of the application document ation for inf ormatio n on choosing a
PostScript driver. If the application does not provide a PostScript
driver, contact the application manufacturer to see if one has become
available since you bought the program. Also, P ostScript drivers for
some applications are availabl e through the QM S bulleti n board and
through CompuServe; see appendix A, “QMS Customer Support,” for
information.
Also, check to see if application notes (tips for printing from specific
applications) are available for your applicat ion from Q-FAX, the QMS
bulletin board, or CompuSe r ve. Appendix A, “QMS Custom er Support,” explains how to use these QMS informatio n services.
Installing the QMS Windows Driver
The QMS-developed Window s driver supports all the printer's features. Use the following procedure to install the driver:
1 With Windows ru nn ing on your PC, insert the QM S “Win-
dows Driver” disk (shipped with your printer) in the PC’s 3.5"
disk drive.
2 Open the Windo ws Con trol Panel, and doubl e-cli ck the
Printer’s icon.
The Control Panel icon is usually located in the Program Manager’s Main window.
3 In the Printers dialog box, choose the Add button.
4 From the List of Printers that appears , choose Install
Unlisted or Updated Printer, and then choose the Install button.
5 In the text box that appears, type the name of the di sk drive
(for example, a: \) the Windows Dri ver di sk is in, and then
choose OK.
QMS 10 60 Pr int Syste m G e tting Start e d4-12
Page 71

PC Printing
Software
6 In the Add Unlisted or Updated Printer dialog box, select the
appropriate printer:
n
If you’re using the QMS Level 2 Windows printer driver, select
your printer (for example, QMS 1060 Level 2) from the list of
printers, and choose OK.
n
Otherwise, select QMS PostScript Printer, and choose OK.
» Note:
If you see the message Insert Microsoft
Windows 3.1 Disk #5 or a disk with the
updated SSERIFF.FON file in..., choose Cancel.
7 When QMS 1060 Level 2 appears in the list of printer s,
choose the Connect button to configure the printer port.
8 In the Connect dialog bo x, select the app rop ri ate compu ter
port in the Ports list, and then choo se OK.
9 Choose the Setup button to configu re the printer’s default
settings:
n
If you’re using the QMS Level 2 Windows printer drive r, on
the setup tabs select the appropriate default settings.
n
Otherwise, in the PostScript Printer on xxx dialog box, select
your printer (for example, QMS 1060) in the Printer dropdown list box, and select the appropriate def ault settin gs.
10 Choose OK to return to the Printers di alo g box.
11 Choose Set As Default Printer to make the QM S printer the
default printer.
12 Repeat steps 3-10 to install the QMS driver for other ports, or
choose Close to exit from the Printers dialo g box.
Now you can set printer options from your applicat ion by choosing
Print Setup from the application’s File menu and then ch oosing the
Options button. Choose the Help button in any of the driver dialog
boxes for information on driver options.
Connecting to a PC
4-13
Page 72

Printing from
the PC
Printer Description Files
Printer description files for Windows applicat ions are included on t he
QMS-developed Windows Drivers disk shipped with your printer.
If you use the QuarkXPress 3.3, after you install the QMS driver for
Windows, install the QMS 1060 P DF according to the instructions in
your QuarkXPress documentatio n for installing PDFs.
If you use PageMaker 5.
Drivers disk. If you experience problems using our Windows driver
with this application, refer to chapter 6, the “QM S Windows Driver
Printing Problems,” section, in the
tion.
If you use Adobe Photoshop, for best output quality use the QM S developed Windows driver. Then, so that choices in the QMS driver
take effect, go to PhotoShop’s Page Setup dialog box, and select Use
Printer’ s Default Screen unde r the Screens opt ion.
x
, use the version 4 PPD on our Windows
Operation
guide for more informa-
Printing from the P C
You're now ready to print from your PC. From this point, you'll probably perform most printing tasks from your applicati on. Fo r specific
informatio n, check the printing section in your applica tion document ation.
For information on print media types and sizes, see chapt er 2, “Print
Media,” in the
Reference
guide.
QMS 10 60 Pr int Syste m G e tting Start e d4-14
Page 73

What's Next?
Now that you’ve connected your print er to a PC, go to the next chapter, to learn about t he print er ’s control panel keys, indicators, and
message window.
v
What's Next?
Connecting to a PC
4-15
Page 74

Page 75

5
Control Panel
In This Chapter . . .
n
Control panel indicators
n
Control panel messa ge window
n
Control panel keys
Page 76

Introduction
Introduction
The control panel, located on the front of the printe r, allows you to
direct the printer ’s operation. In addition, it displays the current status
of the printer, inclu ding any condit ion th at needs your attention.
The control panel consists of the following parts:
n
Four indicators to provide printer status info rmation.
n
A message window to display status and configuration information .
n
Eight keys to allow you to control the printer.
QMS 10 60 Pr int Syste m G e tting Start e d5-2
Page 77

Control Panel
Indicators
Control Panel Indicators
Four indicators on the control panel display printer stat us inform ation.
The Ready light is
n
on when the system is on line and re ady.
n
blinking when the printer is warming up.
n
off when the system is off line or not ready or
both.
The Error light is on when the printer
requires operator intervention. This indicator
is usually accompanied by a status message
in the message window.
The Data light is on when the printer is
receiving data from one or more of the
simultaneous interfaces.
The Disk light is on when any optional
printer hard disk is being accessed.
Message Window
The control panel message window provides status and configuration
information. Status messages are listed in chapter 6, “Troubleshooting,” of the
chapter 4, “Printer Configuration,” of the
Messages are displayed in several different fashions in the 1060 Print
System message window.
Control Panel
Operation
guide. Printer configuration is exp lained in
Reference
guide
.
5-3
Page 78

Message
Window
n
n
n
Continuous displ ay — A short status message such as IDLE
displays continuously until the status changes.
Scrolling display — A longer status message, such as WAITI NG
ON INPUT END JOB?, scrolls marquee-style so that you can
read the whole message whenever you happen to look at the
printer. T hroughou t this manual, mes sages that scroll are shown
in shaded boxes.
Changing display — Messages that show you where you are in
the configuration men u display in two parts. For 1.5 seconds, the
name of the menu you are leaving displays in the window; then
the menu or option you have reached displays until you press
another key.
When you go automatically through one level to its options, the
level you pass through displays for 1.5 seconds, and then the first
option displays. For exampl e, when you take the printe r off line
and then press the Menu key, the messag e window reads
CONFIGURATION for 1.5 seconds and then switches to OPERA-
TOR CONTROL.
Setting the Message Window Language
Status messages and configuration me nus can be displayed in the
message window in English, French, German , or Spanish. If you
need to change the message window language, use the Administration/Miscellaneous/ Keypad Langua ge menu .
If you’re not familiar with using the configurat ion m enu, refer to chapter 4, “Printer Confi gurati on, ” of the
information.
Menu
Choices
Default
Notes
Administratio n/Miscellaneous/Keypad Language
English, French, Germa n, Spanish
English
The printer must be restarted for changes to this menu
to take effect.
QMS 10 60 Pr int Syste m G e tting Start e d5-4
Reference
guide for com plet e
Page 79

Control Panel
Keys
Control Panel Keys
Online/Offline, Tray Select, Status Page, and Cancel Keys
The Online/Offline, Tray Select, Status Page, and Cancel keys
access frequently used prin ter opt ions.
The Online/Offline key switches the printer
from on line to off line status. Press the key
once to take the printer off line when it is on
line and once to return the printer to on line
when it is off line.
If a remote console has taken the printer off
line, pressing the Online/Offline key on the
control panel will not take effect unti l the
console puts the printer back on line.
Control Panel
You must take the print er off line before
using all other keys except the Status Page
and Cancel keys.
The Tray Select key allows you to select the
active media input source:
n
multipurpose (multipurpose tray)
n
lower (standard cassette)
n
optional (optional cassette)
The printer must be off line for you to use the
Tray Select key.
5-5
Page 80

Control Panel
Keys
Use the Status Page key to print a listing of
the current printer settings. See the “Special
Pages” section of chapter 4, “Printer
Configuration,” in the
information on the status page contents. You
can print a status page whether the printer is
on line or off line.
Press the Cancel key and select the Yes
option to cancel all print jobs with a printing,
interpreting, terminating, or spooled status,
or select the End Job option to send an endof-job indicator to jobs waiting fo r incomin g
data. After all jobs with the above status are
canceled or after the current job is ended,
dependent on your selection, the printer
resumes printing other jobs that are in the
queue. (See chapter 3, “Advanced Printing
Features,” of the
complete information.) You can use this key
while the printer is on line.
Reference
Operation
guide for
guide for
If you press the Cancel key by mistake, or if
you decide not to cancel a print job after
pressing this key, press the Menu key to
“cancel” the Cancel key’s function.
Menu, Select, Previous, and Next Keys
The Menu, Select, Previous, and Next keys are used in printer configuration (explained in detail in chapter 4, “Printer Configuration,” of the
Reference
Offline key to take the printer off line.
guide). Before using any of these keys, press the Online/
QMS 10 60 Pr int Syste m G e tting Start e d5-6
Page 81

Control Panel
Keys
The Menu key gives you access to the
configuration me nu. Fi rst press the Online/
Offline key to take the printer off line, and
then press the Menu key to access the
configuration menu. W h en you’re changing
the printer configurat ion, press this key to
cancel a change (before pressing the Select
keys), to return to a previous menu, or to
return to a previous character when entering
character information.
Press the Select key to access a menu or to
choose a displayed menu option.
Press the Previous key to return to the
previous selection or option for the current
menu. When changing charact er
information, use this key to return to the
previous choice for the current input
character.
Control Panel
Press the Next key to advance to the next
selection or option in the current menu.
When changing character information, use
this key to advance to the next choice for the
current input character.
5-7
Page 82

What's Next?
What's Next?
Now you’re ready to print. For more informat ion on the day-to-day
operation of your printer, refer to the
nical informati on, ref er to the
v
Operation
Reference
guide
guide. For more tech-
.
QMS 10 60 Pr int Syste m G e tting Start e d5-8
Page 83

A
QMS Customer
Support
In This Chapter . . .
n
Sources of customer support
n
QMS world-wide offices
Page 84

Sources of
Support
Sources of Support
Several sources of help and information are availa ble, dependin g on
the type of help you need:
Your QMS Vendor
Your local vendor (the one from whom you bought the printer) may be
best equipped to help you. Your vendor has specially trained service
technicians available to answer questions, and the equipment to analyze your printer problems.
Your Application Vendor
Often, “printing” problems ha ve more to do with the application being
used than with the printer. In this case, the app licat ion ma nufa cturer
is the best source of help.
Q-FAX
Q-FAX, a QMS information retrieval service, provides appl icati on
notes, technical support notes on comm on print ing proble ms, and
information about printer sp ecifi catio ns, opt ions, accessories,
consumables, and prices.
In the United States and Canada, call (800) 633-7213 to reach QFAX . In all other countries, call (334) 633-3850. Have your fax number handy when you call (or place the call from your fax machine's
handset).
You can choose t o have either a directory (a list of currently available
documents on a particular topic) or a specific docum ent sent to you.
The first time you call, request the directory (press 2 on your phone or
fax keypad when prompted). Then call back to request sp ecific documents. You can order up to three documents per call.
QMS 10 60 Print Syste m Ge tting Starte dA-2
Page 85

Sources of
Support
The QMS Corporate Bulletin Board System
The QMS Corporate Bulletin Board Sy stem (BBS ) contains te chnical
support notes, application not es, drivers, pat ches, and ut ilities, and
you may leave technical questions not requi ring an immedi ate
response on electronic mail for the Sysop (System Operator).
The bulletin board [(334) 633-3632] operates at 1200, 2400, 9600,
and 14400 baud, 8 data bits, no parity, 1 stop bit, with XMODEM,
YMODEM, and ZMODEM capabilities. Contact the QMS Customer
Response Center for more information about the bulleti n board.
CompuServe
Through CompuServe, you ask general (non-technical) questions,
share information with other users, and access printi ng information
and programs. When you use CompuServe type go qmsprint↵ to
go directly to the forum where QMS is located.
The QMS library section contains appli catio n notes, printer drivers,
utilities, technical information, and announcement files.
Internet
The QMS server provides access to technical reports, new product
announcements, a trade show schedule, and other general information about QMS.
You can access the QMS server via any one of the many web viewers
available to Internet users. If you don’t have access to a web viewer,
we recommend the NC SA Mo sa ic web viewer (Mosaic i s at
ftp.ncsa.uiuc.edu ). The QMS home page is at http://www.qms.com/.
The QMS ftp resource is ftp.qms.com.
QMS Customer Suppo rt
A-3
Page 86

Sources of
Support
QMS Customer Response Center (CRC)
The QMS Customer Response Cent er is available from 7 a.m. to 6
p.m., Central Standard Time, at (334) 633-4500 (US). You can also
fax questions to the CRC at (334) 633-3716 (US). Please indicate
whether you would like a faxed or a phoned reply.
If you call for assistance, have the following information ready so our
technicians can help you more quickly:
n
Your phone number, fax number, and shipping address
n
A description of the problem
n
The printer model and serial numb er
n
The type of host computer you are using
n
The type and version of operating system you are using
n
The interface you are using, and, if serial, the protocol
n
The application and version you are using
n
The emulation you are using
n
Your printer firmware versi on (listed on the stat us and start-up
pages)
QMS 10 60 Print Syste m Ge tting Starte dA-4
Page 87

Sources of
Support
QMS National Service
If you have a problem you cannot resolve, contact QMS National Service. You may need to contact QMS National Service for the following
#
type of message (where
is the error number):
CALL FOR SERVICE ENGINE ERROR
#
Phone Numbers
(800) 762-8894 Service information and maintenance pricing for QMS
and other manufacturers printer’s
(800) 858-1597 On-site service a nd depot repair information
7 a.m. to 7 p.m. Central Time
(334) 633-4300
Extension 2530
» Note:
The above numbe rs are valid in the United States. To
contact QMS in other countries, see the “QMS World-wide
Offices” section later in this appendix.
Spare parts ordering and informati on
8 a.m. to 5 p.m. Central Time
QMS Customer Suppo rt
A-5
Page 88

QMS World-
wide Office s
QMS World-wide Offices
United States/
Latin America
Asia-Pacific QMS Asia-Pacific
Canada QMS Canada, Inc.
Europe,
Middle East,
Africa
QMS, Inc.
One Magnum Pass
Mobile, AL 36618
(334) 633-4300
Product Information: (800) 523-2696
OEM Information: (800) 631-2692
Consumables: (800) 777-7782
Fax: (334) 633-4866
E-mail: info@qms.com
Latin America Fax: (334) 639-3347
Melbourne 61 (3) 899 5777
Sydney 61 (2) 901 3235
Tokyo (81) (3) 3437 4030
9630 Rte. Trans-Canadienne
Saint-Laurent, Québec H4S 1V9
Telephones: (514) 333-5940, (800) 361-3392
Fax: (514) 333-5949
National Service: (800) 268-4969
National Service Fax: (905) 673-7676
Offices in Ottawa, Québec City, Toronto, and Vancouver
Düsseldorf (49) 211/596 1333
London (44) (1) 784 442255
Maarssen (31) 3465 51 333
Paris (33) (1) 4107 9393
Stockholm (46) (8) 725 5680
v
QMS 10 60 Print Syste m Ge tting Starte dA-6
Page 89

B
Configuration
Menu
In This Chapter . . .
n
Configuration menu charts
Page 90

Introduction
Introduction
This section provides the following menu charts:
n
Configuration Me nu
Provides a menu chart of the main Configuration menu selections
n
Communications Menu
Provides a menu chart of the Communicati ons men u .
n
Emulations Menu
Provides a menu chart of the Emulations menu.
Menu Chart Conventions
The following conventi ons are used in the menu charts :
n
Some menu selections are highlighte d in gray. These selections
will only appear on your print system if the specified opti on is
installed.
n
These menu charts show only the top-level menus. See chapt er
4, “Printer Configuratio n,” of the
information on a menu selection’s options.
n
The Administrati on/C omm uni ca tions menu and th e Admini str ation/Emulat ion s menu bot h have more me nu selectio ns than it is
possible to fit on one page, so each of these menus have their
own individual menu charts.
QMS 1060 Print Sys tem Ge tti ng S tartedB-2
Reference
guide for detailed
Page 91

Configuration Menu
K Mem For Spool
K Mem For PSHeap
K Mem PS Font s
K Mem Emul ation
K Mem Emul. Temp
K Mem Display
K Mem Disk Cache
Fra m e b uffer
MB Printer Mem.
Enable Disk Swap
Miscellaneous
Restor e Defaults
Reboot System
New Flash Image
Administration
Engine
Operator Control
Memory
Startup Options
Keypad Language
Image Alignment
Default Paper
Inputbin 1 Name
Inputbin 2 Name
Inputbin 3 Name
Outputbin1 Name
Page Recovery
Toner Out Act.
Energy Saver
Print Density
Do Start Page
Do Sy s St ar t
Do Error Handler
Configuration
Menu
Manual Feed Timeout
Def. Resolution
Conserve Toner
Special Pages
Print Status
Calibration Page
Header Page
Header Inputbin
Trailer Page
Trailer Inputbin
Status Page Type
Emulations
ESP Default
PostScript
PCL 5
HP-GL
Line Prin ter
Communications
Timeouts
Serial
Parallel
LocalTalk
Installation
Use Operator Password Admin Password Use Admin Pwd Operator Password
v
Collation Orientation Inputbin Outputbin Copies Ch ai n In putbi ns Multipurpose Sz
Configuration Menu
Network 2
B-3
Page 92

Configuration
HP-GL
Menu
Administration/Em ulations Men u
Emulations
ESP D efault
PostScript
Emulation Level
Hal f t o ne Type
Gamma Correction
PCL 5
Default Font
Symbol Set
Line s/I nch X1 00
Line T e rm ina tion
Point Size X100
Retain Temporary
Scalable Fonts
Default Font Idx
Monochrom e G L/2
Downld Location
Plotter
Scal i ng P ercent
Origin
Reverse Image
Enhanced Mode
Expand M od e
Paper Type
Pen 1 - Pen 8
Line Printer
Font
Point Sz 100ths
Character Map
Line Numbering
Tab Stops
LF is CRLF
CR is CRLF
FF is CRFF
Orientation
Autowrap
Line s Pe r P a ge
Margi ns
v
QMS 1060 Print Sys tem Ge tti ng S tartedB-4
Page 93

Configuration
LocalTalk
Menu
Administration/Com mu nications Menu
Communicat ions
Timeouts
PS Wait Timeout
Emul Timeout
Job Timeout
ESP Timeout
Serial
Mode
Emulation
Min K Spool
Spool Timeout
End Job Mode
Def Job Prio
Baud Rate
Parity
Ignore Pari t y
RCV SW Flow Ctl
XMIT SW Flow Ctl
Data Bits
Stop Bits
HDWE Flow Ctl
PS Protocol
Parallel
Mode
Emulation
Min K Spool
Spool Timeout
Data Bits
End Job Mode
Def Job Prio
PS Protocol
Mode
Min K Spool
Connecti on
PS Protocol
Def Job Prio
Network 2
CrownNet
Common
EtherTalk
LAN Manager
NetWare
TCP/IP
PS Protocol
Def Job Prio
v
v
Configuration Menu
B-5
Page 94

Page 95

Index
3 hole punched paper (O)6-18
A
A3
Selecting size (R)4-72
A5
Selecting size (R)4-72
A6
Selecting size (R)4-72
Accessing the configuration menu
(R)4-5
Accessing the Kanji fonts (R)6-25
Accessories
See printer options
Active jobs
Status message (O)6-7
Adjust Inputbin Bin
Status message (O)6-7
Administration menu (R) 4- 4
Disk Operations (R)4-52
Memory (R)4-73, (R)5-14
Passwords (R)4-81
Adobe
PageMaker (GS)3-9
PhotoShop (GS)3-12
Separator (GS)3-9
Legend
GS
Getting Starte d
Operation
O
Reference
R
manual
manual
manual
Page 96

Advanced printing features
High-resolution printing (O)5-4
Memory (O)5-5
Advanced status page won’t print
(O)6-21
Albertus (R)6-22
Aldus (GS)3-11
Freehand (GS )3-9, (GS)3-10
PageMaker (GS)3-9
PrePrint (GS)3 -10
Aligning image (GS)2- --3
Allocating memory (R)4-73
ANSI ASCII symbol set (HP-GL)
(R)3-10
Antique Olive (R)6-2 2
Apple Macintosh checklist (O)6-14
AppleTalk (R)G-1
Connection (GS)3-2
See also LocalTalk
Testing communication (GS)3-11
Troubleshooting (O)6-14
Application (R)G-1
Macintosh (GS)3-10, (O)6-21
Notes, QMS (GS)4-12
PC (GS)4-12
ASCII (R)G-1
Automatic jam recovery (GS)1-13
Avant Garde Gothic
ITC Avant Garde Gothic (R)3-3
B
B4
Selecting size (R)4-72
B5
Selecting size (R)4-72
Legend
GS
Getting Starte d
Operation
O
Reference
R
manual
manual
manual
B6
Selecting size (R)4-72
Baud (R)G-2
Rate (R)G-2
Binary data printing problem (O)6-17
Bit (R)G-2
Bitmap (R)G-2
Bitmapped fonts (R)3-5
Black image, entire page (O)6-25
Blank pages, printing (O)6-17
Bookman
ITC Bookman (R)3-3
Buffer (R)G-2
Spooling (R)5-19
Bulletin board, QMS (GS)4-12,
(GS)A-3, (O)A-3, (R)A-3
Byte (R)G-2
C
Cable pinouts
IBM PC/AT (R)B-13
IBM PC/XT (R)B-13
Cabling
LocalTalk (GS)3-3
Macintosh (GS)3-3
PC interface (GS)4-3
Calibration page (R) 4- 8 9
Special pages (R)4-89
Canadian users
Statement (R)D-4
Cancel key (GS)5-5, (O)3-7, (R)G-2
Cancelling a print job (O)3-7
Cancelling job (O)3-7
Status message (O)6-7
Card
Emulation (R)6-16
Font (R)6-16
Security (R)6-26, (R)6-27, (R)6-29
Cassette (GS)1-15, (R)6-2
Chaining (R)4-68
Dual (R)6-3
Loading (GS)2-12
I-2 QMS 1 060 Print System—Master Index
Page 97

Loading, 500-sheet (O)2-3
Printer options (R)6-2
See Cassette, Inputbin, Cassette
Standard (O)2-3
Chain Inputbins menu (R)4-68
Character set (R)3-2
Chunk collation (O)3-3, (R)4-17
Clarendon Condensed (R)6-22
Cleaning the printer (O)4 -4
Cleaning guidelines (O)4-4
Cleaning the inside (O)4-5
Cleaning the outside (O)4-4
Close engine door
Status message (O)6-8
Collating
Output (O)3-3
PCL 5 files (O)3-6
Collation (O)3-3, (R)4-16, (R)4-17
Advantag es (O)3-5
Chunk (O)3-3
Colophon (R)D-4
Communication
Mode (R)5-2
Testing, Macintosh (GS)3-11
Testing, parallel port (GS)4-5
Testing, serial port (GS)4-7
CompuServe, QMS (GS)A-3, (O)A-3,
(R)A-3
Configuration menu 8, 9, (R)4-4
Accessing (R)4-5
Administration menu (R)4-4
Chart 8, (R)E-2
Chart conventions (R)E-2
Installati on m e nu (R)4- 5
Operator Control menu (R)4-5
Configuring the printer for Kanji
(R)6-25
Connection (GS)4-4
Parallel port (GS)4-4
Connector (R)G-3
Box (R)G-3
Conserve toner (O)2-19, (R)4-85
Consumables (R)G-3
Supplies (R)B-10
Warranty (R)B-16
Context switching (R)5- 19
Control panel
Cancel key (GS)5-5, (O)3-7
Data light (GS)5-3
Disk light (GS)5-3
Error light (GS)5-3
Menu key (GS)5-6
Message window (GS)5-3, (O) 6-7
Next key (GS)5-6
Online/Offline key (GS)5-5
Previous key (G S)5-6
Ready light (GS)5-3
Select key (GS)5-6
Status page key (GS)5-5
Tray select key (GS)5-5
Control panel problems
Data indicator stays lit (O)6-15
Paper jam message stays on (O)6-16
Controller (R)G-3
Specifications (R)B-4
Coronet (R)6-22, (R)6-23
Courier (R)3-8, (R)6-22
cpi
Pitch (R)3-5
CRC
See Customer Response Center
Crown Technology (R)G-3
Automatic jam recovery (GS)1-13
Compile-Ahead Technology (GS)1-11
Compressed data formats (GS)1-12
Context switching (GS)1-12
Emulation Sensing Processor
(GS)1-12
Legend
GS
Getting Starte d
Operation
O
Reference
R
manual
manual
manual
I-3QMS 1060E Pr int System—Master Index
Page 98

Multitasking (GS)1-11
Simultaneous Interface Operation
(GS)1-11
Customer Response Center (GS)A-4,
(O)A-4, (R)A-2
Customer support, QMS (GS)A-2,
(O)A-2, (R)A-2
D
Data indicator
Stays lit (O)6-15
Troubleshooting (O)6-13
Data light (GS)5-3
DECnet (GS)3-2
Default (R)G-4
Density, pri nt (O)5-2
Device numbers, hard disks (R)6-54
Dingbats
ITC Zapf Dingbats (R)3-3
Disk
See hard disk
Disk cache (R)5-20
Intellifont SIMM (R)6- 20
Disk light (GS)5-3
Disk Operations
Collation (O)3-3
Display list (R)5-1 6
DOC
See document option commands
Document option commands
Header/trailer feature (R)C-2, (R)C-4
HP PCL emulation features (R)C-3
HP-GL emulation features (R)C-3
PCL 5 (R)C-8
Printer features (R)C-4
Legend
GS
Getting Starte d
Operation
O
Reference
R
manual
manual
manual
Documentation
Conventions, typographic (R)1-4
Manual contents (O)1-2, (R)1-2
Overview of this manual (GS)1- 6
QMS Crown Network Notes (GS)1-4
QMS Crown Remote Console (GS)1-4
QMS CrownNet inter face (GS)1-4
Related product (GS)1-5
Standard product (GS)1-3, (GS)1-5
UNIX Host Software (GS)1-5
DOS
mode command (GS)4-8
Dots per inch
See dpi
Downloadable fonts (R)3-10
Downloading optional emulation
(R)6-30
dpi (R)G-4
Driver
Macintosh (GS)3-5
PC (GS)4-11
PostScript emulation (GS)4-12
Windows (GS)4-11
Driver folder
PDF (GS)3-9
PDX (GS)3-9, (GS) 3-10
PPD (GS)3-9, (GS) 3-10
Dual cassettes (R)6-3
E
Emulation (R)5-18
Card (R)6-16
Downloading optional (R)6-30
HP-GL (GS)1-9
Installing card (R)6-14
Installing optional (R)6-59
Lineprinter (R)4-46
Optional (GS)1-15
Optional, downloading (R)6-30
PCL 5 (GS)1-9
PostScript (GS)1-10, (R)4-49
Removing optional (R)6-61
I-4 QMS 1 060 Print System—Master Index
Page 99

Temporary (R)5-19
Using card (R)6-14
Emulation problems
PostScript level 1 printing (O)6-16
Enabling/Disabling
Collation (R)4-16
End Job mode (R)5-22
Reasons to use (R)5-23
Setting (R)5-24
Ending a print job (O)3-7
End-of-Document command
See EOD command
Energy star (GS)1-13, (GS)2-4
Compliance statement (R)D-4
Environmental requirements (R)B-5
EOD command (R)5-24
Adding to your file (R)5-27
Network job separator (R)5-29
Other print queuing systems (R)5-25
PC print server (R)5-25
Stand-alone PC (R)5-24
Using (R)5-24
EOD command problems (O)6-18
Error codes
HP-GL (O)6-11
PCL (O)6-11
Error light (GS)5-3
ESP
Printing modes (GS)1- 12
Troubleshooting (O)6-13
Ethernet (GS)3-2
EtherTalk (GS)3-2
External hard disk (R)B-9
Flash ROM
See Flash memory
Fonts
Bitmapped (R)3-5
Card (R)6-14, (R)6-16
card (R)6-14
Defined (R)3-2
Downloadable (R)3-10
Installing card (R)6-15
Installing optional (R)6-59
Installing optional font card (R)6-14
Intellifont SIMM (R)6-17, (R)6-22
Intellifonts (R)6-22
Optional (GS)1-15
PCMCIA card (GS)1-14
PostScript emulation (R)B-4
Removing optional (R)6-61
Resident (GS)1-10
Scalable (R)3-5
Screen, Macintosh (GS)3-6
See also specific font name
Subset (R)3-2
TrueType (R)3-10
Using font card (R)6-14, (R)6-15
Format Disk option (R)4-52
Formatting a hard disk (R)4-52
Frame buffer (R)5-14
French/German symbol set (HP-GL)
(R)3-10
F
FCC compliance (R)D-2
Statement (R)D-2
Feeder (GS)1-15
Flash memory (R)4-27, (R)4-28,
(R)4-32, (R)4-33
New flash image (R)4-19
System software, updating (R)4-20
Legend
GS
Getting Starte d
Operation
O
Reference
R
manual
manual
manual
I-5QMS 1060E Pr int System—Master Index
Page 100

G
Gamma correction (O)5-2, (R)5-3,
(R)5-6
Gray levels (R)5-3
Halftone (R)5-3
Screen angle (R)5-6
Screen frequency (R)5-4
Garamond (Stempel) (R)6-23
Gray levels (R)5-3, (R)5-5
Gray-scale (R)5-6
H
Halftone (O)5-3
Cells (R)5-3
Gamma correction (R)5-3
Type (O)5-3
Halftone quality
Device resolution (R)5-3
Laser beam (R)5-3
Scan quality (R)5-3
Screen frequency (R)5-3
Hard disk (R)4-52, (R)5-21
Device numbers (R)6-54
External (R)6-41, (R)B-9
Formatting (R)4-52, (R)6-58
IDE board (R)B-9
Identifying (R)6-54
Internal (R)B-9
Removing an internal IDE (R)6-53
SCSI (R)B-9
Specificati (R)B-9
Helvetica (R)3-8
High-resoluti o n printing (O)5-4
Host input (R)5-19
Host Software, UNIX
Documentation (GS)1-5
How to
Cancel a print job (O)3-8
Chain cassettes (O)3-2
Format a disk (R)6-58
Install an option (R)6-60, (R)6-61
Print a status page (O)3-6
HP EOD
See EOD command
HP PCL emulation
HP PCL fonts (R)3-9, (R)3-10
HP PCL fonts (R)3-9
HP-GL error codes (O)6-11
HP-GL symbol sets (R)3-10
9825 Character Set symbol set
(HP-GL) (R)3-10
ANSI ASCII (R)3-10
French/German (R)3-10
ISO French (R)3-10
ISO German (R)3-10
ISO IRV (International Reference
Version) (R)3-10
ISO Italian (R)3-10
ISO Norway, Version 1 (R)3-1 0
ISO Norway, Version 2 (R)3-1 0
ISO Spanish (R)3-10
ISO Swedish (R)3-10
ISO Swedish For Names (R)3-10
ISO United Kingdom (R)3-10
JIS ASCII (R)3-10
Katakana (R)3-10
Roman Extensions (R)3-10
Scandinavian (R)3-10
Spanish/Latin (R)3-10
Special Symbols (R)3-10
Legend
GS
Getting Starte d
Operation
O
Reference
R
manual
manual
manual
I
IBM PC
AT cable pinouts (R)B-13
XT cable pinouts (R)B-13
IDE-SCSI board (R)6-25, (R)B-9
I-6 QMS 1 060 Print System—Master Index
 Loading...