

Page 1

Device Set-Up
User’s Guide
Page 2

Contents
1 Getting Started
1.1 System Requirements ...................................................................... 1-1
1.2 Overview of Functions ...................................................................... 1-2
2 Software Installation
2.1 bizhub OpenAPI settings ................................................................. 2-1
Installation procedure .................................................................... 2-1
2.2 Installation of Device Set-Up ........................................................... 2-2
Installation ...................................................................................... 2-2
2.3 Uninstalling ........................................................................................ 2-6
3 How to Use the Device Set-Up
3.1 Specifying automatic protection settings ...................................... 3-1
Installation procedure .................................................................... 3-1
To change settings ......................................................................... 3-3
3.2 Main Window ..................................................................................... 3-4
Menu Bar ........................................................................................ 3-5
Icon / Tab in main window ............................................................. 3-6
4 Device Registration
4.1 Search for a supported device ........................................................ 4-1
Register Found Devices ................................................................. 4-1
Registration with the IP address specified .................................... 4-4
Registration from the Function access restriction file .................... 4-6
Registration of the local file ............................................................ 4-9
Set the search range .................................................................... 4-11
Edit of the device registered ........................................................ 4-14
Delete of the device registered .................................................... 4-16
5 Other Functions
5.1 Network Initial Setting ...................................................................... 5-1
Initialize the network of the Device ................................................ 5-1
5.2 Export/Import of the Device list ...................................................... 5-5
Export of the device list ................................................................. 5-5
Import of the device list ................................................................. 5-7
Device Set-Up i
Page 3

Import of the Device list from the previous version ....................... 5-9
5.3 Function Access Restriction File Settings ................................... 5-11
Create a New Function Access Restriction File ........................... 5-11
Add a Device to a Function Access Restriction File .................... 5-14
Edit the Function Access Restriction File .................................... 5-16
Delete the device information
from a Function Access Restriction File ................................ 5-17
5.4 Group Settings ................................................................................ 5-18
Create a New Group .................................................................... 5-18
Edit a Group ................................................................................. 5-19
Delete a Group ............................................................................. 5-20
Set the Default Group .................................................................. 5-21
5.5 LDAP Server Access Settings ....................................................... 5-22
Add LDAP Server Access Settings .............................................. 5-22
Edit LDAP Server Access Settings .............................................. 5-25
Delete LDAP Server Access Settings .......................................... 5-25
5.6 Display Option Settings .................................................................. 5-26
Set Display Options ..................................................................... 5-26
5.7 Displaying the Help ......................................................................... 5-29
Displaying the Help ...................................................................... 5-29
5.8 Displaying the version information ............................................... 5-30
Procedure ..................................................................................... 5-30
Device Set-Up ii
Page 4

About this Product
For The Device Set-up, installing the following plug-ins allows you to obtain
the information of a copier on the network and/or change its settings.
Device Set-Up iii
Page 5

Trademarks
KONICA MINOLTA and the KONICA MINOLTA logo are trademarks of KONICA MINOLTA HOLDINGS, INC.
PageScope is a trademark of KONICA MINOLTA BUSINESS TECHNOLOGIES, INC.
Active Directory, Microsoft and Windows are either registered trademarks or
trademarks of Microsoft Corporation in the United States and/or other countries.
Intel and Pentium are trademarks or registered trademarks of Intel Corporation or its subsidiaries in the United States and other countries.
Microsoft® and Windows® are either registered trademarks or trademarks of
Microsoft Corporation in the United States and/or other countries.
All other product names are trademarks or registered trademarks of their respective companies.
Dialog boxes
The dialog boxes shown in this manual are those that appear in Windows XP.
2
Note
Please be aware that devices and settings may result in the content of
screens being different to as shown in this document.
2
Note
Unauthorized reproduction, translation or duplication of this document,
whether in its entirety or in part, is strictly prohibited.
The content of this document is subject to change without notice.
Copyright © 2007 KONICA MINOLTA BUSINESS
TECHNOLOGIES, INC. All rights reserved.
Device Set-Up iv
Page 6

Getting Started
1 Getting Started
1.1 System Requirements
Systems must have the following specifications in order to use this software.
- Operating System
Windows 2000 Professional (SP4)
Windows XP Professional (SP2)
Windows XP Professional x64 Edition
Windows Vista Business
Windows Vista Enterprise
- Computer
PC/AT compatible, with 1GHz CPU or better
- Memory (RAM)
128 MB or above
- Unused hard drive capacity
100 MB or more
- Display
800 × 600 pixel, 16 bit - color or better
- Network
TCP/IP protocol
- Applications
Microsoft Internet Explorer 6.0 (SP1) or later
Microsoft .NET Framework 2.0
- Supported Devices
For details of the copier and the printer (supported device of the plug-in
application) of KONICA MINOLTA, see the ReadMe of each plug-in application.
1
2
Note
In order to use this software, it is necessary to enable bizhub OpenAPI
from the device panel by clicking Administration Settings, then System.
Device Set-Up 1-1
Page 7
Getting Started
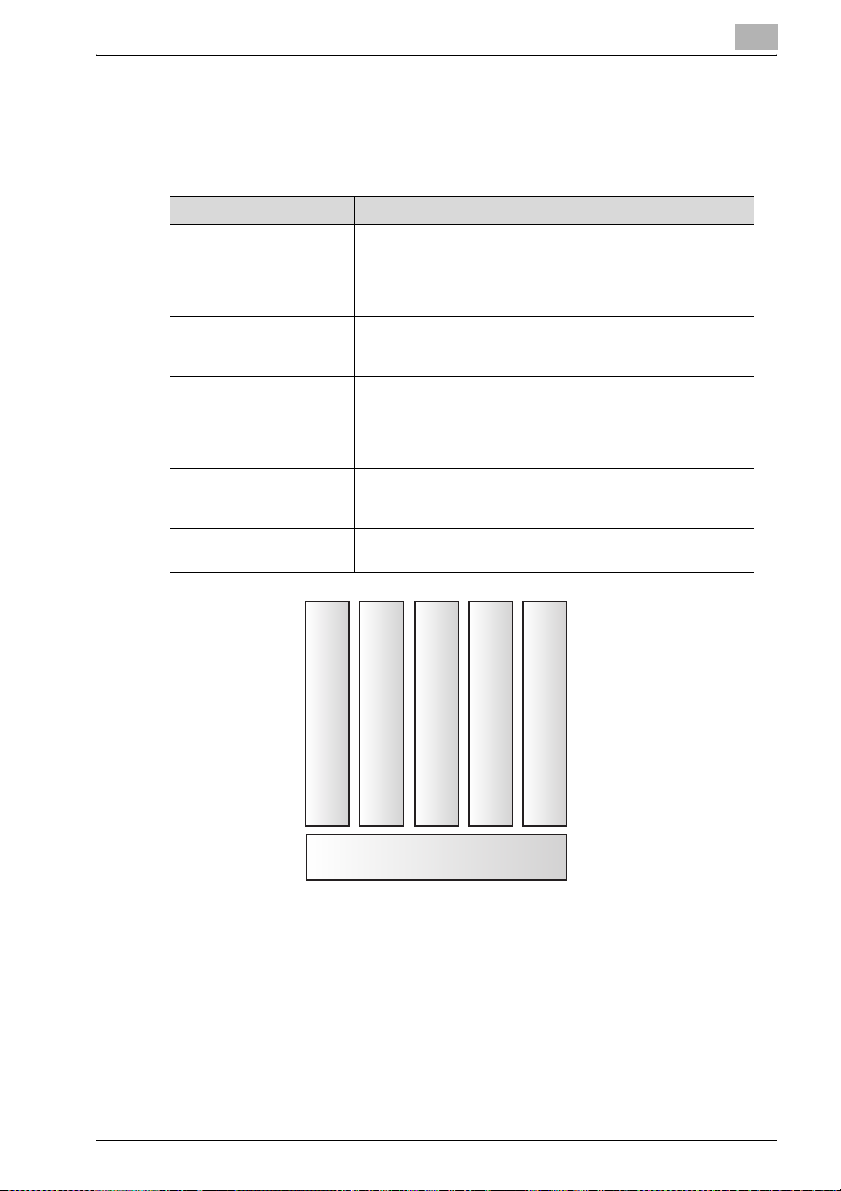
1.2 Overview of Functions
For The Device Set-up, installing the following plug-ins allows you to obtain
the information of a copier on the network and/or change its settings.
Plug-in Description
PageScope
Data Administrator
HDD Backup Utility HDD Backup Utility is used to back up (save) and restore (re-
Log Management Utility Log Management Utility accesses MFP products on the net-
Font Management Utility Font Management Utility is a utility that allows you to add and
Copy Protection Utility Copy Protection Utility is used to program multifunctional
PageScope Data Administrator is an administration tool with
which authentication data and addresses that are registered in
the control panel of supported devices (multifunctional OA
equipment) can be edited and changed from other computers
on the network.
cover) information on media installed in multifunctional products (MFP) on the network.
work, and displays log files (operations and processing
records that include monitoring logs and communications history) stored on these devices. These can be used in management of device usage status, and in troubleshooting.
delete the fonts and the forms for printing of the supported devices (MFPs) that are on a network.
products with copy protection and stamp information.
1
Log Management Utility
Copy Protection Utility
Data Administrator
Font Management Utility
HDD Backup Utility
Device Set-Up
Device Set-Up 1-2
Page 8

Software Installation
2 Software Installation
2.1 bizhub OpenAPI settings
Some plug-in applications use OpenAPI. On an occasion like this, it is necessary to make a write setting in advance on the device side.
Installation procedure
Before installing the Device Set-Up, specify the bizhub OpenAPI settings on
the device.
% Specify the bizhub OpenAPI Login Name and password from the con-
trol panel of the device as necessary.
– For details on the procedure for specifying the bizhub OpenAPI set-
tings from the control panel of the device, refer to the device’s User’s Guide.
2
Note
Follow the instructions in the User’s Guide for the device to specify the
settings for SSL transmission.
2
Device Set-Up 2-1
Page 9
Software Installation
2.2 Installation of Device Set-Up
Install the Device Set-Up as follows:
2
Note
When installing the Device Set-Up, the Microsoft .NET Framework 2.0 is
required to have been installed in advance.
Before installing the utility, be sure to log in with Administrator privileges.
Quit all applications (including virus detection programs) that are running.
Installation
1 Double-click the Setup.exe of the plug-in application you want to in-
stall.
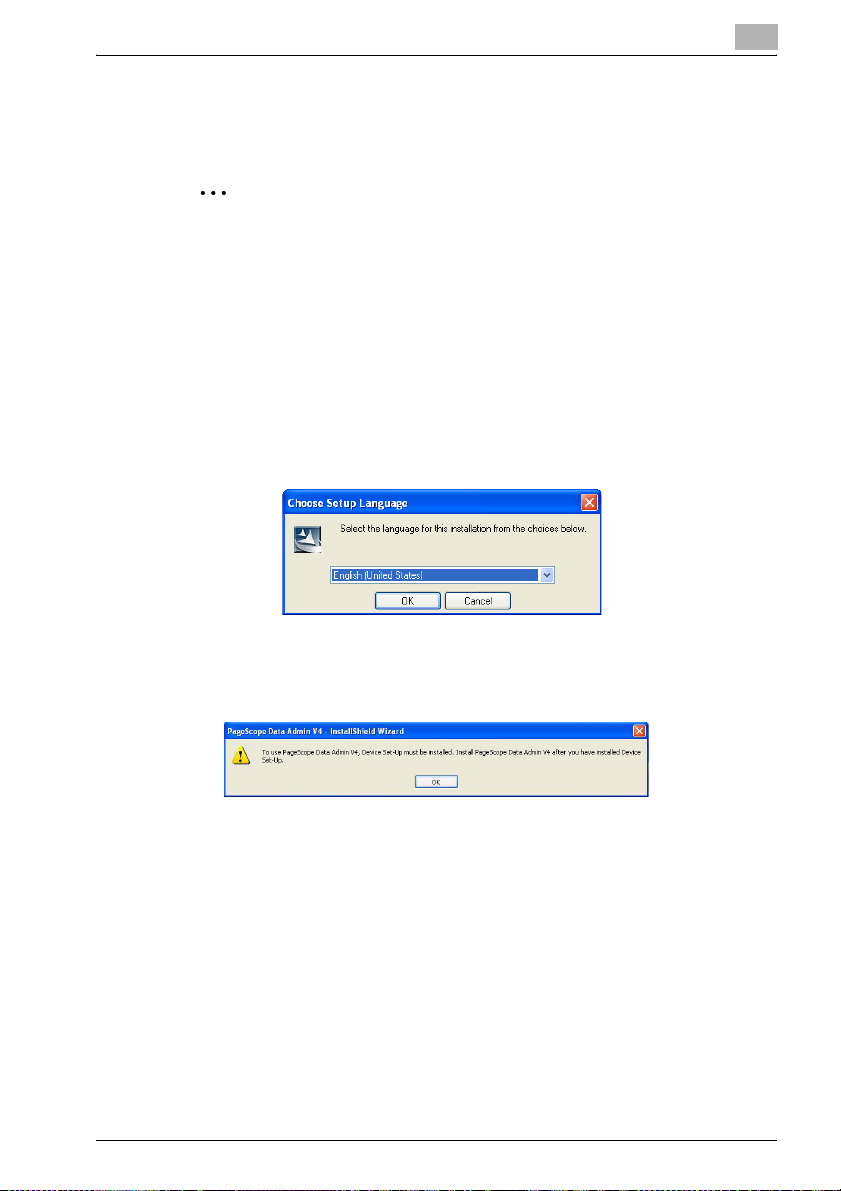
2 Select language and click [OK].
2
3 Before installing the plug-in application, a message is displayed in-
forming that the Device Set-Up will be installed. When the message is
displayed, click [OK].
Device Set-Up 2-2
Page 10
Software Installation
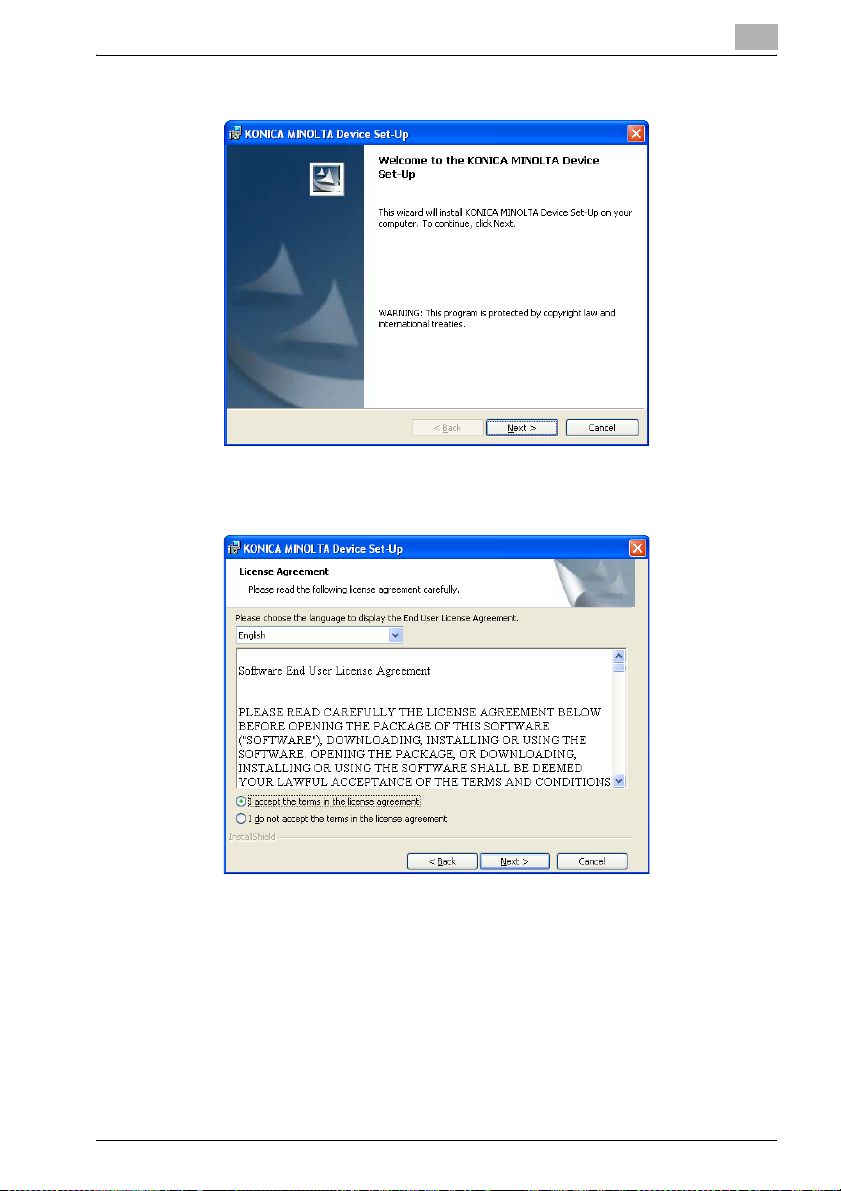
4 Click [Next].
5 When you consent to the Software End User License Agreement, se-
lect [I accept the terms in the license agreement] and then click [Next].
2
– When you do not consent to the Software End User License Agree-
ment, you cannot use this software.
Device Set-Up 2-3
Page 11
Software Installation
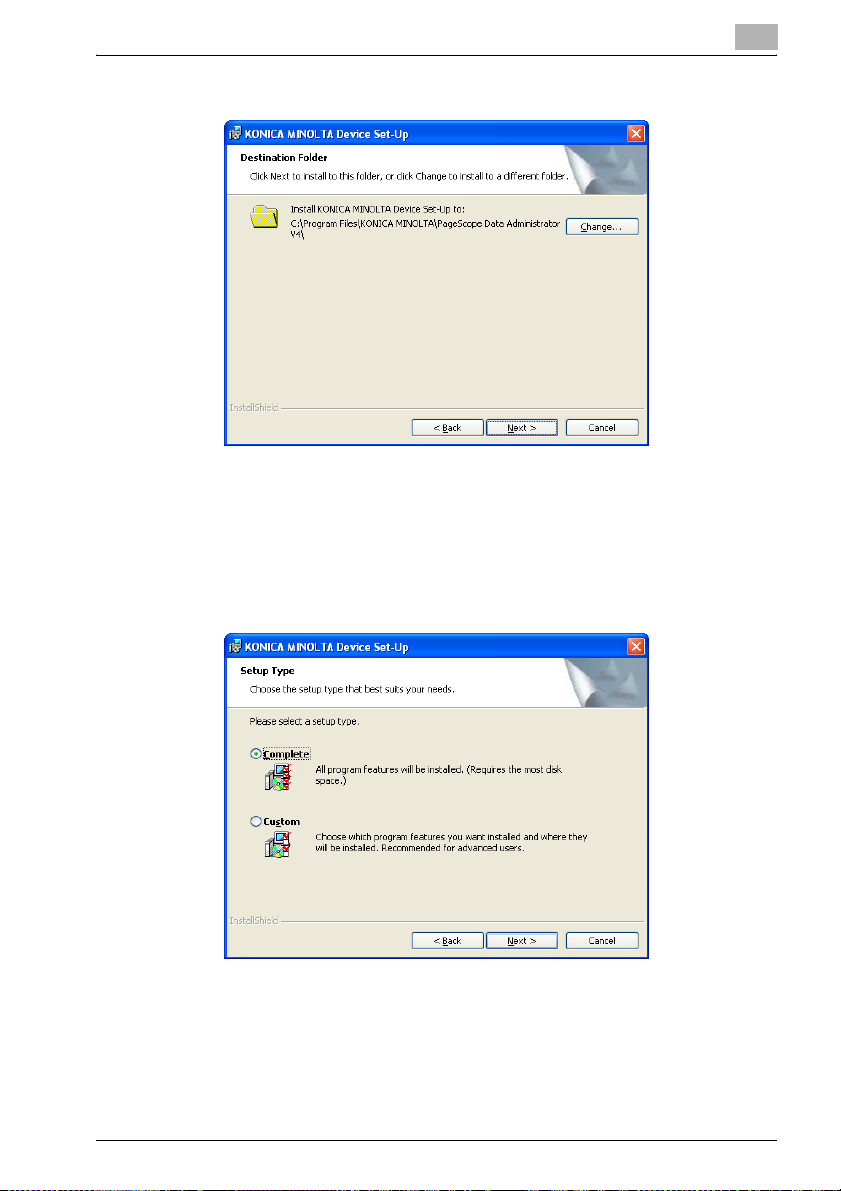
6 Specify a folder into which it is installed, and click [Next].
– When changing the location into which an installation is made, click
– When no change is made to the location into which an installation
7 Select setup type and then click [Next].
2
[Change] to specify the location into which it is installed.
is made, an installation is made into the C:\Program Files\KONICA
MINOLTA\PageScope Data Administrator V4 folder.
– When selecting [Complete], all program features will be installed.
– When selecting [Custom], select which program features you want
installed and where they will be installed.
Device Set-Up 2-4
Page 12
Software Installation
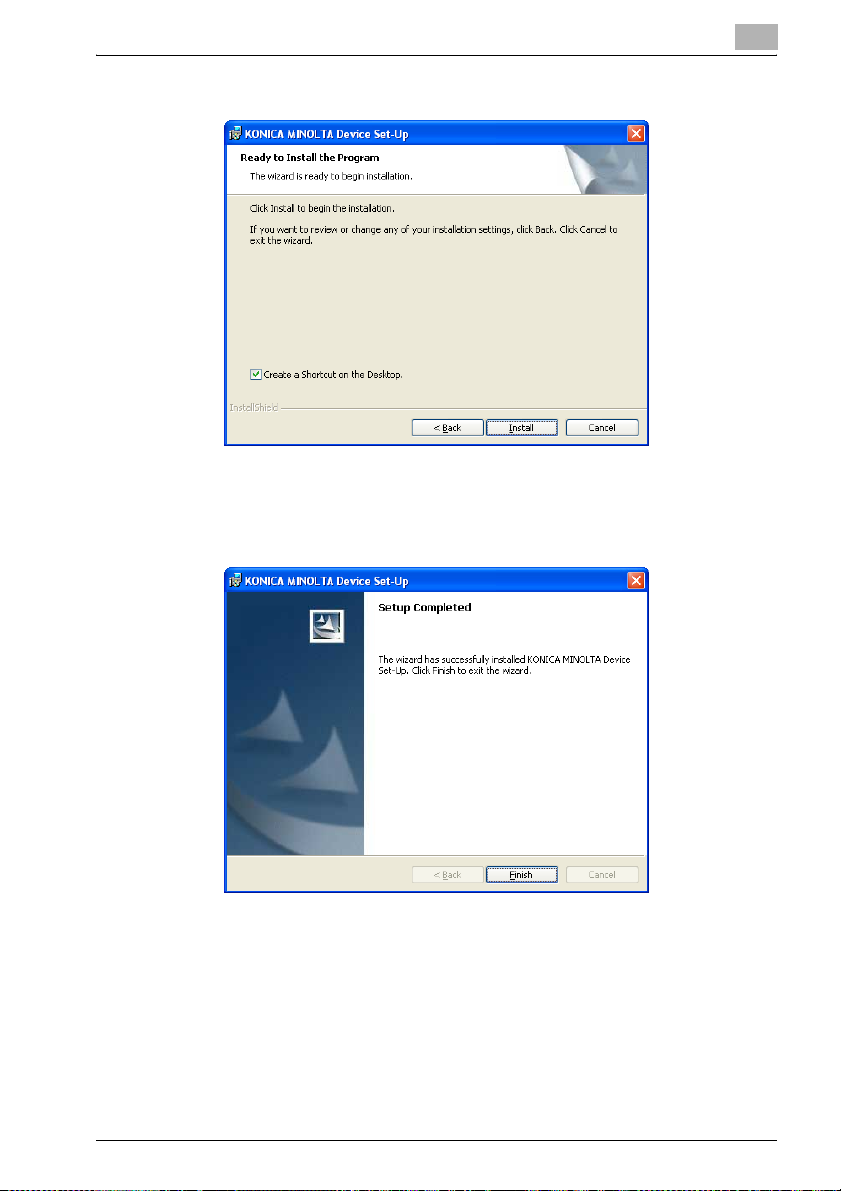
8 Click [Install].
– When specifying [Create a Shortcut on the Desktop], shortcut is
9 Click [Finish].
2
created on the desktop.
The installation is completed.
In addition, install the plug-in application.
For details of the procedure for installation of the plug-in application,
see respective User’s Guides.
Device Set-Up 2-5
Page 13

Software Installation
2.3 Uninstalling
The uninstallation method of Device Set-Up is as follows.
- Using “Add or Remove Programs” in “Control Panel”
– With Windows 2000, click Control Panel, then Add/Remove Programs.
2
Note
Before uninstalling, quit the Device Set-Up.
2
Device Set-Up 2-6
Page 14

How to Use the Device Set-Up
3 How to Use the Device Set-Up
The following procedure describes how to specify the necessary settings
when the Device Set-Up is first started.
3.1 Specifying automatic protection settings
In order to prevent unauthorized use of the application, an access password
and timeout time can be specified. If the length of time that no operation is
performed in this utility exceeds the specified timeout time, the application
is automatically locked. The application can be unlocked if the access password is entered.
Installation procedure
1 From the Windows Start menu, start the Device Set-Up.
– Click the Windows [Start] - [All Programs]([Programs] in Windows
2000) - [KONICA MINOLTA] - [Device Set-Up] - [Device Set-Up].
The Application protect settings dialog box appears.
2 Select [Use auto protect].
3
3 To use automatic protection, specify the [Timeout Period] and the
[Password].
– After the first time that the utility is started, this dialog box does not
appear. Instead, the main window appears.
Device Set-Up 3-1
Page 15

How to Use the Device Set-Up
4 Click [OK].
The automatic protection settings are applied, and the main window
appears.
3
Device Set-Up 3-2
Page 16
How to Use the Device Set-Up
To change settings
Automatic protection settings can be changed using the menu above the
main window.
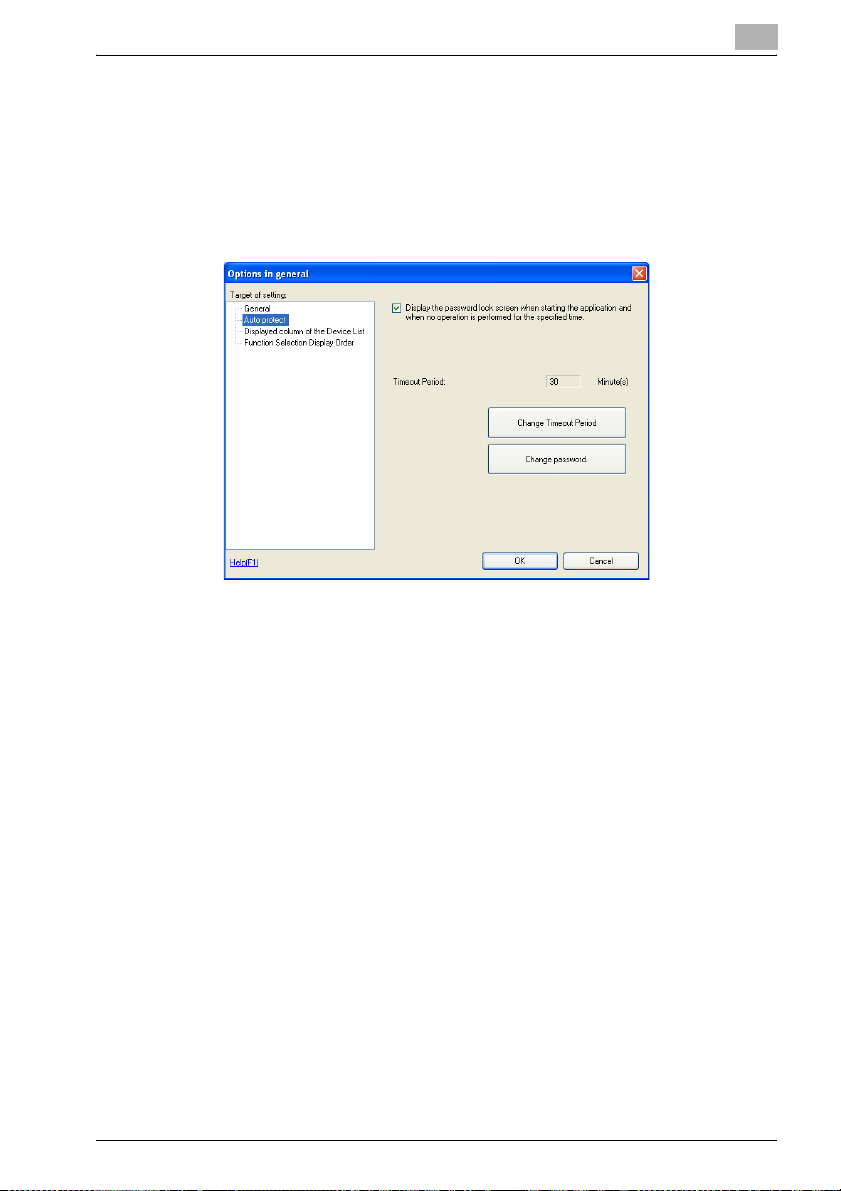
1 Click [Tool] from menu and select [Option] - [General].
2 Select [Auto protect] in [Target of setting] field.
3
3 Change the Auto protect settings, and then click [OK].
– To turn off automatic protection, clear the check box.
– To change the timeout time, click [Change Timeout Period], and
then change the setting.
– To change the access password, click [Change password], and
then change the password.
The changes are applied to the settings, and the main window appears.
Device Set-Up 3-3
Page 17
How to Use the Device Set-Up
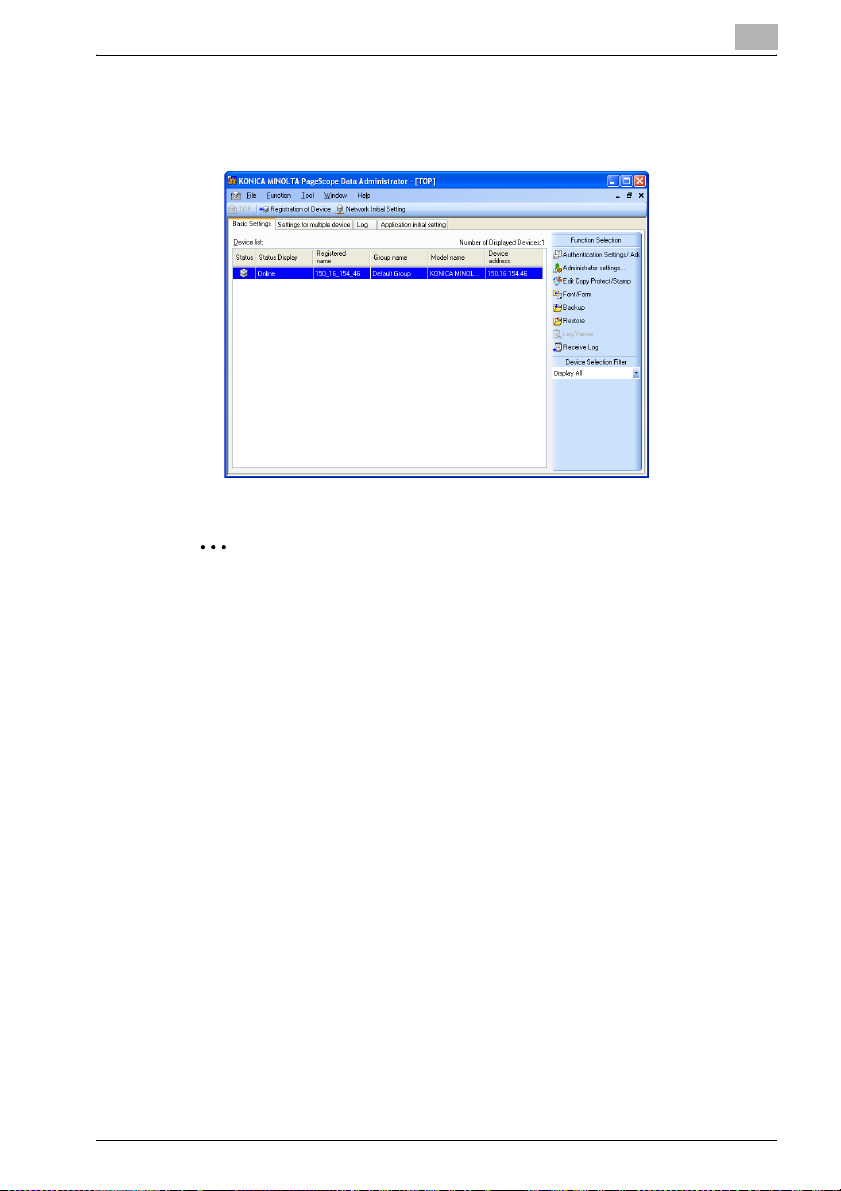
3.2 Main Window
When the Device Set-up is started, the Main window is displayed.
2
Note
The screen above shows the condition in which individual plug-ins are installed. The screen displayed may vary depending on a plug-in installed.
3
For the Device Set-up, the operations such as search, registration and
edit of a copier (supported device) on the network are conducted through
this screen.
For other functions, it is necessary to install each particular plug-in. For
detailed functions of individual plug-ins, refer to the respective user’s
guides.
Device Set-Up 3-4
Page 18

How to Use the Device Set-Up
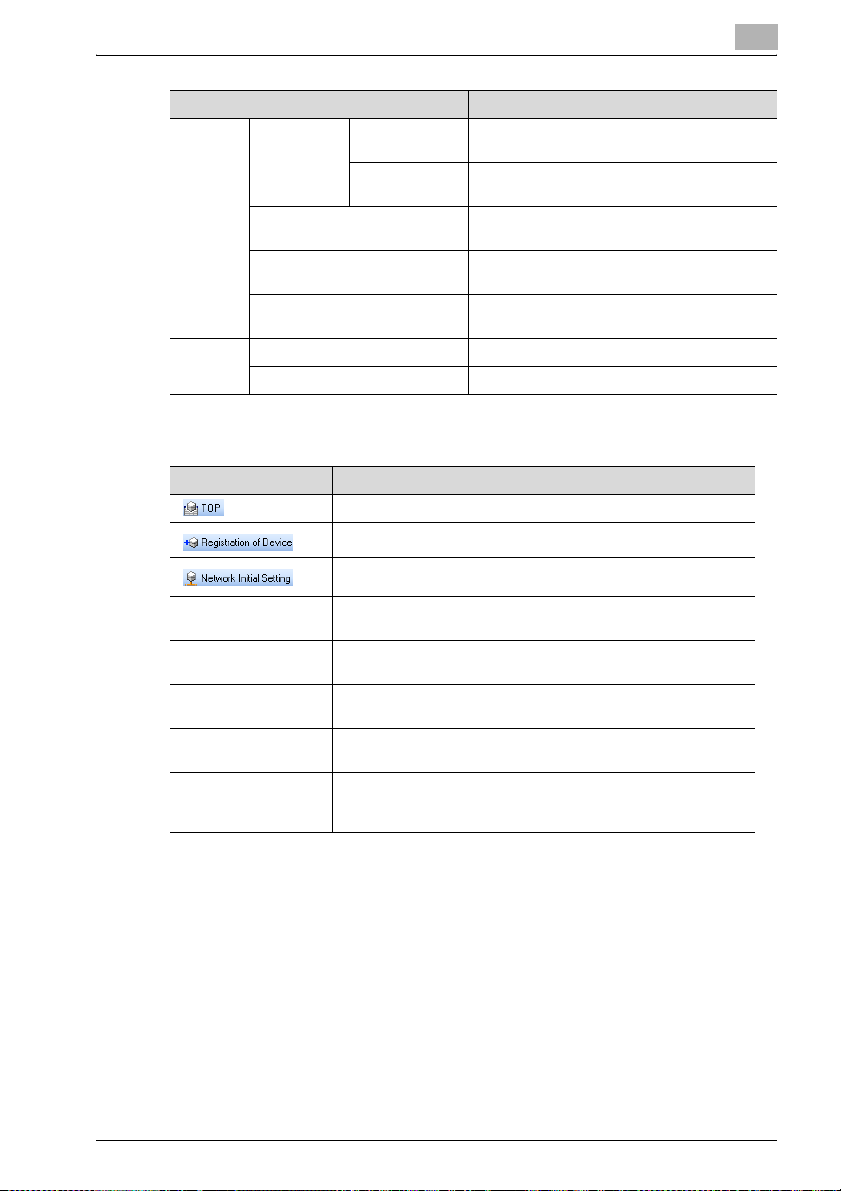
Menu Bar
Menu Explanation
File Device List The import/export of the Device list is made.
Exit Close the application.
Function Edit Copy Protect/Stamp This can be used when the Copy Protection
Font/Form This can be used when the Font Management
HDD Backup This can be used when the HDD Backup Utility
Restore This can be used when the HDD Backup Utility
Log Viewer This can be used when the Log Management
Receive Log This can be used when the Log Management
Authentication Settings/Address
settings
Administrator settings This can be used when the PageScope Data
Settings for multiple devices Individual functions are collectively handled.
Log This can be used when the Log Management
Application initial setting The files set are saved locally with no connec-
Tool Option The optional functions of each plug-in are set.
Device Registration of
LDAP server settings Configure LDAP server settings.
Function access restriction
Utility plug-in is installed.
Utility plug-in is installed.
plug-in is installed.
plug-in is installed.
Utility plug-in is installed.
Utility plug-in is installed.
This can be used when the PageScope Data
Administrator plug-in is installed.
Administrator plug-in is installed.
Utility plug-in is installed.
tion made to the device.
Device
Edit registered
group
Network initial
setting
New Create a function access restriction file.
Open Open an existing function access restriction
Start device registration.
Start group settings.
Configure default settings for the registered device network.
file.
3
Device Set-Up 3-5
Page 19
How to Use the Device Set-Up
Menu Explanation
Window Display Top screen dis-
Cascade view Display screens cascaded inside the main win-
Tile Horizontal Display screens inside the main window tiled
Tile Vertical Display screens inside the main window tiled
Help Help Display Help.
Version information Display the version of Device Set-Up.
Icon / Tab in main window
Icon / Tab Explanation
play
Access history
display
The screen registered as a top screen is displayed.
The registration of the Device is started.
The network of the registered device is initialized.
Top screen is displayed.
The screen for the access history display is displayed.
dow.
horizontally.
vertically.
3
Basic Settings tab The Device list is displayed. It is also possible to select a function
Settings for multiple
devices tab
Log tab The log management is made. For this operation, the Log Man-
Application initial setting tab
Function Selection It is possible to select a function that can be used.
from [Function Selection] to the right of the screen.
Individual functions are collectively processed. The display may
vary depending on a plug-in installed.
agement Utility is required to be installed in advance.
The files set are saved locally with no connection made to the device.
The Device Selection Filter allows you also to list up devices that
are provided with supported functions.
Device Set-Up 3-6
Page 20
Device Registration
4 Device Registration
The Device Set-up allows you to search and register a supported device on
the network. For the supported device registered, various settings can be
made for each plug-in.
4.1 Search for a supported device
As a method for the search/registration of a supported device, the following
are available.
- Method for searching a supported device on the network
- Method for searching a supported device with the IP address specified.
- Method for registering a supported device from the Function access re-
striction file
- Method for registering a local file
!
Detail
When making a search for a device on the network, it is also possible to
set the range of search.
Register Found Devices
4
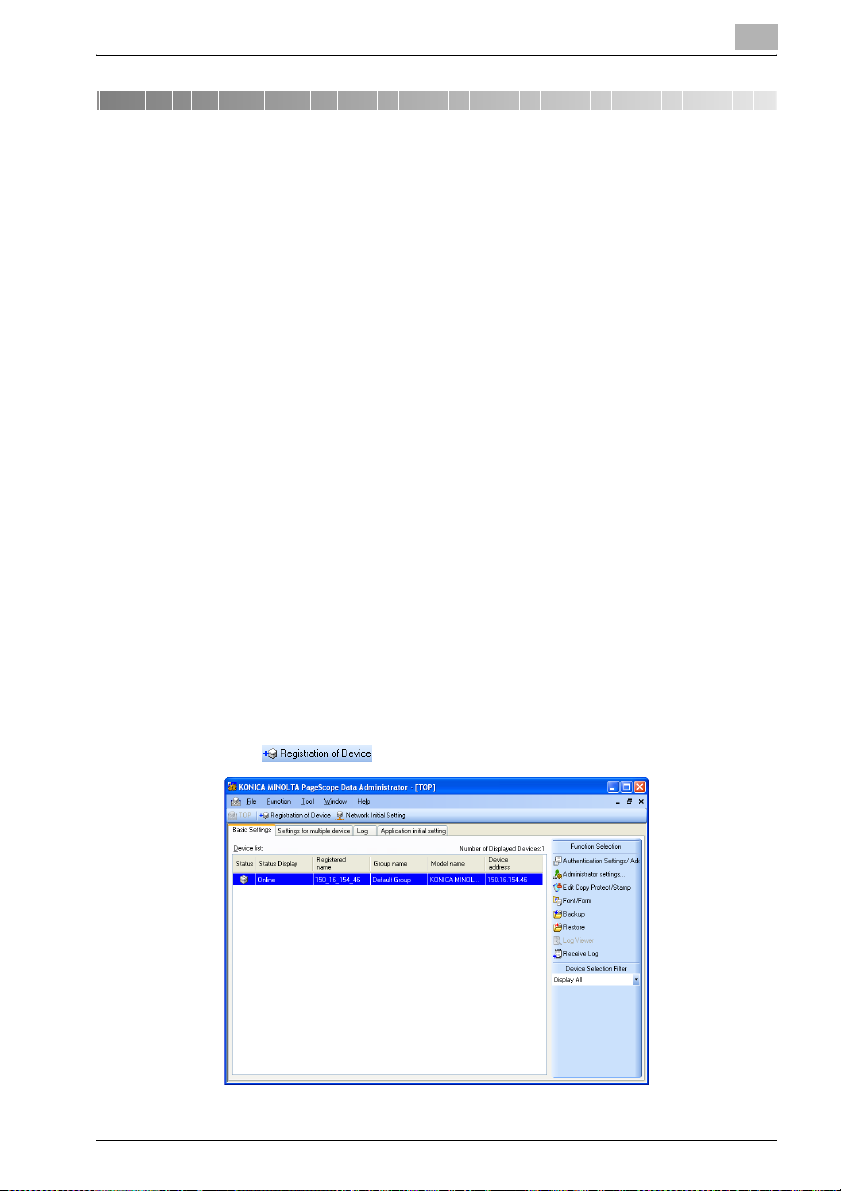
1 Start the Device Set-Up to display main window.
– For details of the method for displaying the main window, refer to
page 3-1.
2 Click .
Device Set-Up 4-1
Page 21
Device Registration
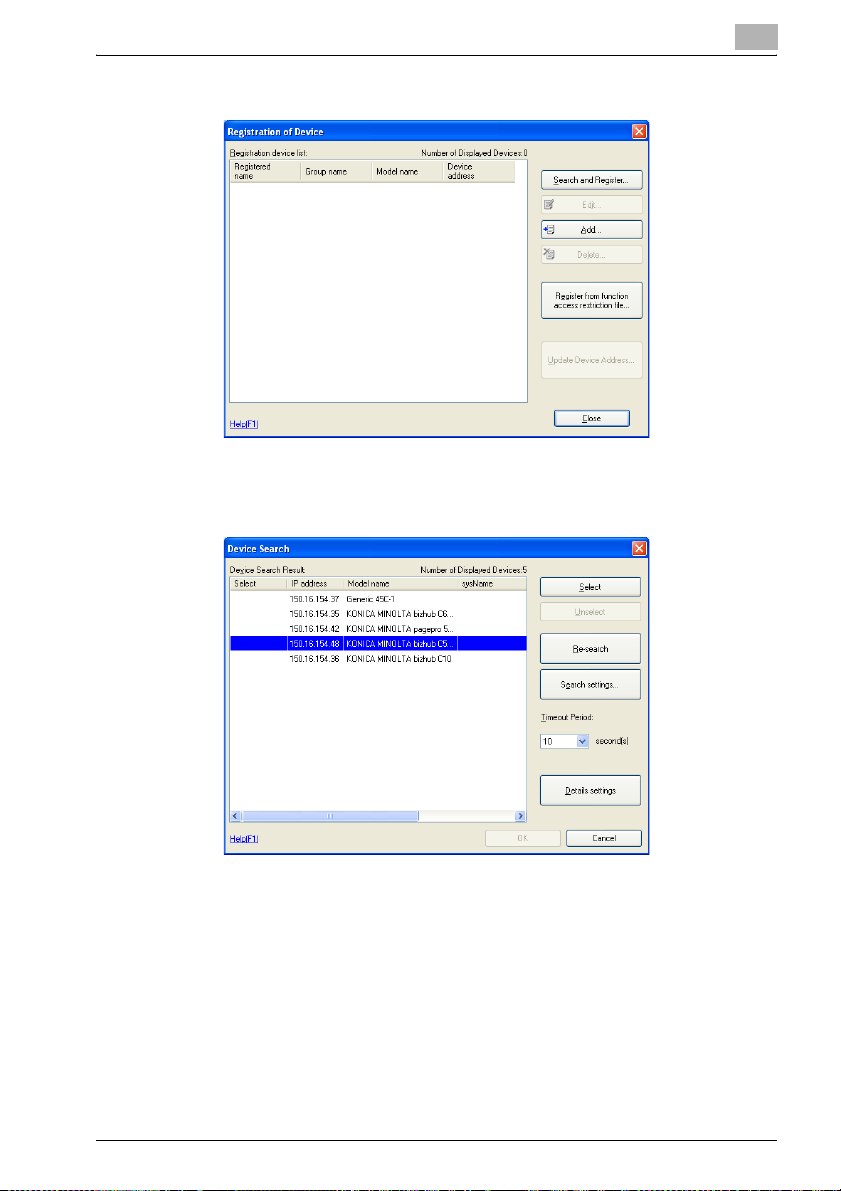
3 Click [Search and Register].
Device Search Result list appears.
4 Select the devices to register and click [Select].
4
– When a search for a device is made again, click [Re-search].
5 Click [OK].
Device Set-Up 4-2
Page 22

Device Registration
6 When the administrator password of the device is required to be en-
tered, enter the password and then click [OK].
7 Click [Close] in Result of Registration Processing window.
4
8 Click [Close].
The devices are registered.
2
Note
It sometimes takes more than two minutes before the device registered
is displayed in the Device list on the main window.
When the device cannot be searched:
There is a possibility that this is not set as “Exceptions program” while in
the setting of the firewall. Set this application as “Exceptions program”
while in the setting of the firewall for the network setting of the PC.
Device Set-Up 4-3
Page 23

Device Registration
Registration with the IP address specified
1 Start the Device Set-Up to display main window.
– For details of the method for displaying the main window, refer to
2 Click .
3 Click [Add].
4
page 3-1.
Device Set-Up 4-4
Page 24

Device Registration
4 Enter the IP address in [Device address] text box and click [OK].
5 Check the contents in Edit device information window and click [OK].
4
6 Click [Close].
The devices are registered.
2
Note
It sometimes takes more than two minutes before the device registered
is displayed in the Device list on the main window.
Device Set-Up 4-5
Page 25

Device Registration
Registration from the Function access restriction file
It is possible to register a supported device from the Function access restriction file that has been written in advance. For details of the creation of the
Function access restriction file, refer to page 5-11.
1 Start the Device Set-Up to display main window.
– For details of the method for displaying the main window, refer to
2 Click .
4
page 3-1.
3 Click [Register from function access restriction file].
4 Select “Function access restriction file” and click [Open].
Device Set-Up 4-6
Page 26

Device Registration
5 Enter the decryption password and click [OK].
6 When the release confirmation screen of the access restriction is dis-
played, click [Yes].
7 Enter the password and click [OK].
8 Select device to import by clicking [Select] and click [Next].
4
Device Set-Up 4-7
Page 27

Device Registration
9 Click [Import].
10 Click [OK].
4
The devices are registered.
2
Note
It sometimes takes more than two minutes before the device registered
is displayed in the Device list on the main window.
Device Set-Up 4-8
Page 28

Device Registration
Registration of the local file
The setting information created in the local file is registered with no connection made to the device.
0 When registering a local file, the PageScope Data Administrator is re-
quired to have been installed in advance.
1 Start the Device Set-Up to display main window.
– For details of the method for displaying the main window, refer to
2 Click [Application initial setting] tab and select [Register a Local file].
4
page 3-1.
3 Click [New].
Device Set-Up 4-9
Page 29

Device Registration
– When reading a backup file, select [Import from the backup file],
4 Click [OK].
5 Enter all informations and click [OK].
4
click [Browse] and then specify the backup file.
6 When a device is selected that requires option setting, specify option
setting and click [OK].
7 When the confirmation message is displayed, click [OK].
The devices are registered.
Device Set-Up 4-10
Page 30

Device Registration
2
Note
It sometimes takes more than two minutes before the device registered
is displayed in the Device list on the main window.
Set the search range
1 Start the Device Set-Up to display main window.
– For details of the method for displaying the main window, refer to
2 Click .
4
page 3-1.
3 Click [Search and Register].
Device Search Result list appears.
Device Set-Up 4-11
Page 31

Device Registration
4 Click [Search settings].
– Details settings:
5 Click [Add].
4
For a device search, specify the priority in registering the device address. The priority thus specified here is applicable when the device
address is updated in [Update Device Address].
– When a change is made to the search settings that have been reg-
istered, click [Edit].
– When deleting the search settings that have been registered, click
[Delete].
Device Set-Up 4-12
Page 32

Device Registration
6 Select search method and click [OK].
7 After setting the IP address, subnet mask, port No. and SNMP V1/V2/
V3 of the search range, click [OK].
4
8 Select the search settings to be added and click [Close].
– The search settings are set.
– When a search is made with the search settings that have been set,
click [Re-search].
Device Set-Up 4-13
Page 33

Device Registration
Edit of the device registered
1 Start the Device Set-Up to display main window.
– For details of the method for displaying the main window, refer to
2 Click .
3 Select the device to edit from the list and click [Edit].
4
page 3-1.
Device Set-Up 4-14
Page 34

Device Registration
4 Change setting and click [OK].
The registration information is edited.
4
Device Set-Up 4-15
Page 35

Device Registration
Delete of the device registered
1 Start the Device Set-Up to display main window.
– For details of the method for displaying the main window, refer to
2 Click .
3 Select the device to delete from the list and click [Delete].
4
page 3-1.
Device Set-Up 4-16
Page 36

Device Registration
4 When the confirmation message is displayed, click [OK].
The registration information is deleted.
4
Device Set-Up 4-17
Page 37

Other Functions
5 Other Functions
For the Device Set-up, the setting of the following can be made other than
the registration of the supported device.
- Network Initial Setting
- Import/Export of device list
- Group setting
- The setting of function access restriction file
- LDAP server settings
- Options settings
5.1 Network Initial Setting
Search a device on the network and then initialize the network.
Initialize the network of the Device
1 Start the Device Set-Up to display main window.
– For details of the method for displaying the main window, refer to
page 3-1.
5
2 Click .
– When the search range of the Device is not yet set, click [Search
settings] to add the search range. For details of the search range
setting, refer to page 4-11.
– A search for devices is started. And devices that have been
searched are displayed in the list of the network initialization
screen.
Device Set-Up 5-1
Page 38

Other Functions
3 Select devices from the list for which to configure network default set-
4 Set required items, and click [Change settings].
5
tings, and click [Network Settings].
– Device Information:
Displays currently set device Model name, IP address, and MAC
address settings.
– Device Name (sysName): Input the device name.
– Location (sysLocation):
Input the location where the device is installed.
– Obtain IP Address automatically:
Select this to have the device IP address automatically set by the
DHCP server.
Device Set-Up 5-2
Page 39

Other Functions
5 When the confirmation message is displayed, click [Yes].
6 Click [OK].
5
– Set IP Address manually:
Select this to enable the following text boxes, enabling specifica-
tion of device IP addresses.
– IP address: Input the IP address of the device.
– Subnet Mask: Input the Subnet mask of the device.
– Default Gateway: Input the default gateway of the device.
7 Click [OK].
Device Set-Up 5-3
Page 40

Other Functions
8 Click [Close].
!
Detail
Configuring network default settings in itself does not allow administration of devices using Device Set-Up. In order to administrator devices,
first register them with Device Set-Up. For details, please refer to “Device
Registration” on page 4-1.
5
Device Set-Up 5-4
Page 41

Other Functions
5.2 Export/Import of the Device list
For the Device Set-up, it is possible to import/export the Device list.
Export of the device list
1 Start the Device Set-Up to display main window.
– For details of the method for displaying the main window, refer to
page 3-1.
2 Select [Device list] - [Export] from the [File] menu.
3 Enter the name of a file to be exported, specify a location into which
the file is saved and then click [Save].
4 Select the device to export from the list and click [Select].
5
5 Click [Next].
Device Set-Up 5-5
Page 42

Other Functions
6 Enter the Encryption password and click [Finished].
7 When the confirmation message is displayed, click [OK].
5
The Device list is exported. (Extension: psa)
Device Set-Up 5-6
Page 43

Other Functions
Import of the device list
1 Start the Device Set-Up to display main window.
2 Select [Device list] - [Import] from the [File] menu.
3 Select the file to import and click [Open].
4 Enter the Decryption password and click [OK].
5 Select the device to import from the list and click [Select].
5
– For details of the method for displaying the main window, refer to
page 3-1.
6 Click [Next].
7 Click [Import].
– When [Connection OK] is not displayed, click [Update].
Device Set-Up 5-7
Page 44

Other Functions
8 When the confirmation message is displayed, click [OK].
5
The Device list is imported.
Device Set-Up 5-8
Page 45

Other Functions
Import of the Device list from the previous version
1 Start the Device Set-Up to display main window.
2 Select [Device list] - [Import from previous version] from the [File] menu
3 Select the device to import from the list and click [Select].
5
– For details of the method for displaying the main window, refer to
page 3-1.
and select the tool of one of the old versions as shown below.
– Copy Protection Utility
– Font Management Utility
– HDD Backup Utility
– Log Management Utility
– PageScope Data Administrator
4 Click [Next].
Device Set-Up 5-9
Page 46

Other Functions
5 Click [Import].
5
– Clicking [Update] updates the condition of the Device list.
– Clicking [Stop] stops updating the condition of the Device list.
The reading of the condition of the Device list into Device lists is
made only for those in the [Connection OK] status.
The device list of the previous version is read.
Device Set-Up 5-10
Page 47

Other Functions
5.3 Function Access Restriction File Settings
Register a device in a function access restriction file. Use of a function access restriction file means that some device functions (address settings, etc.)
can be configured without the input of an administrator password.
Create a New Function Access Restriction File
1 Start the Device Set-Up to display main window.
– For details of the method for displaying the main window, refer to
page 3-1.
2 Select [Function access restriction] - [New] from the [Tool] menu.
3 Select the device to set the function access restriction file from the list
and click [Select].
5
4 Click [OK].
Device Set-Up 5-11
Page 48

Other Functions
5 Configure the function access restriction file, and click [OK].
6 Click [Name and Save], specify the location into which the file is saved,
5
– Authentication setting:
Select this to allow access to authentication settings.
– Address settings: Select this to allow access to address settings.
– Administrator settings:
Select this to allow access to administrator settings.
and then click [Save].
7 Set the Encryption password and Editing password, and click [OK].
Device Set-Up 5-12
Page 49

Other Functions
8 Click [OK].
!
Detail
Refer to p. 4-6 for more information about registration from function access restriction file.
5
– Encryption password:
Input the password to use to open the function access restriction
file.
– Encryption password (Confirmation):
Retype the password for confirmation.
– Editing password:
Input the editing password to use to edit the function access re-
striction file.
– Editing password (Confirmation):
Retype the editing password for confirmation.
The function access restriction file is saved.
Device Set-Up 5-13
Page 50

Other Functions
Add a Device to a Function Access Restriction File
1 Start the Device Set-Up to display main window.
2 Select [Function access restriction] - [Open] from the [Tool] menu.
3 Select the function access restriction file to add a device and click
4 Enter the Decryption password, Editing password and click [OK].
5
– For details of the method for displaying the main window, refer to
page 3-1.
[Open].
5 Click [Select Device].
6 Select the device to add from the list and click [Select], and click [OK].
Device Set-Up 5-14
Page 51

Other Functions
7 Click [Close].
8 Click [Name and Save].
5
– Click [Edit] to set the function access restriction file as necessary
The function access restriction file device is added.
Device Set-Up 5-15
Page 52

Other Functions
Edit the Function Access Restriction File
1 Start the Device Set-Up to display main window.
2 Select [Function access restriction] - [Open] from the [Tool] menu.
3 Select the function access restriction file to edit and click [Open].
4 Enter the Decryption password, Editing password and click [OK].
5 Select the device to edit and click [Edit].
5
– For details of the method for displaying the main window, refer to
page 3-1.
6 Configure the function access restriction file, and click [OK].
7 Click [Name and Save].
The function access restriction file is edited.
Device Set-Up 5-16
Page 53

Other Functions
Delete the device information from a Function Access Restriction File
1 Start the Device Set-Up to display main window.
2 Select [Function access restriction] - [Open] from the [Tool] menu.
3 Select the function access restriction file to delete and click [Open].
4 Enter the Decryption password, Editing password and click [OK].
5 Click [Delete].
5
– For details of the method for displaying the main window, refer to
page 3-1.
6 When the confirmation message is displayed, click [Yes].
The device information is deleted from a function access restriction file.
7 Click [Name and Save], specify the location into which the file is saved,
and then click [Save].
The function access restriction file is saved.
Device Set-Up 5-17
Page 54

Other Functions
5.4 Group Settings
Register groups to be managed in Device Set-Up. If groups are configured
and many devices are being managed, sorting the device list makes arranging items easier. Additionally, up to a maximum of 100 groups can be set.
Create a New Group
1 Start the Device Set-Up to display main window.
– For details of the method for displaying the main window, refer to
page 3-1.
2 Select [Device] - [Edit registered group] from the [Tool] menu.
3 Click [New].
5
4 Set the Group name, and click [OK].
A group is created.
5 Click [Close].
Device Set-Up 5-18
Page 55

Other Functions
Edit a Group
1 Start the Device Set-Up to display main window.
2 Select [Device] - [Edit registered group] from the [Tool] menu.
3 Select a group to edit from the list and click [Edit].
5
– For details of the method for displaying the main window, refer to
page 3-1.
4 Change the Group name, and click [OK].
A group is edited.
5 Click [Close].
Device Set-Up 5-19
Page 56

Other Functions
Delete a Group
1 Start the Device Set-Up to display main window.
2 Select [Device] - [Edit registered group] from the [Tool] menu.
3 Select a group to delete from the list and click [Delete].
5
– For details of the method for displaying the main window, refer to
page 3-1.
4 When the confirmation message is displayed, click [Yes].
The group is deleted.
5 Click [Close].
Device Set-Up 5-20
Page 57

Other Functions
Set the Default Group
1 Start the Device Set-Up to display main window.
2 Select [Device] - [Edit registered group] from the [Tool] menu.
3 Select a group to make default from the list, and click [Set Default].
5
– For details of the method for displaying the main window, refer to
page 3-1.
– The default group is indicated with a “*”.
4 Click [Close].
!
Detail
The default group is indicated with a “*”.
The default group is the initial group displayed when registering a device.
Device Set-Up 5-21
Page 58

Other Functions
5.5 LDAP Server Access Settings
Register the LDAP server that reads the information to register on a device.
Add LDAP Server Access Settings
1 Start the Device Set-Up to display main window.
– For details of the method for displaying the main window, refer to
page 3-1.
2 Select [LDAP server settings] from the [Tool] menu.
3 Click [Add].
5
4 Set LDAP server access settings, and click [OK].
Device Set-Up 5-22
Page 59

Other Functions
5
– When Anonymous is selected
– When Simple is selected
Device Set-Up 5-23
Page 60

Other Functions
5
– When NTLM is selected
– Directory name: Input a name for the current details.
– LDAP server address:
Input the IP address or DNS name of the directory server. If using
SSL, input the DNS name.
–Search Base:
Input the search base. (Up to 512 characters)
(E.g.) ou=sales division, dc=ABCDEFG, dc=com
Consult with the LDAP administrator about search bases to input.
– Port Number:
Specify the port number to be used when accessing LDAP servers.
– SSL: Select when using SSL for LDAP communications.
It is recommended that you use SSL for secure transmission. Not
using SSL means that LDAP data will be transmitted over the net-
work in unsafe ASCII format.
– Search maximum number:
Specify the maximum number of items to show when searching.
– Timeout settings: Specify the transmission timeout for the LDAP
server. (1-120 sec)
– Authentication Settings (Anonymous, Simple, NTLM):
Select the bind type for the LDAP server. Select NTLM when con-
necting to an Active Directory.
– Domain name: Input the domain name.
Input Domain Name when connecting to an Active Directory.
– User Name:
This field can be entered when authentication is not set to Anony-
mous.
– Password:
This field can be entered when authentication is not set to Anony-
mous.
– Password (Confirmation): Re-input password for confirmation.
Device Set-Up 5-24
Page 61

Other Functions
5 Click [OK].
Edit LDAP Server Access Settings
1 Start the Device Set-Up to display main window.
2 Select [LDAP server settings] from the [Tool] menu.
3 Select access settings to edit from the list, and click [Edit].
4 Edit LDAP Server Access Settings, and click [OK].
!
Detail
Refer to p. 5-22 for more information about LDAP server setting.
Delete LDAP Server Access Settings
1 Start the Device Set-Up to display main window.
5
The LDAP server access settings are added.
– For details of the method for displaying the main window, refer to
page 3-1.
The LDAP server access settings are edited.
– For details of the method for displaying the main window, refer to
page 3-1.
2 Select [LDAP server settings] from the [Tool] menu.
3 Select access settings to delete from the list, and click [Delete].
4 When the confirmation message is displayed, click [Yes].
The LDAP server access settings are deleted.
Device Set-Up 5-25
Page 62

Other Functions
5.6 Display Option Settings
Set items to display in lists such as registered device lists, etc.
Set Display Options
1 Start the Device Set-Up to display main window.
– For details of the method for displaying the main window, refer to
page 3-1.
2 Select [Option] - [General] from the [Tool] menu.
– Options in general window appears.
– When selecting [General] in the Target of setting area with [When
minimized, display only on task tray] checked, the display is made
only on the task tray while in the minimized display.
5
– Refer to p. 3-1 for more information about Auto protect.
Device Set-Up 5-26
Page 63

Other Functions
5
– Selecting [Display column of the Device List] in the Target of setting
area allows you to select an item to be displayed in the main win-
dow.
– Device List Header Display Column:
Check an item you want to display.
– Up: Move the selected items up.
– Down: Move the selected items down.
– Selecting [Function Selection Display Order] in the Target of setting
area allows you to select an item to be displayed in the Function Se-
lection area of the main window.
– Up: Move the selected items up.
– Down: Move the selected items down.
3 Set display options, and click [OK].
Device Set-Up 5-27
Page 64

Other Functions
!
Detail
The settings of the Function Selection Display Order are made valid only
after restart.
5
Device Set-Up 5-28
Page 65

Other Functions
5.7 Displaying the Help
From the help menu, it is possible to display the online help of the Device
Set-up and the individual plug-ins.
Displaying the Help
1 Start the Device Set-Up to display main window.
– For details of the method for displaying the main window, refer to
page 3-1.
2 Select [Help] - [Device Set-Up Help] from the [Help] menu.
– It is also possible to display the help information of the individual
plug-ins that have been installed.
– Device Set-Up Help
– Copy Protection Utility Help
– Font Management Utility Help
– HDD Backup Utility Help
– Log Management Utility Help
– PageScope Data Administrator Help
5
Device Set-Up 5-29
Page 66

Other Functions
5.8 Displaying the version information
The version information for the Device Set-Up can be displayed.
Procedure
1 Start the Device Set-Up to display main window.
– For details of the method for displaying the main window, refer to
page 3-1.
2 Select [Help] - [Version information] from the [Help] menu.
3 Confirm the version.
5
!
Detail
When checking the version of the individual plug-ins that have been installed, click [Plug-in version].
Device Set-Up 5-30
Page 67

4343-PS361-01
2004
http://konicaminolta.com
Copyright
2007. 12
 Loading...